I’m very pleased with my finished 1940 Schiaparelli Inspired Dress! The relatively simple style is set off by the pink and green sequined appliqué on the front of the dress.
This post is going to be all about wearing the finished dress. There is a separate detailed post telling all about how I made it that you can read here.
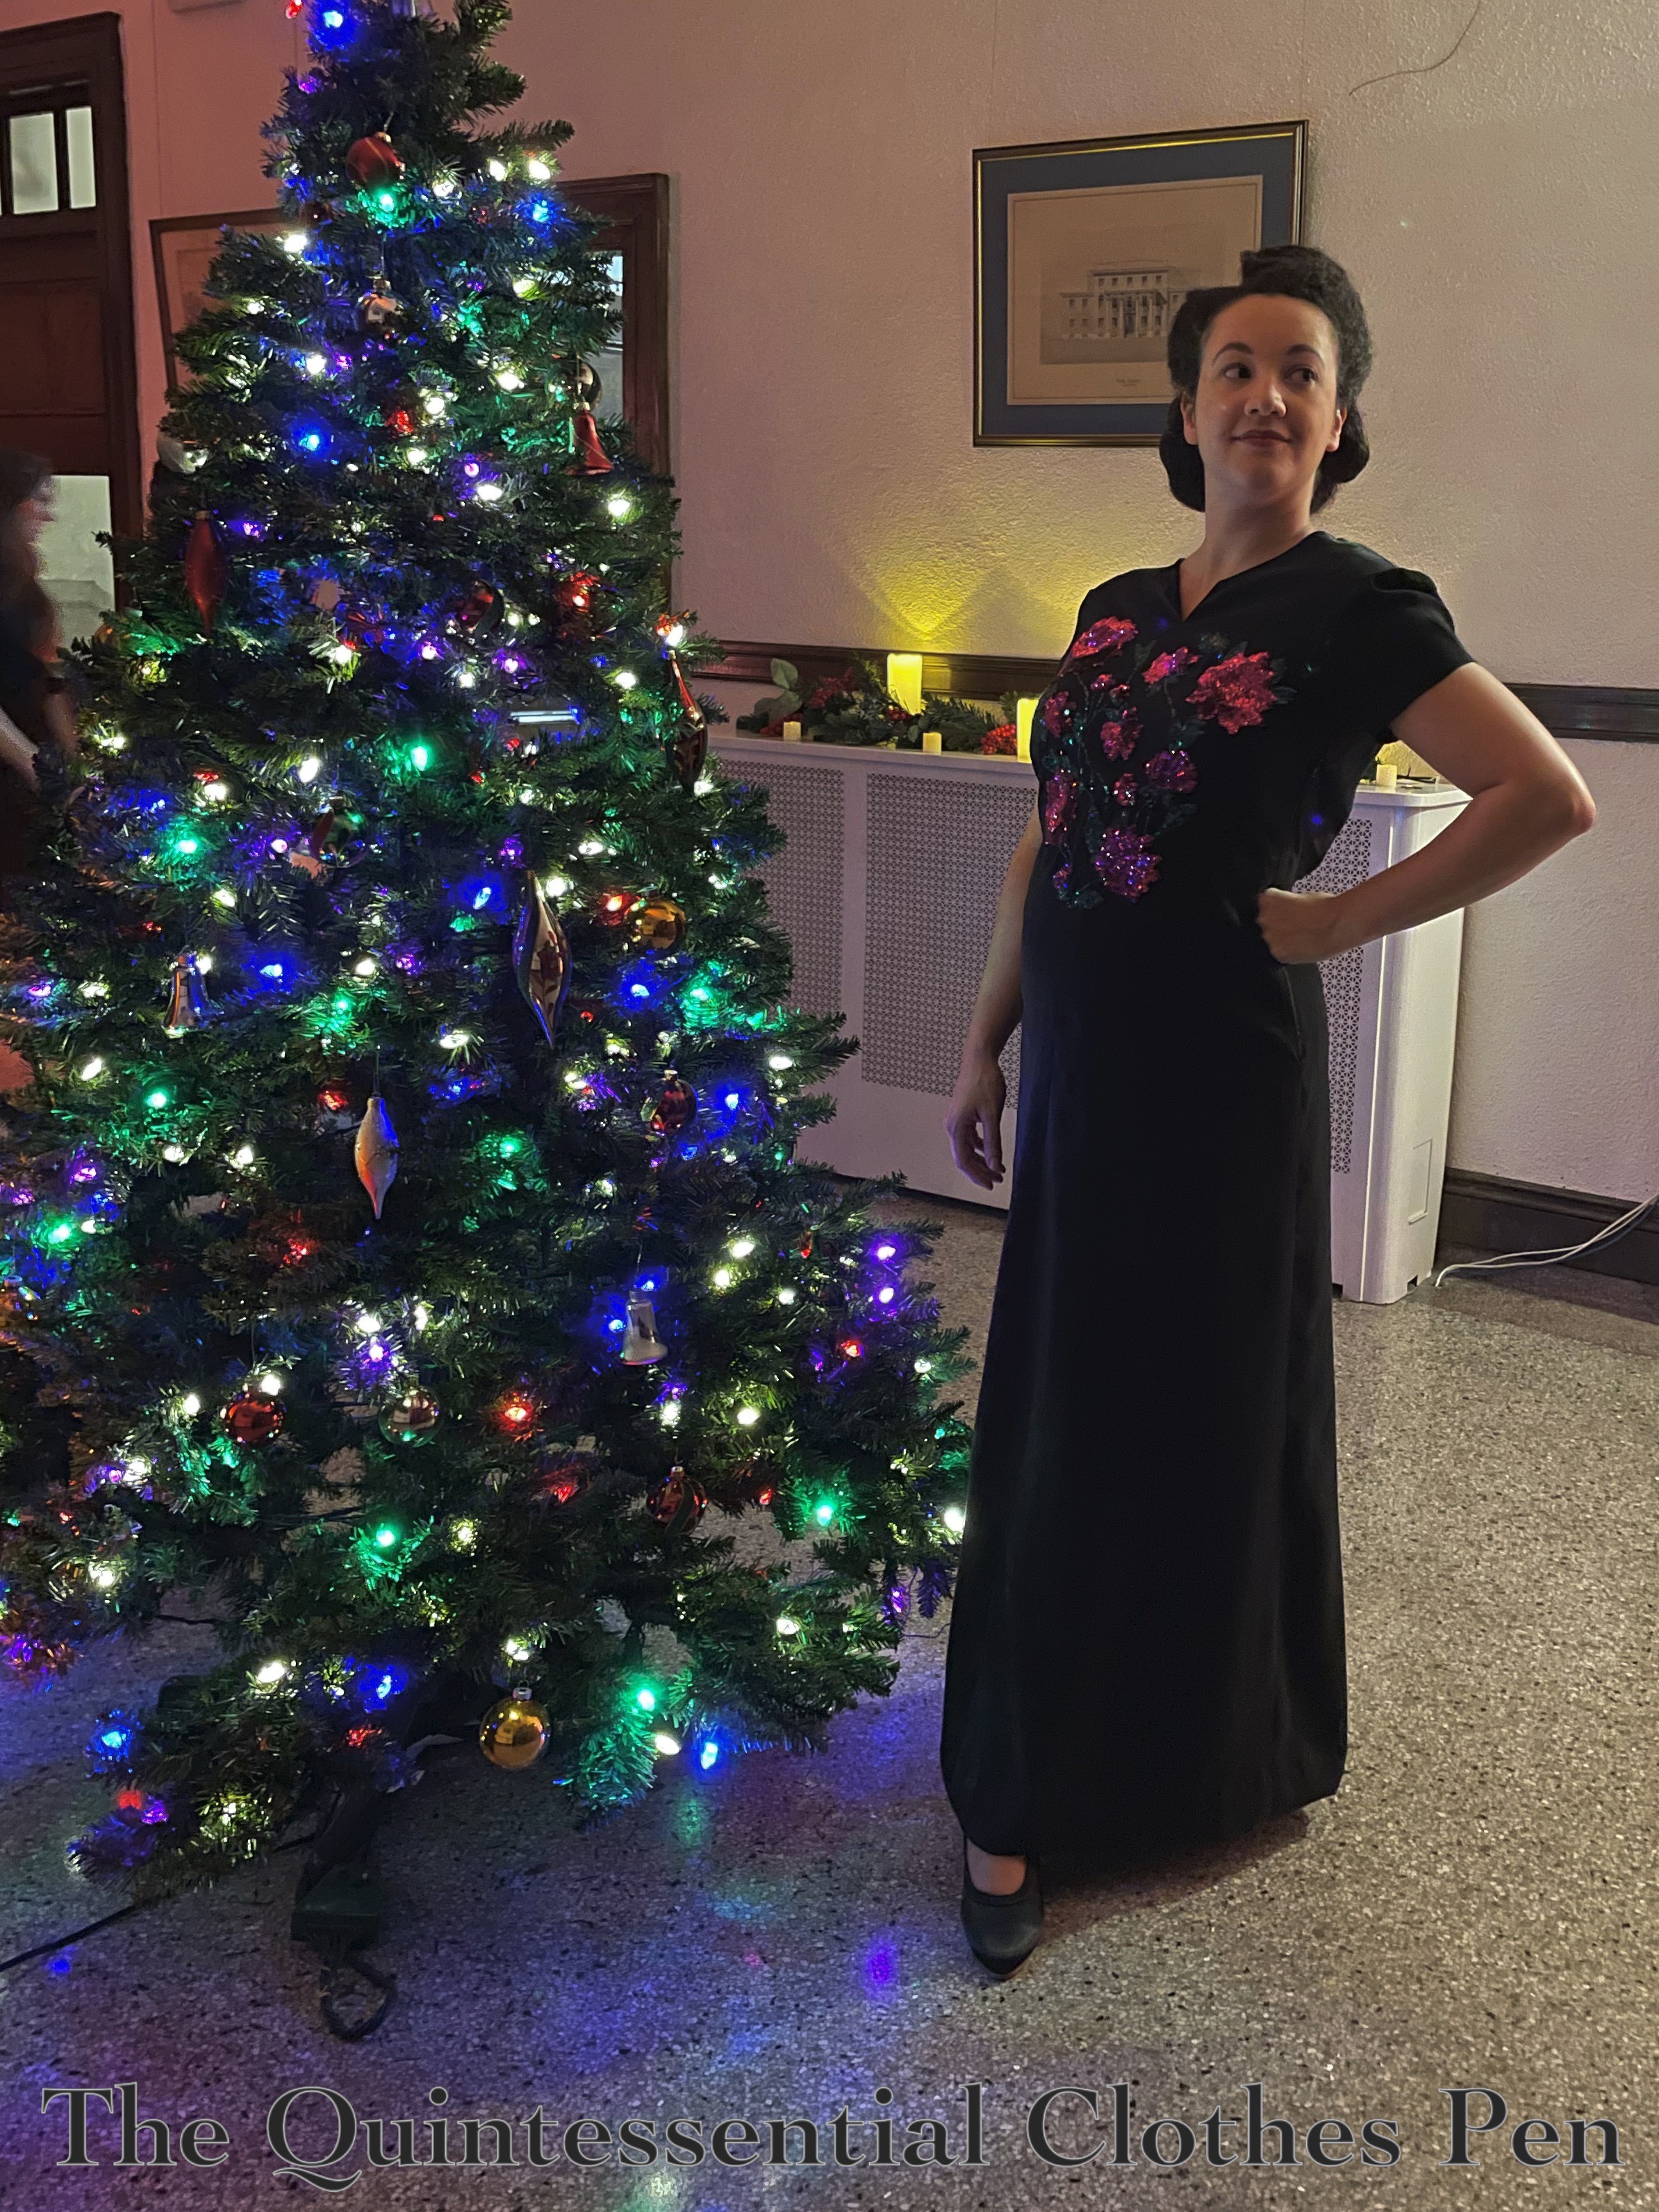
This dress is dramatic, yet simple, and completely different from anything else I have. And, it lends itself to elaborate and large hair which always amuses me.
I chose to do victory rolls, which I’ve posted about doing with my curly hair type in the past. (Not all rolls are technically victory rolls, but if they make a V there is a good argument for calling them by this name. In this case, I’m arguing that the dip between my two rolls makes a V and that’s why I’m calling them victory rolls. You can read lots more about the history of this hairstyle here, on the Bobby Pin Blog.)
The particular roll pattern and shape I chose to do was mainly inspired by this. My hair has enough volume to sustain the rolls on its own, but I cheated a bit on the teasing and stuffed the larger roll with small hair rat to help maintain the height and shape.
I’m very pleased with how the rolls turned out. They were dramatic, just like the dress and they made me super tall looking in combination with my trusty American Duchess black Seabury shoes and the columnar dress.
The V shaped rolls of hair complemented the V shaped sequins on the front of the dress AND the V shape of the back bodice with its V shaped pleats. There are all sorts of V’s in this outfit!
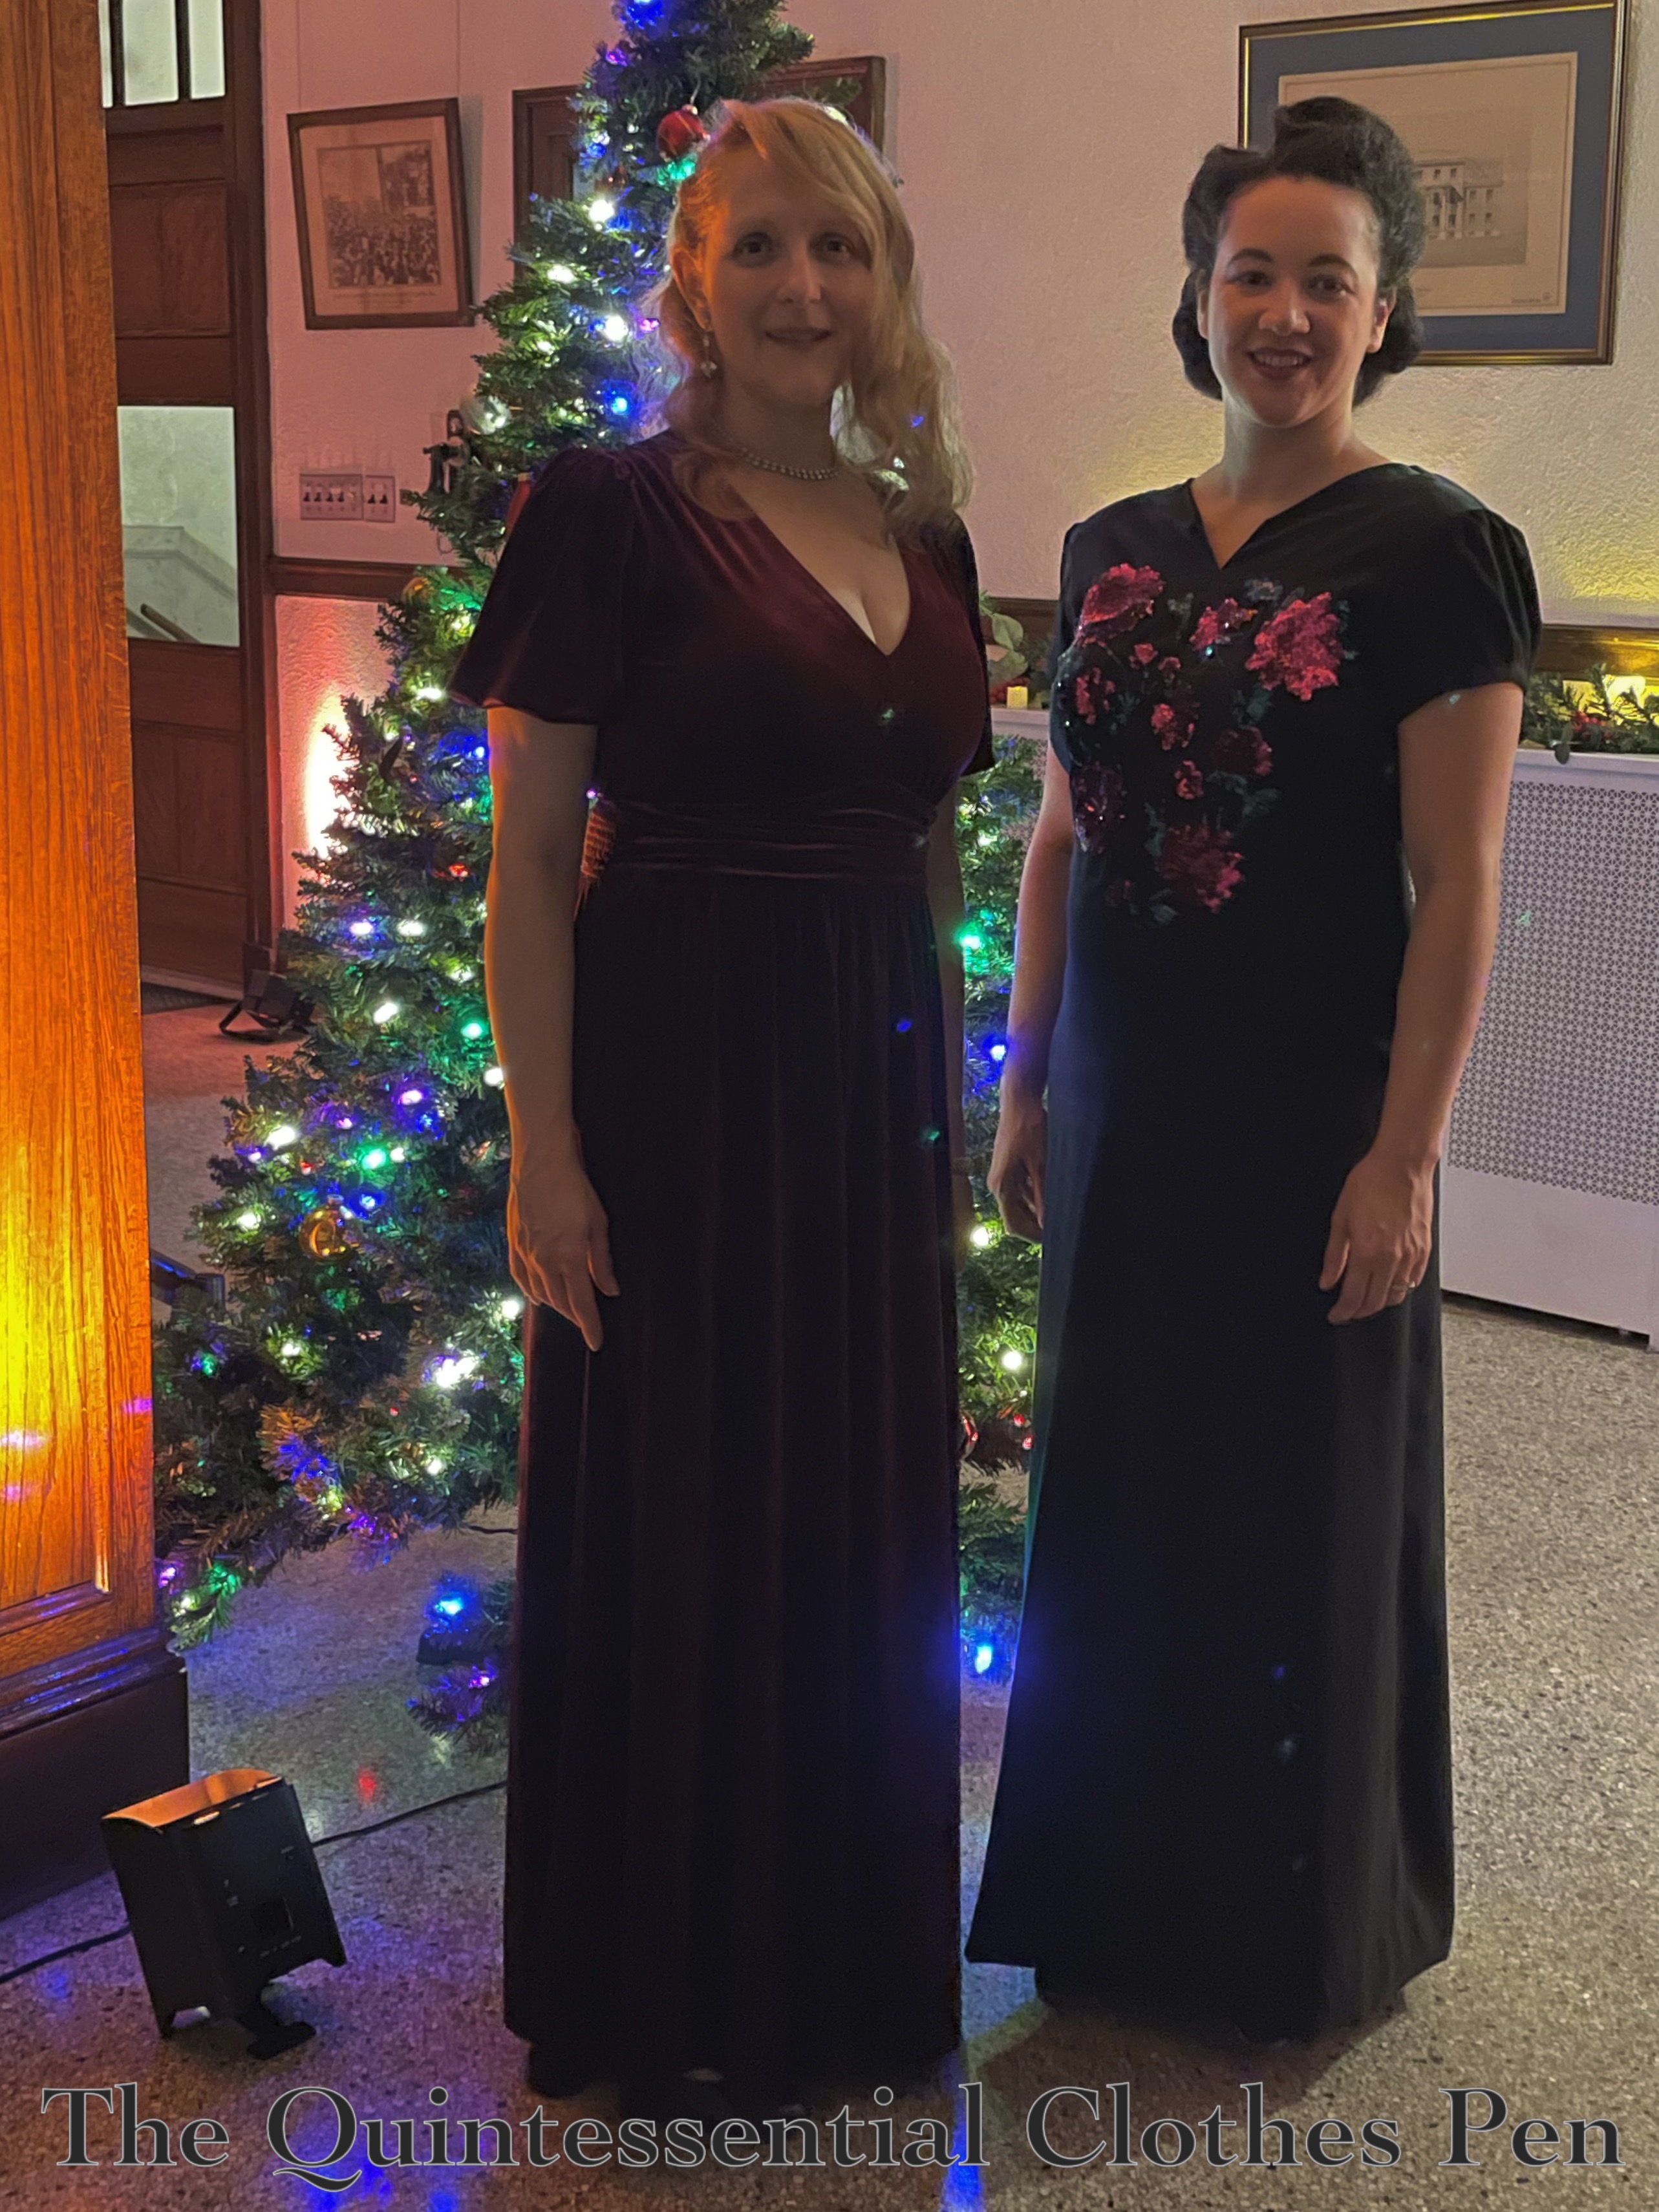
And, not only did I get to wear a fabulous, formal dress with large and fun hair, I was able to have a great time at Club Drosselmeyer with friends while wearing both!
(If you’re in the New England area and you haven’t heard of Club Drosselmeyer before, I suggest you check it out! I’ve been performing at and/or attending for years. It’s really special and fantastic for all sorts of people and interests. Personally, I really enjoy the live Christmas swing music, puzzles, and fabulous clothes, but there are also interactive actors, special performances, an open dance floor, and more!)
I finally open my rereleased new copy of Patterns of Fashion 2 (Pof2) last summer and had great fun looking through all of the previously included garments (from the original edition) as well as the newly included ones. I remember seeing one dress (picture below), in particular, and thinking that it would be fun to recreate it, but that the beading seemed like it would be quite a challenge!
1940 Evening Dress designed by Elsa Schiaparelli. The Victoria and Albert Museum. T.48-1965
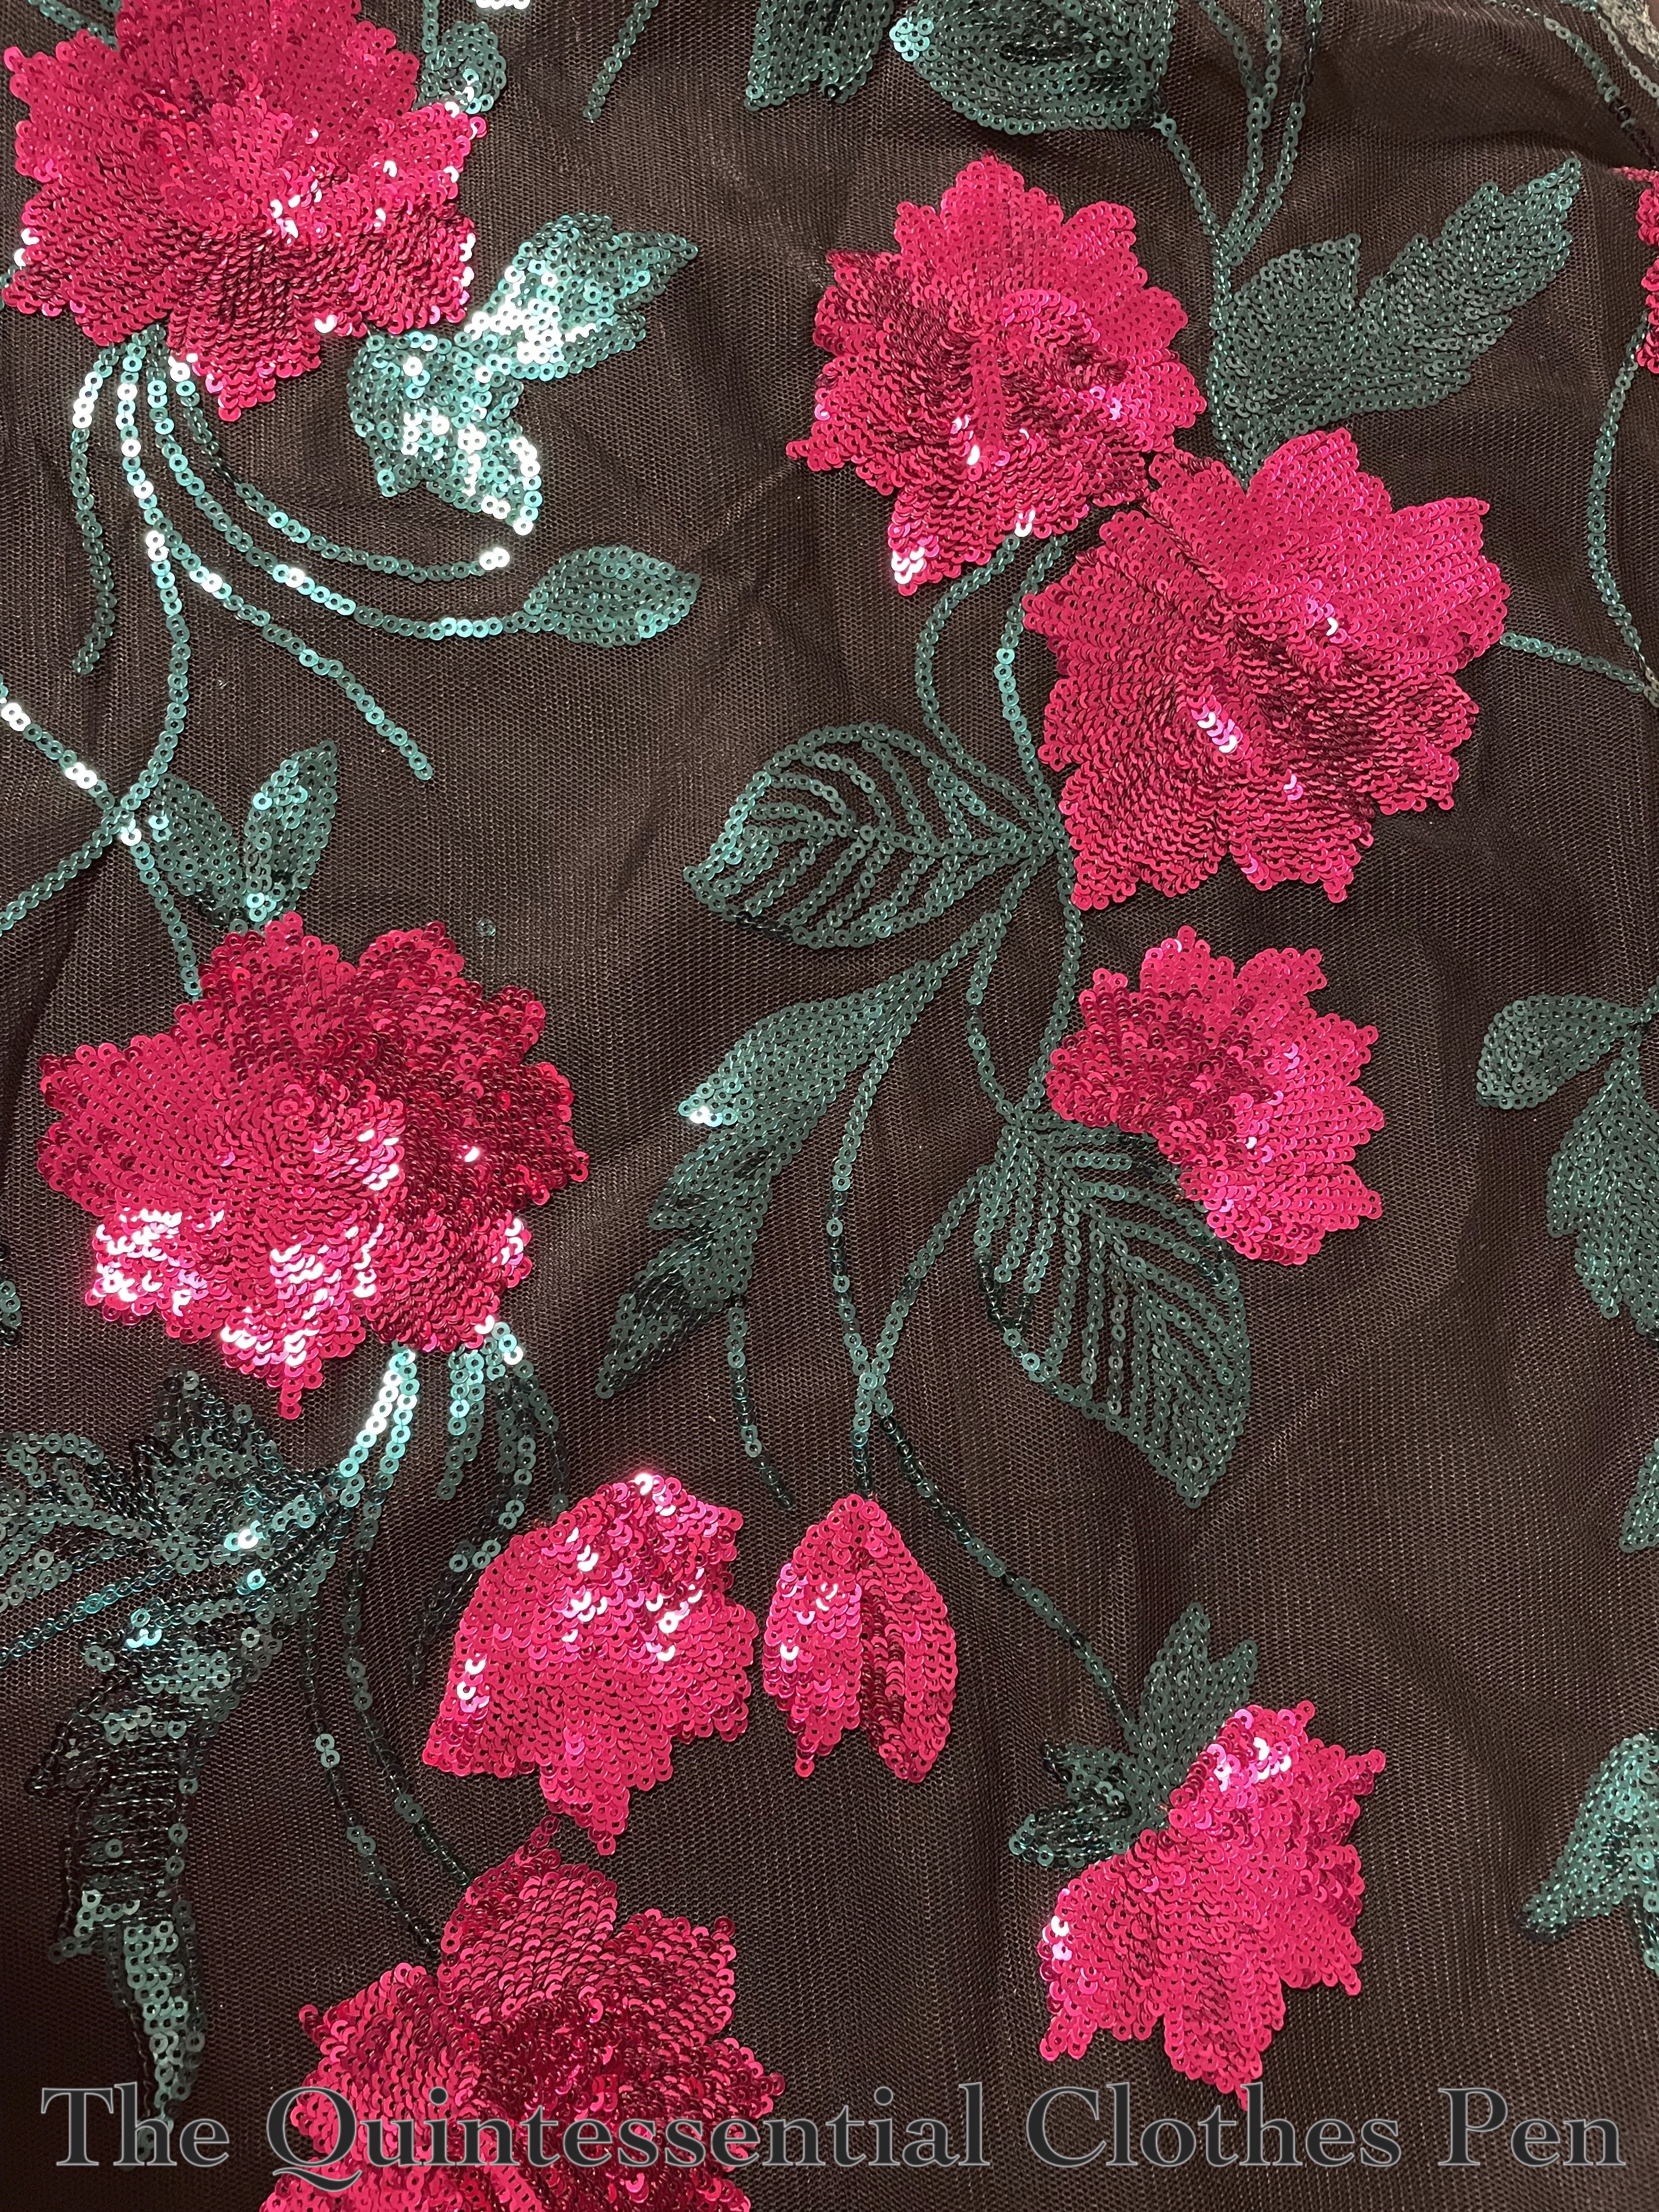
A few months later, I was at Joann Fabrics and saw a fabulous magenta and green sequined net poking out of a shelf. I pulled it out and immediately thought that the colors were very me. But did I have a use for it? Not really… Except… What if I used that fabric to recreate the beaded idea on that dress from PofF2??? Schiaparelli’s designs often made use of magenta pink as a Surrealist inspired color, so it didn’t seem too far fetched for me to include that color in my version of the dress.
So, I bought some. ¼ of a yard, to be exact. Not too much, but enough to be able to pick and choose different parts of the flowers to create a pattern similar to my inspiration. Below is a photo of the inspiration fabric: magenta and green sequins on black net.
Not too long after that, I decided that instead of wearing my updated 1933 Dramatic Evening Dress to a December event, I would instead make a new one–the 1940 Schiaparelli dress!
The first step after my decision was to find black fabric. The original is silk crepe, but I wanted to keep the cost down a bit more than what silk would allow for. I ordered a few swatches of rayon crepe and also went to stores to look at other options. I’d almost decided on one when I came across another random fabric at Joann that stood out to me. I debated for awhile, but decided the Black Shimmer Twill was more interesting than plain black crepe (the shimmer twill is visible in the above photo underneath the sequined net).
The next step was to size up the pattern in PofF2 and adjust it to be not tiny. I am definitely not the measurements of the original! I did those things and made a mockup:
The dress skirt worked, but I wasn’t happy with what the sleeves were doing.
The neckline needed some work to fit comfortably.
I changed the grainline of the back piece. On the original, the back bodices are cut on the bias, but I decided that they would lay better if I cut them on the straight of grain.
Then, another mockup. I made a few more changes and finally it was time for the real fabric!
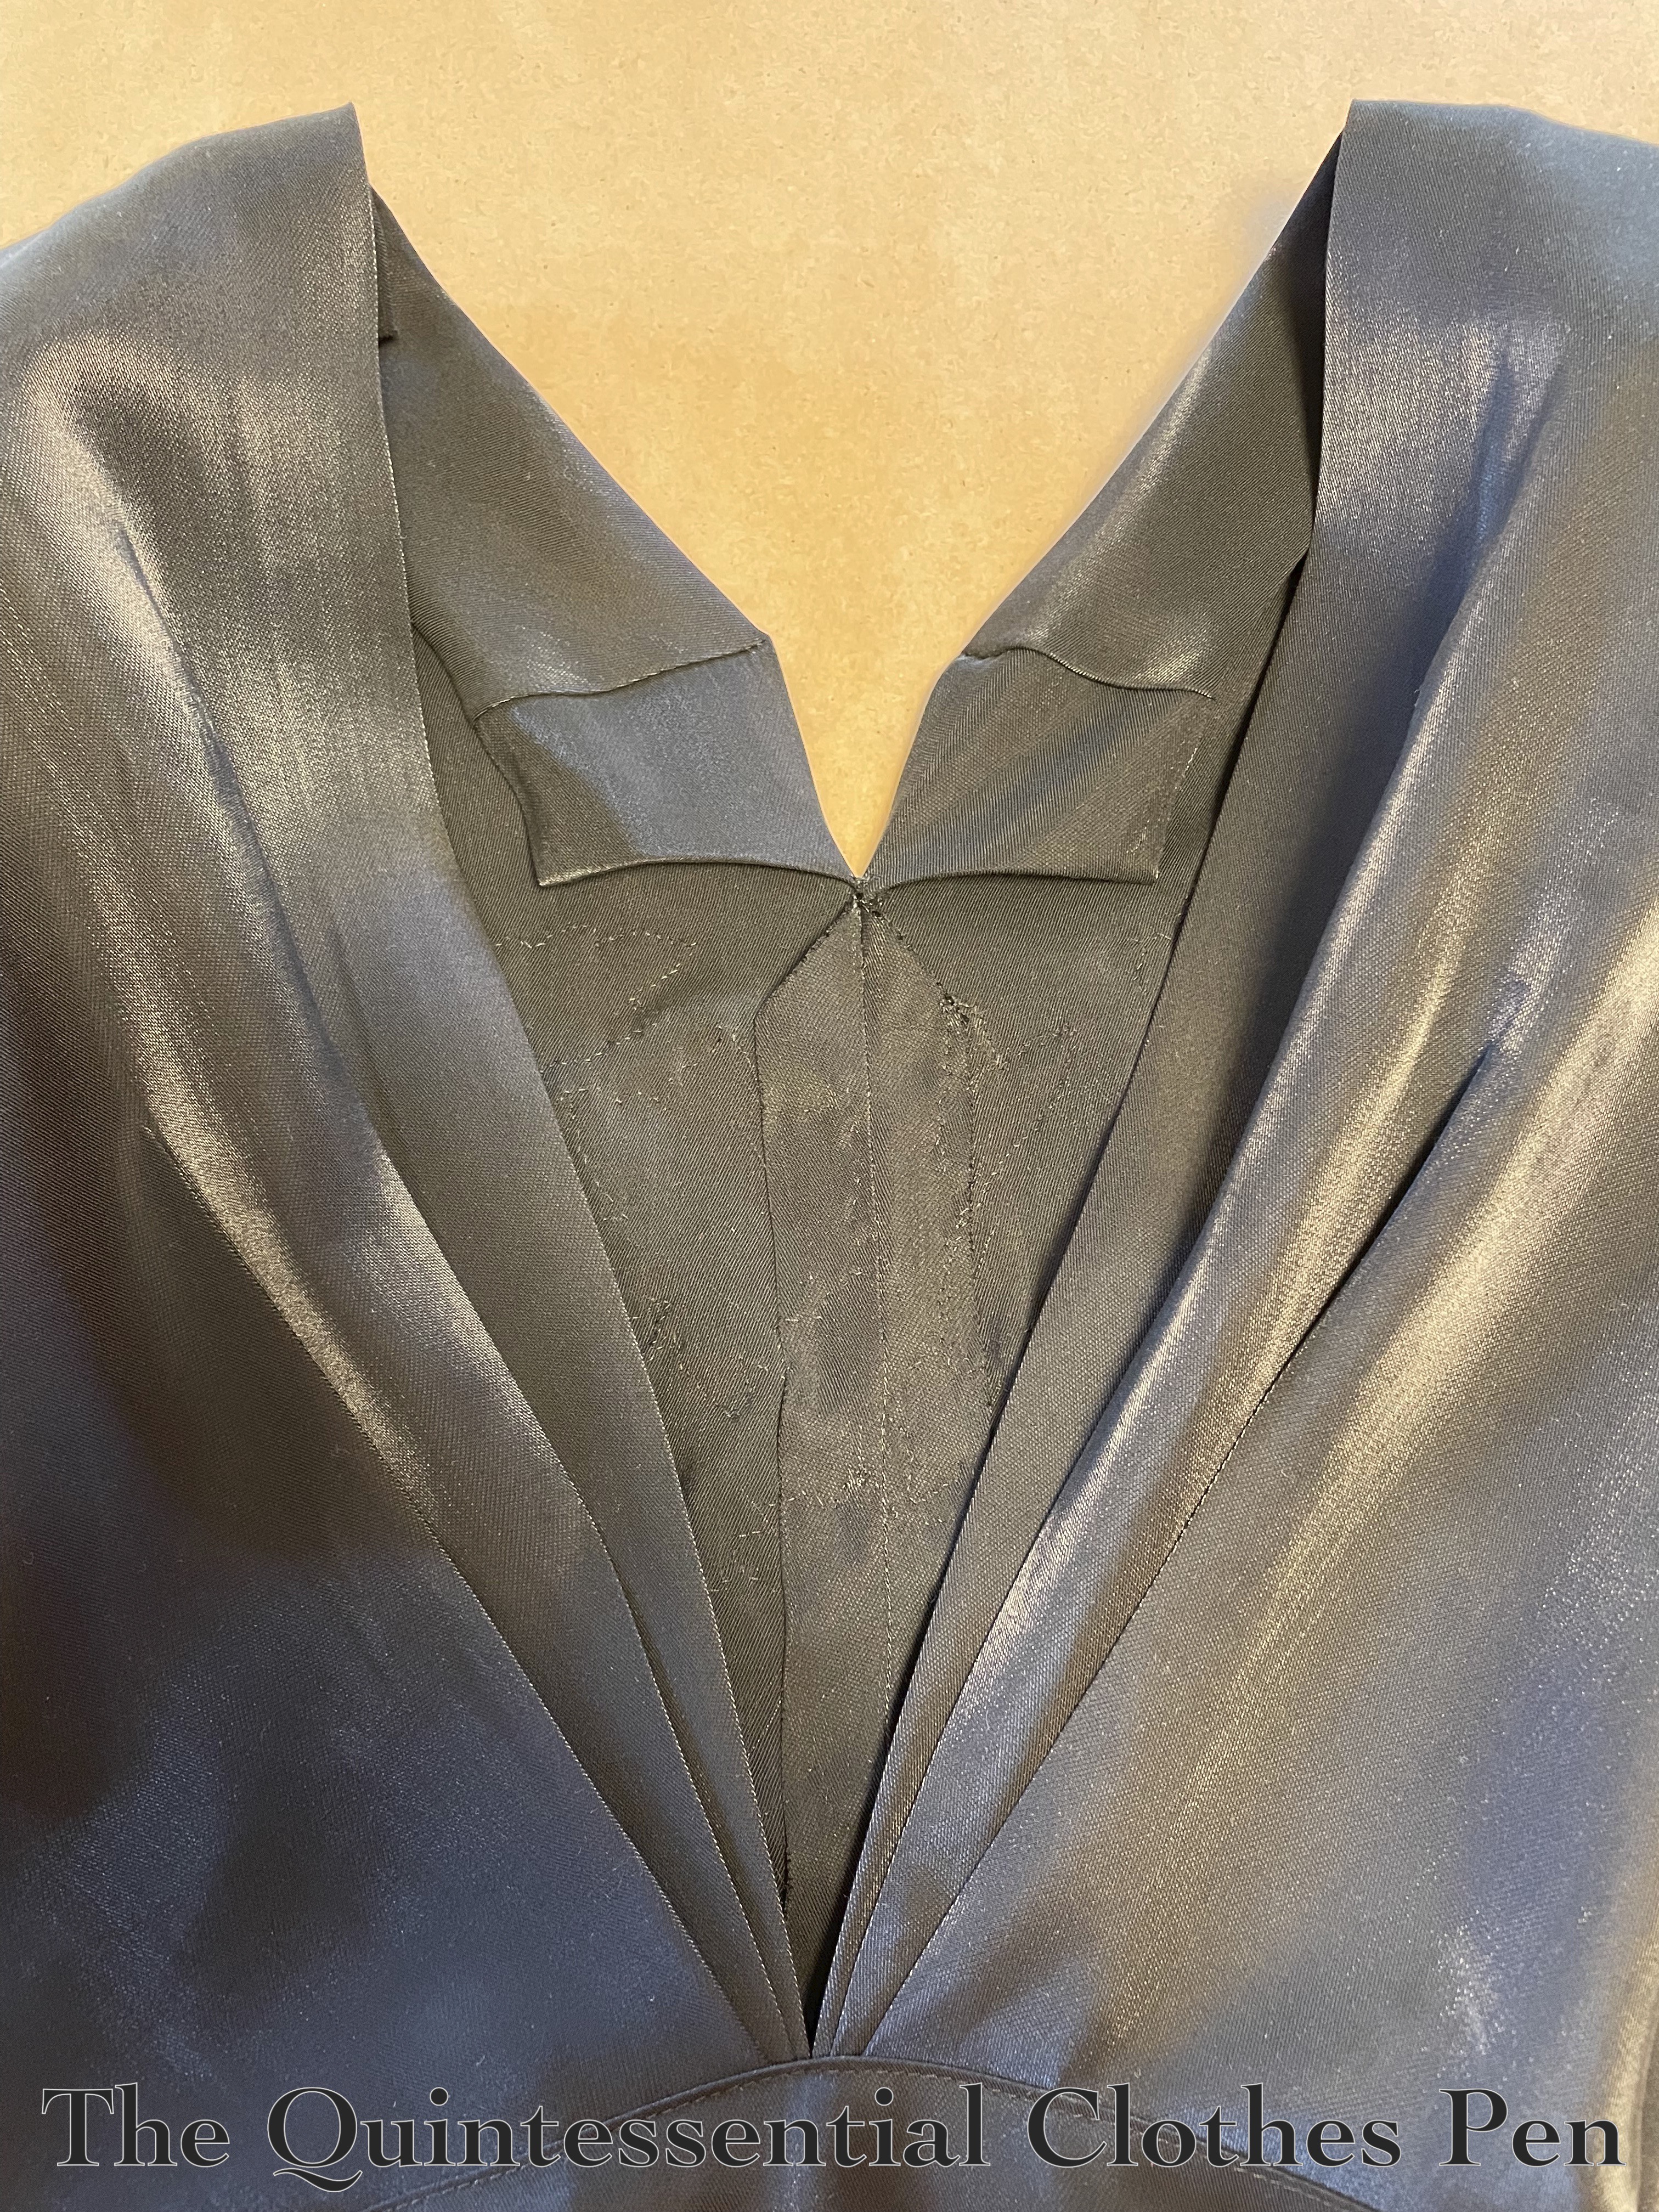
Cutting out the pieces was pretty easy. There actually aren’t too many of them, especially because the facings are cleverly cut on with the front and back bodice pieces. The pieces are: back skirt, back bodice, front bodice/skirts, and sleeves.
Below is a photo of the finished garment showing the clever front facings and the shimmery quality of the black base fabric I chose. (The photo also shows the fun back element of this dress: three v-shaped pleats that meet at the center.)
I sewed up all of the seams I could (so that was the center front seam, the sleeves, and the back waist seams) while still keeping the front flat, so that I could replicate, or at least imitate, the floral V-shaped beading on the original.
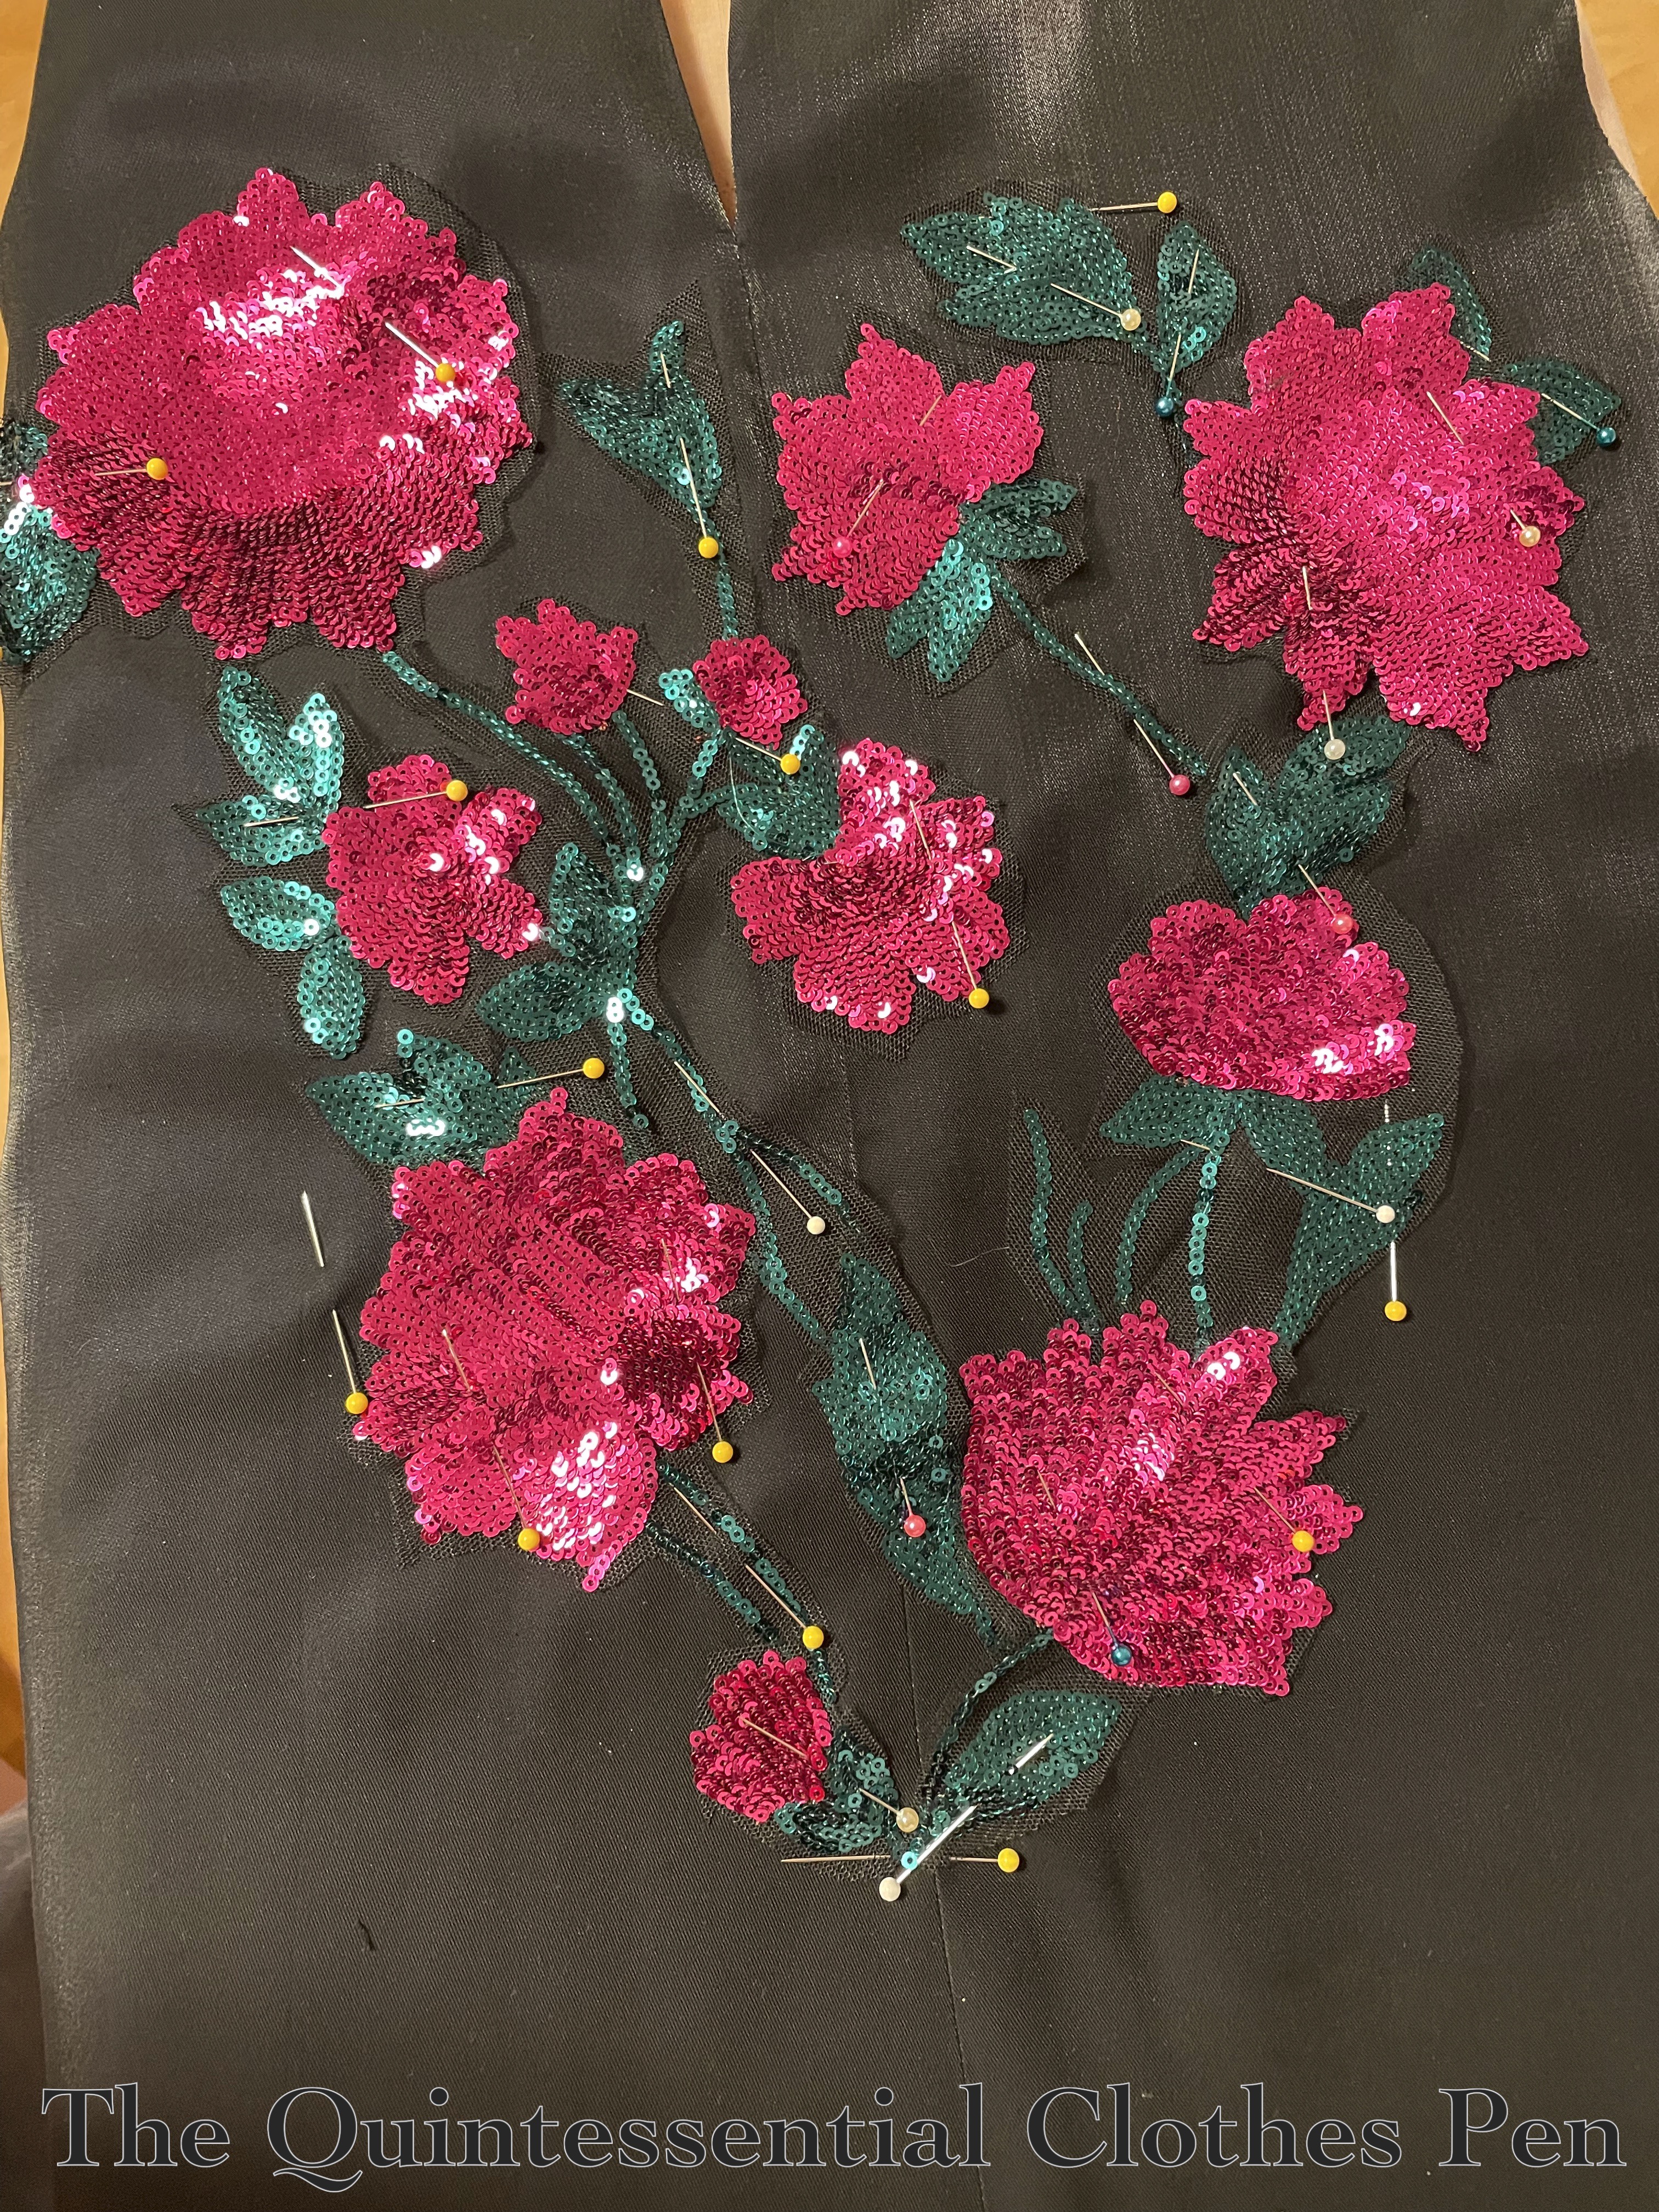
The next big step was using the sequined fabric to create a design similar in shape to the beading on the original. I cut out individual flowers and vines, arranging them on my assembled front pieces and pinning them in place until I was happy with the layout. Below, a photo of my cut out flowers, leaves, and vines while I was deciding on the layout.
Every piece had some net left around the edge so that I could flip them under and appliqué stitch them on. Below is an in-progress photo showing the top right flowers sewn on and some pieces pinned out of the way while I sewed bits that overlapped.
I get great joy out of taking tiny stitches, so I found it fun to catch every sequin as I went around all of the edges of all of the flowers! Here is a view of what all of those stitches look like on the inside of the dress! I didn’t think ahead to put anything to help stabilize the fabric on the inside… I wonder if it would have been less comfortable to wear if I had. Thankfully, the shimmer twill holds its own pretty well and doesn’t show puckers on the outside!
Eventually, all of my sequined bits were sewn in place. And then it was time to finish assembling the dress! The machine sewn seam allowances are all left raw on the inside.
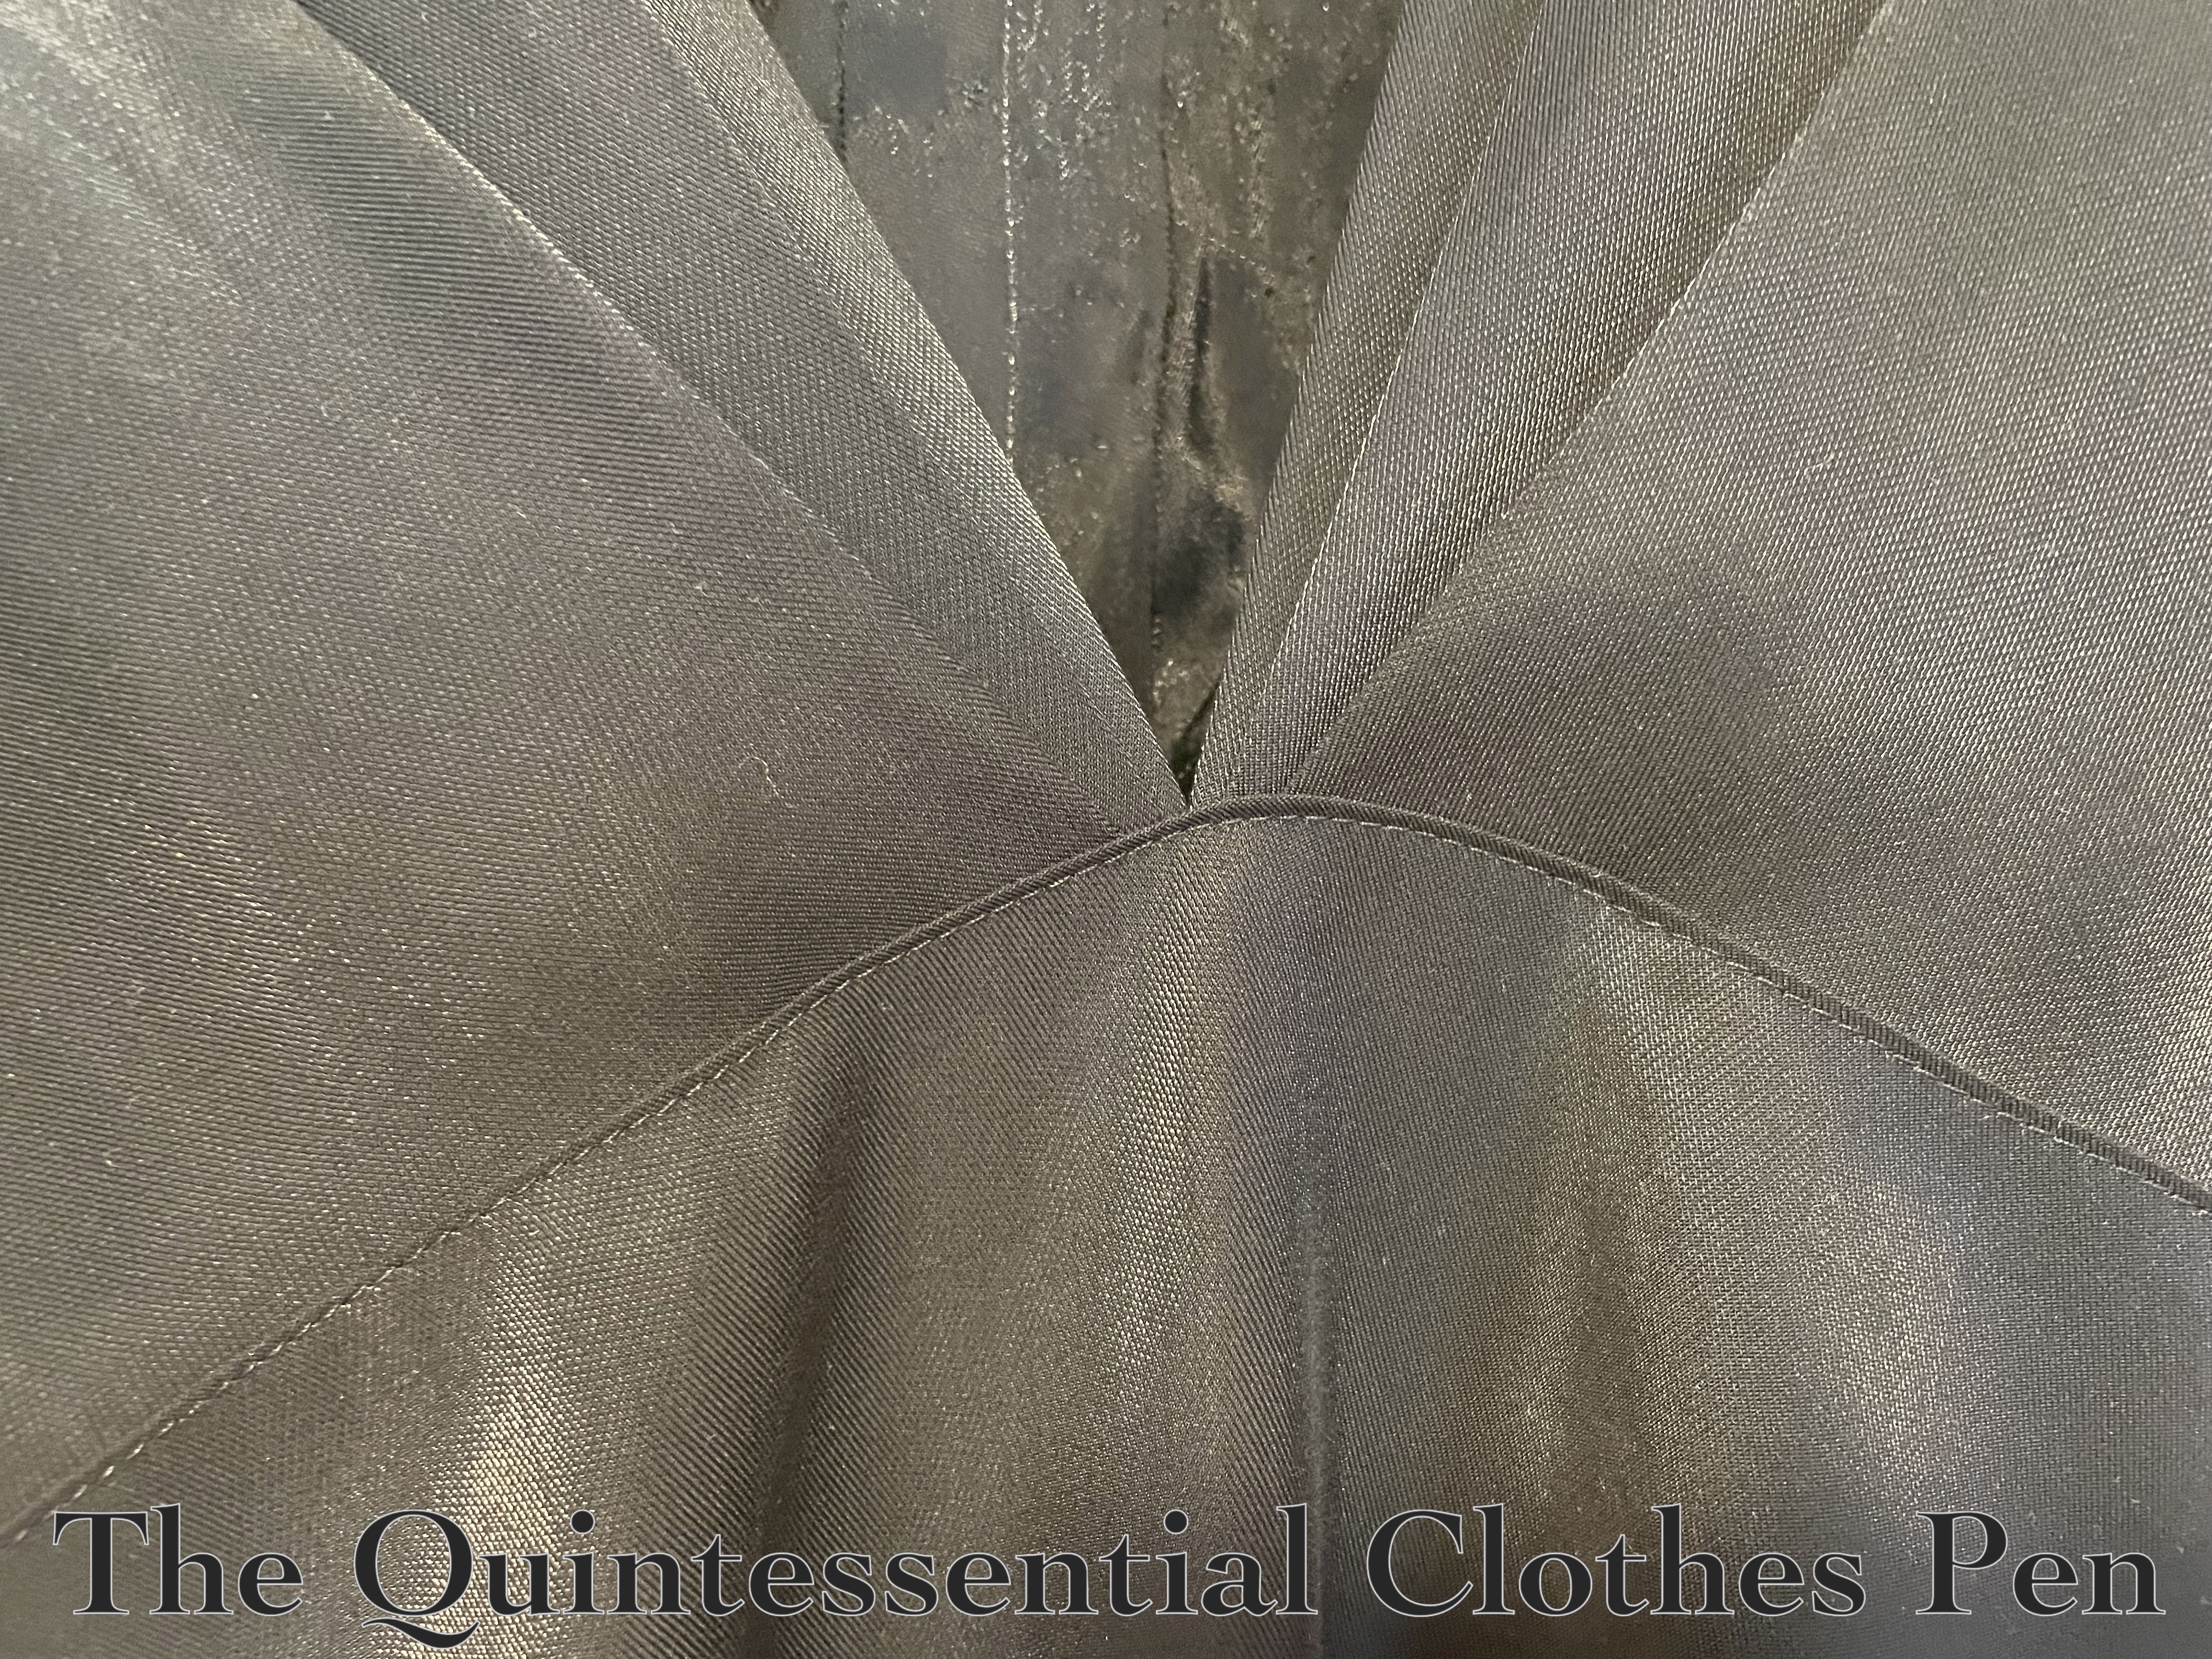
And the top back pieces and back skirt have a fun period way of attaching to each other, which is with a top stitched seam (shown in the photo below). This is pretty common on bias cut dresses I have seen. I understand that this helps to stabilize the seam and is easier to match and line up than it would be to put right sides together in the usual method.
For closures, there is an exposed zipper (gifted to me) on the proper left side of the dress. This method and style was taken directly from the original dress information in PofF2. Below is a photo of the zipper, which is hand stitched into place.
The sleeves and skirt hem are stitched by hand, also following information in PofF2. Here’s a closeup of the sleeve. It is shaped with gathers at the top and two darts at the bottom. The hem is slip stitched into place by hand.
The only other thing that this dress needed was shoulder pads. I don’t think the original has them, as the shoulders look very sloped to me, but they were needed to make the dress sit properly on my body (and they add a very 1940s square shouldered look!).
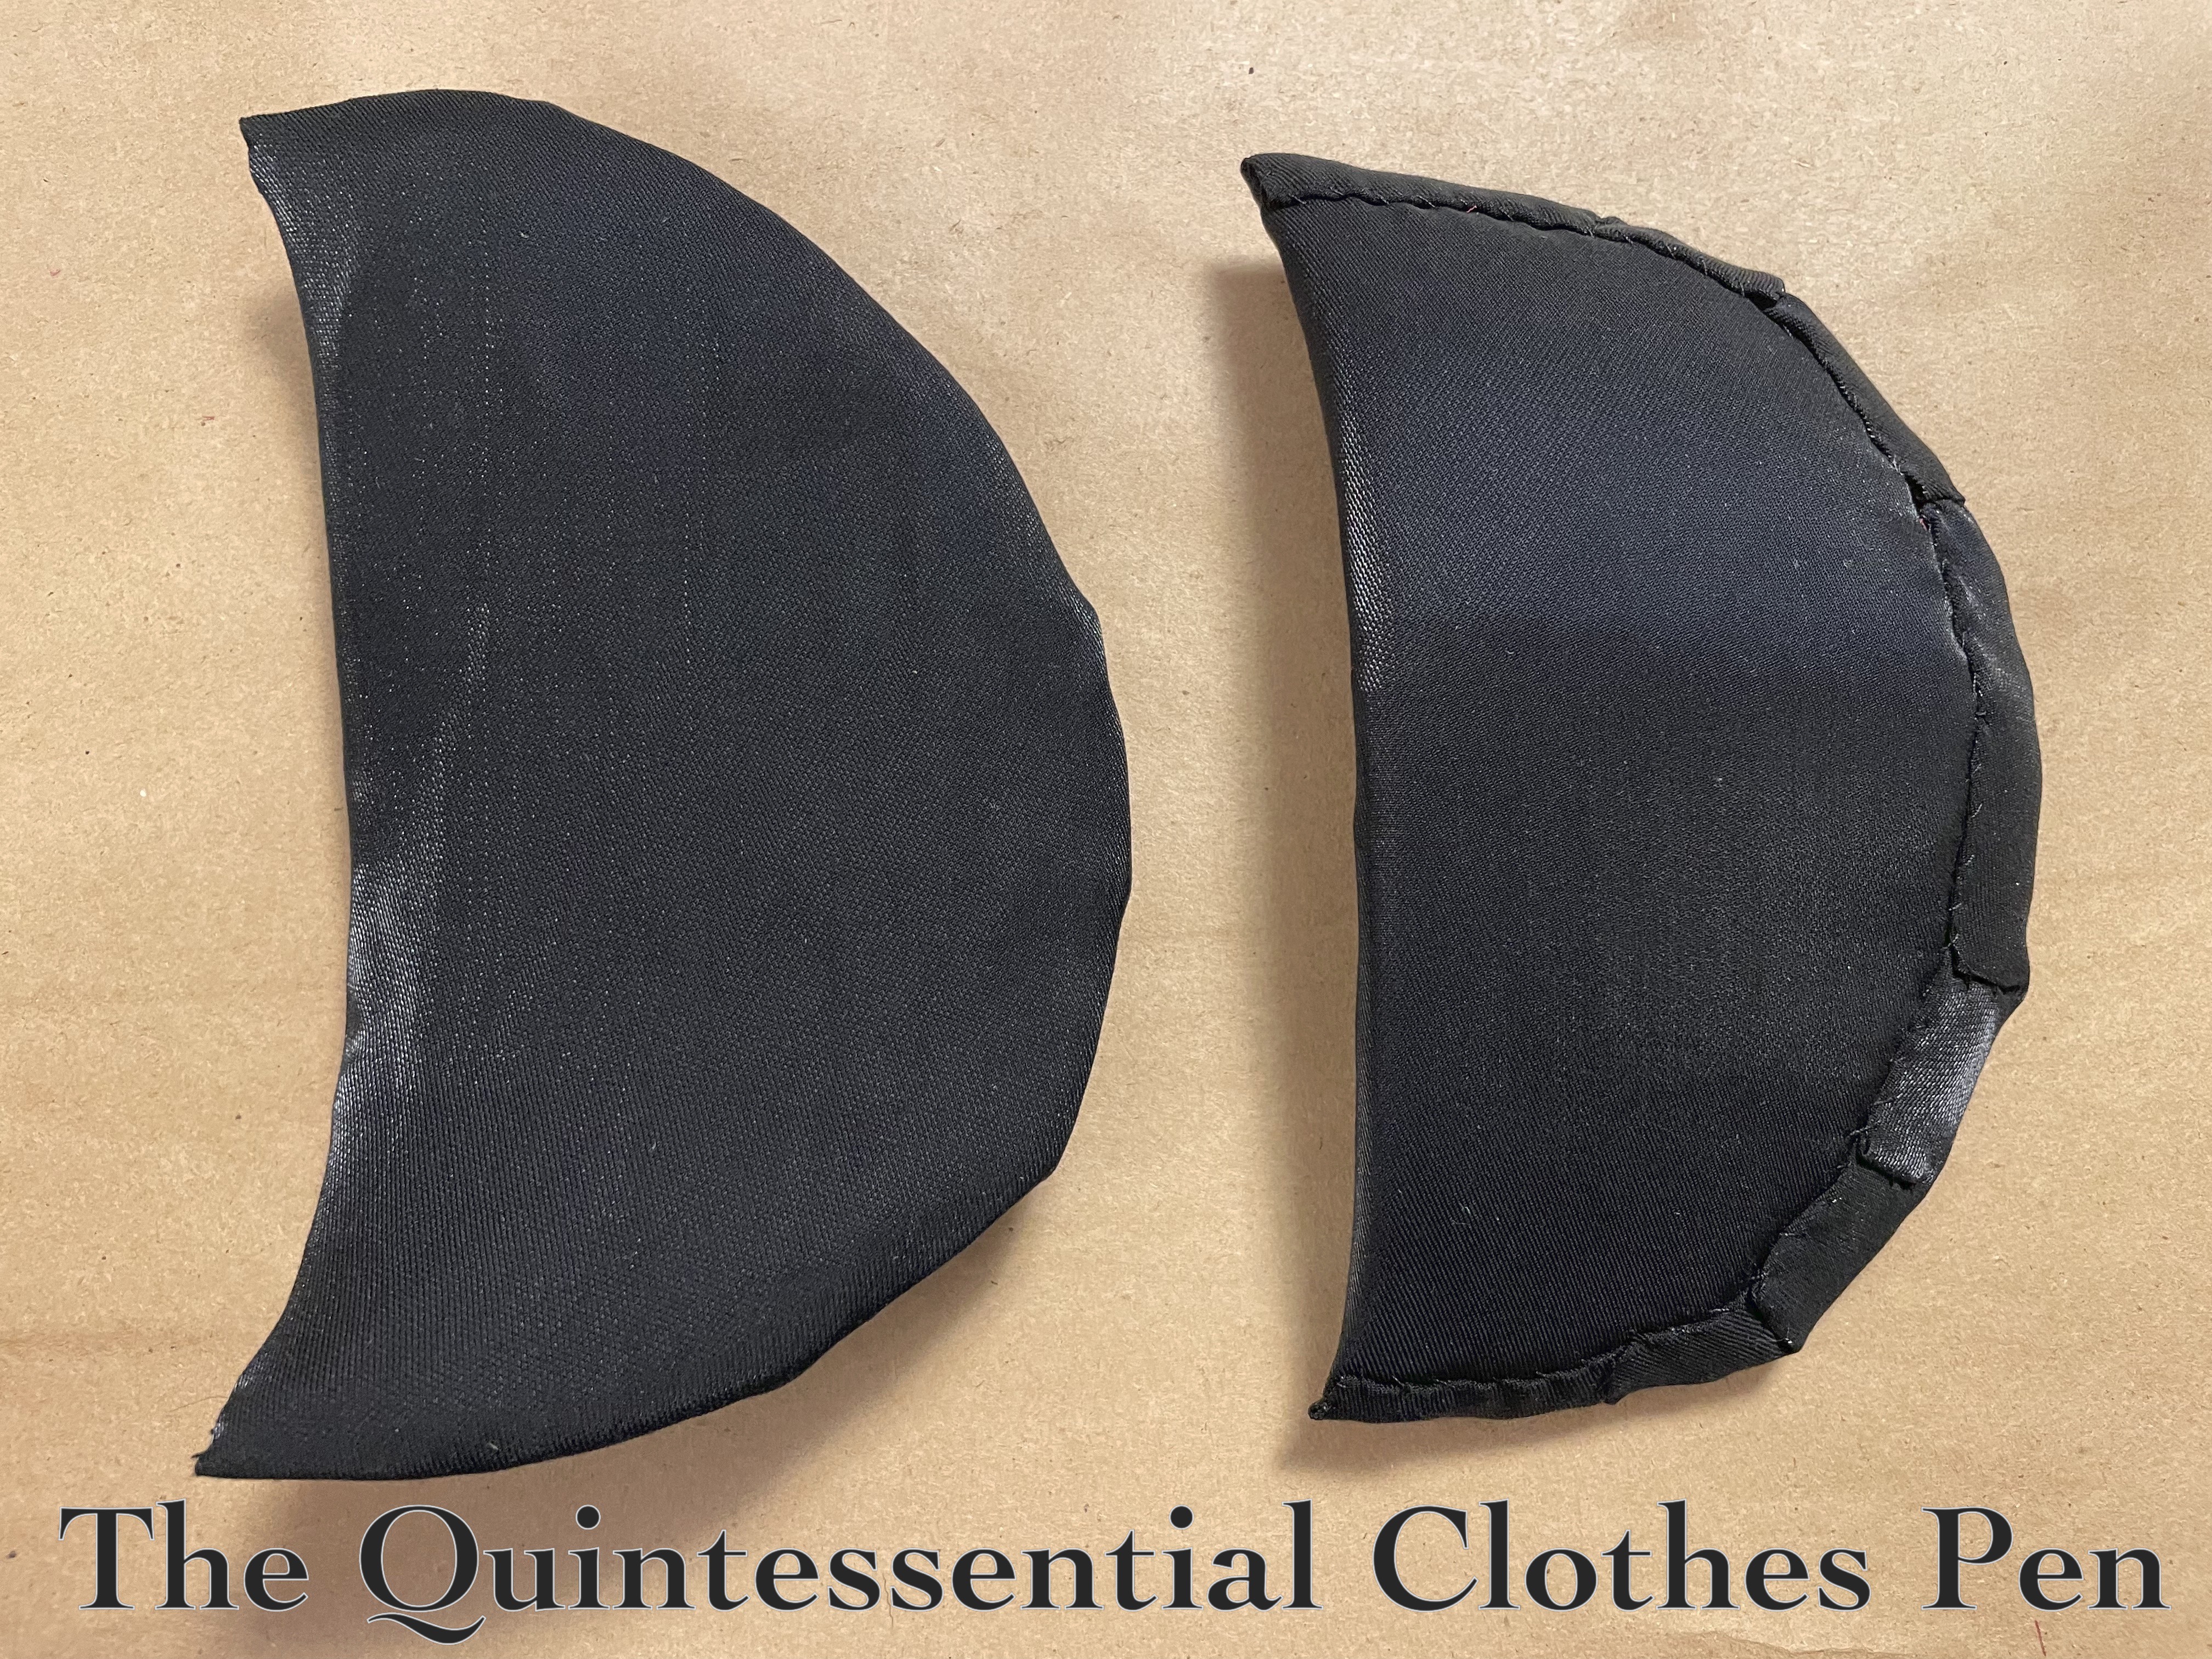
Conveniently, I had a pair of shoulder pads in my stash that worked well. They were, however, light colored and I thought it would be nice if they matched my dress better, so I covered them with scraps of the dress fabric before tacking them in.
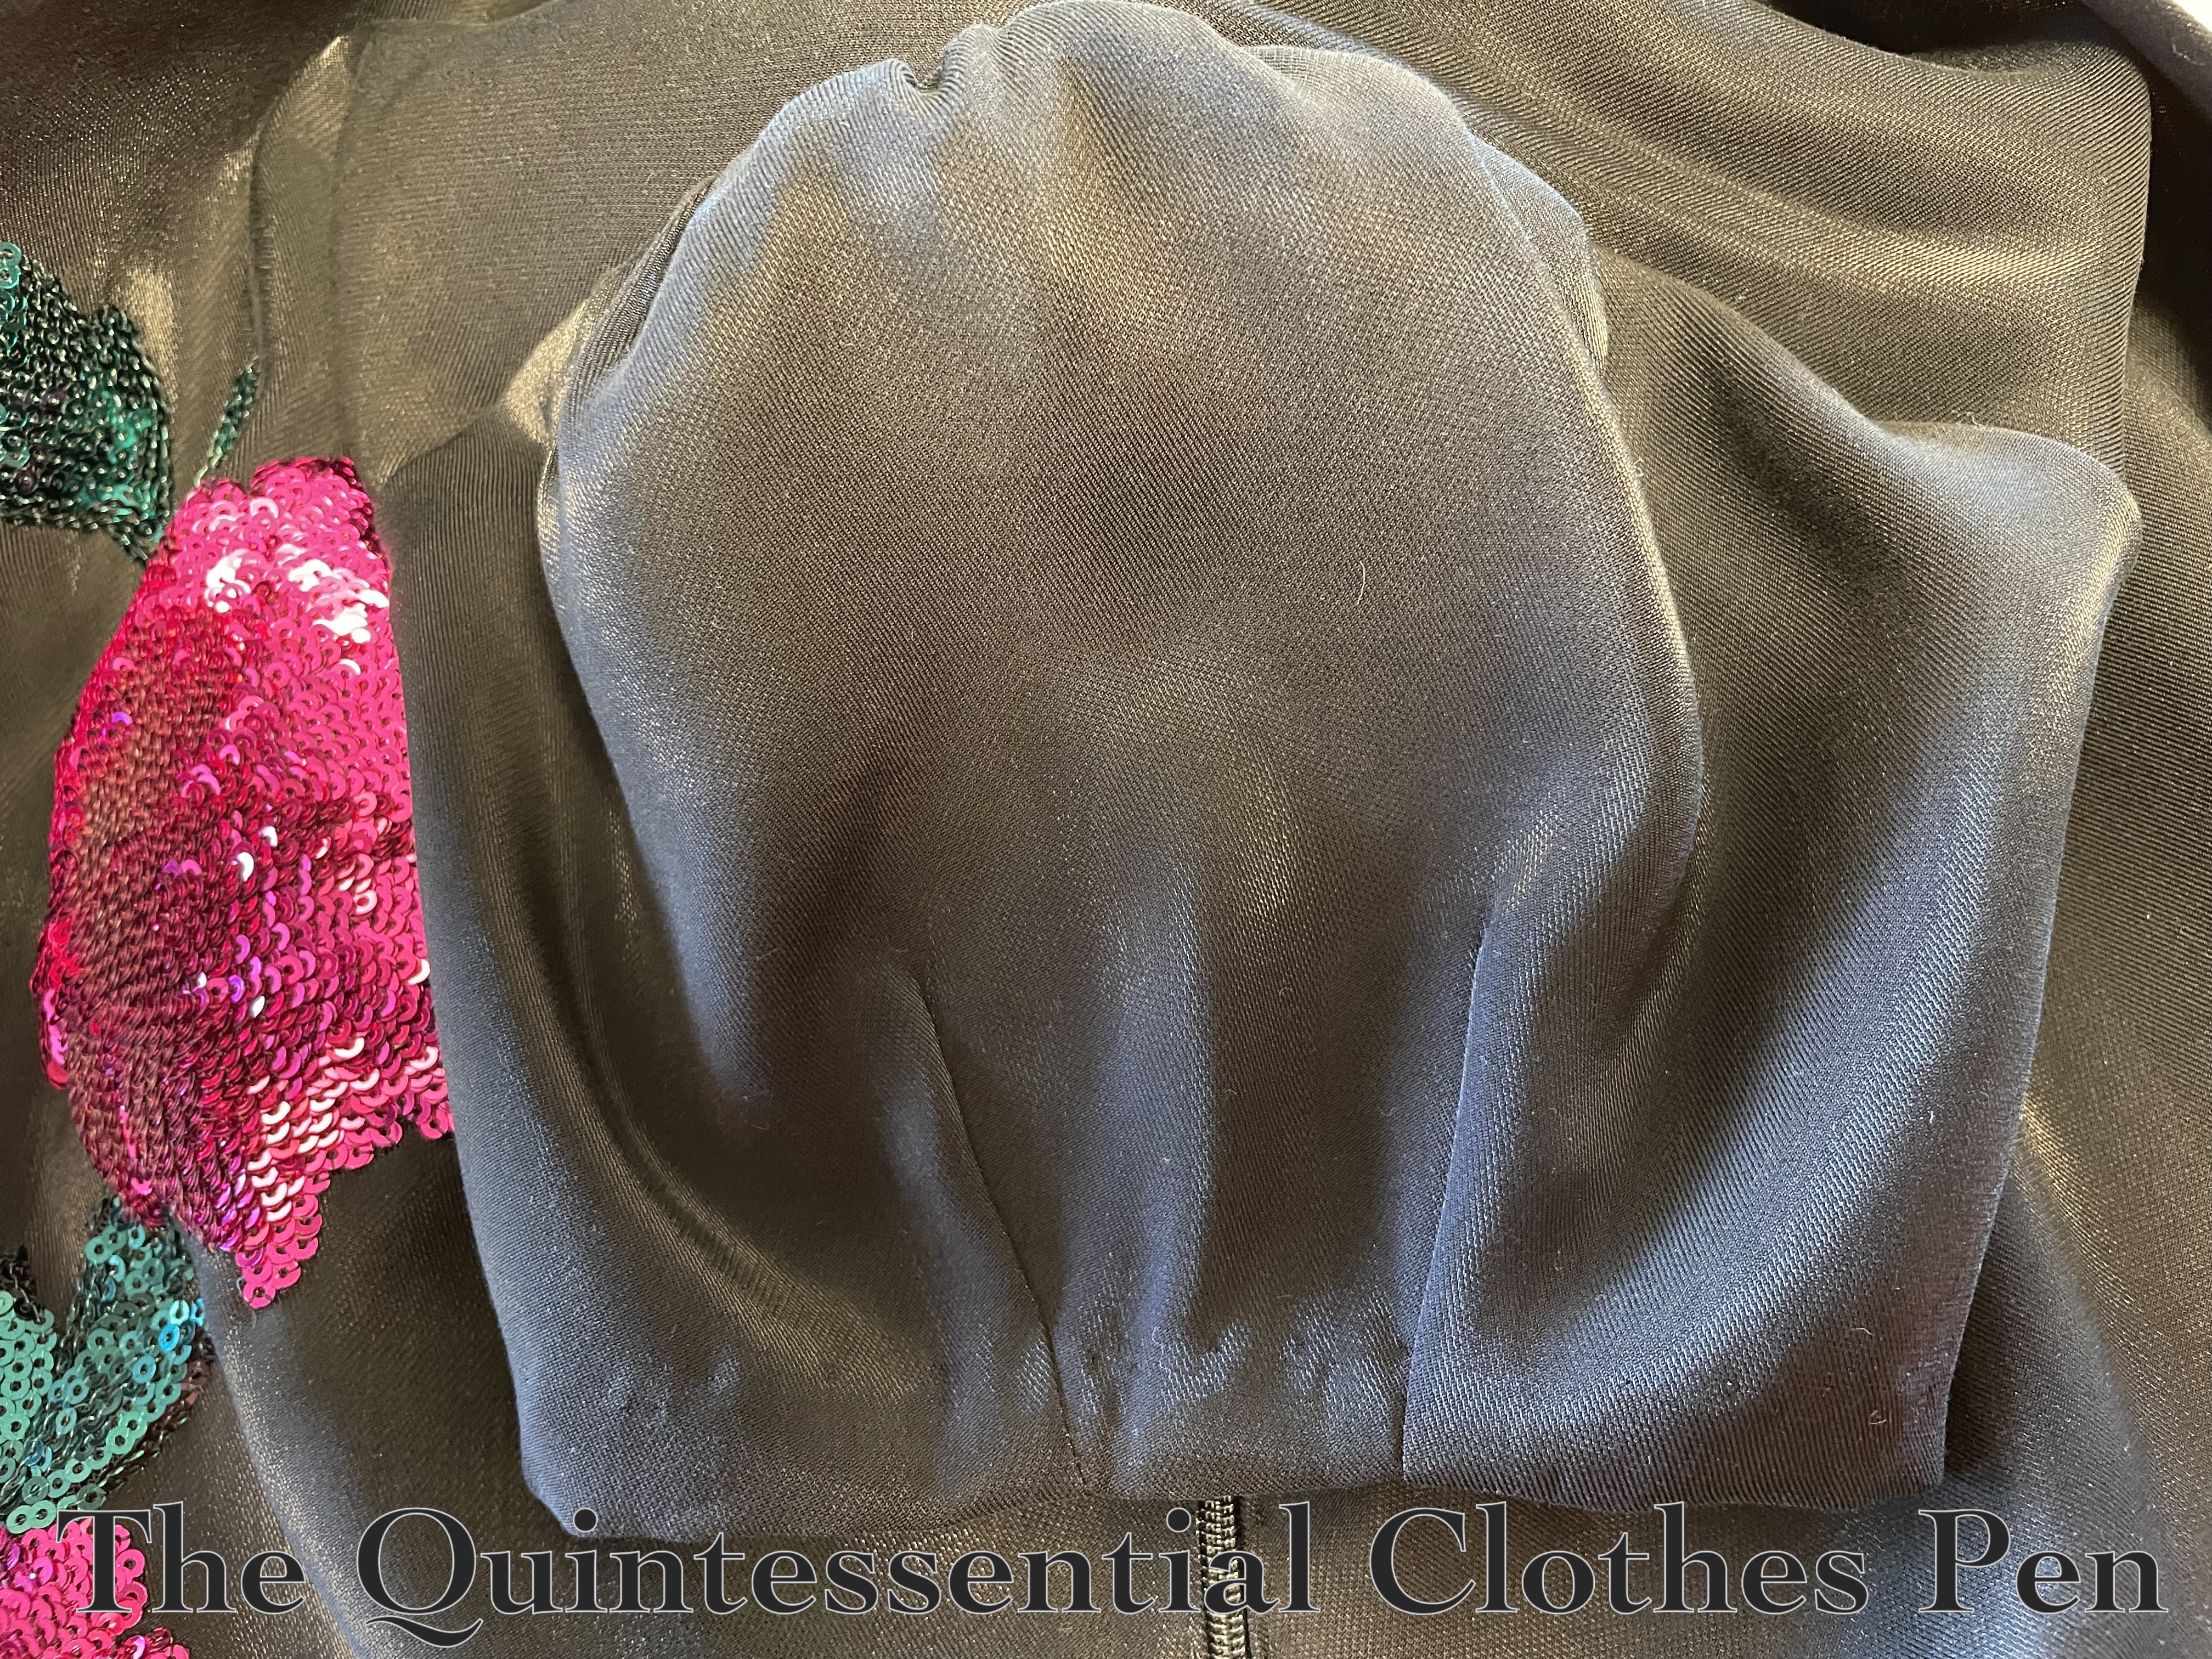
Below is a photo of my covered shoulder pads followed by a photo of the shoulder pads sewn in place on the gown, with bra strap keeps added as well.
And that’s it for now! This post is long enough, so pictures of the full ensemble will be in another post!
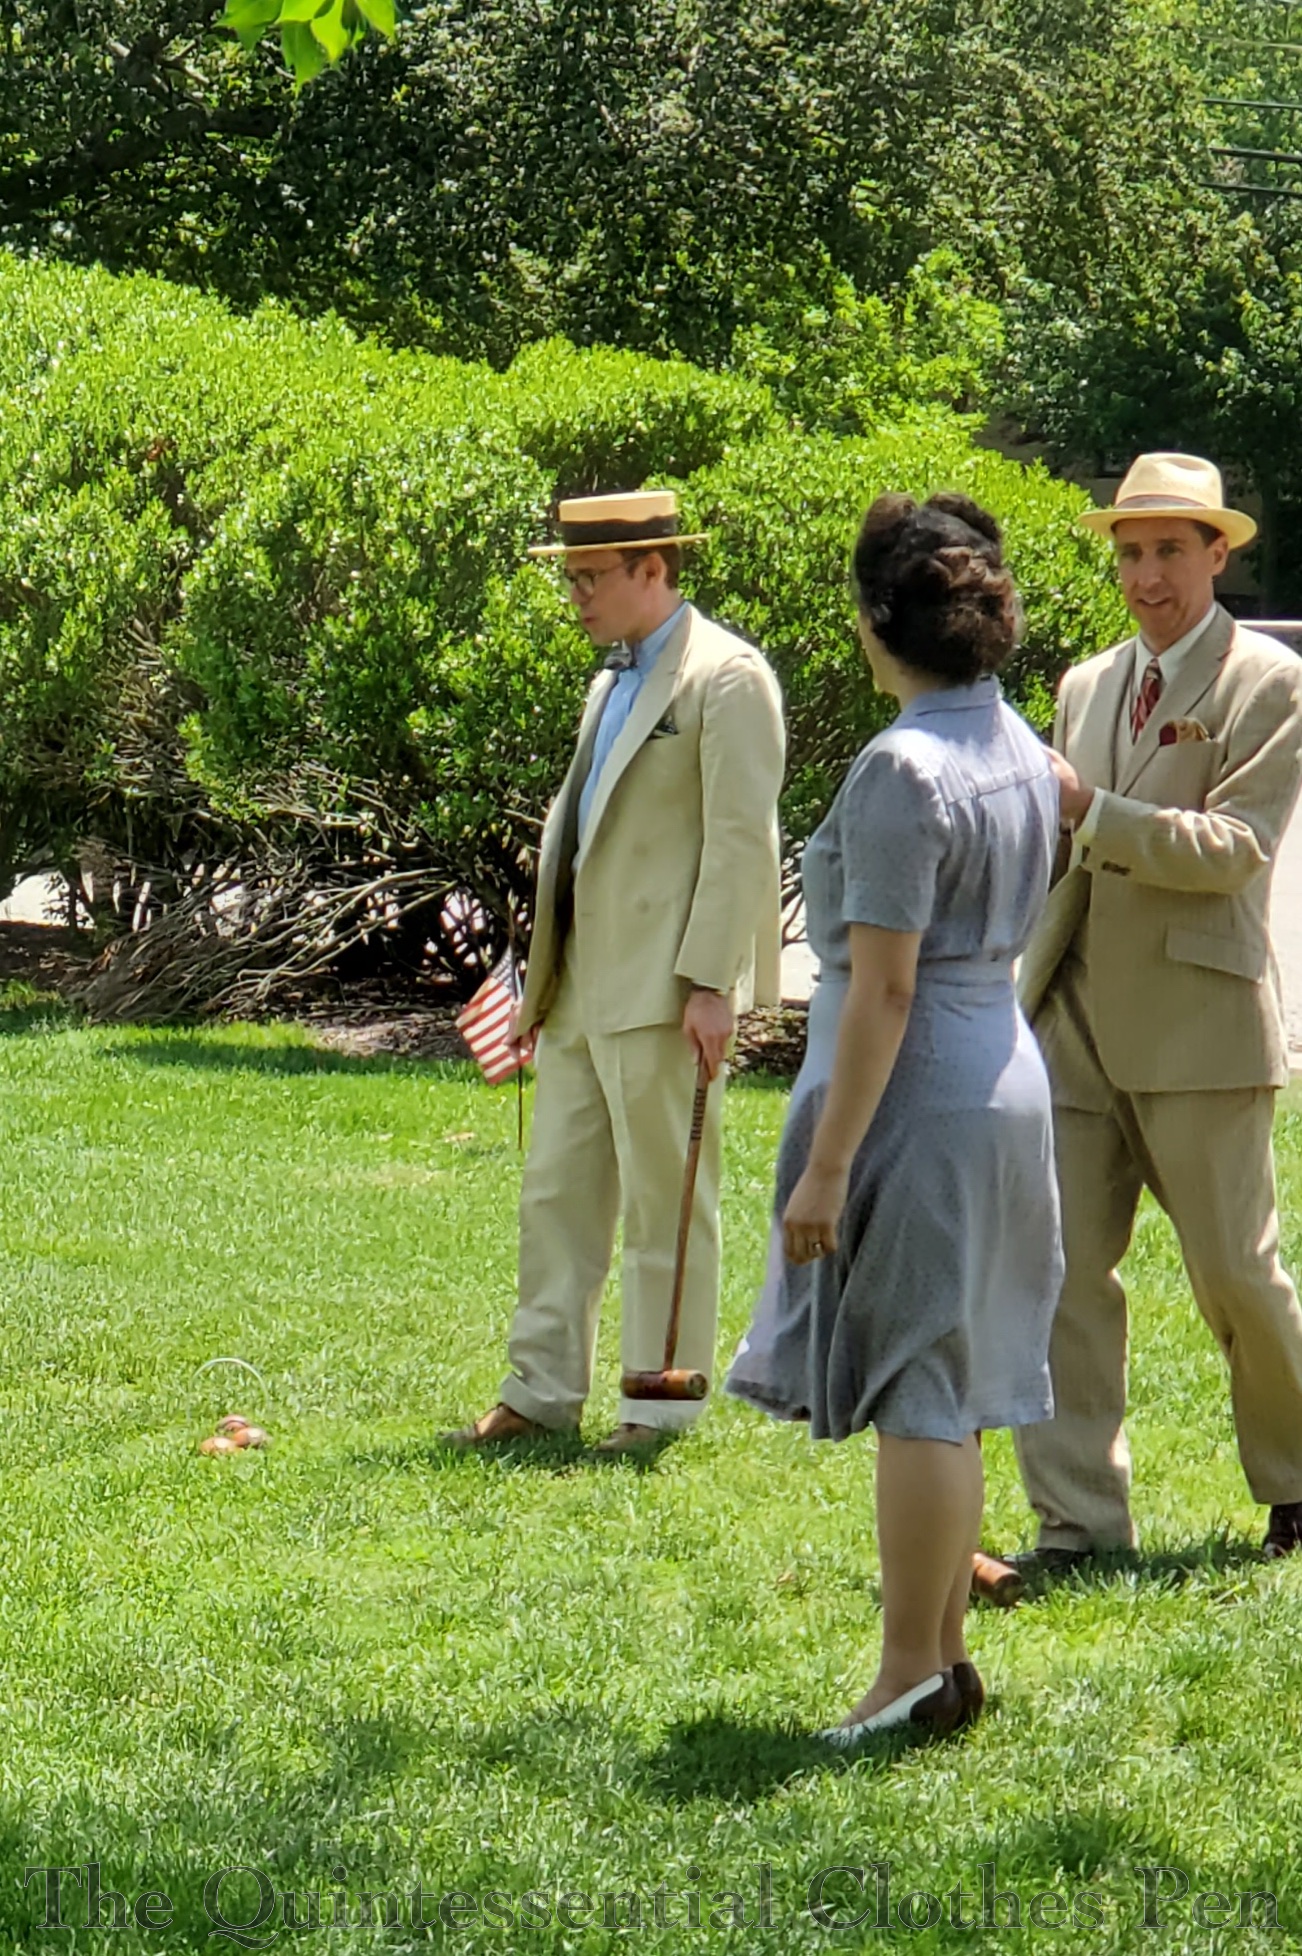
An event! With vintage clothes, and people, and sun, and croquet! The weather was perfectly reasonable–warm without being absurdly toasty–and the ground was dry–perfect for laying out blankets to picnic in style.
I decided to wear my rayon 1943 Mauve Print Dress. I made it in 2017, but have only worn it once, I think. I thought this would be a great opportunity, plus it allowed me the chance to wear my American Duchess Peggy spectators and do my hair in victory rolls. I’m pretty much a fan of big hair in any era, so the victory rolls sounded more appealing than close-to-the-head 1920s styles (1920s being an oft visited decade for summer events since the clothes are easy to wear even when it’s very hot).
(As a side note, I feel like this photo with Plaid Petticoats makes me look like a giant! I don’t think we’re actually that far apart in height (maybe we are?), but the combination of natural waist dress vs dropped waist dress, plus heels vs flats, plus big hair vs hat really makes us look drastically different in height!)
I was very pleased with my victory rolls. I’ve practiced them a few times over the last year or so and have tried a few different products as well. I’ve found that I can make them work (even with my curly hair, yay!) with some Lotta Body on dry hair that hasn’t been washed that day. The biggest challenge is actually that my hair is getting quite long, so the rolls start even farther away from my head than when I wore this dress the last time with victory rolls. My arms almost aren’t long enough anymore!
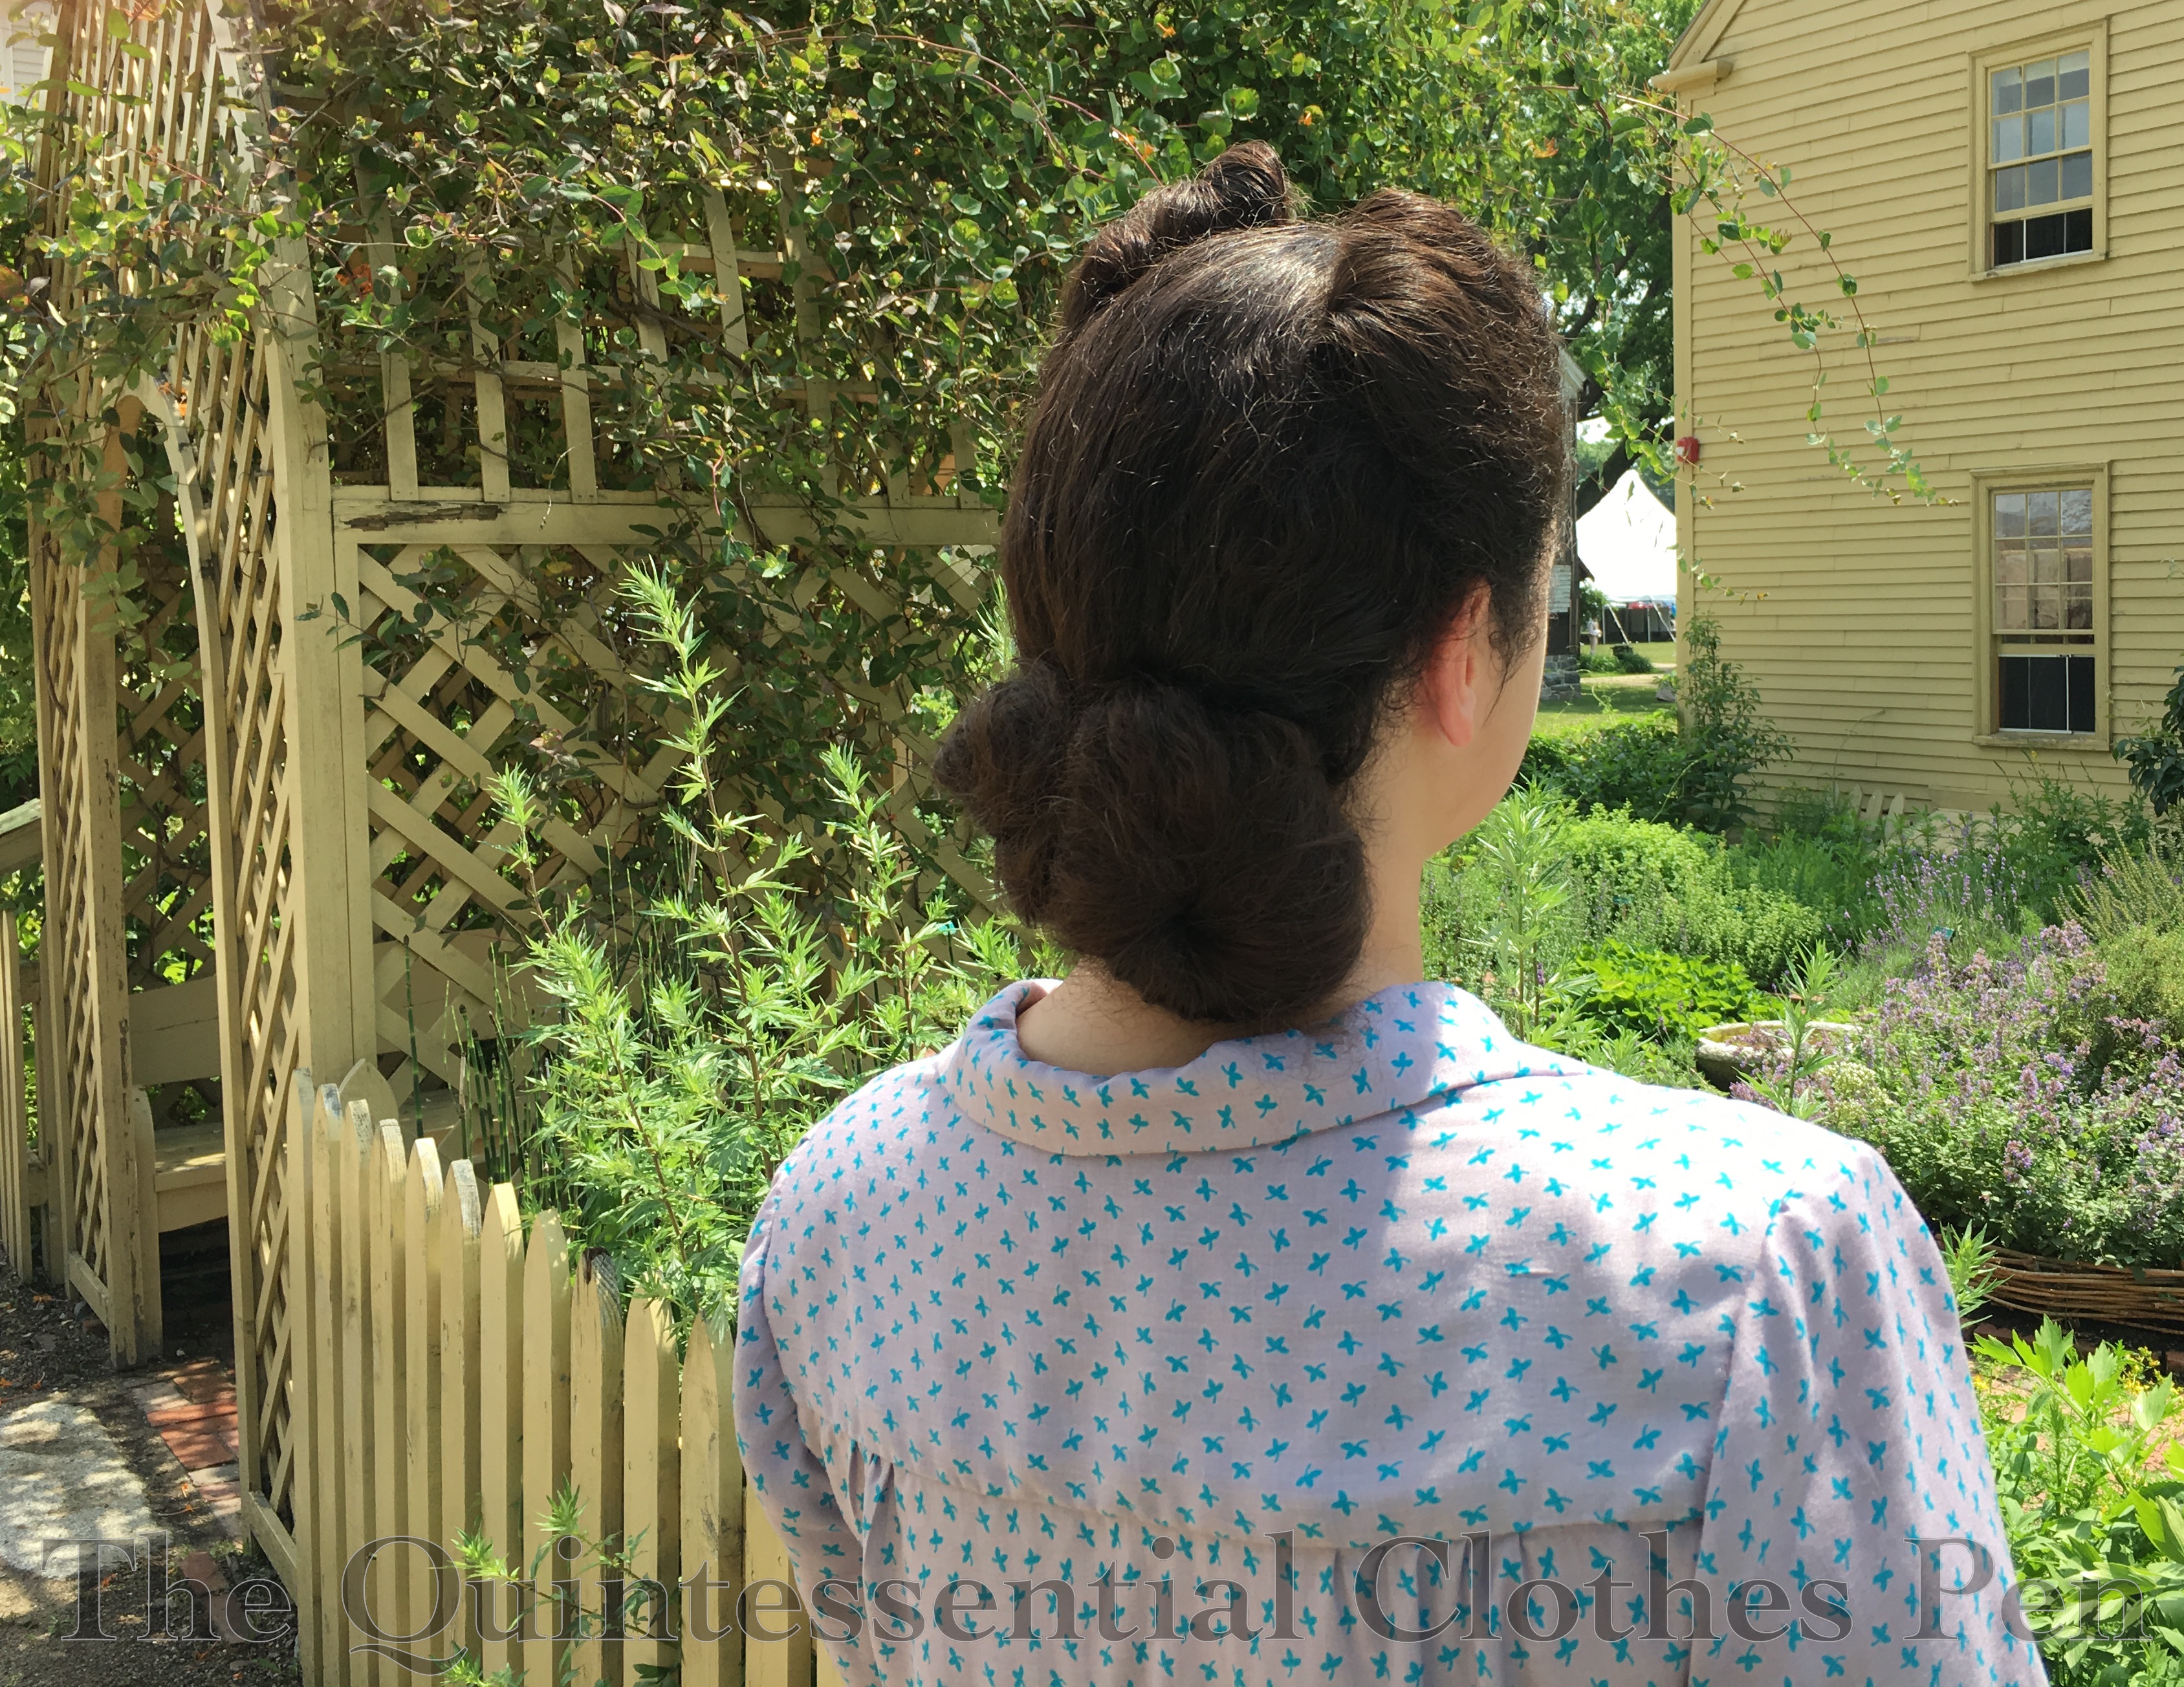
The long hair also makes figuring out the back a little tricky. I was pleased with what I came up with, though I don’t remember exactly how I did it. It’s something with each side separated, twisted, and then dented in the middle so it’s not one big puff. I guess I have to do it again so I can figure that out!
The picnic included a croquet tournament. I was doing unexpectedly well in the first game, but faltered towards the end and didn’t make the cut to the next round due to the fierce competition (said only somewhat jokingly!).
Croquet involves serious thinking and set up!
This was a lovely outing, perfect for easing back into events. It was wonderful to go digging in my historical clothes closet to get out all of the garments, accessories, and picnic things I would need! I’ve really missed that!
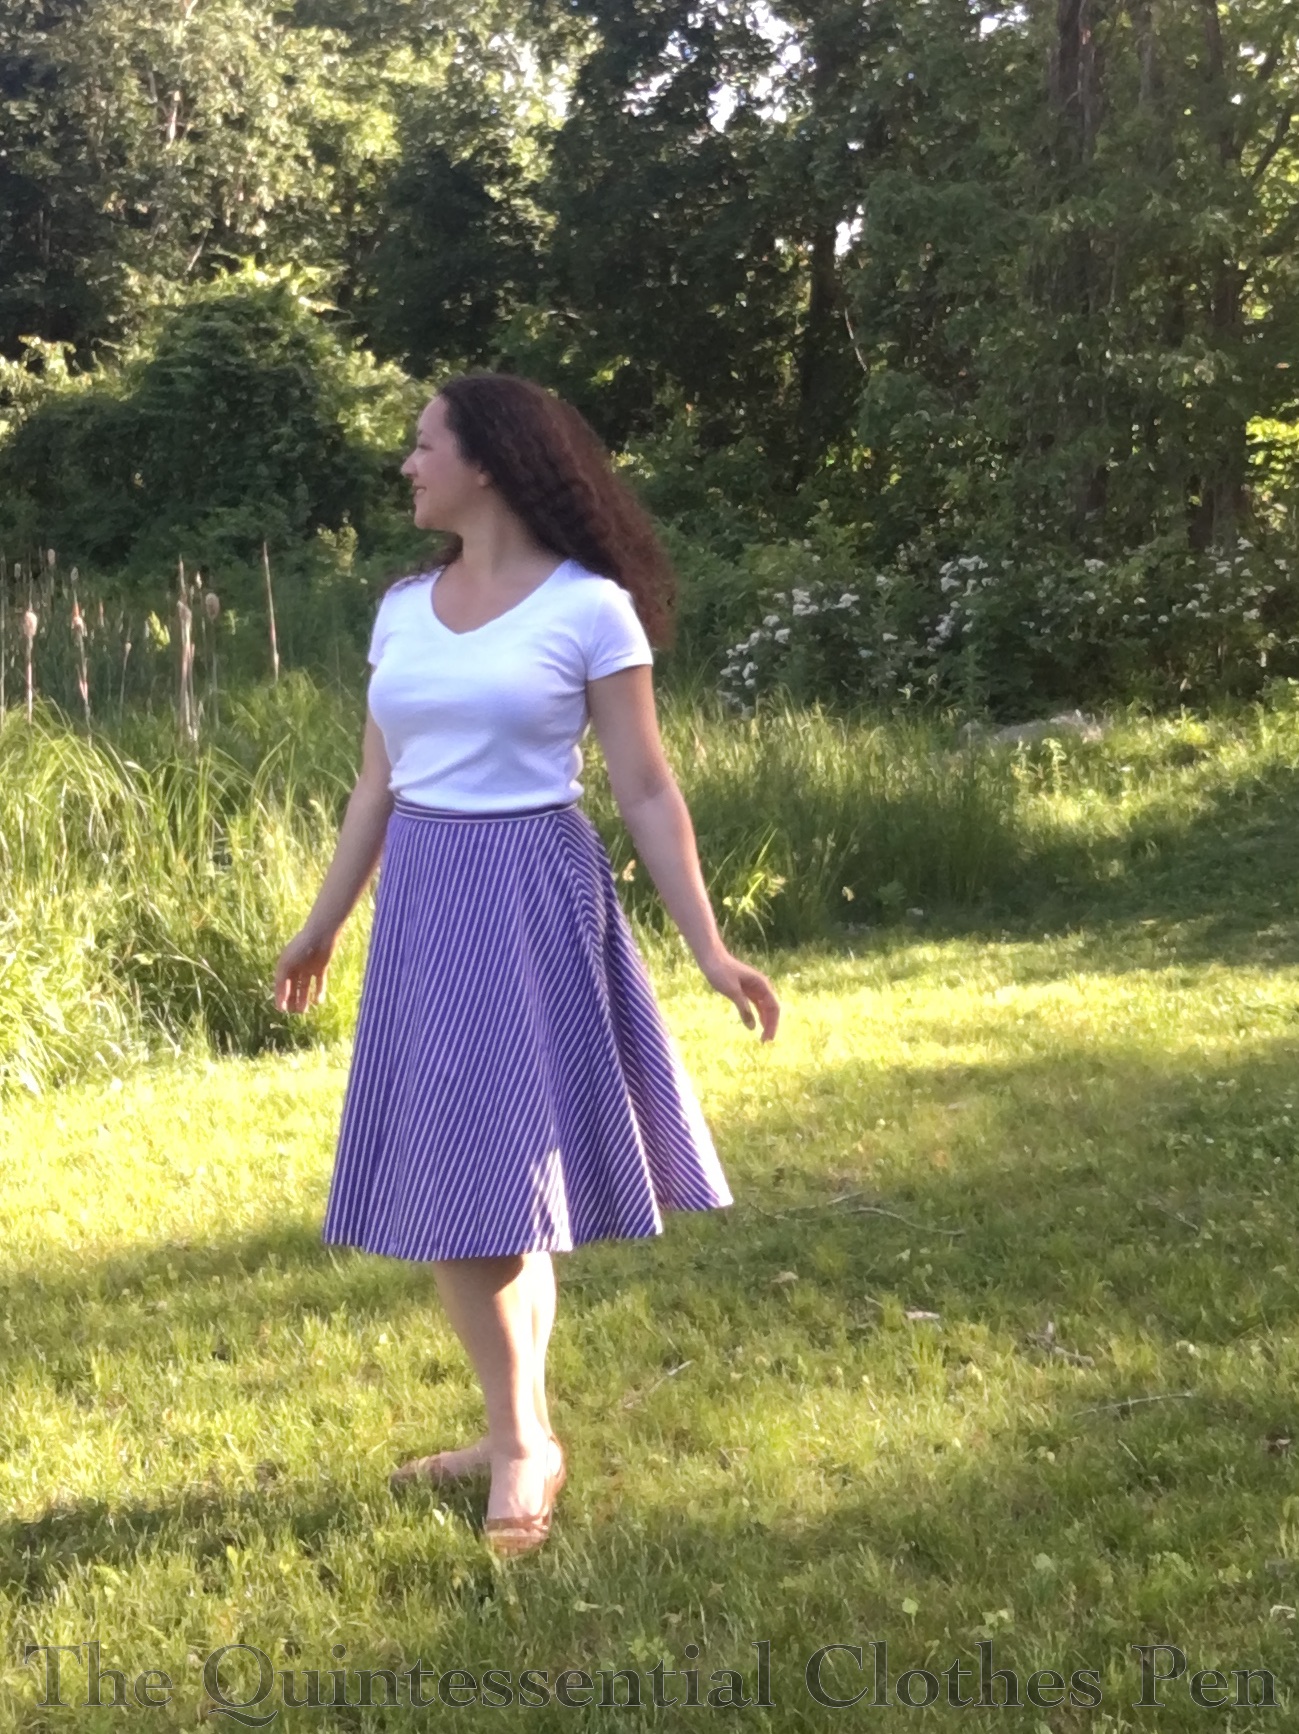
…turn it into a skirt! That’s the take-away from today’s When The Dress No Longer Fits project.
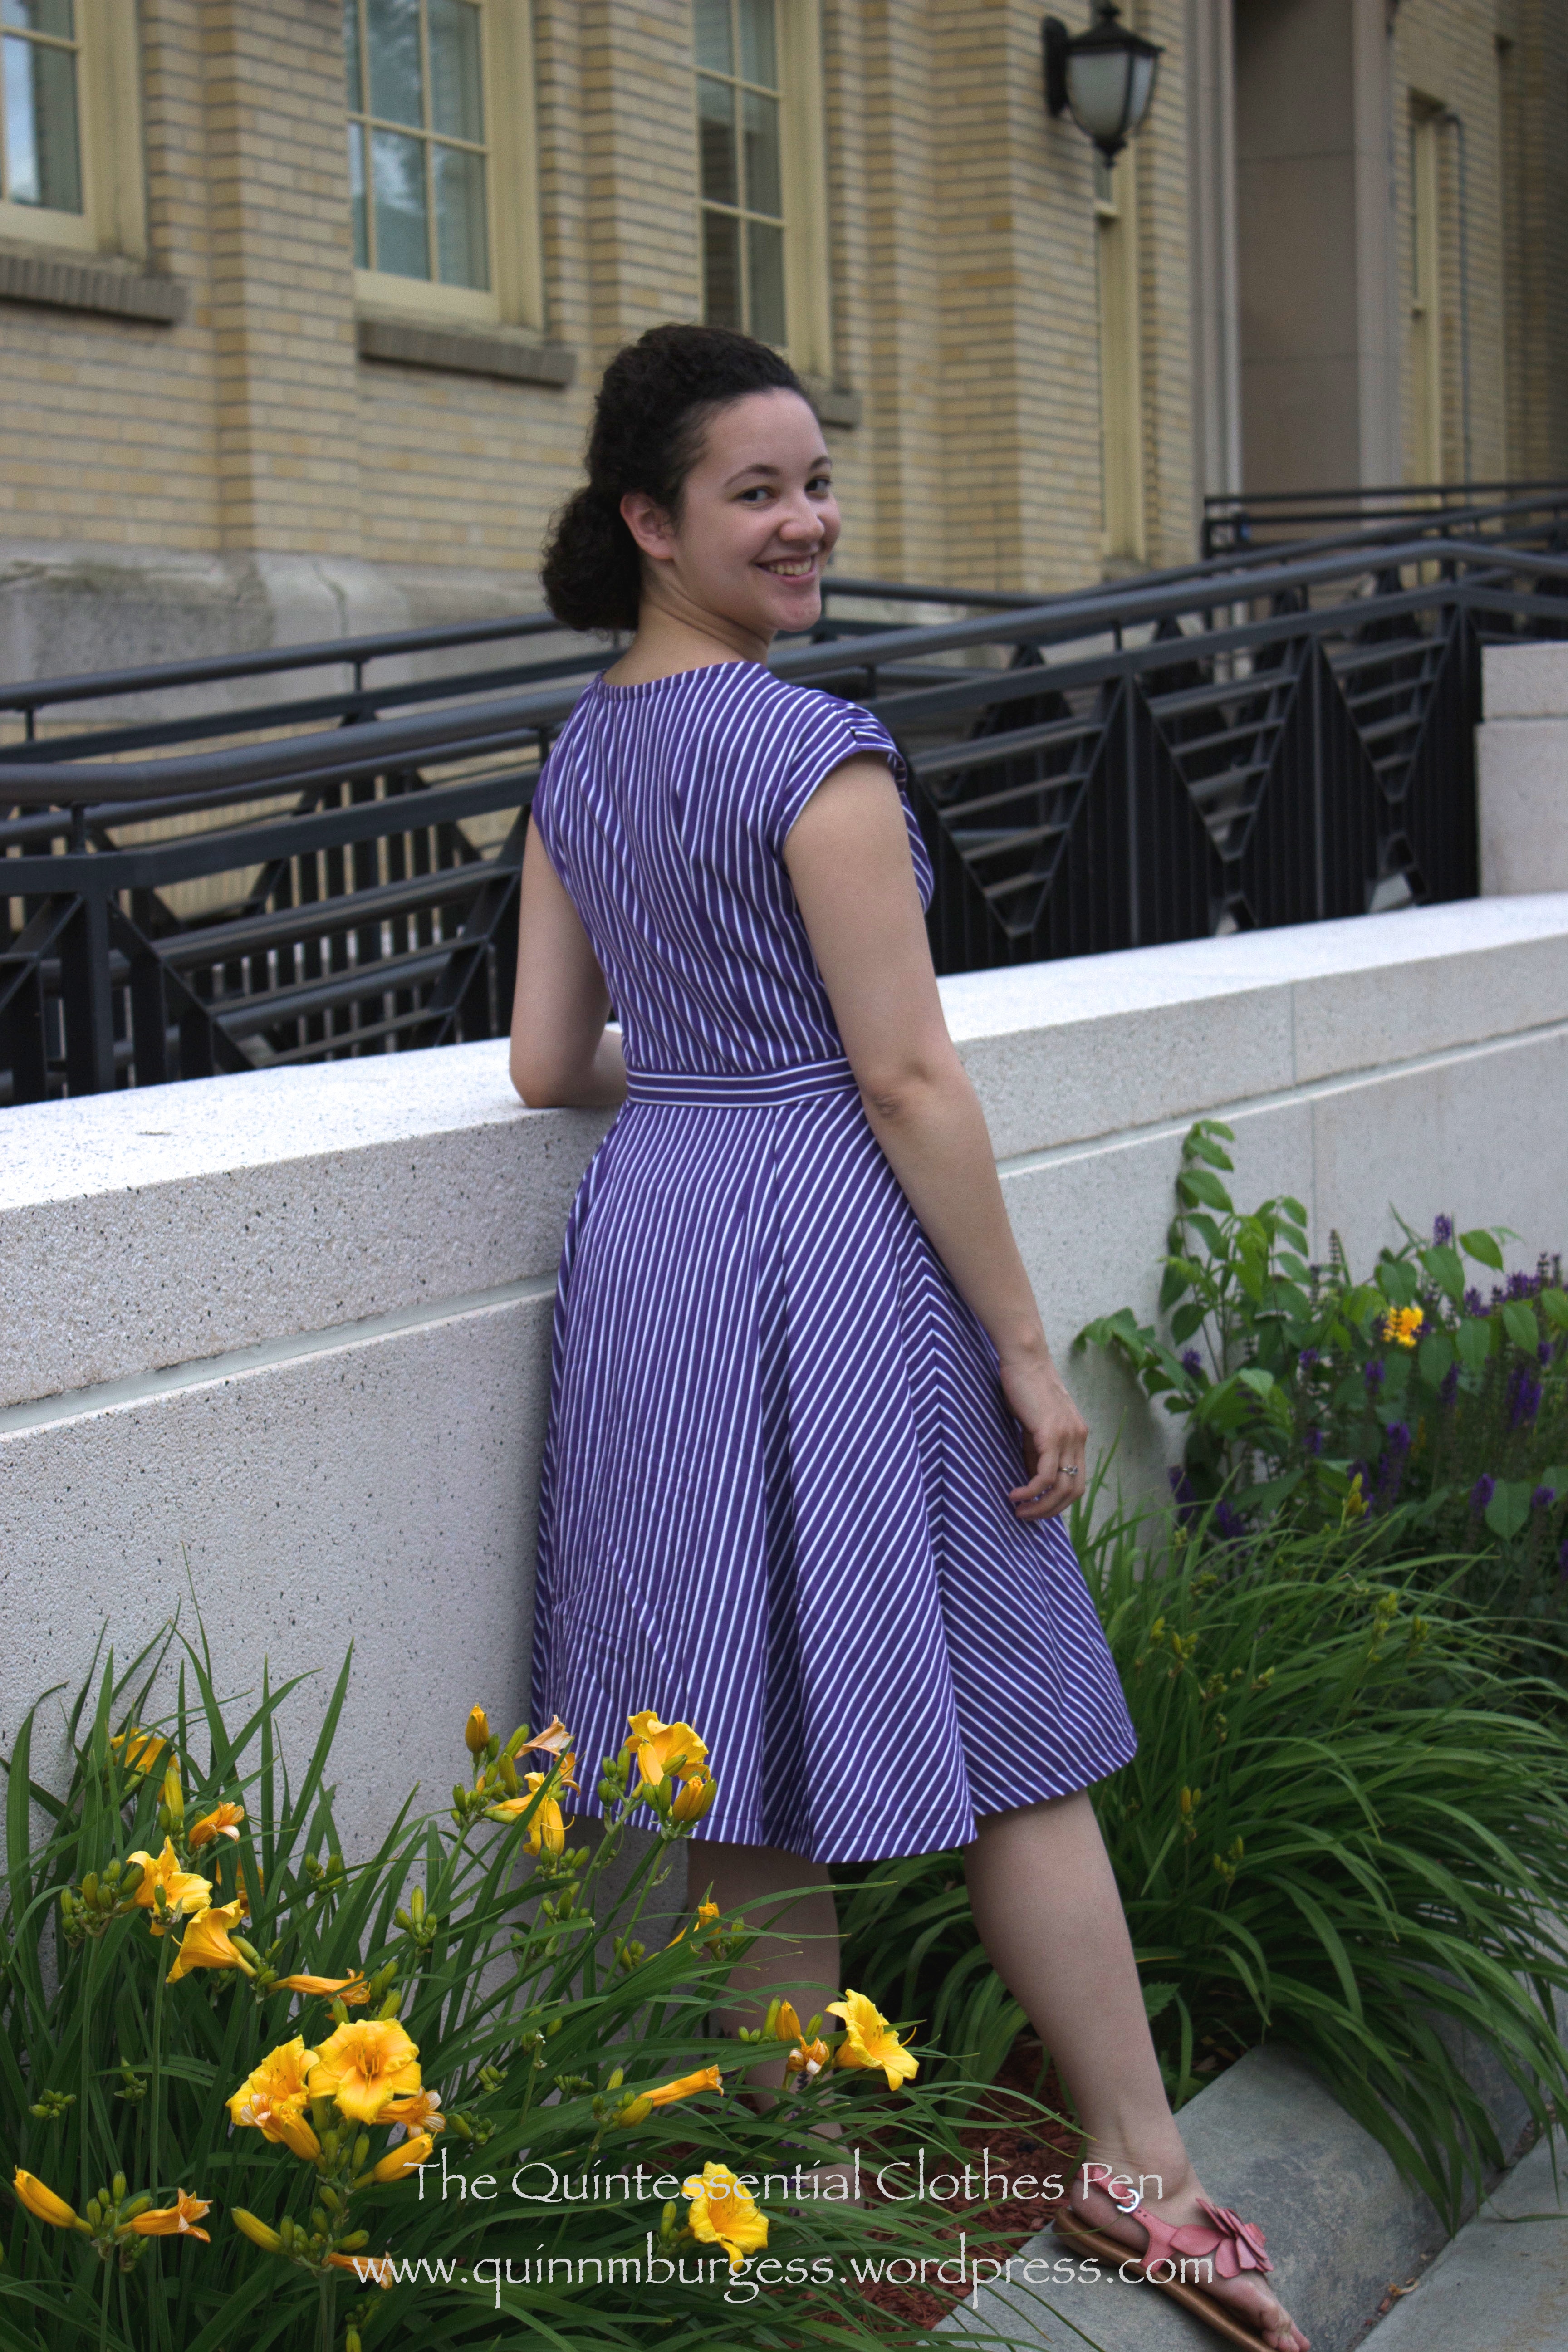
This skirt started life in 2014 as a dress inspired by a 1940s Anne Adams sewing pattern. I don’t actually have the pattern, but I was inspired enough to try patterning my own version based on the pattern envelope image. You can read all about the creation of the dress in this past post.
Since this photo was taken my shape has changed, making the dress a garment that could no longer be worn.
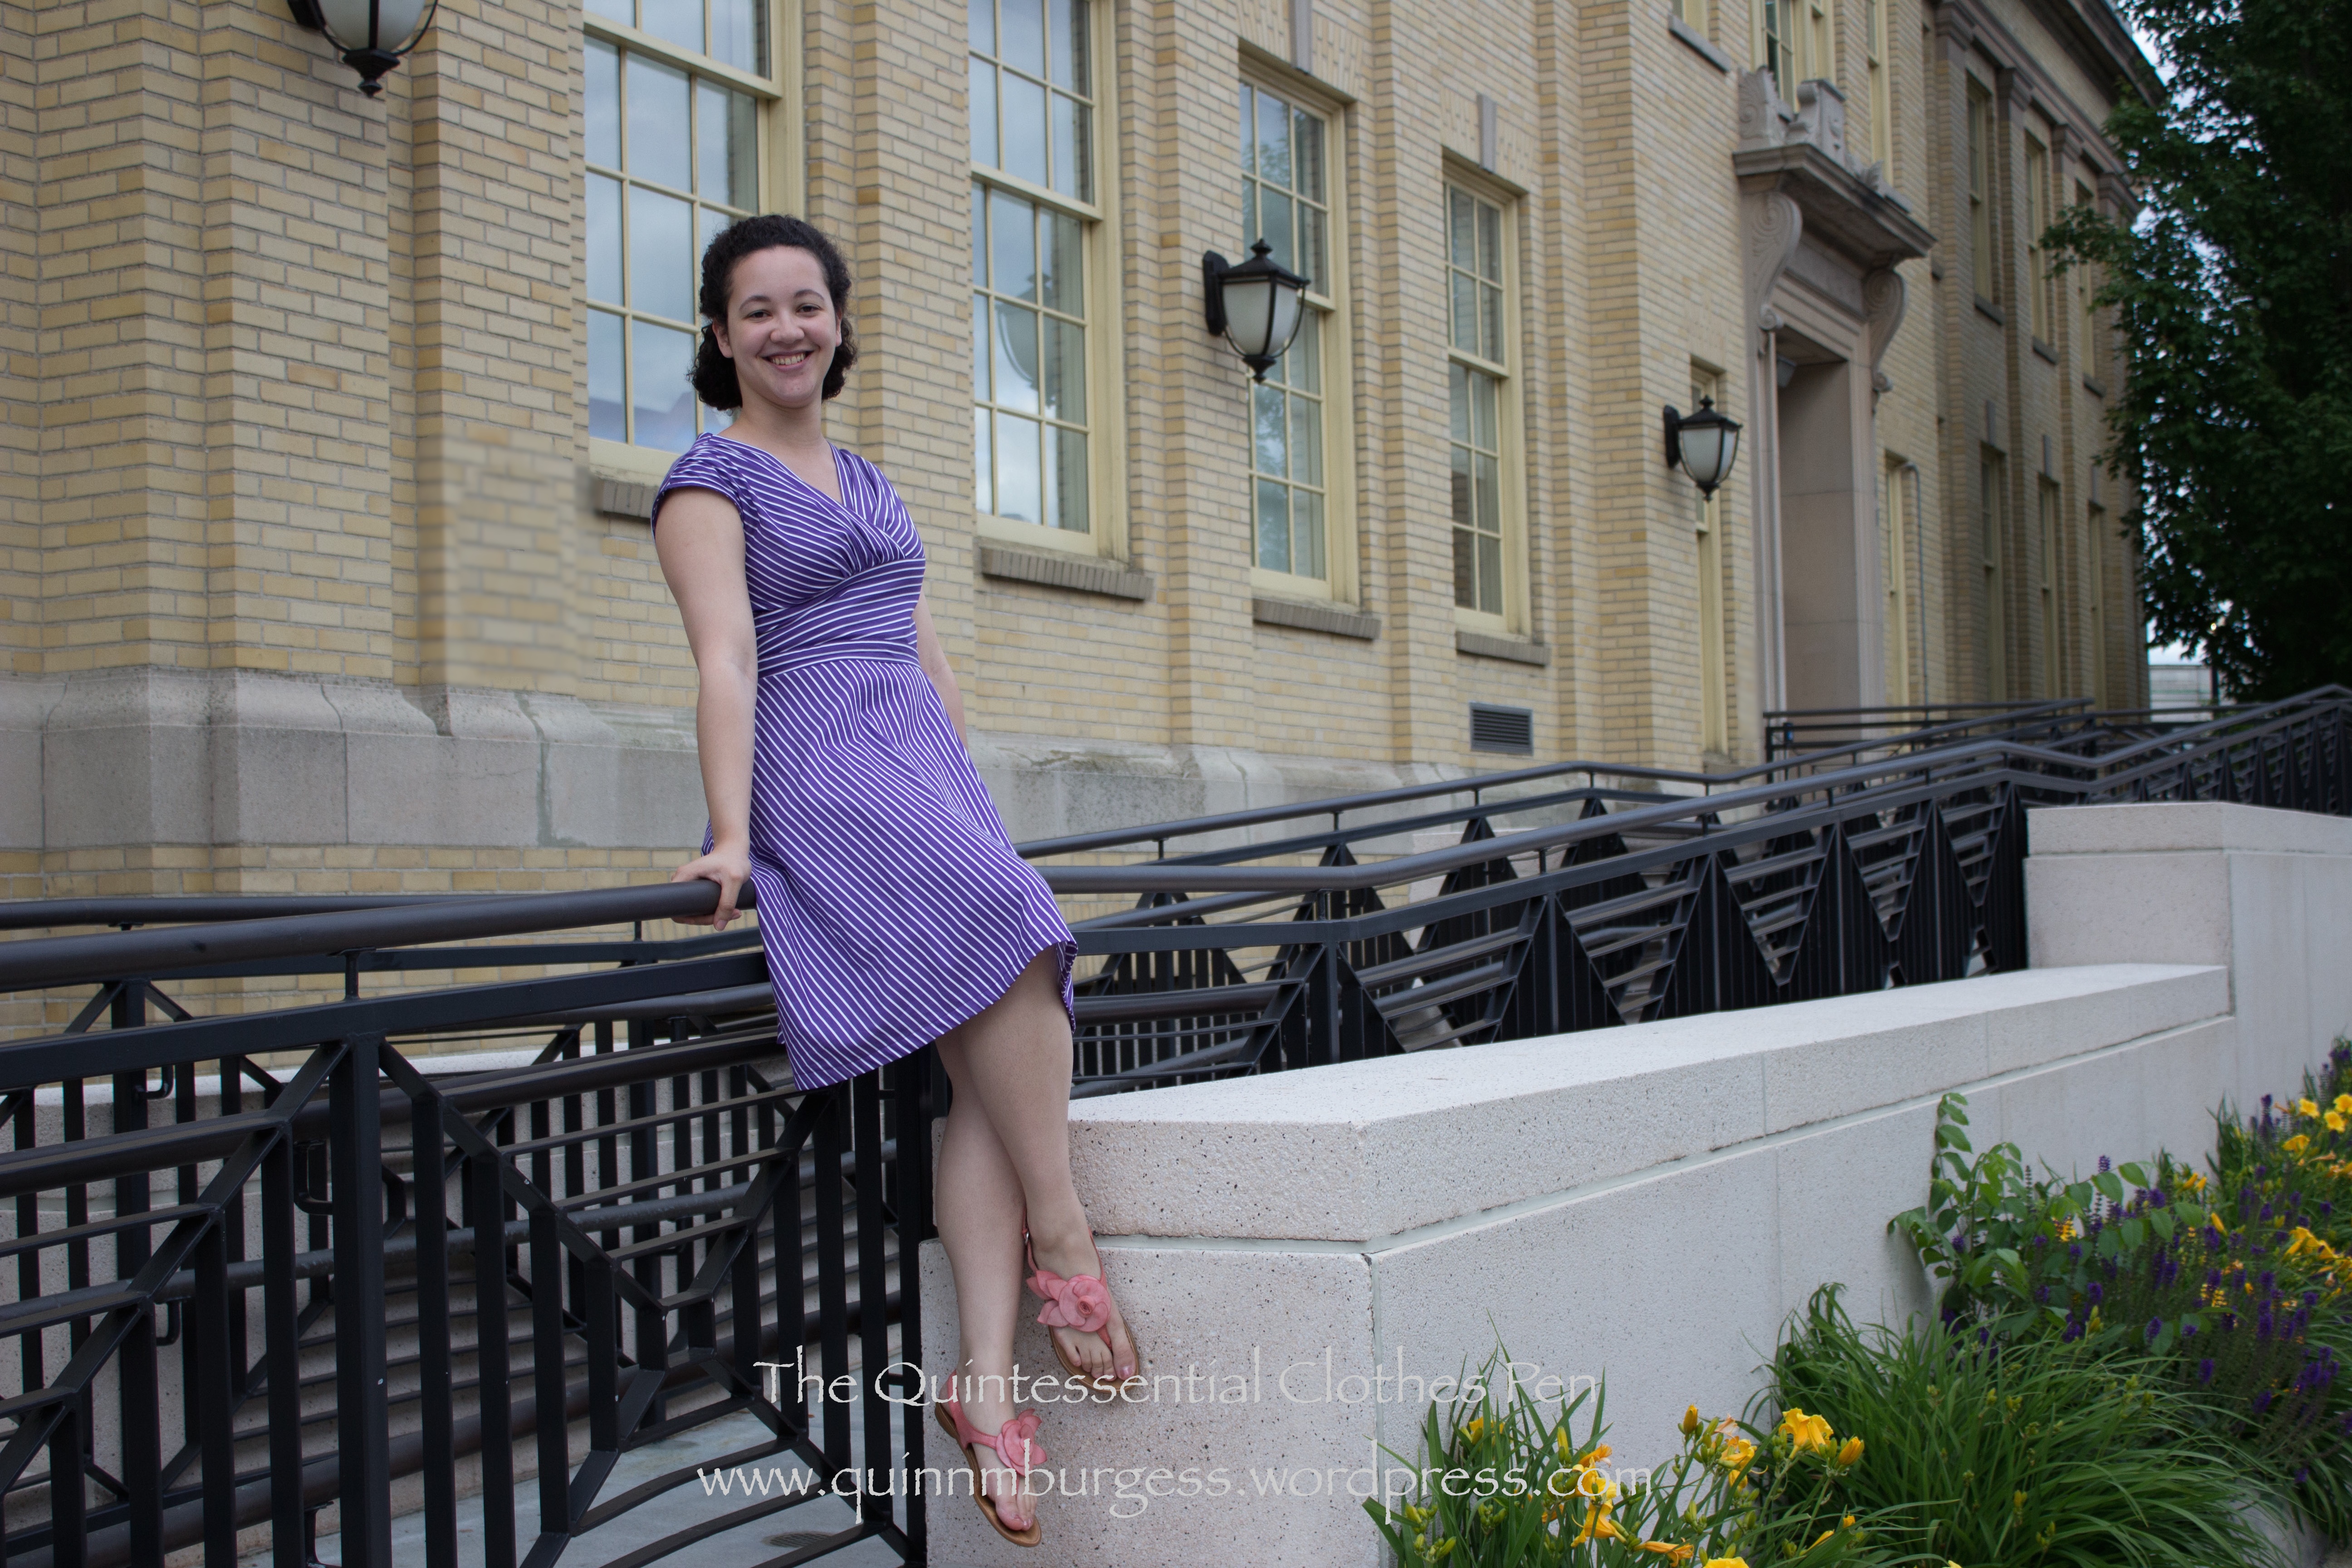
I’ve also never worn this dress all that much. It’s easy to draw a seam along the bust, but hard to pattern it so that the stripes are straight and it actually follows a curved body comfortably. It was ok, but not the most comfortable dress I’ve ever made. And it was a lot of purple.
I have limited fabric leftovers from this dress–certainly not enough to make a whole new front bodice, which is what would be necessary– and not being completely sold on the idea of the dress as a whole, I decided to turn it into a skirt! This eliminated the bodice problem and instantly cut down on the quantity of purple in one seam-ripping swoop.
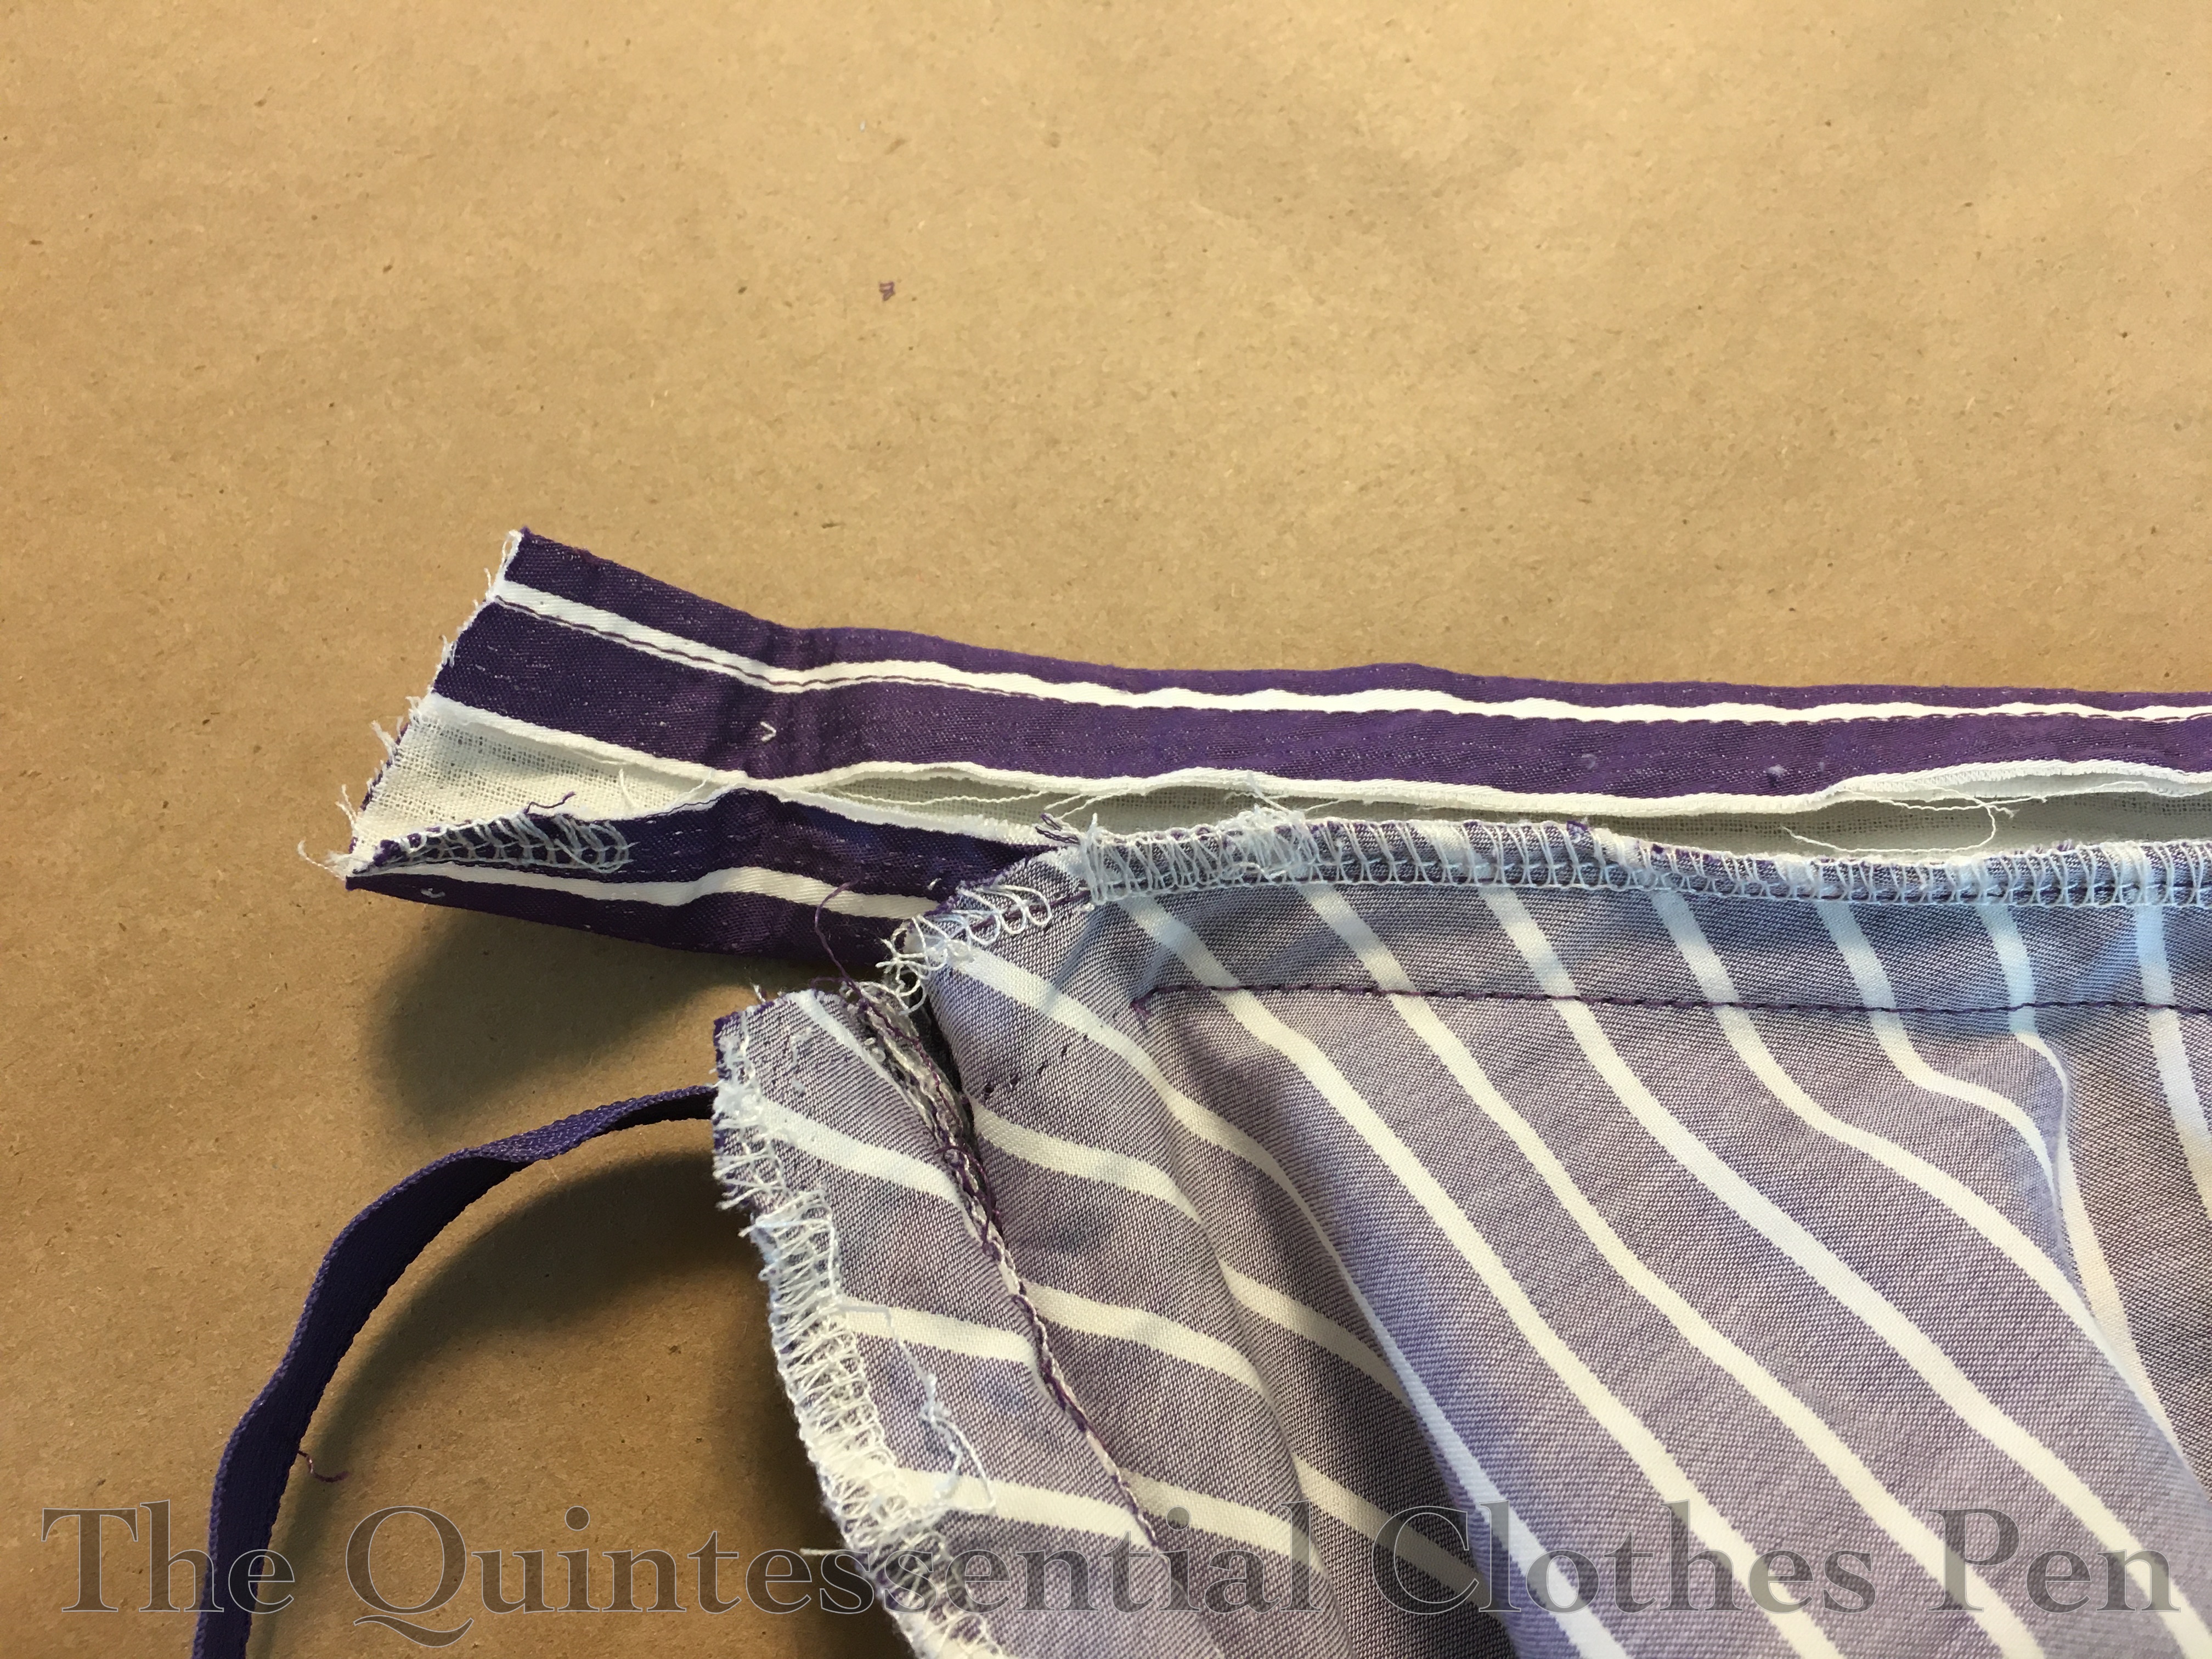
I started by removing the bodice and taking out the zipper where it crossed the waistband, as well as down into the skirt just past the seam that connects the waistband to the top of the skirt, as you can see below.
My waist is larger now than it was when I made the dress, but I was saved by the fact that the waist of the skirt had been a few inches too big when I originally made the dress. Whew!
At the time I made the dress, I’d solved the problem of the skirt being too big by adding tucks on the back. This kept me from needing to alter the side seams, which I didn’t want to do because I’d matched the stripes perfectly.
To alter the dress now, all I had to do was take out the tucks and the waist fit! (I’m reminded that I had a similar problem/good fortune while letting out the waist of my 1904 Anne of Green Gables skirt–I mentioned it in this past post. Interesting that they’re both inspired by Annes!)
Luckily, I had enough extra waistband length to accomodate letting out the tucks. It was a little annoying to do, because I had to take the waistband off entirely to reset it with the extra across the back and I had serged the skirt and waistband seam allowances together. It was a bit of extra seam ripping, but that was better than trying to piece the waistband and match the stripes.
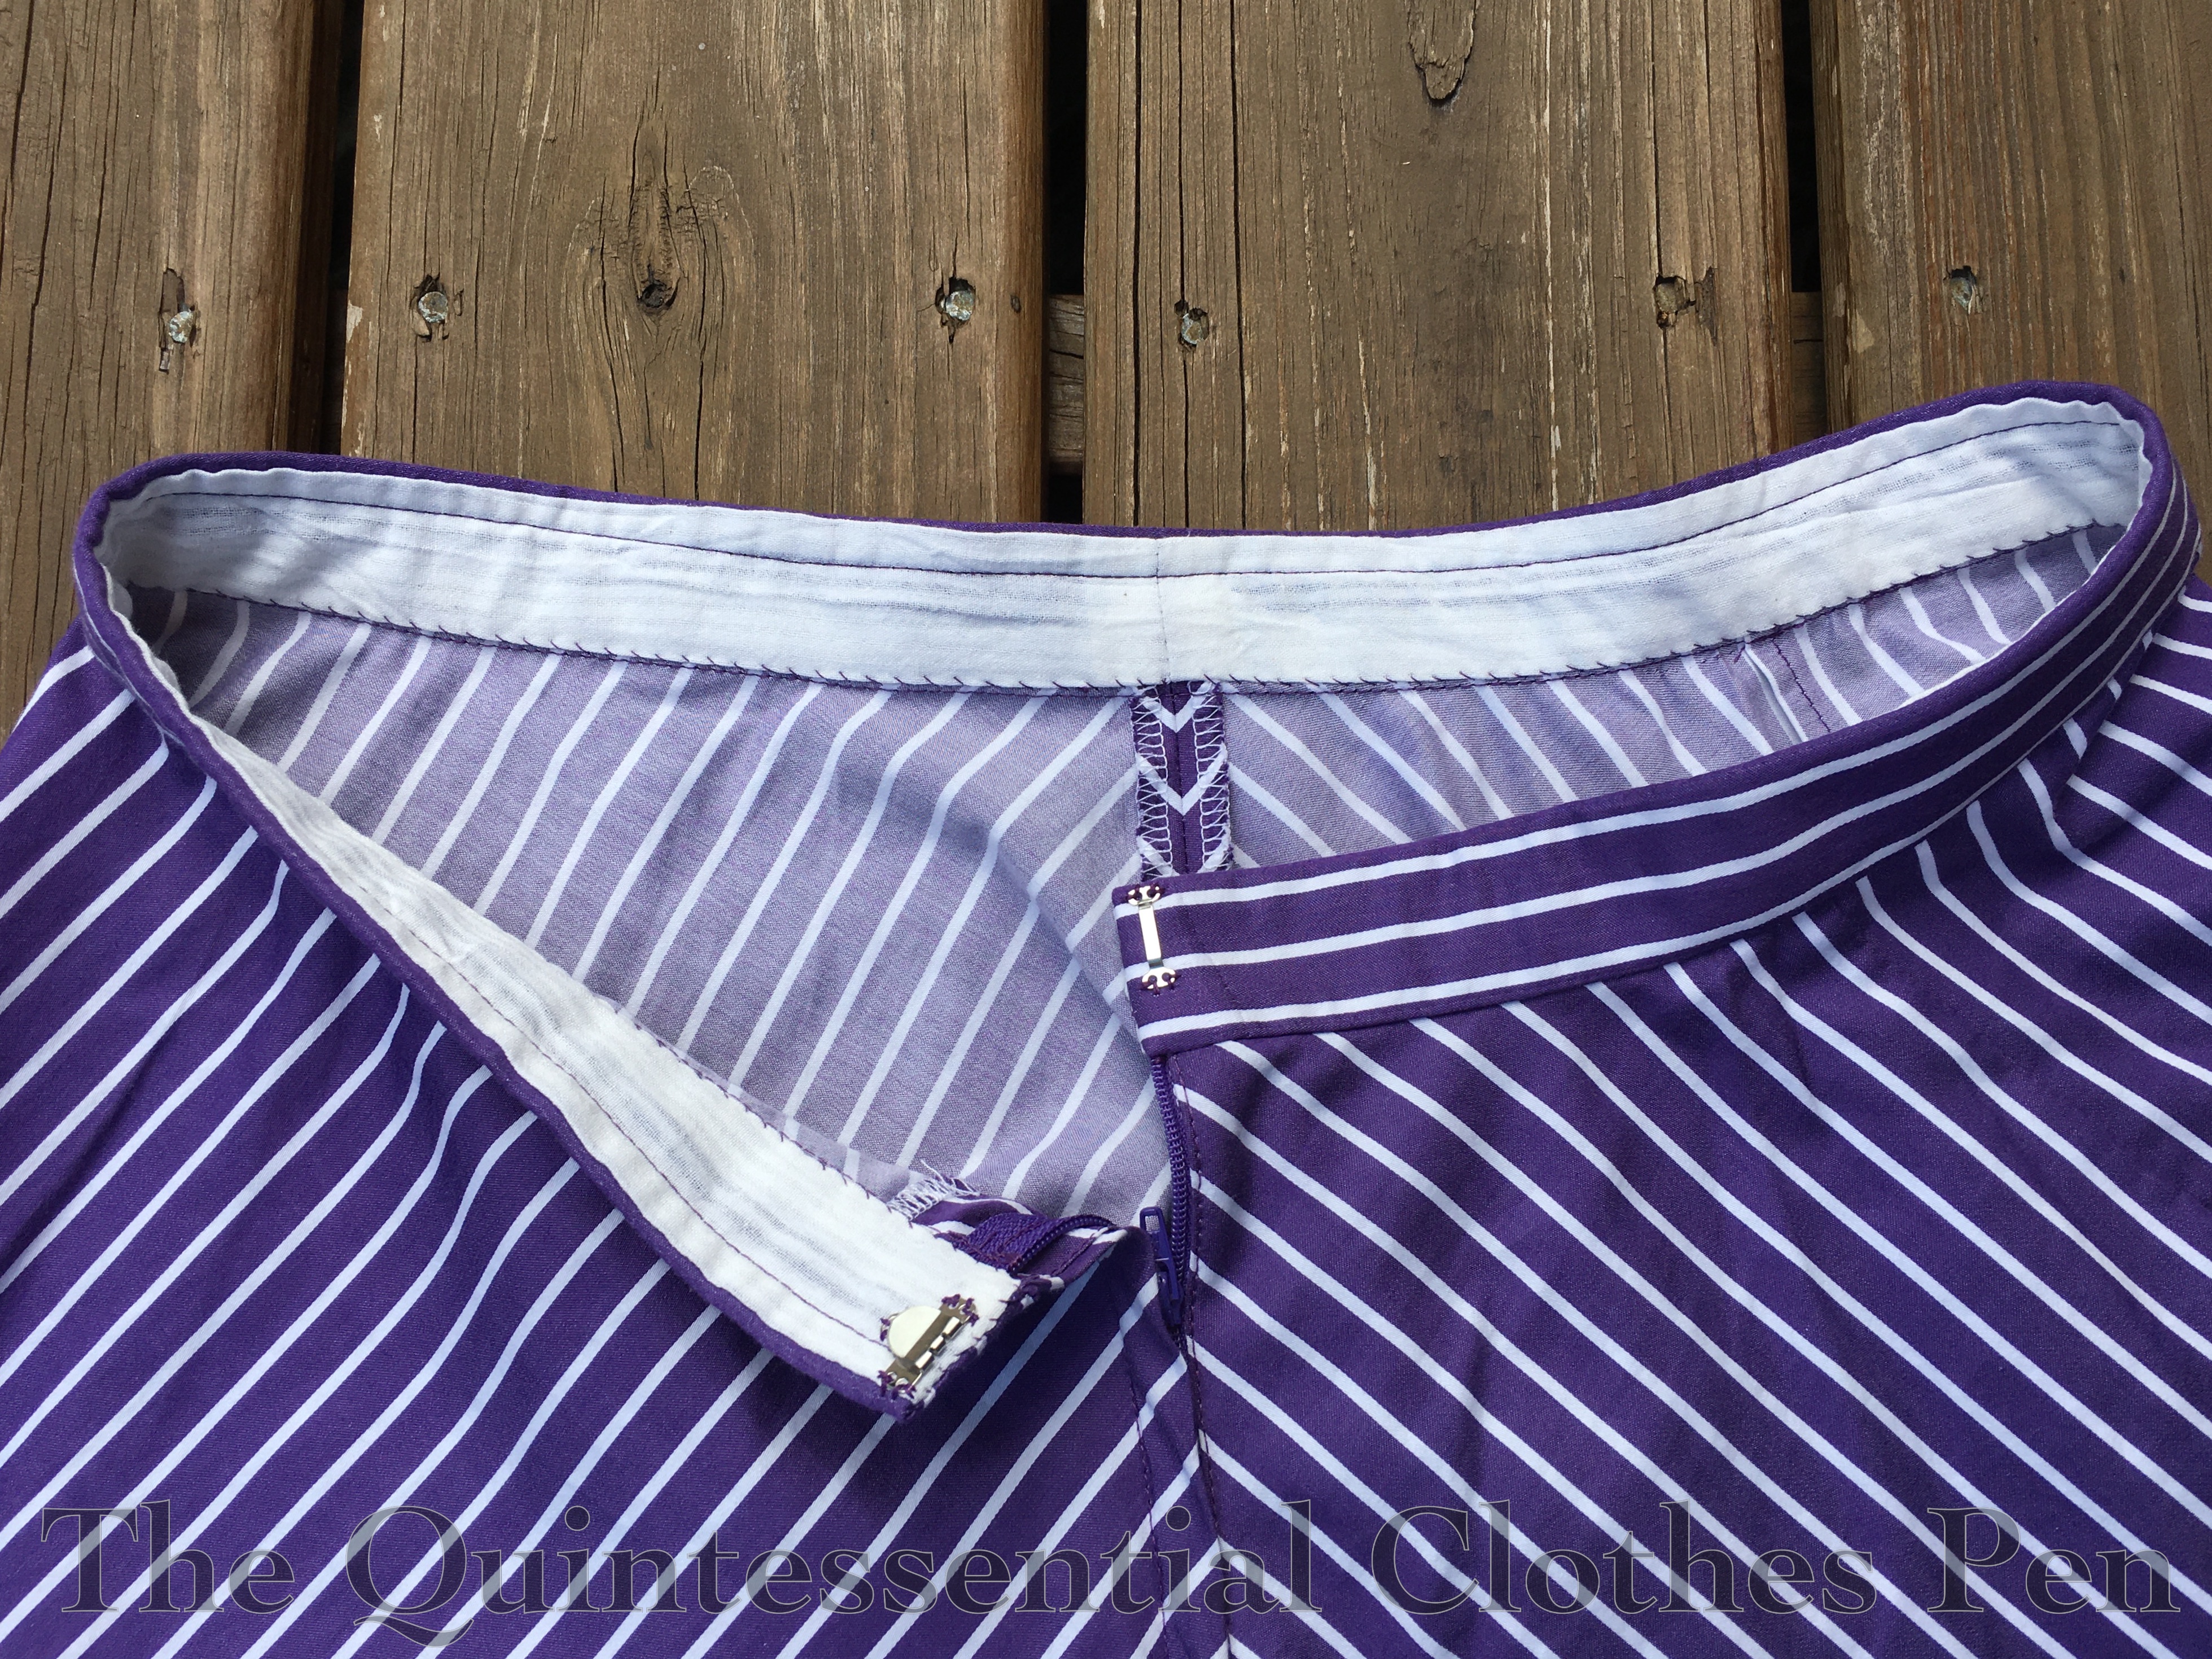
The next step was adding a waistband facing. I used a scrap of white striped cotton for the facing. It is machine sewn on the top edge, understitched (to keep the facing from rolling out and being seen), and then hand whip stitched on the inside.
Here’s a closeup view of the waistband. I shorted the zipper so it stops below the waistband, but I did not re-sew the whole zipper length–I still didn’t want to mess up the stripe matching on the side seam!
The final step was a hook and bar to close the waistband.
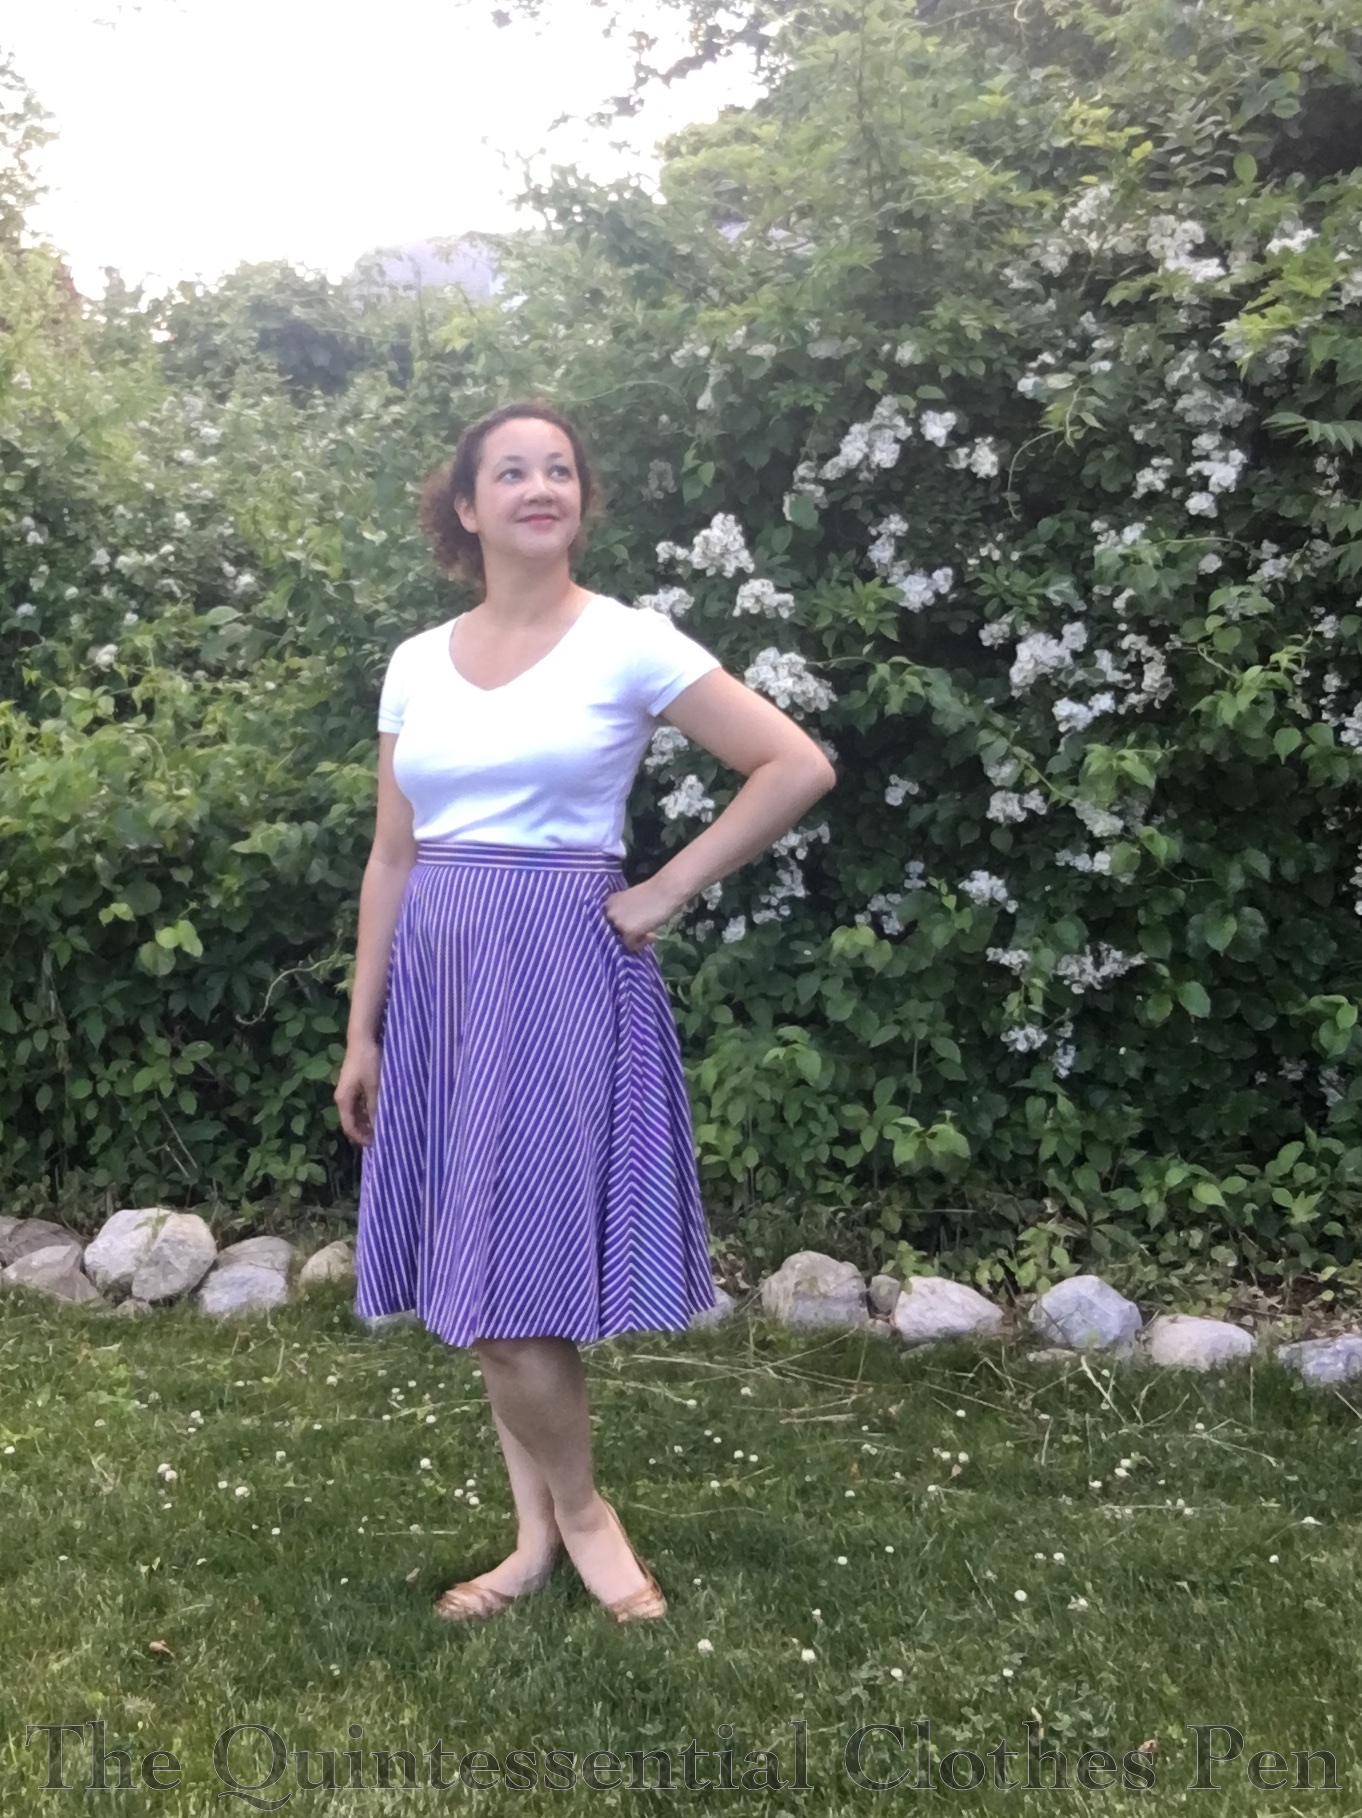
Ta da! The dress is now a skirt.
I’m not completely sold on the skirt. I like it, but I don’t know if I love it.
And I still feel it’s a lot of purple.
I thought it would go with more tops in my wardrobe, but it doesn’t really. I like it with white. I think it would look nice with yellow, but the yellow top I had in mind is horizontally striped and that just seems like too much with a vertically striped purple skirt!
I think I need to try wearing it for awhile and see how I like it. I haven’t really had a chance to wear it this summer given that I haven’t been going out, or wearing real clothes (as opposed to comfy clothes) very much. So a judgement about whether I like the dress-turned-skirt is on hold. That being said, I’m still excited that at least the garment is wearable now, whereas when it was a dress it was not.
I really wanted to try victory rolls as a hairstyle to accompany my 1943 mauve dress. This was in part because they’re so iconic (though not universal, which perhaps means that we shouldn’t all represent them, but still, I couldn’t resist) but also because my hair texture proves to be such a challenge that I had to take it on and see if I could subdue it to my will.
I’ve been interested in trying this style for awhile, so I’ve read and watched various instructions on how to create victory rolls. My favorite for the most information and ease of watching is Miss Victory Violet’s tutorial, which is available here. She’s got lots of other great content about vintage styles in videos and as written blog posts, too. Her blog can be found here. I highly recommend browsing through it!
Here’s the thing. My hair is naturally curly and frizzy. Neither of these things are your friend when you’re trying to make a smooth hairstyle like this. The frizz is an obvious opposite to the smooth goal, but the natural curl is also not helpful. The natural waves actually obscure the beautiful swoop of the rolls! I found that in order to get a successful roll I had to first straighten my hair. Time consuming, yes, but also successful.
Here are some close-ups. It was so hot that my own sweat and the humidity was starting to cause my hair to revert to its natural state, especially near the roots.
Another challenge for me in creating this shape is that my hair is long. Down-to-the-middle-of-my-back-when-it’s-straight long. That’s great for making 18th and 19th century up-dos (1770s, 1830s, and 1890s, to name a few), but less great for making tidy victory rolls. It’s really easy for them to get messy as I roll 18″+ inches of hair in from the ends to my head. The only trick I found for that was practice. I definitely had many rolls fail because they weren’t tidy enough to show off the shape of the roll by the time they made it to my head.
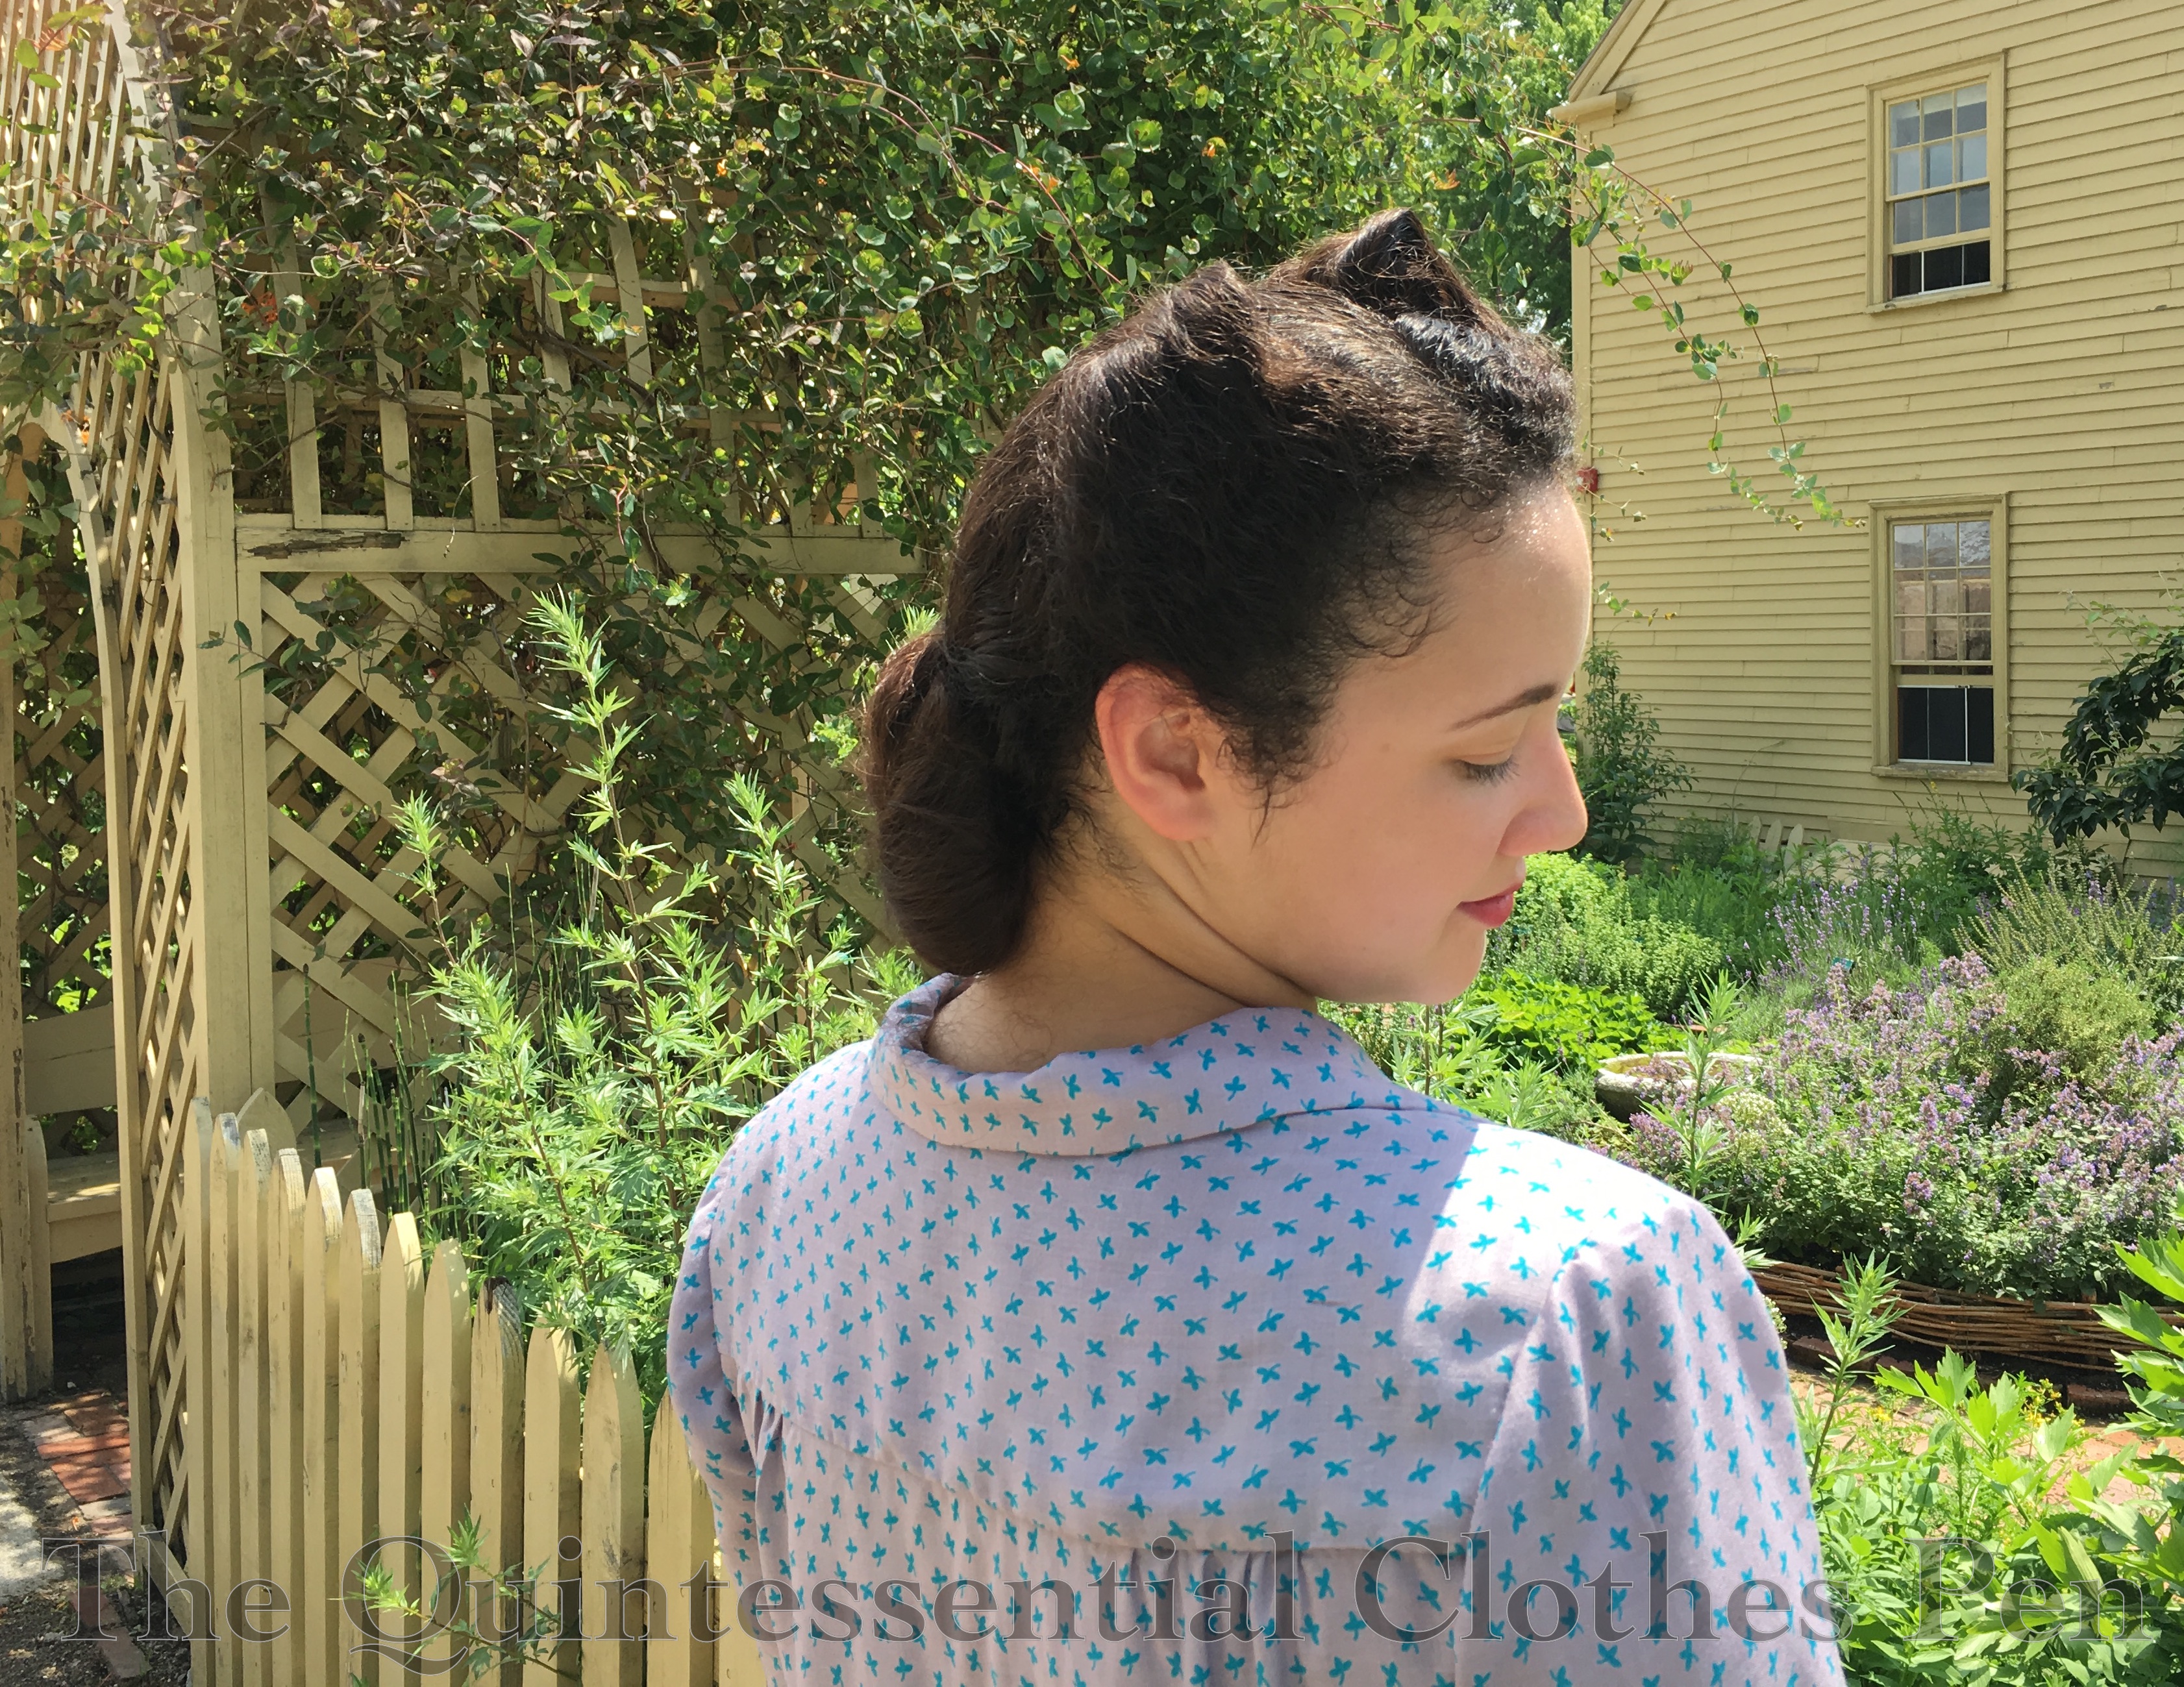
The other obstacle presented by my long hair was what to do with the back of it. Most of these hairstyles were achieved with hair much shorter than mine, which was easier to tuck up into cute 1940s shapes in the back. It was much harder to find inspiration for what to do with long hair. Eventually, though, I came upon an image which shows two asymmetrical buns in the back.
The Double Chignon would work for me! I even had visual instructions and a lovely description encouraging me to try out the style. Here’s the result.
It’s down on my neck like I wanted it to be, but I wonder if the asymmetry just looks like I made a mistake rather than a choice… That’s not a comment on the style, just on my execution of it. Oh well! I was very pleased with the two front rolls and the overall heart-shaped silhouette stye gave my face.
Has anyone else tried victory rolls with long or naturally curly/frizzy hair? Have you been successful? I’m curious to know your experiences and find out your tricks or tips!
Summer temperatures lingered on here until just the other day, though they were not quite as hot and humid as they were on the 4th of July…
The day of the event started off a bit rocky, as I was confused about what time I was meeting my friends to carpool and so was just starting to get ready as they were getting in the car to leave the house I was supposed to meet them at, an hour from my house! I wound up driving to the event by myself and getting there a bit late. It wasn’t a great way to start the day, but at least it went up from there.
Being the beginning of July, it was hot, even in the morning. I was dripping sweat just standing still in the shade and I didn’t sit down until after pictures were taken because I knew how wrinkly my rayon dress would be as soon as I even looked at a chair! See, no wrinkles… yet!
As you have probably deduced by now, I made a new dress! The goal was to have a war-time 1940s dress made from a fabric that had been sitting in the stash since 2013 waiting to be made into a 1930s or 1940s dress.
The dress is constructed from 3ish yards of rayon. (I don’t remember the exact yardage.) It’s a greyish/mauve color with little teal clovers all over. It’s machine sewn and hand finished. The seam allowances are left raw on the inside–a detail I have noticed in 1940s dresses I’ve had the chance to observe.
The dress closes with 12 buttons which run in groups of two down the front (and a hidden hook and eye at the waist). It’s a perfect detail for wartime, when I’ve read that zippers were being used less frequently so the metal could go to the war effort. The buttons-in-groups-of-two detail was directly inspired by this image. (The image came from this post by The Closet Historian. It has many lovely dresses from the Spring/Summer 1943 Montgomery Ward catalogue.)
I spent lots of time looking at buttons on Etsy in order to find some that matched the particular shade of teal I was looking for. I was so pleased when I found them! It was only after I ordered them that I realized they were shipping from Europe. I was very nervous they wouldn’t arrive in time for the event! Luckily, they arrived just a few days before, giving me just enough time to sew them on the dress. Whew!
I couldn’t find a buckle in the same teal color and I thought that might be too matchy anyway, so I went with a slightly grayish mother of pearl buckle instead, also from Etsy.
The pattern is a mix up of two different things: a 1970s shirt dress pattern for the bodice/sleeves and a self-drafted skirt pattern. I wanted to get the two pleats in the front of the skirt like the inspiration image has while also making the hem as full as was allowed during wartime rationing–a sweep of 74″. These two requirements made it easier to pattern something myself than try to start with anything I could easily find. I like the pleats in the front, but wish I had placed them a little farther towards the side seams. Oh well!
The back of the skirt is shaped with darts. Turns out they’re a little tipsy and listing towards the side seams… oops. The square-shoulder 1940s silhouette is achieved with the assistance of some super thick shoulder pads. Looks pretty silly on a hanger but slightly less silly on me, thankfully!
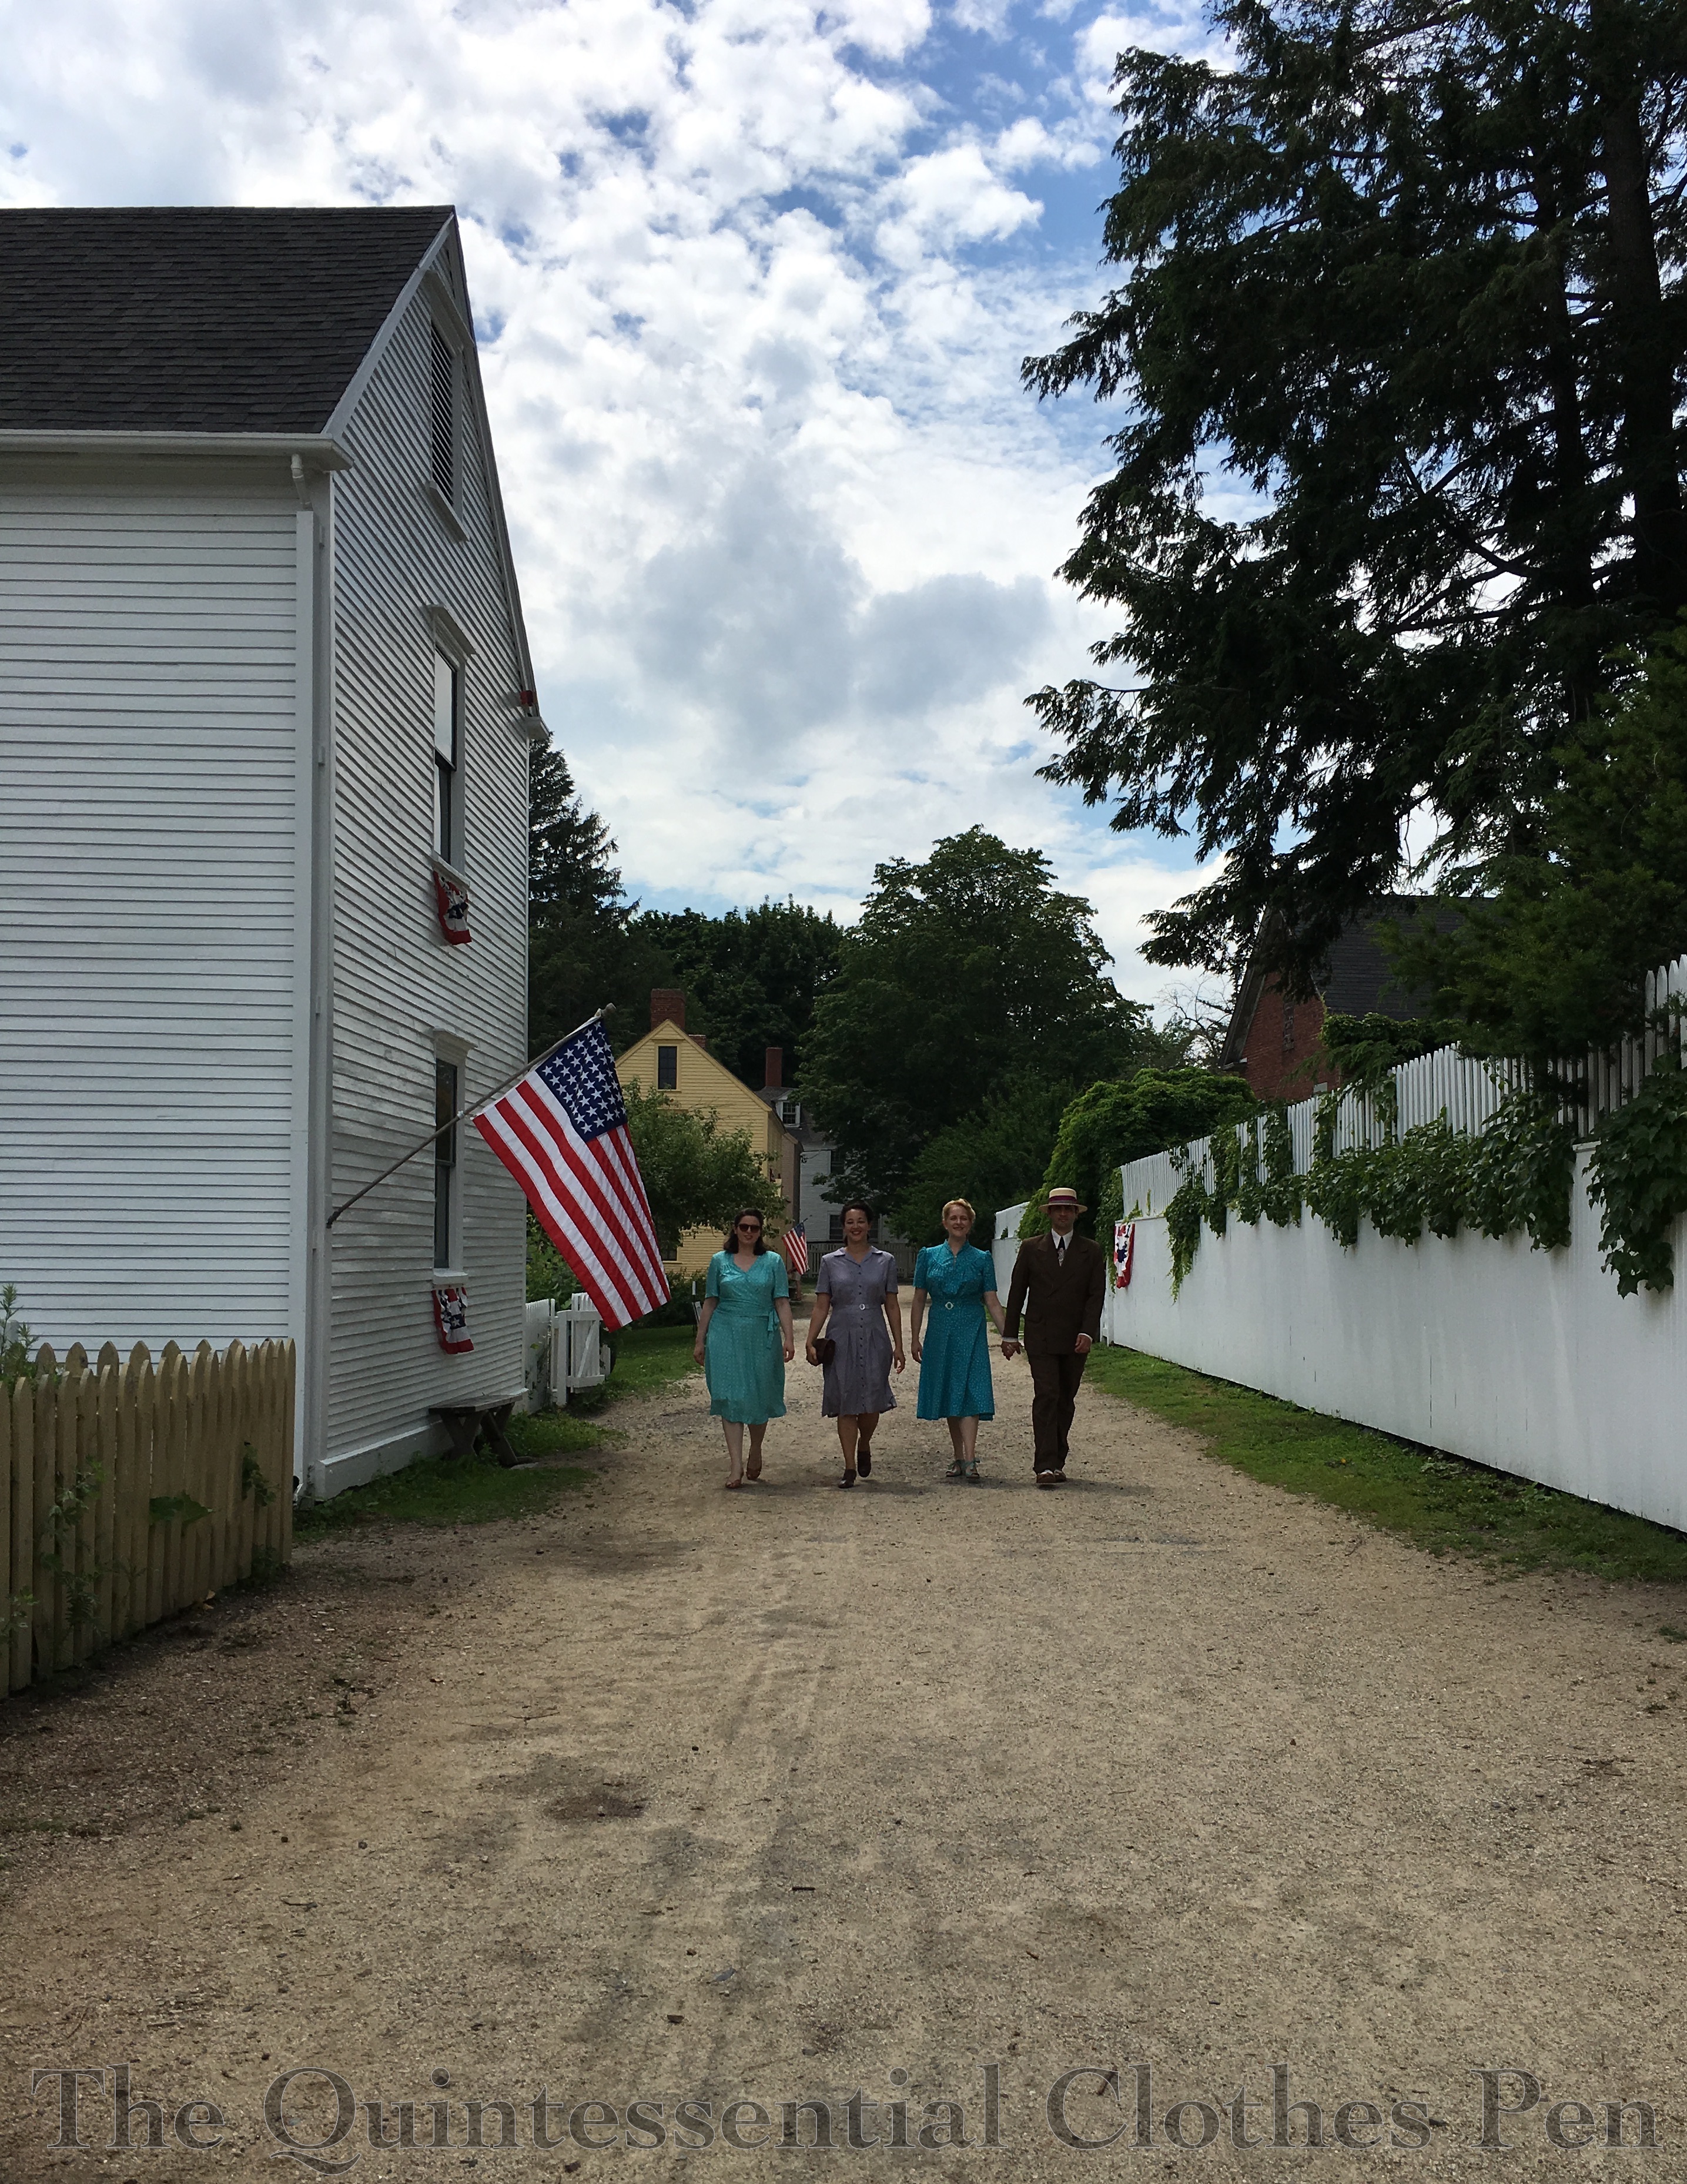
I like this photo of those of us from our group who were dressed in civilian clothes. In fact, there’s a whole series of us walking towards and away from the camera. It was hard to narrow it down to just one!
Before I made it, I wasn’t sure how I’d feel about an early 1940s day dress. I like shirt dresses when I see them but I don’t usually wear clothes with collars (nor many garments with buttons), so these were an unusual touch in my wardrobe. I’m pleased to report that with the proper accessories and hairstyle I felt perfectly comfortable and un-frumpy in this new decade. Win! Next up, a post with all the details of my successful victory rolls!
I was all ready last weekend to create lots of picture heavy posts for the blog, and then my computer seriously died and required hard drive replacement. Luckily, Mr. Q takes care of me and established external backups a long time ago, so I didn’t loose anything (whew!!!). The store was able to fix my computer fairly quickly, but I’d lost the weekend to go through pictures and create posts.
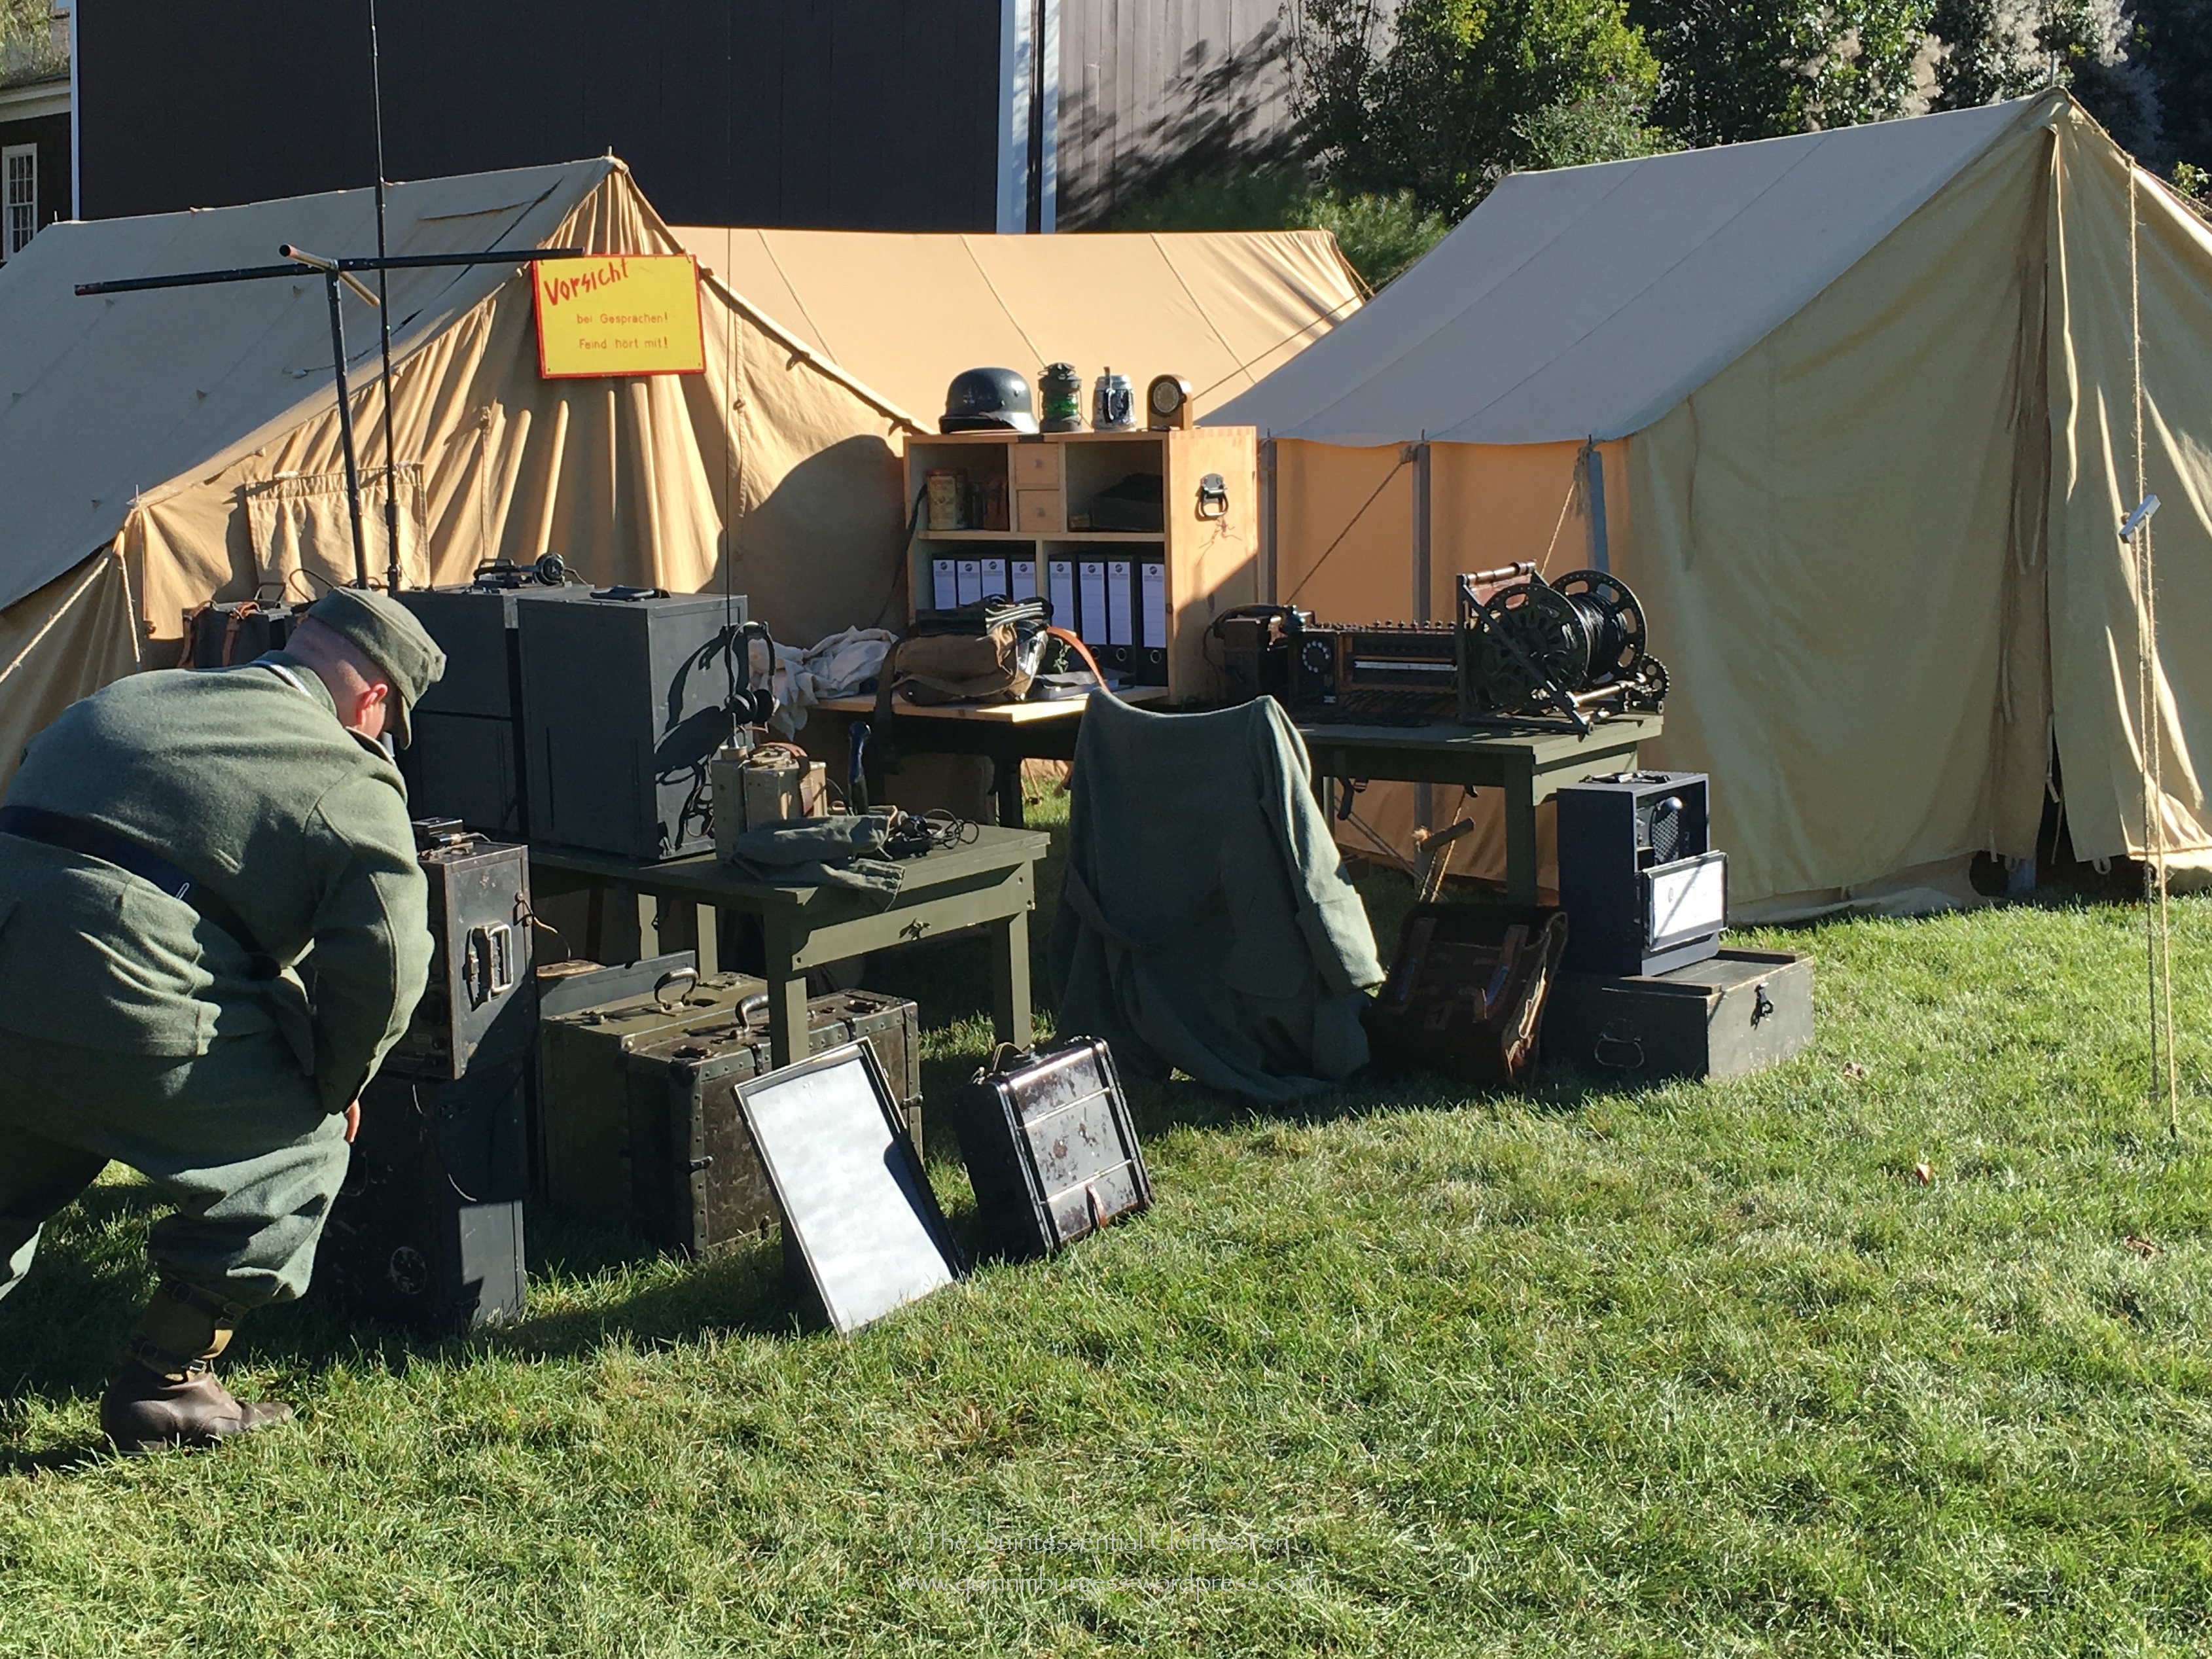
So today is a quicker post with pictures from a WWII event a few weeks ago. WWII is a period I hardly ever visit and don’t have clothes for in my closet, so I was grateful to be able to borrow things from friends and Mr. Q’s closet (he had a polo shirt that looked way better than anything in my closet for this outfit!). The only thing I had was shoes and stockings–thanks guys–I would have been sad indeed without help!
We were a mix of female War Correspondents and Women’s Army Corps. Good thing War Correspondents didn’t have uniforms, because my outfit was a bit thrown together…
The day was gorgeous, though a little cold early in the morning. We just went for the day and enjoyed wandering around the Allied and Axis camps and watching the staged battle. This particular reenactment is known for the large variety of WWII vehicles that are on display and in use, which was neat to see.
Here is the German telegraph set up. The Axis camp actually had a lot of things to look at and one especially interesting interactive set up with food from the period.
The Germans also had some really snazzy cars and other vehicles. They did a few drives around the battlefield before the battle actually started.
Prior to the battle some tanks had been hidden just inside the trees across the grass field. It was my favorite part when they came trundling out mid-battle (especially the well hidden ones that we didn’t spot before things started!). My second favorite part was when, after the battle, they backed the tanks back into the trees to reset for a second battle later in the day.
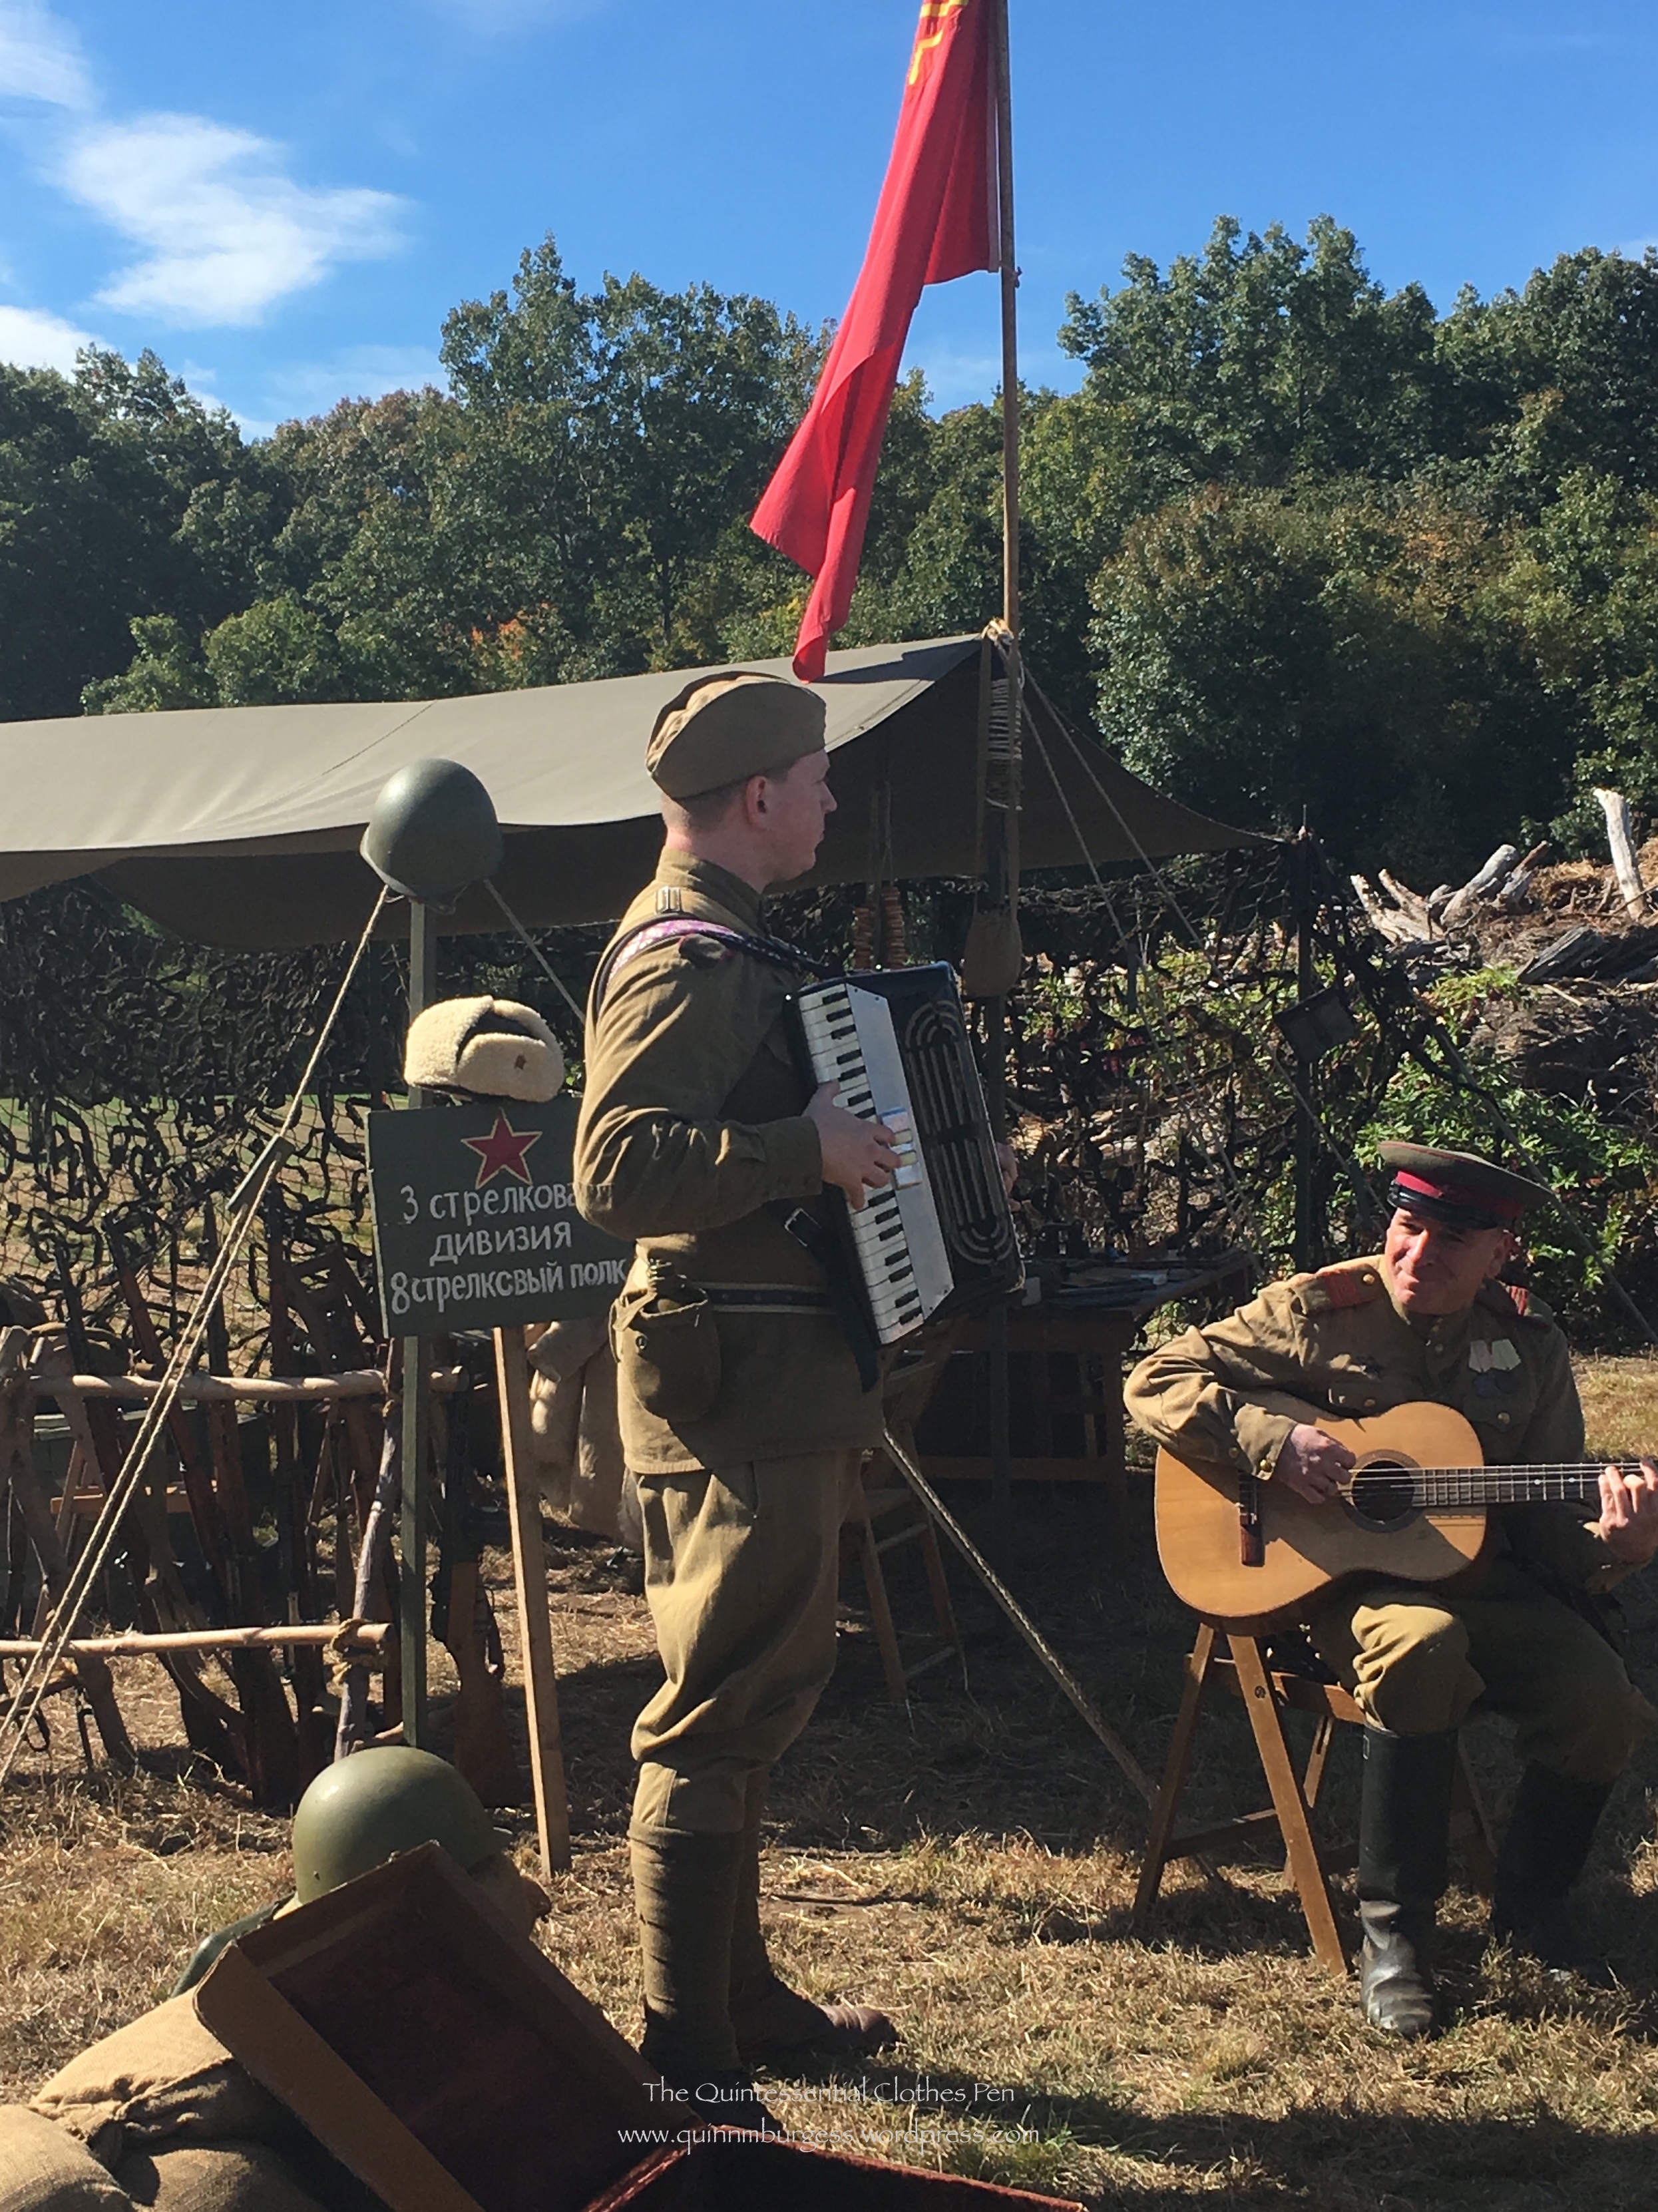
And finally, a Russian unit in the Allied camp. We met another female reenactor who was with the Russian unit (women aren’t that common at these WWII events, you know, so it’s especially neat to meet others, especially those you don’t previous know). The tea and fur coats were pretty tempting while the day was still cold and later in the day there was music! Fun!
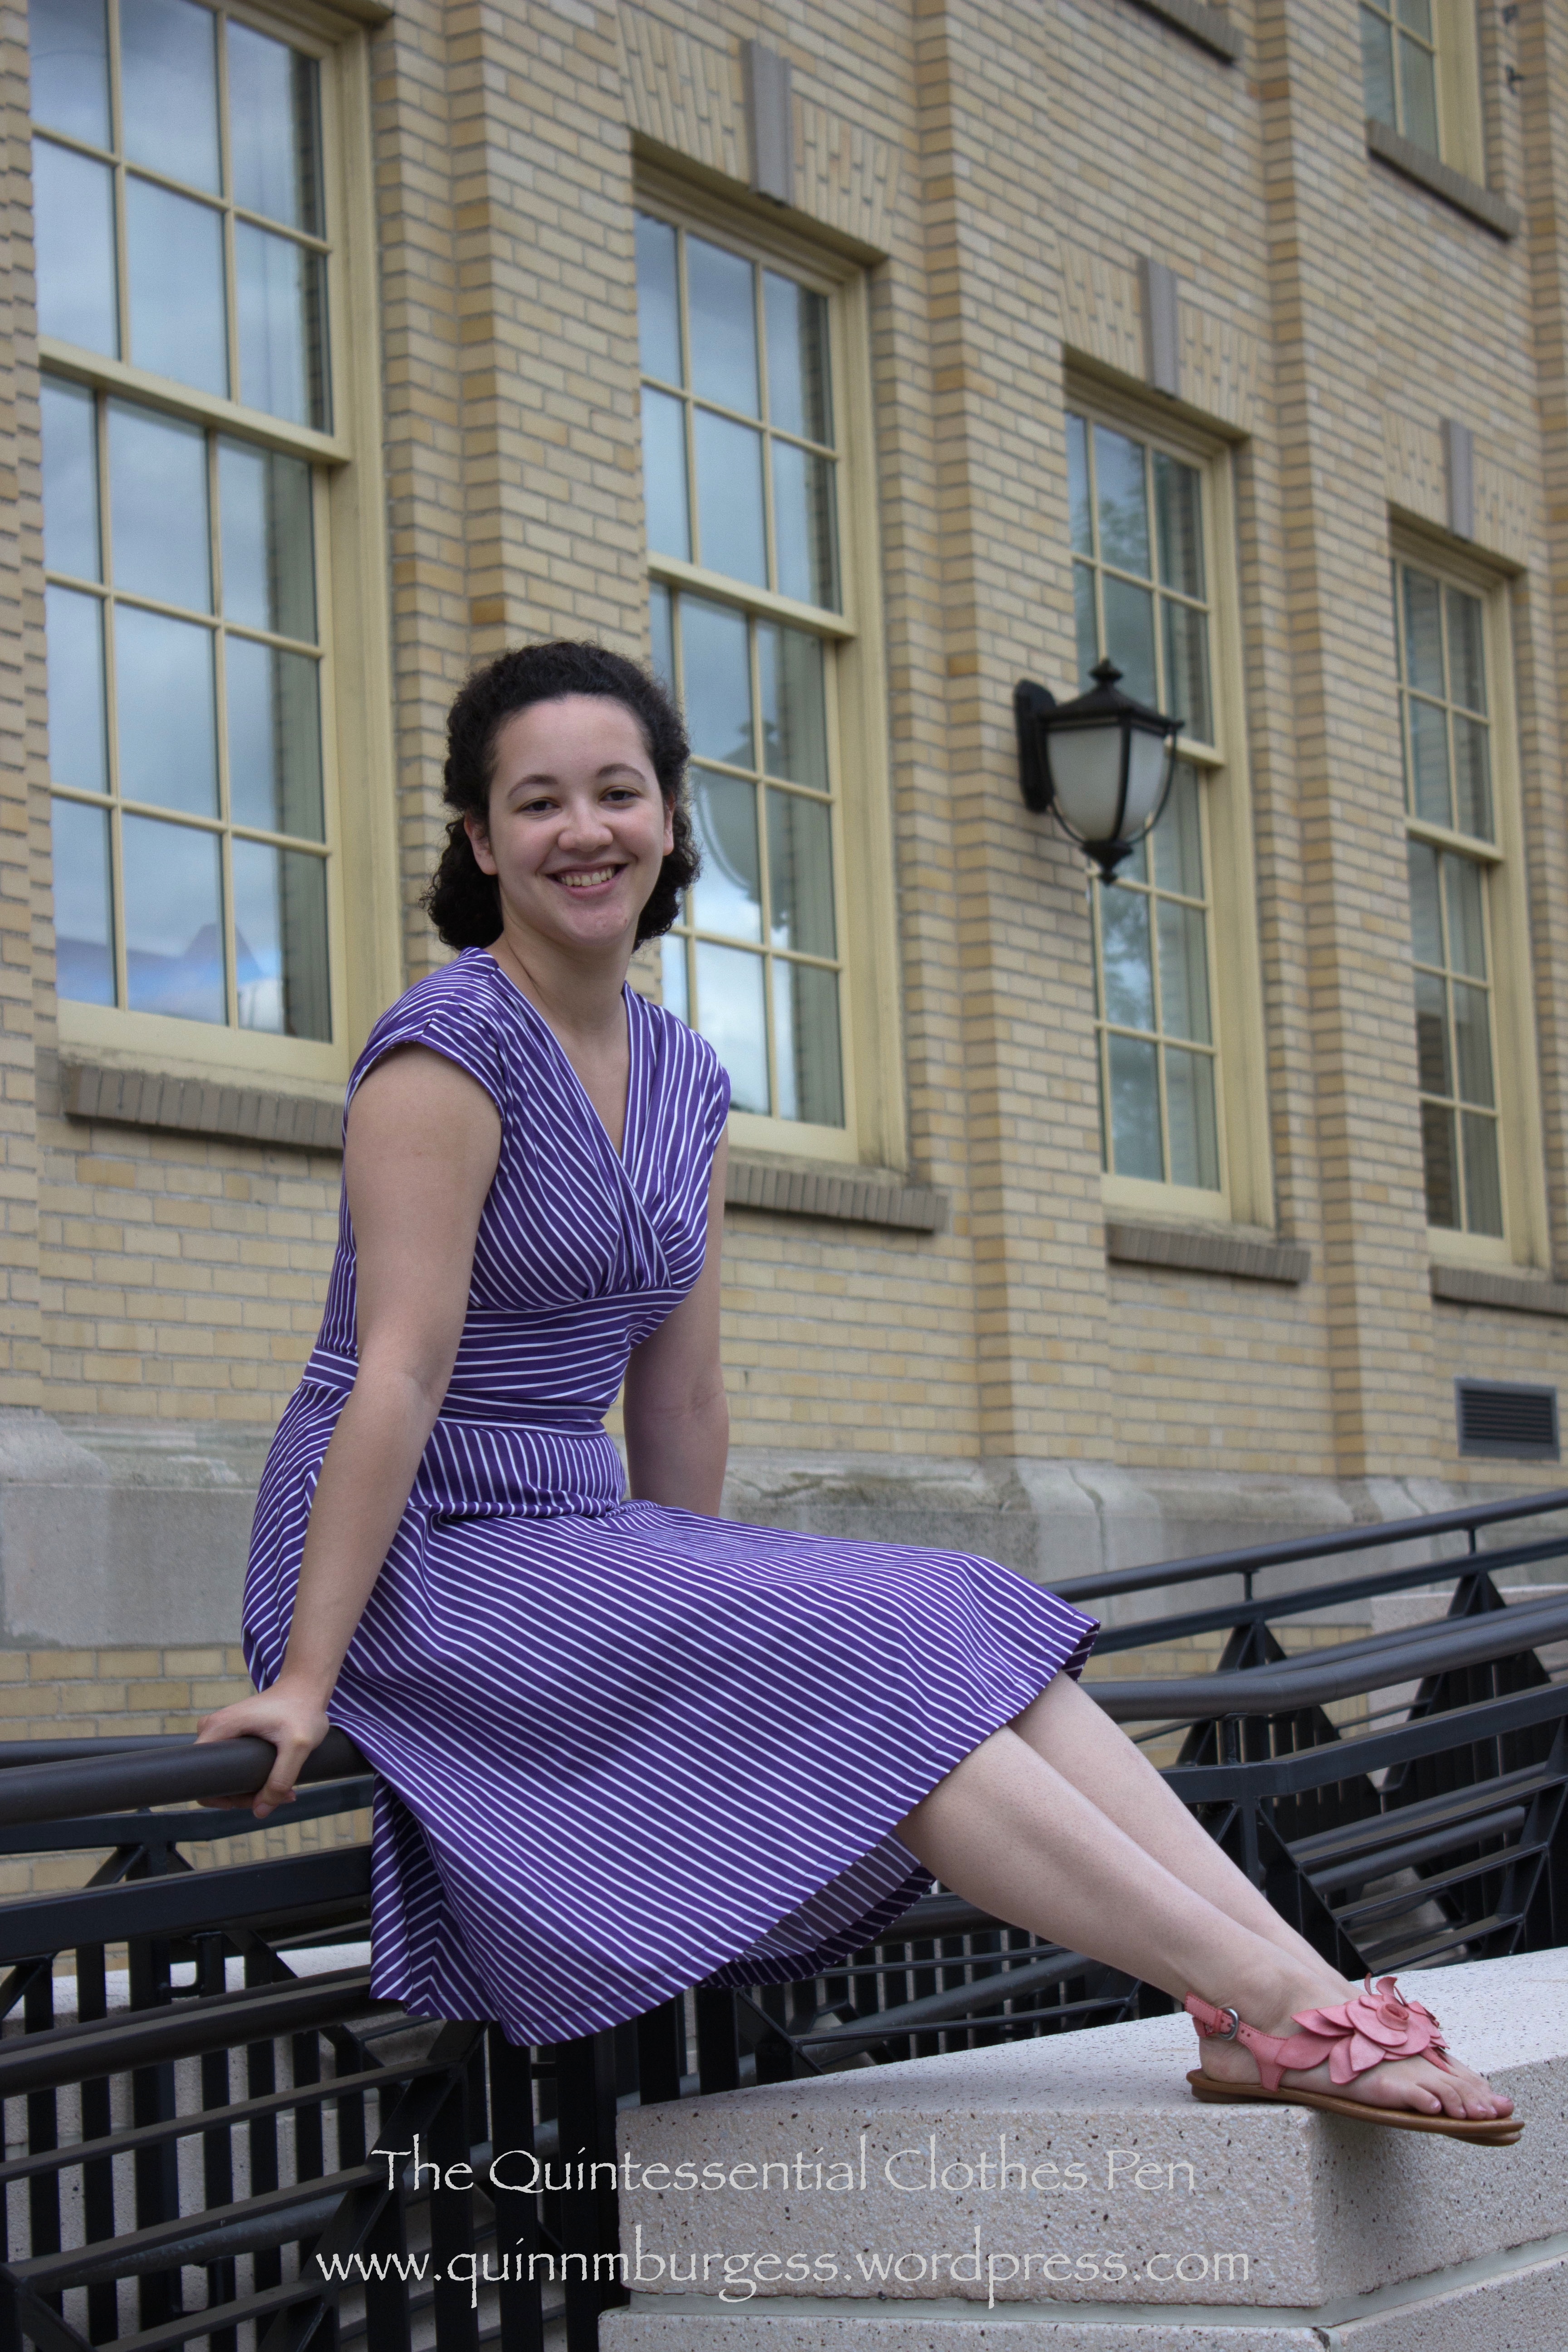
Summer is here, and I’ve been wearing dresses a lot lately. I’m trying to expand the number of dresses in my wardrobe and trying to incorporate more garments that make use of a pattern of some sort rather than just being a solid color. This new dress is… well, a dress, and it has a pattern! And, it’s purple with a wide skirt. What is not to like?
The inspiration is this Anne Adams dress pattern #4752 from the 1940s.
I love it, and really wanted to make a dress just like it. But then, I also wanted a nice full skirt just like another dress I bought from H & M years ago and wear often. Turns out that the full skirt made the angled stripes on the skirt totally impossible to pull off. I tried! It was sad looking, though, and in the end I decided I’d be much happier with the dress if I adjusted the design to accommodate my more-full-than-1940s skirt. Good decision, because I love the dress just as it is! I wouldn’t mind some day making the dress with a skirt that has less fullness and a more 1940s silhouette and trying the stripes as they are in the inspiration, but it wasn’t fated to be for this iteration.
See? Because the skirt is full it’s a curved piece, which meant that the striped panel had to have darts to fit, which wrecked the line of the stripes.
Once I decided to go for the Modern-Does-1940s look I also decided not to bother with the buttons on the bodice. My dress does have topstitching like the pattern image, though you can’t really see it with all the stripes going on.
The dress is constructed from a medium weight cotton I found on the remnant table at my local fabric store for $3ish/yard. Love that price! The armholes and hems are finished with self fabric bias. The dress closes up the left side with a purple lapped zipper. If you’re going to be purple, why not be PURPLE? (Maybe I should call this the Purple People Eater Dress?)
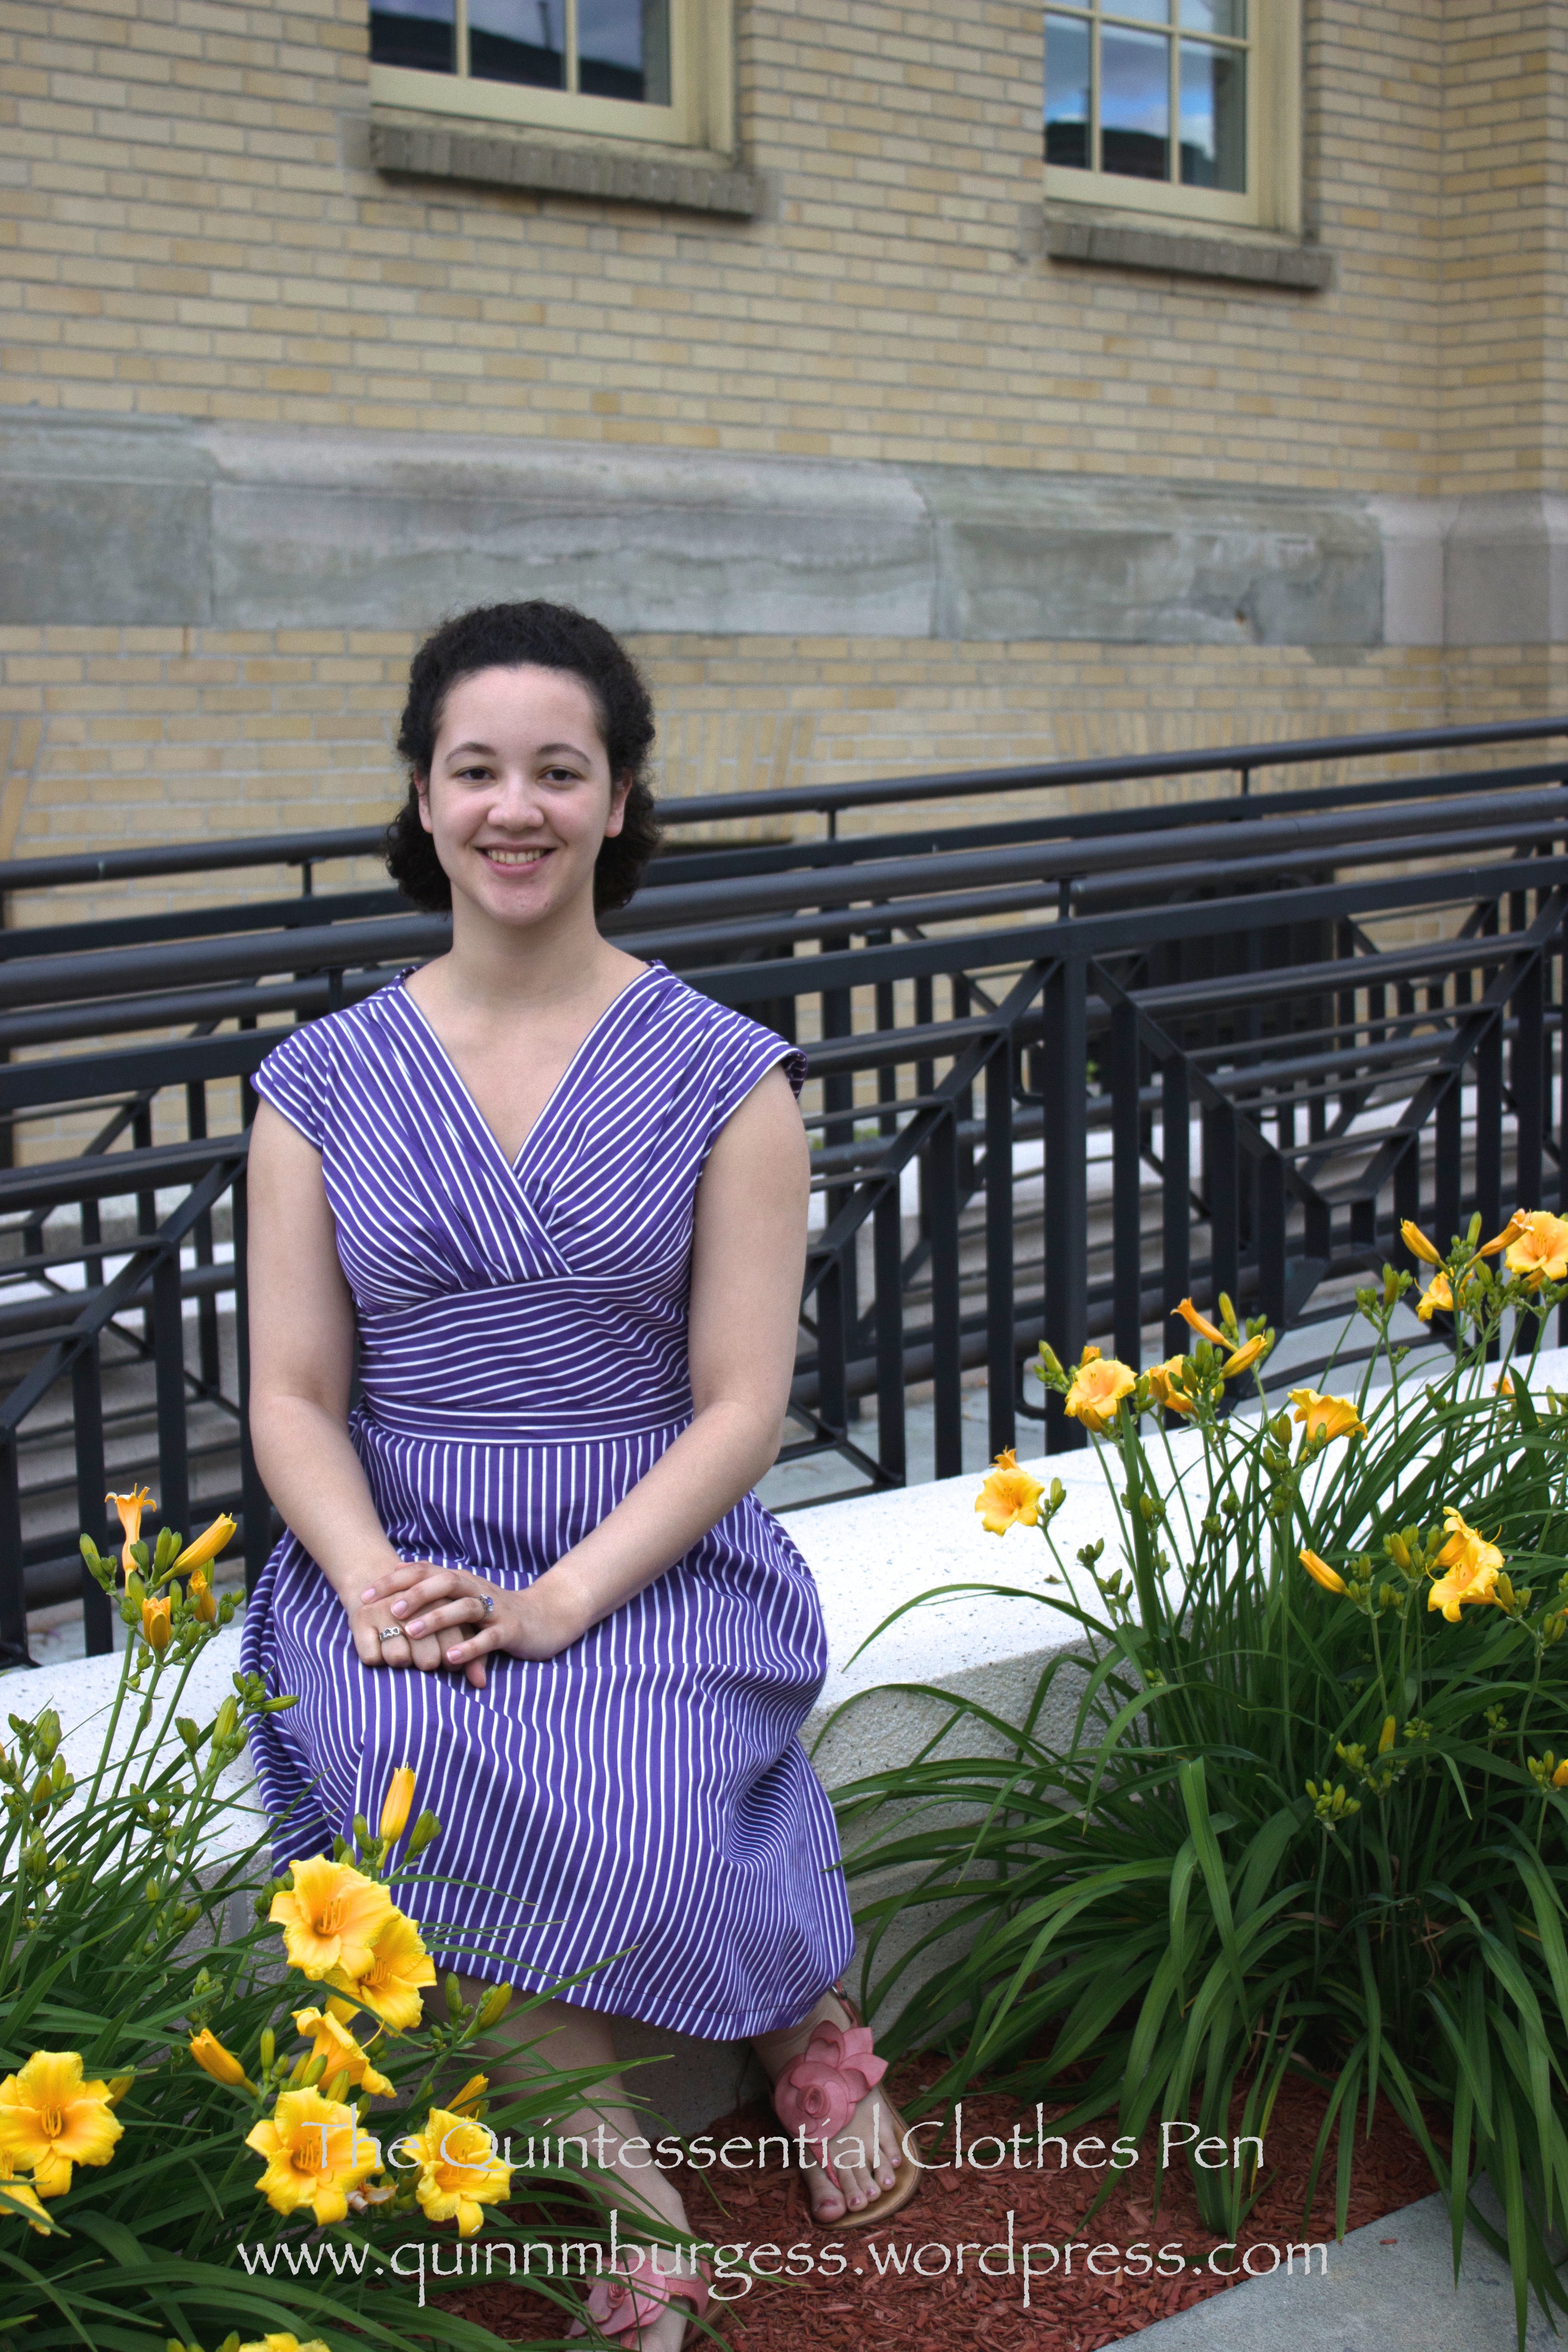
The bodice is a little different than the inspiration, because I wanted to make it fit my body. Thus, both sides of the bodice are gathered into the angled waist piece to create space for the bust (in the inspiration the dress is drawn with the proper left side being flat… but that would mean also being flat chested on that side…). The other thing is that I have a shoulder seam in my dress, and I wound up gathering the front pieces at the shoulders to make the whole thing sit correctly on my body. You can see in the picture with the dress on the mannequin that it started out with no gathers on the shoulders, but it wasn’t fitting me in a flattering way, so I gave up and altered it to be comfortable.
The back bodice has darts and corresponding tucks in the skirt. The tucks were unintentional, added only because the skirt had stretched out and was bigger than the waistband when I went to attach them. That’s what happens when you cut corners and don’t stay stitch… But see the perfect chevrons on the side seam? They make me happy!
I’m wearing modern summer sandals, but I did attempt to do a nod-at-the-1940s hair style for the photos. I don’t mind the style, but clearly I need some more practice (and likely a different hair type without so much frizz) to really get a 1940s style going.
Thanks so much to my wonderful friend photographer, who is so willing and excited to document the things I make so I can share them on my blog! Of course, the trade off is that she gets to practice photography skills on a willing model… Works out well for both of us!
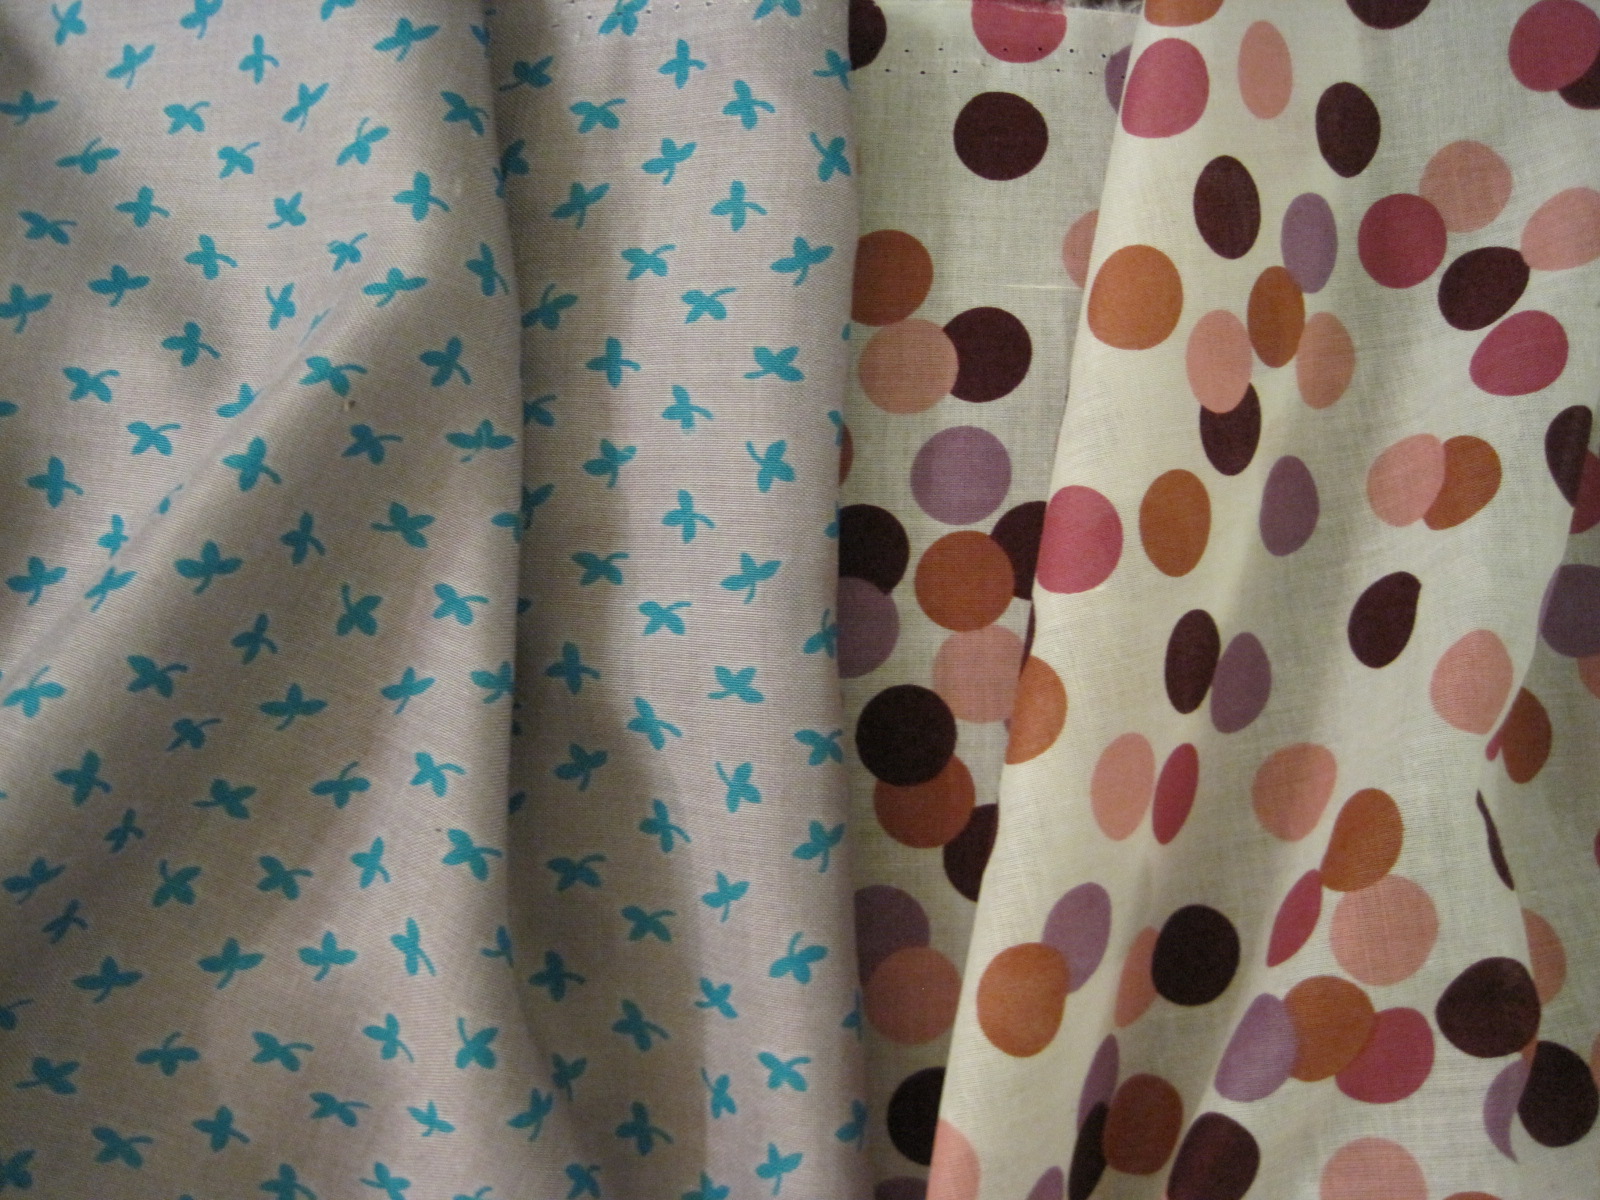
If you look at my clothes, modern and historic, you might notice that I usually wear solid colors. Yes, I do mix solid colors in outfits. But there it is: I hardly ever wear patterned fabric. I want to branch out a bit, at least in my historic wardrobe, so when I saw these patterned fabrics on sale I couldn’t resist.
So here they are: my most recent stash additions. On the left, a rayon challis with a slightly lilac tinted grey background and little teal clovers all over. On the right, a super lightweight cotton lawn with dots in shades of purple and pinkish/redish/orange. What for? I’m thinking 1930s or 40s for the challis and a 50s summer dress for the lawn. I’m pushing the envelope, thinking outside my normal eras! Of course, these projects are pretty low on the list of things to get done… so don’t expect to see them again soon. But maybe this summer the 50s dress could be a fun project. We’ll see. In the meantime, I’ll know I have patterned fabric in my stash, and that’s enough for me!
Let’s start here: with this evening ensemble designed by Elsa Shiaparelli at the Metropolitan Museum of Art. My first thought about this was something along the lines of the following: “The dress has a lovely shape. What’s the abstract embellishment on the bolero?”
Gymnast bolero designed by Elsa Schiaparelli 1938
Well, look carefully at the Bolero picture. It’s decorated with gymnasts!
Evening dress by Elsa Schiaparelli 1938
Here’s the back of the dress without the bolero over it. Such lovely lines. In the picture on the right, you can also see the texture of the dress fabric. It’s difficult to discern what it is. Looks to me like it might be a jacquard or watermarked fabric. Do you have other ideas about what the fabric is?
This next bolero was designed by Balenciaga in the 1940s. Its style is much more traditional than Schiaparelli’s gymnast bolero. The beading and other trimming on this Balenciaga bolero is exquisite!
Balenciaga Bolero 1946-1947
The Oxford English Dictionary includes these quotes regarding boleros in the definition. They are good context for the style and use of boleros in women’s clothing during the mid-20th century.
1941 ‘R. West’ Black Lamb I. 407 The boleros the women wore over their white linen blouses.
1968 J. Ironside Fashion Alphabet 35 Bolero, a short jacket reaching to the waist, worn open over a blouse‥sleeved or sleeveless‥worn by Spanish dancers and bullfighters.
I’m including this final bolero just for fun. I can envision it with a slinky black bias-cut 1930s evening gown with a low cut back… It even has a matching belt! This bolero strongly reminds me of the style of Ginger Roger’s dresses in her videos with Fred Astaire. I’ve also included just a few fun pictures of Ginger’s fabulous dresses below so you can see her general style. Beautiful!