I am super belated in posting about this event, but the one benefit of being so slow is that we’ve come full circle back to the appropriate season for these photos! I hope you enjoy recalling this lovely walk with me.
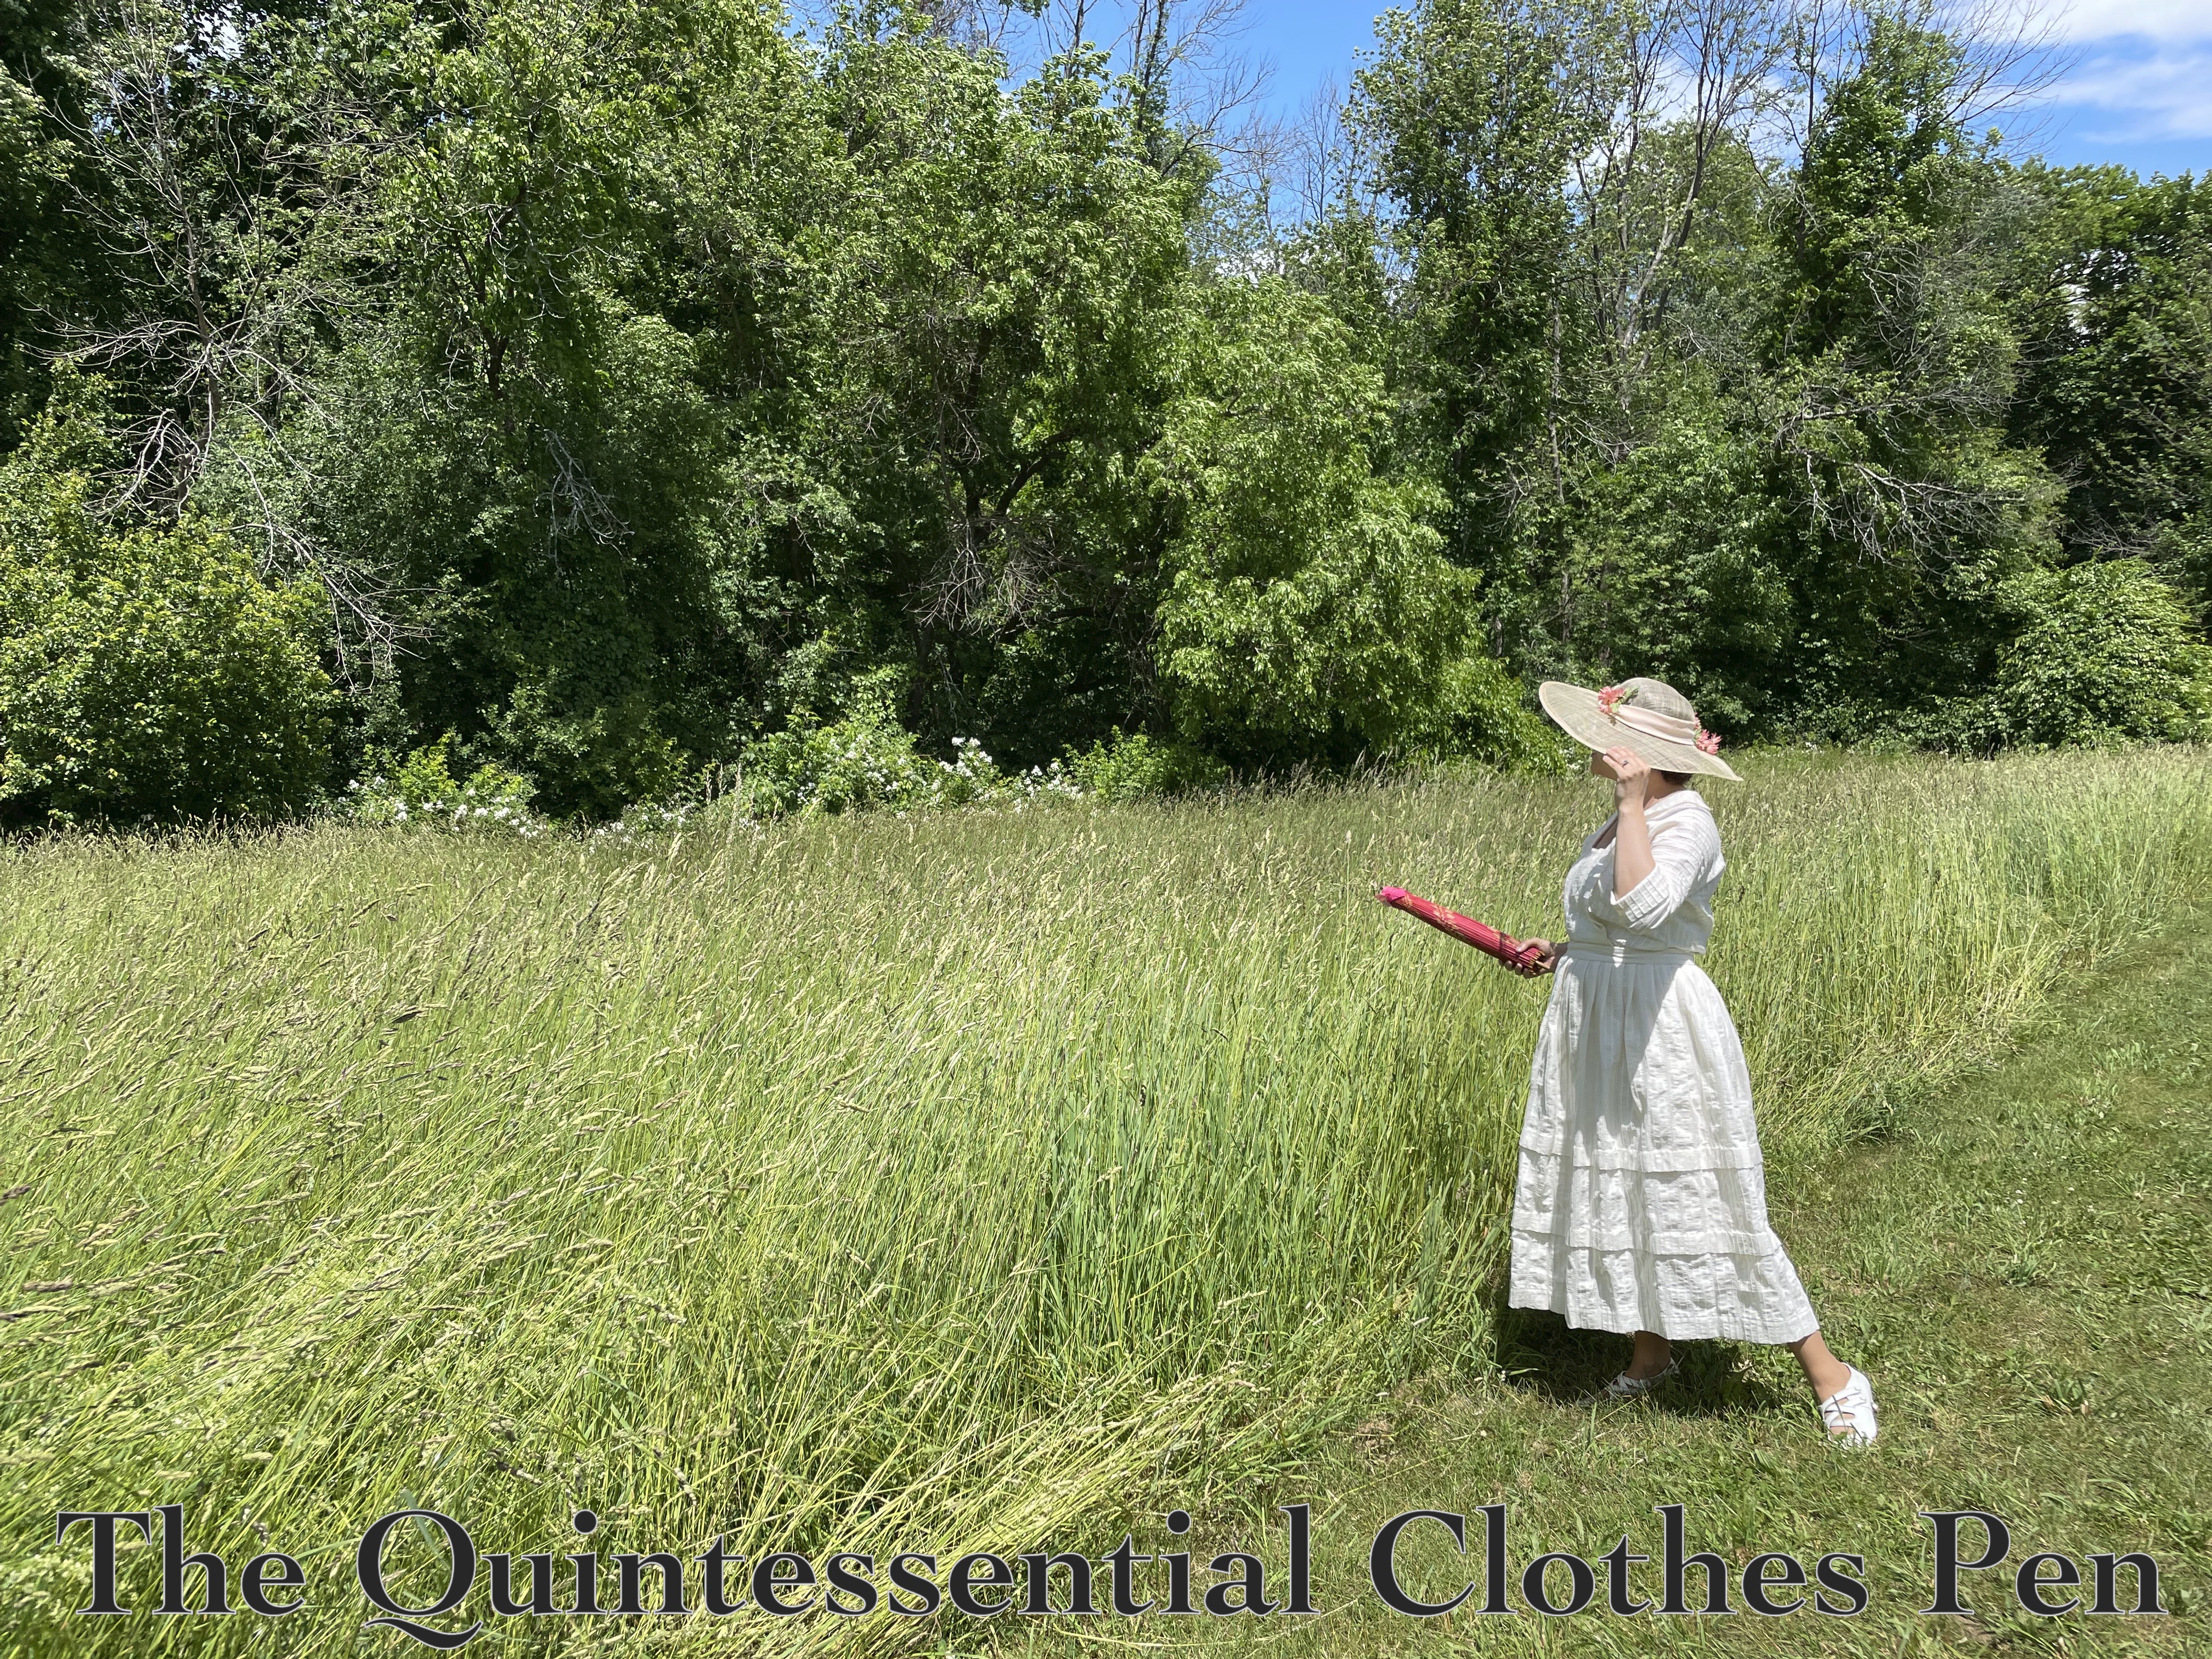
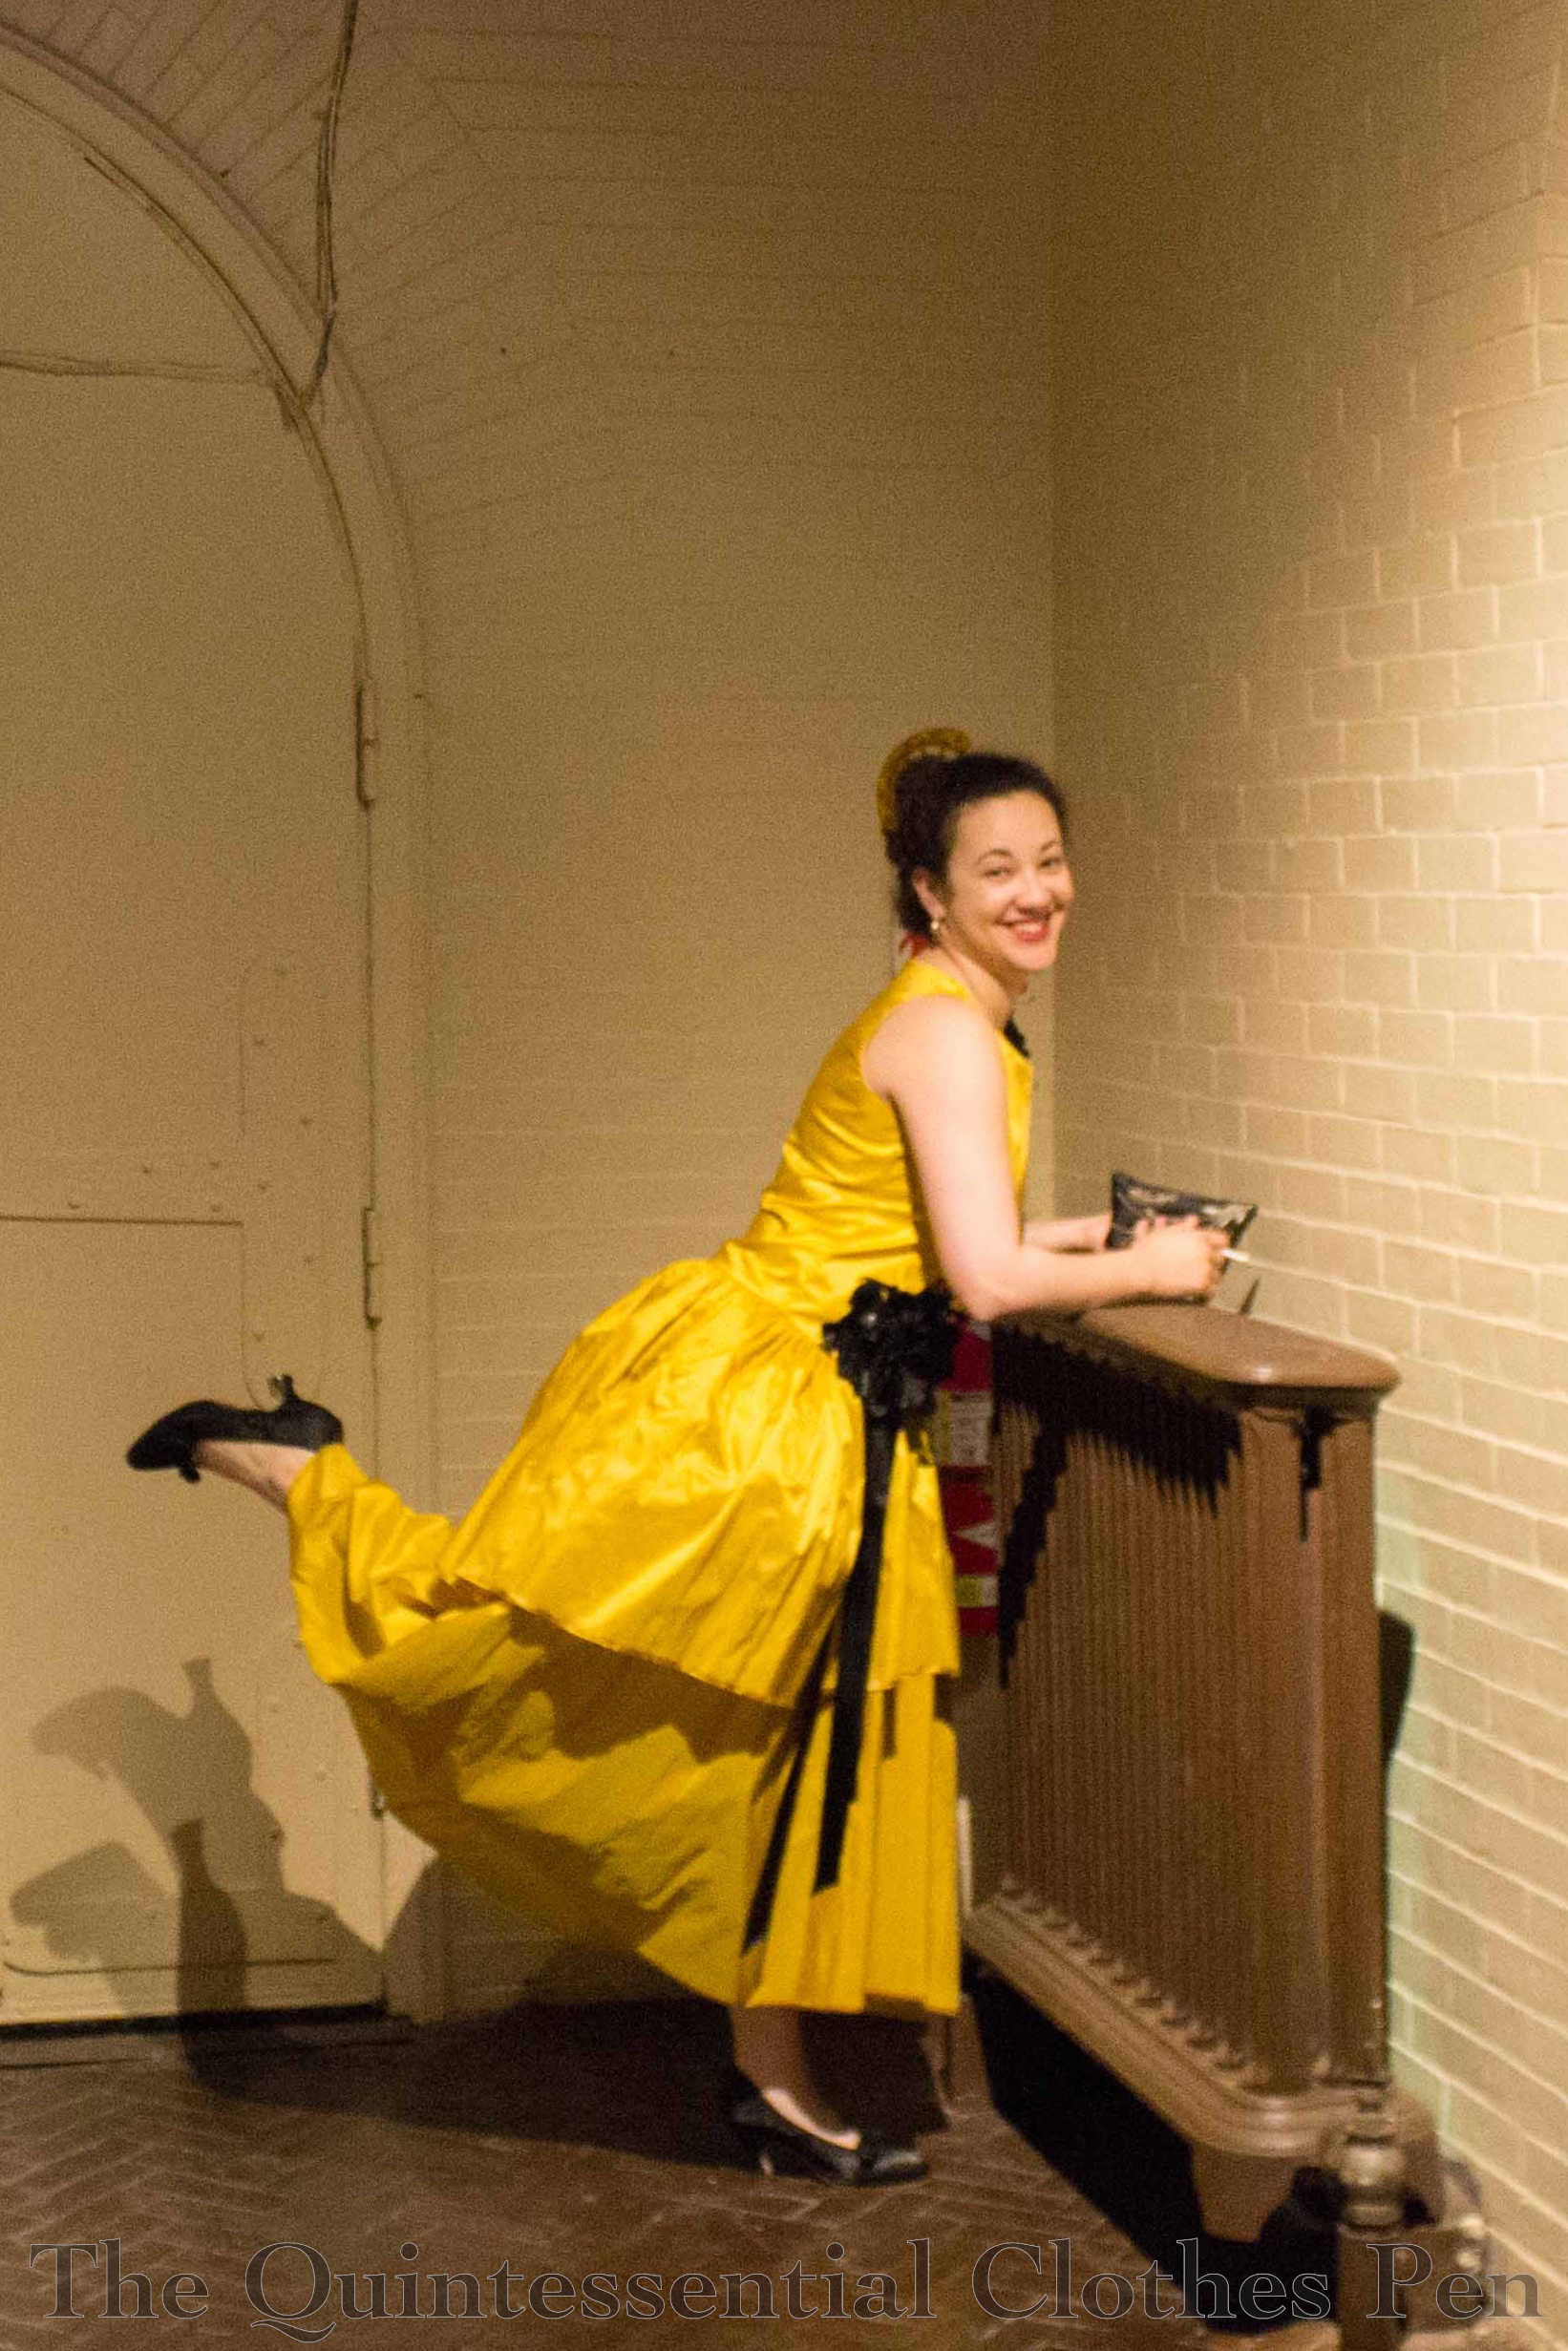
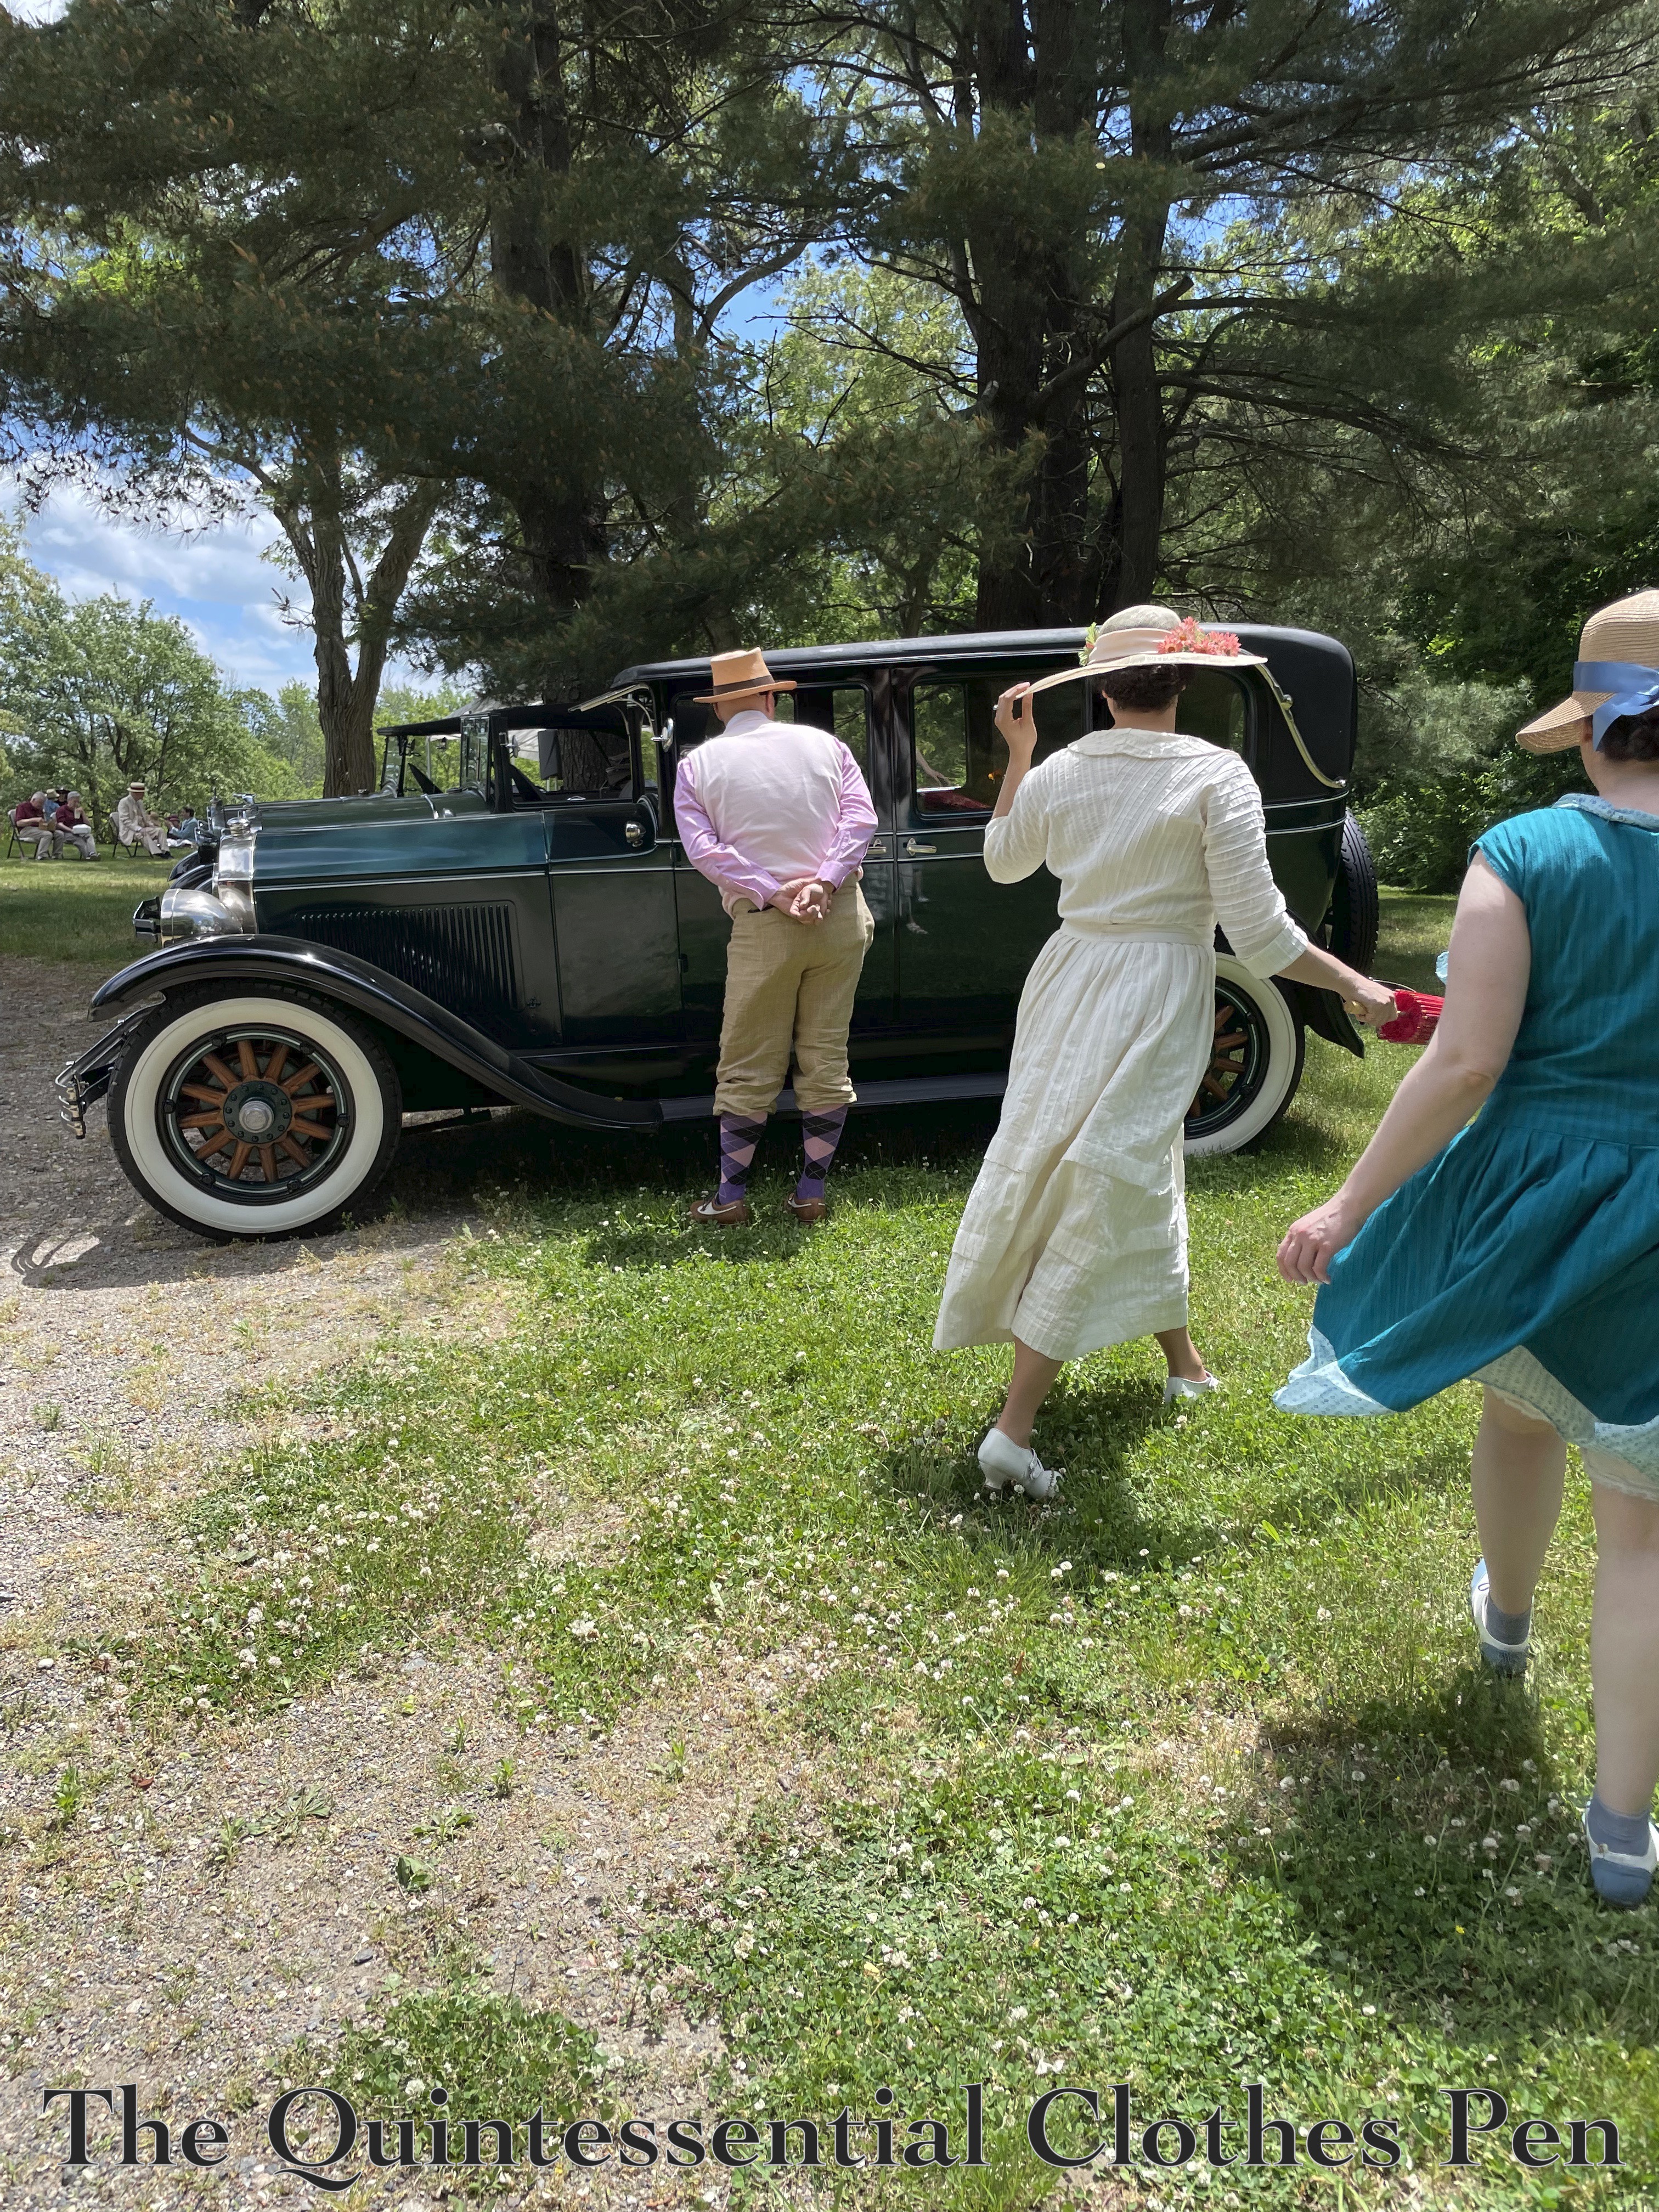
In June of 2024, I attended a 1920s themed Gala Day celebration at the Rebecca Nurse Homestead in Danvers, MA. (More about Gala Day can be read here, on the Rebecca Nurse Homestead site.) It was a beautiful day with sun and blue skies. Not hot, but pleasantly comfortable. And windy!
Hang on to your hats!
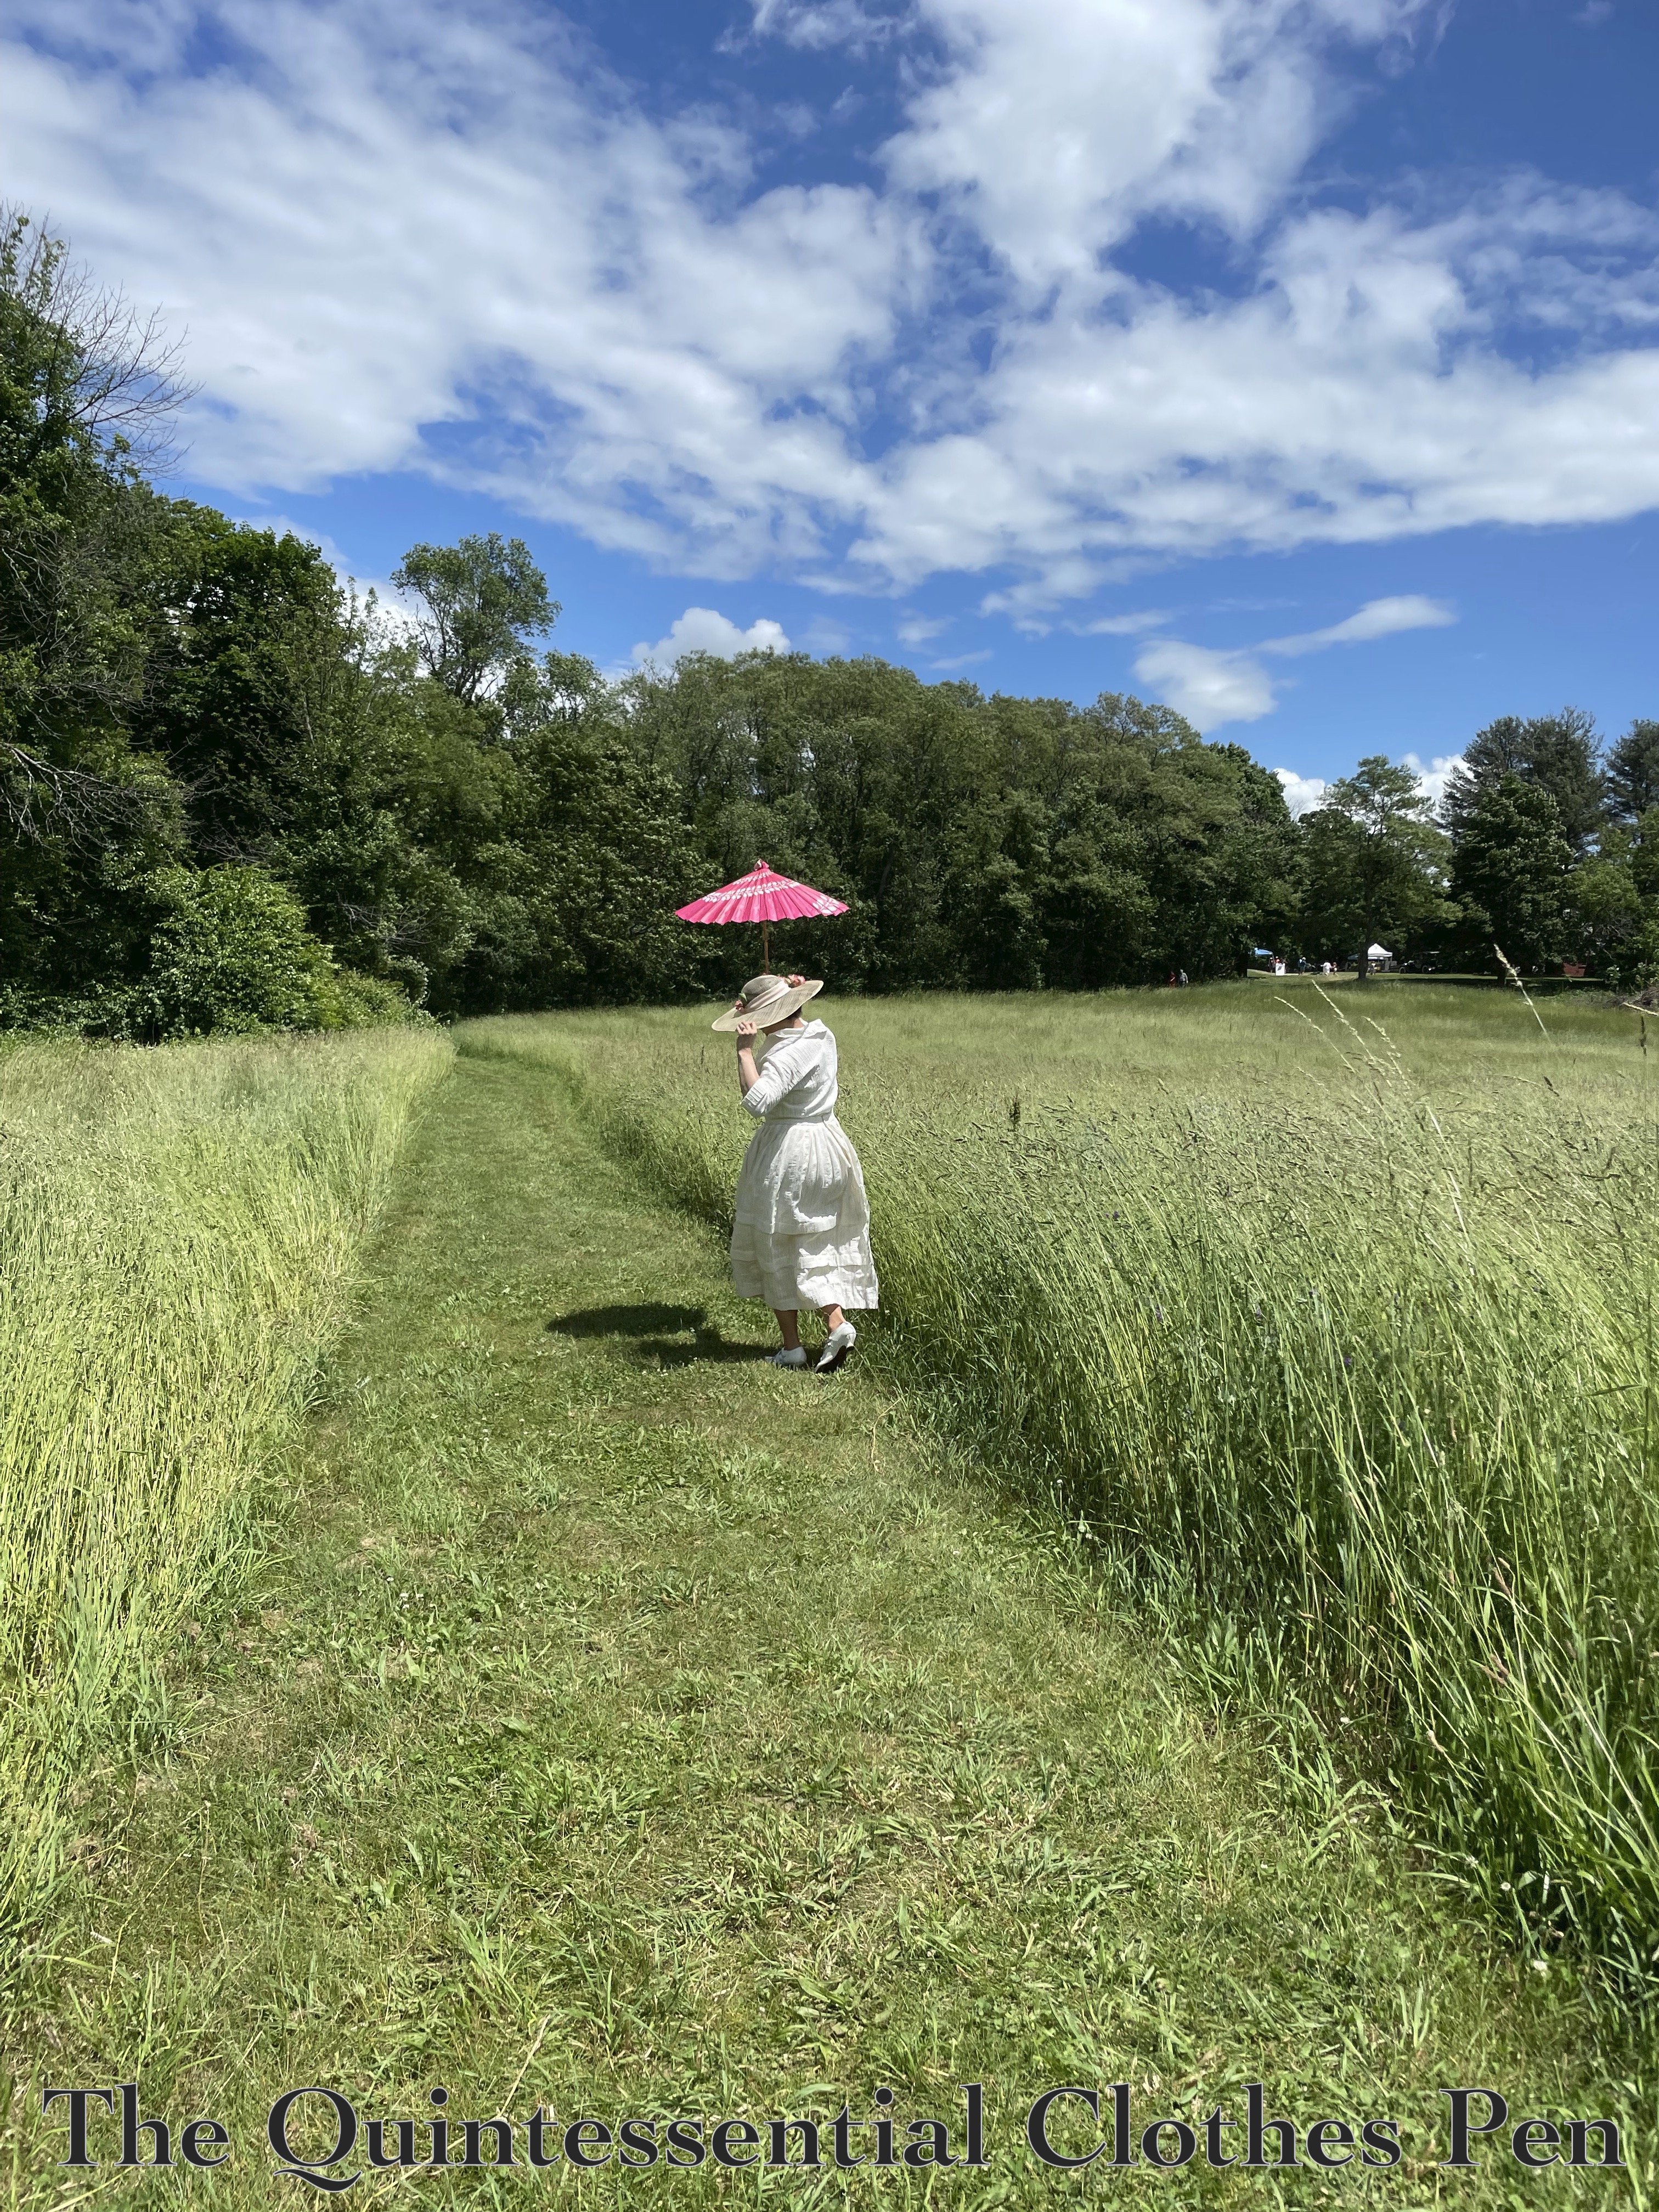
One of the parts of the event I enjoyed most was exploring the grounds, which afforded a number of lovely vistas for photos.
Five years ago (yikes, where did the time go?!?), I made ivory gaiters. They were made to wear over heeled shoes, giving the look of two tone boots. Unfortunately, the ivory gaiters I already have don’t work for the the 1896 cycling ensemble on my sewing table! Ivory gaiters would show dirt and be rather impractical for the sporting look, so I decided to make utilitarian black ones for this outfit.
I used the same pattern as for the ivory gaiters with only a few modifications: the top edge curves in a bit more over my calf and the back heel is longer so it stays on top of my shoe (in my blog post about the ivory gaiters I share about how they were riding up over my shoe–I solved this with a little piece I added in after the photos were taken, but for the new pair the pattern was cut longer instead). It was lovely to have a pattern ready to go!
I’m pleased that I squeezed this small project into 2018. I can count it for the HSM Challenge #12: Neglected! This challenge is sort of a catch-all for making something that fits into a previous challenge either from this year or a previous year. I chose the September 2018 challenge, Hands and Feet, for this December challenge.
Just the facts:
Fabric: About ¼ yard slightly stretchy black cotton.
Pattern: Created by me.
Year: 1896.
Notions: Thread, ¼” and ½” cotton twill tape in various widths, and plastic buttons.
How historically accurate?: 90%. The look is right but the materials are a mix and match of right and modern.
Hours to complete: Approximately 5.
First worn: Not yet!
Total cost: $5 for the buttons. The fabric and twill tapes were in my stash!
These are constructed in the same way as my previous pair. The seams are covered with ½” twill tape, the edges are bound with ¼” twill tape, there is a strap (in this case made of the exterior fabric), and then buttons and buttonholes finish it off.
The great thing about my gaiter pattern is that they work for a few different decades. The ivory pair was made for a 1917 outfit, but I feel perfectly confidant that the pattern works for the 1890s and 1900s as well. I’m looking forward to trying these on with my cycling ensemble once that is far enough along to put all the pieces together!
I have a three evening gowns from the 1920s, but only two daytime ensembles. For summer events from the Ragtime dance period and the 1920s in general, I wanted a new addition in the daywear lineup, so I kept my eyes open while out shopping for other projects. I came across the fabric for this dress a few months ago before I had time to sew, but with a general plan in mind.
Fast forward to about a month ago and I started actually planning the dress. I had thought to make a dress from about 1916 with a distinct a-line shape (a silhouette like this), but reconsidered that plan when considering the very linear effect of the tucks in the fabric. The linear fabric was much more suited to the period from 1919 to 1922 and so down that road I went.
Year: 1919, explained in detail further along in the post.
Notions: Thread, snaps, and a hook and bar.
How historically accurate is it?: 95%. Accurate pattern from the period, reasonable fabric, and accurate finishing methods. Woo!
Hours to complete: 30? I took my time to enjoy the process, hand sewed more than was absolutely necessary in order to watch Netflix and not dig out the sewing machine, and fiddled with the bodice for awhile to get a style I was satisfied with.
First worn: July 17 for a Ragtime tea dance.
Total cost: $30 for the fabric.
(Edit: I forgot to mention what HSF challenge this was for when I originally published the post. It’s for challenge #7: Monochrome.)
Why did I decide on 1919 for the year of my dress? The pattern dates to 1918-1920, putting my dress squarely in the middle, but I also looked at the details that changed with each year from 1918-1922 to confirm the plan.
1918. Skirts have just ceased being the A-line shape of the prior three years, but they still have fullness and waists remain high.1919. Still some full skirts, but the silhouette is narrowing.1920. Slimmer skirts with high waists.1921. Slimmer skirts with a dropping waistline.1922. The waistline has dropped to hip level and drape effects are fashionable.
1919 is the year when the features I most wanted all come together: full skirt, high waist, playing with the linear nature of my fabric going both vertically and horizontally, and skirt tucks. These features can be seen in the following most inspirational images.
c. 1915c. 1915c. 19201919
Plus, these two fashion plates, from 1920 and 1921.
And construction? I kept it simple, with a few unfinished edges in the skirt (gasp!), pinking on the seams and exposed edges in the bodice, and as few closures as possible. No fuss. The bodice closes off center in front but the skirt closes in back because I was originally planning to make a separate blouse and skirt. When I decided I didn’t feel like dealing with a peplum, and that even with a peplum a blouse was likely to come untucked (as happens with my 1917 blouse when I wear it), I just hand sewed the now-bodice to the inside of the waistband and sewed snaps around the other side to keep it together, as you can see. This way, it’s easy to separate the two pieces in the future.
All in all, a pretty quick project as my projects go. Comfortable, flattering, easy to alter (a component of sewing projects I am trying to incorporate more often as I move forward with projects), satisfying to wear, plus it goes well with my Astoria shoes. Win!
I mentioned in my last post that I am the happy owner of a pair of black American Duchess Seaburys. What I didn’t mention in that post is that I am also the happy owner of a pair of dove gray Seaburys!
I bought the black ones first, around Christmas-time, and picked that color because of the versatility of black shoes. Once I received them and was able to fully appreciate the gorgeous materials, elegant design, and sturdy construction I started raving about them to friends. During one conversation in particular, I managed to inadvertently talk myself into buying the dove grey Seaburys as well… They’re being discontinued and are such lovely shoes with such a distinctive shape that they’re worth having in two different colors.
I’ve only worn the gray ones once so far, when I decided to wear them with modern clothes to the ballet. I found them to be just as elegant for modern dress as for historical dress, which was great! It’s hard to find gorgeous modern heels that meet all my various criteria.
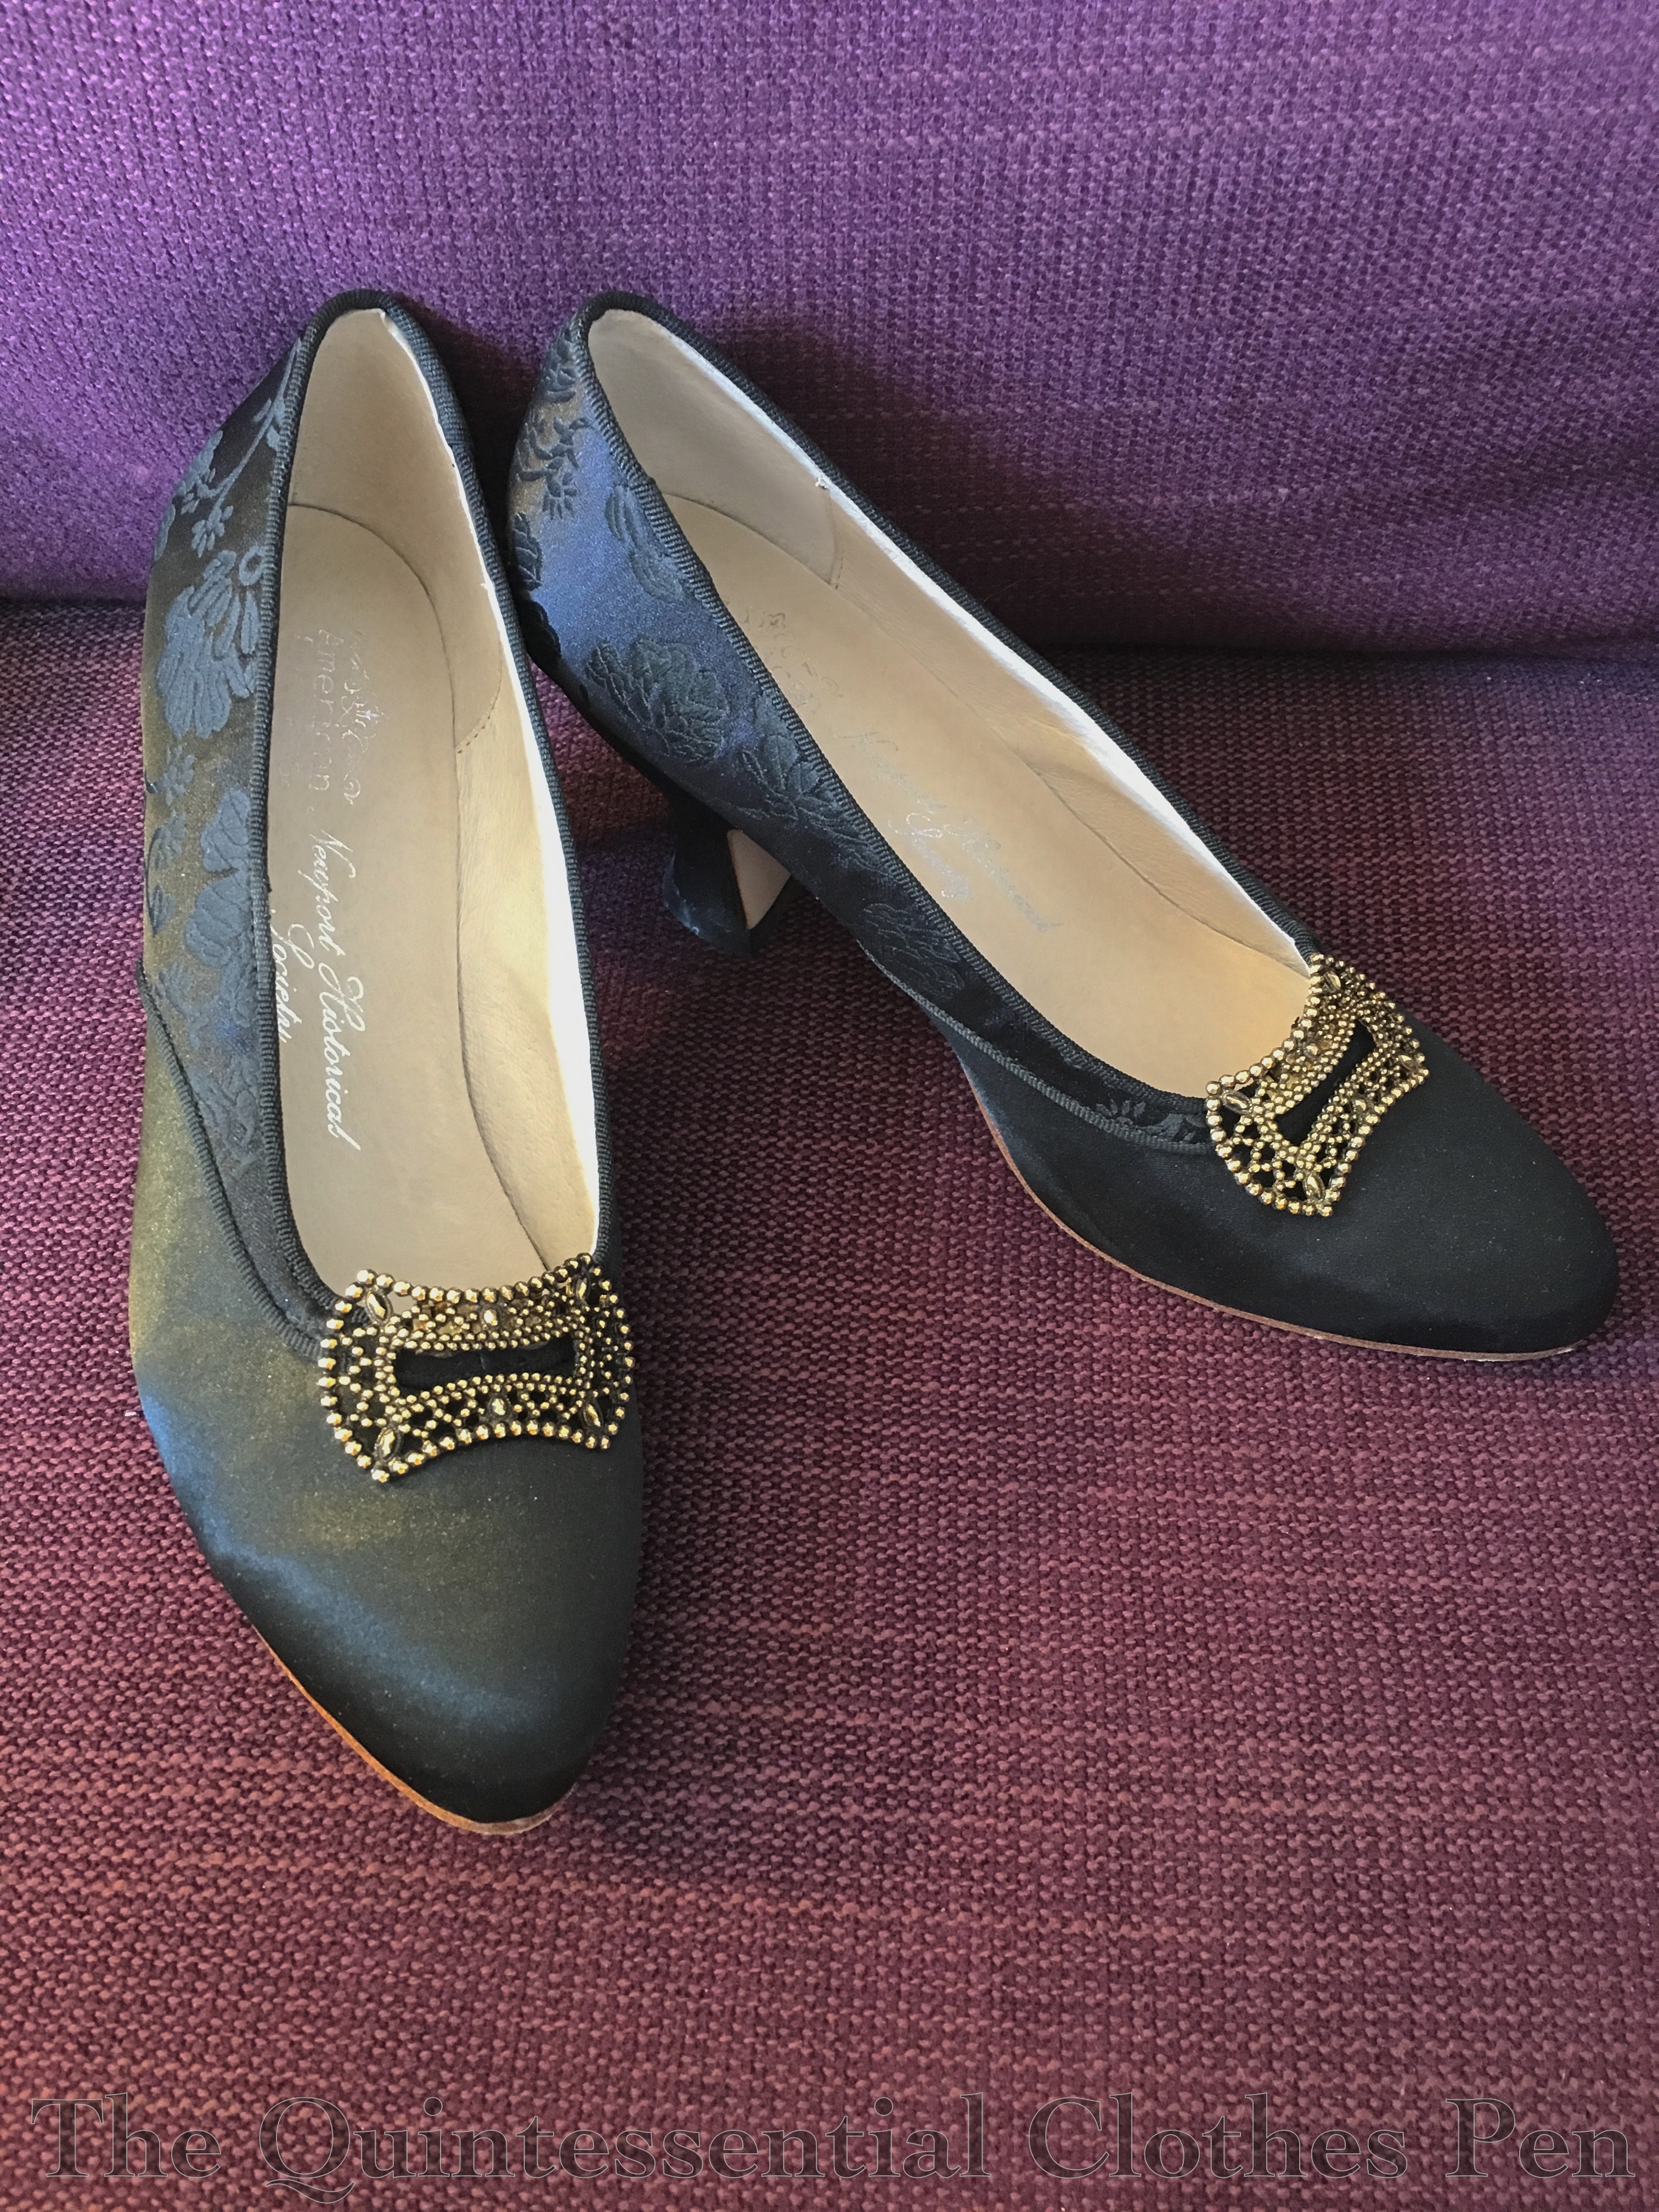
I decided to try this pair without the shoe clip bows. The gray silk gleamed and the custom designed brocade was much more obvious in this color than in the black, as I expected.
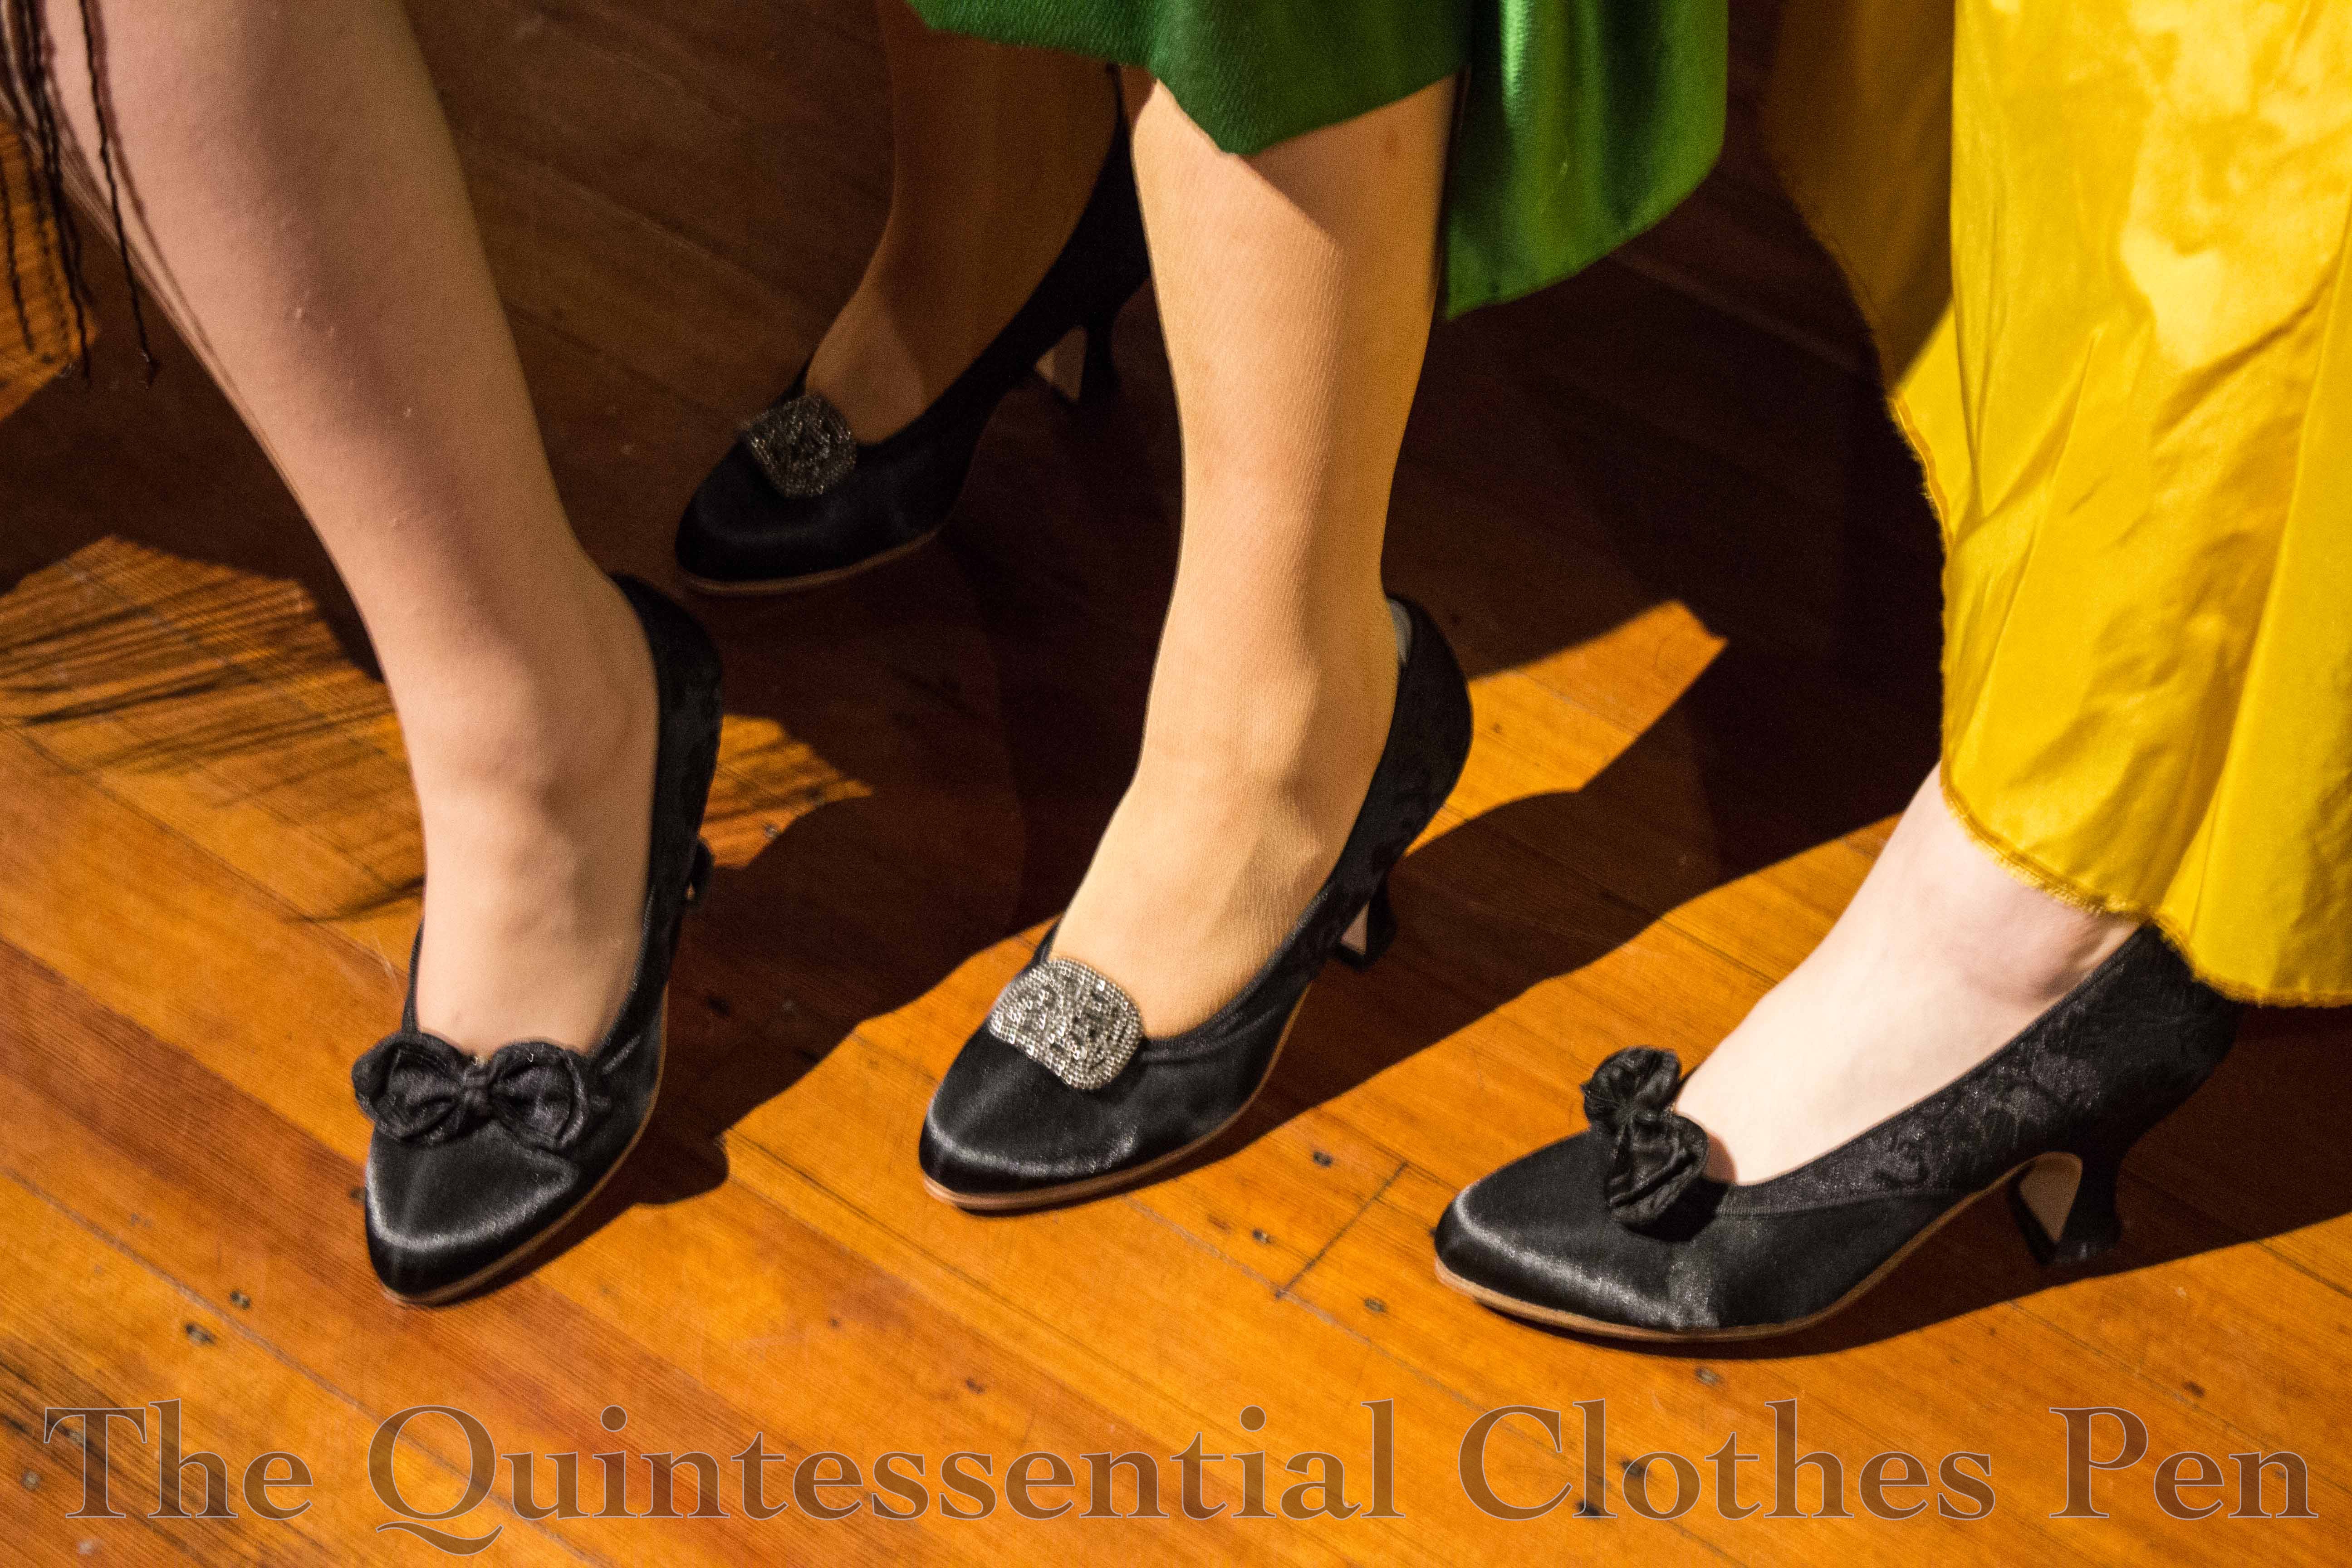
In fact, there were three of us at that event wearing black Seaburys. The nice thing is that they looked elegant and unique on each of us. Emily, in the center, got creative with hers and changed out the removable bows for vintage shoe clips… and it blew my mind!
The idea of shoe clips with different decorations for Regency shoes is standard to me at this point, but I had never considered the idea for 20th century shoes. I loved the look ofEmily’s and immediately came home and started searching for some that I liked so I could vary my shoes more. Since then, I have acquired two different pairs of shoe clips. Now I need places to wear them!
The gold buckle ones are my favorite of the two styles. I love the color and the curved edges! The rhinestone ones are a nice bit of bling, but aren’t quite as exciting as the gold. I haven’t tried them on my grey Seaburys, but I’m curious if they might match better. I also like them flipped over so the rhinestones spread over the toes, but wearing them that way would require some finagling, since the clips on the back would be upside down.
The verdict is that after wearing Seaburys multiple times in different situations, I can say with certainty that they are stunning shoes. They’re quite comfortable for standing around and light walking, with a well balanced, elegantly shaped heel. I have a narrow foot and I am pleased that these pumps stay on the back of my heels without a problem and without extra assistance. I wouldn’t plan to walk too far in mine especially outdoors, partly because the uppers are silk and I wouldn’t want to ruin them with scrapes and scratches.
For dancing, however, these are not the most comfortable shoes. They work pretty well, but as with most heels, my toes started to feel a bit pinched and tight after a few Charlestons and my feet were much more relieved to take off the shoes after wearing them while dancing vs. wearing them while just standing. Also, with nylons, I was more afraid that while dancing my heels might slip out of the back of the pumps.
But as I said at the beginning, these shoes are worth raving about. Both the solid silk and the silk brocade are gorgeous, Lauren created an incredibly elegant design with an attractive toe box and beautiful French heel, and they are sturdy and carefully crafted.
Unfortunately, Seaburys are no longer being produced. However, the new American Duchess Amelie shoes have the same gorgeous silk exteriors (without the brocade). They have a lower heel but are still a unique, historical shape, and they come in a variety of beautiful colors in addition to black and silver.
Product links in this post contain an affiliate code, which provides a small benefit to my shoe fund. This does not affect my impressions and reviews of this product.
This gown was already in my sewing plan before I decided it fit into the HSF/M Challenge #10: Sewing Secrets. It turns out that it fits into the Sewing Secrets challenge for multiple reasons:
#1: Because like many dresses from the first few decades of the 20th century, the method of closure is cleverly hidden, rather complicated, and definitely secretive–you really can’t tell how the dress goes on just looking at it once it’s all hooked up. (Right? Can you figure it out before I show you later in the post?)
#2: The beaded panel on the front might look familiar if you’ve been reading my blog for a few years. It is actually the sleeve (turned upside down) from a 1980s evening gown that I remade into a sleeveless 1925 evening gown.
#3: I made this dress with a train because I had enough fabric, it’s elegant, and I don’t get to have many dresses with trains because I’m usually dancing in them. However, I do plan to dance in this dress, so I included a secret hidden button under the decorative knot at the back and a loop on the center back skirt seam so that the skirt can hook up (bustling, essentially) to be a uniform length all around so I can dance unhindered!
I paired this new dress with my American Duchess Astoria shoes, because they are super comfy and made sense color-wise with my other accessories: plain white stockings, a super long strand of faux pearls, lovely clear/white dangle earrings I’ve had for at least ten years, and two matching metallic silver wrapped hair pins I think my mother gave me also a number of years ago. Underneath is my 1913 chemise and corset.
I’ve had all the fabrics in the stash for at least three to seven years. The underskirt was leftover from a former project never fully pictured here on the blog–an 1890s 2 part dress taken directly from an extant bodice with an extrapolated skirt (the skirt was worn by a friend in Newport in 2012–there are pictures toward the bottom of this past post, and I forgot that the ensemble I’m wearing in that post also uses this same fabric as trim). I had purchased way more fabric than I needed and had more than enough for the new project, so I guess I’ll be using it on another something someday. The matching chiffon and charmeuse I’d purchased with the intention of making a 1910s evening dress back in 2012, but ran out of time that year.
When I was first seriously thinking of making this dress, I thought I had enough fabric to do something like this dress, but I hit a snag when I realized I only had about ½ yd of the charmeuse and that the beaded sleeve I was hoping to incorporate into the dress was entirely unsuited for the shape of the beaded bit on the inspiration dress. I decided to make a dress like my original inspiration someday, but to go back to the beginning for the current dress and rethink what the dress might look like. I would up with something I am quite happy with that is drawn from a variety of inspirational dresses on my 1909-1914 evening gown Pinterest board with this as the most obvious inspiration.
Just the facts:
Fabric: One beaded silk sleeve from a 1980s evening dress that I deconstructed two years ago to make a 1925 evening dress, about ¼ yd of plain weave cotton for the base, less than ¼ yd of silk charmeuse, about 2 yds of silk chiffon, and 3-4 yds of lightweight silk faille for the underskirt.
Pattern: Created by me, loosely starting with the pattern for the bodice of my 1912 burgundy and gold evening gown and referencing skirt shapes in Janet Arnold for inspiration.
Year: 1910.
Notions: Thread, hooks and bars, and two pre-made tassels.
How historically accurate is it?: It definitely passes Leimomi’s test of being recognizable in its own time. It uses accurate materials and accurate techniques. 95%.
Hours to complete: More than I kept count of.
First worn: In September 2015.
Total cost: Technically this is a stash project because all of the things I used have been in my stash for years, except the tassels, which I bought within the last year knowing this project was high on the to do list. If I had to guess at the cost of the materials it was probably $50-$60 dollars.
The dress was sewn with a mixture of machine and hand sewing. Most of the assembly of the bodice and skirt pieces while they were separate was done by machine, as was the hemming of all the chiffon and faille (though the hem edge of the chiffon is actually the selvedge). The hand sewing came in when I went to mount all of the pieces together. I started with the under bodice and kept adding layers and figuring things out as I went. The closures are also hand sewn.
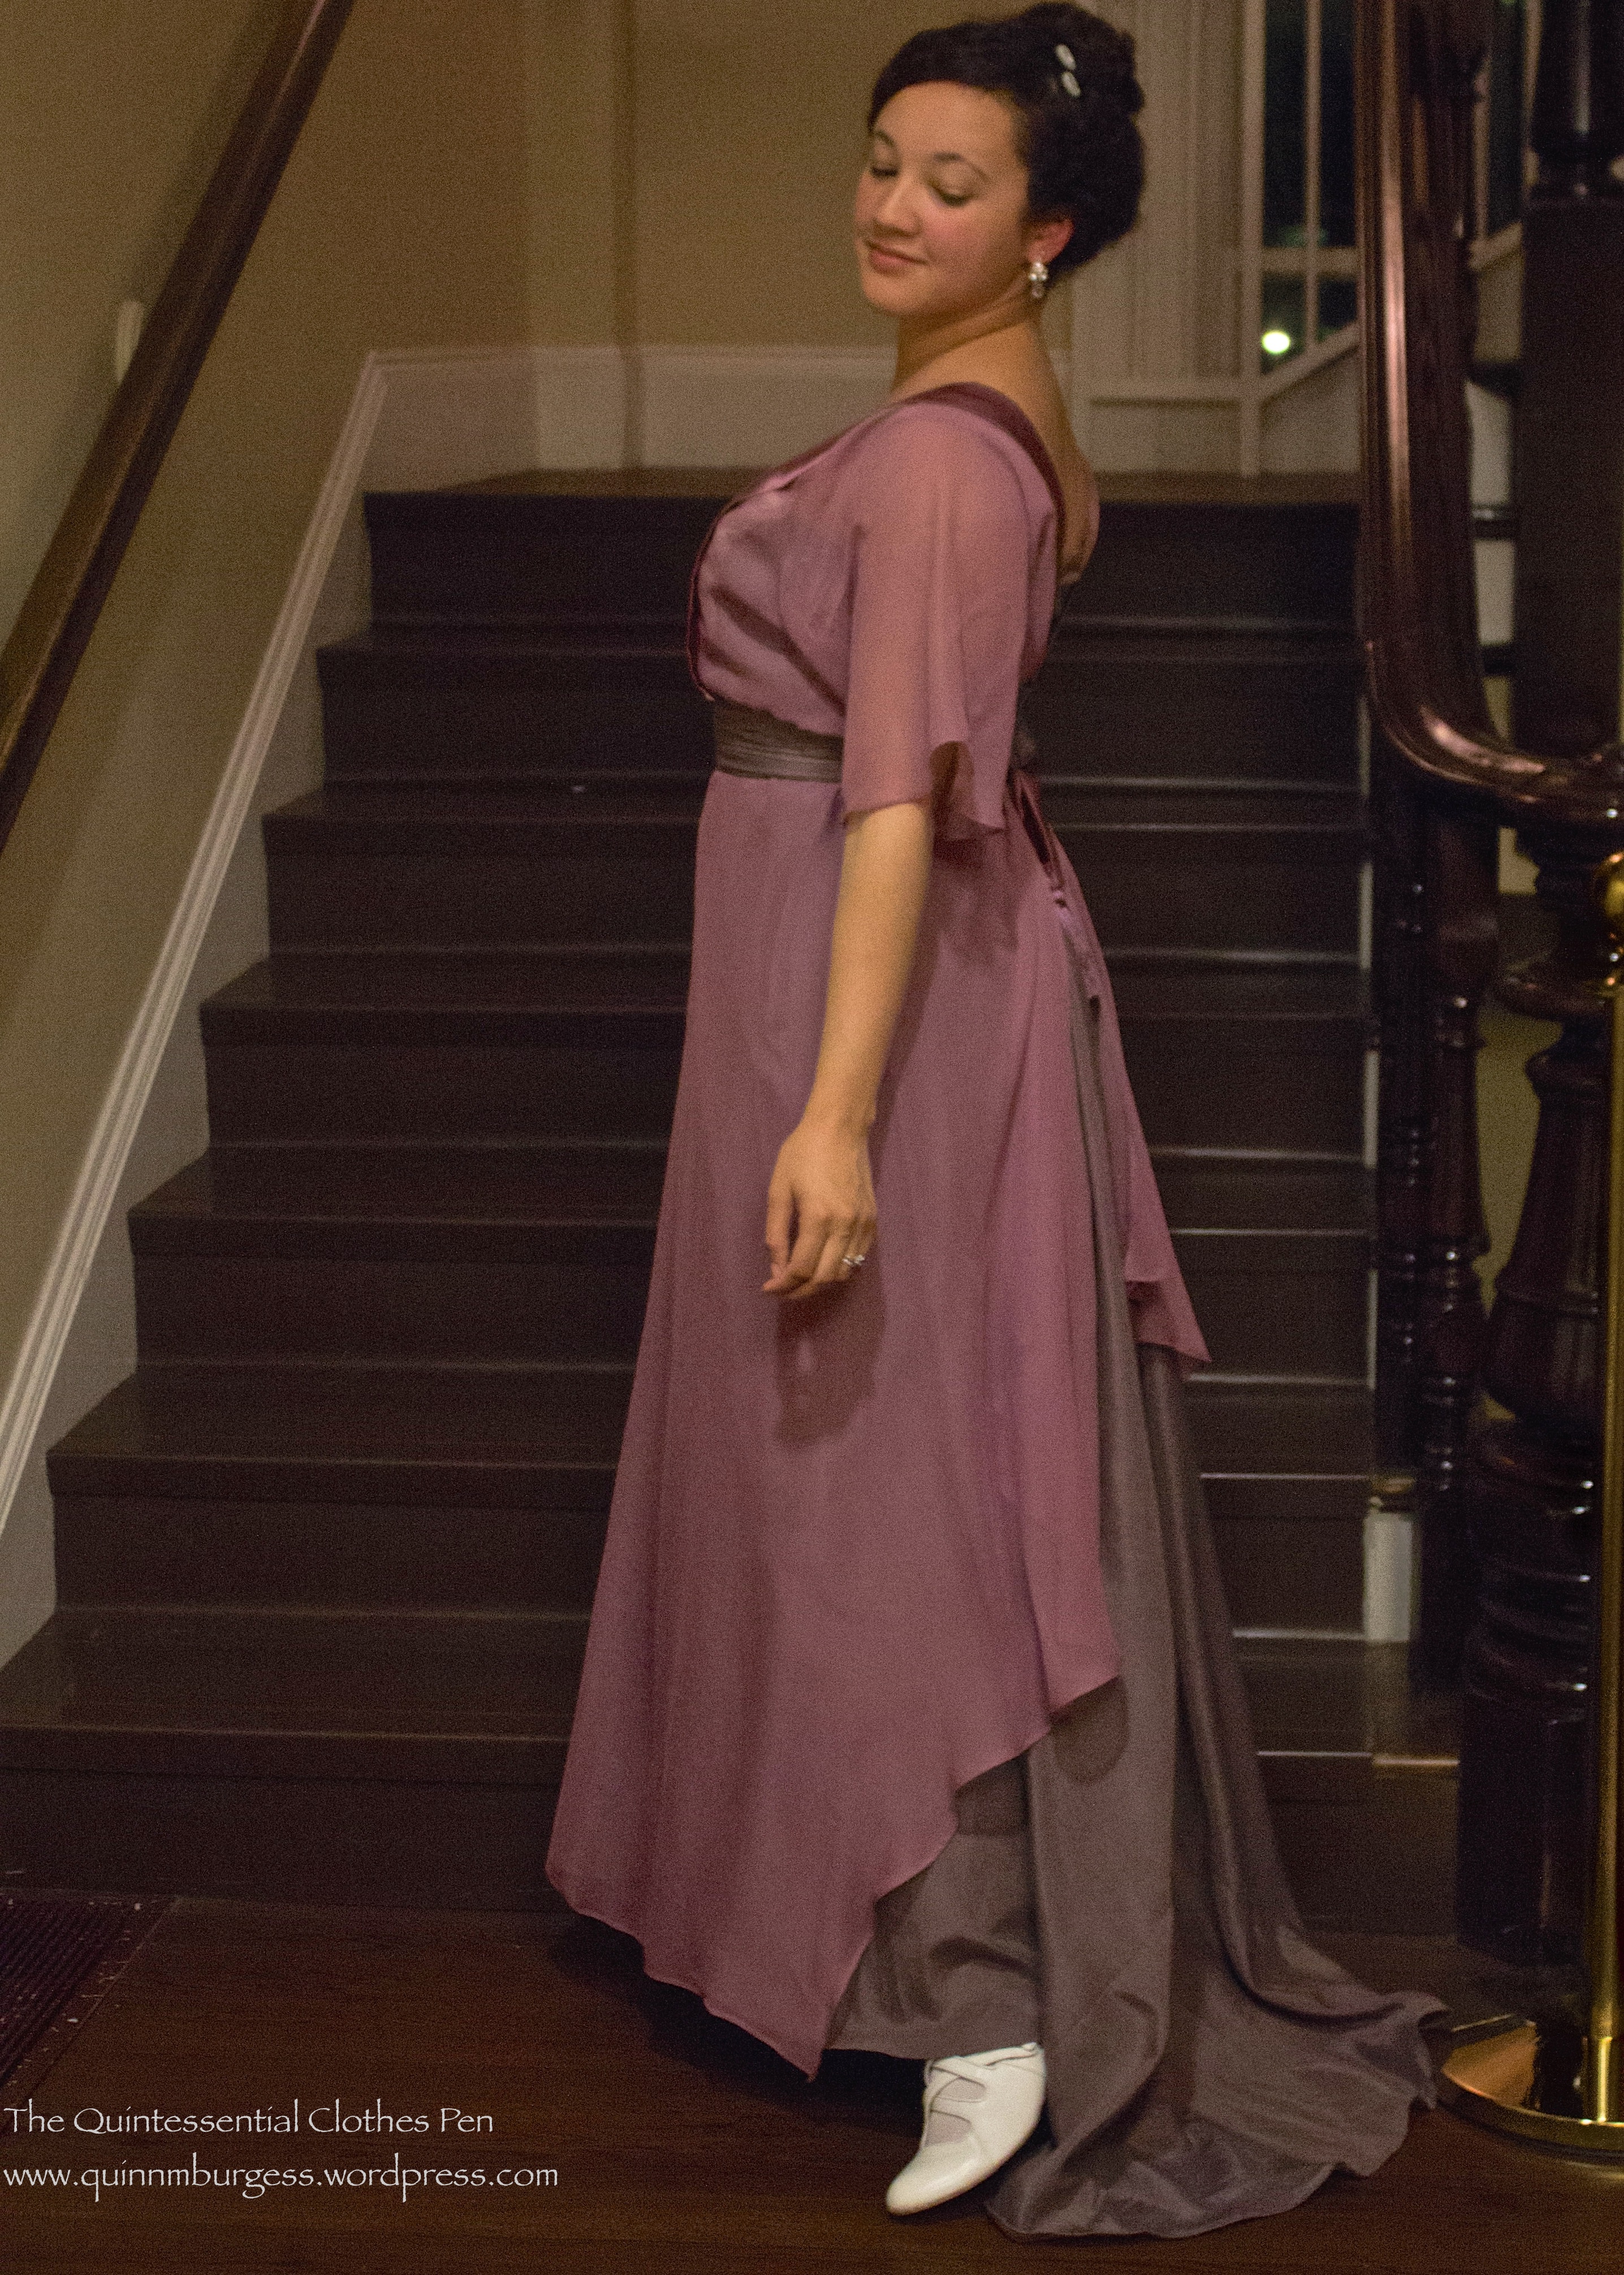
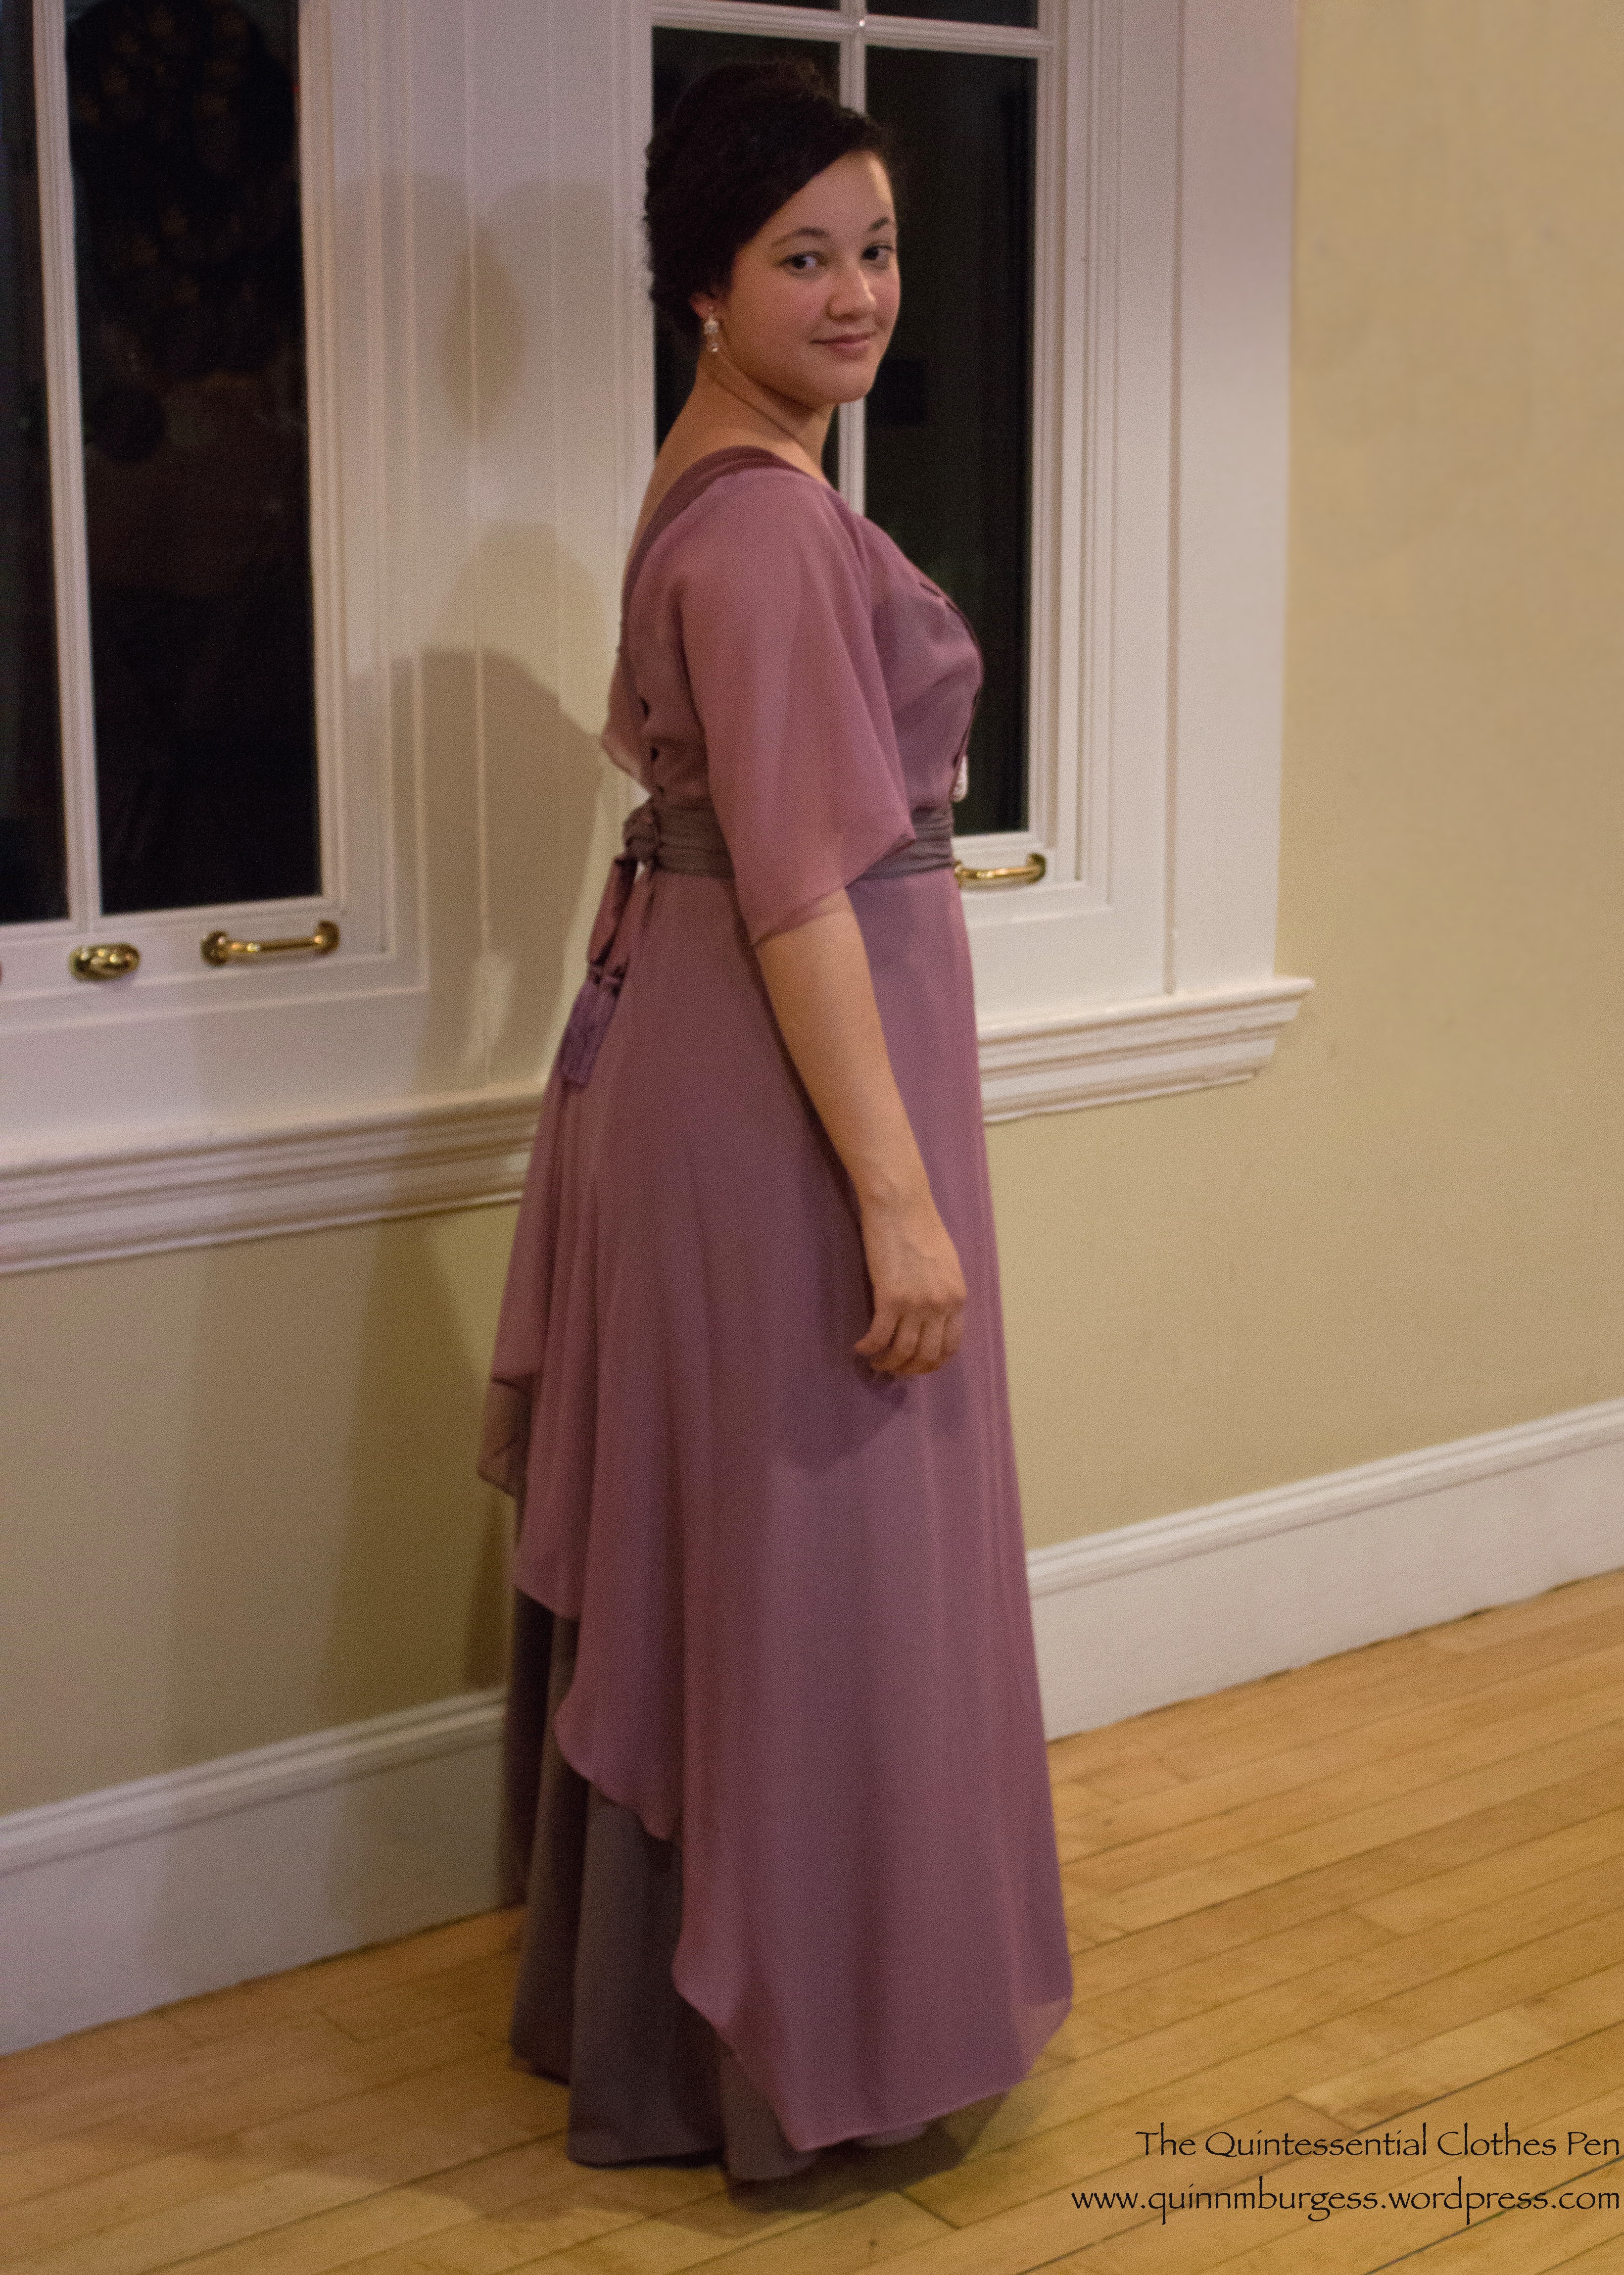
Incidentally, I’m not really sure what color to call this dress. I’ve been calling the colors orchid and mauve, but I’m not really sure those are the best color names. The chiffon and charmeuse are a shade of pinky/purple that’s hard to put a finger on and the contrast faille is more grey than anything when it’s by itself, though it really takes on a pinky/purple cast when paired with these other fabrics. Does any really perfect color name come to your mind? If it does I’d be happy to know what it is!
As I mentioned, the closure for this dress is quite complicated and as I knew I was going to include it in the sewing secrets challenge we took pictures specifically of the closures to document how it works. If I tried to explain only with words I’m sure there would be confusion, so I think the pictures will clarify things. We’ll start hooked up and unhook as we go.
The back knot snaps into place over the belt, which hooks together at the back. The button for the bustling skirt loop is hidden under the belt in this picture.The belt unhooks all the way to center front.The chiffon overskirt unhooks from center back to the side.Then the front bodice chiffon layer unhooks at the top edge of the beading and at the waist so it peels back toward the side. After that the under bodice unhooks and the dress slides right off. Is that what you thought might be the closure system?
Overall, I’m super pleased with this dress. It’s very comfortable, has lots of fabric in the skirt so is easy to dance in, and is a nice transitional style between the full skirts and pigeon breasts of the years around 1908 and the much slimmer, longer lines of the years around 1912. Plus, it has a train!
Here’s a comparison of the dress with the train down and then with it looped up. Luckily, these pictures were taken before dancing. Turns out that while I was dancing a very fast waltz, either my or my partner’s foot caught the hem of the dress and caused the loop to break, so I’ll have to repair it more sturdily for the next wearing. Ah well, that’s why they make safety pins!
I was quite pleased with how my hair turned out, so I had to make sure to get a reasonable close-up. Some of the curls are natural and some are made nice and smooth with a curling iron. The key is to put the hair up in a lot of different sections–and I mean a lot!
I call this dress the “Dowager Countess” gown because the shape of it reminds me of what Maggie Smith’s character in Downton Abbey often wears to dinner parties. Look at the bodices on these dresses: this dress, this dress, and this dress are all examples of a similar style–one that the Dowager Countess wears often! And why wouldn’t I want to be reminded of Maggie Smith when I think of this dress? Her snarky comments are highlights of Downton Abbey! (Incidentally, one of my friends wore the just-emerging-in-the-1910s style of pants in the ballroom to this ball–gasp!–and we took some posed snarky pictures. Head over to her blog, Plaid Petticoats, to take a look at her scandalous outfit. When you get to the bottom you’ll find the snarky pictures. You might even find that you think I’m there twice, because I was wearing this new 1910 dress and I loaned my 1912 evening gown from 2012 to a friend who happens to be being snarky with me.)
At last year’s Plymouth Thanksgiving Parade in November 2014, I portrayed suffragists with the same ladies as I did in 2013. I recently posted about the finally finished 1917 wool skirt I wore that day, but I thought it would be fun to share this video also and it didn’t quite fit in with the skirt post. It’s a little clip of us singing a suffrage song: While We Go Marching Together. For more information on suffrage songs, one of the other participants from our suffrage adventures wrote a blog post about them awhile ago that you can view here.
In addition to singing suffrage songs, we made suffrage ribbons and photocopied suffrage pamphlets, both to hand out to the public while interacting with them about the subject of women’s suffrage. We talked with men, women, and children about the value of women’s suffrage and the history of the movement, encouraging everyone to consider the importance of the right of women to vote.
From the Cranberry Scarf post, proof that I was wearing my wool skirt, though all the layers cover up the changes I made that completed it.The new placket closes with hidden skirt hooks and bars.
While the side seams, hem, and waistband were totally finished for the first wearing, the skirt never had closures. It just sat in my closet taunting me with it’s almost-finished status. When I went to finish it I realized that a side closure would make it much easier to get dresses and be less gap-y than the center back closure I had originally intended. Moving the closure meant re-do-ing the waistband, so I also used the opportunity to change out the pockets.
As a side note, pockets on day wear are genius! They’re so useful when you’re the public eye and you need to keep things like your car key, phone, and ID on you but you don’t want to leave them lying around. They free your hands from any sort of bag and ensure that your sensitive modern items are not lost or stolen. GENIUS!
New (modern shaped) pocket.
The pockets I’d originally put in were rectangles set in vertically that extended both in front of and behind the pocket slit. They are just fine in skirts with more fullness, but for this period they were hard to get my hand in and out of. So when I was changing around the waistband, I cut out a new pocket shaped like what you would find in a modern garment. The new pocket has a facing piece of the skirt wool sewn over the muslin where it might show when I put my hand in (that’s the square set of stitching on the upper right). Because I added a side closure I only have one pocket on the other side, but it is easier to use than the old pocket style was. Both the pocket and the waistband facing are made from scrap muslin (not itchy, not slippery, and who doesn’t love using up scraps?!?).
Both sides of the skirt have four covered buttons on them. Buttons were often used in the 1910s to decorate skirts and blouses (take a look at my 1915-18 Pinterest board, for instance, and you’ll see lots of examples). These buttons are just for show, though, because the skirt closes with hidden skirt hooks and bars.
Braving the cold to show off my completed skirt placket.
I referenced Jennifer Rosbrugh’s great placket tutorial (I could remember all the directions exactly, but it’s so much easier to just take a quick look to remember which pieces to cut to different sizes and where to put them!) and this tutorial showing how to add hidden side pockets (Again, nice to to have to think very hard: easy directions and good illustrative photos!). And I’m super pleased that the skirt is complete! Yay!
…and it qualifies for the HSF Challenge #23: Modern History! This particular challenge is to make something historical or historically inspired that is wearable in an everyday context. And a scarf like this: absolutely wearable in my modern life if I choose!
Just the facts:
Fabric: 2 skeins, of unknown length, of probably acrylic yarn.
Pattern: Made by me. (More details below.)
Year: 1910s. (More details below.)
Notions: None!
How historically accurate?: Ideally, it would have been made of angora yarn, but I had the acrylic on hand and didn’t want to spend extra money (angora yarn isn’t cheap, you know!). Acrylic wasn’t invented until 1941. However, the dimensions of the scarf are accurate, the pattern is entirely plausible for the 1910s, and the style is taken directly from an ad from the 1910s. So I’d say 90%.
Hours to complete: No idea. I knit while watching Netflix and didn’t pay any attention.
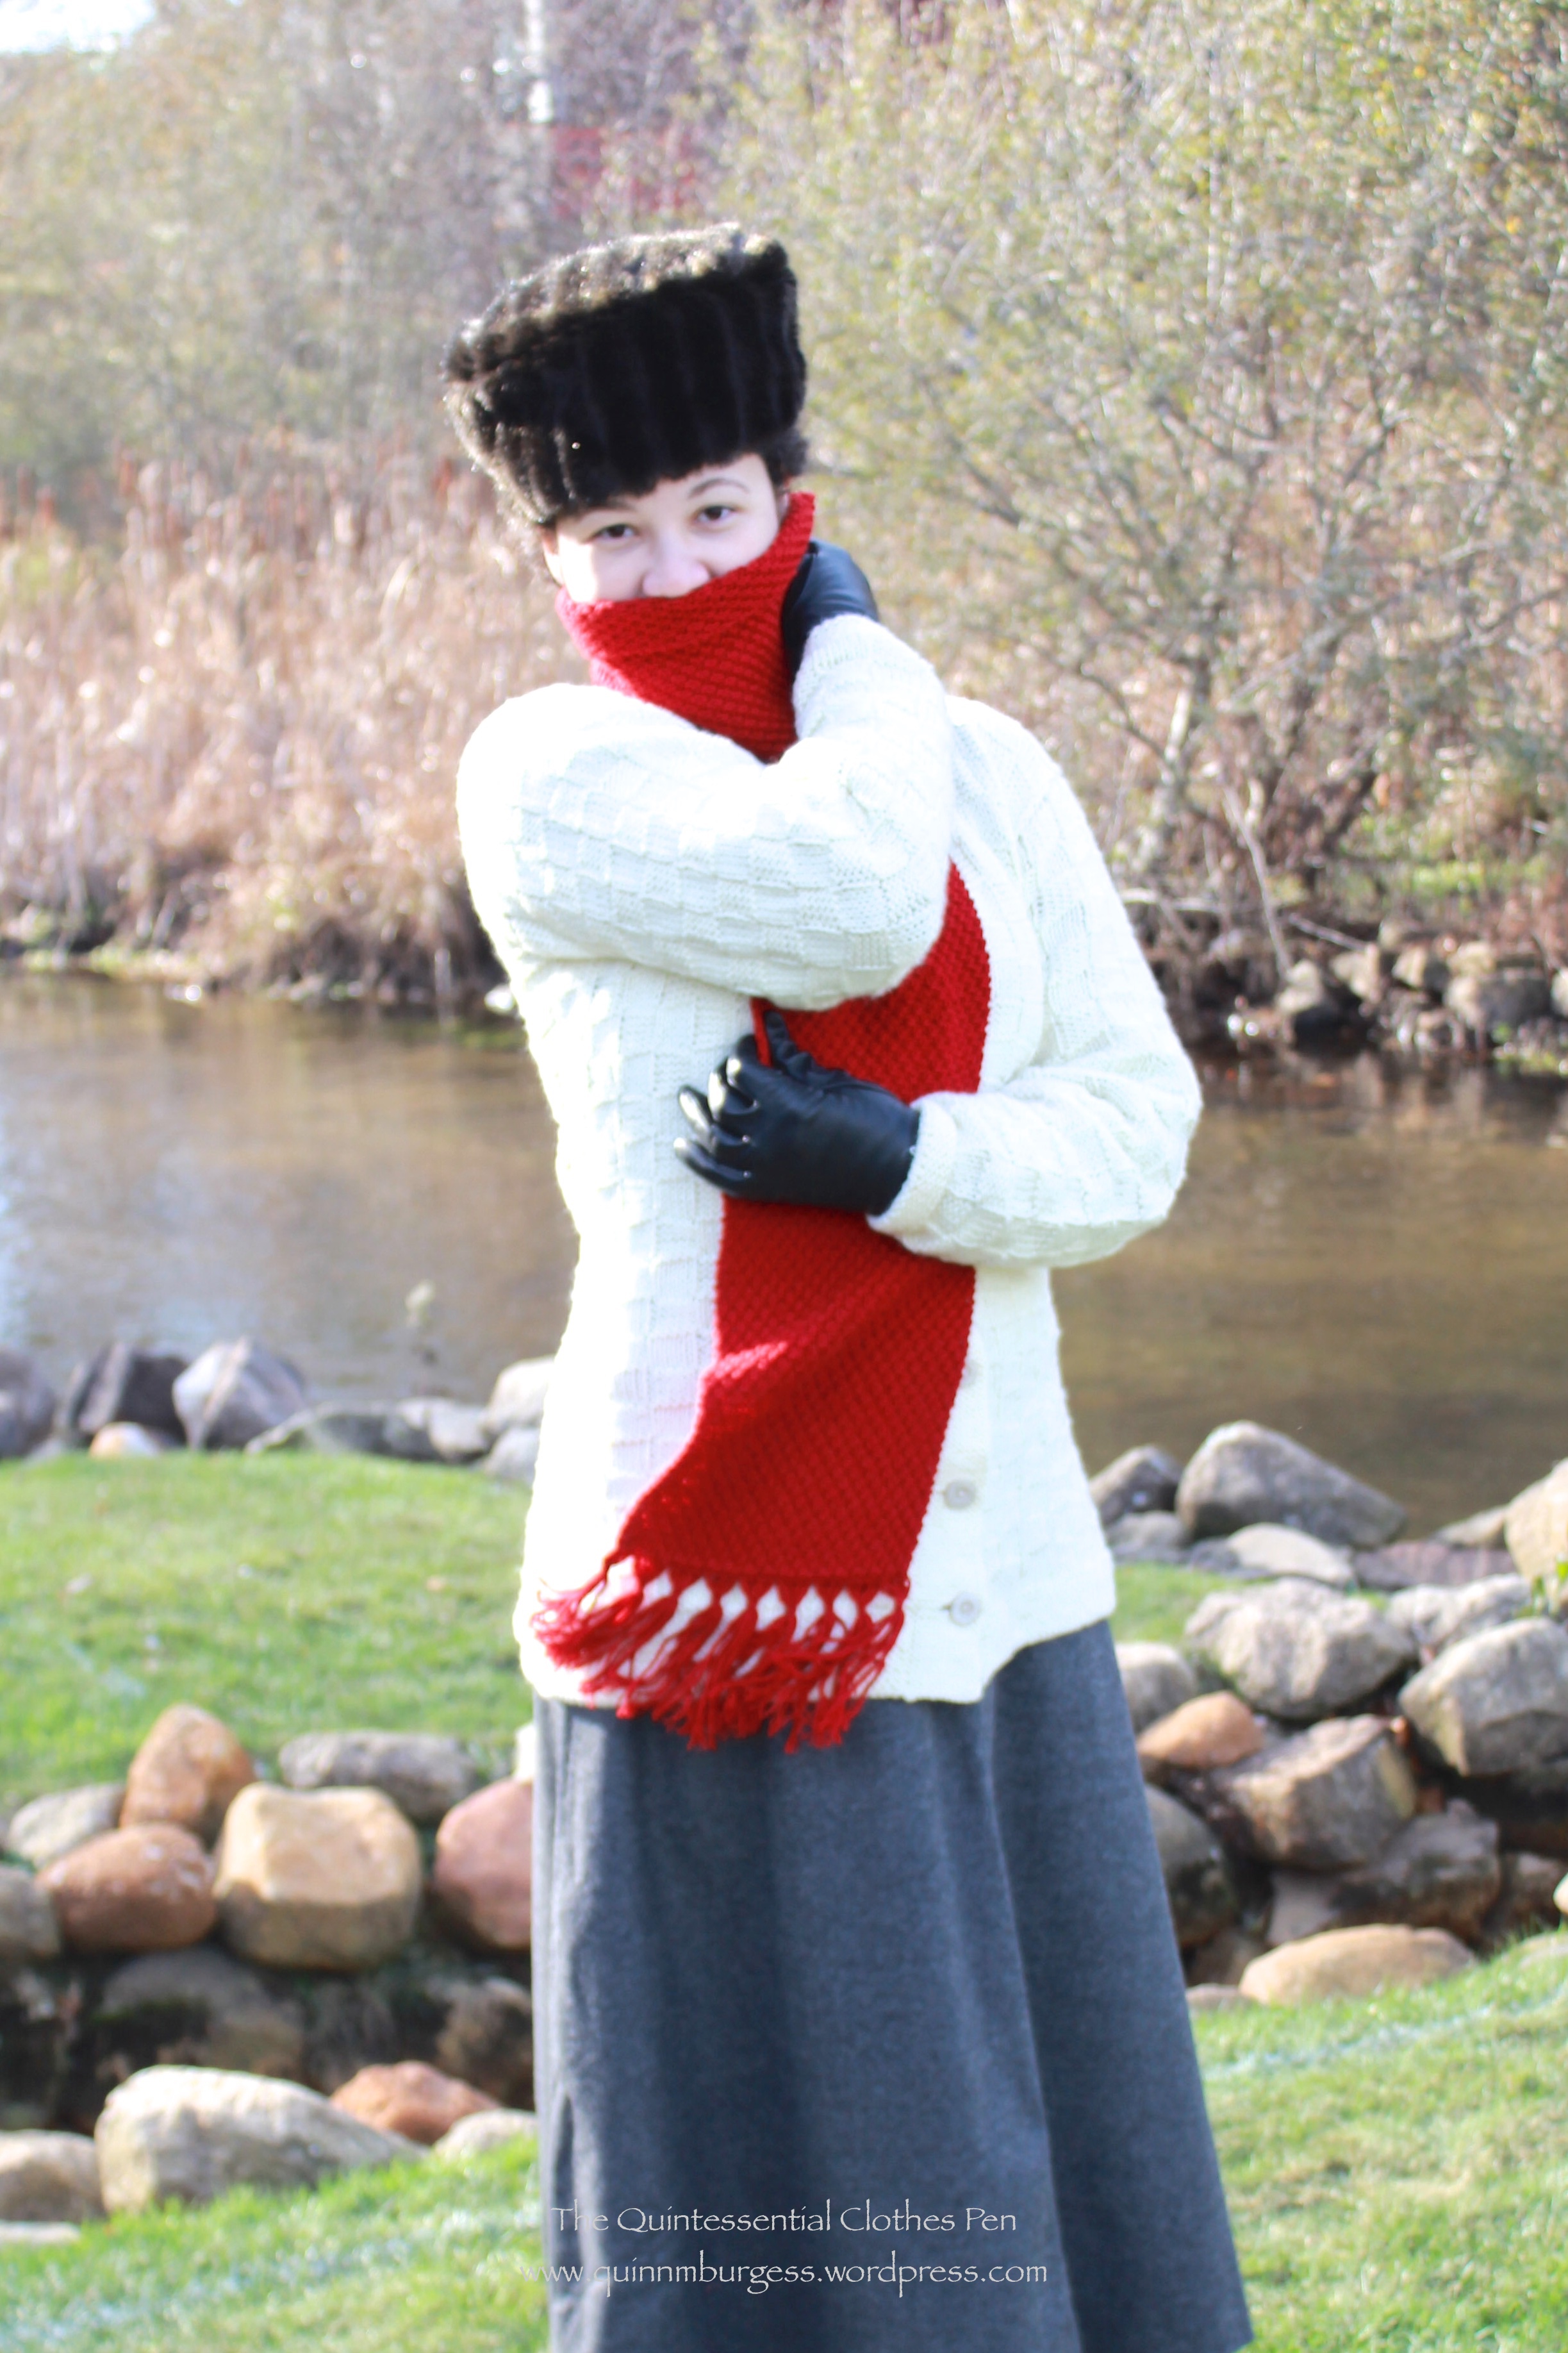
First worn: In Plymouth, MA the weekend before Thanksgiving while portraying a suffragette (as I did last year).
Total cost: $2.50 for the knitting needles and $1 for the yarn = $3.50.
The color is perfectly suited to the holiday season, being cranberry red just like the fresh berries I used to make homemade cranberry sauce last week. (That was really easy and tasty, by the way–I bought Ocean Spray cranberries and the recipe was on the bag!)
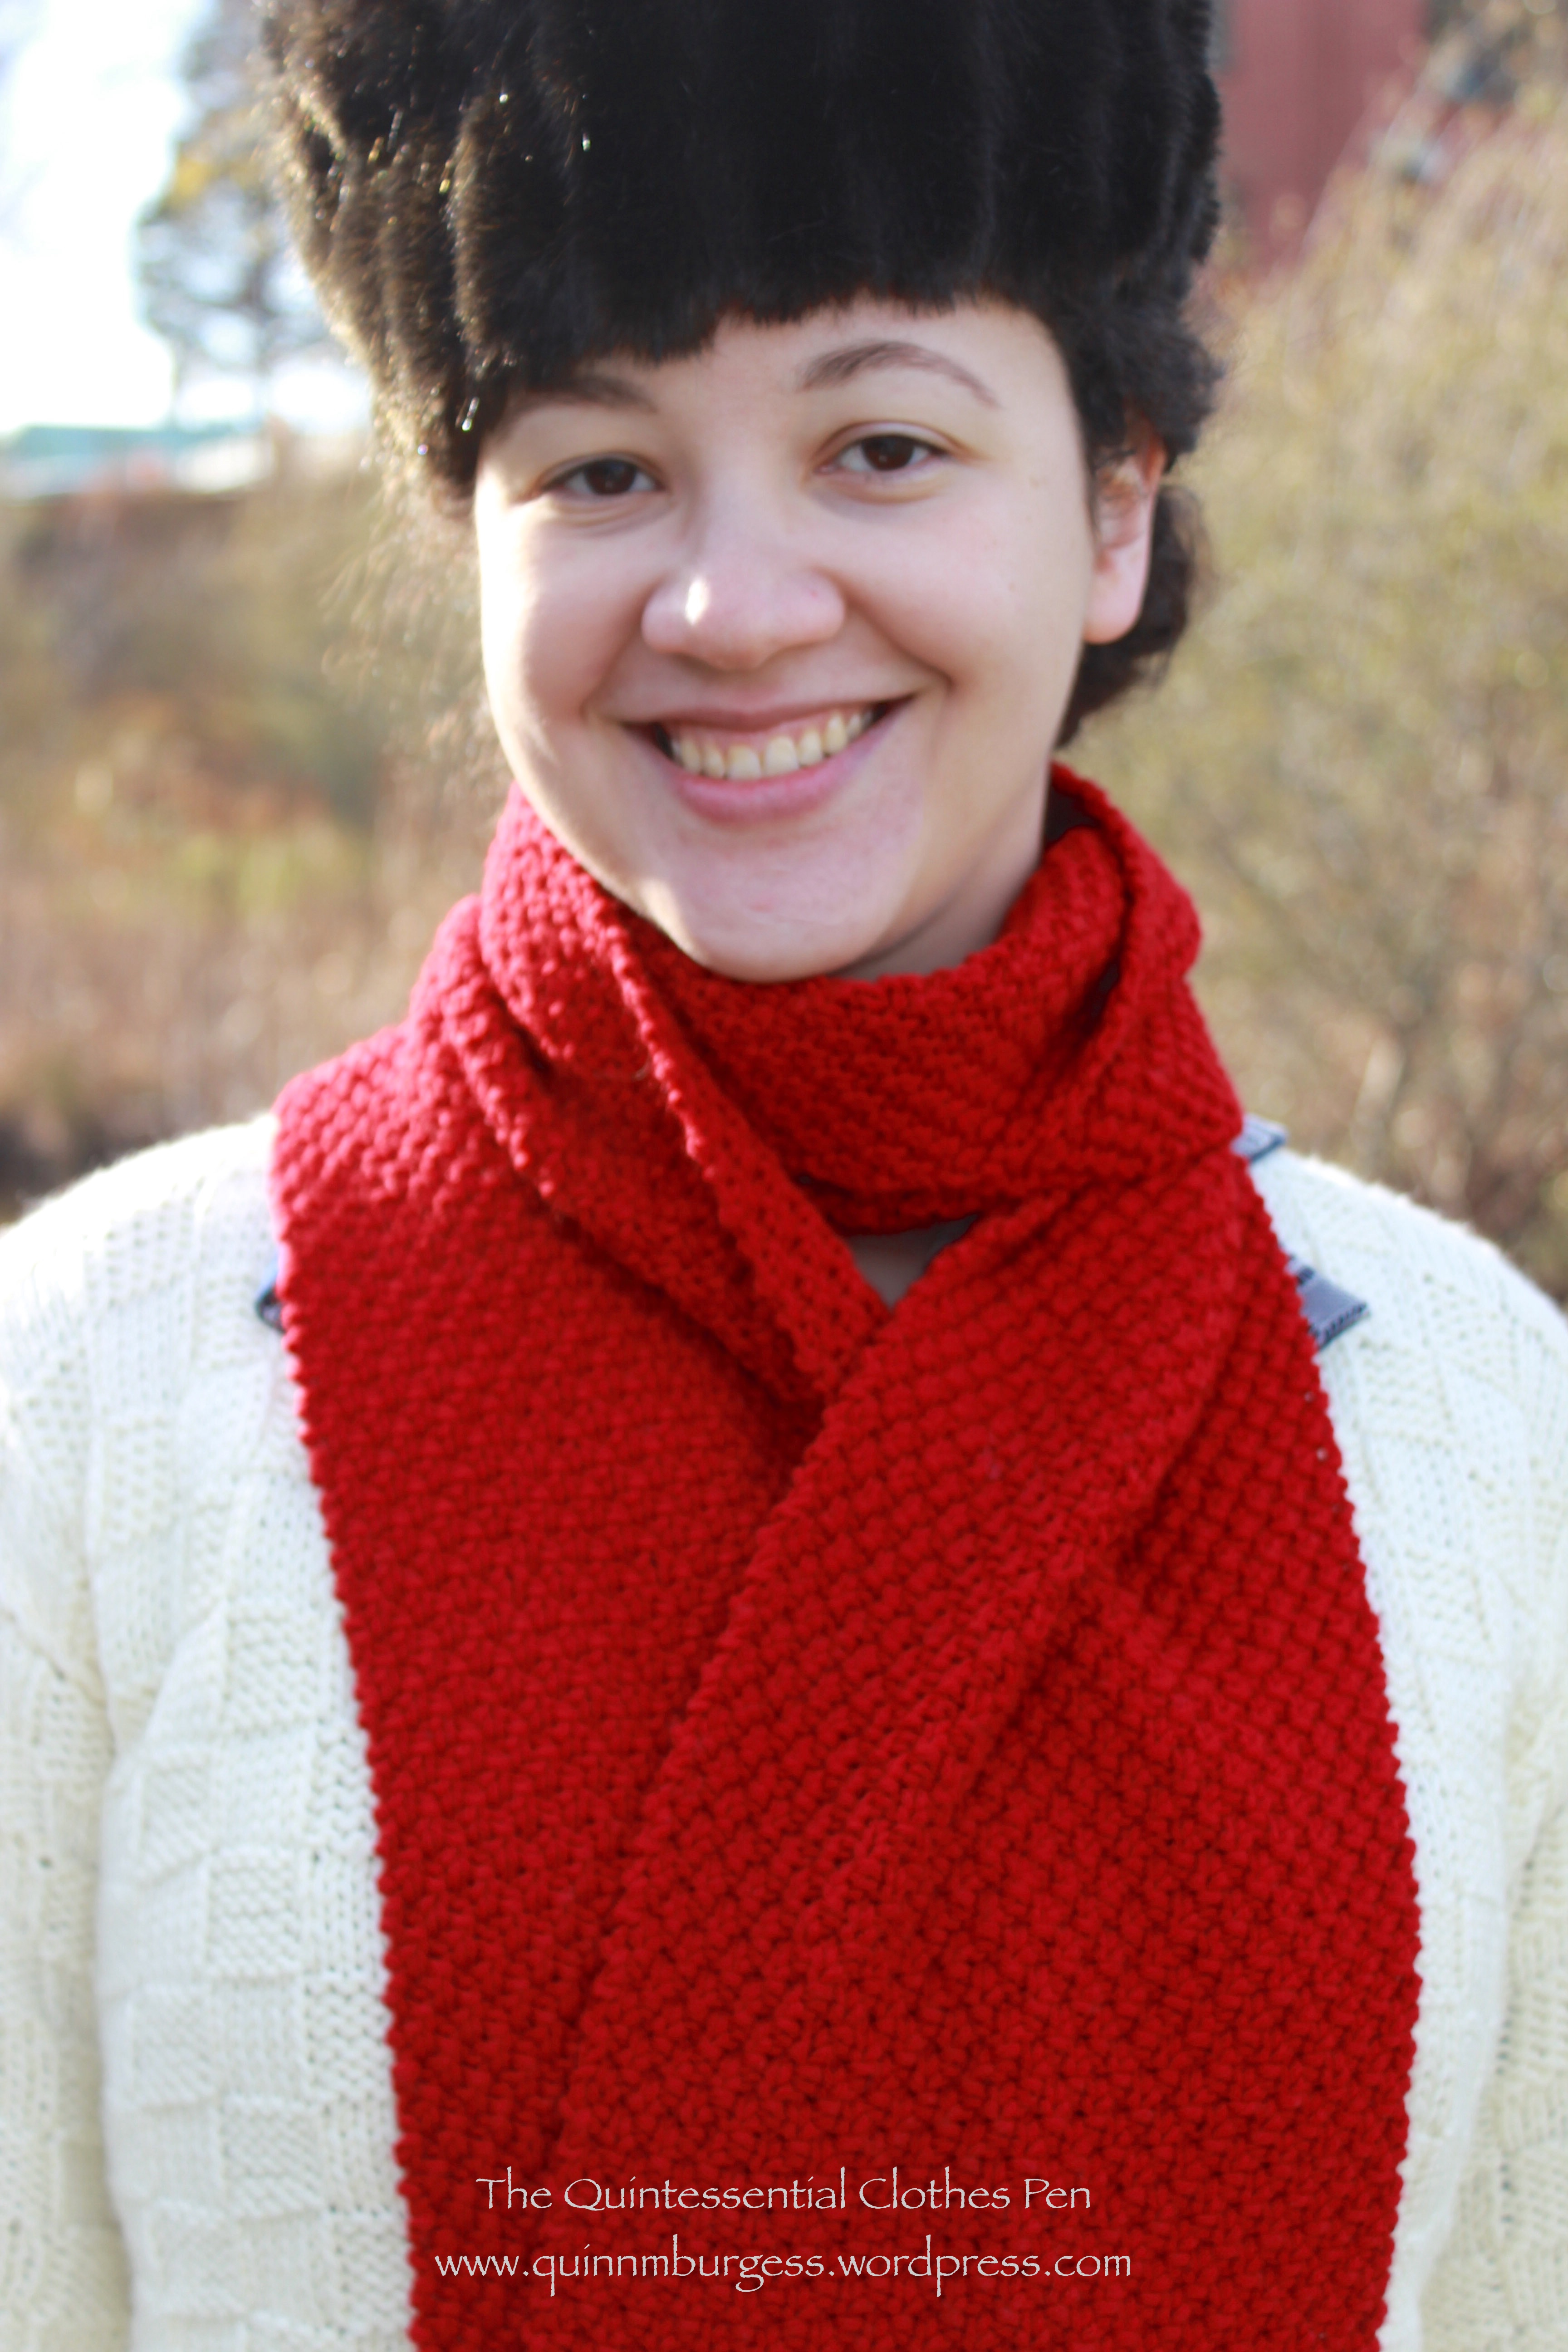
Cranberry red!
The pattern is moss stitch. I knit an extra row at the beginning and end just to provide some stability. Then, K2, P2 all the way across for two rows. P2, K2 all the way across for the next two rows. Repeat. Super easy. I keep track of what row I’m on in a little notebook with all my knitting patterns in it. That way I know where I’m at while I’m watching Netflix or when I’ve put it down and picked it up on a different day.
The dimensions are taken directly from a 1910s knitted wear ad that Lauren from Wearing History shared on her blog, here. I made my scarf 8” wide and 68″ long so it would provide maximum warmth while being worn. It also helps that it’s acrylic, which doesn’t breath and keeps you toasty. The fringe is about 6″ long and tied into 9 tassels, just as seen in the ad on a few of the scarves (turns out that I had the perfect number of fringe pieces to divide by 9 without planning!).
I had hoped to make these gloves from a 1910s pattern in matching yarn, but didn’t even start them. Perhaps it’s something that I can do next year! I’ve never knit gloves and I’ve only just taught myself to knit in the round, so while the cables in the pattern are not at all daunting, the simple idea of making gloves is. But challenges are fun sometimes! And I’m very pleased with the scarf.
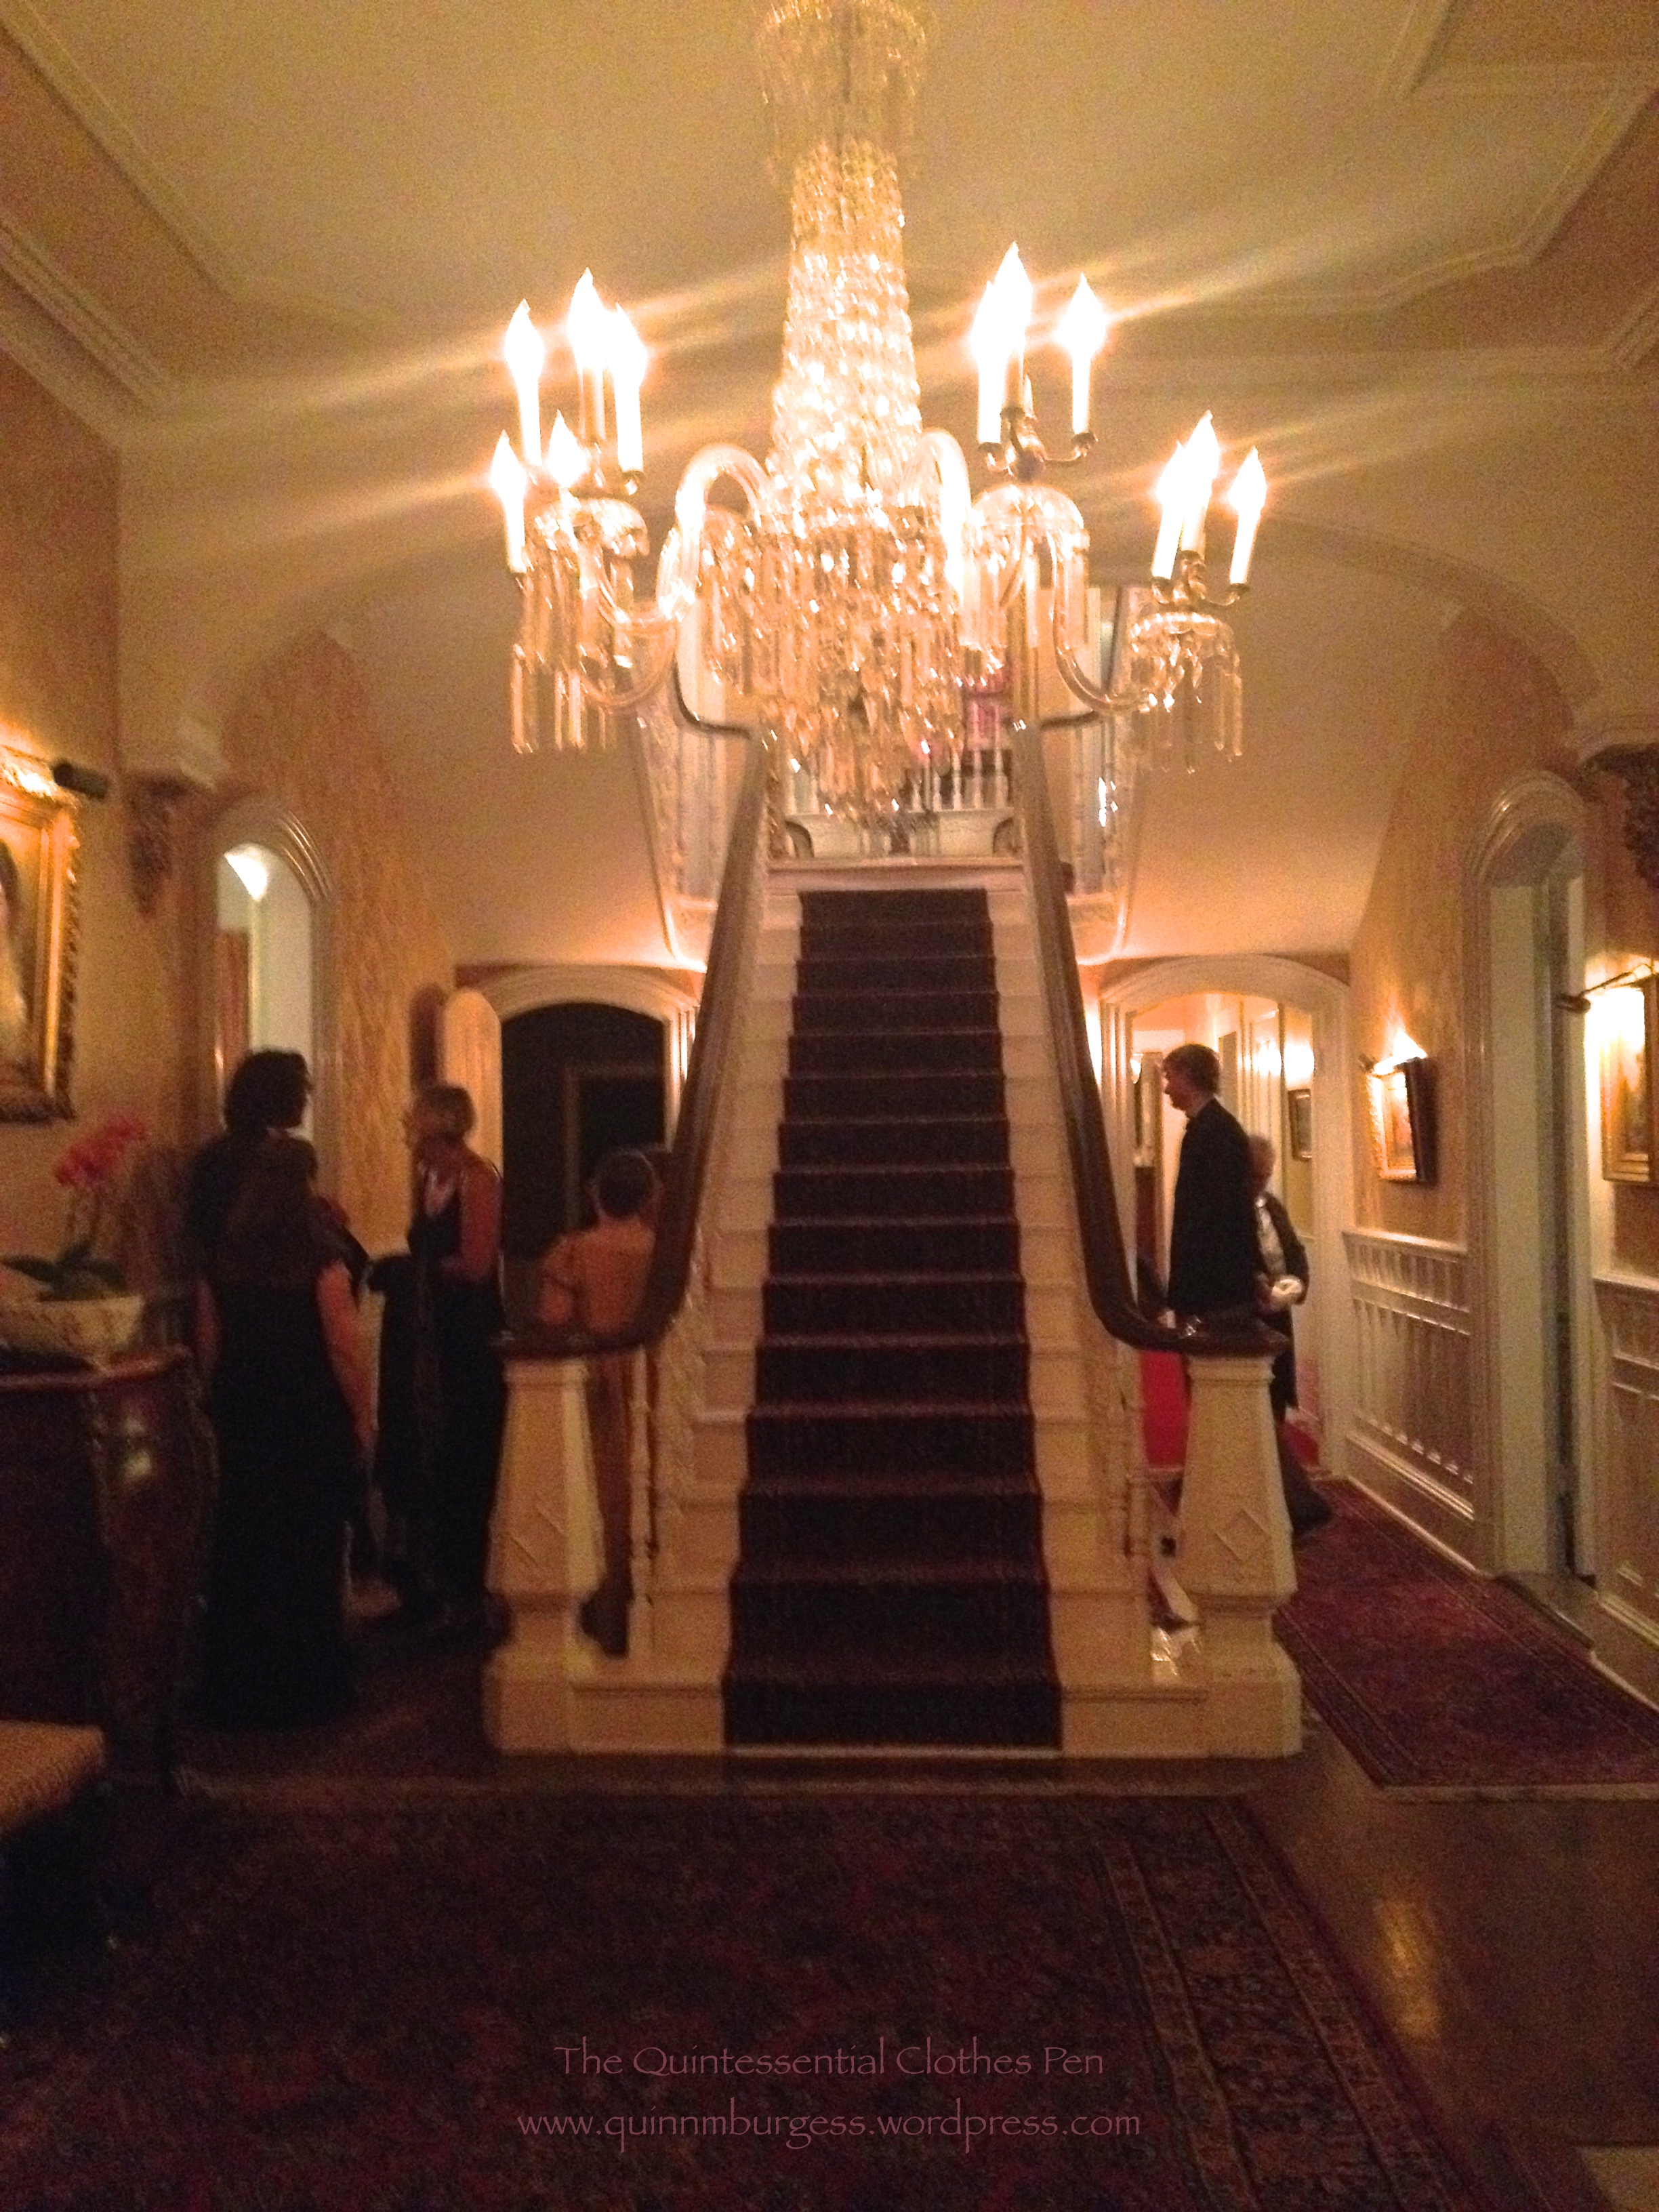
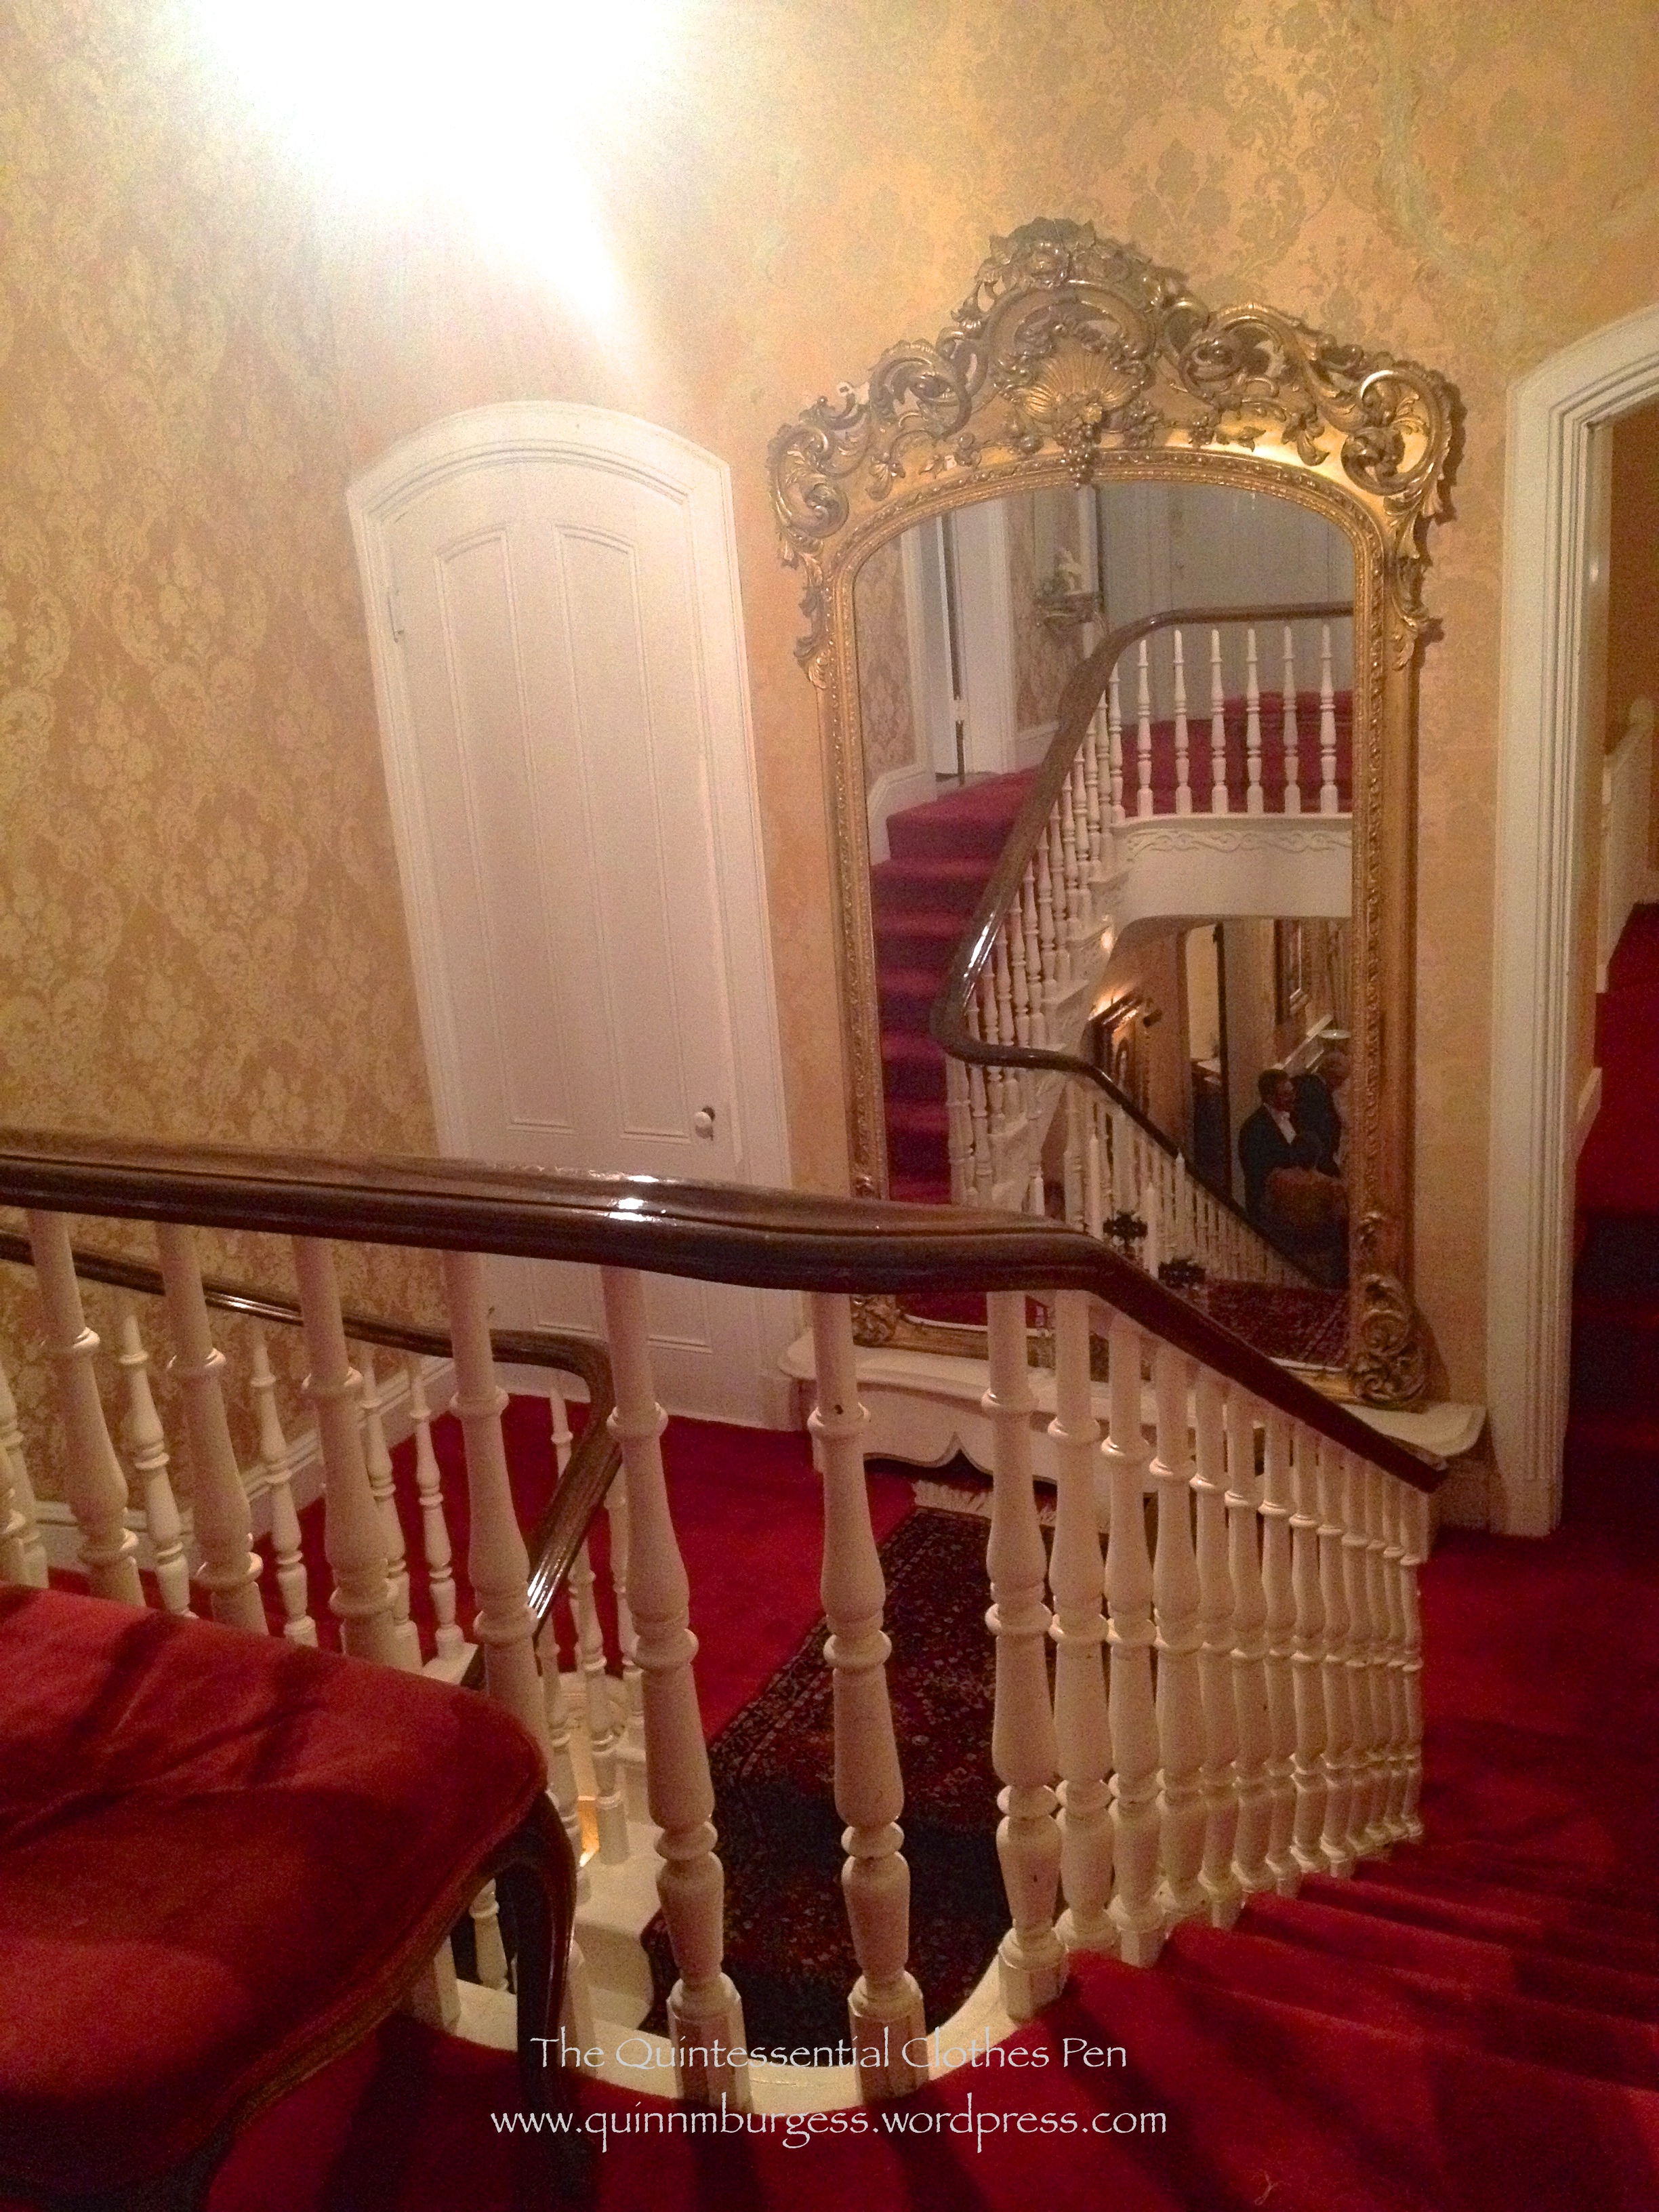
Early in August, I was able to attend two events that were part of Vintage Victorian’s Nahant Vintage Dance Weekend. The first was a lovely late 19th/early 20th century soiree at Egg Rock, a lovely historic house with beautiful furnishings built in 1864 right on the cliffs overlooking the ocean (the second was the Grand Ball, but I’ll save that for another post). The event was quite elegant and included catered food and drinks. I’d like to take you with me to wander around the house, if you’re inclined. (I apologize for the slightly blurry pictures, the phone camera didn’t like the lighting much.)
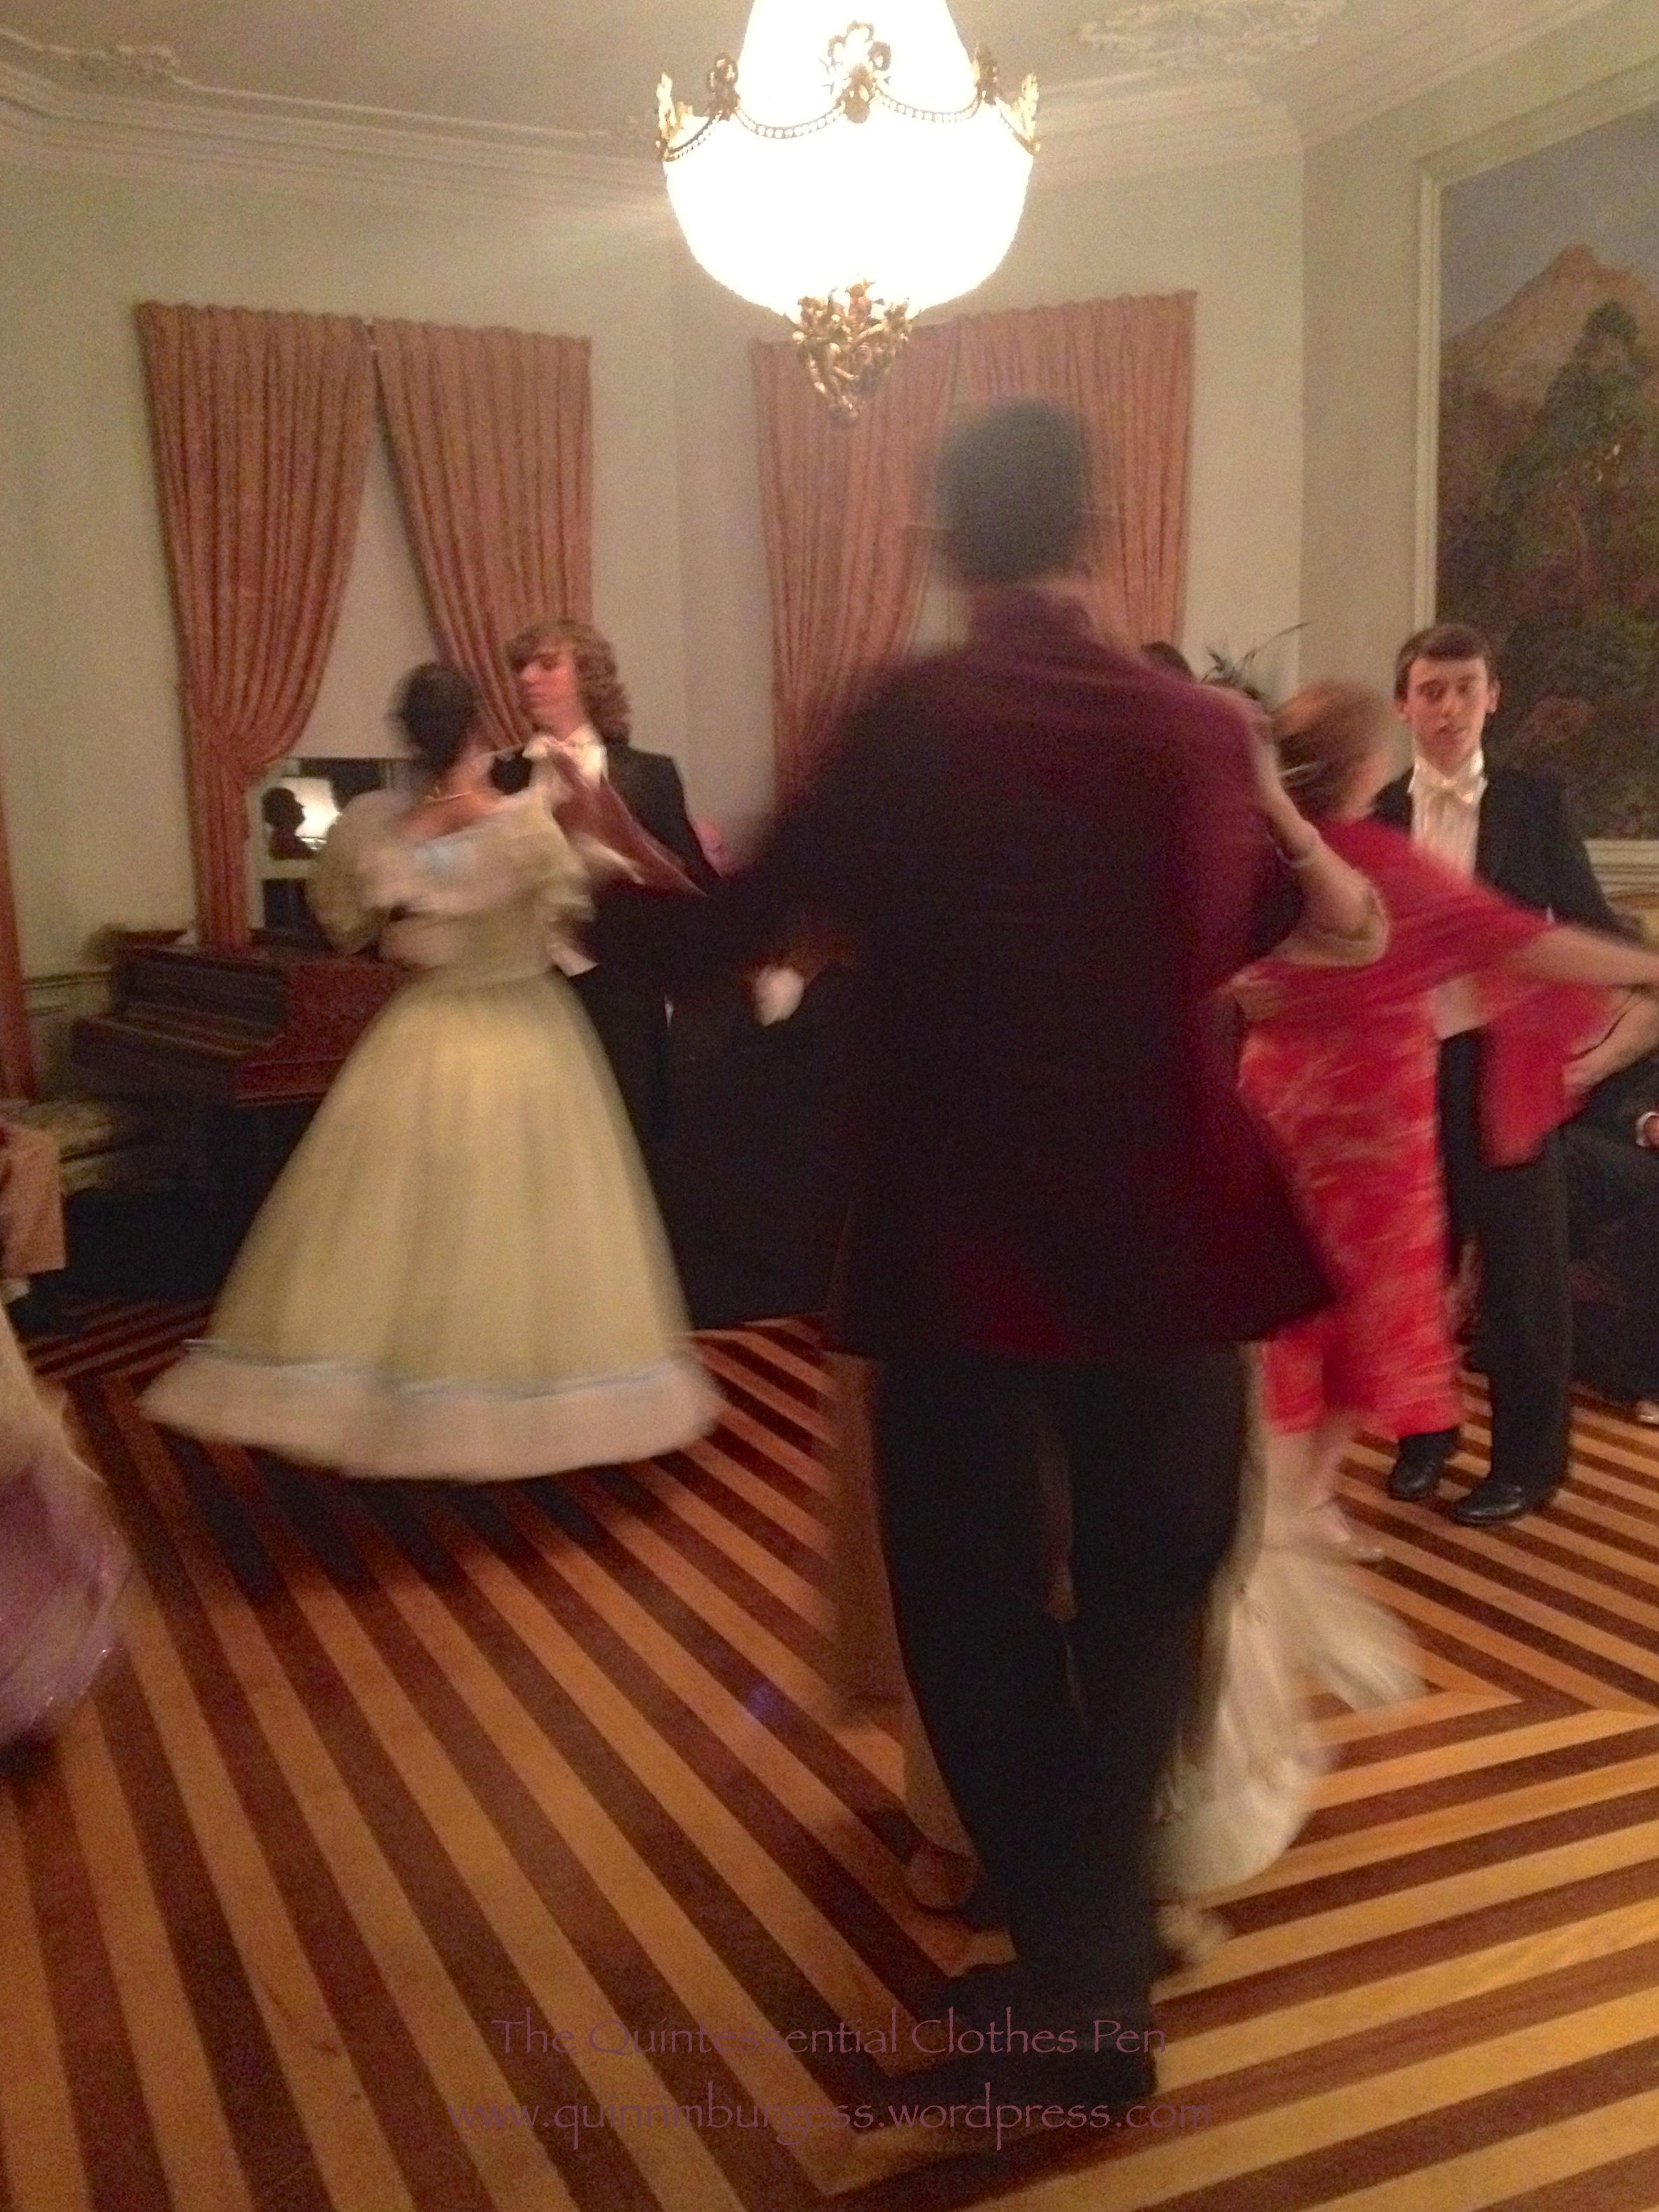
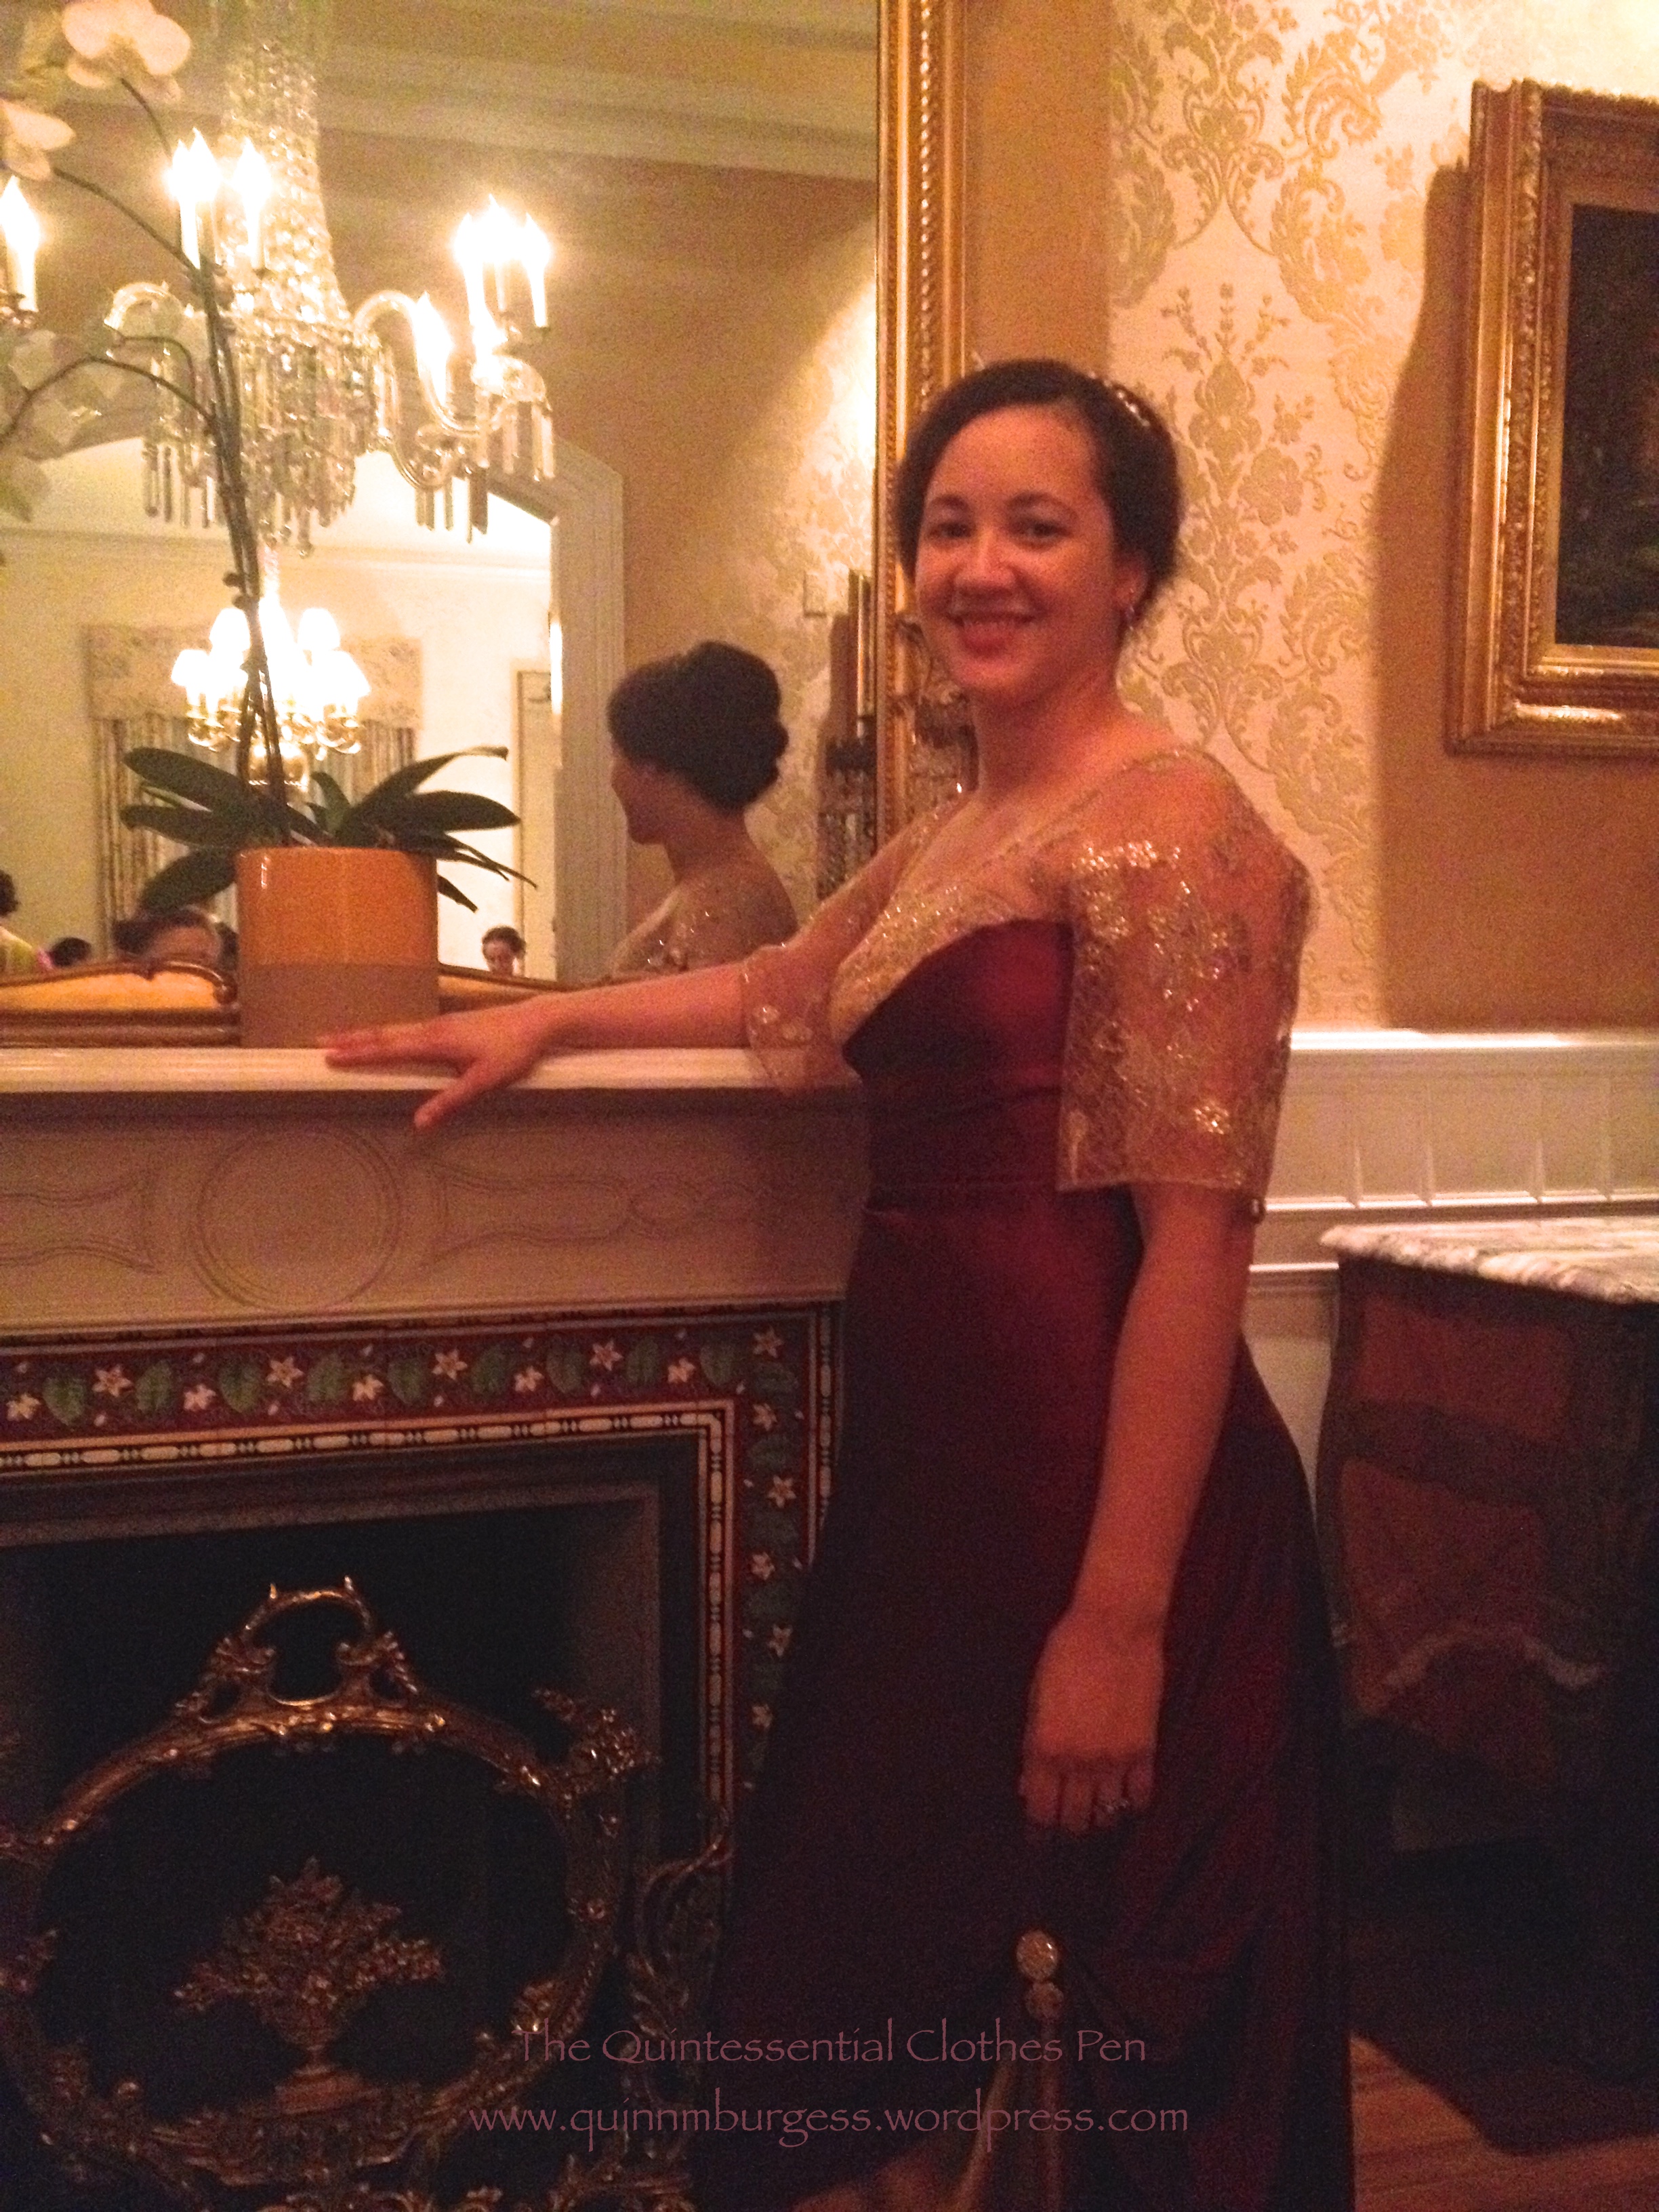
A lovely staircase in the front hall greets us, as is is typical of a mid-19 century home.Beautiful architectural details grace all aspects of the house: see the lovely gold damask wallpaper and the decorative woodwork along the stair moulding?At the top of the stairs there is another split set of stairs leading up to a cute balcony and bedrooms overlooking the ocean.Standing at the top of the balcony we can look into the fabulous tall mirror down the stairs into the hallway below.Back downstairs in the entrance hall we can appreciate another lovely mirror, beautiful fireplace, and elegant grandfather clock.Off to the opposite side of the hall from the fireplace is a small ballroom with a distinctive wood floor. Dancers whirled in small circles here all evening to the tune of live music.The ballroom’s walls were adorned with large pastoral paintings which sadly were peeling and in need of conservation. There was also this elegant sofa on one side. I love that the colors in these dresses complement each other so well and that the attitudes of each person are so distinctive and pretty.And here I am, wearing my burgundy and gold 1912 evening gown, which harmonized beautifully with the colors in the entry hall. See that wallpaper? I love it!
I was rather undecided about attending this event until the last moment, so I did a reprise of my hair style from July using the beaded gold necklace as a headband, but did it hastily and without a curling iron, so the texture was my normal wavy frizz rather than defined waves and curls. I’m glad I attended, though, because I had a lovely time and really enjoyed the house. I hope you also enjoyed this short visit to Egg Rock!
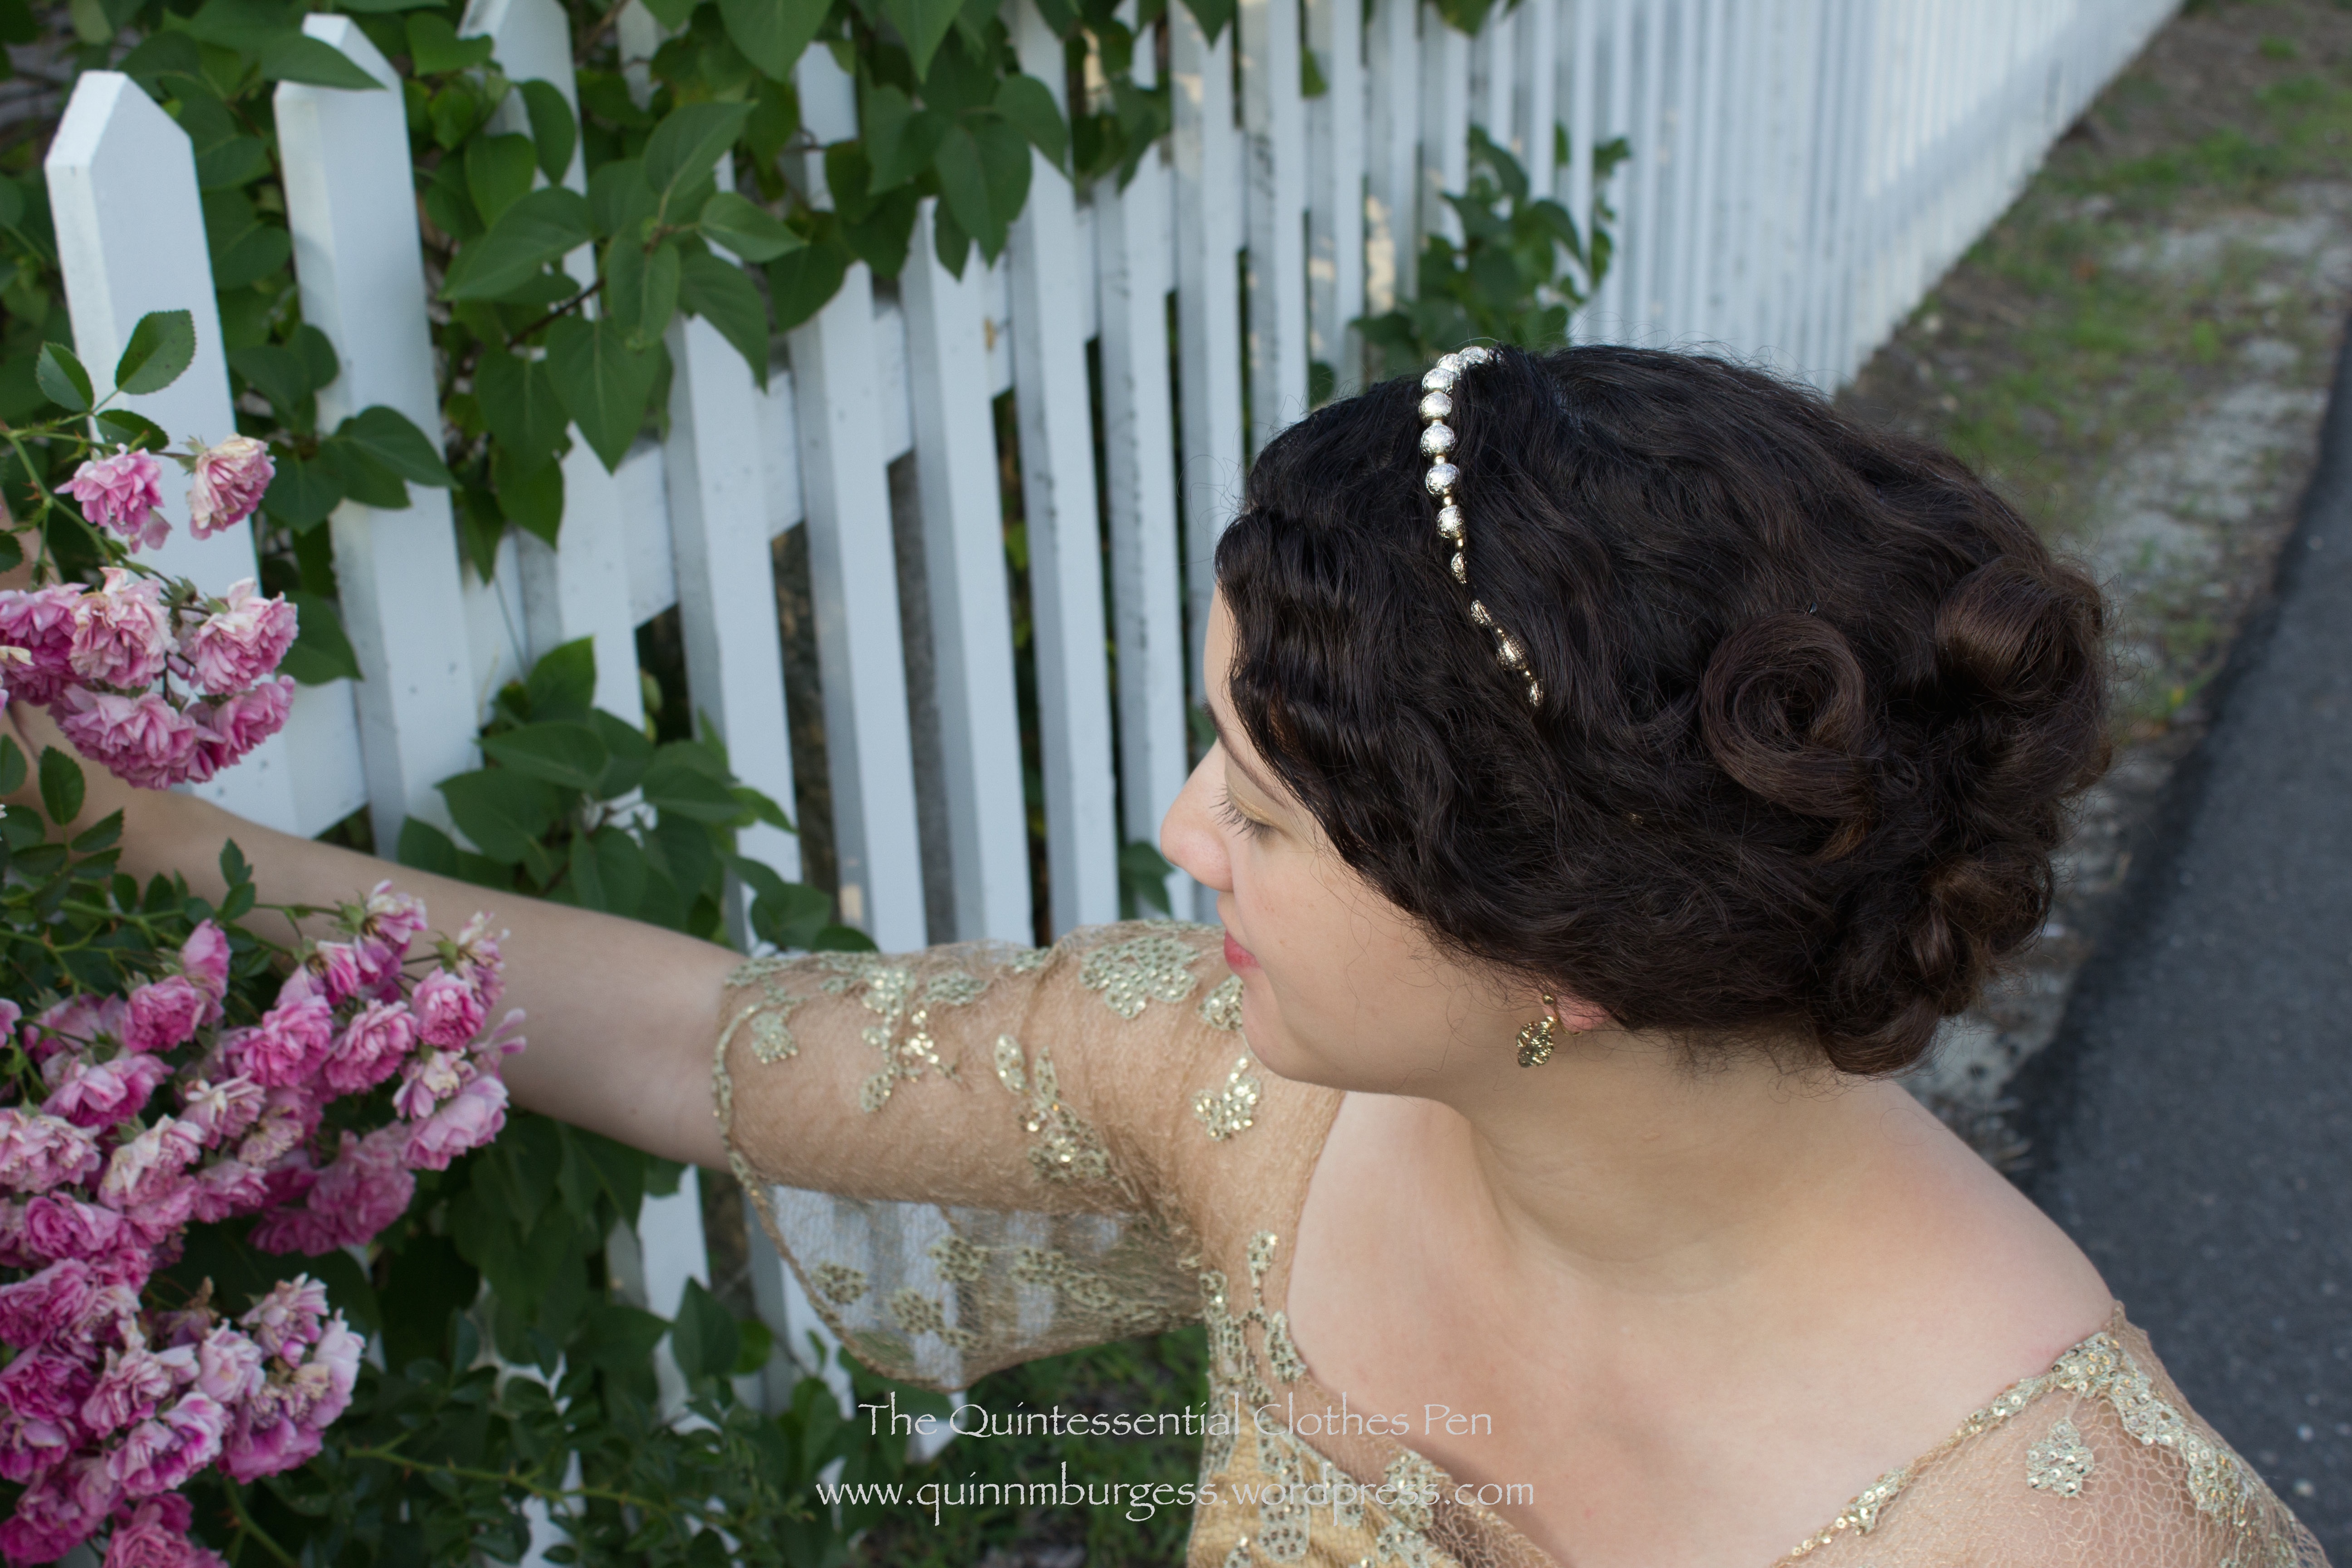
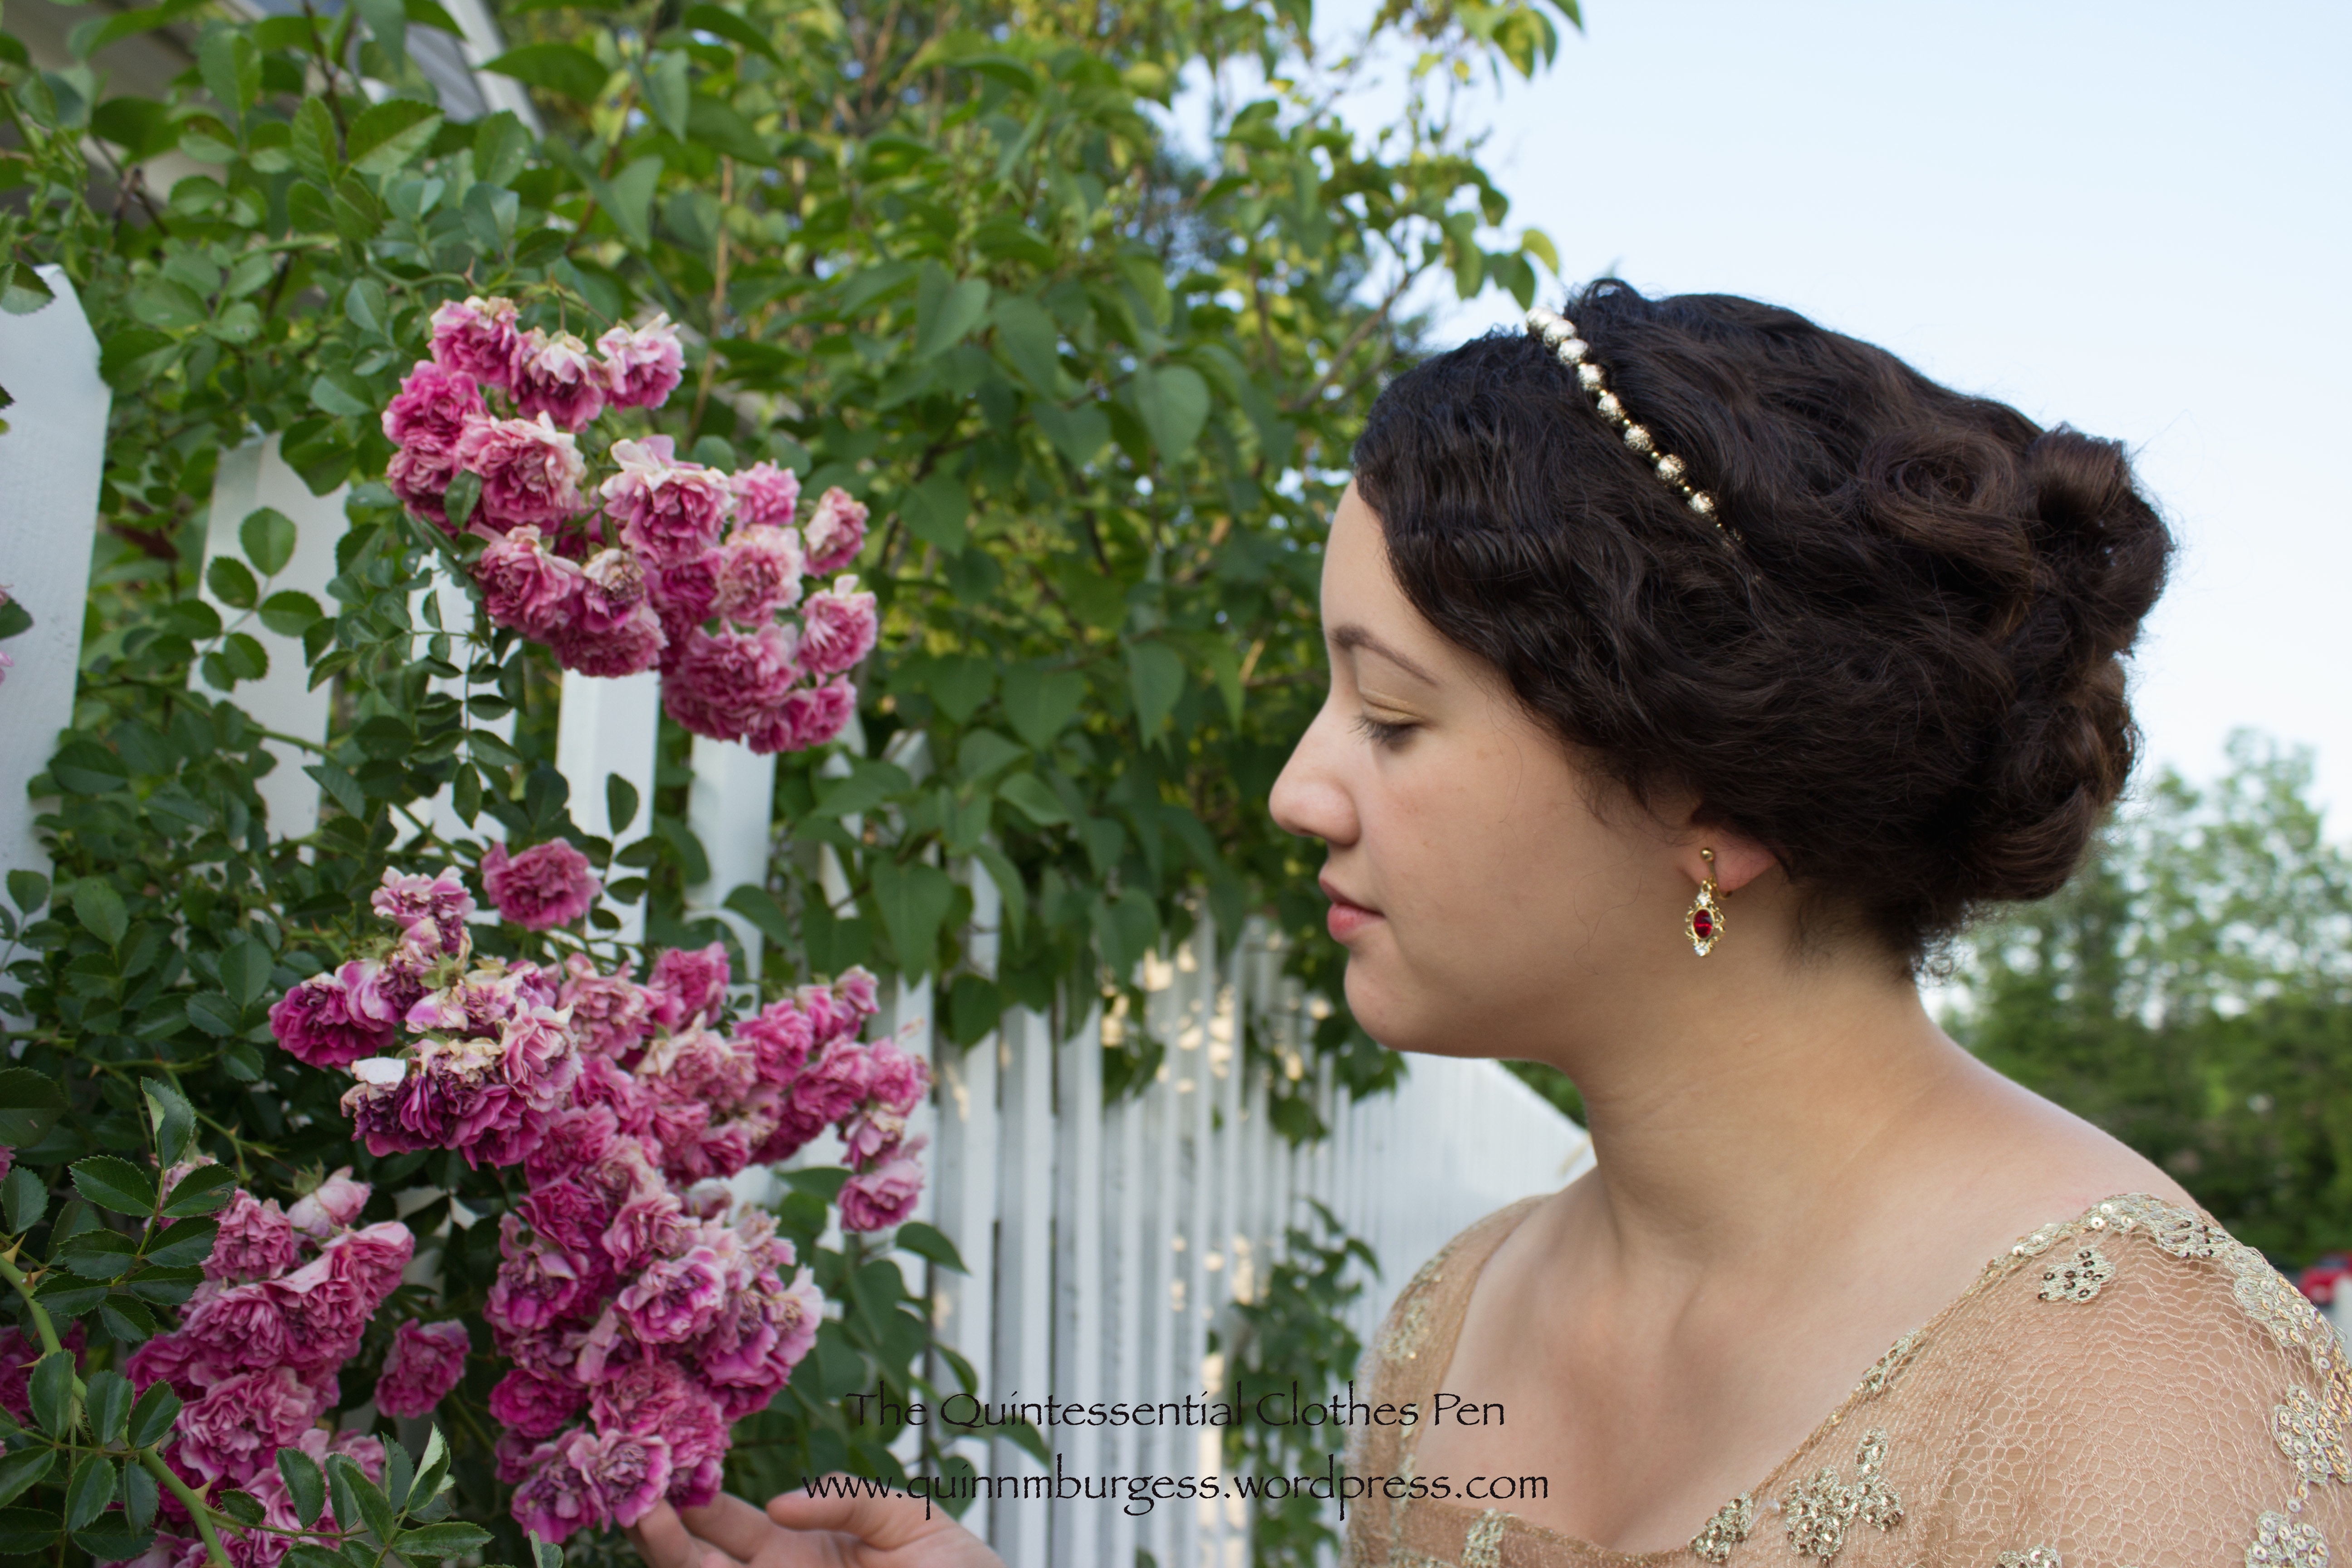
It’s been over a month now, but back in July I attended a Ragtime ball that proved to be great fun. I wore my tried-and-true 1912 burgundy and gold evening gown (while it’s nice to have new things, it’s also nice to pull beautiful things out of the closet, too!). Despite wearing a dress I’ve worn before, I tried a new style with my hair, including a repurposed (and therefore new-feeling) accessory.
I was inspired by hairstyles like these from the early 1910s. There are more examples on my Hair: 1900-1920 Pinterest board as well, if you’re interested. What I took away from these images was the use of a headband of some sort, the rather large airy shape, and the defined waves and curls.
c. 1912 Lily ElsieLa coiffure française illustrée. (1910)
Of course, I decided to try this out the afternoon of the event so I hadn’t thought ahead in terms of what to use for a headband. After casting around a bit I thought of a bead necklace I’d purchased a few years ago that ties with a ribbon. Why not use that as a headband? In addition to the bead-necklace-as-headband, I wore my Downton Abbey Collection earrings, which are quite lovely and matched my dress very well in color and style.
It took rather a lot of time to create the front waves with my curling iron. The back loopy curls were time consuming, too, though fun until my arms started to hurt from being held up for extended periods of time.I love how defined the curls came out, though, and while I do think there’s a slightly flat spot at the back of my head I generally think the silhouette is what I was aiming for.Waves, curls, and earrings!
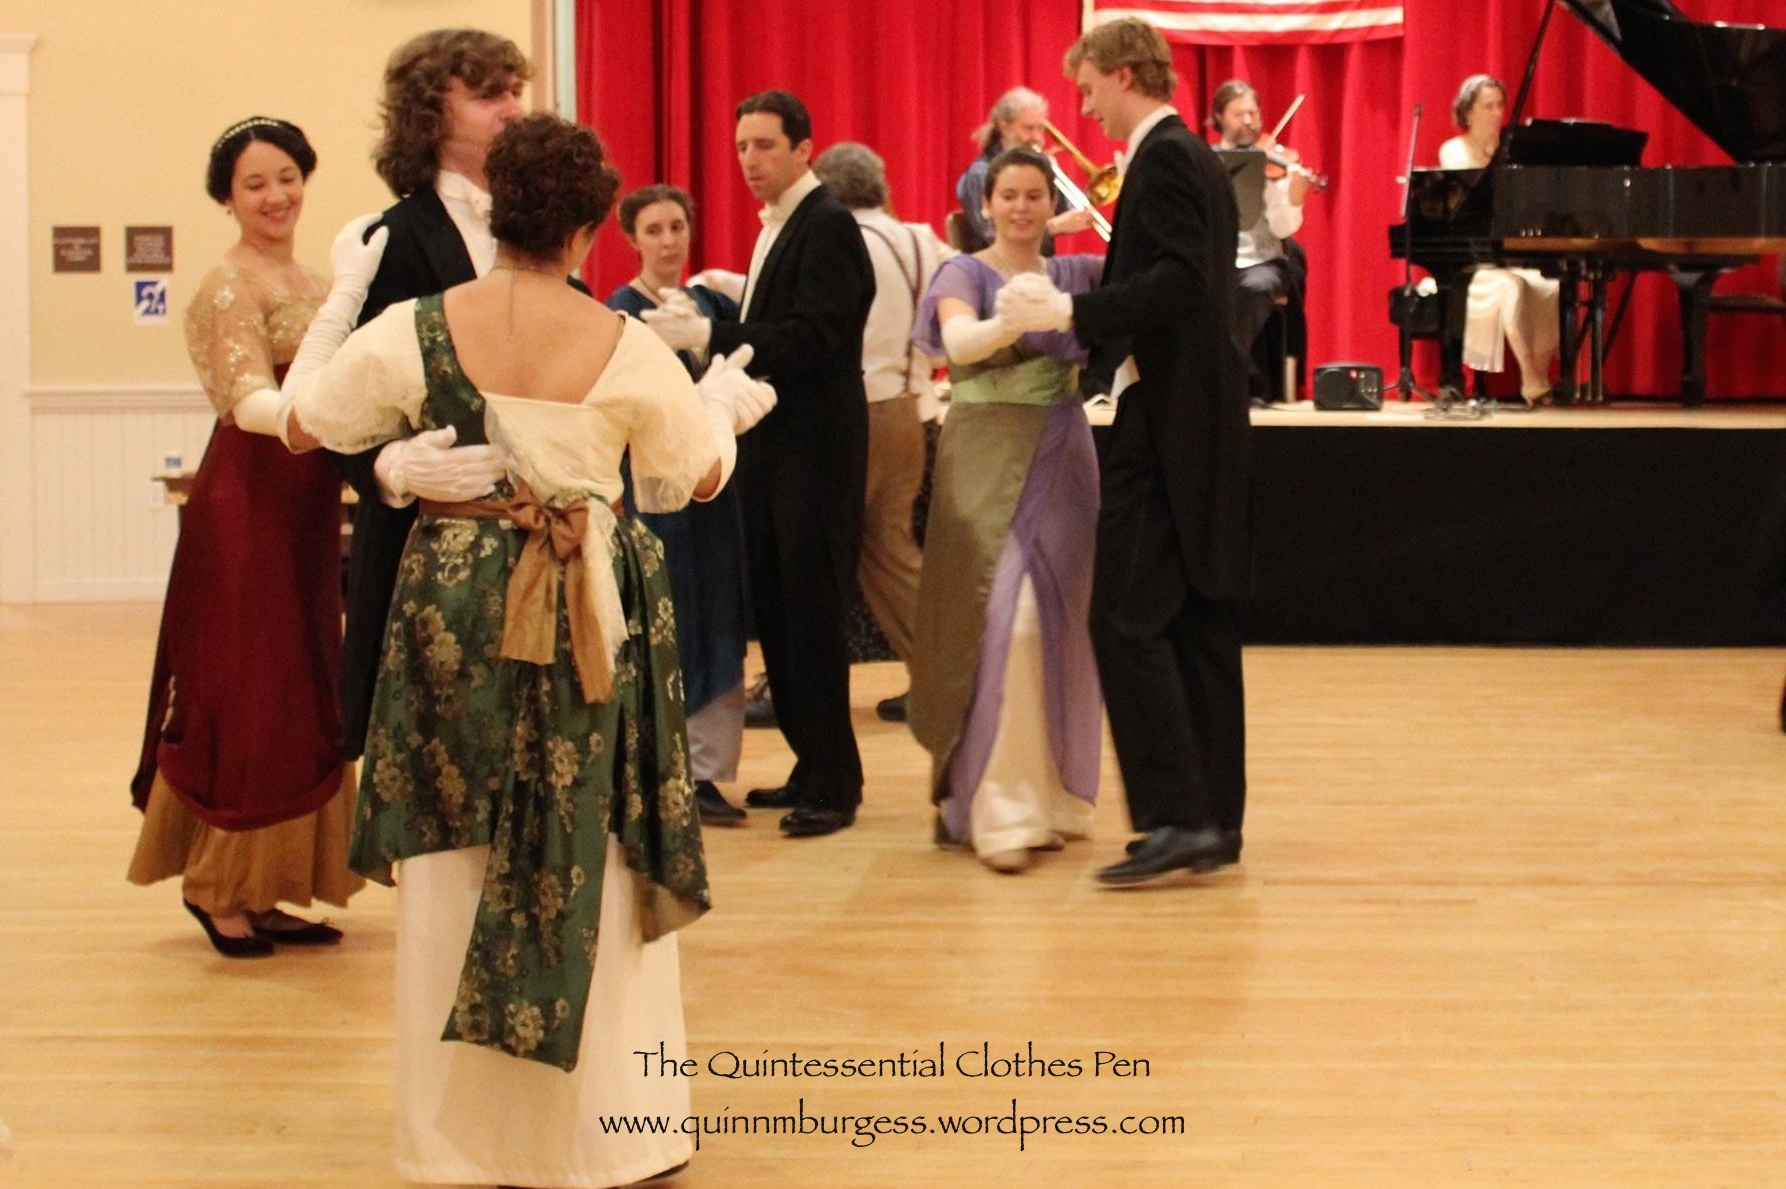
And here is the dancing in action! People were very well dressed and enthusastic at this event and really seemed to have a good time. For most dances there was hardly anyone sitting out! That’s great, especially when the crowd is a mix of ages.


 One of the parts of the event I enjoyed most was exploring the grounds, which afforded a number of lovely vistas for photos.