Over a year ago, I was reading this post on Miss Victory Violet’s blog and fell in love with her skirt. I decided then and there that I wanted one for myself a similar style, except in wool. So I went on the hunt and found a fabric I thought would do the job back in October. I was determined not to let is languish in the stash as many of my fabric purchases do and so over the Thanksgiving holiday weekend I made a skirt! I’m very pleased that I made something so shortly after the buying the fabric, especially a modern garment.
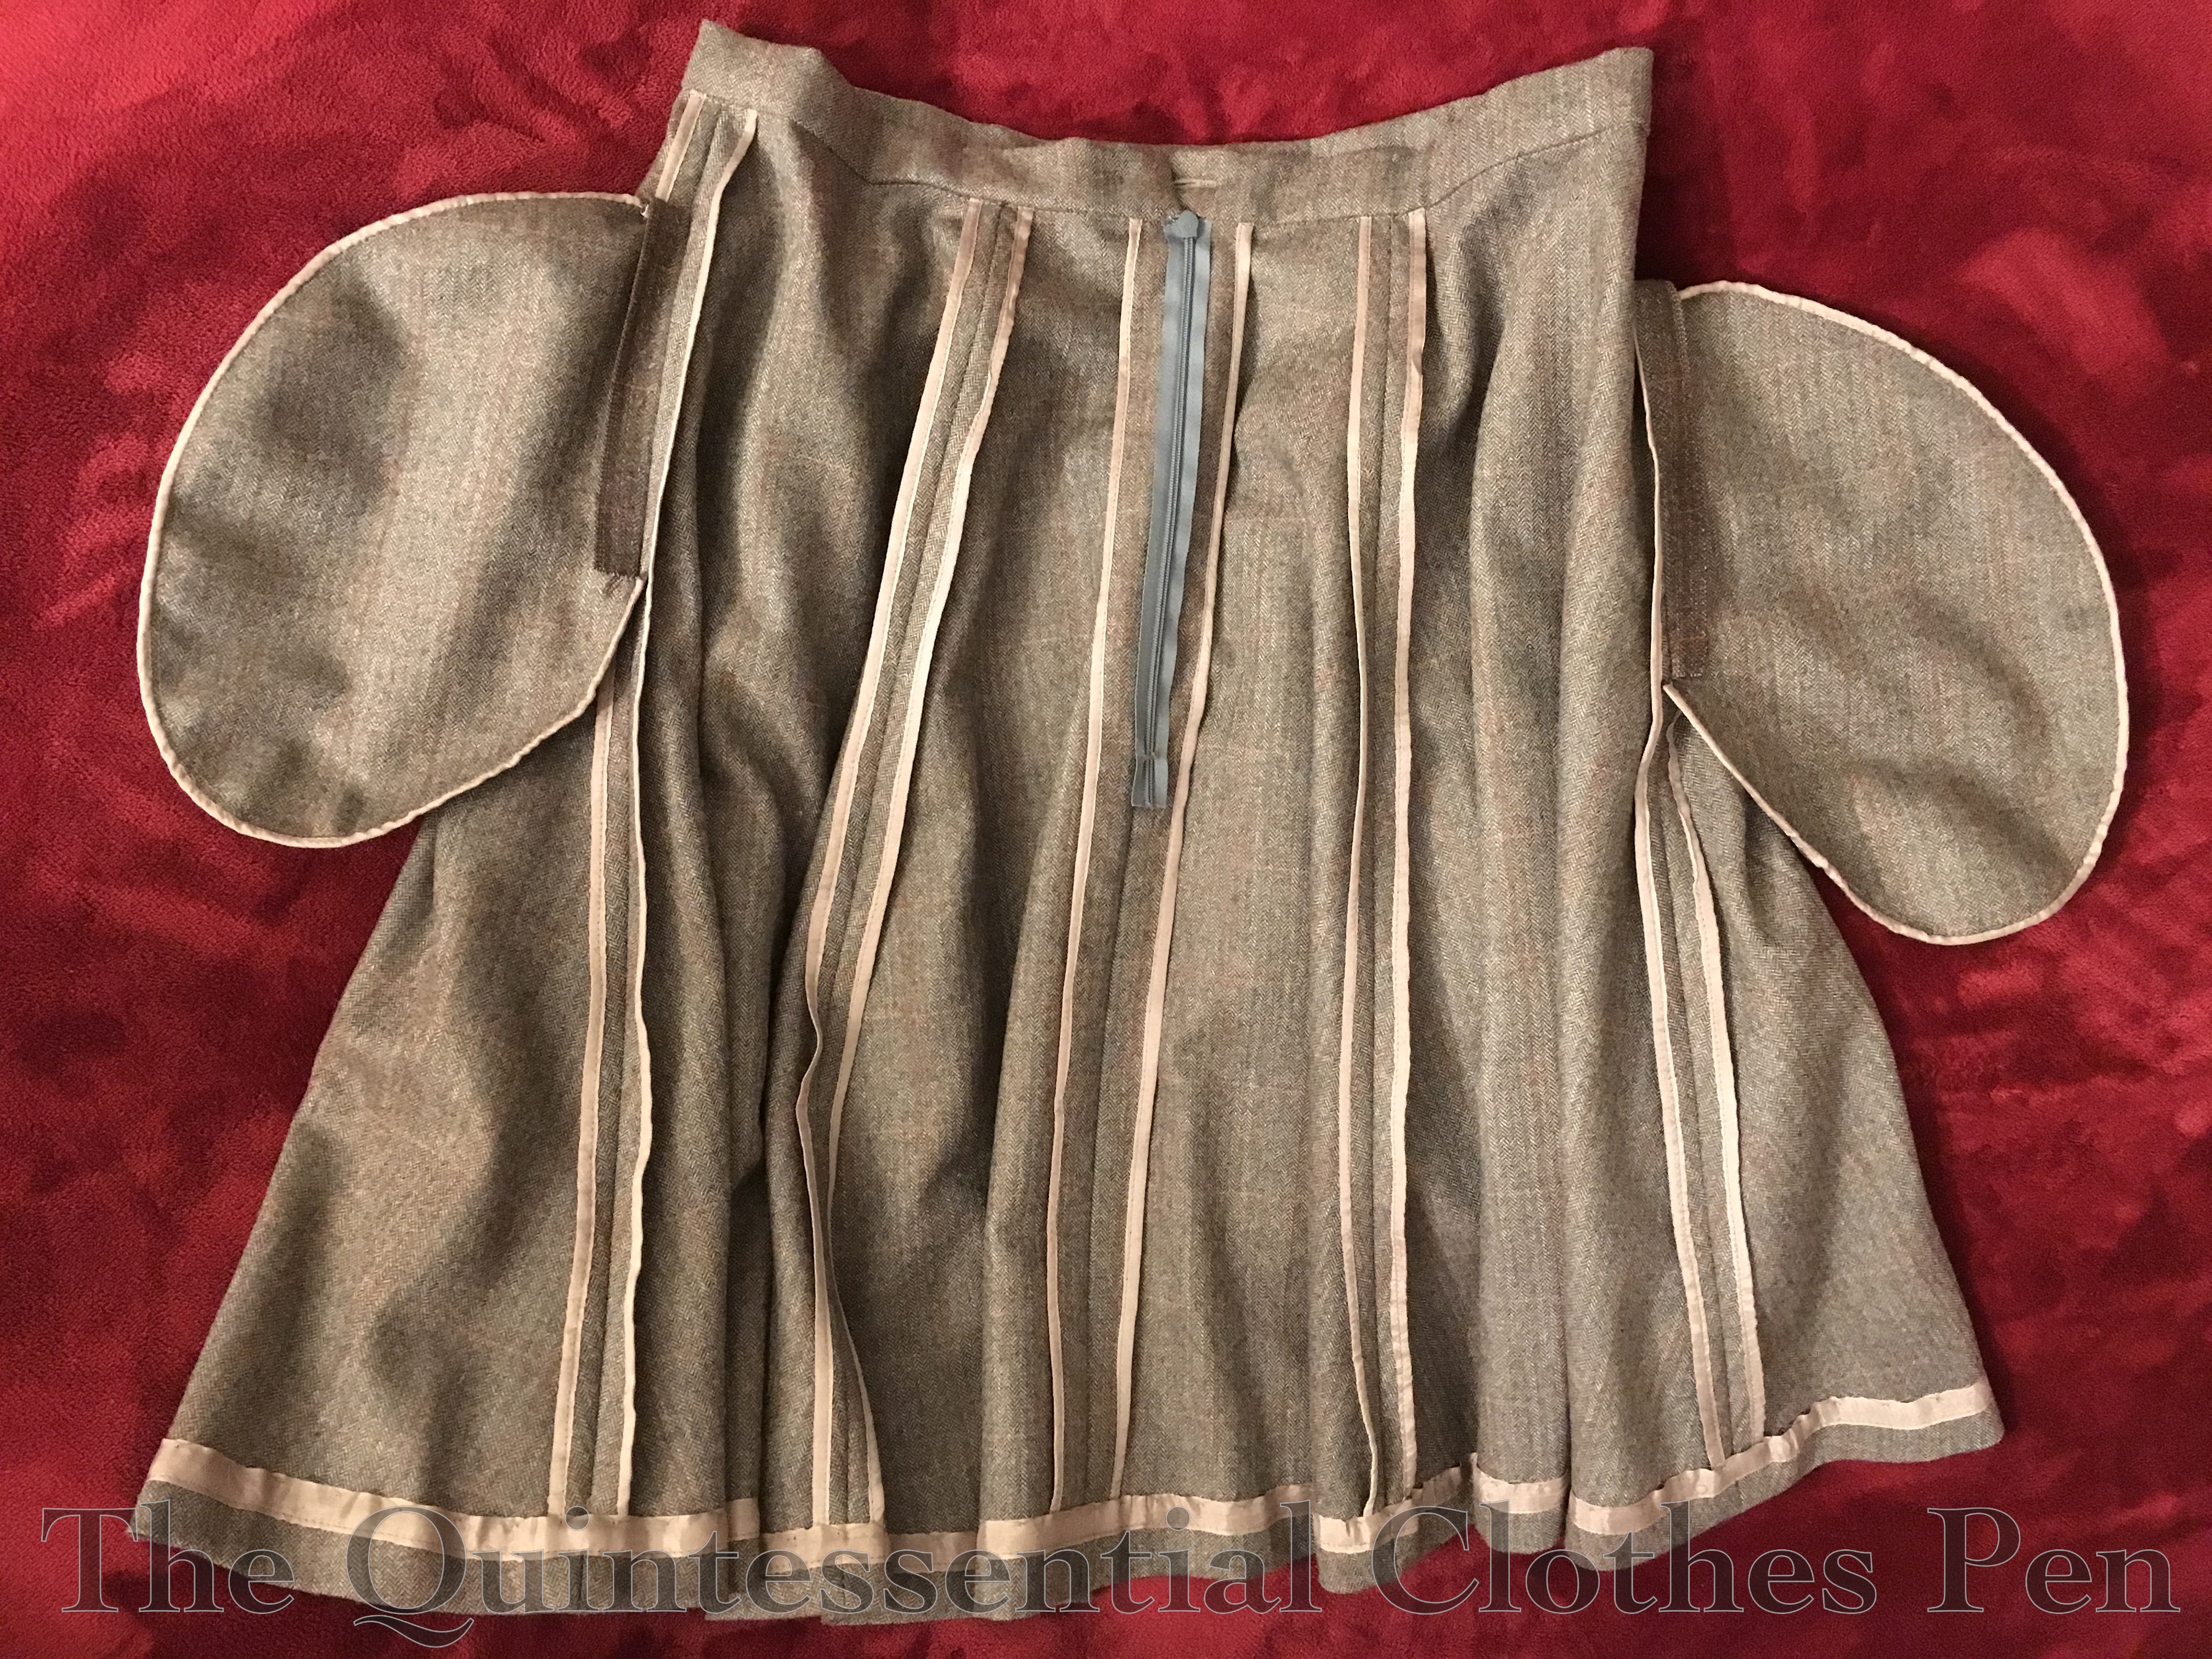
The fabric is brown and grey herringbone with a light windowpane in red, pink, and blue. As you can see, the colors blend into more of a subtle texture than you might think when viewed from a normal distance. It’s perhaps more grey than I was envisioning, but that just means a more true brown skirt needs to be in my future, right?
The skirt closes with an invisible zipper and a button tab on the waistband. I did a rather good job matching the pattern while cutting and sewing, I think!
The skirt is a full 3/4 circle, divided into six gores in order to keep the windowpane under control. I took the time to bind each edge with taupe hug snug, as well as the hem and around the pocket bags. It certainly added time, but makes for such a tidy interior!
Pockets! The skirt has lovely in seam pockets. I had to get a picture showing them off in use.
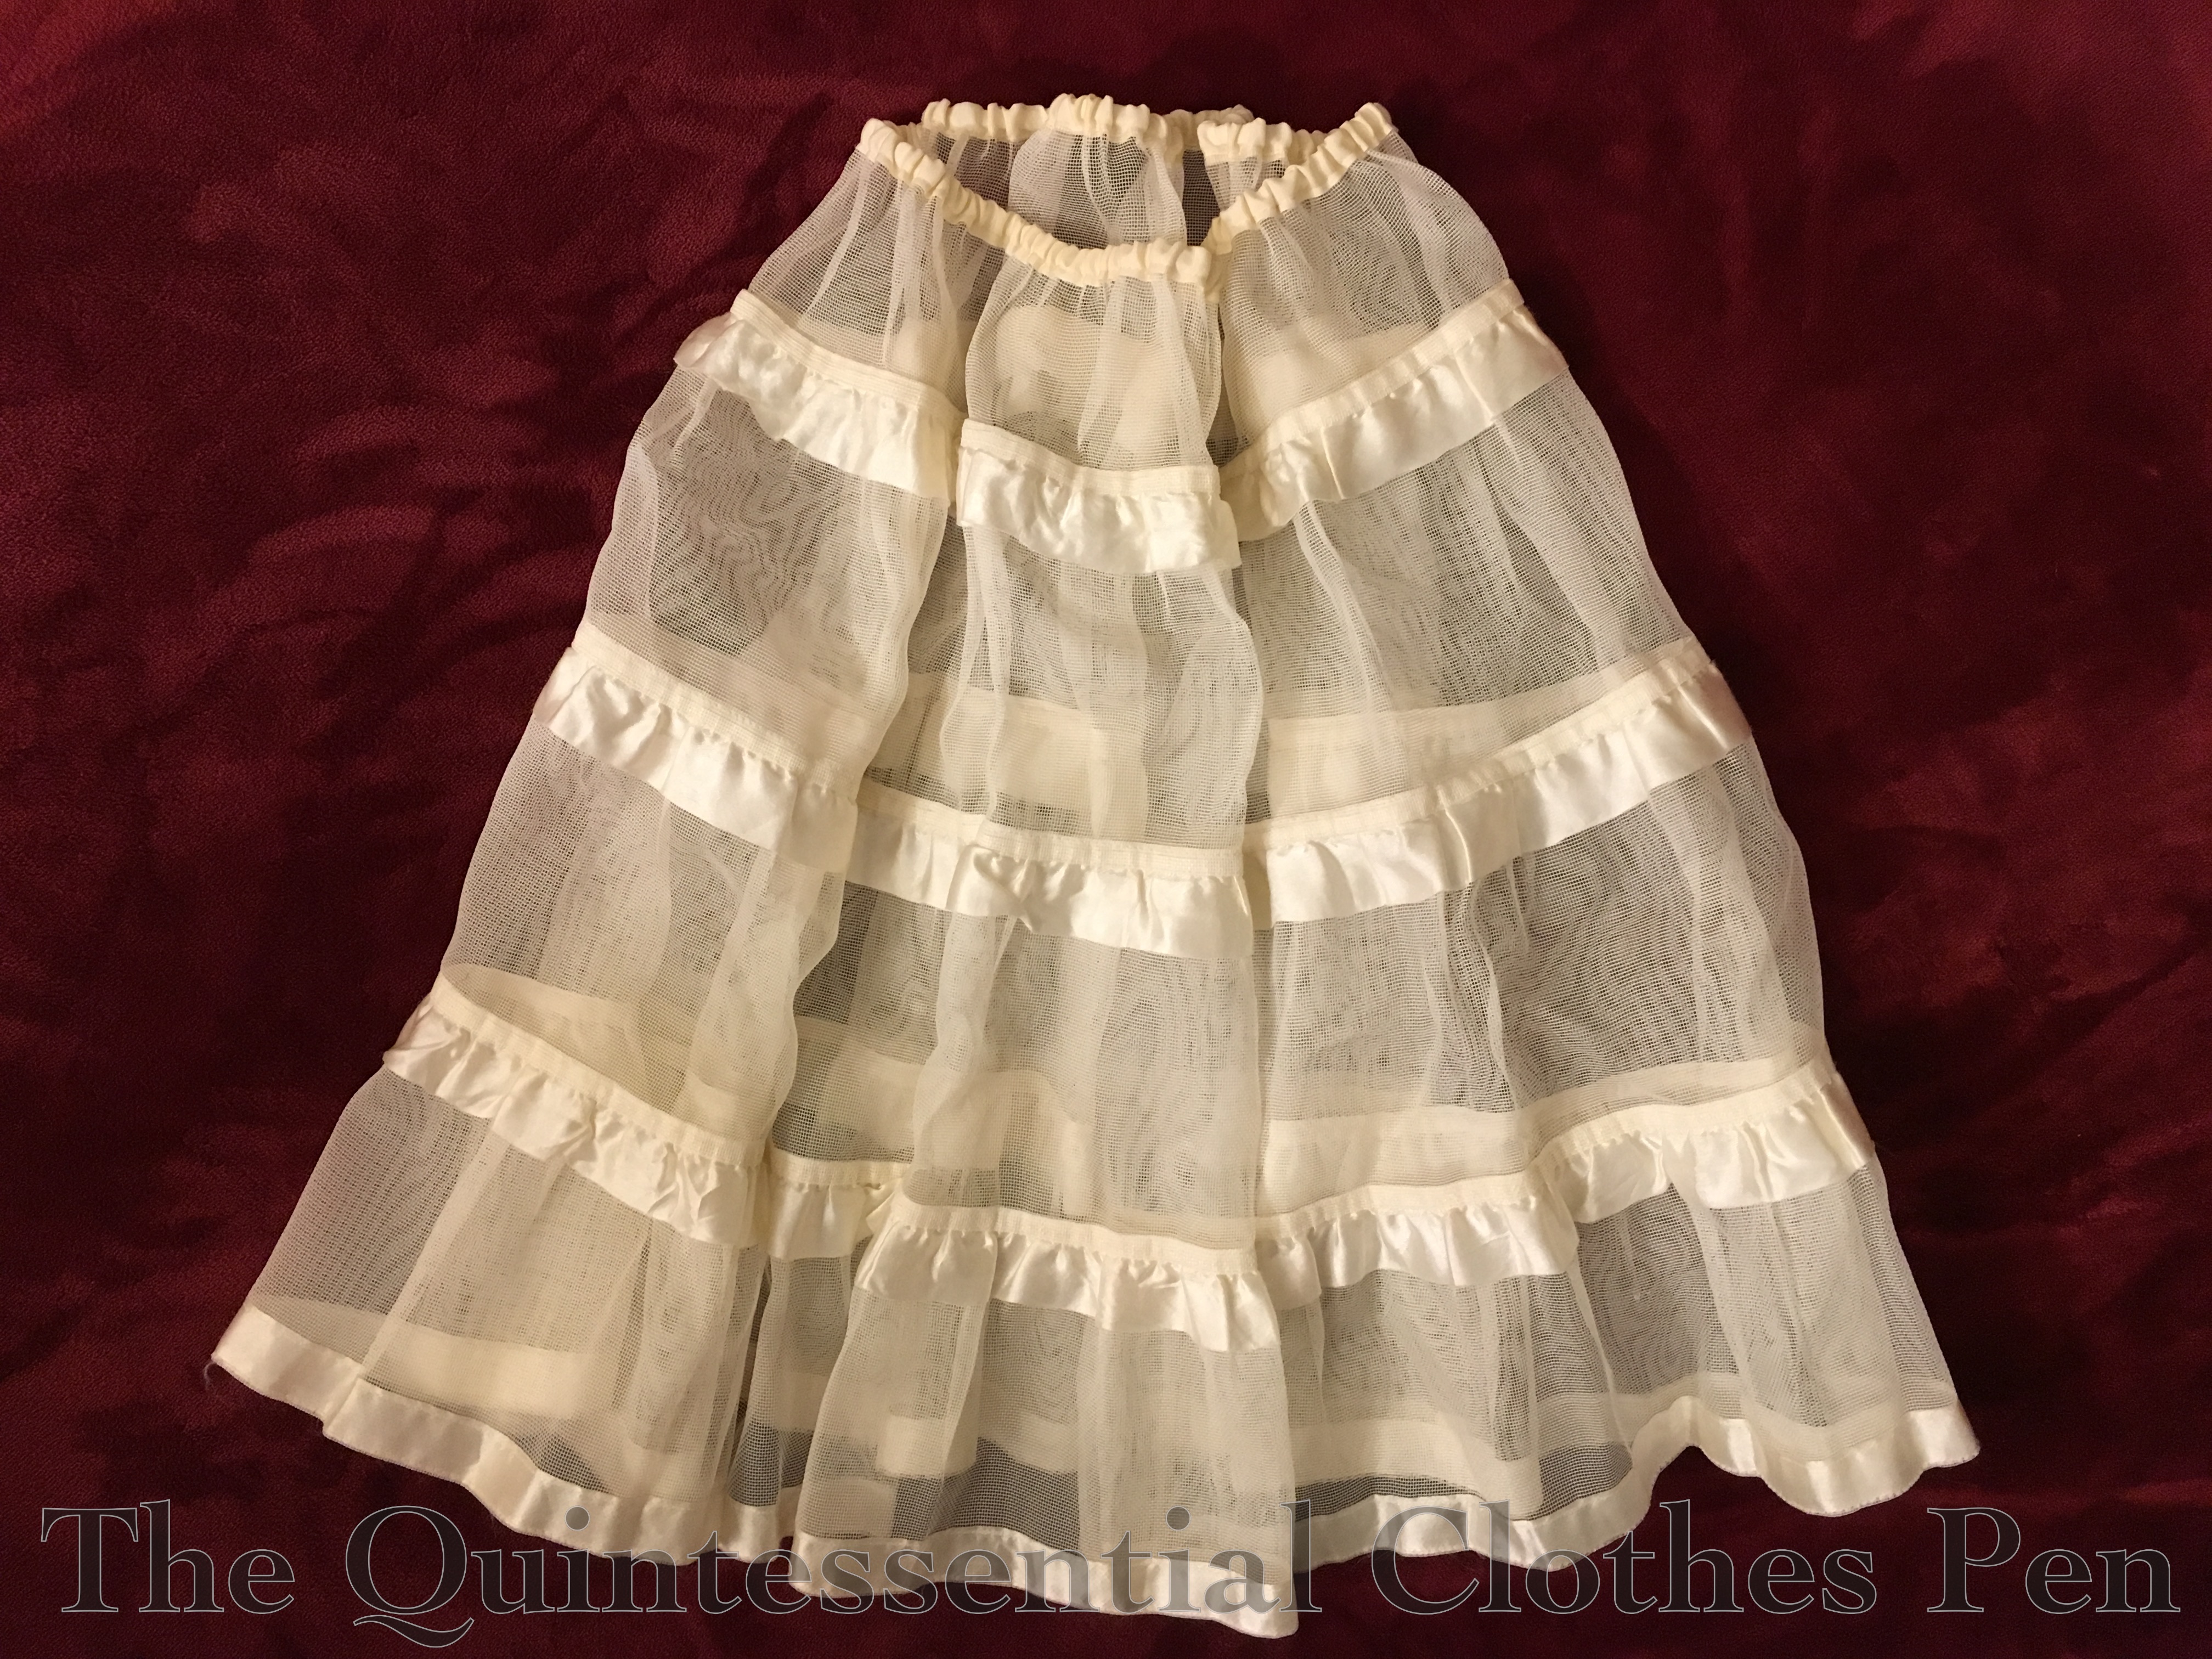
In order to help it keep the skirt keep an A-line shape, I’m wearing a recently acquired petticoat with it. I was inspired to get the petticoat after wearing my Bubble Dots skirt for modern life and feeling that the skirt was too limp. I had saved Lily’s petticoat comparison and went back to it to see what new inspiration I might have. I was re-inspired by her vintage petticoat and set off on a search to find my own for a reasonable price. There are actually sooooo many pretty vintage petticoats out there, but I stayed on track and only purchased the one, which is a slightly stiff netting. The elastic at the top was totally dead, but it was too small for me and too long anyway, so I cut off a few inches at the top, made a new casing, and inserted new elastic. Voila!
I’m very pleased with the subtle shape this petticoat provides. It’s enough to make my fuller skirts look A-line and more flattering, but not enough that a modern person would think that I’m wearing a petticoat!
And the skirt? It’s great fun to wear. Such a nice, swishy shape. And it’s warm! Perfect for cold winter weather. Especially when worn with my somewhat new Victoria carriage boots! (They’re subtly making an appearance in the first picture and will be making more appearances. I’m wearing them pretty often!)
As the end of this year draws nearer, I feel the urge to complete my plan to share all the details of my 1814 Vernet Ensemble before the end of 2016. In order to do that, I have the smaller garments to discuss (petticoat and muff) and the witzchoura itself, which I know some people have had questions about for probably about a year. Sorry to keep you waiting!
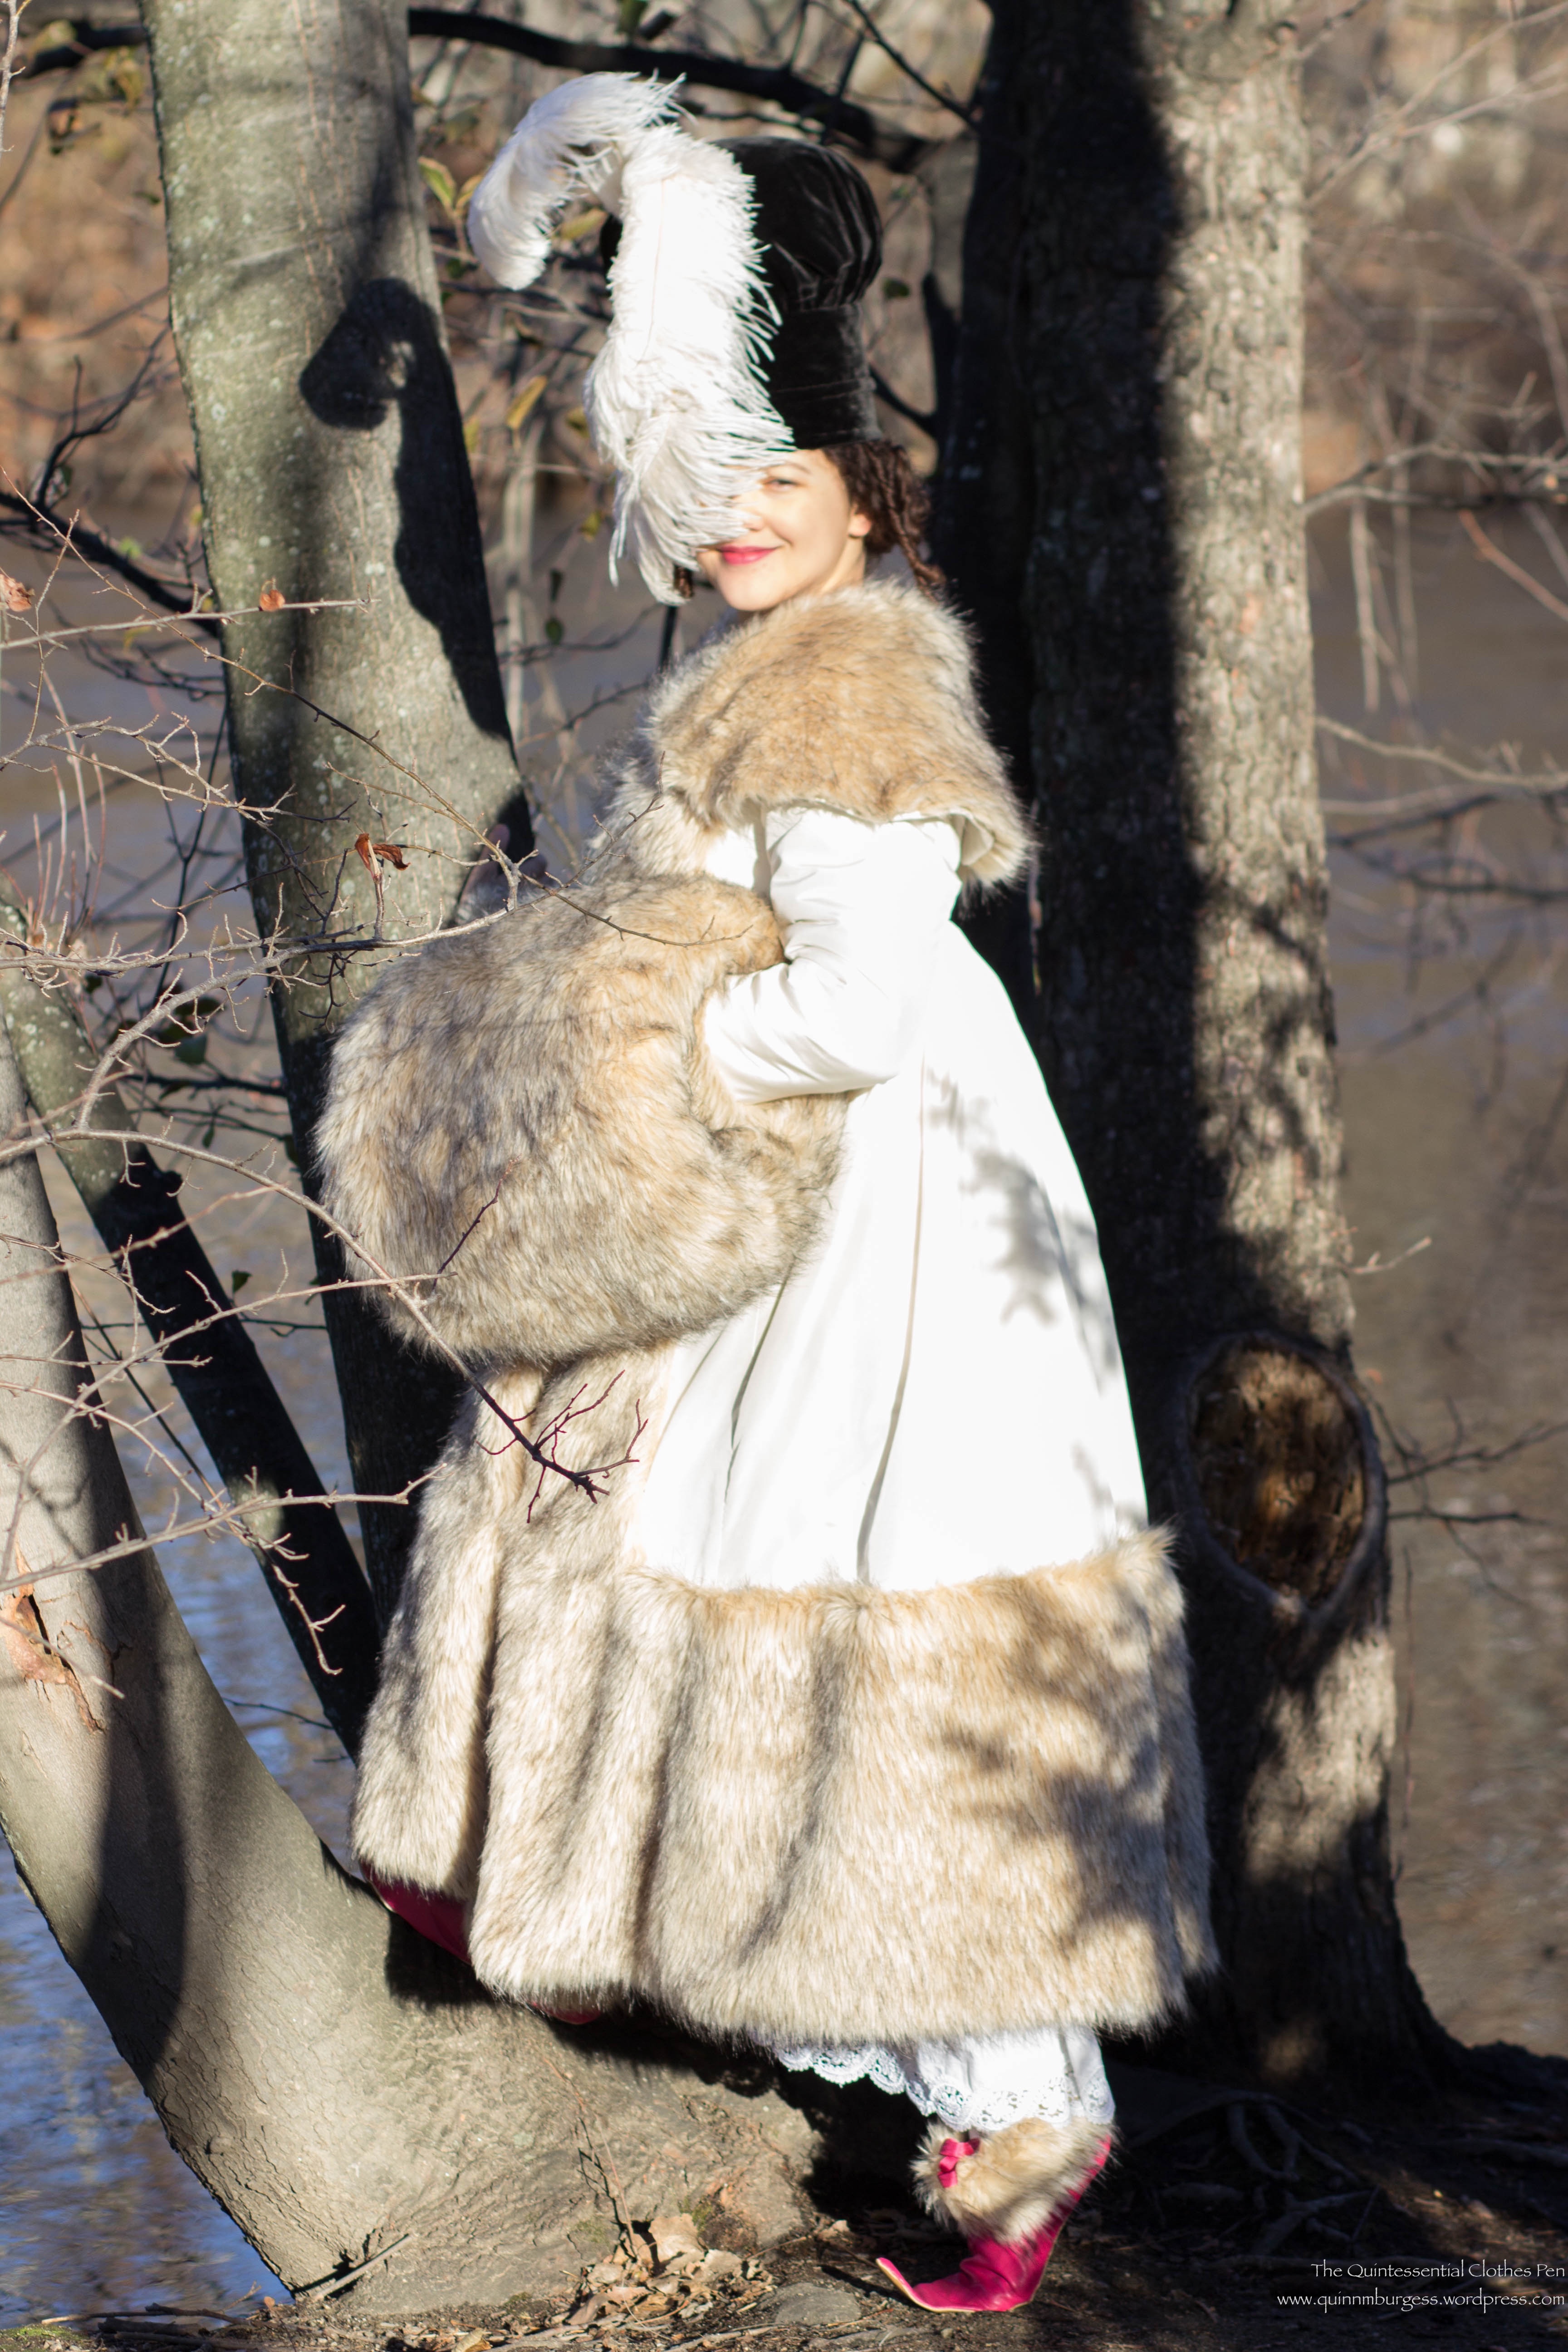
As I’m saving the witzchoura to be the grand finale, today I want to share some details about the petticoat and muff. First, here are some repeat pictures of the full ensemble in case you’ve started reading since this project was unveiled. Both of these pictures are from my Vernet Project photo shoot in 2015. They give you a good glimpse at the petticoat and the muff.
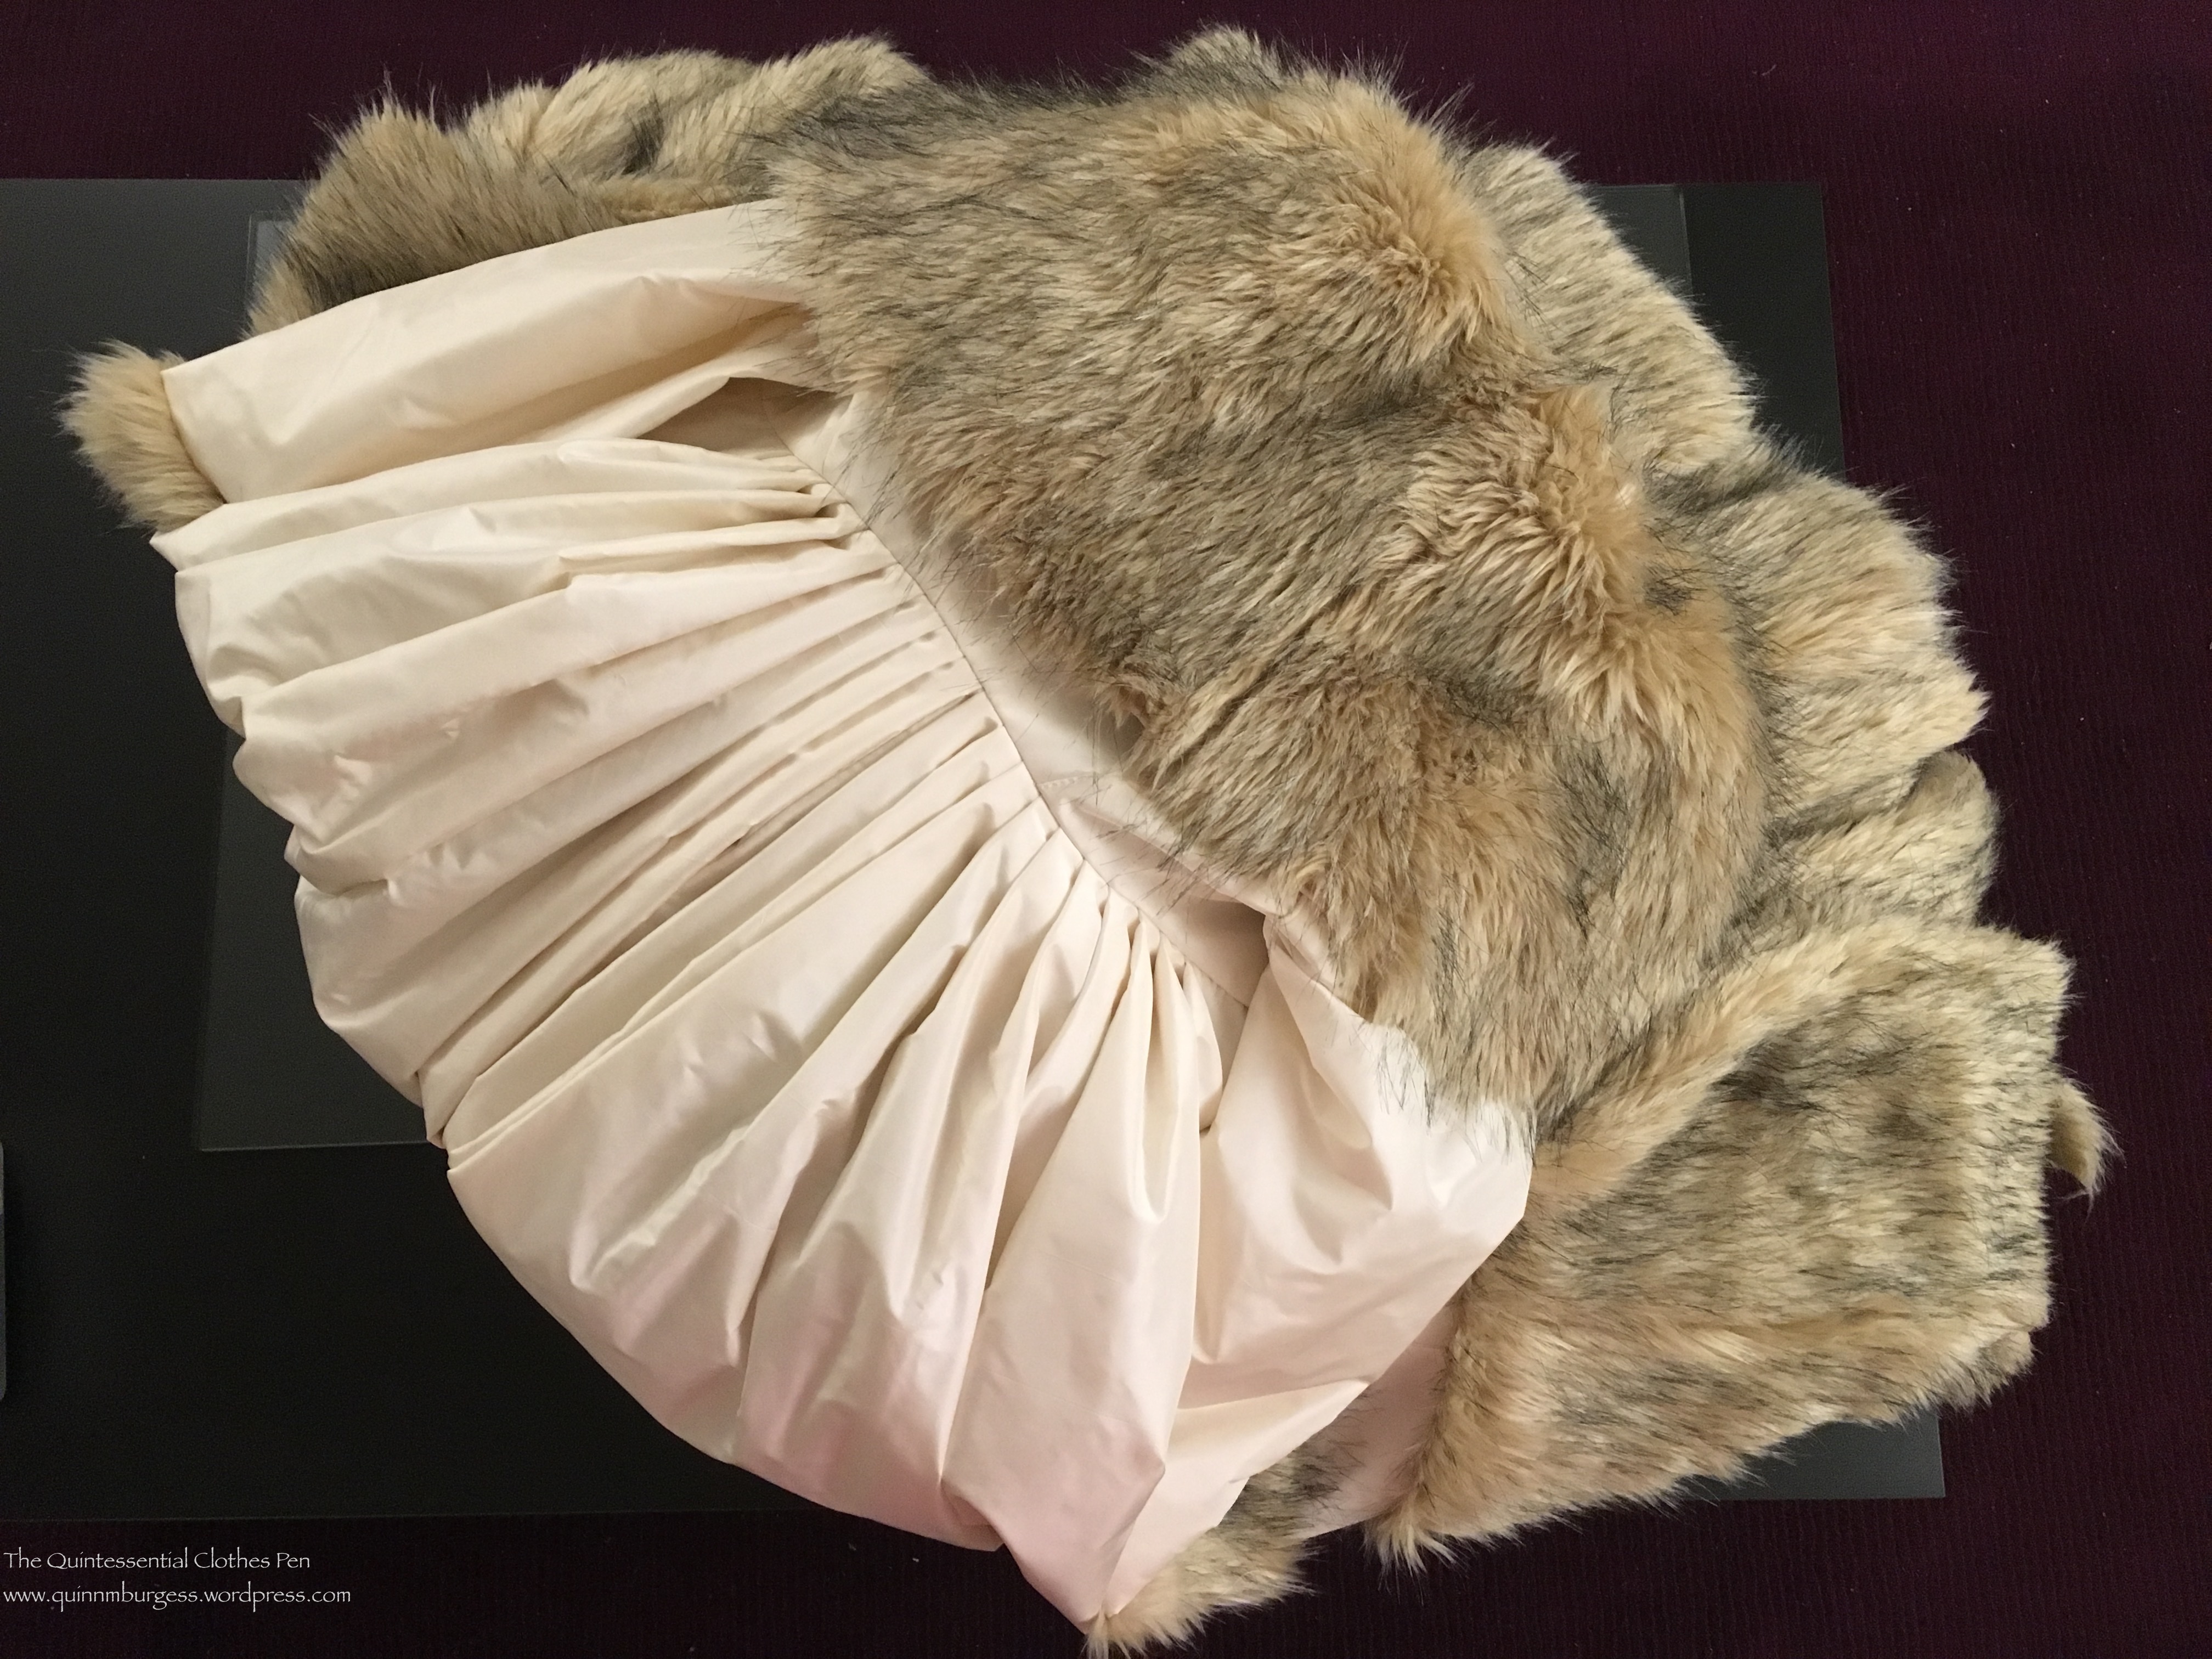
The muff exterior is the same faux fur as the trim on the witzchoura. The lining is an ivory cotton flannel, which feels warmer on the hands than a silk lining and which I don’t think is out of the realm of possibility in terms of historical reasonability (a theory I have tested out with multiple muffs over the last few years).
In order to get the distinctly Regency style of a beehive style muff, the inner flannel lining is substantially smaller in dimension than the exterior fur. Layers of high loft polyester batting fill in the shape and the fur actually wraps to the inside of the lining for a few inches on each side and is gathered to fit the smaller circumference of the lining. The result is a very large and very cozy muff. (This method is different than making the interior and exterior the same or similar in dimensions, resulting a muff that looks like my 1822 one. The blog post sharing details about that muff has lots of great images of both types of muffs from this period, if you want to see more. Also, it’s worth noting that polyester batting would not have been used to keep one’s hands warm in the early 19th century, but that I chose that materials because I had it on hand and it is not visible.)
The petticoat is the only piece of my Vernet project that existed before I agreed to participate. It started life as part of a dress, but was removed and languished for years. Turns out I had made it too narrow to dance in, which isn’t very useful in my life. On the bright side, I had just enough of the cotton fabric left to add another panel, thus making the hem circumference much more wearable.
The petticoat had an attached sleeveless bodice before the addition of extra fabric in the skirt, so after adding fullness I was able to simply reattach the bodice. The edges of the bodice are narrow hemmed and it closes at center front with a tie at the waist and a button and loop at the bust. This past blog post discusses extant sleeveless underdresses or petticoats such as this. As with everything else in this project, both this petticoat and the muff are entirely hand sewn.
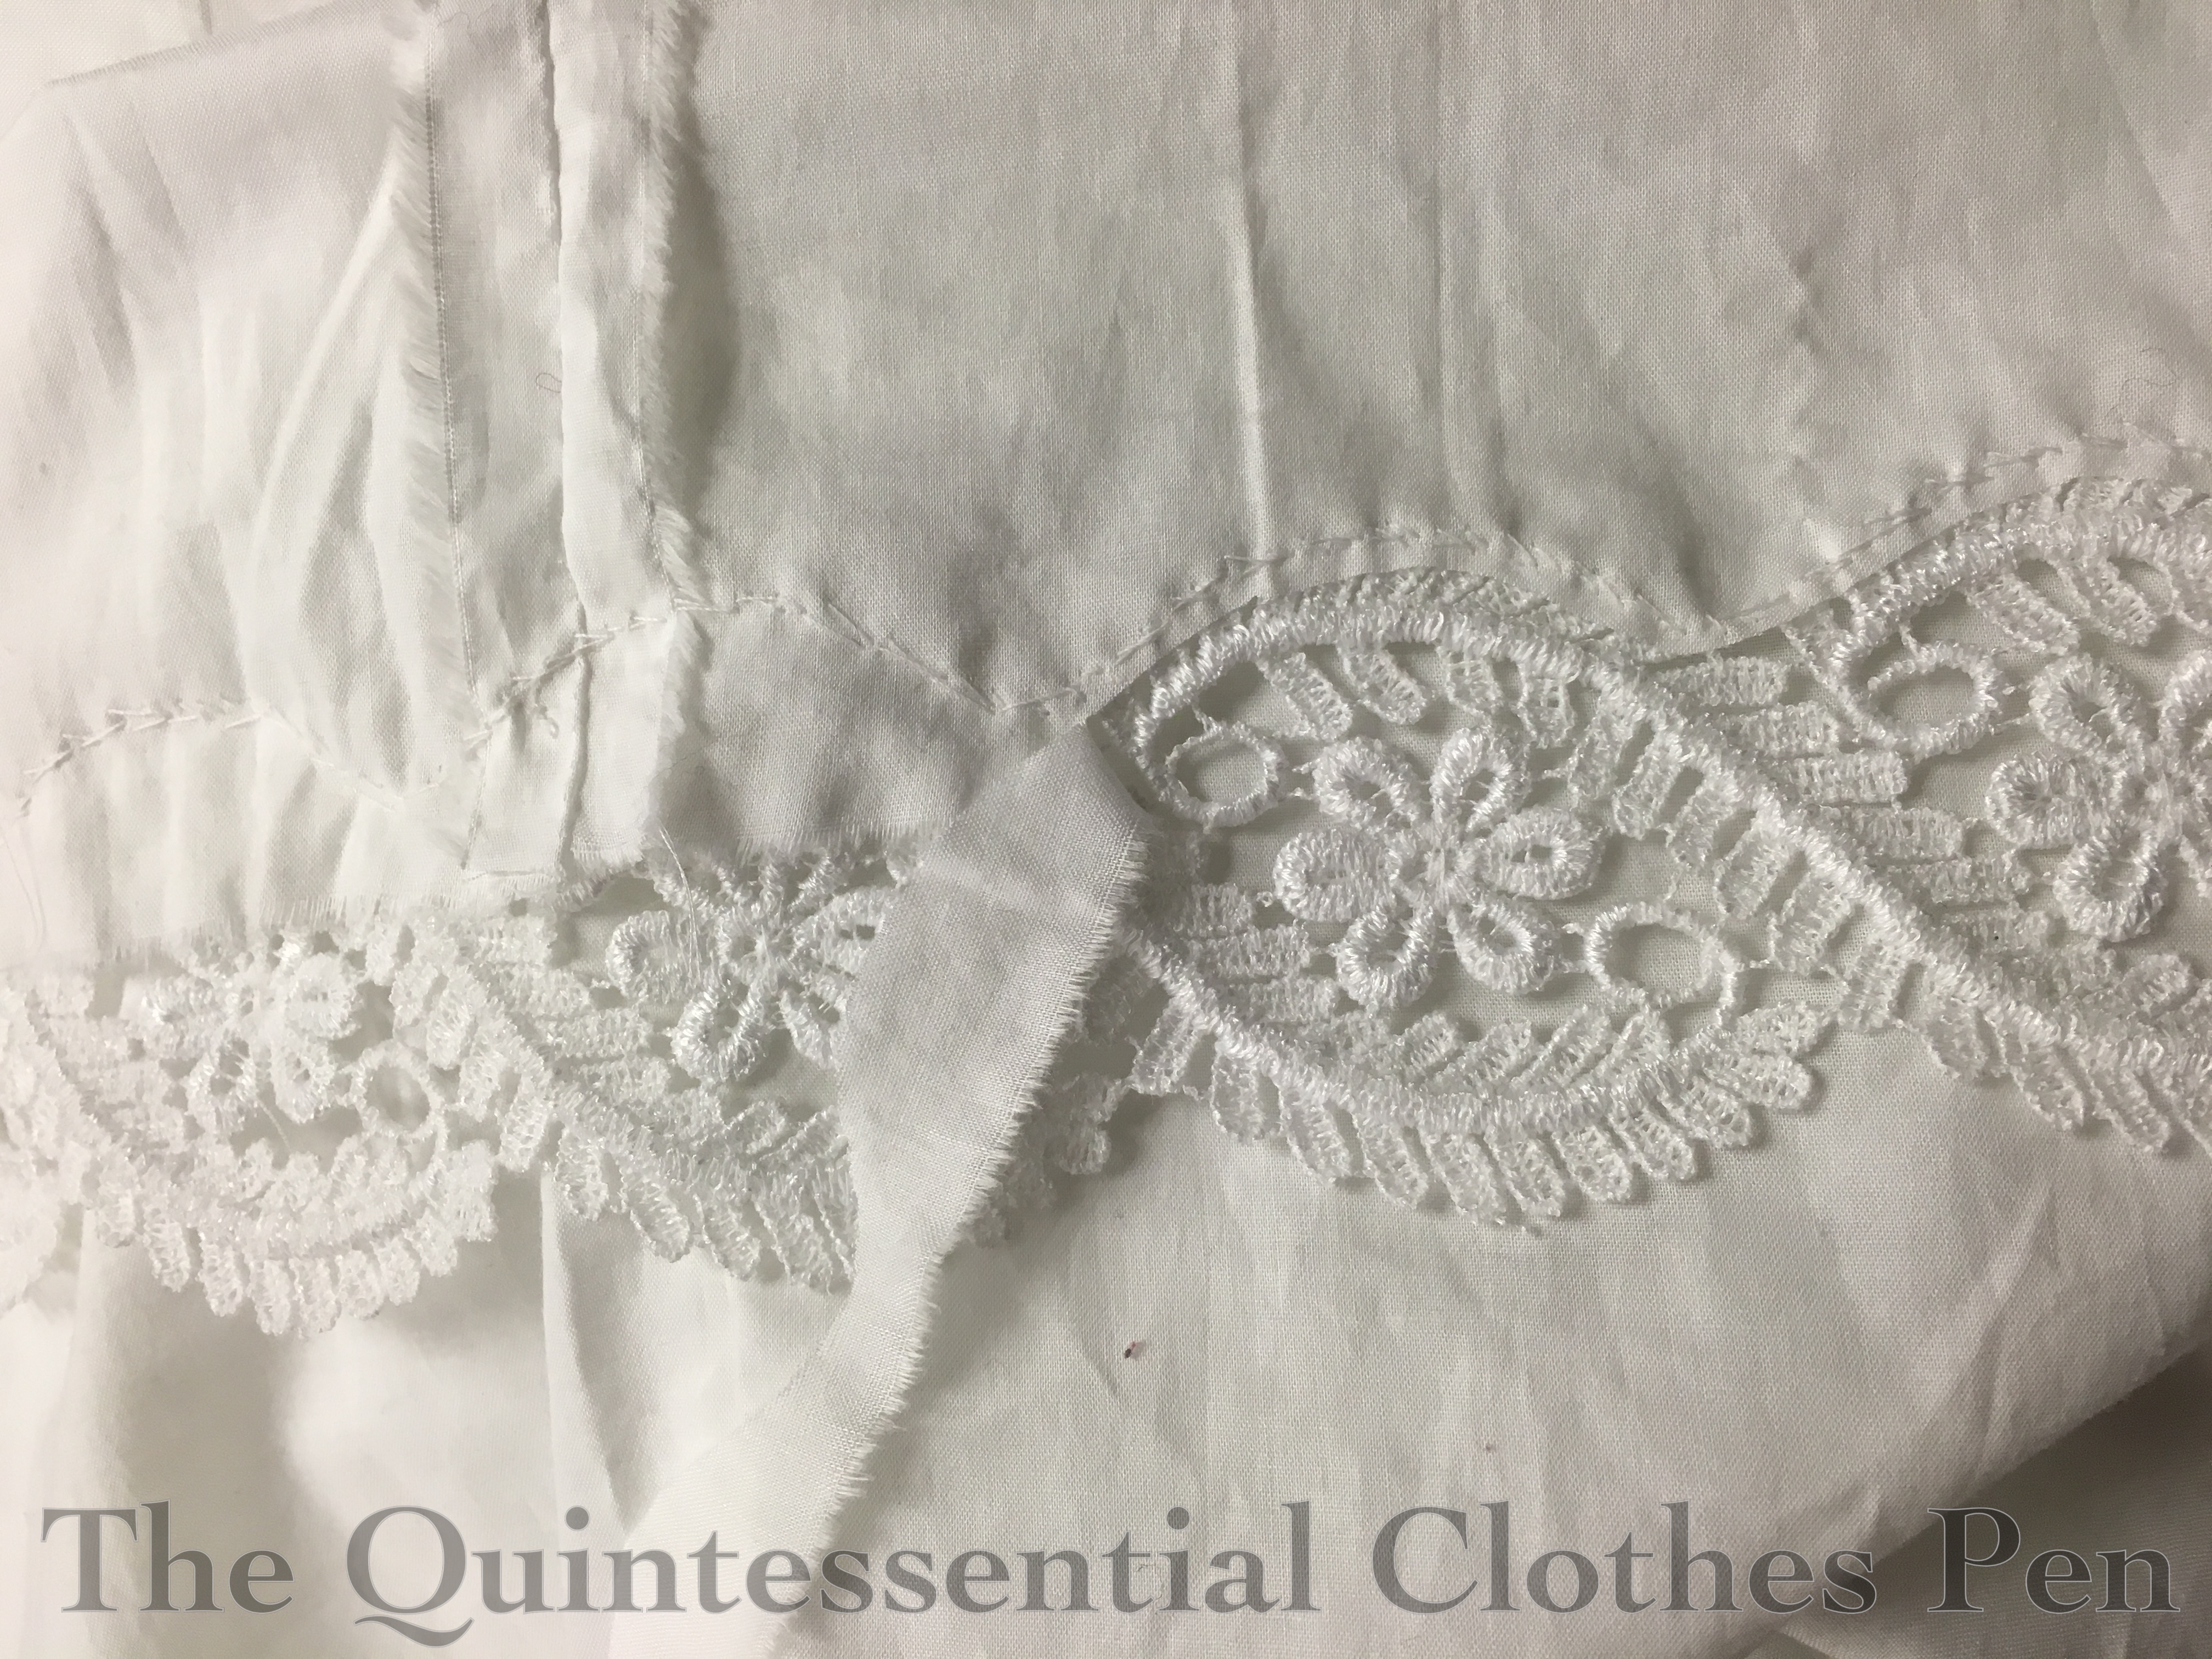
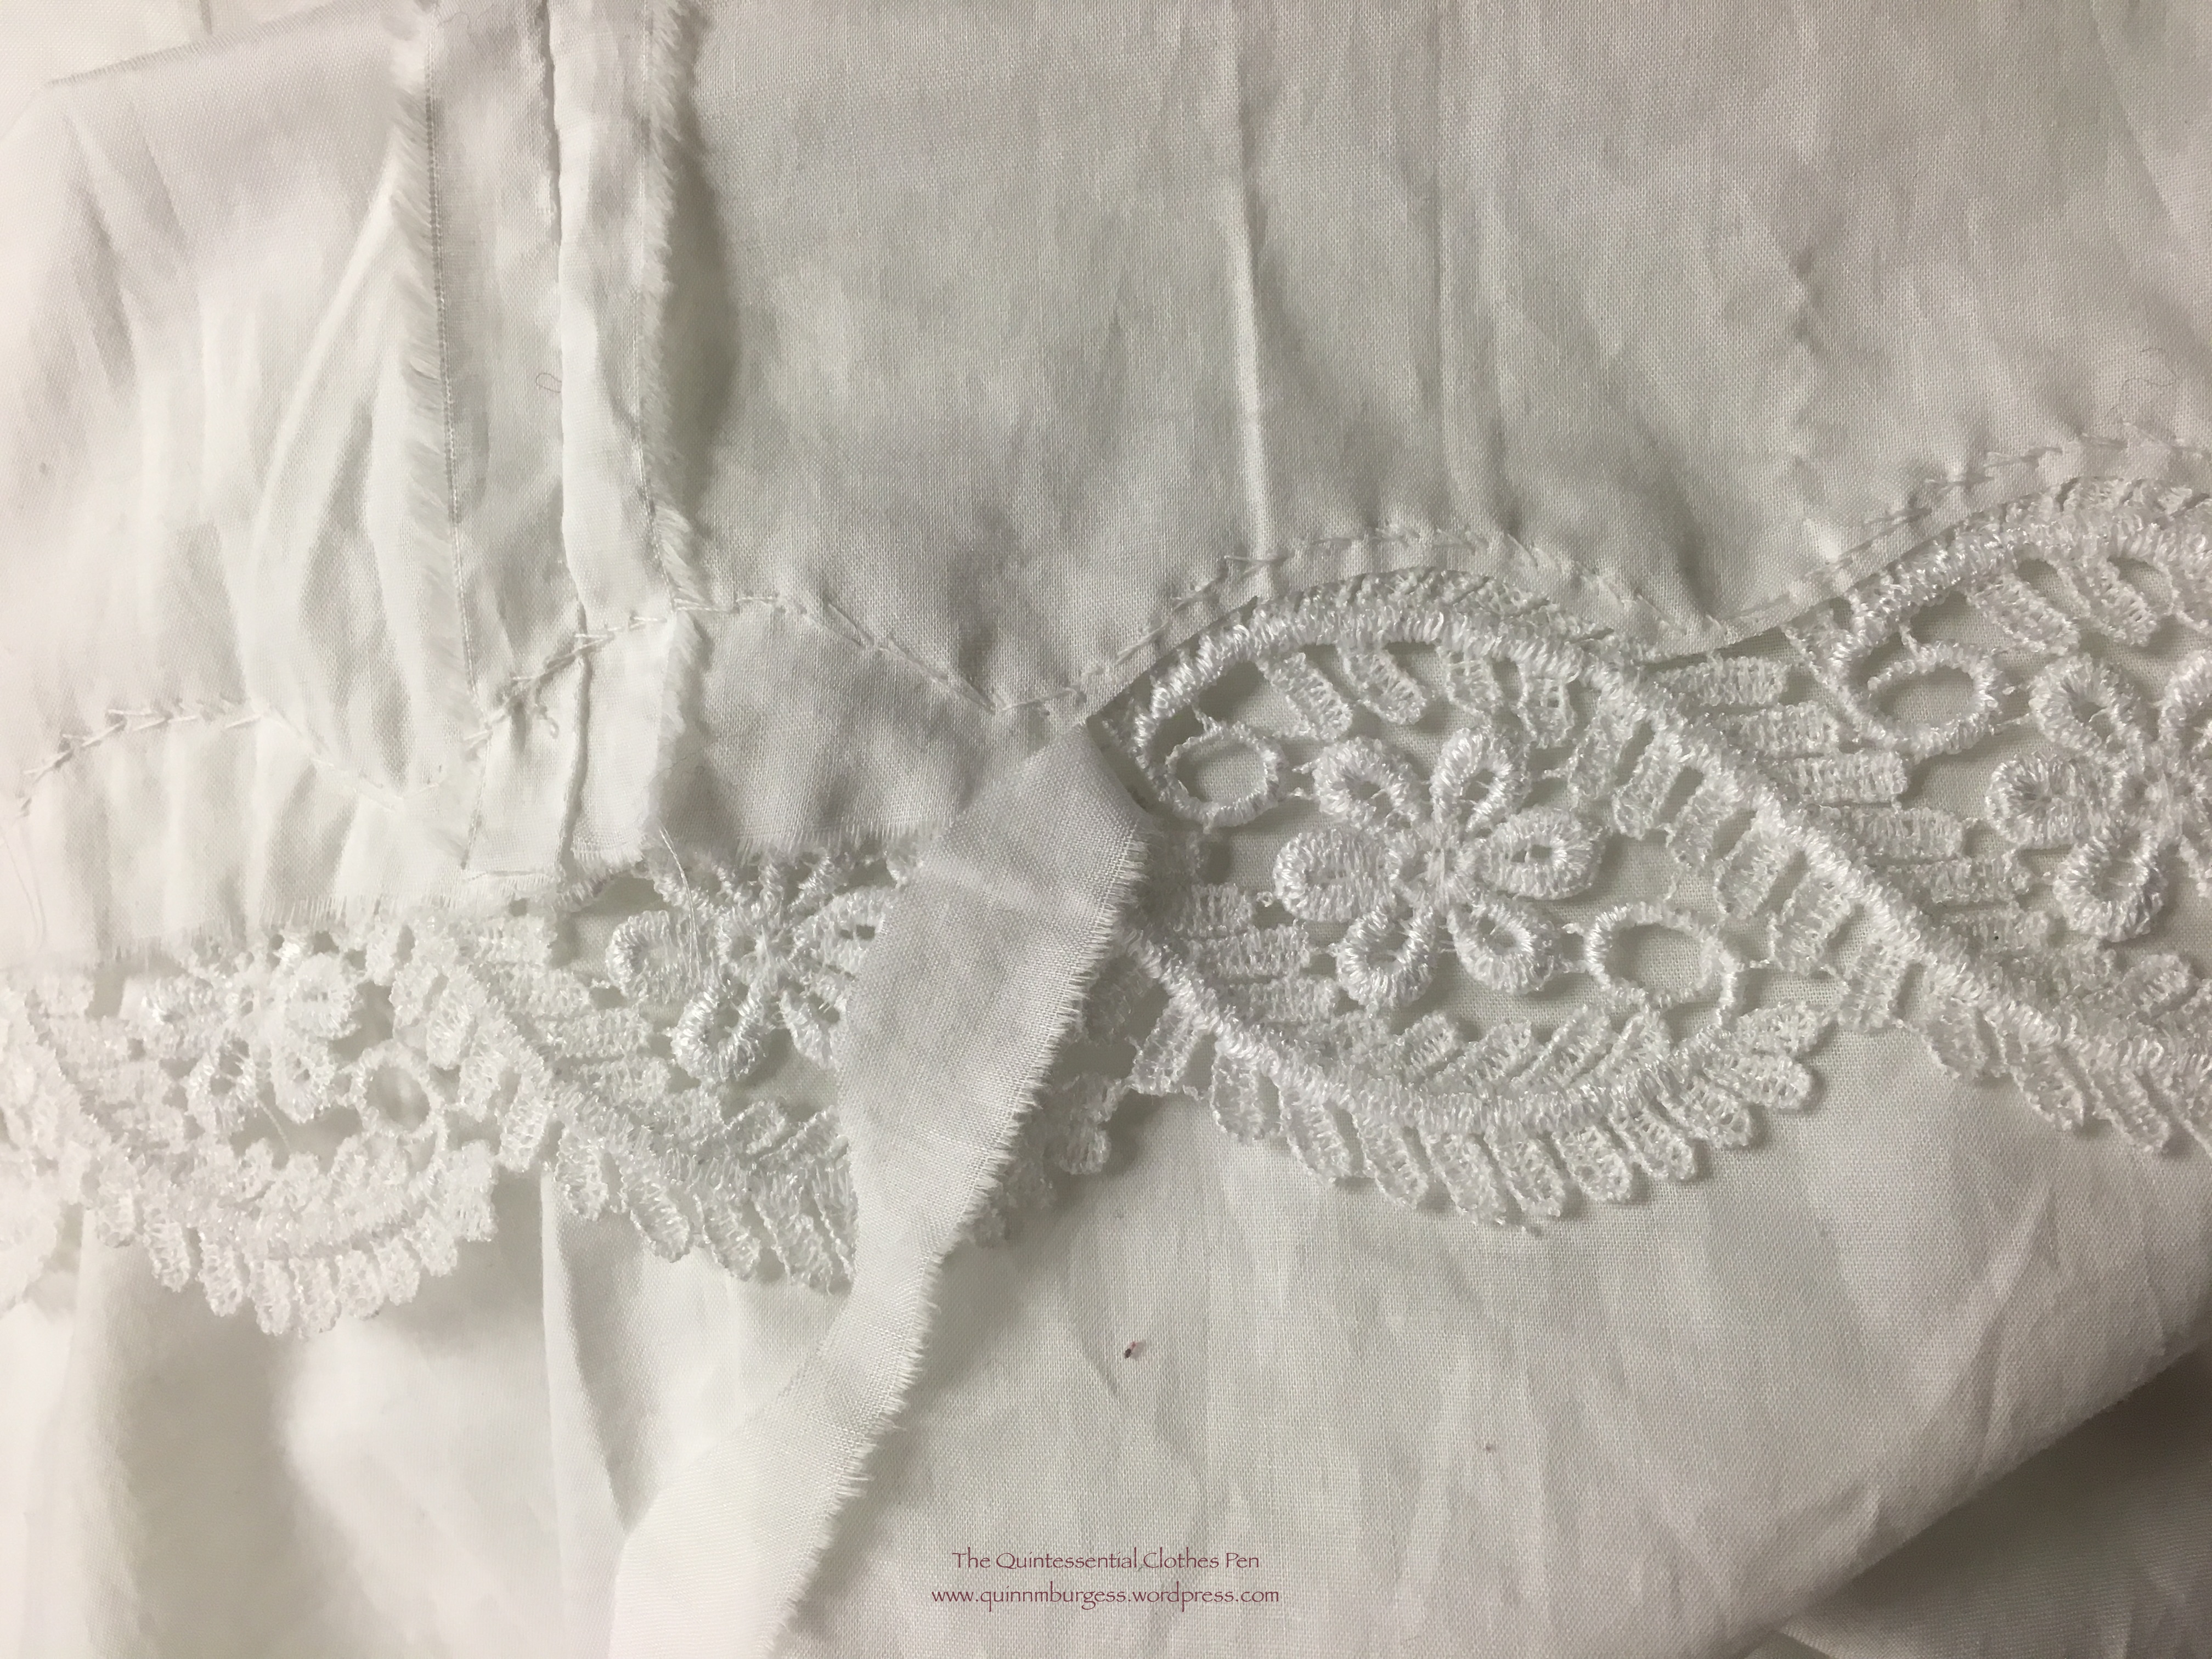
The only other changes I needed to make to the petticoat to use it for the Vernet Project were at the hem. I started by adding lace that mimicked the shape of the embroidery seen in my Vernet fashion plate. I whip stitched the lace on with small stitches and then cut away the fabric behind the lace, creating a lovely scalloped hem.
After trying on the petticoat with the finished hem, I decided it was too long and took a tuck above the hem to shorten it. You can see the tuck in one of the photo shoot pictures early in this post.
This final picture is from when I was hemming the witzchoura. While I had that garment on the dress form I also put the petticoat on to determine the placement of the lace on the previously hemmed petticoat.
And that’s it! Those two garments were minor in scale compared to the toque de velours, silly shoes, and the witzchoura itself, both in terms of materials and sheer volume of work involved.
All those pictures of Versailles look amazing, but a lot of work went into looking effortlessly elegant. Some of the work I’ll be sharing in posts specifically about my hair and gown, but I also have a few pictures from the day along the same lines that didn’t quite fit into main post. They’re more ‘behind the scenes’. Enjoy!
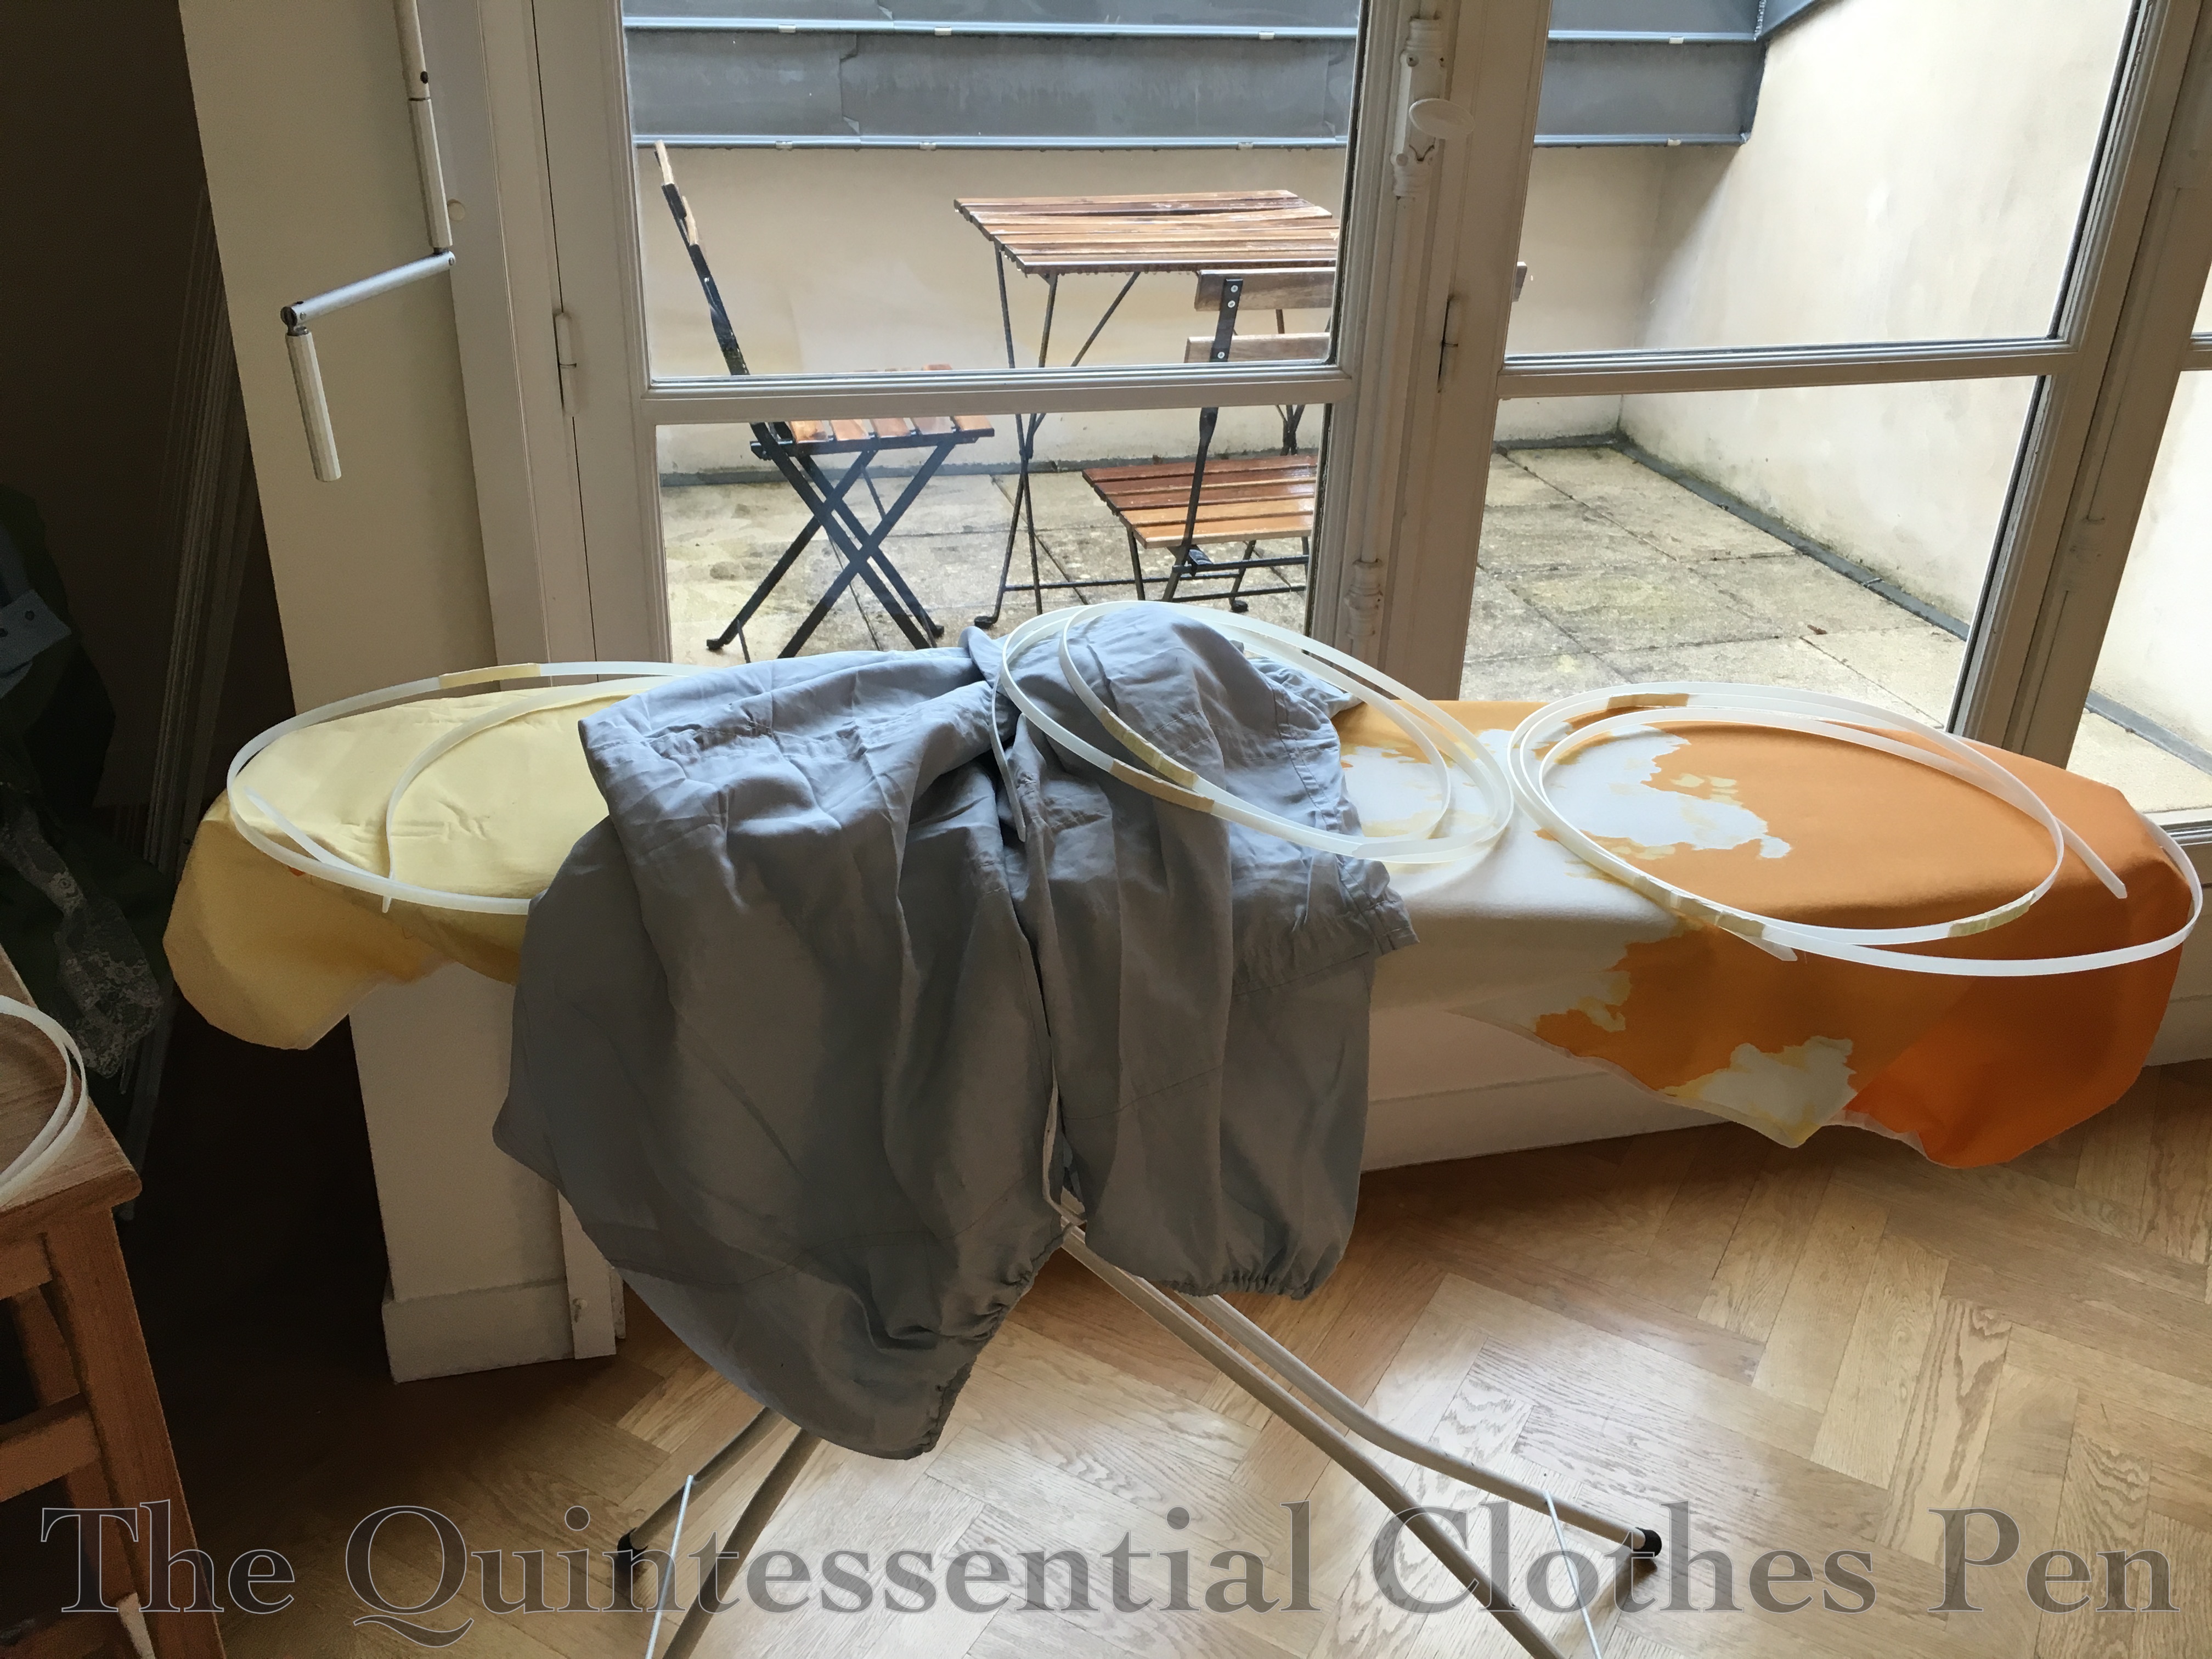
This is Mr. Panniers after escaping my suitcase and before having his bones inserted for the big event. Hard to recognize without his proper shape, I think!Getting ready. My half finished hair is half powdered, to show the difference in color. As you can see, I only did a light bit of powder.A final graceful pose in the Hall of Mirrors as the staff was very slowly herding us out.
At first, everything seemed to behave: I cut out the pieces and started sewing. Then I realized I didn’t have time for the project and so I let the panniers languish until earlier this year when I pulled them out again to finish them so I could use them as a base for my Versailles Sacque. Perhaps it was the languishing that caused Mr. Panniers to take on a personality and want to thwart me when I got back to him this year…
It started with perfectly amiable sewing. The waist casing and drawstring were without event. And then, boning! There was twisting, and warping, and curving inwards, and all sorts of bad. The lower three bone channels eventually cooperated, but those angled top bones? Nope! No cooperation from them! (Yes, check my picture, there are no angled top bones. No, I’m not trying to trick you.)
The bones curved in on my bum and front side so badly that it made the panniers look like a jelly bean! Not what I was aiming for. My solution was to unpick the channels across the front and back (not the sides) and make one continuous horizontal bone channel like those below it. (That’s why you can’t see angled bone channels in the picture.) But the fabric is a very tight weave and does not easily forgive pin or needle holes, so you can still see the angle I originally stitched as directed by the pattern if you look closely.
Mr. Panniers was much more cooperative with the new horizontal channel across the top. Whew! And ok, I have to take some responsibility for the problems because I’m confident that some of the struggle was due to my choice of boning–1/2″ wide zip ties about 18″ long that I masking taped together to get the lengths I needed. I have to pack this guy, and having bones that don’t weigh a lot (like metal) and won’t break (like cane or reed) was high on the list. The bones are simply overlapped in the channels, each of which has an opening, so the plan is to remove them (and label them) for packing, then reinsert them once I’m unpacking the whole ensemble in France. Anyway, the zip ties were coiled in the packaging and didn’t want to change their shape, which is why the angled bones were curving in towards my body and why the whole thing is so bent on warping if not carefully and delicately handled.
Here’s a look at Mr. Panniers interior. The white ribbons are suggested in the pattern to help keep the shape. They’ve all been adjusted to my body shape (tedious, but worth it–sewing these on and fixing that angled bone channel problem were the things that kept this from being finished a month ago!).
As you can see, in terms of materials and construction, Mr. Panniers aims for the right shape as the goal. To that end, I appreciate that with my overlapping bones I can easily adjust the size at any point by overlapping the bones more. I find that this pattern is a bit too trapezoidal for my taste, so I’ve overlapped the bottom bone a little extra to make the skirt hang more vertically from about the knee down.
Needless to say, the bones are staying in and Mr. Pannier will be resting flat and collapsed until I need to pack him, so that for any fittings, etc. no more wrangling will be necessary.
(Side question: Does anyone know when it would be appropriate to use singular ‘pannier’? Would that be appropriate for referring to one of a set of two pocket hoops, for example?)
Side note: this is officially the last post that will be tagged 1770 court gown, since that project has now morphed into the saga of the Versailles Sacque and accessories.
I’m excited that the 1880s corset I made last summer is finally, actually, finished! I got around to adding the finishing touches, lace and ribbon around the top, over the fall. Now there is nothing left to sew, and, after two wearings I can say with confidence that there are no little alterations I want to do! Yay!
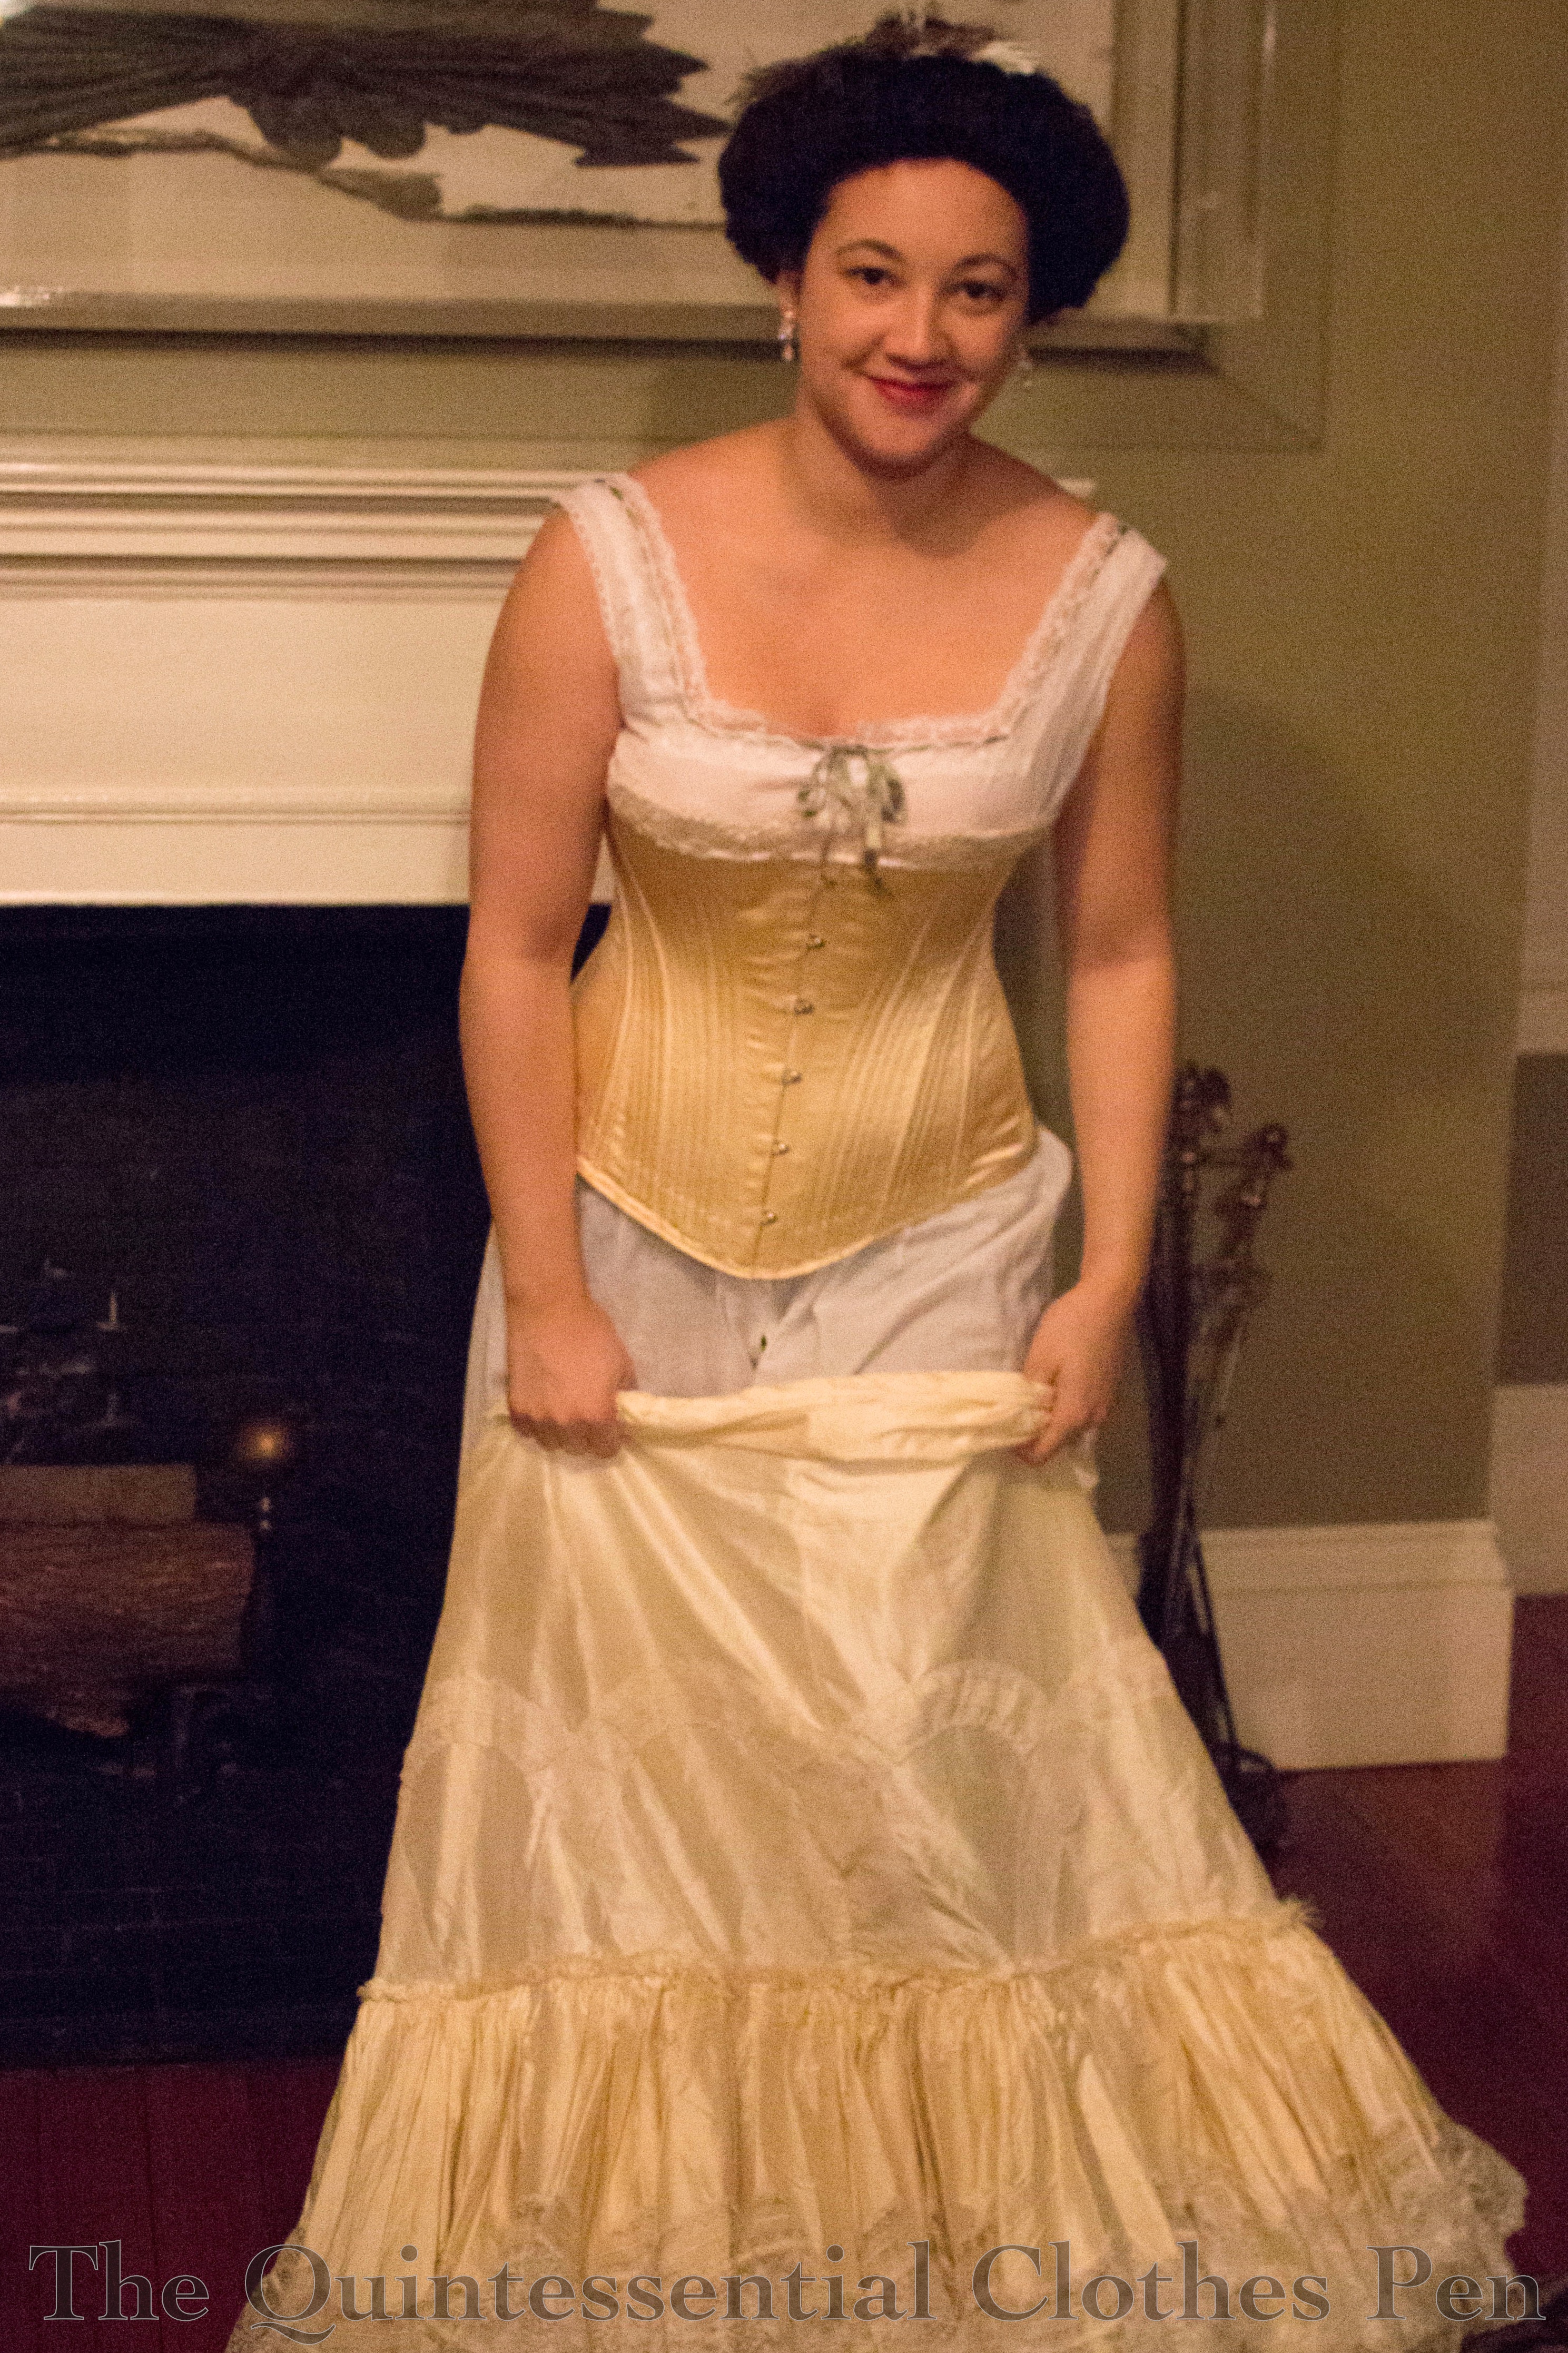
The first wearing was in August last year, with my 1885 frills and furbelows dress. The second wearing was in January this year, under my new 1899 evening gown. Both times I found the corset to be extremely comfortable to wear. And in January, I was able to get pictures of the completely finished corset! So, without further explanation, here is the corset in its finished form. (If you didn’t get to read all the intricate details of the patterning, construction, and steaming process, you can see all past posts here, in the project journal.)
The super frilly petticoat was a great prop for these photos! (I’m much better at looking natural rather than awkward when I have props!). It’s from 1903 and was finished in 2011. I’ve worn it many times but have never taken photos of it on me. It’s entirely silk, with two layers of flounces, both made of multiple gathered circles and edged with wide lace in a scallop pattern. It closes with a silk ribbon that threads through the waistband in manner described in Authentic Victorian Dressmaking Techniques. It’s decadent to wear–it makes rustling sounds, has great body, and when you take it off it stands up on it’s own! I can’t remember how many yards of fabric went into this petticoat, but I know it was a lot, with all the circles in the flounces!
Awesome petticoat aside, this corset is pretty decadent to wear, also. Silk, tons of curvy seams and bones, perfectly fitted, lovingly, painstakingly, and beautifully sewn… what’s not to like!
Thanks to the usual camera toting culprit for doing a corset photo shoot with me in the midst of getting dressed for a ball! You know who you are.
(As a side note, it’s a challenge to take historical clothing underwear pictures that look reasonably like historical photos and images but don’t go into the modern lingerie photo direction. See the inspiration here and here? I tried this as well as the standing pose in the second link, but awkward really describes the outcome. But I think we did pretty well in the end. It’s amusing to feel these photos are revealing when I’m quite dressed by modern standards… Do you feel the same way about taking pictures in your historical underwear?)
Our group’s early December deadline to finish sewing our Vernet Projects is fast approaching! Thank goodness we’ve had all year to work on these–mine has been quite a project with all the hand sewing and patterning and learning new skills. Of my five pieces, one is totally done, two have less than three tasks left to be finished, and 2 are still about halfway completed. It won’t quite be furious sewing, but I do have to keep at it to get it done in time. For now, here is proof that I’ve been making progress!
Starting December 7th, you should check in often with the group on Facebook to see each recreation released side by side with the original Vernet fashion plate. It’s going to be really, really amazing to see these crazy and beautiful fashion plates in 3D form!
I’ve wanted a robe de style to join my historic closet for at least a year, but haven’t had just the right fabric or the time or impetus to make it happen until this past spring. And as a general goal, I’ve been trying to expand my color choices beyond blues, greens, and reds, because those colors seem to dominate my historic wardrobe. Then this spring, I found gorgeous yellow silk at the local discount fabric store. I convinced myself that I didn’t need it, but couldn’t stop thinking about it, so I drove back to the fabric store a few days later to purchase the fabric.
I was inspired by the styles from the earlier years of the 20s for this particular robe de style, when the skirts were long and full. You can see a mix of robe de styles from the 20s on my inspiration Pinterest board. I didn’t follow any particular image or extant garment, but used them in general to create a unique dress. I really enjoyed wearing this dress and would like to make another someday that I think I’ll make a little shorter, more like later 20s styles.
I chose to accent the waistline of this dress with a ribbon rosette in a contrasting silk ribbon. It has an inner circle of matching yellow silk and a bit of gold sequined lace in the center. It looks a little like I won a prize at a state fair, but I like that it breaks up all the yellow of the dress.
The pattern is loosely based off the information provided by Maria in this blog post about her black robe de style. I scaled up her pattern, made a mockup, and then adjusted it to suit my body shape. The skirt required some math to get the right curve across the top to achieve the high-low hem–the bottom edges are the straight selvedge edges–but aside from that the panels are just gathered to fit the waist, with more gathers concentrated over the sides than in the front and back. The extra bonus about using selvedge edges for the hems is that they have a nice fringed edge that meant I didn’t even need to hem them! Instant hems and a nice lightweight looking skirt. Double win!
I used the opportunity of wearing this new dress to break out a new pair of shoes. Glamorous gold t-straps! (All the credit goes to Katherine for these shoes–she bought them in silver and posted about it which is what directed my attention to the style in the first place.) I bought them about 10 months ago for my birthday but hadn’t had an opportunity to wear them until now.
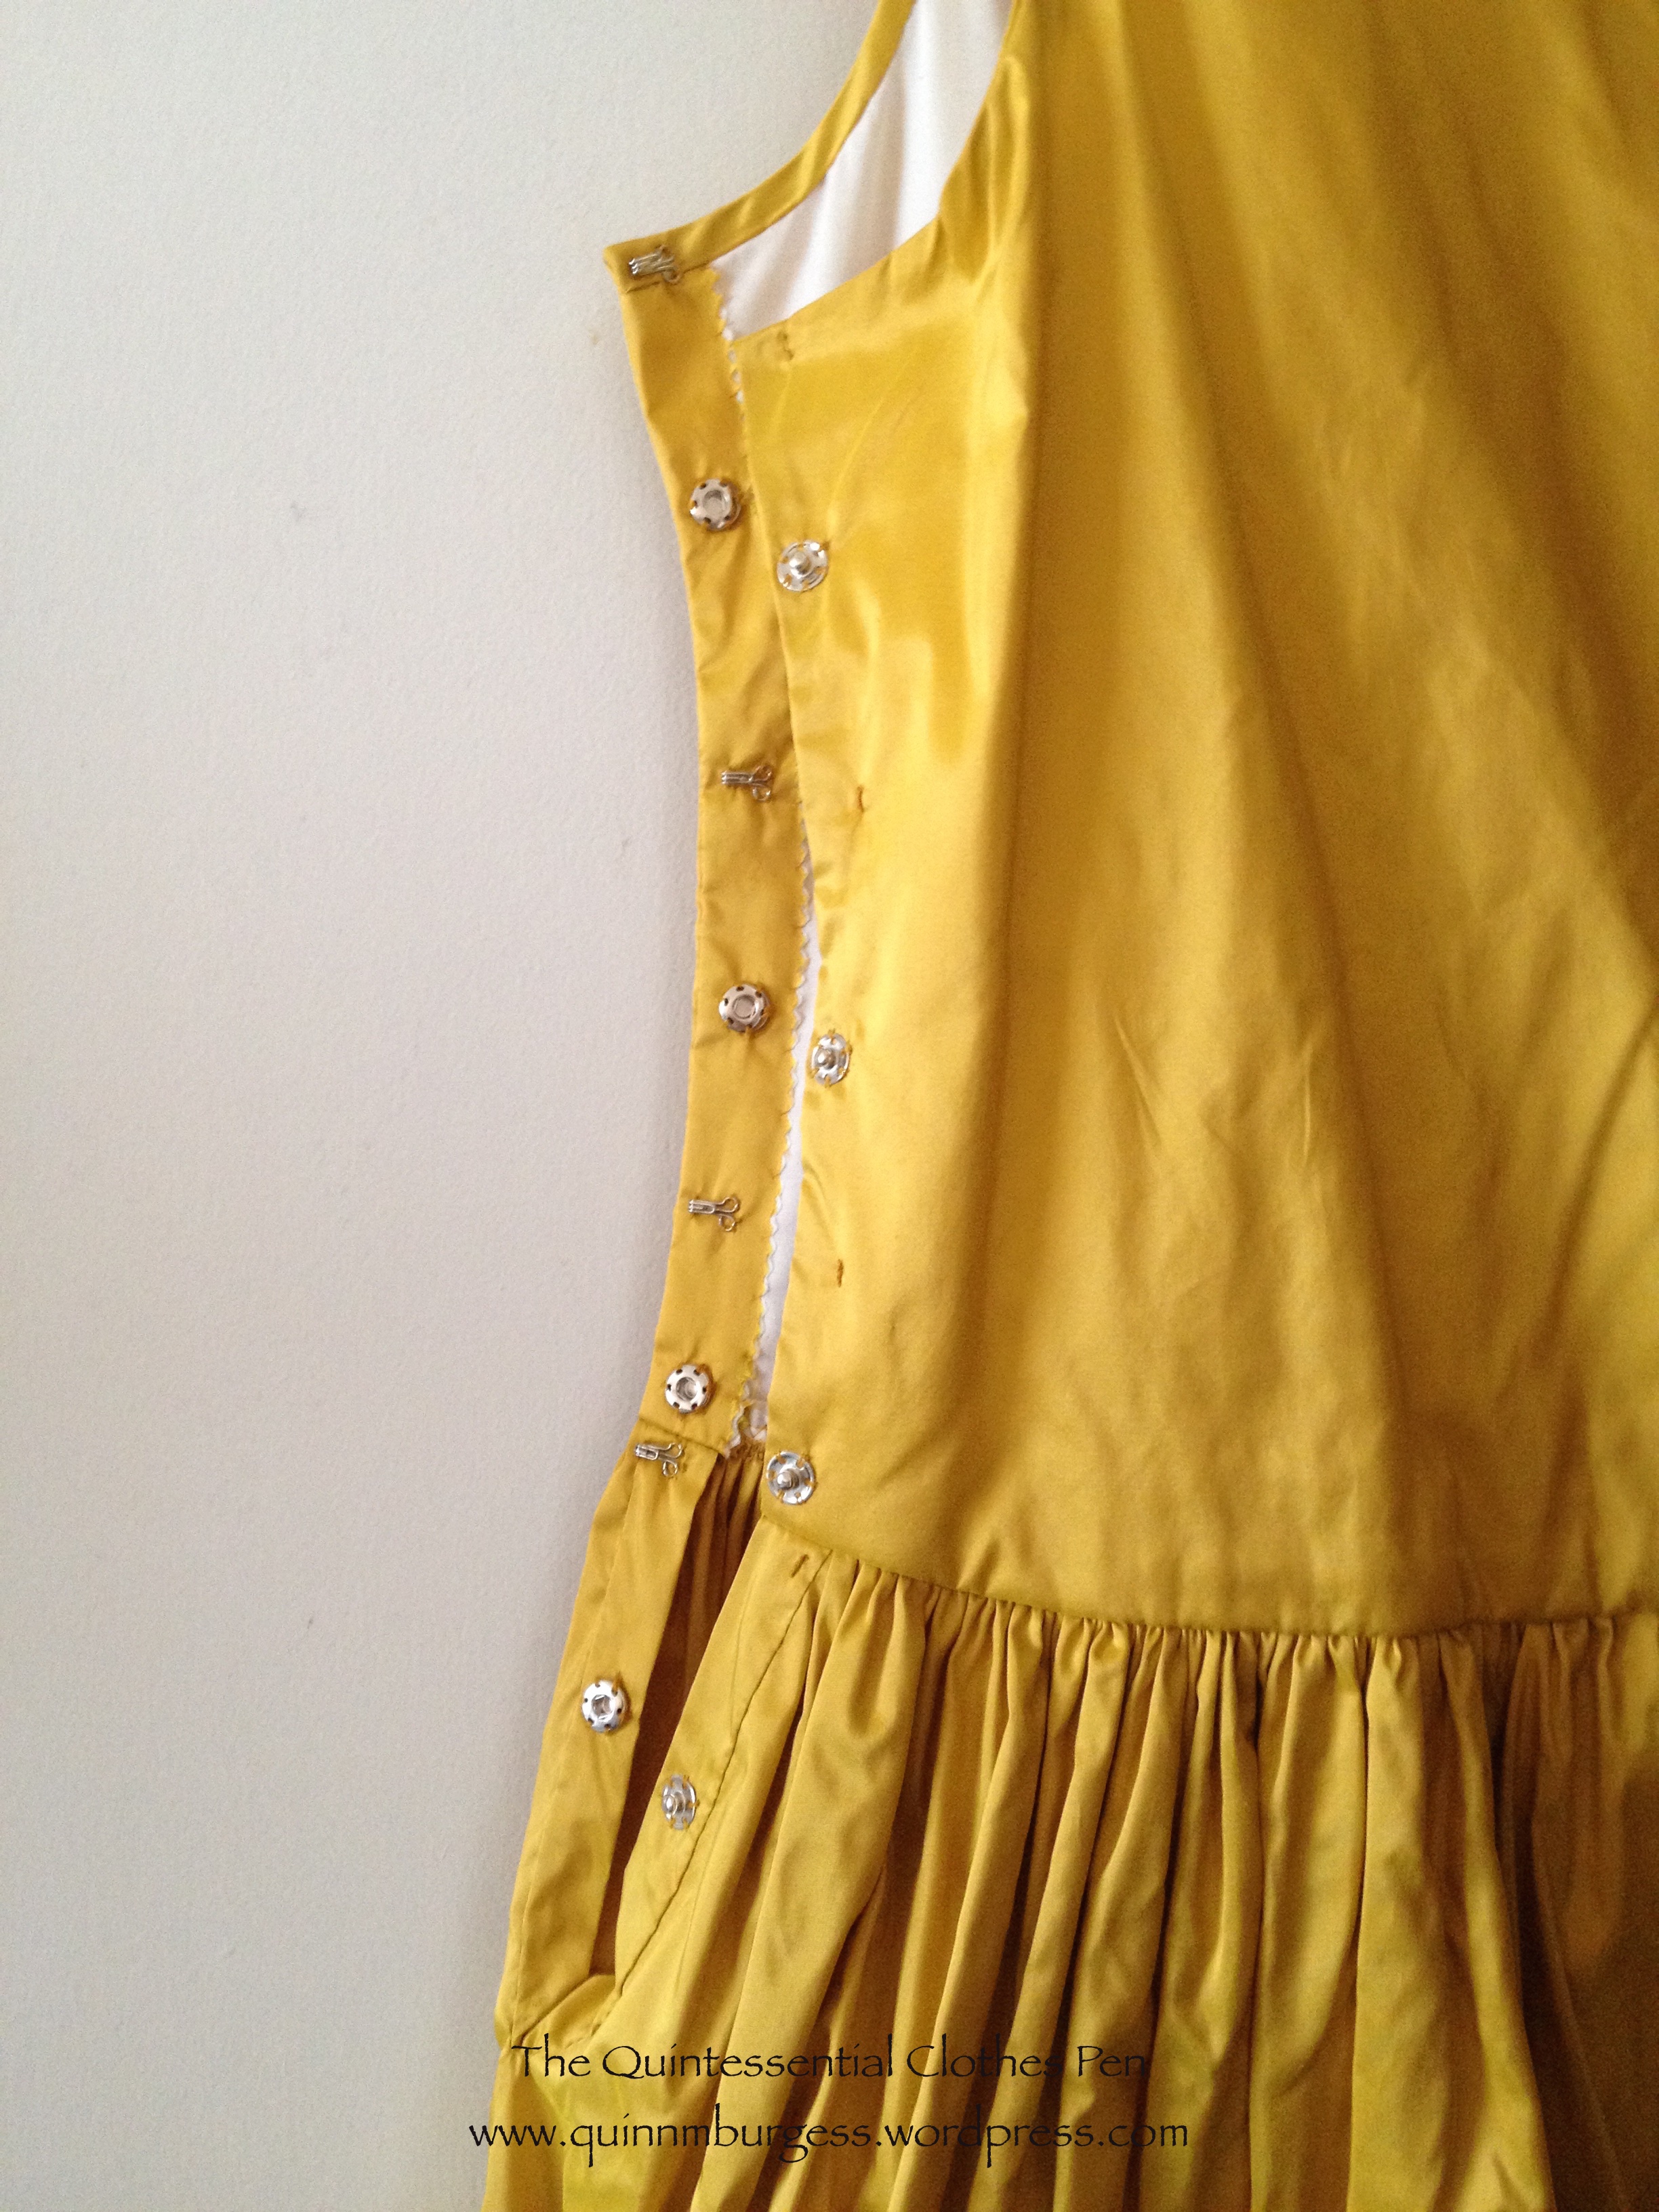
In addition to the pattern, I was also inspired by Maria’s simple finishing methods. I therefore flat lined my bodice, finished the neck and armholes with bias, and made a side closure. I opted to alternate snaps and hook/eyes for the closure, since Maria (and Katherine, who also made an inspirational robe de style you can see here) mentioned that their predominantly snap closures had a tendency not to stay closed. I had no problems with my closures on the dress’s first outing!
I chose to keep the understructure for this dress separate rather than building it in–that way I can easily use it for a second robe de style in the future! The understructure is mini-18th century pocket hoops attached to a grosgrain ribbon that fastens around my hips. I found that they shifted a little bit while I was wearing the dress, but not enough for me to really notice or care.
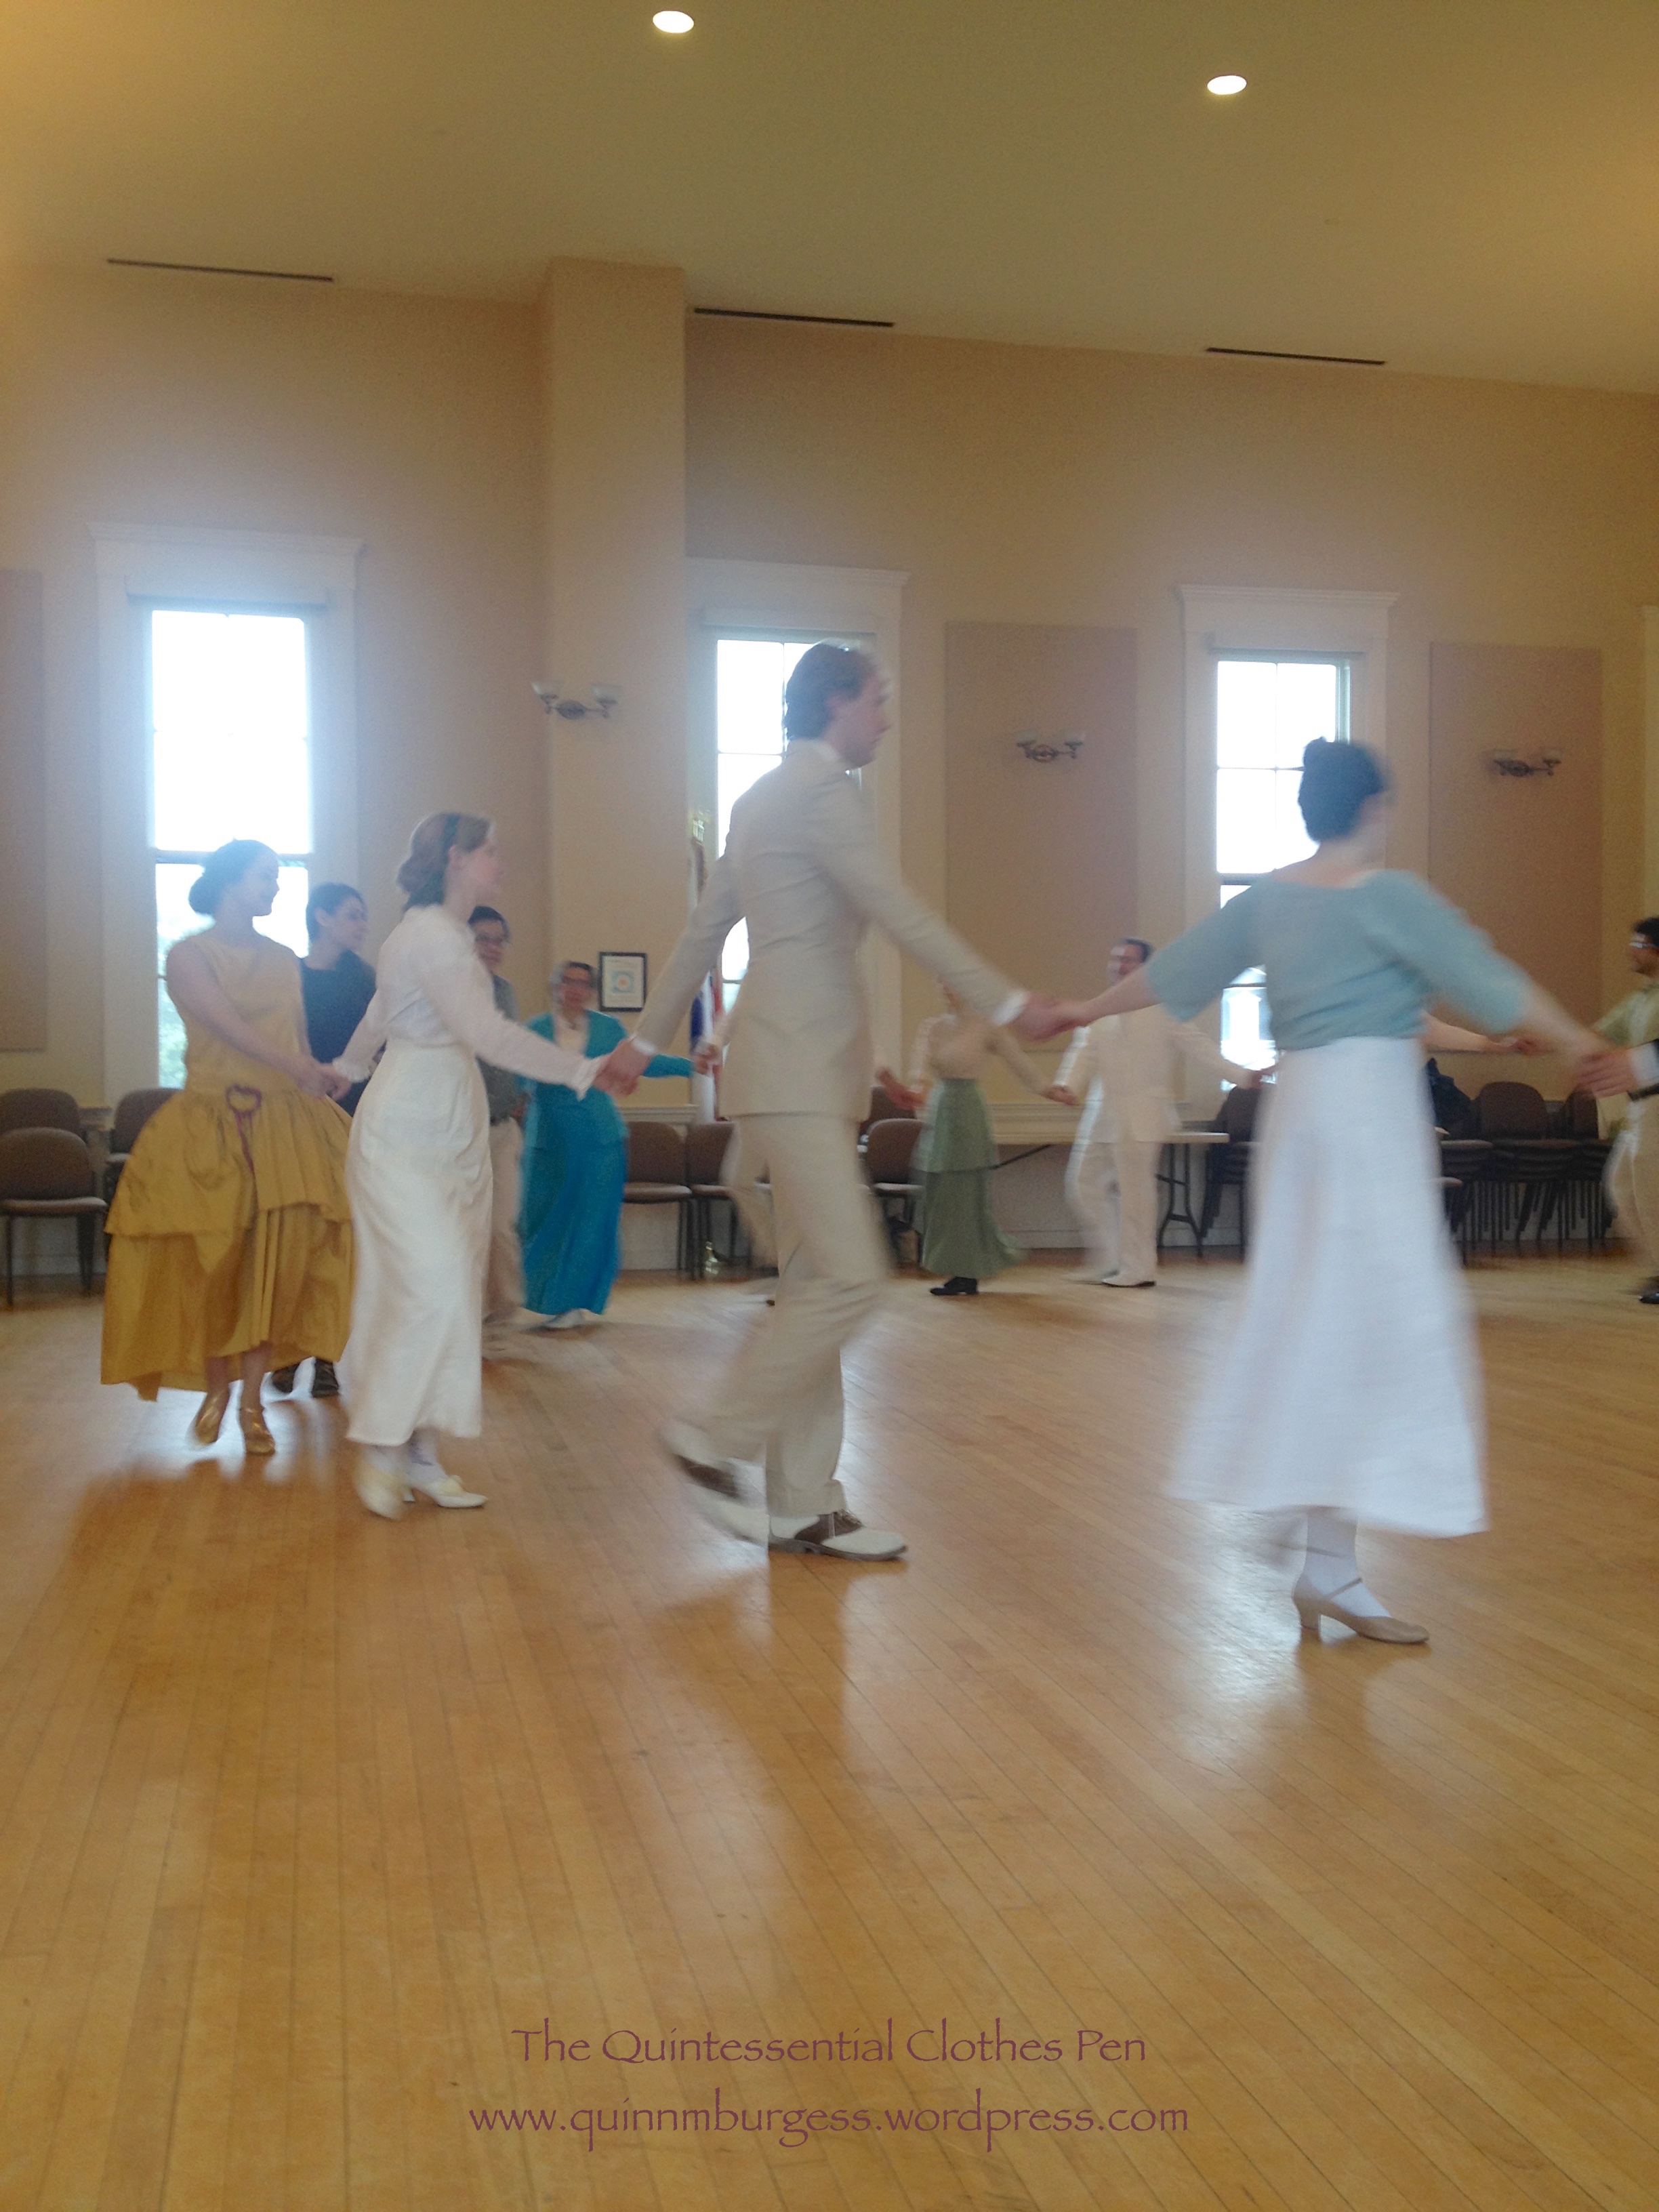
Unfortunately, the silk does want to wrinkle every chance it gets. But when the dress is in motion it’s really not very noticeable! I wore the new dress to an afternoon ragtime tea dance, which is what the pictures in action are from. There are 2 more tea dances this summer (one of them is this coming Sunday) and a suffrage rally and formal ball in September, so if you’re in the area and have the time I would love to see you at one of these future events (details here).
Most of the work on this new corset was completed during the sewing process, which you can read all about in detail in this previous post. The remaining steps were to starch and steam mold the corset, to floss the corset, and to add lace to the top of the corset.
One of the most successful was the steam-moulding process developed by Edwin Izod in 1868, and still used in the 1880s to create elegant corsets such as this one. The procedure involved placing a corset, wet with starch, on a steam-heated copper torso form until it dried into shape. The result was a beautifully formed corset, whereby ‘the fabric and bones are adapted with marvellous accuracy to every curve and undulation of the finest type of figure’ (The Ladies’ Gazette of Fashion advertisement, London July 1879).
To begin, I made a solution of cornstarch dissolved in water. I put 2 tsp to 350 ml water, but wound up using only about 1/5 of that. On a scrap, I tried applying the starch solution with a spoon, but decided against that because it left a visible starch crust on the fabric as it dried. What I found worked better for even distribution of the starch solution was a spray bottle. I sprayed the inside of my corset (the coutil layer) until it was thoroughly damp, then put it onto Squishy (since I don’t have a steam-heated copper torso of myself available, darn!): she’s a squishable dress form that I had previously padded to be close to my measurements and proportions (that’s an important point, that she had my proportions–padding in the right areas so the corset would dry into my shape!) and covered with a plastic garment bag so the starch would stay on the corset. Once the corset was on the form, I steamed it all over using a Rowenta Steam-n-press hand held steamer about three or four times. Then I intermittently steamed it again while it dried overnight.
Steaming the starched corset on Squishy.
I only did one application of starch and I believe it had some effect. It’s not as stiff as cardboard and able to stand up on its own, as I have heard some steam molded corsets described, but it does seam to want to create the curves that were patterned into it with ease and I do think that the bones took on a little of the curvy shape during the drying process as well. (Here is an example of an extant very stiff steam molded corset. Look at how well it retains its shape! I want to do some more research regarding the Symmington corset company but that’s going to have to wait a bit.)
After the corset was dry, I flossed the boning channels using ivory silk thread and the flossing pattern from my inspiration corset. Unfortunately, I only had enough of the thread to floss the bottom of the channels… so I have to deviate from my inspiration a little and not have flossing across the top.
The last step will be to add lace across the top of the corset. I’d like to use the same lace that I’m using to trim my in-progress 1885 bustle dress, but I’ve only got a small bit left and I want to make sure the dress has enough before I use it on the corset. I’ve started figuring it out but am not confident yet that I have enough, so I’m going to hold off on taking absolute final pictures of the corset with the flossing and lace until I’ve officially decided that point. Regardless of the lace issue, we’re going to call this corset done, because it is entirely wearable at this point, just in time for it to qualify for the HSF/M #6: Out Of Your Comfort Zone!
Just the facts:
Fabric: A remnant of yellow silk duchess satin, a remnant of ivory linen, and white herringbone coutil.
Pattern: Created by me (more details in this blog post about mockups and this one about the pattern pieces themselves).
Year: c. 1885
Notions: 38 bones (34 of which are spiral steel and 4 of which are flat steel), a metal busk, metal grommets, cotton twill tape, thread, silk thread for flossing, and a lace for the corset (with the addition of decorative lace sometime soon).
How historically accurate is it?: As accurate as I can be using the research I’ve done and the materials that are available in 2015. I think it passes Leimomi’s test of being recognizable in its own time.
Hours to complete: Many! Patterning, cutting, sewing, finishing…
First worn: Only for fitting the mockup of the dress that inspired it–but I plan to wear it with that dress in August.
Total cost: The fabrics were all from the stash, as were most of the notions, except for the bones and busk, for which I paid about $50.
New techniques: Steam molding! But I also added a few new details to the corset construction process. Details in this construction in detail blog post.
Reflecting back on the process, I think I probably could attempt to starch the corset with a stronger solution or more applications, but at this point I’m satisfied and ready to move on to the many other things I’d like to sew this summer, including the 1885 bustle dress that sparked this project in the first place! (I’ve actually already moving ahead with that–I fit the mockup bodice over the corset and was very pleased! More on that in a few weeks hopefully!)
This corset is made up of three different fabrics, all sandwiched together and flat lined. The outer fashion fabric is a scrap of butter yellow duchess silk satin that just barely fit all my pattern pieces (whew!). The inner layer is a white herringbone cotton coutil. Sandwiched in between these two layers is a tightly woven slightly off white linen. I chose this fabric for a few reasons: #1, because it was in the stash and an odd shaped scrap not likely to be used for a garment that required large pattern pieces; #2, because it didn’t have any dye that might leech through onto the yellow silk; and #3, because it is tightly woven enough that I’m not worried about the bones poking through it over repeated use.
The three layers of fabric in this corset.
I decided to use three fabrics instead of the usual one (coutil) or two (coutil and a fashion fabric) for two reasons: #1, because I wanted an extra layer of fabric between my silk fashion fabric and my inner coutil layer so there would be less chance of any sort of spotting from the starch; and #2, because applying boning channels of any material would have been incredibly bulky and challenging with all the curves and bones on seams, but by having a third layer of tightly woven fabric I could sew boning channels anywhere I pleased without adding bulk.
After cutting out all 12 pieces in each fabric I machine basted the layers together so nothing would be sliding around creating bubbles while I assembled the pieces. Most of the basting wound up being removed as I moved through other steps in the process–either during the grading of the seams or while inserting bones.
Once the layers were flat lined I put the grommets in the two back pieces. Normally, I do this later in the process, but this time it worked well placed here. I used size 0 silver grommets. They are a little larger than extant corsets seem to have, but they are what I had available. After that, I assembled the pieces along their vertical seams. Then I graded each seam so that when it was pressed towards the back of the corset it would be less bulky.
A graded seam.And here’s what it looked like with all the seams graded and ready to go.
Most of my previously made corsets have flat felled seams, some of which are used as boning channels and some of which are not. I prefer this method because it provides more strength along each seam than any method in which seam allowances are left pressed open. In this case, though, 3 layers of fabric getting flat felled was very thick, so I decided to try a different method. I bound each seam with ⅝” cotton twill tape, not worrying about the fact that the graded fabrics closest to the original seam were not encased in the binding.
All the seam allowances bound with twill tape.
The seam allowances were all pressed towards the back, but not immediately topstitched as with a flat felled seam. Instead, they were caught and stitched down as I stitched boning channels. Some of them have boning channels that run all the way down the seam while others are held down by boning channels in enough places that, when combined with a binding on the top and bottom edges, will be sufficient to keep the binding flat and not allow any of the graded seam allowances to peek out.
With all the boning channels in place the bound seam allowances are caught in enough places that they won’t flip around.
Another detail unique to this corset is related to stitching the boning channels. Often when I flat fell seams for corsets I don’t also topstitch right along the seam. For this corset, however, I stitched an extra line of stitching next to the fold of the seam allowance. This detail is taken directly from my inspiration corset at the V and A. While this might provide a little extra strength, I believe it is mostly a decorative and flattening stitch.
On the left you can see how the seam has not been topstitched next to the fold, while on the right you can see the extra line of topstitching.
I was able to stitch most of the boning channels prior to inserting any of my boning. This corset was intended to have 4o bones, as the V and A description states, but wound up with 38. Unlike the original, which has whalebone, this corset has ¼” spiral steel bones except for the bones that flank the grommet channel, which are ¼” flat steel.
This is the first corset I’ve made that uses this much spiral steel. Usually I use flat steel, but these boning channels are much to curvy for that. The spiral steel definitely lends itself to the curviness of the corset, allowing it to shape to my body rather than making it a more cylindrical shape.
This is also the first corset I’ve made with this much boning. I’d say it has about double the usual amount of boning. That, combined with the three layers of fabric, make this one heavy corset (and heavy duty, too!)! Unfortunately, I don’t own a scale to weigh it, but the weight is surprising every time I pick it up.
The back of this corset has diagonal boning channels that bump up against a seam on one side and the grommet channel on the other. I order to sew those and also get a bone in them, I first stitched the bottom line of stitching, then inserted a bone and used a zipper foot to sew very close to the other side of that bone to create the channel. These diagonal back channels are where I lost 1 bone on each side of the corset. My estimates must have been off, because I had one bone that was way to long for the channel, but eliminating it fixed everything. I was ok with that deviation from my inspiration corset by this point in the process.
My boning channels got a little wonky up near the top (where the presser foot is), but it almost looks artistic, and is symmetrical on both sides of the corset. And I was ready to be done by the time I reached these boning channels!
The above picture shows another corset trick, also. When I’m stitching boning channels that end partway across a panel, rather than at the top or bottom, I leave my thread tails and do not backstitch. Once I’ve completed the channel I flip the corset over to the wrong side, use a seam ripper to pull both thread ends to the inside, hand tie them, and snip them close. That leaves no tiny thread ends on the outside of the corset making little shadows that look un-tidy. The method works wonderfully!
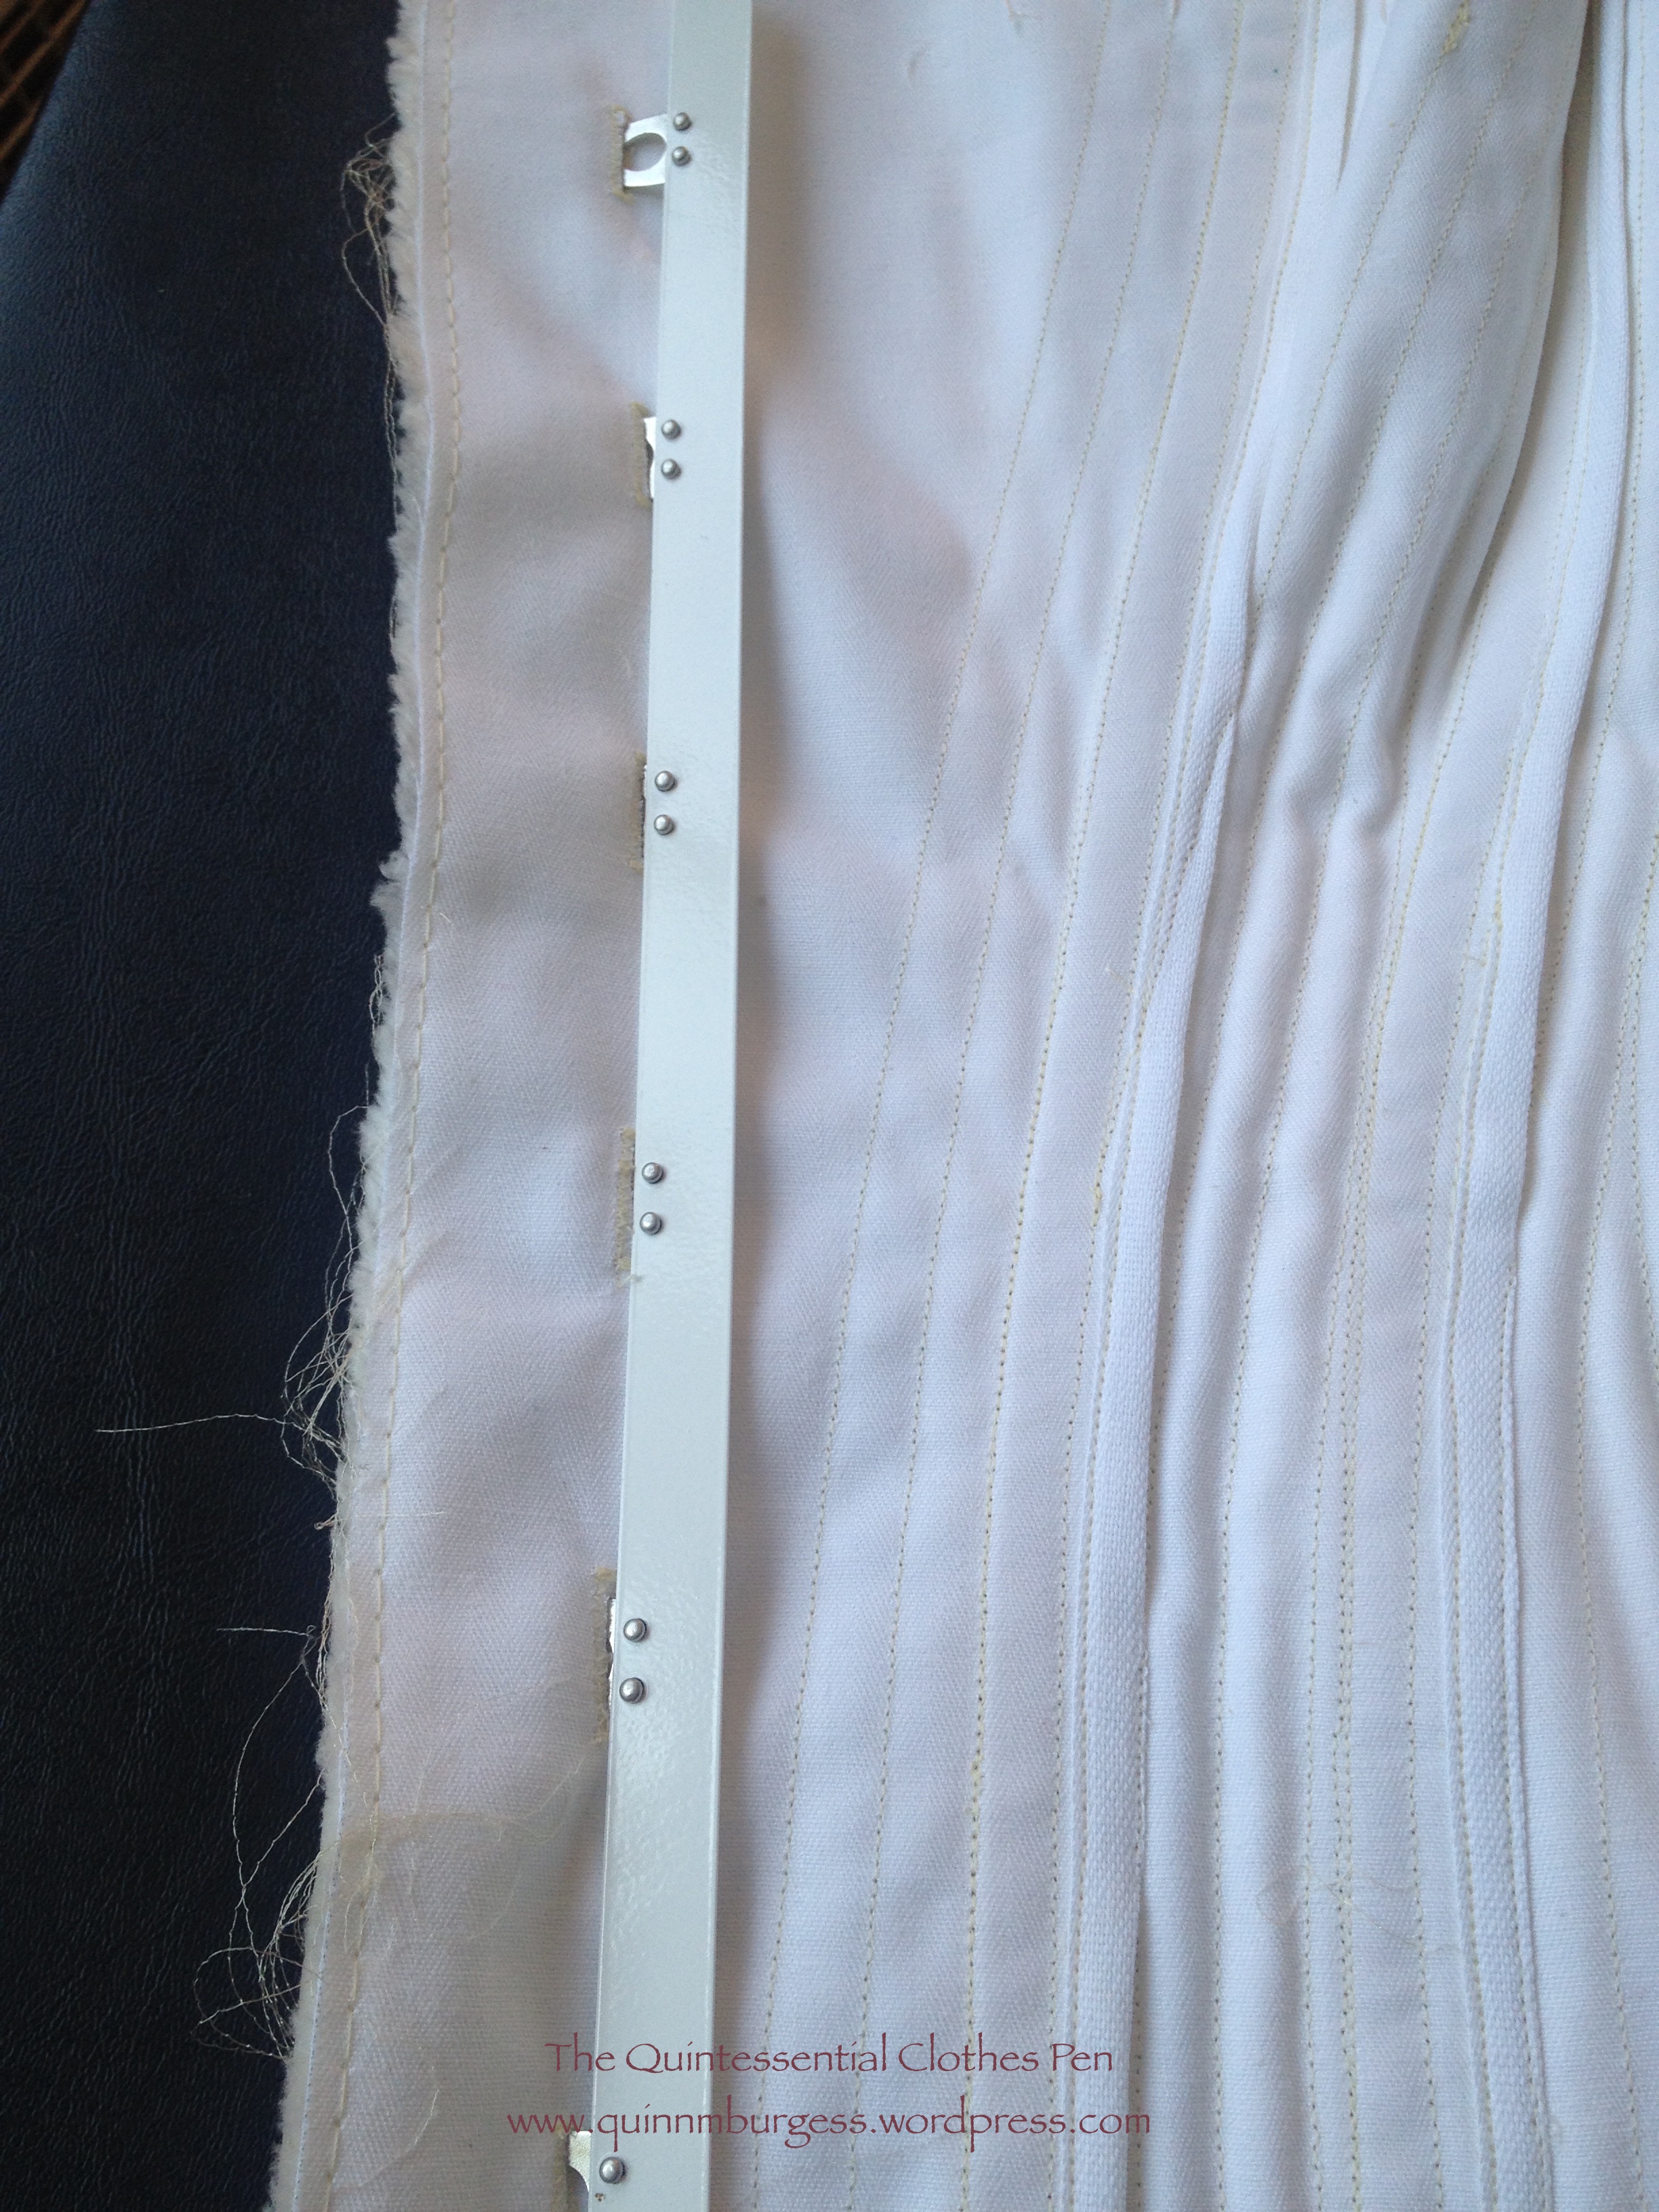
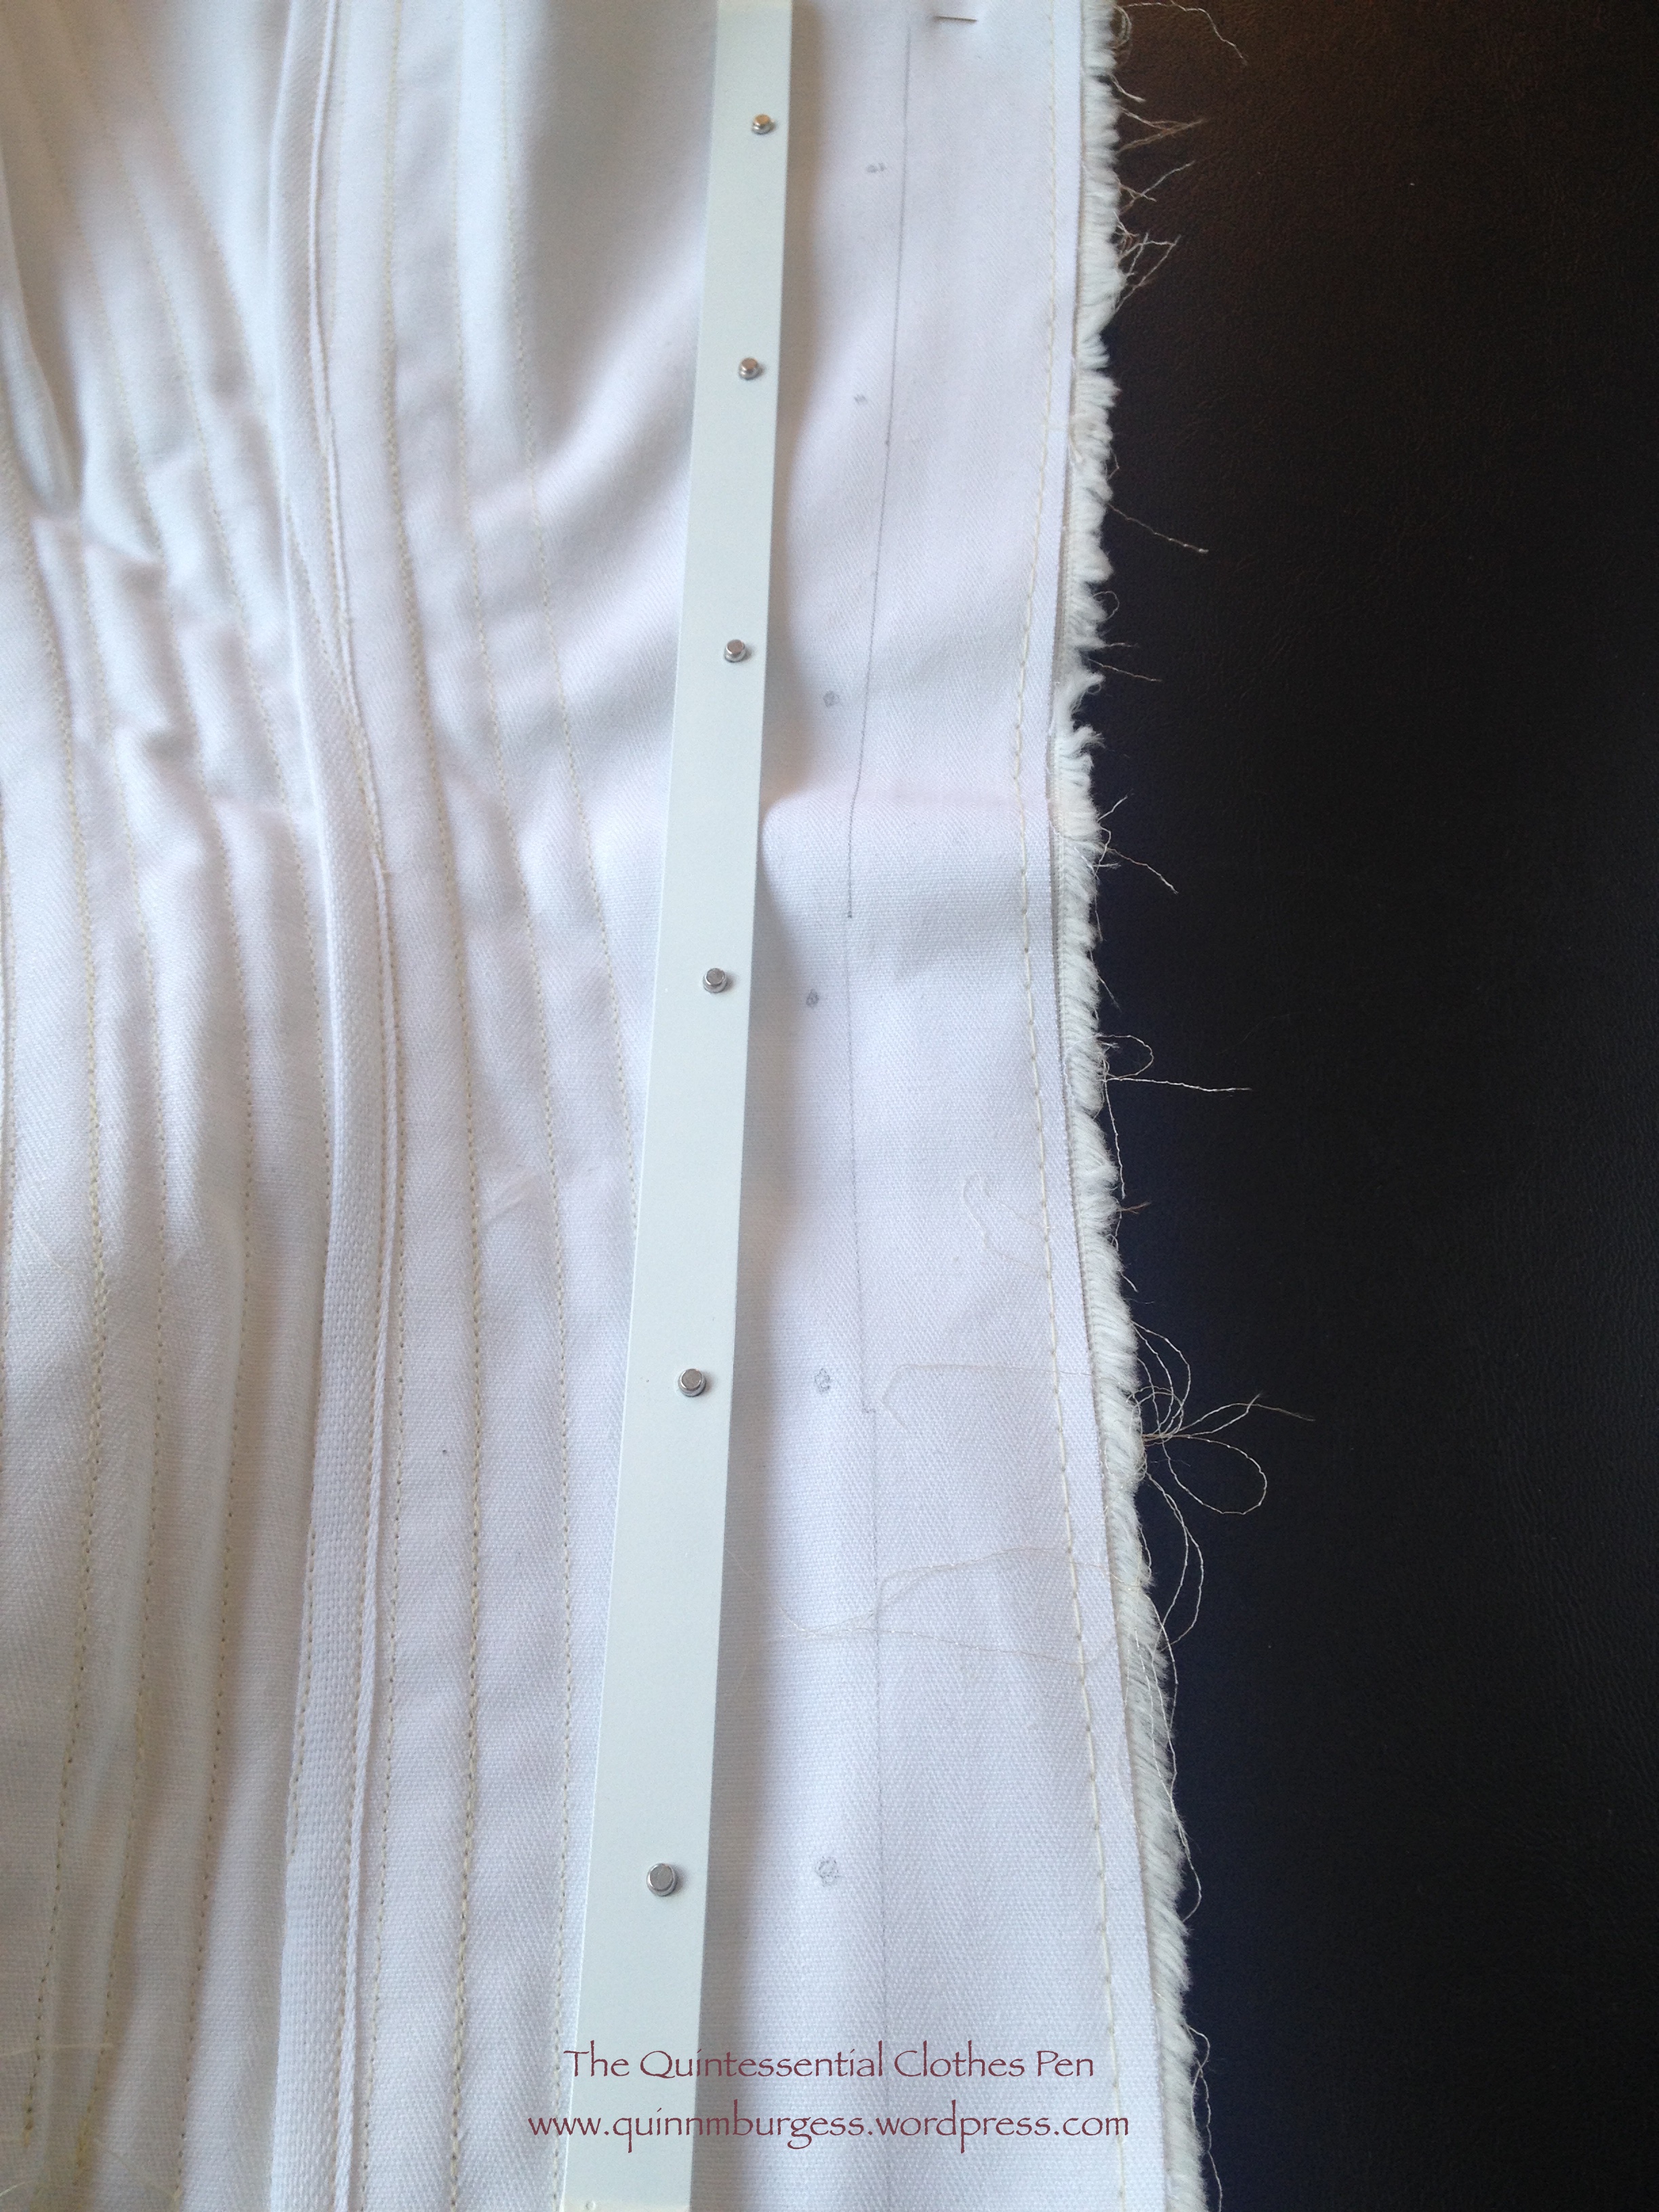
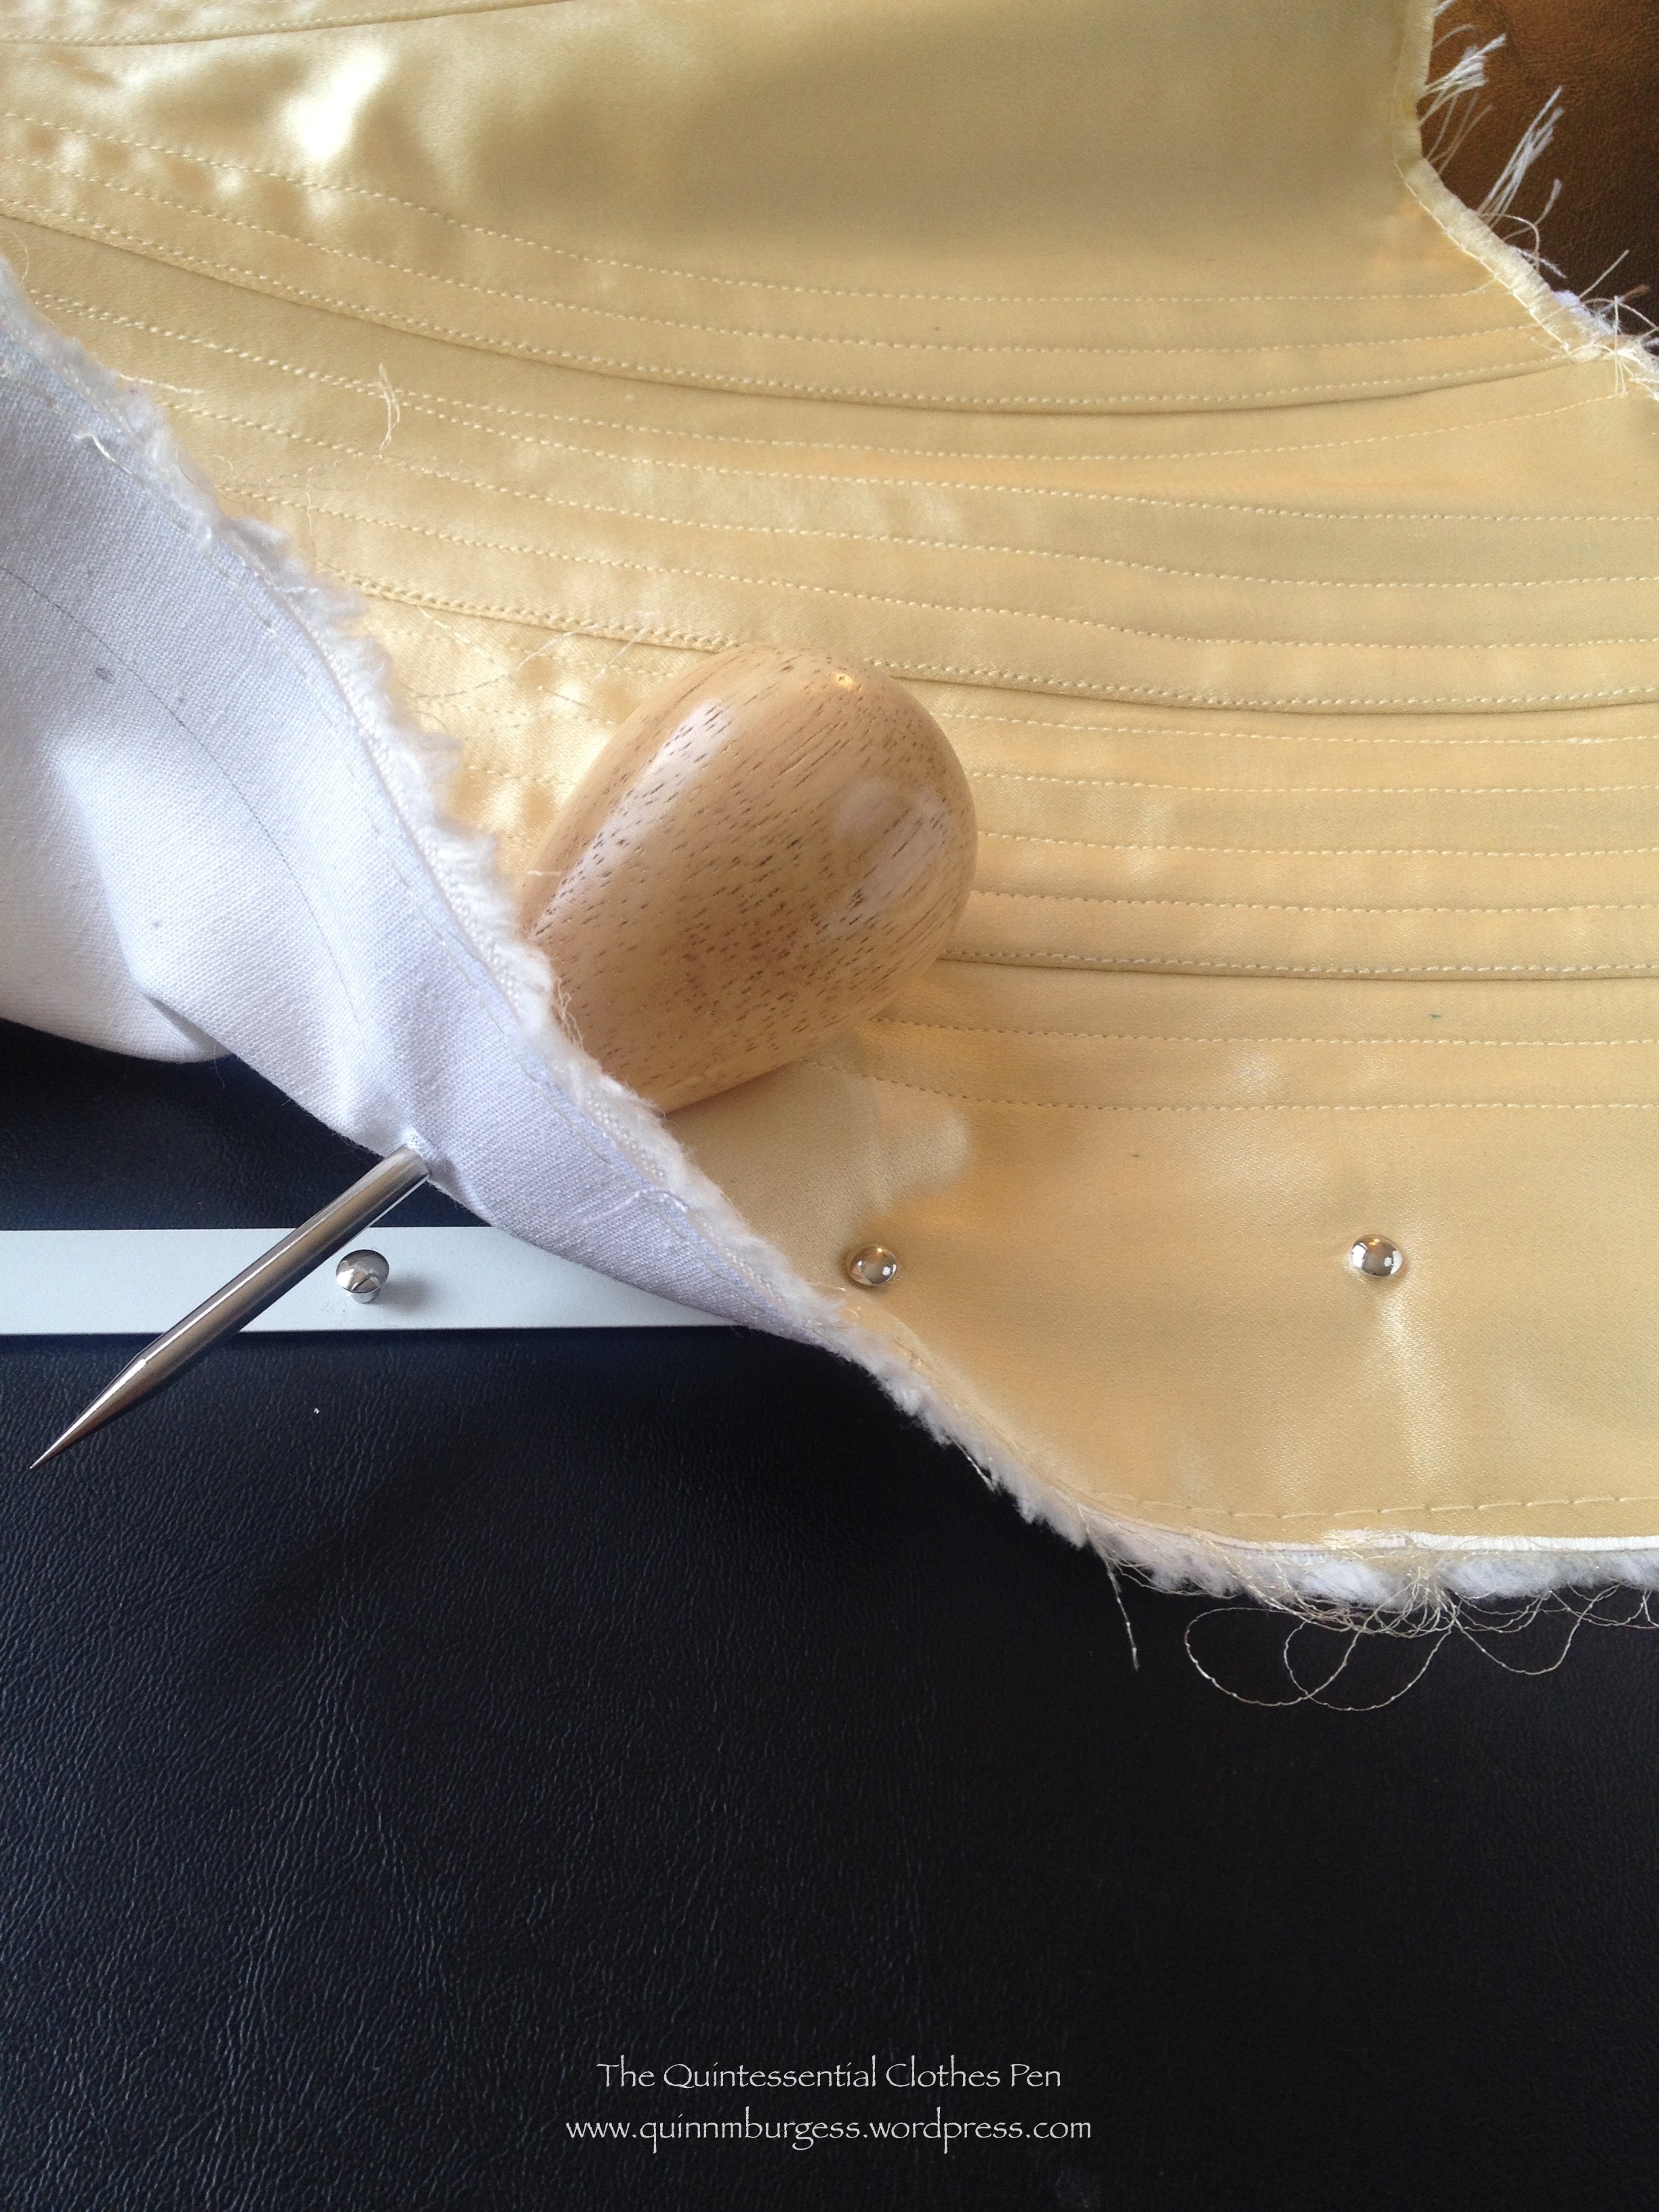
Once I finished the boning channels I put the busk into the two front edges of the corset. I thought I’d show you how I like to do those steps in more detail. After the steps that are pictured, I turn the extra seam allowance under the busk on the inside (trimming it if I’ve left too much) and top stitch with a zipper foot right next to the edge of the busk. On my older corsets, I stitched a straight line from top to bottom, but on more recently made corsets I curve around the top and bottom of the busk to keep it from sliding up and down (another detail I’ve noticed in extant corsets).
I’ve found that putting both sides of the front busk on a fold is nice and sturdy. I’ve also found that creating buttonholes for the loops to poke through helps minimize wear and tear on the corset over time as well.I make sure to make the buttonholes just larger than each loop and placed exactly so there are no bubbles anywhere.For the other side of the busk, you can see that I’ve roughly marked a fold line as well as the placement of each knob. Again, these have to be exactly placed.Then I use an awl to open up the weave of the fabrics so I can push the knob through.
After that, I was ready to bind the bottom edge of the corset! Sewing all 38 boning channels took hours (this corset is thick and sewn with small stitches, another detail I’ve noticed in extant corsets), so I was excited to move on to the next step. Luckily, I thought ahead and realized that there are three vertical bones on the back panels that dead-end at those diagonal channels–the bones for those channels had to be inserted before I sewed the bottom binding on. I didn’t take a picture of that exact step, but I did take a picture of the assembled corset with boning channels before I bound either edge.
You can see the vertical boning channels in the back that dead-end at the diagonal channels and you can see that the diagonal channels that don’t reach the top edge had the bones stitched in as I went along.
The bottom binding is bias strips cut 1″ wide. I had to do a lot of piecing of my small scraps to have enough binding for the entire corset (see that seam just to the right of the busk in the picture below?). I stitched them first to the right side of the corset with ⅛” seam allowance on my bias, trimmed my corset seam allowance to just about ⅛”, folded the bias over the edge, turned the raw edge under on the wrong side, hand whip stitched the bias down on the inside (slow, but a more effective method than pinning in this case), then turned the corset back to the right side and topstitched very close to the edge of the first fold. This narrow topstitched binding seems to be common on late 19th century extant corsets and looks very tidy.
Bottom binding sewn on.
Then came the struggle of the bones! I really struggled with this! I spread the job out over about a week and worked on it a little each day because it was hard on my fingers and wrists. The spiral boning condenses when pressure is applied, so pushing it through tight boning channels was a challenge! I wound up wrangling the corset bones into submission using a thimble, pliers, and a chopstick to help out my hands. Turns out that especially at the boning channels on seam lines, where the seam allowances were thick, I should have made the channels a little wider to make getting the bones in easier. There were one or two channels I finally resorted to unpicking and then restitching after inserting the bones for part of their length. In the end, victory was mine and I was able to move on and bind off the top edge of the corset. This was done in the same way as the bottom edge, being careful to be symmetrical between the sides and avoid sewing over bones.
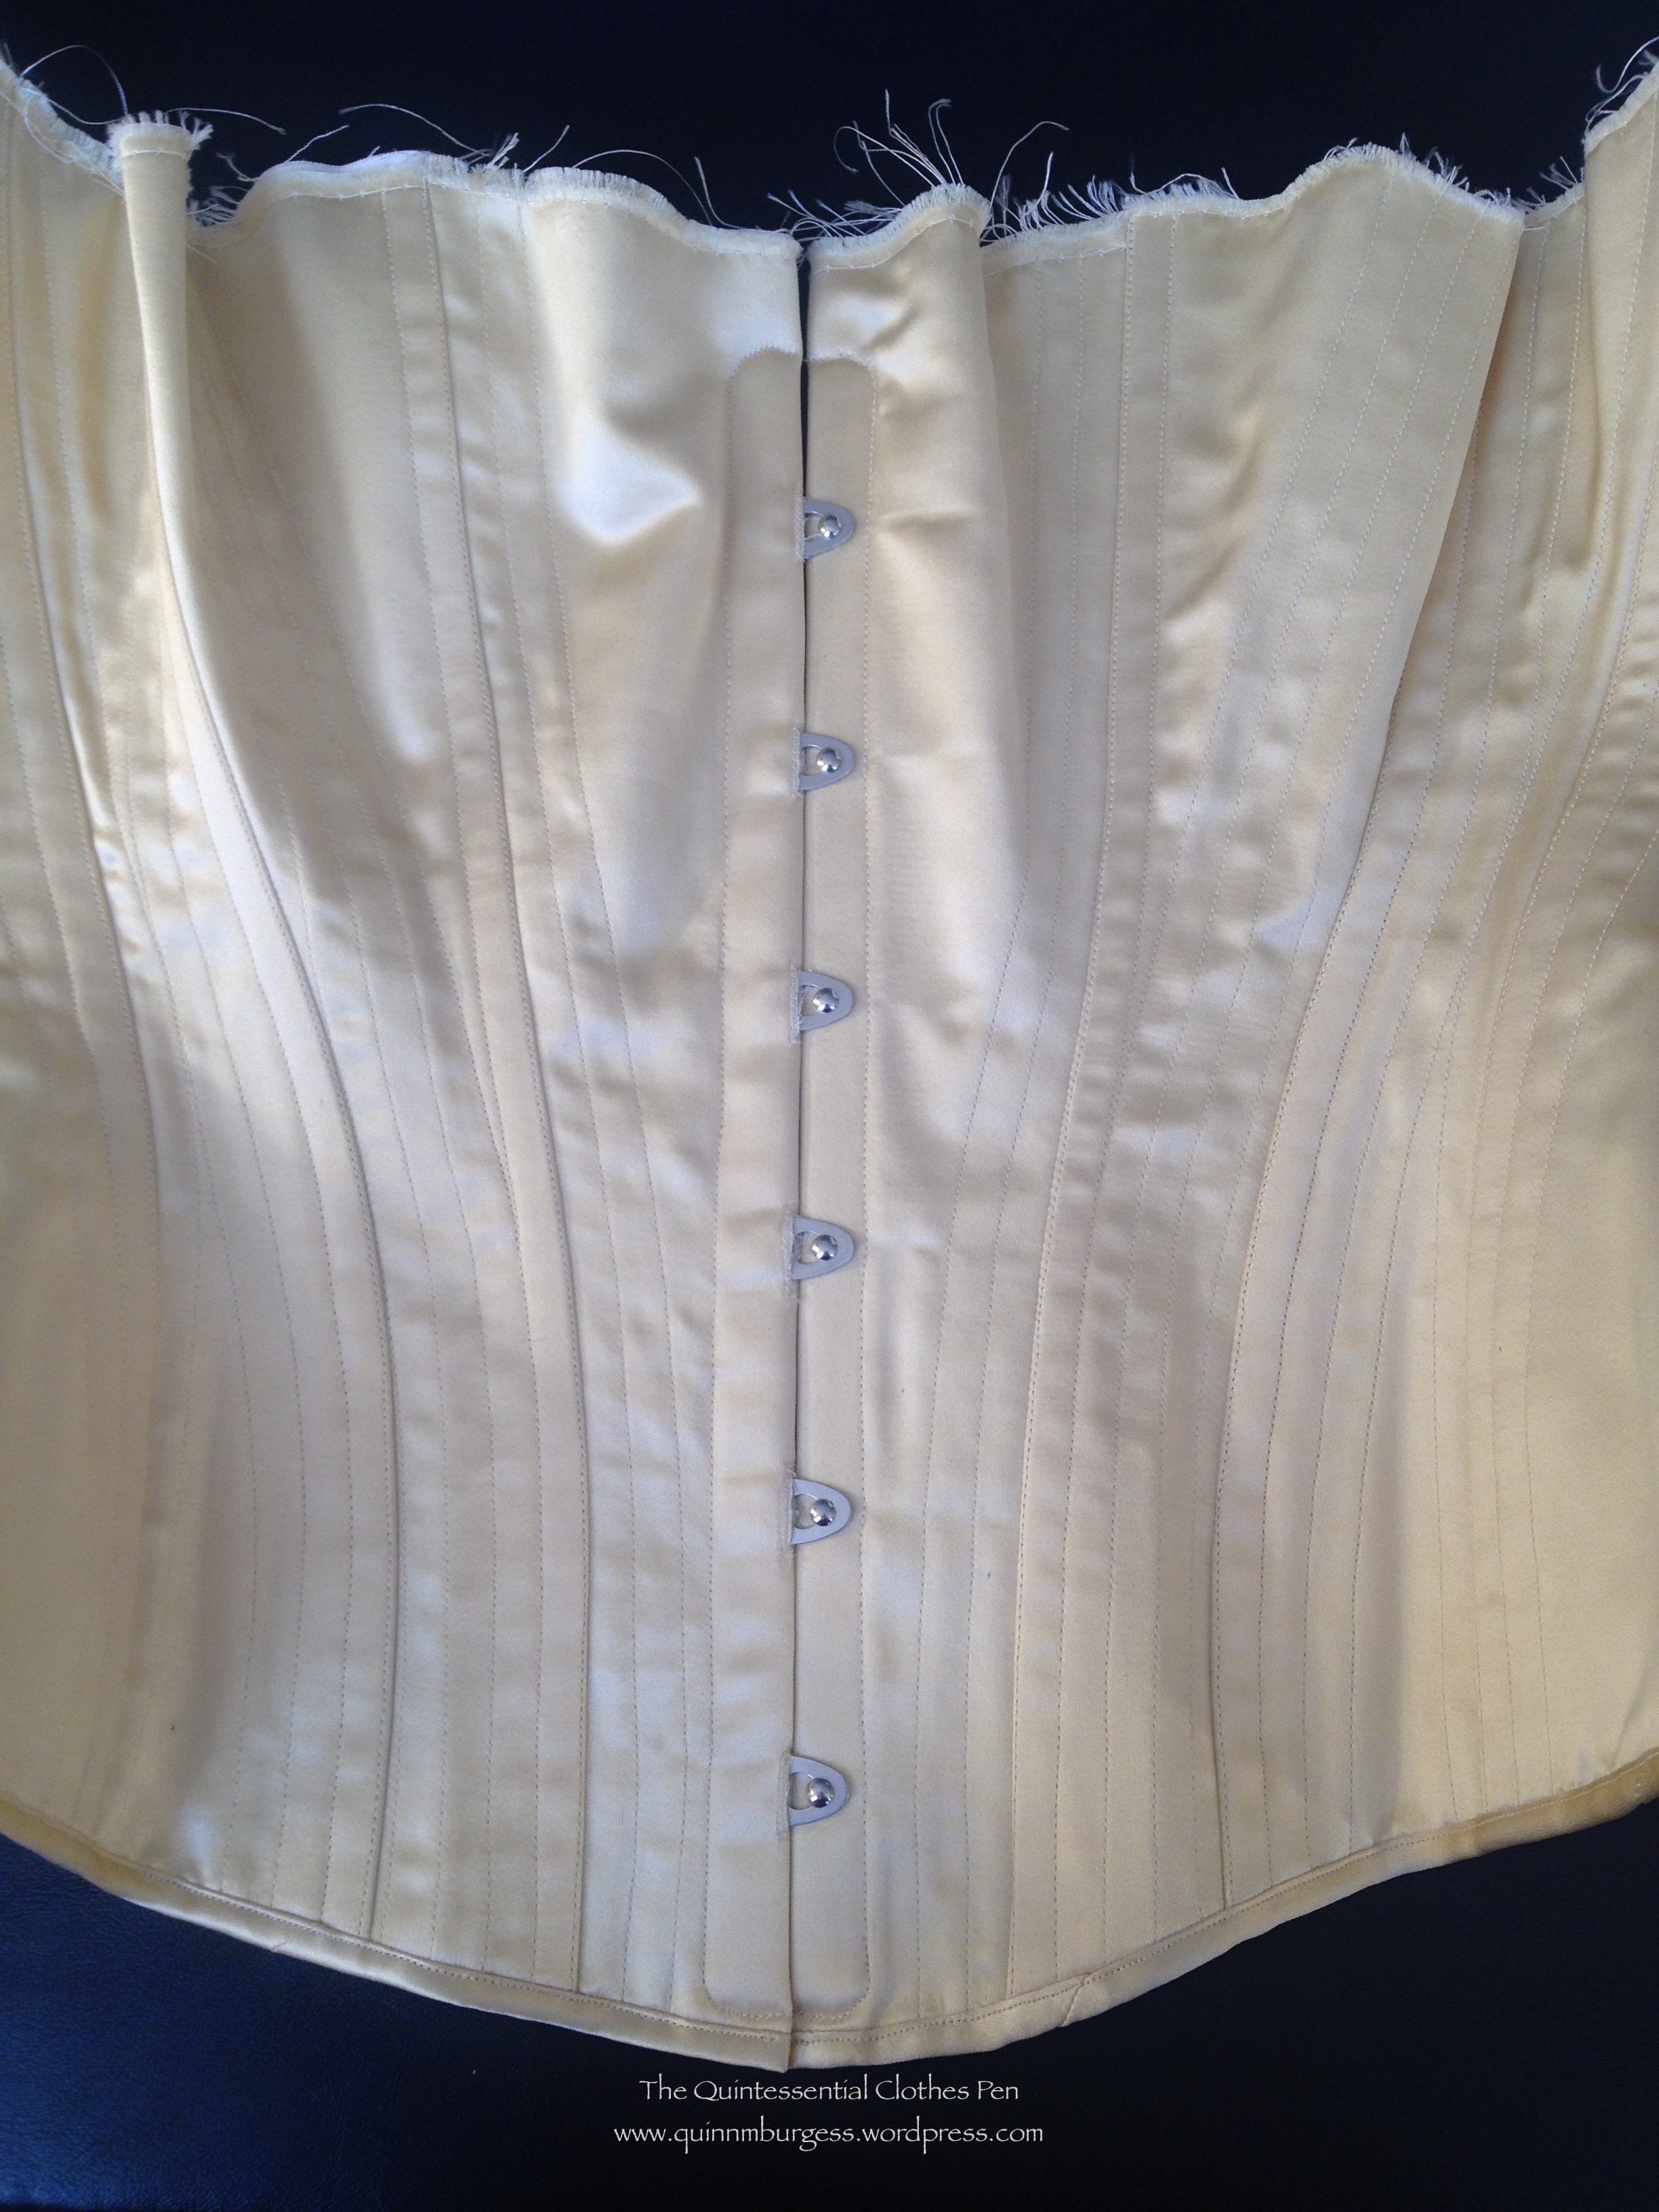
And here is the result! It’s wearable at this point, but not quite complete.
The previous post in this series compared the two mockups I created while finalizing the pattern for the new corset. This post let’s compare the pattern pieces themselves.
Since my inspiration corset is only shown from one angle in a single photo, I had to use other information to extrapolate information for the areas not visible in that photo. As I mentioned in my previous post, I began the patterning process with the 1880s corset pattern in Corsets and Crinolines. That, combined with observations of other 1880s corsets, and the information below from the V and A description of my inspiration corset, all helped inform my decision to have 6 pieces in each half of the corset.
This corset from the 1880s is composed of twelve separate shaped pieces and forty whalebone strips.
The image below shows the pattern pieces from my first mockup compared to the pattern pieces from my second mockup. At first glance they are basically the same, but upon closer inspection there are subtle differences. It’s the same idea I’ve been repeating in every post about this corset: the lines aren’t really that different, but the curves on them have been exaggerated (this is especially noticeable on pieces 1 (CF), 3, and 6 (CB)).
Center front is on the left and center back is on the right.
You might also remember that I mentioned in my previous post that I had changed the two pieces closet to center back after the mockup. Here are the two original 5 and 6 pattern pieces from Version 2 compared to the newer 5 and 6 pieces from Version 2.
On the left, pieces 5 and 6 (CB) Version 2.1, as seen in the mockup. On the right, pieces 5 and 6 (CB) Version 2.2, updated after the mockup.
I think the change in the pattern pieces is pretty obvious when they are compared side by side. You can see the inspiration image of the back of an 1880s corset that prompted me to make this change in my previous post.
Determining where the boning channels would be was an essential part of the patterning process, due to the immense number of bones and their specific placement between seams on the inspiration corset. I looked very closely at the inspiration corset to determine where the bones would be located on the front pieces of the corset. For the back pieces, I used the mention from the V and A that the inspiration corset had 40 bones to figure out how many additional bones I needed after the front ones were planned and information gathered from back views of other 1880s corsets to determine bone placement. You can see that the pattern pieces from Version 2 have short vertical lines drawn on them to help me envision where the boning channels would be as I created the pattern. Once I was satisfied with the shape of the pieces and the location of the boning channels I was able to move on to the cutting and construction… more on that soon!