Project Journal: 1822-1824 Ensemble Part VIII: 1824 Dress Re-Imagined (HSM #1)

Sweeping views, a gold tinged sunset, lilacs in full bloom… and a re-work of an old dress!
Backstory

Back in 2014 I was on an 1820s kick, making undergarments and multiple outfits for dancing and staying warm while out in the winter. I shared about the design, construction process, and wearing of these garments in a Project Journal series of posts (hence the name of this blog post, which is installment VIII in this series). This link will take you to the full project journal. I wore these 1820s outfits over the next number of years, discovering different small details I wasn’t completely happy with and letting out this green dress in the sleeve circumference and back closure, in particular, to adapt to my size around 2015.

The small details that never quite made me happy included:

  • The way the skirt hung in the front with an outward fold rather than flat with a more exaggerated A-line silhouette.
  • The length, which was a little shorter than I liked the proportions of.
  • The fact that the appliquéd organza trim didn’t have quite the impact I was hoping for. I was actually a little bored with it.

Re-Imagining

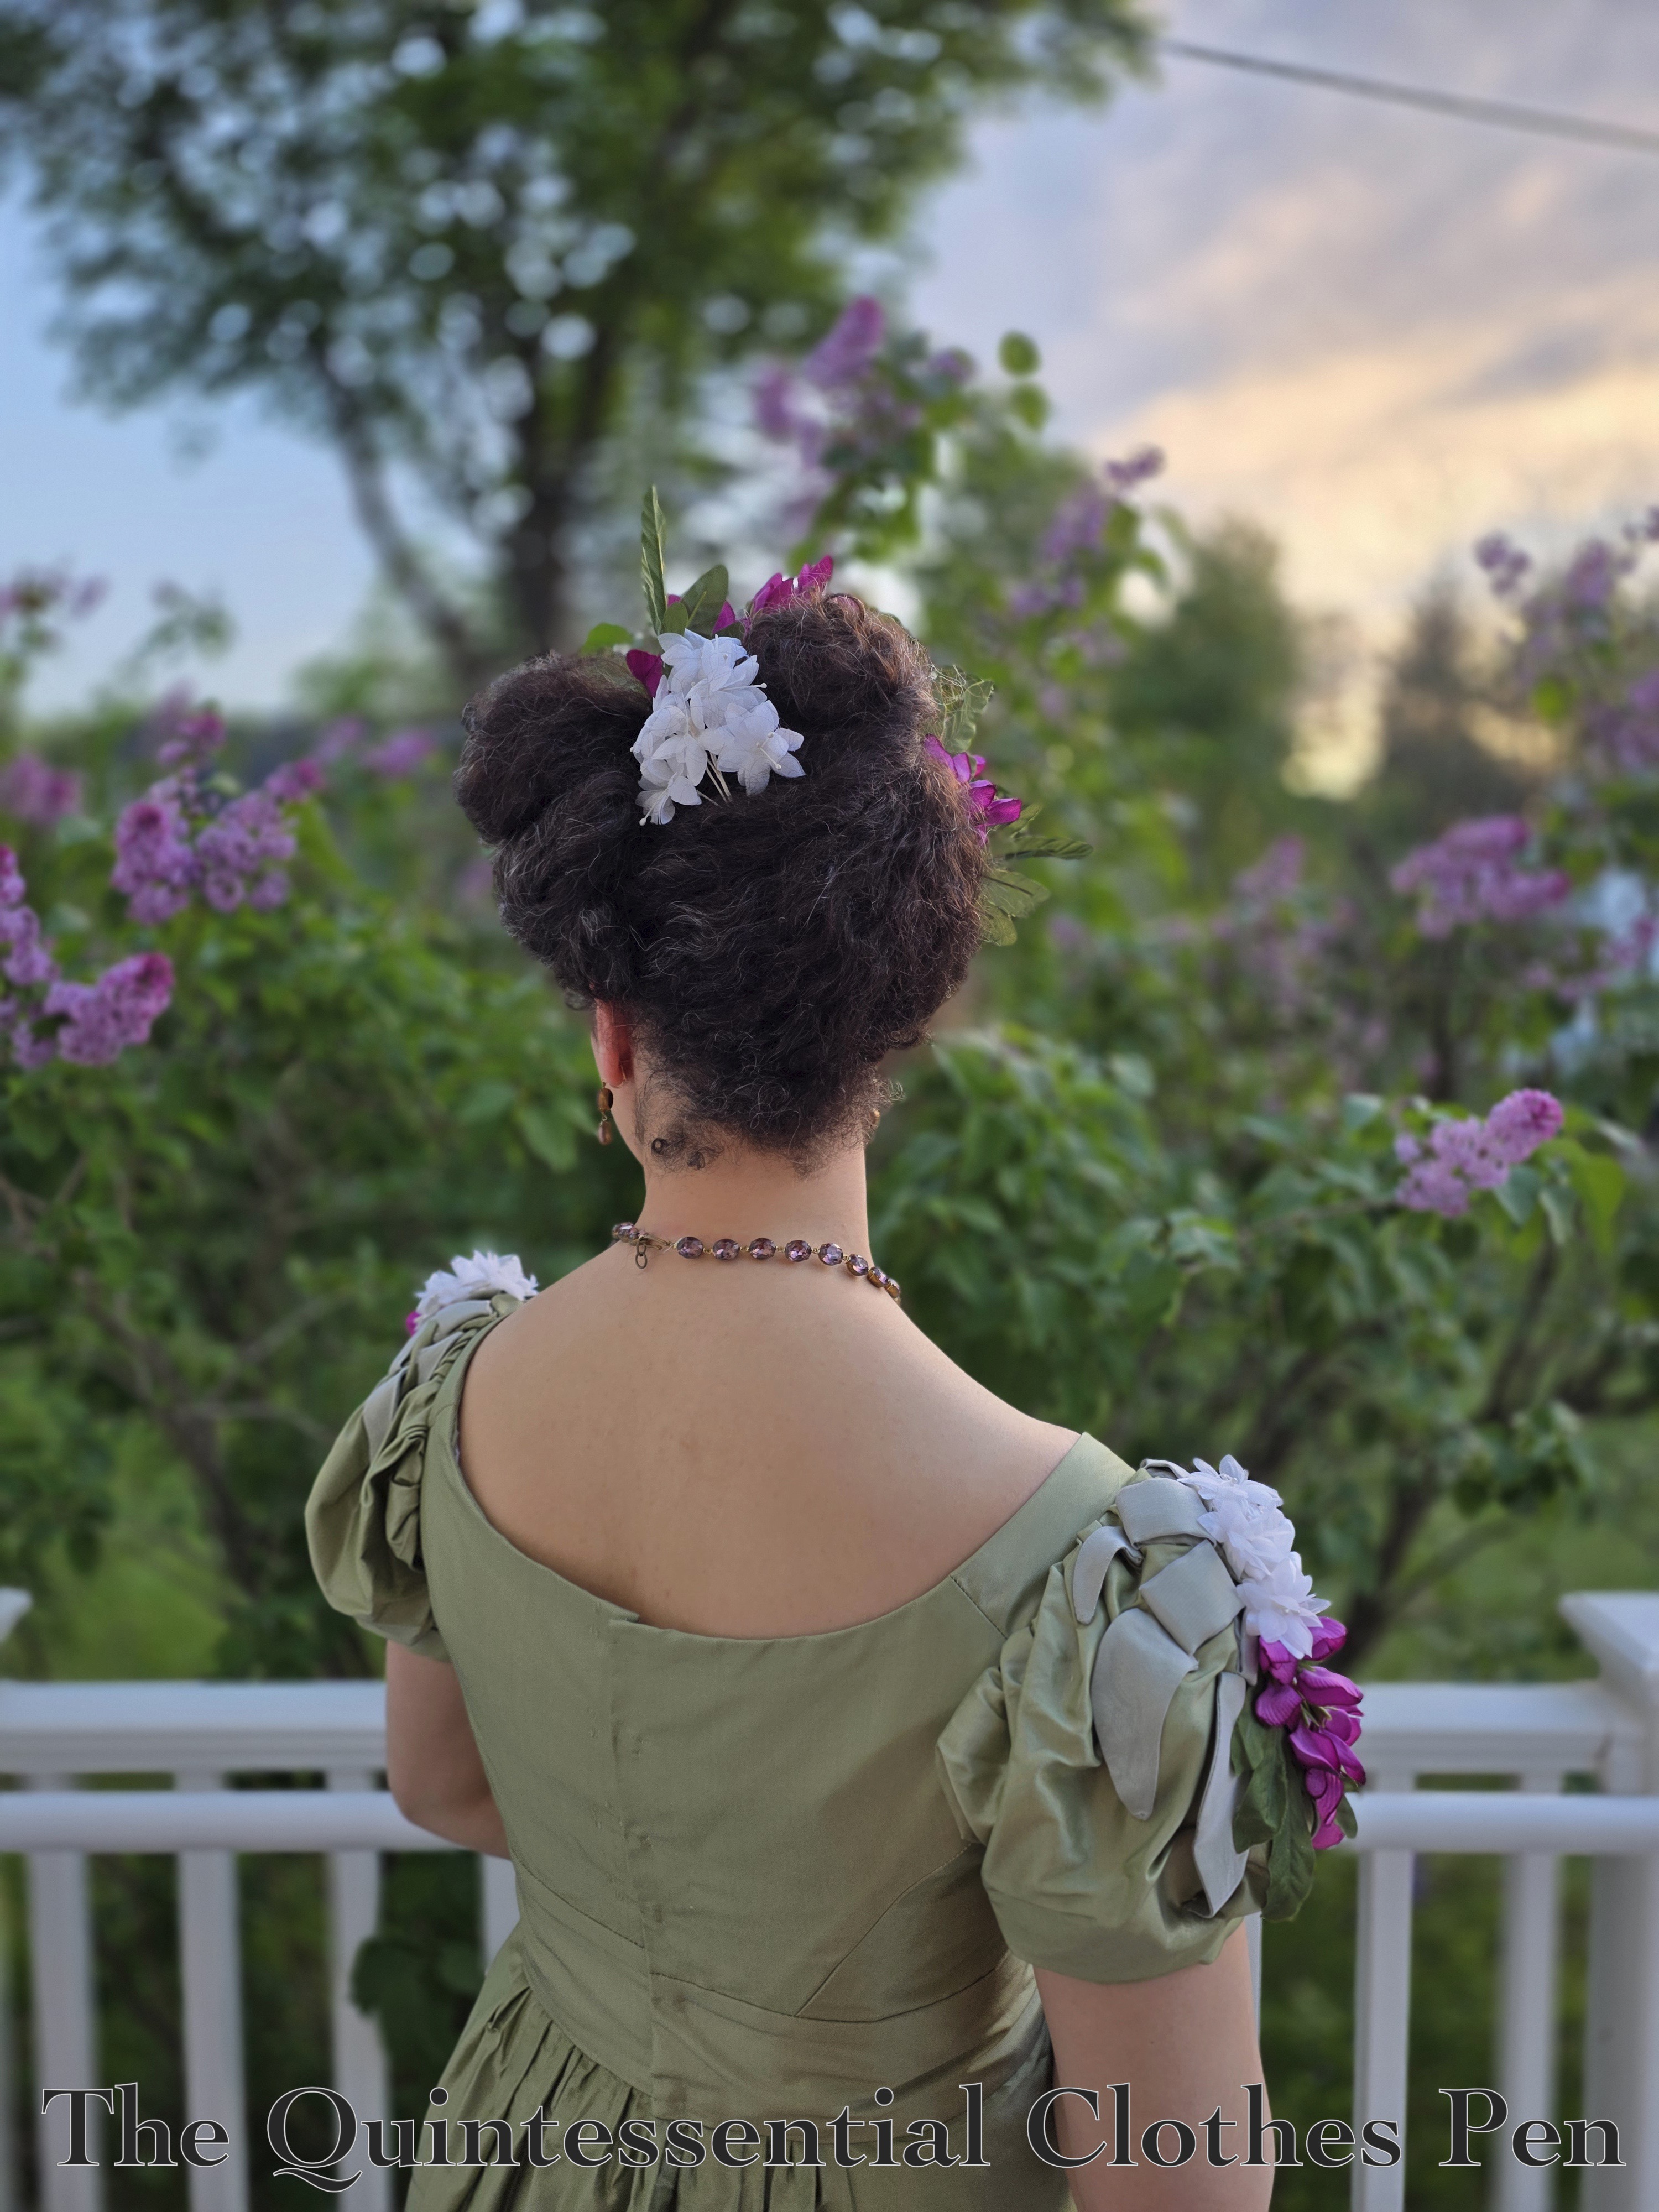
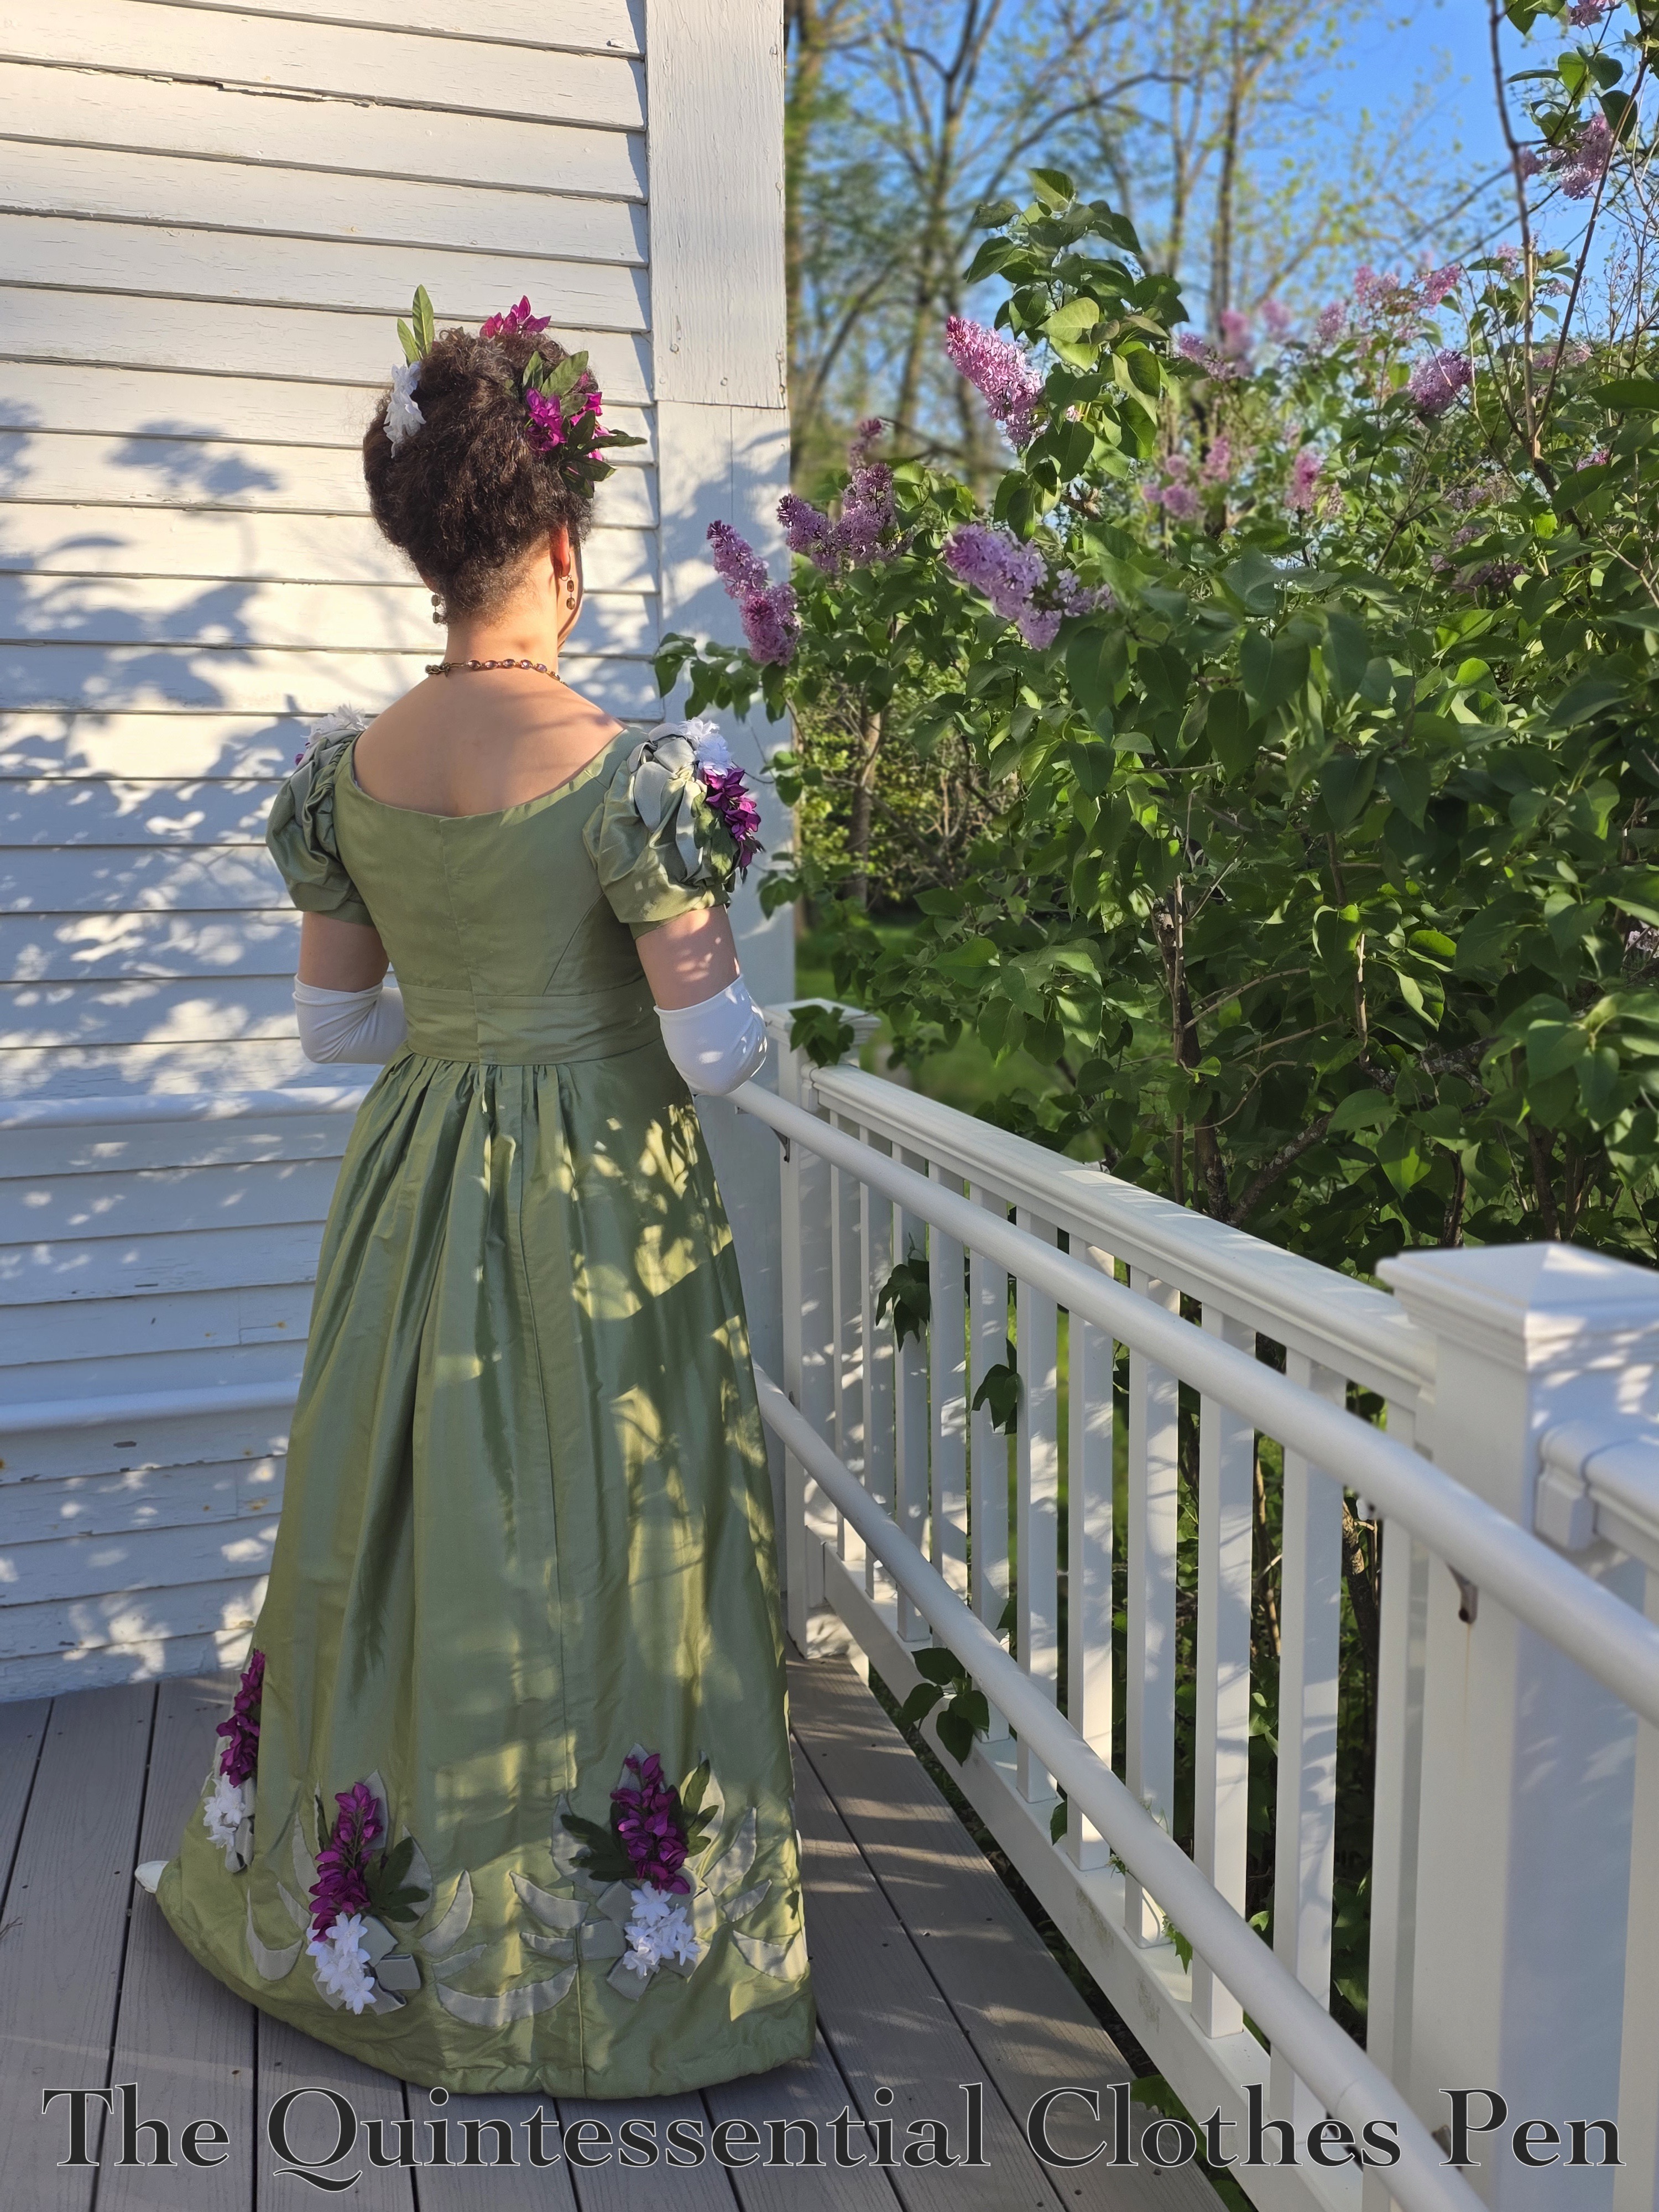
I had an upcoming event to wear the updated dress to and theme was a “blossoms ball!” So as I was brainstorming about the trim I thought “perhaps I need to add more flowers!” Here is the finished result.
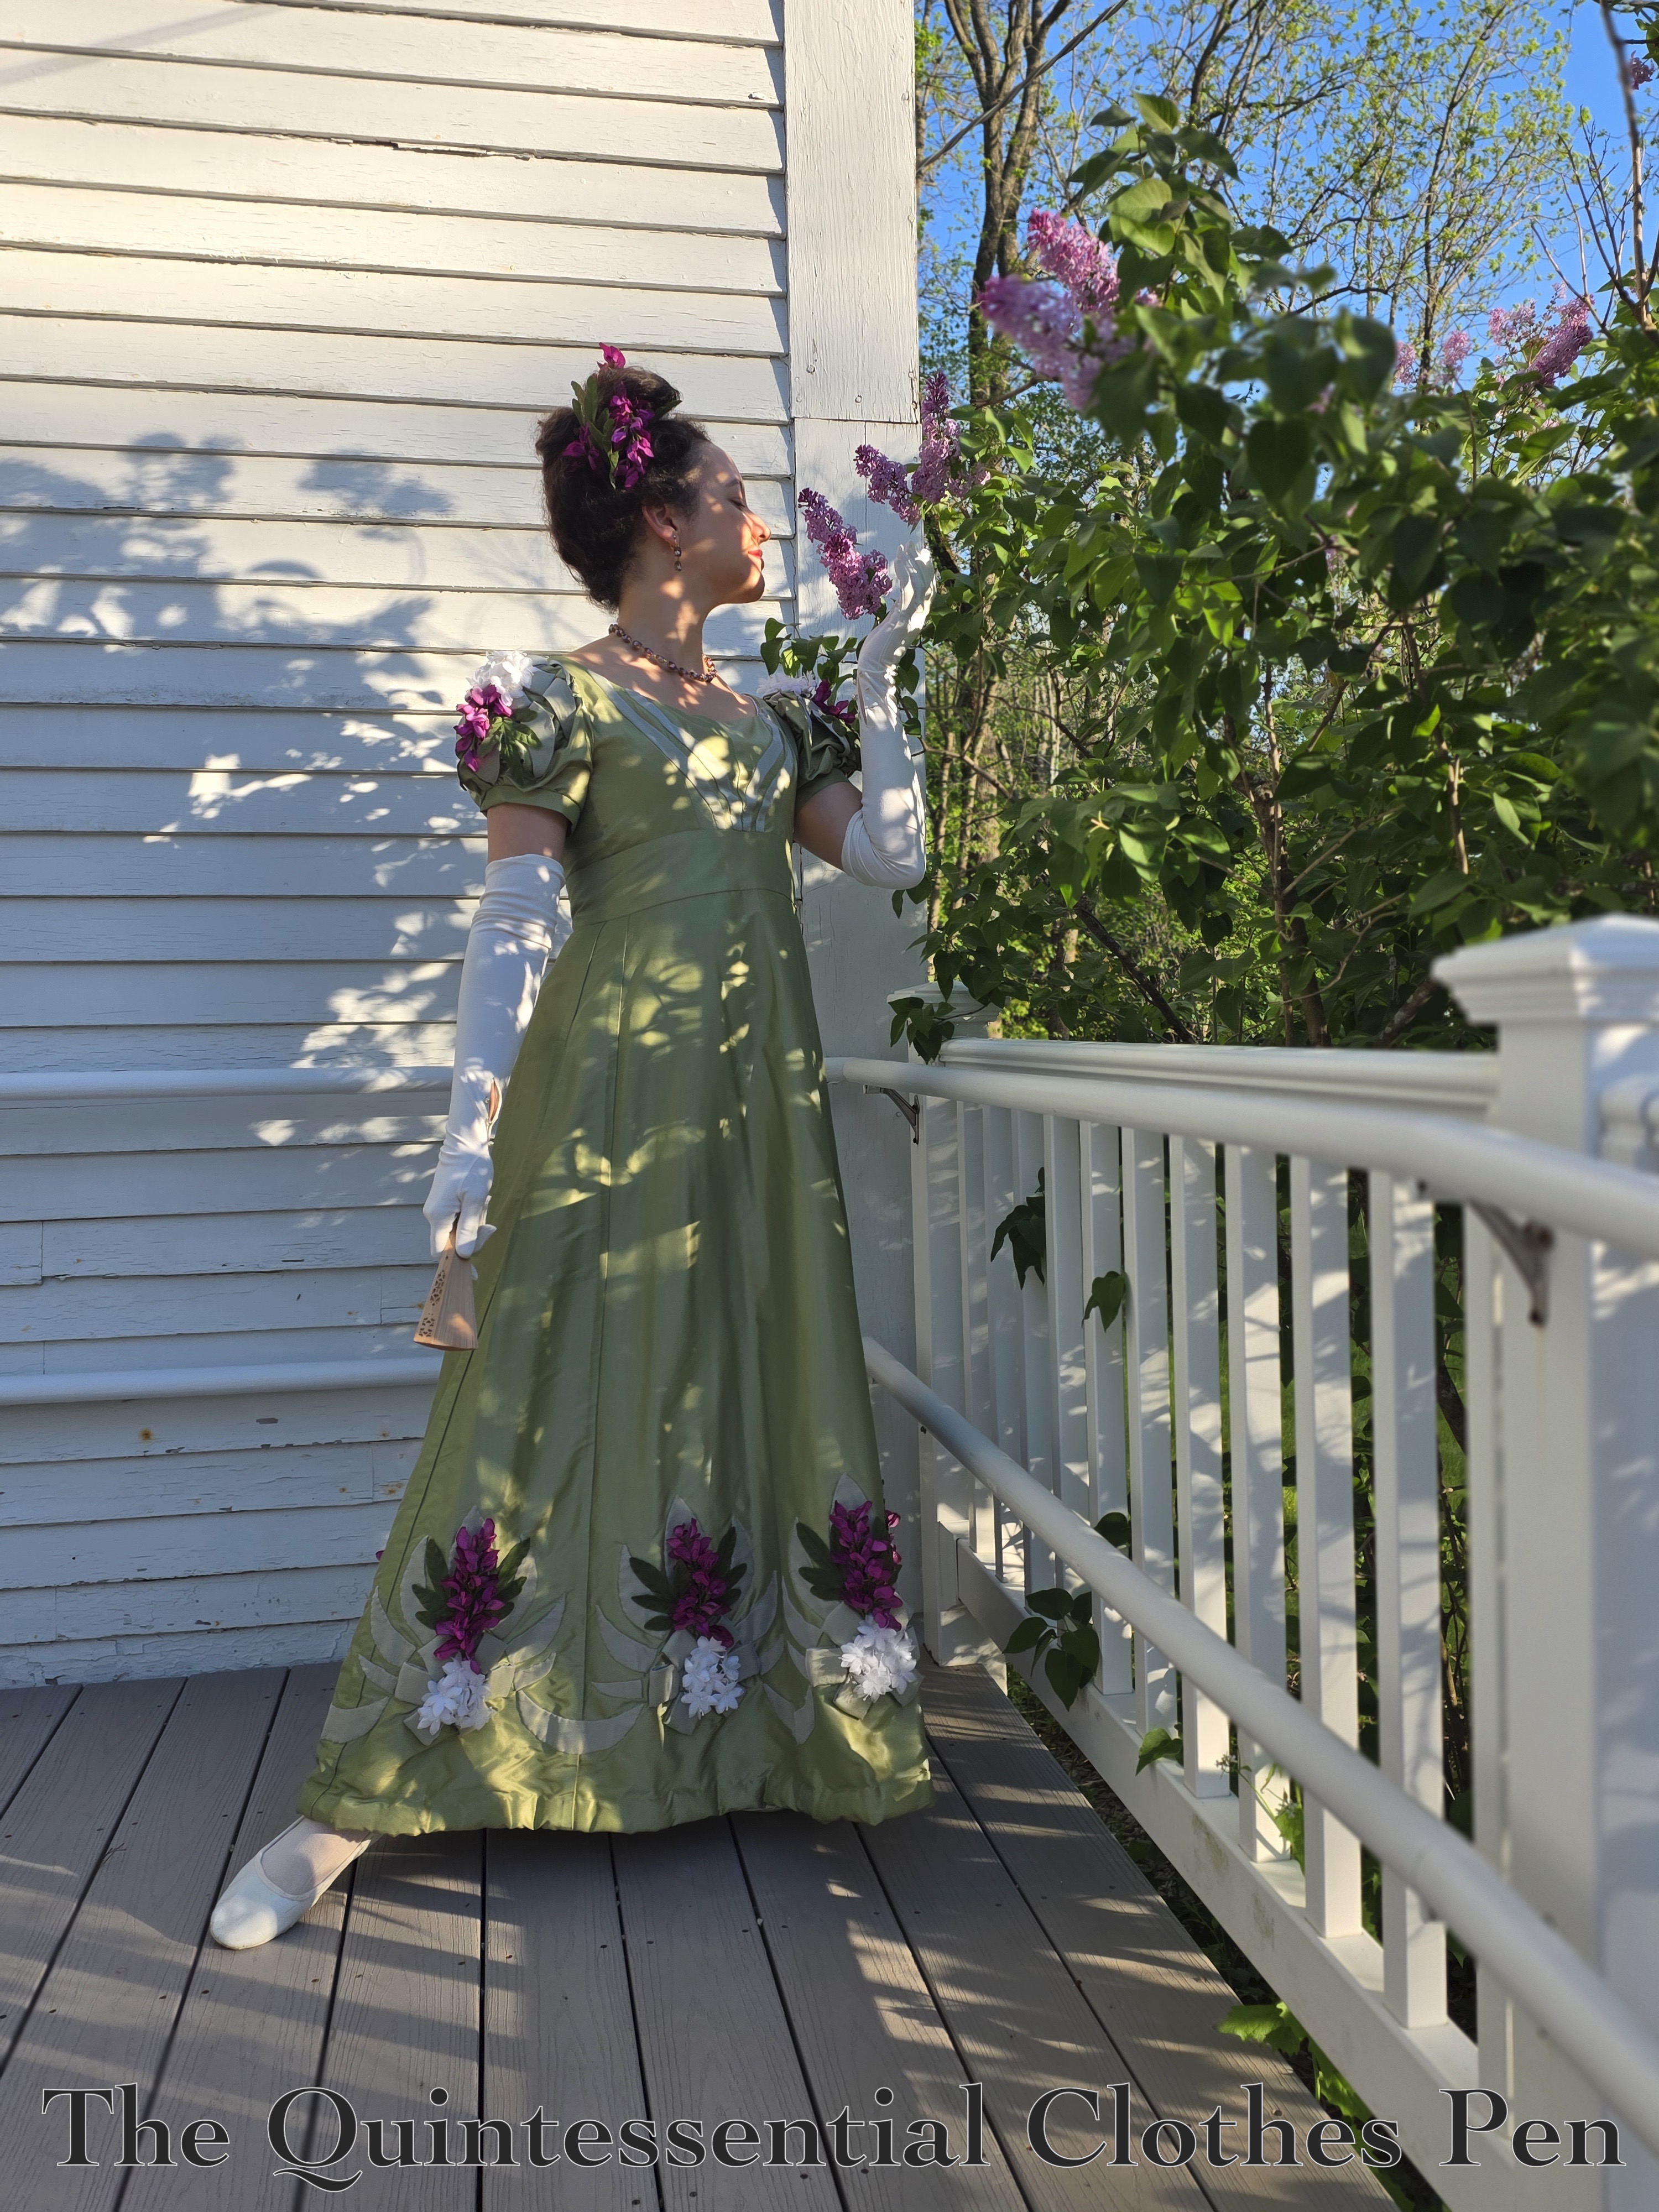
Let me explain the updates. The first goal was to lengthen the hem. I had actually left length on the bodice that could have been used to add overall length by resetting the waistband a lower position, but the silk fabric had permanent holes from the stitching that were quite visible, so this wasn’t a viable option. My solution was to make a new, wider waistband. This would drop the hem while also shifting the proportions just a bit to be more flattering. I still had a yard or so of this fabric carefully stashed away and cataloged (you can read about my stash system in this past post if you’re interested), so the materials part was easy.

The second goal was addressed while the waistband was getting replaced. I shifted the skirt gathers to be a little wider across the back and better suit the overlap of the formerly-let-out back pieces. In the original iteration of this dress the gathers were concentrated in about half of the space that they are now, based on the historical pattern information I was using as a guide. But what I found while wearing the dress is that that placement of the gathers was eliminating some of the A-line shape that I was going for.
Additionally, I discovered that changing the waistline curve of the side skirt pieces would also help flatten the front of the skirt and kick out the sides to create the A-line shape I wanted. This makes sense from a patterning perspective, but was an update from the pattern pieces I had taken from Patterns of Fashion when I originally made the dress. I lowered the stitch line on the side skirt panel by about 1″ and tapered that towards center front and center. back. Below is a photo of the new waistband being attached, showing the old cut edge and stitch line very clearly above the new stitch line.
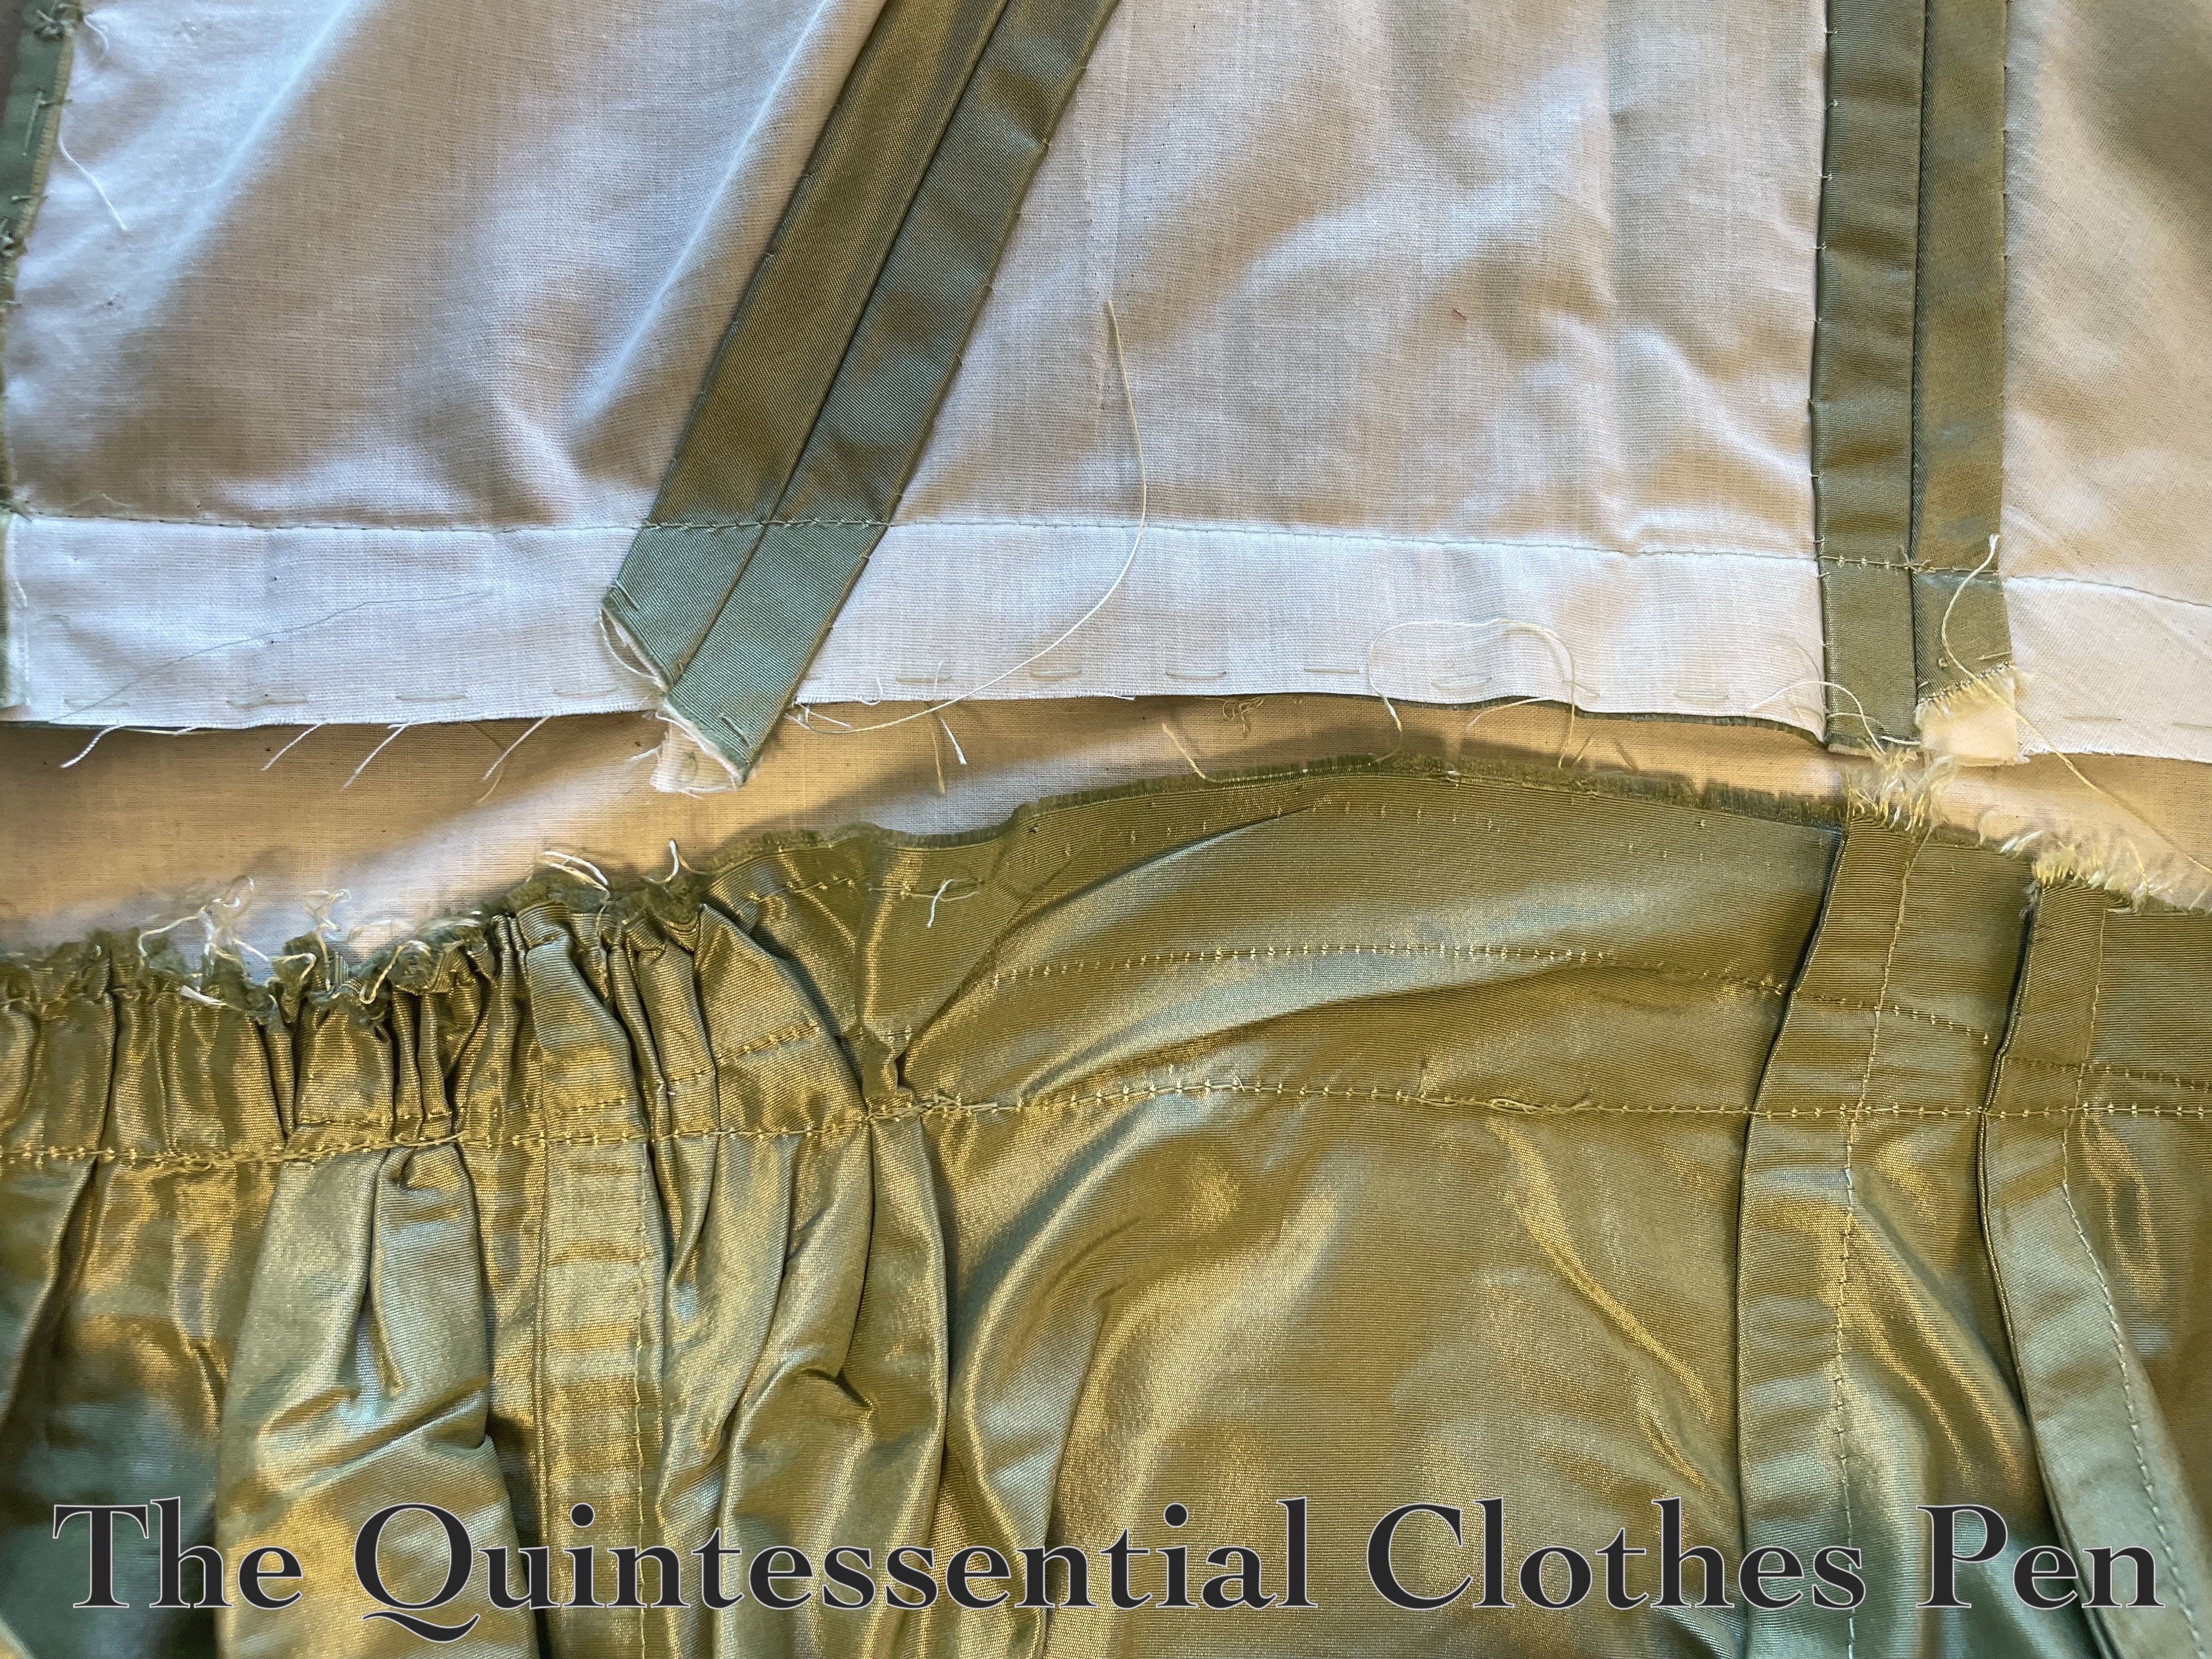
The bodice still fit in its let-out state (yay!), so it was easy to reattach it to the new waistband. I carefully followed the original stitch line to keep old stitch marks from showing! Those changes covered the first two goals of this re-imagining.

The last goal was to energize the trimming! I still remember the time consuming and finicky process of adding the appliqué silk organza motifs to the dress. I didn’t want to diminish that work! But it just doesn’t pop that much on its own… The fashion plate I was originally referencing can be seen here. It is partway down the page, labeled 1824 – Ackermann’s Repository Series 3 Vol 3 – May Issue.

When I looked at fashion plates from 1822-1824 again the 3D nature of the trimmings stood out to me and I thought “what if I add 3D flowers to the existing motifs?” There are multiple examples of evening gowns with this type of 3D trimming in this digitized volume of Ackerman’s The Repository of arts, literature, commerce, manufactures, fashions and politics. (The easiest way to find them is by looking at the thumbnails and quickly scrolling through all of the pages of text to look for the full page fashion plates scattered throughout.)

Off I went to my flower stash to see what I could find! I considered pink, yellow, and purple to complement the green of the dress. Given what I had available the purple was the winner. The color popped and brought energy to the whole dress without being garish and the flowers, which are silk but with plastic stems, didn’t appear too plastic-y to complement the silk dress. They needed a little bit of a transition, so I decided on adding some wired white silk millinery flowers as well. The fact that all of these flowers just exist in my stash in bulk was so helpful! And cost effective!
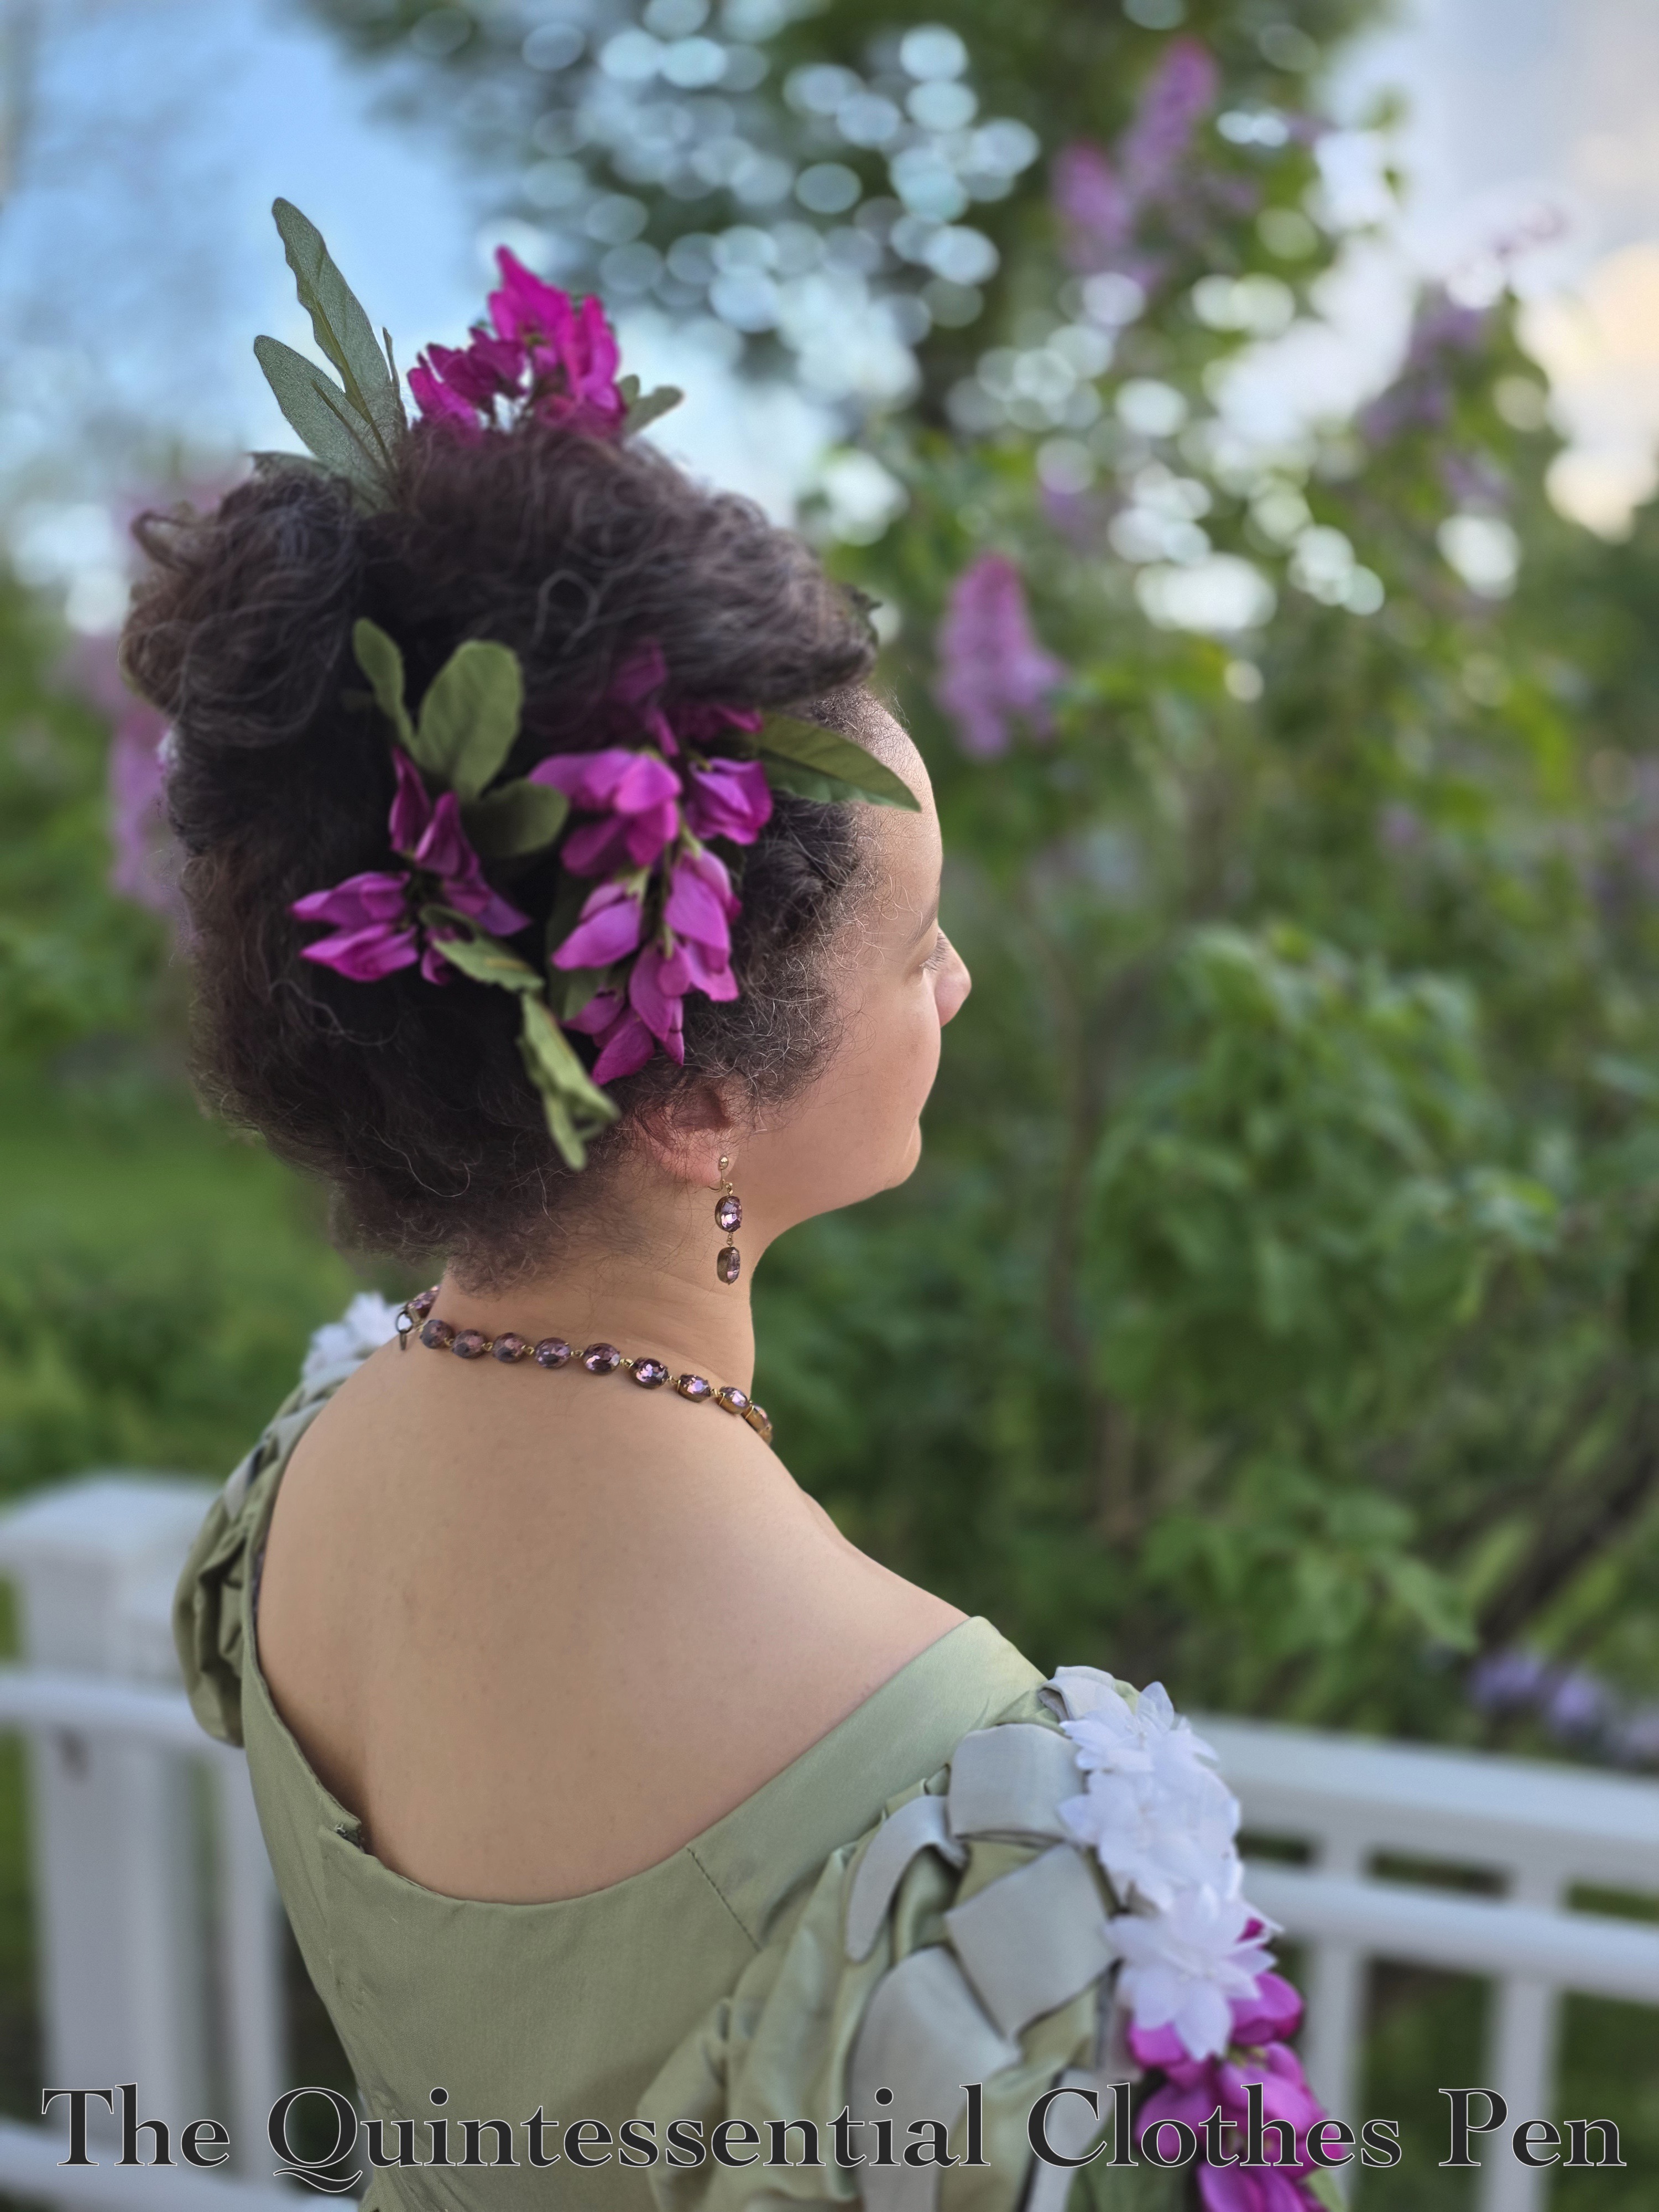
I had so much fun creating a hairstyle to go with this updated dress, too! More on that in my next post. For now, this re-make is my entry for the 2026 HSM Challenge #1 Joy For January:

Create an item that epitomises the joy you find in historical costuming – or simply something that would bring you joy at this time of year, whether it’s dark and cold, or sweltering hot where you are!

This dress fits the challenge because I find joy in:

  1. Re-making garments to fit better or have a more arresting design
  2. Re-wearing garments so I get more use out of my hard work
  3. Applying new knowledge to my projects

Just the facts:

Fabric/Materials: Leftover scraps of green silk.

Pattern: My own.

Year: 1824.

Notions: Thread and flowers.

How historically accurate is it?: 99%. Altering clothing to adjust for fit and shifting fashionable silhouettes is a documented historical method! A small bit off for not perfectly accurate flowers.

Hours to complete: I did not keep track. 6-8 is my guess. Most of that would have been hand sewing on the flowers.

First worn: May 16, 2026.

Total cost: $5. The fabric used was scraps from the original project. The flowers were purchased in bulk for a very low cost and stashed for years.
Wearing A Star Trek Dress

My previous post detailed my process making of a Star Trek dress. Today, I’m going to share about the final detail (adding rank) as well as photos of the finished dress. Be prepared for a number of Star Trek references…

Beam me up, Scotty!

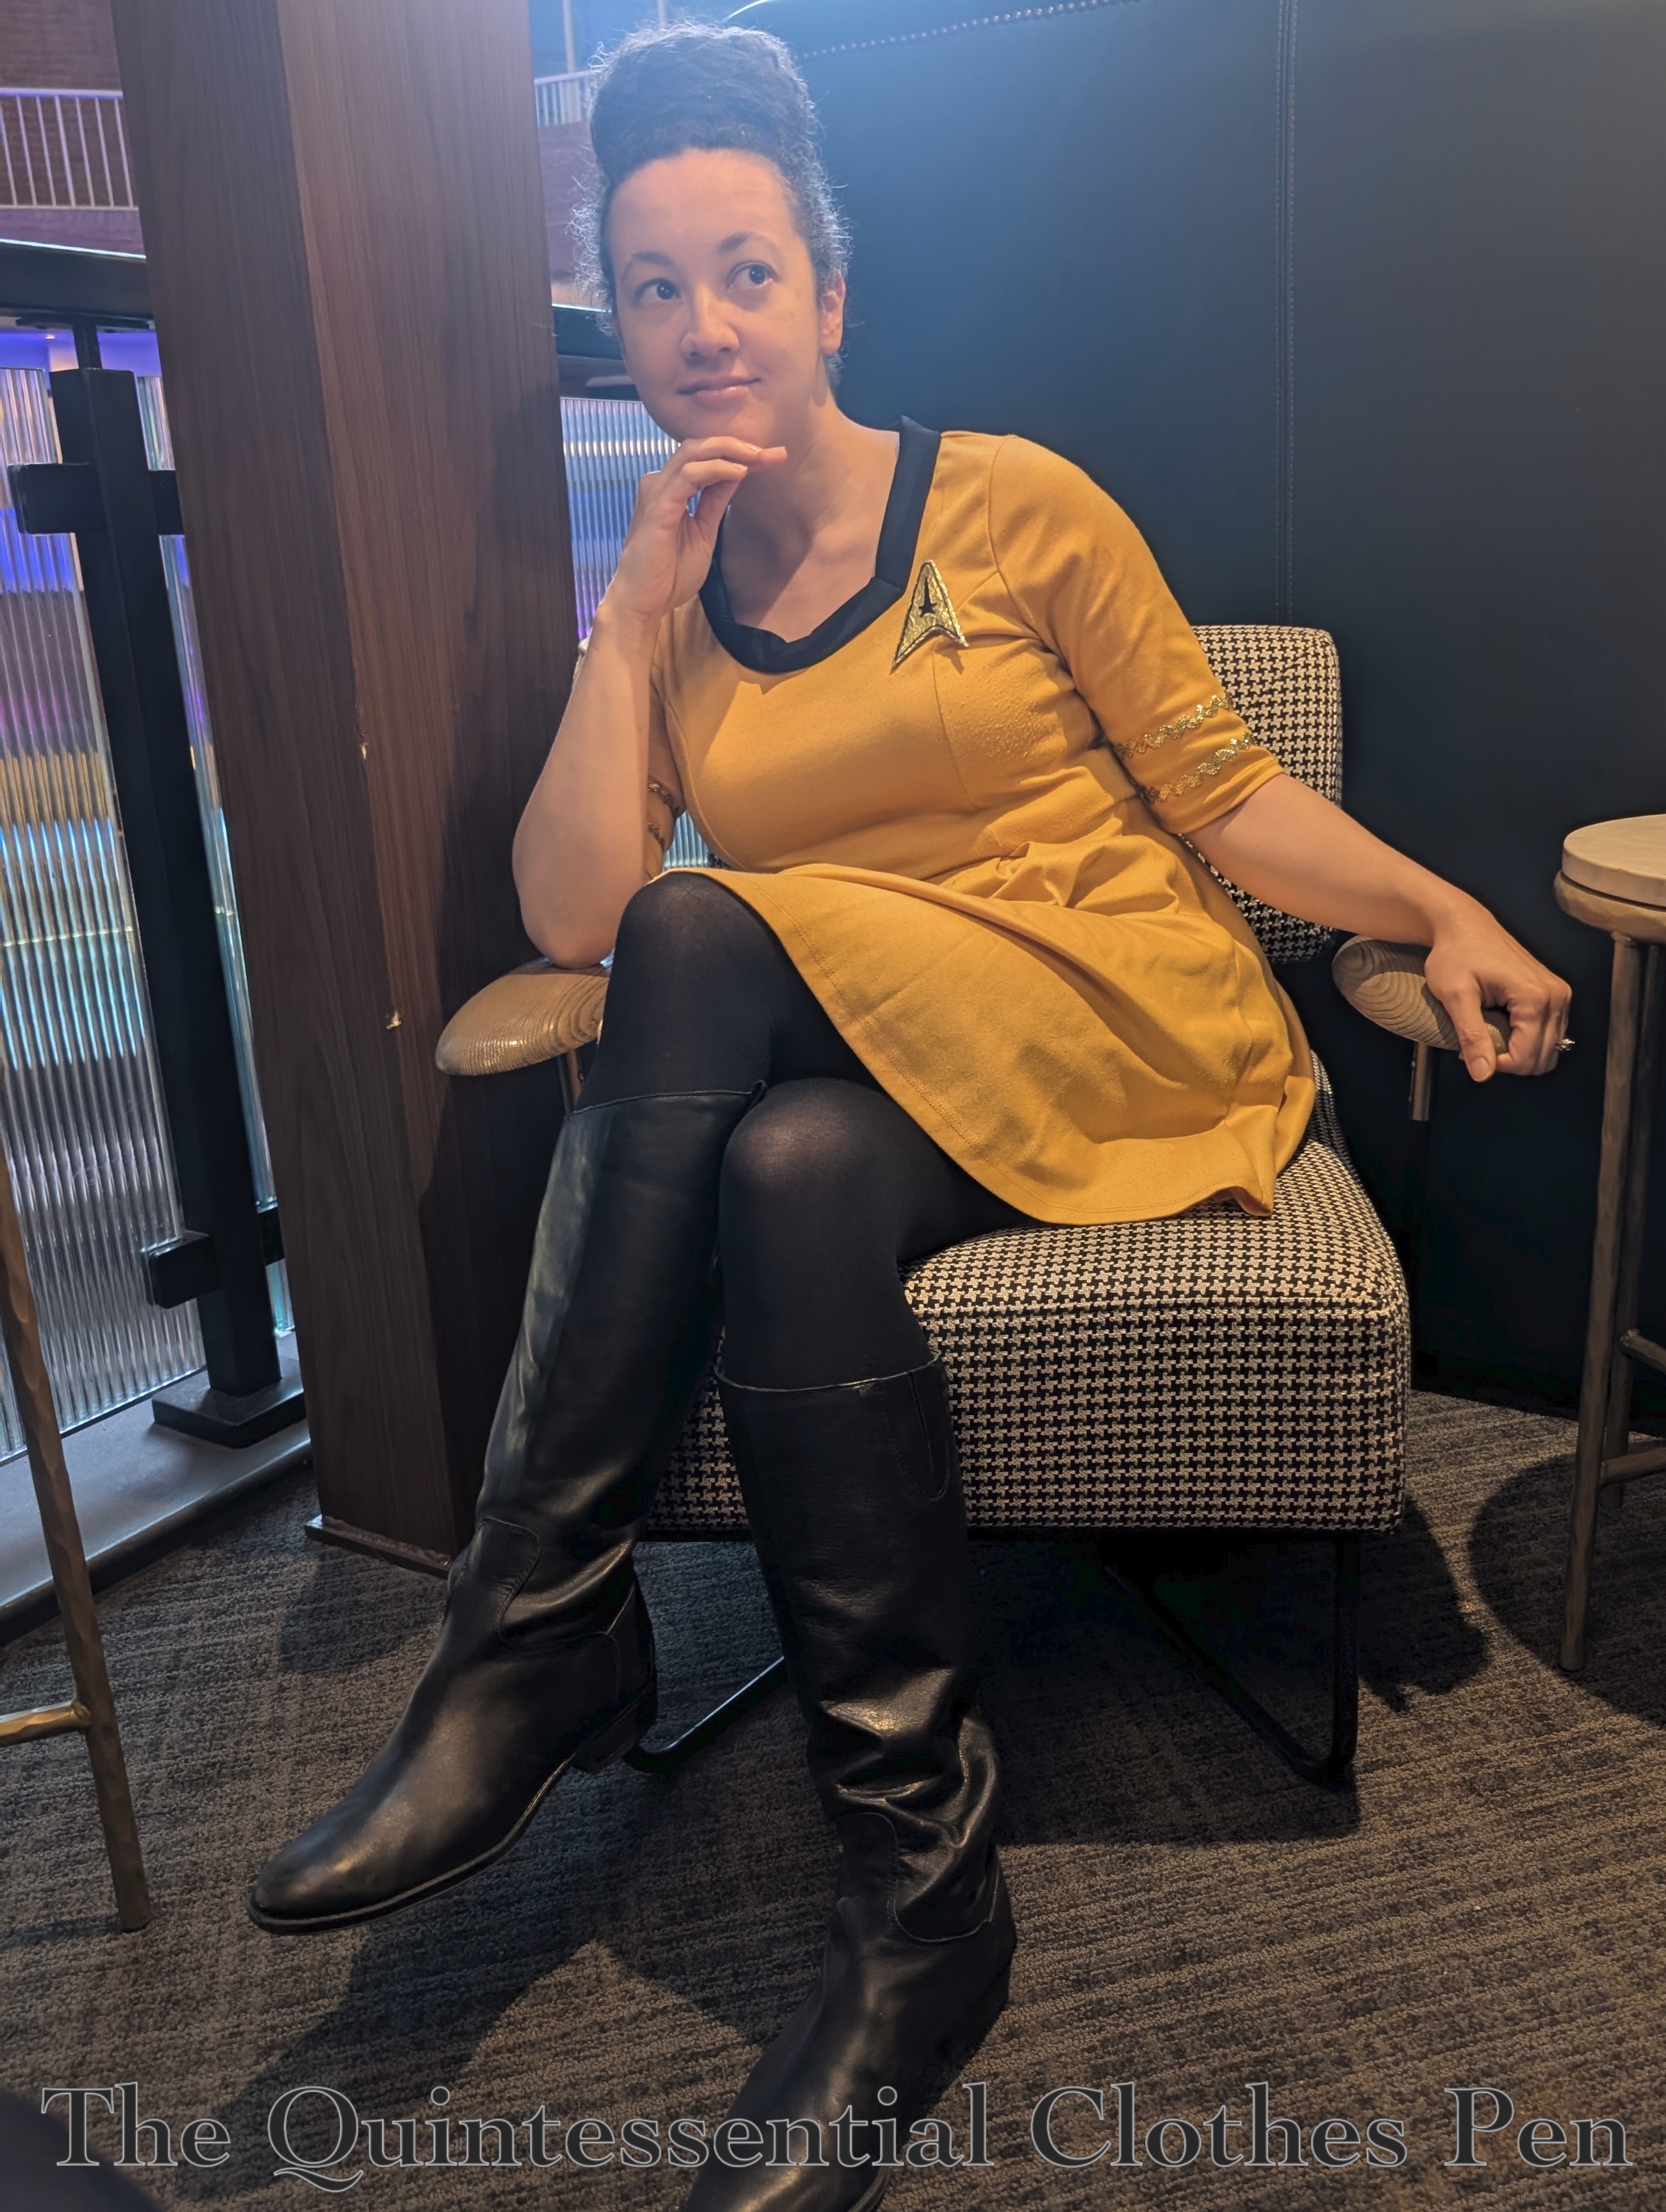
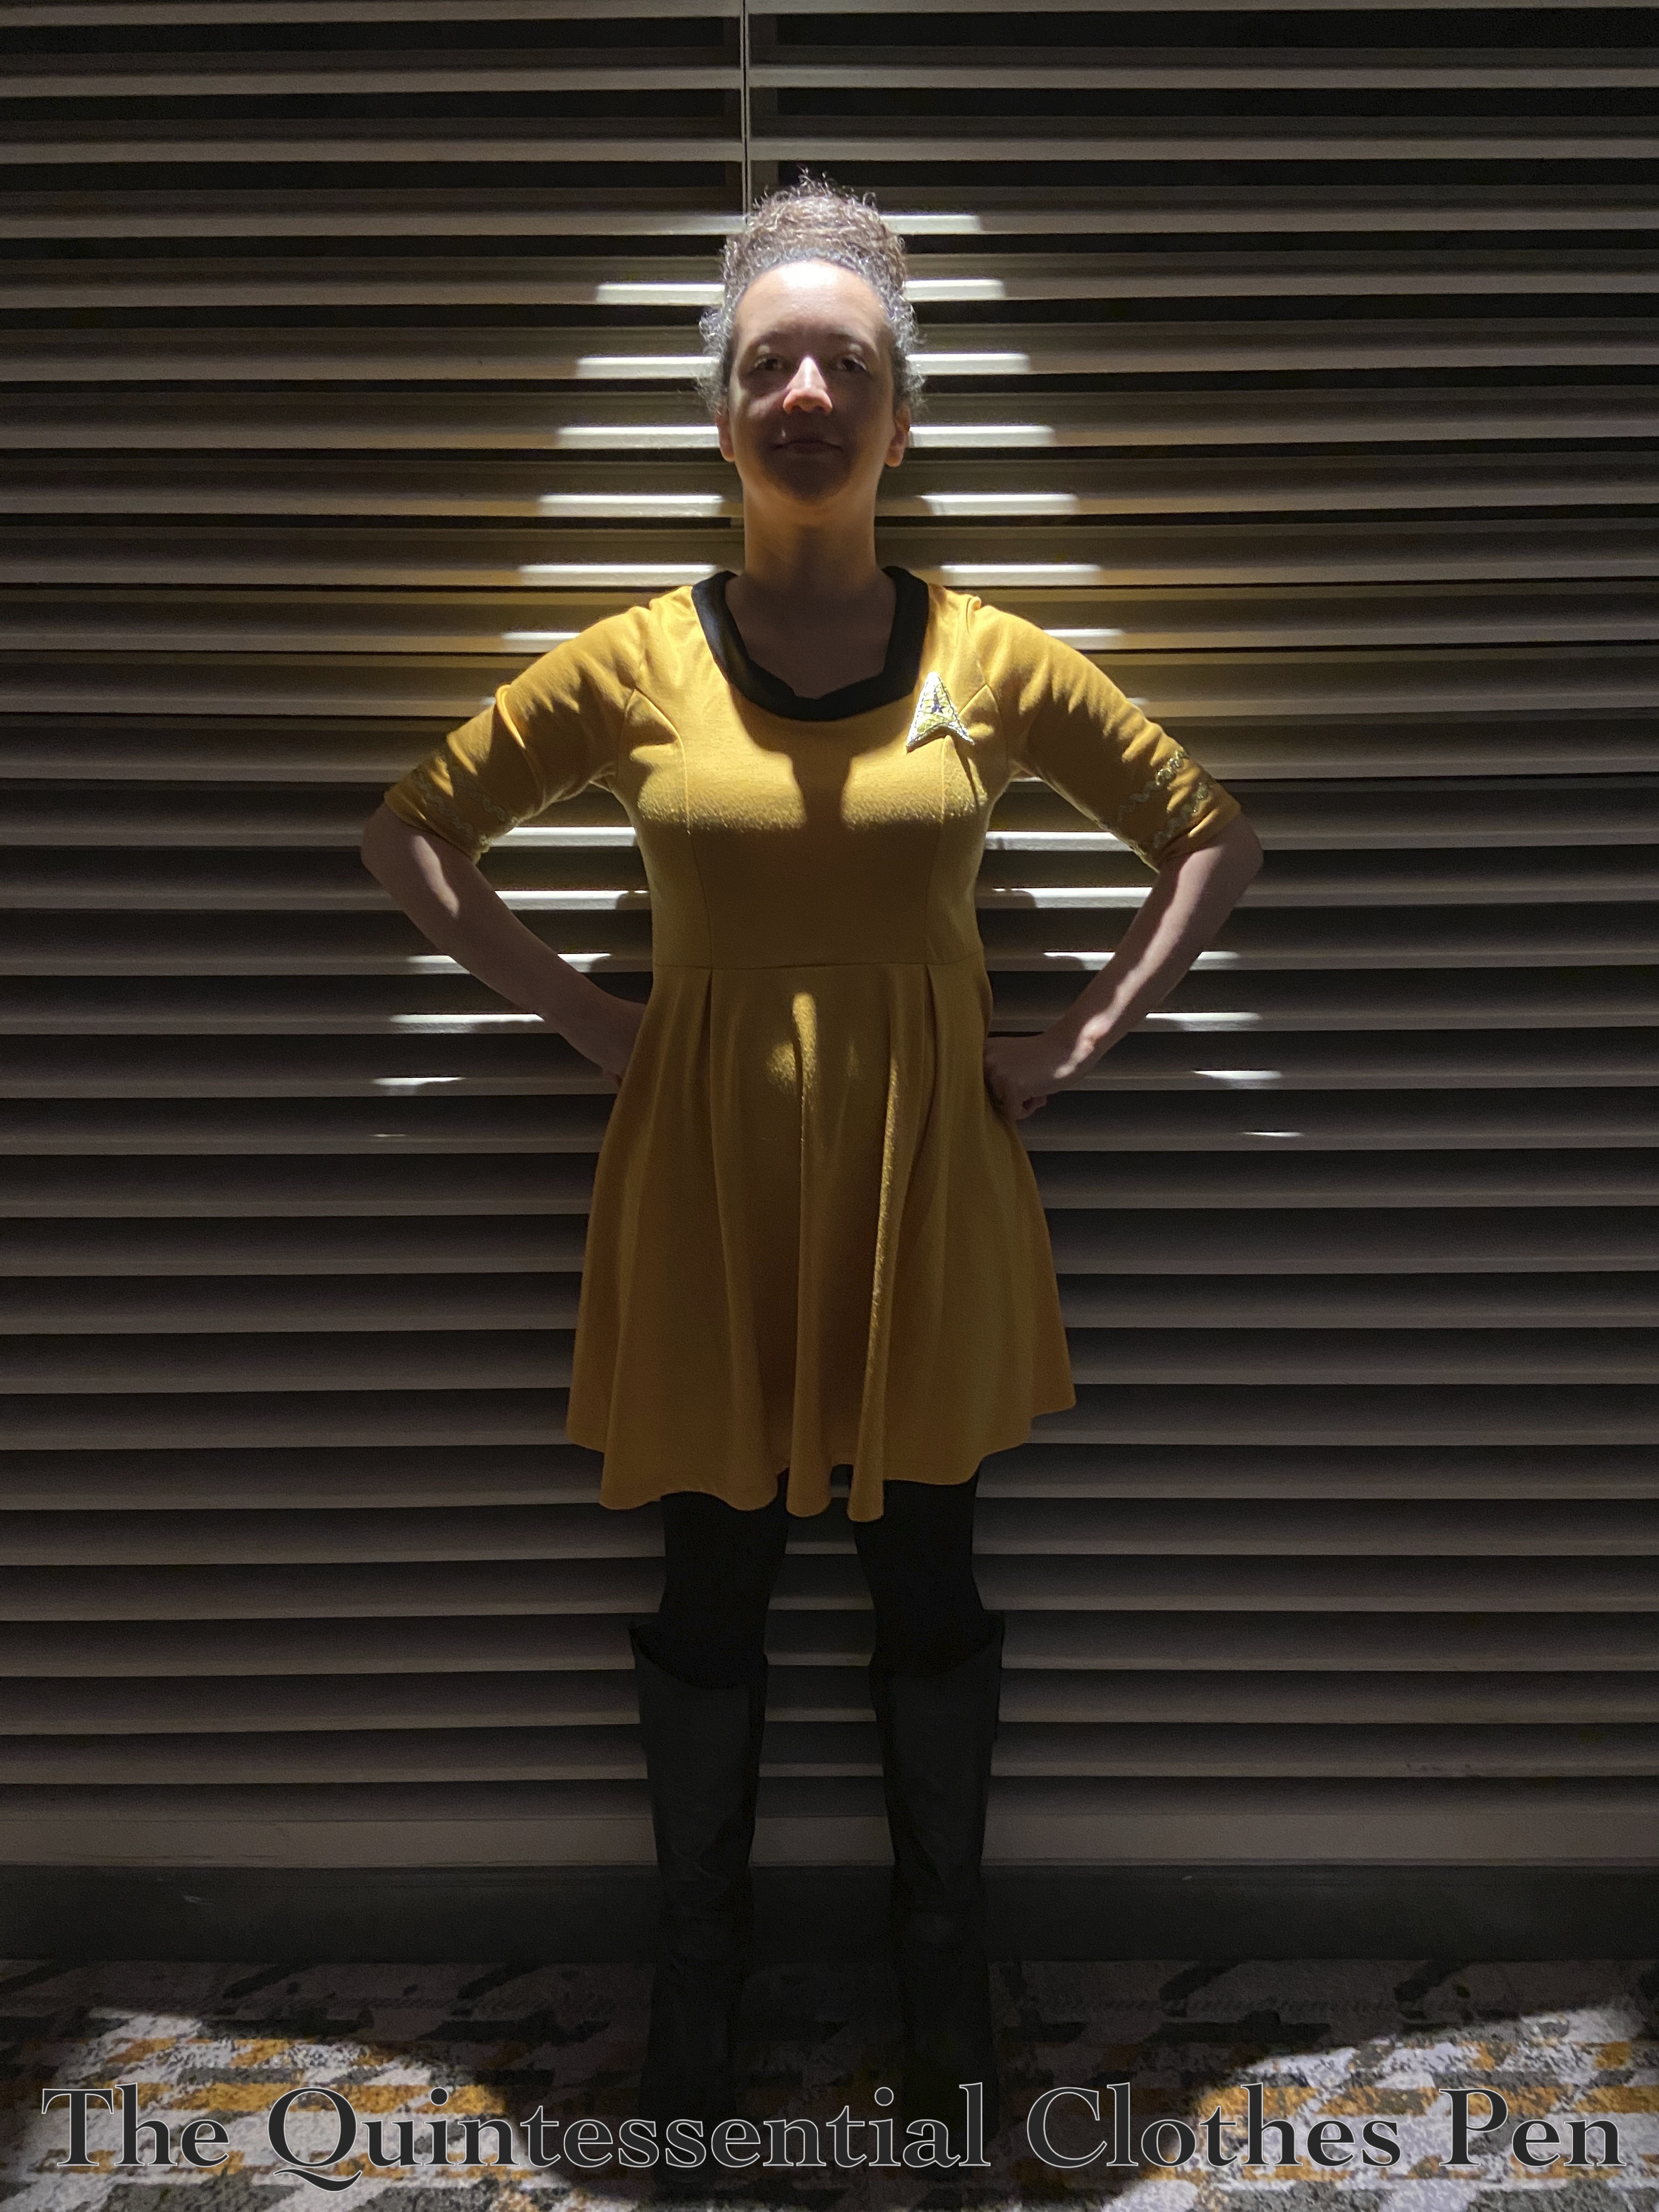
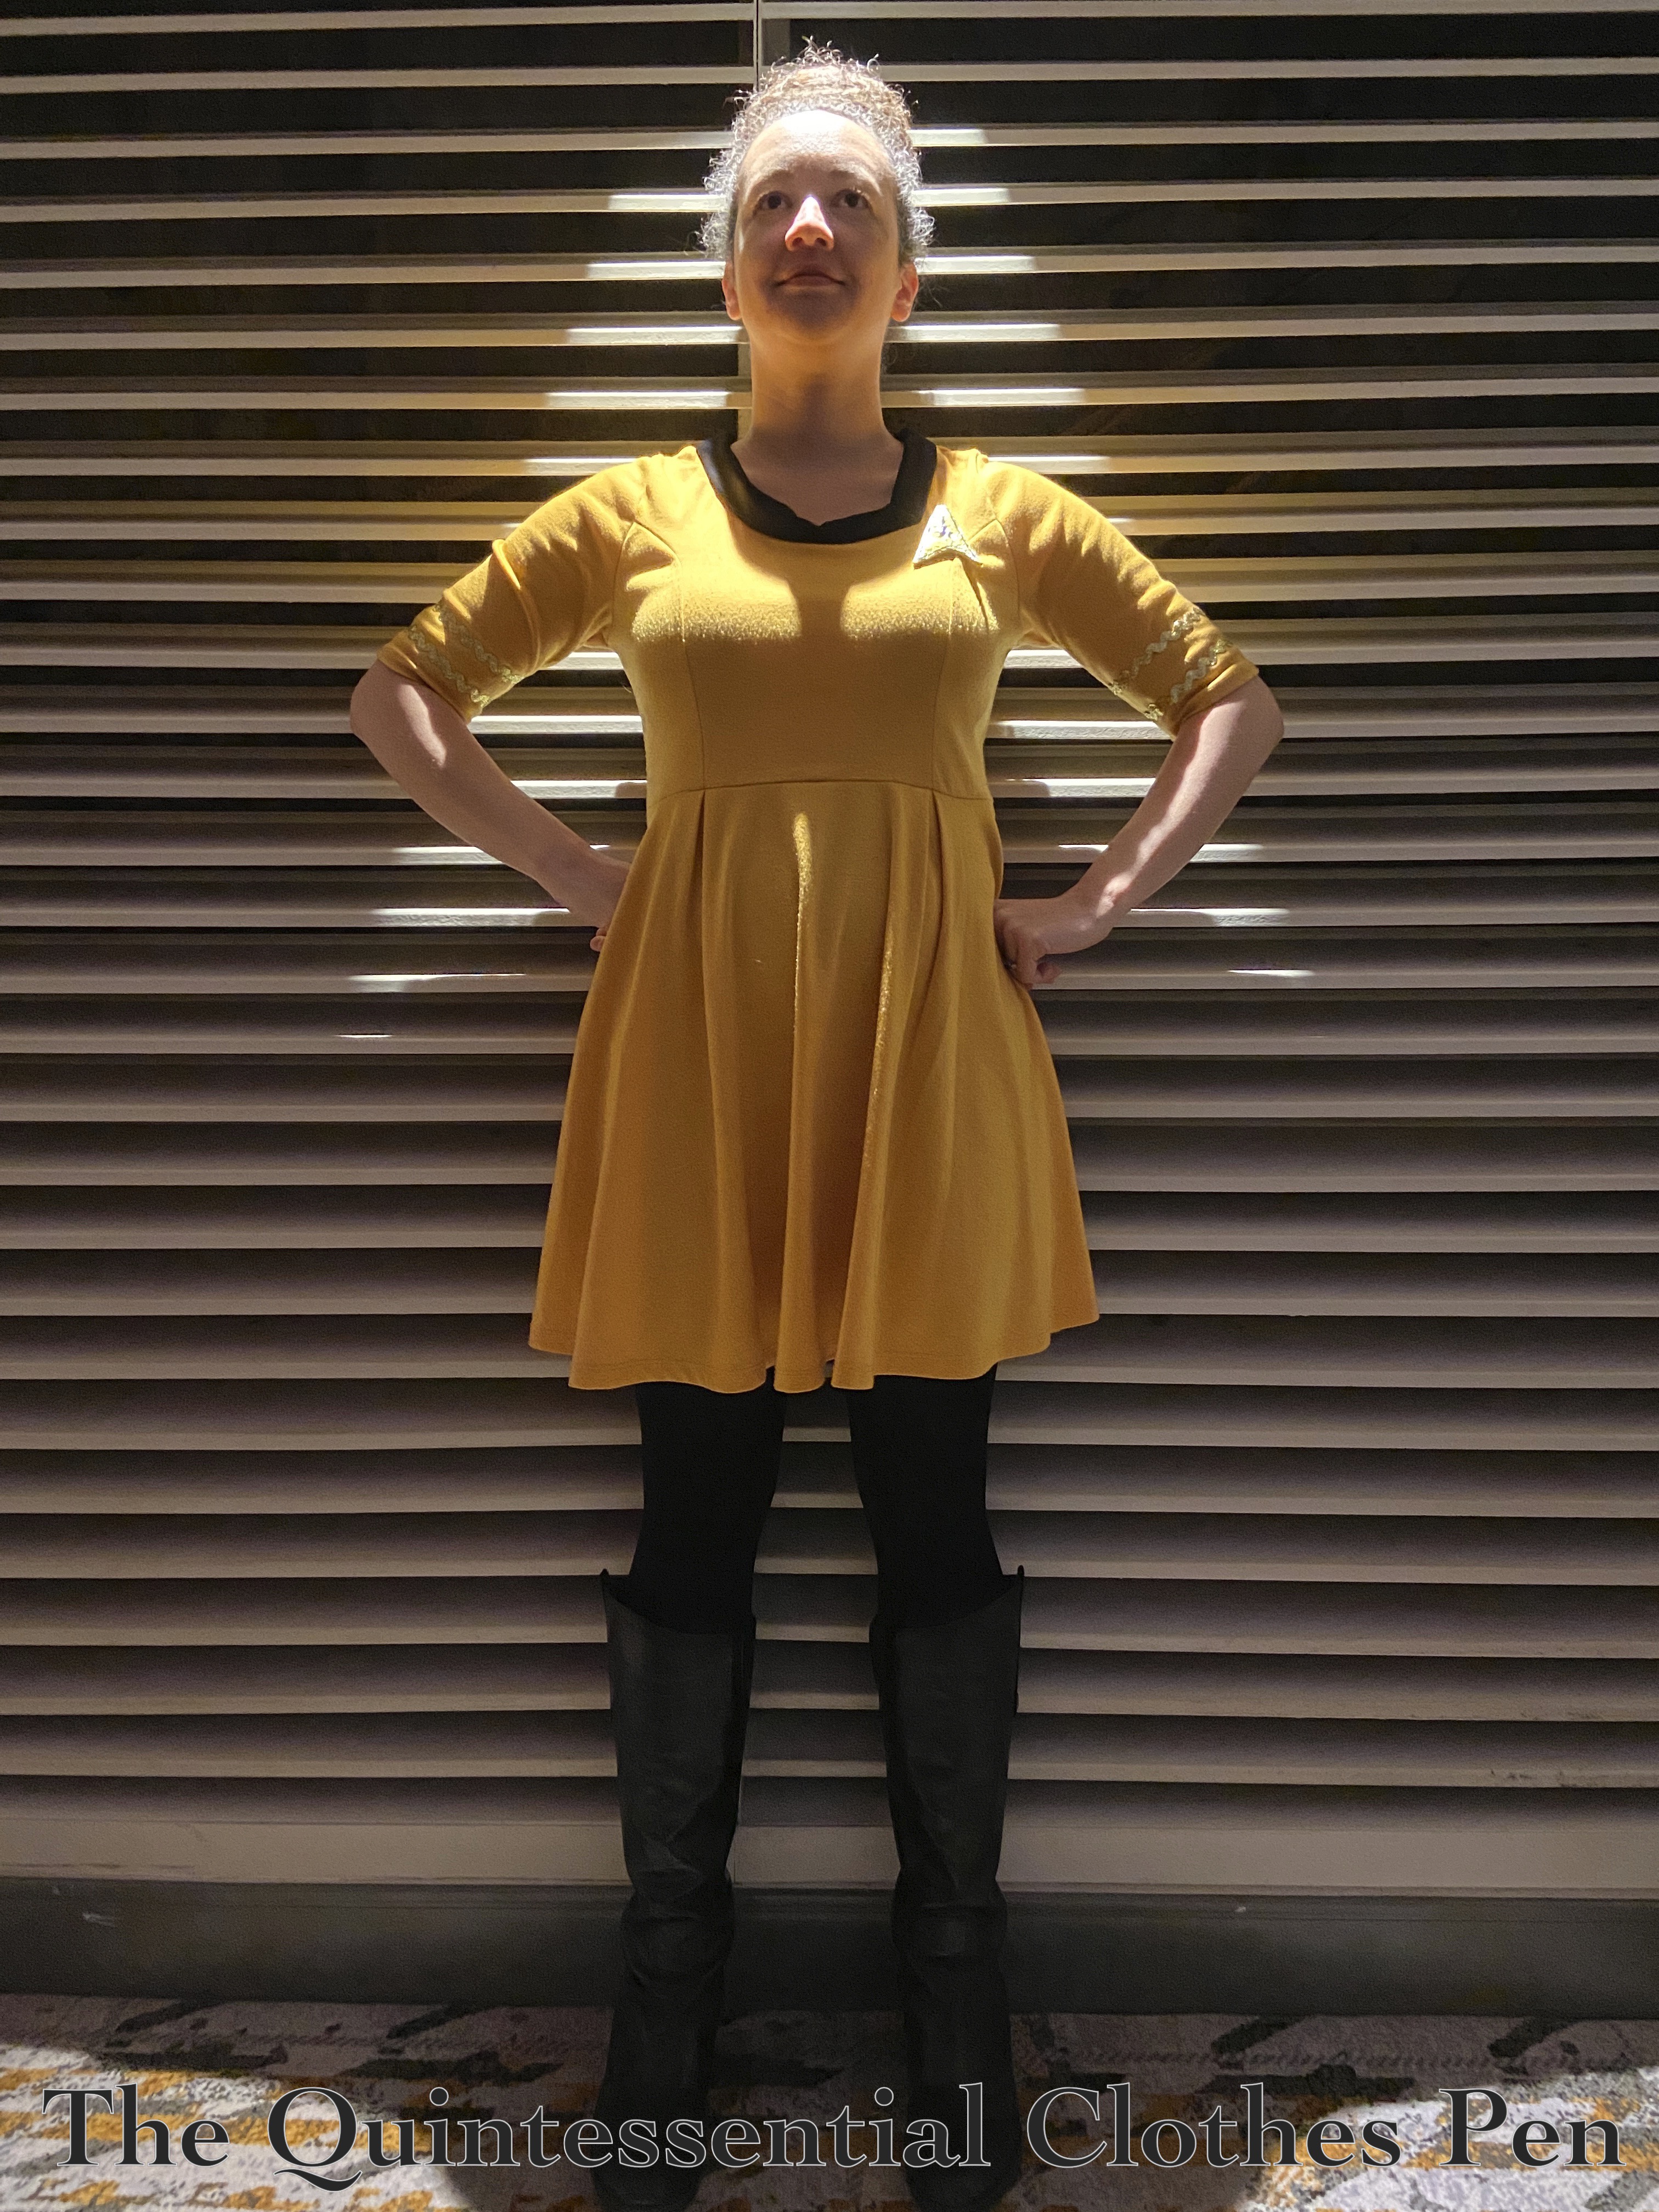
The end result of my Star Trek dress adventure is not an exact uniform. As I explained in my previous post, the dress doesn’t have seams in the same places as the original uniforms, it has an above the knee length and a skater style skirt, and the sleeves are only elbow length. And I wore it with knee high boots. But the reference is clear and I’m pleased to have been able to repurpose the marigold dress into something new! Below, a similar photo that better shows the outfit details.

As I was finishing the insignia and neckband, I was thinking about what rank I wanted to represent on this dress. This website has a very clear chart showing rank markings used on the sleeves of The Original Series uniforms. Using this reference, and the fact that finding gold rick rack was a manageable task, I decided to go with the rank of Commander (two rows of trim).

To show it off, here I am pondering decision making as I temporarily occupy a theoretical captain’s chair. Or 10 Forward (though that requires some time travel, I think).

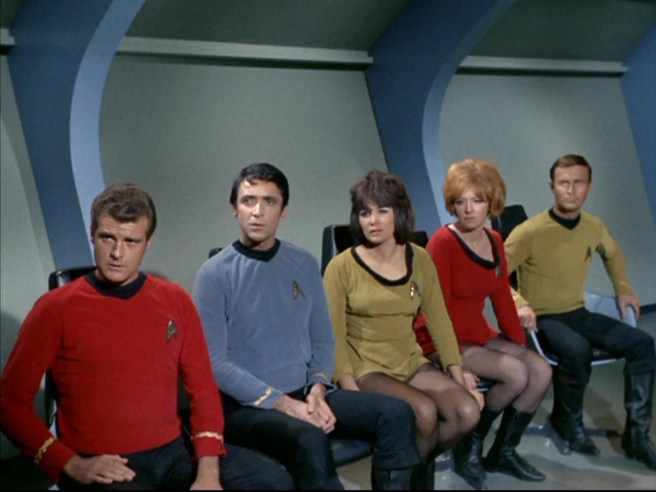
For reference, here is an image of the The Original Series cast, where you can clearly see the neckline, insignia, rank markings, boots styles, etc. This image is a screen capture of the show, found here.

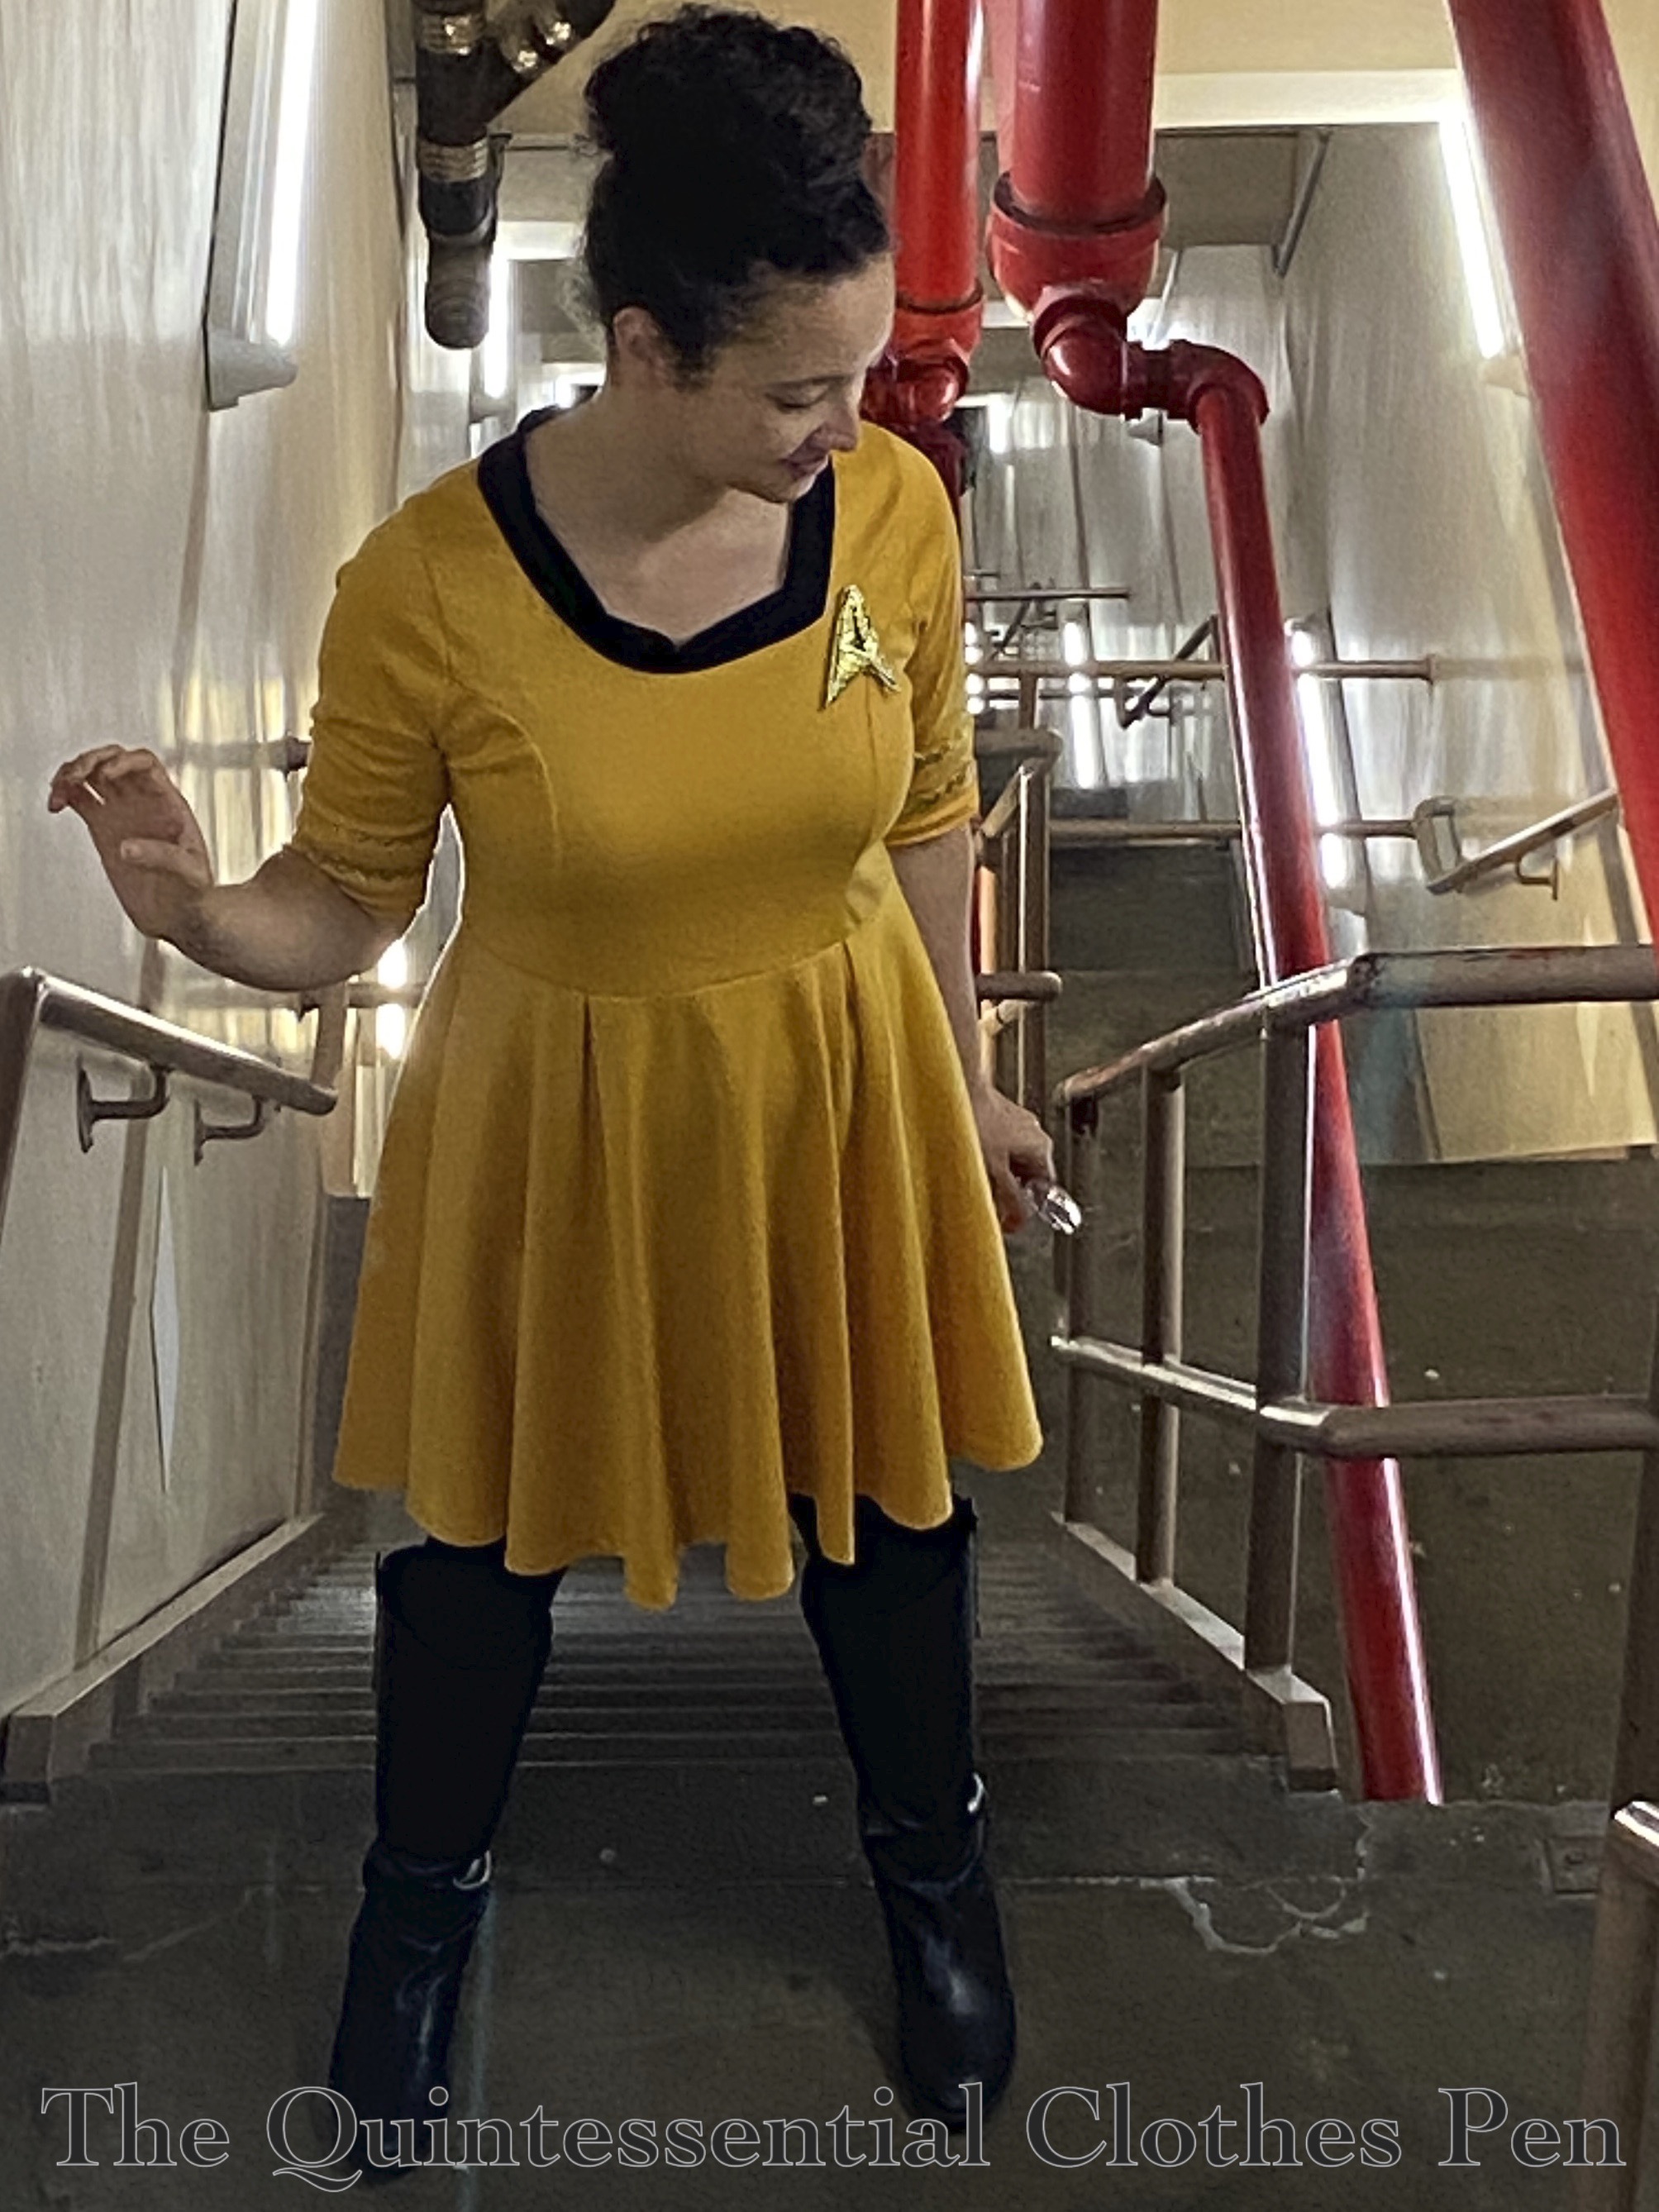
No Star Trek episode is complete without some adventure! In my case, I visited a (makeshift) Jeffries tube. Dizzying heights, but I am ready to complete repairs and make my way to other parts of the ship while under duress!

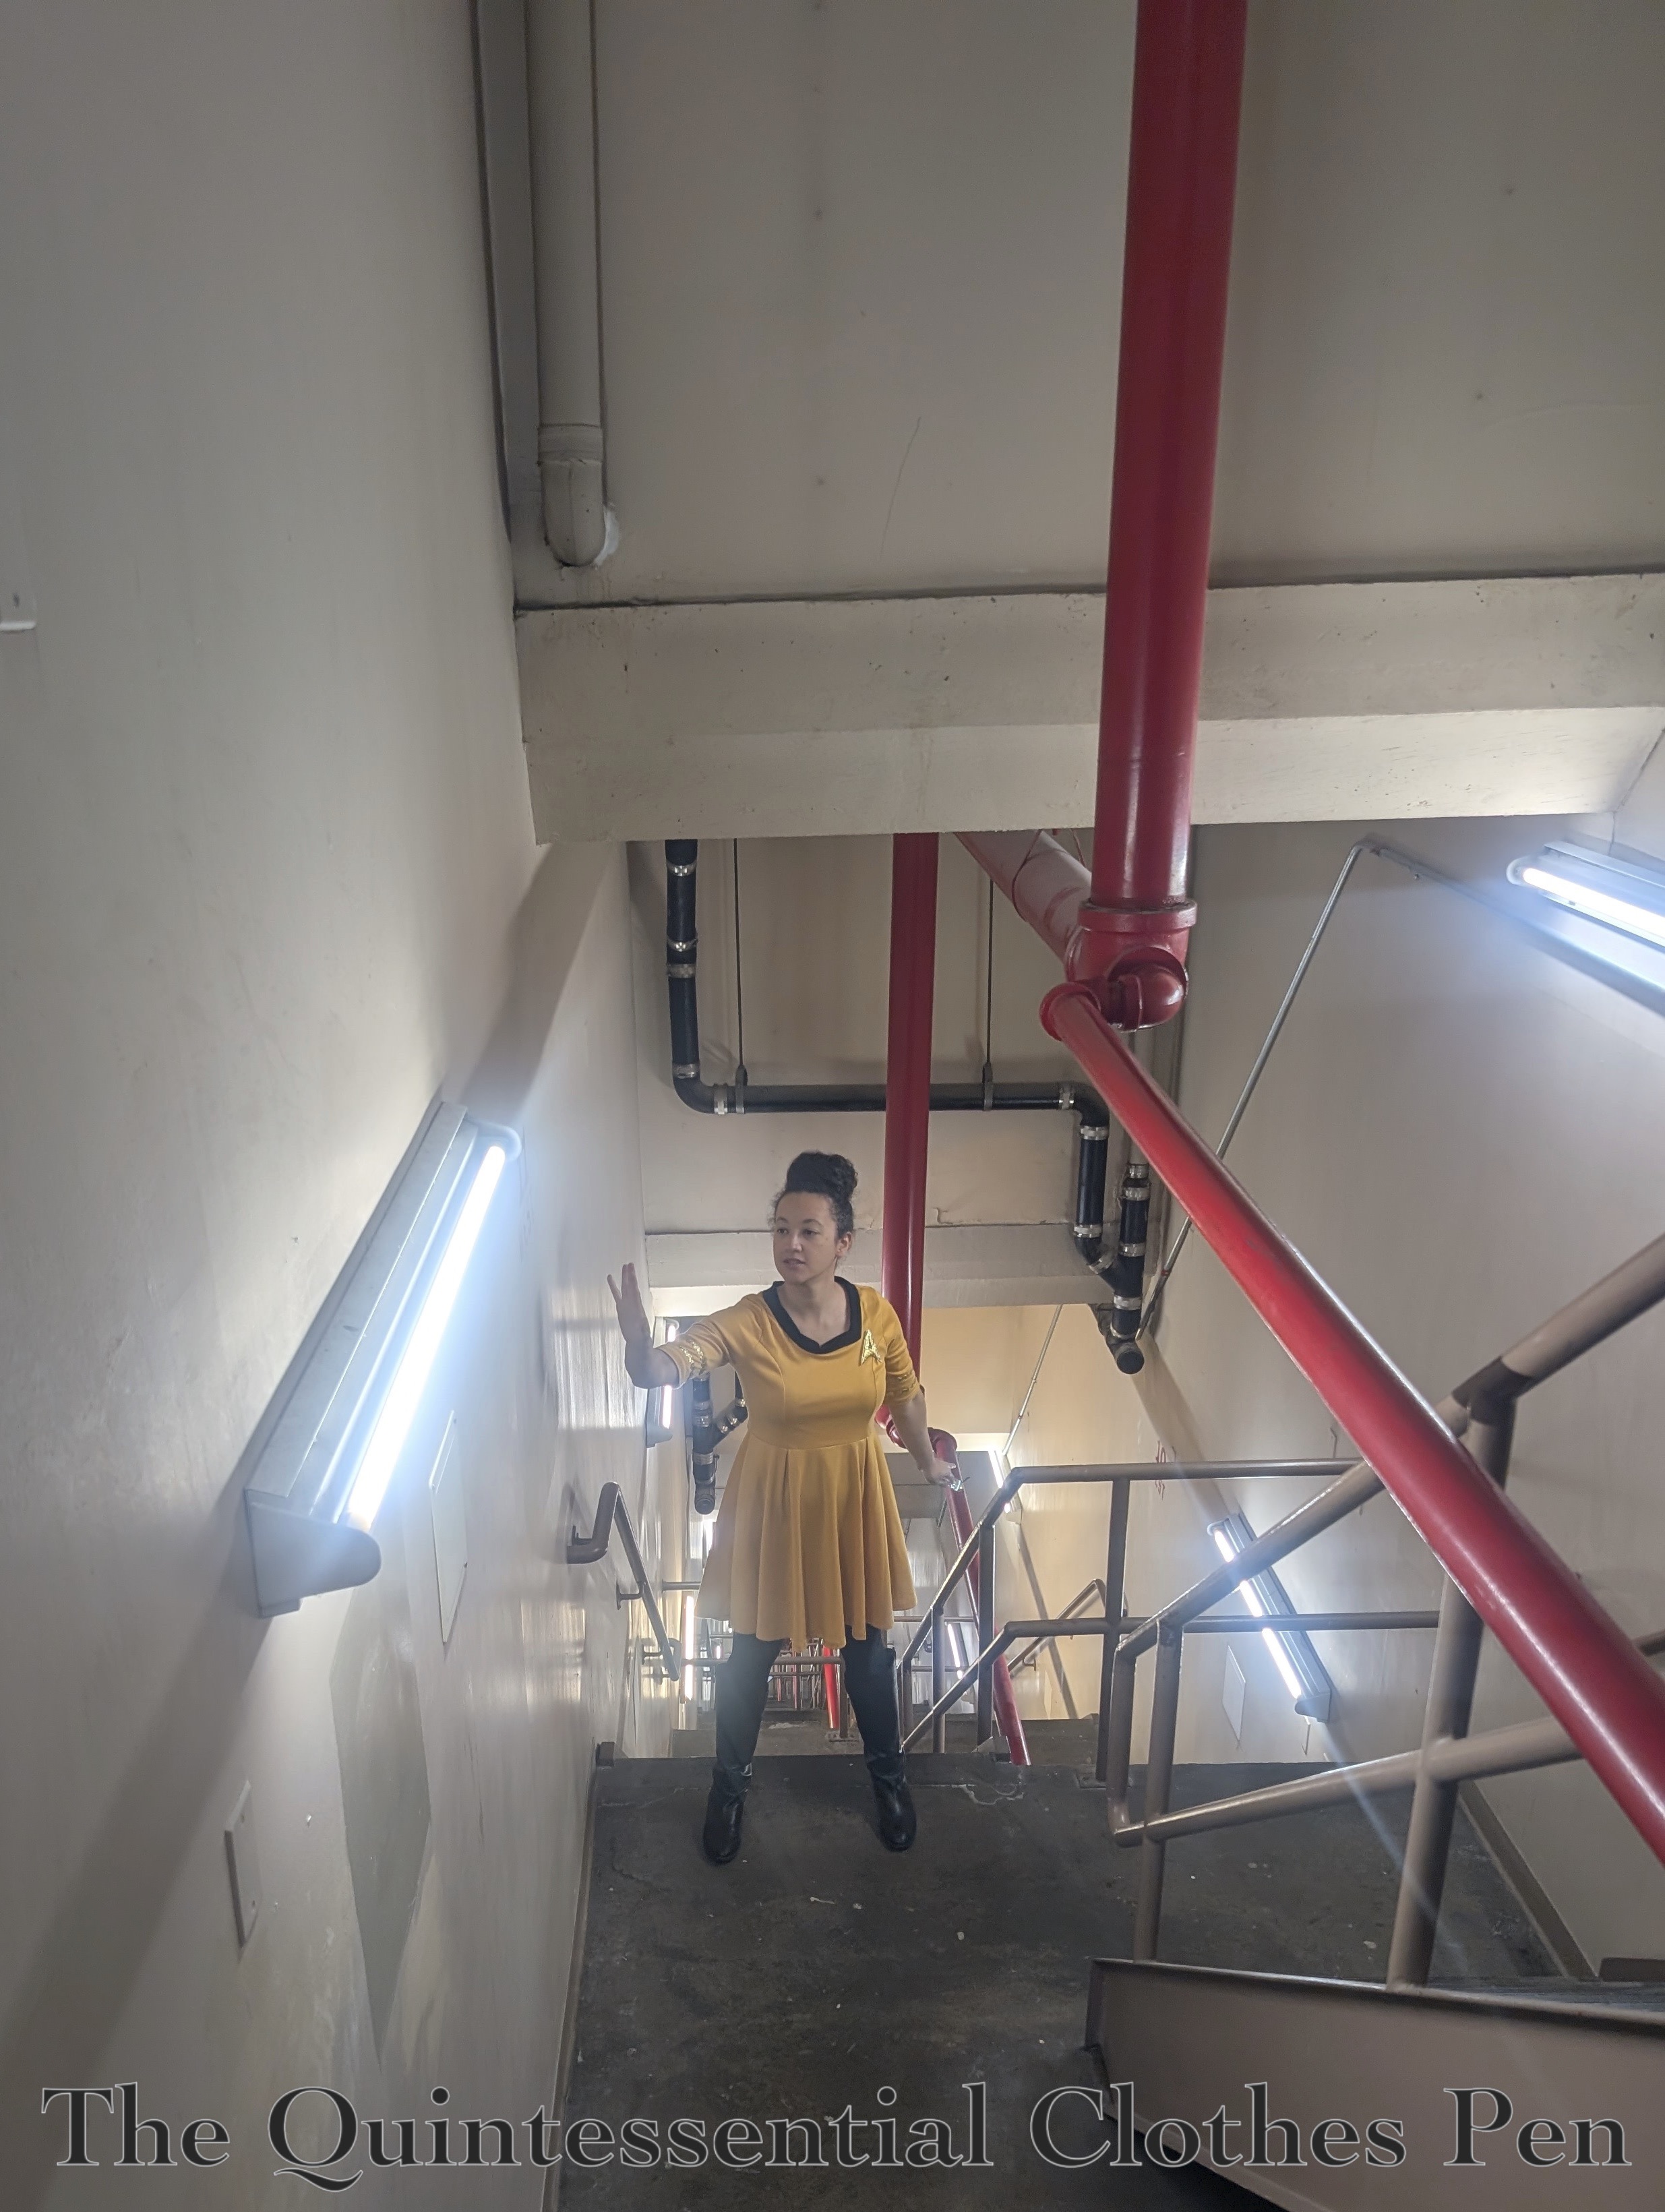
But wait! We’ve missed something! (What did we miss? Nothing, really, but this is another fun view of the makeshift Jeffries tube!)

End of Commander’s log. (Thanks for enjoying a silly outing with me!)

Re-Imagined 1885 Fancy Dress (HSM #9)

The Backstory

In 2016, I made a dress for a Fancy Dress Ball inspired by a dress worn by Alice Gwynn Vanderbilt in 1883. Alice’s now-famous dress, made by The House Of Worth, celebrated Electric Light as its theme. The dress uses beading and metallic elements (as well as an electric torch, for the original wearing!) to visually reflect light as well as communicate the electric light theme via decorative motifs. I posted an image of the inspiration gown and a link to more information about it in my original post about my dress in 2016, which you can view here.

I was inspired by the trimmings on the gown, but needed to create a dress with little expenditure (much different than the budget for a Worth dress!). To achieve this, the goal when I made my dress in 2016 was to use as many materials as I could that I already owned. The main dress fabrics were already in the stash from old projects and the silver net was leftover from trimming the Versailles sacque I posted about wearing recently.

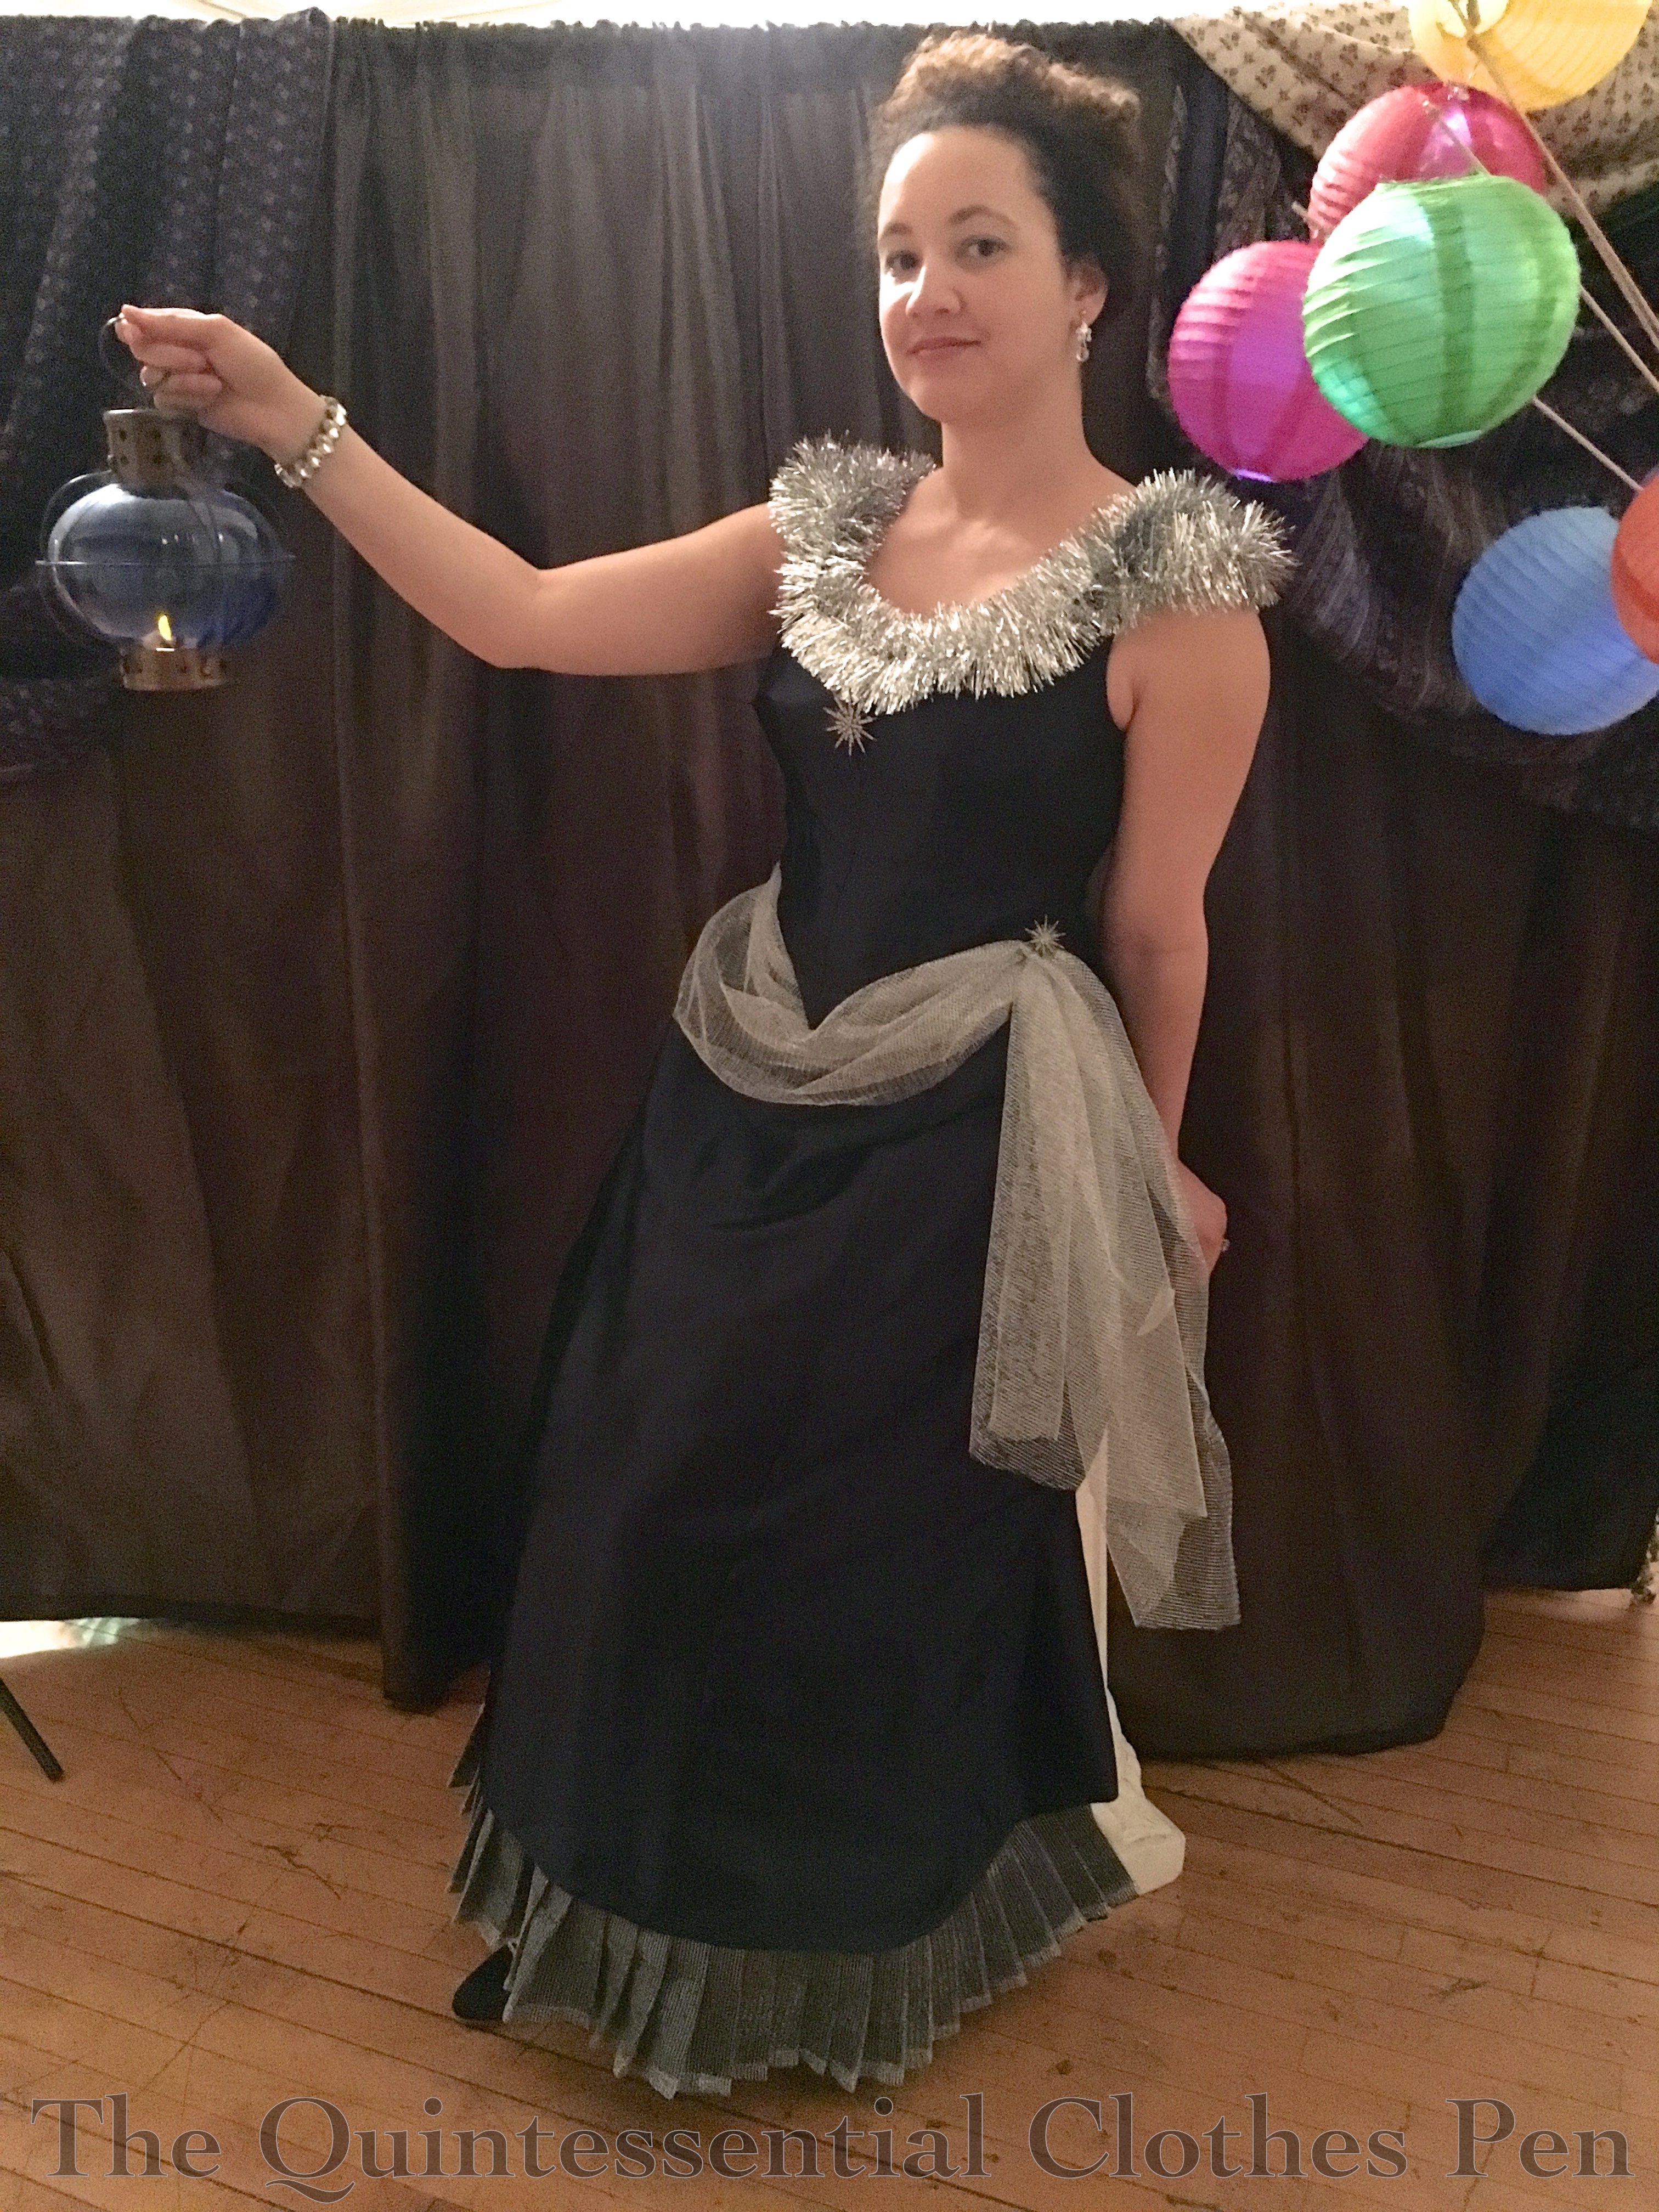
Below, a photo of the dress in 2016, with a lantern standing in for “electric light.”

There were a few small changes I wanted to make after the first wearing of the dress, but I didn’t have a need to wear it again for years. Fancy Dress events are not all that common even within the already limited realm of historically clothed events! And with the original trimmings I didn’t like the dress for regular wear. Plus, for a number of years after making the dress the events I was attending did not encompass the 1880s.

More recently, however, I have had more opportunities to wear clothing from this period, as The Footwork and Frolick Society has hosted a few events with themes that can include the 1880s. Therefore, I decided to re-trim the Fancy Dress dress into a more regular, less Fancy Dress, ballgown style for the Yuletide Ball in 2024.

Inspiration

This time, my inspiration was a mashup of ideas from a variety of images.

From the fashion plate below, published in the Revue de la Mode in February 1886, I pulled information from the gown on the right, with the pleated fabric along the v-shaped neckline and asymmetrical decorations (which I guess are feathers) on the shoulder and skirt.

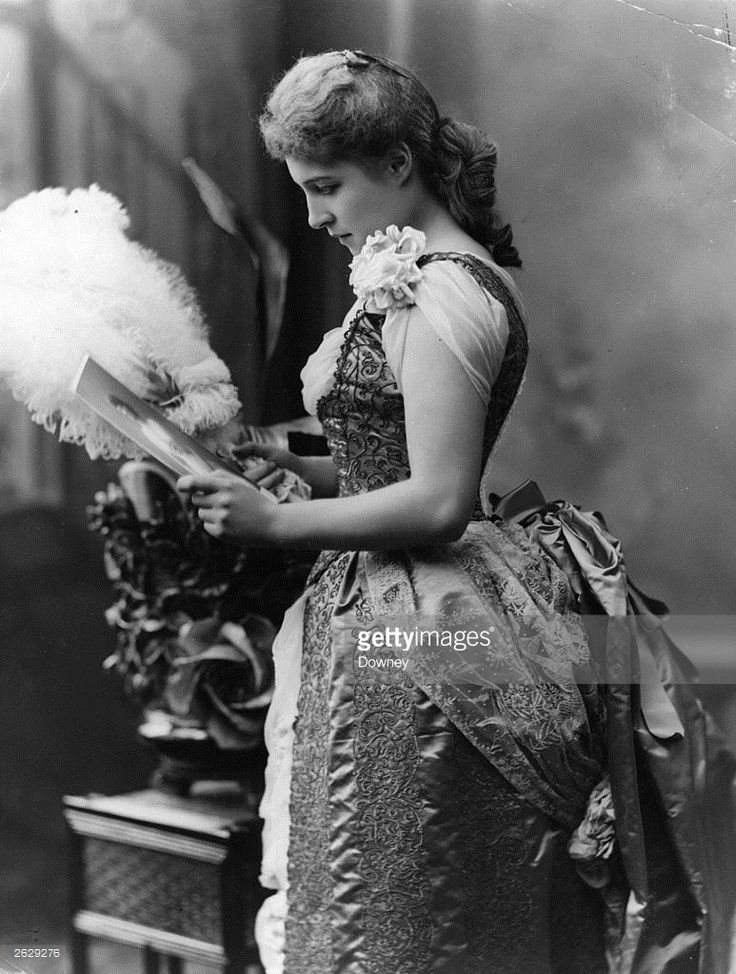
From the photo below of British actress Lillie Langtry (Original Publication: People Disc – HU0206. Photo by Downey/Getty Images), I pulled inspiration for the “sleeve” idea I wanted to incorporate. The pattern of the fabric used for the bodice in this photo was also reminiscent of one of the fabrics I used to update my dress.

And finally, I was also inspired by the beaded swags (and chiffon “sleeves”) on the c. 1887 dress in the collection of the Kent State University Museum in the photo below.

Dress Update Overview

For the re-make of the dress, I wanted to maintain my goal of using materials already on hand. I still had small scraps of the navy blue satin in my stash as well as the silver net. I also went through my fabric stash binder to see what other fabrics and trimmings might work and found that the best bets were a piece of polyester velvet flocked with silver swirls that I’d purchased at Joann Fabrics probably twenty years ago when I had just started sewing and loads of silver ribbon that I had been gifted to me. The blue and silver colors fit the colors of the existing dress perfectly and I thought there was a sort of New Year’s aspect to the color scheme, as well. (I also purchased the Joann fabric in burgundy and green (both with gold swirls) and had made Christmas decorations out those, but I don’t think I ever used the piece of blue, so this was a great opportunity!)

With my materials decided, I moved on to the sewing part of the project, starting with unpicking the original trim from the dress. I had made it knowing I might someday want to change the trimmings, so they were not sewn into seams and were pretty easy to remove. That left me with an almost entirely navy blue dress, relieved only by the silver pleats at the bottom of the skirt.

Then I went back and considered my original list of changes, which included:

  • Boning the center back edges so they would lie flat when laced closed
  • Adding a matching piece of satin behind the lacing holes to hide any white fabric of undergarments
  • Making sure that my chemise wouldn’t poke out of the armholes

Quoting myself, from 2016… “these are minor changes and I’m not sure when I’ll have the opportunity to wear this again so it might be awhile before they happen.” I’ll say! It only took 9 years!

Historical Sew Monthly

My goal of using stash-only materials for this dress re-do makes it fit into the Historical Sew Monthly 2025 Challenge #9 Blue:

Make an item that features blue, in any shade from azure to zaffre.

Just the facts:

Fabric/Materials: Approximately ¾ yard silver net, just over 1 yard of navy velvet with silver motifs, and scraps of navy polyester satin.

Pattern: My own.

Year: c. 1885.

Notions: Approximately 23.5 yards of ¼” silver ribbon.

How historically accurate is it?: 90%. Polyester and modern synthetic ribbon do not have accurate fiber content. And my patterning is conjecture. But the overall idea is pretty good.

Hours to complete: I didn’t keep track.

First worn: December 7, 2024.

Total cost: Free, since everything came from the stash and was either gifted to me or purchased ages ago!

Dress Update: Back Closure

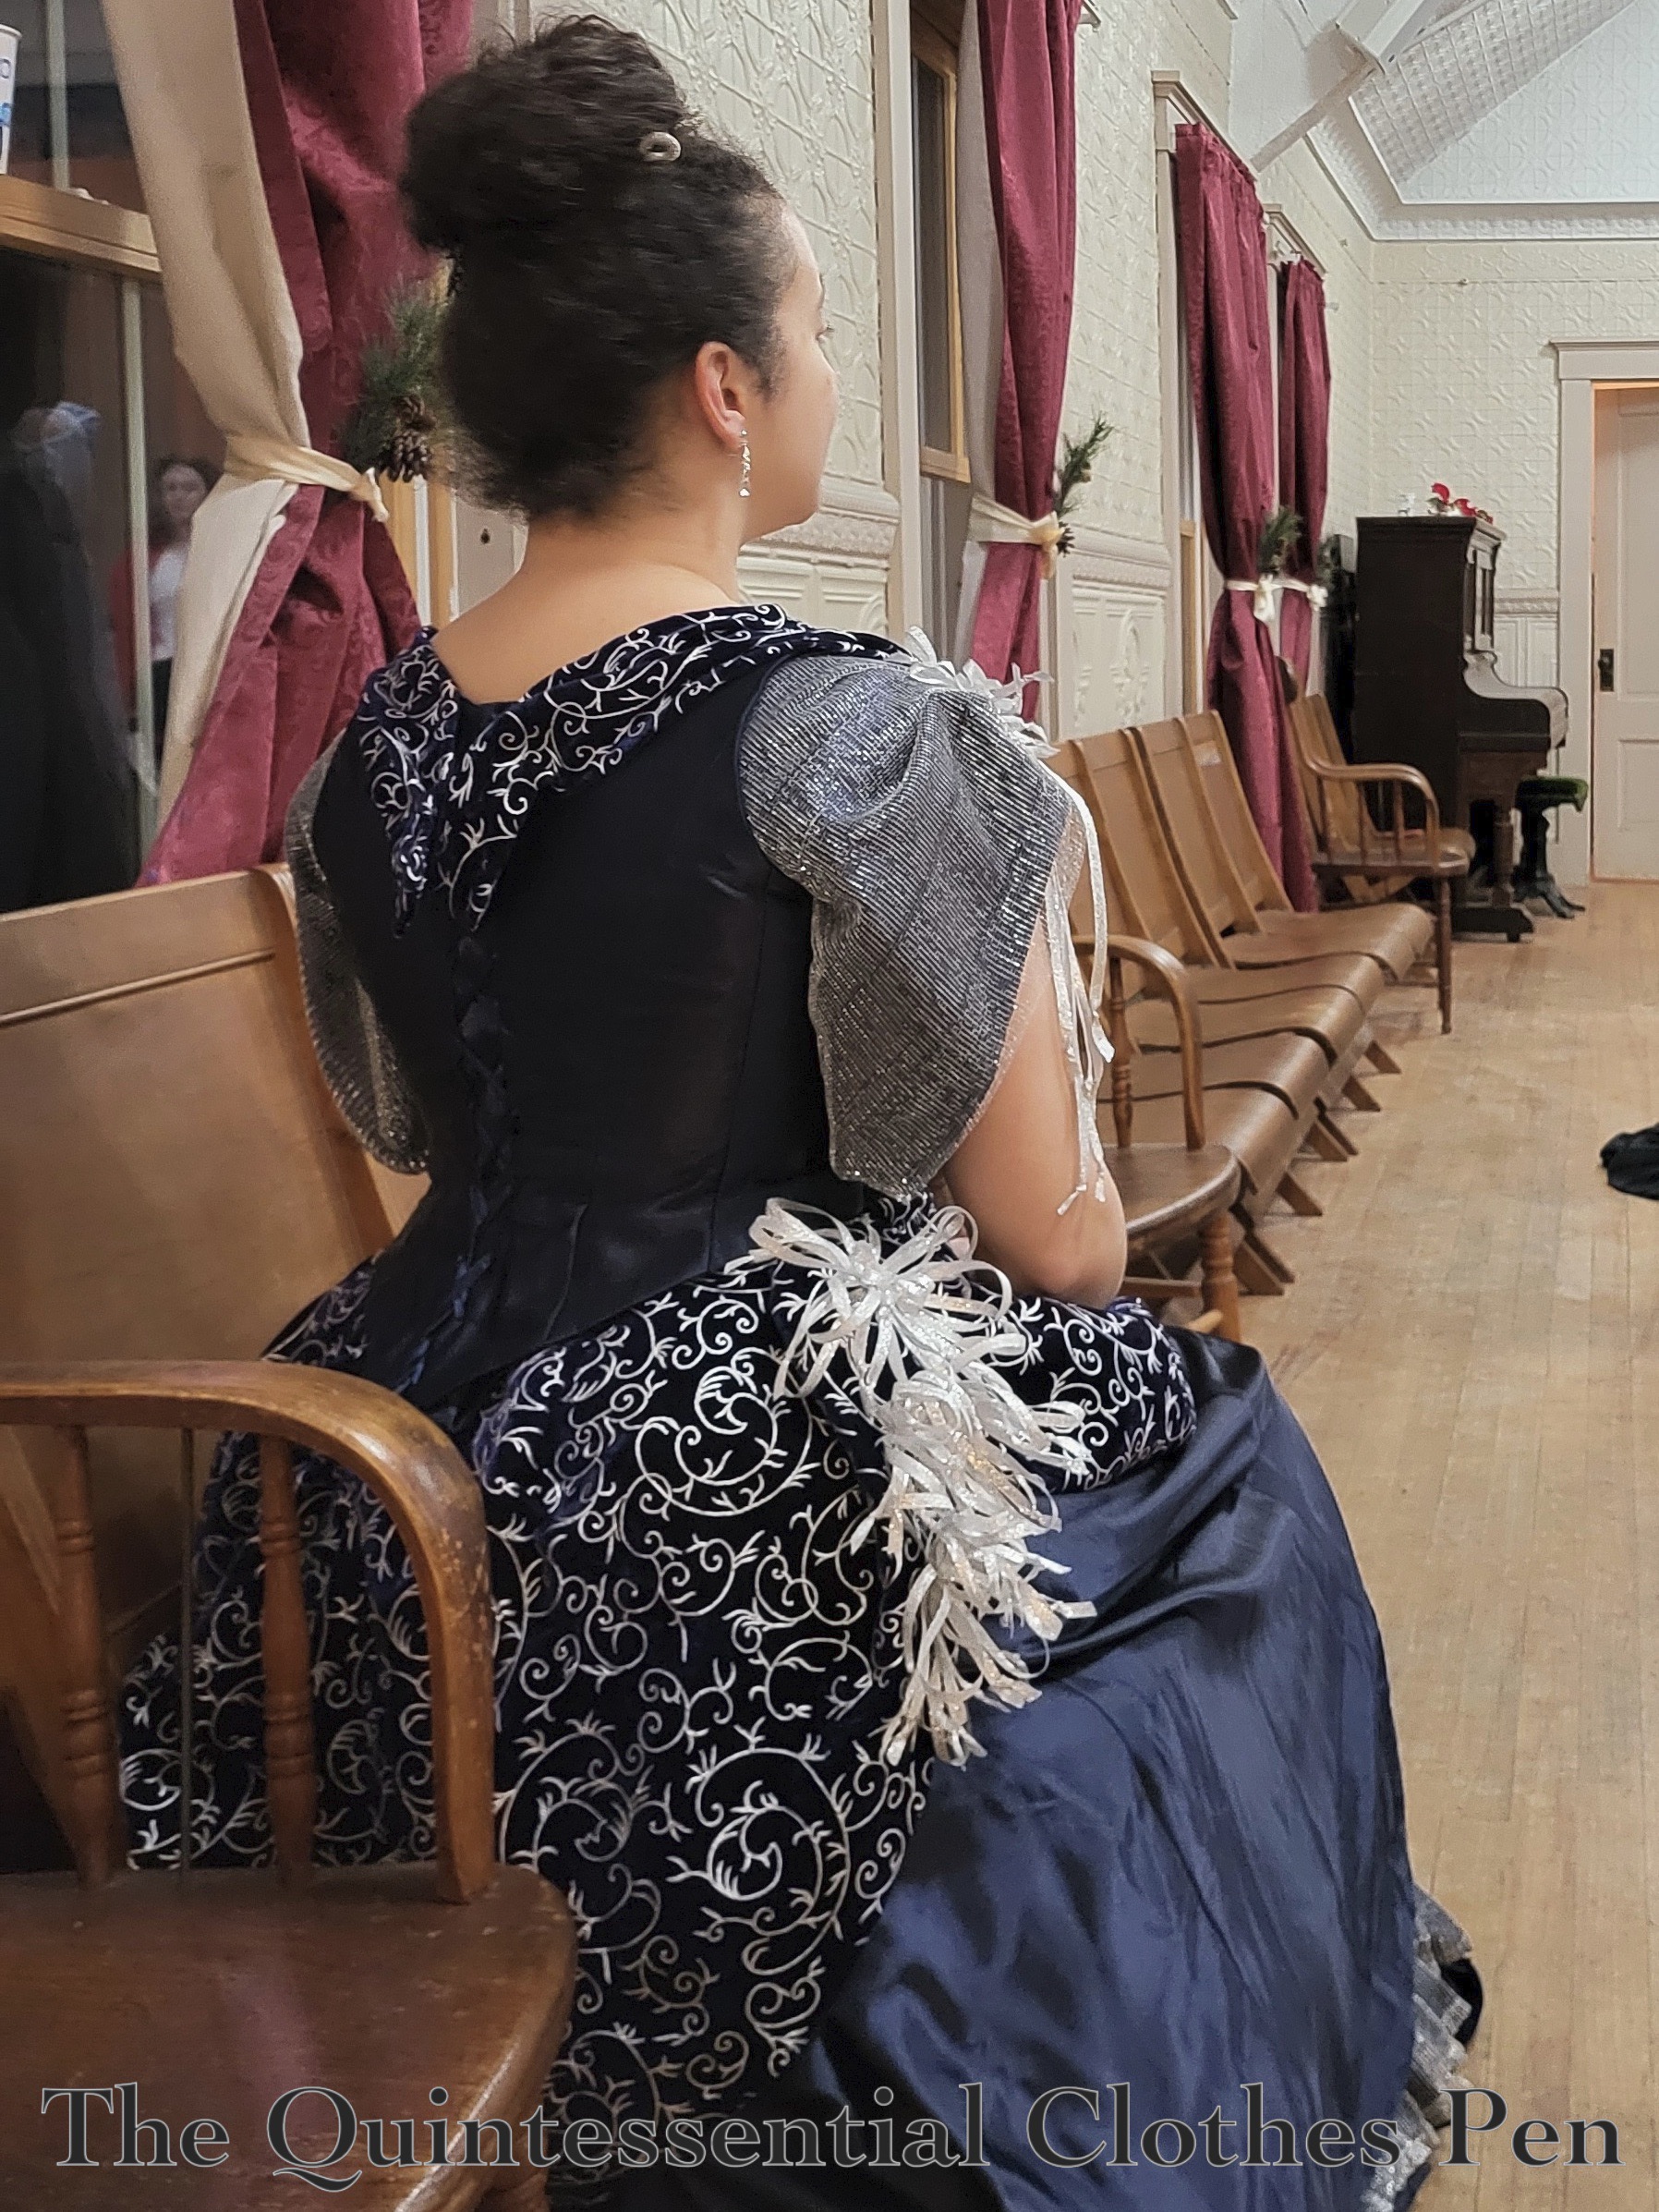
Following the original list of changes, I added a placket behind the lacing holes and added plastic bones along the very back edges, to help hide undergarments (the white color really does pop against the navy blue of the dress!) and keep the back laying flat when laced closed.

Dress Update: Sleeves

When re-examining the dress in 2024 with fresh eyes, one of my biggest desires for change was to better fill in the armholes of the dress and provide a decorative element. Yes, evening dresses in the 1880s were often sleeveless, but when really looking closely at them again, I found that while not having sleeves, they do almost always have something that obscures the armhole and even the upper arm. I am more likely to call these styles swags or drapes of fabric, as they aren’t really proper sleeves, but they are certainly set into the armhole in some way. I wanted something like that for the re-do of this dress.

I haven’t had a need to pattern something like this for this period before, so I looked through my historical pattern books for places to start. Interestingly, I didn’t find much. There was one sleeve that seemed like a possible starting place, but when I mocked it up it didn’t really do what I was hoping for at all!

So that left me with the decision to create a pattern from scratch. Thinking about what didn’t work in the mockup and my inspiration image, I proceeded to drape a mockup that achieved what I was hoping for. I didn’t have my dress form handy, so it required a fair bit of going back and forth between pinning and trying on the bodice to get the right shape. But I did! It’s a strange shape, for any sort of sleeve pattern. But that makes sense, since the sleeve drape is a not-really-sleeve!

Dress Update: Apron, Sleeve Swags, and Ribbon Flowers

I pondered creating some sort of beaded fringe for the armhole (and maybe even the waist, as can be seen in the third inspiration photo, above), but decided against it for time and material reasons. I really did want to stick to the stash!

Even if the beaded fringe wasn’t going to happen, I liked the idea of something to set off the wonderfully pointed bodice so that it would show up and not blend into the skirt. So in the end I decided to use some of the velvet from the stash to make an apron layer for the skirt, as was very common on dresses from the 1880s.

I started with making the pleated neck swag, so I wouldn’t run out of fabric, and then used all of the leftover fabric to make the apron. Due to this fabric restriction, I patterned the apron based on what was possible with my fabric, using a general understanding of the how these skirt elements were patterned in this period. The front of the apron is a curved piece that is pleated into the back on each side. The back piece is a bit scant, but has a few pleats along the top to give volume and descends to a point at the center back, since that was the shape of the fabric that was available! I used up pretty much all of the blue velvet!

For the sleeves, I made flower shaped sprays from lengths of ribbon that were tied into loose knots close to each end and then folded into quarters to make one loop and two ends. These individual elements were then combined and sewn together to make the flower-like formations, with larger scale ones on the skirt and smaller ones on the bodice.

The sleeve dangles were made from the same ribbon, knotted in the same way, that was folded to make a longer and shorter side and then tucked under the sprays on the shoulders.

Below, you can see the individual spray elements and a length of ribbon ready to be added as a sleeve dangle.

Finished Updates

Here is the updated dress! The blue velvet pleated v-shaped neck swag completely ignores the neck shape of the bodice underneath, which is more of a square shape. The same fabric is used again to create an apron, stitched to the outside of the waistband of the skirt to reduce bulk.

The silver net is used over the blue satin scraps to create “sleeves” that are pleated into the armhole and decorated with sprays and dangles of silver ribbon.

The “sleeves” wound up looking a little odd where the meet the back of the bodice, but that’s more due to my original patterning of a very inset armhole in the back than it is the sleeve pattern. It’s a lesson/change for the next bustle period evening gown I make, whenever that is!

I didn’t know what to do with the back of the velvet swag, because I wanted it to be easily adjustable depending on how tightly the back was laced. I ended up with this pointed arrangement that accomplished the goal of flexibility.

The armholes, left side front of the bodice, and right side front of the skirt are decorated with the sprays of looped silver ribbon. I used x4 — 4 yard spools of ribbon and half each of x3 more spools that were 5 yards each.

I calculated how many sprays and dangles I wanted for each section, but in the end I was running out of ribbon and started to just combine and move things around until they looked reasonable. Sadly, that means I don’t have a good record of how much ribbon went into each element or how long each piece of ribbon ended up being. I think that the smaller sprays were made of piece of ribbon that were 10″, the larger sprays on the skirt were made of pieces of ribbon that were 16″, and the arm dangles were 11″ before being folded.

Wearing

I wanted to find a simple but still 1880s hair style for this wearing, so I was pleased when I came across a photo of women in 1880s evening dresses with their hair drawn back and pulled up into simple large chignons on the backs of their heads. I wore that style with the addition of a few silver hair pins to tie everything together.

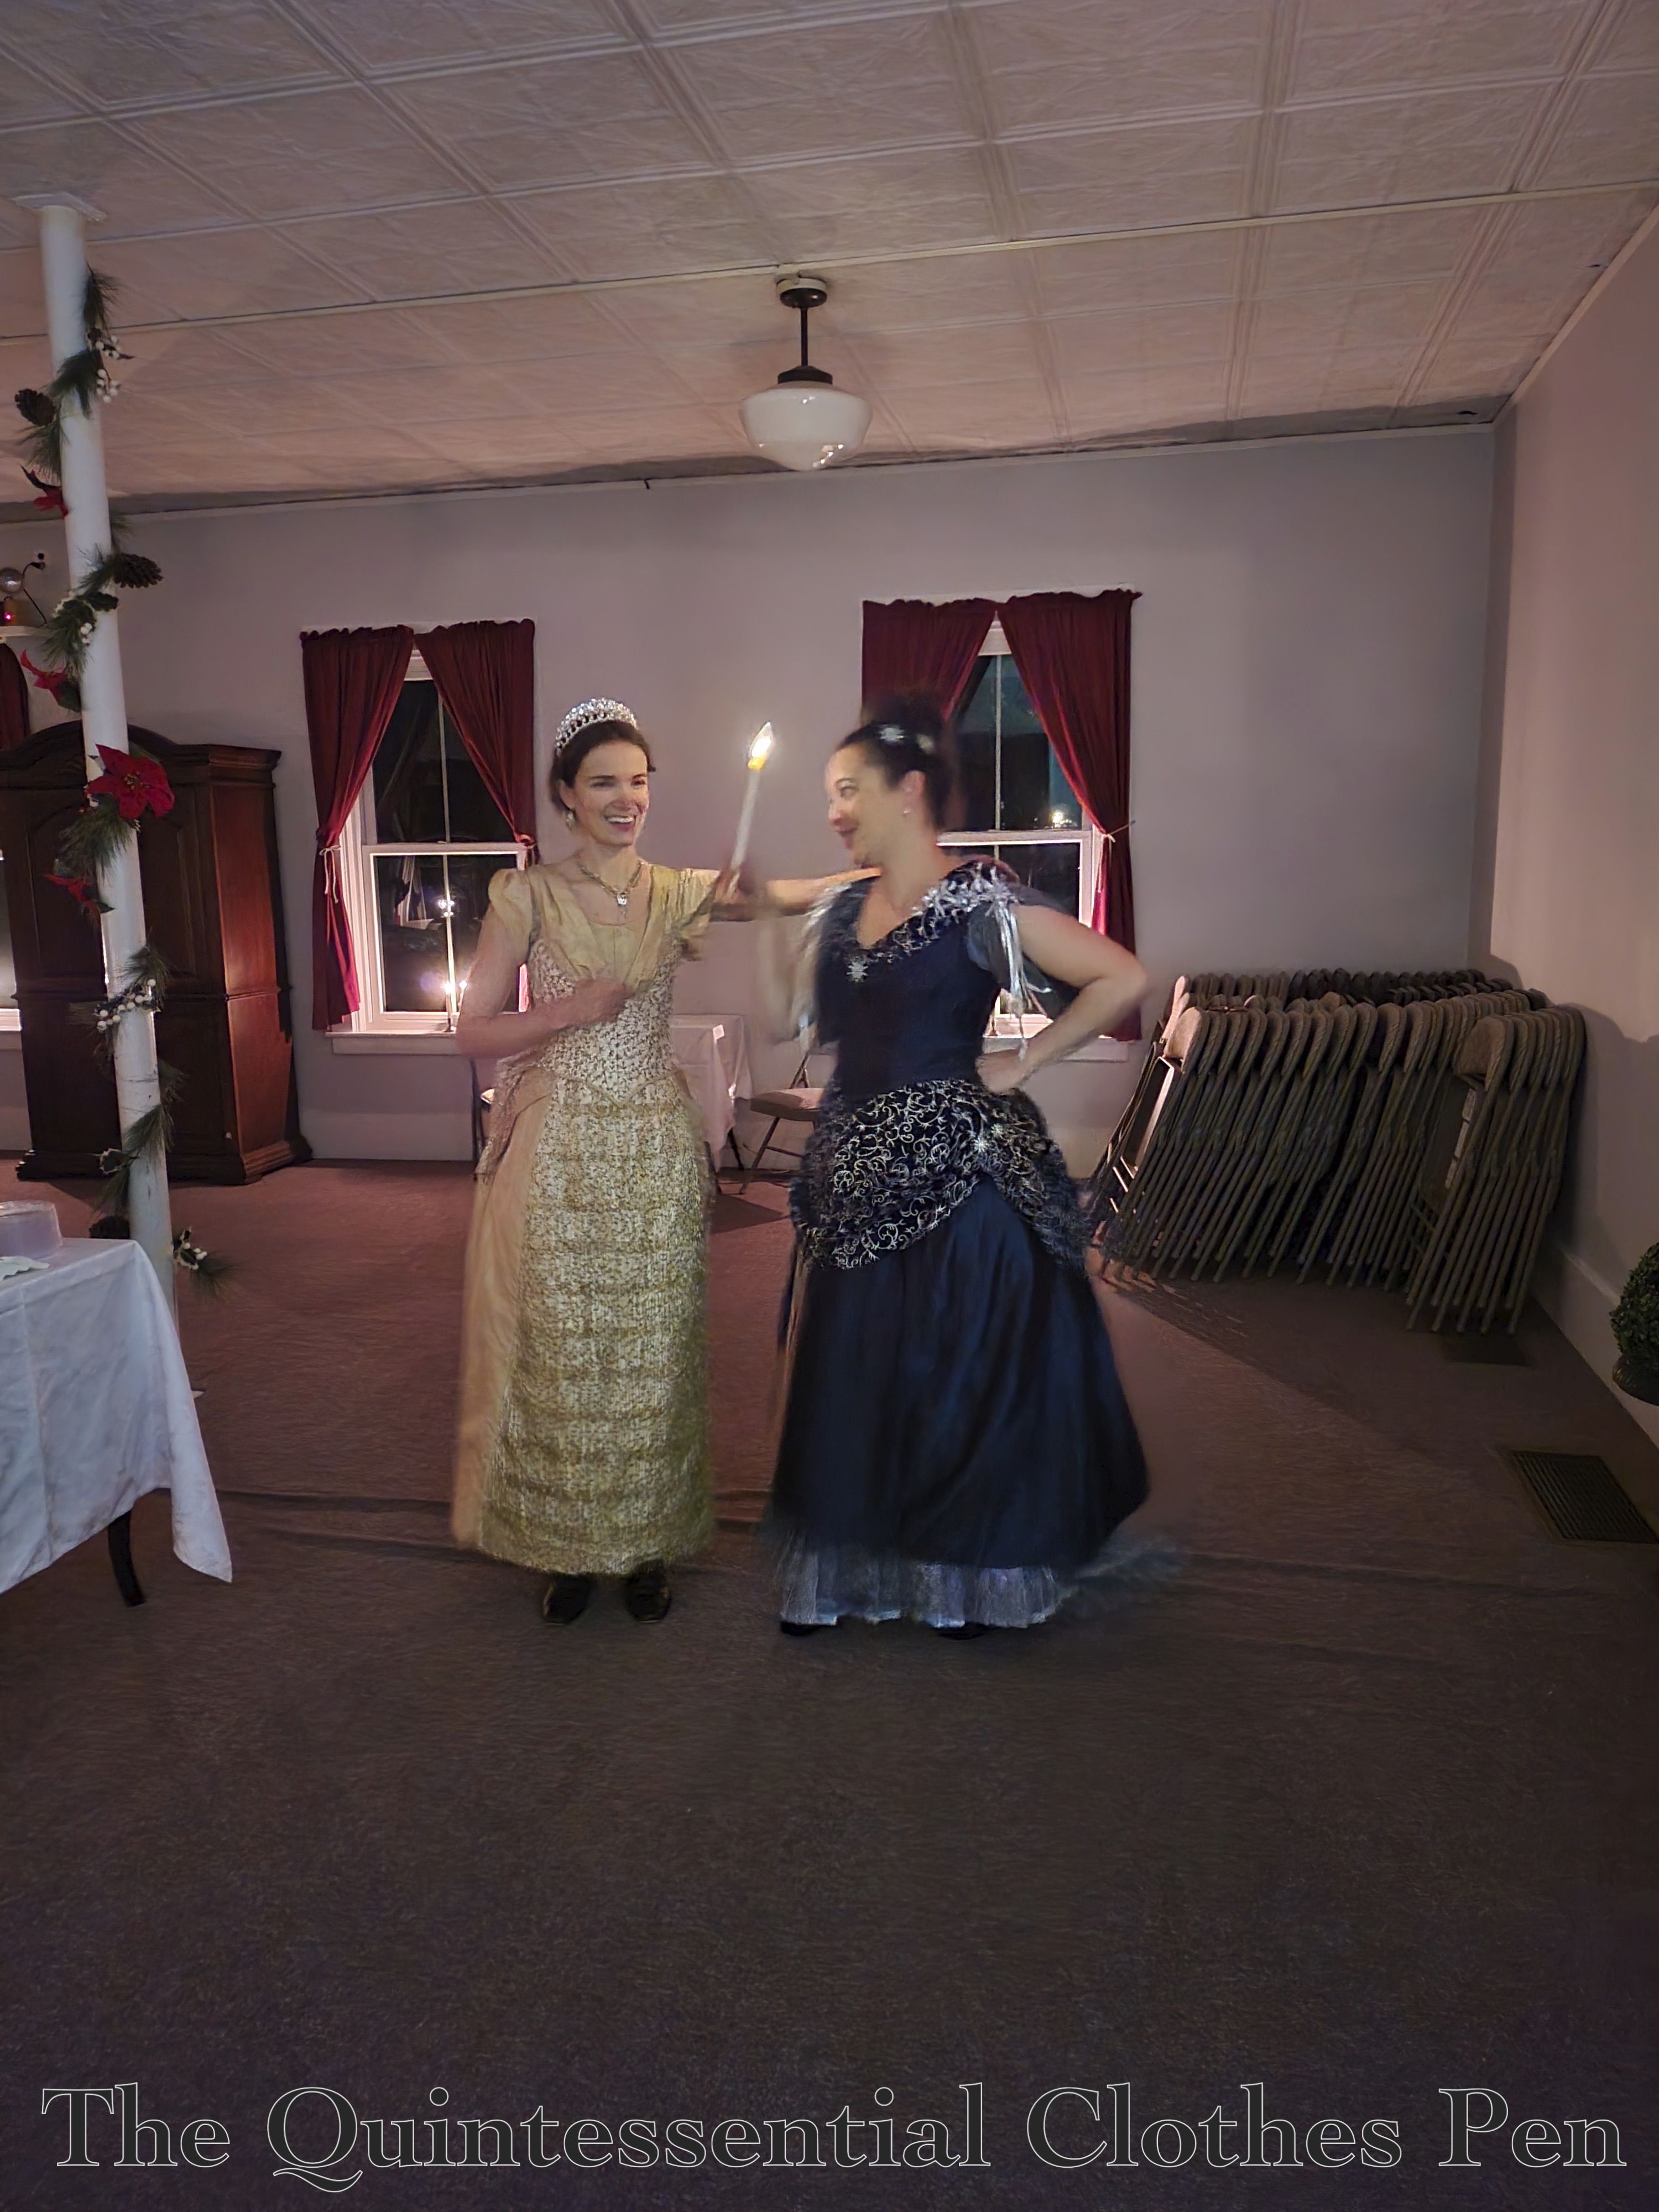
I also reused some of the star brooches from the first iteration of this dress, adding one at the center from of the bodice, two on the left side of the skirt, and some on the left side of my hair. They stand out well in the photo below, in which the two of us are bobbling about, making the ribbons on my dress and beaded trim on the dress on the left shimmer, sparkle, and sway.

Other Photos From The Event

This was a ball for bustles! There were multiple people wearing dresses with this feature, including the dress above, as well as the burgundy velvet dress below.

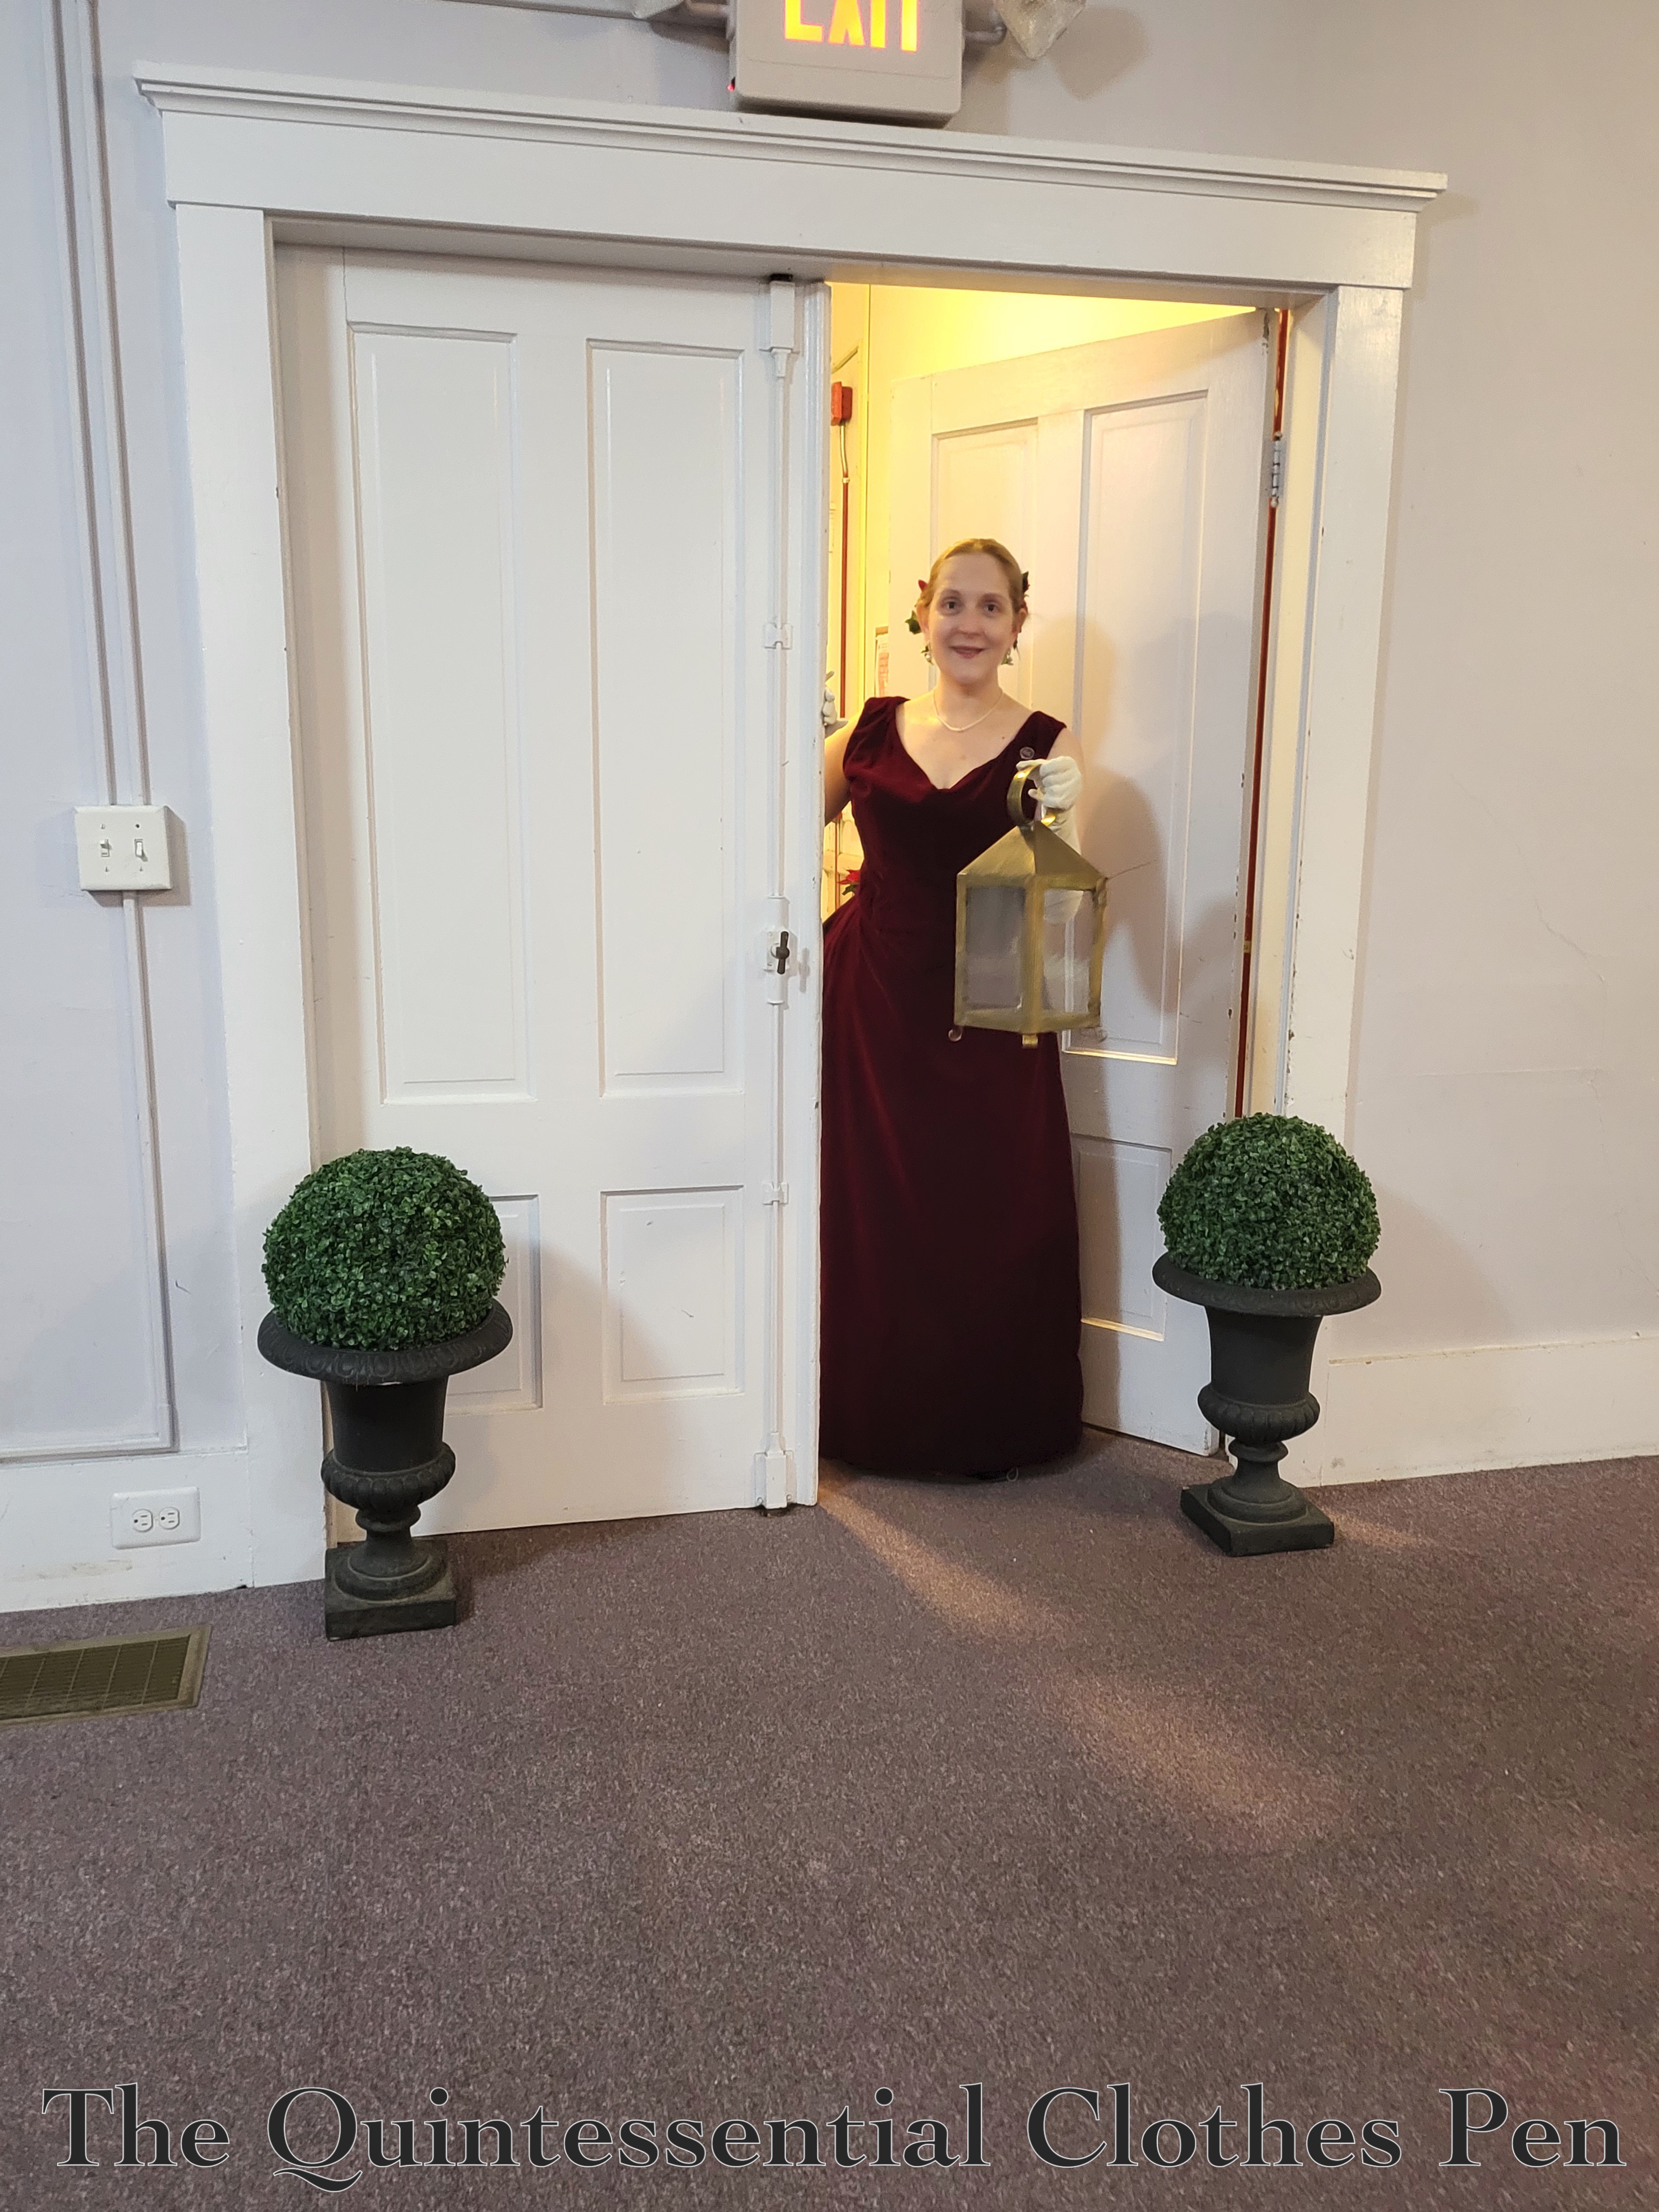
Finally, a cheerful holiday view into the ballroom. I wasn’t feeling my best at this event and therefore didn’t dance, but everyone else had a grand time! I look forward to the next event in which I can participate in dancing with the bustle! It’s really quite fun to experience the movement of dancing with all of your dress behind you!