HSF #16: Eugenie Inspired 1857 Straw Hat

I recently participated in an outdoor mid-century dance performance for which the weather was an un-obliging 90-something degrees + humidity. Yup, not kidding. It was HOT! And we were dancing on asphalt. Luckily, we were out on an island in the Boston harbor and had a breeze. But it was HOT!

Anyway, more on that performance soon, because it involved a new cotton print day dress made from one of my recently acquired historic cotton prints! In addition to the dress, I also restyled a straw hat to go with the outfit and keep some of the sun off of my head. The hat has been used with various other clothes (1780s and Regency come to mind), but I had only ever added a simple ribbon to it rather than really styling it. This was the perfect opportunity to really make something of the hat!

I wanted to keep it simple and in the 1850s/60s, so I started by adding inspirational images to my pinterest board for this project. I visited the board many times before making a decision that I loved the shape of Eugenie’s straw hat in this painting. The hat has that nice downward curve in the front that sort of frames the face and accentuates the fashionable heart shape. The gauzy/tulle trim was a little whimsical for my purposes, so I opted for a more subdued and practical trim style on my hat.

Empress_Eugénie,_Hillwood_Museum,_1857
Franz Xaver Winterhalter (1805–1873) Eugénie of Montijo, Empress of France Date 1857

I started by wetting my hat in the bathtub then tying it with string so it would dry with the curve that I wanted to achieve in the brim. I also wanted the back to curve under a bit, so I let the hat curve on both sides.

IMG_4612
Tying the hat to create curves.

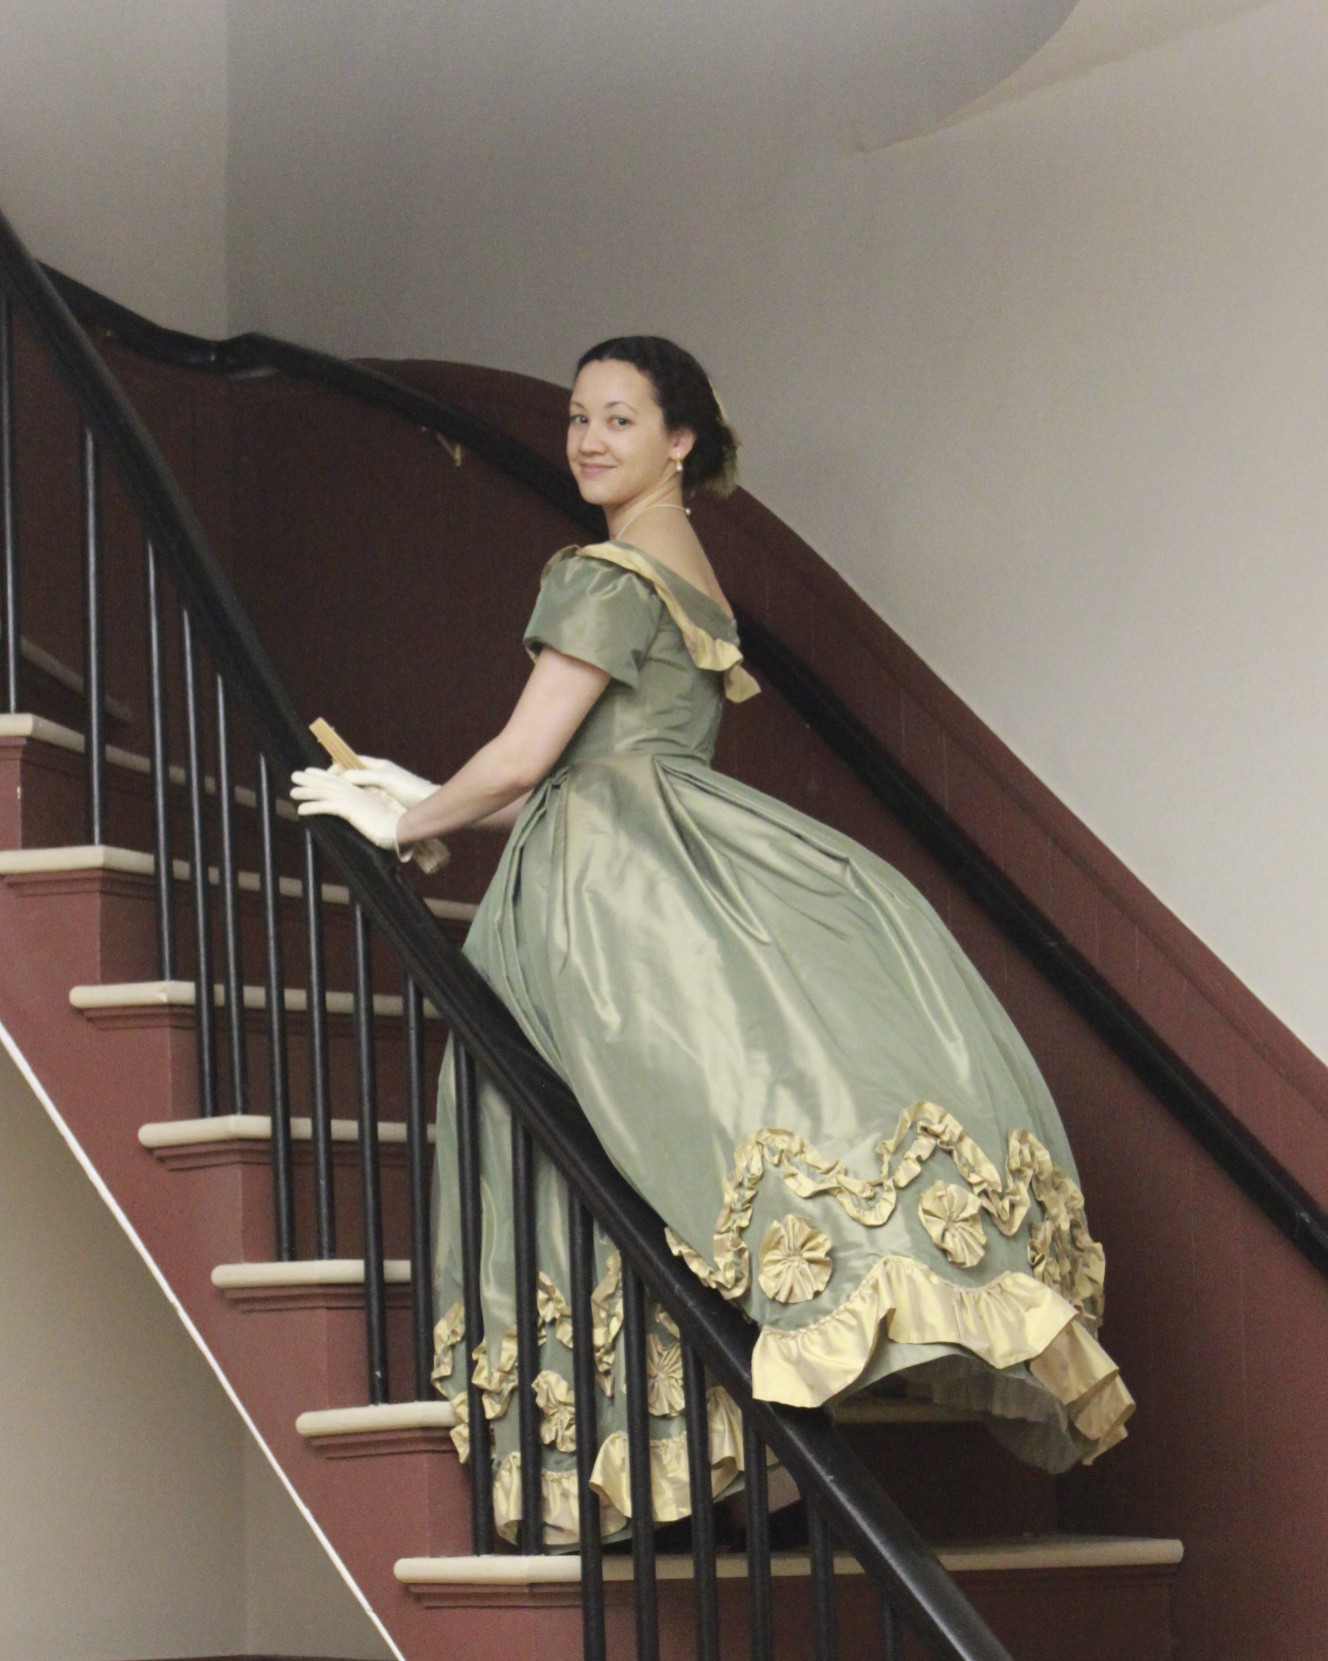
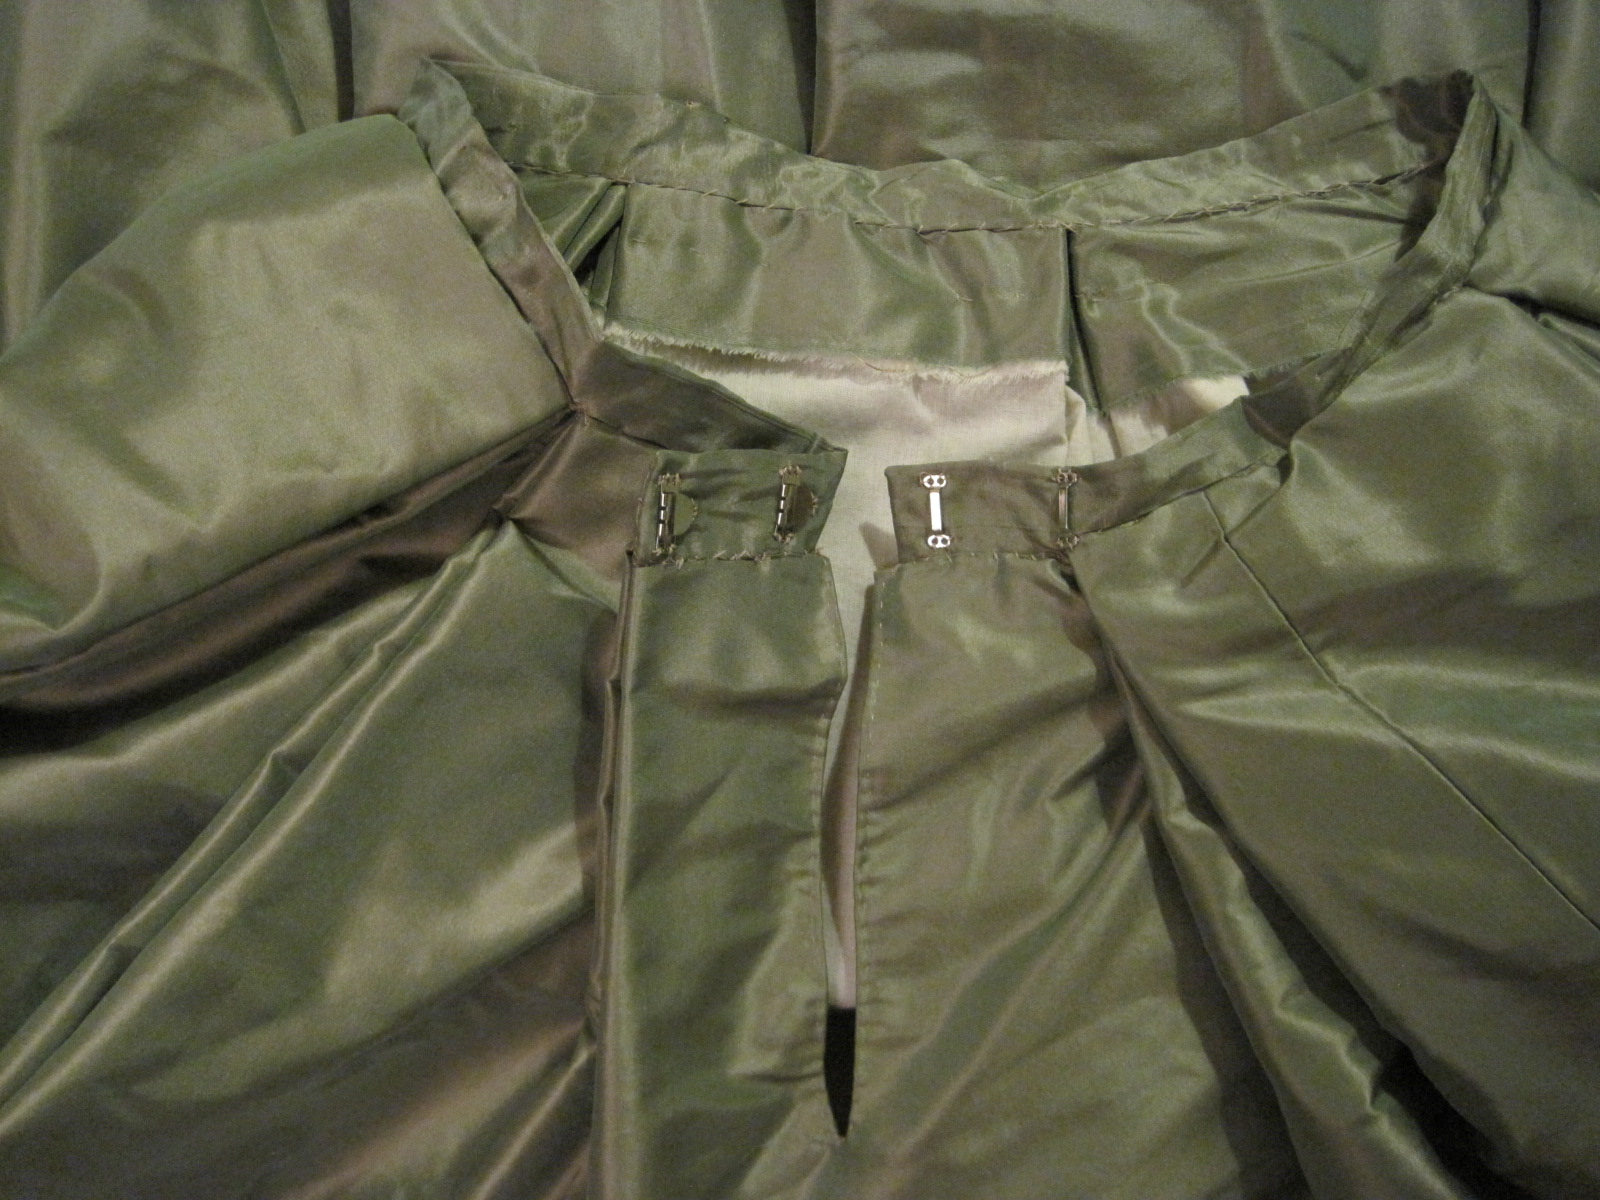
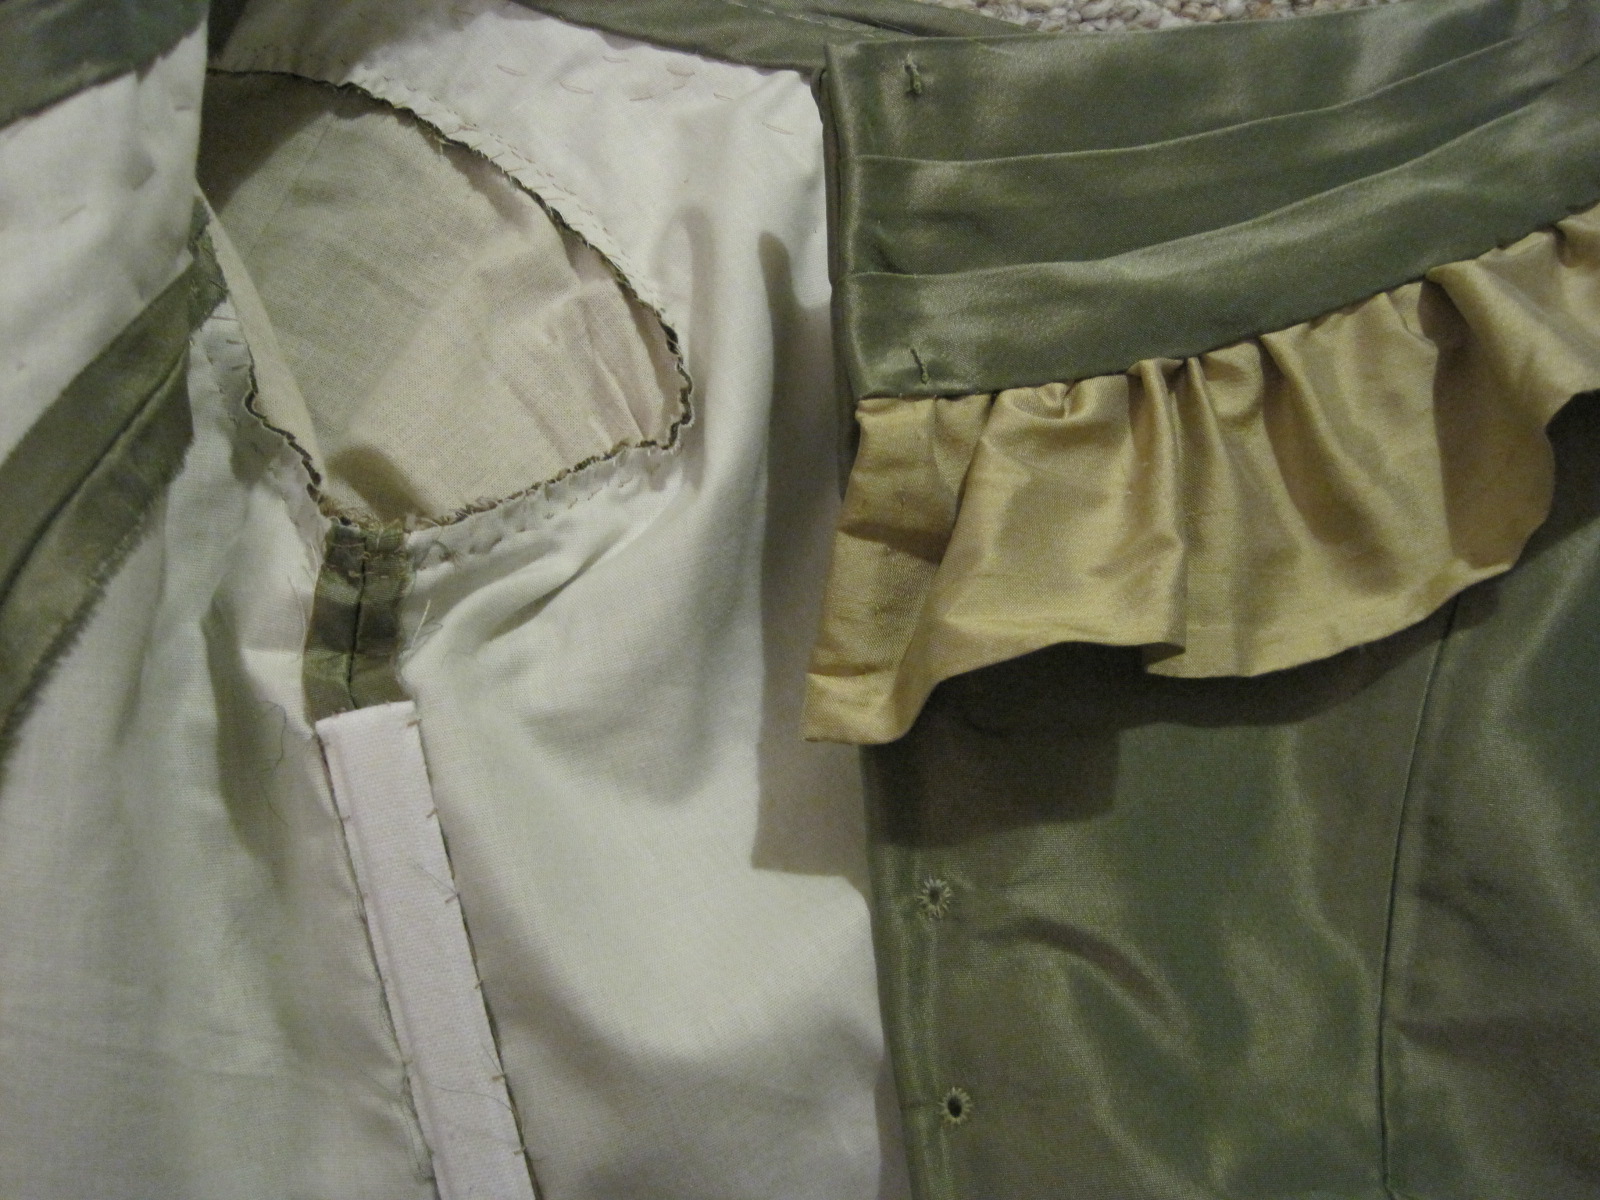
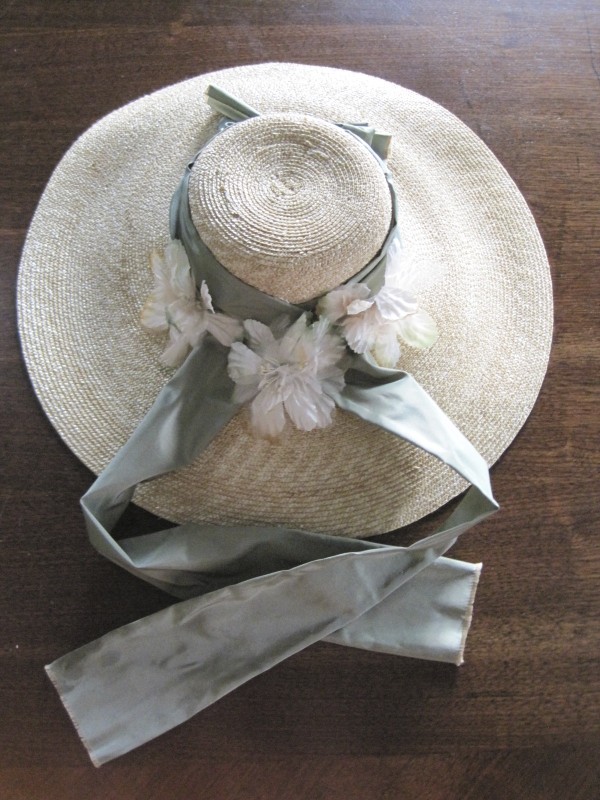
Once the hat had dried all that was left was to trim it! I chose to use green silk left over from Evie, my 1864 ball gown, and some silk millinery flowers. The silk is narrow hemmed on both sides and the ends are fringed, showing gold threads (the fabric is green/gold shot taffeta). The long ends hang down the back while the hat is worn, a style like the one below which you can see in the images on my pinterest board. I also added a bow on the front like you see in the images. Turns out that the bow is not quite centered… whoops!

56737fd6fd819eb71c2360fd4be5679f
LAPL, Magasin des Demoiselles, August 1858

And here is the result of my labors, and my fulfillment of the HSF Challenge #16: Separates. “Make a non-matching garment which can be paired with other items in your historical wardrobe to extend your outfit choices.”

IMG_4729
You can’t see the curve since the hat is sitting flat on the table… but you can see the trim!

Just the facts:

Fabric: A 4″ width of green silk 60″ wide plus a few scraps.

Pattern: None.

Year: 1850s generally, 1857 specifically.

Notions: Straw hat, silk flowers, thread.

How historically accurate?: I give it 98% (and that’s pretty high for me!). Straw, silk, more silk… The sewing machine was even invented by 1858, so the machine sewn hat isn’t totally out of the realm of possibility. The -2% is for the polyester thread.

Hours to complete: 2, not including time for the straw to dry.

First worn: July 20 for a vintage dance performance on George’s Island in the Boston harbor.

Total cost: I bought the hat a few years ago for probably about $25, the silk was leftover from another project, and the flowers cost some small number of cents since I got them as part of a large box for only $5! Let’s just say $26 total.

IMG_4617
Back view of the hat on my head. See how the front dips? This is also a sneak peak of my new gown, Georgina, to whom you will be formally introduced soon.
IMG_4623
Front view. See the dip?

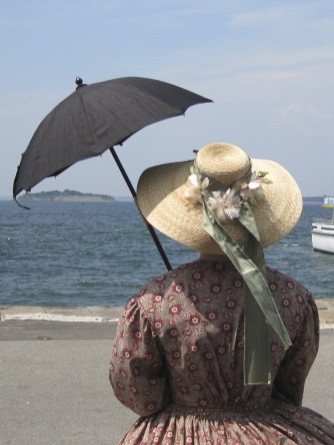
At first I thought I had made the curve too pronounced, but when I look at the pictures again, I think I was pretty darn spot on! Woo! Completed new separates accessory for my historic wardrobe: check. Oh, and did I mention I’m in early on this project? The deadline is August 12!

Returning Heroes Ball 2013

I’ve been slow to post my final group of pictures from this event. Sorry! You’ll remember that I first posted Three Series of Photos of my new green 1864 ball gown, Evie, and her undergarments? Then I posted A Second Series of Photos of friends? It’s finally time for the final installment of posts from the Commonwealth Vintage Dancers’ Returning Heroes Ball back in March.

IMG_0026
A ballroom full of hoop skirted ladies and suited gentlemen.
IMG_0072
A lovely set of dancers. Don’t we all look nice in our light colored dresses?
IMG_0087
Dancing a waltz.
IMG_9934
A “German Cotillion” dance game during intermission, in which the two young men vied for the young lady holding the candle, each trying to blow it out first. Whoever blew it out was rewarded with a waltz.
IMG_0106
More dancing after intermission.
IMG_8697
Caught on camera!
IMG_0160
Do The Jellyfish! There are more Jellyfish pictures from Ochre Court last year.
IMG_0048
The chandelier is perhaps not the loveliest style, but I like the artsy style of the photo. The coffered ceiling is great!

Project Journal: 1864 Ball Gown Part IV: Three Series Of Photos

Remember in my last post I promised pictures of the finished ball gown now known as Evie? The time has come! I had a hard time narrowing down the options (because of course I wanted to share ALL of the good pictures), but I’ve tried to limit myself to only the best of the best. This post will focus on the completion of my dress, Evie, but there are two more posts coming soon that will share some of the other photo series as well as pictures of the ball itself!

These photos are the idea of my friend with the camera. She wanted to take series of pictures of us in our modern clothes, 1860s undies, and then dressed in our 1860s ball gowns: all in the same location and the same pose. It’s a neat idea and the results are great, not only because it provided lots of pictures (yay!) some of which are of things I don’t have pictures of (like my 1860s undies), but also because you can see the time passing through the evening by looking at the light in the photos. They start in the afternoon, proceed to early evening, then finish at night. Not all the series are a complete set, but all around, it’s pretty cool. Which series do you like best?

Series 1: To The Right

IMG_9740
To The Right: first layer
IMG_9735
To The Right, second layer
IMG_0151
To The Right, third layer

Series 2: What A Change

IMG_9546
What A Change, first layer
IMG_9729
What A Change, second layer
IMG_0144
What A Change, third layer

Series 3: On The Stairs

IMG_9693
On The Stairs, first layer
IMG_9714
On The Stairs, second layer
IMG_0130
On The Stairs, third layer

I’ve never been able to get pictures of my 1860s undies before, so this is exciting! I’ve got a chemise, corset, drawers, cage crinoline, and petticoat (in addition to stockings, shoes, jewelry, hair wreath, gloves, fan, and gown). The crinoline is entirely hand sewn, except for the waistband. The measurements of the hoops are taken from an extant crinoline, and I believe the circumference of the bottom hoop is about 120″. The crinoline closes with a hook on the waistband. The other pieces are machine sewn and trimmed with lace, pin tucks, and ribbon. The chemise slips over the head and the drawers close at the back with a button and loop arrangement. (And that poor petticoat does need a press… but I threw it in the washer and dryer a while ago and since it doesn’t usually get seen I haven’t taken the time to press it.) The petticoat ties around the waist. As you can see, the crinoline stops mid-calf, so the intense petticoat ruffle really helps keep the shape for the skirt below that point, in addition to keeping my hoops from showing as horizontal lines through the skirt of the gown.

Want to be further amused? Look at the apparently changeable feathers on my hair wreath. Sometimes they’re brownish/gold and sometimes vivid green! They really do seem to change color depending on the light!

I don’t think I’ve mentioned it yet, but the basic pattern for this gown is essentially taken from Janet Arnold’s Patterns of Fashion 2. The trim however, is based on two things. Thing 1: the skirt trim is from the fashion plate I shared with you in the first post of this project journal. Thing 2 : the bodice trim is based on this gown, below. I went through a lot of phases trying to decide how to trim the bodice, since I didn’t really like the fashion plate bodice trim. In the end, I decided on this look: a graduated ruffle (just one, in my case, to match the one ruffle on the skirt) that gets longer toward center back, a triple pleated bertha that has a swoop towards center front rather than being straight, and a big trim thing right at the center (in my case, a rosette to match the skirt, rather than a bow). It’s pretty hard to see the front of my dress in these pictures I’ve shared so far, but there are some coming up in the next two posts which will show off the front of the gown better, so stay tuned for that!

5178aec3e06e5f940a6b607a4b697fcc
A costume from the movie Il Gattopardo (1962, costume design by Piero Tosi). It’s lovely, despite the fact that it is not an extant gown from the 1860s.

While getting dressed we might have been making silly faces for the camera while the owner walked away…

IMG_9674
Haha! Moose making companion! In case you don’t know, this is my favorite silly face to make. Don’t believe me? Look here and here!

Project Journal: 1864 Ball Gown Part III: Innards

It’s been a little while since I posted about my new 1864 ball gown. Over a month, I think, because in February I posted about the plan/inspiration and then about the progress I made on the trim. I was steadily working on it during the month of March and had it ready to go for the Returning Heroes Ball a week ago. That’s not to say there wasn’t a little bit of last minute sewing the afternoon of the ball. My last minute sewing was gloves and hair piece, though, not dress, so that’s an accomplishment! And I wasn’t alone in my afternoon sewing… friends were sewing with me! There are lots of upcoming pictures but for now I’m going to post about the insides of the skirt and bodice. It’s a sneak peak, since you have to wait for the others pictures to see the full ensemble!

IMG_4361
Completed skirt trim! I was SO ready to be done with it by the time I was sewing down the green zig zag (the last step of the skirt trim).

My other 1860s dresses have names: Belle is my dark blue gown and Annabelle is my white gown. I haven’t really been thinking of this dress by name until recently. Upon consideration, I’ve decided that she’s named Evelyn, or perhaps Evie for short. Why that name? I just like it, it’s old fashioned, and it has Y, and I have a fondness for the less commonly used letters of the alphabet. So here she is: Evie.

IMG_4362
Skirt waistband of self fabric, to which the box pleated skirt is sewn. There is a cleverly hidden opening on the fold of one of the pleats.
IMG_4363
Magic! The pleats are deep enough that you can’t see the opening when the skirt is hooked closed, even with my hoops underneath.

The raw top edges of the skirt are just turned to the inside and left alone. The silk skirt is flat lined with muslin, which helps give it some body, preventing creasing, and some stability at the hem for all that trim. There are six double box pleats evenly spaced around the skirt, as you can see. I haven’t tried this evenly distributed method on an 1860s skirt before (my previous dresses have knife pleated fronts and cartridge pleated backs, which makes them much heavier in the back than the front… I suppose I could divide the skirt in half and do that method, but given how those skirts are weighted, I’m sure there’s more fabric in back than in front). All that to say that I love how evenly weighted this skirt is! It means I don’t need a giant bum pad to keep my hoops level with the floor. (Come to think of it, I suppose I could remount the skirts of my other dresses onto new waistbands and redistribute the fabric… hm… I’ll have to think about that!)

IMG_4365
Inside of the bodice at center front. The bodice is flat lined in ivory polished cotton. The edges are finished with cording (even the top edge, which you can’t see on the outside because it is hidden by the bertha, grrr, but oh well!).
IMG_4368
Inside of the left front and outside of the right back.

The sleeve is lined in muslin. I originally intended that it wouldn’t be seen, but then changed the sleeve design so now the muslin is visible on the inside of the bodice. It doesn’t matter, though, but I do like it when everything matches. The seam allowances of the bodice are just left unfinished (I might whip stitch over the edges some day, but that’s unlikely, since I’ll probably be sewing something else!). The armhole seam allowances are whip stitched together to keep them from fraying and to keep all those layers together. The armholes also have cording in them. The bodice closes at center back with lacing. The eyelets, like everything else, are hand sewn. The bertha also closes at center back (unusual, since a lot of them close on the shoulder, but I didn’t want my bertha pleating to be able to move or show the top of the ruffle). You can see the stitching holding the bertha in place in the first bodice picture, because those stitches go right through to the inside of the bodice.

I stopped keeping track of how many yards of hand sewing went into this dress… but now I’m curious again. So when I finished stitching the gathering stitches I was at 86 1/2 yds just for the trim. I’d estimate about another 22 yds of stitching to attach the trim and about 12 yds of stitching to construct the skirt before attaching it to the waistband. Waistband attachment was probably about 7 yds (it’s quite sturdy and all those pleats are well sewn!). That puts the skirt at a total of about 127 1/2 yds of hand sewing. Then there’s the bodice, which is maybe 12 yds of hand sewing total? That’s a harder one to estimate. That brings Evie to a total of approximately 140 yds of stitching.

I’m proud to say that every single stitch is hand sewn. Next time, though, I’m planning on machine stitching the inside seams. It’s super satisfying to have an entirely hand sewn dress, but it took about two months, and that could have been much sped up with the use of a sewing machine, which means I could have made more things! Who knows, I might change my mind, but right now even I am tired of hand sewing that dress.

Another Annabelle Adventure (Returning Heroes Ball 2012)

Alliterative, agreed? Ok, I’m done… Honestly, the words just came–I didn’t spend long on them! Last weekend I attended the Returning Heroes Ball hosted by the Commonwealth Vintage Dancers in Holliston, MA. As usual, it was full of fun and laughs. There were fabulous dresses all around (because of course one of the joys of a ball is to observe dresses–old and new) and wonderful refreshments as well. I don’t have pictures of other people, but I have pictures of me!… You can see a variety of people in the photos on Antonia’s blog, Experiments in Elegance

Me, in Annabelle. I really, really love hoop skirted dresses! And flounces! Whee!!!

I recently gained a new accessory: a deep purple burnout silk velvet scarf, big enough to use as a shawl. The shawl was decommissioned from a friend’s modern wardrobe because it is rather intense for a modern look; however, it works wonderfully as a 19th century piece, I think! I’ve been waiting for about three months to try it out with this outfit… I think it is fabulous and nicely complements the purple in the flowers.  Do you think it works for an 1860s look?

Ooo... Purple silk velvet shawl. So cosy! (and stylish to boot!)
Thanks for taking the photos, gentlemen (you know who you are)!

I’ve been trying out more complicated, poof-filled hair styles in preparation for early 20th century styling and I put some extra effort into this hair-do to try out more poof-ing. From the front my hair has it’s normal 1860s style with a center part where each from section is slightly poofed and rolled back to join the low rolled chignon at the nape of my neck (above, left and right)… but from the back this most recent style has extra poof-age!

See the extra poof at the top of my head?
Poof close-up

 In terms of the hair-styling itself, I think I like the extra poof as it gives more dimension and adds a regal feel to the overall look. Do you like the added poof?

I also decided to rework the hair wreath I’d made for the German Cotillion back in October (left). I’m not sure I like it as a giant mass of flowers, I might rework it again into a crescent shape like the flower piece that matches Belle, my other 1860s ball gown (above right). In terms of the flowers, giant mass or crescent shape?

Annabelle, adorned with flowers

Over the summer I built Annabelle, a white flounced 1860 ball gown, in order to have an alternative to my dark blue 1860 ball gown. My intention was to adorn Annabelle with flowers, as in my inspiration fashion plate from Godey’s Lady’s Book (Annabelle is based off of the gown on the far right); however, I did not have time over the summer to add the flowers.

September 1860 "Dressed for a party" (Fitting title, don't you think?)

I decided to wear a be-flowered Annabelle to the Commonwealth Vintage Dancer’s German Cotillion last week. My original plan was to hand make the flowers from hand painted pink silk organza. I started on that endeavor, but the process was time consuming and so I have only made perhaps 100 flowers (first: cut 5 rounded point shapes, second: fray check the edge all around, third: gather the center of each flower). Each flower is about 1 1/2″ across. When I went to sew the flowers on the dress I realized two things that made me change my mind about using them: the flowers were too small for the scale of the dress and I would need so many more hundreds to make the look work. In the end I used purple millinery flowers, from the fantastic stash I mentioned in the post about my 1860 hair crescent, to adorn the dress. I actually really enjoy the purple flowers and the scale is far better for the overall look as well.

Annabelle with flowers!

I used matching flowers plus a few others in the pink family to create a wreath for my hair to match the dress.

Annabelle back
Matching hair wreath

If you would like to see what Annabelle looked like without the flowers, you can visit the following posts and see pictures: Of Flounces and Dance Cards: Part I and Ochre Court 1860s Ball 2011. And, to finish off this post, here are a few pictures of Annabelle in action at the German!

Playing dance games at the German Cotillion

Salem Light Infantry Levee and Ball 2011

The Salem Light Infantry Levee and Ball was an event hosted by The Commonwealth Vintage Dancers and Salem Light Infantry in October 2011.

In 1861 the members of the Salem Light Infantry
held a ball on their return from service in the Civil War.
For a brief moment,
before joining other units and returning to battle,
they celebrated friends and fellowship.

This event was held in Hamilton Hall in Salem, Massachusetts, in the hall where the original event was held 150 years ago.

You can click here to see the event announcement. If you are interested in learning more about the Salem Zouaves you can view their website by clicking here. You can also read one of my older blog posts to learn about Civil War Zouaves in general: A waltzing Zouave?.

First, let me share with you a video of the Salem Zouaves performing a military drill during the course of the evening.

Second, let me share with you some photos of the evening. It was quite lovely!

Waltzing back in time on a fine October evening
Dancers at the ball
Taking a rest from dancing
I met another young lady who also took a break from dancing
Salem Light Infantry Zouaves
Watching the Zouaves

Ochre Court 1860s Ball 2011 (Newport Vintage Dance Week)

Quinn, taking a short break from dancing at Ochre Court

Well, I am exceptionally delayed in posting about this event (it was in August), but I was inspired today to remember how fabulous this was and to reminisce… So here we are! I was able to wear Annabelle, my latest 1860s dress to this event. You can read more about this dress by clicking on this link. I have to say, I did receive one comment that I looked “like Scarlett O’Hara.” Whee! That is really a dream come true for me… you know she does wear a white flounced gown in the movie… I intentionally did not make a gown just like hers (for one thing, mine does not have red trim).

The mid-18th century ball at Ochre Court was just one event hosted by the Commonwealth Vintage Dancers during Newport Vintage Dance Week 2011 in Newport, Rhode Island. And yes, that is the Newport of fabulous historic mansions! (Newport Vintage Dance week was included in the New York Times’ Evening Hours by Bill Cunningham on August 21, 2011. Click on this link to see Mr. Cunningham’s wonderful pictures of various Newport Vintage Dance Week events!)

Aside from repeating (many, many, many times) how absolutely fabulous this event was, I don’t have a whole lot of commentary. Thus, my commentary will be confined to captions, so that way I can include a lot of pictures! Yay! I hope that you are able to look at these and be transported to this historic mansion full of hoop-skirted ladies, distinguished gentlemen, and elegant music.

This photo comes courtesy of my friend, Carly. This is the main ballroom at Ochre Court.
Front stairs at Ochre Court.
Ascending the red carpeted stairs to the upper levels.
Ochre Court main ballroom upper levels and ceiling... Beautiful!!!
Looking down on the main ballroom at Ochre Court.
Oh look! There I am, watching the dancers below!
Look! There's someone taking pictures! (Look at the fabulous detail around me!)
Ah, now you can really appreciate the intricate detail!
Time to descend the stairs and dance!
And here are Terri and Carly, also descending the stairs!
Dancers at Ochre Court.
More dancers at Ochre Court.
Dancers in the dining room at Ochre Court.
Strike a pose by one of the enormous fireplaces!
Carly in front of the fireplace.
Taking a breather in the library at Ochre Court.
Would you care to dance? Ochre Court main ballroom.
One more scene at Ochre Court.
Saying good bye to Ochre Court at the end of a fairytale night.

Pleated trimming on 1860s gowns

I absolutely love the use of pleating as a trim motif in the 19th century! I also admire the immense amount of time and fabric required to edge the dresses of the 1800s in pleated trim.

Take a look at the dress below and note the rolling wave pattern of the pleated trim on the skirt as well as the pleated trim on the sleeves. You can see that the trim is made of the same fabric as the dress, which was a technique often employed in the 19th century for the trimming of gowns.

c. 1862 Afternoon Dress at the Metropolitan Museum of Art

Now, take a look at this dress from 1860-1861 (which was also include in this post). Doesn’t the trim style look familiar? Yes, it’s a more bunting-like placement of the trim, but the idea is exactly the same as the dress above!

1860-1861 Dress at the Metropolitan Museum of Art

So now that we’ve looked at a few actual garments with the pleated trim, let’s look at some fashion plates. You know, I went through about 50-100 fashion plates from 1860-1865 and I was surprised by the lack of plates that included dresses with pleated trim! Considering that I have frequently seen pleated trim used on existing garments I am intrigued by their relative absence in fashion plates… I wonder if pleated trim is just challenging to execute when creating a fashion plate? Certainly I found some with bands of trim, and perhaps those could have been executed with pleated trim when constructed?

Godey’s Fashions for September 1861
Godey’s Fashions for September 1862

In both of these fashion plates the ladies on the far left are the ones I’m looking at and think that they are wearing dresses with pleated trim. The one from 1862 as especially clear detail that shows the trim being pleated. It is interesting to note that these two fashion plates correspond directly with the two existing dresses at the Metropolitan Museum of Art.

Braid trimming on 1860s gowns

I have noticed a particular style of trim used on multiple 1860s gowns that I find interesting and want to share with you.

This first gown was also included in my post Bolero and Zouave jackets of the mid-19th century. The bolero style of the bodice is exceptionally well suited to the 1860s: you can read more about that by clicking on the link at the beginning of the paragraph. What I find most fascinating about the dressmaker’s choices in this dress is the fabric and trim. The pale yellow background is wonderful, but to me the foreground (with the cinnamon colored lines and bunches of flowers in between) as well as the small flowers on the background create quite a busy look all on their own. And then to add the green trim on top, with a repeating vertical line motif… but there’s even more! There are tassels and the yellow and green twisted cord zigzagging between the points in the green trim. It’s just a lot going on, and I do think the end result is lovely and congruous, but I think if I was designing a dress I wouldn’t be able to envision all of these elements coming together in such harmony.

c. 1862 dress at the Metropolitan Museum of Art

This second dress is actually a dressing gown. The trimming is not exactly like the bolero dress above, but it is strikingly similar. It is a narrow braid that is used as a border trim in horizontal repetition with points where the trim pattern lifts up into diagonal lattice patterns. The trimming is really quite stunning on it’s own, but consider the time it would take to actually trim a garment in this fashion!

c. 1860 Dressing Gown at the Metropolitan Museum of Art
c. 1860 Dressing Gown trim