Sometimes the spaces between stuff are what makes a garment special. Make a garment that is about holes, whether it is lace, slashing, eyelets, etc.
And boy, are my shoes about the lace (which has holes!). The lace makes the shoes complete and finished looking. (Also, the buckles required holes being made to fit the buckles, so that’s a roundabout way of including the shoes, too.)
Notions: Just under 3 yards of 1/4″ metallic lace; other supplies included angelus leather preparer and deglazer, angelus leather paint, angelus matte acrylic finisher, masking tape, paint brushes, and hot glue.
How historically accurate is it?: 85%. Reasonable color and trim on well researched historical shoes, but of course the whole thing is actually modern.
Hours to complete: 8 maybe? I took a long time painting lots of layers until I got a color I was happy with and then adding the lace took another hour or two.
First worn: Will be worn at the end of May!
Total cost: $102 for imperfect Kensingtons and the buckles a few years ago, $15 for the lace, $15 for the paint, and the rest was from the stash, so about $137 total.
I’ve been making lots of things this spring, but they haven’t lined up with the HSF since January. Yay! I’m pleased these fit the HSF challenge.
Product links in this post contain an affiliate code, which provides a small benefit to my shoe fund. This does not affect my impressions and reviews of this product.
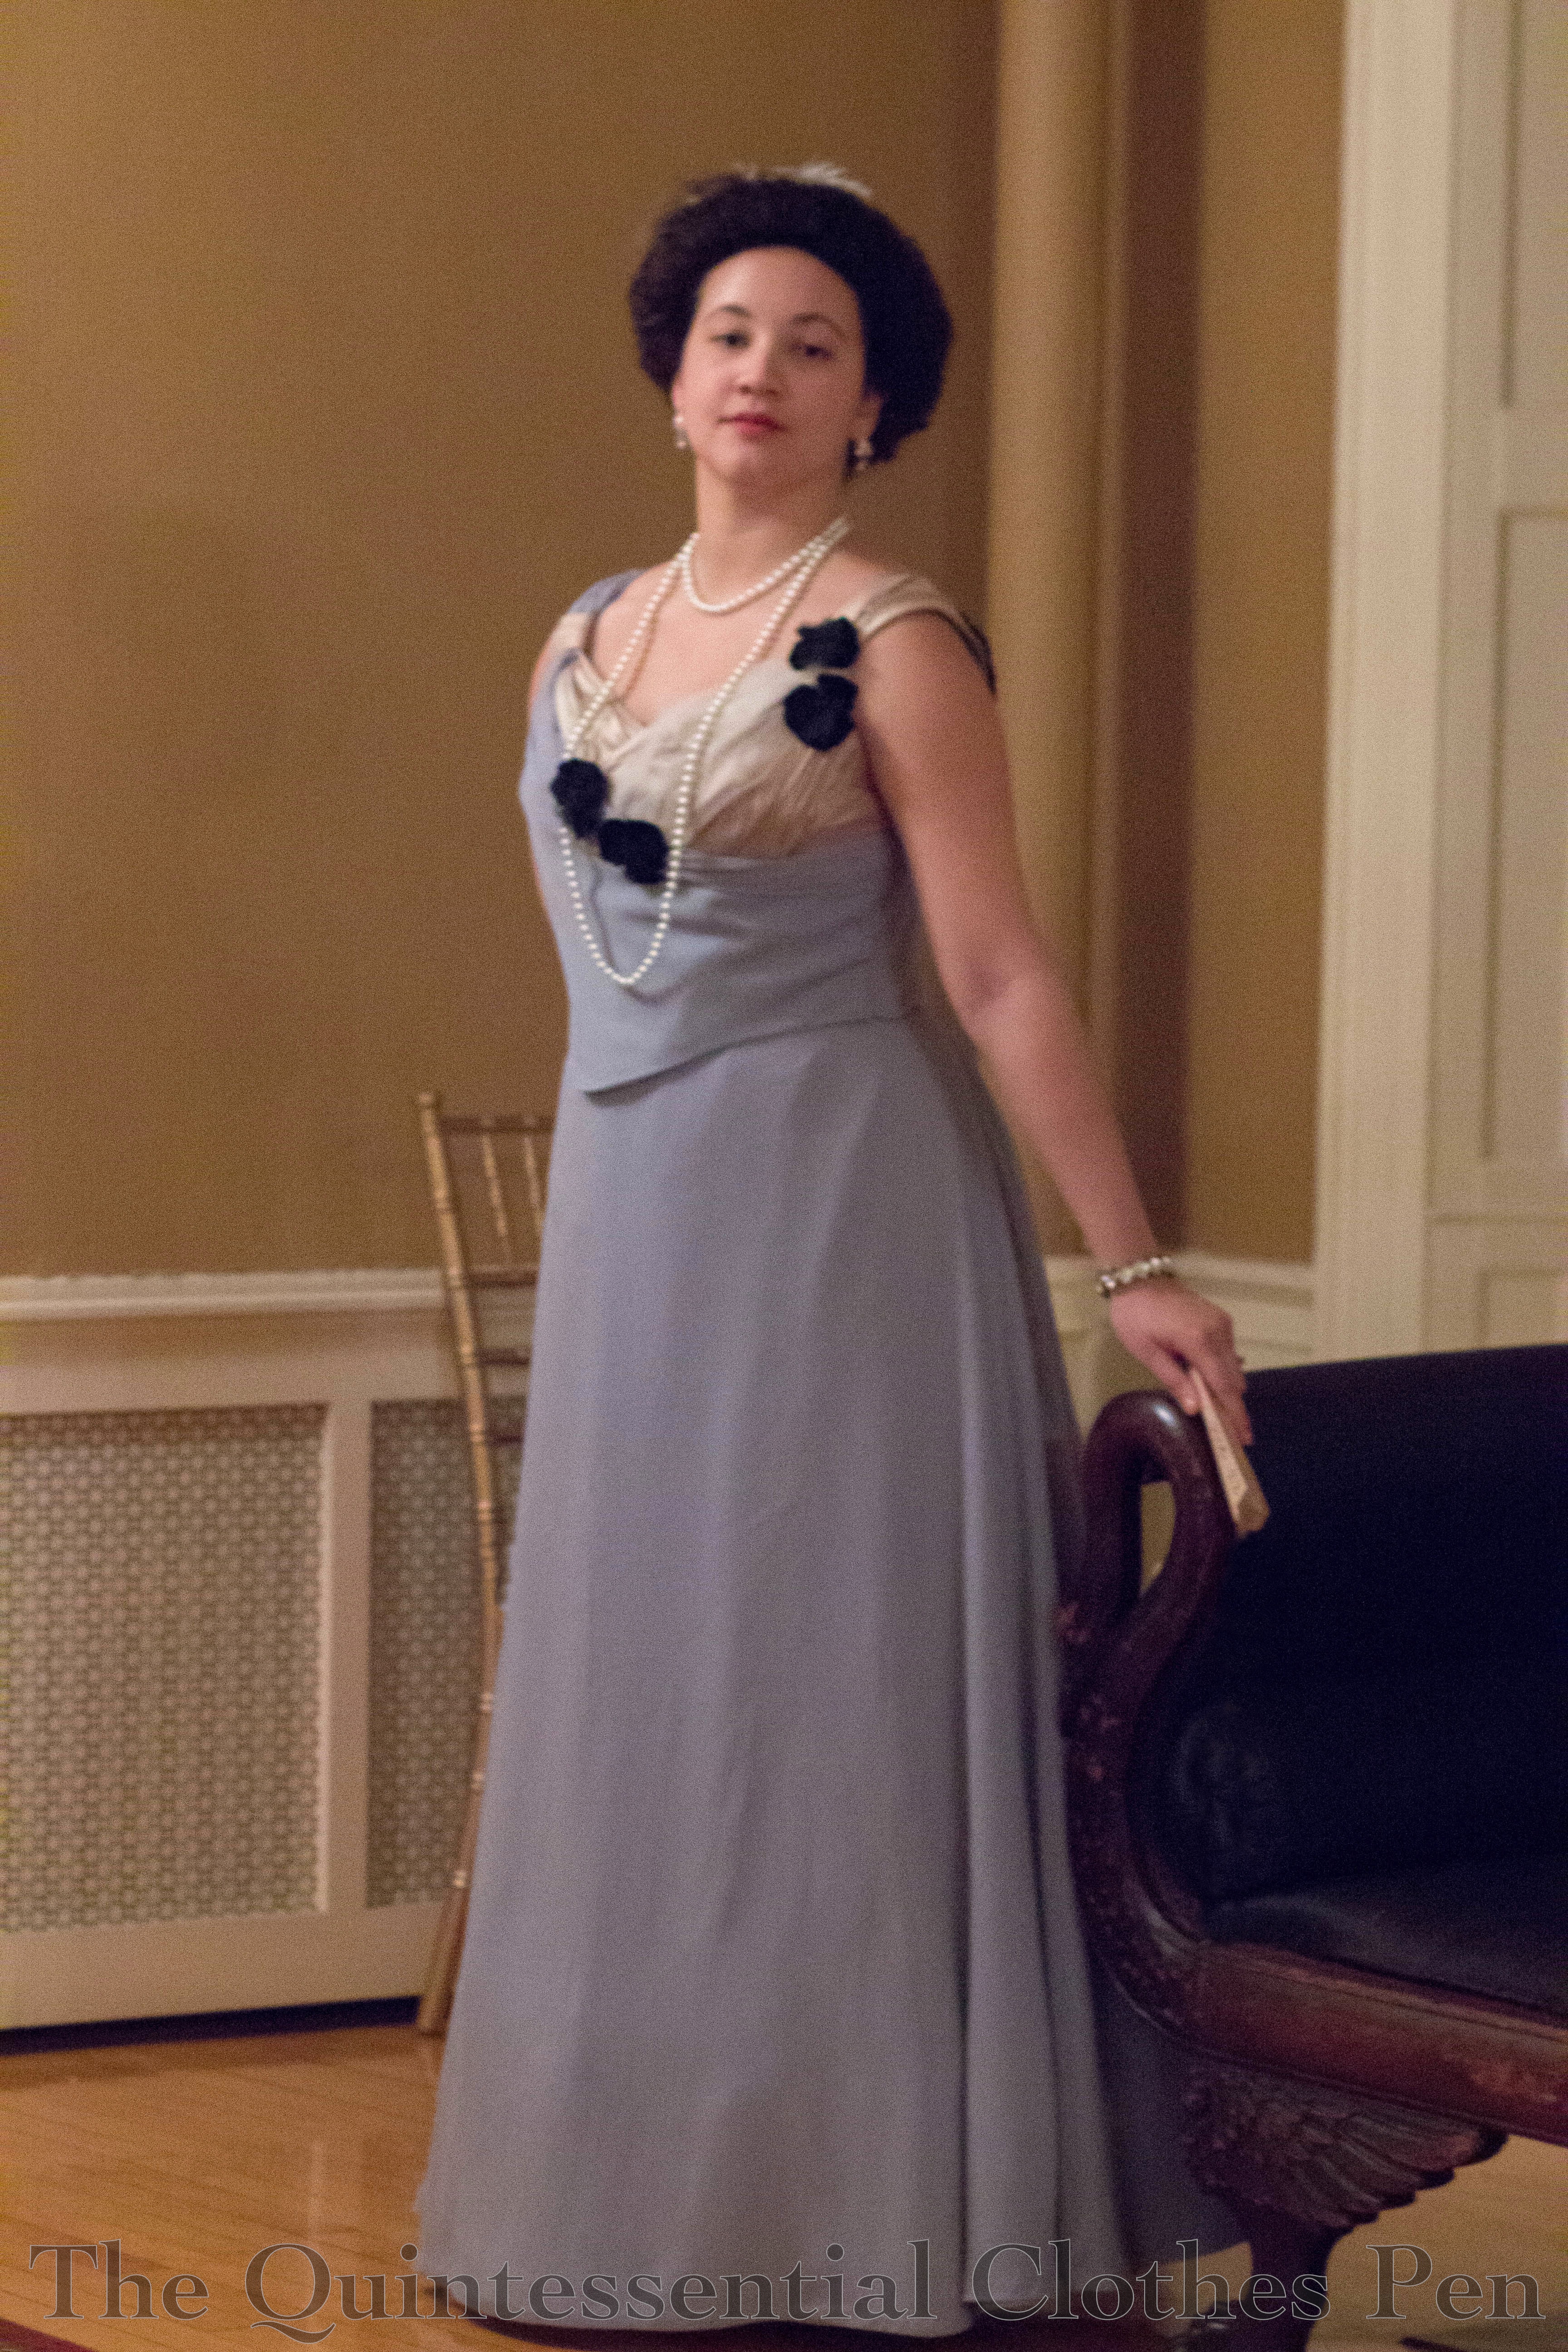
I already had inspiration pinned to a board, I had fabric in the stash (the fabric is more of the same elusive blue I used to make my 1811 evening gown in 2014–it time travels!), and I had an opportunity to wear an 1890s gown this past month! With a vague plan in mind, I started the skirts* sometime in the fall with the sincere hope of getting a fair bit done on them, but only got as far as cutting them out, after which they languished in the closet while I worked on other projects. Languishing is a variation on procrastination, which is the HSF challenge for this January. And so, with the languishing having finished its course, here is the finished new gown.
Just the facts:
Fabric: 5 yards or so of(likely polyester) elusive blue chiffon, 3 yards or so of elusive blue polyester for skirt lining, 3/4 yard or so robin’s egg blue cotton, 1 yard or so of pink glazed cotton, 1/8 yard or so of taupe silk shantung, some small bits of ivory polyester tulle and ivory silk gauze.
Pattern: Created by me, with reference to Janet Arnold dresses from the 1890s.
Year: 1899.
Notions: Wide grosgrain ribbon, bone casing, 1/4″ plastic wire tires, narrow grosgrain ribbon, black velvet and organza millinery flowers, hooks and eyes, and thread.
How historically accurate is it?: Definitely recognizable in its own time. The silhouette is spot on. The colors are inspired by extant clothing. The construction is mostly accurate. The materials are a mix of accurate and inaccurate. I’ll give it 80%.
Hours to complete: Many. I worked on this over a few months.
First worn: January 9, 2016.
Total cost: About $15-$20.
(The low cost is due to the fact that the chiffon and lining fabrics were purchased for the amazing price of $1/yard and that many of the notions and small bits were in my fabric stash.)
For the bodice, I started with the pattern for my 1893 gown (which was adapted from Janet Arnold originally). The back needed very slight alteration, but the front had quite a few changes, due to being worn over my new 1880s corset and because I wanted different dart placements, neckline, a front/side hidden closure, etc. I did multiple mock-up fittings (no pictures, sorry) before feeling ready to cut real fabric.
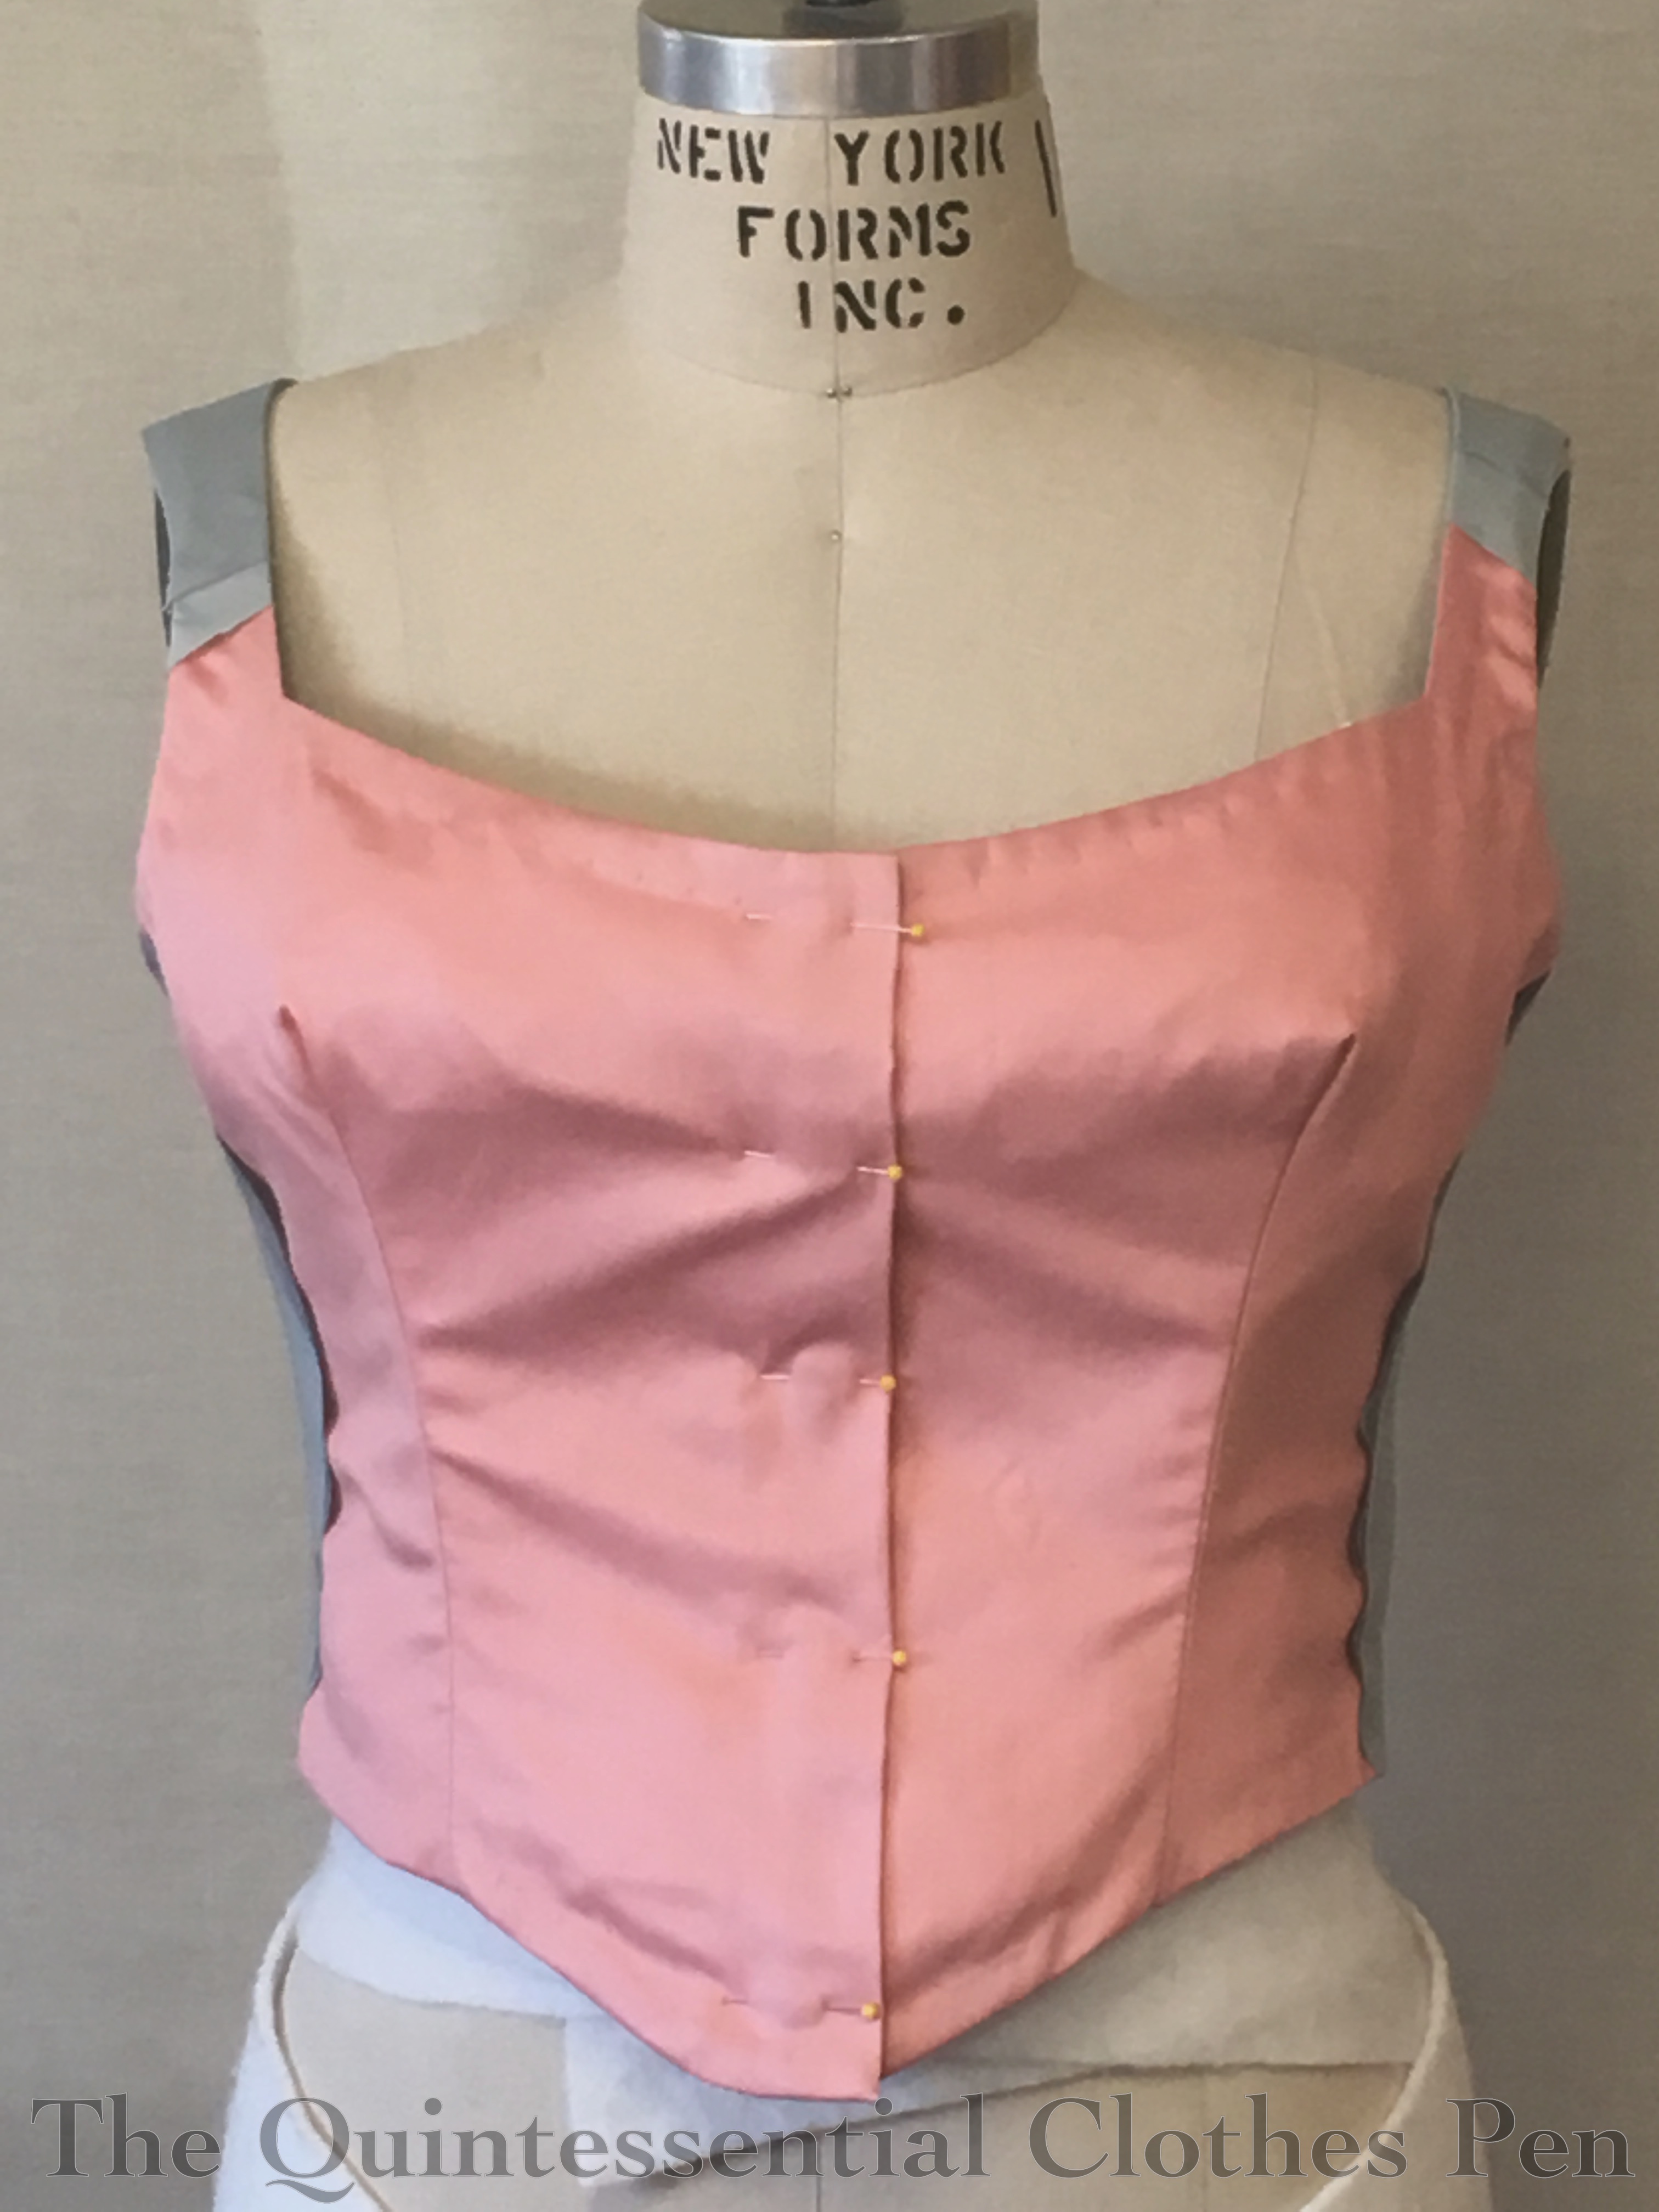
Here is the bodice in the middle stages on construction. You’d never guess from the exterior, but the bodice is flat lined with pink! This is not a standard lining color, but I had it on hand, it is the right weight (with a glazed finish, which is standard), and it amused me. By this point, I’d finished my edges, adding boning, nicely finished my interior seam allowances, and covered the back with elusive blue lining and chiffon cut on the bias.
Next was creating the front bodice main piece, which is also on the bias. I draped it and then bagged the lining/chiffon with the robin’s egg cotton to create nice finished edges. The flapping bit on the left of the picture was turned under and hand sewn later in the process.
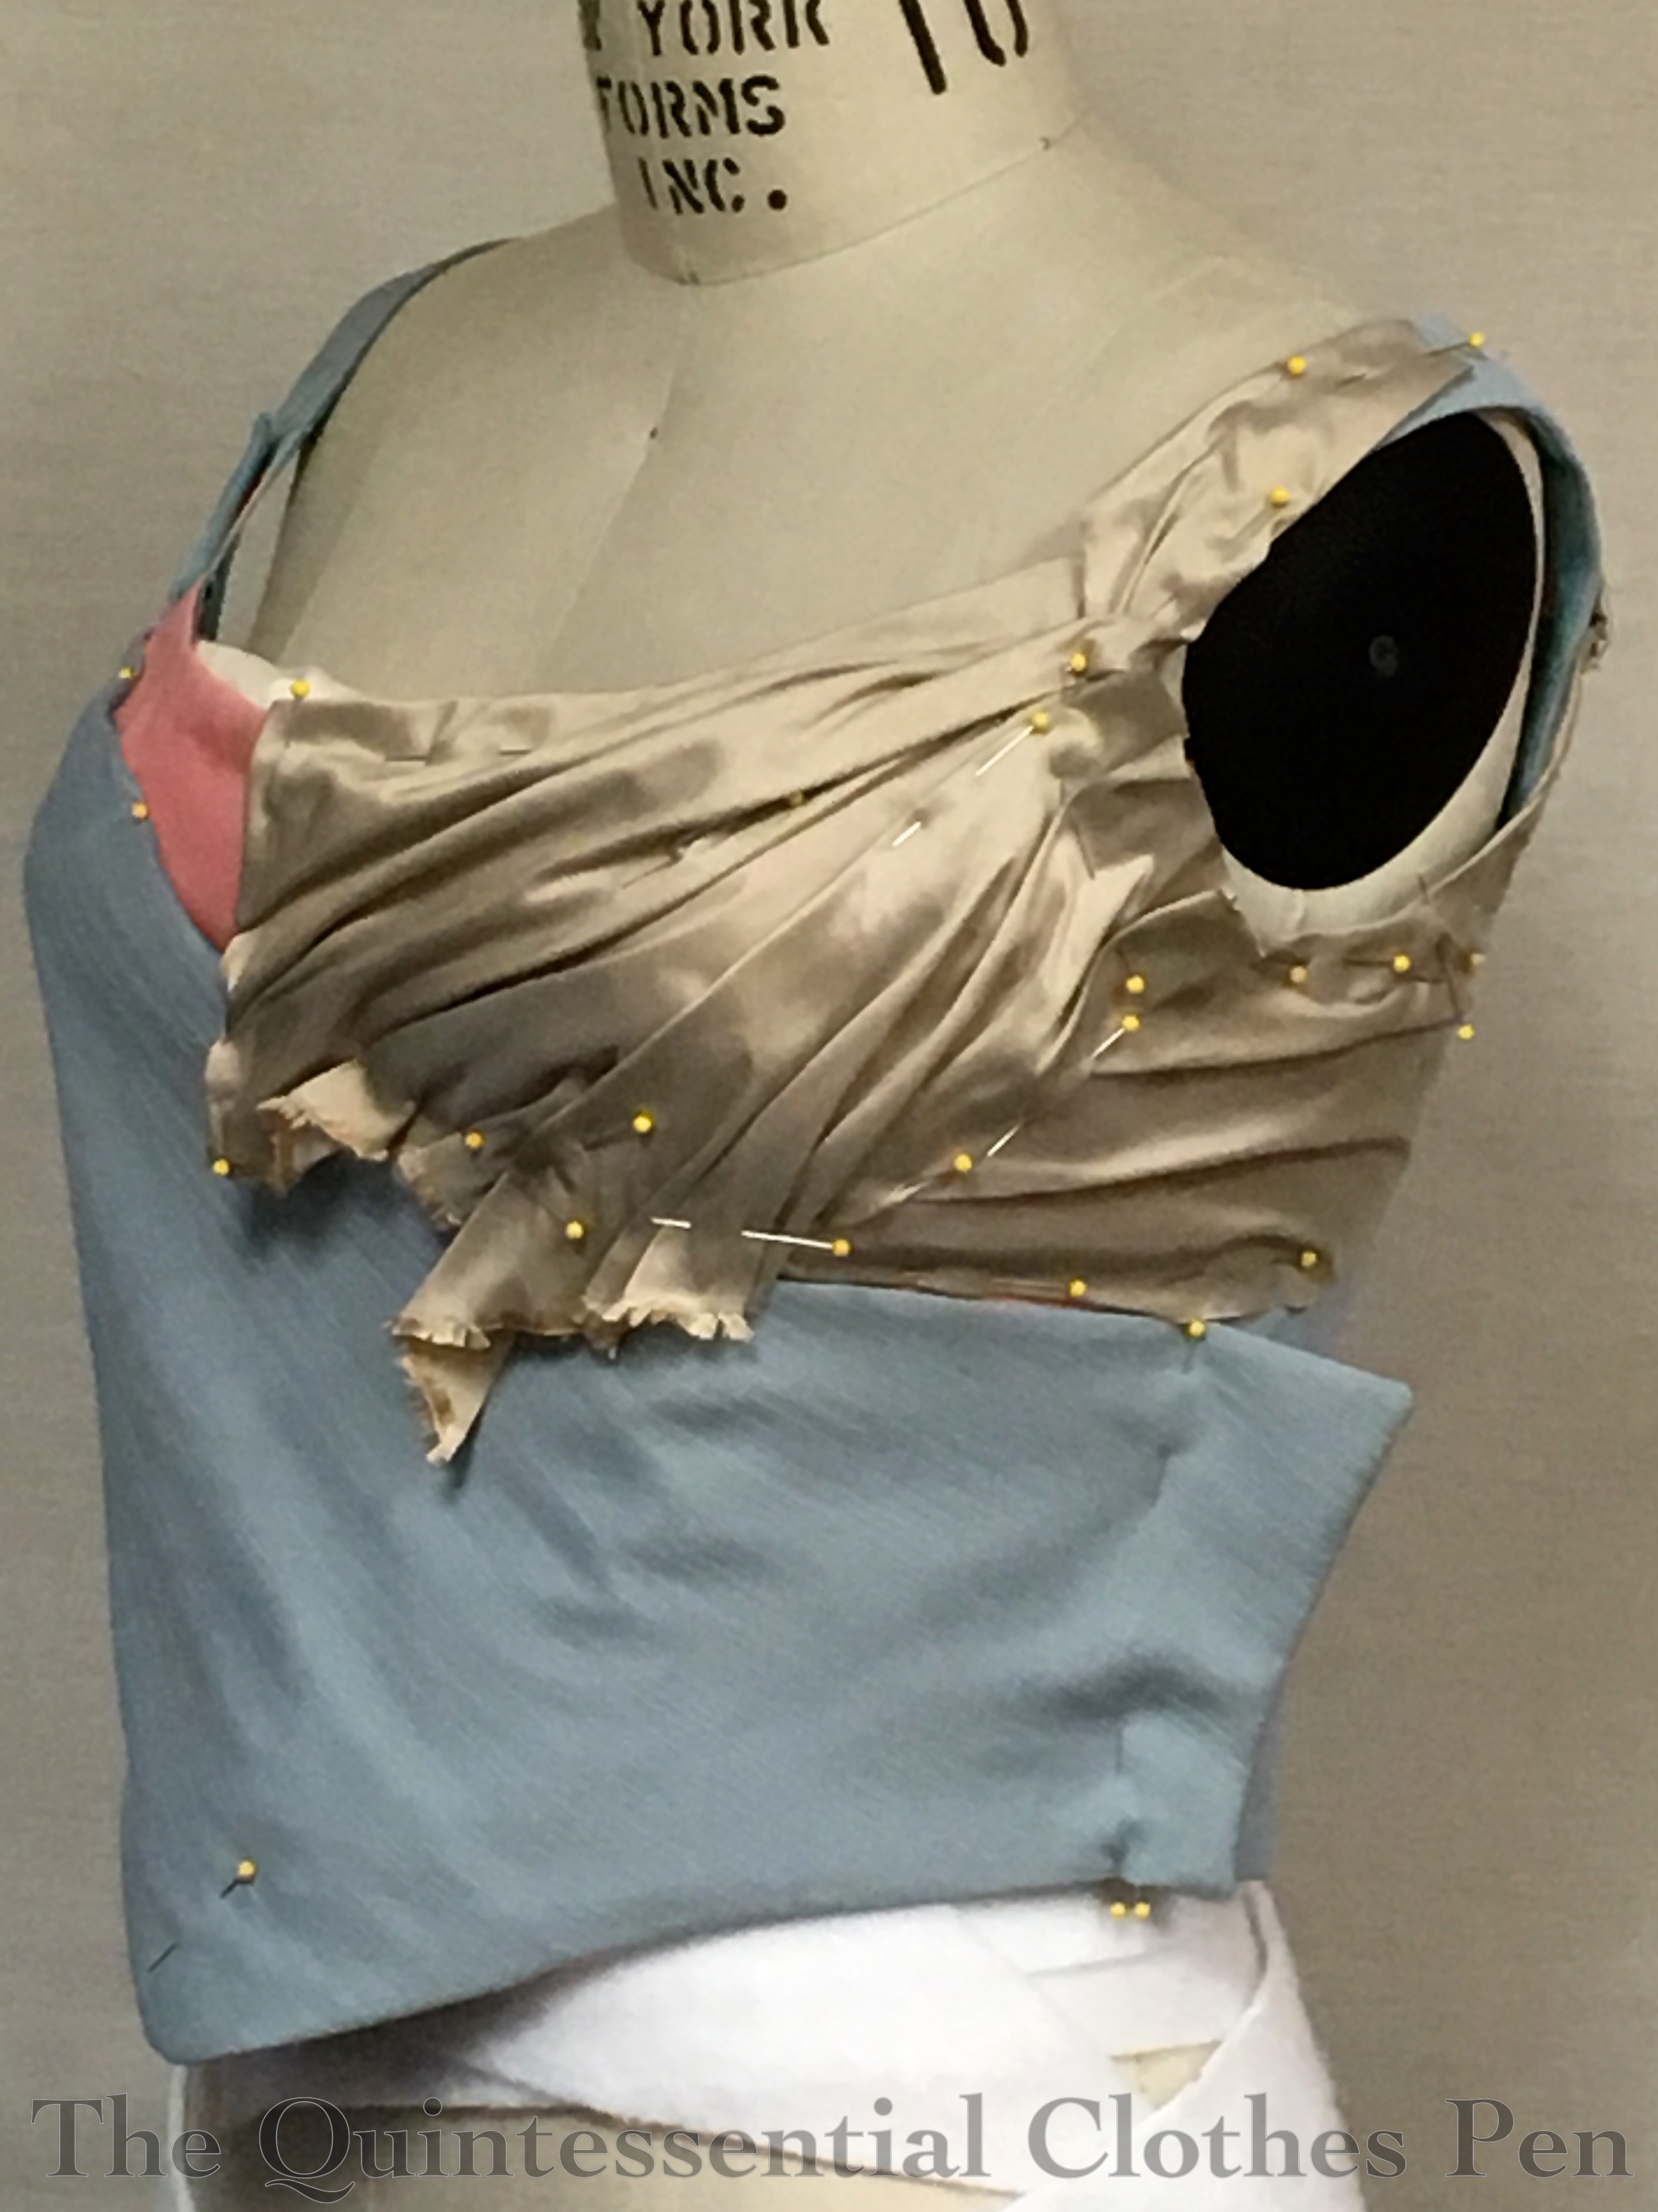
Draping the silk was next. There are actually a number of small pieces carefully pleated before being hand sewn in place.
My original main inspiration was this gown at the Met (and the alternate skirt follows this idea quite closely), but when I looked at my material options, I really loved this variation, also from the Met. Other dresses with a similar cut were also influential, including this, this, and this. Here’s a similar example that clearly shows the shadow of a side closure.
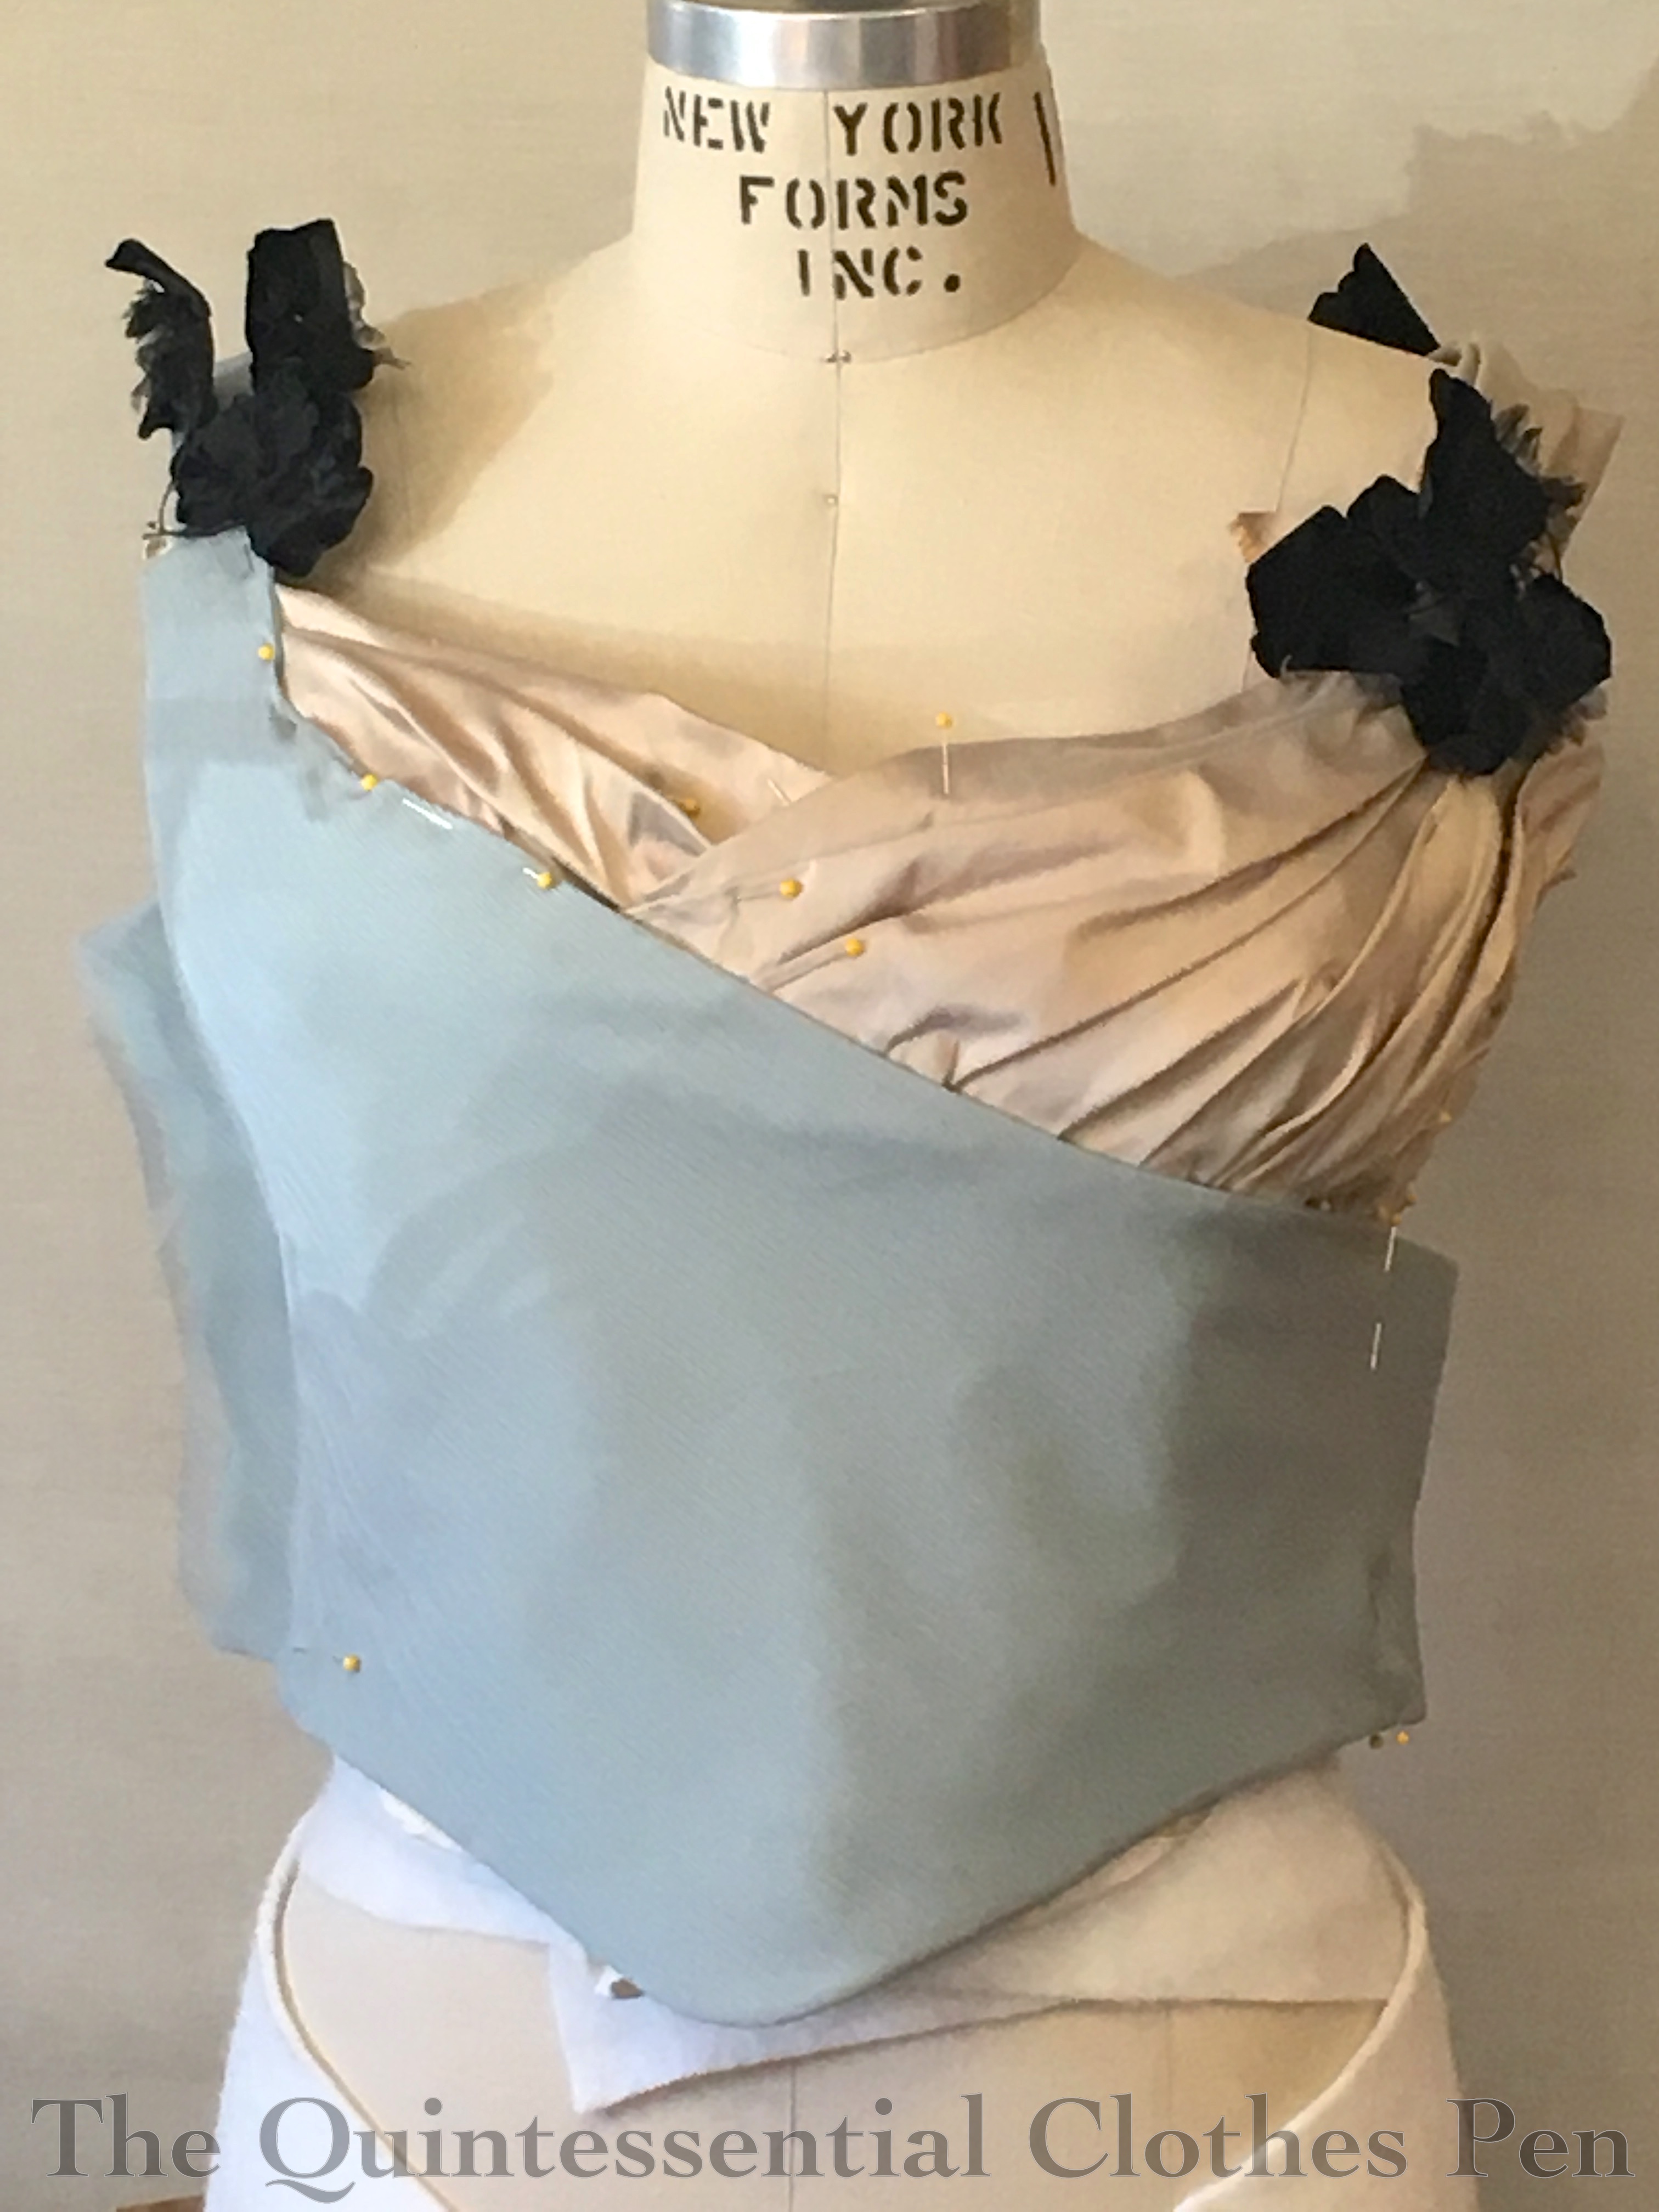
In the next picture, both the left and right sides have been covered in silk. Each side of the bust layers and attaches separately. I also started playing with flower placement at this point. I was inspired to add black accents to the otherwise subdued colors by this dress. I really like how the black pops!
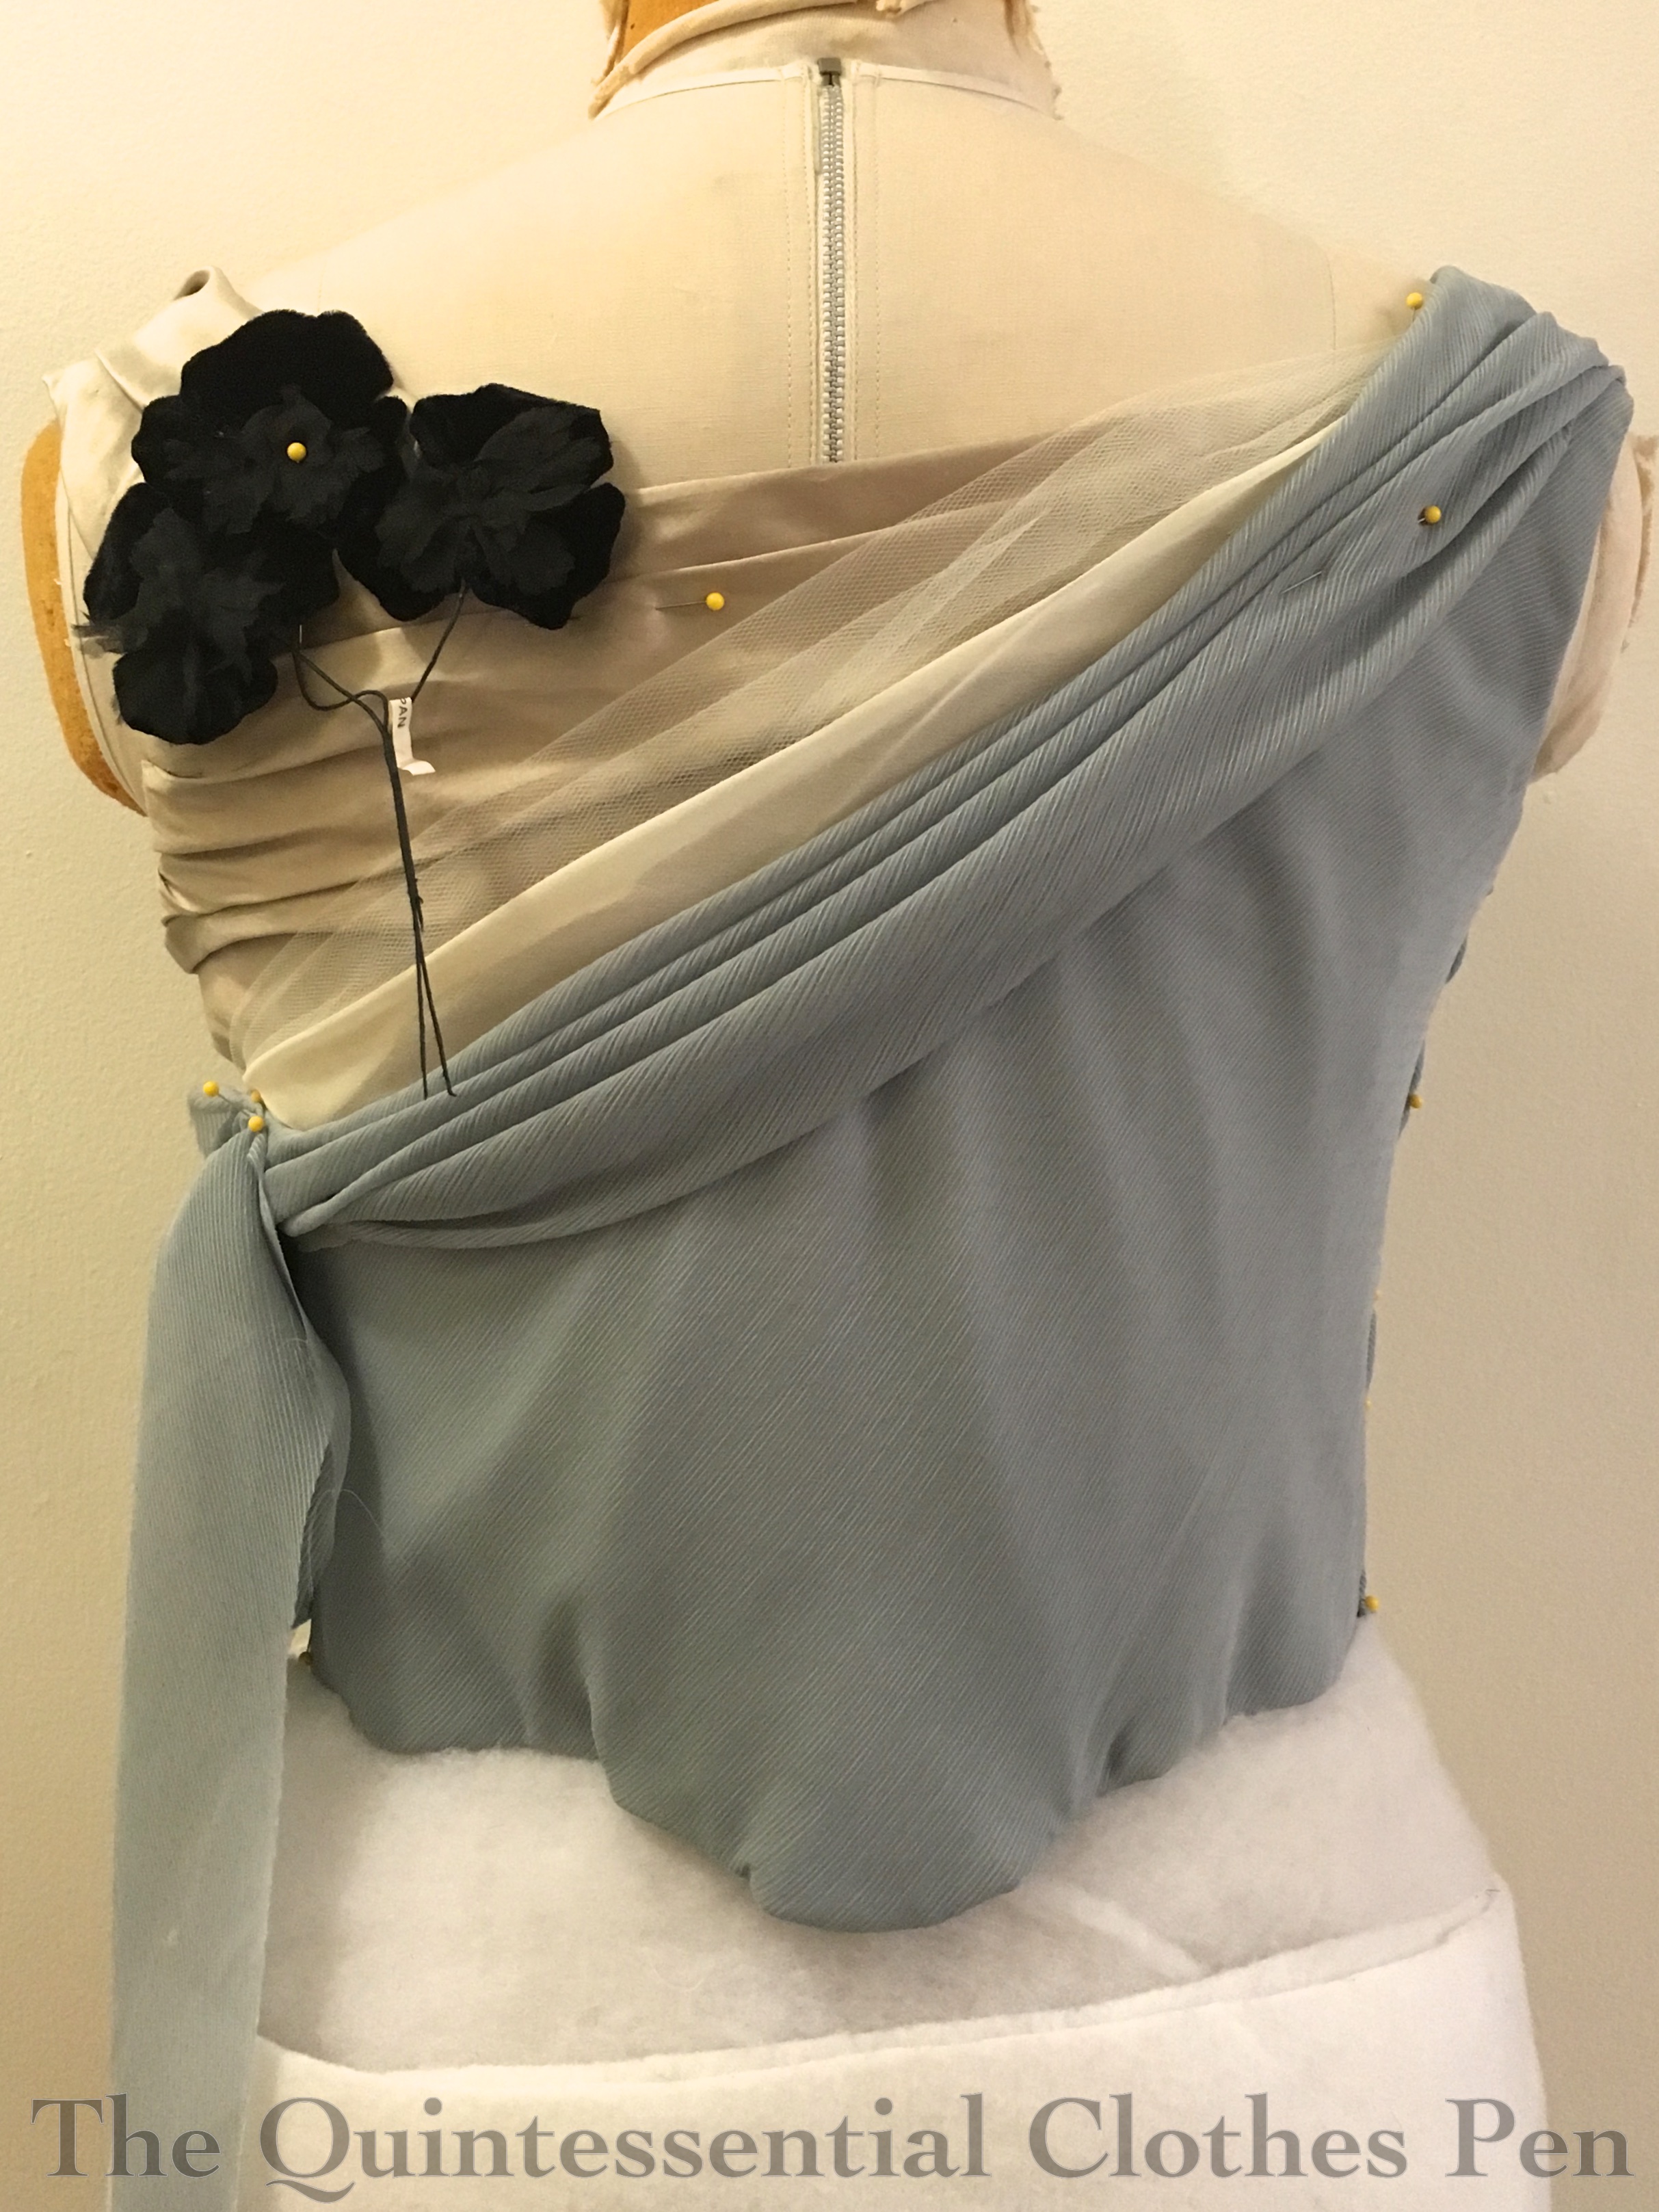
Here’s the back around the same stage.
At this stage, I’ve added gauze and tulle to the front and am playing with the chiffon edging. The flowers are tucked into place to see the effect. I’ve also sewn down the proper right (left in the picture) side. The proper left (right in the picture) side is pinned and tucked, waiting for a final fitting before finishing and adding closures.
The back also received a treatment of gauze and tulle in addition to a chiffon edging. You can see that the flowers came in stems of three (these are another part of one of two huge hauls of millinery flowers for super cheap that I’ve had in the last few years, yay!).
Sewing down all the pleats just so, in order to look natural and not constrained, took rather a long time, as did nicely tucking all the silk around the armhole. But it was worth it!
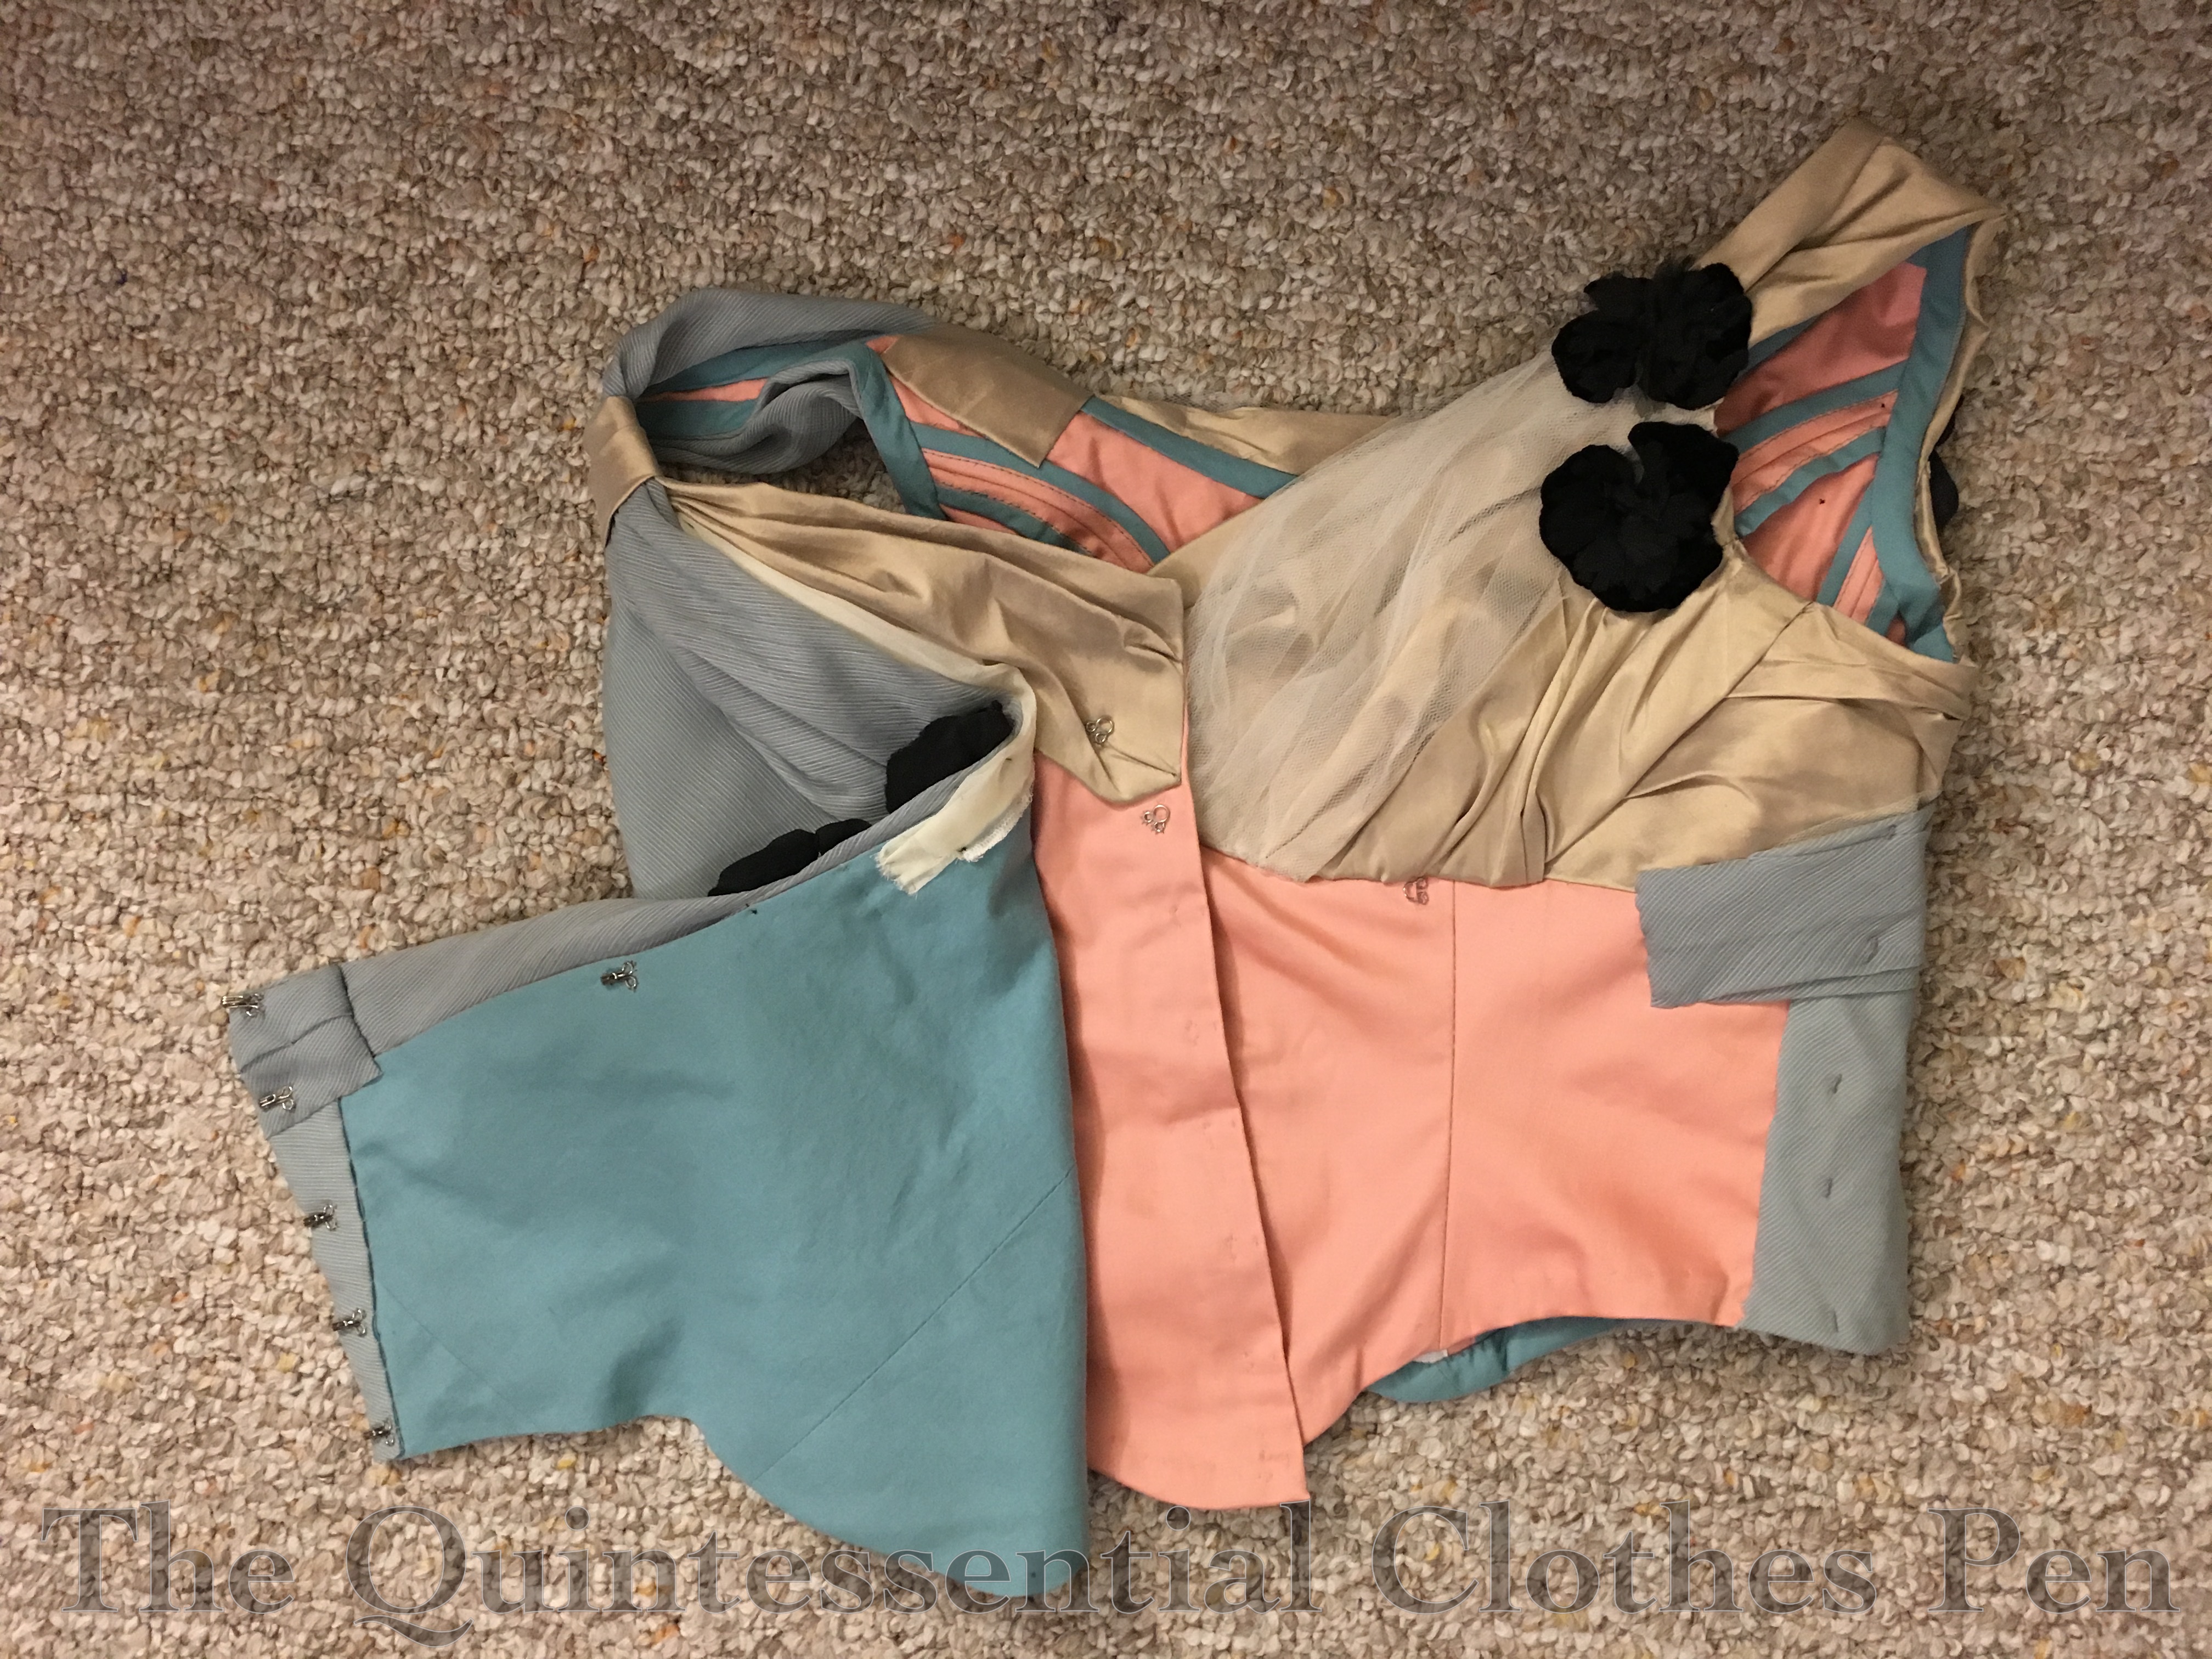
Here is the inside of the bodice, finished. I decided to bind the seam allowances in the same robin’s egg blue cotton that I used for bias binding for the edges and armholes. A hong kong finish is not accurate, but I didn’t feel like hand whip stitching all the seam allowances (although, in the end, it probably would have taken just as much time, or less), plus, I enjoy the effect. There are also closures (yay!) and a waist tape.
And here’s what the bodice looks like with center fronts together. The bit with the tulle actually hooks over the other side (but pictured this way, you can see the closures). After that, the front panel hooks across the front and is securely hooked at the side seam, effectively covering my pink lining.
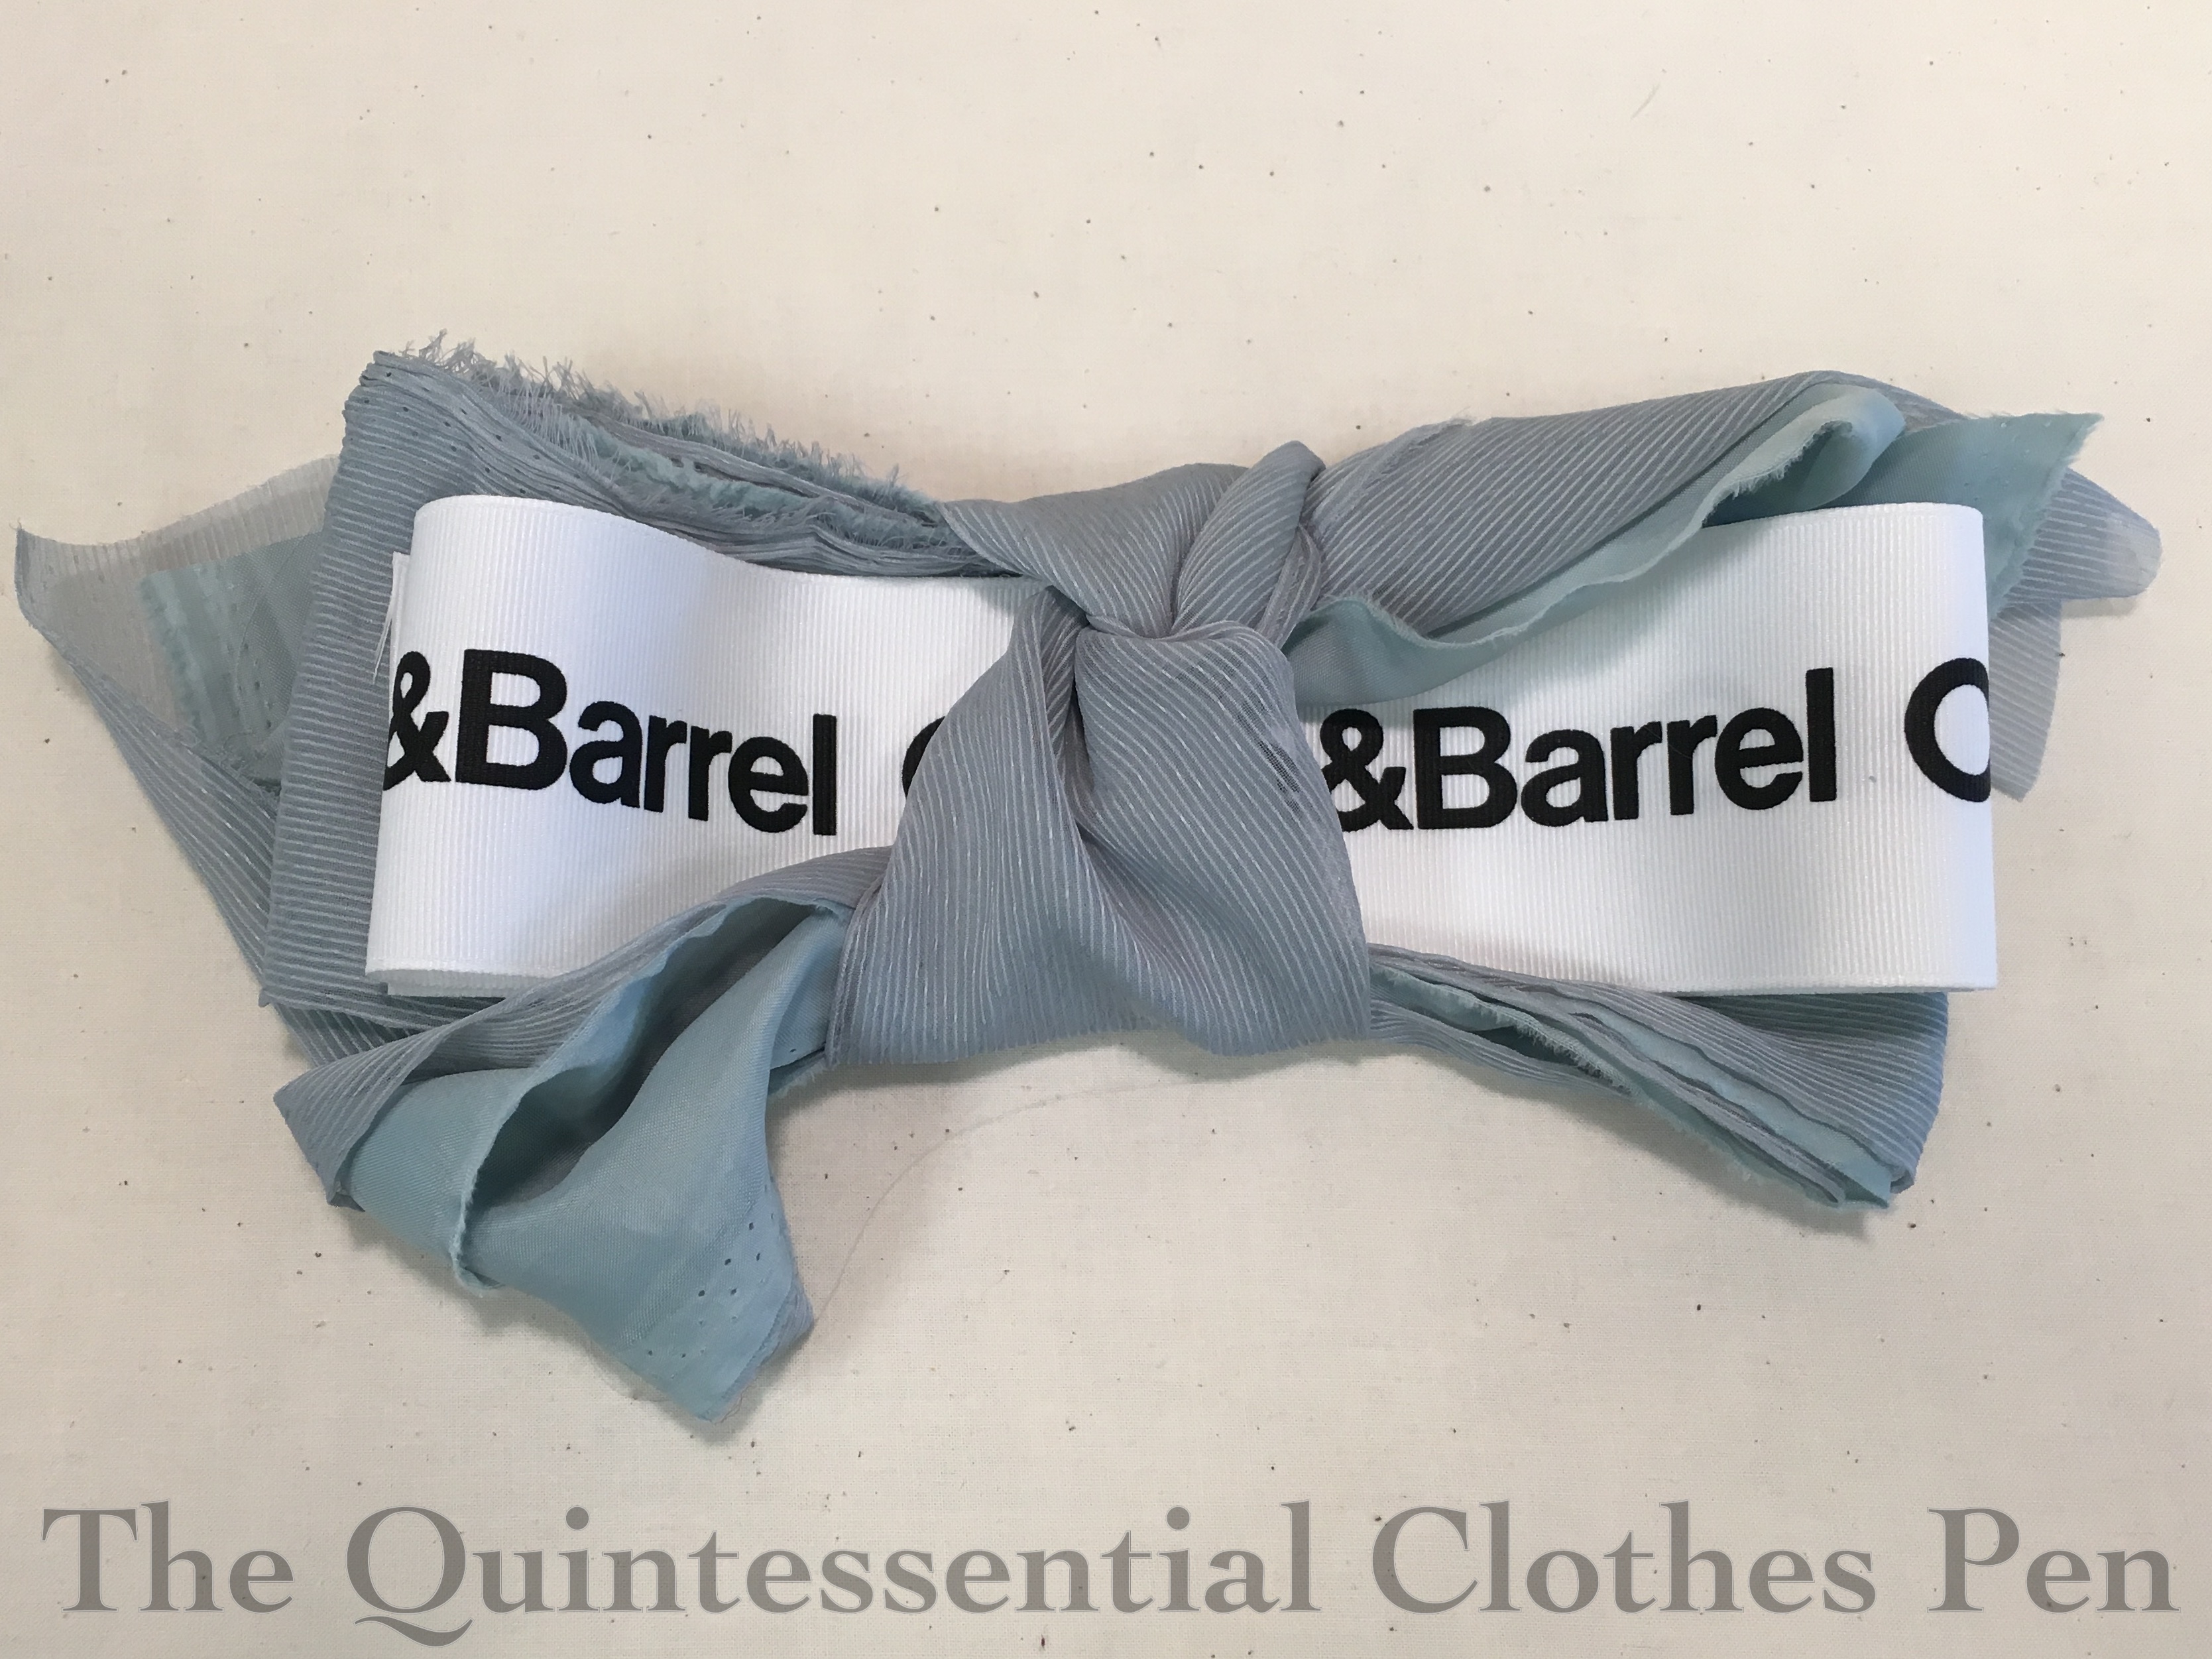
The untrained skirt is flat in front and gathered at the back. It is cut in an umbrella shape (like my 1895 skating ensemble skirt), so that the only seams needed are center back, and a diagonal seam across the back to add width to the panel. The waistband and placket are standard 19th century style, with the exception of the fact that the ribbon I used to stabilize the thin fabrics is leftover gift wrapping ribbon from wedding gifts we received from Crate and Barrel. Yay! It’s hidden on the inside and folded in half, but it amuses me, because recycling is great and it’s nice to have a bit of Mr. Q-related-something in a dress.
A nice package of placket and waistband pieces. I made one for each skirt.
The most annoying thing about fitting this gown was marking the hem on the skirt. (Fitting the bodice on myself with all the layered closures was also a feat, but more uncomfortable twisting than annoying.) Chiffon is annoying to hem most of the time and it only gets more complicated when you’re marking the hem on yourself. It meant looking in the mirror, bending over to place a marking pin while everything shifted, standing up to check things, and then repeating that over and over again to shift pins by tiny amounts until they all looked good (while wearing a corset and fluffy petticoat of course, so the whole thing would hang properly on my body). Once that was all over, I hemmed each layer with self fabric bias that is turned to the inside and invisibly hand stitched in place.
I was quite successful, but it took a whole afternoon to mark and cut and sew the hem of the chiffon and of the lining (because of course the lining couldn’t stick out or be too short!). The whole thing would have been much speedier if I’d had someone else to mark the hem for me. (I thought of using my hem puffer, but the floor is too close for the puffer to reach and I didn’t have anything to stand on.)
Anyway, the end effect was fabulous. The chiffon and lining swooshed so beautifully that it was necessary to get “swooshy skirt” pictures at the ball just to highlight their movement.
The ball also gave me an opportunity to have fabulous hair and a new hair ornament instead of a tiara as well as an opportunity to photograph my new 1880s corset completely finished and the fabulous petticoat I have for 1890s/1900s styles. It gets worn often, but hardly ever seen (which I suppose is rather the point of a petticoat, but when you have one as lovely as this, it really should be seen!). There will be future posts for the hair and undergarments, as this post is getting pretty long.
Overall, 1890s ball was lovely, with beautiful dresses and beautiful dancers. There were fun new people as well as quiet moments to sit and have engaging exchanges with friends.
And the new gown was very comfortable and fun to wear. I’m looking forward to completing the trained skirt (hopefully without too much procrastination) and wearing it this summer!
*My plan is to have two skirts for this gown, one without a train, for dancing, and one with a train, because trains are fun! I only finished the non-trained skirt for the ball, though the trained skirt is assembled and mostly finished with the exception of a closure and hems.
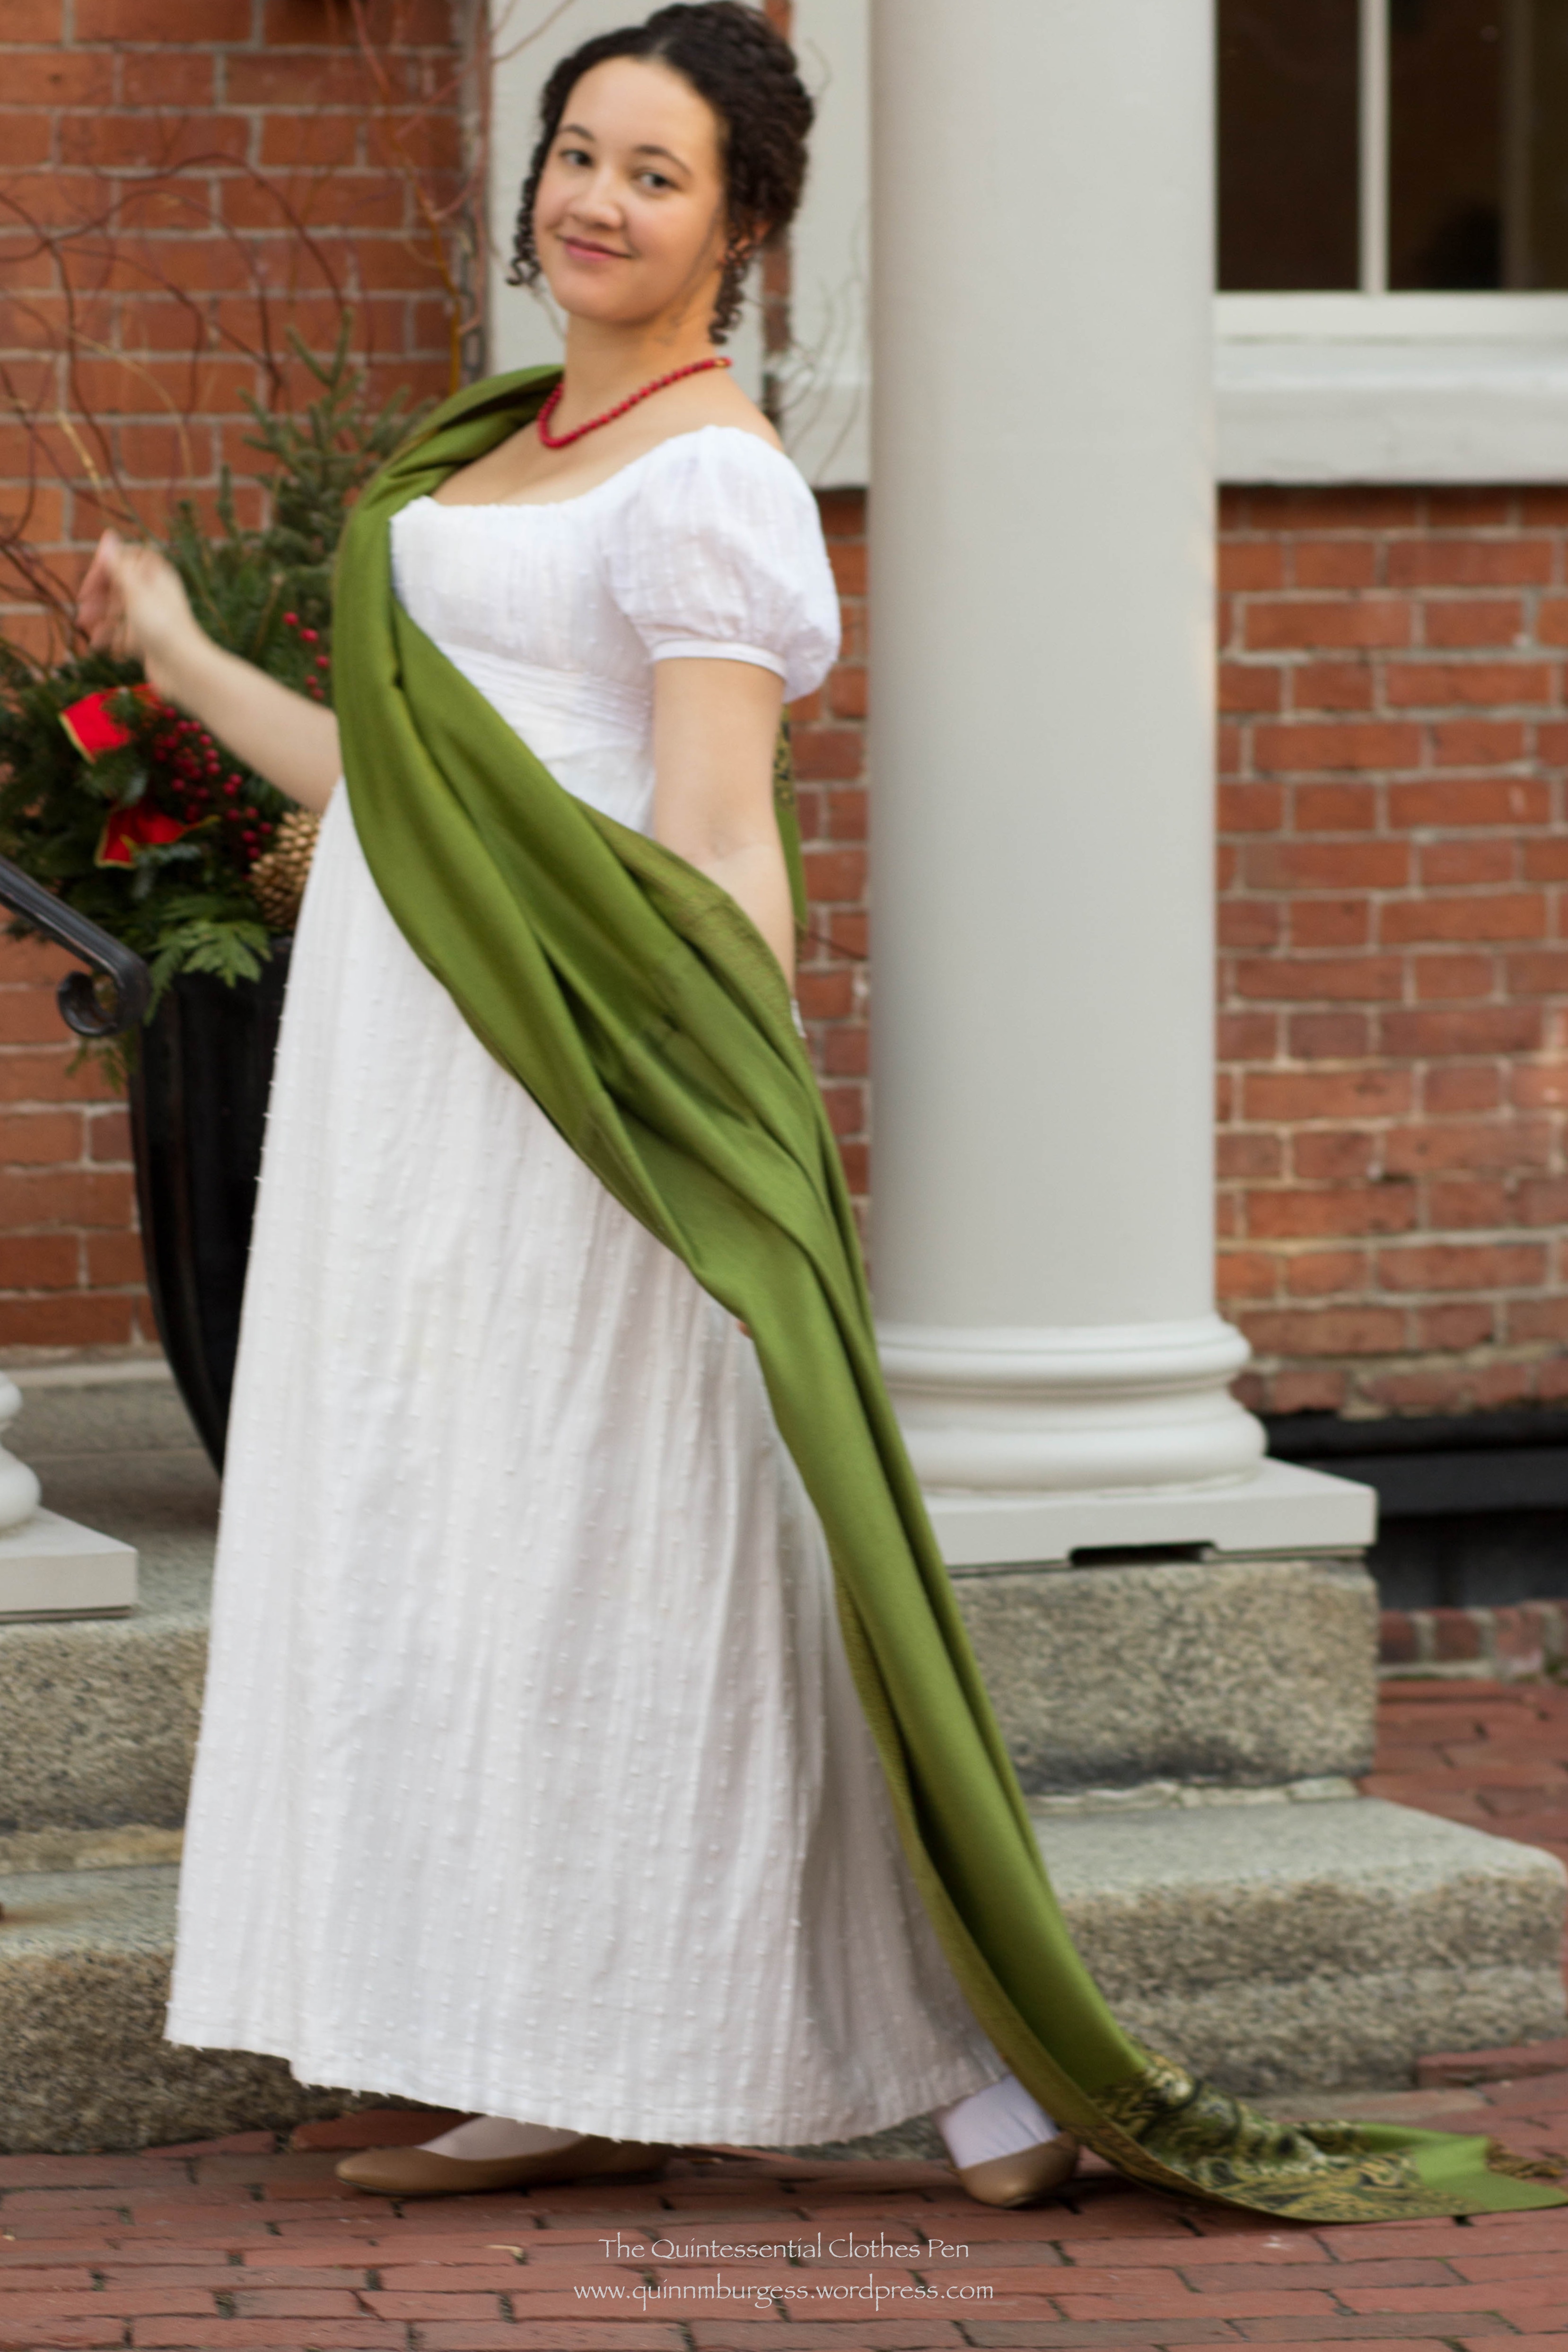
I was inspired this fall to make an extra long Regency shawl. Others around the blog world have done this before–it’s certainly not a new idea I came up with so I can’t take credit for the creativity of sewing two pashminas together to make one longer one.
I started by looking at my Pinterest boards to see what colors popped up often in fashion plates and extant shawls so I could pick a reasonably Regency color for my own creation (this board has a number of fashion plates and extant shawls). Common colors I saw were cream, dark red, grassy green, and dark blue. Occasional other colors included vibrant autumnal orange and rich yellow.
The second step was to consider the colors in my current Regency wardrobe so I could pick a color shawl that would harmonize with my outfits. Lastly, I looked at what was available on eBay for available color options and with sufficiently wide borders around all the edges to have the look of a Regency shawl. I found a few that matched my research but the color that best fit all of my criteria was grassy green. This shawl from the Met is a very similar in color to mine and was an inspiration in terms of border proportions.
How historically accurate is it?: It definitely passes Leimomi’s test of being recognizable in its own time in general and in terms of the color and border trim proportions, but most shawls would have been silk or wool, which mine is not. Also, since it is two shawls sewn together, it has an inaccurate seam down the back. So we’ll sway 75%.
Hours to complete: Less than 1.
First worn: December 5, 2015.
Total cost: About $10-$15.
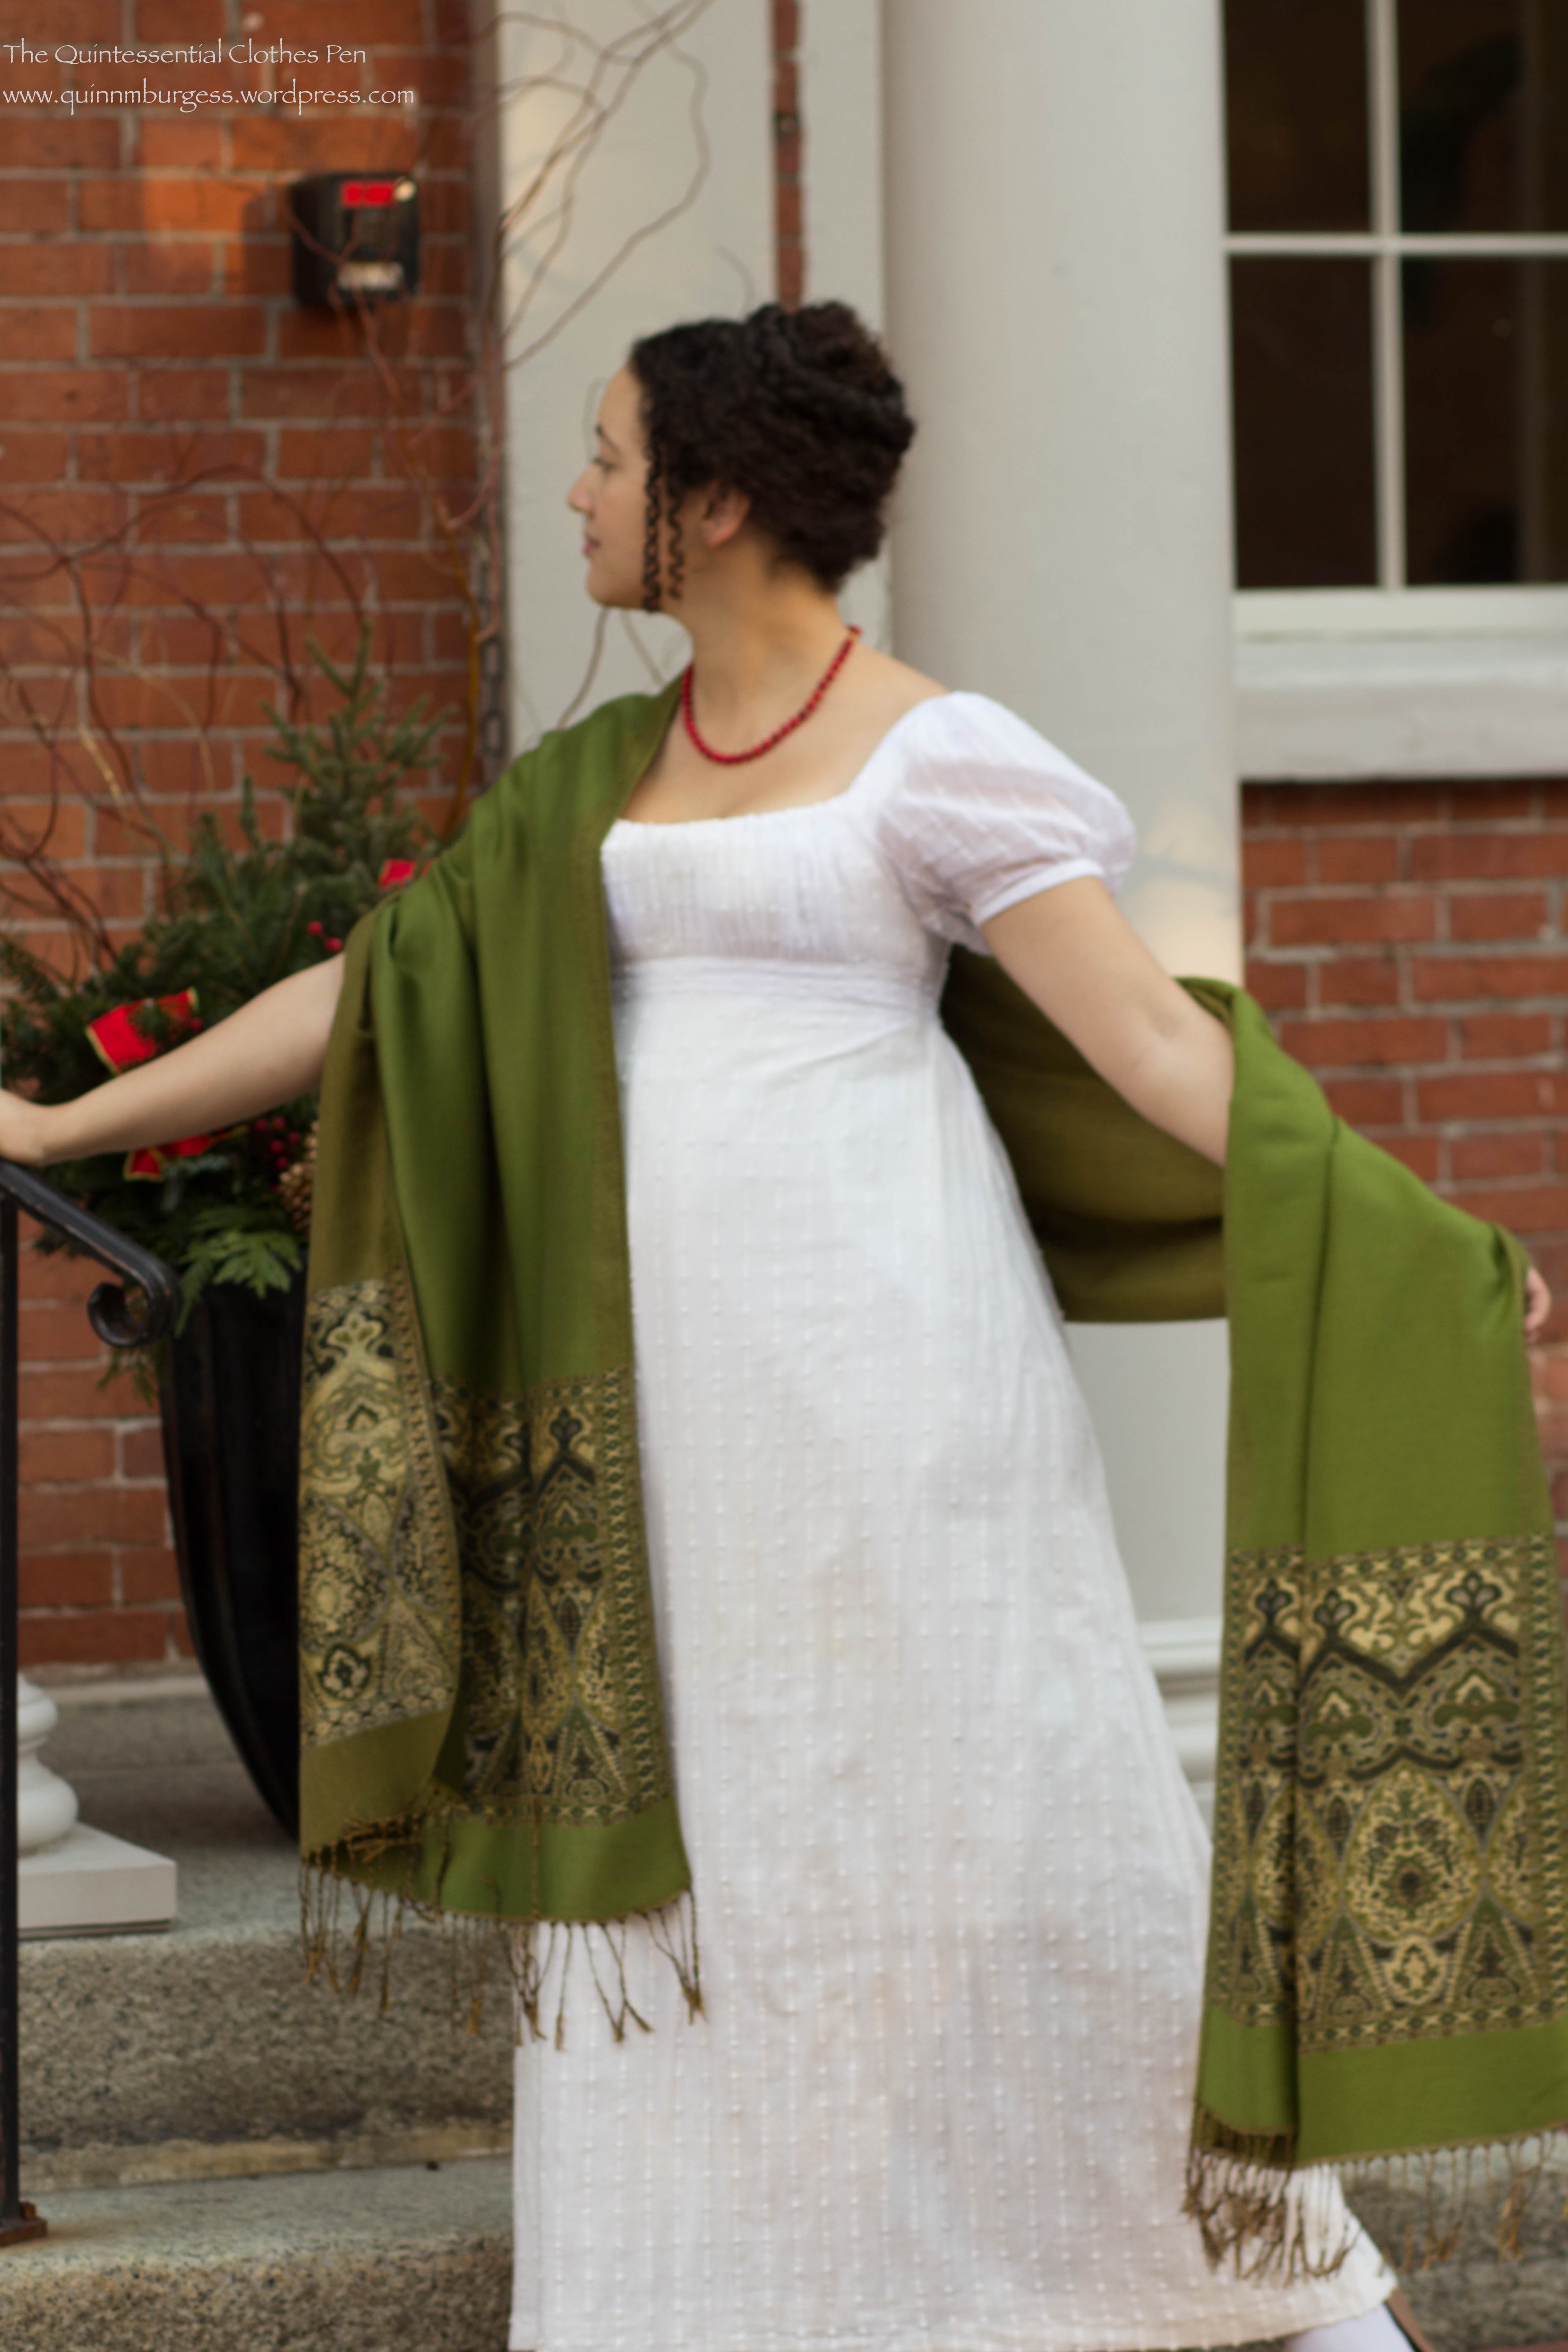
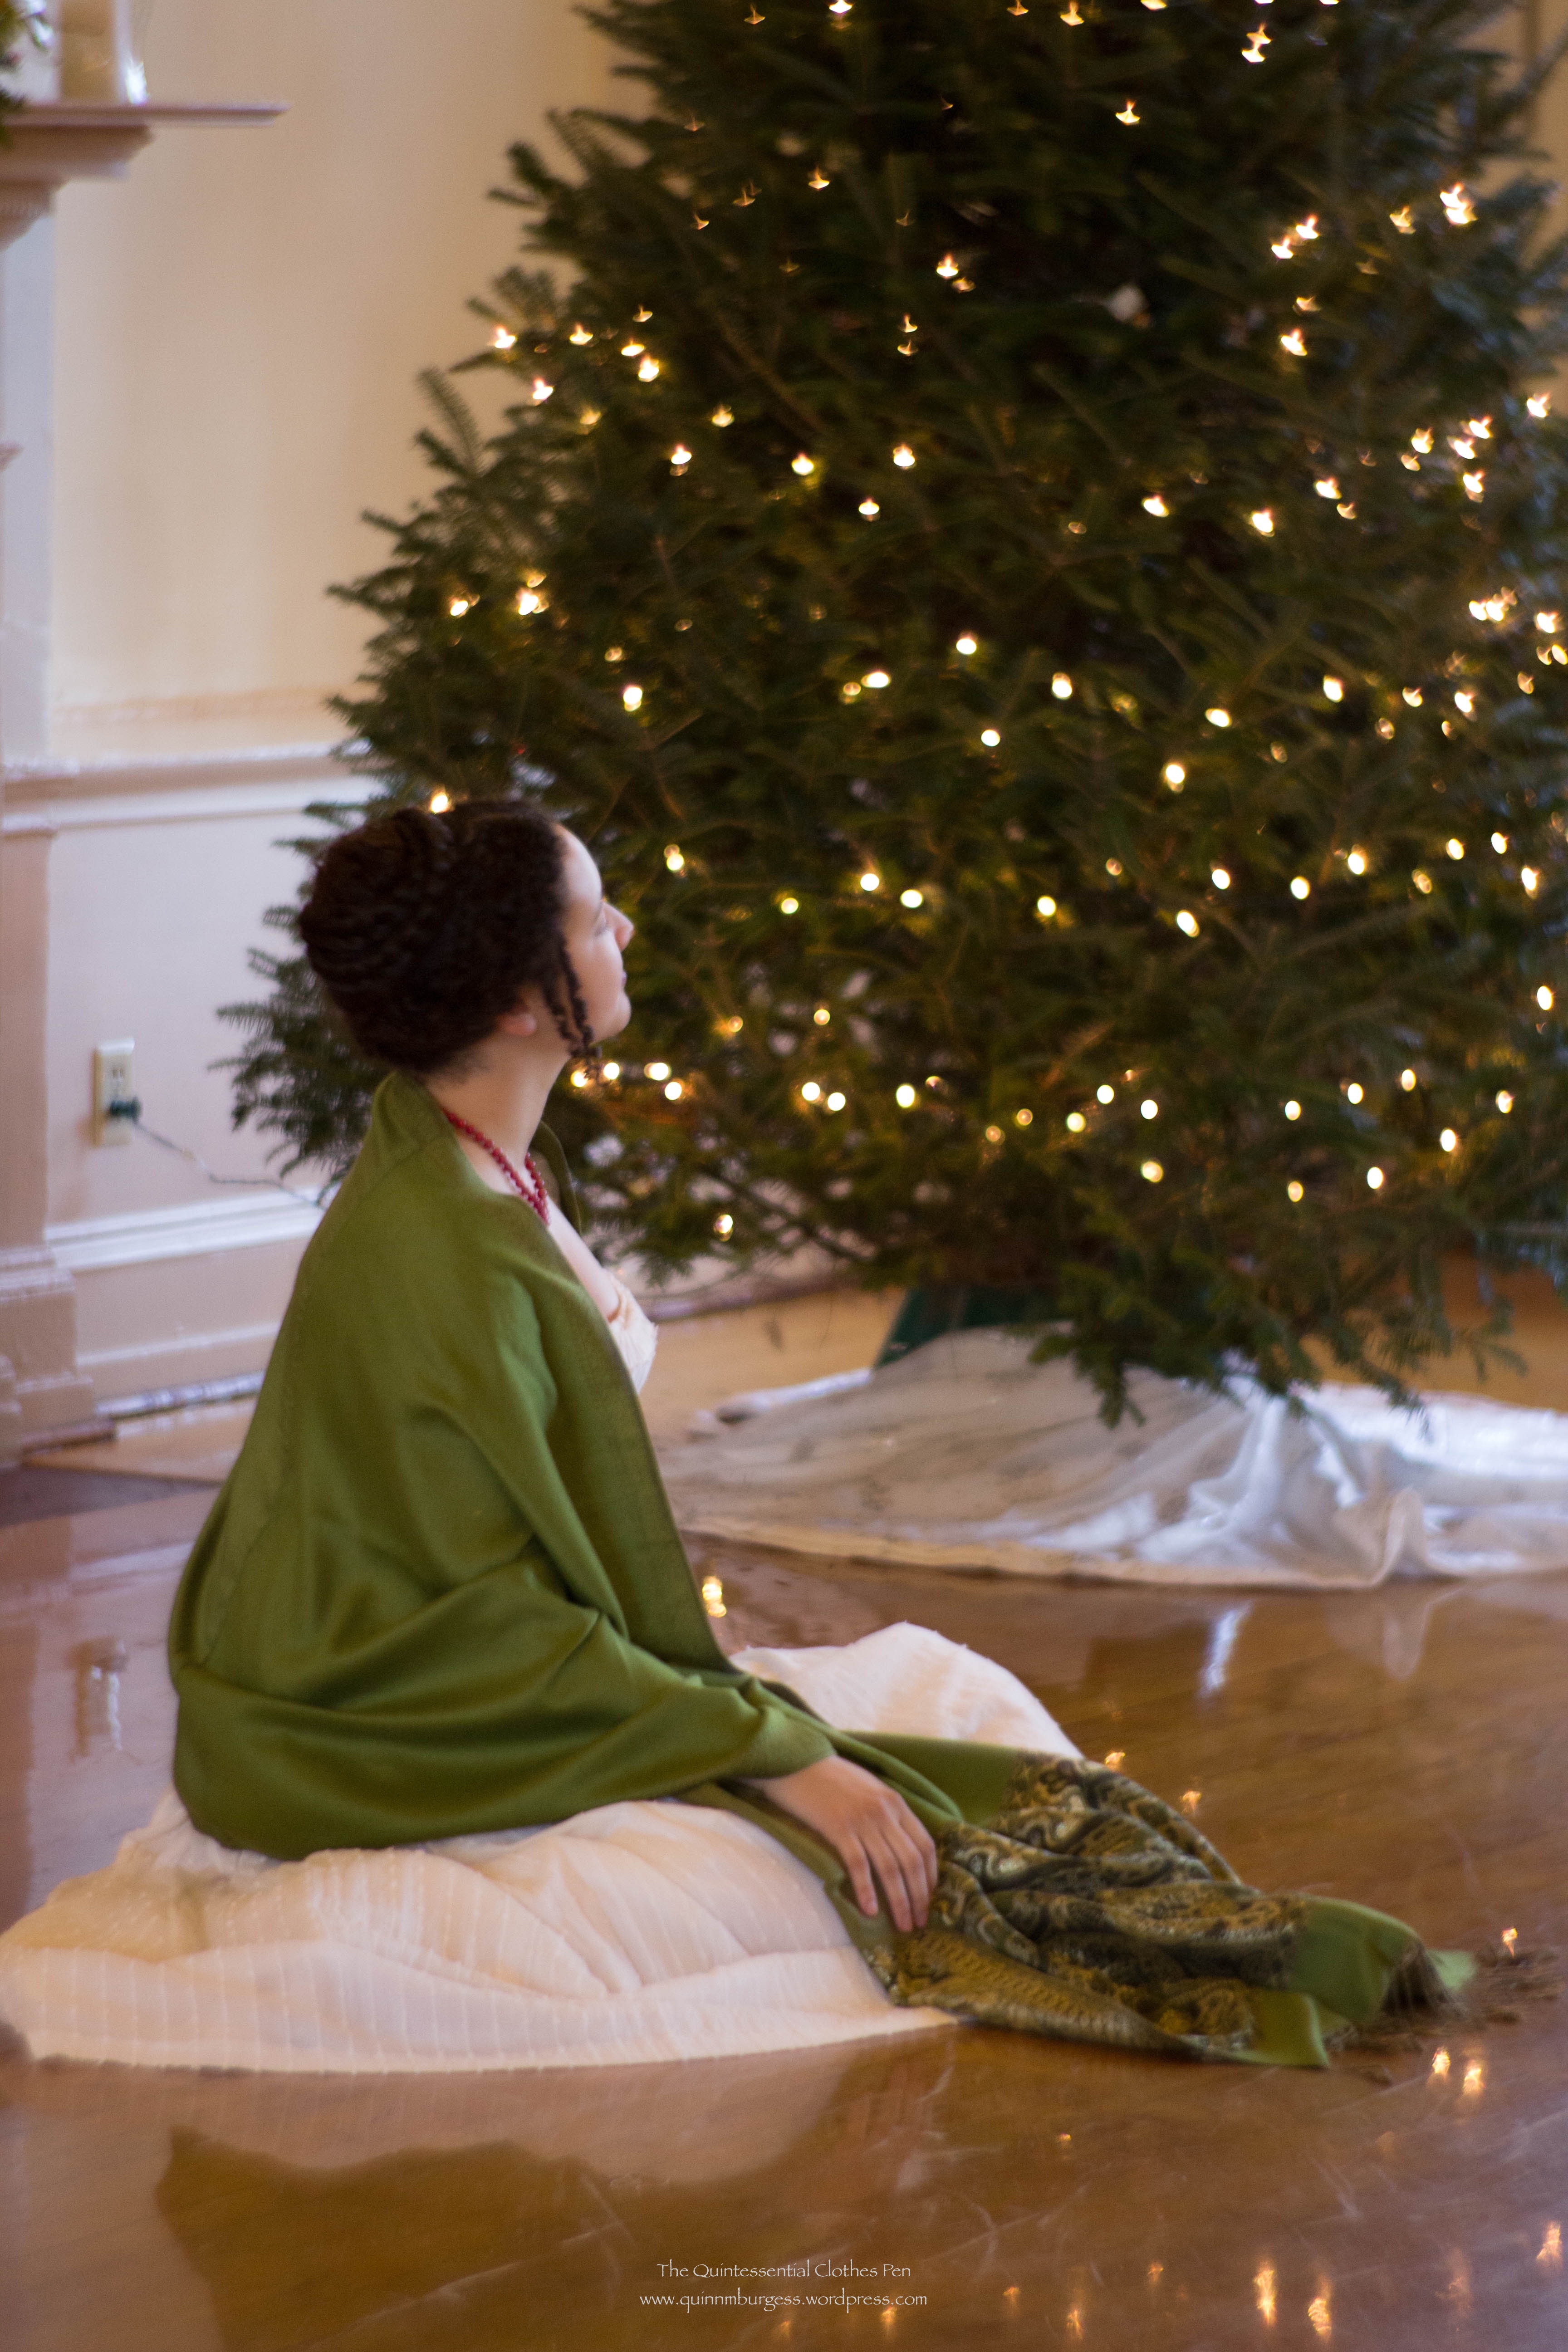
I was dancing in a Regency period hall in December and it was the perfect opportunity to get some of the classic Regency shawl pose pictures. (The hall was decorated for the holidays, which matched my accessories perfectly!) It’s always amusing to me how the shawls are often depicted halfway off the wearer or draped artfully but with no apparent desire to keep warm.
I wore my 1812 square neck dress but removed the pink sash that I’ve had on it for the last two years or so. It was nice to go back to a plain white dress for a change. It’s not plain at all with the new shawl!
I took the time to create a fun hairstyle with small diameter face framing curls and an extra braid of fake hair. I was very pleased with the overall shape and silhouette. (I’ll be sharing more about how I made the curls at some point in 2016 when I post more information about my Vernet ensemble and the photo shoot of the completed outfit.)
I had a blast dancing all day in such a beautiful space. When I cooled off between dances the shawl was great to keep me warm. And I love how festive it looks with the red necklace! I hope your holidays are full of fun, joy, and blessings!
This gown was already in my sewing plan before I decided it fit into the HSF/M Challenge #10: Sewing Secrets. It turns out that it fits into the Sewing Secrets challenge for multiple reasons:
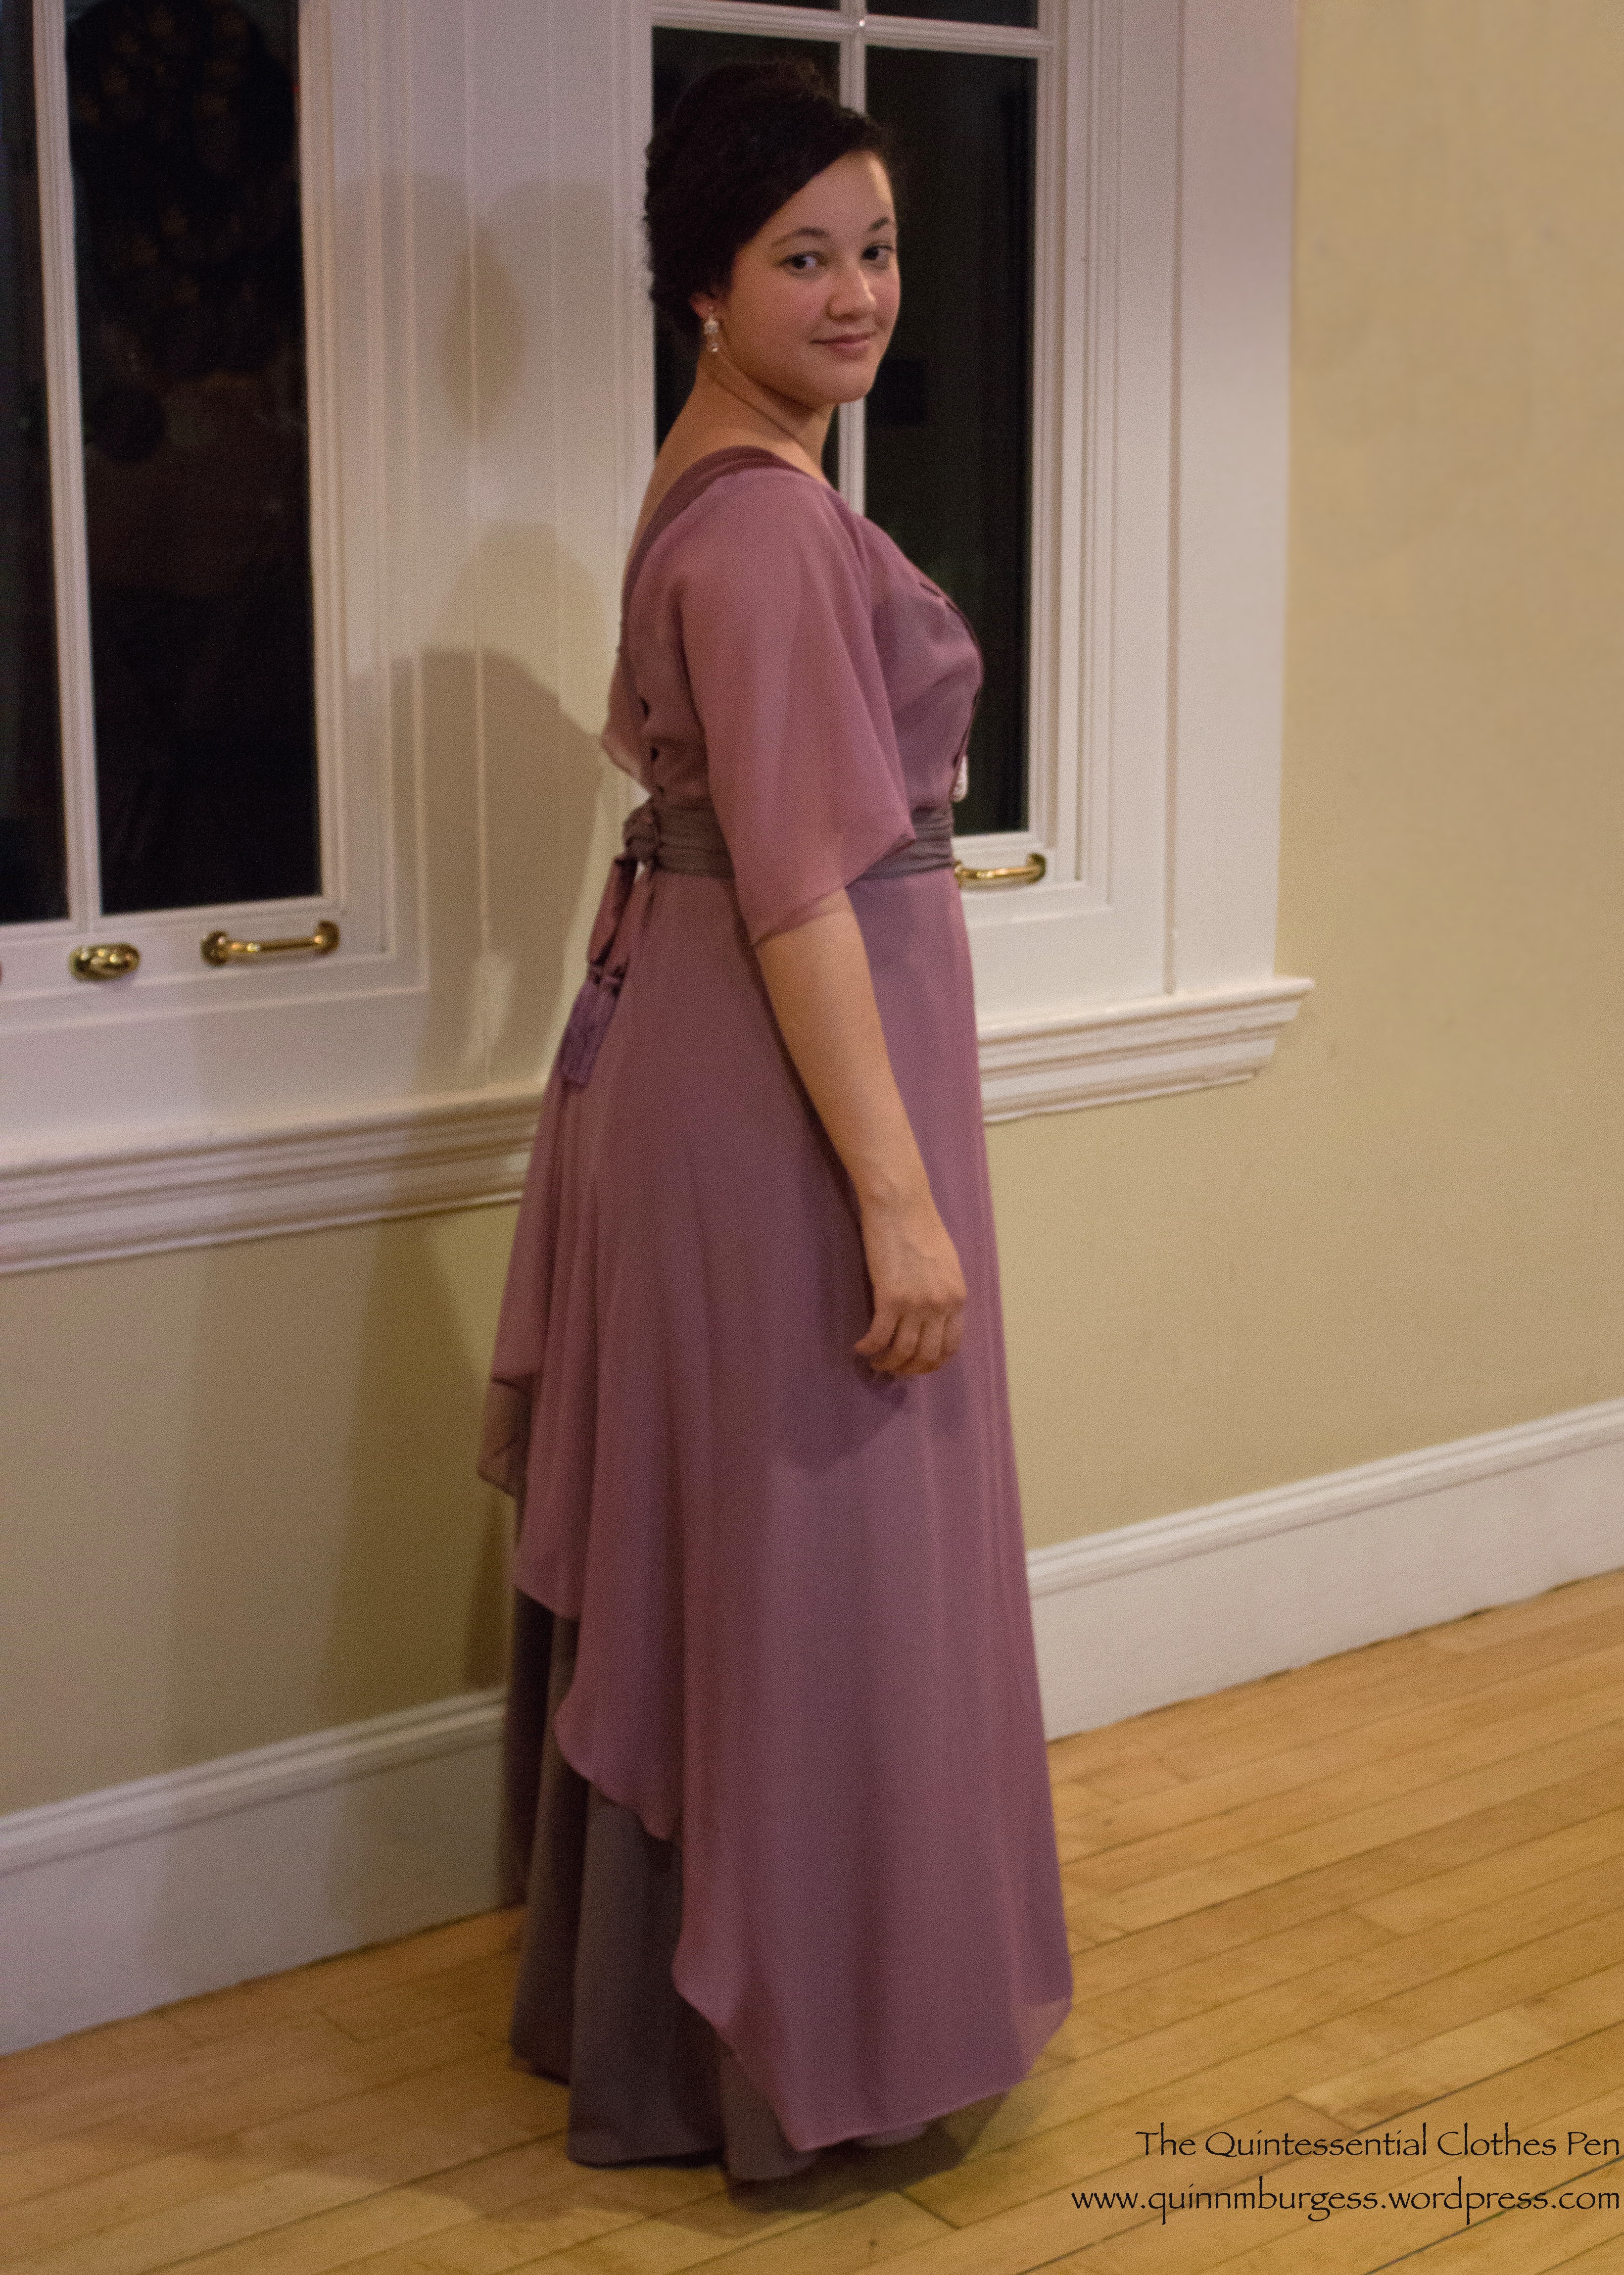
#1: Because like many dresses from the first few decades of the 20th century, the method of closure is cleverly hidden, rather complicated, and definitely secretive–you really can’t tell how the dress goes on just looking at it once it’s all hooked up. (Right? Can you figure it out before I show you later in the post?)
#2: The beaded panel on the front might look familiar if you’ve been reading my blog for a few years. It is actually the sleeve (turned upside down) from a 1980s evening gown that I remade into a sleeveless 1925 evening gown.
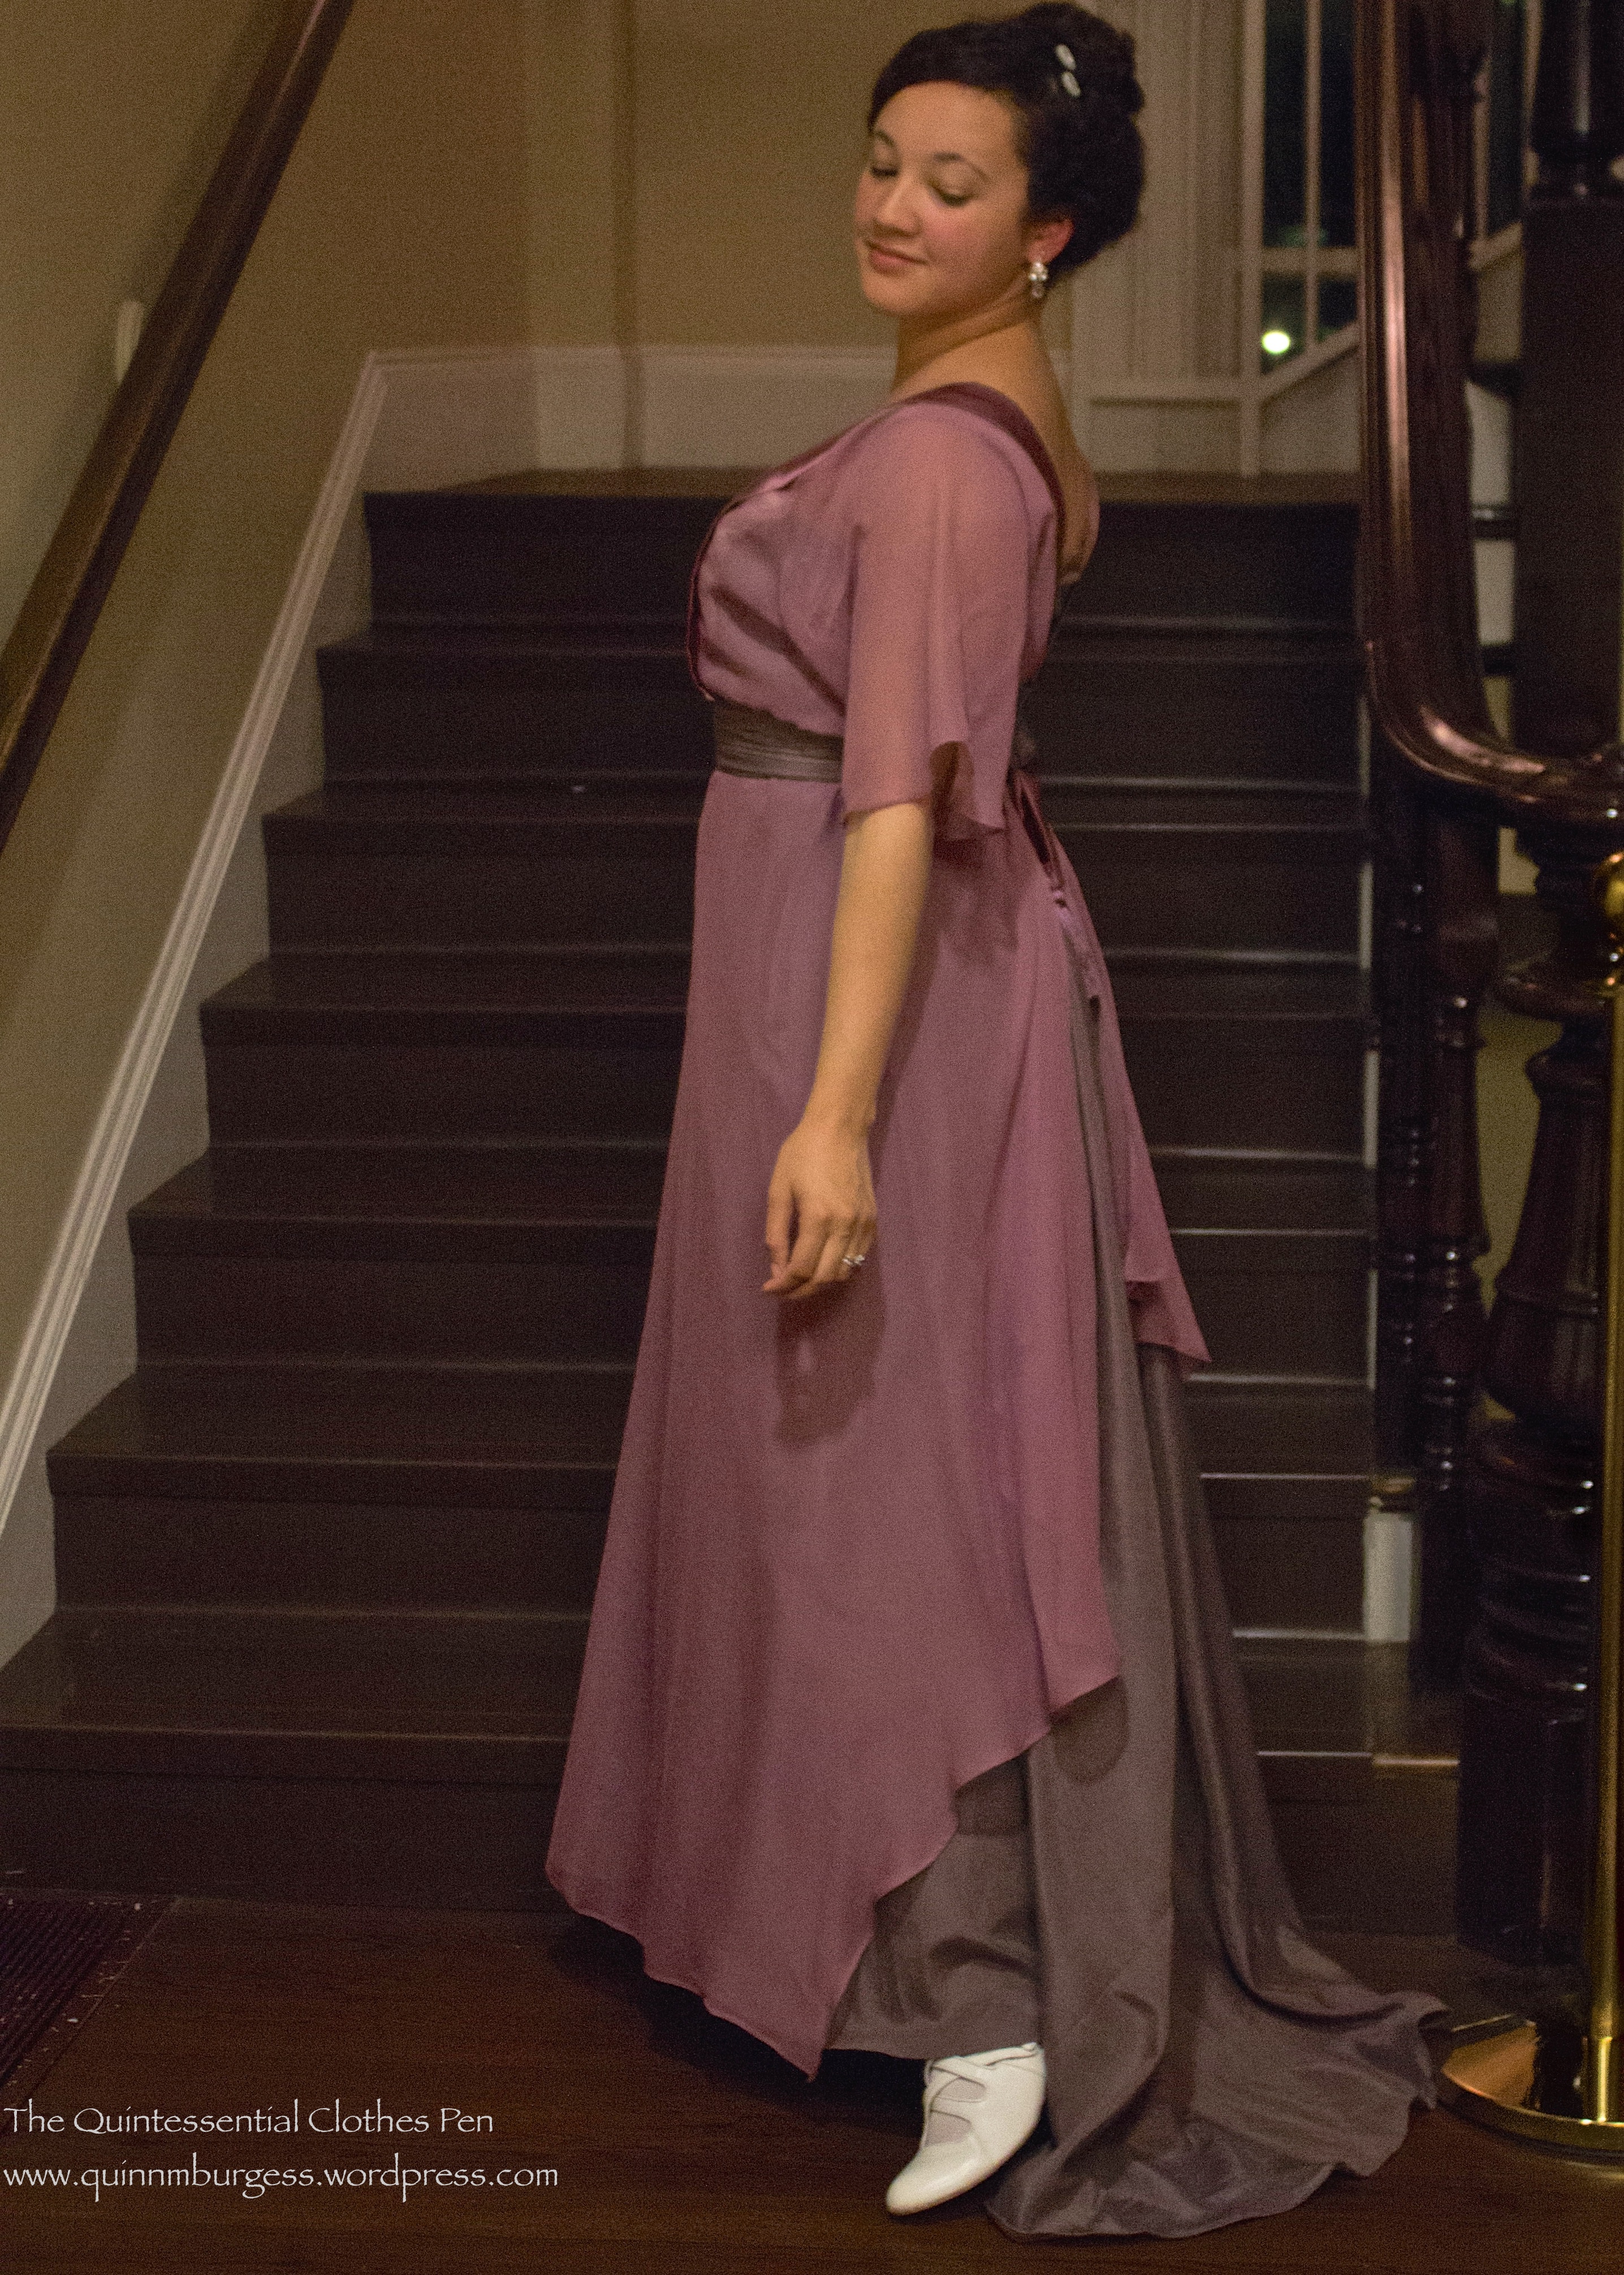
#3: I made this dress with a train because I had enough fabric, it’s elegant, and I don’t get to have many dresses with trains because I’m usually dancing in them. However, I do plan to dance in this dress, so I included a secret hidden button under the decorative knot at the back and a loop on the center back skirt seam so that the skirt can hook up (bustling, essentially) to be a uniform length all around so I can dance unhindered!
I paired this new dress with my American Duchess Astoria shoes, because they are super comfy and made sense color-wise with my other accessories: plain white stockings, a super long strand of faux pearls, lovely clear/white dangle earrings I’ve had for at least ten years, and two matching metallic silver wrapped hair pins I think my mother gave me also a number of years ago. Underneath is my 1913 chemise and corset.
I’ve had all the fabrics in the stash for at least three to seven years. The underskirt was leftover from a former project never fully pictured here on the blog–an 1890s 2 part dress taken directly from an extant bodice with an extrapolated skirt (the skirt was worn by a friend in Newport in 2012–there are pictures toward the bottom of this past post, and I forgot that the ensemble I’m wearing in that post also uses this same fabric as trim). I had purchased way more fabric than I needed and had more than enough for the new project, so I guess I’ll be using it on another something someday. The matching chiffon and charmeuse I’d purchased with the intention of making a 1910s evening dress back in 2012, but ran out of time that year.
When I was first seriously thinking of making this dress, I thought I had enough fabric to do something like this dress, but I hit a snag when I realized I only had about ½ yd of the charmeuse and that the beaded sleeve I was hoping to incorporate into the dress was entirely unsuited for the shape of the beaded bit on the inspiration dress. I decided to make a dress like my original inspiration someday, but to go back to the beginning for the current dress and rethink what the dress might look like. I would up with something I am quite happy with that is drawn from a variety of inspirational dresses on my 1909-1914 evening gown Pinterest board with this as the most obvious inspiration.
Just the facts:
Fabric: One beaded silk sleeve from a 1980s evening dress that I deconstructed two years ago to make a 1925 evening dress, about ¼ yd of plain weave cotton for the base, less than ¼ yd of silk charmeuse, about 2 yds of silk chiffon, and 3-4 yds of lightweight silk faille for the underskirt.
Pattern: Created by me, loosely starting with the pattern for the bodice of my 1912 burgundy and gold evening gown and referencing skirt shapes in Janet Arnold for inspiration.
Year: 1910.
Notions: Thread, hooks and bars, and two pre-made tassels.
How historically accurate is it?: It definitely passes Leimomi’s test of being recognizable in its own time. It uses accurate materials and accurate techniques. 95%.
Hours to complete: More than I kept count of.
First worn: In September 2015.
Total cost: Technically this is a stash project because all of the things I used have been in my stash for years, except the tassels, which I bought within the last year knowing this project was high on the to do list. If I had to guess at the cost of the materials it was probably $50-$60 dollars.
The dress was sewn with a mixture of machine and hand sewing. Most of the assembly of the bodice and skirt pieces while they were separate was done by machine, as was the hemming of all the chiffon and faille (though the hem edge of the chiffon is actually the selvedge). The hand sewing came in when I went to mount all of the pieces together. I started with the under bodice and kept adding layers and figuring things out as I went. The closures are also hand sewn.
Incidentally, I’m not really sure what color to call this dress. I’ve been calling the colors orchid and mauve, but I’m not really sure those are the best color names. The chiffon and charmeuse are a shade of pinky/purple that’s hard to put a finger on and the contrast faille is more grey than anything when it’s by itself, though it really takes on a pinky/purple cast when paired with these other fabrics. Does any really perfect color name come to your mind? If it does I’d be happy to know what it is!
As I mentioned, the closure for this dress is quite complicated and as I knew I was going to include it in the sewing secrets challenge we took pictures specifically of the closures to document how it works. If I tried to explain only with words I’m sure there would be confusion, so I think the pictures will clarify things. We’ll start hooked up and unhook as we go.
The back knot snaps into place over the belt, which hooks together at the back. The button for the bustling skirt loop is hidden under the belt in this picture.The belt unhooks all the way to center front.The chiffon overskirt unhooks from center back to the side.Then the front bodice chiffon layer unhooks at the top edge of the beading and at the waist so it peels back toward the side. After that the under bodice unhooks and the dress slides right off. Is that what you thought might be the closure system?
Overall, I’m super pleased with this dress. It’s very comfortable, has lots of fabric in the skirt so is easy to dance in, and is a nice transitional style between the full skirts and pigeon breasts of the years around 1908 and the much slimmer, longer lines of the years around 1912. Plus, it has a train!
Here’s a comparison of the dress with the train down and then with it looped up. Luckily, these pictures were taken before dancing. Turns out that while I was dancing a very fast waltz, either my or my partner’s foot caught the hem of the dress and caused the loop to break, so I’ll have to repair it more sturdily for the next wearing. Ah well, that’s why they make safety pins!
I was quite pleased with how my hair turned out, so I had to make sure to get a reasonable close-up. Some of the curls are natural and some are made nice and smooth with a curling iron. The key is to put the hair up in a lot of different sections–and I mean a lot!
I call this dress the “Dowager Countess” gown because the shape of it reminds me of what Maggie Smith’s character in Downton Abbey often wears to dinner parties. Look at the bodices on these dresses: this dress, this dress, and this dress are all examples of a similar style–one that the Dowager Countess wears often! And why wouldn’t I want to be reminded of Maggie Smith when I think of this dress? Her snarky comments are highlights of Downton Abbey! (Incidentally, one of my friends wore the just-emerging-in-the-1910s style of pants in the ballroom to this ball–gasp!–and we took some posed snarky pictures. Head over to her blog, Plaid Petticoats, to take a look at her scandalous outfit. When you get to the bottom you’ll find the snarky pictures. You might even find that you think I’m there twice, because I was wearing this new 1910 dress and I loaned my 1912 evening gown from 2012 to a friend who happens to be being snarky with me.)
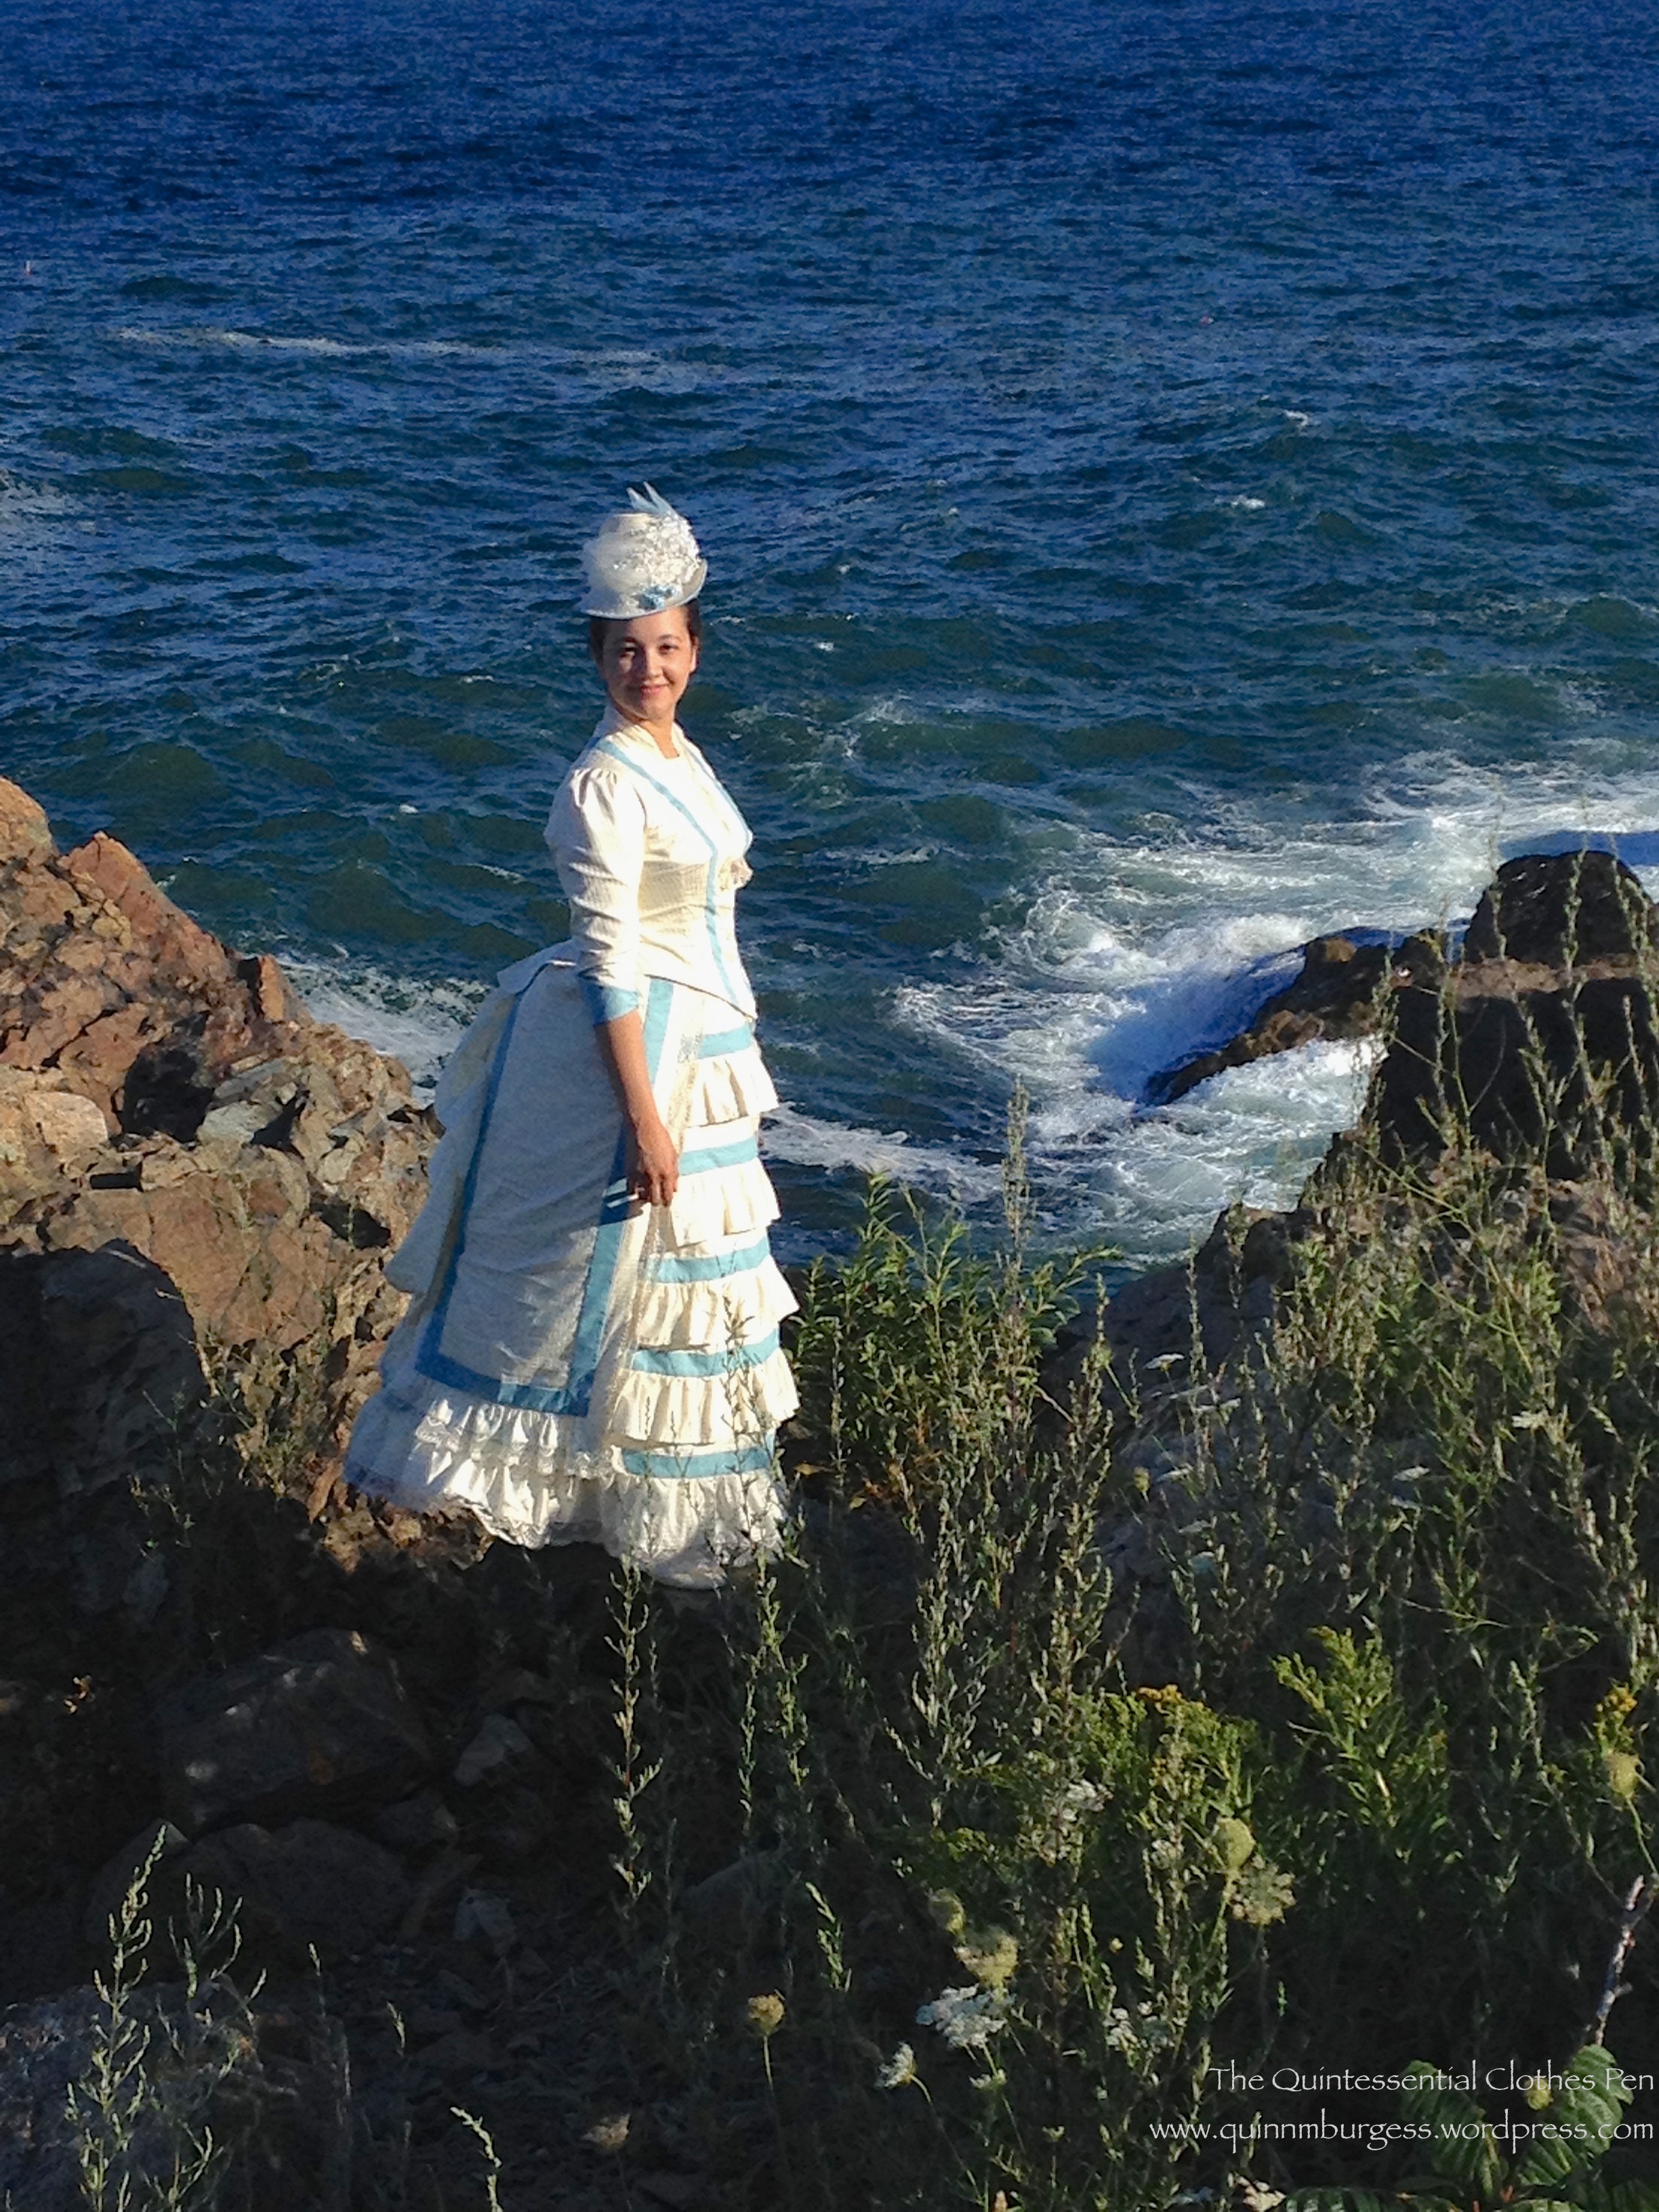
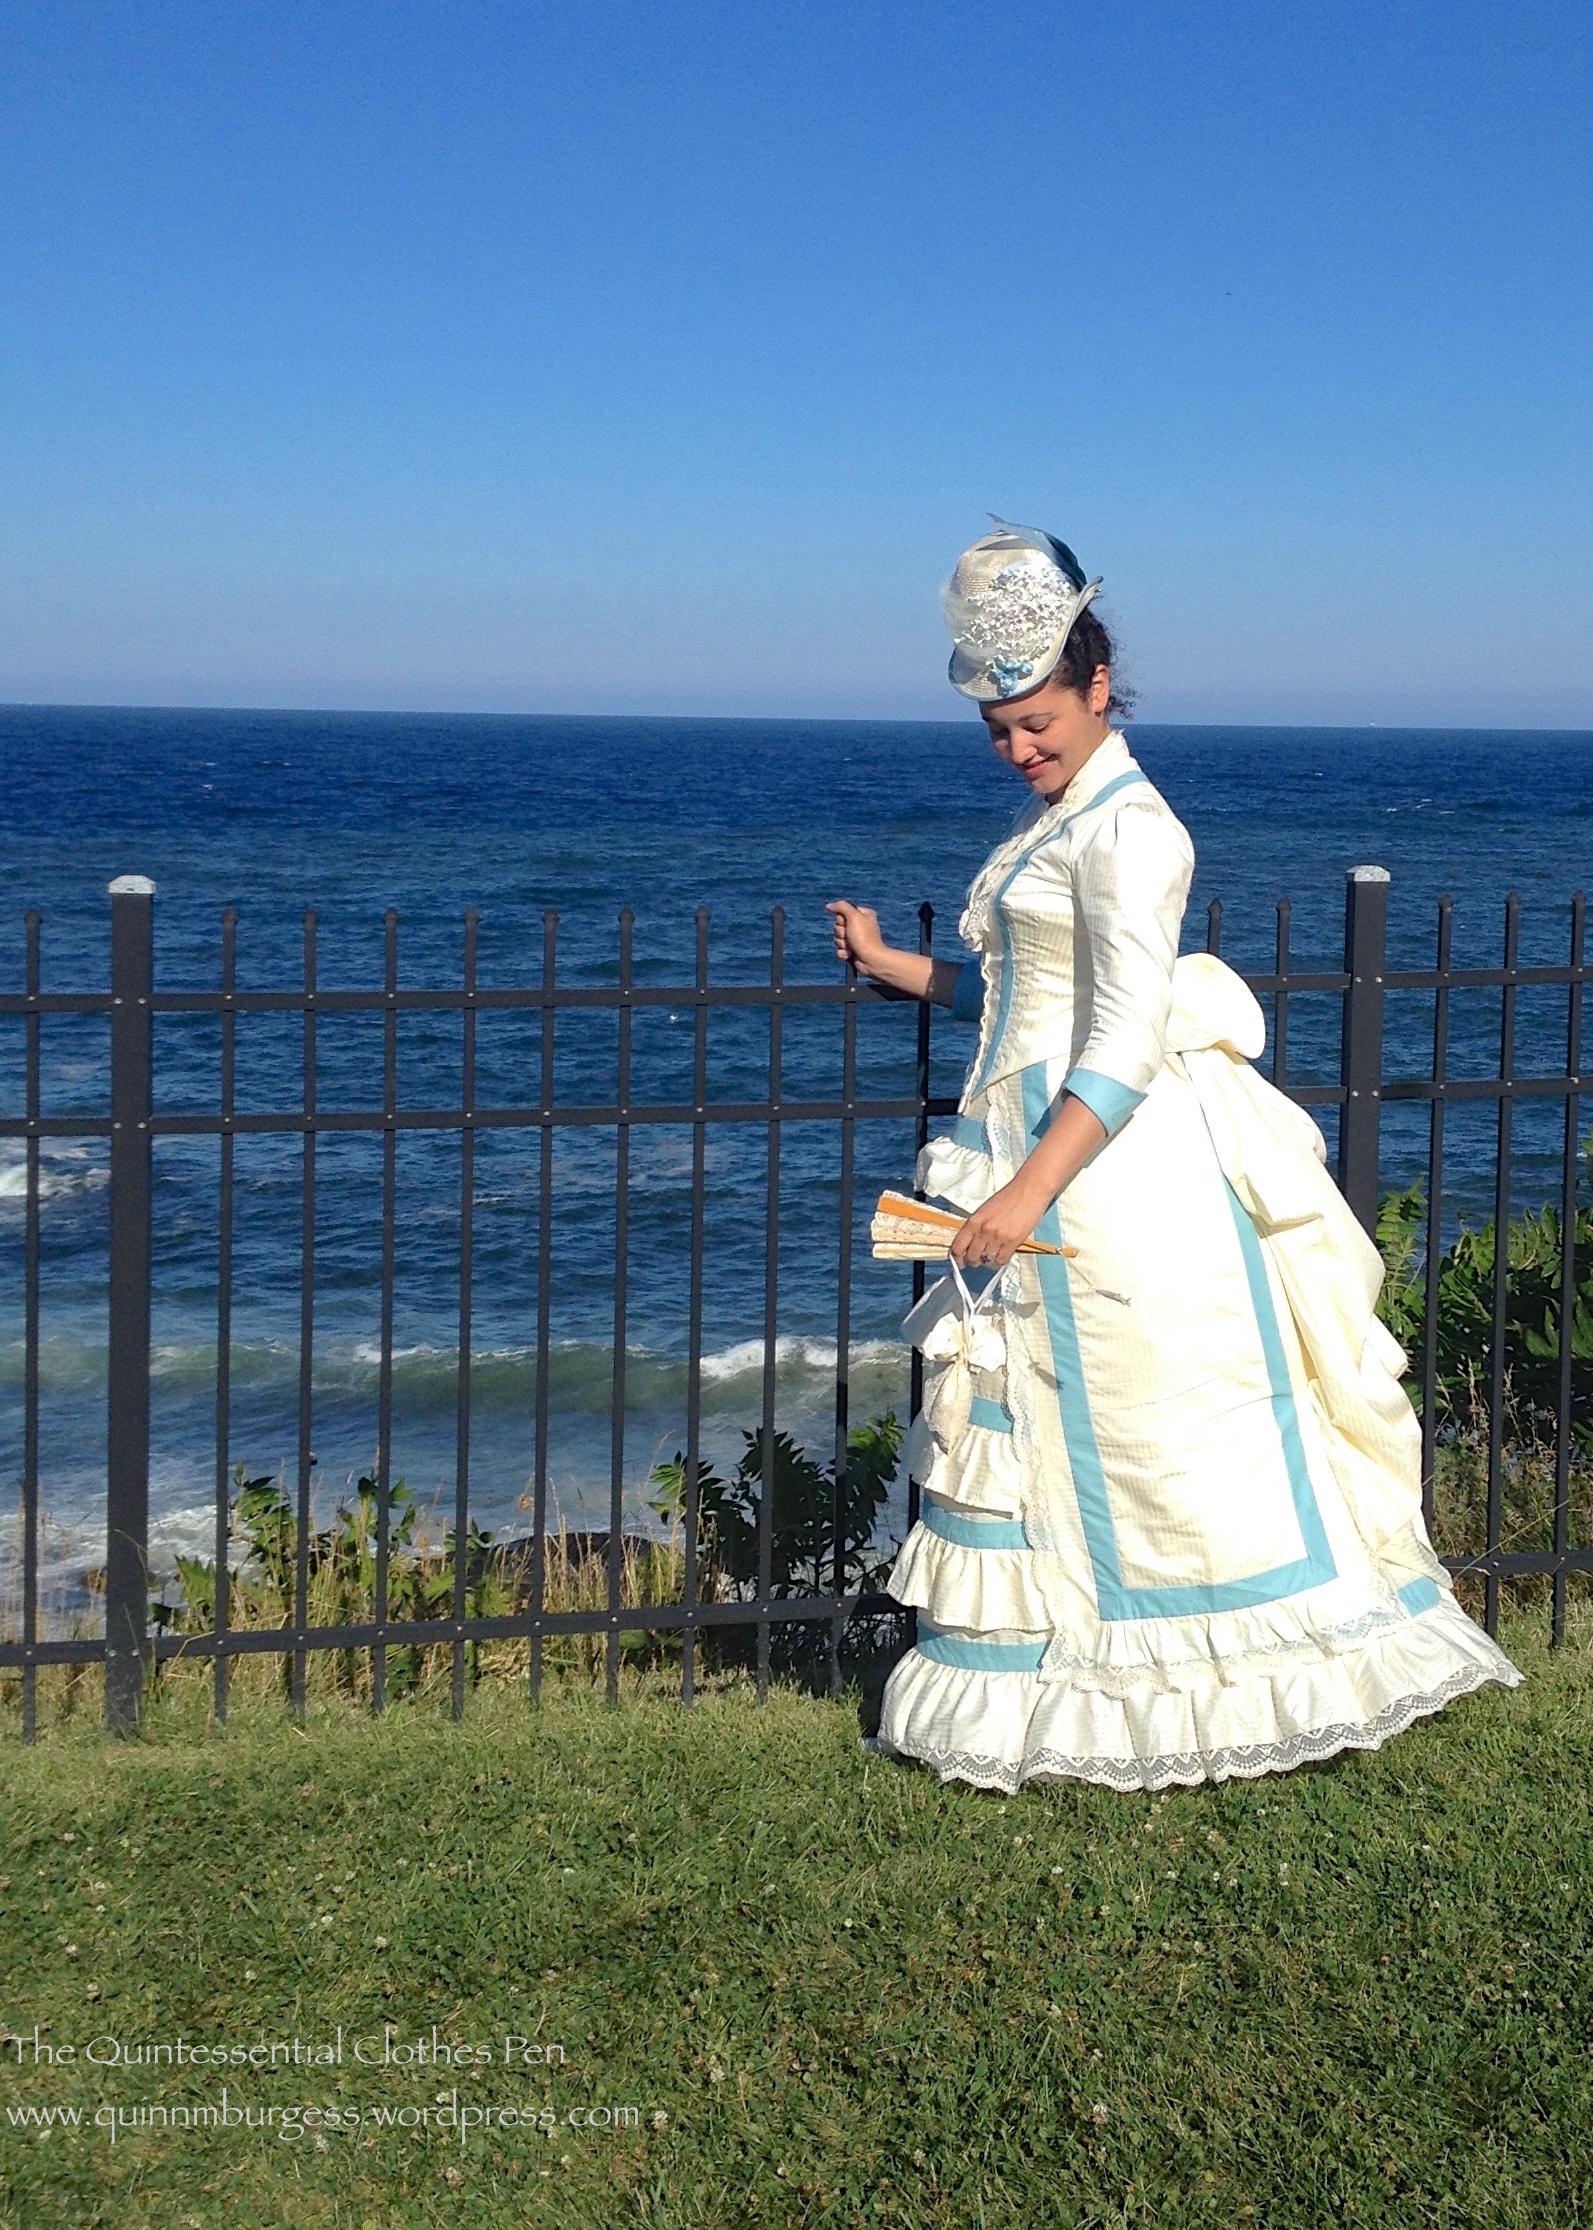
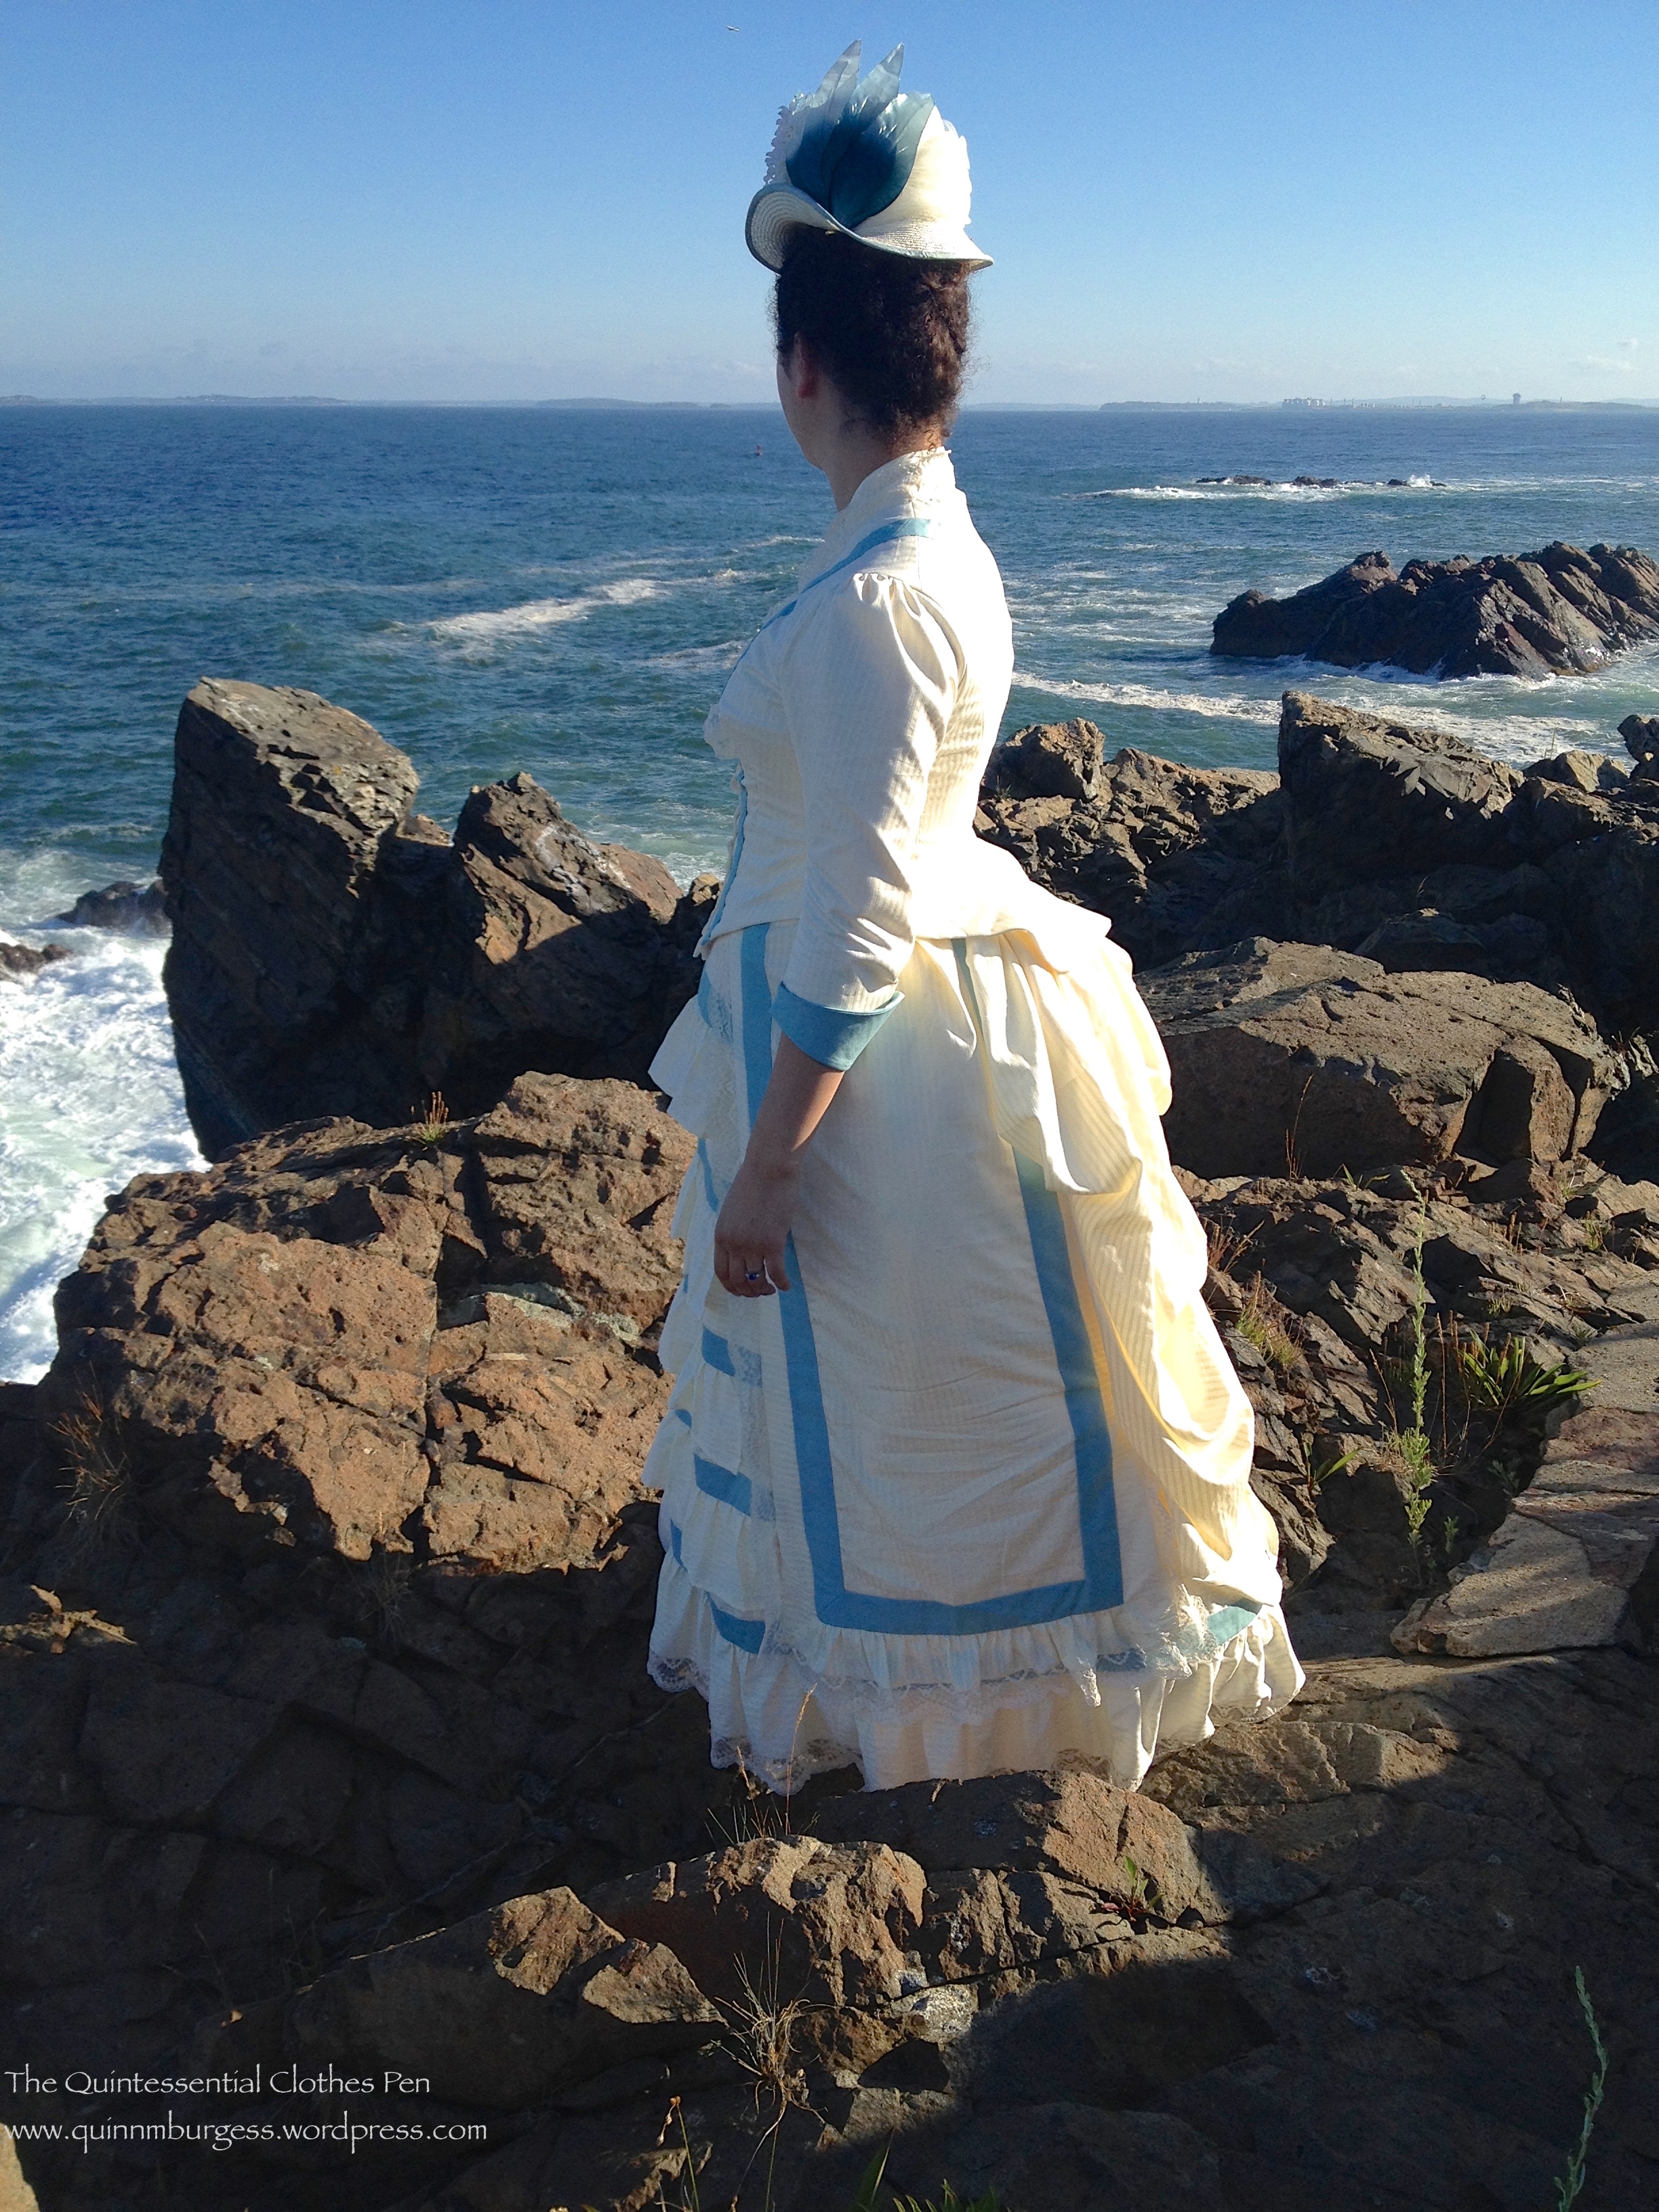
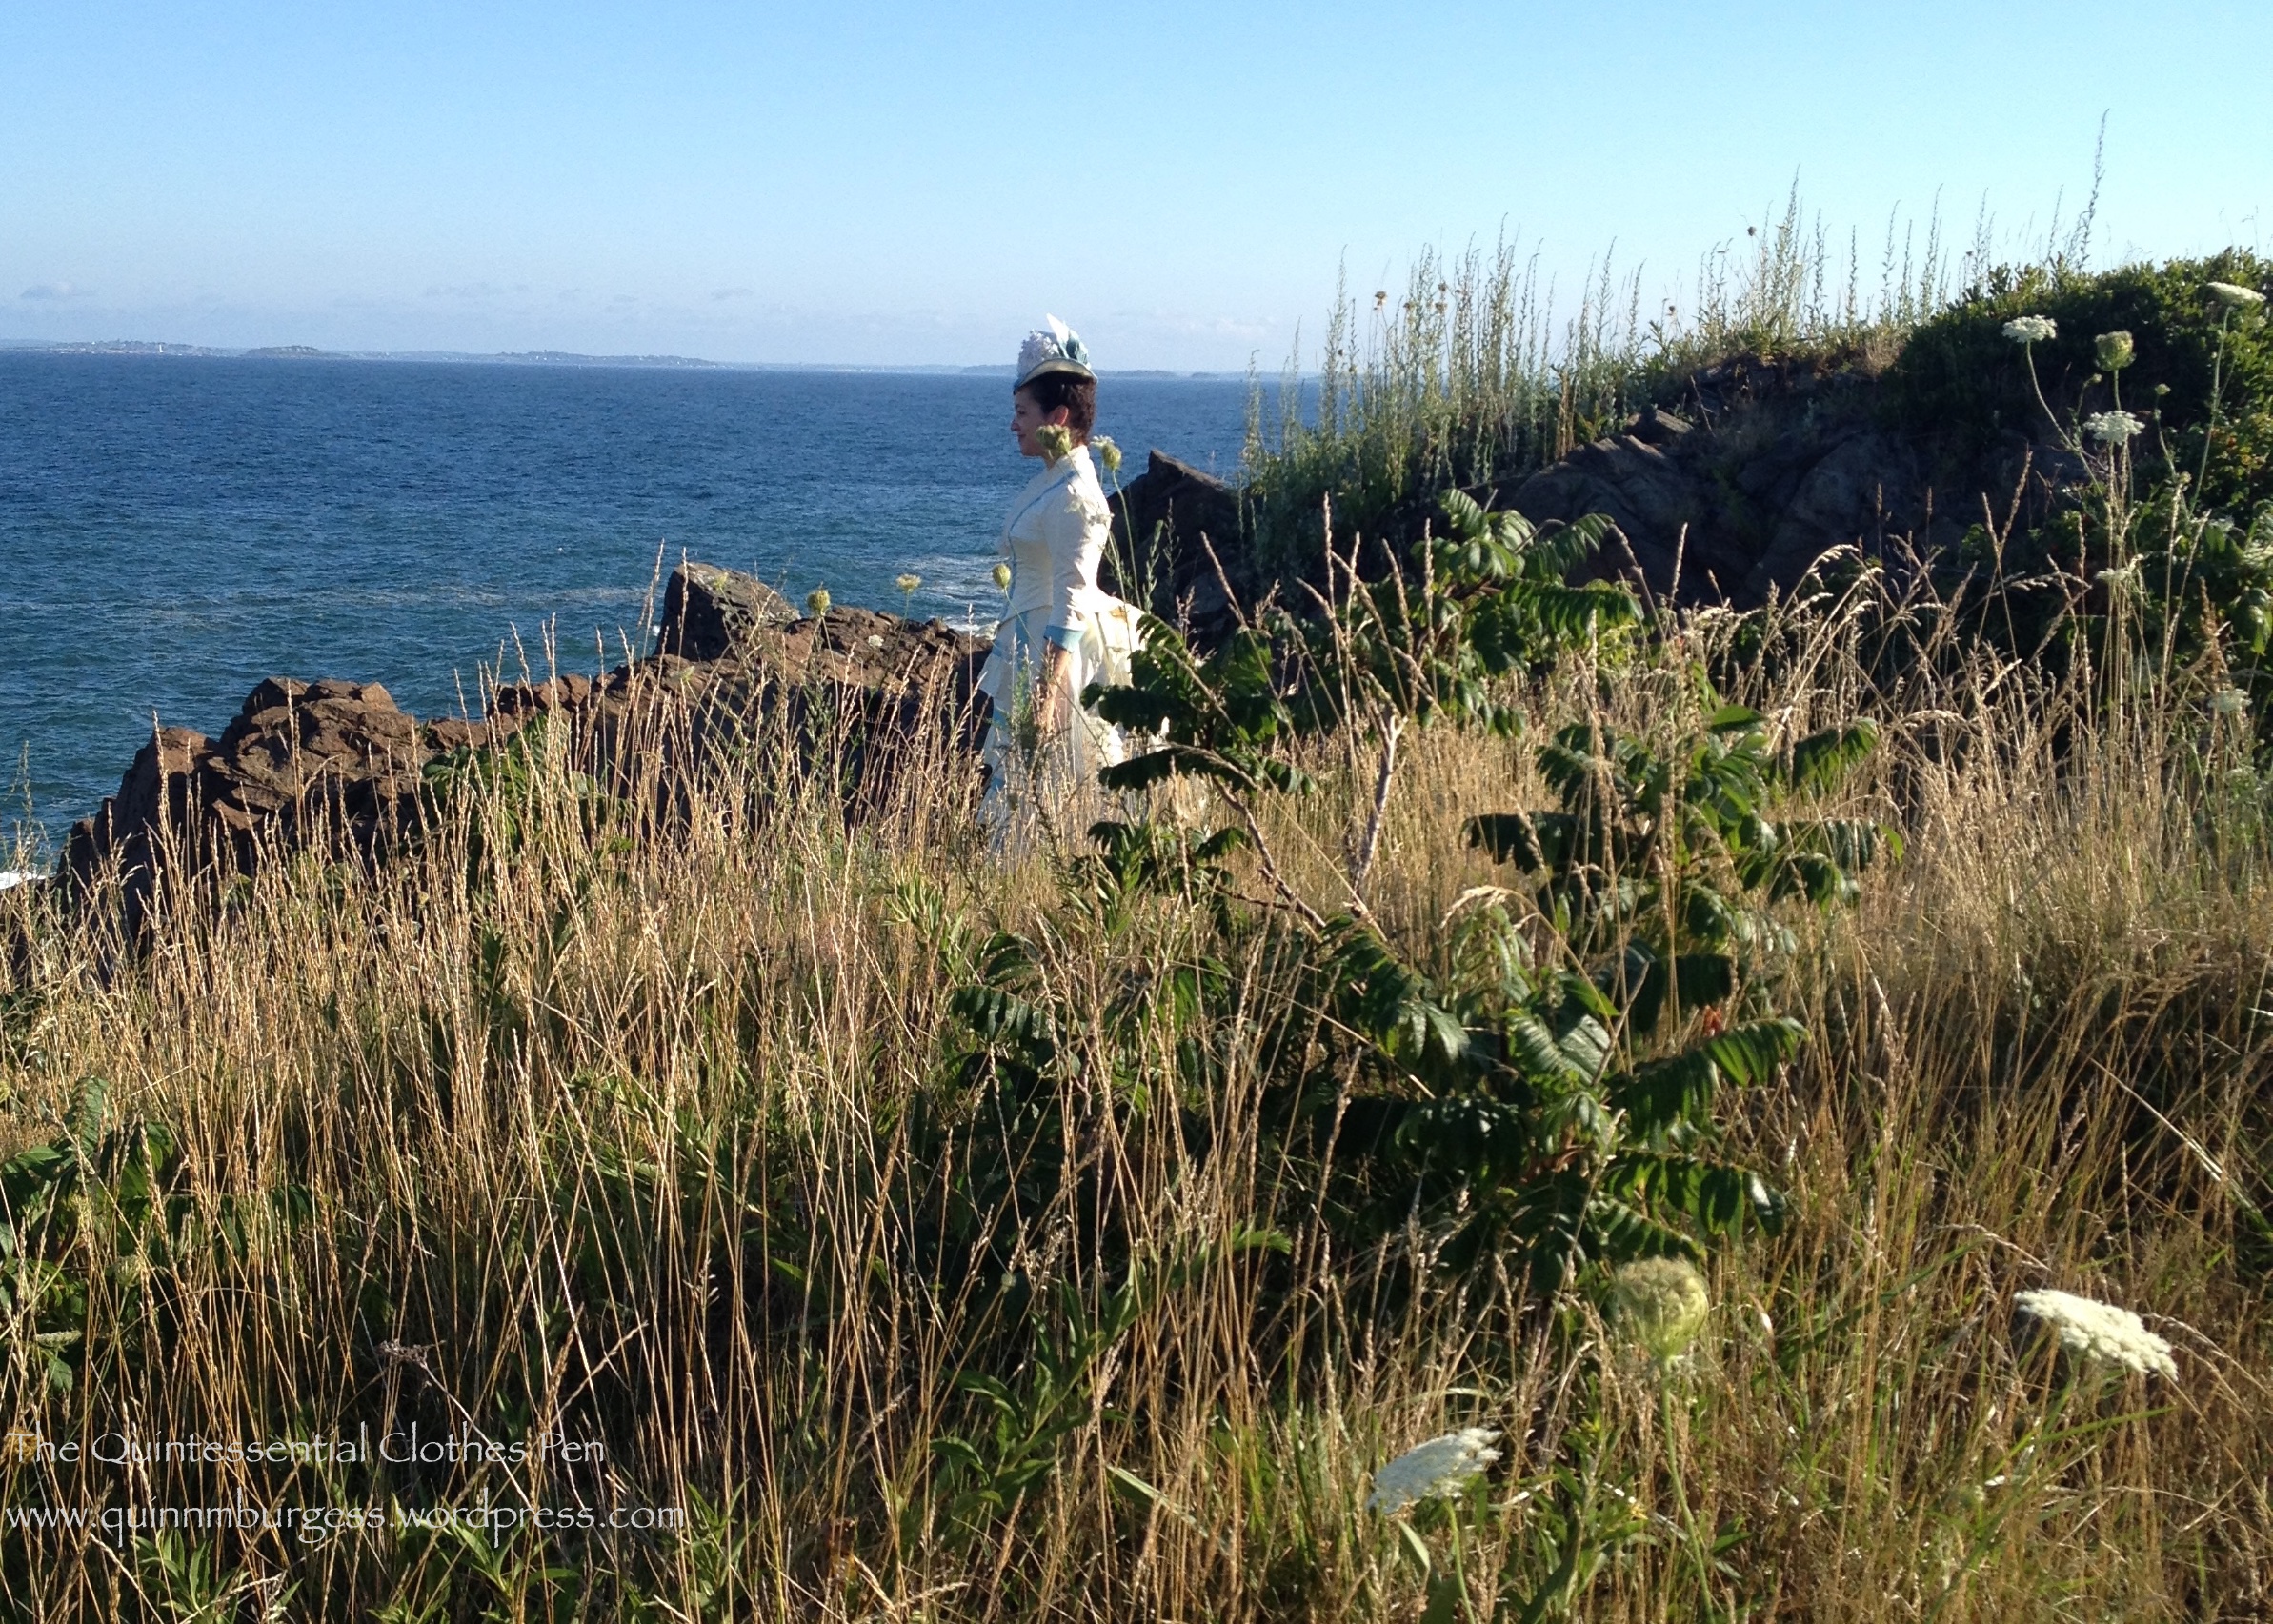
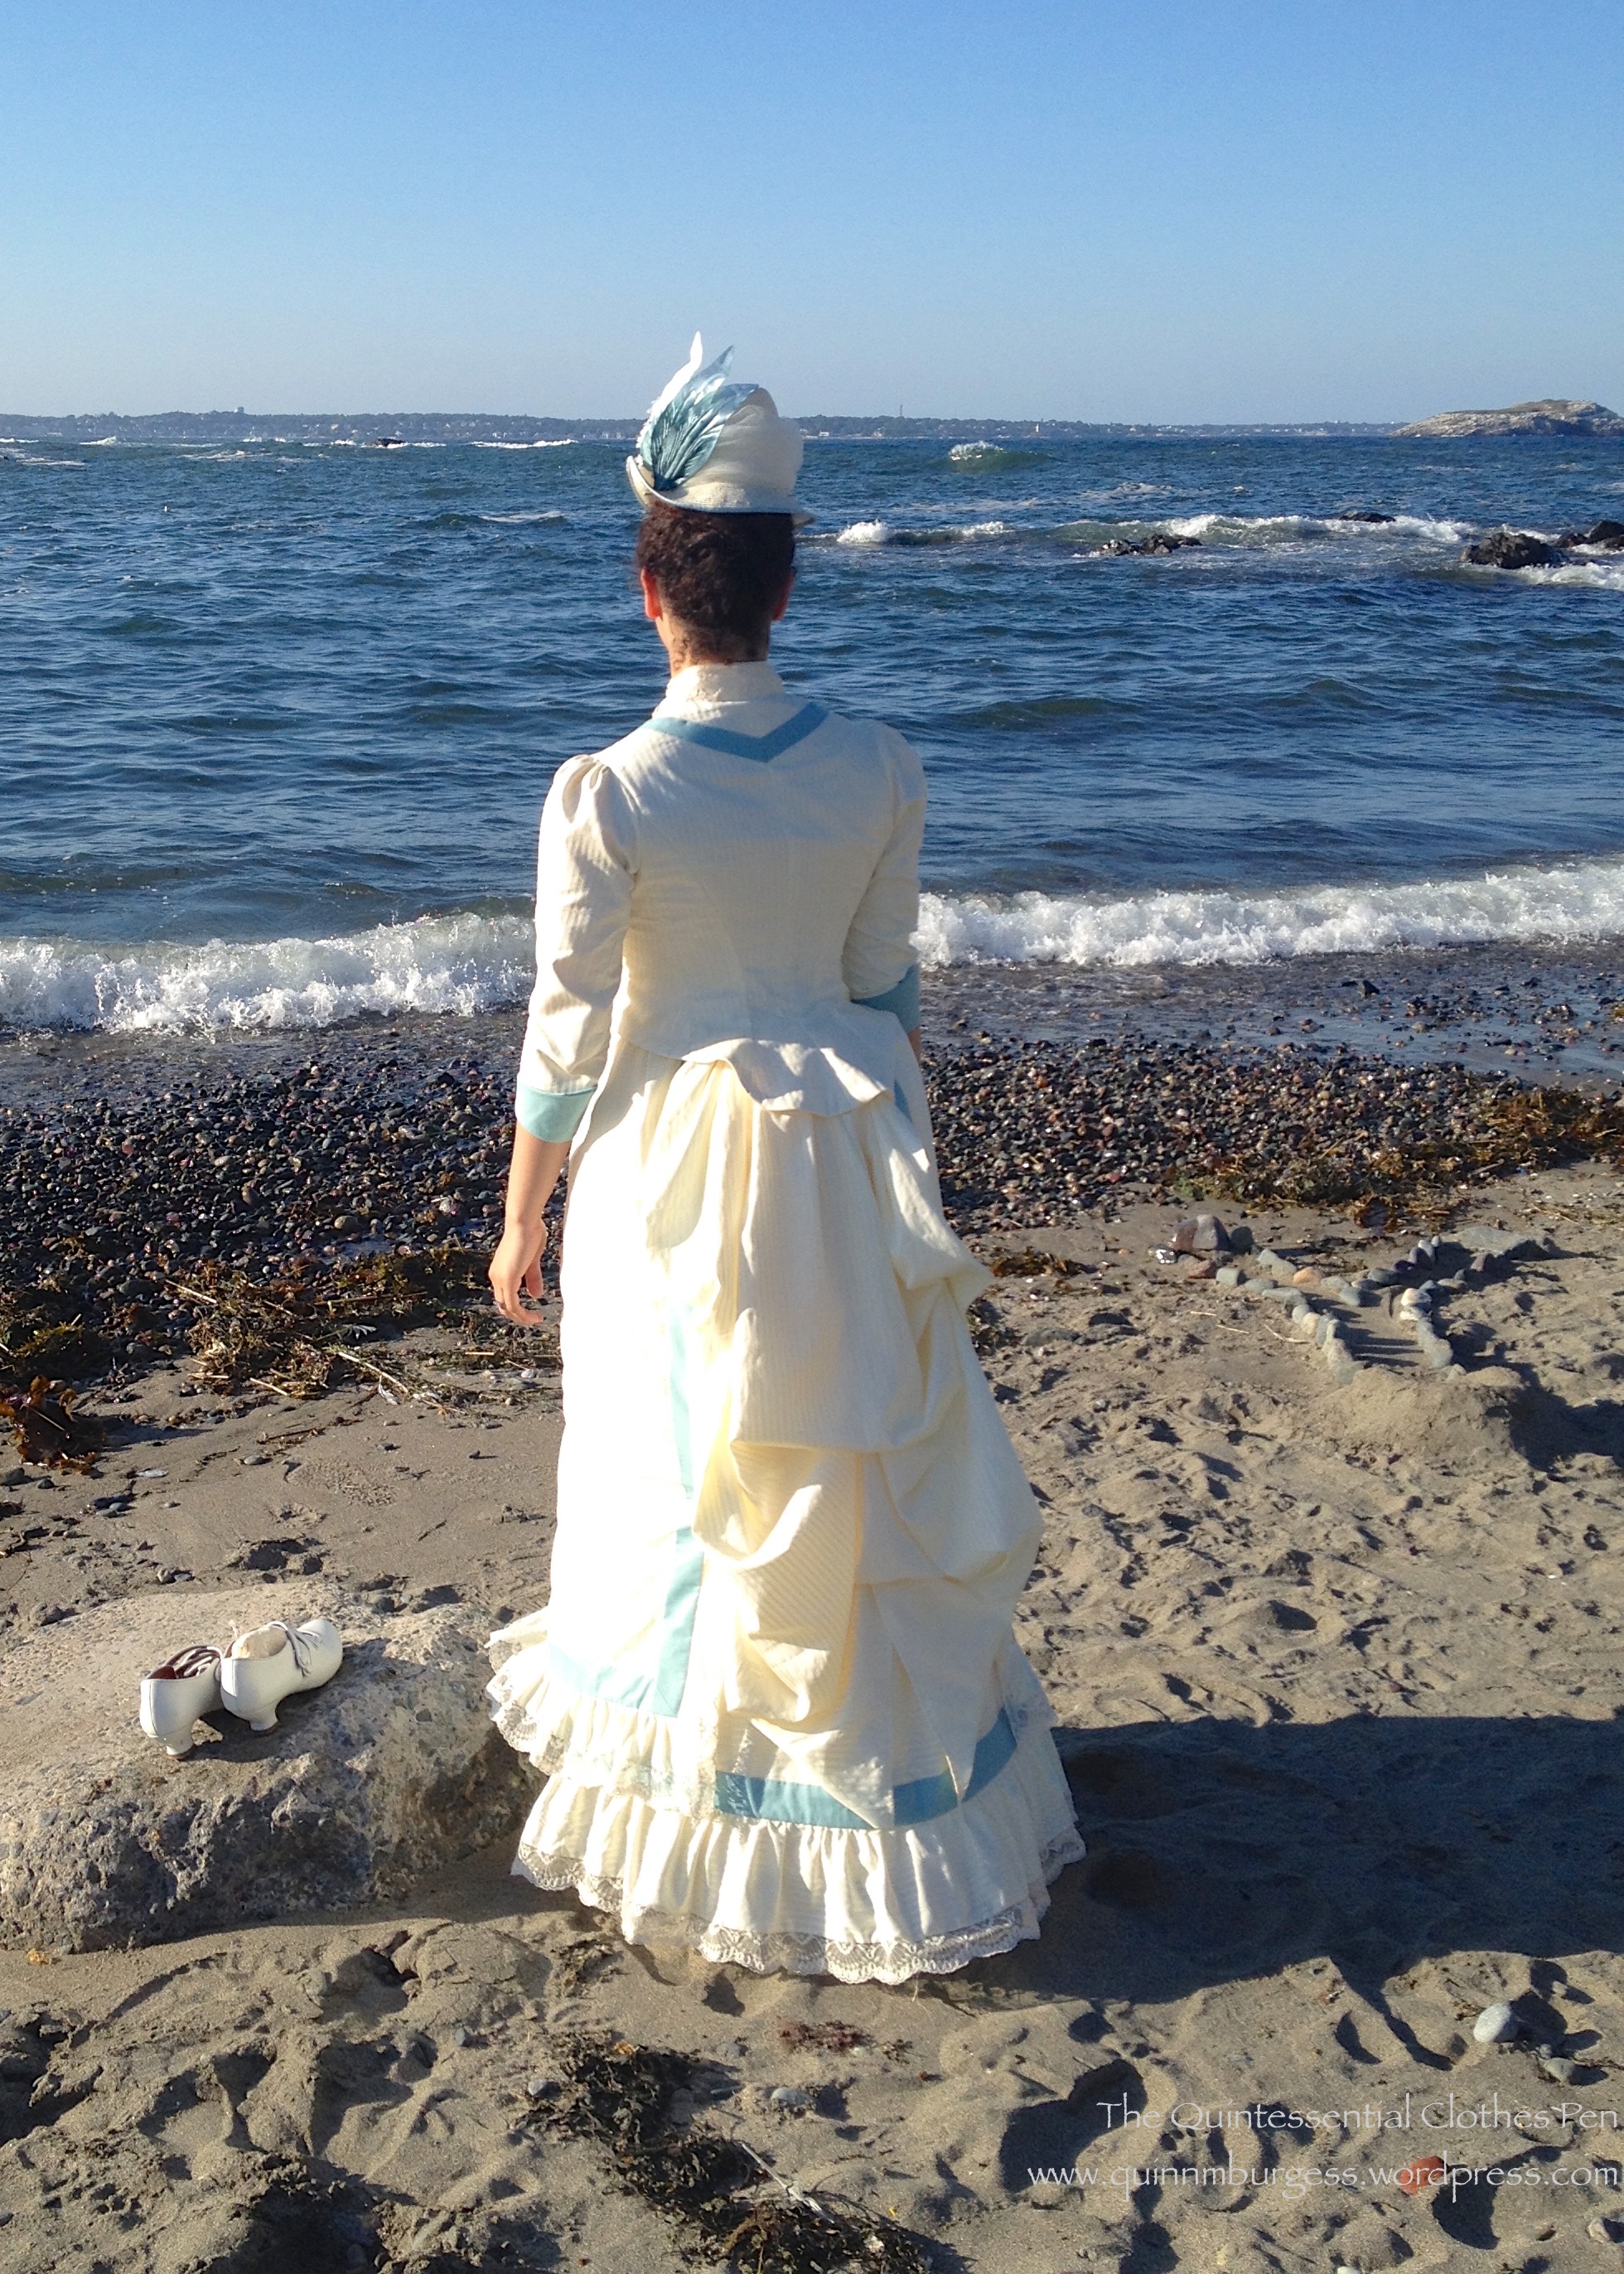
For my 300th post on the blog, I thought I’d share a dress that makes me smile. This dress makes me smile because of the frilliness of it which reminds me of Anne of Green Gables, because of the fact that it was very enjoyable and comfortable to wear, because I love that it is a UFO from 2013 that is finally complete, and because of the stunning backdrop I had for the pictures of it, which also remind me of Anne of Green Gables.
I wore this dress to the Nahant Vintage Dance Weekend Formal Tea and Seaside Promenade in August. It was also the first outing for the my new 1880s steam molded corset and my recently made 1885 straw hat. I am pleased to report that they were all comfortable garments and accessories to wear. Being heavily boned, the corset was very supportive and thankfully didn’t feel heavy, and because it is shaped exactly to my body it was super comfortable–smoothing my figure without squishing it uncomfortably. The dress was perfectly reasonable to wear, with the exception of sitting, which required a slight sideways perch that was a bit precarious. And the hat stayed in place perfectly with two hat pins, as you can see from the pictures where my head is tilted in various directions.
This dress has an association in my head with the puffed sleeves that Anne wants in Anne of Green Gables. While being from the wrong decade, it seems exactly like the sort of dress covered in frills and furbelows that Marilla wouldn’t waste fabric on. And just like Anne, I would often rather have the ridiculous, fashionable styles in historical clothing than the plain and sensible ones!
MARILLA: I’m not going to pamper your vanity. These are good and sensible dresses. This one is for Sunday, and the others you can wear to school.
ANNE: I am greatful, but I’d be even more grateful if you’d made this one with puffed sleeves.
MARILLA: I cannot waste material on ridiculous looking frills and furbelows. Plain and sensible is best.
ANNE: I’ve always dreamed of going to a picnic in puffed sleeves. I’d rather look ridiculous with everyone else than plain and sensible all by myself.
This dress was started in 2013. I had grand hopes of finishing it that summer for the Historical Sew Fortnightly challenge #13: Lace and Lacing…
Lacing is one of the simplest and oldest forms of fastening a garment, eminently practical, and occasionally decorative. Lace has been one of the most valuable and desirable textiles for centuries, legislated, coveted, at times worth more than its weight in gold, passed down from one garment to the next over centuries. Elaborate and delicate it is eminently decorative, and rarely practical. Celebrate the practicality of lacing, and the decorative frivolity of lace, with a garment that laces or has lace trim, or both.
And while I did make significant progress on the skirt that summer (getting all of the trimming figured out, cut, and assembled, as well as getting the skirt base and side panels constructed), I didn’t get anywhere near far enough along to have a wearable outfit. So it sat in my “in-progress” sewing box with hopes to be worked on, but didn’t really make it to the top of my sewing list again until this summer. I had enlarged and sized a pattern from Janet Arnold in between 2013 and 2015, even cutting and assembling a mockup, but that had been waiting for a fitting because I wanted to wear my new specifically 1880s corset with the dress and the new corset didn’t get completed until June. Once I had the corset done, I set to work on the dress again, fitting the mockup bodice, finishing the skirt, and making the bodice, as well as a slight delay while I made the hat to match. It’s handy to make a hat part-way through the process of making the dress, because you don’t wind up running out of time at the end and not having matching accessories!
The first inspiration for my dress was this white summer dress at the LACMA. The skirt was pretty much directly taken from the original, except for the back, which has a cascade of fabric instead of tucks as on the original–I figured there was already enough fluff for me on the front of the dress. I originally planned to edge all the front ruffles in lace as well, but ran out of lace. Running out of lace also made me rethink how I was going to trim the bodice. I went back to my inspiration boards and found these dresses with inspiring bodice treatments: a seaside ensemble and an afternoon dress with very different fabrics and intent, but I thought this could be adapted for my summery seaside dress. I had only a few yards of lace left when I got to working on the bodice and I decided to save some for edging the top of the 1880s corset because the shape of the lace is perfect, but that didn’t leave me much for the bodice. It turns out I had just enough to execute the final trimming plan I decided on.
Since this was originally intended to be part of the HSF, here are just the facts:
Fabric: 7ish, I think, yards of cream satin stripe cotton, 1/3ish of a yard of blue polished cotton, and 1.5 yards or so of cream polished cotton for flat lining the bodice.
Pattern: Created by me, but the shapes are based on a dress in Janet Arnold.
Year: 1885.
Notions: 9 yards of ivory lace, hooks and eyes, scraps of white cotton for finishing off the bodice edges, and vintage ivory buttons.
How historically accurate is it?: As accurate as I can be using the research I’ve done and the materials that are available in 2015. It definitely passes Leimomi’s test of being recognizable in its own time.
Hours to complete: Tons over two years.
First worn: In August 2015.
Total cost: I bought the all the cottons for super cheap, probably $3/yard, the lace was probably about $8, the buttons were a few dollars, and the rest was from the stash, so around $30-$35.
There were so many good pictures it was very hard to limit myself for this post! So here’s some more, with a bit of commentary to go along with them.
We had a beautiful day for the Tea and Promenade. It had been very hot prior to this, but the day of the event was a little cooler and the stiff ocean breezes made for a temperature that felt perfect for me in my layers and ¾ sleeves. The formal tea part of the day was at Egg Rock on Nahant (the same location as the Formal Soiree I attended last August). There was a lovely concert inside the house as well as guests lounging around outside, including me, playing croquet. At that point the stiff breeze had me worried that my hat wouldn’t stay on without pulling at my hair, so I chose not to wear it for awhile. (Thank goodness I gave it a try later, though, because it is perfect with the dress and I wouldn’t have wanted to miss wearing the two together!)
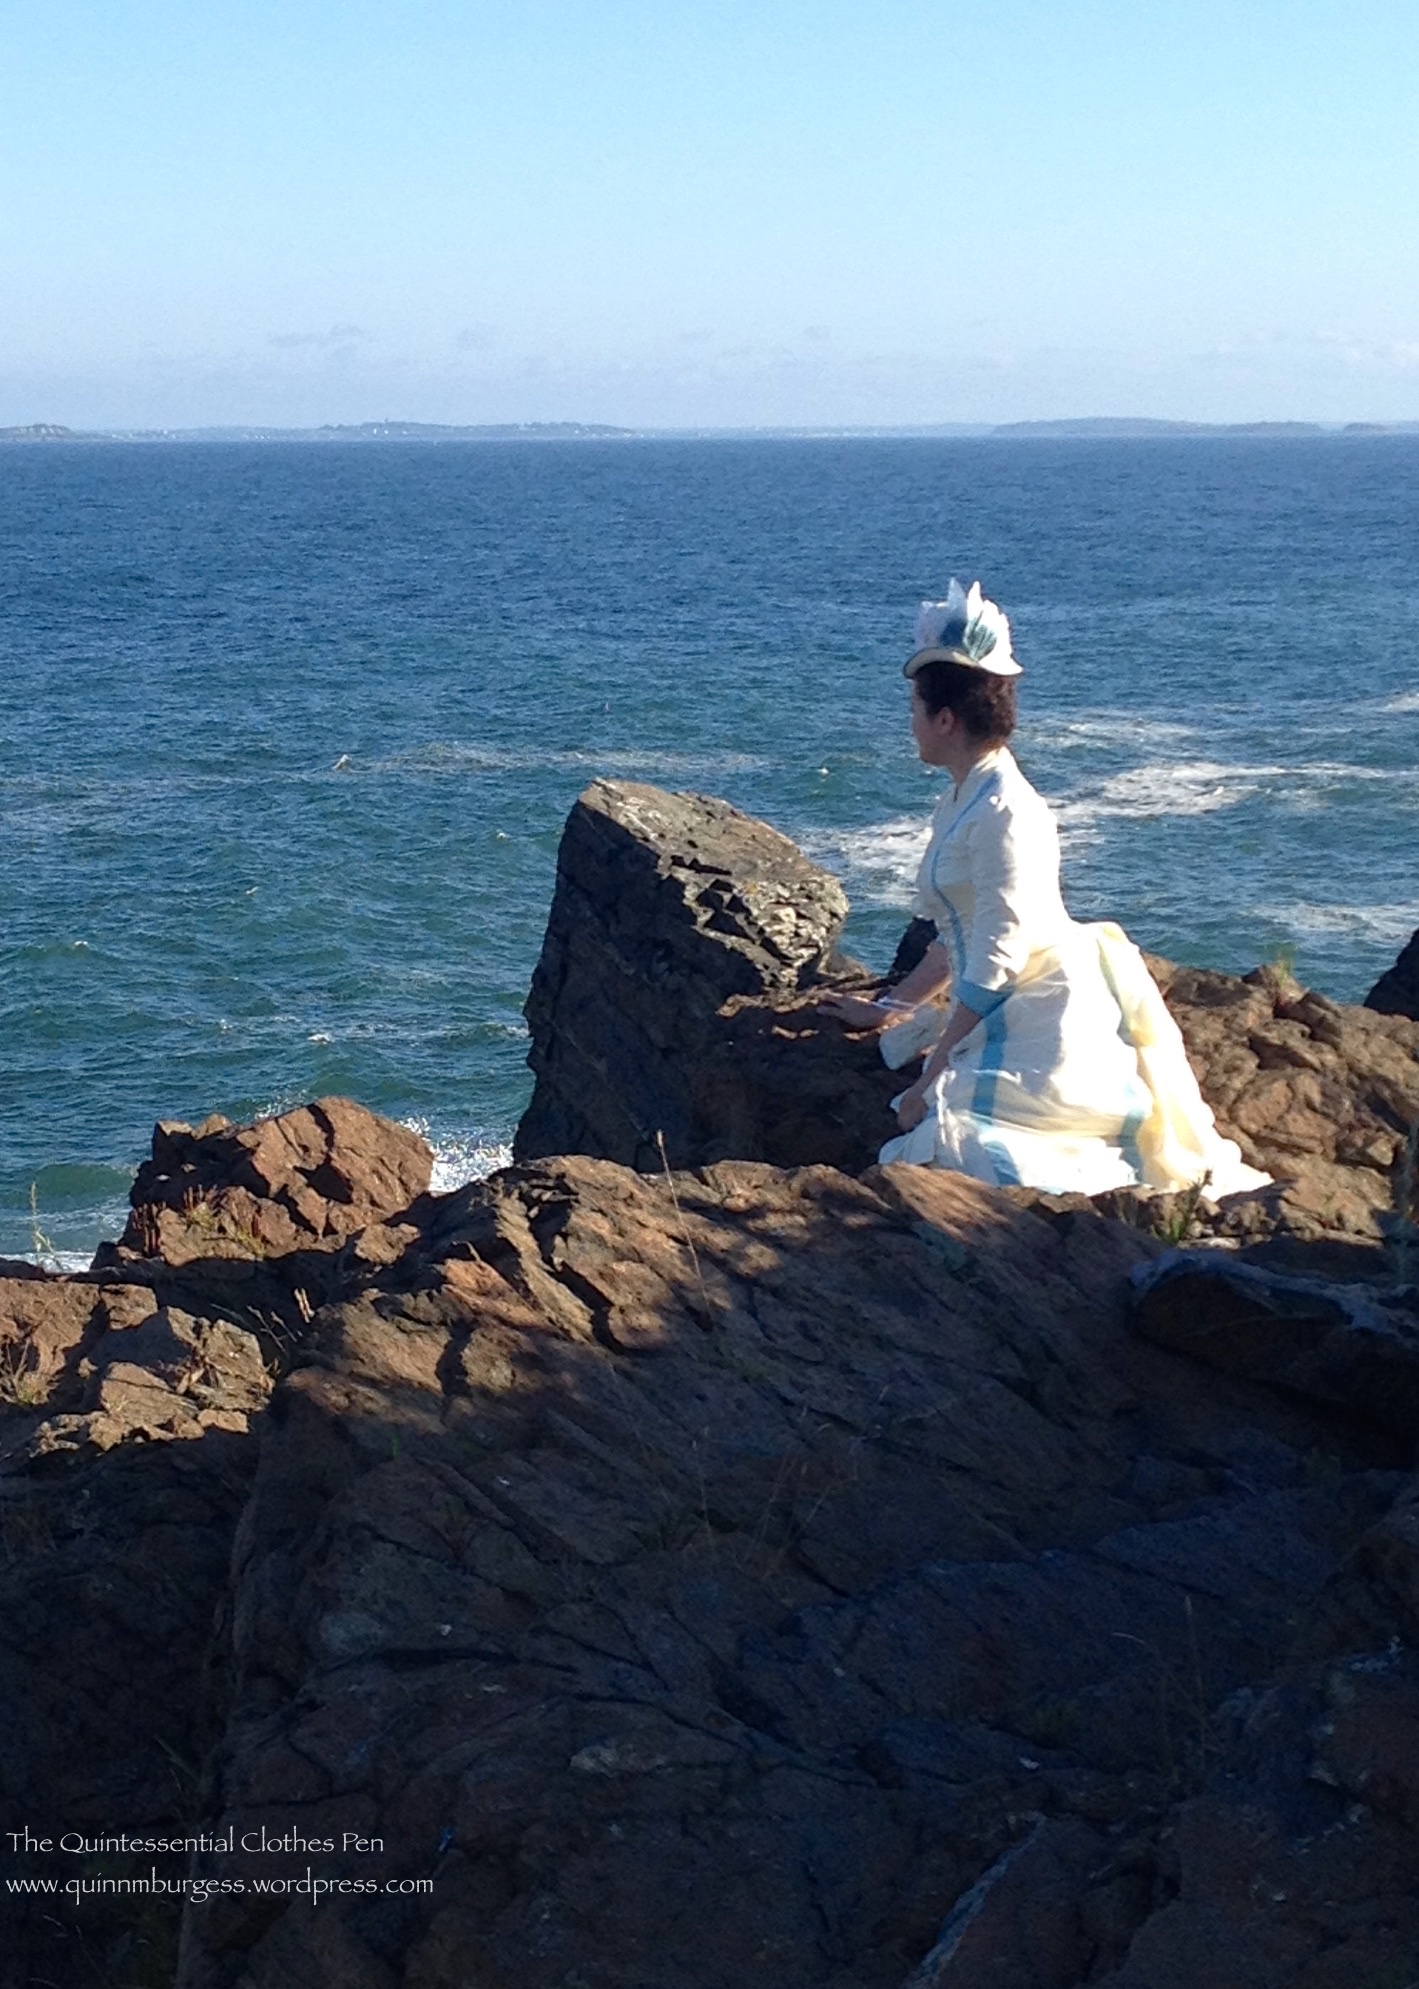
After the concert and some refreshments, the guests assembled for the promenade. As you would expect, we stopped traffic, attracted stares, and received questions from the more brave souls who would talk to us rather than just making up stories in their heads about our unusual clothing. The promenade took us to East Point, former site of the 19th century Nahant Hotel. The hotel is no longer standing, but there were stunning views of the Atlantic and the rocky coast to clamber on!
Not me, but such a gorgeous view and cute picture that I had to share it, too!
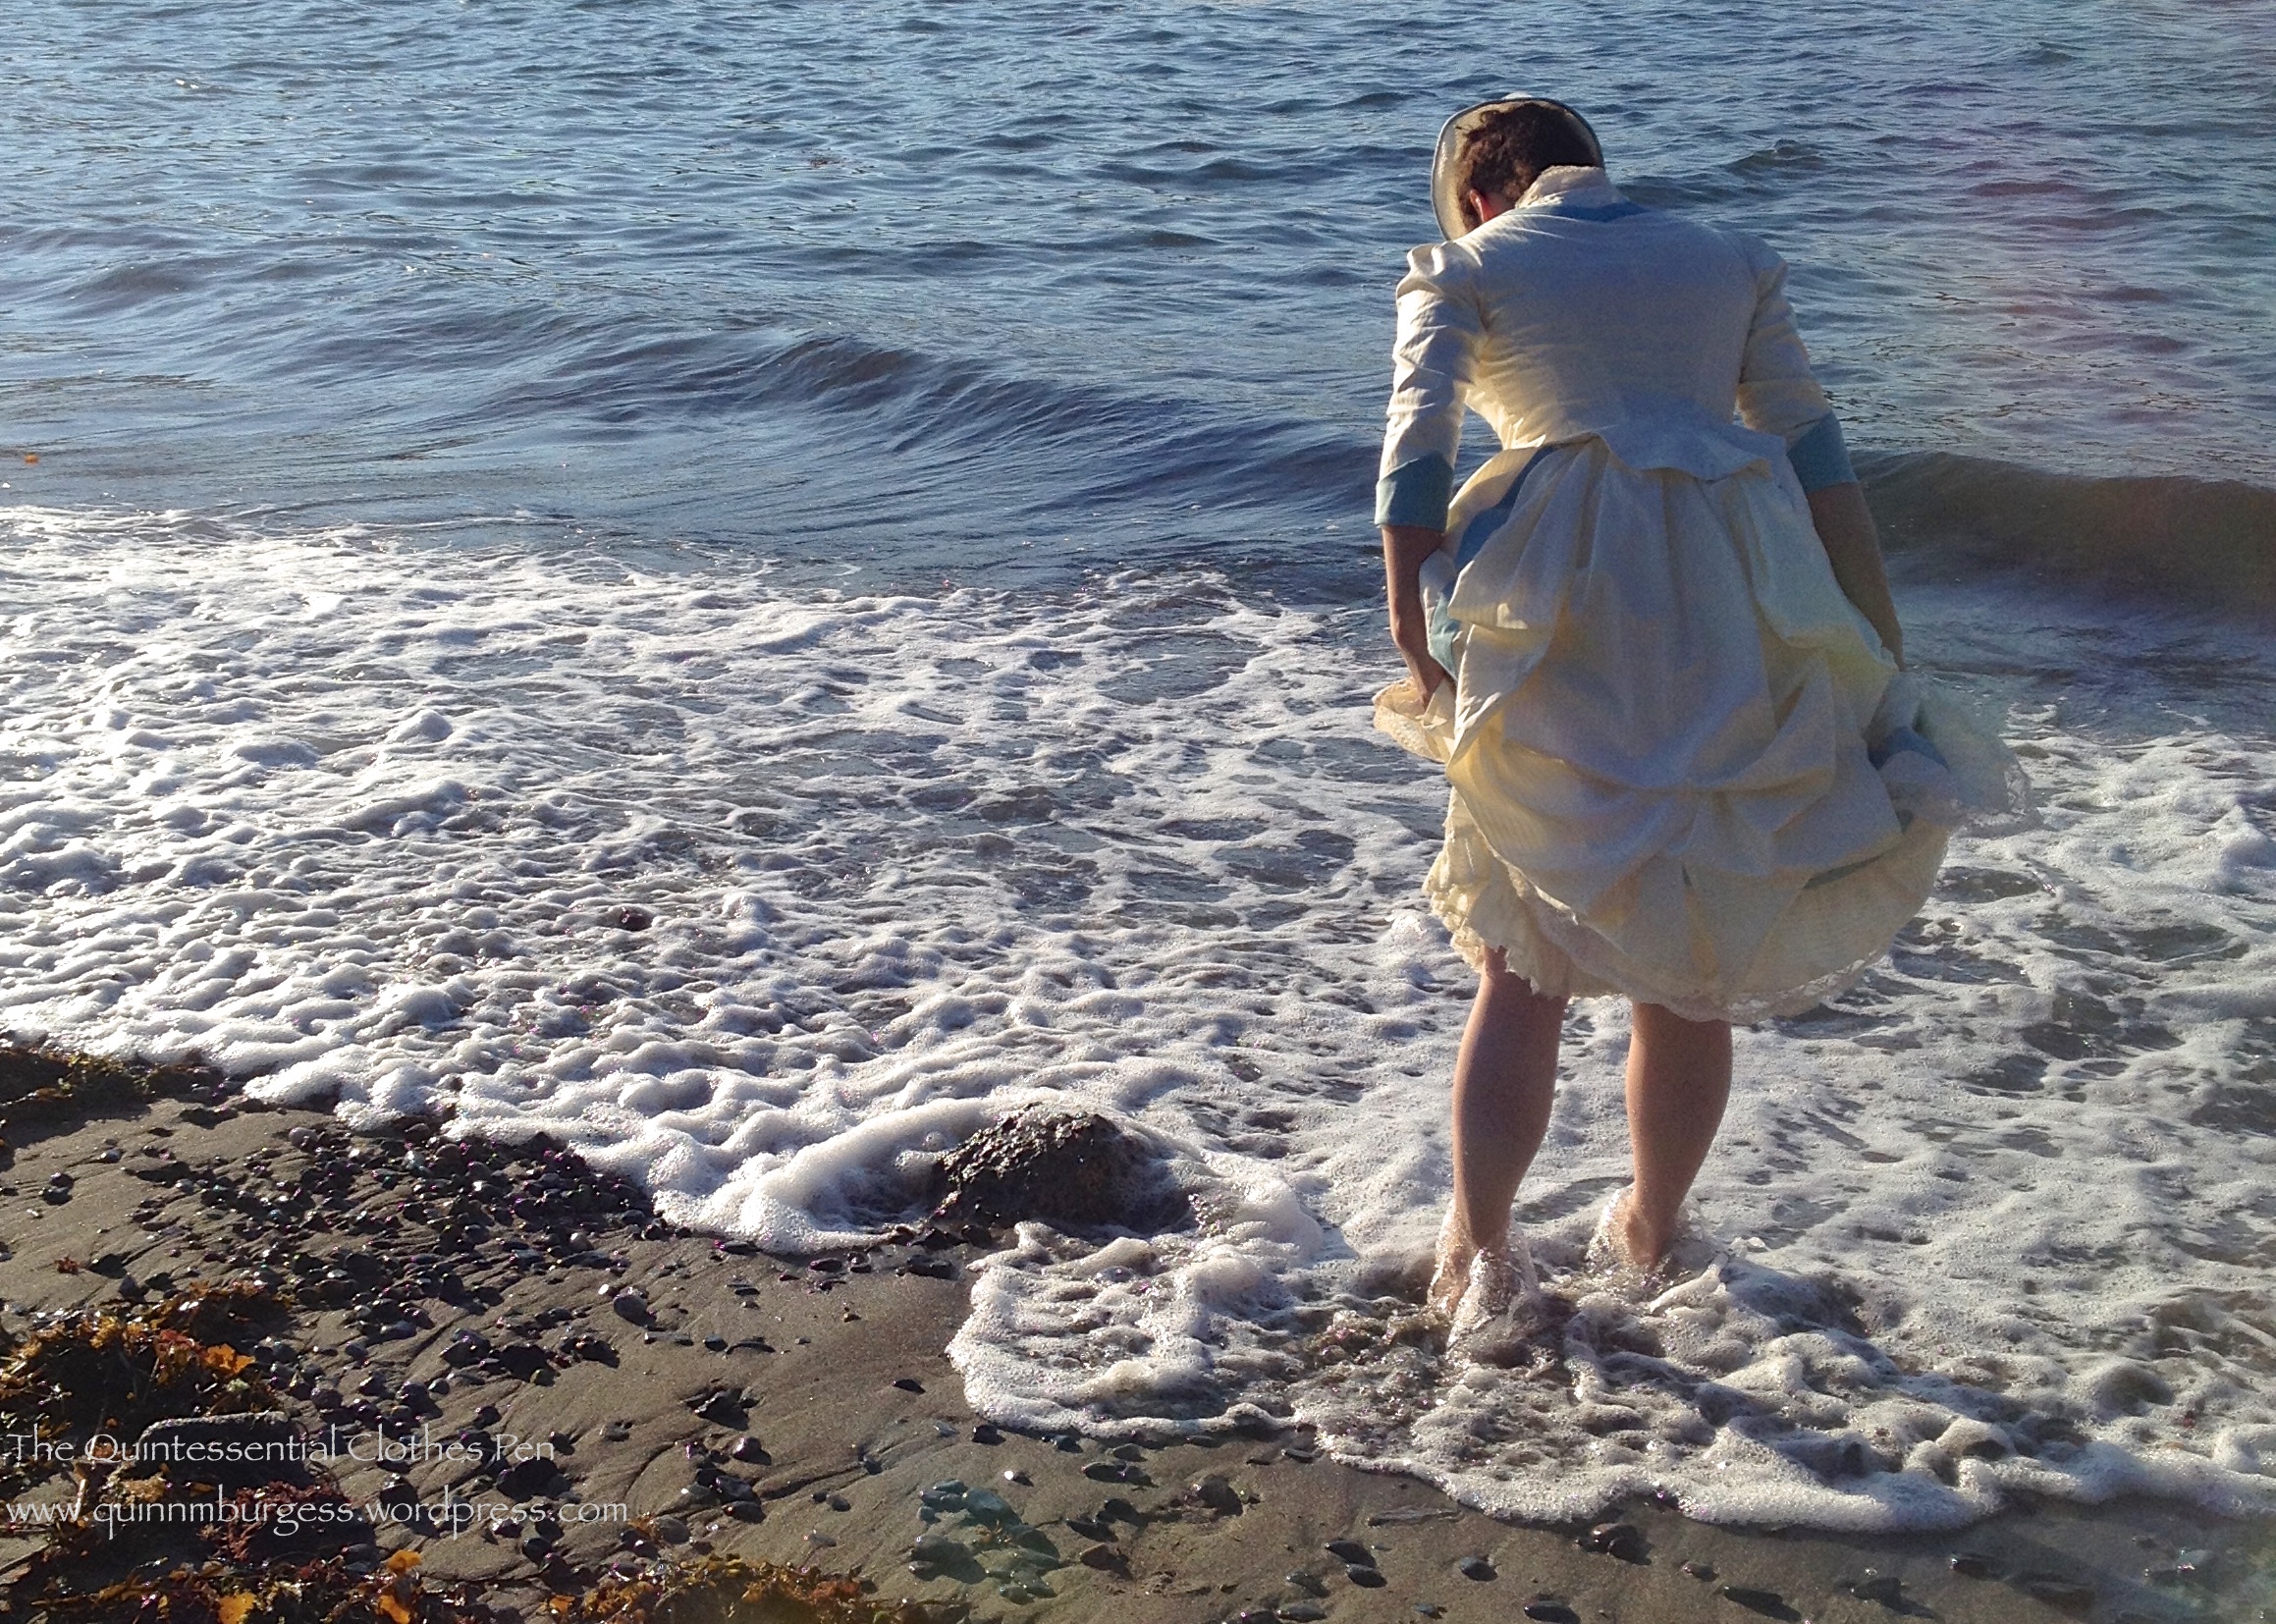
Some of us decided to head back a little early so we could stop at a small beach we had passed on our way to East Point and go wading! After the walk, the cold Atlantic water felt quite good on our feet. Here I am with stockings and shoes off, ready to head into the water.
And here I am, wading in my bustle dress!
There’s this picture of two ladies in bustle dresses from 1885 who look like they are collecting shells. That’s what I had in mind when I took this next picture, although looking at the 1885 picture again I see that the ladies in the picture are still wearing their stockings and shoes… I guess I’m pretty scandalous for 1885 in my bare legs and feet!
Here we are, the whole wading group. It was a pretty fun adventure. I don’t think I’ve been wading in historical clothing since Newport in 2012.
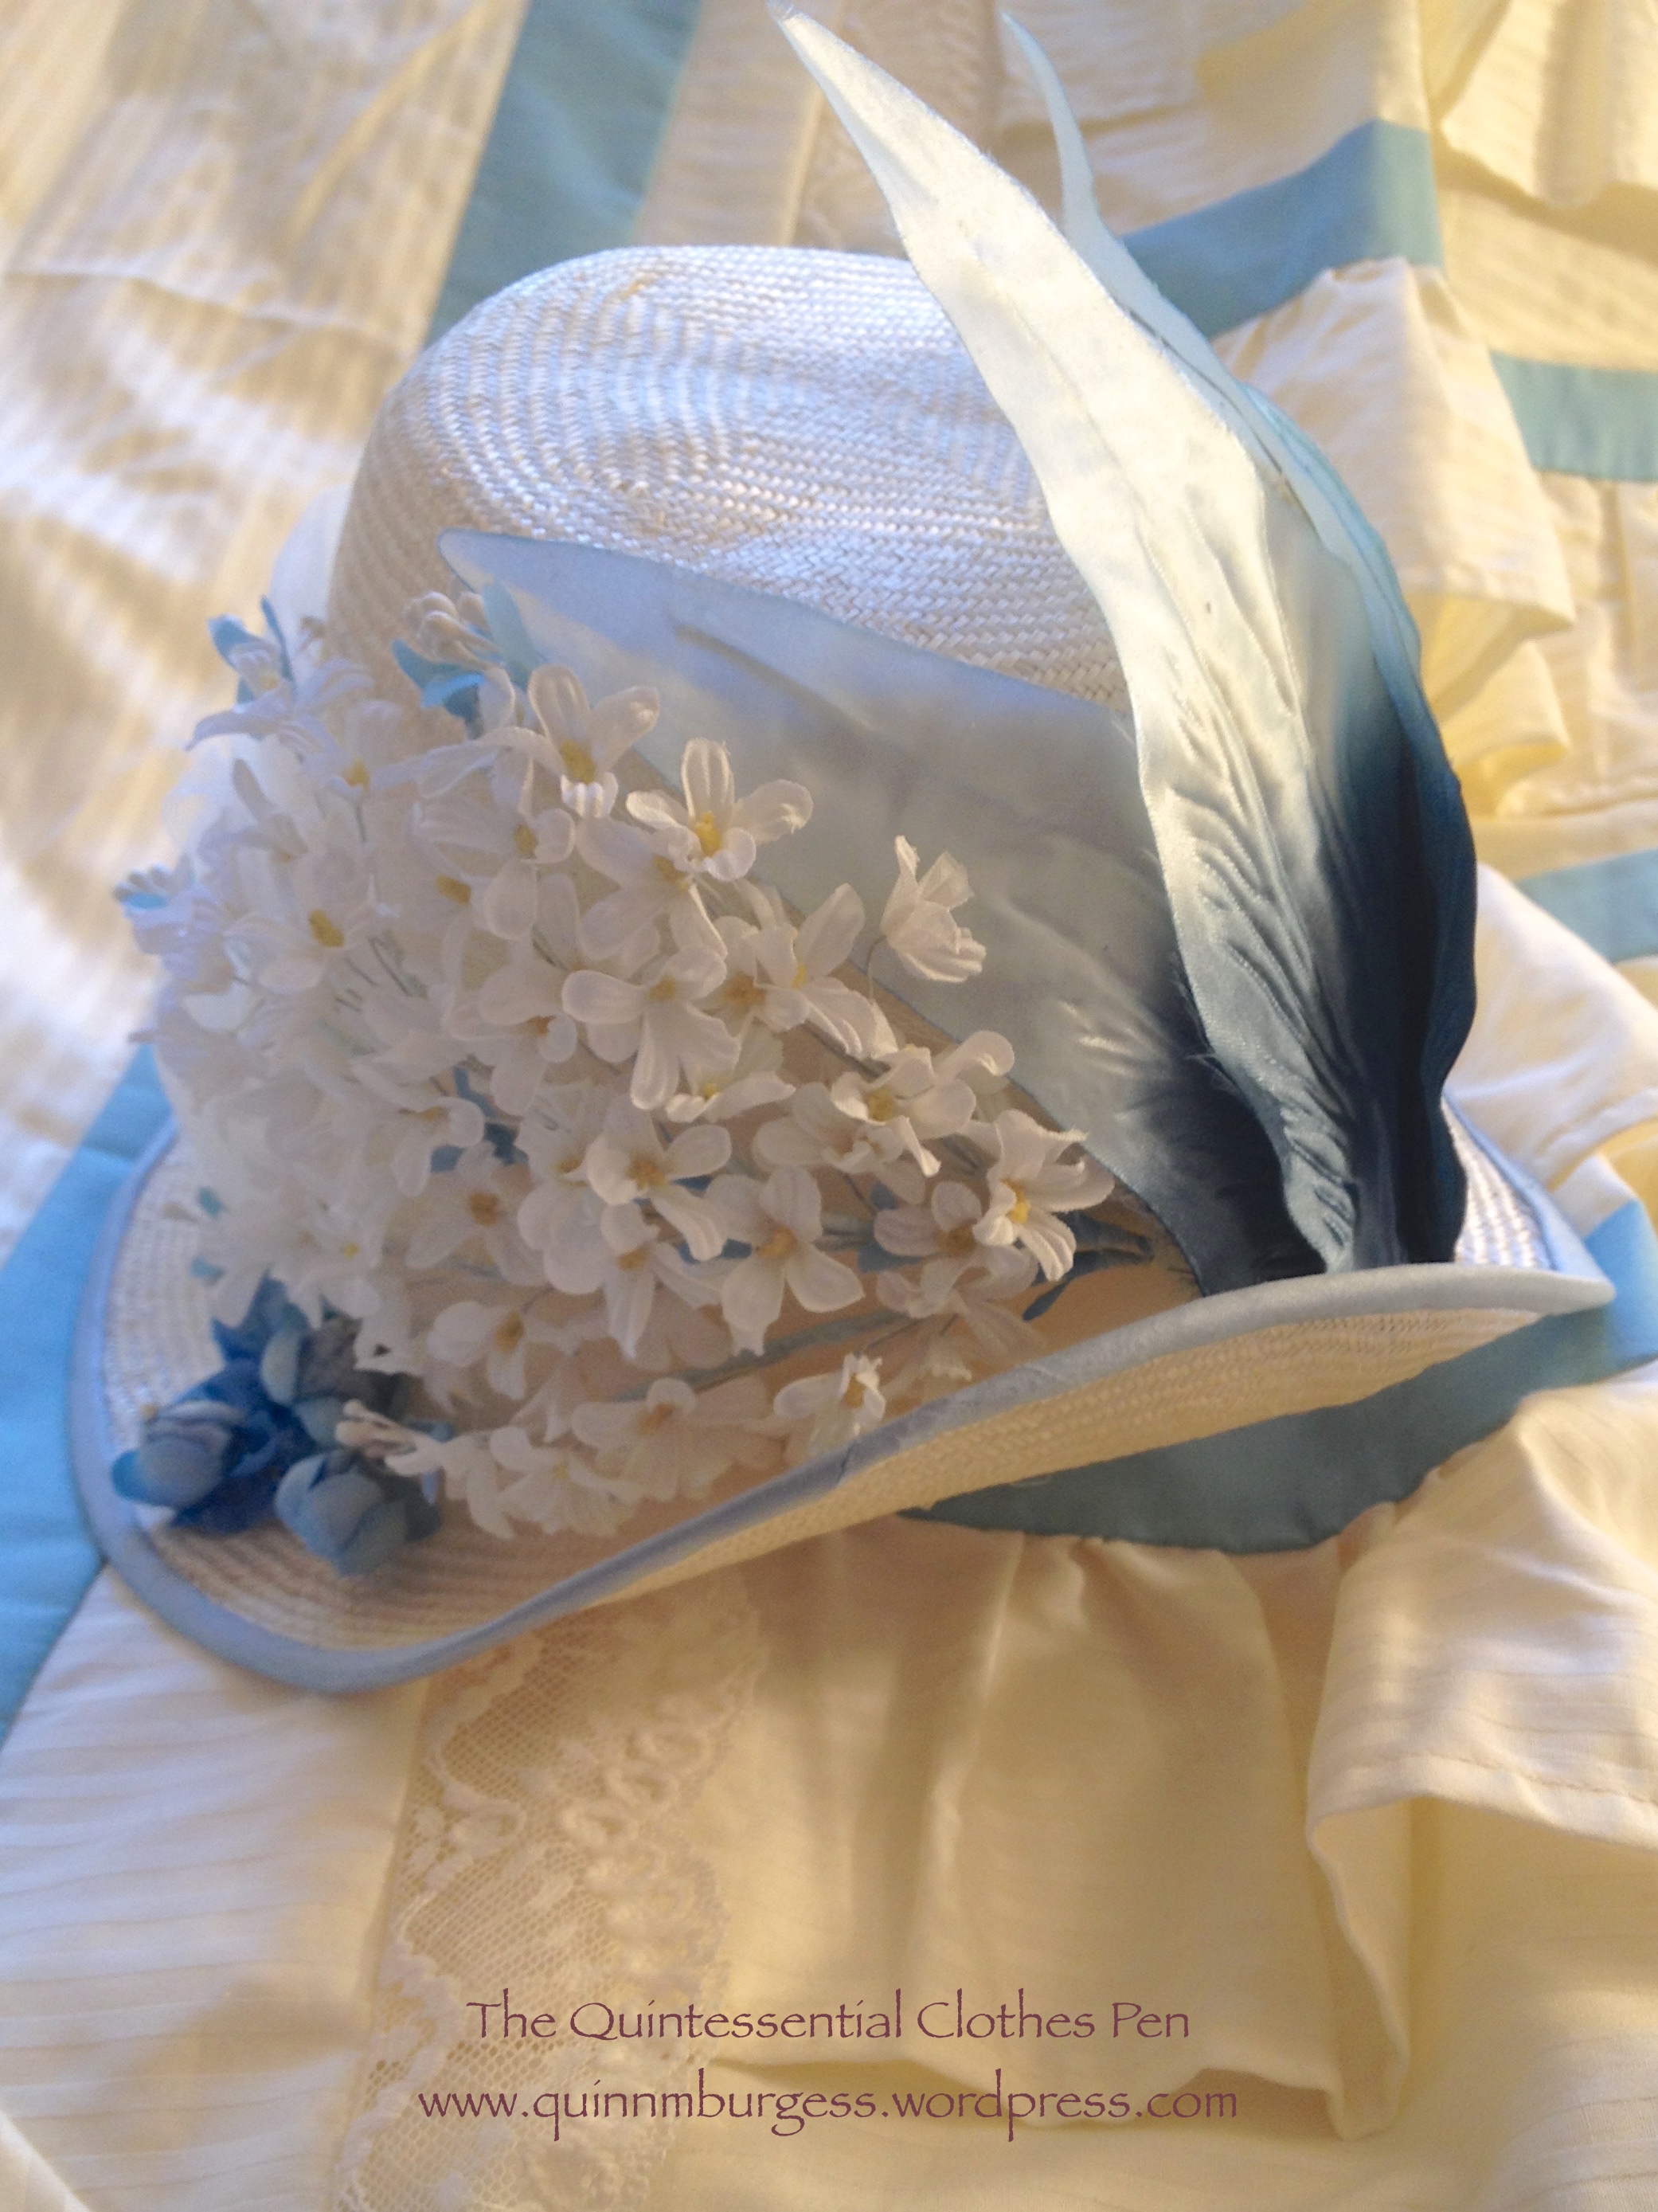
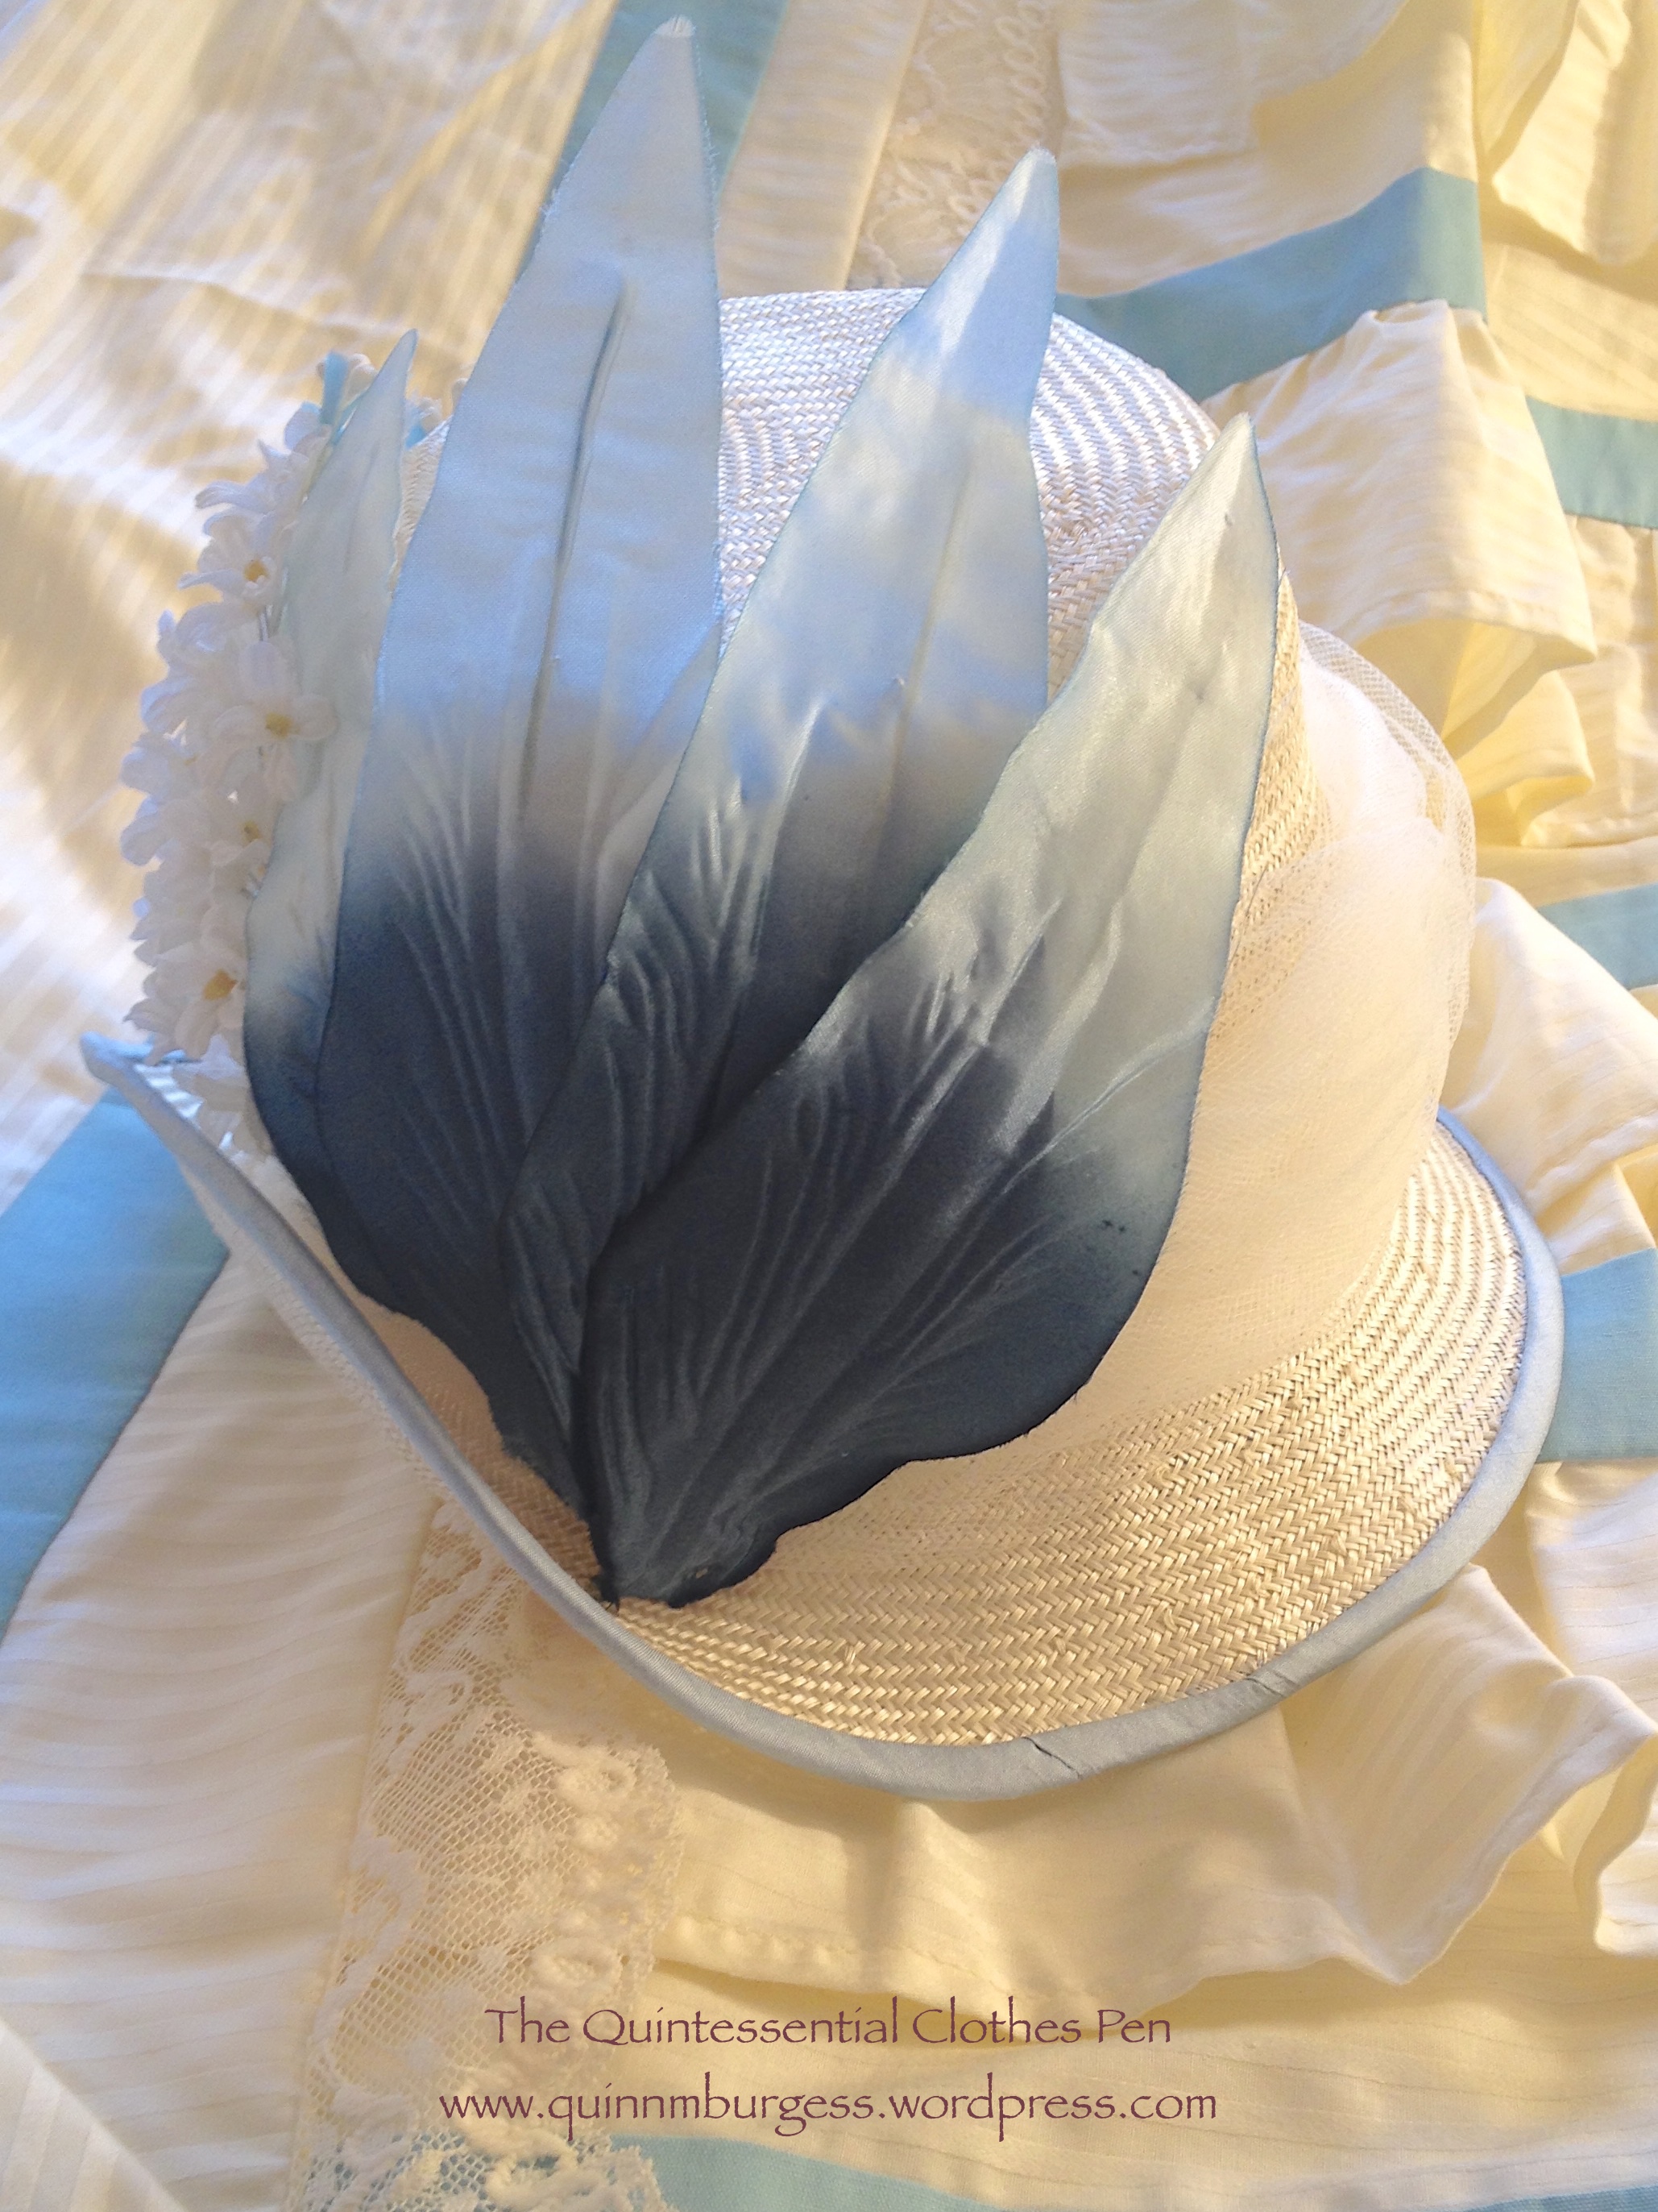
This month’s HSF/M challenge is “Accessorize.” In preparation for the first wearing of a new 1885 outfit next month, I made up a hat to match.
I chose to make a flowerpot shaped hat, a style that is quite common in the mid-1880s. You can see other examples of this style and others on my 1880s headwear Pinterest board.
The straw base of this hat has seen multiple previous shapes that failed in creating a look I was happy with. (You can see one of the old iterations in this previous post from 2012. And as a side note, I really need to wear the other clothes in that post again–it’s been awhile and they’re cute!) So I was happy to reblock the straw into a new shape (that I am very happy with!).
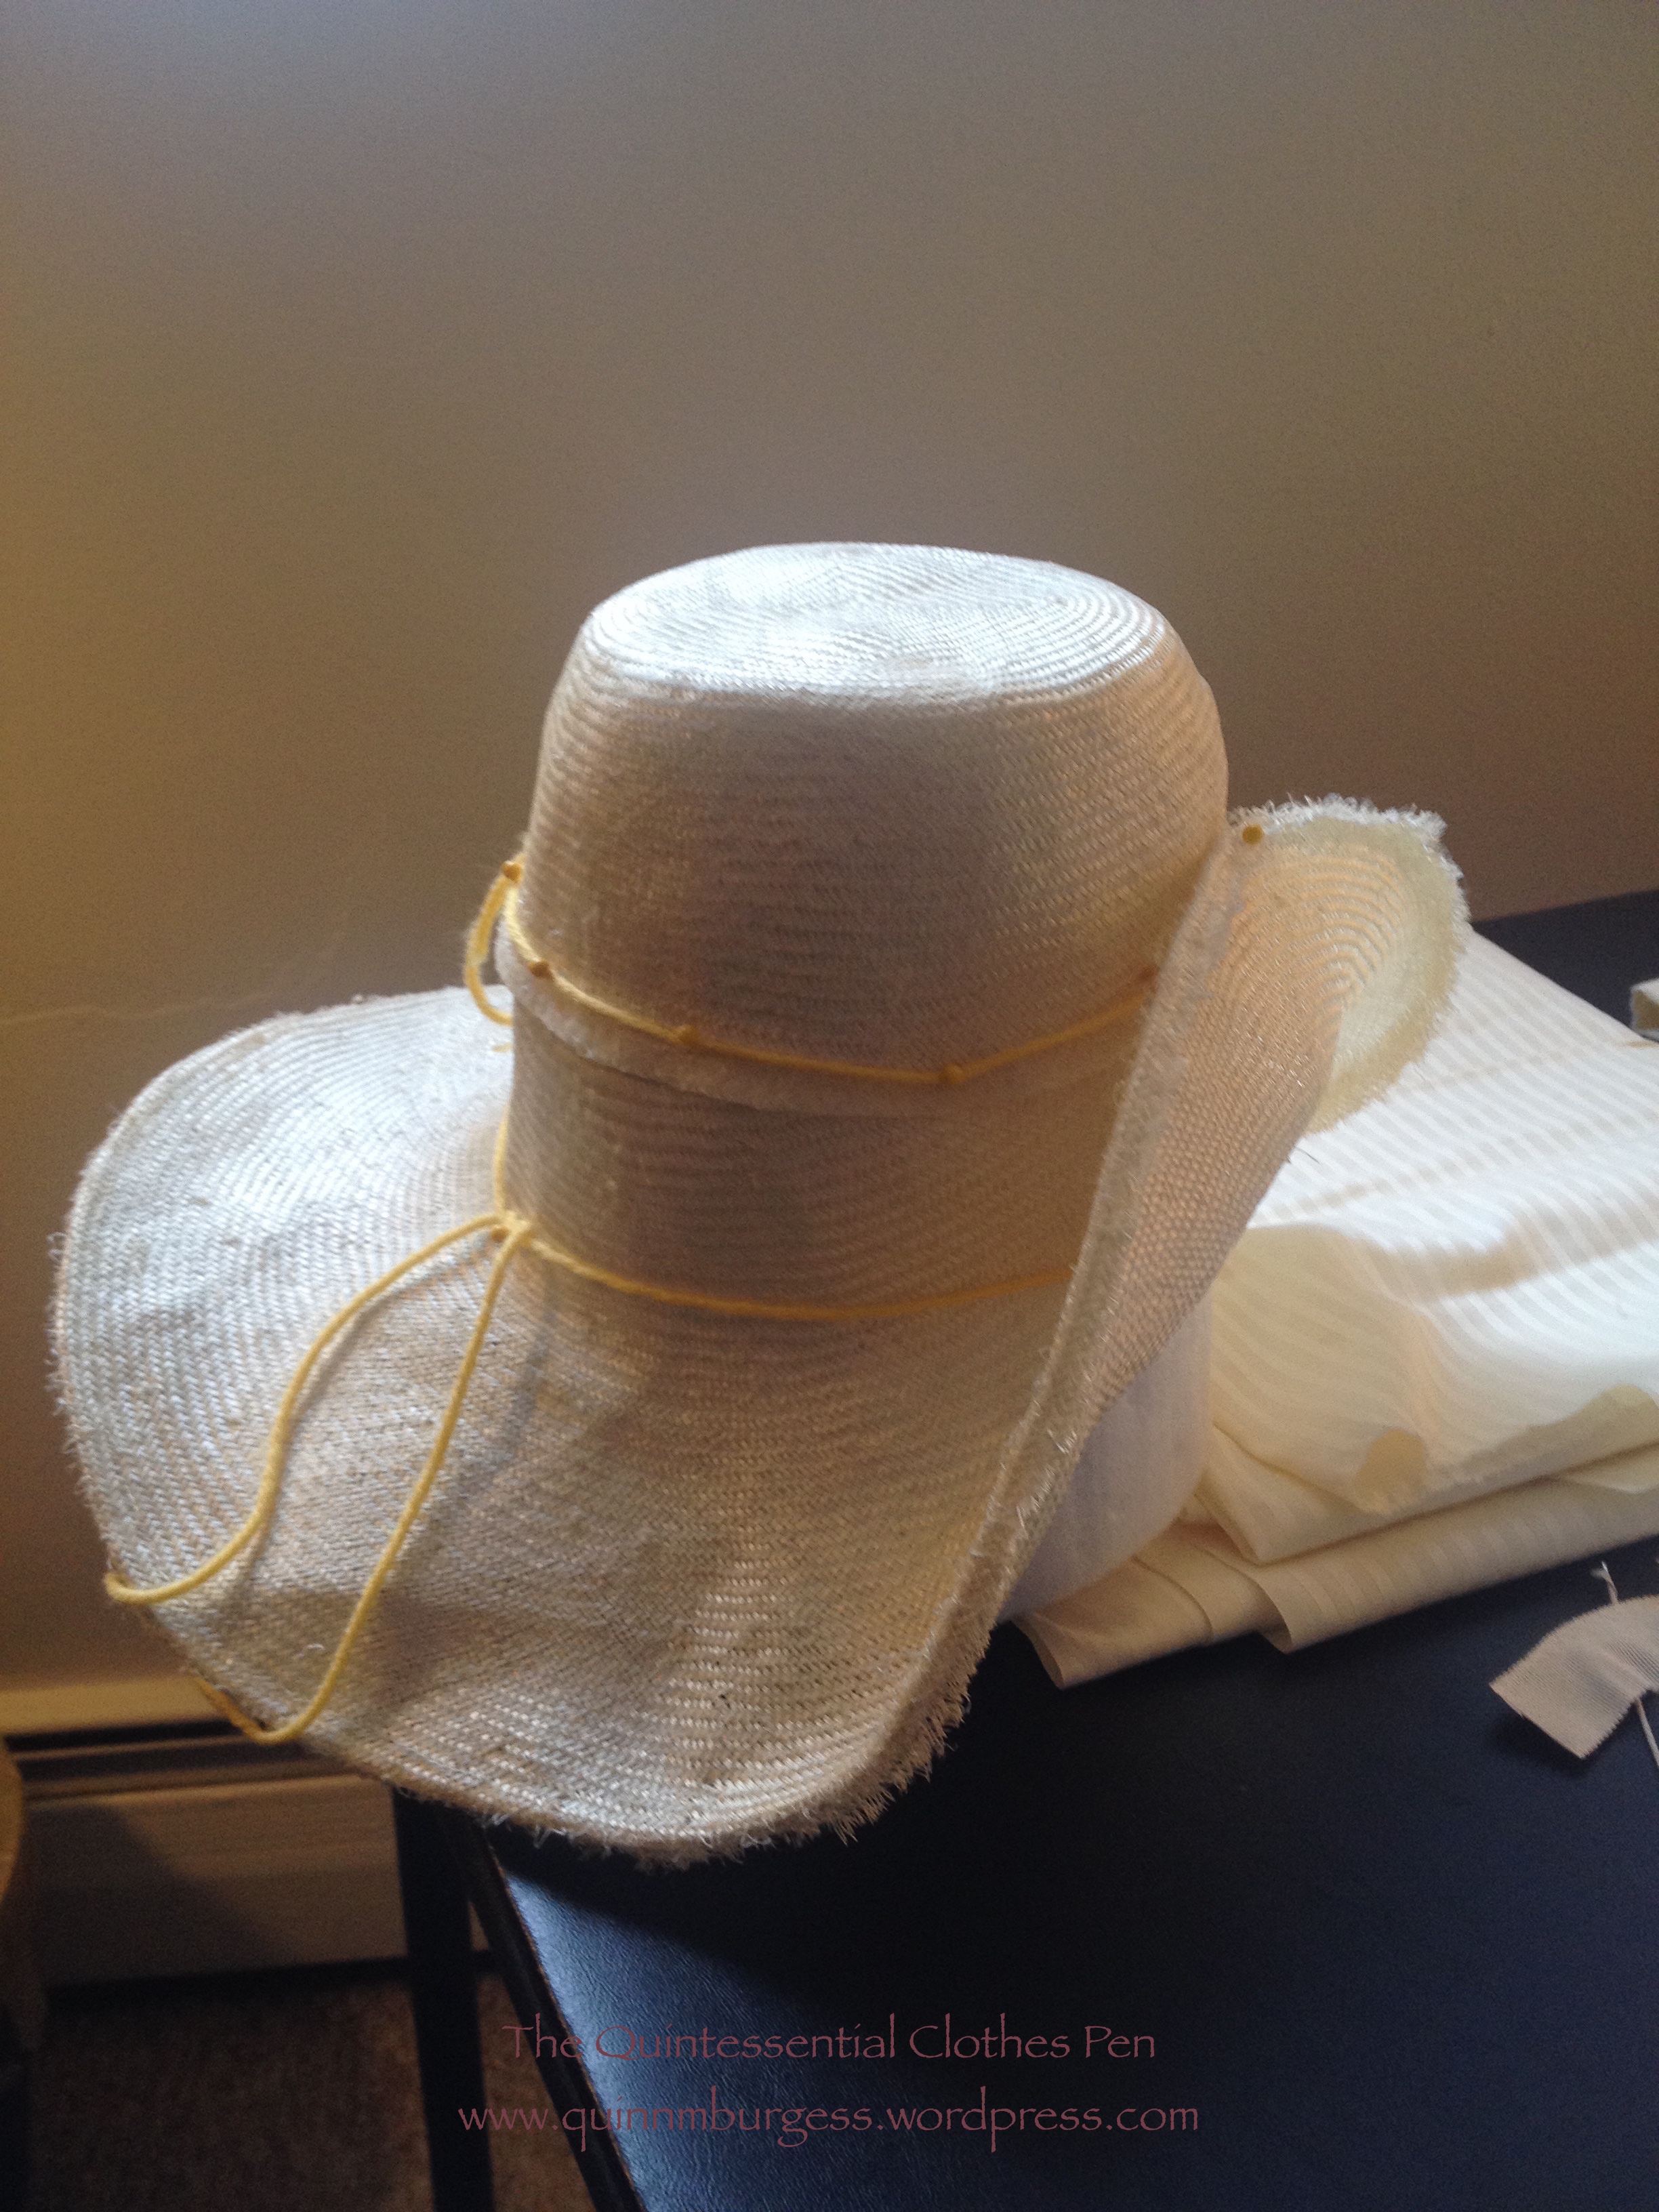
I made my hat block out of packing foam stuff that I masking taped around a lysol wipe container–make do with what you have, right? To begin, I wet the straw, then used a paintbrush to cover the straw with a layer of my sizing (a bit of elmer’s glue dissolved in water–no formula, I just winged it). In order to keep the straw in place while the hat was drying overnight I used yarn tied and pinned in strategic locations to keep everything in place. I wanted to use twine, but we’d run out, so I made do again. As you can see, there is a random seam in the middle of the hat crown, because in the past it had made sense to have a crown separate from a brim, but for this hat I needed some of the old brim to become the crown. (The seam was later covered by the tulle trimming.)
My inspiration for the trimming of this flowerpot hat is this fashion plate. The lady on the left happens to be wearing an outfit in the same colors as my outfit and the fashion plate is dated only one year later. I used materials I had on hand, but was inspired in general by her trim placement and scale.
Side view.Side back view.
Just the facts:
Fabric: A bit of blue silk shantung for binding and a length of 6″ wide tulle.
Pattern: None.
Year: c. 1885.
Notions: French crinoline for binding the straw edges, thread, millinery grosgrain for the inner hat band, elmer’s glue for sizing, and vintage millinery flowers.
How historically accurate is it?: As accurate as I can be using the research I’ve done and the materials that are available in 2015. It definitely passes Leimomi’s test of being recognizable in its own time.
Hours to complete: All hand sewn, so a few mostly on the brim binding. Then a whole lot of days debating over the placement of the flowers–actually sewing them on didn’t take very long.
First worn: Has not been worn yet, but I have plans to wear it in August.
Most of the work on this new corset was completed during the sewing process, which you can read all about in detail in this previous post. The remaining steps were to starch and steam mold the corset, to floss the corset, and to add lace to the top of the corset.
One of the most successful was the steam-moulding process developed by Edwin Izod in 1868, and still used in the 1880s to create elegant corsets such as this one. The procedure involved placing a corset, wet with starch, on a steam-heated copper torso form until it dried into shape. The result was a beautifully formed corset, whereby ‘the fabric and bones are adapted with marvellous accuracy to every curve and undulation of the finest type of figure’ (The Ladies’ Gazette of Fashion advertisement, London July 1879).
To begin, I made a solution of cornstarch dissolved in water. I put 2 tsp to 350 ml water, but wound up using only about 1/5 of that. On a scrap, I tried applying the starch solution with a spoon, but decided against that because it left a visible starch crust on the fabric as it dried. What I found worked better for even distribution of the starch solution was a spray bottle. I sprayed the inside of my corset (the coutil layer) until it was thoroughly damp, then put it onto Squishy (since I don’t have a steam-heated copper torso of myself available, darn!): she’s a squishable dress form that I had previously padded to be close to my measurements and proportions (that’s an important point, that she had my proportions–padding in the right areas so the corset would dry into my shape!) and covered with a plastic garment bag so the starch would stay on the corset. Once the corset was on the form, I steamed it all over using a Rowenta Steam-n-press hand held steamer about three or four times. Then I intermittently steamed it again while it dried overnight.
Steaming the starched corset on Squishy.
I only did one application of starch and I believe it had some effect. It’s not as stiff as cardboard and able to stand up on its own, as I have heard some steam molded corsets described, but it does seam to want to create the curves that were patterned into it with ease and I do think that the bones took on a little of the curvy shape during the drying process as well. (Here is an example of an extant very stiff steam molded corset. Look at how well it retains its shape! I want to do some more research regarding the Symmington corset company but that’s going to have to wait a bit.)
After the corset was dry, I flossed the boning channels using ivory silk thread and the flossing pattern from my inspiration corset. Unfortunately, I only had enough of the thread to floss the bottom of the channels… so I have to deviate from my inspiration a little and not have flossing across the top.
The last step will be to add lace across the top of the corset. I’d like to use the same lace that I’m using to trim my in-progress 1885 bustle dress, but I’ve only got a small bit left and I want to make sure the dress has enough before I use it on the corset. I’ve started figuring it out but am not confident yet that I have enough, so I’m going to hold off on taking absolute final pictures of the corset with the flossing and lace until I’ve officially decided that point. Regardless of the lace issue, we’re going to call this corset done, because it is entirely wearable at this point, just in time for it to qualify for the HSF/M #6: Out Of Your Comfort Zone!
Just the facts:
Fabric: A remnant of yellow silk duchess satin, a remnant of ivory linen, and white herringbone coutil.
Pattern: Created by me (more details in this blog post about mockups and this one about the pattern pieces themselves).
Year: c. 1885
Notions: 38 bones (34 of which are spiral steel and 4 of which are flat steel), a metal busk, metal grommets, cotton twill tape, thread, silk thread for flossing, and a lace for the corset (with the addition of decorative lace sometime soon).
How historically accurate is it?: As accurate as I can be using the research I’ve done and the materials that are available in 2015. I think it passes Leimomi’s test of being recognizable in its own time.
Hours to complete: Many! Patterning, cutting, sewing, finishing…
First worn: Only for fitting the mockup of the dress that inspired it–but I plan to wear it with that dress in August.
Total cost: The fabrics were all from the stash, as were most of the notions, except for the bones and busk, for which I paid about $50.
New techniques: Steam molding! But I also added a few new details to the corset construction process. Details in this construction in detail blog post.
Reflecting back on the process, I think I probably could attempt to starch the corset with a stronger solution or more applications, but at this point I’m satisfied and ready to move on to the many other things I’d like to sew this summer, including the 1885 bustle dress that sparked this project in the first place! (I’ve actually already moving ahead with that–I fit the mockup bodice over the corset and was very pleased! More on that in a few weeks hopefully!)
I used the deadline of the HSF/M Challenge #2: Blue to finish the nagging little things on my 1811 Elusive Blue evening gown that either didn’t make it to completion in time for the first wearing last April or that bothered me after wearing it that first time. The changes: lengthening the hem of the underdress, adding a drawstring below the bust to control where the fullness and folds will fall beneath the overdress, fixing a section of pearls on the back hem that had come loose, and creating trim to finish off the sleeve openings.
The trim on the sleeve openings is probably the most noticeable and interesting of the things that brought the dress to completion.
Just the facts:
Fabric: Scraps of elusive blue and dark blue fabric from the original dress.
Notions: Extra pearls, thin yarn for cording, and thread.
How historically accurate is it? The trim is directly inspired by this extant gown at the Met and is entirely hand sewn. I think it would be recognizable by someone in 1811, so the only points off would be for inaccurate fabric choice. Let’s say 90%.
Hours to complete: As usual, I did not keep track for the changes/finishing or for the original construction. I can safely say, “a lot.”
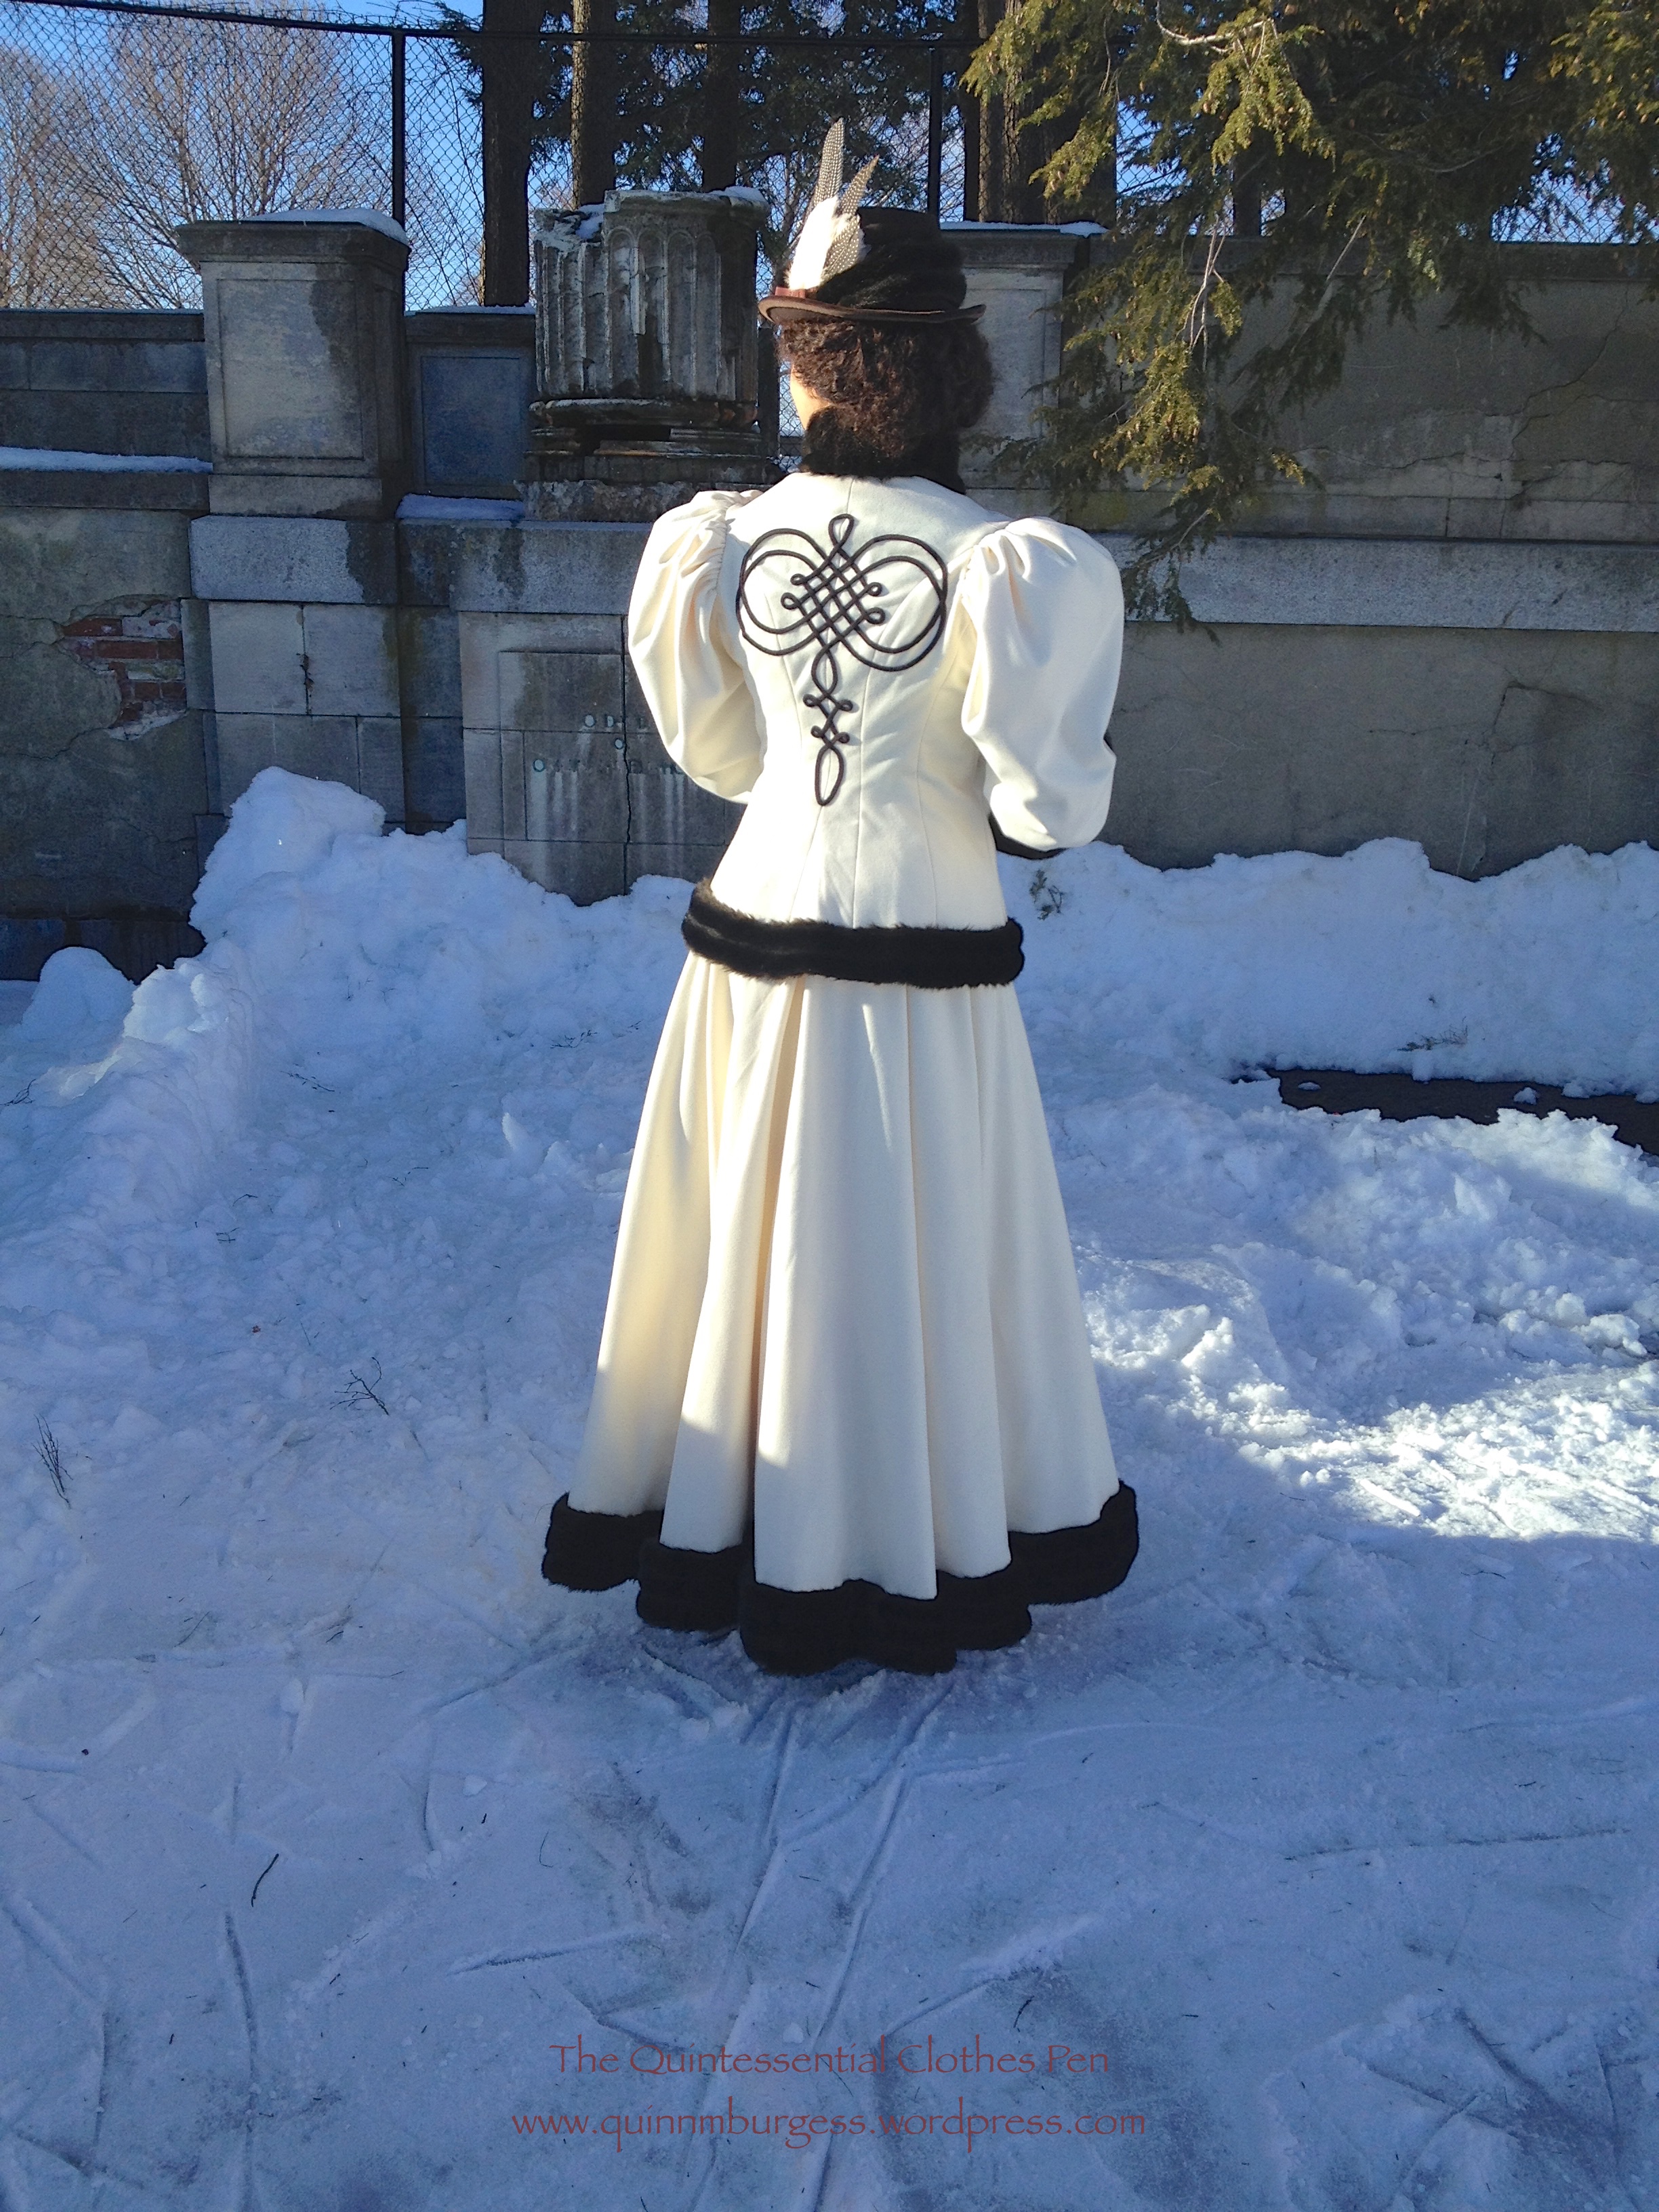
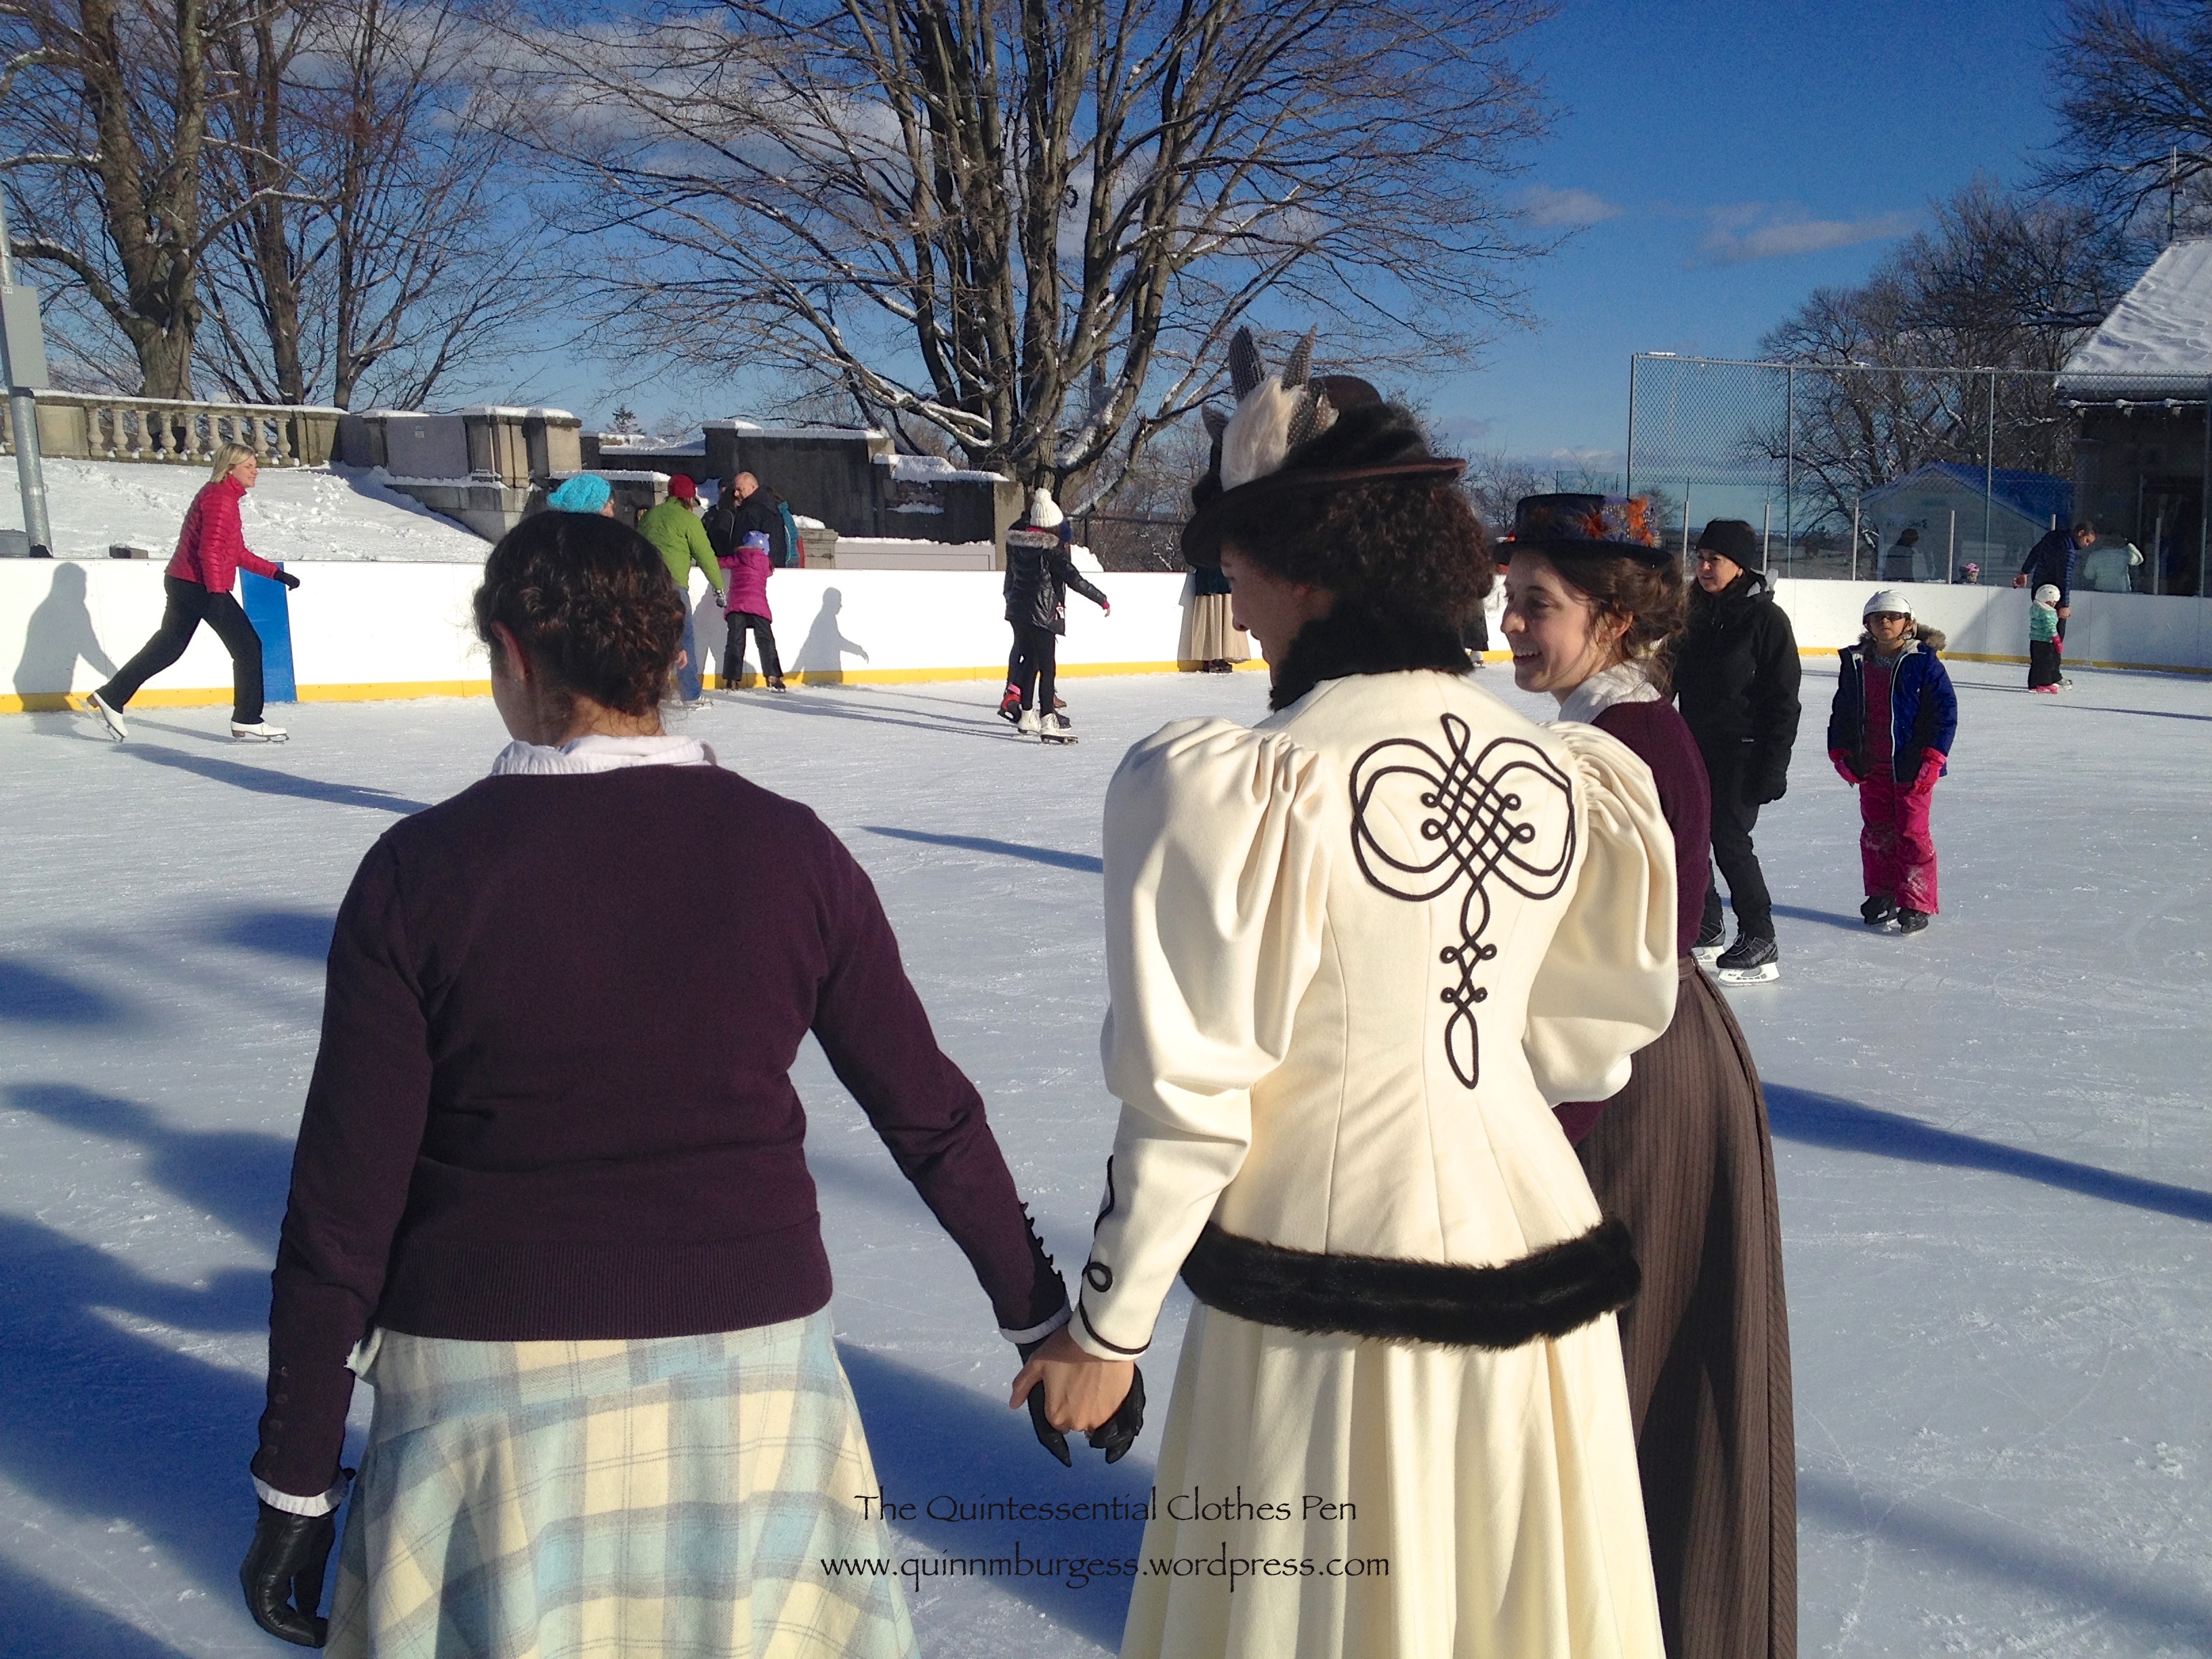
This is one of my favorite outfits of all time. I just want to hug myself, with all the fur, and I love the trim on the back! The whole thing is so cozy and so hug-able and the skirt has such a nice drape and the accessories work so well… and I actually got to go skating in it! I am just utterly chuffed (to use a British word) with the whole thing!
I was on the fence about whether this outfit would apply to the Historical Sew Fortnightly/MonthlyChallenge #1: Foundations, but then I read Leimomi’s teaser post about her foundation entry in which she reminds us about different interpretations of foundations and the intent of this challenge to create loose guidelines open to interpretation.
I was convinced (or pushed off the fence, if you prefer to think of it in that amusing way). I’m claiming my all new 1895 skating outfit for the first challenge of the new year! It does rather stretch the idea of foundations. Is the skirt a foundation because it is literally worn below the jacket, thus being a foundation as you would think of one in a building? Or is the bodice a foundation, because my direct inspiration is a lonely jacket without a skirt and therefore it is the foundation of the outfit because I wouldn’t have made the skirt without having the jacket? Either way, there is an element of a foundation in there.
Just the facts:
Fabric: 5 yds of ivory wool, about ⅓ to ½ yd of dark brown faux fur, probably about 3 yds of scrap muslin for flat lining the jacket, a bit of scrap canvas to stiffen the collar, and a bit of ivory flannel to line the inside of the collar.
Pattern: Made by me and based on my inspiration jacket as well as patterns published in Authentic Victorian Fashion Patterns (a Dover book).
Year: c. 1895.
Notions: 5 yds of brown braid, thread, a bit of high loft polyester batting to keep the sleeves puffed out, about 1 yd of ivory hug snug to finish the bottom of the jacket, hooks and bars for the skirt, and thread.
How historically accurate is it? Pretty darn good. Definitely recognizable by someone in the 1890s. The construction is accurate, aside from the use of hug snug instead of bias and faux fur instead of real fur. So, 95%.
Hours to complete: Um… As usual, I did not keep track. I definitely spent at least 15 hours the few days before the event sewing on my braid and fur trim… Plus full days of pattern making, fitting, cutting, and sewing. Maybe 30-40 hours? I care so much more about the finished project than the time it takes to get there! And I loved sewing this, so I didn’t mind that it took time!
Total cost: $75 for the wool, probably about $8 for the fur yardage I used for this project, $4 for the braid, and the rest from the stash = $87
My accessories were a matching fur muff that I made a few years ago and wore once for caroling (with my as-yet-undocumented 1860s winter cape) but more often with my 1917 winter ensemble and a revamp of my 1883 wool hat. I didn’t have time to make a new hat because of all the last minute fur and trim sewing, so I pinned a fur scrap around the 1883 hat and added some feathers to stand up a bit more like 1890s hats and called it good. My main inspiration (and the reason I feel it was an acceptable looking style to have the squashy fedora hat look in the 1890s) was this image.
For good measure, here’s my Pinterest board for the entire project. And here are pictures of us skating (with ice skates: all our snow and cold weather does occasionally come in handy here in Boston)!
Yes, we just crashed a local outdoor ice rink on a Sunday afternoon. One of the attendees even wore vintage skates! Turns out they can be hard to skate in because they’re not very supportive… but they looked fantastic! We got lots of comments from people asking what we were doing, why we were dressed up, and that we looked good. I was asked by multiple groups of young girls why I was dressed up and one group in particular asked what the swirly thing was that I had, which I got to explain was a muff to keep my hands warm!
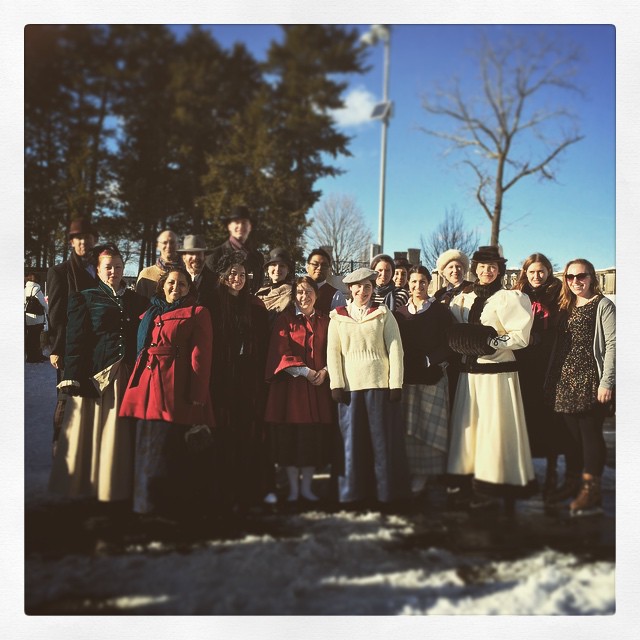
Here’s our skating group. People came in a variety of late 19th century and early 20th century winter outfits as well as modern clothes.
With my skating ensemble I wore fleece lined tights (modern, but warm so I didn’t care), knee high bamboo socks (modern again), my 1903 silk petticoat (super useful for the 1890s, also), a modern tank top (instead of combinations, because I needed to go to work later in the afternoon and change out of my outfit in the back seat of my car without being indecent…), my 1895 corset, and a long sleeve modern waffle tee (mostly to shield my skin against the wool seam allowances and also for warmth). And I was perfectly warm wearing this out for skating on a day that was sunny and right around freezing. In fact, with the muff and wool hat I actually was too warm at times.
Pleased, chuffed, and smiling all afternoon! So fun! Maybe we will get to go skating again this winter!
…and it qualifies for the HSF Challenge #23: Modern History! This particular challenge is to make something historical or historically inspired that is wearable in an everyday context. And a scarf like this: absolutely wearable in my modern life if I choose!
Just the facts:
Fabric: 2 skeins, of unknown length, of probably acrylic yarn.
Pattern: Made by me. (More details below.)
Year: 1910s. (More details below.)
Notions: None!
How historically accurate?: Ideally, it would have been made of angora yarn, but I had the acrylic on hand and didn’t want to spend extra money (angora yarn isn’t cheap, you know!). Acrylic wasn’t invented until 1941. However, the dimensions of the scarf are accurate, the pattern is entirely plausible for the 1910s, and the style is taken directly from an ad from the 1910s. So I’d say 90%.
Hours to complete: No idea. I knit while watching Netflix and didn’t pay any attention.
First worn: In Plymouth, MA the weekend before Thanksgiving while portraying a suffragette (as I did last year).
Total cost: $2.50 for the knitting needles and $1 for the yarn = $3.50.
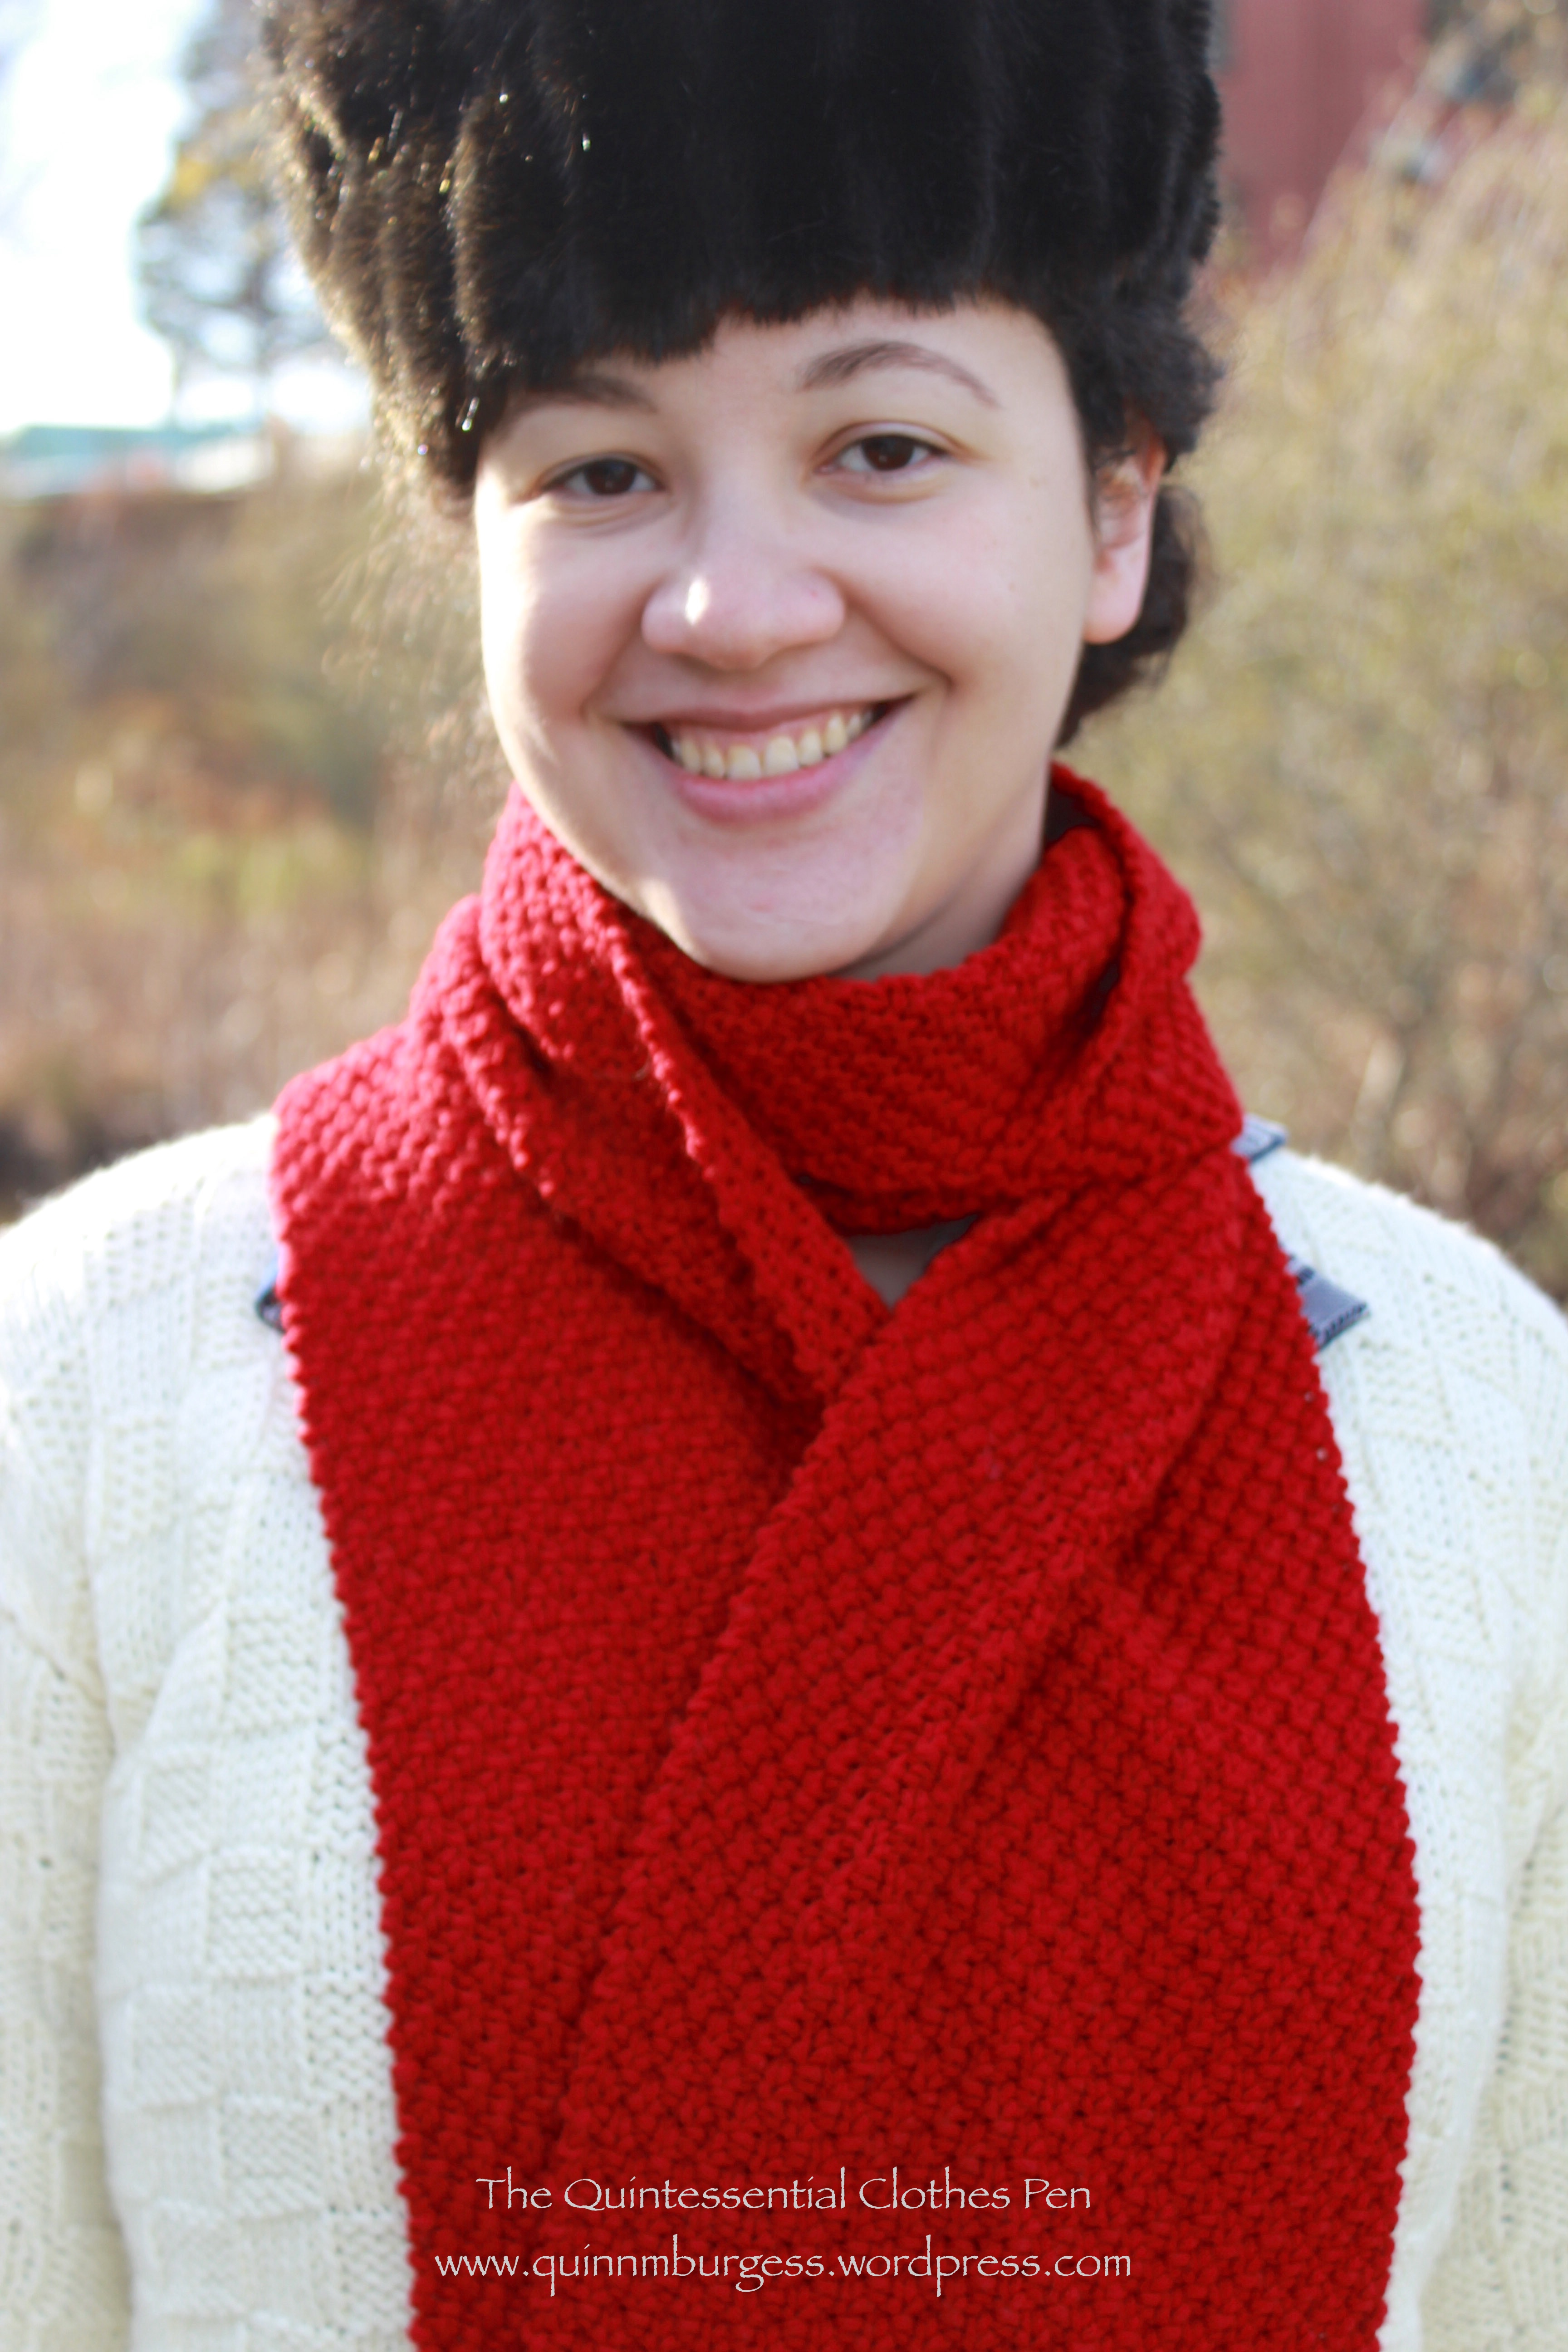
The color is perfectly suited to the holiday season, being cranberry red just like the fresh berries I used to make homemade cranberry sauce last week. (That was really easy and tasty, by the way–I bought Ocean Spray cranberries and the recipe was on the bag!)
Cranberry red!
The pattern is moss stitch. I knit an extra row at the beginning and end just to provide some stability. Then, K2, P2 all the way across for two rows. P2, K2 all the way across for the next two rows. Repeat. Super easy. I keep track of what row I’m on in a little notebook with all my knitting patterns in it. That way I know where I’m at while I’m watching Netflix or when I’ve put it down and picked it up on a different day.
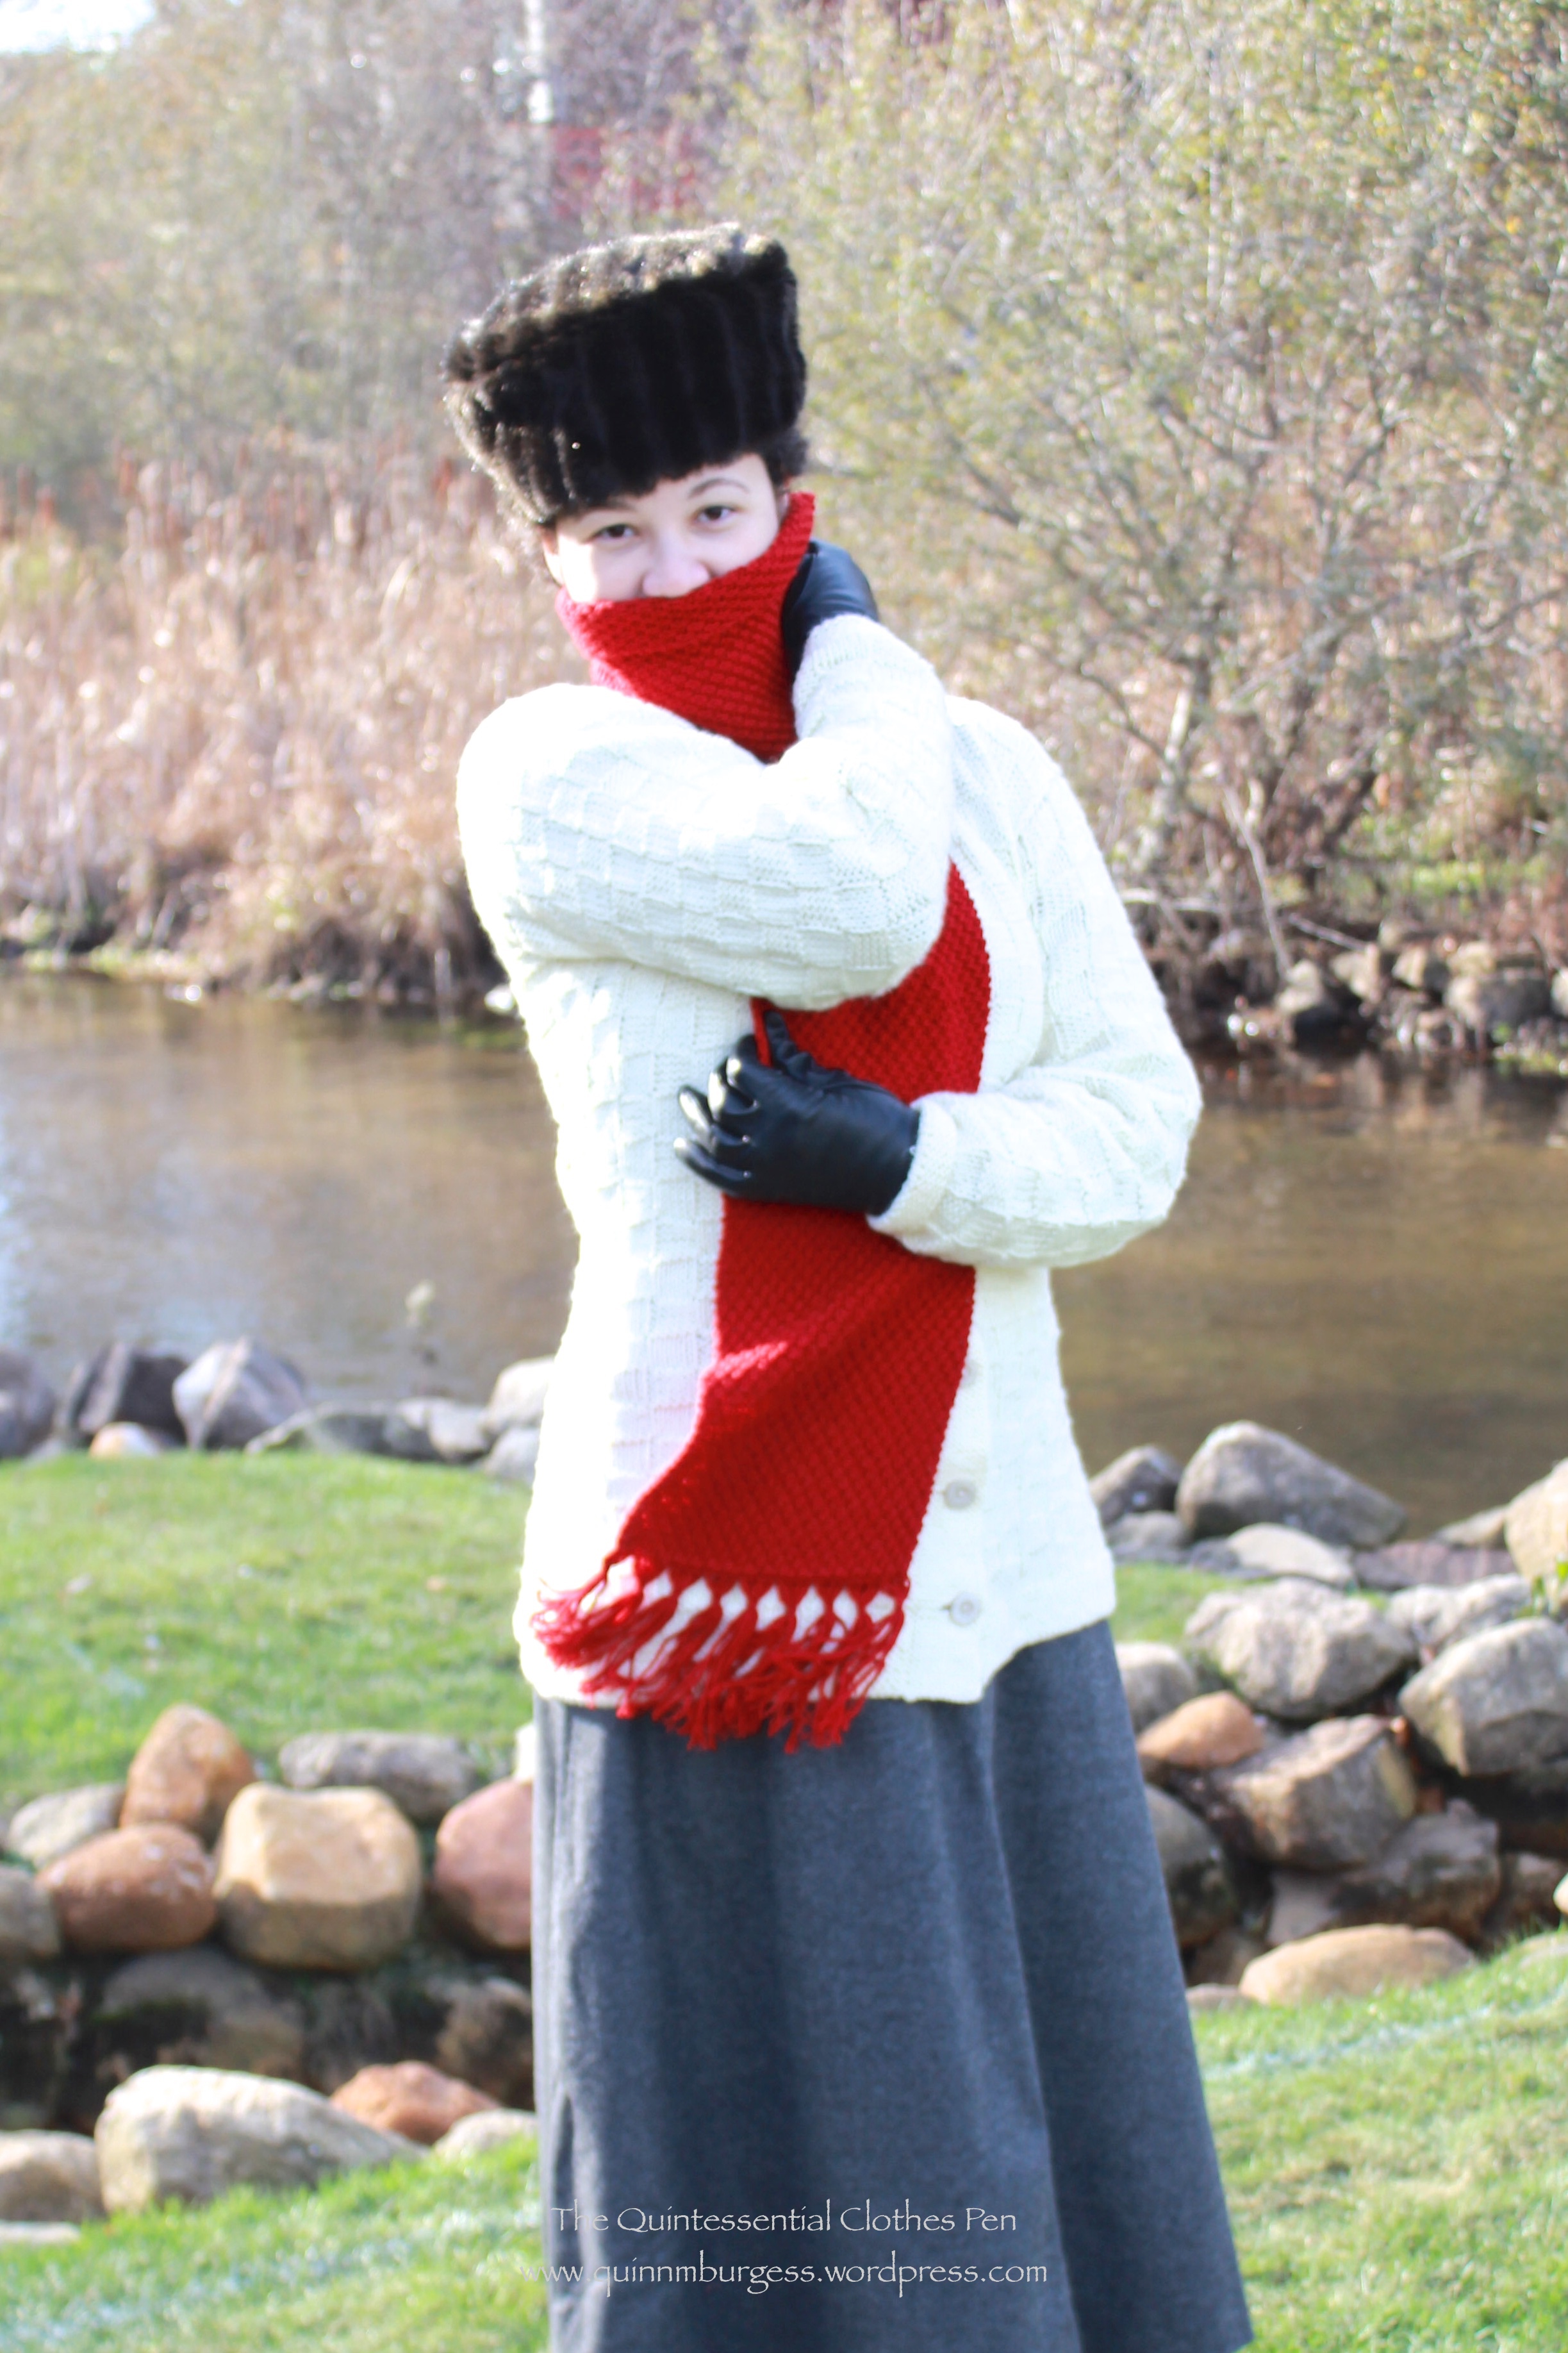
The dimensions are taken directly from a 1910s knitted wear ad that Lauren from Wearing History shared on her blog, here. I made my scarf 8” wide and 68″ long so it would provide maximum warmth while being worn. It also helps that it’s acrylic, which doesn’t breath and keeps you toasty. The fringe is about 6″ long and tied into 9 tassels, just as seen in the ad on a few of the scarves (turns out that I had the perfect number of fringe pieces to divide by 9 without planning!).
I had hoped to make these gloves from a 1910s pattern in matching yarn, but didn’t even start them. Perhaps it’s something that I can do next year! I’ve never knit gloves and I’ve only just taught myself to knit in the round, so while the cables in the pattern are not at all daunting, the simple idea of making gloves is. But challenges are fun sometimes! And I’m very pleased with the scarf.
































 The Quintessential Clothes Pen