This post is part of my ongoing and slow work on a 1790s ensemble.
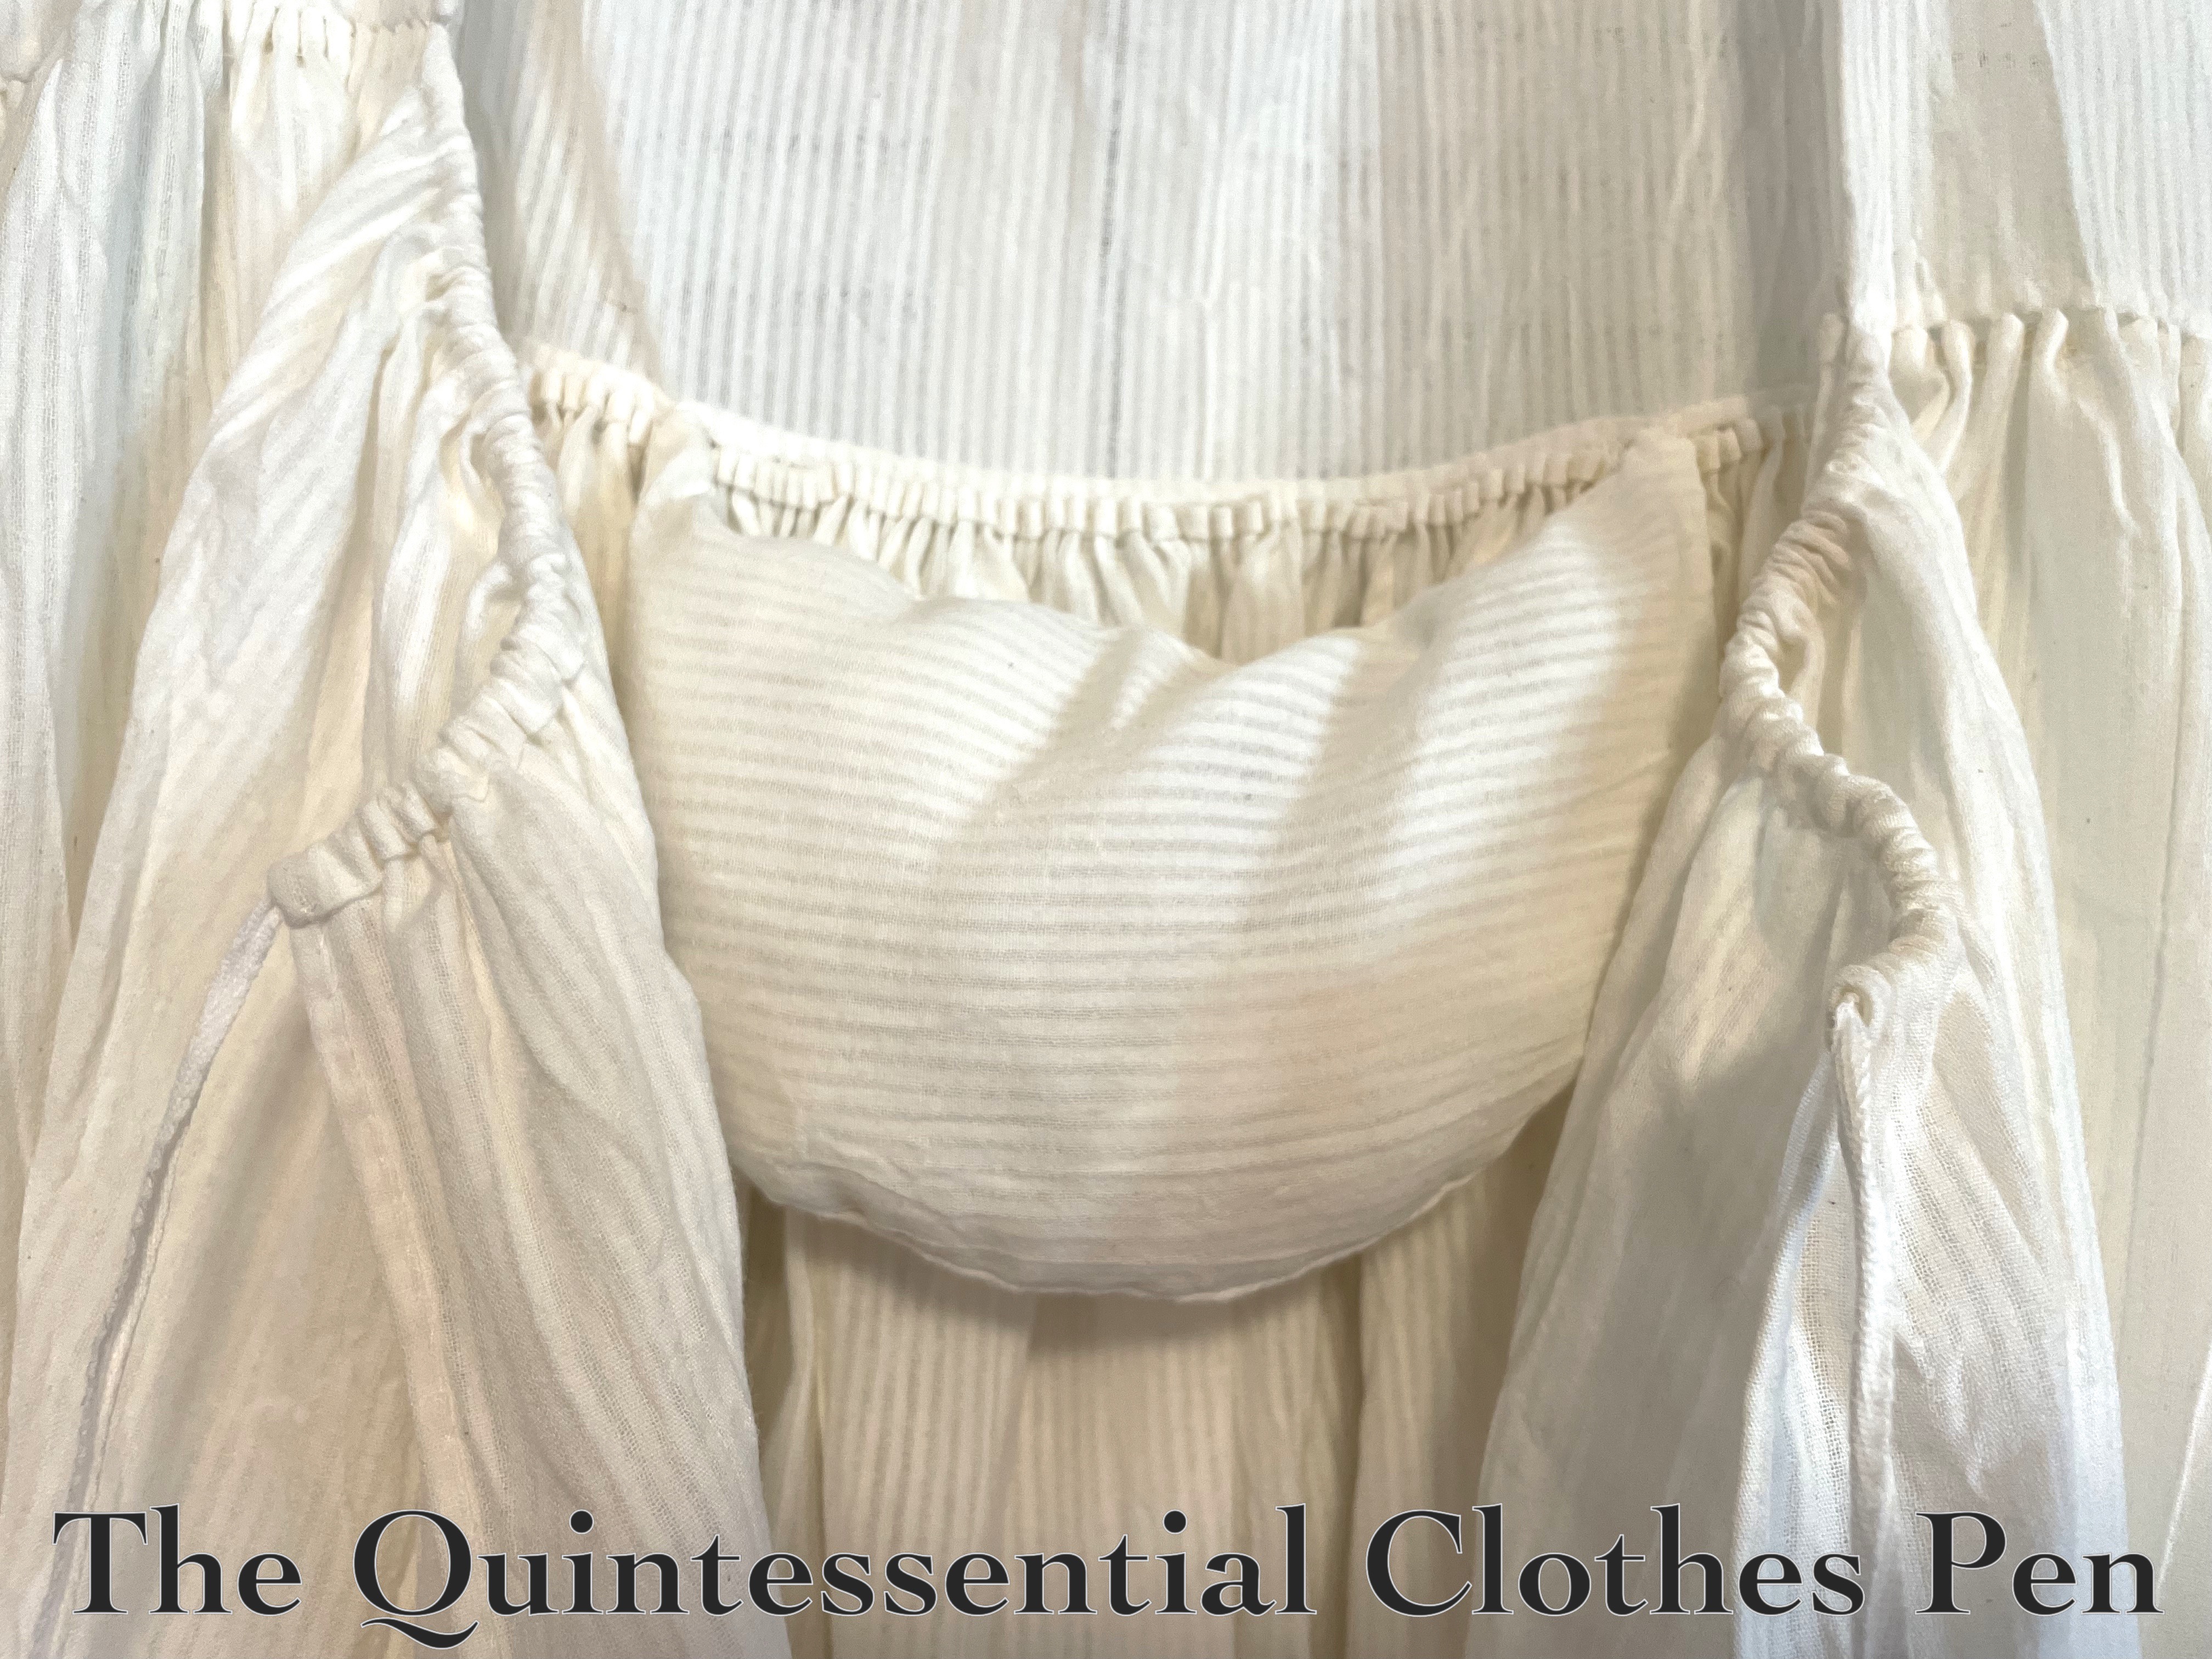
Last year, I was working on a petticoat and bum pad to create a foundation for a dress. The petticoat was pretty much done by the end of the year. The bum pad needed just a final fitting for me to decide if I liked the plumpness before sewing it closed.
After a fitting when the dress was very close to done I determined that I did like the plump pad (stuffed with scraps of the white striped cotton the petticoat and bum pad are made of).
With the bum pad being good to go, I was finally able to finish up the petticoat!
This is my entry for the Historical Sew Monthly 2024 Challenge #8 Stripes and Dots:
Make something using striped or dotted material. The stripes or dots can be printed on the material, knitted/woven in to the material, or created with surface embellishment (ex: embroidery). Textural stripes or dots (i.e: those that are the same colour as the base fabric) are permitted!
This petticoat is made from fabric with a narrow woven in stripe.
Just the facts:
Fabric/Materials: Approximately 3 yards of white striped cotton.
Pattern: From The American Duchess Guide To 18th Century Dressmaking by Lauren Stowell and Abby Cox.
Year: c. 1795.
Notions: Approximately 1 yard of 1/4″ white cotton twill tape, 4 hooks and loops, and thread.
How historically accurate is it?: 100%. Entirely hand sewn, made from plausible fabric, using a pattern that is backed up by lots of research… I’d say this one is pretty accurate!
Hours to complete: About 2 ¼ hours.
First worn: Not yet worn.
Total cost: Approximately $4. The fabric was just $1 per yard when I purchased it years ago and the twill tape and hooks/loops were bought in super bulk and probably cost no more than $1 for all of the bits that I used.
More details:
The petticoat closes with a drawstring, as can be seen below. I love this, as it will make it easily adjustable (a common theme in my recent sewing projects!)
The front opening is finished on both sides with a narrow hem. It’s long enough that I didn’t feel the need to reinforce the bottom, as I don’t think I’m likely to rip it getting in and out.
The next photo shows that I left extra seam allowance at the sides and shoulder seams… again on the theme of garments being alter-able!
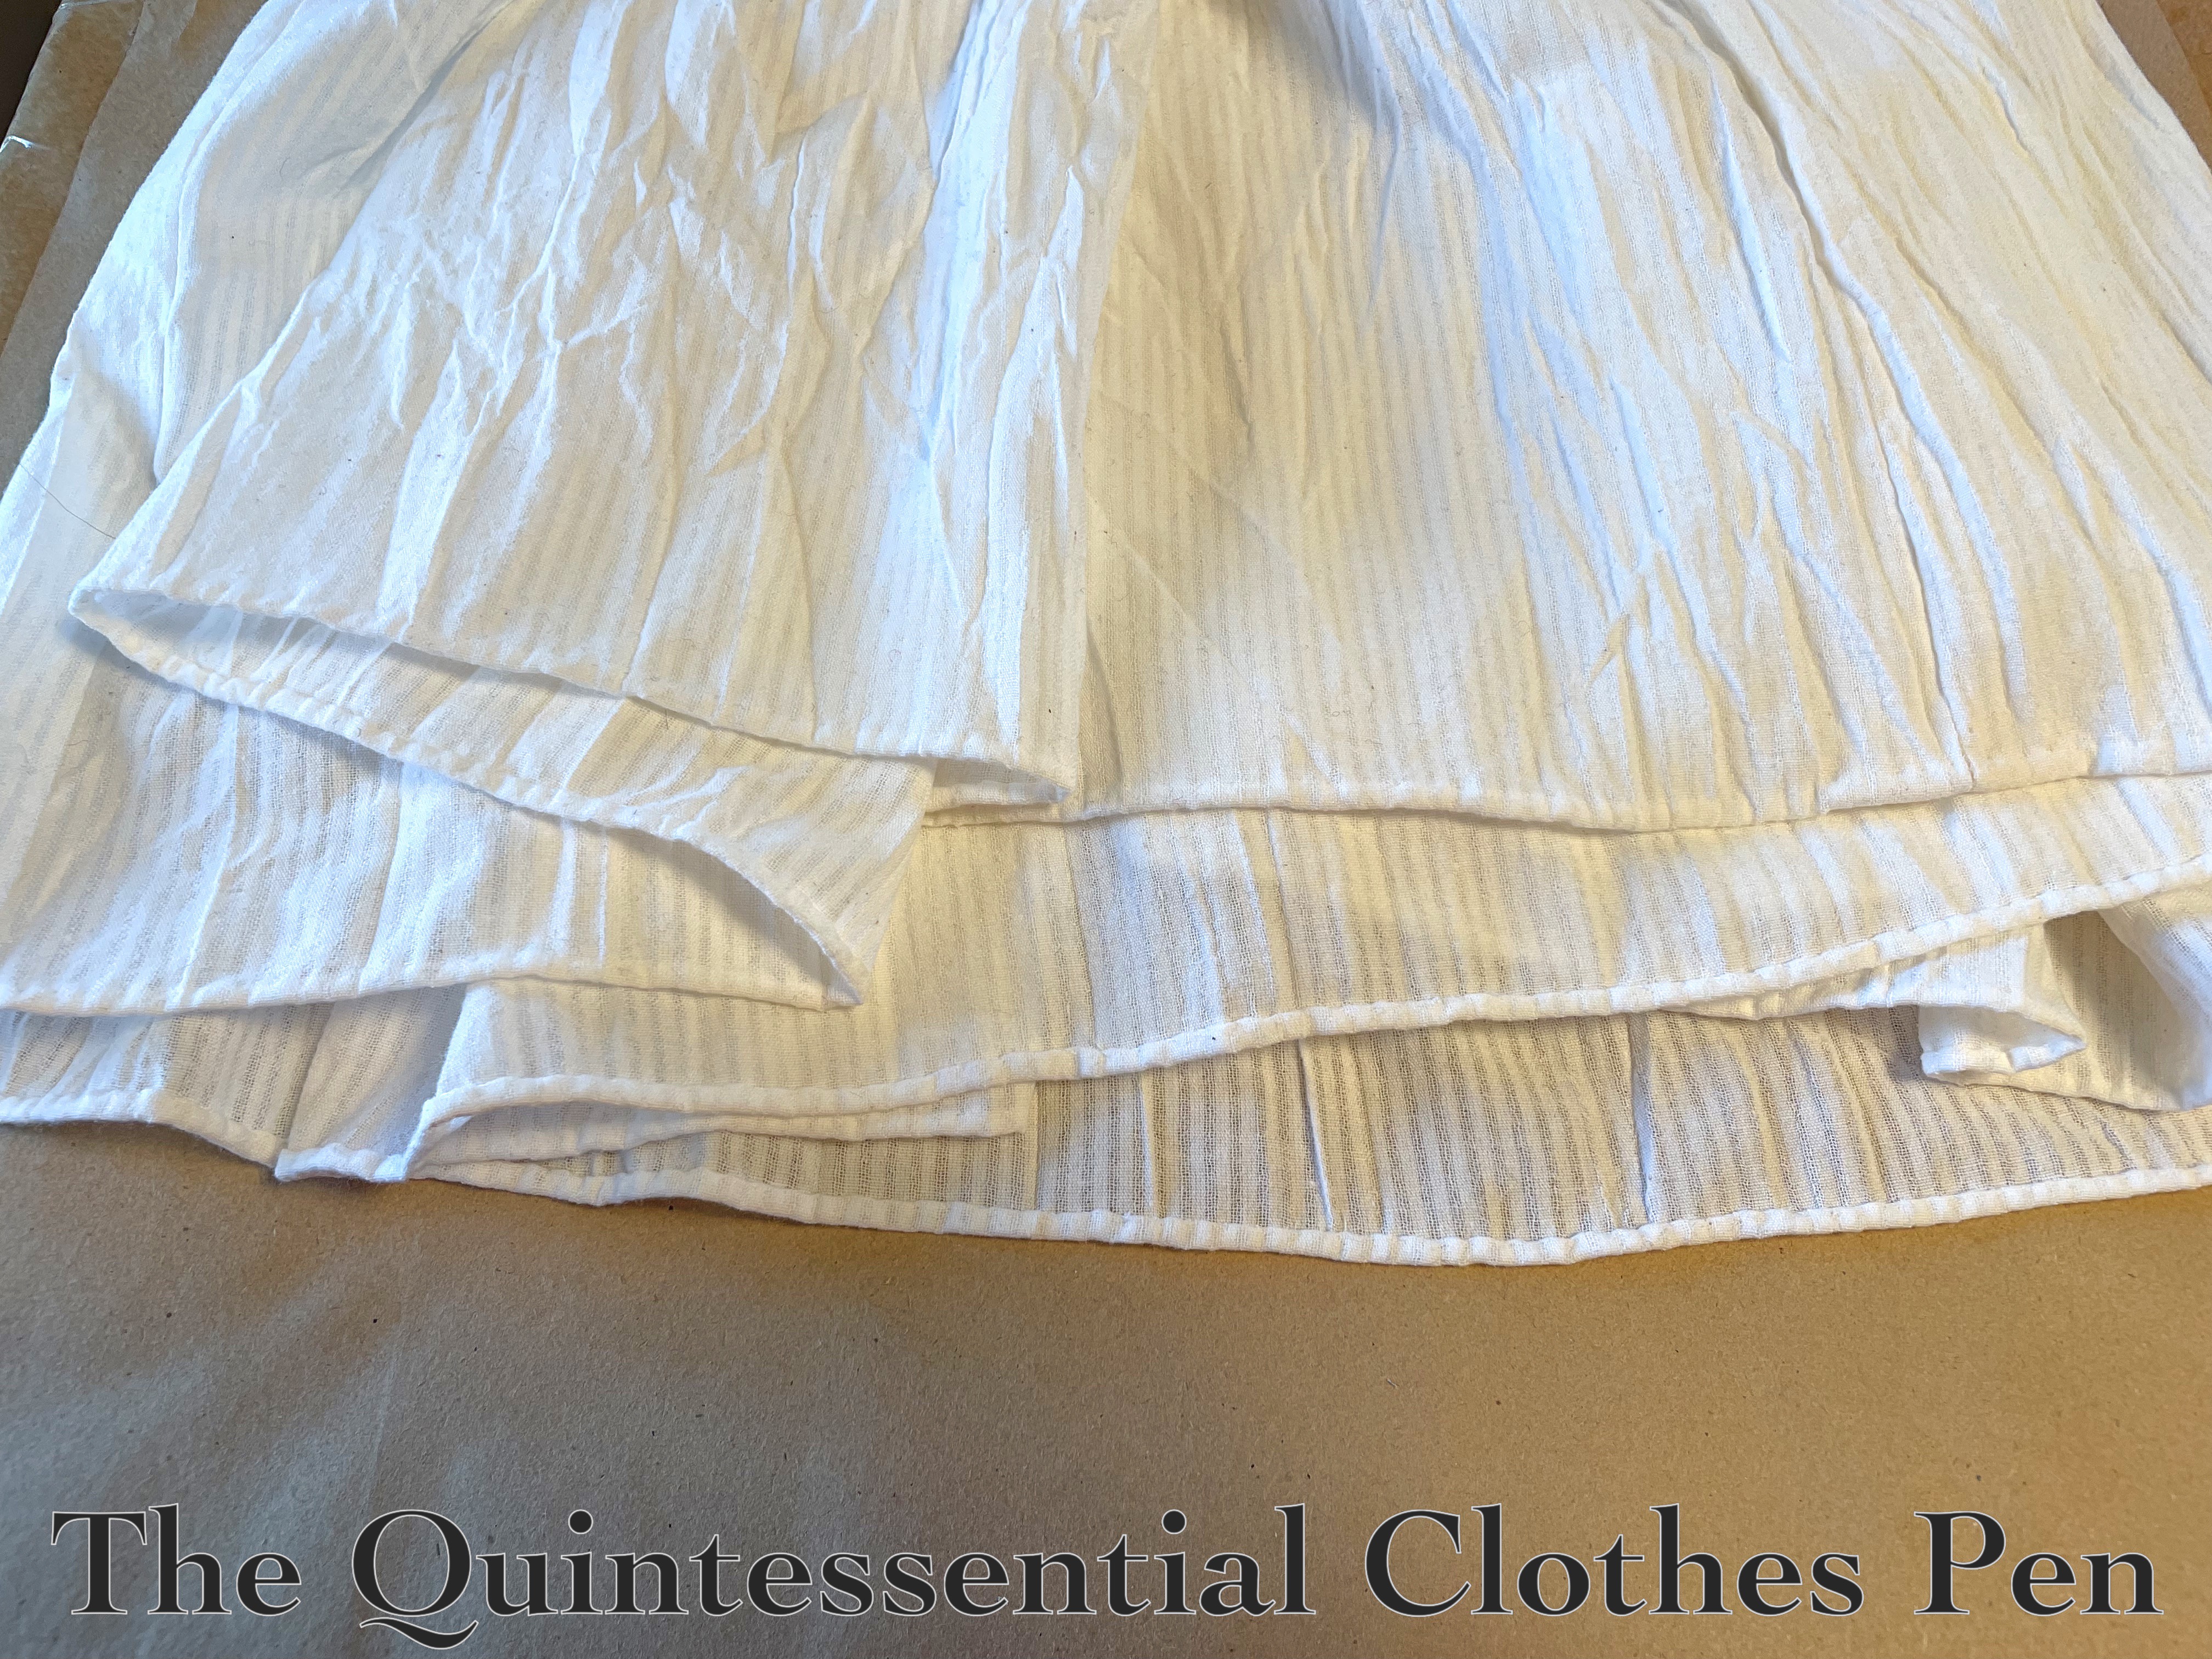
And finally, a hem! I needed to max out the length to accommodate the sheer dress that will be worn over this, so the hem is only about ¼”.
And that’s it! I’m excited to have another foundation piece for a new-to-me decade of clothing and I’m pleased that it is entirely hand sewn.
I’ve loved my 1815 Tree Gown ever since I made it in 2013 (here is the link to the original post about making the dress) and have worn it many times, most recently last summer for a Regency picnic which I posted about here. It was clear at that point that this dress needed to be updated to fit my current shape!
Making a plan
I finally had the brain space to deal with it this summer (and the added encouragement of wanting to be able to wear it in June). So, accordingly, I dug out the small bit of fabric I had leftover from originally making the dress.
Then, I took stock of what was needed. In a fitting, I realized that not only were the sleeves now a bit too tight, but the shoulders were also not quite wide enough for my now-broader shoulder width, which was also contributing to the dress wanting to fall off of my shoulders. Ugh!
There was no easy way to deal with that second problem except to make the back wider… So, I took a deep breath and decided to replace the back panels.
Making it happen: taking the dress apart
I had seam ripped the arm seams last year after realizing they needed to be let out, so the sleeves were already in that taken-apart state.
As I was taking apart the back, I remembered that I had taken a tuck in the finished dress to make the armsceye a little smaller. Alas, letting this out was not nearly enough to prevent me from needing to replace the back panels.
Making it happen: forming a new plan
Fast forward through a bit of seam ripping (French seams make for a lovely finish, but also mean double the seam ripping!), and I had a bunch of loose panels flopping around. I used the original back pieces and my desired new measurements to cut mockup pieces of what I thought the back should become. I safety pinned those in and tried the dress on to make sure I was on the right track.
Here is the old back piece laid over the mockup. It’s not a huge difference, but that 1″ or so on most edges made a huge difference in terms of fit.
I also made a pattern piece for the arm gusset I needed based on the measurements I wanted the new sleeve size to be. In the end, I decided to extend the gusset all the way down to the cuff opening, as I figured a little extra room for my hand to get through was a reasonable idea (it was a tight squeeze otherwise!).
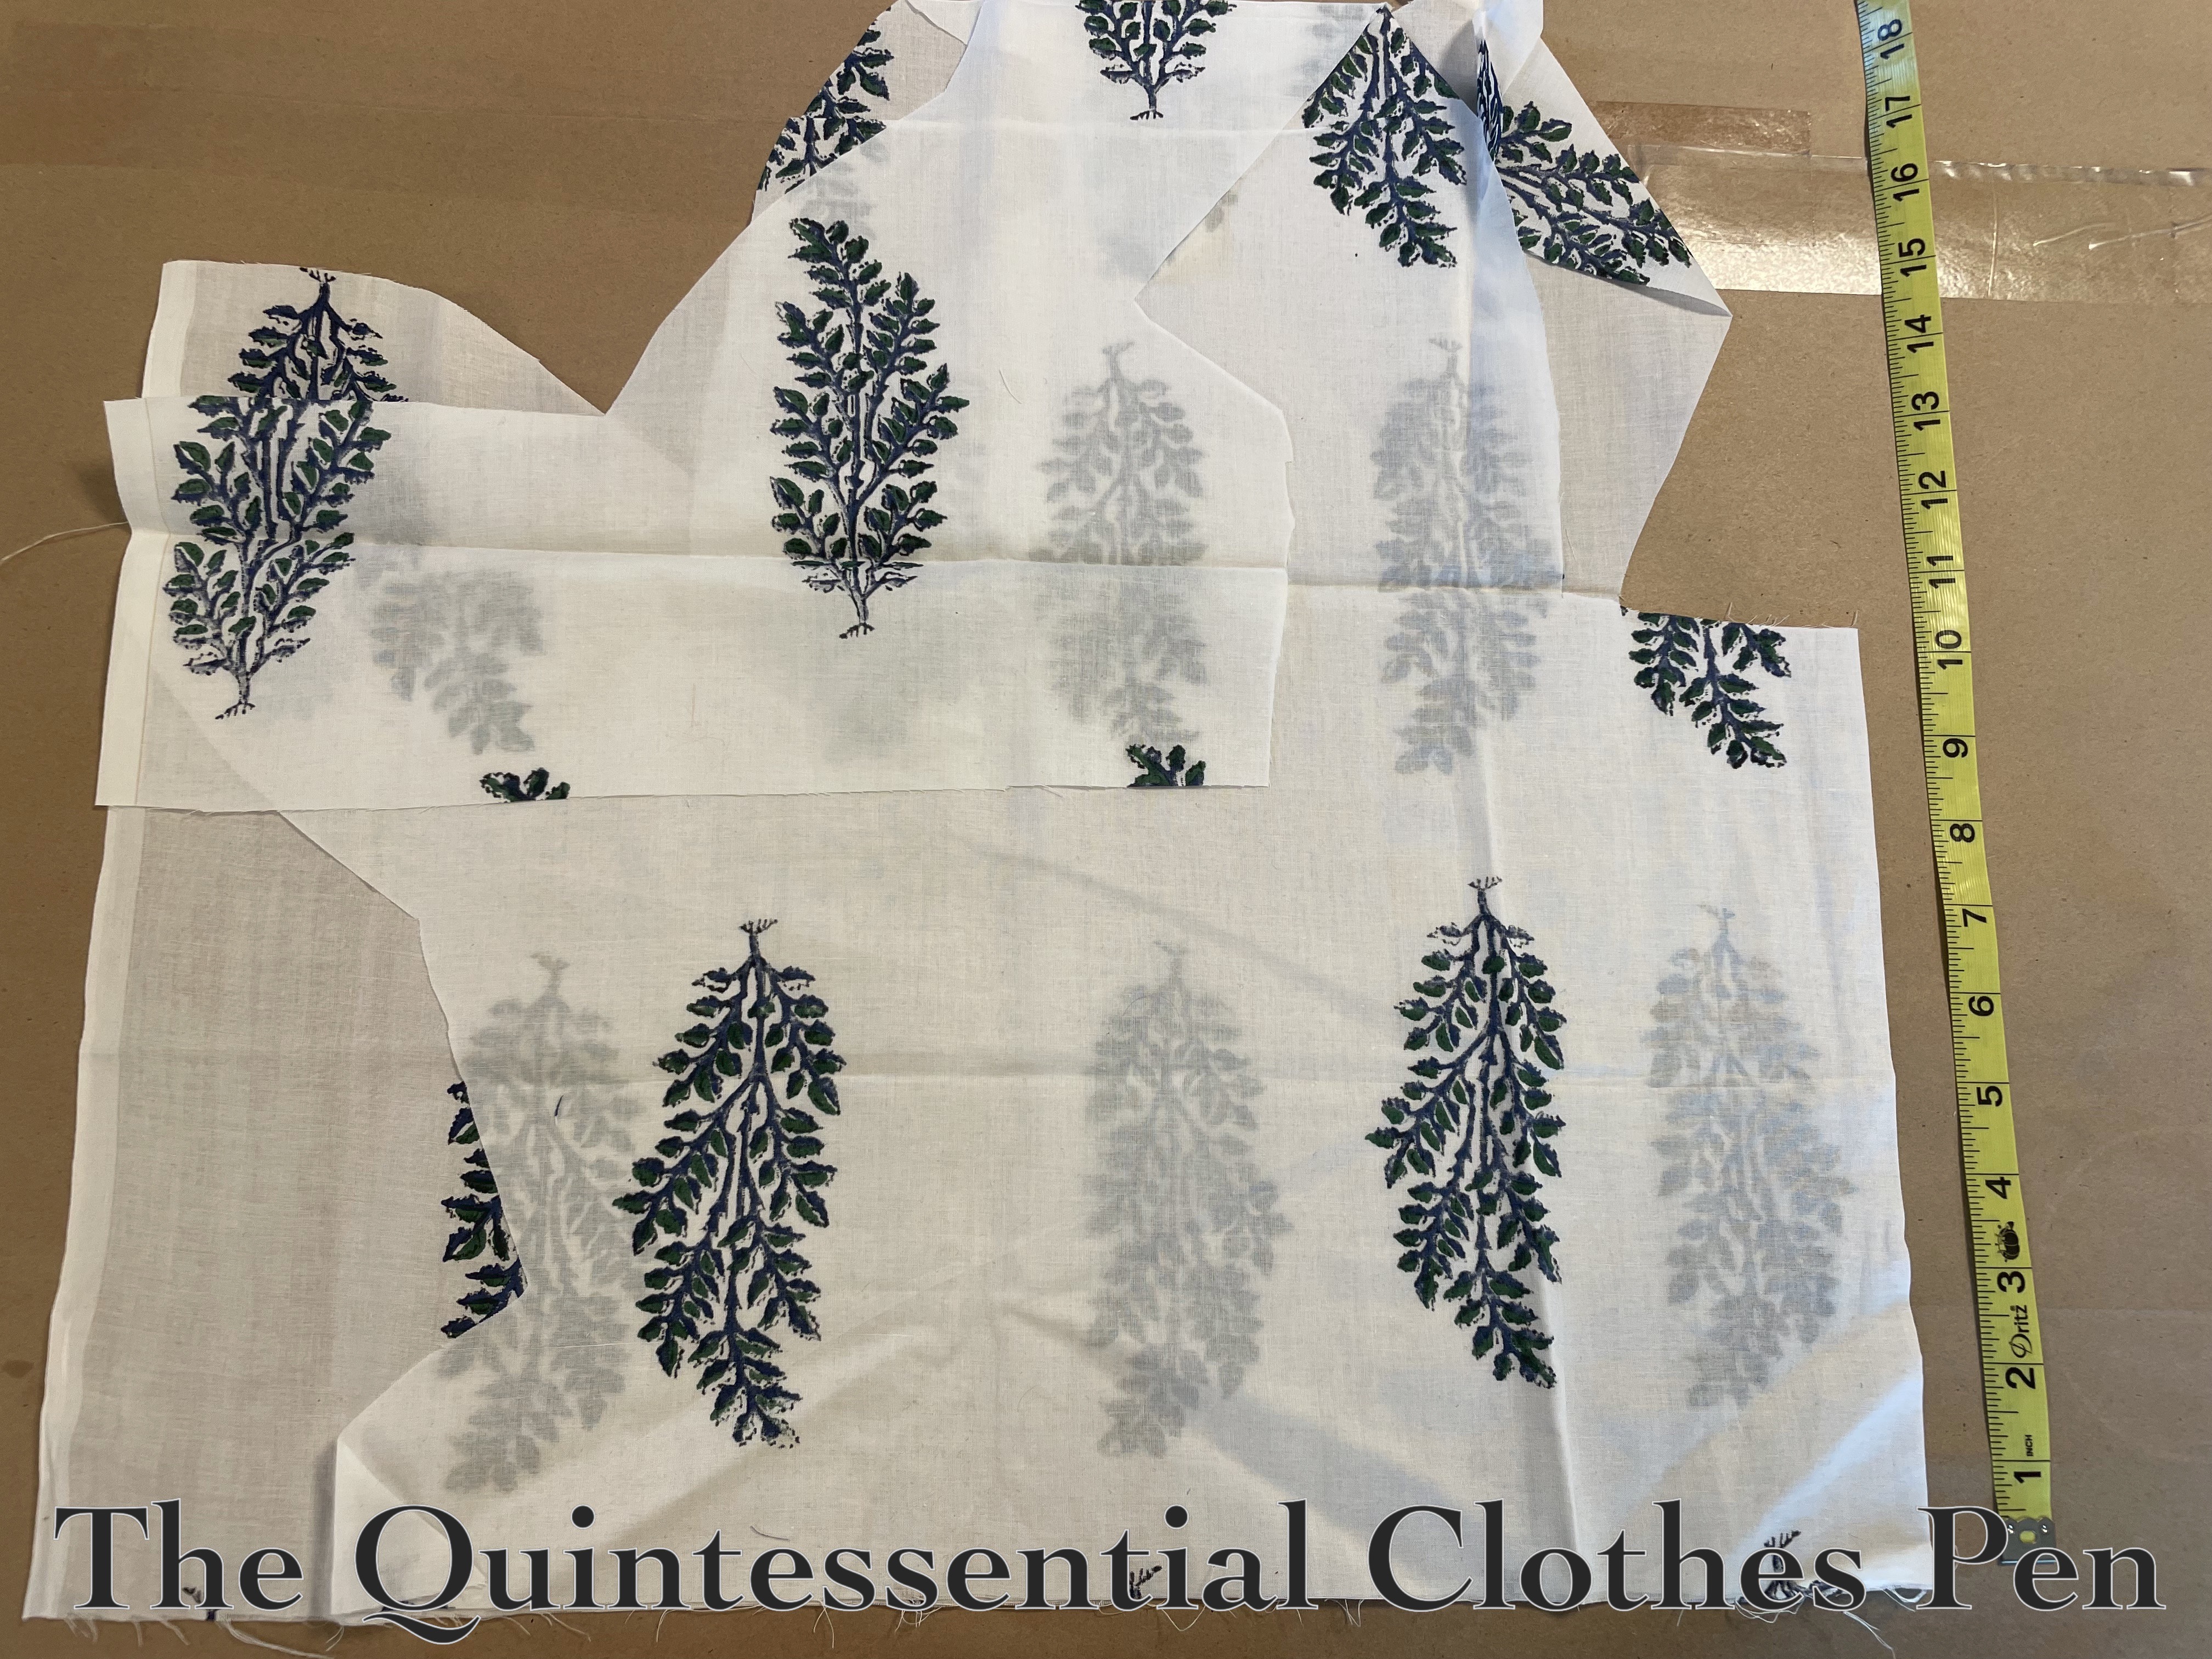
Then, I used my minimal scraps to cut out the new pieces. I’m super pleased that even with small scraps I was able to match up the block printed areas!
For the back pieces, the image below shows what I had to work with. Not much! I could fit both pieces if I didn’t maintain symmetry in the block print, but… I did such a nice job matching it up when the dress was made! I just couldn’t bring myself not to make the re-do match, too! But I couldn’t get two pieces with matched patterns out of what was left.
It was too much to think about late at night and I knew I only had one chance at cutting to get it right…
So I took a break and came back to it another day. And I had a brainstorm! The way to make my goal happen was to piece one of the pieces somewhere. I could have placed an extra seam in a shoulder area, but that seemed more obvious than my second option given the sheer fabric of the dress. The second option that I decided on is a vertical seam in the white space near the center back opening. There was just enough fabric to make it happen!
Making it happen: putting the dress back together
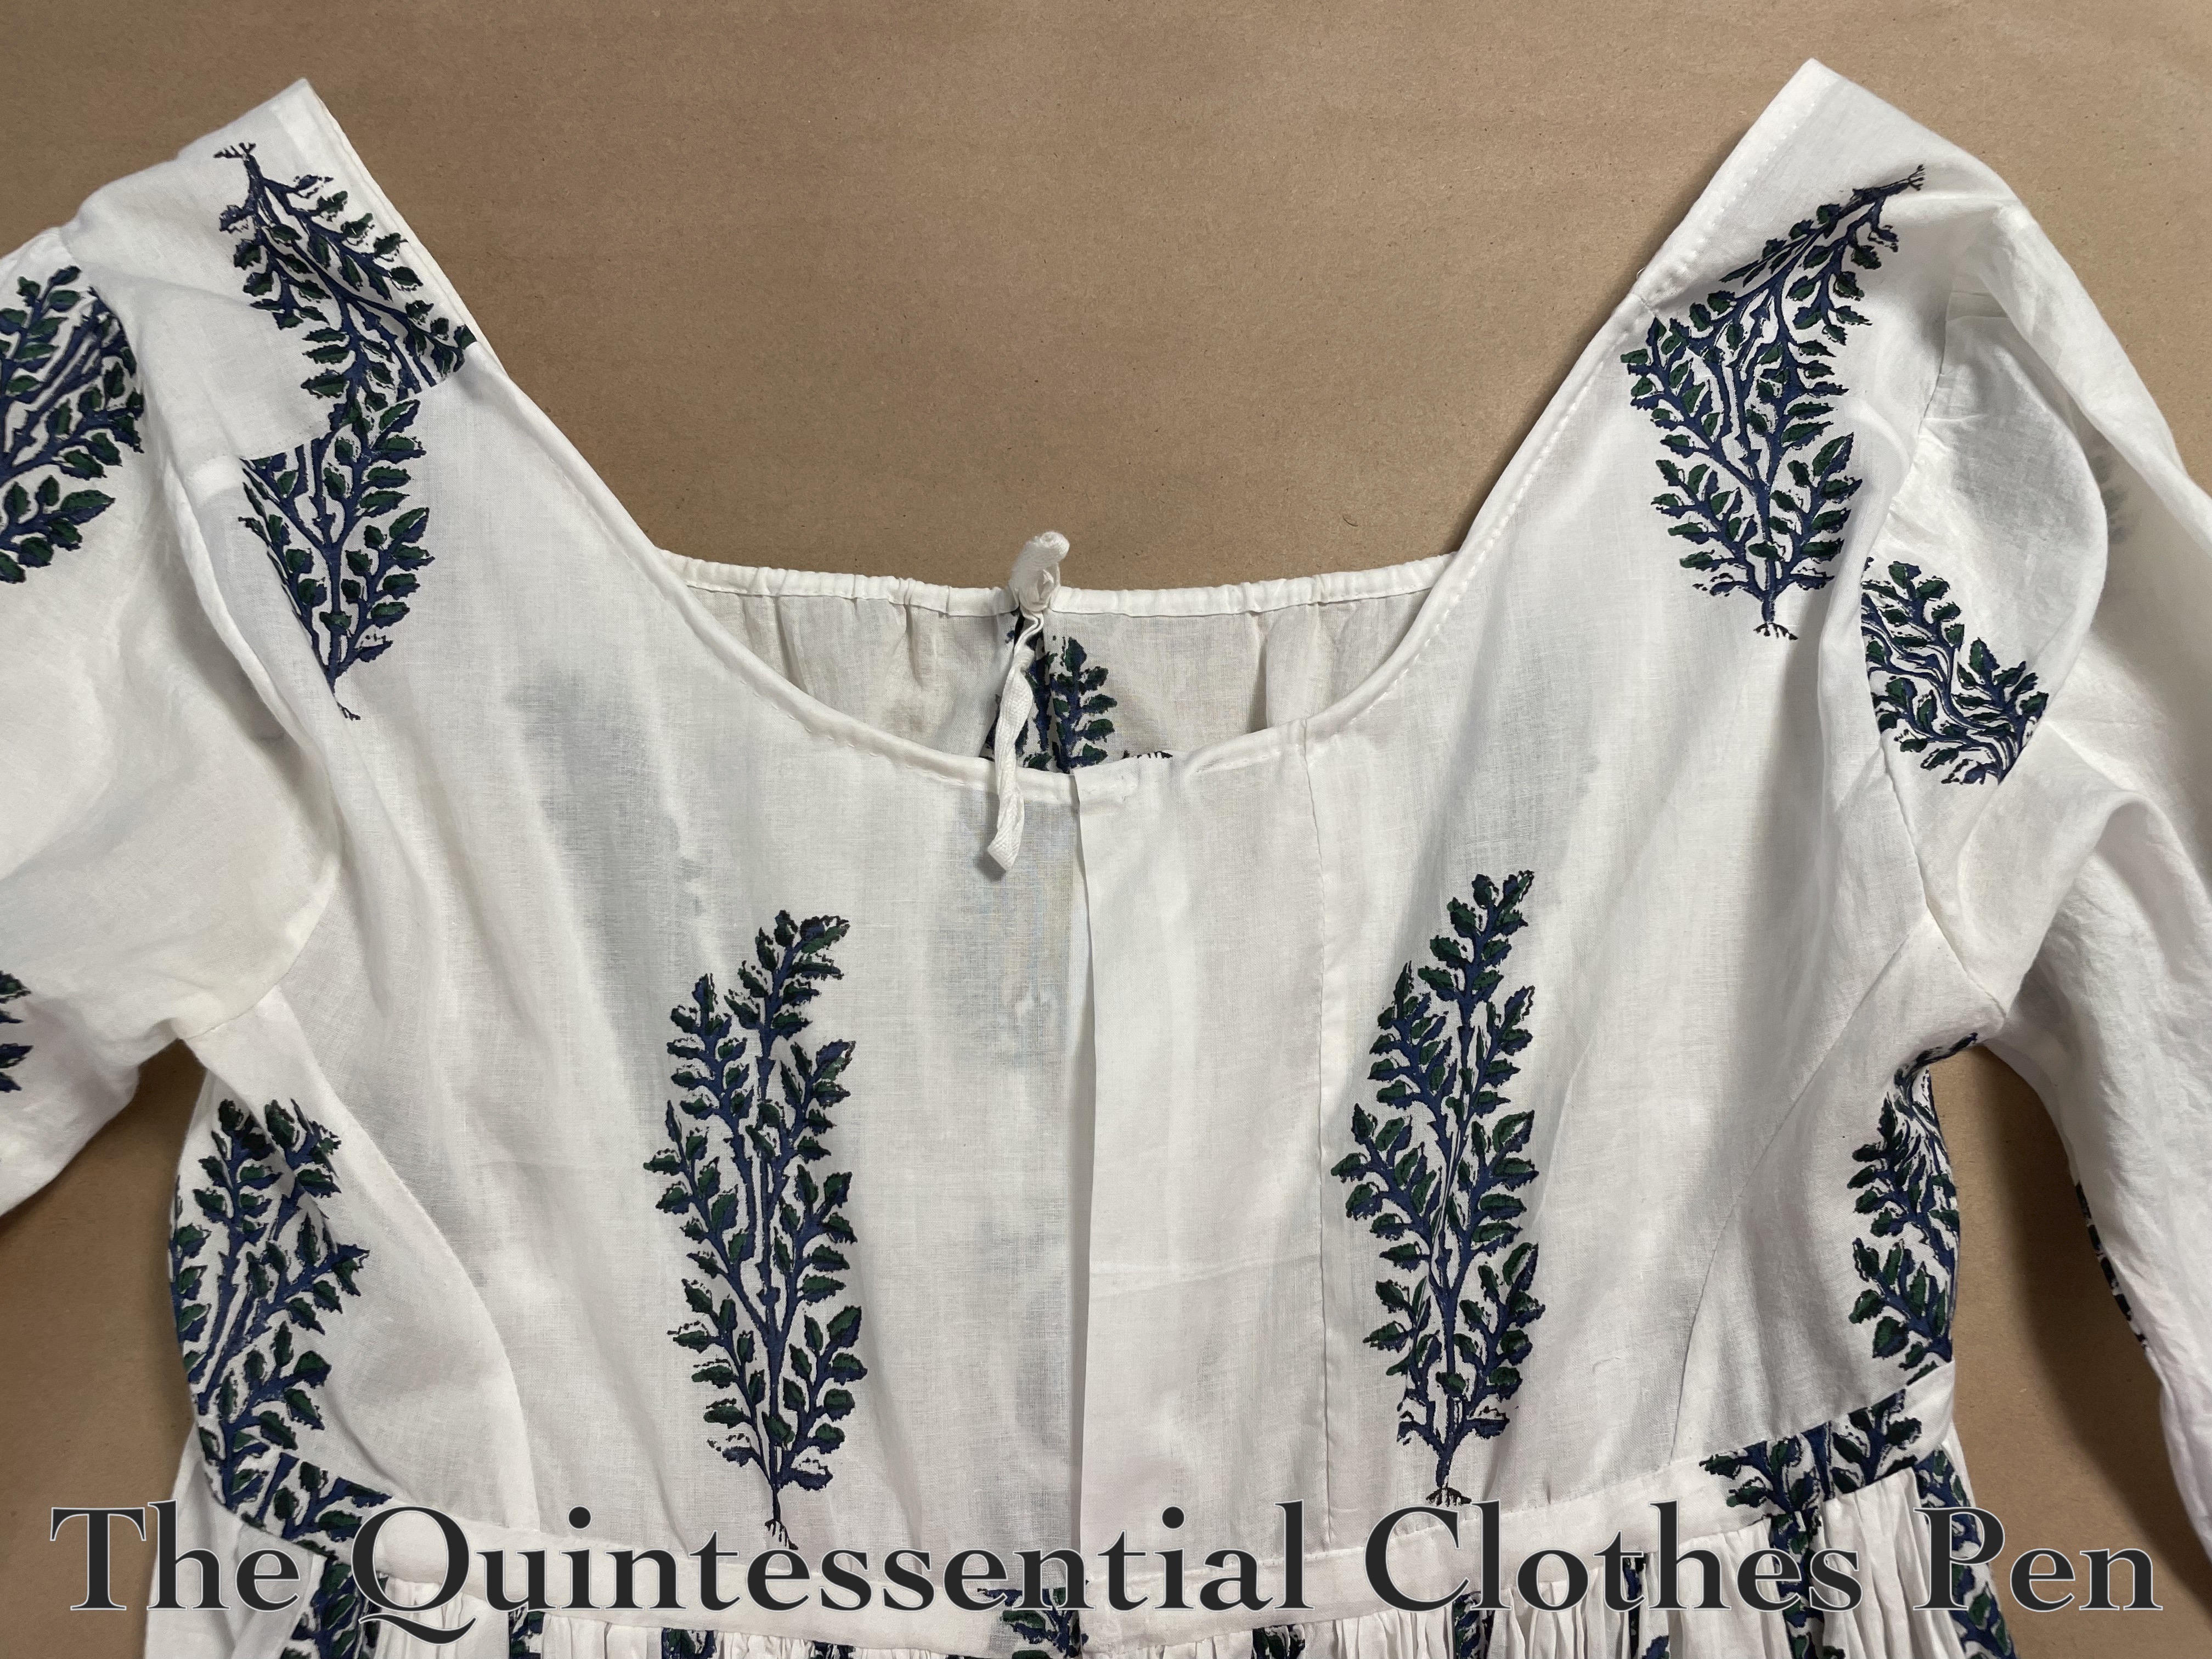
With my new back pieces cut, it was just a matter of putting them back into all of the seams (including the armsceyes, shoulders, side back, and waist). I was able to reset the sleeves without any of the original gathers, which allowed for the extra circumference my new back pattern had created. Then, I created a new drawstring channel along the neckline and re-applied my closures… and the update was complete!
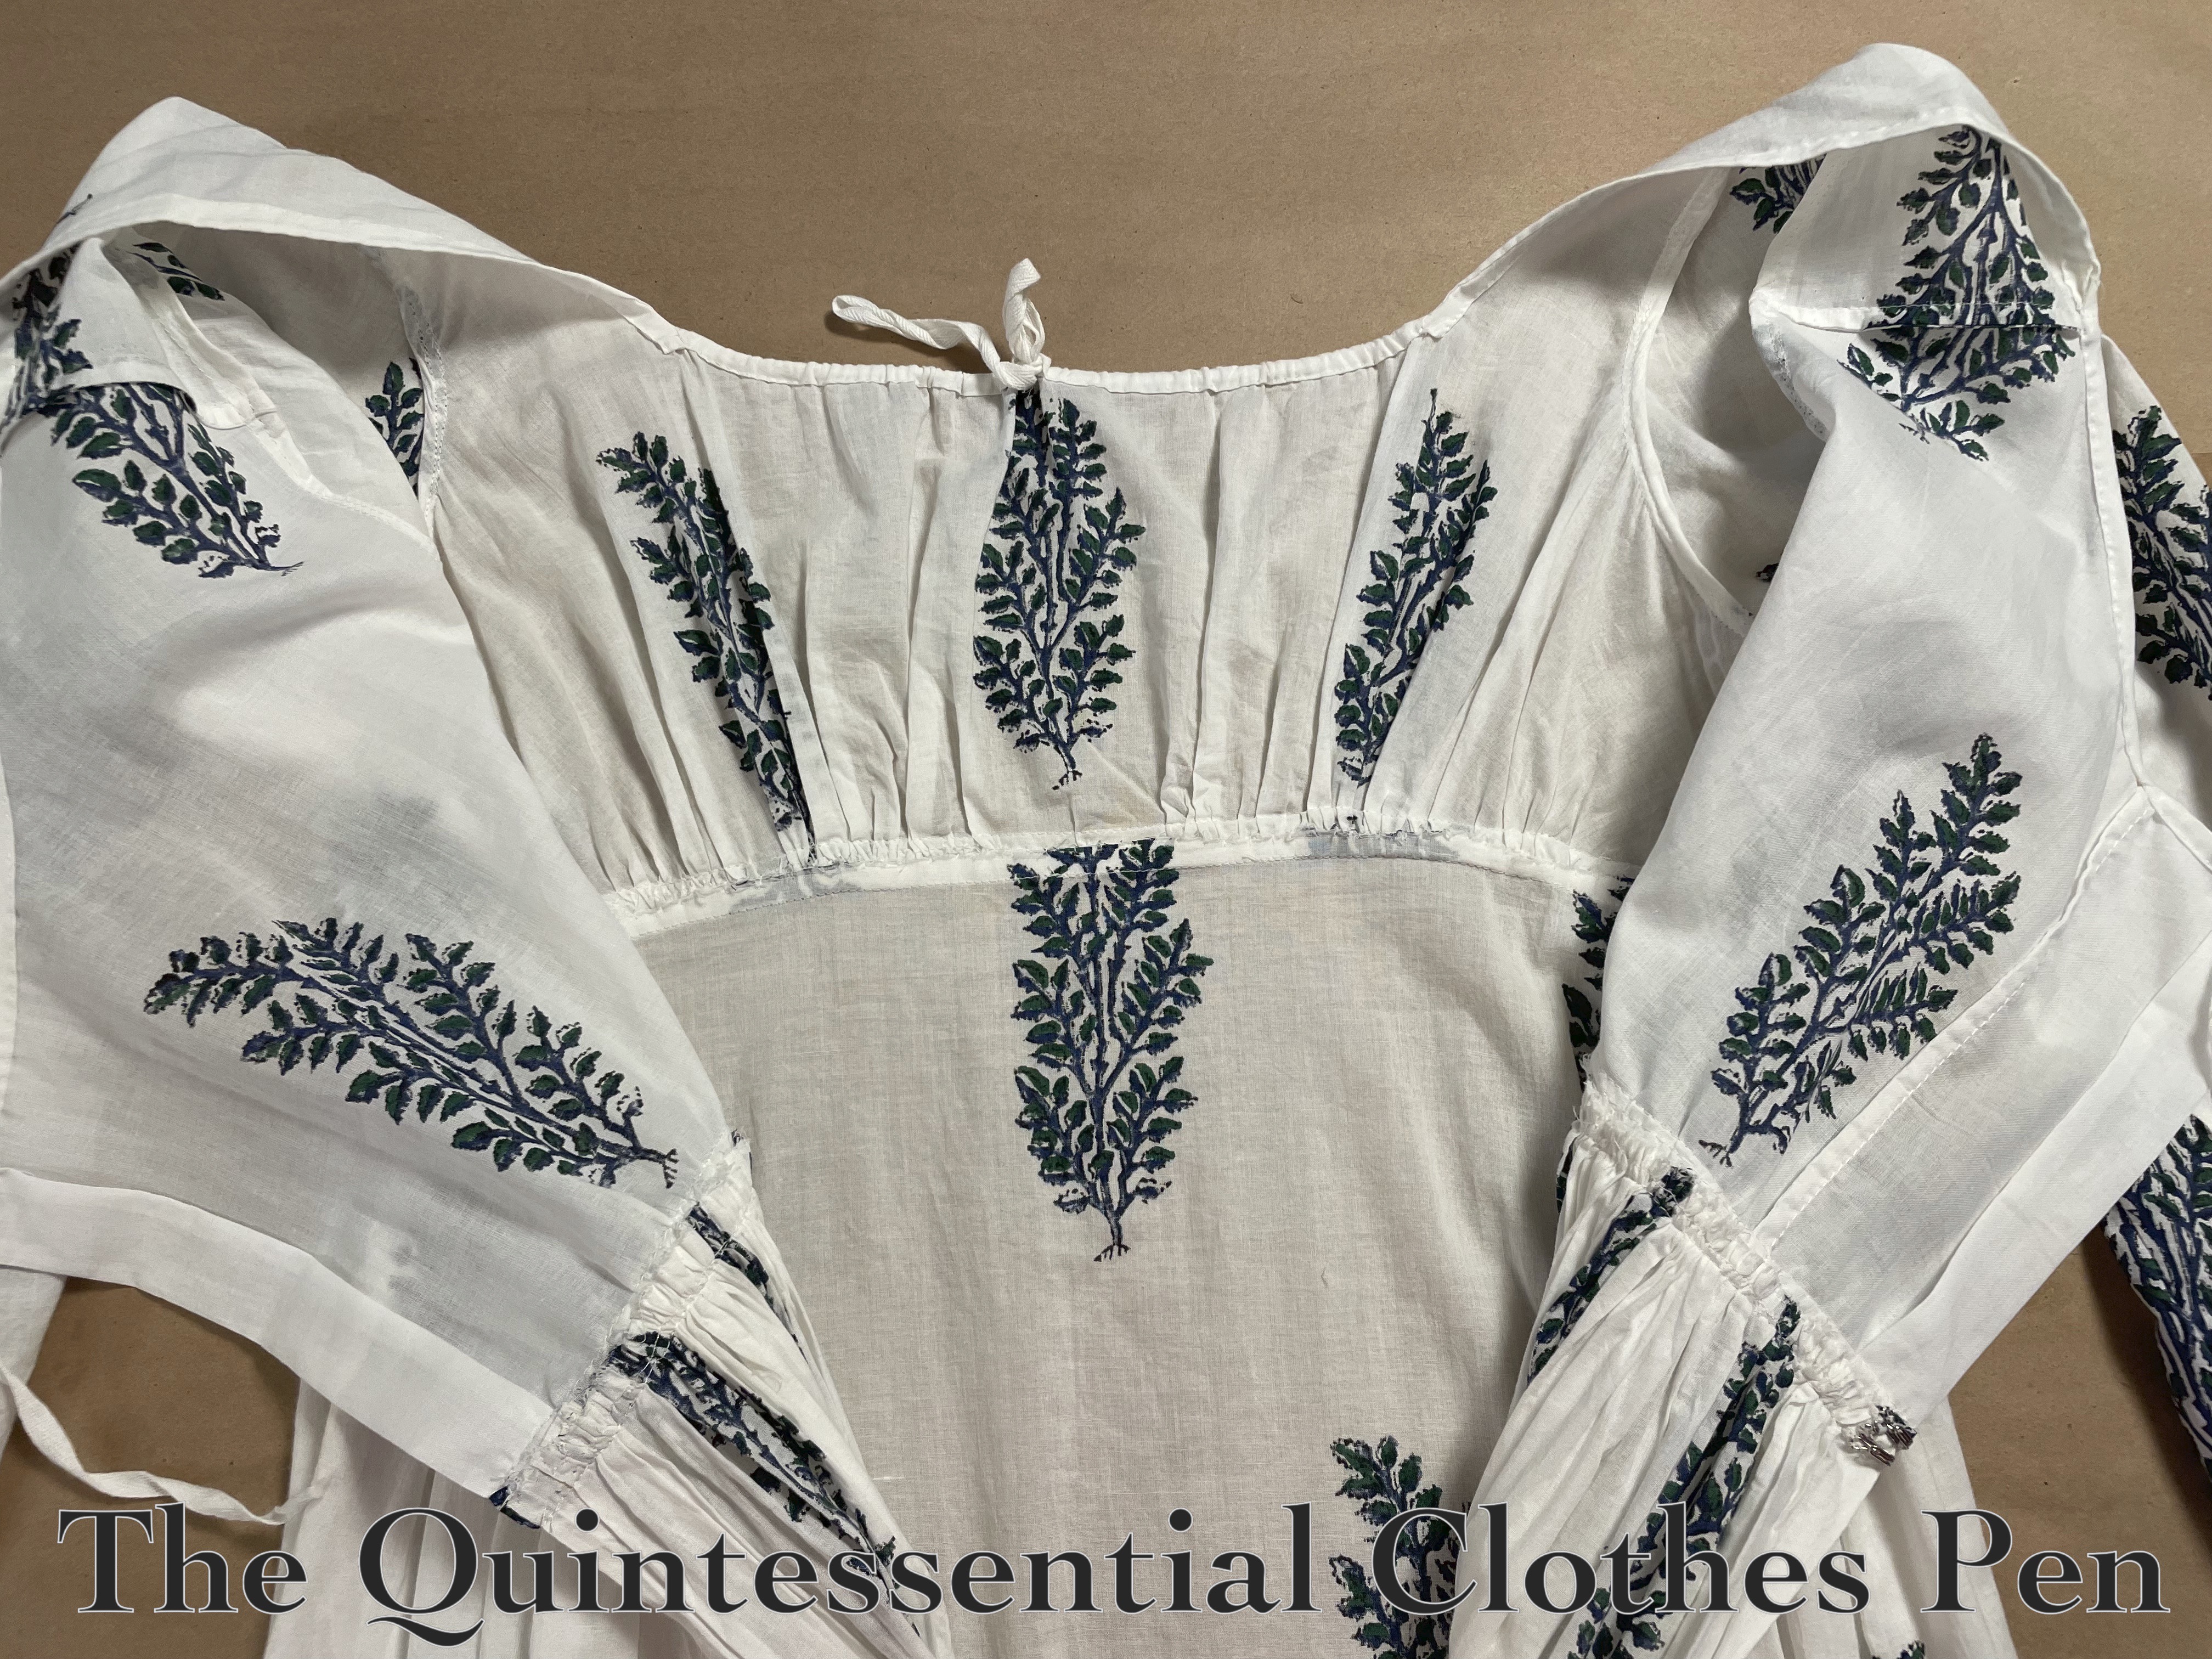
Here is the new back view of this dress, with the pieced seam on right (but with symmetrical block printing!).
I used a French seam to attach the pieced bit, so that it would match all of the other seams in the dress and stay nice and tidy with no fraying edges.
I also made the right side of the drawstring come out before the center back edge, so that the overlap with the hook can still function properly while the drawstring pulls up the excess width across my shoulders that I included. (There was extra in the original version, too… but I maxed that out years ago!)
Here’s another view of the lovely, tidy interior of the dress with the updated back.
And finally, here is a photo of the finished sleeves with the added gussets. Where the block printing is located the seams blend so well you can’t even see them! It makes my heart pitter-patter with glee!
The final step after putting in the gussets was to re-hem the cuff openings.
And then… this dress was updated! Now it’s a story of ‘when the dress fits again!’
I finally open my rereleased new copy of Patterns of Fashion 2 (Pof2) last summer and had great fun looking through all of the previously included garments (from the original edition) as well as the newly included ones. I remember seeing one dress (picture below), in particular, and thinking that it would be fun to recreate it, but that the beading seemed like it would be quite a challenge!
1940 Evening Dress designed by Elsa Schiaparelli. The Victoria and Albert Museum. T.48-1965
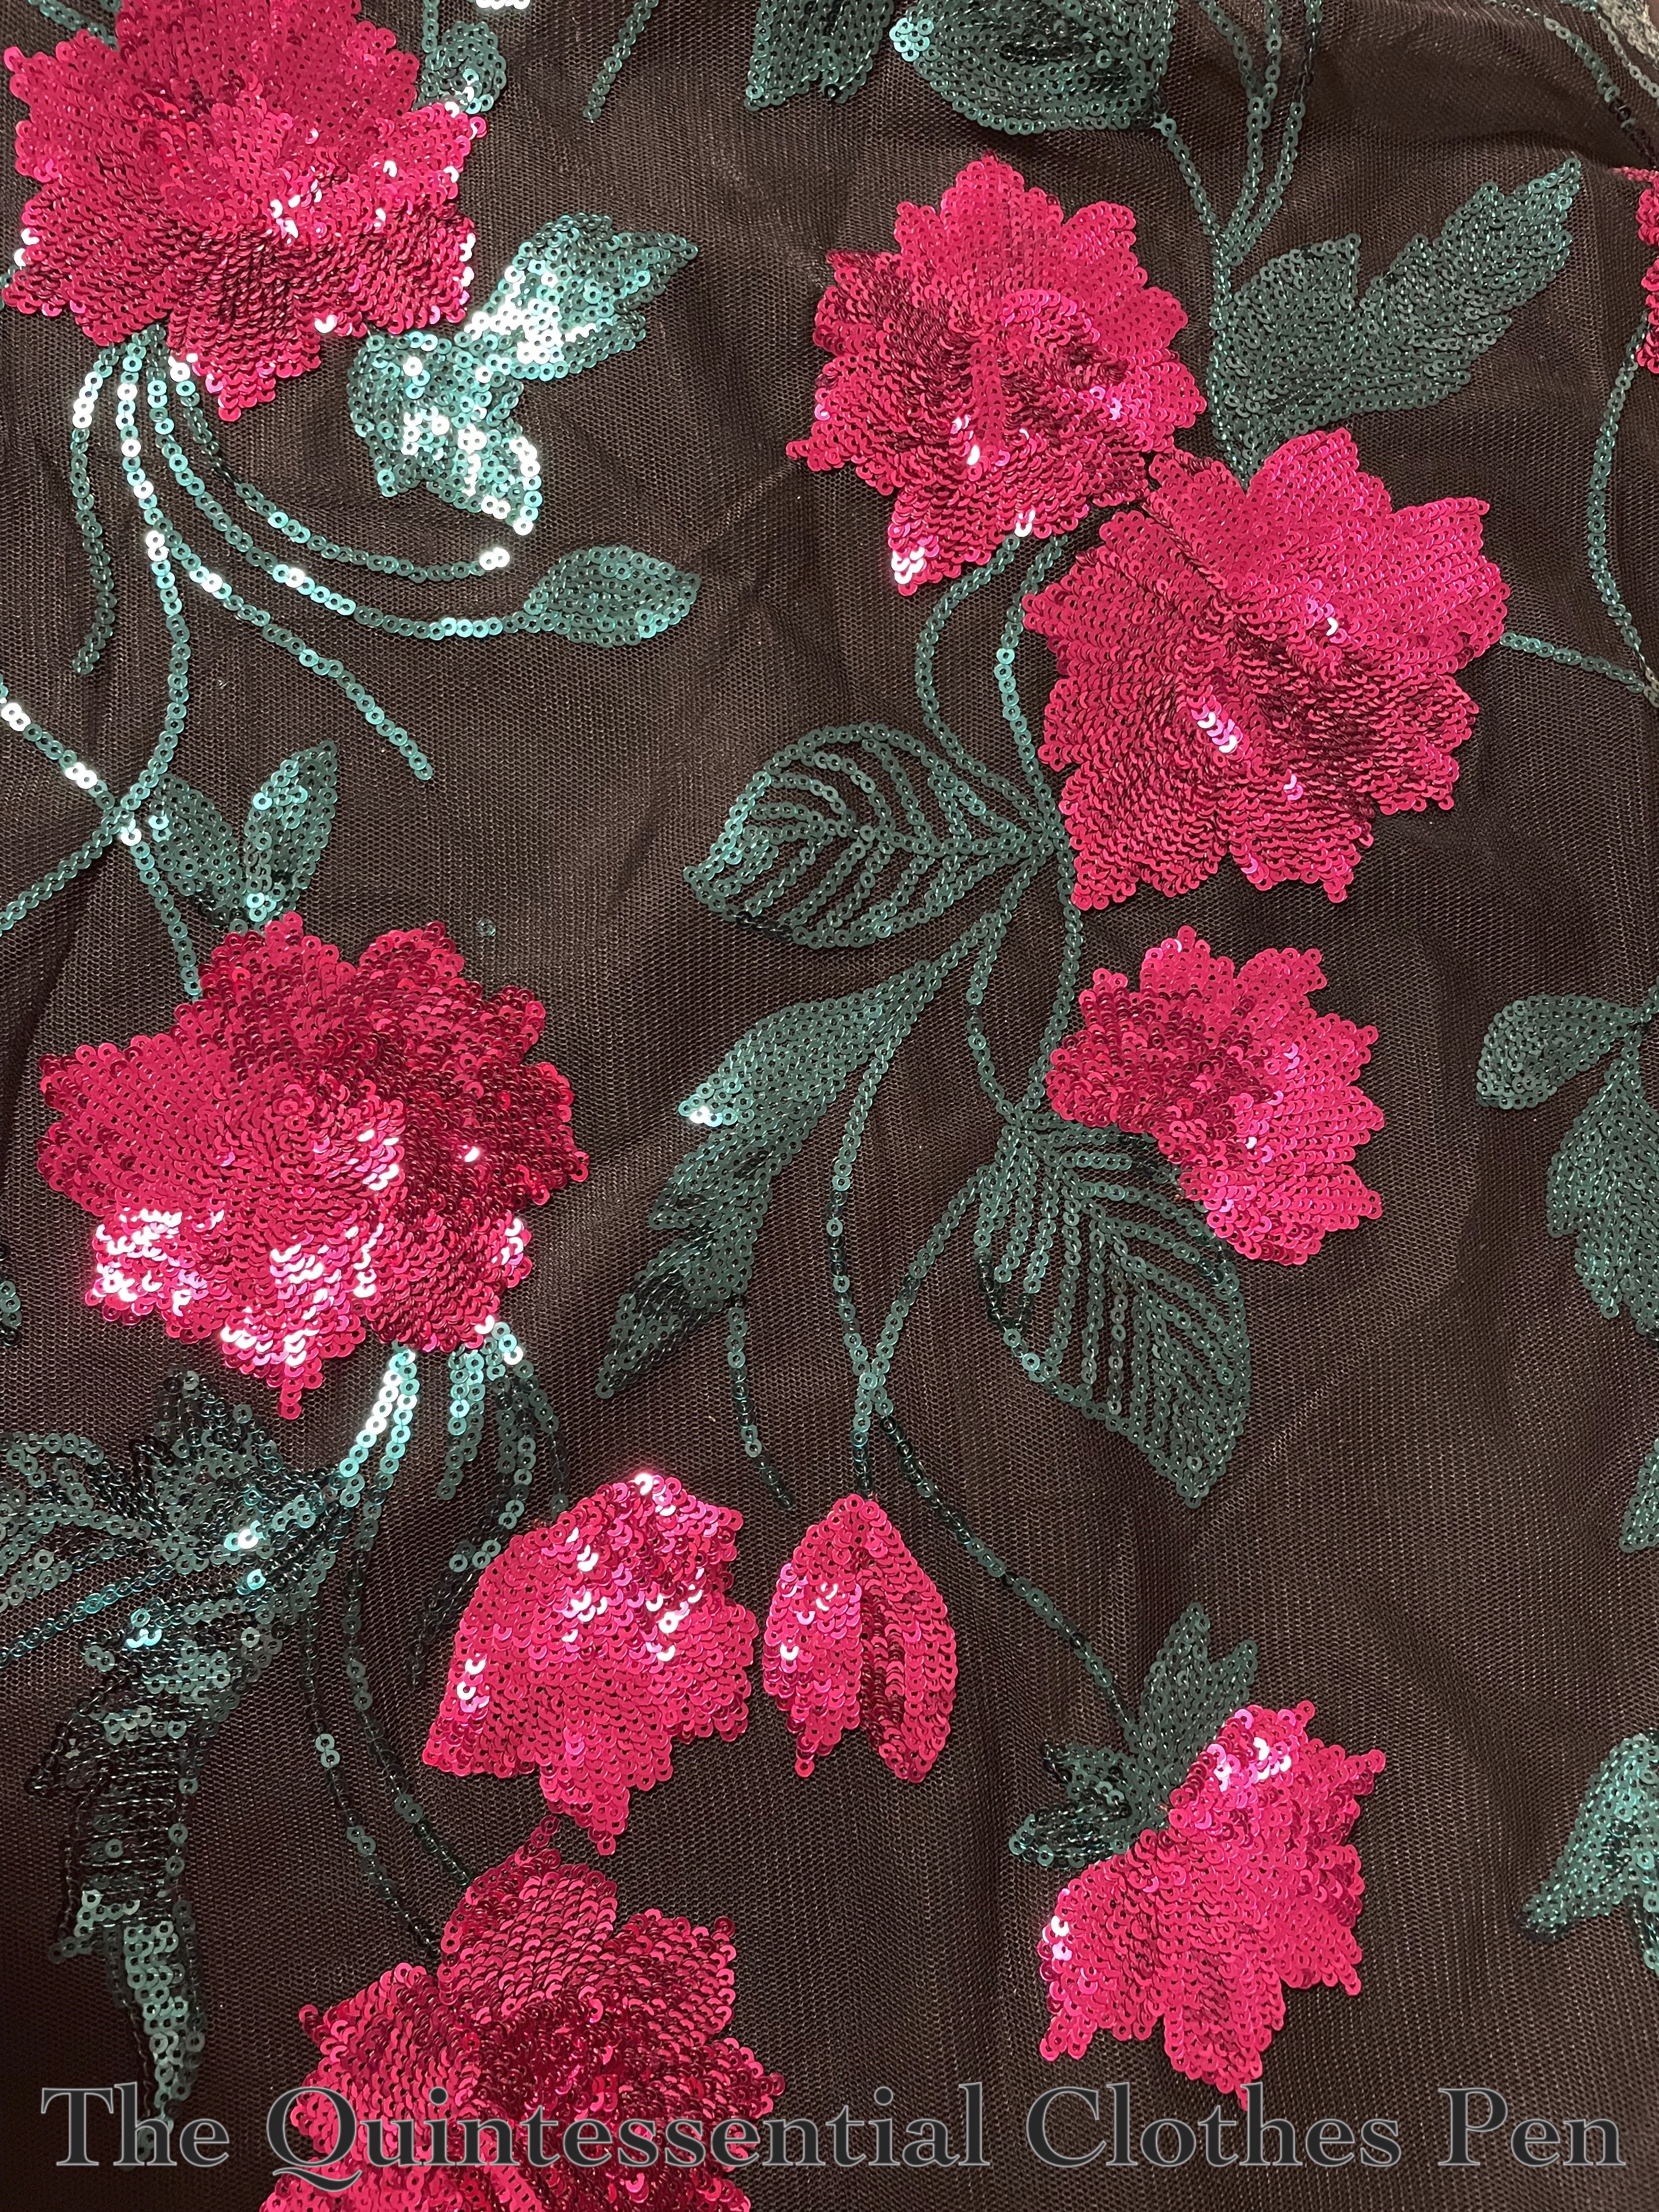
A few months later, I was at Joann Fabrics and saw a fabulous magenta and green sequined net poking out of a shelf. I pulled it out and immediately thought that the colors were very me. But did I have a use for it? Not really… Except… What if I used that fabric to recreate the beaded idea on that dress from PofF2??? Schiaparelli’s designs often made use of magenta pink as a Surrealist inspired color, so it didn’t seem too far fetched for me to include that color in my version of the dress.
So, I bought some. ¼ of a yard, to be exact. Not too much, but enough to be able to pick and choose different parts of the flowers to create a pattern similar to my inspiration. Below is a photo of the inspiration fabric: magenta and green sequins on black net.
Not too long after that, I decided that instead of wearing my updated 1933 Dramatic Evening Dress to a December event, I would instead make a new one–the 1940 Schiaparelli dress!
The first step after my decision was to find black fabric. The original is silk crepe, but I wanted to keep the cost down a bit more than what silk would allow for. I ordered a few swatches of rayon crepe and also went to stores to look at other options. I’d almost decided on one when I came across another random fabric at Joann that stood out to me. I debated for awhile, but decided the Black Shimmer Twill was more interesting than plain black crepe (the shimmer twill is visible in the above photo underneath the sequined net).
The next step was to size up the pattern in PofF2 and adjust it to be not tiny. I am definitely not the measurements of the original! I did those things and made a mockup:
The dress skirt worked, but I wasn’t happy with what the sleeves were doing.
The neckline needed some work to fit comfortably.
I changed the grainline of the back piece. On the original, the back bodices are cut on the bias, but I decided that they would lay better if I cut them on the straight of grain.
Then, another mockup. I made a few more changes and finally it was time for the real fabric!
Cutting out the pieces was pretty easy. There actually aren’t too many of them, especially because the facings are cleverly cut on with the front and back bodice pieces. The pieces are: back skirt, back bodice, front bodice/skirts, and sleeves.
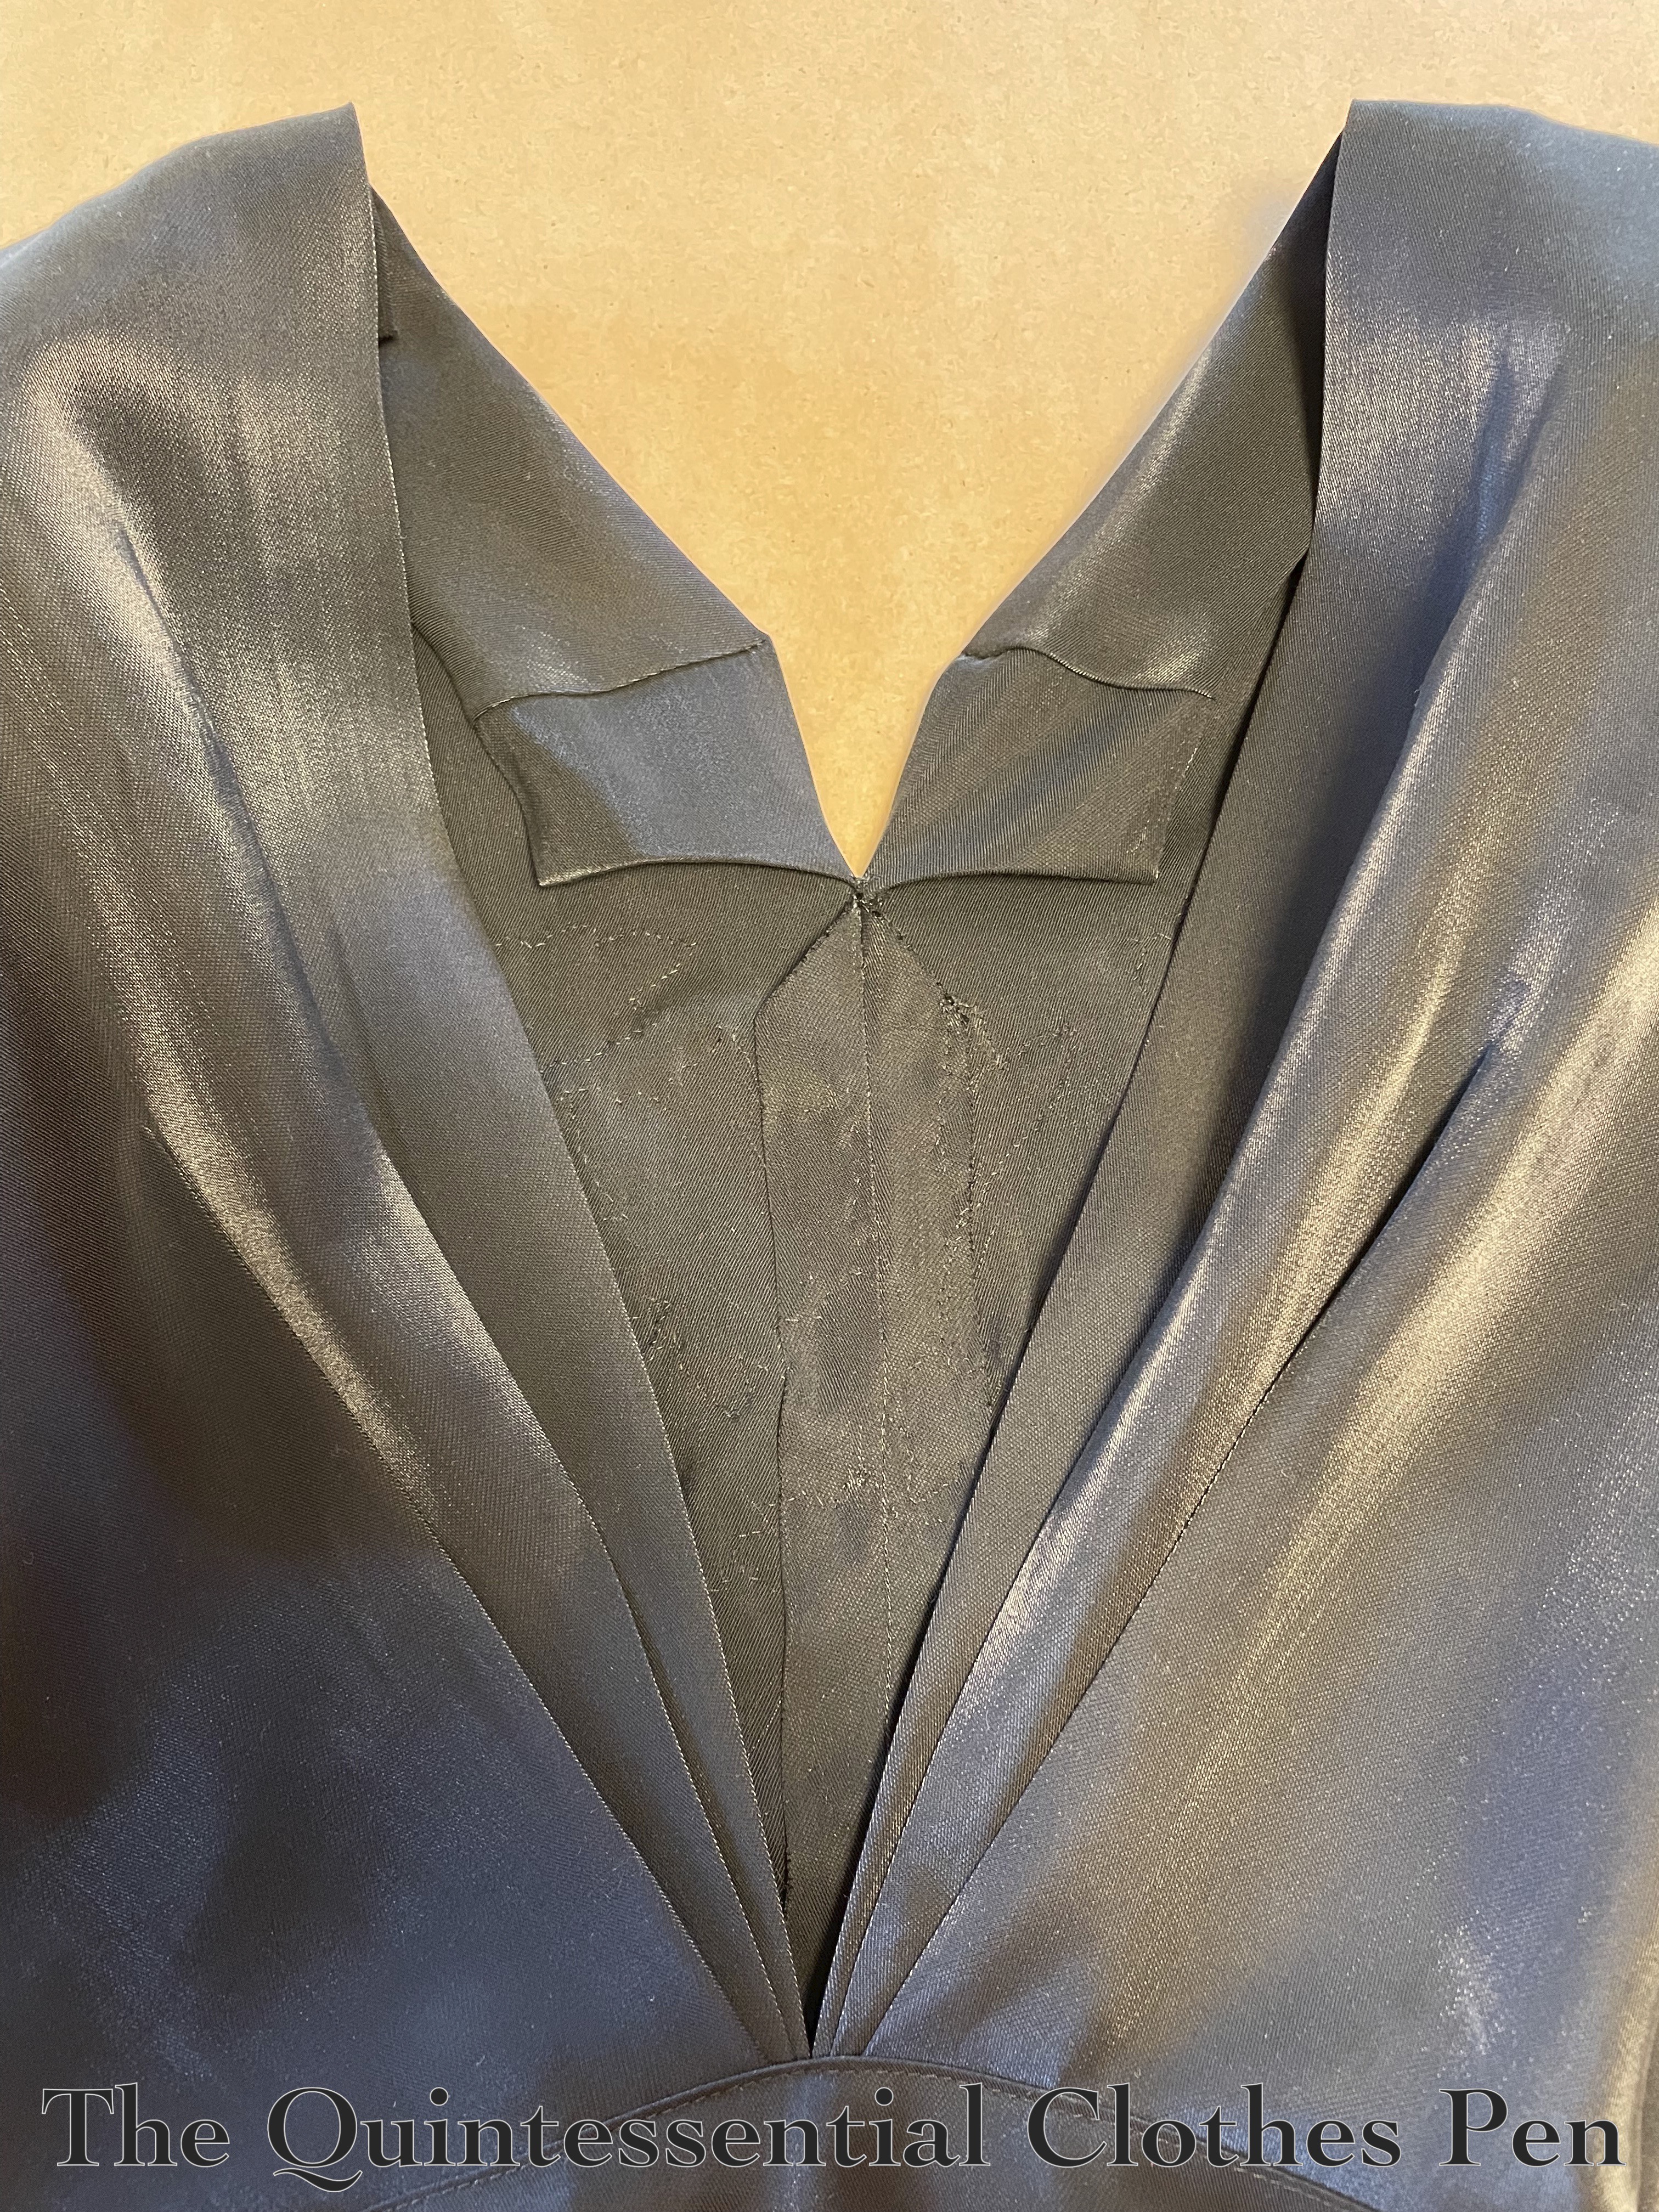
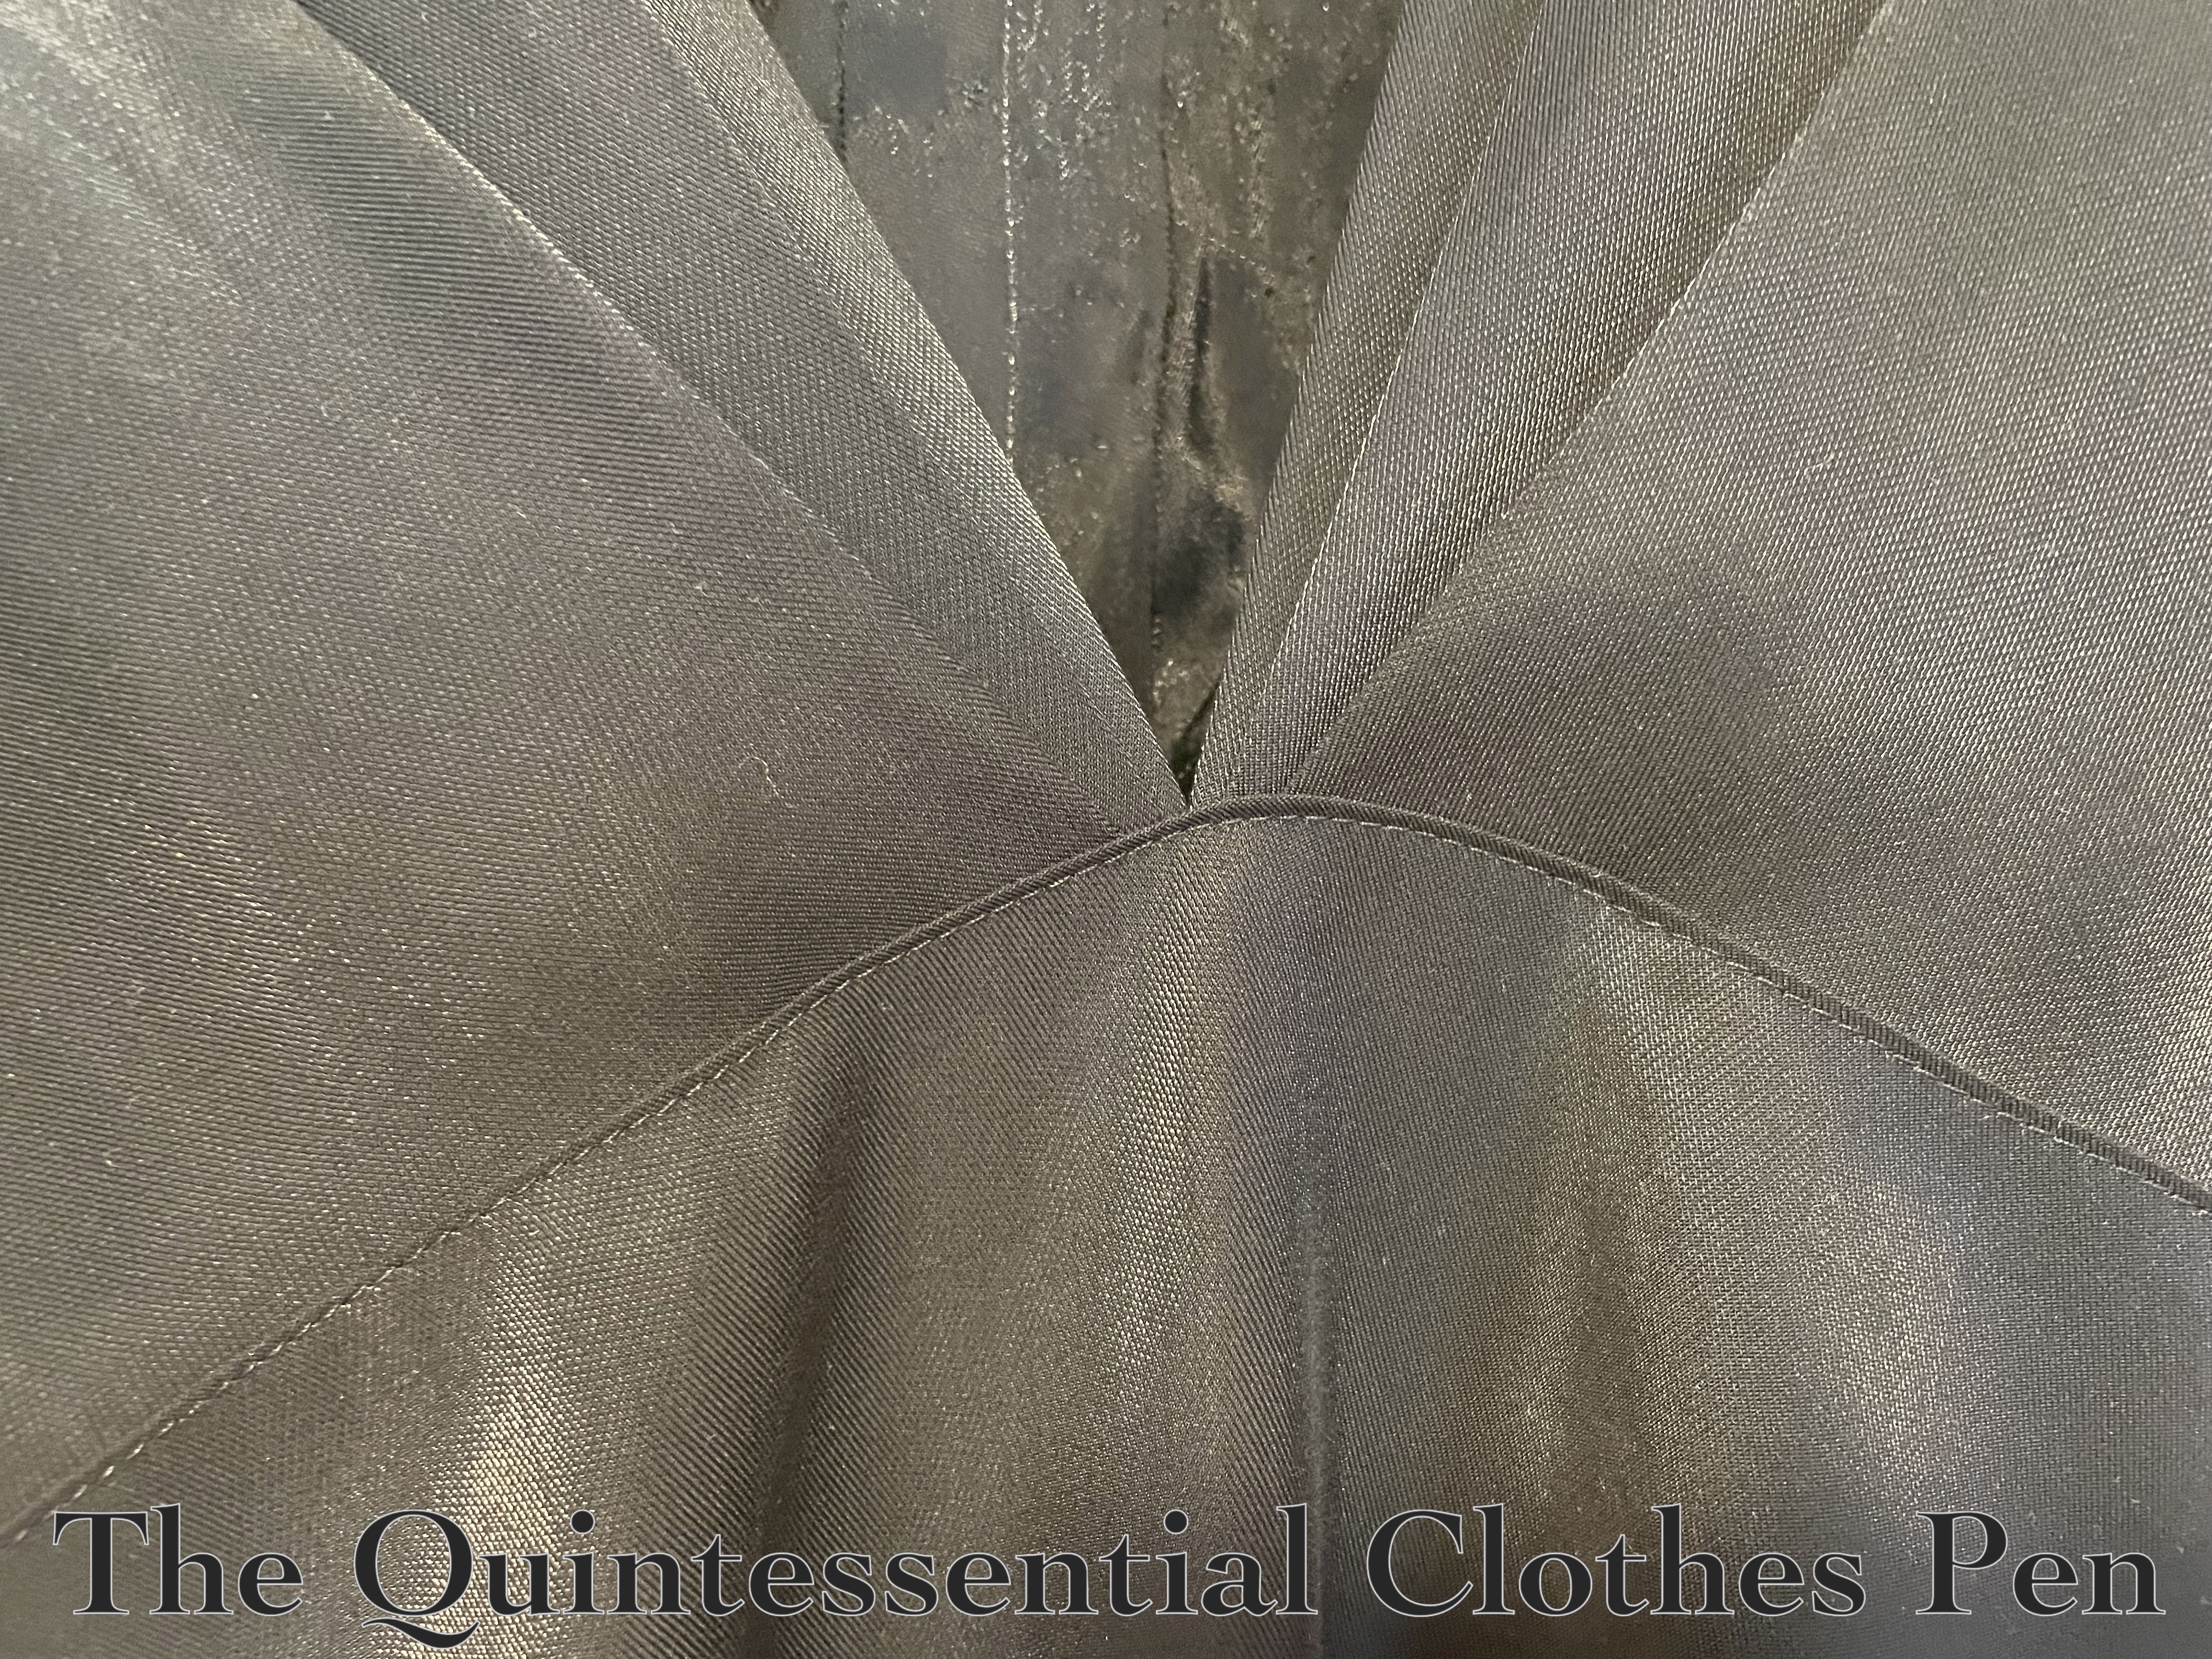
Below is a photo of the finished garment showing the clever front facings and the shimmery quality of the black base fabric I chose. (The photo also shows the fun back element of this dress: three v-shaped pleats that meet at the center.)
I sewed up all of the seams I could (so that was the center front seam, the sleeves, and the back waist seams) while still keeping the front flat, so that I could replicate, or at least imitate, the floral V-shaped beading on the original.
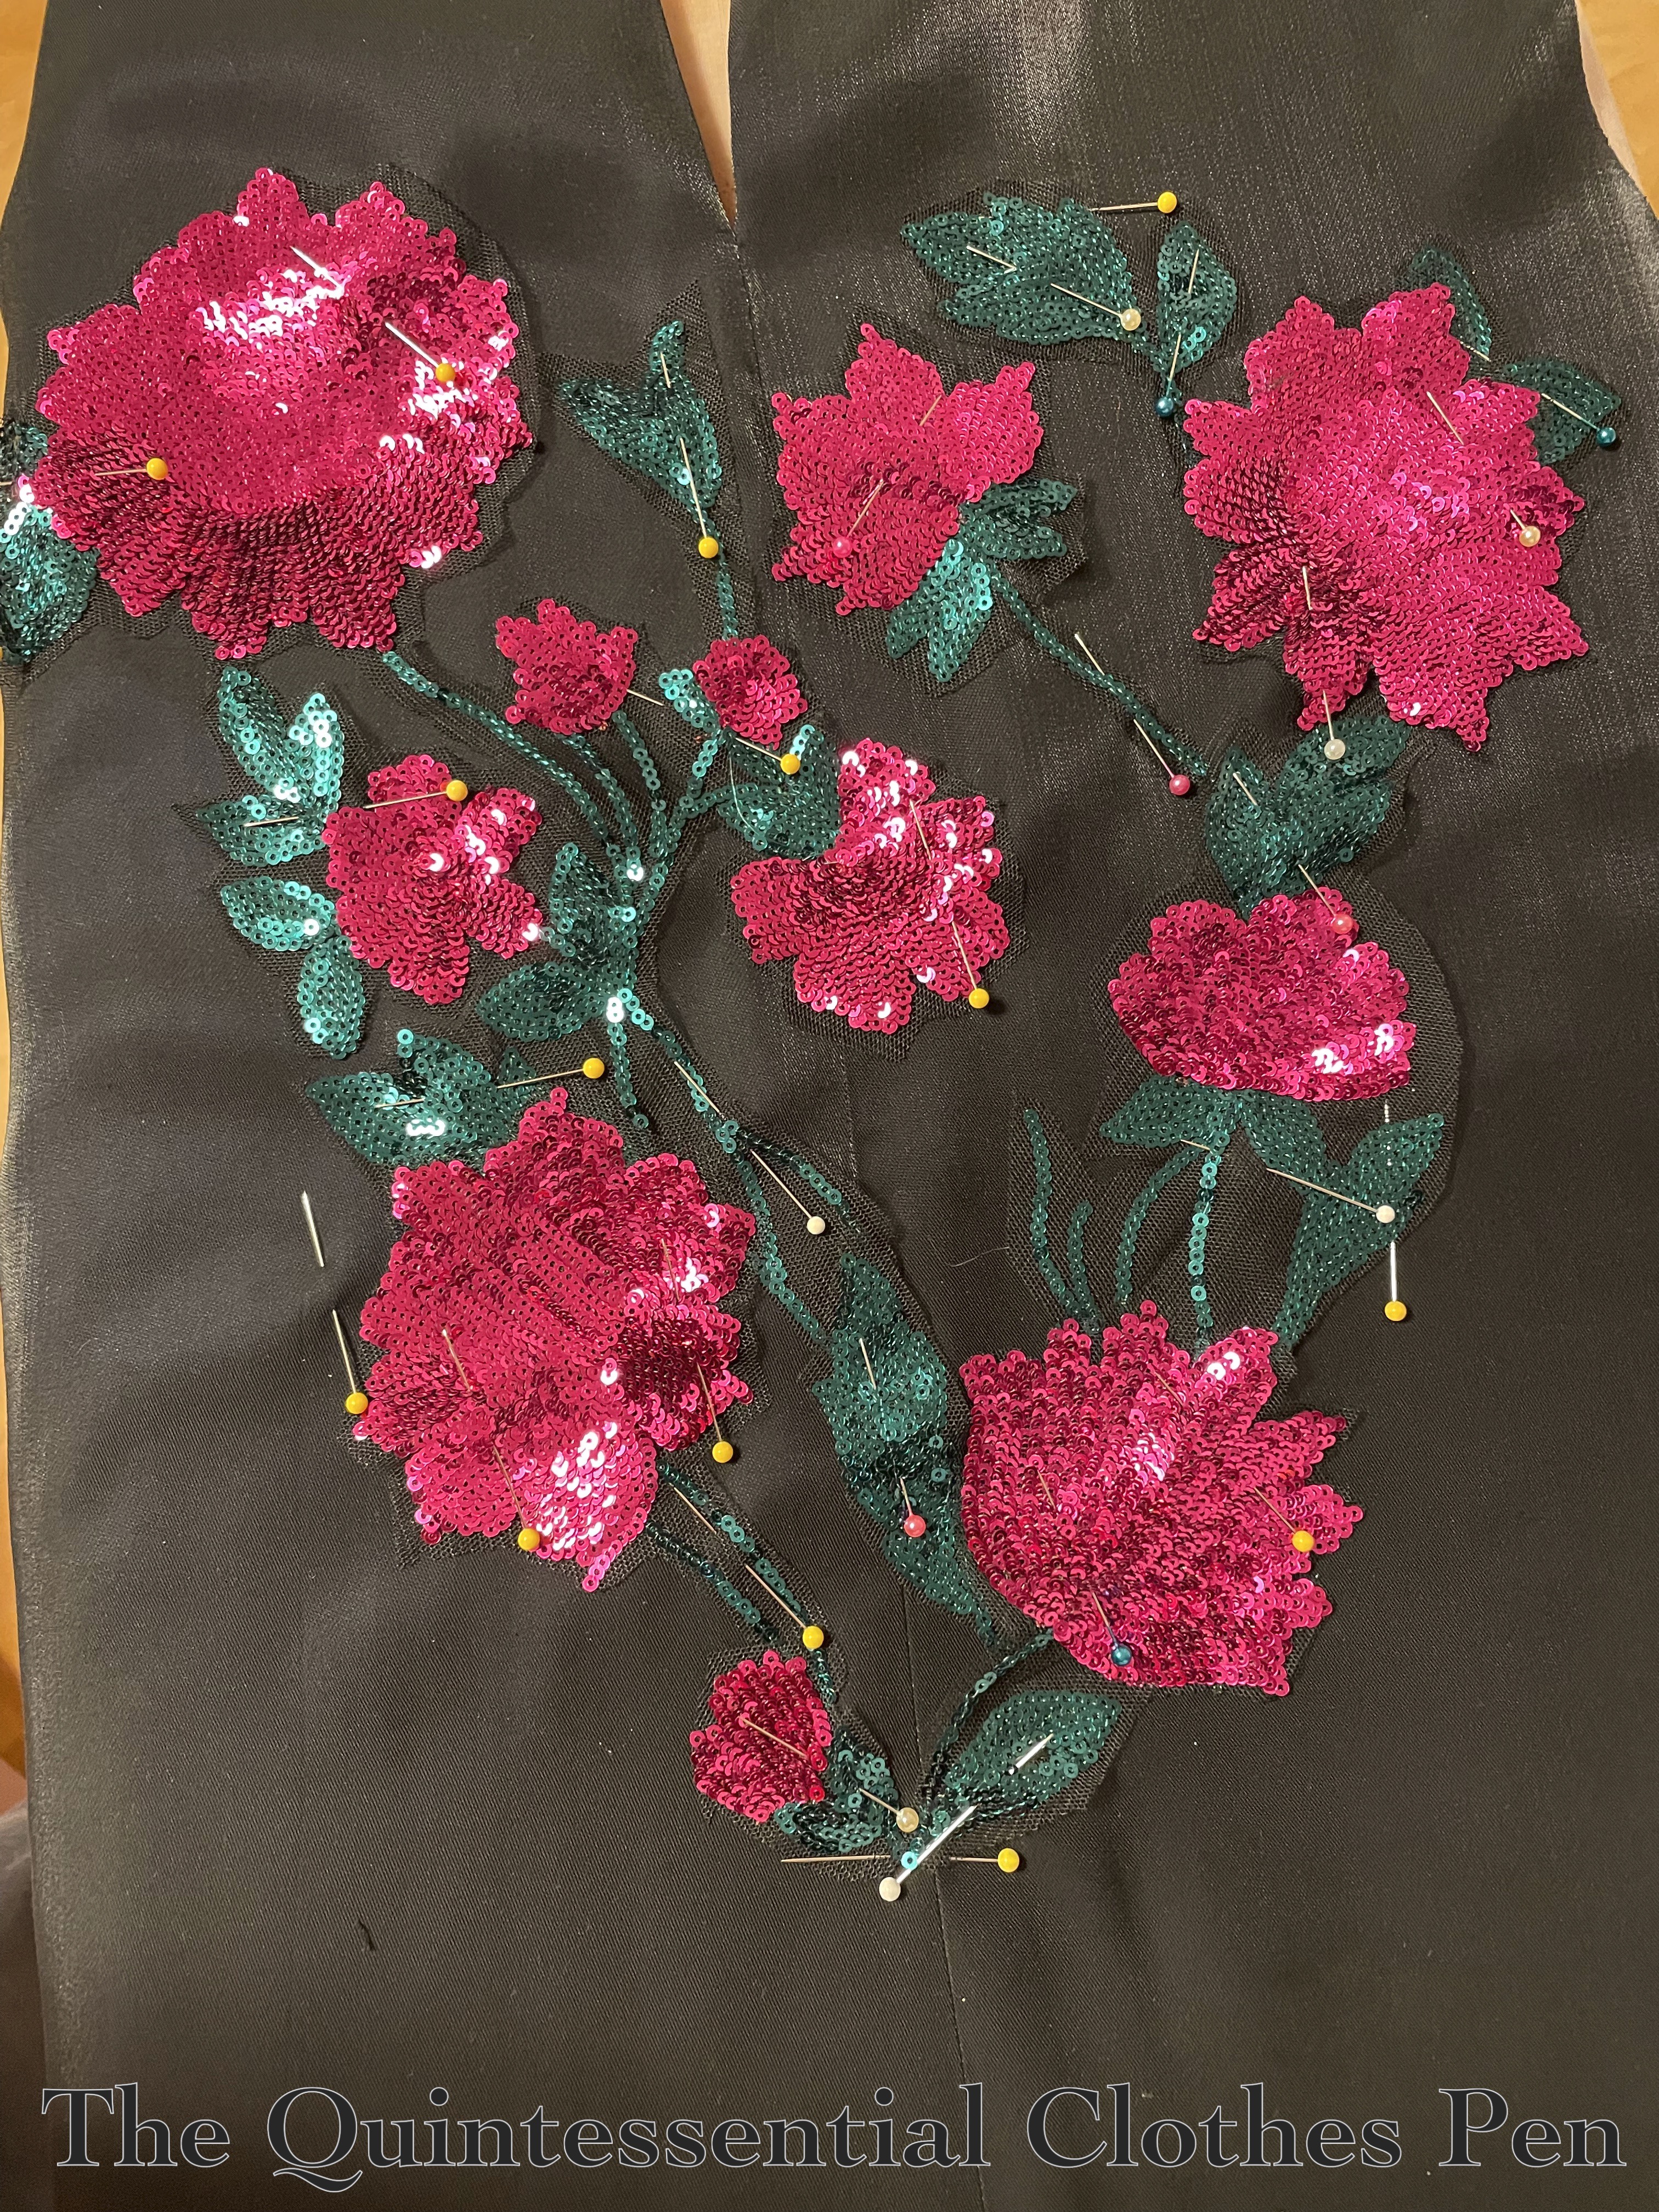
The next big step was using the sequined fabric to create a design similar in shape to the beading on the original. I cut out individual flowers and vines, arranging them on my assembled front pieces and pinning them in place until I was happy with the layout. Below, a photo of my cut out flowers, leaves, and vines while I was deciding on the layout.
Every piece had some net left around the edge so that I could flip them under and appliqué stitch them on. Below is an in-progress photo showing the top right flowers sewn on and some pieces pinned out of the way while I sewed bits that overlapped.
I get great joy out of taking tiny stitches, so I found it fun to catch every sequin as I went around all of the edges of all of the flowers! Here is a view of what all of those stitches look like on the inside of the dress! I didn’t think ahead to put anything to help stabilize the fabric on the inside… I wonder if it would have been less comfortable to wear if I had. Thankfully, the shimmer twill holds its own pretty well and doesn’t show puckers on the outside!
Eventually, all of my sequined bits were sewn in place. And then it was time to finish assembling the dress! The machine sewn seam allowances are all left raw on the inside.
And the top back pieces and back skirt have a fun period way of attaching to each other, which is with a top stitched seam (shown in the photo below). This is pretty common on bias cut dresses I have seen. I understand that this helps to stabilize the seam and is easier to match and line up than it would be to put right sides together in the usual method.
For closures, there is an exposed zipper (gifted to me) on the proper left side of the dress. This method and style was taken directly from the original dress information in PofF2. Below is a photo of the zipper, which is hand stitched into place.
The sleeves and skirt hem are stitched by hand, also following information in PofF2. Here’s a closeup of the sleeve. It is shaped with gathers at the top and two darts at the bottom. The hem is slip stitched into place by hand.
The only other thing that this dress needed was shoulder pads. I don’t think the original has them, as the shoulders look very sloped to me, but they were needed to make the dress sit properly on my body (and they add a very 1940s square shouldered look!).
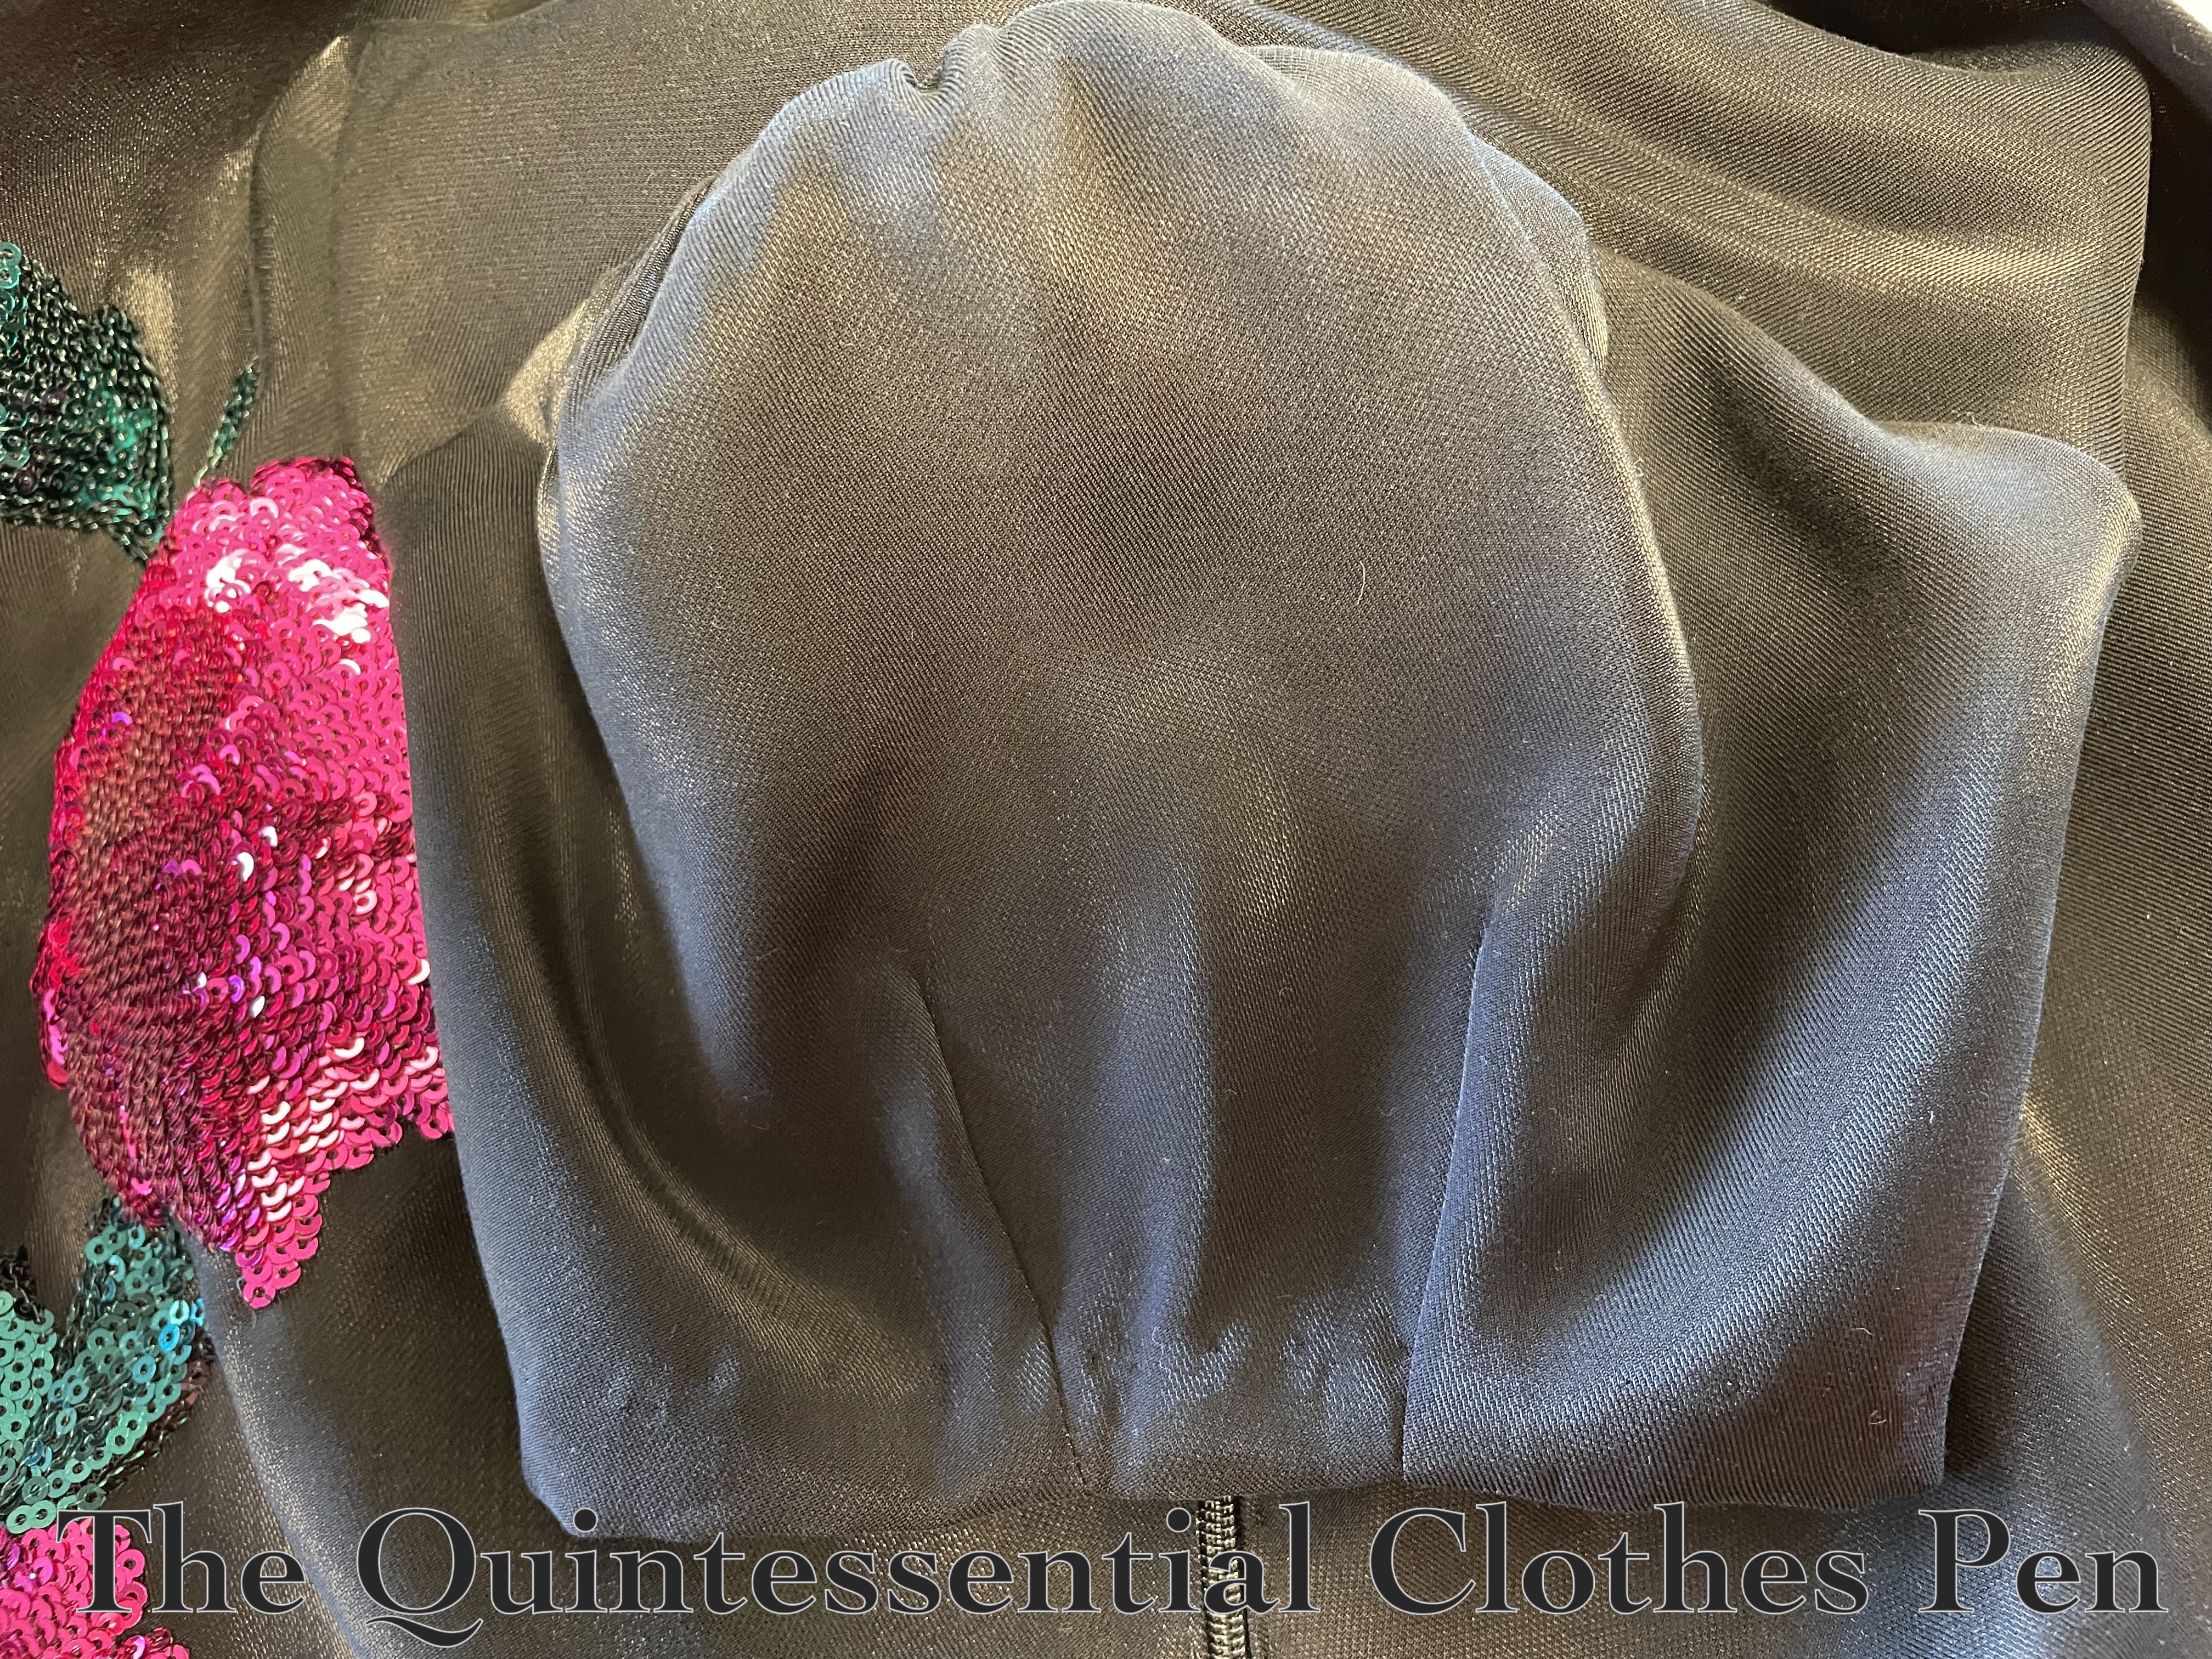
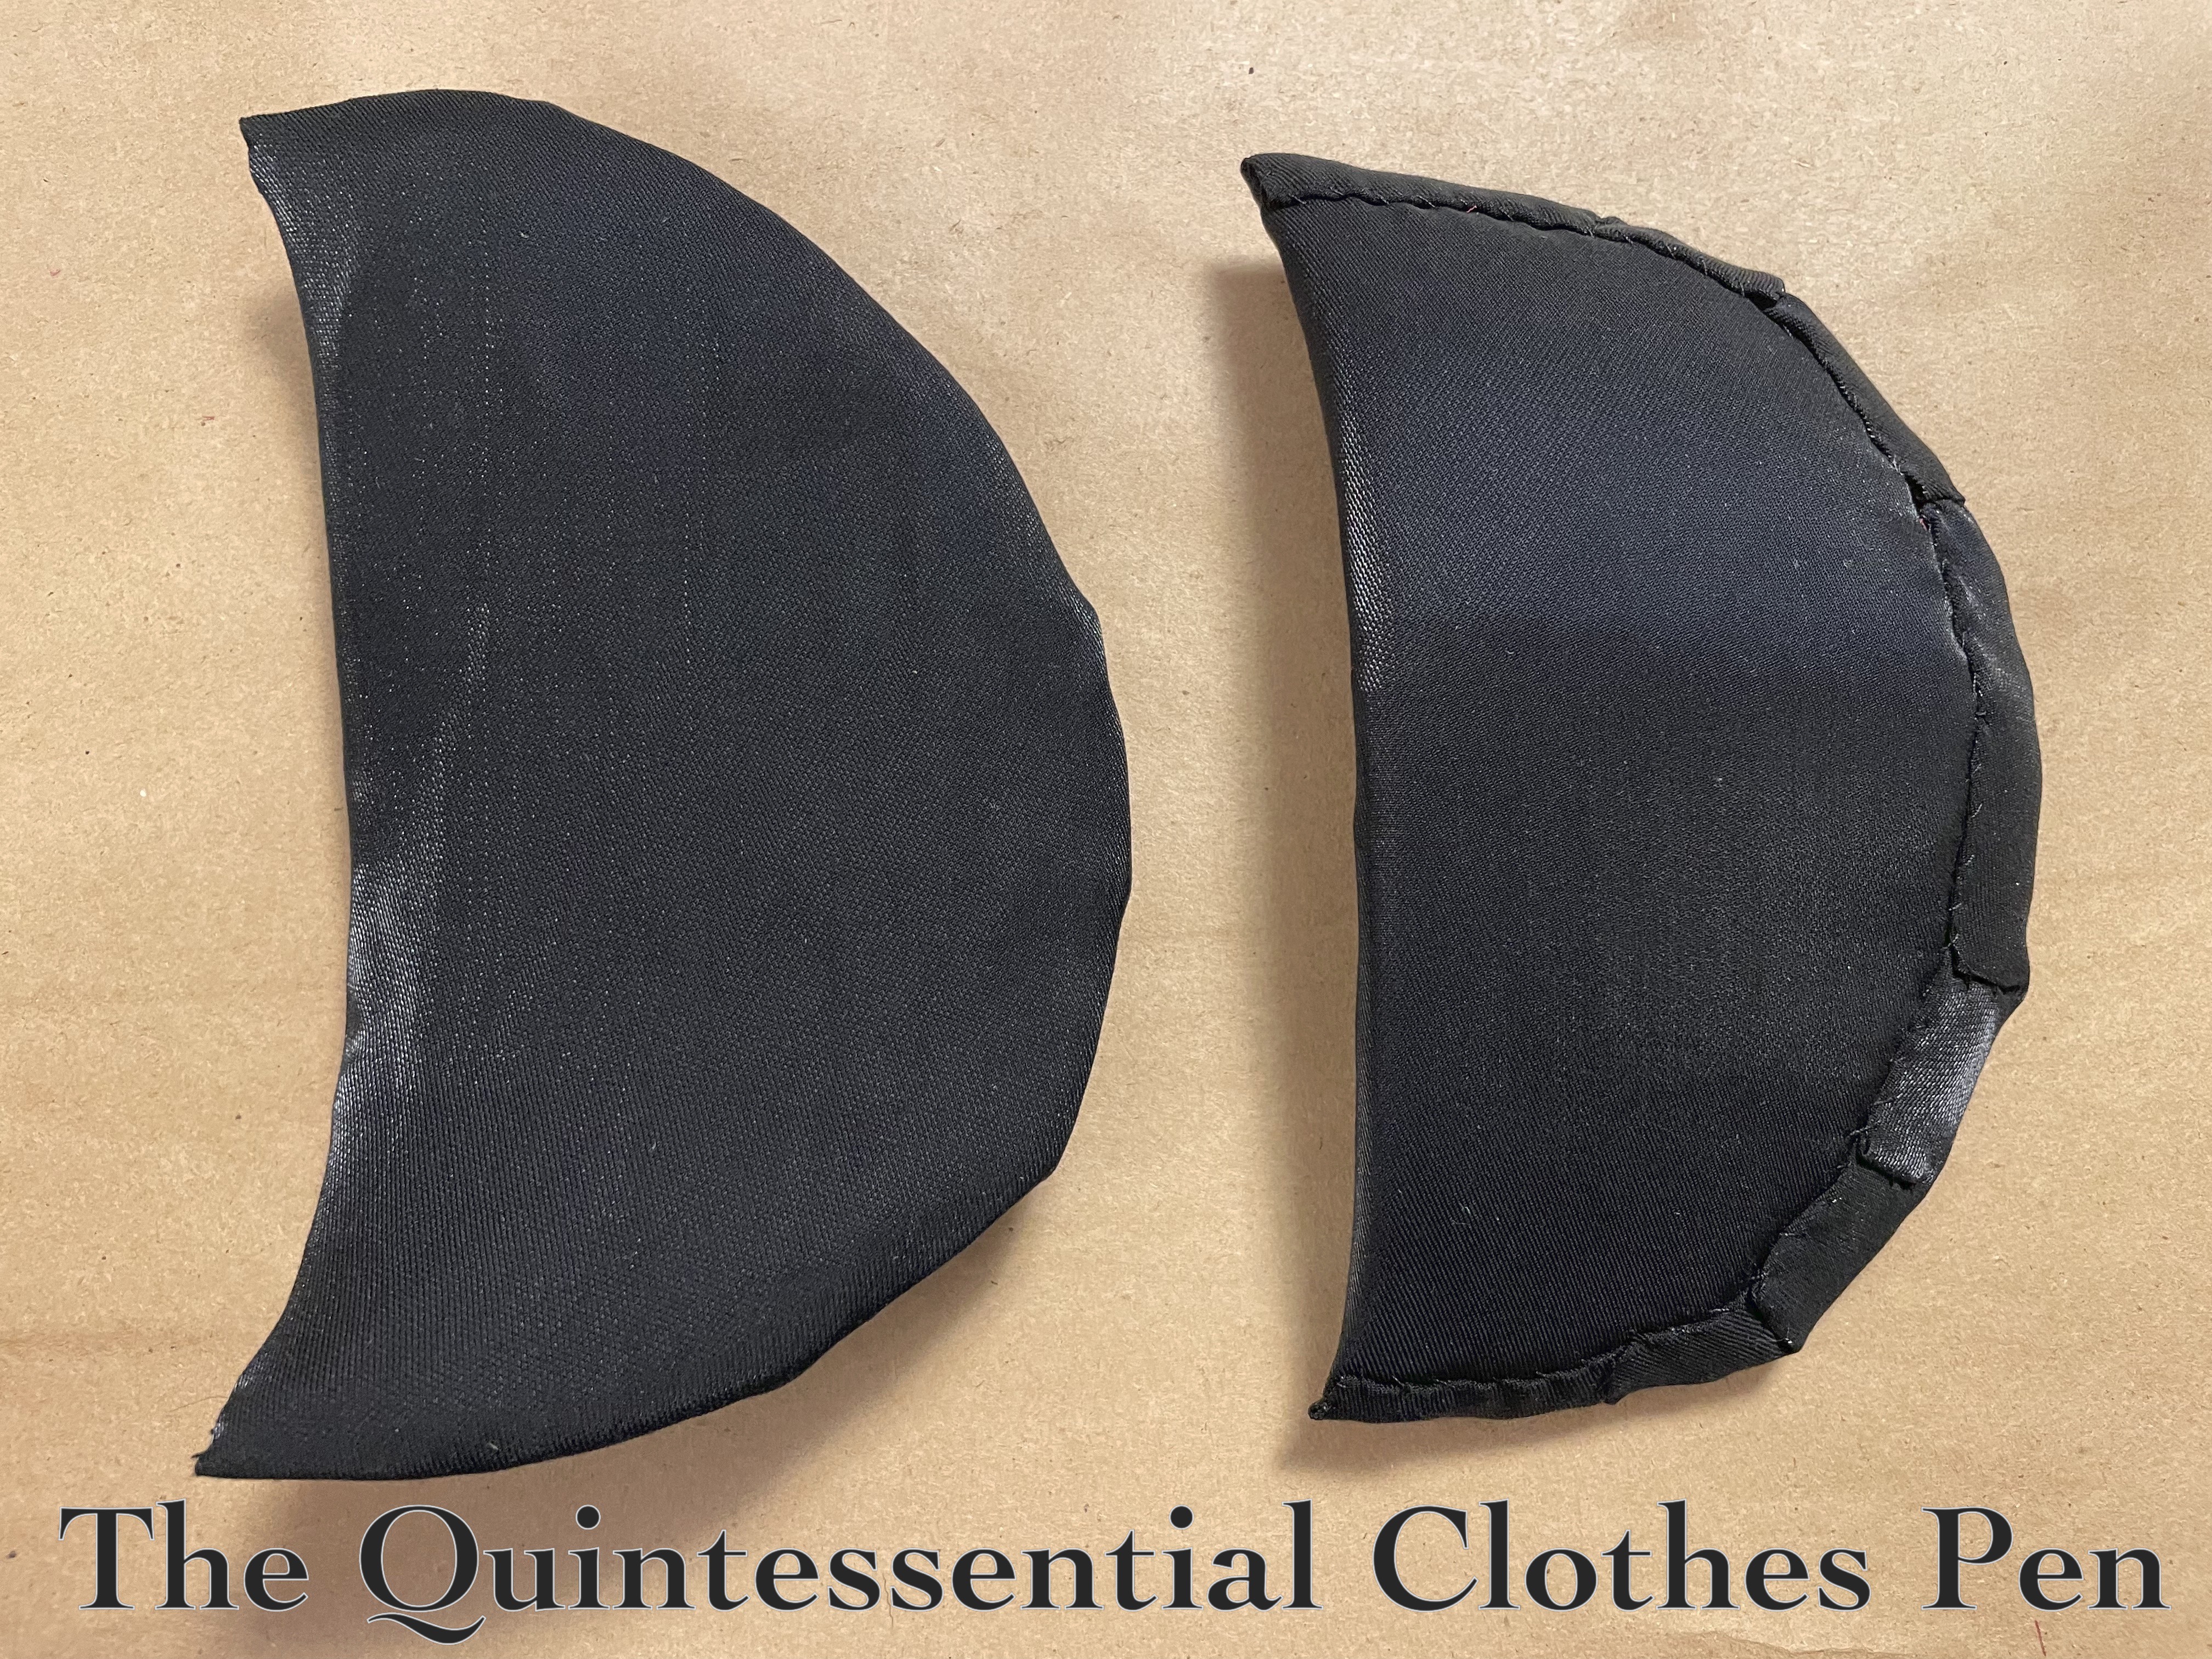
Conveniently, I had a pair of shoulder pads in my stash that worked well. They were, however, light colored and I thought it would be nice if they matched my dress better, so I covered them with scraps of the dress fabric before tacking them in.
Below is a photo of my covered shoulder pads followed by a photo of the shoulder pads sewn in place on the gown, with bra strap keeps added as well.
And that’s it for now! This post is long enough, so pictures of the full ensemble will be in another post!
I’ve been on a roll finishing up foundation and accessory projects that I started over the summer as smaller pieces of larger ensembles I have in the works! Today, I’m sharing about a hand sewn 1790s cap!
This accessory qualifies for the Historical Sew Monthly Challenge #5, Hair Apparel:
Make something worn in the hair or on the head.
Just the facts:
Fabric/Materials: ¼ yd white linen, ¼ yd white silk organza, ¼ yd gold striped polyester organza, and 1 yd ¼” white cotton twill tape.
Pattern: 1790s “Vigée le Brun” Turban Cap in the book The American Duchess Guide To 18th Century Dressmaking, by Lauren Stowell and Abby Cox.
Year: c. 1790.
Notions: Thread.
How historically accurate is it?: 95%. Polyester is obviously not historically accurate, but most of the materials, methods, and hand sewing method are.
Hours to complete: 5.
First worn: Has not been worn yet.
Total cost: All of the materials are from the stash (leftovers from other projects), so let’s say free!
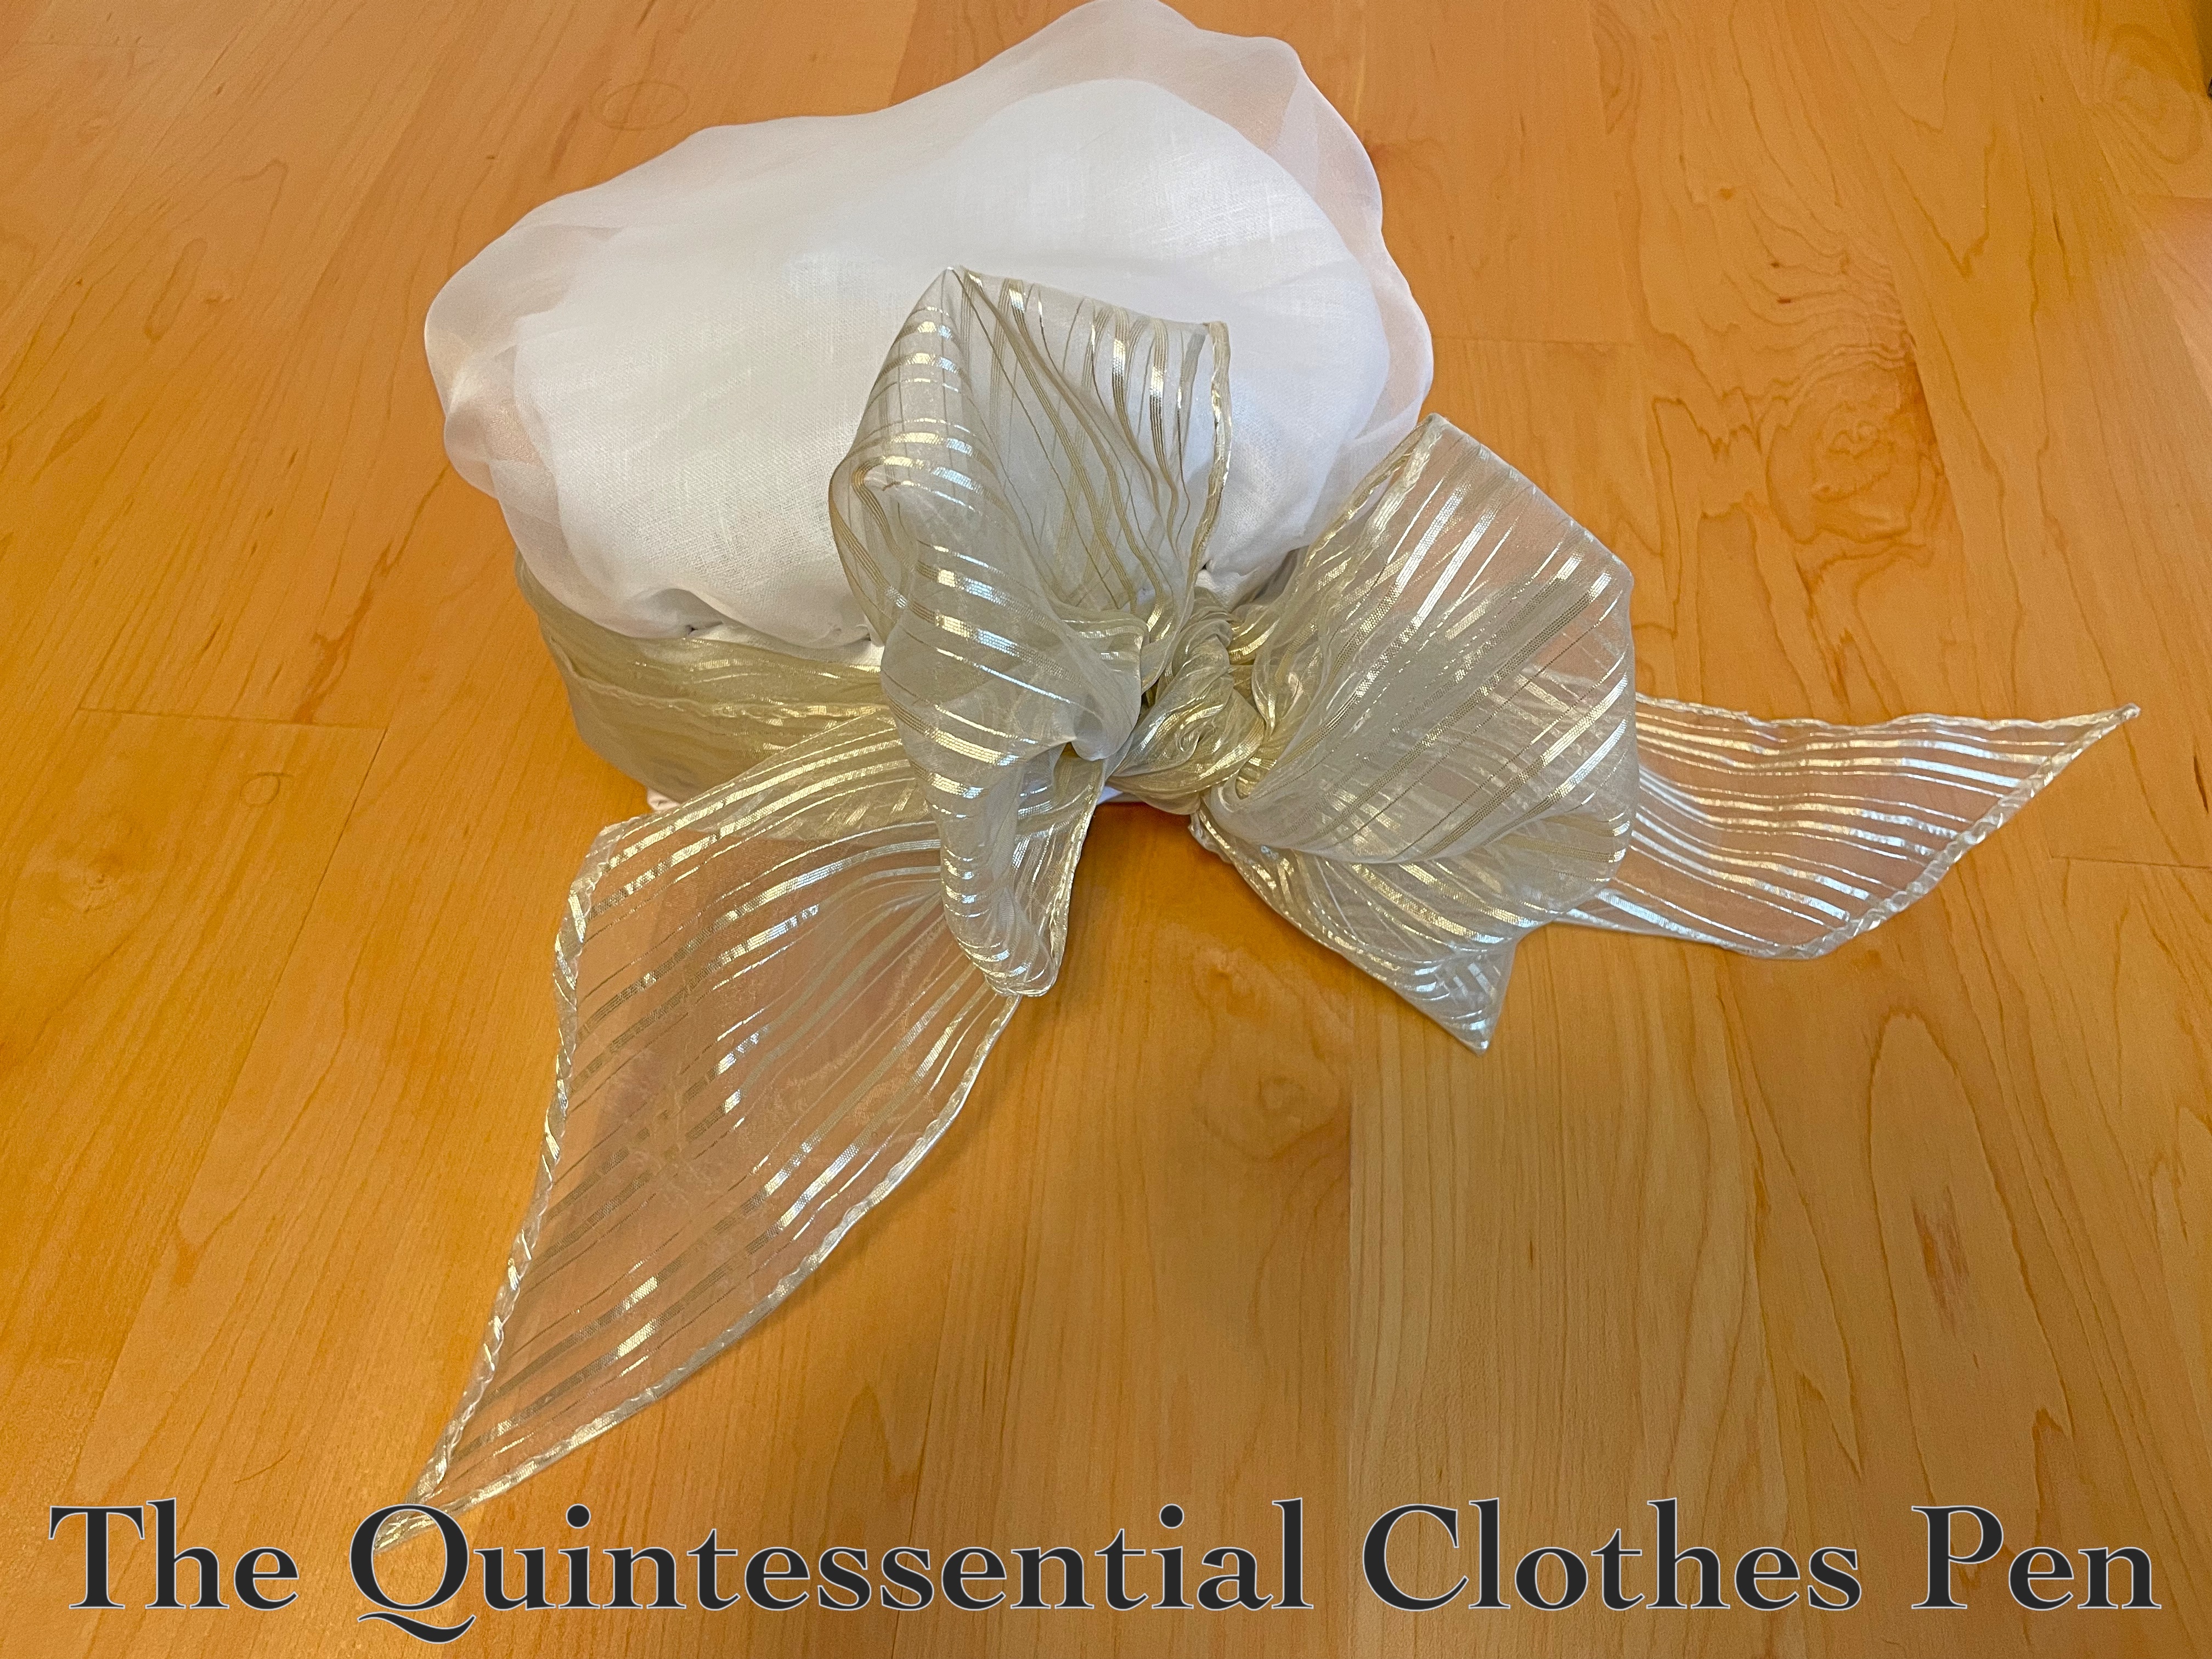
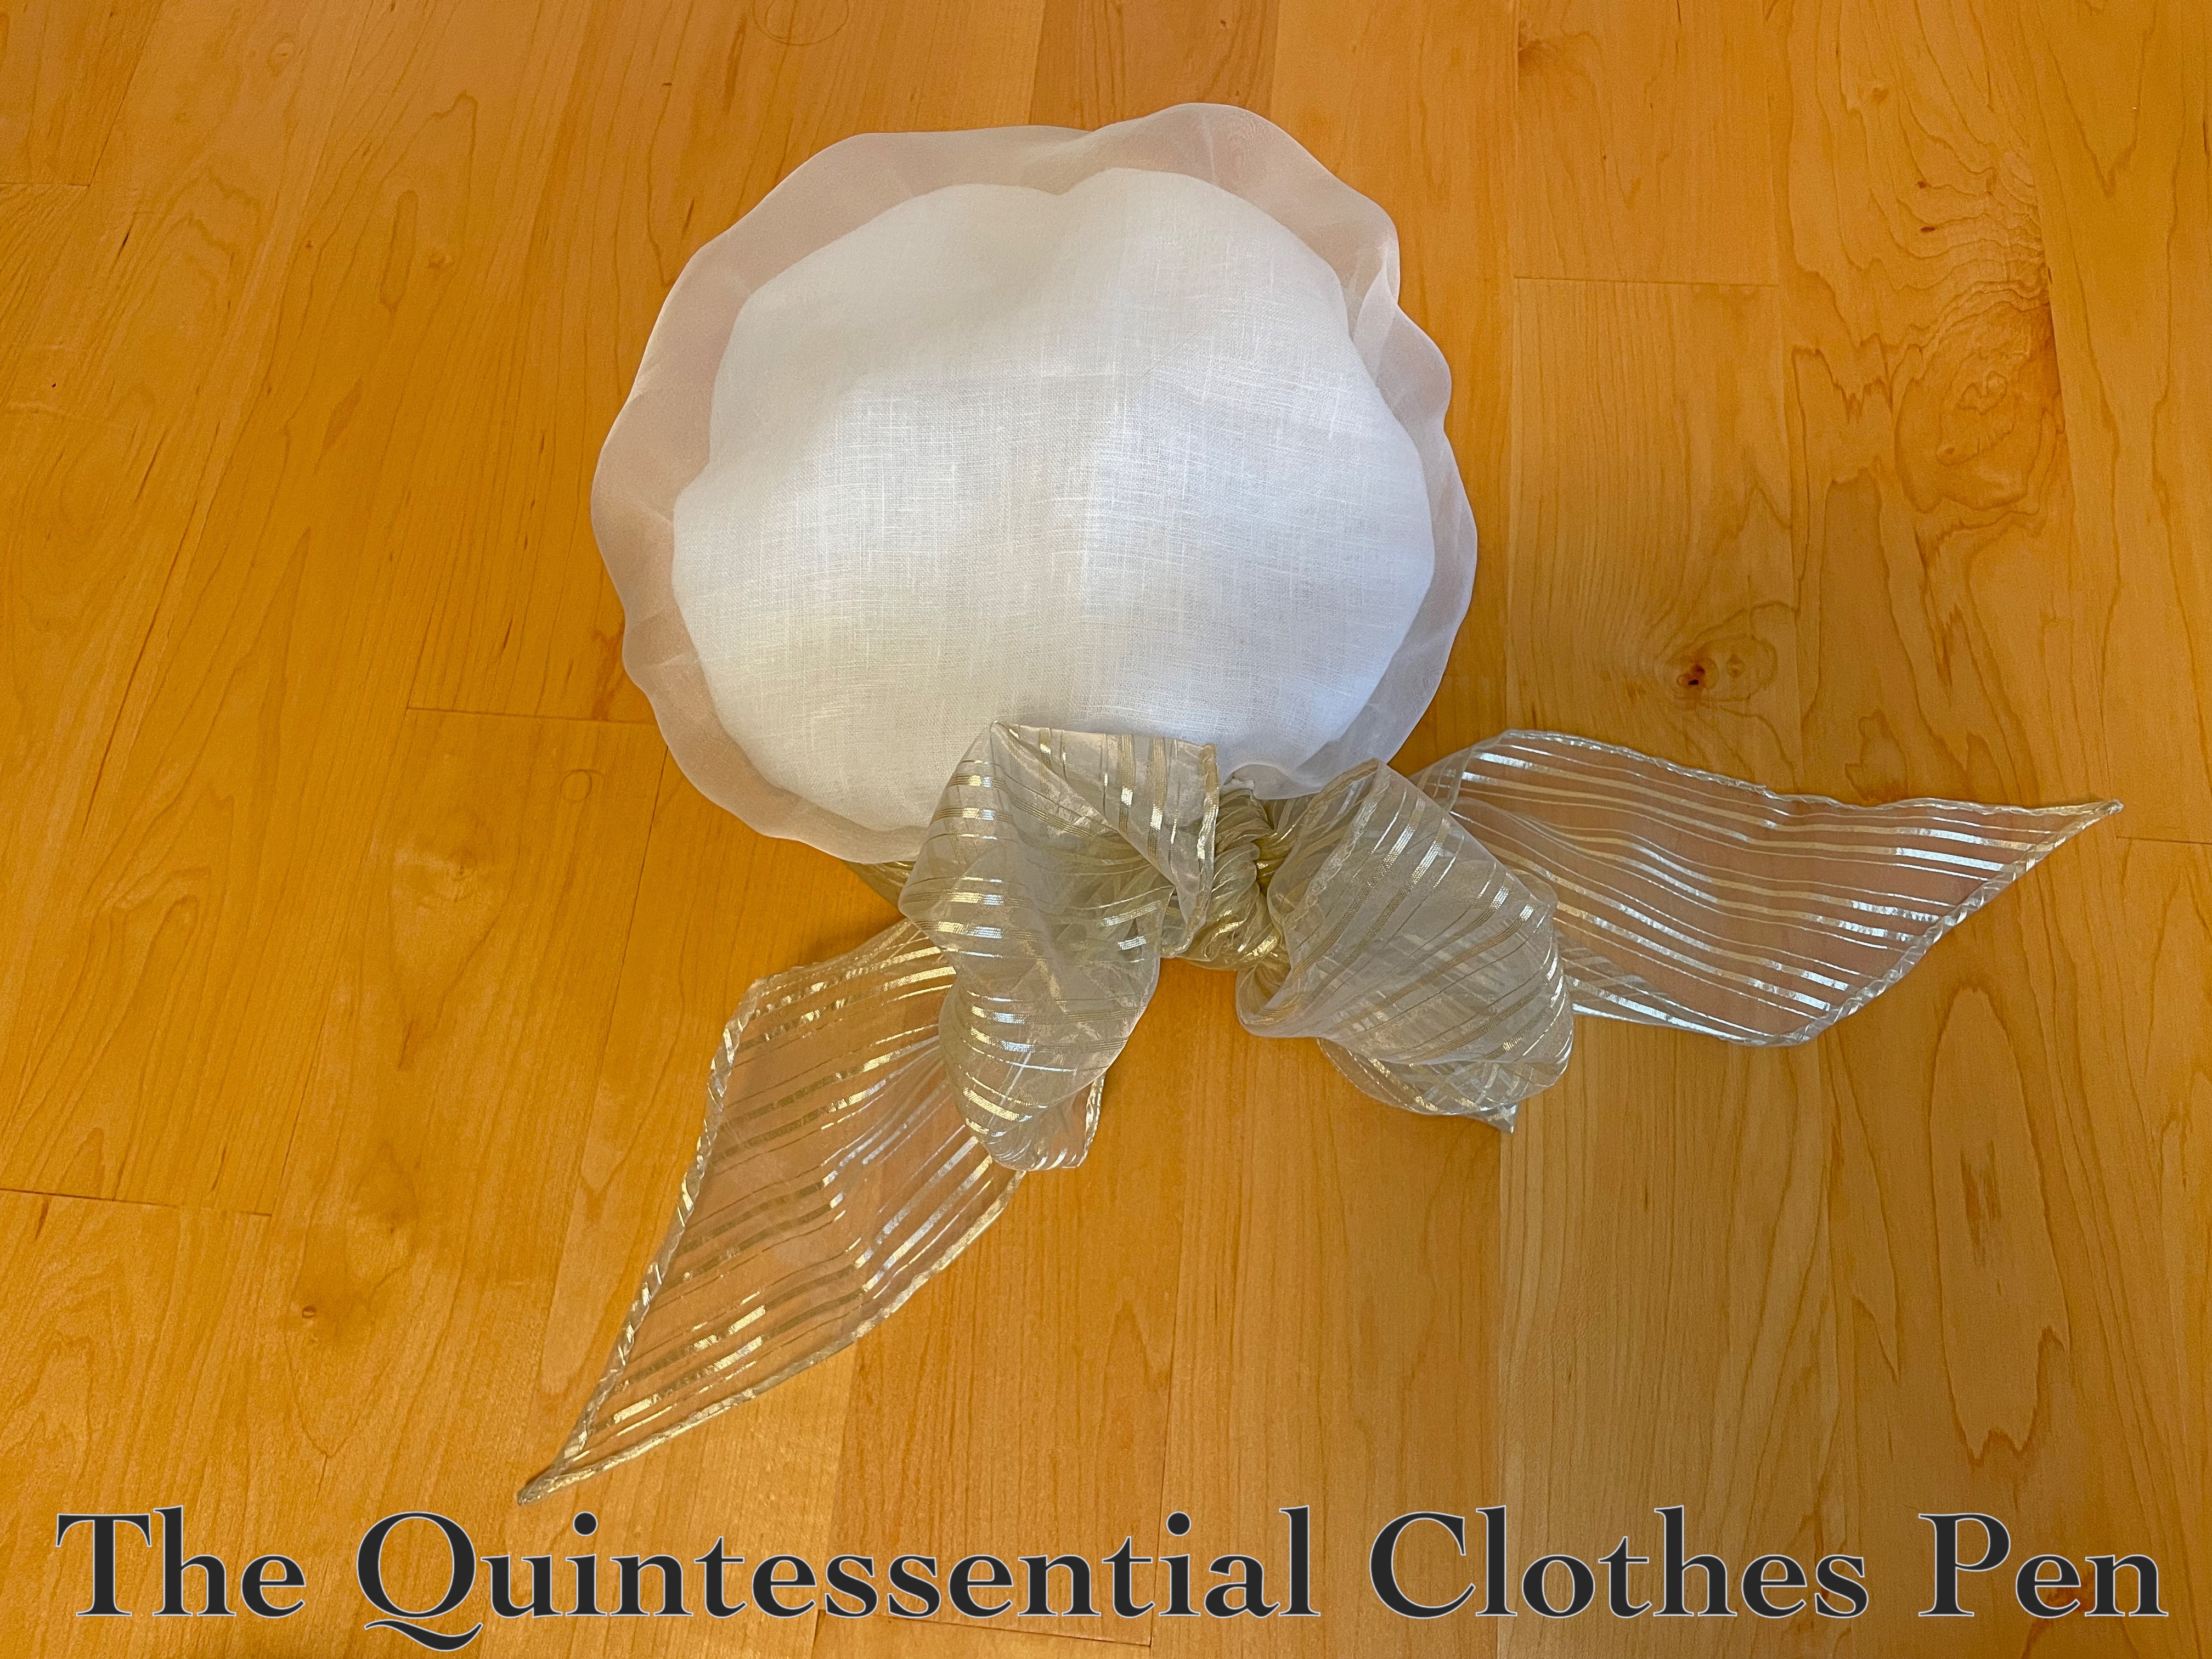
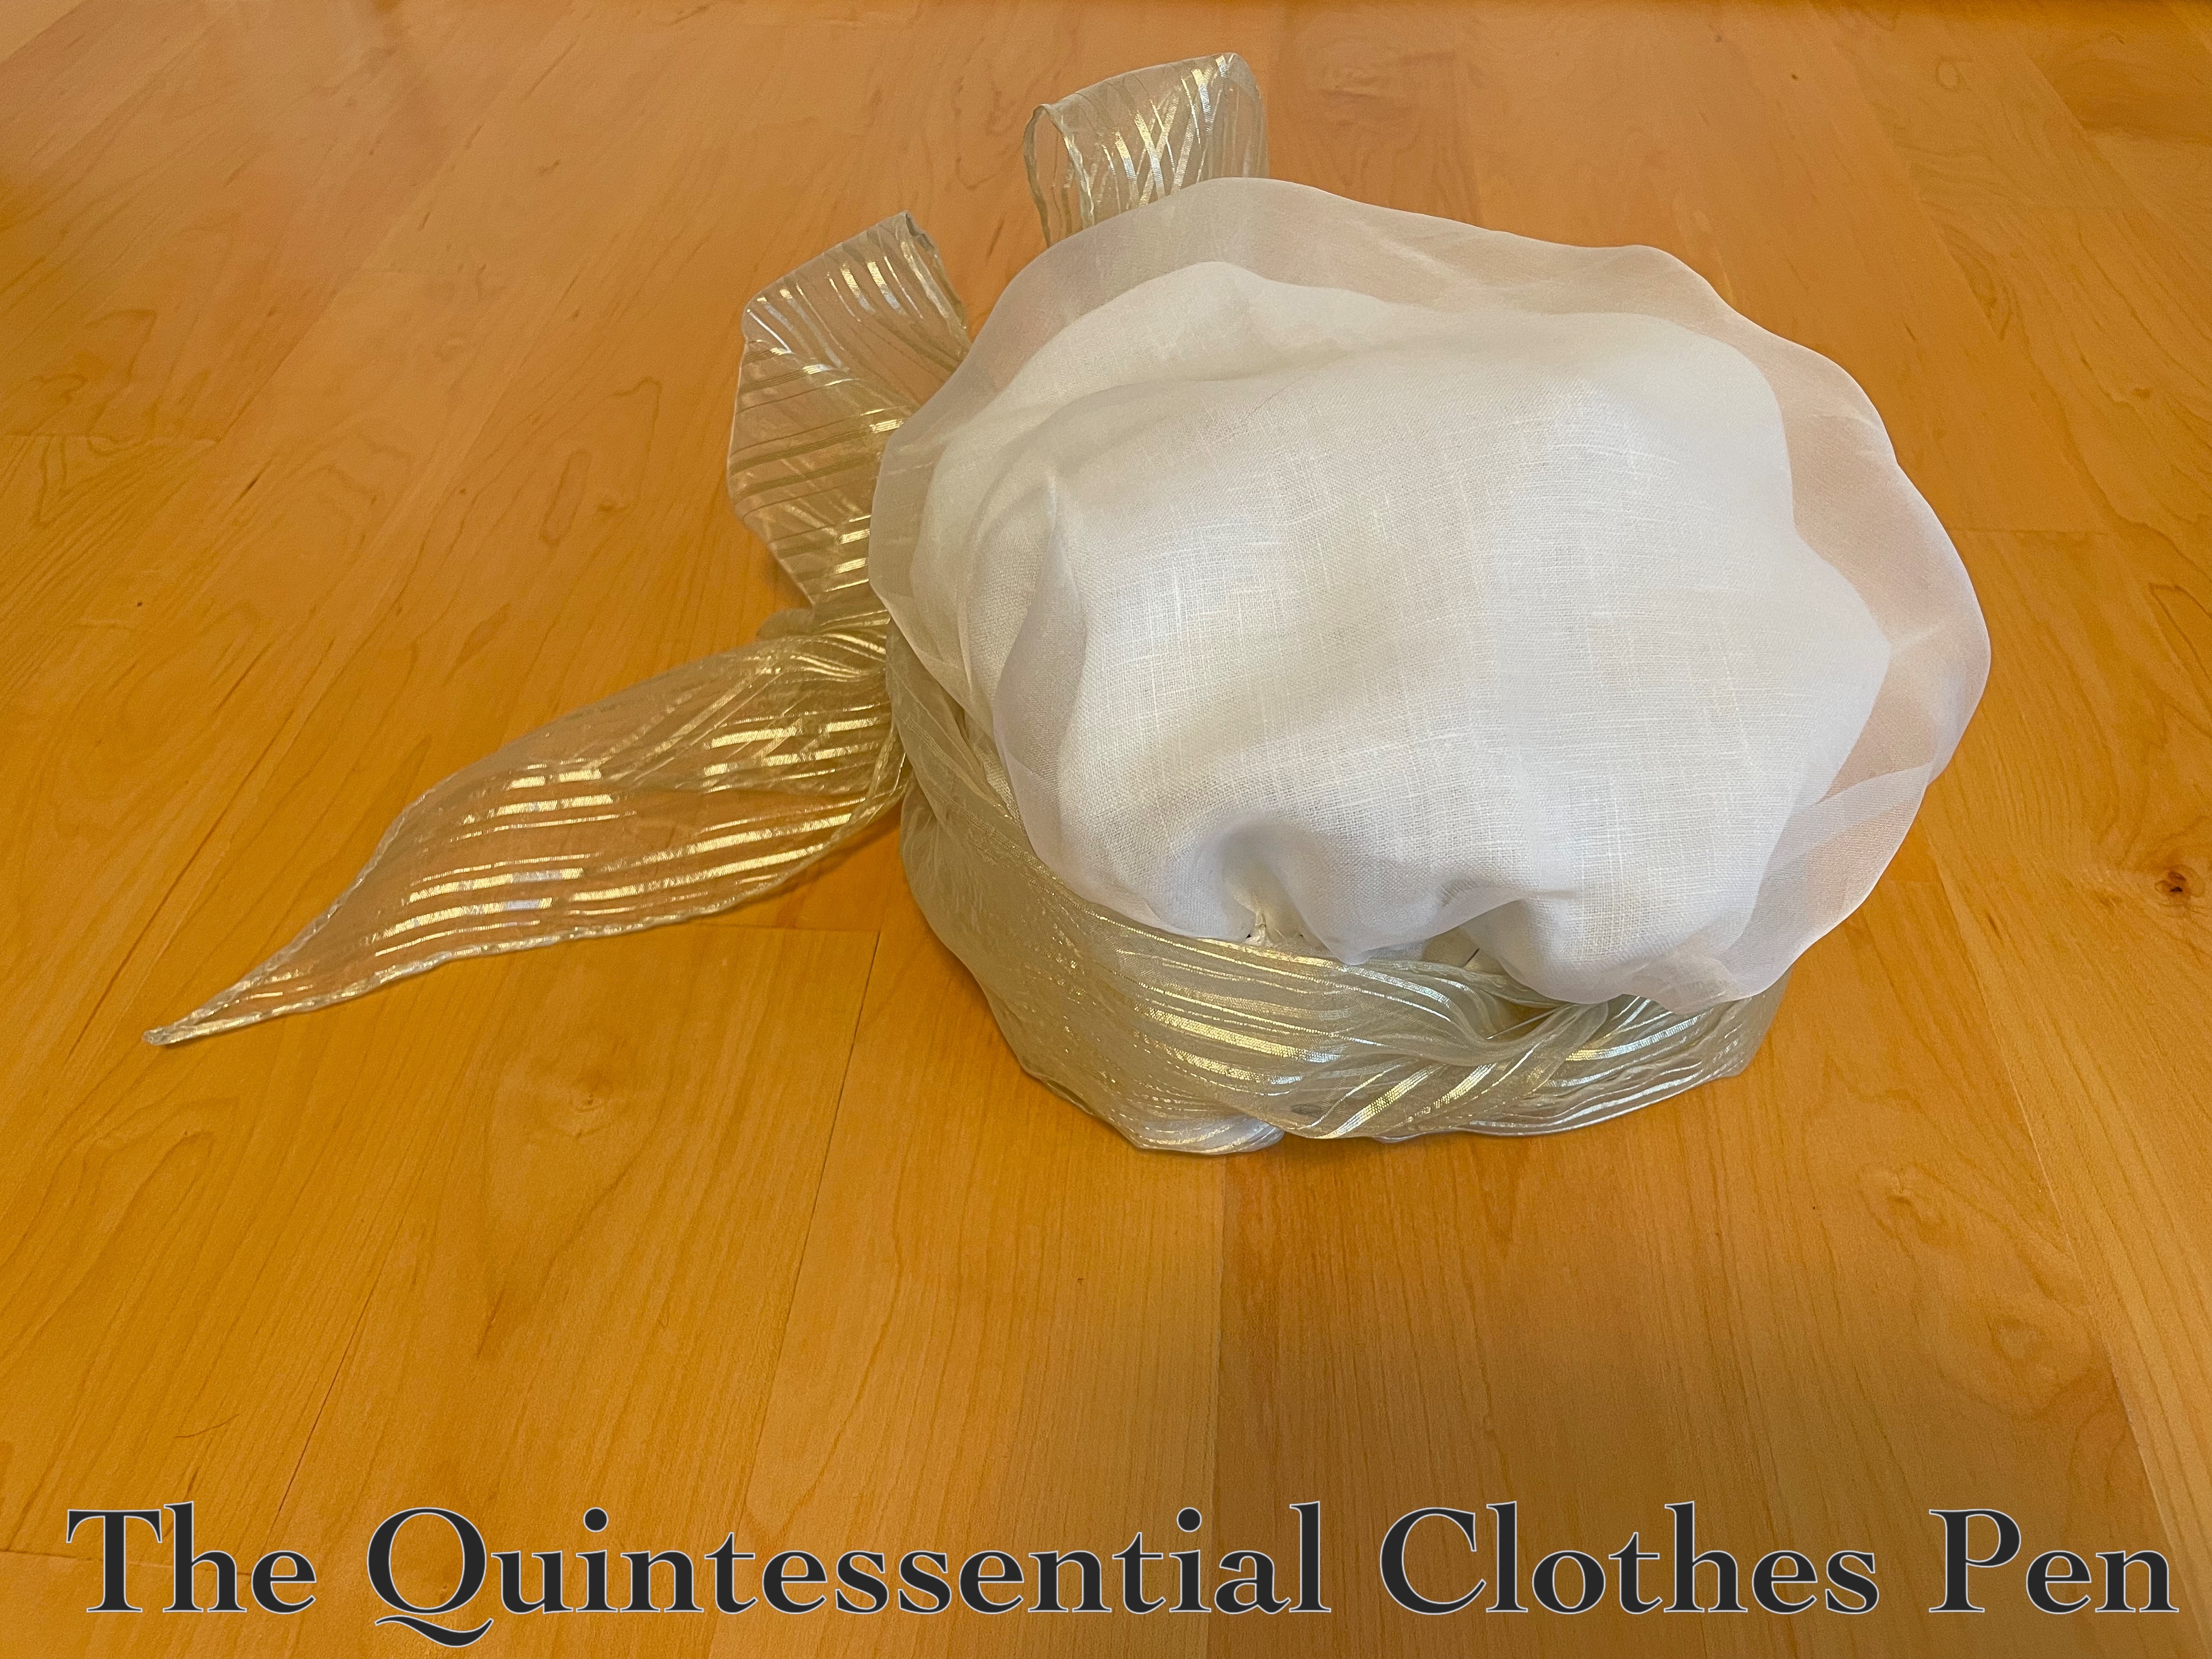
This is a fun accessory to add to my collection! I’m amused by the oversized crown and bow. The oversized crown, especially, is visible in the photo below.
The silk organza used for the outer crown is fun, but when considered with the all white dress in the works it seemed a bit monochromatic. So to liven things up a bit, I decided on a gold stripe organza (leftovers from my 1817 Duchess Gown) for the bow. It’s polyester, so points off for historical accuracy, but I like that it’s neutral but more interesting than white.
For now the cap is just living on my sewing table so the carefully pressed fabrics don’t crease. Hopefully, next year the cap will get an outing and be documented on my head!
I finished a project! It’s small, but I’m very pleased with it.
The project is a sash to be worn with an in-progress 1790s dress. The goal is to be slowly progressing towards an entire 1790s outfit, with all of the appropriate accessories.
I’ve enjoyed making lists of what those accessories might be and getting them cut out and lined up for mindless hand sewing. That way, even when life is busy and I don’t have time to think about a project, I can still make progress and have something to sew, which brings me great joy and a sense of calm.
This project takes its inspiration and instruction from The American Duchess Guide To 18th Century Dressmaking, by Lauren Stowell and Abby Cox.
I’m excited that the sash qualifies for the Historical Sew Monthly Challenge #3, Focus on the Fabric:
Make something in which the fabric colour/ texture/print/material etc. is the central feature of the design.
This fits the challenge in that the sash really isn’t at all about the construction details… The only cuts to the fabric were to make strips, and the only sewing is joining them and finishing the edges. So it really is all about the fabric!
Just the facts:
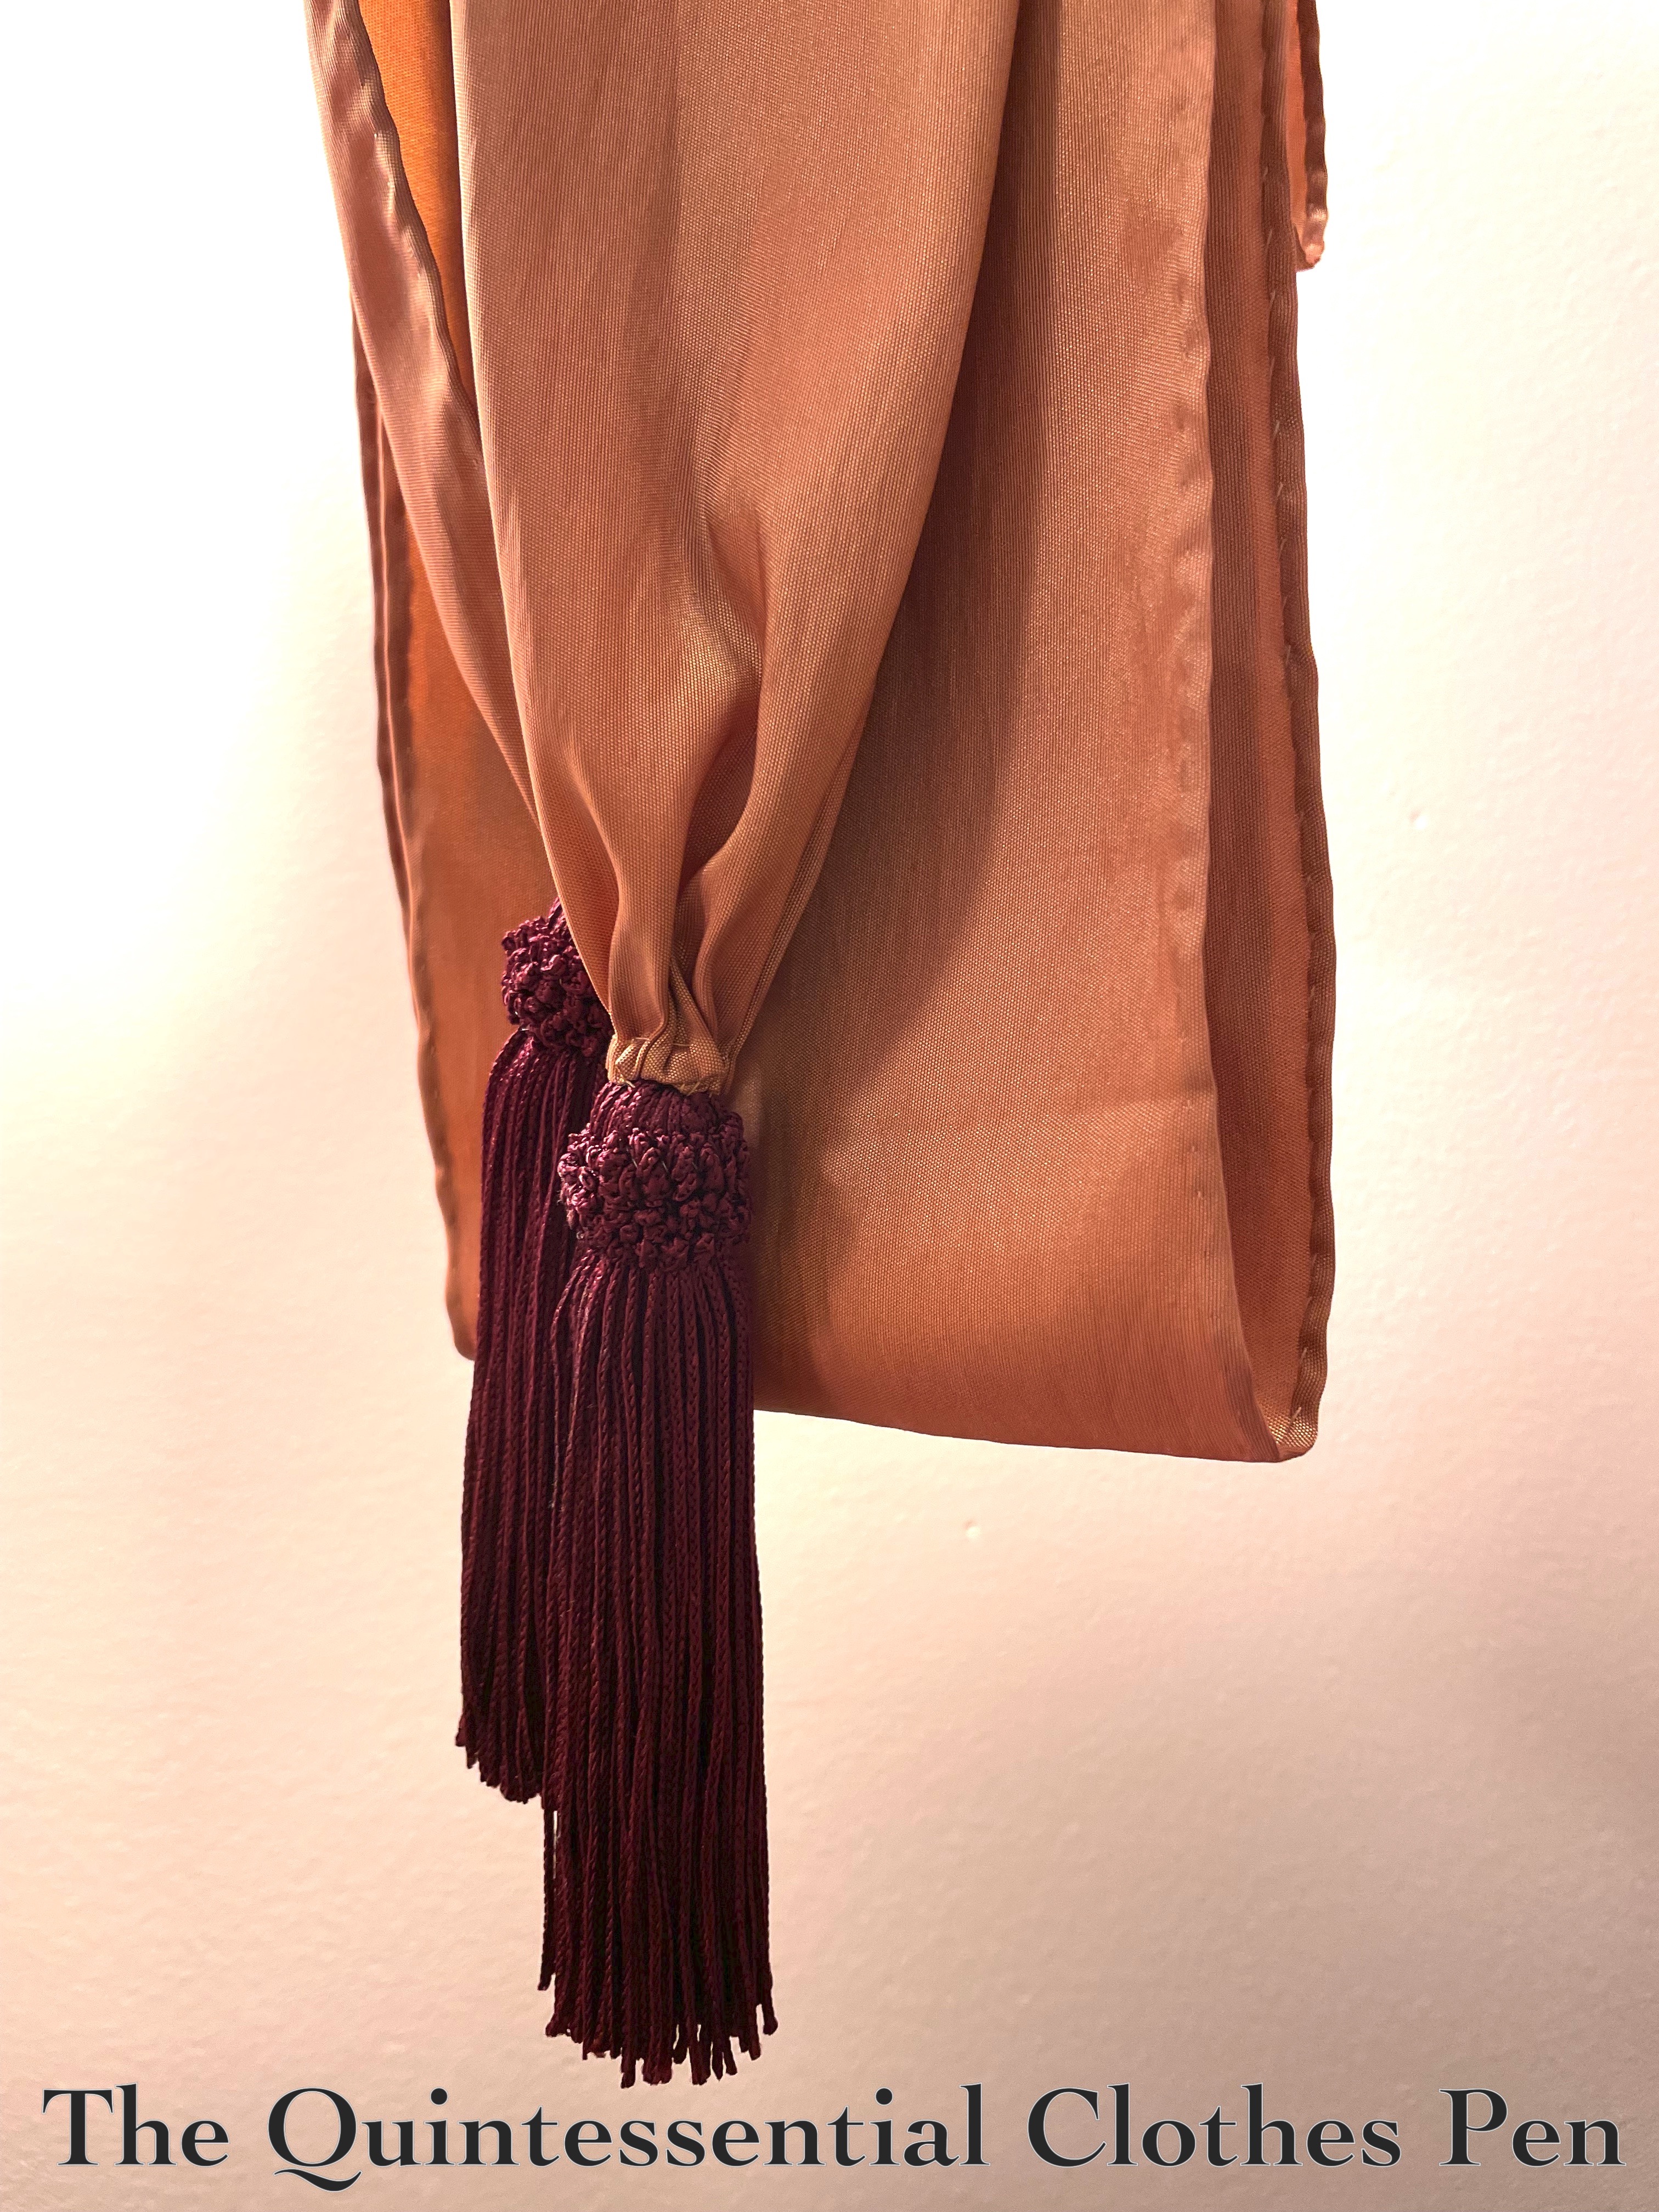
Fabric/Materials: ½ yard or so orange/gold shot polyester taffeta leftover from a very old project and 2 burgundy tassels.
Pattern: 1790s Sash in the book The American Duchess Guide To 18th Century Dressmaking, by Lauren Stowell and Abby Cox.
Year: c. 1790.
Notions: Thread.
How historically accurate is it?: 90%. Polyester is obviously not historically accurate, but the dimensions and hand sewing method are.
Hours to complete: 5.
First worn: Has not been worn yet.
Total cost: $2 for the tassels and let’s say $.50 for the thread. We’ll count the fabric as free. So, $2.50.
I recently finished up a series of blog posts that document the trials, tribulations, and triumphs of a new pair of 18th century stays. Here is the link to the most recent post (and I’ll include a link to all of the posts in the series at the end of this post).
I’m really, really excited that this pair of stays is complete! They are entirely hand sewn, which took quite a bit of time. And, they were a struggle to fit that ended in success. For both of those reasons, I’m excited that these qualify for the HSM Challenge #11: Style Starts At Home:
Make something which would generally be seen only within the household (ex: informal at-home wear, nightwear, undergarments)
How do these fit the challenge? Well, stays are an undergarment that would generally only be seen at home!
Just the facts:
Fabric/Materials: ⅔ yard natural linen for exterior (scraps from another project), 1 ⅓ yards thick/heavy white linen for interlining (scraps from another project), and ½ yard cream linen/cotton blend for lining
Pattern: 1785-1788 Half-Boned Stays from Mandy Barrington’s book Stays and Corsets: Historical Patterns Translated for the Modern Body
Year: c. 1785-1788
Notions: 29 10″-14″ zip ties that I cut to be 3/16″ wide for boning, 2 ½ yards 3/16″ wide natural linen twill tape for seam covering, 4 yards 1/2″ wide natural linen plain weave tape for binding, 3 yards white cotton cord for lacing, 1 yard ¼” wide cotton twill tape for front lacing, 2 yards ¾” wide cream cotton twill tape for straps, regular weight thread, and heavy weight thread
How historically accurate is it?: 90%. The pattern and methods are based on historical examples. The materials are pretty close, though the zip ties and cotton/linen blend aren’t perfect replicas of 18th century materials.
Hours to complete: I only kept track of about 50 hours, but my guess is that I spent at least 70-80 on these stays.
First worn: In May 2023 for photos.
Total cost: Approximately $40.
And, a few more photos: side and back view, as well as a view of the stays folded in half from the inside.
After the progress made in the last post, there weren’t that many steps left to complete. Yay! Below are details about those steps.
Binding
I used ½” natural linen tape. It is whip stitched onto the right side and then wrapped around to the inside and more roughly whipped. The inside stitches will be covered with the lining, so making them invisible and pretty is less important. Below is a photo of the inside of the stays after the binding was sewn on.
Lining
At this point, the stays were almost done. The lining serves to cover up all of the interior construction. To make it, I laid my stays out wrong side face up (as in the above photo) with my lining fabric on top. I pinned in a few strategic places and then roughly penciled where I wanted the cutting lines to be. Then, I cut the lining pieces out.
Once cut, I pinned the center lining piece in place, then pinned the piece next to it, turning under my raw edges at the places I wanted the seam to be and around the edges. Those edges were all pinned in place and then each edge was whip stitched. Additionally, each tab has a separate, small piece of lining whose edges are also whip stitched in place.
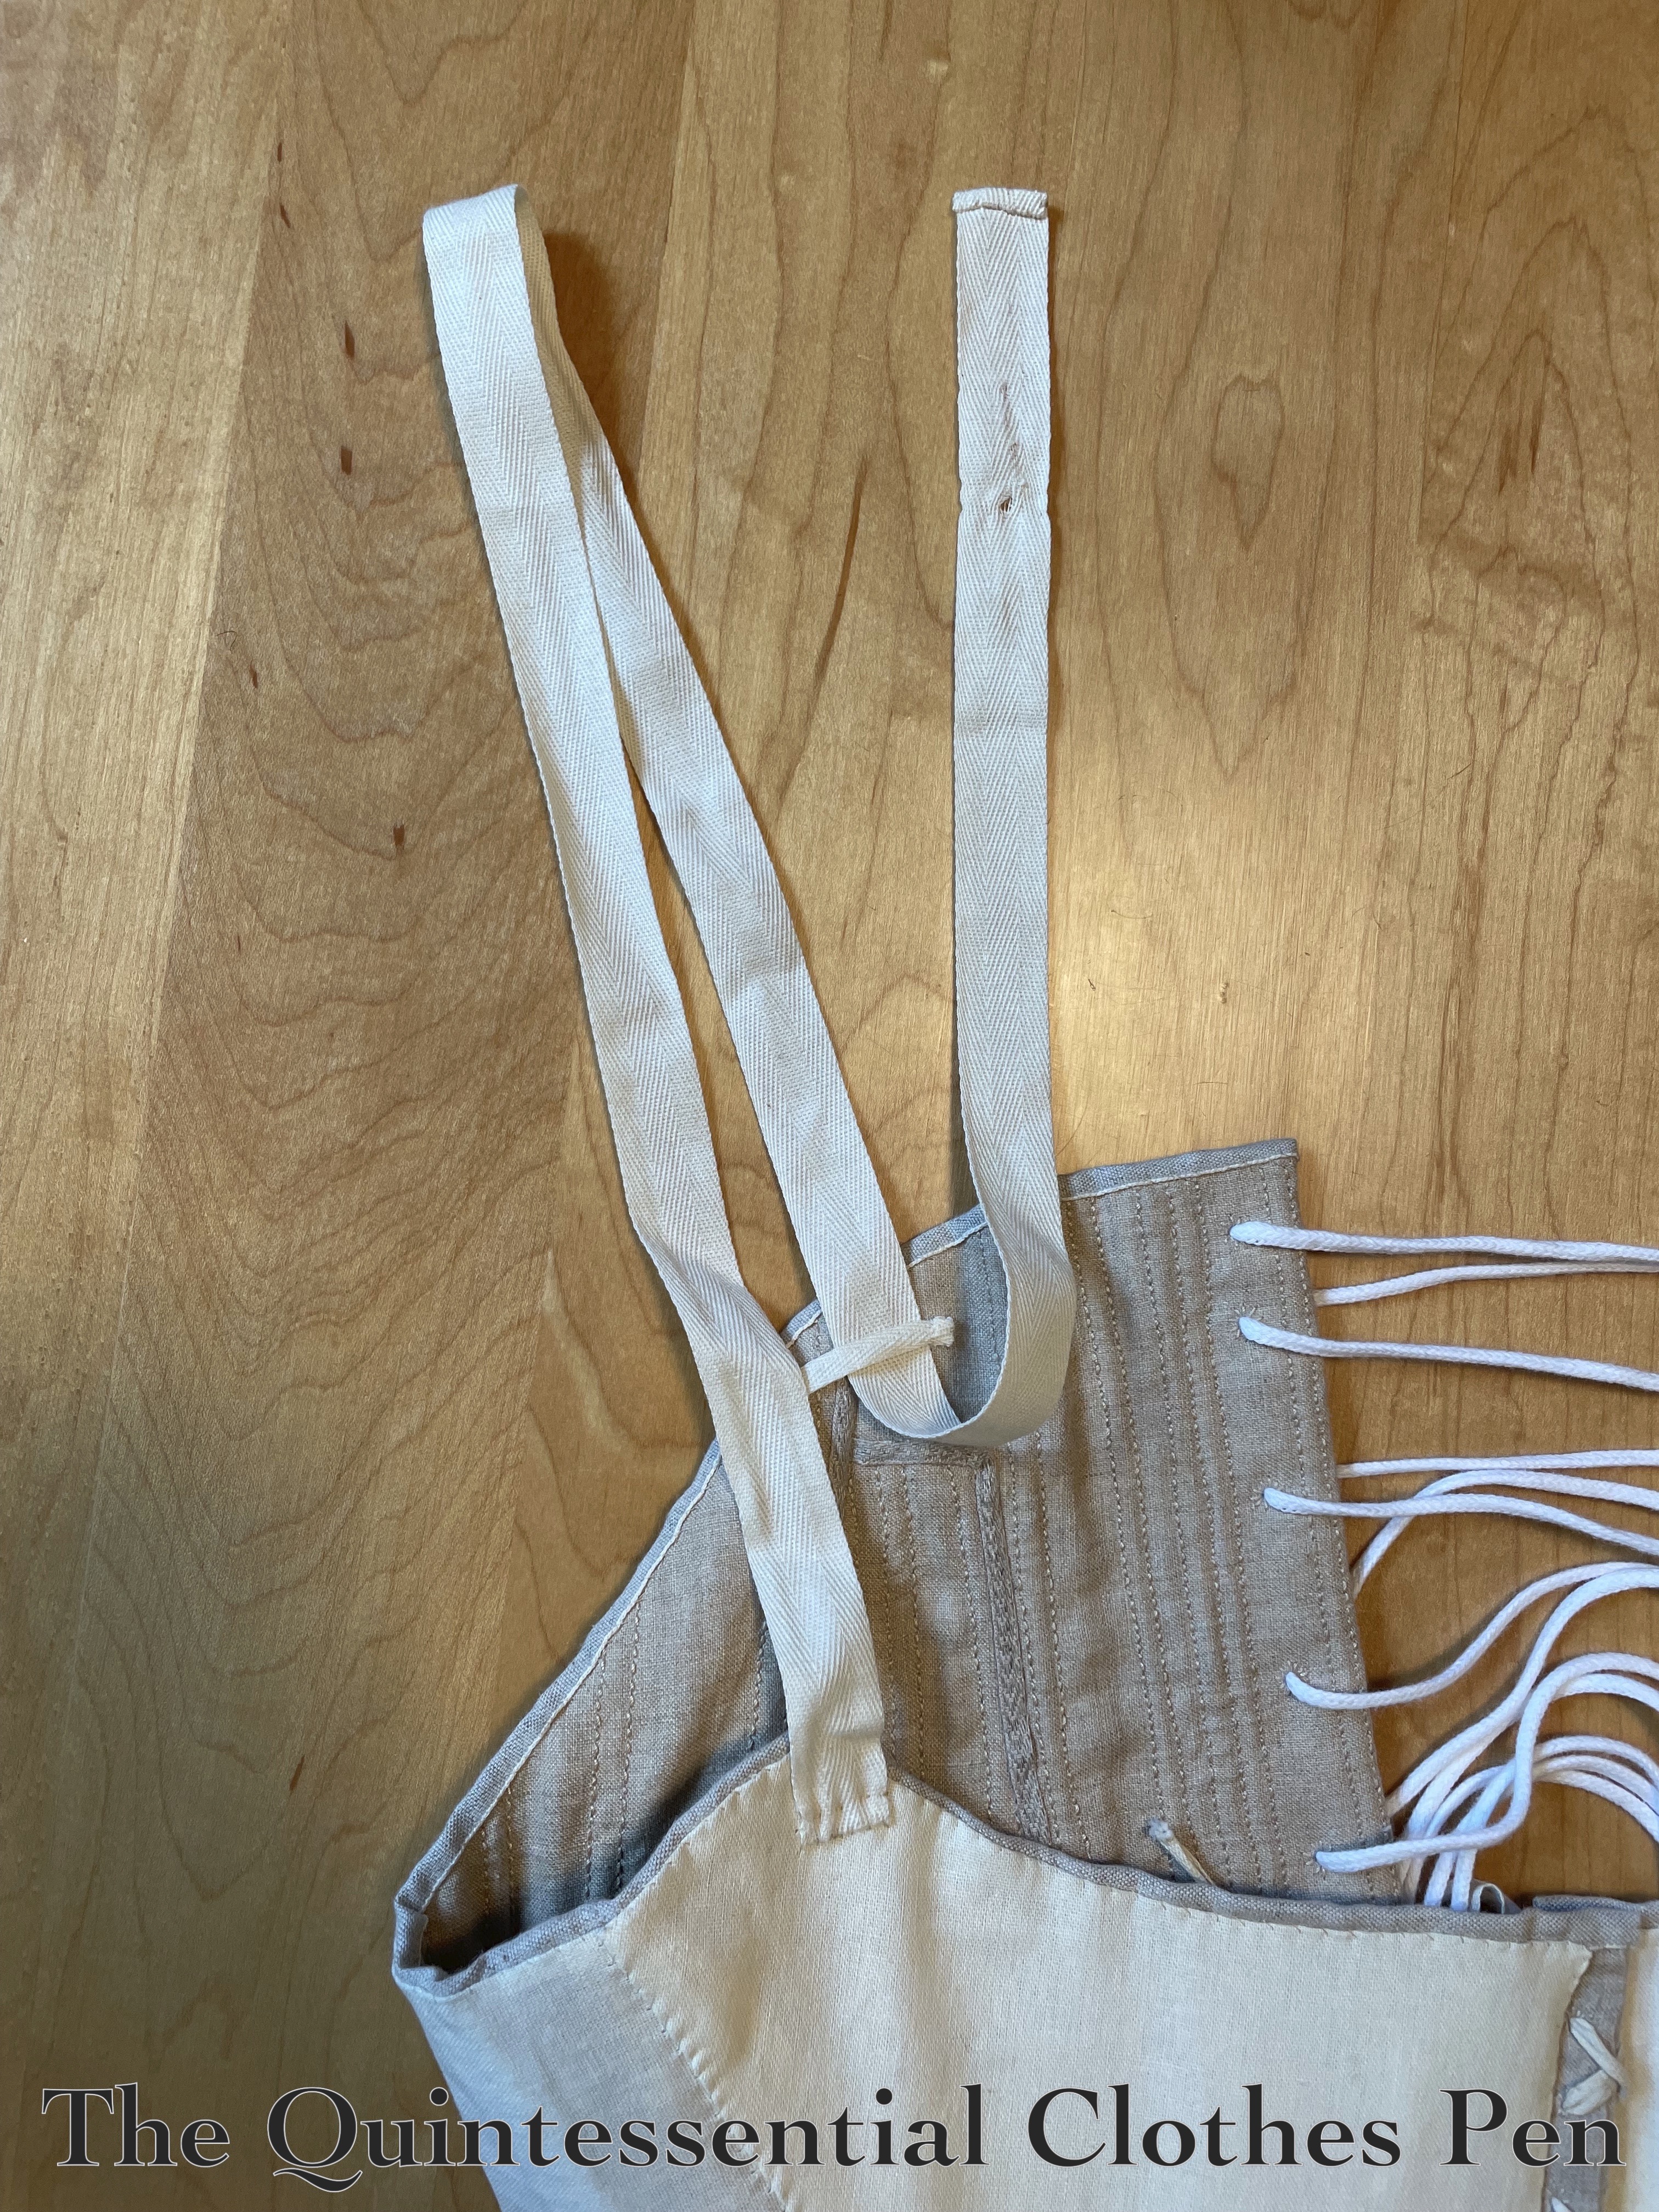
Straps
The truly final step was to add straps! I used ¾” ivory cotton twill tape. Each strap was sewn to the front points of the stays and the short raw end hemmed. A scrap of ¼” twill tape was also sewn on each of the side backs for the wider tape to run through.
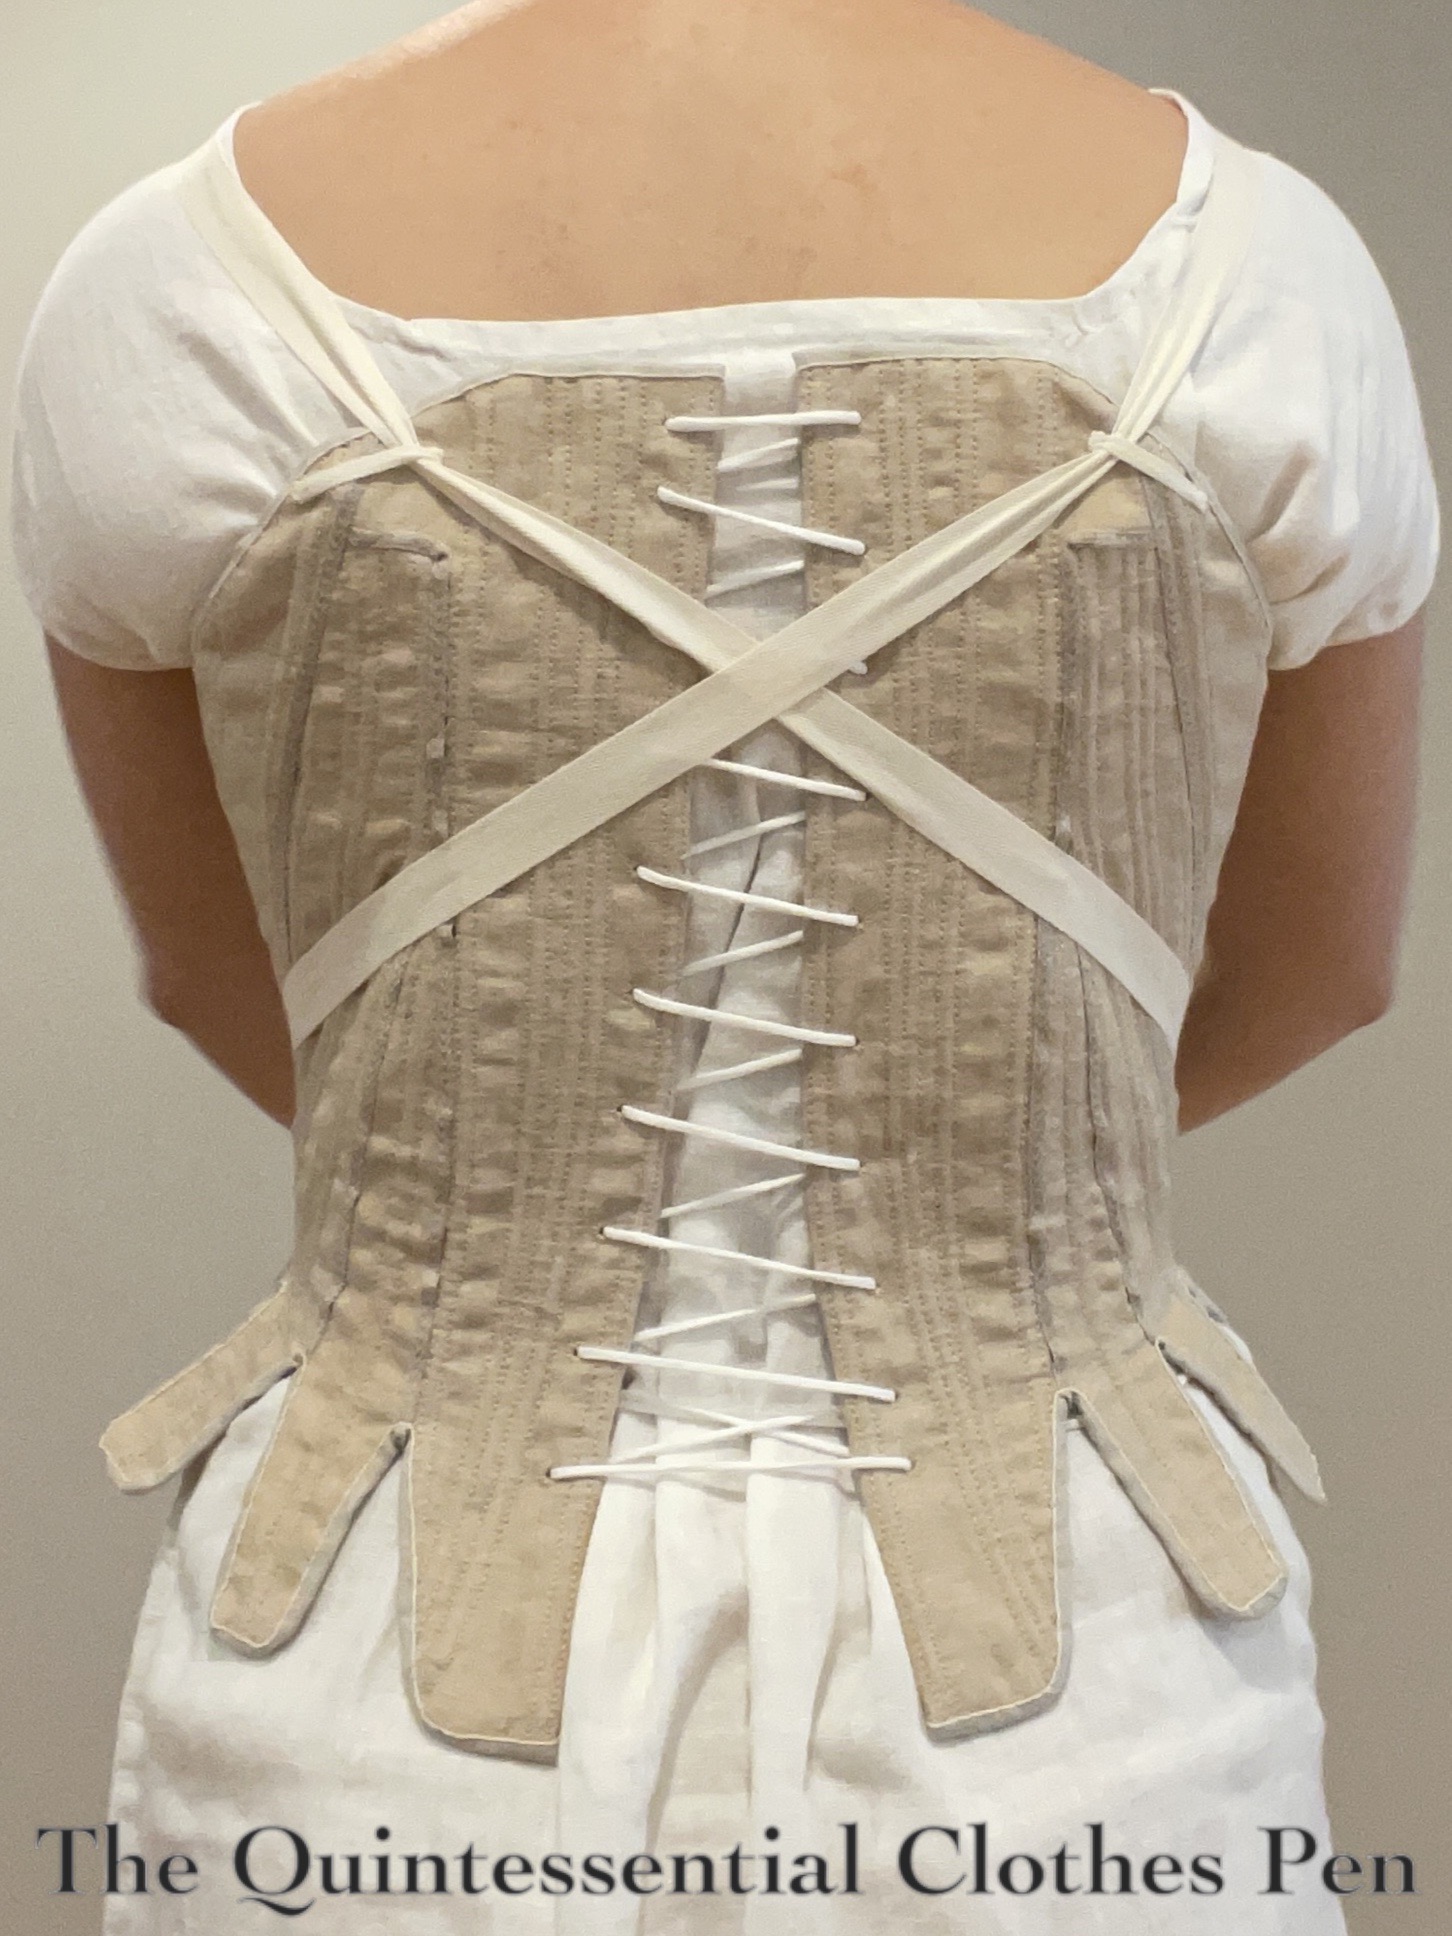
Then, I tried on the stays and determined where I needed to place the hooks that the straps would attach to. Below is a photo of one of the straps held in place by the sideways hook. The straps are long enough to wrap over the shoulder, cross in back, and wrap around towards the front to catch on the hooks.
After that, all I had to do was attach the hooks… and… after many years… the stays were finally, finally… finally…. DONE! They were finished in April 2023.
I had hoped to get all of my remaining construction details into this post, but progress on the stays has slowed. Plus, I realized I didn’t have enough linen tape to bind the edges, so new binding needed to be ordered. That has been done but I’ve been so busy that no sewing has happened yet. So for now, here are the middle parts of the construction update.
Updating Gussets
After all the initial steps of putting the stays together (which I detailed in my previous post in this series), I had a fitting that left me feeling rather disappointed. I’ve already detailed the results of that fitting, in Part II of this series.
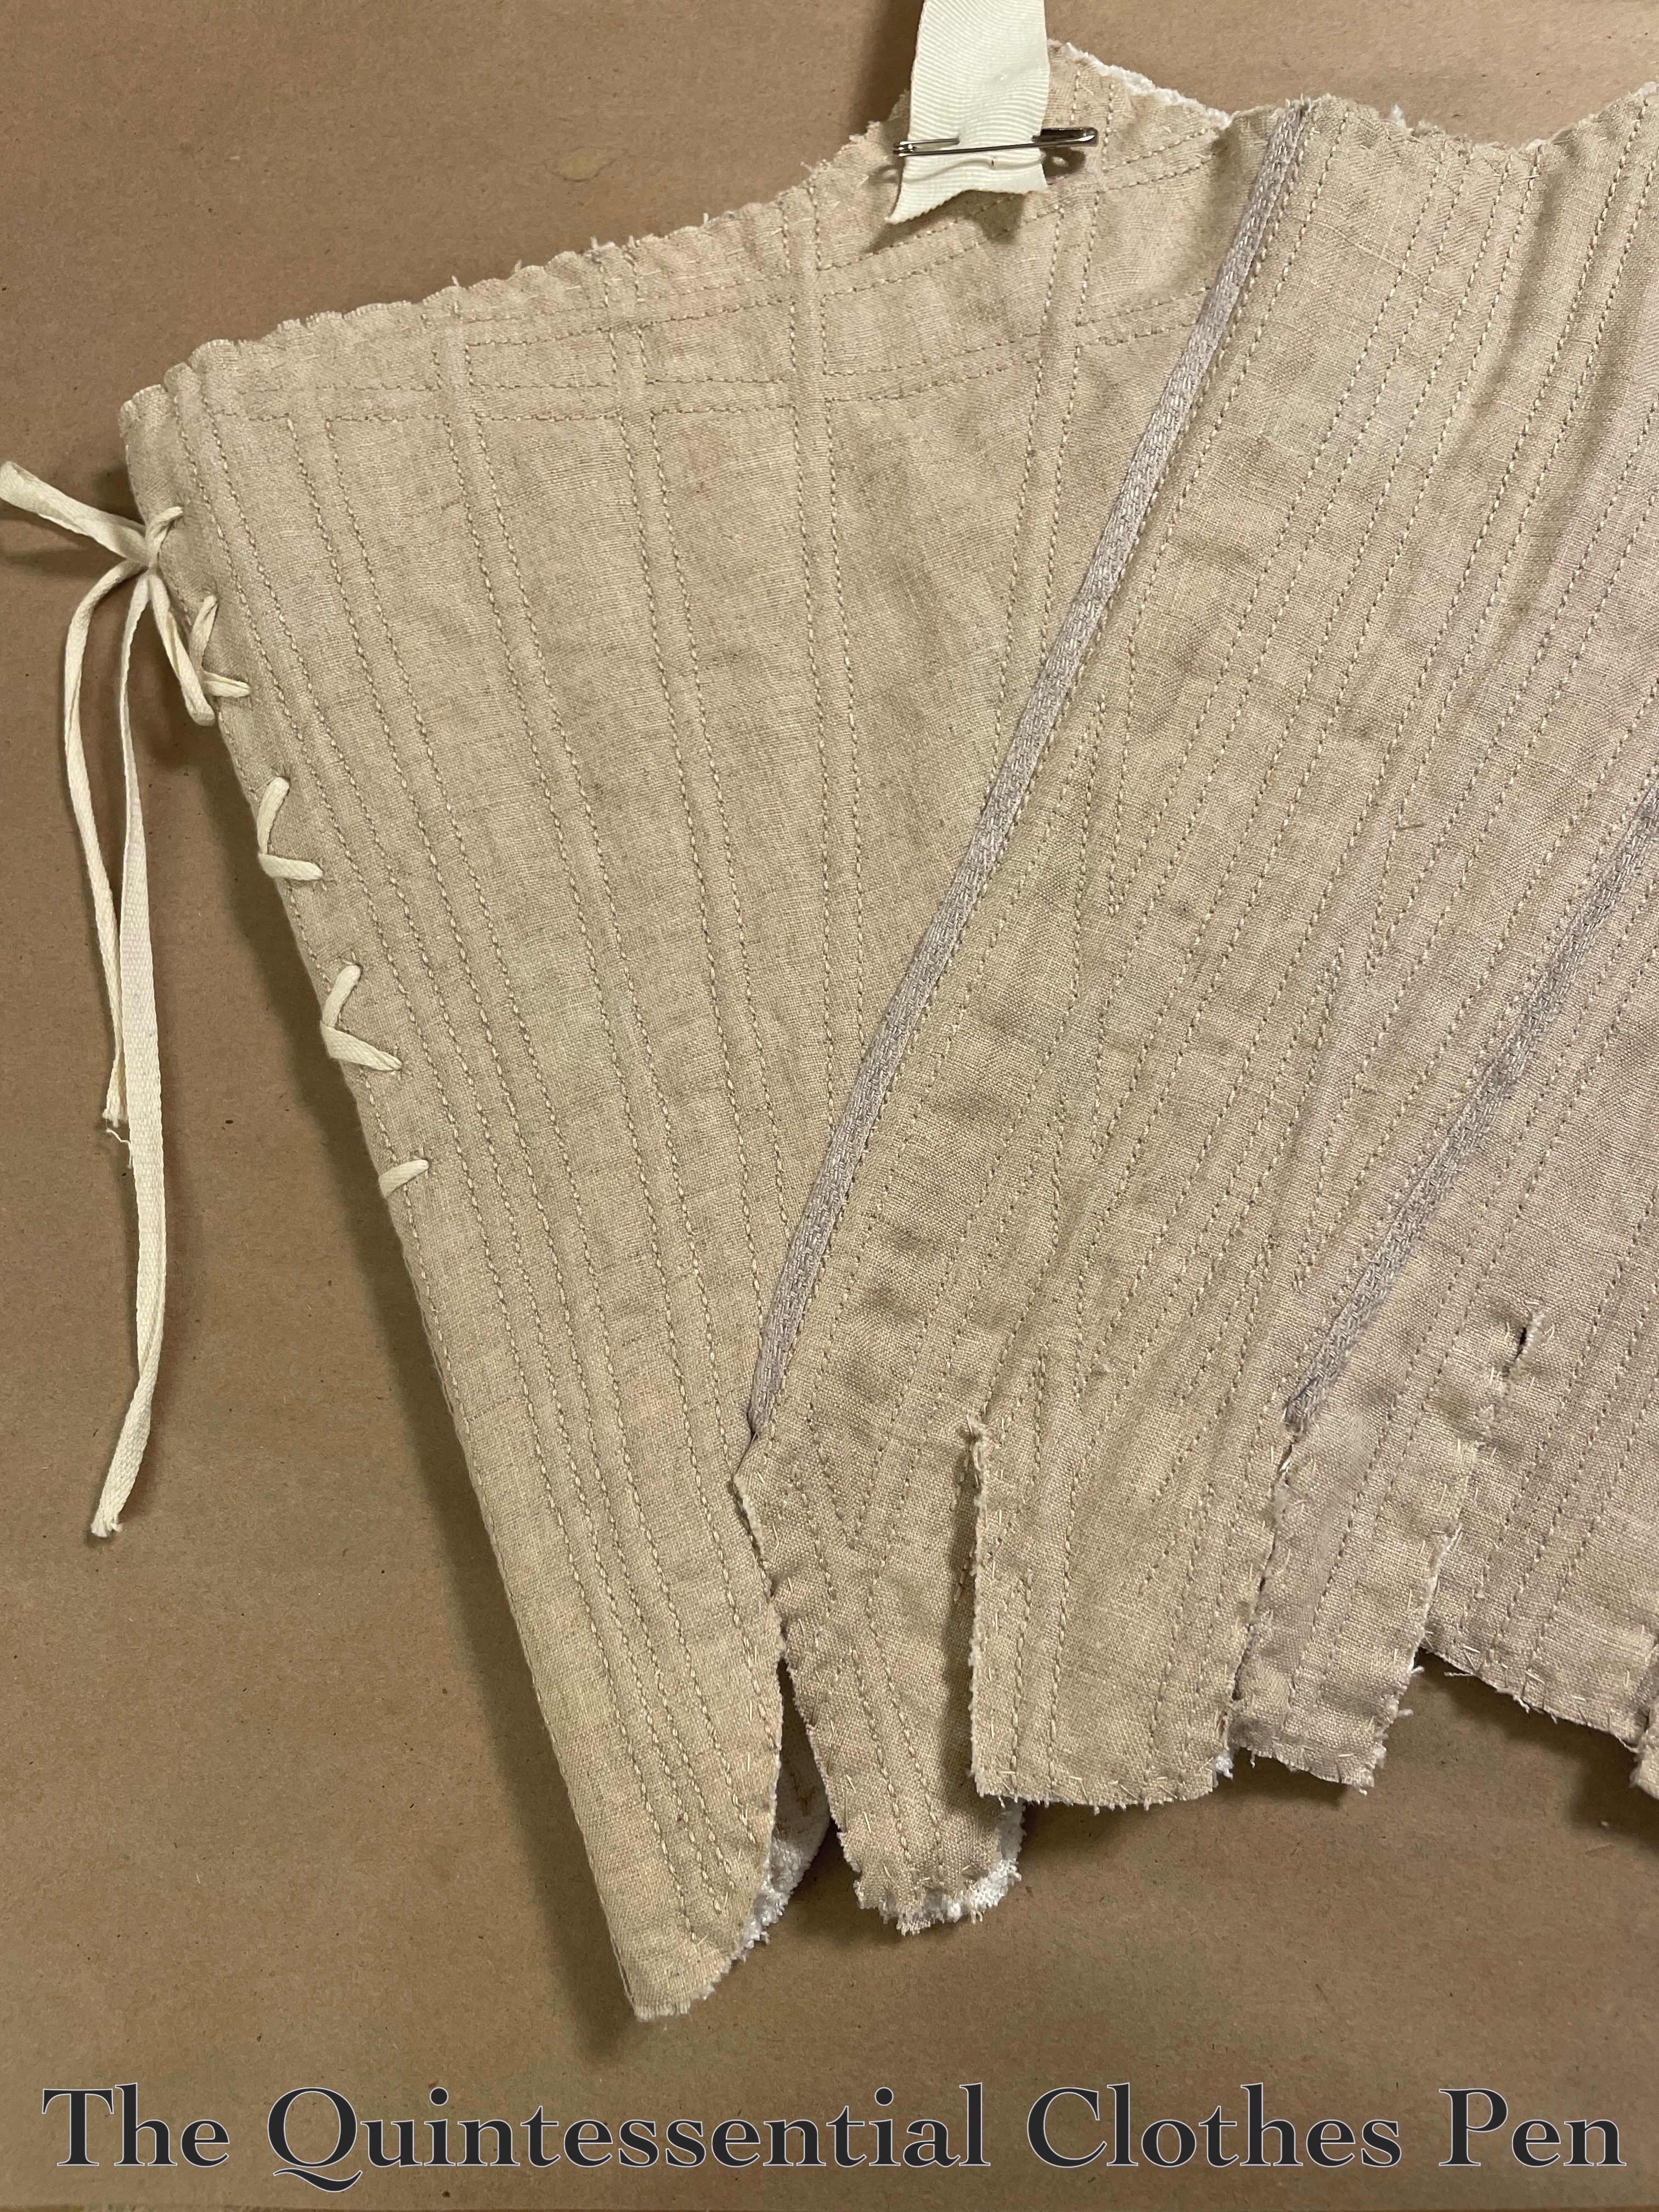
To summarize: I wanted to raise the gusset I’d added to the back with the goal of providing more width at the waist and hopefully increasing the comfort of the stays on my back. Accordingly, I removed the offending short gusset out of the stays, but, instead of piecing new gussets out of my meager scraps, I realized I could cannibalize the straps I’d originally cut (but decided not to use) to make longer gussets.
Below: the new, longer gussets in place.
This worked well for the exterior linen and one layer of interlining linen, but the straps were only ever going to have one inner layer of linen. And none of my scraps were quite long enough to make a second layer now that the piece would be used in the main body of the stays.
So, I used what I could and layered a second piece near the bottom tab to extend the second layer of linen. Work with what you have, right?
This new gusset had a wider bone channel already sewed… and I really didn’t want to deal with my narrow bone idea again. Therefore, these two pieces will have permanently wide boning channels. It’s all in the spirit of making do! I did have to extend the bone channels after adding the extra bit of linen near the tab, but that was easy to do.
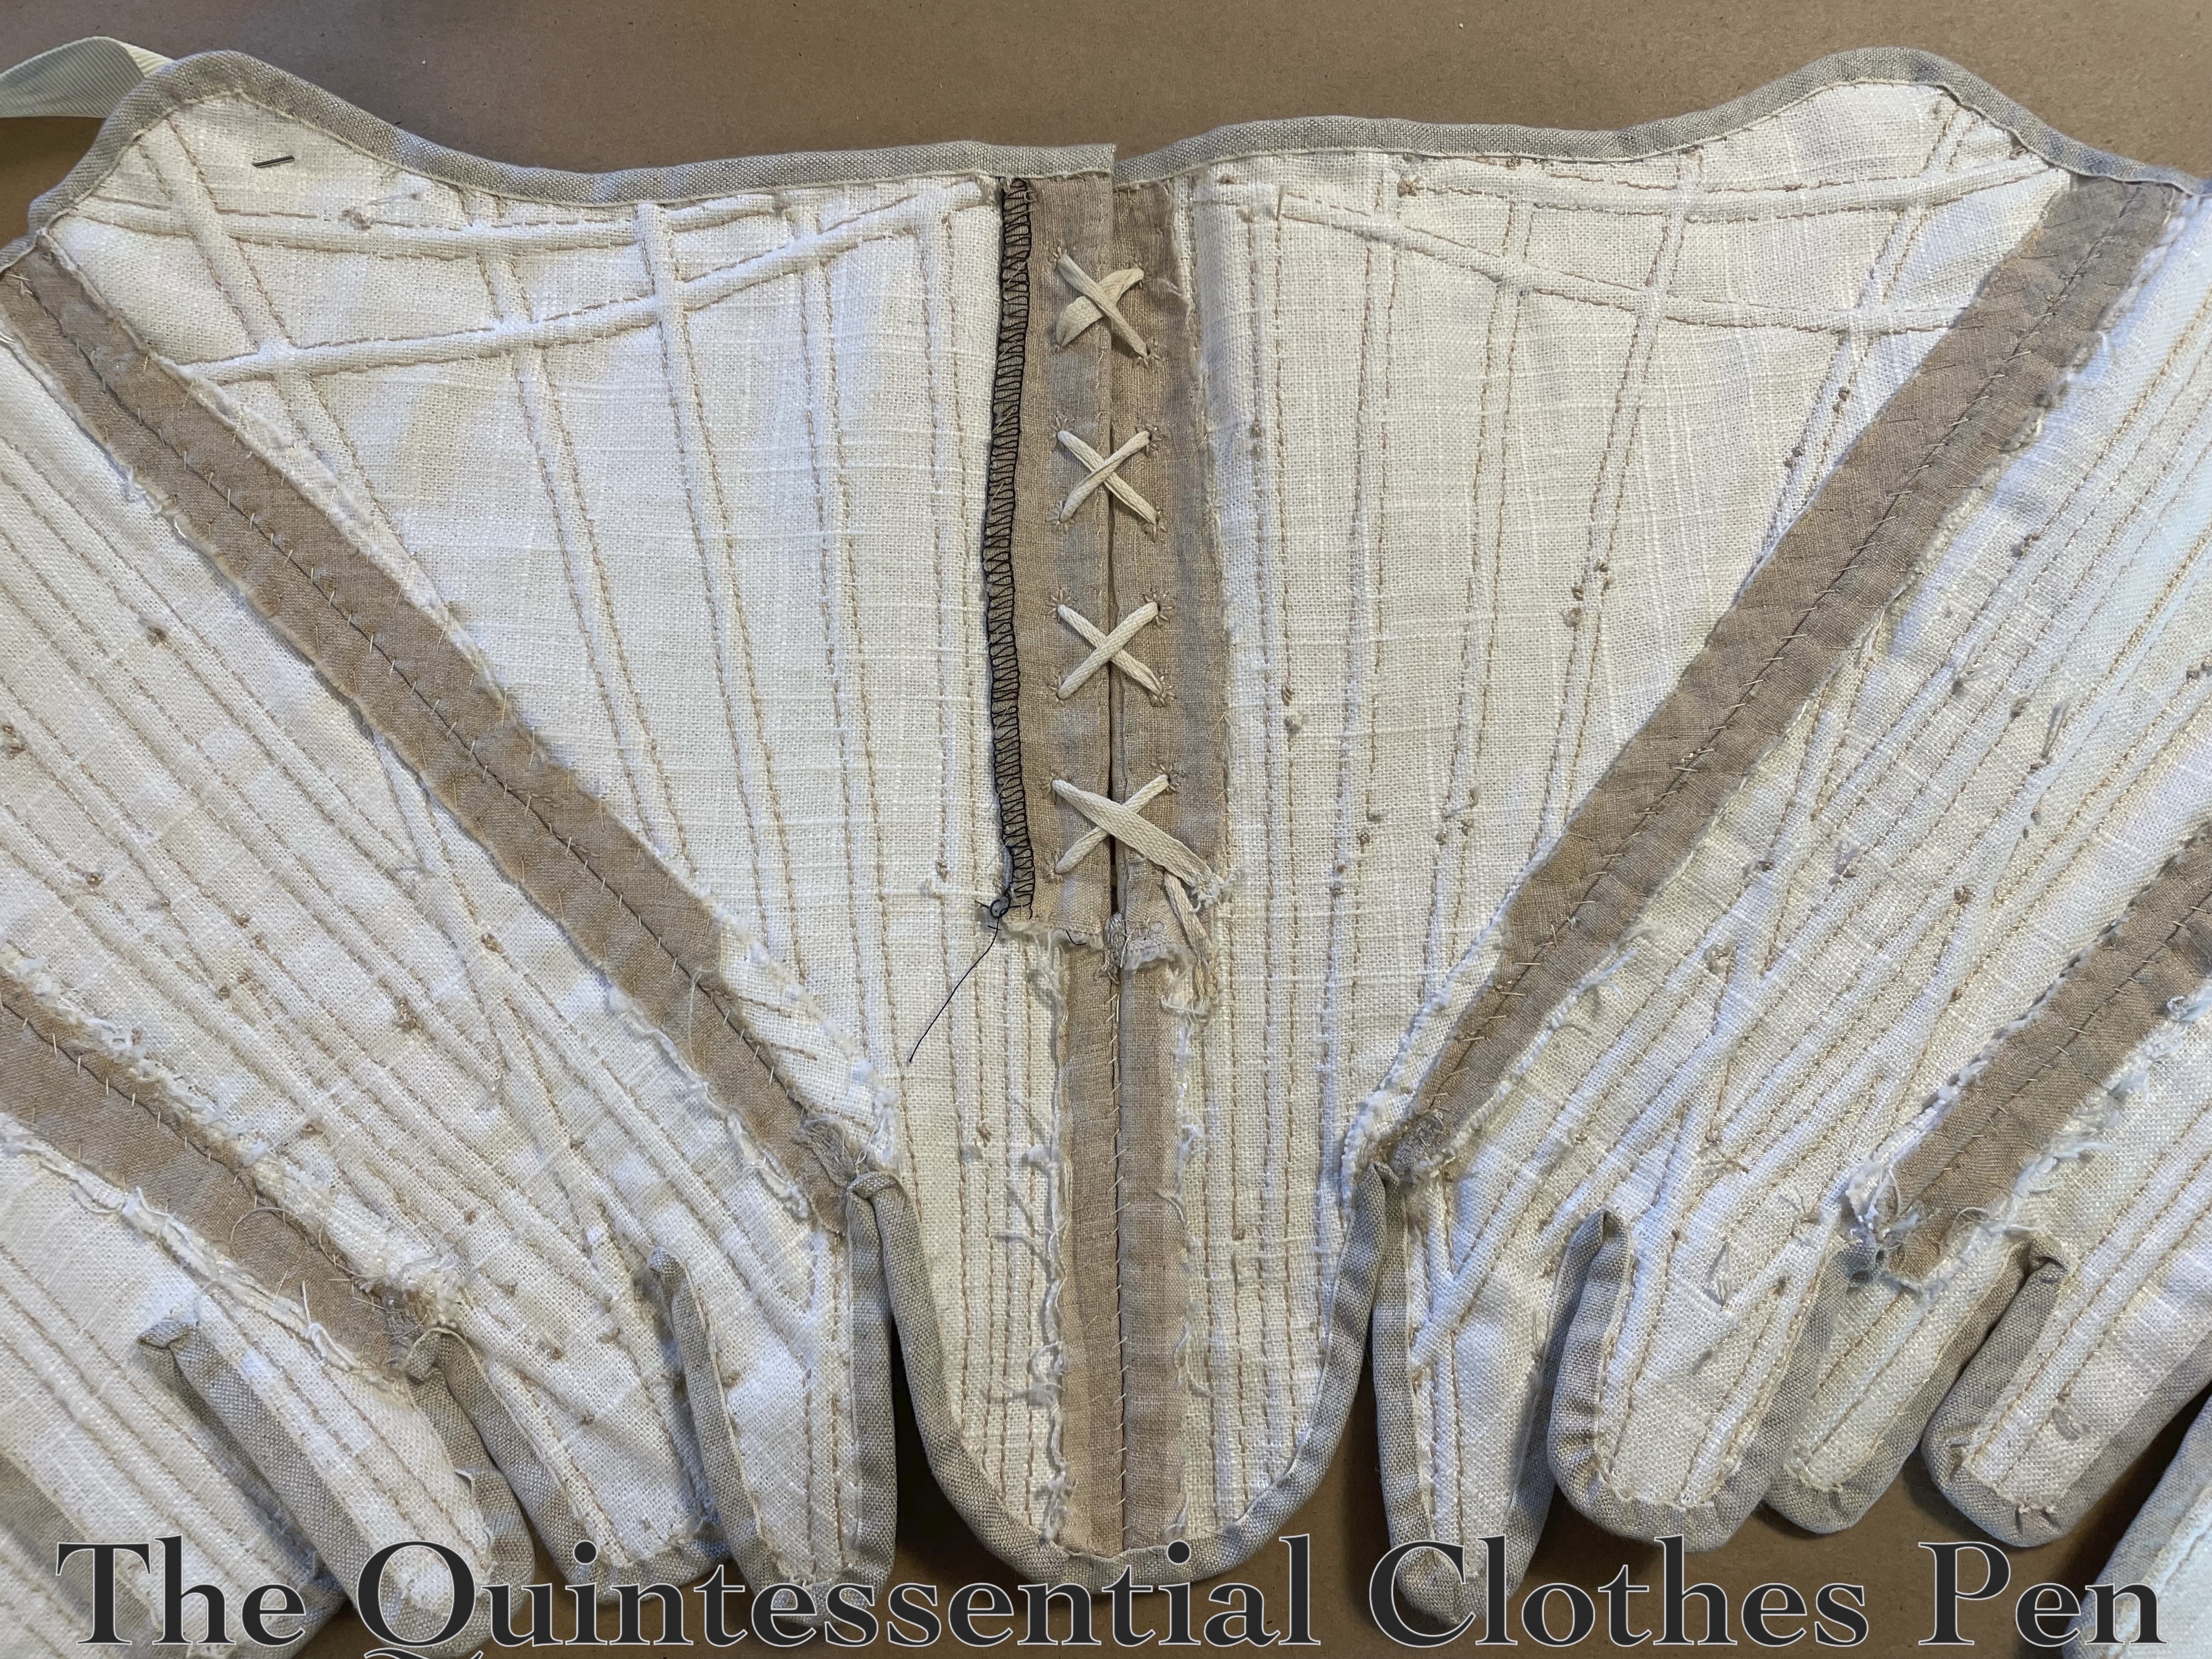
Covering Seams & Finishing Edges
Following the information in Patterns of Fashion 5 (see my fourth blog post in this series for more information on this incredible book), I covered the visible whip stitches that formed the seams of the pieces with 1/4″ linen tape.
Then, I basted all around every exterior edge, to hold the layers in place while I continued to work on the stays. I followed that by whip stitching the raw edges, in order to create a more stable edge for the binding.
In the photo below you can see the linen tape covering the seams and the edges that have been basted and whipped.
The book I used to create the pattern for my stays (Stays and Corsets: Historical Patterns Translated for the Modern Body by Mandy Barrington) gives very little in the way of construction information for stays (process, materials, and details). I found this to be really disappointing.
Thankfully, however, there are other resources that one can go to for this type of information. I chose to reference Patterns of Fashion 5 (PofF5), authored by Janet Arnold, Jenny Tiramani, Luca Costigliolo, Sebastien Passot, Armelle Lucas and Johannes Pietsch.
The great thing is that I could go to PoF5! It had not yet been released when I started this project, but I have it in hand now… and I must say that it is an absolute gold mine of information! There is so much research, expertise, and detail included. There are so many color photos. There are x rays of extant garments. And of course there are patterns. And information about patterning and making both in the past and now.
I cannot do anything but rave about this book! It is almost double the length of the earlier Patterns of Fashion books. I actually sat down and read this book cover to cover, which is not how I usually deal with pattern books (usually I read the bits that are relevant to a certain project). This book is amazing!
On To The Construction Process
Despite creating a pattern from another source, PoF5 was invaluable for the construction process of my stays. Using information in PoF5, I decided to make my stays from an outer layer of linen, 2 layers of linen buckram, and a lining (that will likely be linen).
To start, I cut out the exterior and 2 layers of heavy linen for the interlining. Below is a photo of my inner heavy linen with the pattern laid on top. I used stash fabric and found a piece that just barely fit my pieces. No seam allowance is included in the pattern, so you can see that I really eked my pieces out!
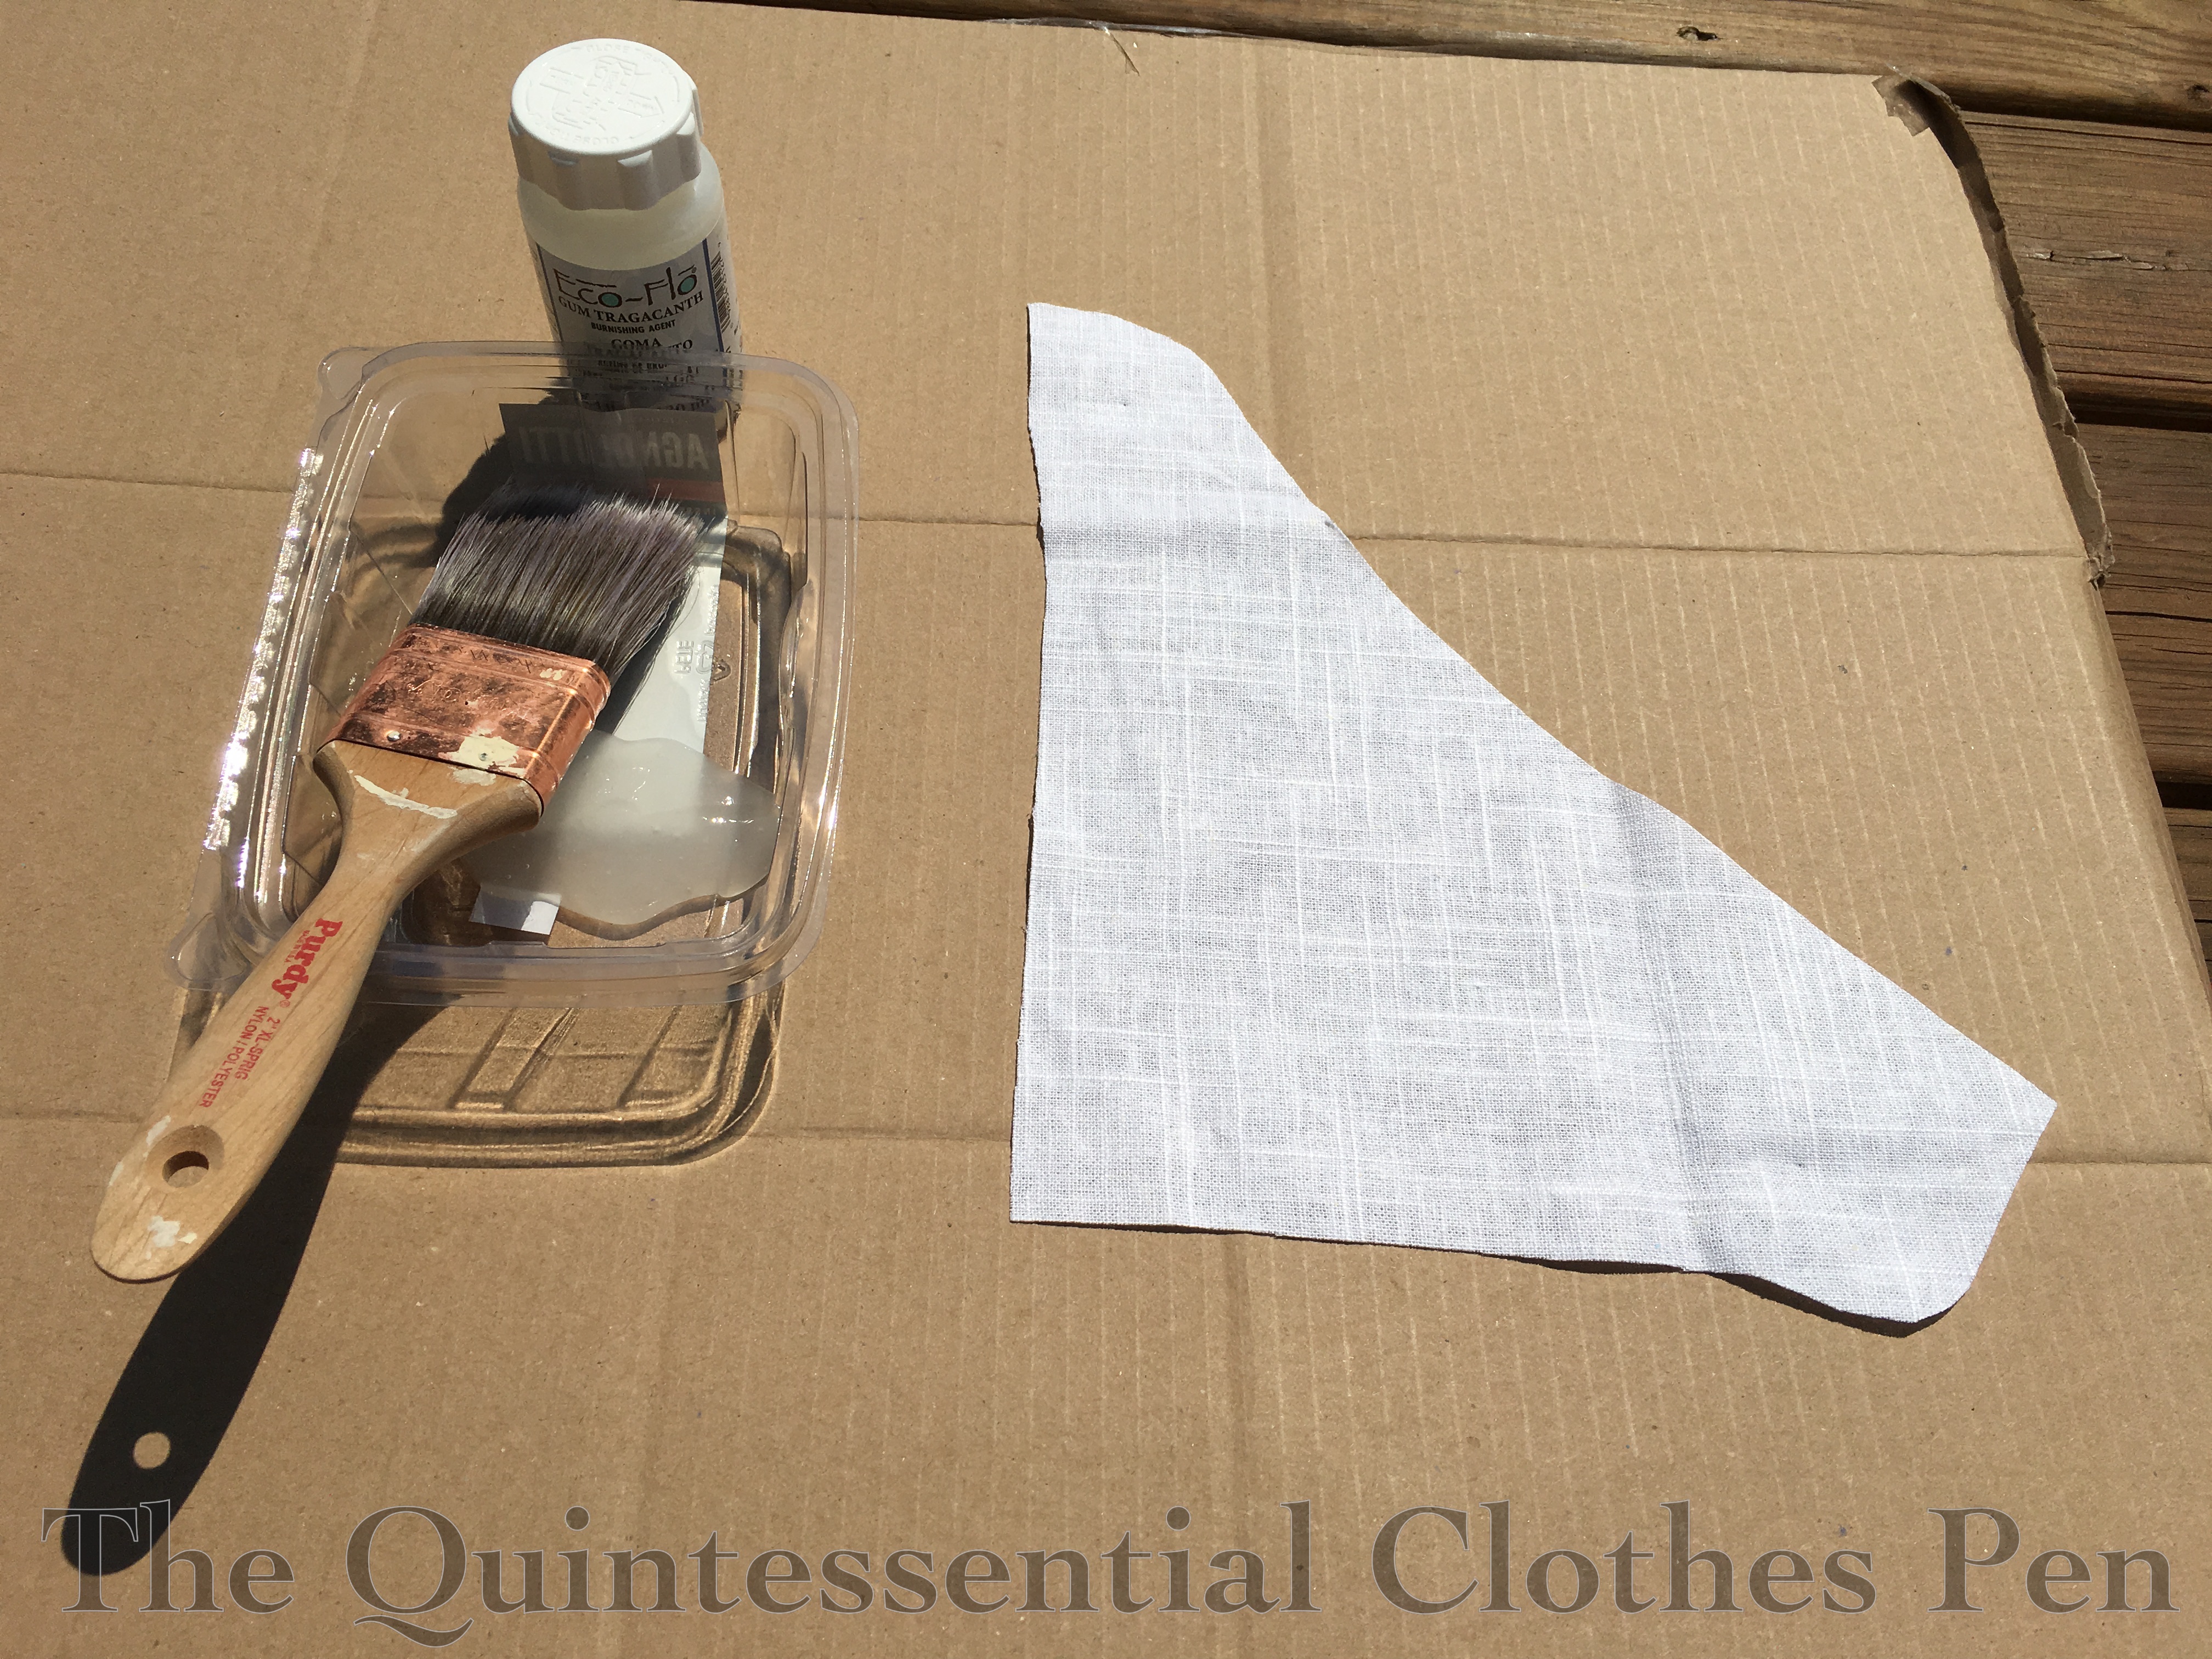
To nerd out on history fun and try something new, I decided to make my own stiffened buckram for the inner layers. So, on a hot August afternoon I was to be found sitting on my deck dripping with sweat while painting gum tragacanth onto my linen pieces instead of being inside where it was cool.
So what is gum tragacanth? It is a stiffening agent used to make linen buckram, which is a material used to stiffen 18th century stays.
I used a paintbrush to spread my gum tragacanth on my linen. By the end I was definitely getting a little sloppy because I wanted to get out of the sun as quickly as possible, but I was still impressed with myself for the lengths I go to sometimes for the sake of historical exploration!
Below is a photo of my set up. Cardboard from the recycle, a dish-shaped piece of packaging from the recycle, and a paint brush.
I used a full 4.4 oz bottle of Eco-Flo Gum Tragacanth for my double layer linen interlining. In the dish you can see the consistency of it. It was wonderful not to need to mix or heat it, as you would need to do with xanthan gum.
To be honest, I didn’t notice too much of a difference in the linen after applying the gum tragacanth. (This could be because I was already using a heavy linen?) It also seems, and makes sense, that the stiffness has been reduced as I’ve worked with the fabrics. Regardless, I am still entertained and enriched by my experiment.
After the gum tragacanth dried, I flat lined my 3 layers for each piece (2 layers of heavy linen and the exterior linen) and marked my boning channels. I found that using Frixion pens worked well, because the marks easily erase with a hot iron after the channels are sewn (and the pen marks don’t rub off while being sewn, as with chalk). Magic!
There was lots… and lots… of sewing boning channels, as you can see blow.
I realized that I hadn’t cut my center back pieces with enough fabric to wrap around past the eyelets (though I didn’t have enough fabric to do that, anyway!), so I pieced strips together and whip stitched them on to make the extension, as you can see on the right side of the next photo.
After the eyelets were done, I assembled my pieces with whip stitches.
I whip stitched the seam allowances down as well, thinking that might help make the stays fit smoothly for a fitting.
That basically brings the project up to the unfinished state it is in now, minus a few fittings and adding that back gusset.
Let me back up from the current state of the Stays Of Fail to all the wonderful documentation I did about making them, at least to this point. When I started these stays back in 2018, I intended them to be a sort of in-between-projects-project for when I wanted a bit of hand sewing to do. Given that, the project moved at a pace only slightly faster than a glacier!
Somewhere very early in the planning stages of these stays I decided to try out a new book for patterning them: Stays and Corsets: Historical Patterns Translated for the Modern Body by Mandy Barrington. This book presents the idea that you can use any person’s measurements to draft a basic block of the body and then use the basic block to draft any of the historical stays in the book. It’s a neat idea, in theory, and I wanted to try it out.
The Pattern
I didn’t keep track of how long the patterning/drafting process took me. But it was a long time…
There was lots of math, which always happens with drafting a body block and is to be expected, but on top of that there was also the drafting of the specific pair of stays I’d decided on: the 1785-1788 Half Boned Stays (patterned from a pair of stays held at the Chertsey Museum). I was doing my pattern drafting while being often interrupted, so that slowed me down, but despite that the process was longer than I was expecting (and I’m not new to making body blocks or patterns).
(The nice thing is that if I were to use this book to pattern another set of stays or corset I would be halfway there, having already now created a custom body block, but I suspect it would be faster for me to start with a pattern from another book source, because I think my brain wraps around the idea of resizing a pattern without the body block drafting pretty easily.)
I eventually had my body block and was able to draft my pattern using the instructions. The instructions were quite detailed, so that was great. I finally had a pattern that I was able to cut out and make a mockup out of! I was able to get into the fun part: sewing!
Testing The Pattern With A Mockup
I had expected that, after spending a lot of time spent patterning the stays to fit my measurements, I would have stays that basically fit. And I did. But they fit my measurements with the center backs touching and no compression, just sort of lightly surrounding my body without providing support.
The drafting did it’s job of making stays to my measurements, but I was dubious about whether they would do their supporting job when fully boned and finished. So I decided to adjust the mockup a bit–taking some in at the waist, in particular. (While this is a small adjustment to make, it reminded me that at the point at which I had to alter the mockup I might as well have started with a pattern that took less time to create.)
But perhaps, that alteration was my downfall. As you’ll see in later posts, I later had to add fabric back into the waist size.
That’s all for now. Next post, I’ll detail the early construction process, including stiffening my own linen!