Vernet Project: A Witzchoura Tangent

I started this post soon after joining the Vernet Project, so I think it must have been in my drafts for close to two years at this point. I didn’t want to leave it in the drafts folder forever, though, so I thought I’d include it as I’m wrapping up my Vernet posts.

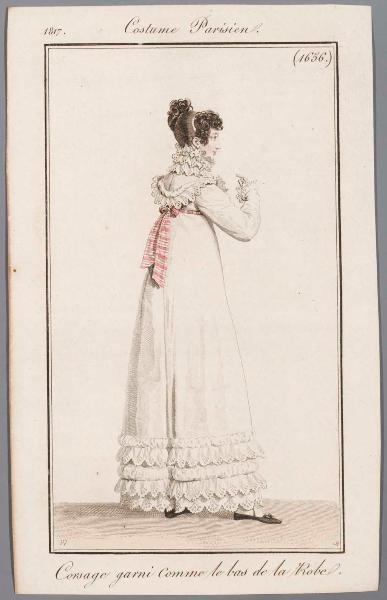
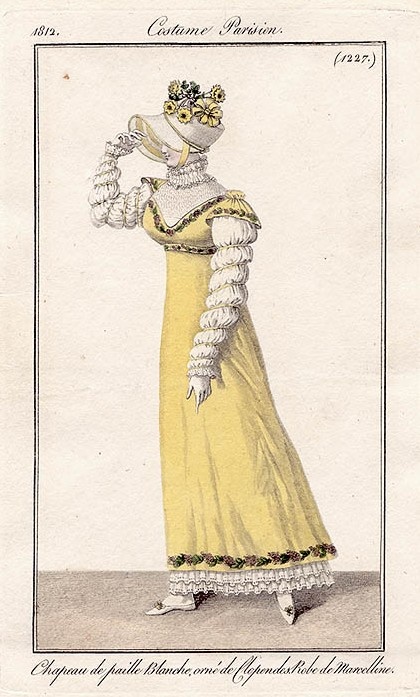
Throughout my research, I’ve looked through many hundreds of pins on my Pinterest boards from the 1810s, 1820s, and 1830s and have found only a handful of plates that show outerwear specifically labeled as witzchouras (these can be seen in this past post showing examples). There are a much larger number of other, similar, types of outerwear.

(If you’ve missed out, this post explores the origins and qualities of a witzchoura, while this past post explores witzchouras in even more depth, with multiple excepts from the first part of the 19th century mentioning them.)

Examples of garments similar to witzchouras

Common garments in this category are labeled using words such as pelisse and pardessus. Then there are also carriage dresses (example), promenade dresses (example), and redingotes (example) trimmed in fur, but it seems clear in the fashion plate descriptions that these garments were not considered witzchouras.

ac27bb830f63f1673e45316d0e18f87d
Fashion plate showing a Pardessus from 1811.

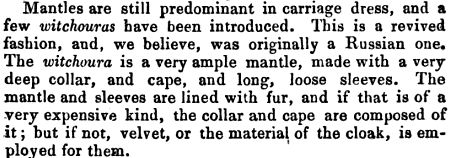
Here is another similar garment, a Russian mantle, described in The Ladies Pocket Magazine in 1838 under the chapter English Fashions and Novelties: Remarks On The Prevailing London Fashions.

content

Descriptions of garments similar to witzchouras

In 1849, La Belle Assembleé addresses this for us (while also mentioning yet another type of outer wear, a burnous. The Dreamstress defines and explores this garment specifically as it relates to historical fashion, which is excellent and full of images!). The author of this reflection of fashion specifically mentions the weight of a witzchoura and how that compares to the weight of a pardessus, as well as the types of outings that these garments would have been worn for. Interesting that they would be worn for carriage dress, when, alternatively, one could also wear a ‘carriage dress’.

content

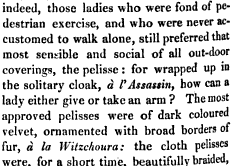
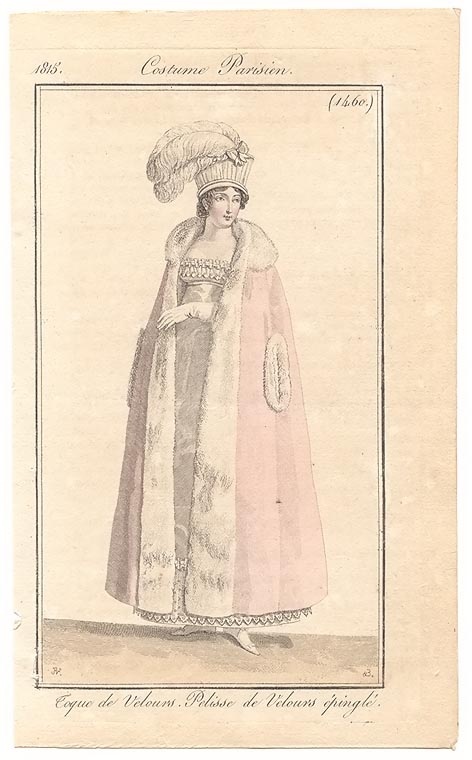
This next excerpt, from La Belle Assembleé in 1825, tells us one distinctive quality of a pelisse which is that the arms were not encased in the garment and could be freely moved about.
content-1

a94e6fc37e3582c81ab22797c3c06b78
Example of a Pelisse from 1815, showing the armholes that would allow movement.
004c2dc3370c00425fcfd044369a9d53
A slightly later example of a Pelisse in a similar style. This is from 1821.

Examples of out of the ordinary witzchouras

Then there are garments labeled as witzchouras, but which are odd in a variety of ways. For example, take a look at the interesting witzchoura mentioned in The Lady’s Monthly Museum in 1817, seen below.

content

I’m not really sure what qualities allow a witzchorua to keep one’s dress from being rumpled, but what strikes me as odd is that the witzchoura mention is lined with silk and that is has a chapeau bras attached! Also in 1817, La Belle Assembleé mentions this exact garment twice! The first is a description of the garment. The second is about the inventor, Mrs. Bell, who, if you care to read more, has a long list of other interesting things that she supplies.

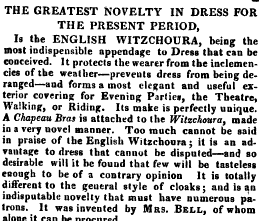
content

content-1

In this next case, the witzchoura is described as being lined with sarsnet (a fine plain or sometimes twill weave usually silk fabric) and only trimmed with fur rather than being lined entirely with fur. Haven’t we seen conclusively that a witzchoura should be lined and trimmed in fur? This witzchoura is also interesting because of its colors. It is quite likely a garment made for the general mourning of the death of Queen Charlotte, who passed away in November 1818.

“For out-door costume nothing can be reckoned more completely elegant than the Witchoura pelisse of black velvet lined with white sarsnet, and trimmed with real ermine.”

La Belle Assembleé  in January 1818

Finally, there is this fashion plate at the LACMA which is labeled as being a witzchoura but with nothing witzchoura-like about it! A mistake perhaps? This looks like a summer garment, not a heavy winter garment.

What a rabbit hole of obscure information the witzchoura is. I’m rather glad to say that I’ve now exhausted my currnet list of historical references to the witzchoura!

c. 1920 Bathing Boots

I had already decided this spring that a 1920s bathing suit was on the sewing list for this summer when Gina, of Beauty From Ashes, contacted me and asked if I’d like to test an Edwardian bathing boot pattern for her. I’m pretty sure I squeaked! “Of course!” But then I realized that there was no way I was going to have time to work on the boots before summer when I returned from my trip to Versailles. Luckily, that timing was just fine.

217ca1fa-bbe6-4199-8273-16e146a188bfGina had taken the boot pattern from a pair of extant boots that she owns, sized the pattern for her own feet,  and then made a pair herself (of course with a lot of work on the pattern  along the way). To the right are Gina’s boots, which you can read more about in her post, here.

The idea coincided so closely with my plan for the 1925 bathing suit that I really wanted to push the boot date towards the 1920s and wear them together. I did some digging into bathing boot history in Women’s Shoes in America, 1795-1930 and found some great info supporting my plan, including information about the wearing of stockings with swimsuits and how that practice changed from the end of the 19th century through the 1920s. The following are excerpts from pages 137-139. There’s lots more detail about stockings and bathing shoes in the late 19th century that I haven’t included here, so if that interests you I highly suggest you get your hands on the book.

Bathing shoes were always optional, depending on how rough the terrain was and how tender the feet…

The most common bathing shoe at all times is a low slipper fitted with tapes that cross over the instep in varying arrangements and tie round the ankle. These are shown as early as 1867…

As long as bathing garments covered most of the legs, that is until the late 1870s, stockings were not considered absolutely necessary…

In the late nineteenth and early twentieth centuries, black stockings were very often worn for bathing without any shoe at all… When bathing shoes are shown, they are usually lighter than the stocking…and the commonest style is still the low slipper, presumably cork-soled, with tapes to cross once or twice and tie round the ankle…

About 1915, a new style of bathing footgear appeared, a mid-calf high boot, solid on the sides and back of the leg, but open down the front and laced across the opening… [and] the acceptance of real swimming (as opposed to splashing in the waves) brought about changes in bathing costume… Closer-fitted knitted suits appeared in the 1920s, and gradually the long black stockings were discarded (the last fashion picture I find including them is from 1922). In the late 1910s and early 1920s, short stockings were worn gartered someplace below the knee, but soon even these disappeared and bare legs began to appear in the early 1920s. Bathing shoes were still worn over bare feet when rough ground made them desirable, but they were a matter of utility, not modesty.

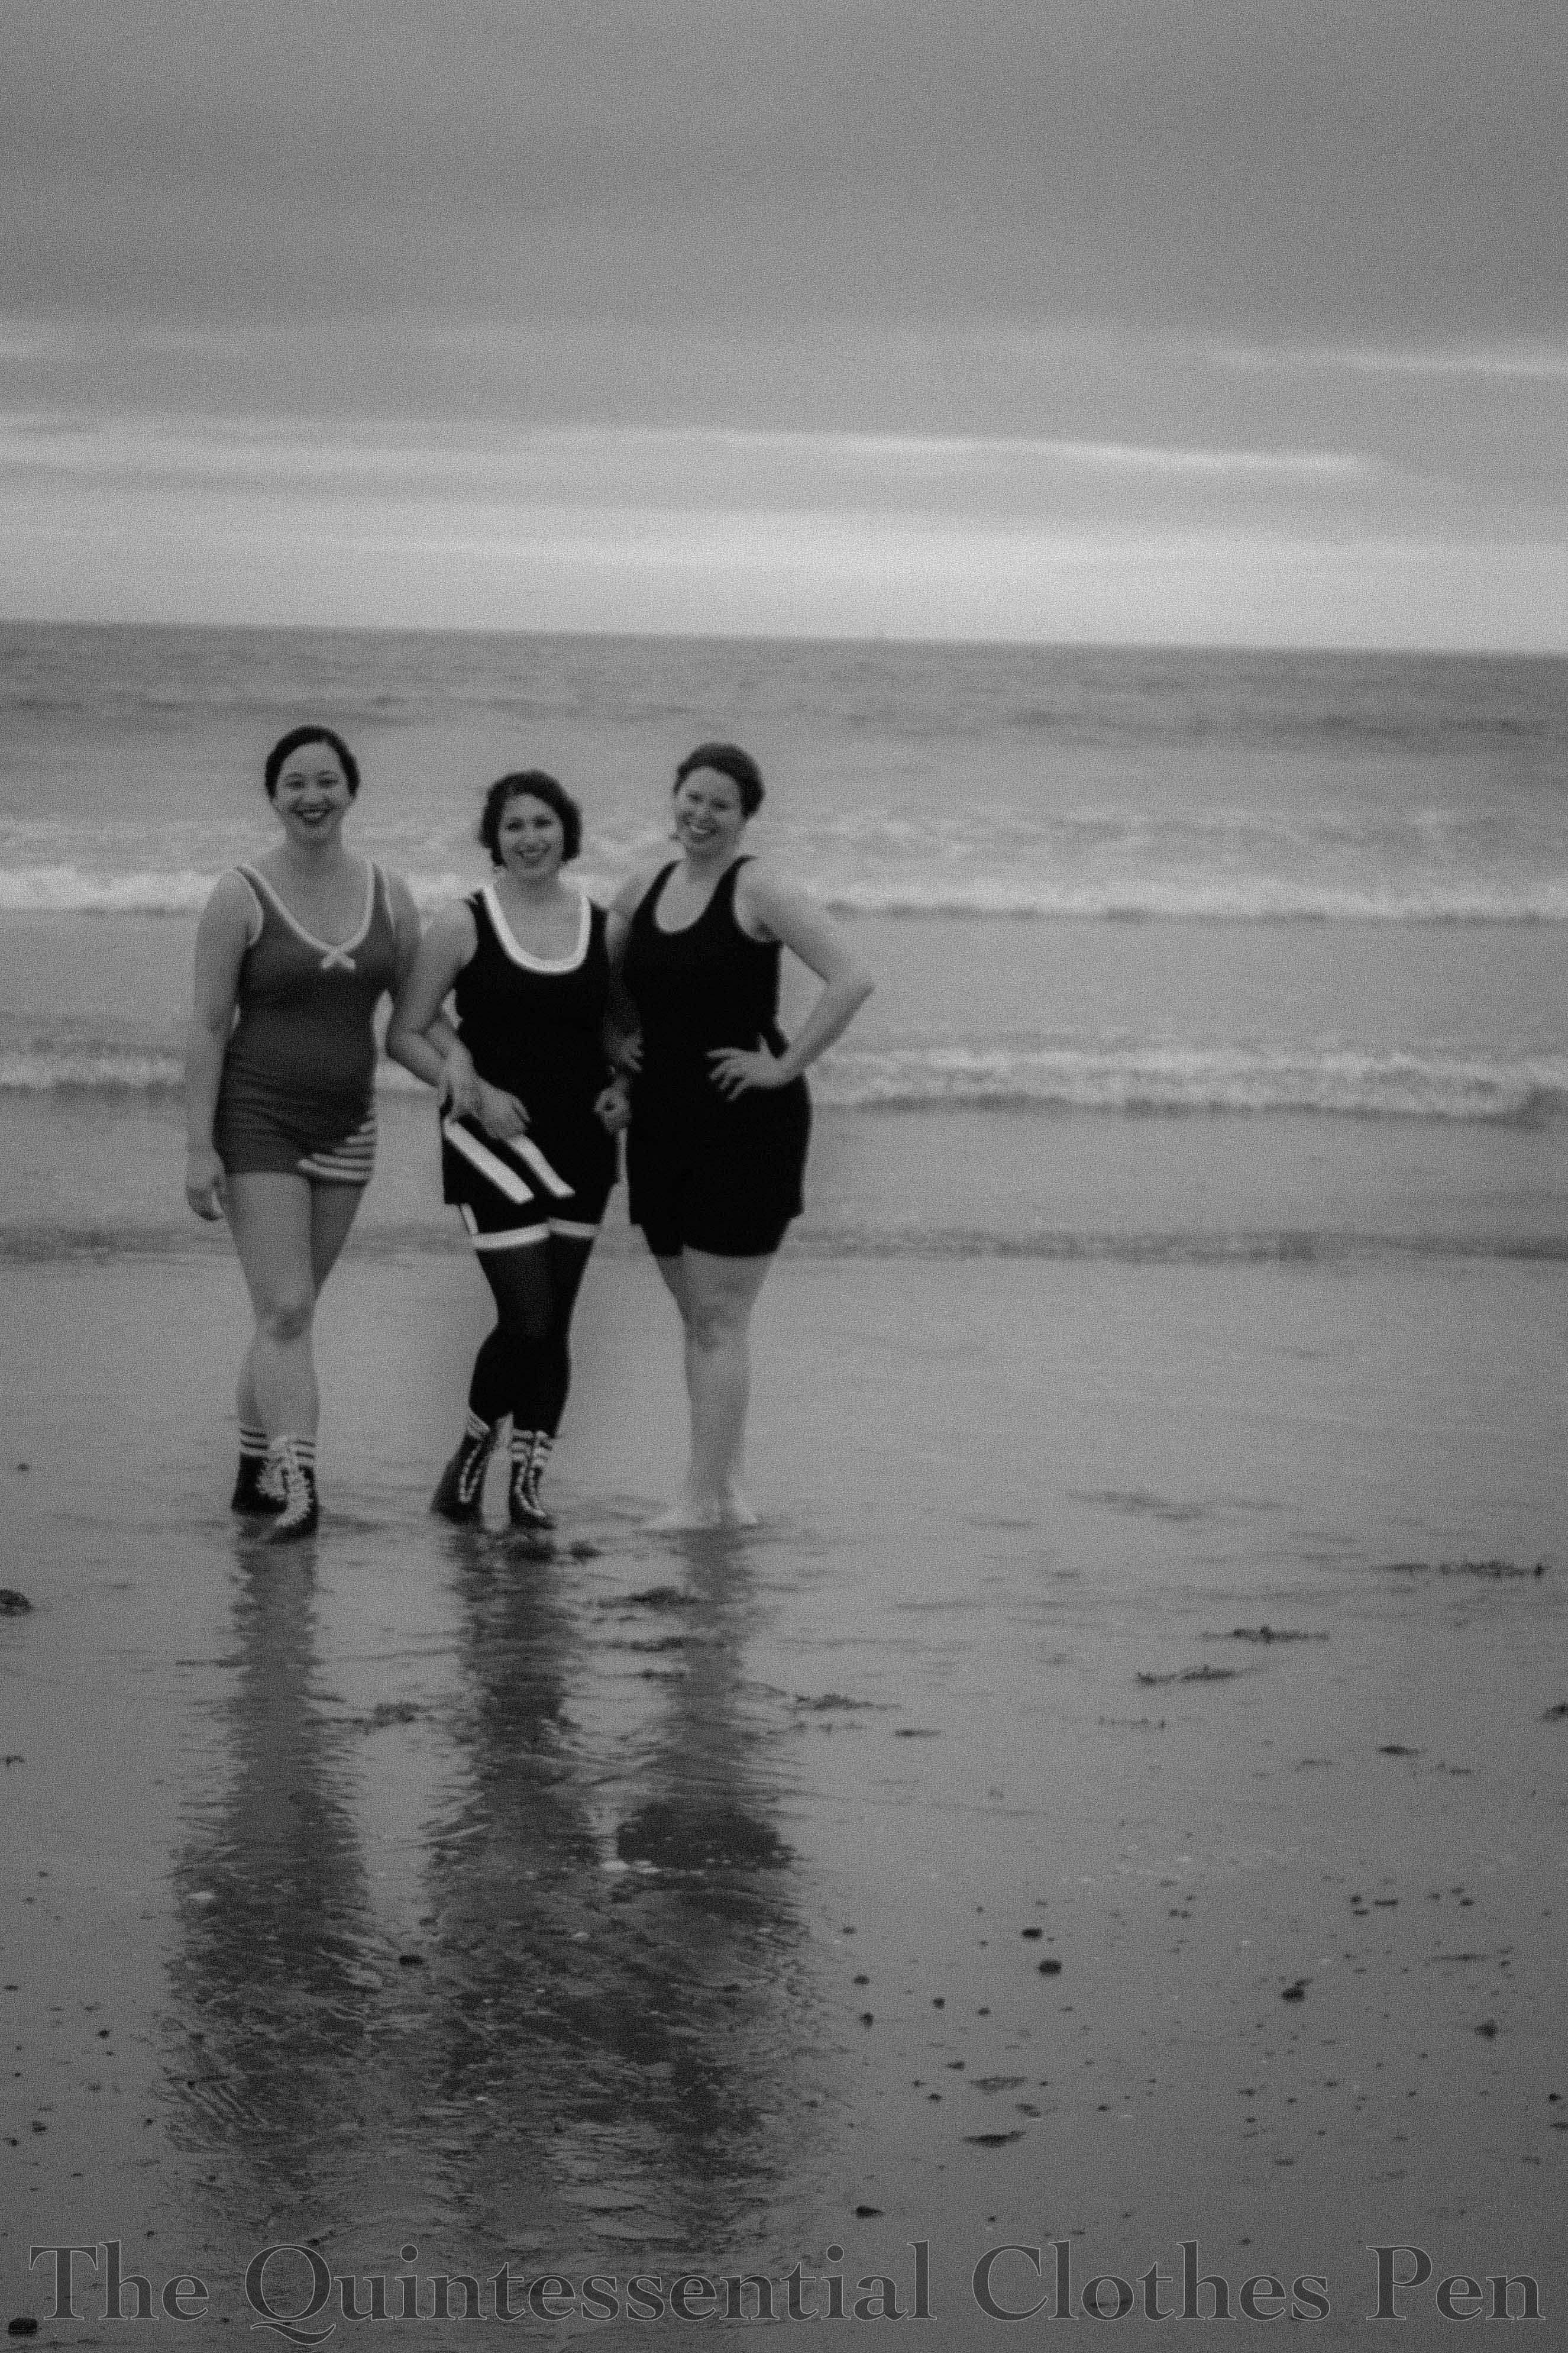
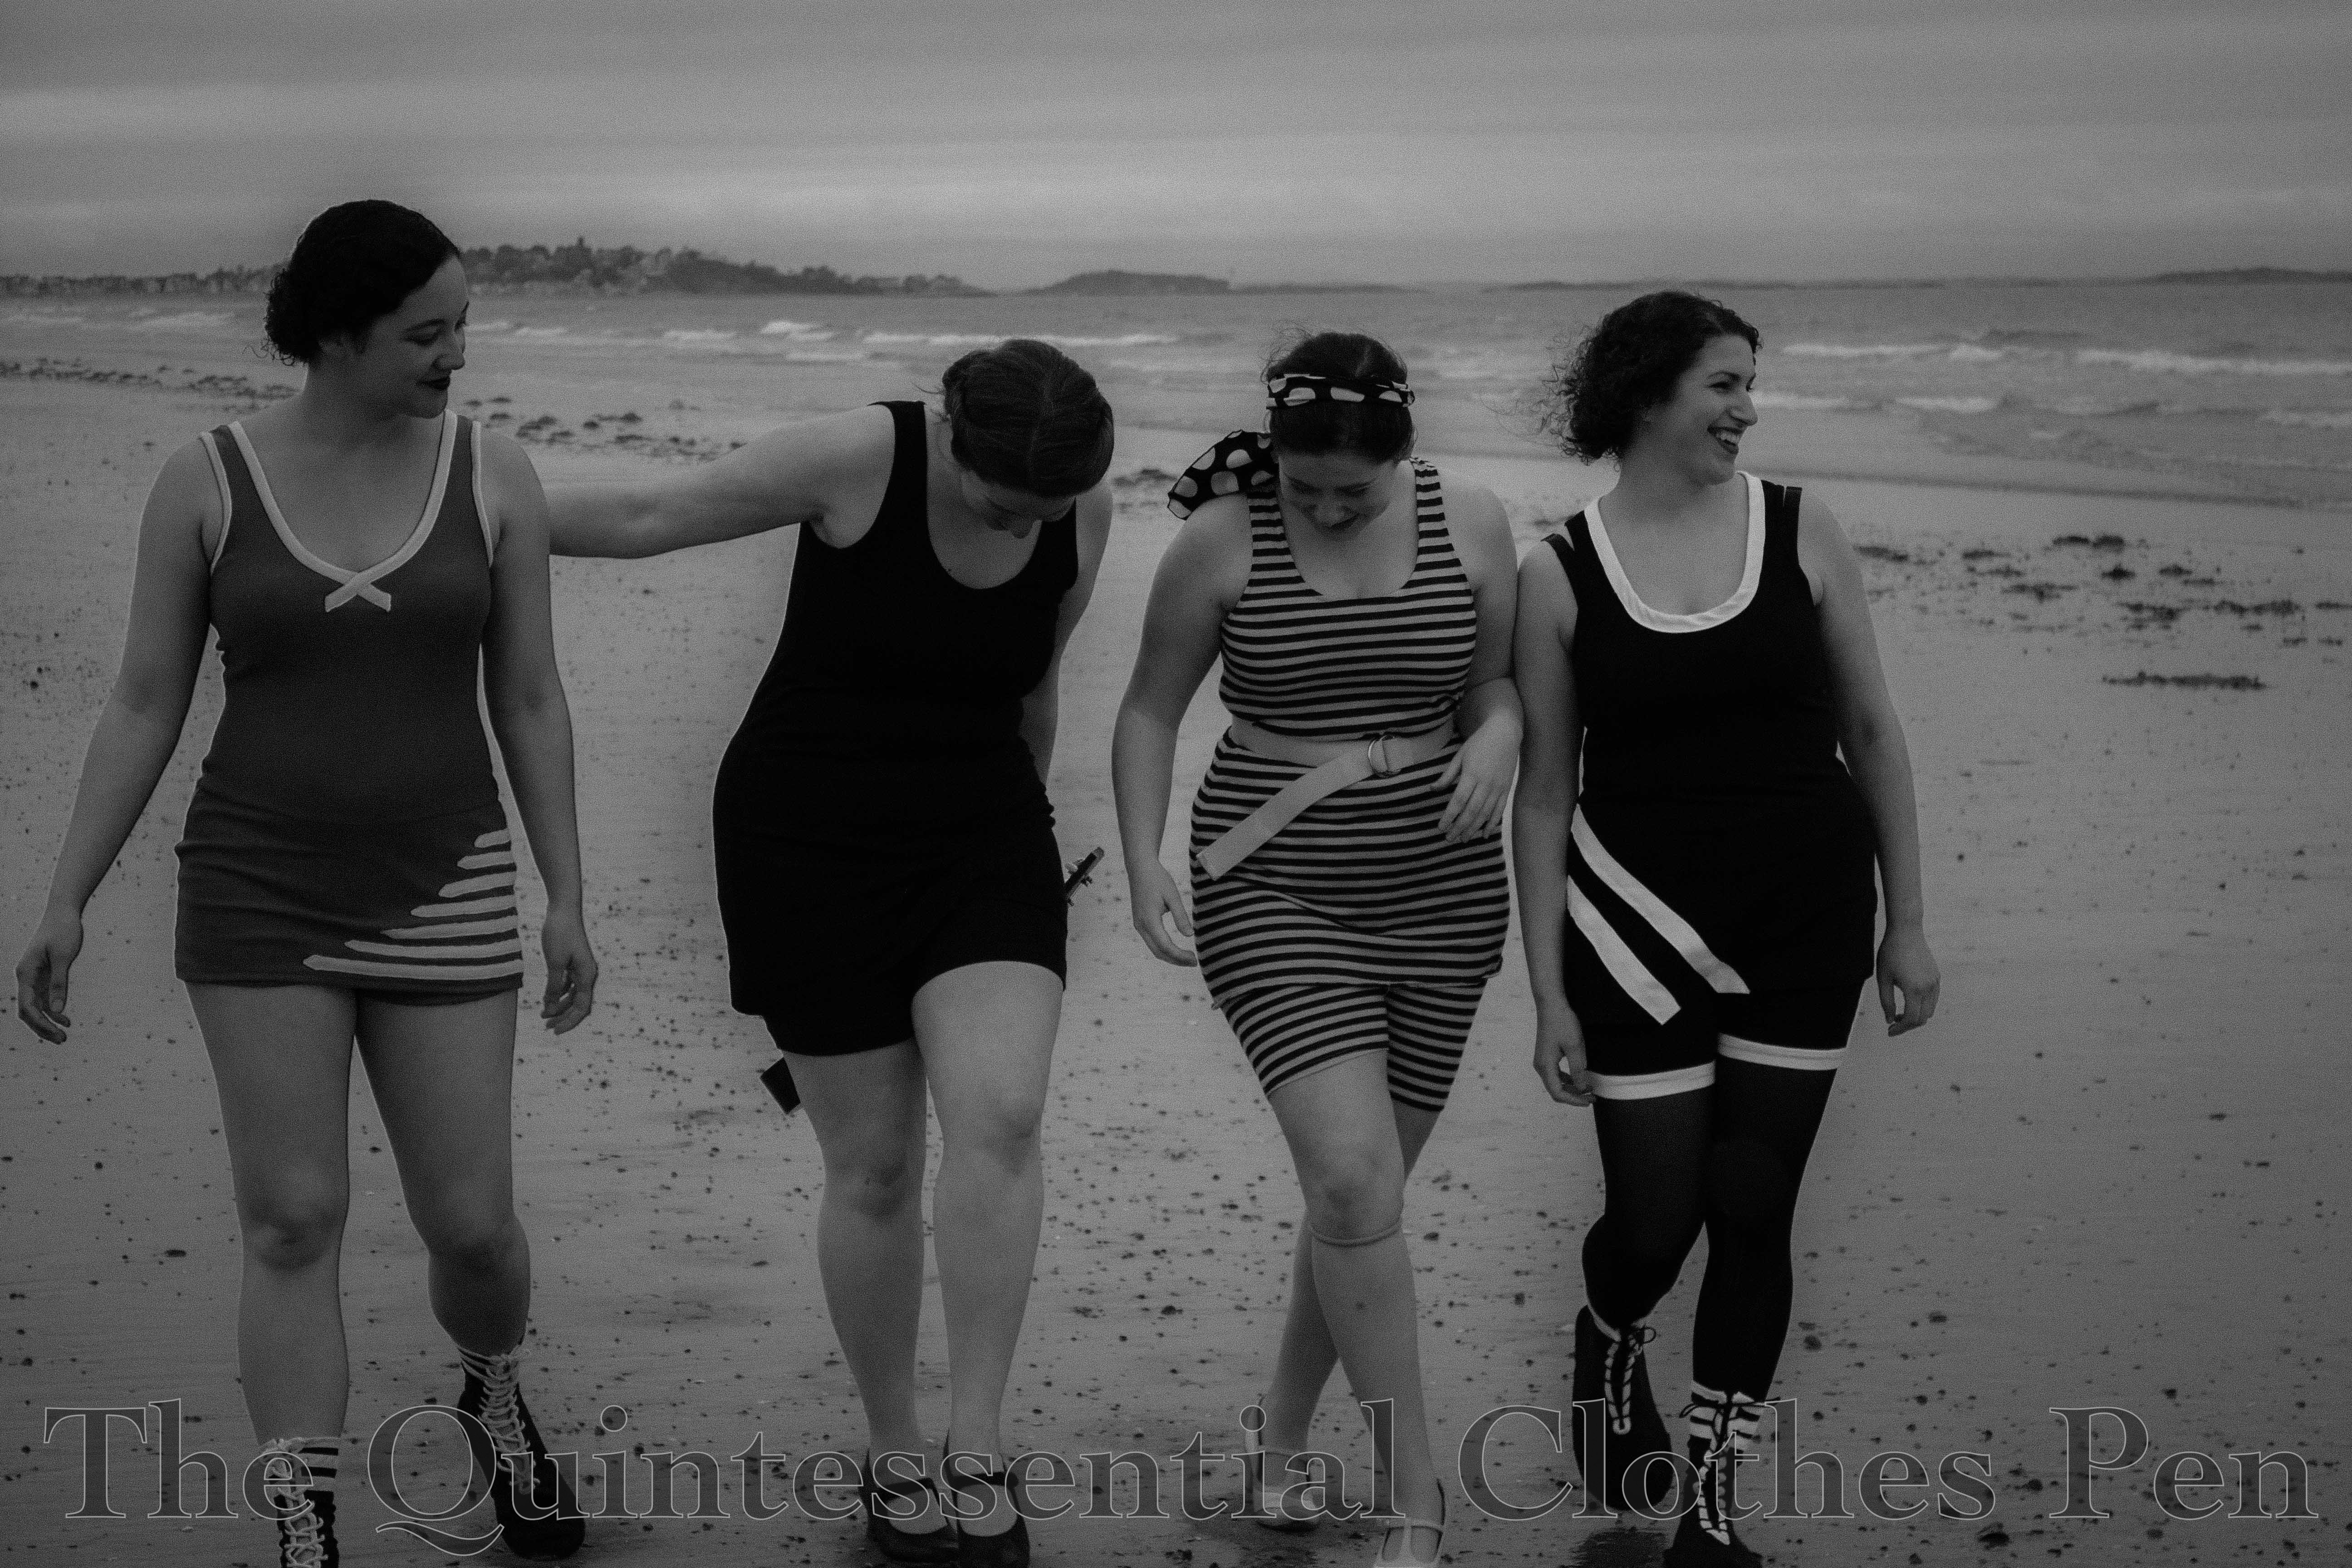
Such useful information when deciding what accessories I wanted to wear with my swimsuit and boots! I thought of taking pictures with stockings and without but decided that was too much of a hassle and settled instead for pictures with boots and without. You’ve already seen the pictures without boots. Now for a few with! (Yes, a friend also joined the pattern testing and wore her bathing boots to the beach, too!)

IMG_2895-2 (1)

IMG_2883-2 copy

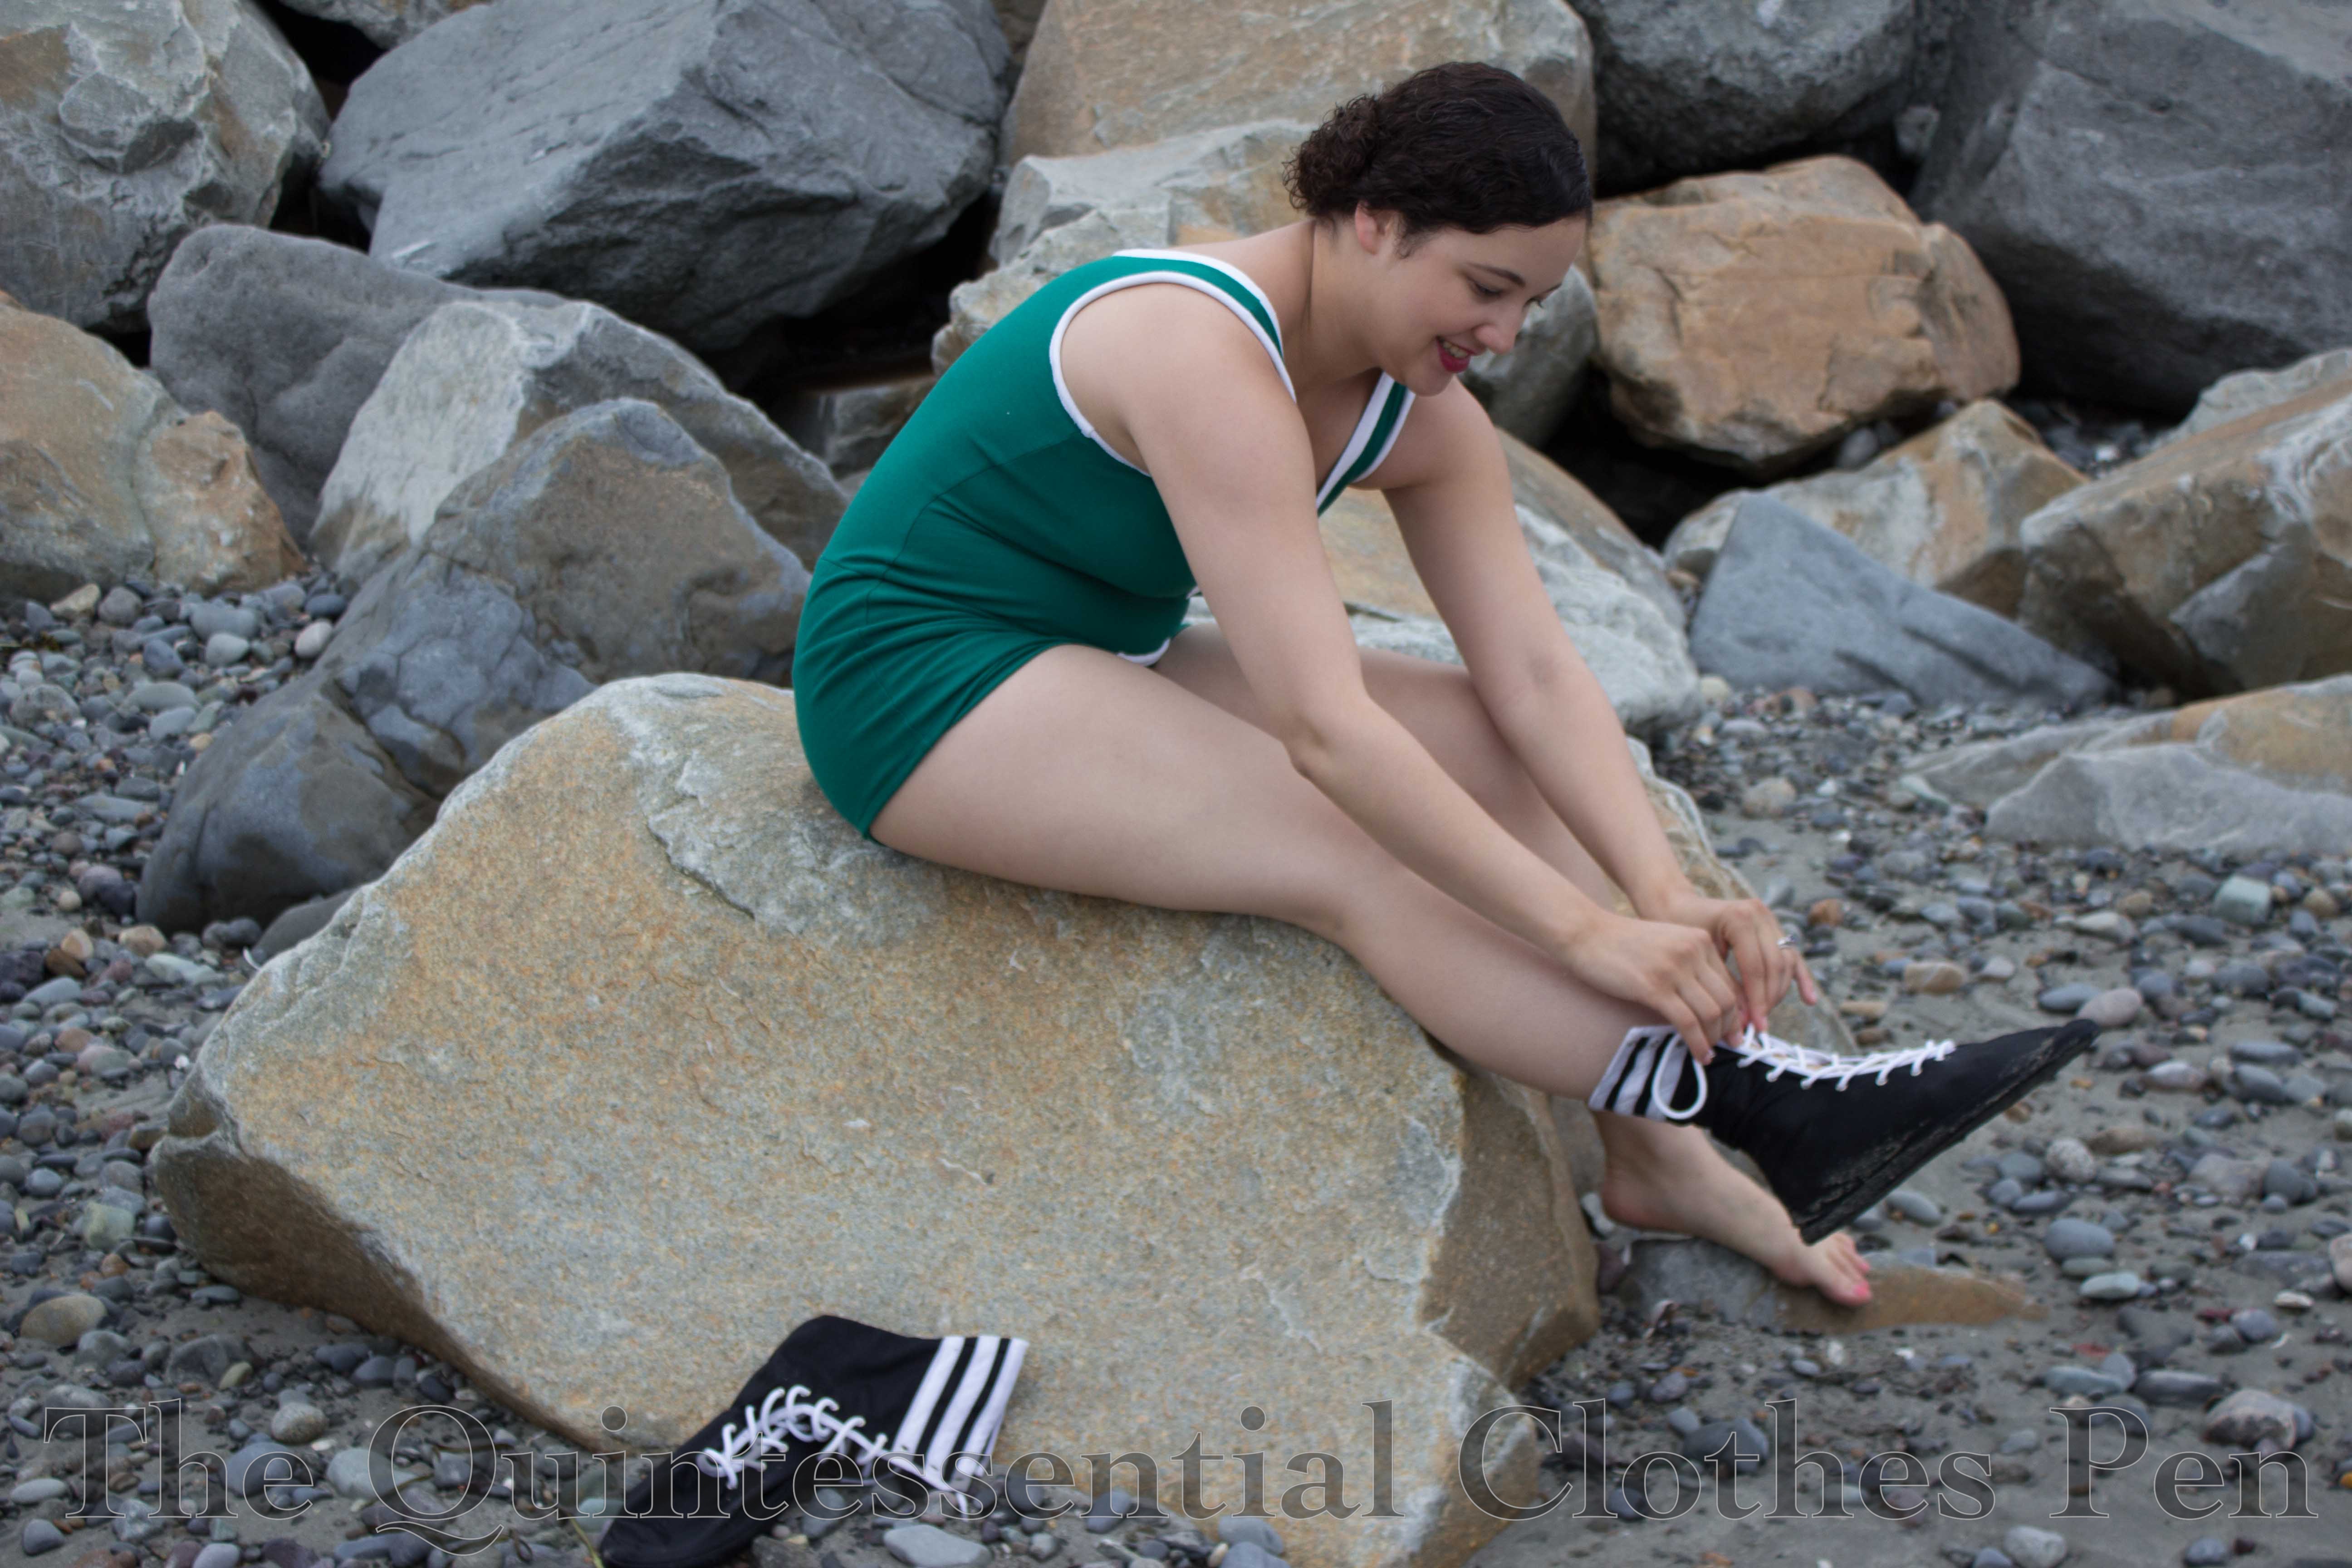
After wearing the boots in the water I took them off for pictures of the suit, but then decided to put them back on. As you might expect, they are less exciting to put on when feet and boots are already wet and covered with sand… though I think all the sand in the boots did give my feet a good exfoliation!

IMG_2941 (1)

IMG_2979 (1)

As for construction, here’s a quick run-down. I chose to make my boots out of navy cotton twill and white cotton canvas. Despite the fact that green boots exist, I didn’t want to try and match my greens. Plus, both the navy and white fabrics were in the stash and are neutral enough to wear with any future bathing suit I might decide to build.

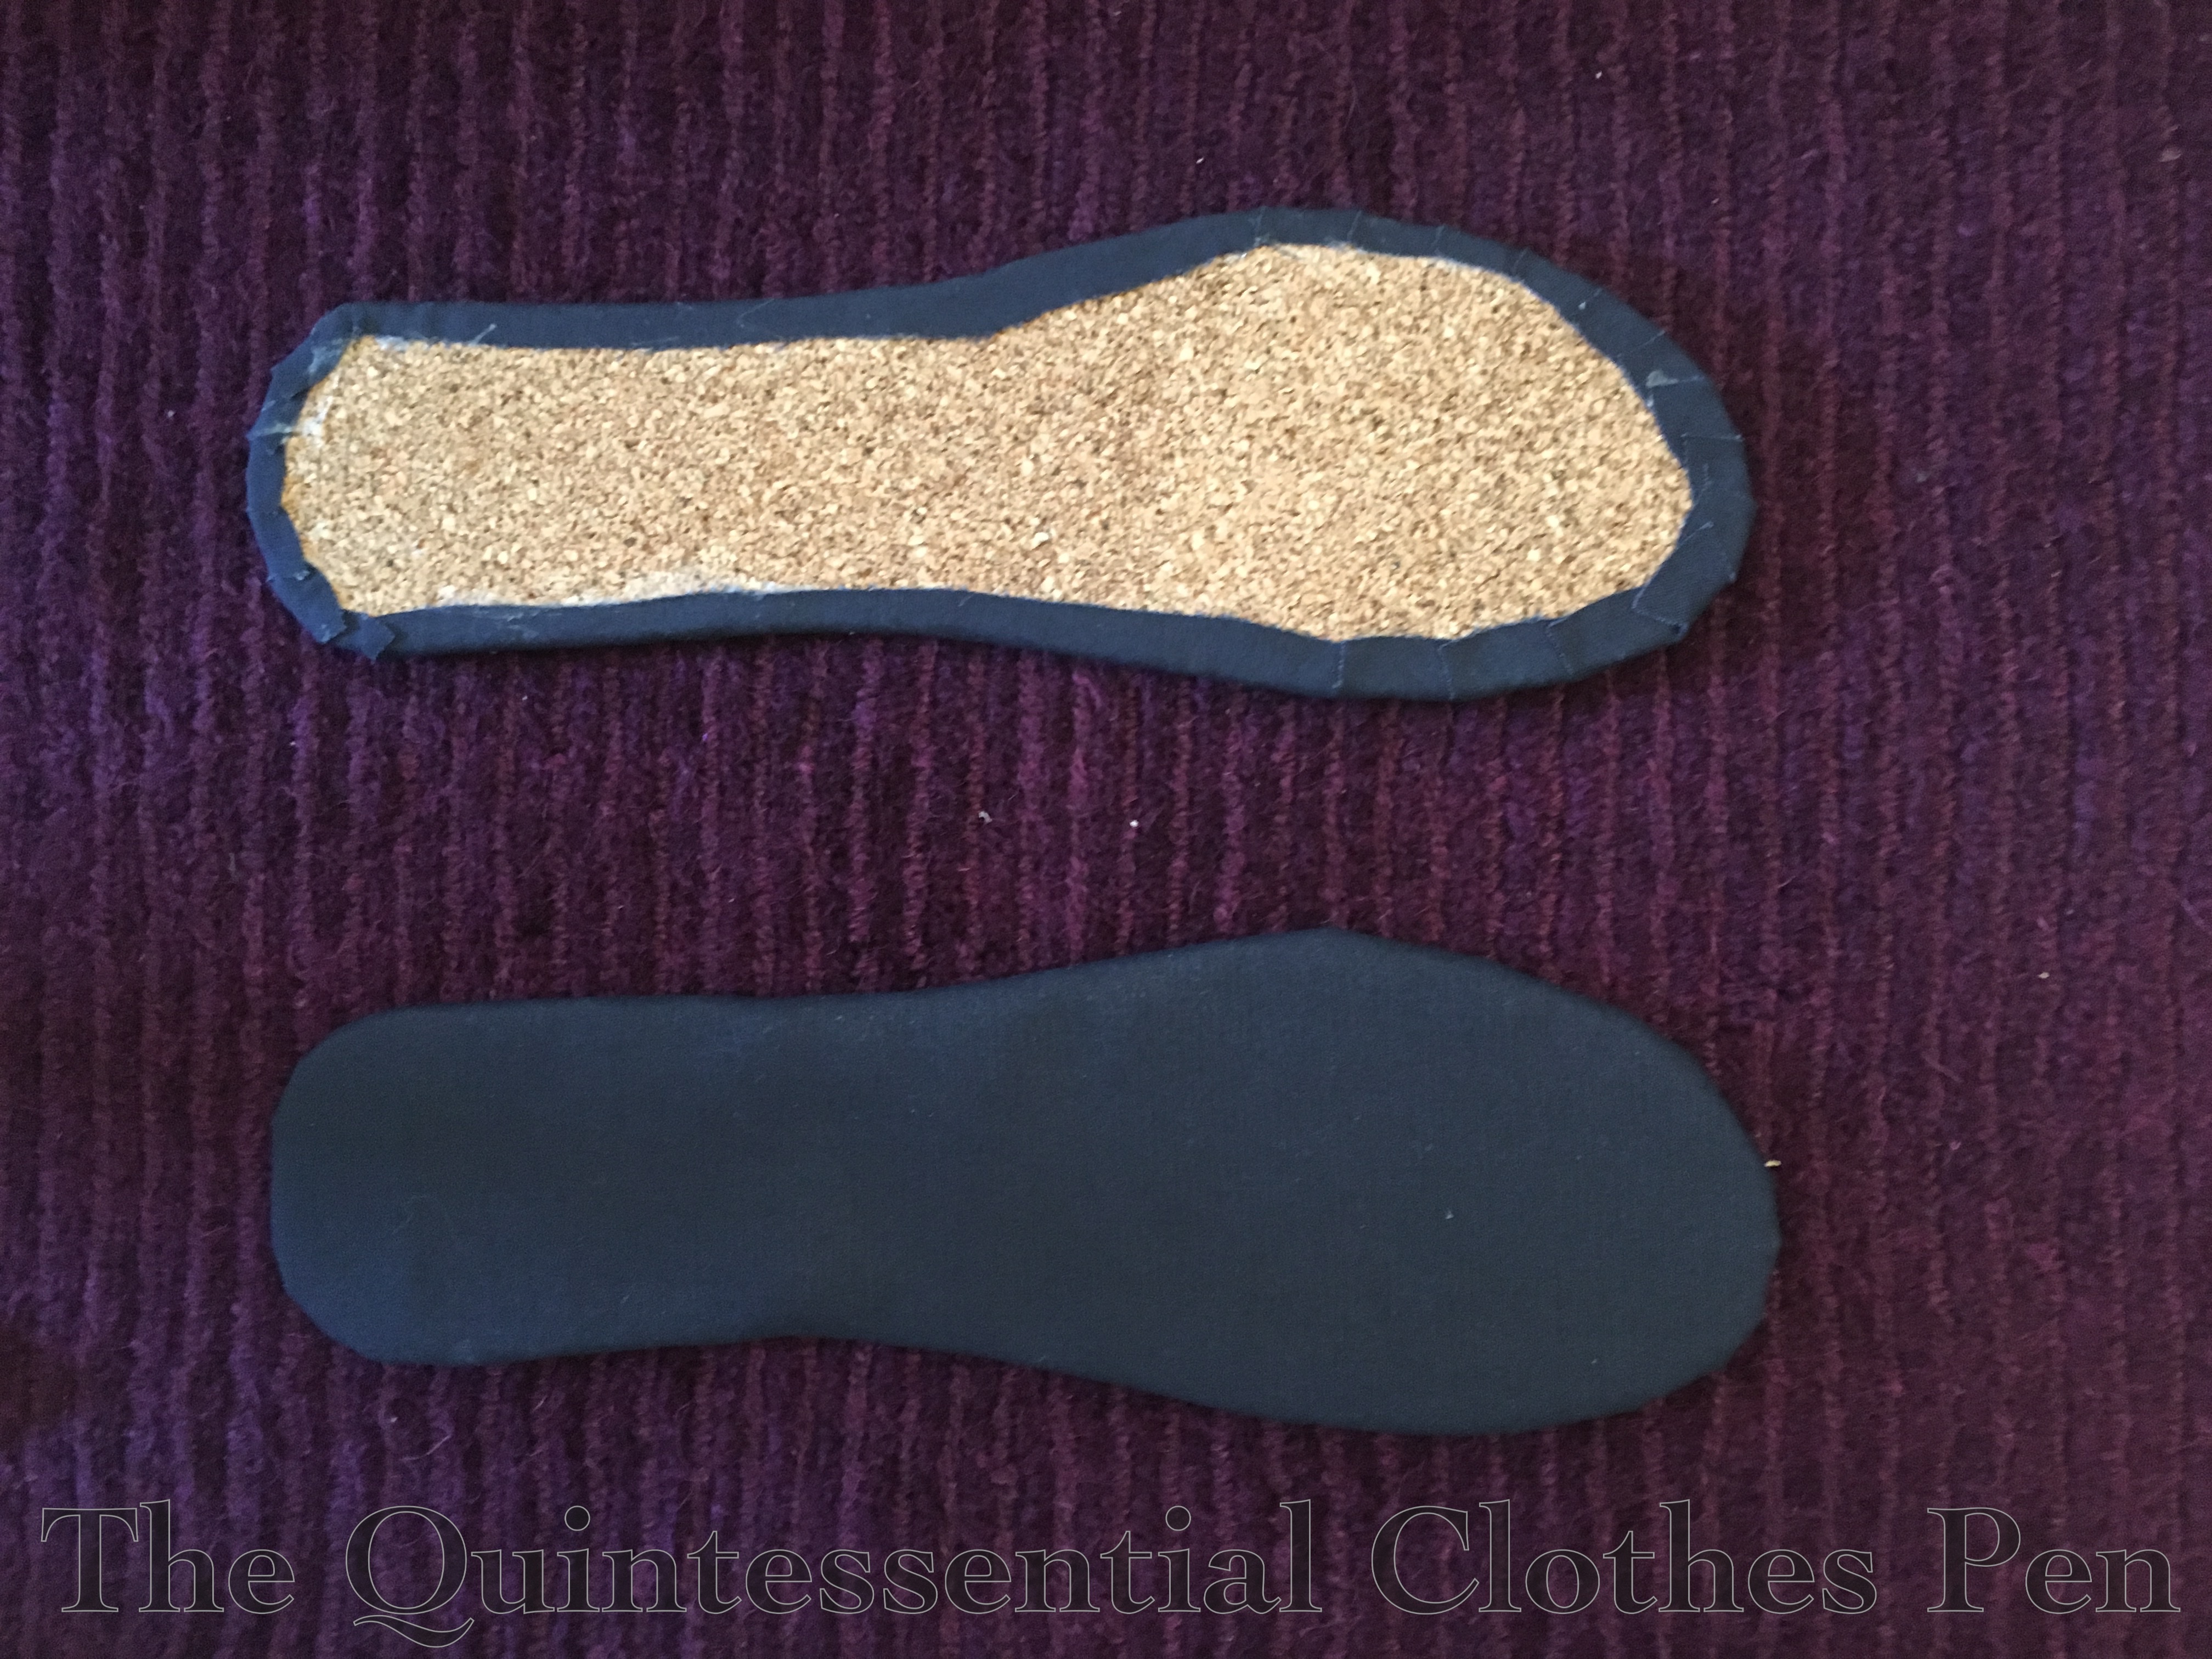
Each outsole has two layers of cork bound in bias. Nice and sturdy for walking, but too thick for a sewing machine, which meant a lot of unexpected hand sewing for this project.

IMG_1599 (1)

The insoles are a single layer of cork with the fabric glued in place. I just slipped in insoles into the boots for wearing, which meant I could take them out to let them dry after wearing. Given that they were soaked through this was great.

IMG_1600 (1)

The uppers were fully finished before attaching them to the soles. This part is all machine sewn.

IMG_1606 (1)

Finally, I hand sewed the uppers to the soles.

(I’ve made this all sound very easy and speedy, but I’ll admit that I took a shortcut and purchased cheap eyelets and a cheap eyelet setter to get the right look with high hopes for the quality. Unfortunately, I was disappointed. The eyelets were such a pain! The setter squashed them unevenly and then I needed pliers to make them look somewhat reasonable and trim off sharp bits. There are 44 eyelets. It took a long time. And it made my hands hurt. It would have been faster for me to hand sew the eyelets. Plus, they rusted after just the one wearing the water! And they got rust on my shoelaces, which was also a pain because the standard round shoelaces barely fit through the eyelets and getting them laced was hours all by itself. Ugh! For next time, I found narrower laces that will be so much easier to use, so I can at least take them out after wearing the boots without it taking forever. Or maybe I just won’t wear them in the water. Anyway, I don’t suggest you follow my example on the cheap eyelet front.)

IMG_1608 (1)

I am so grateful to Gina for sharing her pattern with me! It takes a lot of work to perfect a pattern and I probably would not have attempted bathing boots without having one already made and in hand.

Suggestions For Dressmakers, 1896

“When it comes to making, the actual sewing and finishing, the American dressmaker has nothing to learn from anyone. First class American dressmakers turn out the best work, so far as the mechanics of dressmaking go, of any dressmakers in the world. In point of fact, they make dresses too well. They might with advantage to themselves, and with no disadvantage to their patrons, unlearn something about sewing, and let some of the fussy details, over which they now bother their heads to very little purpose, go by default.

But the A-1 American dressmaker puts too much fine sewing into her dresses. They look well; they look about as well on the wrong side as upon the right side; perhaps if they were not such marvels of patience in the inside finishing, they might be more artistic to look like on the outside. Look at even the highest priced foreign made dresses; by comparison, they seem almost slovenly in workmanship, compared with American dress, but after all to what end put such an infinite amount of pains into finishing off a dress that, nowadays, is worn but a few times…house dresses and evening dresses might be slighted in finishing just as the Parisian dressmakers slight them without suffering an iota in looks or wearing possibilities, and with a notable saving in time and trouble.

The Parisian dressmaker is clever. She knows every trick in putting her work where it will make the most show. So long as she gets the effect she wants, and it stays as long…as it is required, which is not long, for instance, in a tulle party frock, she doesn’t try to make the sewing in every part of the sort that would win a prize at a school exhibition. The Parisian Milliner long, long ago, found that she could get effects by pinning on her hat and bonnet trimmings that absolutely defied sewing, and the Parisian dressmaker will catch a flounce of lace here and a ribbon there with fascinating grace, and never bother her head about what it looks like on the wrong side. Why should she?”

7138bd5bed5bd5a8921d1fd61bbdfd27I came across this passage in Suggestions For Dressmakers (1896) a number of months ago around the time I was completing my 1899 elusive blue evening gown. It is from the chapter called “Making” on pages 27-28.

The passage immediately brought to mind my process for making historical garments, which is usually along the lines of the “American dressmaker” in that I put many hours of fine sewing into my dresses to make the insides just as much as work of art as the exterior.

The obvious and most current example that came to mind was the dress I was completing at the time, but there are many others as well. Here are a few made during the last few years and spanning the 19th century in terms of their origins.

IMG_0544
In the style of the “American Dressmaker”, the beautifully finished interior of my 1899 elusive blue bodice made in 2016.
IMG_0951 (1 of 1)
Another beautifully finished bodice in the “American Dressmaker” style from 2014. This is Georgina’s 1858 evening bodice.
IMG_4277
Tidy insides in my 1813 evening gown made in 2013, also in the “American Dressmaker” style.

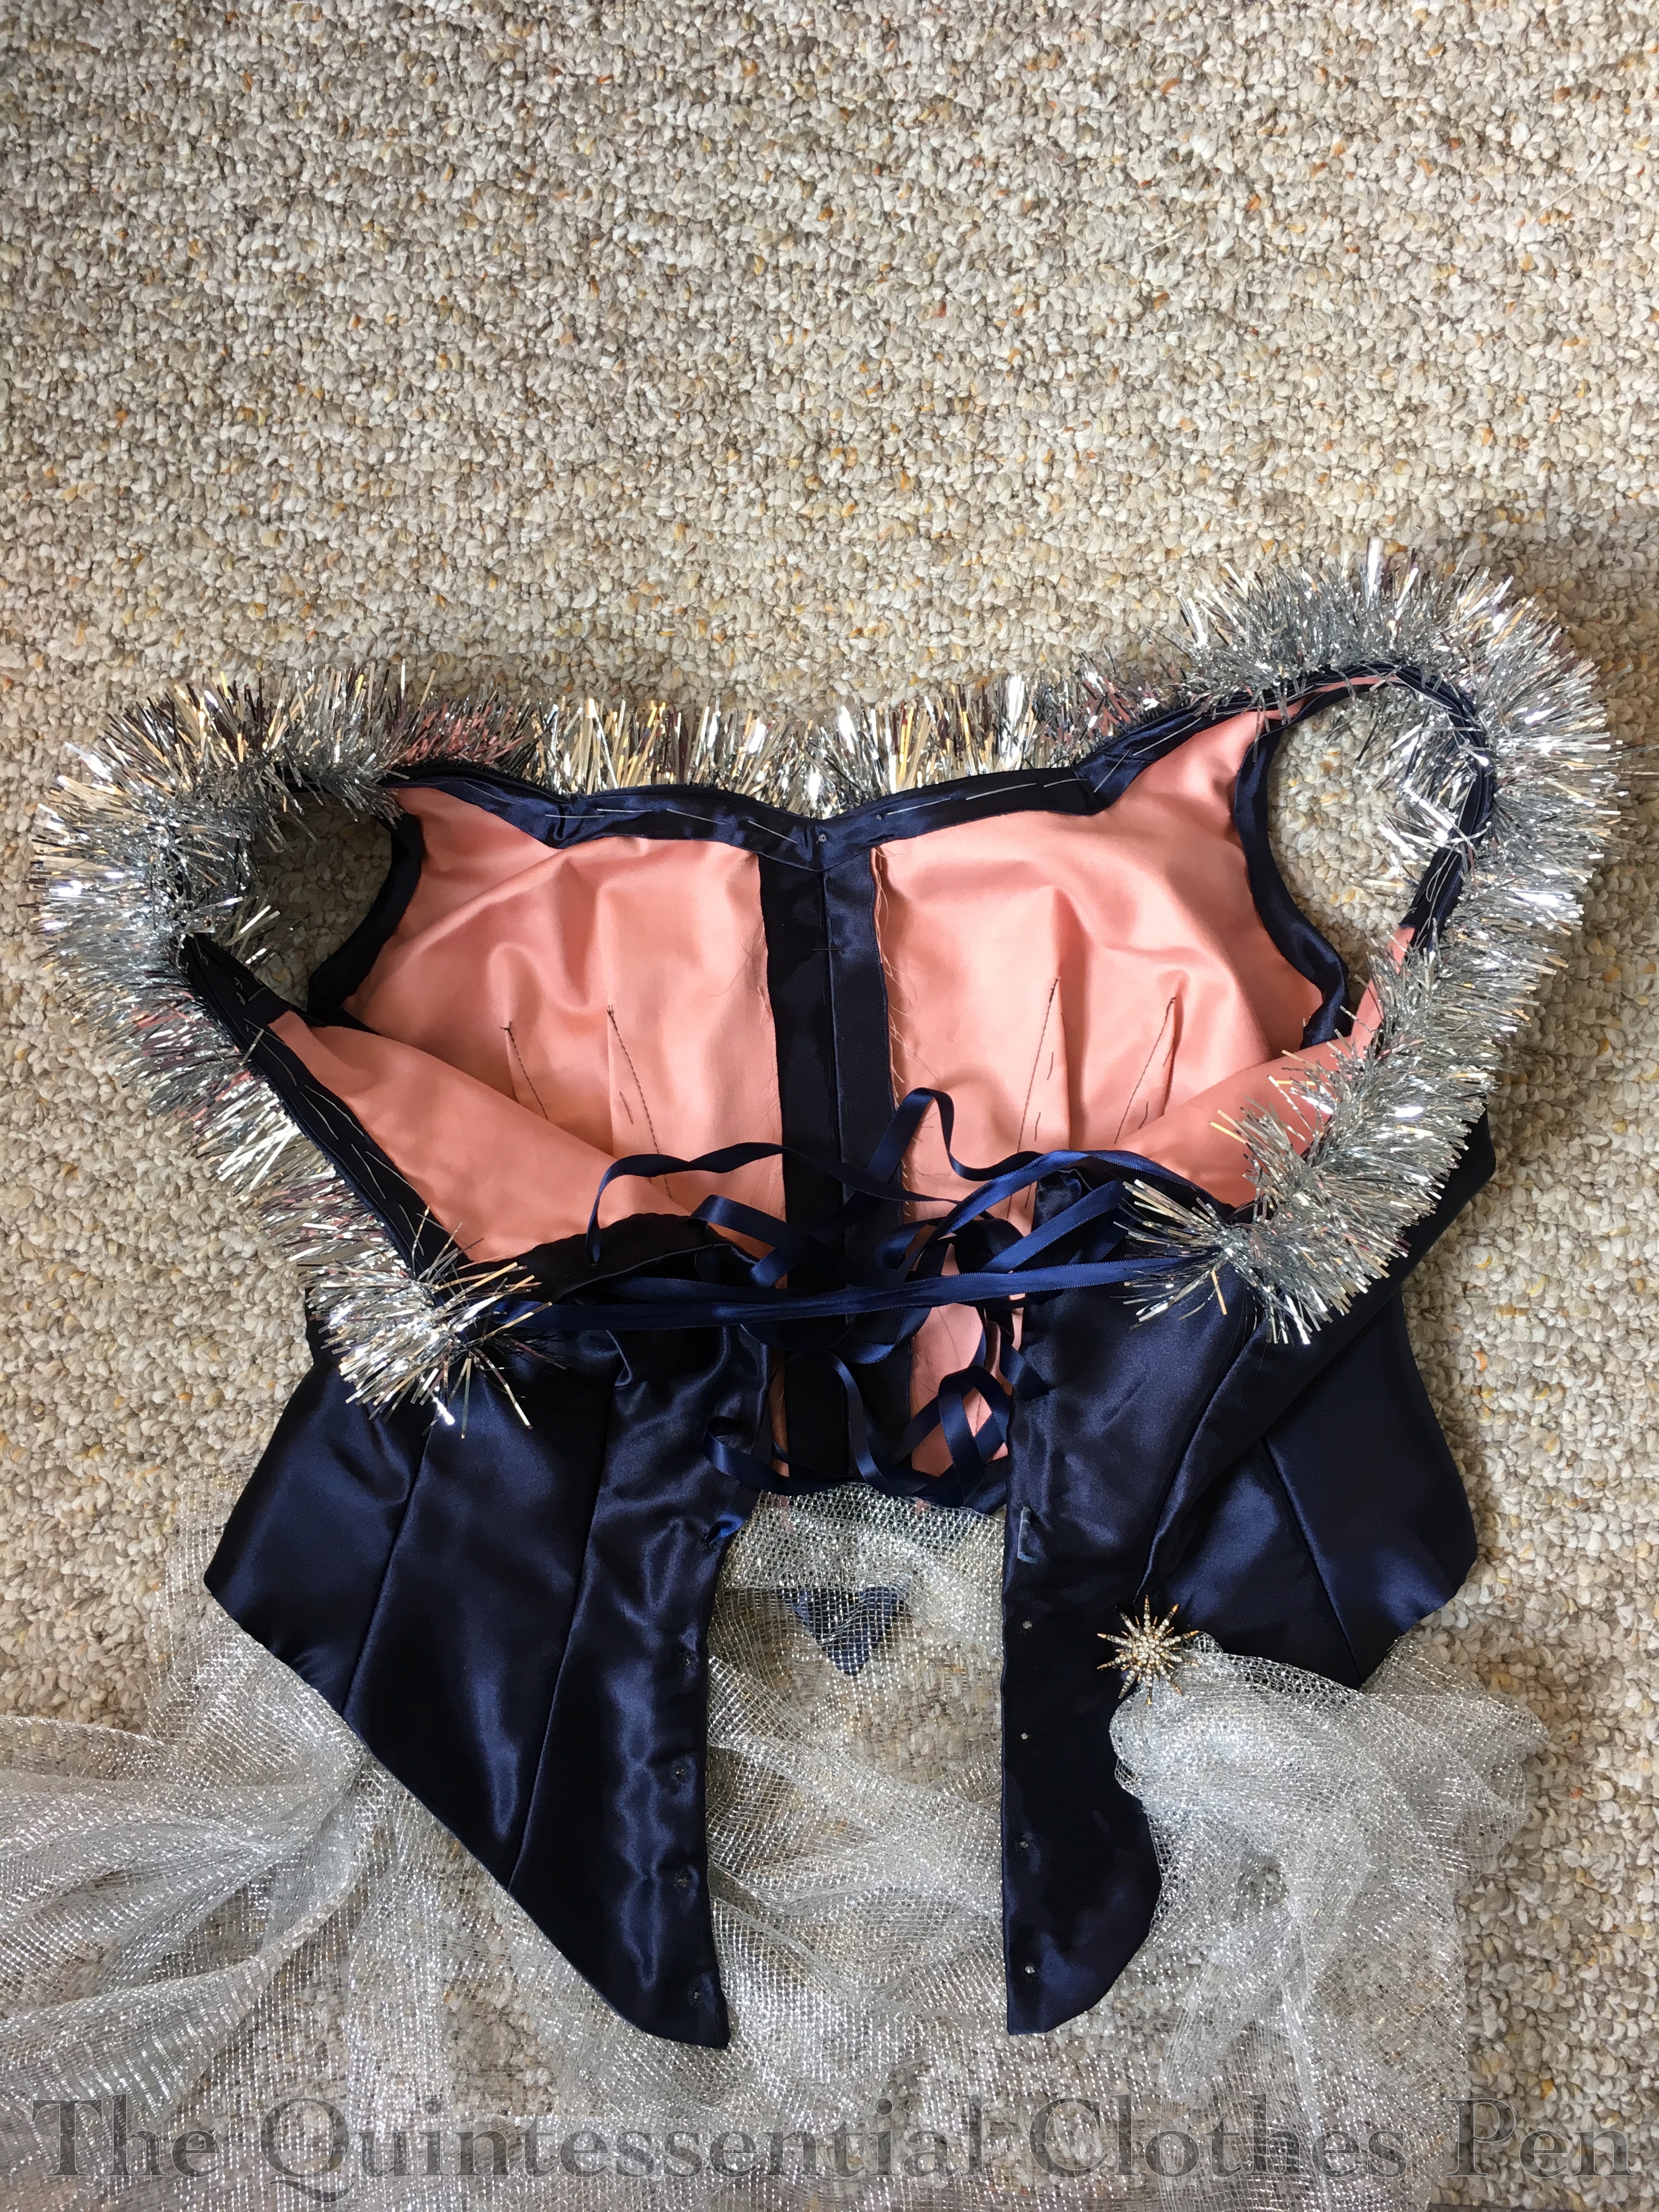
I also had this passage in mind while working over the first part of this year on my recent 1885 Night Sky fancy dress. I decided with that ensemble to follow the suggestion to adapt to the “Parisian Dressmaker” style and not worry about the insides as I usually do. While still quite tidy, I did not spend time finishing unseen seams inside the skirt or finishing the edges of the vertical seams on the bodice, as you can see below. It was a bit of a struggle with my natural instincts, but worked out very well in terms of the working on this right up until the deadline and not having time for all the pretty finishing anyway.

IMG_1483
I couldn’t entirely shake the urge to be tidy and nicely finish things, but I did leave some edges raw and basted on the trim in case I want to easily remove it in the future.

There’s also the mention of pinning trim on hats. That is a suggestion that I often make use of! I can think of multiple examples of hats that have had trim pinned on for years even while the hats are in storage. For example, remember the hat that I wear with my 1895 Skating Ensemble? That’s the same hat from my 1883 Tailored Ensemble with fur trim and extra feathers that have been pinned on since early 2015. I’ve felt no need to sew those on!

Do you sew like American dressmaker or a Parisian dressmaker? Is it a conscious choice for you to pick one style or the other, or is it just your natural sewing method? What about hats? Do you ever pin your trimmings on?

Project Journal: 1880s Steam Molded Corset: Inspiration

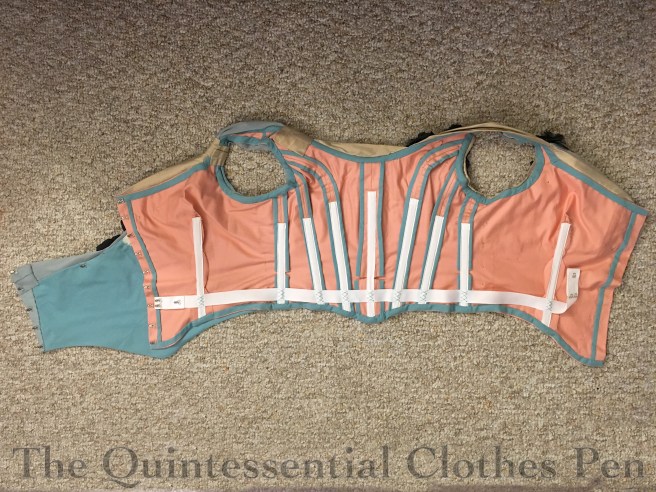
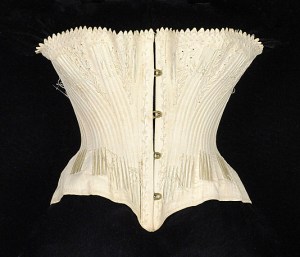
The first corset I ever constructed was from a modern historical pattern company. While the corset was fitted to my specific curves, the pattern pieces for it still created a basically cylindrical shape without a lot of hip or bust shaping visible when the corset was laid flat. (I’m wearing that first-ever corset in the pictures in this past blog post.) I’m not saying that shape is wrong for the 19th century, because there are extant examples, patents, and other information showing us that style, such as the corset below.

34cccb898ab3130f745b2c3bb6017b26
French corset c. 1885, The Met

Looking at corsets from the last half of the 19th century, however, there are a variety of other styles that have more interesting lines and definitive flare at curvy points than the basic cylindrical shape. My c. 1860 pink silk corset is an example of a style of corset that uses bust and hip gores to create a more curvy silhouette. (I discussed this in detail in a post about that c. 1860 corset that you can read here. That post has examples of extant corsets showing that shape.) Here is a catalog page of corsets from the 1880s showing that same style.

In addition to the hip gore style corset, there are also a growing number of curvy seam corsets as the 19th century progresses. Some of these also make use of bust gores while maintaining the curvy seams to really provide shape. These all lead up to the s-shape corset of the early 20th century, but we’re not quite there yet in the 1880s.

Here are some extant examples of curvy seam 1880s corsets: black, light blue, and ivory (very similar to the one pictured above, but more extreme in its curves if you look carefully). The curvy seam corset style is what caught my eye for this project, because it is a style that brings new challenges in terms of patterning and because it will be a new style in my wardrobe when completed. Compare this to the the photo above and you can see quite a difference in terms of the cut of the pieces.

046b07af92b3f1063aa27c342bed5124
Edwin Izod corset, 1887, V and A.

This Edwin Izod corset from the V and A is my inspiration. I’m intrigued by the shaping of the panels and the completed silhouette, but also by the construction method. The V and A gives some tantalizing information about the steam molding process patented by Edwin Izod and used to create this corset, just enough information to make me want to see if I can create some form of steam molding and discover how it might change the finished silhouette and wearable feel of the finished corset when compared to other corsets I’ve constructed.

From the V and A:

Fashion and technological innovation changed the shape of late ninteenth-century corsets. As the bustle replaced the crinoline and bodices contoured the figure, corsets became longer to achieve the desired hourglass silhouette. They encased the abdomen and enveloped the hips, and the amount of whalebone also increased to give a smoother outline and help prevent wrinkling of the fabric. This corset from the 1880s is composed of twelve separate shaped pieces and forty whalebone strips.

To improve shape, performance and comfort, manufacturers claimed numerous inventions. One of the most successful was the steam-moulding process developed by Edwin Izod in 1868, and still used in the 1880s to create elegant corsets such as this one. The procedure involved placing a corset, wet with starch, on a steam-heated copper torso form until it dried into shape. The result was a beautifully formed corset, whereby ‘the fabric and bones are adapted with marvellous accuracy to every curve and undulation of the finest type of figure’ (The Ladies’ Gazette of Fashion advertisement, London July 1879).

I’ll be coming back to the nuggets of detail contained in this description, because some relate to patterning and some relate to the steam molding itself, but those are topics for future posts.

* In case you’re wondering why I spell steam molding without a “u” but the V and A quote spells it with a “u”, check out this little bit of information.

Vernet Project: Witzchoura Images

As a quick recap, I started my witzchoura research journey here, being confused about how the word was spelled. After sharing that with you, I moved on to look at basic witzchoura definitions and then further witzchoura references, but I haven’t really shared images of witzchouras with you yet, so that’s what this post is going to focus on.

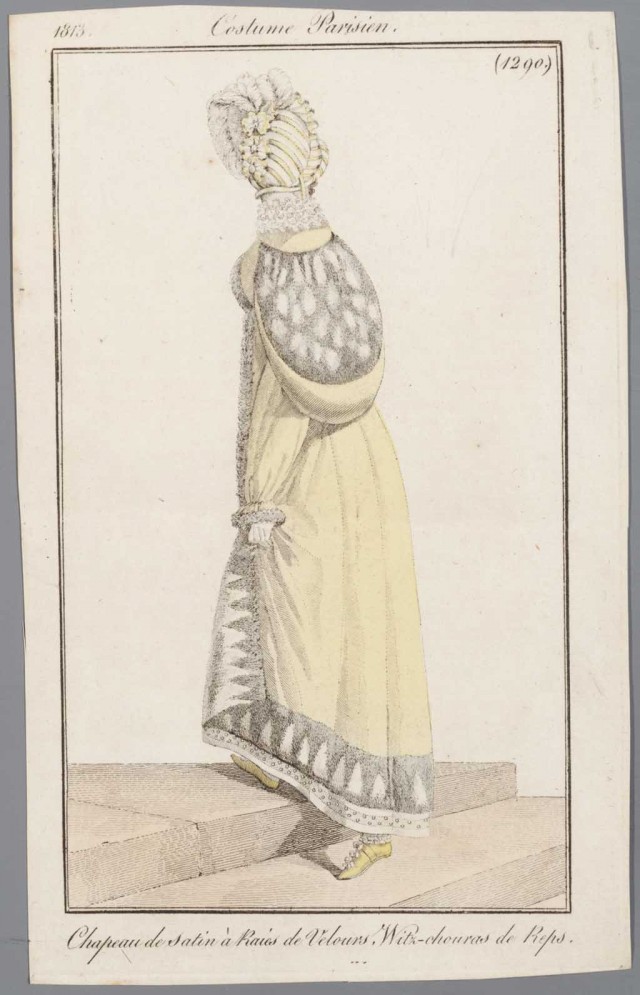
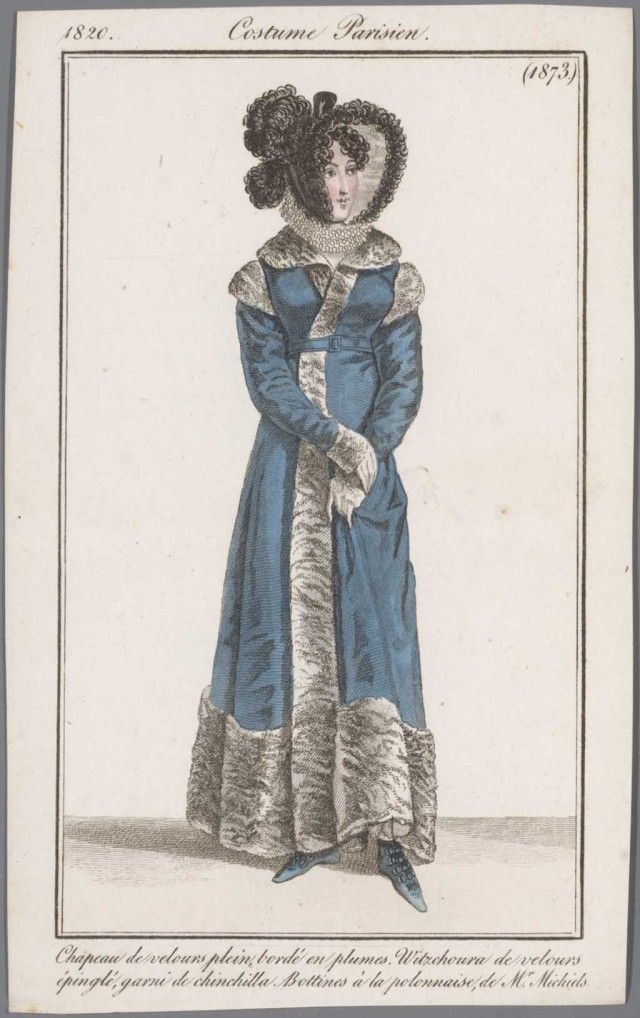
Out of the thousands of pins on my historic clothing Pinterest boards, the images below are the only ones I could find that specifically mention that they show a witzchoura. (Never fear, I’ll be looking at not-quite-witzchouras in a future post.)  If you know of any other images that specifically name the garment shown as being a witzchoura please let me know!

I find it interesting that two are yellow and two are blue. Also interesting that all the furs that are depicted are textured or downright weird (like the first one with the flower-fur… what is that?). However, in terms of materials there is variation: one of merino (wool), one of reps (could be wool, silk, or cotton, according to the OED), and two of velvet (fabric content unknown, though wool, silk, or cotton would seem to be likely).

b2e293cd8d6787e52979911acc6c3539
Costume Parisien, 1812
pictura2009%5Cs_a_55466_000
Costume Parisien, 1813
49a82ad6569f70e121aebe638e857efd
Costume Parisien, 1818
1ec484b324c9135cf9d6934f28eb8dfd
Costume Parisien, 1820

Vernet Project: Further Witzchoura References

Last post relating to witzchouras, we looked at basic definitions of the word, determining that the garment and its name developed from Polish and French influences, that the garment was popular c. 1808 to 1835, and that the chief qualifications are that it is an outer coat or mantle lined and trimmed in fur. But let’s not stop there: here are more references to the witzchouras from the early 19th century.

In 1817, La Belle Assembleé has multiple mentions of witzchouras. The following excerpt tells us a good amount about this style:

8ae3d6c93e063c498406346d8b7c7662

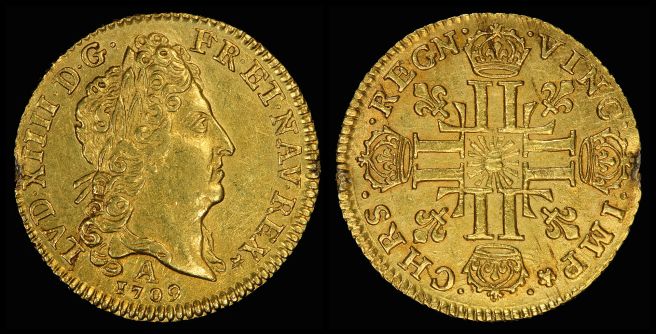
Side note: A Louis d’Or is a French gold coin first struck in 1640. These were promoted by the French kings to fill the need for a large denomination coin, since the franc and livre silver coins were greatly decreasing in value. In 1726, France developed monetary stability and the Louis d’Or was established as being worth 24 livres, a value that remained static through the French Revolution. At the time of this quote in 1817, a Louis d’Or referred to a 20 franc gold piece, also called a Napoleon, so named because Napoleon coopted the idea of the French kings before him. (Sources: Merriam Webster, the OED for louis d’orNapoleon, and livre, and the Encyclopedia Britannica.)

France_1709-A_One_Louis_d'Or
Louis d’Or from 1709

Throughout the 18th century, a franc was similar in value to a livre, and about 20 of either of these coins equalled one Louis d’Or. La Belle Assembleé tells us that a witzchoura in 1817 was worth 30-90 Louis d’Ors. What I’m driving at here is the relative value of one of these garments.

The OED gives us an idea of the value of a livre over time: in 1746 one captain was paid 120 livres a month (6 Louis d’Ors). Extrapolate that for a year, and that captain was making 72 Louis d’Ors, just enough for a witzchoura or two and nothing else! Another example from 1797 sounds outraged that an English sea officer was charged 300 livres for eight days of lodging (15 Louis d’Ors). That’s almost 60 Louis d’Ors per month, which would easily be a witzchoura, though I doubt that sea officer would need a witzchoura instead of lodgings! The takeaway message is that, as La Belle Assembleé says, witzchouras were costly and worn only by the wealthy.

It is worth noting that there are fur lined pelisses mentioned which do not qualify as witzchouras in the eyes of La Belle Assembleé. I’ll be examining these almost-witzchouras in a later post.

Moving along some years, The Ladies’ Pocket Magazine describes fashionable witzchouras in 1833 (the OED had quoted part of this in their definition of witzchoura that we looked at in my last post):

ead143cce8137354ba0807c21dd308b2

As we established before, by the 1830s the shape of the witzchoura had changed to accommodate the changing fashions of dresses under them: becoming more cape-like, with collars and loose sleeves rather than being fitted like a pelisse as they were in the earlier years of their popularity. Again, we are reminded that witzchouras are made from expensive fur, and the more expensive the fur the more likely to see it displayed as much as possible.

Moving forward once again, C. Willet Cunnington mentions witzchouras in his book English Women’s Clothing in the 19th Century referencing a year as late as 1849: “The Witzchoura Mantle, for the carriage, lined and trimmed with fur.”

This quote from La Belle Assembleé in 1849 could be the source for Cunnington’s mention of the style, as the phrasing is quite close to Cunnington’s description:

1e04c8043ce18b6ef88613d6b34c37cb

Here there is a mention of another garment similar to a witzchoura: in this case a burnous. According to the OED again, a burnous is a woman’s cloak or mantle from the 19th century resembling an Arabian upper garment of the same name. It is interesting to note that by the 1830s and 1840s a witzchoura is described as heavy, cumbrous, and very ample instead of the more fashionable and positive descriptions from the decades prior.

One final mention of the witzchoura is from The Outdoor Girl Of A Century Ago, published in 1922:

books

This is the second mention in this post of a similar (or possibly the same) garment of Russian origin. In addition to the specific evidence of the Polish origins of the witzchoura in name and relating to Napoleon himself, I’ve also come across multiple mentions of the witzchoura style being brought back to France from Russia by Napoleon’s forces. Both of these influences fit in with the dating we’ve established and lead me to wonder if these are two separate and unique garments. Perhaps, though I suspect that if they were indeed separate styles in name they would have been variations on a similar theme, just like the fur-lined pelisse mentioned earlier in this post.

Vernet Project: Basic Witzchoura Descriptions

It’s time for a little more information about witzchouras! Back in January, I shared my round-about journey to figure out what a witzchoura is. Now it’s time to look at witzchouras in more detail to determine what qualities define them.

In that last post, we left off with this enlightening sentence from the book Empire Fashions by Dover Publishers: “Around 1808, a high-waisted, fur-lined woman’s coat appeared, the witzchoura [wi choo ra].” Here is an example of what a witzchoura looks like.

e8e5aa673e63adffbf95754dc2b25ffe
Costume Parisien from 1813

My go-to source when I get geeky about word history is the Oxford English Dictionary, and lucky for me, it has an entry for witzchoura! The OED tells us it as an obsolete noun from the French vitchoura and the Polish wilczura (a wolf-skin coat) that is defined as “A style of lady’s mantle fashionable c. 1820-35.”  The OED also shares four uses of the word from period sources. Here they are, with slight edits:

1823 La Belle Assemblée Dec. Witzchoura pelisse of gros de Naples,..trimmed with a very broad border of swansdown.
1833 Ladies Pocket Mag. The witchoura is a very ample mantle, made with a very deep collar, and cape, and long, loose sleeves.
1835 Court Mag. [The mantle] is of the Witzchoura form, drawn close at the back, with large Turkish sleeves, and a deep falling collar.
[1898 M. Loyd tr. O. Uzanne Fashion in Paris Witzchouras had not yet [c1806] come into vogue.]

So far, our qualifications for a witzchoura include: a high waist for earlier witzchouras (to correspond with the fashionable silhouette), fur lining, fur trim, the fact that a witzchoura is a coat or mantle (for outerwear, with another garment worn underneath), that it was most popular c. 1820-1835, and that it had not yet become fashionable c. 1806. Other sources add to a witzchoura’s qualifications those of its being full length, having large sleeves and a wide collar (or sometimes hood or cape layers over the shoulders) especially in the 1830s when the silhouette changed, as well as the general period of the “early 19th century” for its popularity, which makes sense since we’ve just looked at sources that mention dates between 1806 and 1835.

There is some information telling us that the garment became popular after Napoleon gained a Polish mistress in 1808 and other information that tells us that the garment was Russian in origin and became popular after the Napoleonic Wars brought the style back to France and England. (For more information about these early witzchoura influences, check out this post at the Sewing Empire blog.)

I’m excited the word has Polish or Russian origins, because “witz” sounds Polish or German to me. Also, I love that the last quote from the OED tells us that witzchouras weren’t popular just a few years prior to the year 1814. Oh, how fashionable is a merveilleuse!
Vernet Project: Have You Ever Head Of A Witzchoura?

I hadn’t!

164-0000-021 (1)

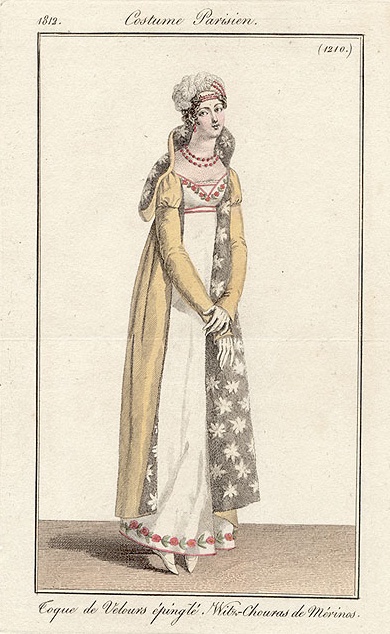
The text reads: “Toque de Velours. Witz-choura de Satin.” I’ve looked at enough fashion plates to guess the meaning of most of the text. After some quick reference to translation programs, I confirmed my suspicions and translated the text as: “Hat of velvet. ____ of satin.” The question is, what does “Witz-choura” mean?

First, let me tell you that I originally read the plate as “Toque de Velours. With-choura de Satin.” That z looks remarkably like an h, despite the fact that I don’t think “with” is a word in French (also, I don’t really associate the letter z with French words, so I was happy to interpret it as an h). I followed this path for awhile, though, despite the fact that it didn’t quite make sense. Assuming “With” meant what it does in English, I proceeded to try to figure out what “choura” meant. I looked at English dictionaries, including the Oxford English Dictionary, with no luck. And in French dictionaries the closest thing I found is that “choura” is conjugation of “chouraver” or “chourer,” a verb which seems to mean “to steal” or “to rob” in English. But that didn’t make any sort of sense! The only other reference to the word “choura” I found was that it has a connection to an Arabic word relating to the parliament of an Islamic state. Again, no connection. So then I thought, what’s the word for shoes in French? Maybe “choura” is an older form of that word? Turns out that “les chaussures” means shoes in French.

I was about to pursue this train of thought, when Mr. Q interrupted me. When I complained about my lack of useful results he suggested I try, amongst other ideas, a search of Google Scholar. My initial search turned up lots of science related publications with authors whose last names were Choura. But then, when I added the word “fashion” to my search, I was returned one result which was to the point and clarified the whole business (at least a little bit!). Mr. Q broke the mystery wide open!

The clarification comes from the book Empire Fashions by Dover Publishers. The relevant sentence can be found here and reads: “Around 1808, a high-waisted, fur-lined woman’s coat appeared, the witzchoura [wi choo ra].” Ohhhh, I thought, that’s not an h it’s a z!

Upon searching for it with the now-corrected spelling I finally found relevant information! All that will be in future posts, though. I thought I’d break it up to avoid having one really long post. So you can look forward to a post with descriptions of witzchouras and then also a post with images of them. At least I was on the right track!

(Click here for my original post about the 1814 Vernet Project, to which this post refers.)

Ca. 1860 Corset Intense Details

This is a follow-up post to my last post: ca. 1860 Corset For Me! (HSF #4)That post has a short background on my reasons for building the corset, but it doesn’t mention other details, so that’s what this post is for!

IMG_7441
My new ca. 1860 corset.

So let’s start with more background, since this post is all about intense amounts of details! We’ll start with the pattern I made for this corset: you’ll notice it has bust and hip gores as well as that curved piece on each side of the front. The bust gores aren’t so unusual for a modern 1860s corset recreation, but I don’t see too many corsets made (and certainly not many corset patterns) with hip gores and I’m not sure I’ve ever seen anyone reproduce an 1860s corset with that curved piece in front. I found these details intriguing and wanted to make this style for two reasons: 1, because it’s a style I haven’t seen recreated, but which I have multiple examples of in my research, and 2, because it seemed like it would fit into a new thought I absorbed a few months ago.

50.180.3_CP2
1865-1867 corset, The Met

First, a discussion about the style. It seems like a lot of modern ca. 1860s corsets are cut with vertical seams that run from top to bottom of the corset to create shaping, sometimes with the addition of bust gores. (The corset on the right is an example of one from the 1860s that uses this style of seaming to create shape.) These corsets are cut with shaping in the seams to create space for the bust and hips, but an alternative to this is to use bust and hip gores to achieve shape for the body. The interesting thing is that hip gores do not seem to be very commonly used in historic corsets made by modern people, despite their use in historic clothing. I attribute this to the fact that shaped seams are easier to execute than inserting gores of any type, but especially gores that are not in a seam (like the gores in my corset). Also, I would think that pattern companies have an easier time grading patterns using the shaped seams, because the gores (particularly hip gores) really need a lot more individual adjustment and fiddling on a body than shaped seams do.

Second, about this new thought that I absorbed. While reading Merja’s most recent blog posts about corset construction, I was rather surprised by a simple statement that makes so much sense but which I haven’t necessarily followed in corset making  in the past (here are Merja’s gusseted 1870s corset, which has the sentence which mentions this magical new thought, as well as her 1880s purple corset and 1860s white corset with seaming like the Met corset, above, which exhibit the thought without it being explicitly stated). Essentially, she says that she always makes adequate space in the corset for bust and hips, so that the corset is only constraining her waist. Duh! A related thought is that when you tighten your corset you displace some bits to your bust and hips, so your corset really does need adequate room there to accommodate the normal and the extra. That makes so much sense and sounds so much more comfortable than having a corset that digs into your hips or pushes your bust around uncomfortably. I made the goal to take this approach for the new corset and all future corsets! and this new corset was my first attempt at really following this sound piece of information.

So given that the style I set out to make is one that I haven’t ever seen a pattern for, where did I get mine? Well, it’s loosely based off of one in Corsets and Crinolines by Norah Waugh (the pattern is ca. 1873, pg. 80). I say loosely, because I started there, but then began combining pieces and changing the shape of them to suit my measurements and the seam placement that I wanted (most importantly the hip gore and that curved front piece). Interestingly, Waugh notes on a different corset pattern (ca. 1860, pg. 78) that the 1860s style of corset without bust or hip gores (more like what I seem to see in modern made ca. 1860 corsets like the one from the Met at the top of this post) was a style preferred in France. The English preferred the style of corset I am making with gores. (Merja’s white 1860s corset I mentioned in the pervious paragraph uses this French corset pattern in Waugh, if you’d like to see what it looks like made up.)

I wound up making two mockups to get the pattern the way I wanted it even after adjusting the pattern from the beginning (and still made a few alterations before cutting out my real fabric). The original pattern in the book had a waist that was much too small and a bust that was a little large relative to my measurements. Despite my changes, the first mockup was too short waisted, needed bigger and longer bust gores, smaller hip gores (I had overestimated how much ease I needed there), and a little bigger waist. The second mockup was still a little short (I added another ½” to the top), the hip gores were still just slightly too big, and the lacing gap between the back pieces was wider than I wanted it to be by about 3″. Ugh! I actually determined that last fact after cutting out and sewing up my actual fabric. Turns out my shoulder blade area is bigger than I thought. I had an inner struggle about if I wanted to take out the small stitch size flat felled seam to insert a piece or if I wanted to just let it go. Adding a piece won in the end, because I figured that I was spending so much time on the corset that I really wanted to be pleased with it and not have nagging doubts for the next number of years until making a replacement. (The piece I added is between the front and back pieces. You can see it easily in the first picture in this post. It’s a v shaped piece that extends from top to bottom.) Adding the piece actually wasn’t so bad, despite all my inner complaining and I’m very pleased I did it, because I am happy with the result.

2010EE8233_jpg_l
1864 corset, The Victoria and Albert Museum.

That’s all the aspects of choosing the pattern and executing it. Now I can move on to my inspiration for creating it. This blue corset at the V and A is the most thoroughly photographed piece of inspiration (click through, there are lots of different angles of the corset, and close up pictures!). As you can see, the blue corset has bust gores, that curved front piece, (and if you look at the pictures of the back…) hip gores, as well as useful close up construction photos showing the flossing, how the busk is sewn in, how the binding is sewn on, etc. You can also see great detail for things like how to sew the points of the bust darts and the tops of the hip gores: they are overcast near the tips of the bust gores and tops of the hip gores before being machine sewn with topstitching to the binding. I used this method in my corset, sewing the overcasting by hand. I found that it was very useful on the bust gores (since mine are set into a slit in the fabric, not a seam) because the amount of seam allowance near the points is negligible (like, less than ⅛”) and that would have been extremely frustrating to try and machine sew! Also, the overcasting kept the edges from fraying as I was working with them. It also adds an extra measure of stability and sturdiness to those areas.

CI38.23.10b
1839-1841 corset, The Met.

Other very useful images to me were this orange 1860s corset front and side views (with generally similar lines as the blue V and A one) and this 1862 Godey’s image of a corset (with very similar lines as the blue V and A one). (As a side note: Does anyone know what collection houses the orange corset? I’ve only been able to find images, but no real source.) These corsets provide a nice end date range for my corset pattern, because in the 1870s the corset begins to change shape. But to determine a good start date for my corset I had to look elsewhere. The Met has a corset dated 1839-1841 with similar hip gores and the front curved piece (great zoomable pictures including an interior view, click through the image!), but it does not have separate bust gores (they are cut in one with the front pieces as is usual for 1840s corsets) and it does not have a front opening busk (those weren’t in general use until 1849). The 1839-41 corset is more curvy than the 1860s ones, as you would expect from an 1840s corset, but it still looks like a forerunner to me! Waugh has an 1844 corset pattern (pg. 77) that has similar lines to the 1839-41 Met one, with bust gores but without hip gores or the curved front piece. These 1840s corsets are useful for determining the start point of my date range, which seems to safely be the 1850s. Thus, my corset is dated ca. 1860, which is just a shorter way of saying 1850-1870. That makes sense looking at the silhouette of the dresses from these decades, as well, since neither the 1850s or 1860s require the curvy shape of 1840s or 1870s corsets.

EDIT: The orange corset mentioned above is in the collection of the Manchester Art Gallery via this link.

I used all of these different images to look for construction details to use in my corset. Specific things I was looking for include: stitch size, width of the binding, method of sewing the binding, placement of bones, design of flossing, seam placement, method of setting bust and hip gores, location of topstitching, placement of eyelets down the back, finishing of the interior of the corset, and length of the busk. Some of these things can be determined by looking at the extant corsets I’ve shared in this post, but others required other helpful research. Specifically, the gusset construction method I used came from this image that Merja shared in her 1870s corset post. It’s from 1872, but is still relevant for my corset, because if you look at the blue and orange corset pictures you will see it used on the overcasting at the bust and hip gores. This image, from 1868, shows similar methods as well (and has a selection of mostly French and a few English style corsets if you’d like to see more examples of those).

And now, here are the close up construction details of my corset that I promised.

IMG_7452
An interior view of my corset. It’s important to me that the inside of garments is as nicely finished as the outside, as you can see. It’s a little hard to see, but the grommets near the waist are set closer together than the ones a the top and bottom.
IMG_7449
Details: Hand sewn overcast stitches at the bast of the bust gore and machine top stitching above that. Machine sewn button holes for the busk hooks (I’ve found this method to be much sturdier than leaving a gap in a seam on the edge).
IMG_7444
Details: The busk is top stitched around the top curve to keep it from moving. There is flossing at the top of the boning channels (every boning channel is flossed at the top and bottom). Machine sewn top stitched binding.
IMG_7454
Details: The top hook of my busk is a few inches below the top of the corset, so I added a hook and thread loop at the top to keep it closed. I used coutil cut on the straight of grain for my boning channels: the edges are pressed under and then they are topstitched into place and into the proper number of channels (keeps the inside tidy and doesn’t require extra notions!). The seam allowance of my bust gores is turned under and flat felled by hand with a whip stitch that only catches the coutil. The curved front piece is flat felled by machine.
IMG_7456
Years of use have caused my busk to have a bend in it at my waist line. See how it curves up from the table in the middle? Impressive, really, that my body can permanently change the shape of metal.

I’m hoping to get pictures of the corset on me this weekend at its first ever wearing. Hopefully I’ll be able to share those in the near future!

Variety Please: Regency Ribbon Sashes

In modern interpretations of Regency costume, there is a widespread use of what I am going to call the “ribbon sash.” By this I mean a length of ribbon, in a contrasting color to the dress and not used to trim any other part of the dress, tidily tied or sewn under the bust, and terminating with long hanging ends. I understand that this style provides an easy way to adorn a dress of any color or add color to a white dress, but I believe that the style is much too often used relative to the occurrences we see of them being worn in portraits, fashion plates, and built into extant gowns. I would like to encourage all of us to have variety in the ribbon sash styles we wear with Regency clothing.

When looking at portraits, fashion plates, and extant gowns, you do find the sort of ribbon sash I described in the beginning of this post, but you don’t find them in anywhere near the same proportion with which they are used today. You do see these types of sashes, but it is a small proportion of the styles worn and you see a variety of other sash styles, too. I would like to share a variety of ribbon sash styles with you and encourage you to pick one of these less used styles if you decide to wear a ribbon sash yourself or if you have the influence to encourage others in their own ribbon sash wearing. By expanding the styles of ribbon sashes worn, hopefully we can all more accurately represent clothing worn in the Regency period.

Generally speaking, there are 4 large categories of ribbon sash styles. I’ve included an example image of each style underneath the accompanying description and I’ve included links to other good examples (below the four sash style descriptions) so you can look at them for more ideas.

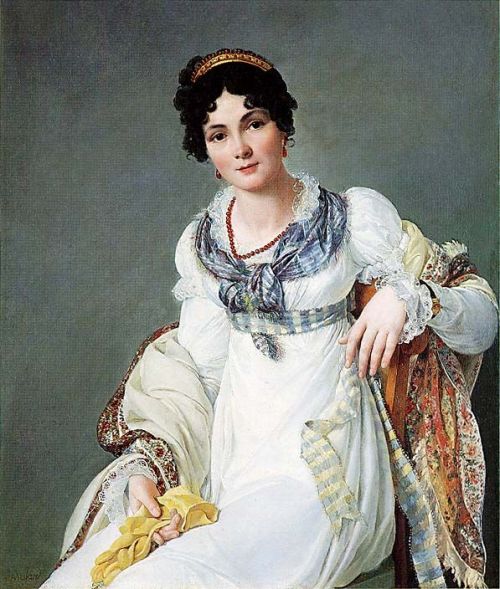
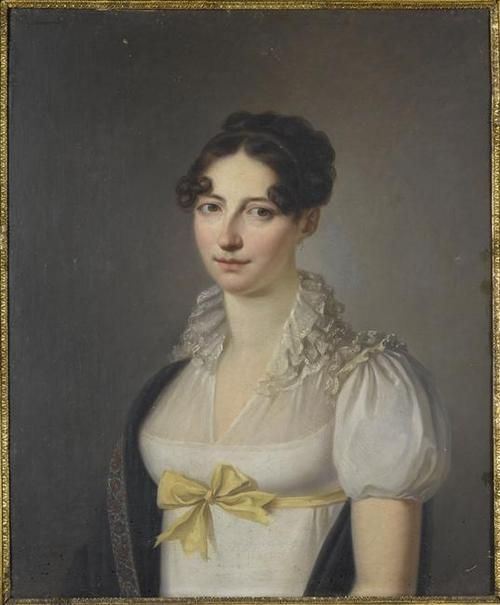
1: The Ribbon Sash (as described in the beginning of this post): a length of ribbon, in a contrasting color to the dress and not used to trim any other part of the dress, tidily sewn or tied under the bust, and terminating with long hanging ends approximately 24″-36″. It is very rare to see this style used in a fashion plate or painting with the termination of the sash in any location other than center back.

f718f40238cfc85cf02418565c440a52
Henri François Mulard, Portrait of a lady, circa 1810

2: The Short Sash: a length of ribbon, in a contrasting color to the dress and not used to trim any other part of the dress, tidily sewn or tied under the bust, and terminating with short hanging ends approximately 6″-18″. I have seen this style with the termination of the sash in center back, center front, and  occasionally off to one side of the front.

39b5c0d0d643bba771d16242bc7cd001
Costume Parisien, 1817

3: The Belt Sash: a length of ribbon, in a contrasting color to the dress and not used to trim any other part of the dress, tidily sewn or tied under the bust, and with very short hanging ends or without hanging ends at all. This style is sometimes plain or sometimes adorned with a buckle or bow. The buckle or bow with short ends is often at center front.

bf13efcf8156d526622fc6126c7b045b
Portrait de Laure de Berny ca. 1810 by Henri-Nicolas Van Gorp

4: The Trim Sash: a much more common variant of any of the first three sash styles. Any of the first three sash styles can fall into this category if the sash matches and coordinates, in a harmonious fashion, with trim elsewhere on the dress (neckline, sleeve openings, or hem).

6d79a16093d852e426ea43901059fa9c
Costume Parisien, 1812

All of these sash styles are seen with different styles of termination. I’ve most often seen a variety of bows as well as tidy arrangement of loops. Often, the belt style seems as though the belt sash is actually sewn to the dress, but for the sake of options, I can easily see a ribbon sash made with a closure such as hook and eyes so the sash can be easily added or removed from any outfit. It’s worth noting that there are a substantial amount of images showing ladies from the front who appear to be wearing a ribbon sash of some sort. The trouble is that we often can’t see what’s going on in the back, so we can’t know with certainty what style of ribbon sash is actually being represented, though we can make educated guesses.

Here are more examples of each of the sash styles shown above:

1: The Ribbon Sash

Portrait of a lady, ca. 1810: ribbon sash on a white dress (ties in back)

Costume Parisien, 1813: ribbon sash on a white dress (ties in back)

2: The Short Sash

Auguste-Amalie de Baviere, ca. 1815: short sash (ties in front)

Costume Parisien, 1817: short sash (ties in back)

3: The Belt Sash

Laure de Berny, ca. 1810 (bow in front)

A young woman wearing gloves in a park, 1813

Anna Maria Magnani, 1814 (bow in front)

Woman knitting in a blue dress, ca. 1819 (bow in front)

4: The Trim Sash

Dress, ca. 1810, The Met: belt sash

Dress, ca. 1810-1811, Gemeentemuseum Den Haag: belt sash

Costume Parisien, 1812: belt sash

Costume Parisien, 1812: belt sash

Dress, ca. 1810-1815, Rijksmuseum: belt sash

Family Portrait, 1813: short sash (ties in front)

Of course, these are only a starting point. My pinterest boards have hundreds of pins from the 1800s and 1810s that you are welcome to look at for other ideas. Keep the contrasting ribbon sashes in mind, but don’t forget that you can make sashes out of your dress fabric, too (see below). Sashes made from self fabric are quite common. Look around and see what you can find that inspires you. This Regency Portraits board has a lot of great images showing all sorts of sashes as well.

Here are some great examples of dresses with sashes made from self fabric (meaning that fabric used in the dress was also used to create a ribbon sash look):

Désirée Bernadine Eugénie Clary, ca. 1810: long sash

Costume Parisien, 1810 short sash (ties in front)

Costume Parisien, 1811: short sash (ties in front)

Costume Parisien, 1811: short sash (ties in front)

Costume Parisien, 1812: short sash (ties in front)

Costume Parisien, 1814: short sash (ties in back)

Costume Parisien, 1817: short sash (ties in back)

In looking at my pinterest board covering 1800-1809, I do find that there are some very cute sashes then, too, that are relevant for a potential sash look. In  this period it seems that most sashes match the trim used on the dress, though it is not an absolute rule. I’ll include a few examples of this sort below, so you can look if you’re curious.

Costume Parisien, 1799: short sash (ties in front)

Costume Parisien, 1800: short sash: (ties in front)

Costume Parisien, 1800: trim ribbon sash with long ends

Young Woman Drawing, 1801: short sash (ties in back)

La Belle Assemblee, 1807: trim ribbon sash with long ends

Costume Parisien, 1808: belt sash

Felicite de Durfort von Merry, 1808: belt sash

Charlotte Bonaparte, 1808: belt sash

For the record (and because I always forget!), the official “Regency” is referring to England during the years 1811-1820, following the Prince of Wales being named regent for George III in 1810. In France, the Napoleonic Empire spanned the years 1804-1814. So there is some overlap between Empire and Regency, but not a whole lot. (And just to add another date to the mix, the Federal period in America roughly spanned the years 1780-1830.) For the purposes of this post, I’m using the word Regency to specify the 1810s, but my points about variety in sash styles are relevant for the first decade of the 19th century as well.

As a final note, let me encourage you to use color in Regency dresses (color in trim as well as color in the fabric), especially in those dresses intended to represent the 1810s rather than 1800s. By the 1810s, not all dresses were in white tones, as they were much more predominantly in the first few years of the 19th century. Colors were used often, some of the colors even being rather vivid in tone (don’t get too carried away with very bright colors, though, because chemical dyes weren’t invented till the middle of the 19th century). Check out these great resources that describe and show colors used in the Regency:

Colours used in the Regency and Georgian eras

Regency Colors and Fabrics