The text reads: “Toque de Velours. Witz-choura de Satin.” I’ve looked at enough fashion plates to guess the meaning of most of the text. After some quick reference to translation programs, I confirmed my suspicions and translated the text as: “Hat of velvet. ____ of satin.” The question is, what does “Witz-choura” mean?
First, let me tell you that I originally read the plate as “Toque de Velours. With-choura de Satin.” That z looks remarkably like an h, despite the fact that I don’t think “with” is a word in French (also, I don’t really associate the letter z with French words, so I was happy to interpret it as an h). I followed this path for awhile, though, despite the fact that it didn’t quite make sense. Assuming “With” meant what it does in English, I proceeded to try to figure out what “choura” meant. I looked at English dictionaries, including the Oxford English Dictionary, with no luck. And in French dictionaries the closest thing I found is that “choura” is conjugation of “chouraver” or “chourer,” a verb which seems to mean “to steal” or “to rob” in English. But that didn’t make any sort of sense! The only other reference to the word “choura” I found was that it has a connection to an Arabic word relating to the parliament of an Islamic state. Again, no connection. So then I thought, what’s the word for shoes in French? Maybe “choura” is an older form of that word? Turns out that “les chaussures” means shoes in French.
I was about to pursue this train of thought, when Mr. Q interrupted me. When I complained about my lack of useful results he suggested I try, amongst other ideas, a search of Google Scholar. My initial search turned up lots of science related publications with authors whose last names were Choura. But then, when I added the word “fashion” to my search, I was returned one result which was to the point and clarified the whole business (at least a little bit!). Mr. Q broke the mystery wide open!
The clarification comes from the book Empire Fashions by Dover Publishers. The relevant sentence can be found here and reads: “Around 1808, a high-waisted, fur-lined woman’s coat appeared, the witzchoura [wi choo ra].” Ohhhh, I thought, that’s not an h it’s a z!
Upon searching for it with the now-corrected spelling I finally found relevant information! All that will be in future posts, though. I thought I’d break it up to avoid having one really long post. So you can look forward to a post with descriptions of witzchouras and then also a post with images of them. At least I was on the right track!
(Click here for my original post about the 1814 Vernet Project, to which this post refers.)
First, you have to pretend it’s still summer and the air is still warm. Once you feel the warmth, come back with me to the Regency period with a performance by The Commonwealth Vintage Dancers at the Salem Maritime Festival back in August. The day was cloudy, but not too warm, and was interrupted mid-afternoon by a bit of strong rain (during which many of our dancers had wandered off and I sat under a tree and watched the rain fall).
Opening the gate to our own historic house front yard performing space.I brought along the kites I’d made in 2013 and though we didn’t fly them they looked nice on our picnic blankets. The strings had become all tangled over the last 18 months and thankfully some others found the untangling task rather enjoyable.We were pleasantly surprised to be provided with two live musicians who not only played for us, but also sang.While visiting a neighboring house we took the opportunity to peer at the modern visitors just as they peer at us!Another participant in the day’s events snapped a few sneaky photos of us through the window of the neighboring West India Goods Store where she was set up for the day. Photo by Sew 18th Century.
Really exciting things are secretly brewing amongst an international group of historical seamstresses, tailors, and costumers. They are strange, beautiful, unusual, fun, just plain weird, and detailed… and they are coming to life in 2015!
Join us on Facebook and look forward to more tantalizing posts here and around the historical clothing and costuming blog-world as we research, sew, and prepare to unveil this amazing project in December 2015. Do you Vernet?
I thought I’d share a couple of extant round reticules that bear some similarity to the one I recently made and posted about here. These both have a gathered or pleated outer circle surrounding a decorated inner circle. The bottom one uses the same cord as the ties are made of to circle the inner circle. Both reticules have an opening that is gathered to close, though the bottom one’s gathering direction is more unusual and unexpected. I like both, and think they are fun! Do you have a favorite between these?
A cotton reticule that the Met dates to the 1st quarter of the 19th century.A silk reticule that the MFA dates to the early 19th century.
I’ve recently finished another Regency reticule (I say another, because not too long ago I posted about a new red and gold reticule). This one is circular!
I love the round shape.
I was inspired by an image and directions found in The American Girl’s Book: Or, Occupation For Play Hours, which can be viewed here, on google books (the directions for the circular reticule are found on page 262). I was particularly encouraged by having already gathered silk strips left over after adjusting my brown fur muff at the end of last year. In addition to the leftover gathered silk strips, I used some pink silk scraps backed with coutil for the center of the circles, a bit of peach cotton for the lining, pink poly ribbon for the handles (it was the best color, even though it wasn’t silk), and, for the beading, 2 buckles I picked up for $1 each.
I didn’t really follow the directions, instead I just made up my own order of events. I started by cutting out the center circle and basting the coutil to the silk. Then I placed the buckles on these circles and pinned the gathered silk around the edges After that I sewed the edges. The next step was to sew the two finished sides together, then sew a lining of two more circles of the cotton. The last thing was to sew on the ribbons and whip stitch the top edges of the silk to the lining.
Looking down into the lining.
I decided not to have my ribbons gather the opening, because I so like the look of the circle and really didn’t want to ruin the effect. Plus, the reticule just perfectly fits my phone right now, and if the top was gathered it might not fit! Yay for a relatively quick project that’s entirely hand sewn. It’s exciting to have more reticule options!
As promised last post, here are a few pictures from the two balls at April’s Regency Intensive Dance Weekend. Hopefully, you remember my descriptions of this weekend as being full of amazing learning opportunities and lovely memories with amiable people. Indeed, both balls left me with a feeling, expressed by Elizabeth Bennet in Pride and Prejudice, of being at a very pleasant house party or private ball, though indeed these events are open to the public.
Dancers displaying their waltz at Saturday’s informal ball.
“It is your turn to say something now, Mr. Darcy. — I talked about the dance, and you ought to make some kind of remark on the size of the room, or the number of couples.”
He smiled, and assured her that whatever she wished him to say should be said.
“Very well. — That reply will do for the present. — Perhaps by and by I may observe that private balls are much pleasanter than public ones. — But now we may be silent.”
From Pride and Prejudice by Jane Austen, in Chapter Eighteen.
Looking into Sunday evening’s formal reception, which included a balcony for the musicians (see them in the mirror?).The formal ball included lavish and delicious refreshments.Taking a break from dancing to munch on some super yummy syllabub.
Indeed, we were dancing so often at the formal ball that we really didn’t get many pictures of the dancing in action, so you’ll just have to believe me when I express the elegance of the dancing and the ballroom scene.
You can read more about Sunday afternoon’s imaginary visit to Mansfield Park in this post and more about the new ball gown that I made for the Sunday evening ball in this post. You can read more about the entire weekend here, at Plaid Petticoats blog post about the weekend.
I know I promised pictures of the two balls at the Regency Intensive Dance Weekend in my last post, and I still promise that those are coming, but we’re going to take a quick detour before we get to ball pictures, to look at…
“A Dress Suited For Eve” (Elusive blue ball gown, 1811)
When dressed for the evening the girls nowadays
Scarce an atom of dress on them leave;
Nor blame them; for what is an evening dress
But a dress that is suited for Eve?
-1818
Quoted from page 42 of C. Willett Cunnington’s Fashion and Women’s Attitudes in the Nineteenth Century.
I came across this quote as I was either planning or starting this dress and I so enjoyed the curmudgeonly generation-gap thoughts expressed in it that it has stuck in my head as a sort of motto. I should explain that this quote occurs as Cunnington is discussing the new Classical style of gowns between the years 1800-1820. These dresses are usually not quite as scandalous to our modern sensibilities as they would have been to people at the time, especially those of older generations. Interestingly, this quote is from 1818 although in my opinion the often sheer muslin dresses from 1800-1810 are generally more revealing than those from 1810-1815, and especially more revealing than those from 1815-1820. Regardless, the idea of these dresses being so revealing that one is dressed as Eve would have been (i.e., wearing nothing!) is amusing to me.
This new gown is actually two separate gowns: a dark blue sleeveless underdress and a lightweight sleeved overdress in a color I call “elusive blue.” Both dresses are a mixture of hand and machine sewing, though all the finishing was done by hand on both pieces.
The underdress is simple and without a waist seam: it is gathered to a yoke in the back and gathered by a drawstring in front. The waist is created by tying the overdress. The overdress, however, is more complicated. The skirt is a simple rectangle with rounded front corners (two widths of fabric wide: there’s a seam at center back), but the bodice has front pieces, shoulder straps, and an interestingly gathered back piece, as well as sleeves. In addition to having more pieces, the overdress is edged all around with lace and faux pearls, as well as having puffs edged with lace and trim sewn on to the sleeves.
Back view (you can see the gathers on the back bodice piece).
I did indeed sew all the pearls on by hand, individually, and good thing, too! You see, if each pearl is sewn on individually then if the thread breaks you might loose a few pearls, but you won’t have your entire pearl job go spilling all over the dance floor (that could be catastrophic for the dancing and your hard work!). I did wear this to the Grand Ball on the Sunday evening of the Regency Dance Weekend, and by the end of the night I had lost a very small section of pearls along the back hem of my dress. Thanks to all my fastidious pearl sewing, that was all I lost and there were no comical/catastrophic scenes with pearls spilling on to the dance floor! If you look closely at the wavy lines you can see that they get a little wobbly at times, but I did do my best to be symmetrical despite the wobbles. I also did my best to estimate the wavelength of the pearls and replicate it as best I could while eyeballing as I went along. (In fact, I think my wavy lines of pearls are actually more regular than those on my inspiration dress.)
My dress is a direct interpretation of the ball gown at the Met from 1811 (pictured below). The most obvious difference is the colors I chose to use (partly because I found the fabulous elusive blue overdress fabric in the perfect light weight fabric for $1/yard!). I’m sure there are other small differences, too, but I did my best to follow the construction methods I gleaned from the zoom feature when making my dress. (The zoom feature on most of the Met’s pictures is so amazing! I love it.)
Ball gown, 1811, the Met.
As is usual with the first wearing of a new garment, there are things I am unsatisfied with and want to change. There are also things that didn’t quite get completed and need to be addressed.
First, the sleeves. My sleeves didn’t quite turn out like the ones in the inspiration photo, but they also didn’t get completed before I wore the dress (if you look closely, you’ll see that my sleeves are just raw edges on the bottom!). I ran out of time, but I also wasn’t sure that I would like how my sleeve puffs look and I didn’t want to spend time completing the sleeves if I was going to wind up disliking them in the end. Each puff is edged in the narrow bit I cut off of the wide edging lace and then also edged in a bit of trim that perfectly matches the elusive blue fabric (and that I purchased for about $2!). I don’t think my puffs look quite as elegant as the original, but they were a lot of work and I don’t have any more of that elusive blue trim to change things up. Also, if you look closely at the sleeves of the dress on the Met you’ll see that they are not displayed in the same way. I prefer the sleeve that is more puffed up (on the right), but I examined the pictures really closely and I think that it is just caught up on the mannequin and is intended to look like the other sleeve (on the left). So I have to decide, and that will help me determine how to finish the bottom of my sleeves.
Other things that bothered me were the length of my underdress (seems to have a similar length ratio to the inspiration, but I think I want my underdress to be about 2″ longer), the fact that I realized after sewing on all the lace that I had put in on with the wrong side facing out (oops! but I am absolutely not changing that!), and the fact that the blue underdress is a super bag without the overdress holding it in (I think part of the problem is my skirt shaping–I tried something new and it did not work–but the skirt kept wanting to poof out from between the fronts of the overdress, which I didn’t like). I’d like to address the underdress problems, but I’m not going to bother with that lace problem!
The lighting in this photo captures the colors of the dress much better than in the other photos.
I tried a new thing with my hair for this event which I think was quite successful. The poof is normal, but in front of it and my pearl hair “tiara” (it’s really a necklace!) are two narrow braids, one coming from each side of my head. I managed to hide the ends under the braids and my natural highlights allowed the braids to stand out from my front hair, in the right light (as with the picture, above). The only odd thing was covering up the points where the braids started. I liked it and I think I’ll try it again sometime. I also was able to wear some new earrings: green gems with little fake diamonds set around the edge of the teardrop shape. Despite not matching exactly, I think they suited the dress.
Ok, now the next post in this series really will be about the balls themselves!
This April, I was again blessed to be able to take a weekend and step out of my modern, incredibly busy life to join other like-minded individuals for a Regency Intensive Dance Weekend hosted by the Commonwealth Vintage Dancers. Here is the link to all of last year’s posts, which describe a weekend just as wonderful as this year’s turned out to be.
Saturday consisted of lots of dance class, followed in the evening by an informal ball. Sunday’s schedule had a little bit of dance class in the morning followed by a low-key afternoon of Regency non-dance activities and finished up with a reception and grand ball in the evening.
We took fewer pictures this year than last year, but we still captured the amazing essence of this wonderful event: Saturday’s ball really felt like an immersion into an intimate house party rather than a public ball, Sunday’s afternoon events were wonderfully relaxed and felt like an afternoon one might have while visiting Mansfield Park, and Sunday’s grand ball was amazing to behold and be a part of in terms of exquisite refreshments, companionable company, and excellent dancing.
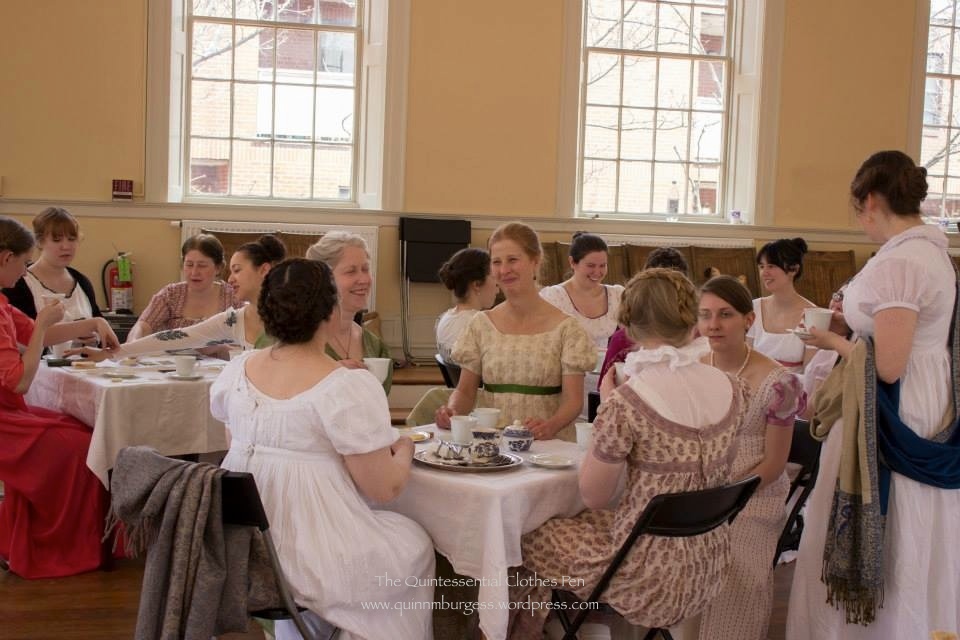
Having so few pictures of the Saturday evening informal ball, I’ve decided to just include them in a second post which will have pictures from both balls. So then this post will be about Sunday afternoon’s event. Activities included sword demonstrations, playing various period card games, participating in or watching a “theatrical,” listening to a short and impromptu piano interlude, and delighting in the delicious refreshments and tea. Of course, there was also lively conversation, as you would expect! (We had hoped to have some outdoor actives, too, such as playing graces in the park and taking a walk, but unfortunately it was raining all morning and things were wet, so we decided to stay inside. In the end, it turned out to be just fine and we still had a lovely time!)
Cards and counting chips laid out and ready to participate in a game.
The “theatrical” was staged for us by a group of interested and theatrically inclined ladies. They only had perhaps a portion of an hour to prepare a few scenes from The Rivals for us (a play first performed in 1775 and written by Richard Brinsley Sheridan). It was highly enjoyable and, we, the audience laughed a lot! Indeed, The Rivals is one of the plays that is dismissed by the party in Mansfield Park when they are thinking of putting on a play (hence why I’ve specifically mentioned that the afternoon felt like visiting Mansfield Park!). In the book, they decide on another play in the end (Lovers’ Vows, from 1798), but it was neat to see scenes from one of the plays mentioned in the book!
“All the best plays were run over in vain. Neither Hamlet, nor Macbeth, nor Othello, nor Douglas, nor The Gamester, presented anything that could satisfy even the tragedians; and The Rivals, The School for Scandal, Wheel of Fortune, Heir at Law, and a long et cetera, were successively dismissed with yet warmer objections.” From Mansfield Park by Jane Austen, in Chapter Fourteen.
Small props had been thought of ahead of time and provided extra amusement: the hat, cravat, and beard were a few of these amusing things!Really, the scenes were amusing and acted with conviction.Delicious refreshments (we had a variety of scones, cookies, and cucumber sandwiches). Tea is being poured out in the background.A portion of the party enjoying card games, conversation, and refreshments.
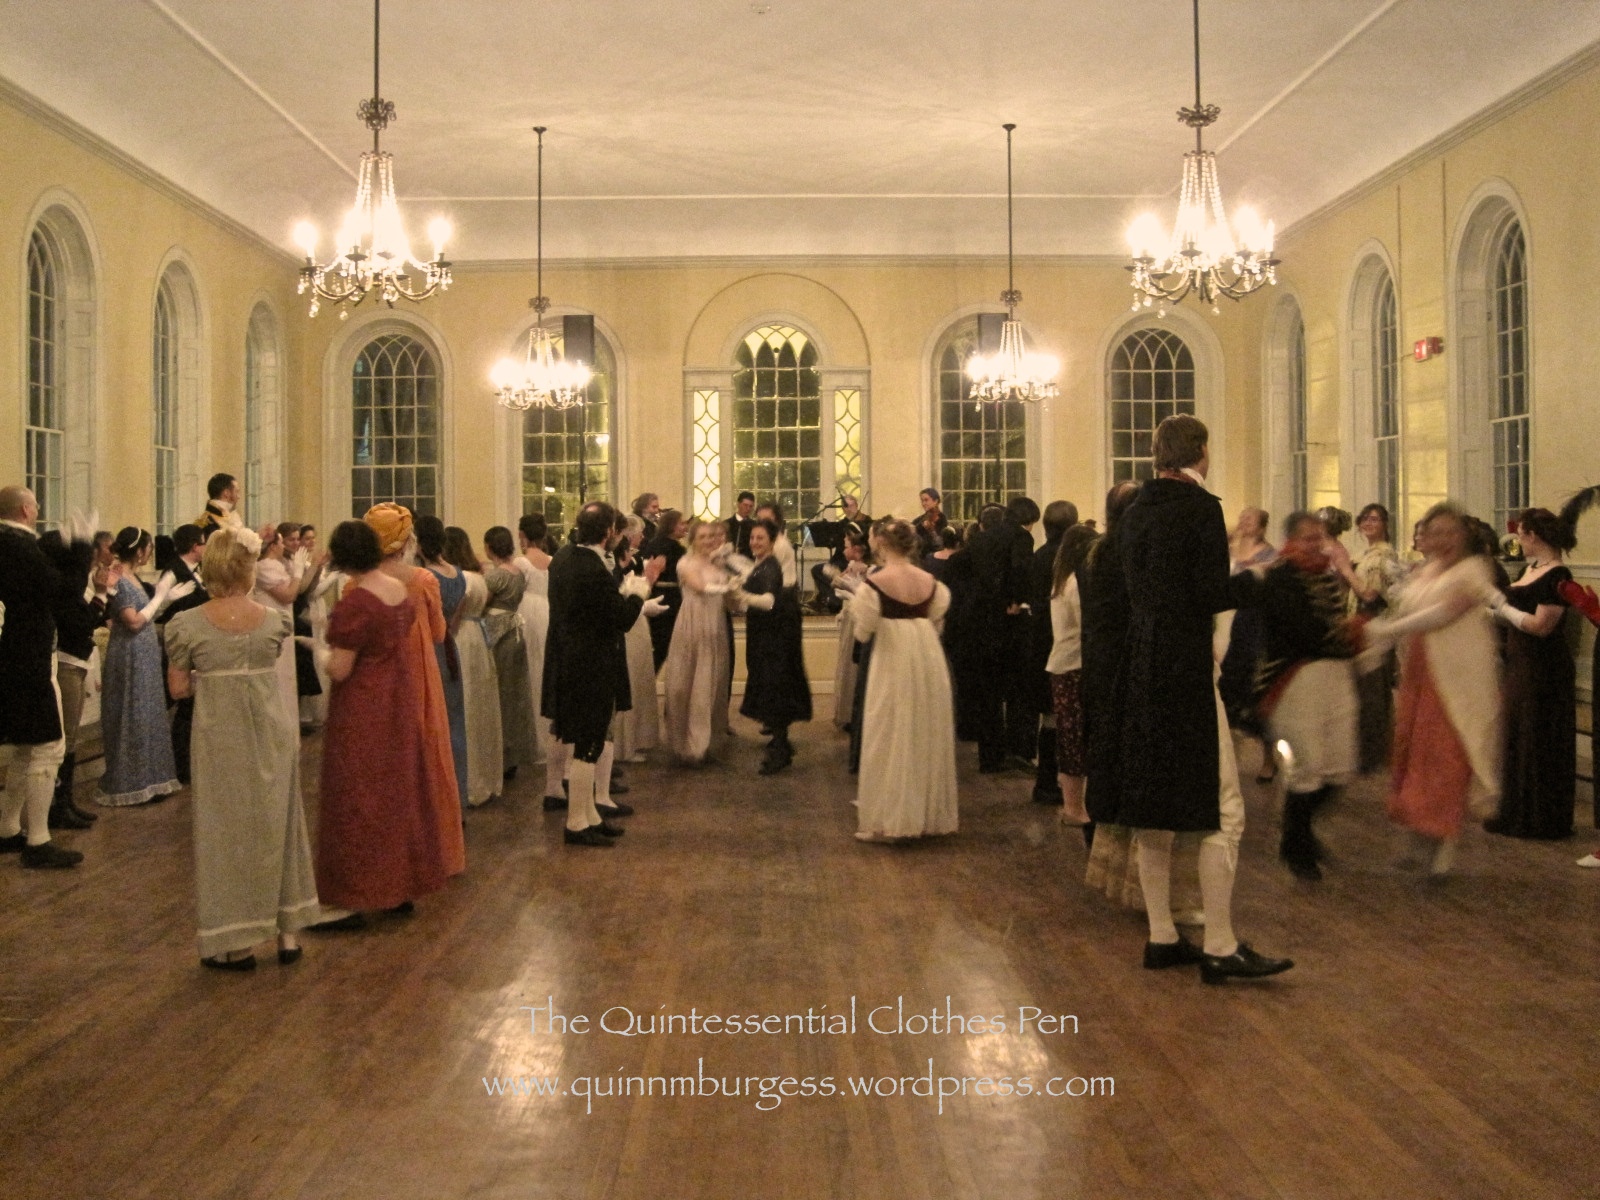
Our venue was built around 1816-1817 and provides a wonderful environment for Regency activities especially: beautiful windows, high ceilings, a lovely dance floor that lends itself to Regency style dancing, etc. I also like the creamy butter yellow walls with lovely white trim.
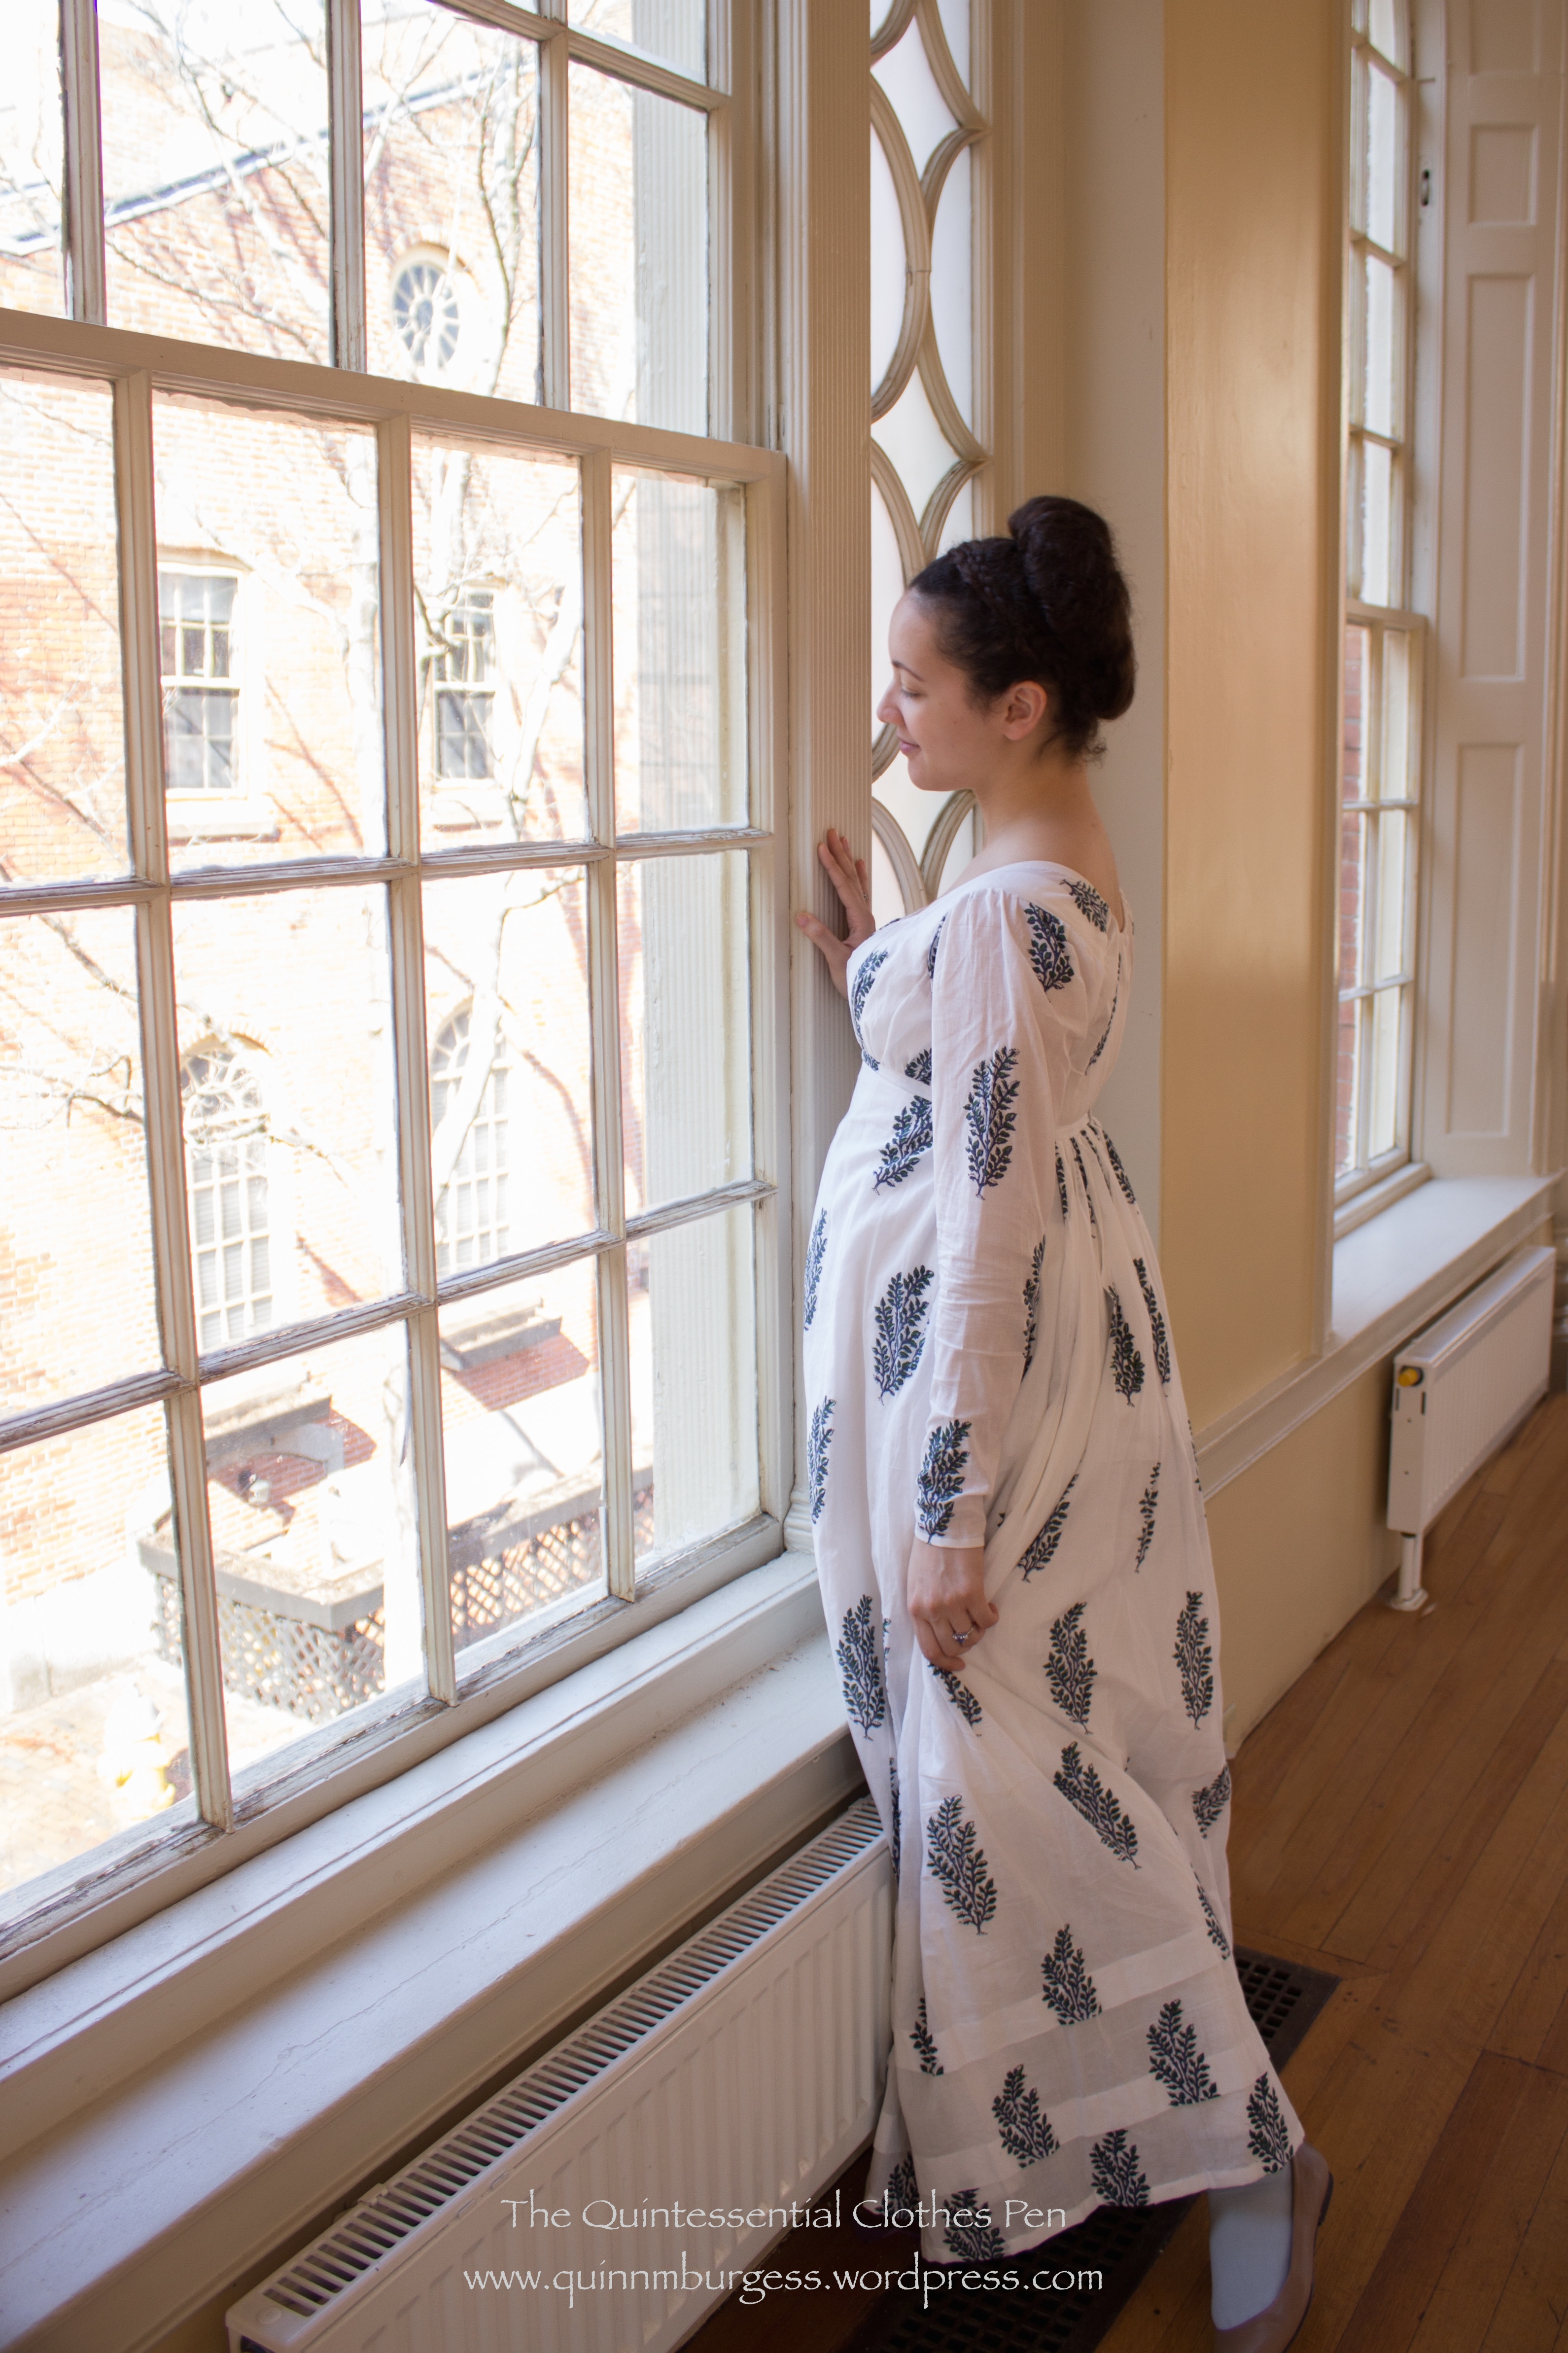
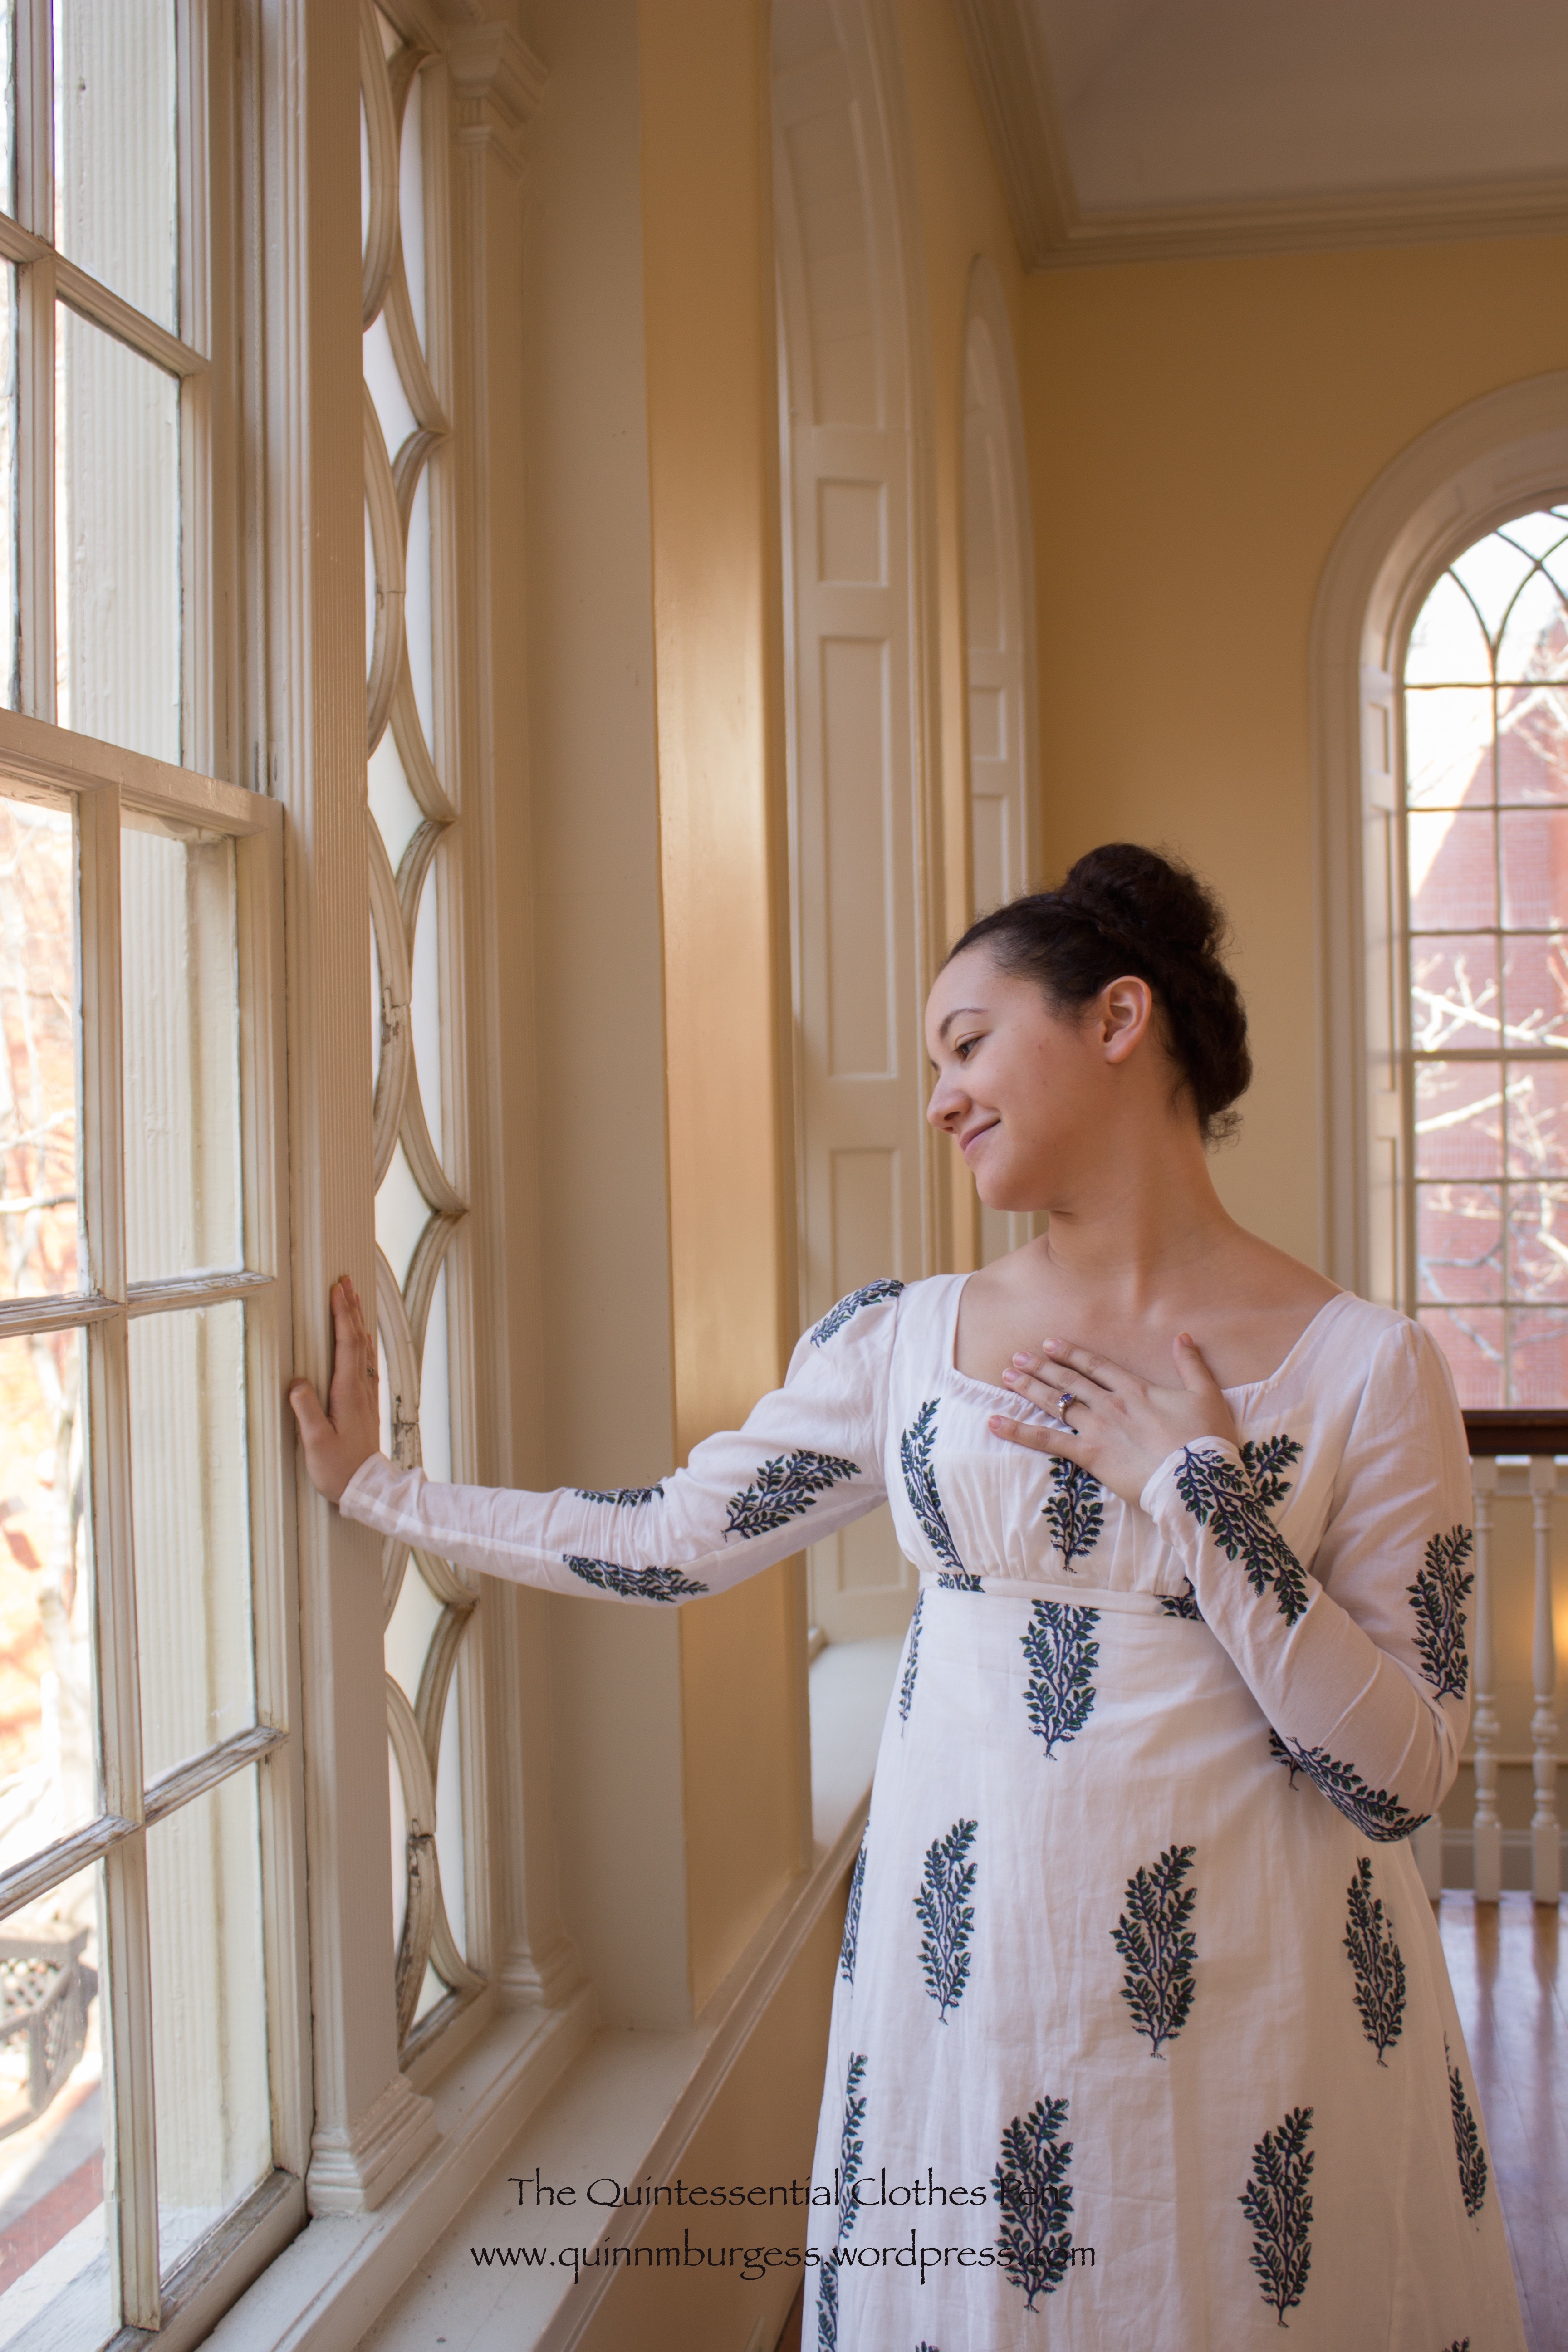
I wore my tree gown. I’m attempting to look pensively out the window hoping that Mr. Darcy will come by…I’ve seen him! Be still my heart!
Yes, I know I’m mixing my books here. Perhaps I should have thought of myself as Fanny Price waiting to see a glimpse of Edmund Bertram out the window. Ah, but I don’t identify with Fanny so much as Elizabeth Bennet, so you’ll have to cope with my mixing of books!
It’s been a little while since I completed a challenge for the HSF 2014. I’ve either been too busy to sew (sad!) or I’ve been sewing things that haven’t remotely lined up with the HSF challenges as they came along (also sad!). This time, though, I found a little bit of time to finish up a partially completed Regency reticule, which perfectly fits challenge #8: UFOs and PHDs (click through the link if you don’t know what those acronyms mean in sewing-land!).
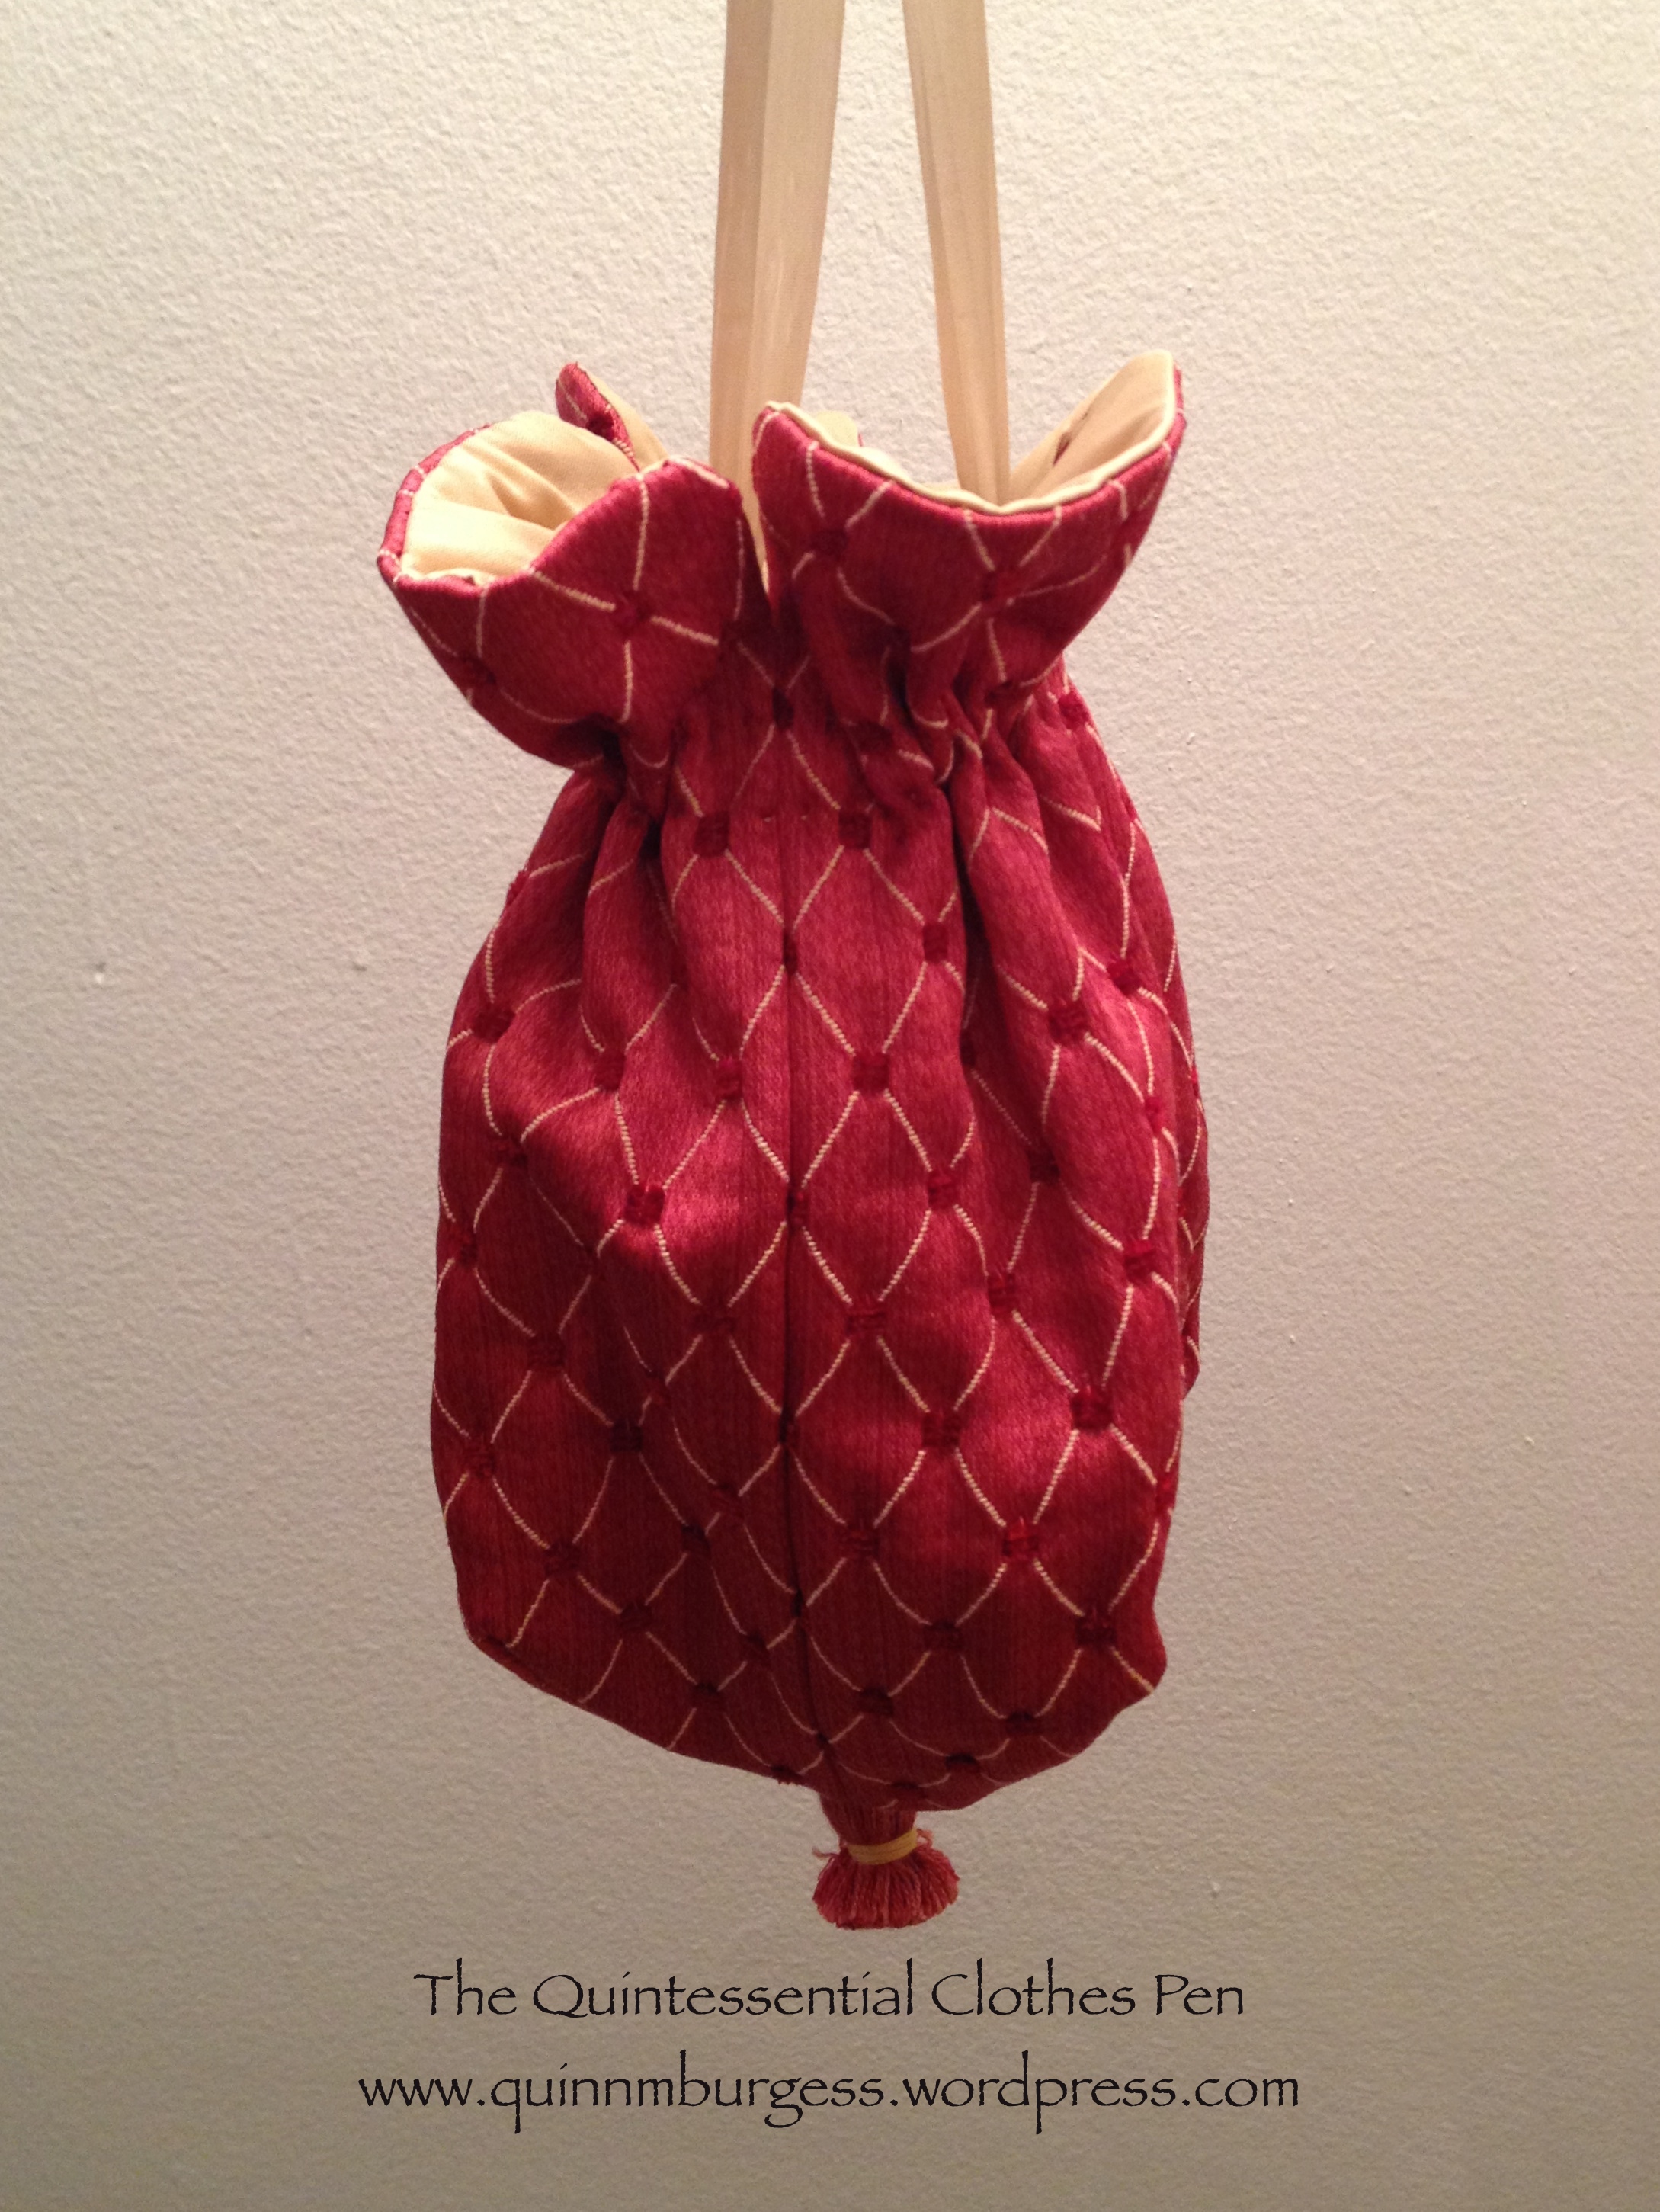
Red/Gold Regency Reticule
I was inspired by this Regency reticule pattern which is available on Etsy. I just made up my own pattern based on the image. I didn’t quite get the proportions right so mine is more elongated and a little less round, as well as not bunching up very tightly at the top due to the fabric I chose, but I’m happy with it nonetheless. Perhaps some day, I’ll try making it in a lighter weight fabric and see if I can get a more round shape and a tighter gather at the top (on the other hand, this one does hold its shape nicely… and a lighter weight fabric may not do that for me).
The facts:
Fabric: Polyester upholstery fabric for the exterior and gold polyester taffeta for the lining.
Pattern: Made up by me.
Year: c. 1810
Notions: 1 tassel, gold and burgundy thread, and about 1 yd of gold silk ribbon.
How historically accurate?: Accurate in style but not in materials or use of a sewing machine… Let’s say 50%.
Hours to complete: Not many, though I didn’t really keep track since I worked on it in small bits of time.
Portrait of Maria Theresa of Austria (1801–1855), 1817
You know those face framing curls that Regency women often sport in paintings and fashion plates? Modern ladies with bangs have it so much easier than those of us with all around long hair when creating this style! Unfortunately, I’m one of those modern ladies with long hair all around. The only short pieces I have are frizz! Nevertheless, I wanted to try to create this style at the Dolley Madison Ball hosted by the Commonwealth Vintage Dancers earlier this month.
I’ve been pondering how to fake these face framing curls with my long hair for awhile. I’ve contemplated hiding the bulk of my hair length under a turban and having the curly ends come out from under that (which I still think would work, though I haven’t tried it…yet). I had the fabric for the turban picked out from my stash, but then I decided to wear my 1819 ruffle dress and when I looked at images for turban inspiration I didn’t find anything similar to what I was envisioning for that particular period. But I did find a lot of cute buns with braids and flowers (like the painting at the beginning of this post, and this portrait from 1813, and this fashion plate from 1819, and this fashion plates from 1816). So I changed course and decided to go in that direction, instead.
Successful face framing curls surmounted by a braided bun and ornamented with a little flower bouquet!
All of the flowers and leaves used in my little bouquet are intended for millinery, meaning that each stem of blooms and individual leaf is wired. That makes it particularly moldable once it’s on my head! Originally, both flower sprays were bright white which I didn’t think would go with my ivory dress and lavender jewelry, so I decided to try dyeing the flowers to a more suitable color. After brainstorming for awhile I decided that going in a purple direction with the flowers would nicely complement the jewelry and make the entire ensemble look put together. So that’s what I did, using RIT. I wanted to be down and dirty about just getting the flowers dyed, so I used whatever colors I had (which included navy blue, wine, and purple). I made a few different cups of dye with different colors and then dipped the different stems in until I liked them, which also created variation within the sprays, which I think helps them look more lively. Unfortunately, some of the silk flowers lost their nicely cupped petal shapes after being soaked with dye, so the flowers do have a different style than before they were dyed. The more vertical sprays didn’t seem to droop at all after dyeing nor did they loose their shape. I’ll have to keep that in mind for next time!
A better view of the bouquet.
So, how did I do it? First, I separated the hair at the front crown of my head to save for later. Then I put the rest of my hair into a pony tail. I curled bits from the pony tail (about three per side) and then pinned them along the top/side of my head so they terminated right below the separated crown bit I held out from the beginning. That took a lot of bobby pins… Once I was satisfied (which took a long time and included a melt down… sigh, it happens to even the best of us sometimes!), I parted the separated crown bit and brought those pieces down over the side of my head to cover all my bobby pins. Then I wrapped the ends of those bits up into the bun. I also braided some parts of the bun, though it’s hard to see that detail in the pictures.
I had fun helping a friend make similar face framing curls for the ball, too. Here we are, being curly hair friends!
Note: My friend has shorter hair than I do–it’s maybe shoulder length (mine is at least 6-8″ longer than that)–so we were able to use the same method for her hair, but without the added extra effort of putting the front bits into the bun and then running them back to the front of the face. Basically, with my hair I had to zig zag back and forth to make the pieces short enough, but with her hair all she needed was a curling iron and the front parted bits to cover the bobby pins!