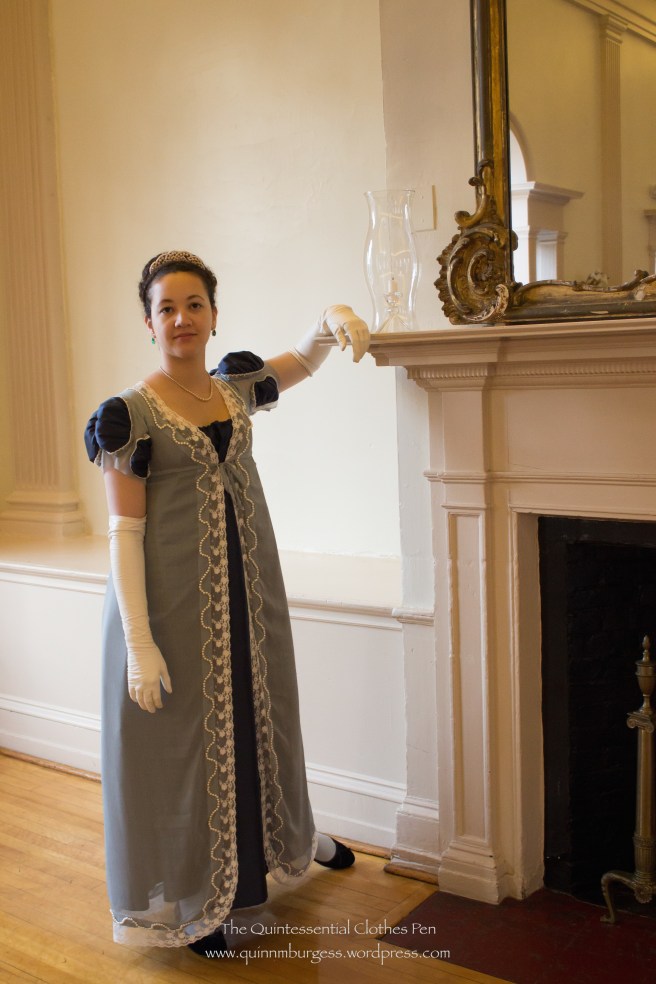
I used the deadline of the HSF/M Challenge #2: Blue to finish the nagging little things on my 1811 Elusive Blue evening gown that either didn’t make it to completion in time for the first wearing last April or that bothered me after wearing it that first time. The changes: lengthening the hem of the underdress, adding a drawstring below the bust to control where the fullness and folds will fall beneath the overdress, fixing a section of pearls on the back hem that had come loose, and creating trim to finish off the sleeve openings.
The trim on the sleeve openings is probably the most noticeable and interesting of the things that brought the dress to completion.
Just the facts:
Fabric: Scraps of elusive blue and dark blue fabric from the original dress.
Notions: Extra pearls, thin yarn for cording, and thread.
How historically accurate is it? The trim is directly inspired by this extant gown at the Met and is entirely hand sewn. I think it would be recognizable by someone in 1811, so the only points off would be for inaccurate fabric choice. Let’s say 90%.
Hours to complete: As usual, I did not keep track for the changes/finishing or for the original construction. I can safely say, “a lot.”
I bought ice skates! I was so pleased with skating in my 1895 Skating Ensemble that I really wanted to skate again this winter. I had plans to skate on a lake (so exciting!), but unfortunately we’ve had too much snow here in Boston and the lake was covered in huge drifts and unskate-able (also, we just had a day above freezing, the first in over a month, so it might also be unsafe to go out on naturally formed ice at this point). I’d still like to use my ice skates to skate on an outdoor rink like we did in January, it just means I’ll only have to pay to skate, not to rent the skates! We’ll see if these plans materialize…
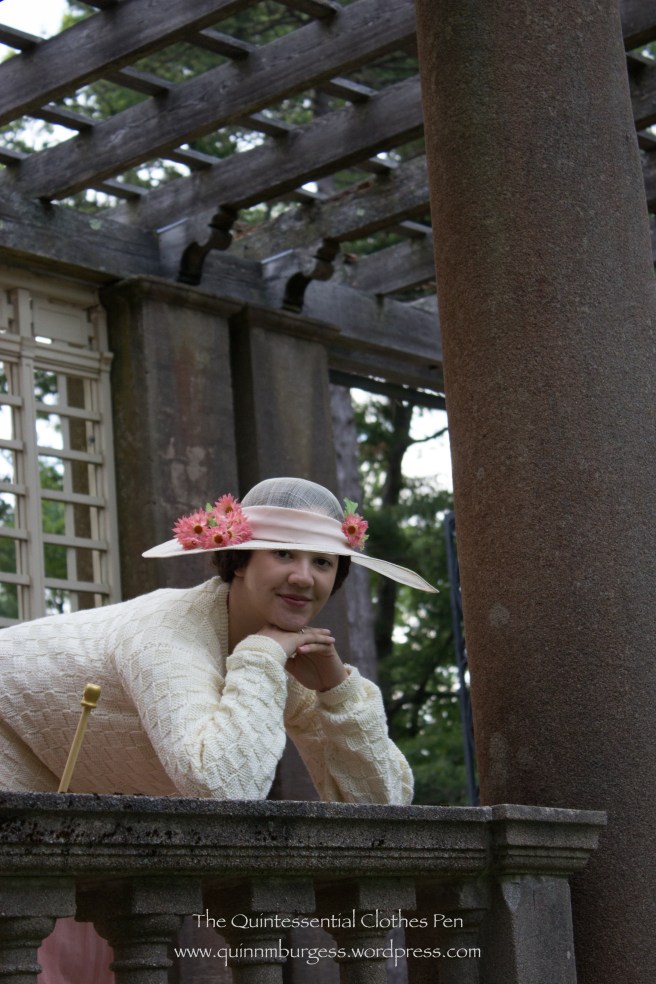
In the meantime, here are skate pictures! I bought vintage skates from Etsy. I’ve never bought ice skates before, so I was definitely guessing on the size. I gauged the size partly based off the size 8 skates I wore in January (too small) and also asked the seller for the length of the boot before purchasing to compare to my foot length (he sent me pictures with a ruler, very helpful!). It worked out and the skates fit! We’ll have to see how they work out once I’ve been in them for a bit while skating.
I’m guessing these skates are from the 1970s based on the clothing of the illustrated skaters. If anyone has thoughts I’d be happy to hear them!They came not only in the original box, but also with their tag, skate scabbards (and packaging) and a hook-y thing. Does anyone know what the hook-y thing is used for or what it is called? Do I carry my skates with it? I feel a little silly not knowing what it is, but it’s a cool thing regardless, all wood and metal.These skates have never been worn! The only time-damage was on the tongue lining, which had been glued originally. The glue had entirely disintegrated, leaving a dusty foam behind. I cleaned it off and re-glued the tongue lining in place. So far it seems to have worked beautifully!
But those polka dotted doohickeys are not vintage. I made them! They’re called soakers and I understand that they are put on the skate blades after being used to soak up any excess moisture in order to keep the blades from rusting. I came across them while looking for skate scabbards (the doohickeys you wear around the rink while not on the ice to protect the blades from getting dull) while I was researching skates to purchase. The different pictures I found of them looked so cute that I wanted some for my new skates! (Ha, remember my post about thin-gummies? Yup, here I am using the word doohickey.)
One soaker on, one soaker off.
This is the tutorial I followed for making my soakers. It was super easy. I had to piece my fabrics because the scraps I had were small, so that added some time, and I made my towel two layers thick since it was thin terry cloth, which added a little time and bulk, but those are the only things I changed. The polka dot exteriors are scraps from my 1953 Polka Dot Dress and the terry cloth linings are cut out of a failed robe I made years ago when I was first learning how to make clothes. Yay for repurposing! I love how silly and girly they are. They make me smile! Plus, I don’t use elastic for many projects of my own, but I happened to have just one piece in my bag of random scrap notions that was the perfect length, so the whole project was free and from my stash!
I have no idea if these skates are sharp. I assume that skates come sharp when you purchase them? They don’t feel very sharp… but I thought I’d try them and see what happens. It’s not like I’m a great skater, I sort of just putter around the rink, so if they’re not terribly sharp I expect I’ll be ok…
In January, The Commonwealth Vintage Dancers hosted an 1890s weekend (the same weekend that included an ice skating party that I blogged about a few weeks ago). Despite some snow during the day and into the evening, people were not kept away and the ball on Saturday was packed with dancers. Please join me on a little jaunt back to a snowy evening in the 1890s.
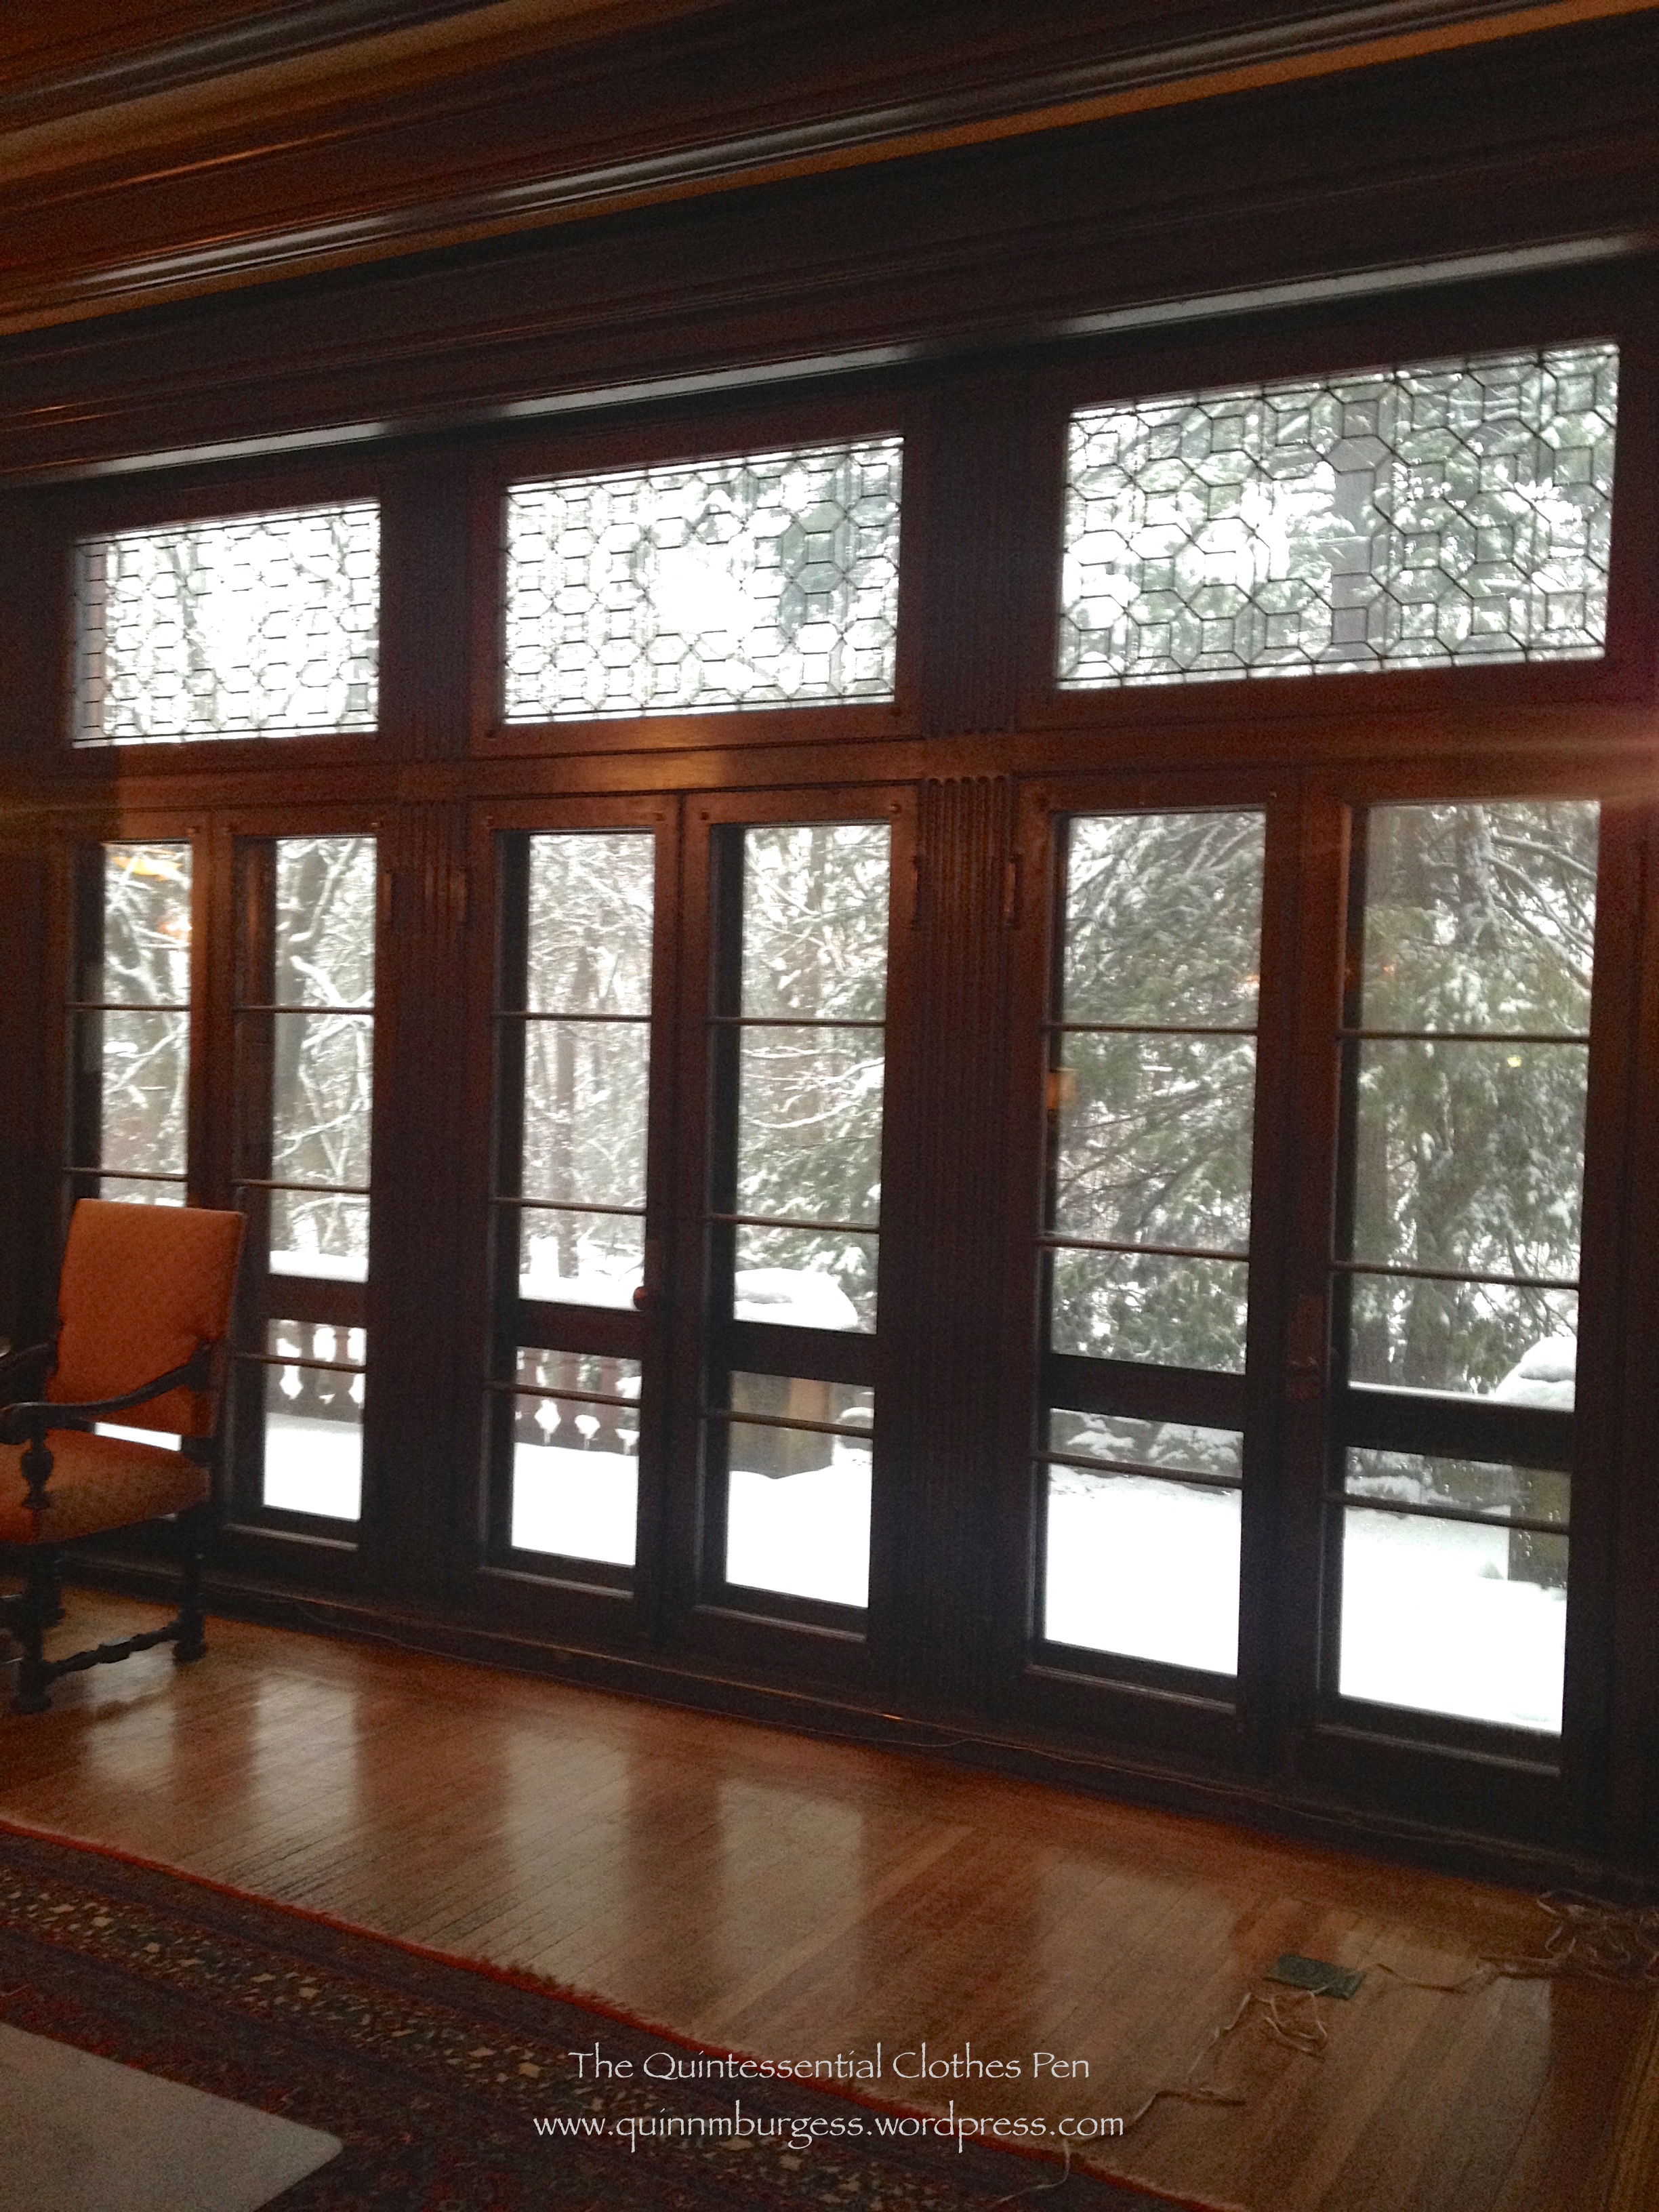
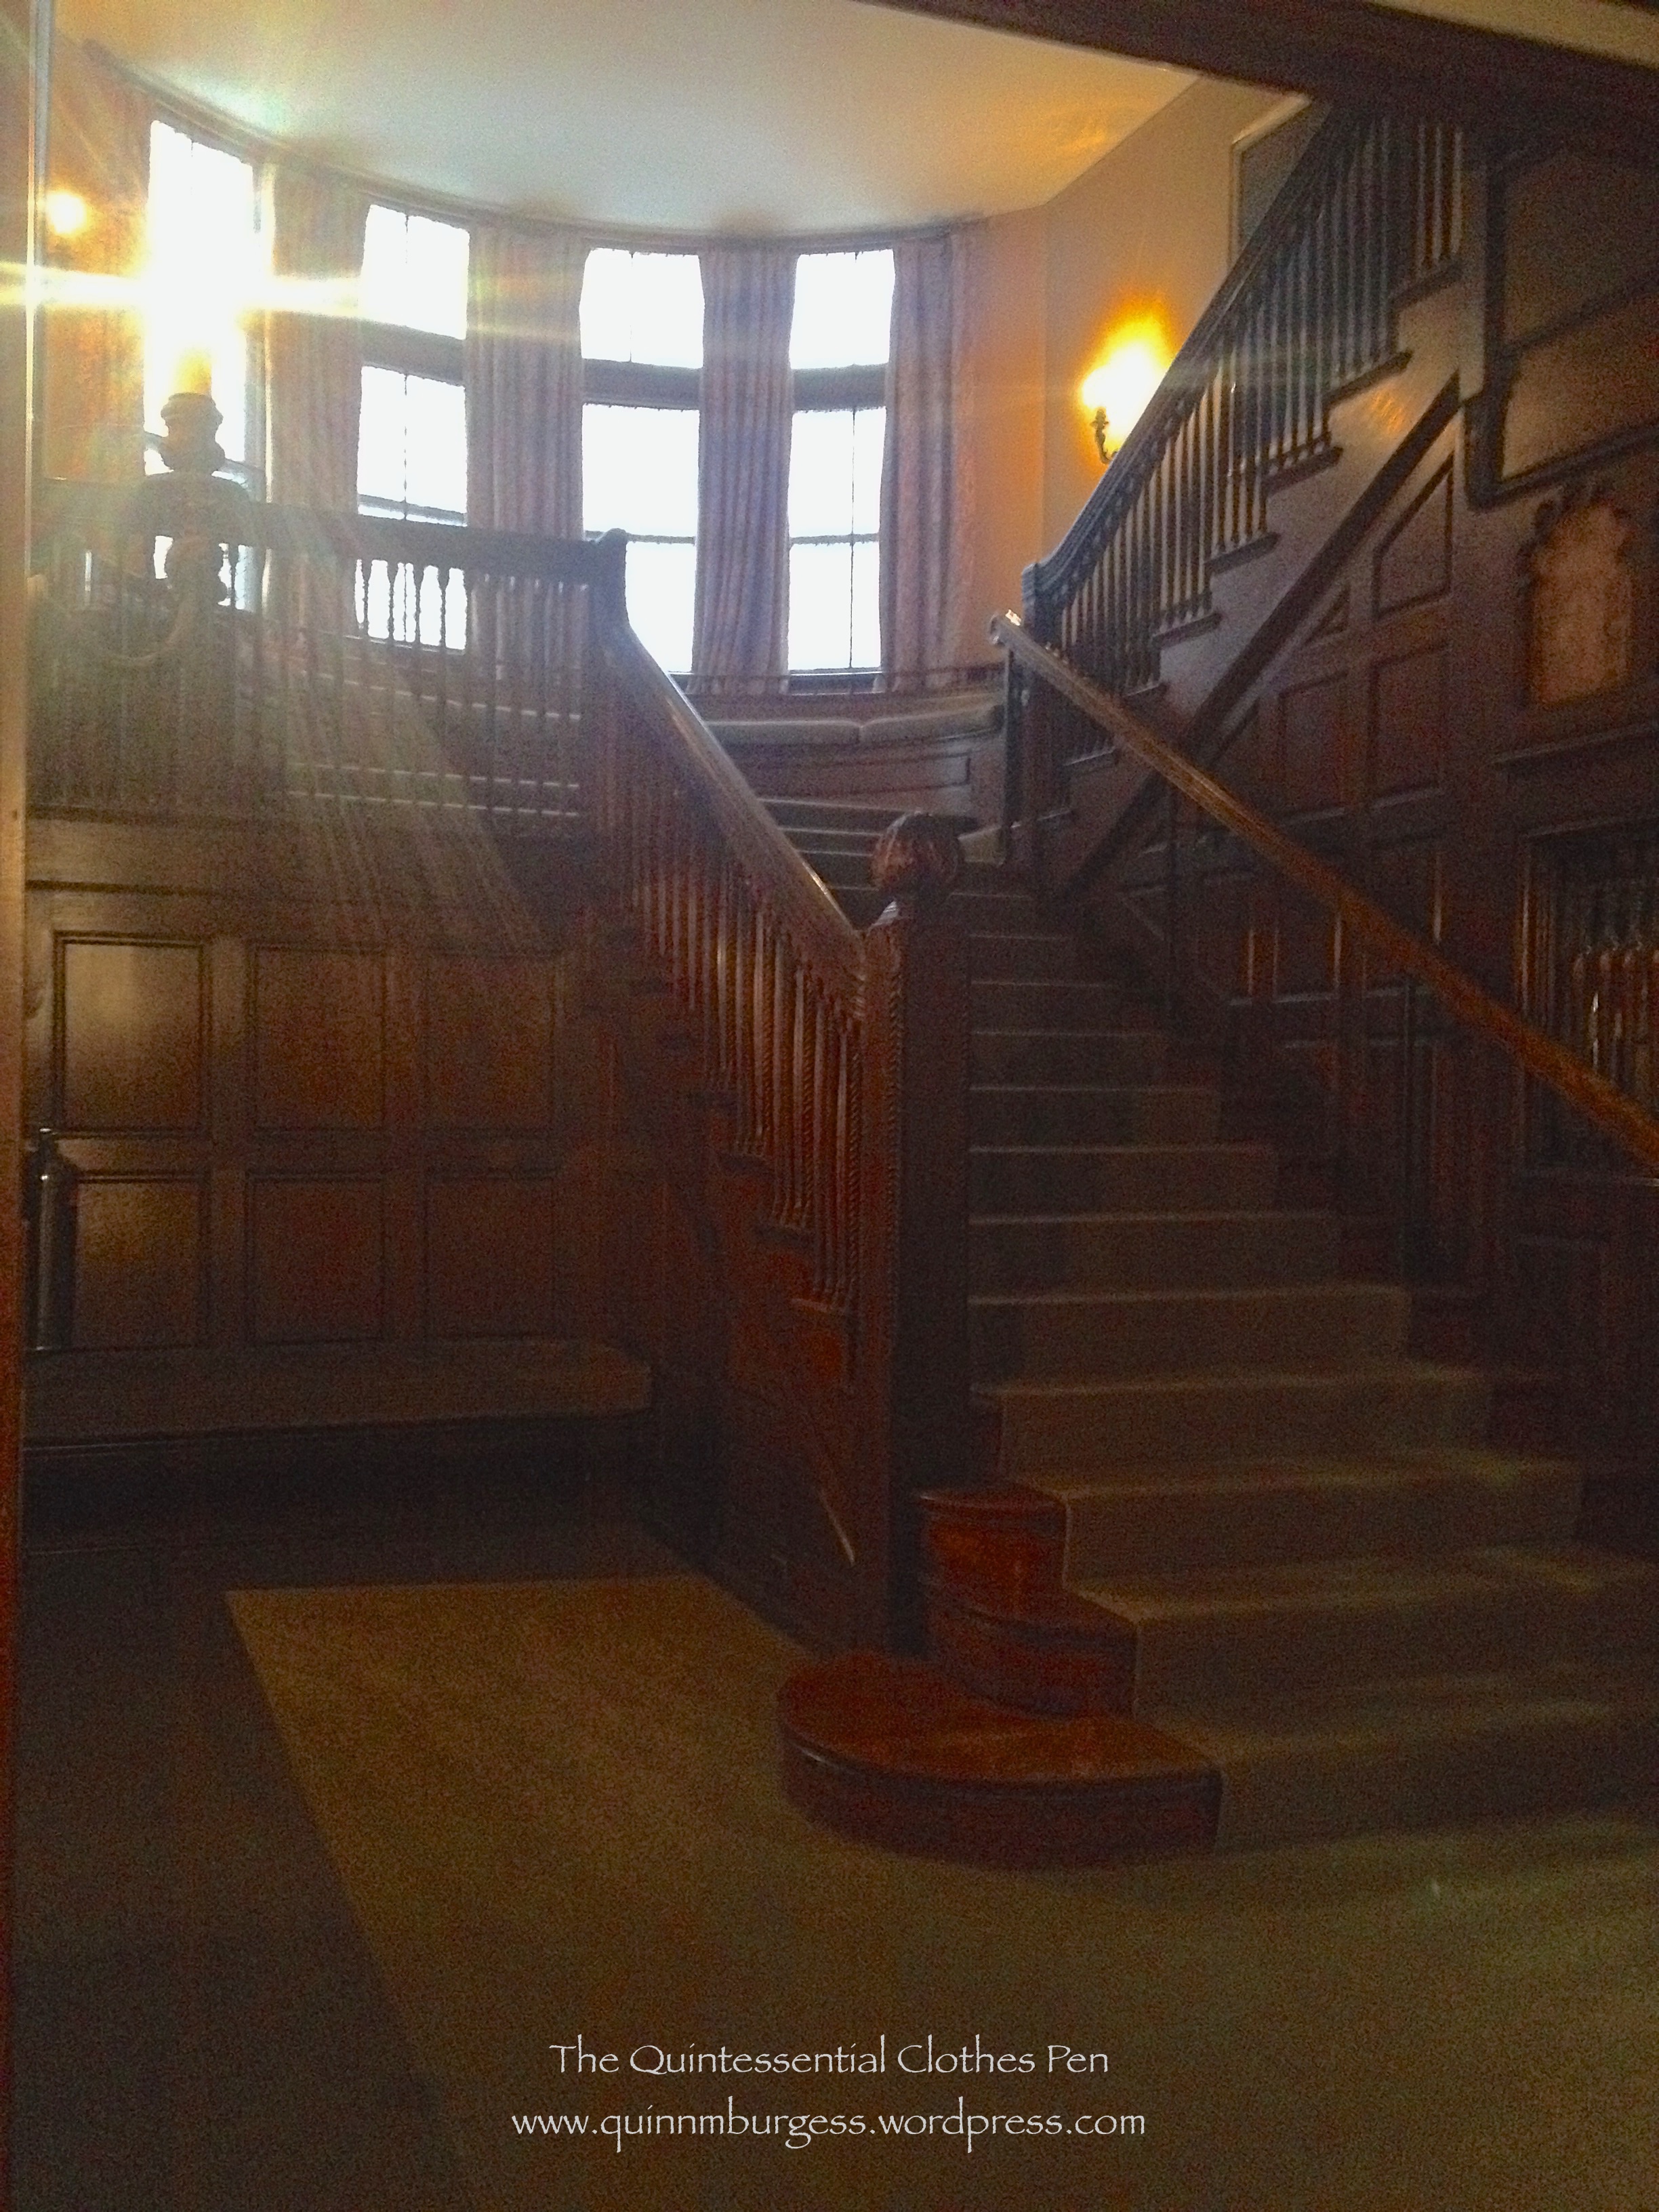
Arriving at the ball in the snow. (Well, sort of… I actually arrived in modern clothes, got dressed in my 1893 ball gown, borrowed a friend’s fur cape to keep the snow off my silk and the cold off my chest, and went back outside to take staged “arriving” photos.)The entrance hall’s view of the snow outside.The beautiful main staircase to the upper floors. There were lots of lovely sitting areas and nooks throughout the venue.There were also bookcases everywhere full of elegant hard cover books (my favorite!).In the ballroom, couples danced round dances including waltzes and polkas.What strikes me in this photograph are the black and white evening suits of the gentlemen. Everyone is nicely lined up to dance what I believe was the Opera Reel.
Videos are even more immersive than photos, and with this you can actually step into the ballroom that evening. Keep a look out for me partway through the video dancing a polka and then dancing a waltz at the end.
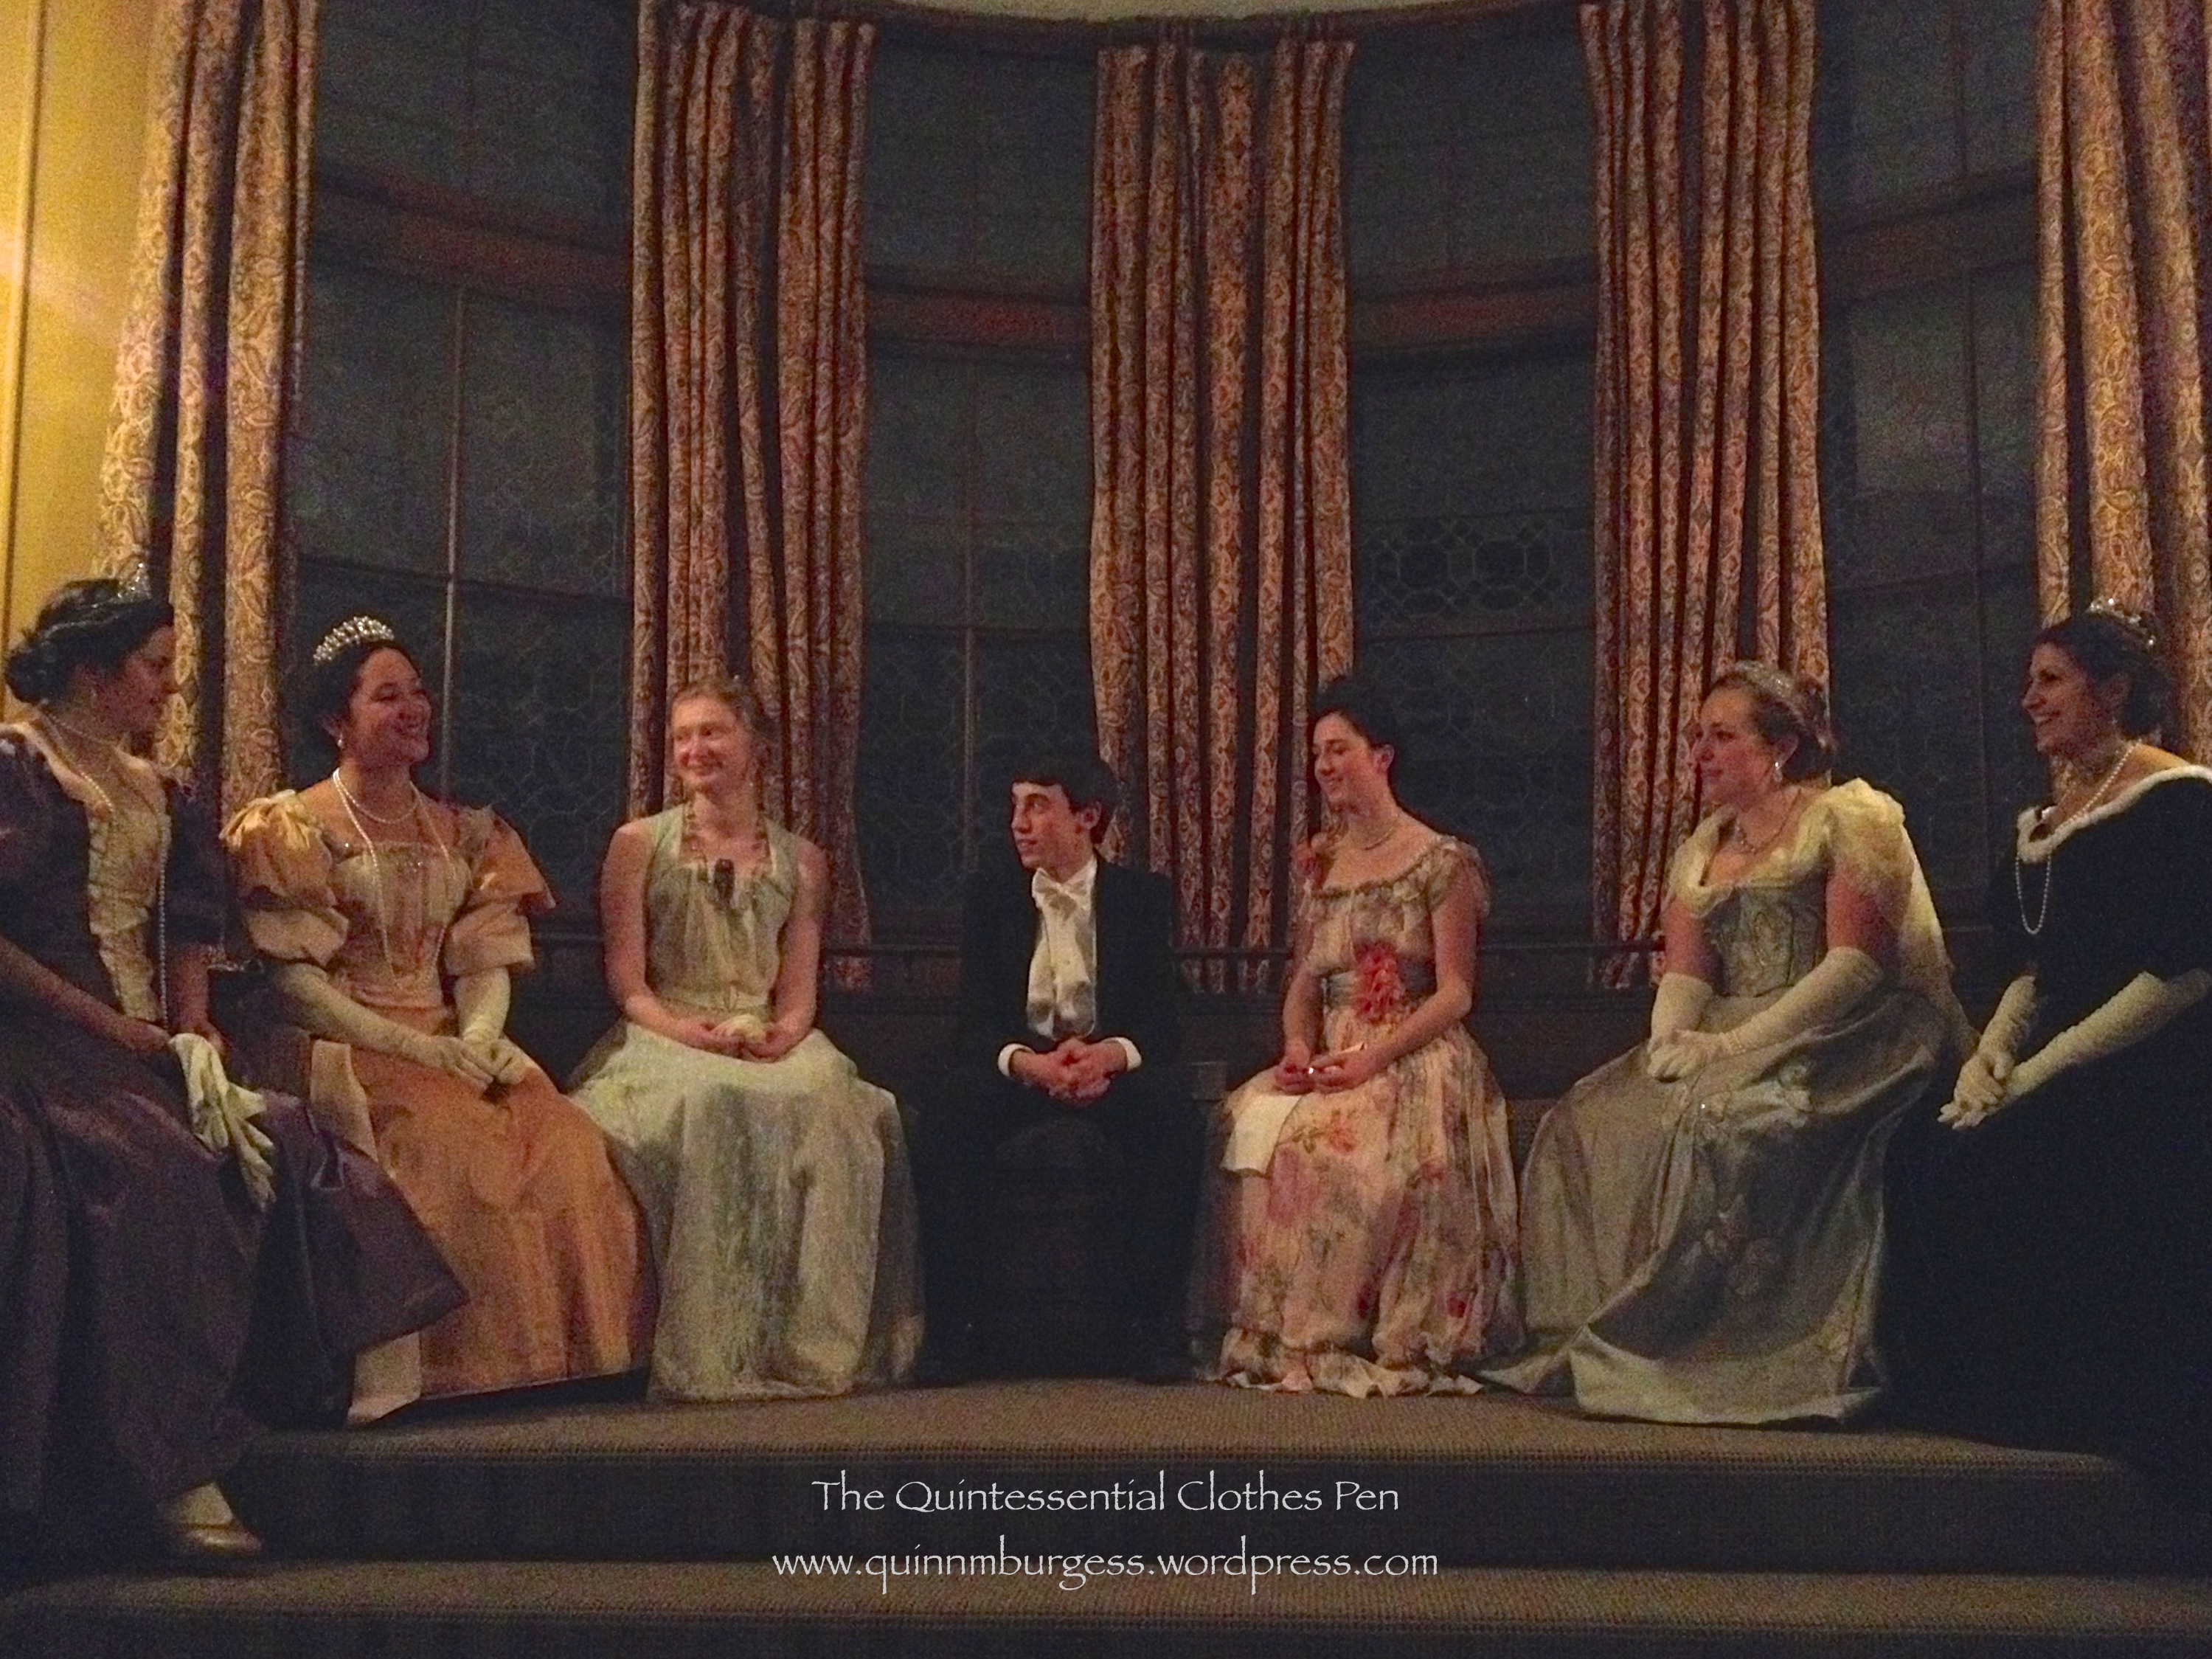
It became quite warm in the ballroom with all that dancing, so I stepped outside partway through to cool off and the snow had resumed in earnest!People spread through the house during the a break in the dancing. Here we are part way up the main staircase. Aren’t we well set up for a photo?And finally, being silly, because I blended very well with the curtains! Good night!
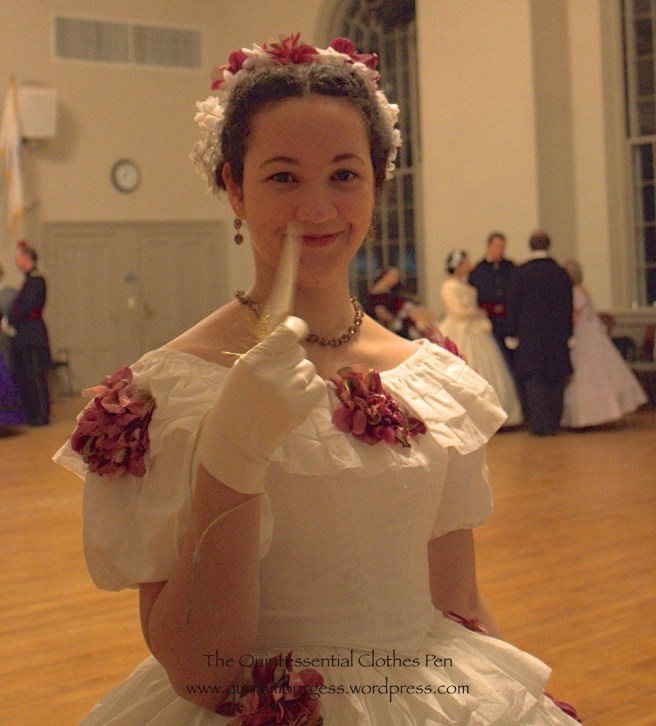
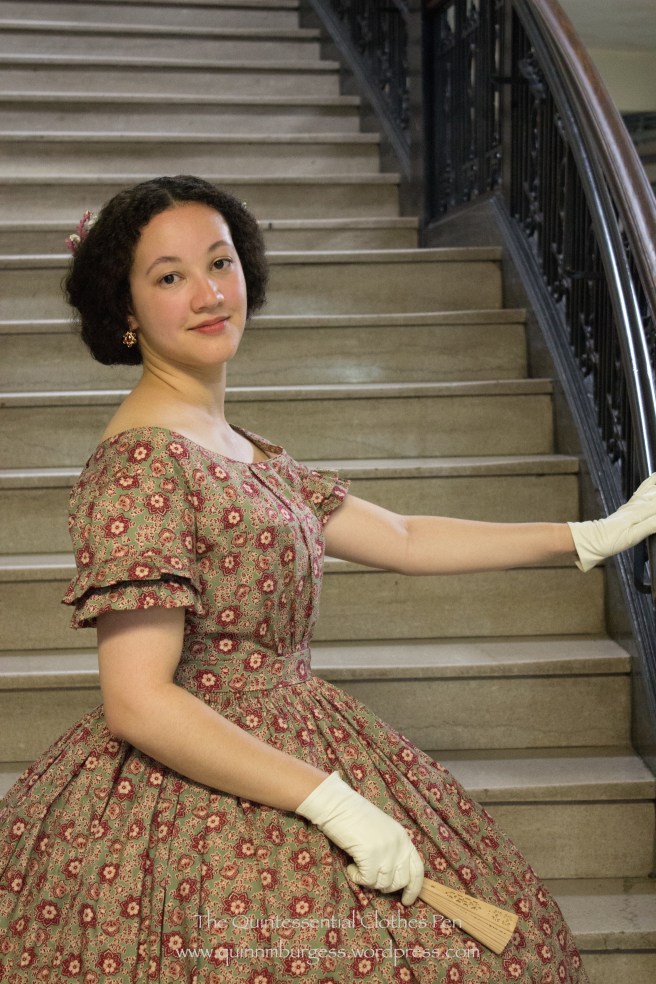
I attended a small Regency ball last weekend. It was charming and not nearly as packed full of people as I have grown accustomed to at these events in recent years. The smaller crowd made for a much more subdued (but still pleasant) evening than I was expecting.
The only downside was that the hall was exceptionally cold and not being full of people did not warm up very quickly! Few of us had planned for the situation and we were mostly scrambling to find any scarves or sweaters to wrap ourselves in. Many of us were resorting to items that we’d worn to keep ourselves warm outside, sacrificing fashion for warmth (it’s been below freezing here in Boston for at least the last three or four weeks consistently). I, for example, wrapped up in my pink cashmere scarf despite wearing a red dress. I thought it looked odd, though I was told that the colors looked good together. But there were a few lucky solutions that were both fashionable and warm: a large paisley shawl and a plaid scarf/wrap that looked very Scottish were the two most fashionable looks in my opinion. After some dancing and about midway through the evening, many had warmed up enough that scarves were being discarded, though I do believe I kept my scarf wrapped over my shoulders and chest throughout the entire evening.
Elegant, fashionable lounging during the refreshment break.Delicious refreshments alluringly laid out.
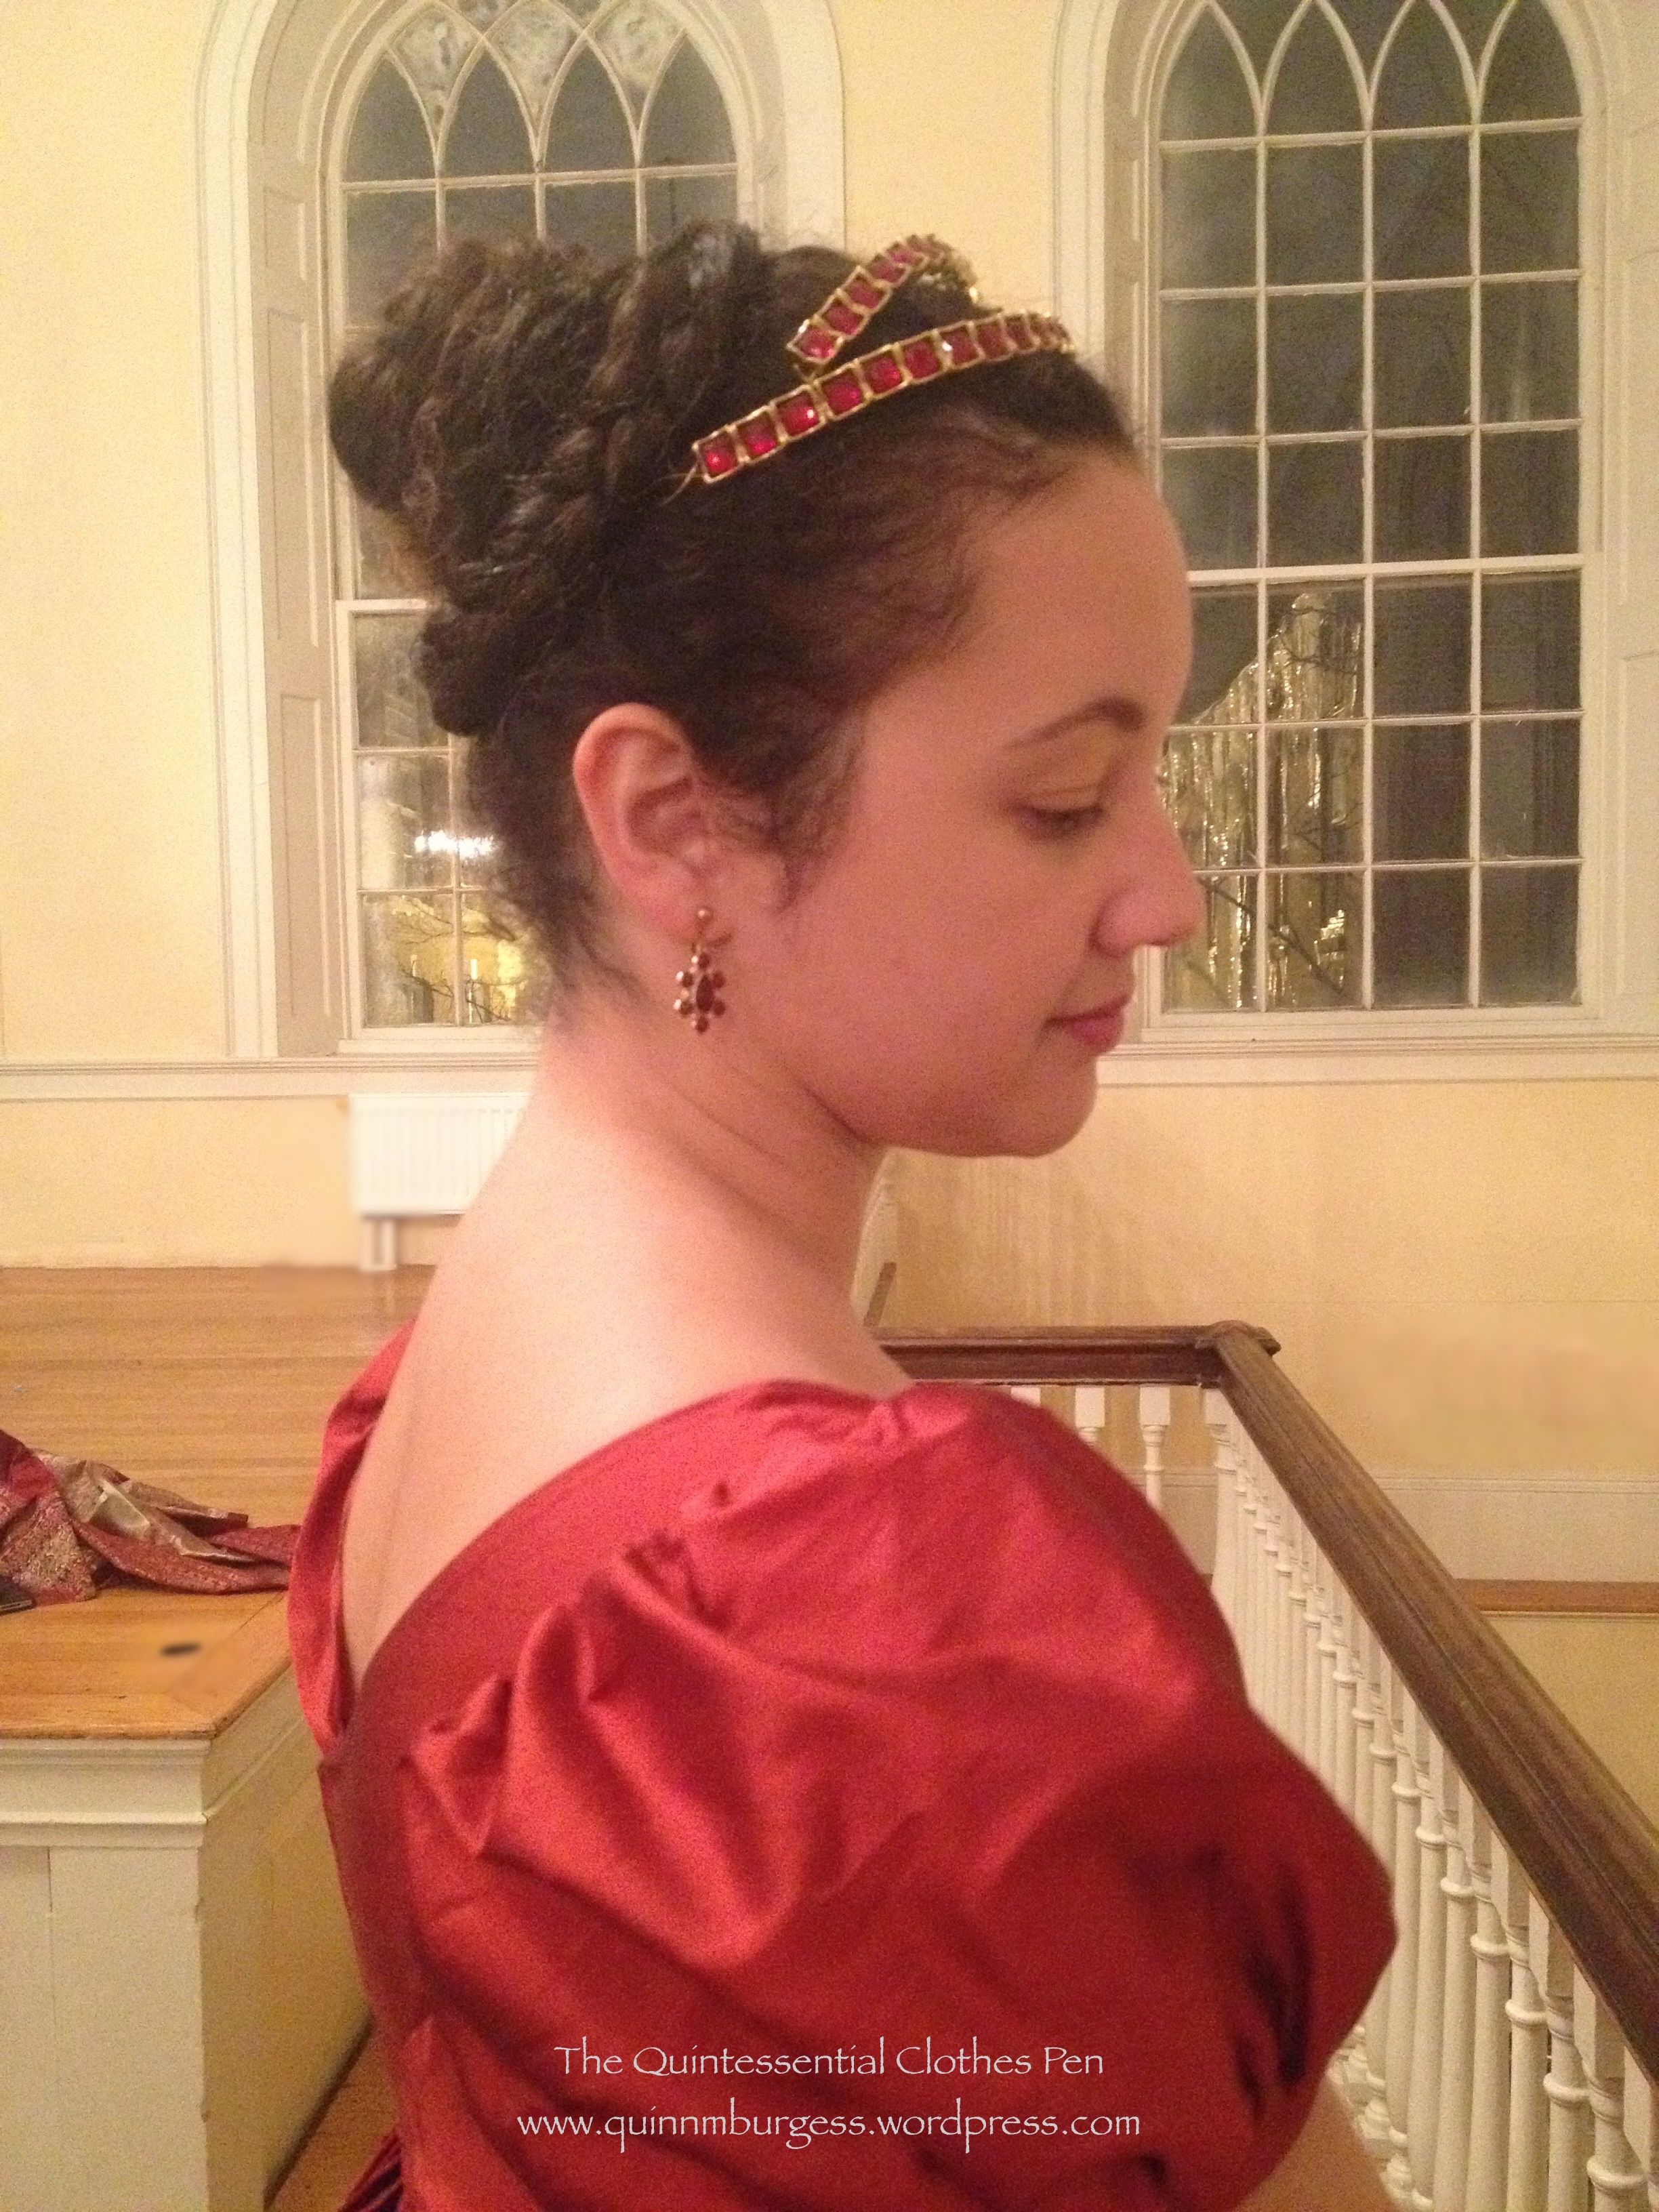
I wore my red 1813 evening gown and my homemade red and gold tiara. (I had hoped to finish and wear my 1811 elusive blue evening gown, but I would have had to do a lot of last minute sewing to finish it in time and after my recent skating costume last minute sewing adventure I was not inclined to do so again so soon. It is very satisfying to have a closet of options for an event, especially when plans to complete something new go awry.) I also brought along my red and gold reticule, because it matches the outfit so perfectly (although the only thing I kept in it was my phone… which is the reason for the slightly blurry, grainy photos).
All the red and gold Regency pieces in my wardrobe put together in one outfit!It was so cold getting dressed that I was not inclined to do a complicated hair style. Heeheehee, fake hair to the rescue! I just put my hair in a pony tail, braided it, and wrapped it around itself. Simple! The big braid is what makes it look complicated, but it is pre-braided fake hair. I think it completes the style perfectly and has a bit of a “chinoise” look to it, too.
What do I mean by “chinoise”? The word itself is from the French adjective meaning Chinese. In terms of fashion, there are scarce references to “chinoise” styles in Regency fashion plates (compared to the abundance of Regency fashion plates showing other styles). Here are a few examples. This Merveilleuse from 1814 has a “Coeffure Chinoise,” this lady from 1812 has a “Coeffure a la Chinoise,” and this fashion plate shows “La Toilette Chinoise.” (I do sort of wonder how some of these attributes, and the hairstyles in particular, said “Chinese” to people during the Regency, but of course the world was perceived very differently then and people had access to vastly different quantities and types of information than I do today.)
I’ve often noticed that “chinoise” hairstyles make use of braids that wrap around the head. In addition, there seems to often be a vertical emphasis to the hair and to a bun, if one is present in the style. It is these attributes that say “a la chinoise” when I look at my own coiffure from last weekend. Sometime, I’ll have to try to make a more exaggerated “chinoise” style with a very tall and flyaway bun such as the Merveilleuse from 1814 has. I’m pretty sure my hair will have no trouble with that since it is naturally curly and wanting to fly away!
For your 19th century ballroom edification today, we have a list of etiquette points from The Royal Ball-Room Guide and Etiquette of the Drawing Room, 1877 (available through The Library of Congress). This is a great digest of lots of etiquette points on a variety of topics.
I believe many modern ladies and gentlemen could take note of many of these points when attending recreations of 19th century balls. My top choices for attendees and personal favorites are numbers 4, 11, 18, and 22.
Do you have a favorite (or two)? Did any surprise you? Have you been to a recreated 19th century ball and longed for any of these points to be adopted by modern ball guests?
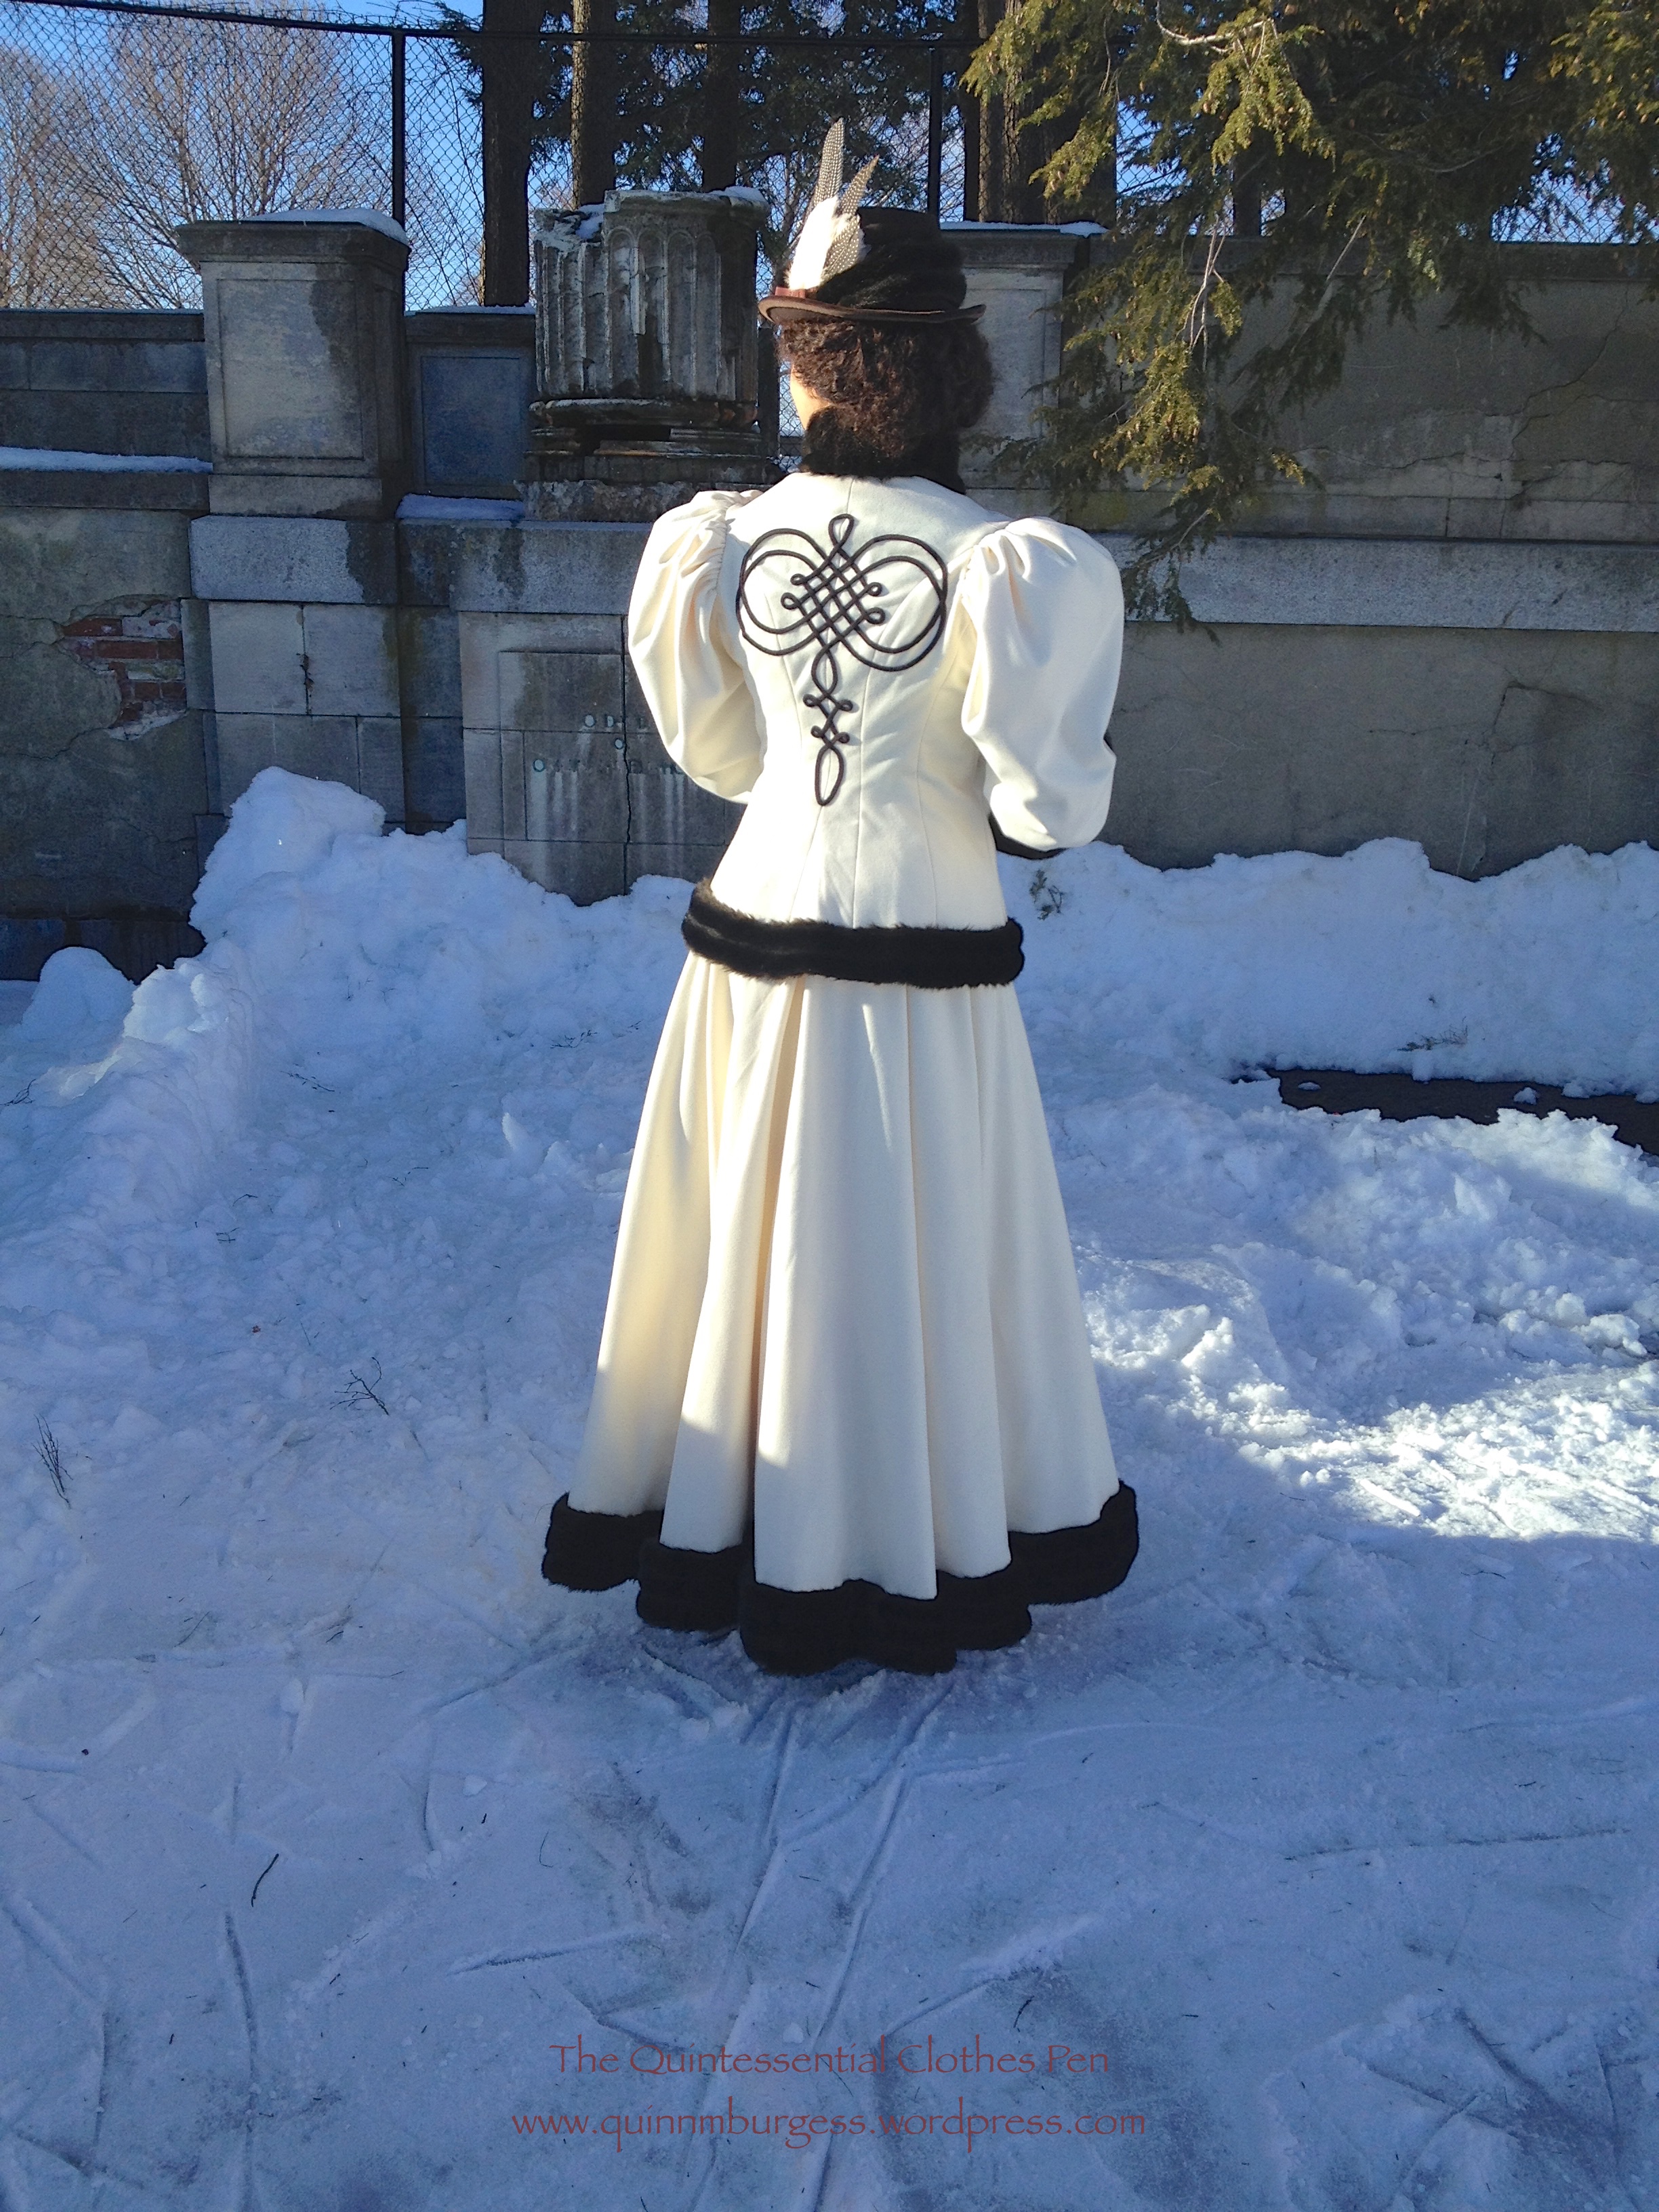
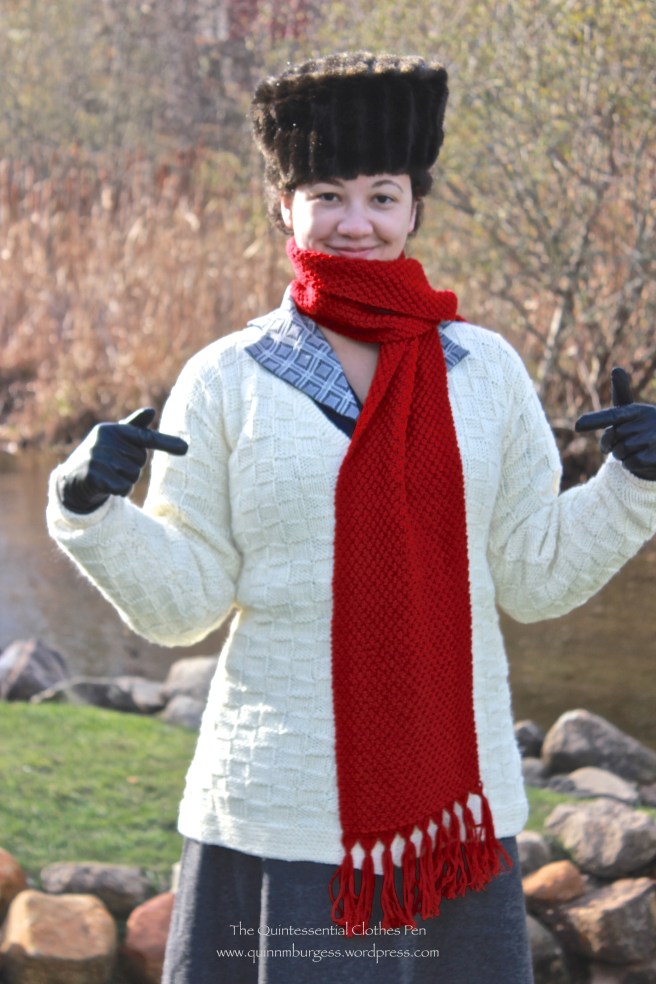
This is one of my favorite outfits of all time. I just want to hug myself, with all the fur, and I love the trim on the back! The whole thing is so cozy and so hug-able and the skirt has such a nice drape and the accessories work so well… and I actually got to go skating in it! I am just utterly chuffed (to use a British word) with the whole thing!
I was on the fence about whether this outfit would apply to the Historical Sew Fortnightly/MonthlyChallenge #1: Foundations, but then I read Leimomi’s teaser post about her foundation entry in which she reminds us about different interpretations of foundations and the intent of this challenge to create loose guidelines open to interpretation.
I was convinced (or pushed off the fence, if you prefer to think of it in that amusing way). I’m claiming my all new 1895 skating outfit for the first challenge of the new year! It does rather stretch the idea of foundations. Is the skirt a foundation because it is literally worn below the jacket, thus being a foundation as you would think of one in a building? Or is the bodice a foundation, because my direct inspiration is a lonely jacket without a skirt and therefore it is the foundation of the outfit because I wouldn’t have made the skirt without having the jacket? Either way, there is an element of a foundation in there.
Just the facts:
Fabric: 5 yds of ivory wool, about ⅓ to ½ yd of dark brown faux fur, probably about 3 yds of scrap muslin for flat lining the jacket, a bit of scrap canvas to stiffen the collar, and a bit of ivory flannel to line the inside of the collar.
Pattern: Made by me and based on my inspiration jacket as well as patterns published in Authentic Victorian Fashion Patterns (a Dover book).
Year: c. 1895.
Notions: 5 yds of brown braid, thread, a bit of high loft polyester batting to keep the sleeves puffed out, about 1 yd of ivory hug snug to finish the bottom of the jacket, hooks and bars for the skirt, and thread.
How historically accurate is it? Pretty darn good. Definitely recognizable by someone in the 1890s. The construction is accurate, aside from the use of hug snug instead of bias and faux fur instead of real fur. So, 95%.
Hours to complete: Um… As usual, I did not keep track. I definitely spent at least 15 hours the few days before the event sewing on my braid and fur trim… Plus full days of pattern making, fitting, cutting, and sewing. Maybe 30-40 hours? I care so much more about the finished project than the time it takes to get there! And I loved sewing this, so I didn’t mind that it took time!
Total cost: $75 for the wool, probably about $8 for the fur yardage I used for this project, $4 for the braid, and the rest from the stash = $87
My accessories were a matching fur muff that I made a few years ago and wore once for caroling (with my as-yet-undocumented 1860s winter cape) but more often with my 1917 winter ensemble and a revamp of my 1883 wool hat. I didn’t have time to make a new hat because of all the last minute fur and trim sewing, so I pinned a fur scrap around the 1883 hat and added some feathers to stand up a bit more like 1890s hats and called it good. My main inspiration (and the reason I feel it was an acceptable looking style to have the squashy fedora hat look in the 1890s) was this image.
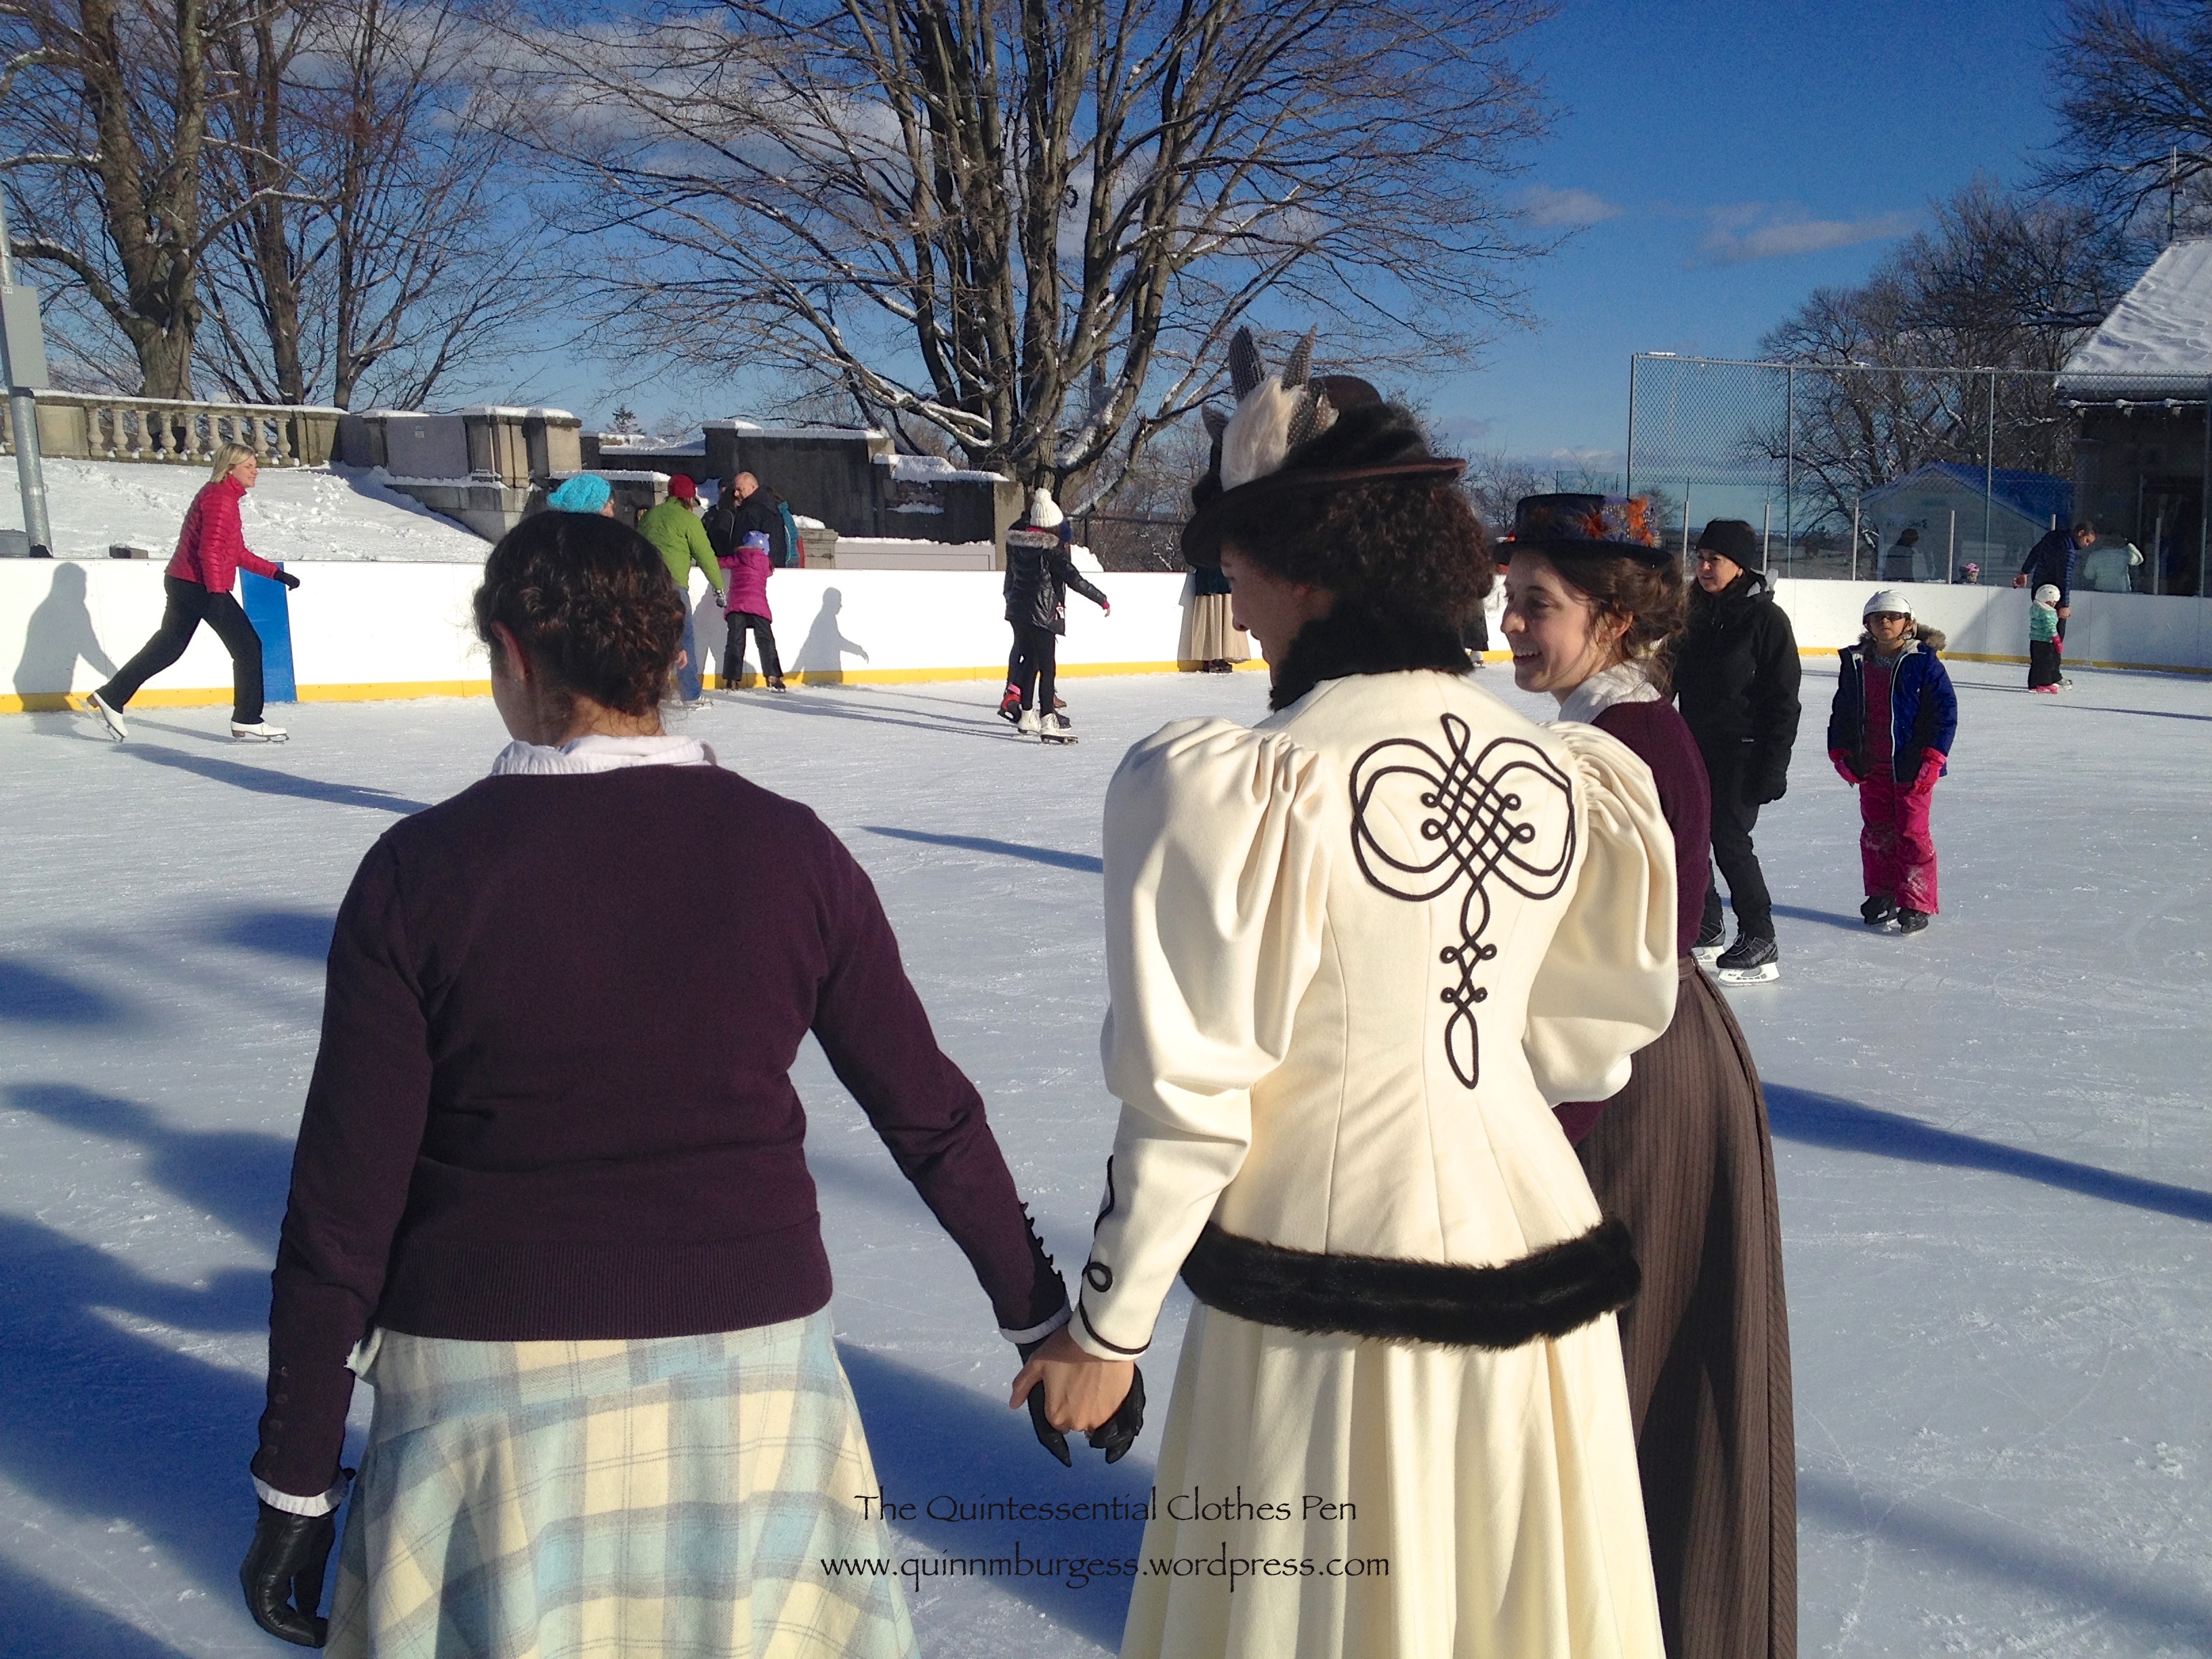
For good measure, here’s my Pinterest board for the entire project. And here are pictures of us skating (with ice skates: all our snow and cold weather does occasionally come in handy here in Boston)!
Yes, we just crashed a local outdoor ice rink on a Sunday afternoon. One of the attendees even wore vintage skates! Turns out they can be hard to skate in because they’re not very supportive… but they looked fantastic! We got lots of comments from people asking what we were doing, why we were dressed up, and that we looked good. I was asked by multiple groups of young girls why I was dressed up and one group in particular asked what the swirly thing was that I had, which I got to explain was a muff to keep my hands warm!
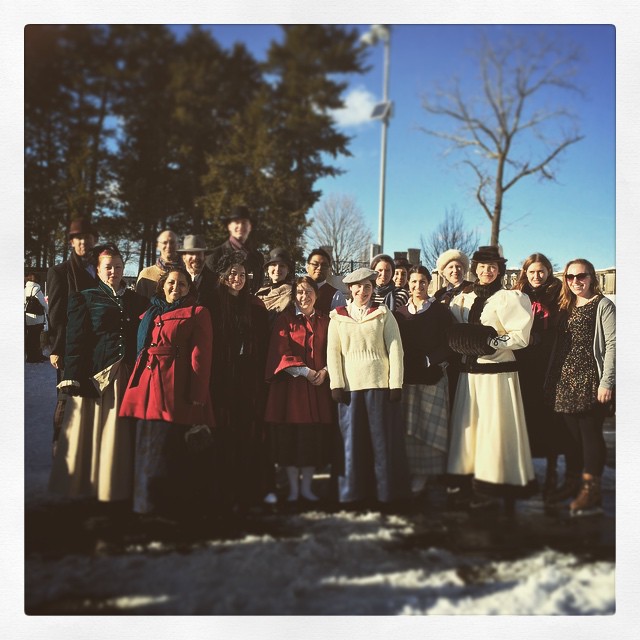
Here’s our skating group. People came in a variety of late 19th century and early 20th century winter outfits as well as modern clothes.
With my skating ensemble I wore fleece lined tights (modern, but warm so I didn’t care), knee high bamboo socks (modern again), my 1903 silk petticoat (super useful for the 1890s, also), a modern tank top (instead of combinations, because I needed to go to work later in the afternoon and change out of my outfit in the back seat of my car without being indecent…), my 1895 corset, and a long sleeve modern waffle tee (mostly to shield my skin against the wool seam allowances and also for warmth). And I was perfectly warm wearing this out for skating on a day that was sunny and right around freezing. In fact, with the muff and wool hat I actually was too warm at times.
Pleased, chuffed, and smiling all afternoon! So fun! Maybe we will get to go skating again this winter!
The text reads: “Toque de Velours. Witz-choura de Satin.” I’ve looked at enough fashion plates to guess the meaning of most of the text. After some quick reference to translation programs, I confirmed my suspicions and translated the text as: “Hat of velvet. ____ of satin.” The question is, what does “Witz-choura” mean?
First, let me tell you that I originally read the plate as “Toque de Velours. With-choura de Satin.” That z looks remarkably like an h, despite the fact that I don’t think “with” is a word in French (also, I don’t really associate the letter z with French words, so I was happy to interpret it as an h). I followed this path for awhile, though, despite the fact that it didn’t quite make sense. Assuming “With” meant what it does in English, I proceeded to try to figure out what “choura” meant. I looked at English dictionaries, including the Oxford English Dictionary, with no luck. And in French dictionaries the closest thing I found is that “choura” is conjugation of “chouraver” or “chourer,” a verb which seems to mean “to steal” or “to rob” in English. But that didn’t make any sort of sense! The only other reference to the word “choura” I found was that it has a connection to an Arabic word relating to the parliament of an Islamic state. Again, no connection. So then I thought, what’s the word for shoes in French? Maybe “choura” is an older form of that word? Turns out that “les chaussures” means shoes in French.
I was about to pursue this train of thought, when Mr. Q interrupted me. When I complained about my lack of useful results he suggested I try, amongst other ideas, a search of Google Scholar. My initial search turned up lots of science related publications with authors whose last names were Choura. But then, when I added the word “fashion” to my search, I was returned one result which was to the point and clarified the whole business (at least a little bit!). Mr. Q broke the mystery wide open!
The clarification comes from the book Empire Fashions by Dover Publishers. The relevant sentence can be found here and reads: “Around 1808, a high-waisted, fur-lined woman’s coat appeared, the witzchoura [wi choo ra].” Ohhhh, I thought, that’s not an h it’s a z!
Upon searching for it with the now-corrected spelling I finally found relevant information! All that will be in future posts, though. I thought I’d break it up to avoid having one really long post. So you can look forward to a post with descriptions of witzchouras and then also a post with images of them. At least I was on the right track!
(Click here for my original post about the 1814 Vernet Project, to which this post refers.)
The last bit of our Apartment Redecoration Project that I want to share is the bathroom (we did the bedroom, too, but it’s hard to get pictures that show the changes, so you’ll just have to believe that it has improved).
As you can see, a lot of the bathroom is finished with pink tile (and a matching tub, who thought that was a good idea?) and unfortunately that was something we couldn’t change. But Mr. Q had the idea to put in a floating floor of tile-look laminate over the old pink tile floor with the grungy grout that you can see below. It’s semi-permanent–something we can remove when we move out if necessary.
Laying the grey/brown floating floor over the pink tile.
In addition to that project, which involved a lot of sawing of pieces and patterning around the toilet, we also: re-caulked the join between the tub and shower tiles, put up a new shower curtain rod and shower curtain hangers, hung a floating shelf over the toilet, replaced the light fixture, replaced the medicine cabinet, replaced the outlet cover, painted the walls, and tried to replace the fan in the ceiling (that idea was foiled by the way it was installed–the fan base was bigger than the fan blade area, we think it was installed before the ceiling was put in). Oh, and I reorganized everything under the sink and added storage solutions to make better use of the space.
Wall in progress: clearly there is no light fixture, medicine cabinet, or outlet cover, and we were preparing to paint, all by the light of a work lamp.
There was a day or two when the power was cut off to that room so Mr. Q could deal with the electrical stuff and we were showering and working on the bathroom by the light of a hanging work light… a bit of an inconvenience but not the end of the world.
In the end, all the work paid off and the bathroom looks a lot nicer and less pink. And all in all, our apartment looks more put together and designed than it did before. I’m also pleased that the furniture we jettisoned from the living room and bedroom found it’s way to a new home within ten minutes of being put in the lobby with a “free” sign! We’ve had our days of taking advantage of free things in the lobby and I’m glad someone else will be able to make use of the things we no longer need rather than just throwing serviceable and nicely cared for things in the trash. We received, we give… I appreciate the circle of sharing!
Ahh! It’s halfway through January and I feel rather behind on posting my 2014 summary. It seems like everyone else is so much more on the ball with that than I am this year. Well, without further ado…
Completed projects in 2014:
January: The Make Do Shift (HSF #1)February: A Pink Regency Belt Style Sash (HSF #3)March: ca. 1860 Corset For Me! (HSF #4)March: New Annabelle hair wreathApril: 1811 Elusive Blue Regency Dress (well, mostly finished)April: Red/Gold Regency Reticule (HSF #5)May/June: Anne Adams DressMay/June: Round Regency ReticuleJuly: Georgina Evening Bodice and Hair Crescent (HSF #13)July: Orange ParasolJuly: 1850s CollarAugust: 1920s Sinamay Hat (HSF #15)November: 1917 Cranberry Red Scarf (HSF #23)November: Our Apartment Redecoration ProjectDecember: 1950 Baroness Dress
Looking forward to 2015, I’m planning the following for certain:
Finishing a modern cotton dress I started last year
Finishing a 1910s evening dress I started last year
Finishing an 1880s day dress I started in 2013
A 1900s evening gown
An 1830s evening gown
Knitted red gloves
A robe de style
A late 1910s day dress
Finishing an 1814 pelisse and day dress I started at some point
Of course, I have lots of other ideas in mind, too! A lot of it depends on how busy I am, how much time I have to sew, and what events pop up.
As usual, I completed some things on my looking forward to 2014 list and some things just totally fell by the wayside. In particular, while I started panniers for the court gown project, I didn’t finish them, nor did I start any other part of that ensemble. I’m a bit sad that I didn’t work on this project very much. I’m pondering whether to leave it on my list of things to do or to reallocate the fabrics for some other project. I was so excited to participate, but I have so many other things to make that I can actually wear to events… and I wasn’t boosted along in my enthusiasm by the general blogging world because it seems lots of other excited people were busy last year also. Alas, life takes up so much time!
I did exceed 100 followers and 200,000 views on the blog this year. And I announced my engagement (and to be fair, planning a wedding is definitely something that is keeping me busy in my spare time!). I was also awarded the Liebster Blog Award for the second time. This time by Susan, of the blog Threading Through Time.
I participated in the Historical Sew Fortnightly 2014, but only completed 7 challenges out of 24. I think I was mostly busy with life or busy with other projects that didn’t line up with the HSF for most of the year. I will likely participate in the HSF 2015 this year, though as in the past two years I won’t go super out of my way to make projects just to satisfy challenges if they’re not also being made for another purpose.
And in terms of events… 22 for 2014: 9 balls, 8 other events (teas, picnics, outings etc.), and 5 performances.
We spent the beginning of this month vacationing in the Caribbean. As we continue to sail along on our life adventure, I hope to create many more fond memories and retain the relaxation from our Caribbean escape. I hope your year is full of the same!
Never anticipate the point or joke of an anecdote told in your presence. If you have heard the story before, it may be new to others, and the narrator should always be allowed to finish it in his own words. To take any sentence from the mouth of another person, before he has time to utter it, is the height of ill-breeding. Avoid it carefully.
…
Be careful always to speak in a distinct, clear voice; at the same time avoid talking too loudly, there is a happy medium between mumbling and screaming. Strive to attain it.
This particular quote is from page 14 of the The Ladies’ Book of Etiquette, and Manual of Politeness (1873), source here. Warning to all: avoid the “height of ill-breeding” in the new year! And, happy new year!