HSF/M #1: 1895 Hug-able Skating Costume

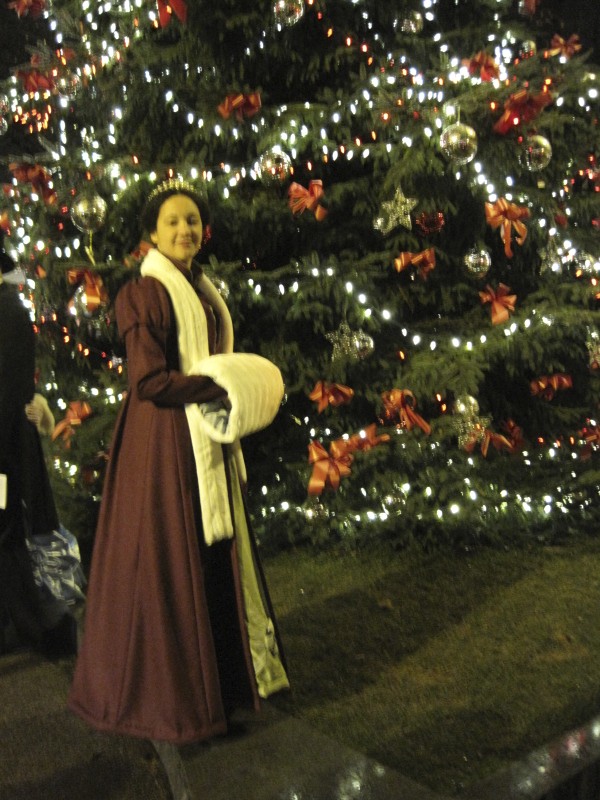
This is one of my favorite outfits of all time. I just want to hug myself, with all the fur, and I love the trim on the back! The whole thing is so cozy and so hug-able and the skirt has such a nice drape and the accessories work so well… and I actually got to go skating in it! I am just utterly chuffed (to use a British word) with the whole thing!

IMG_1952

IMG_1955

IMG_1956

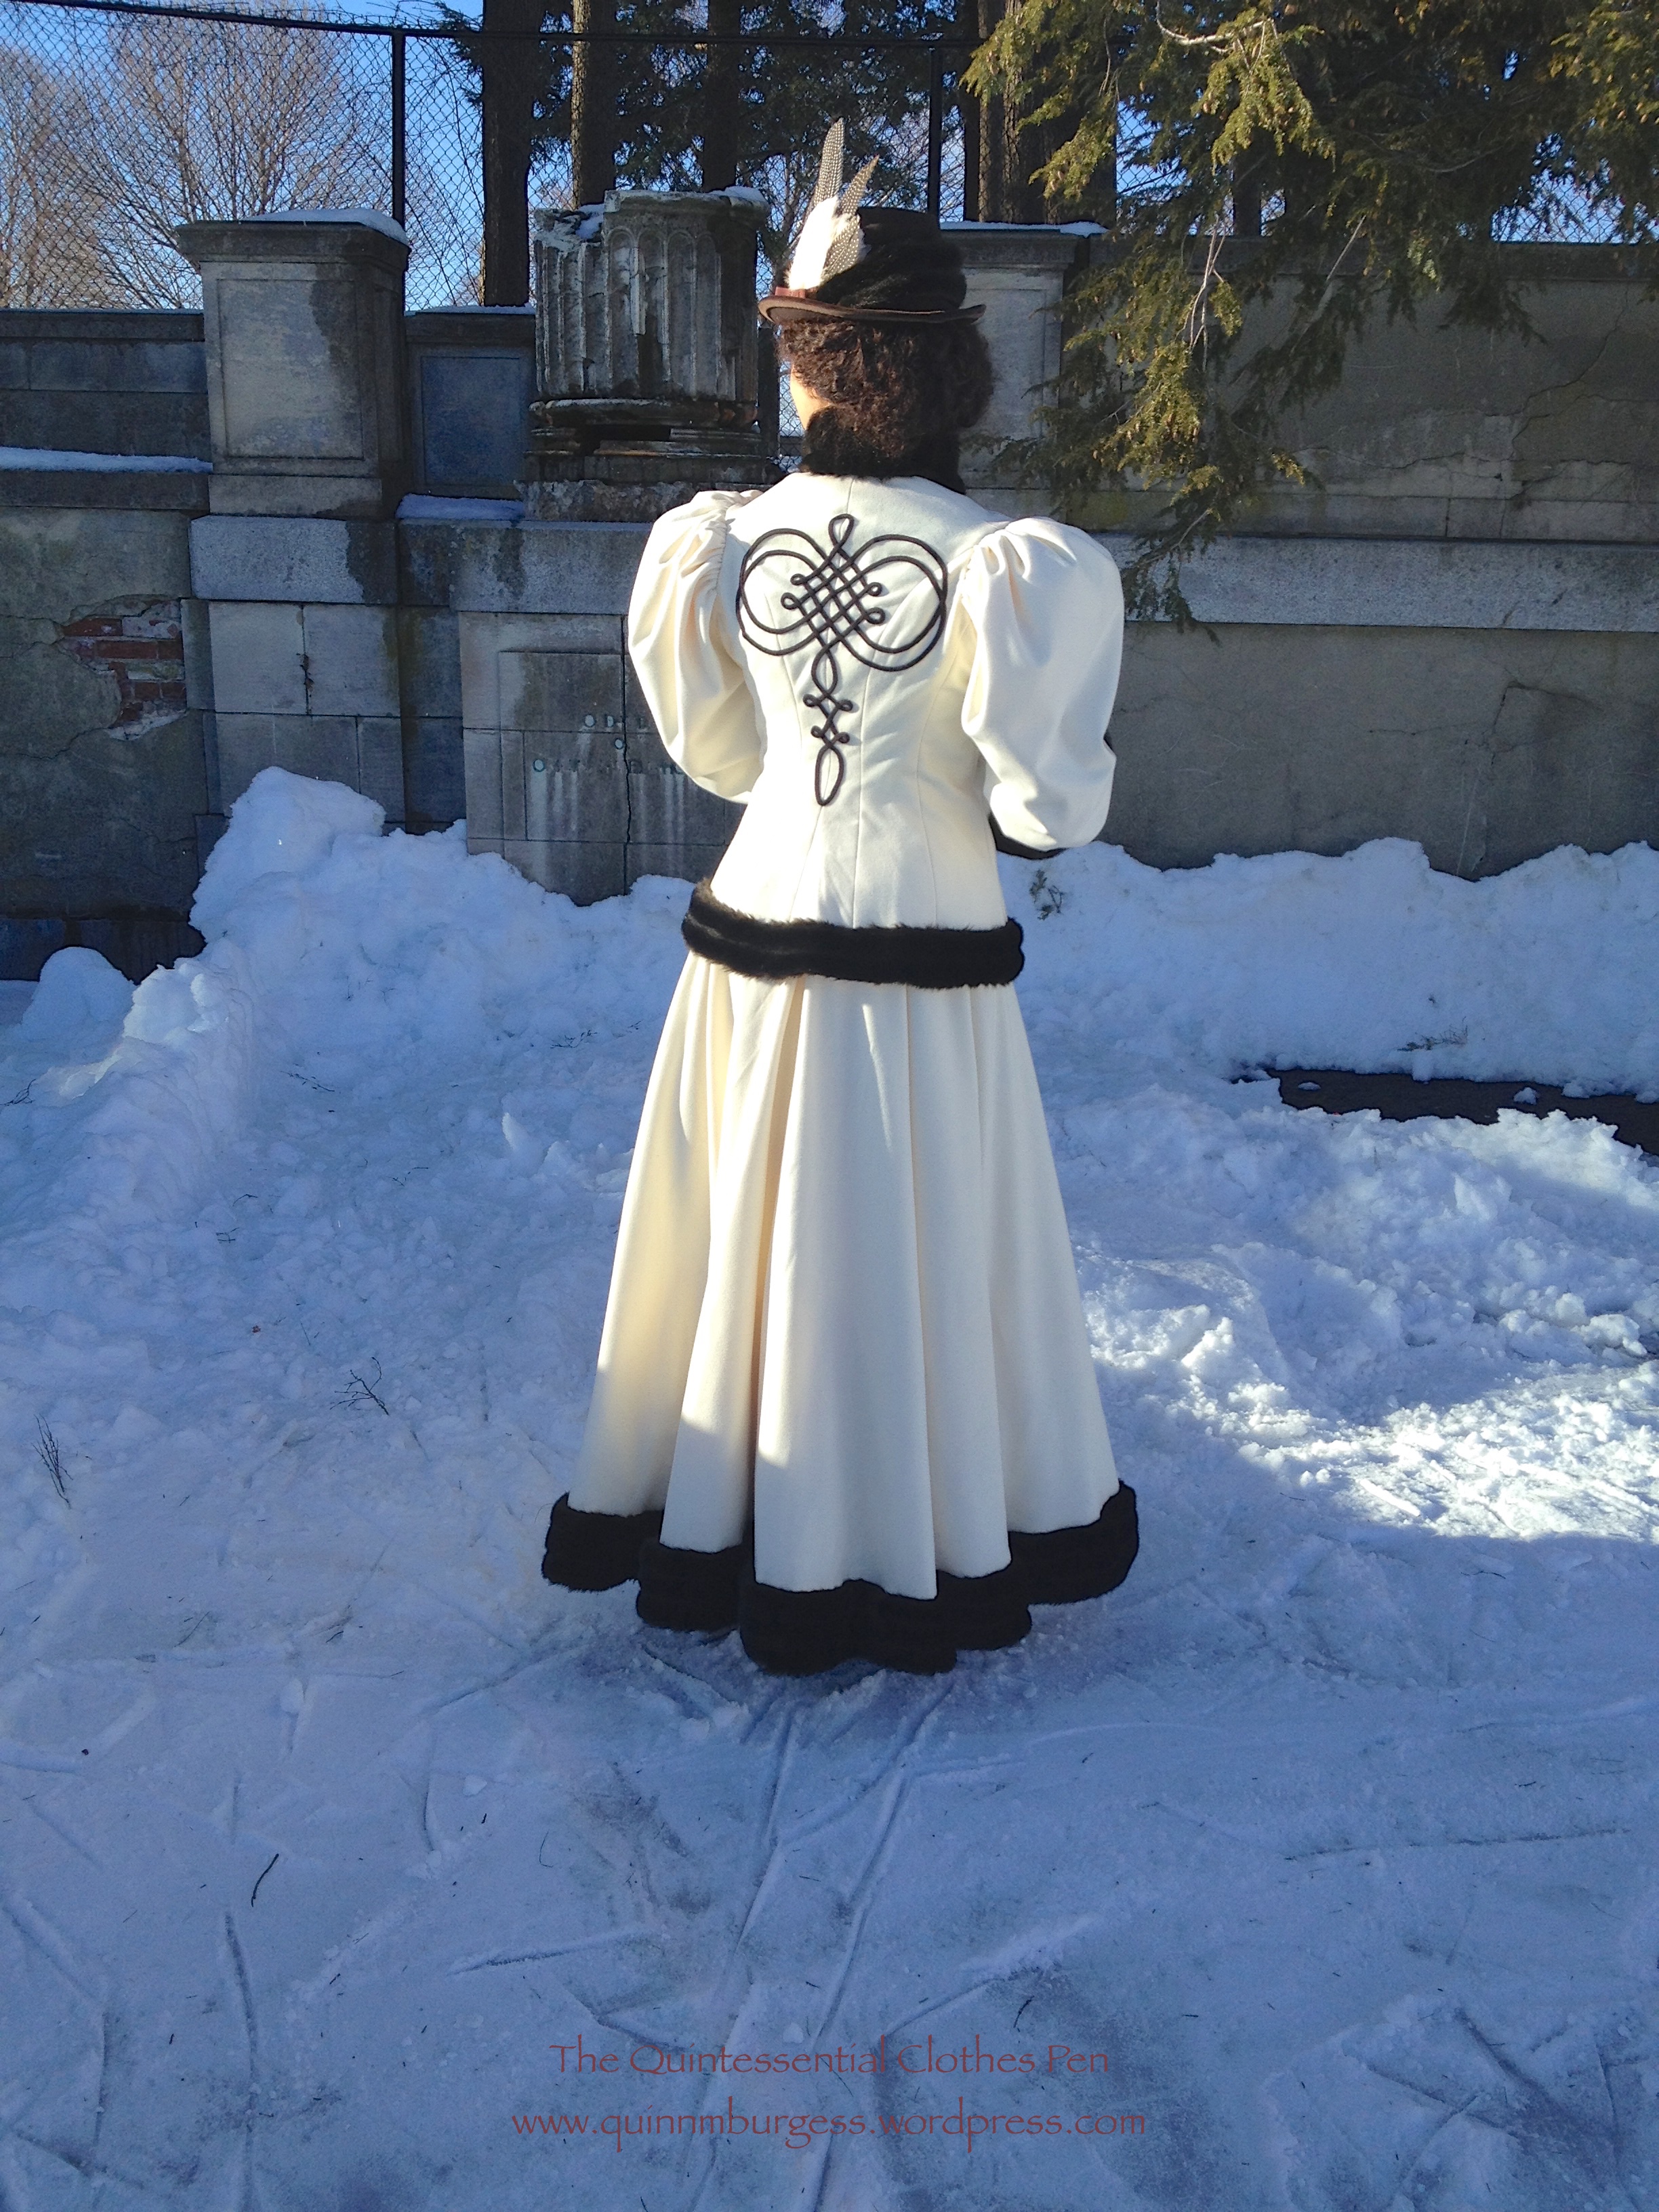
I was on the fence about whether this outfit would apply to the Historical Sew Fortnightly/Monthly Challenge #1: Foundations, but then I read Leimomi’s teaser post about her foundation entry in which she reminds us about different interpretations of foundations and the intent of this challenge to create loose guidelines open to interpretation.

I was convinced (or pushed off the fence, if you prefer to think of it in that amusing way). I’m claiming my all new 1895 skating outfit for the first challenge of the new year! It does rather stretch the idea of foundations. Is the skirt a foundation because it is literally worn below the jacket, thus being a foundation as you would think of one in a building? Or is the bodice a foundation, because my direct inspiration is a lonely jacket without a skirt and therefore it is the foundation of the outfit because I wouldn’t have made the skirt without having the jacket? Either way, there is an element of a foundation in there.

Just the facts:

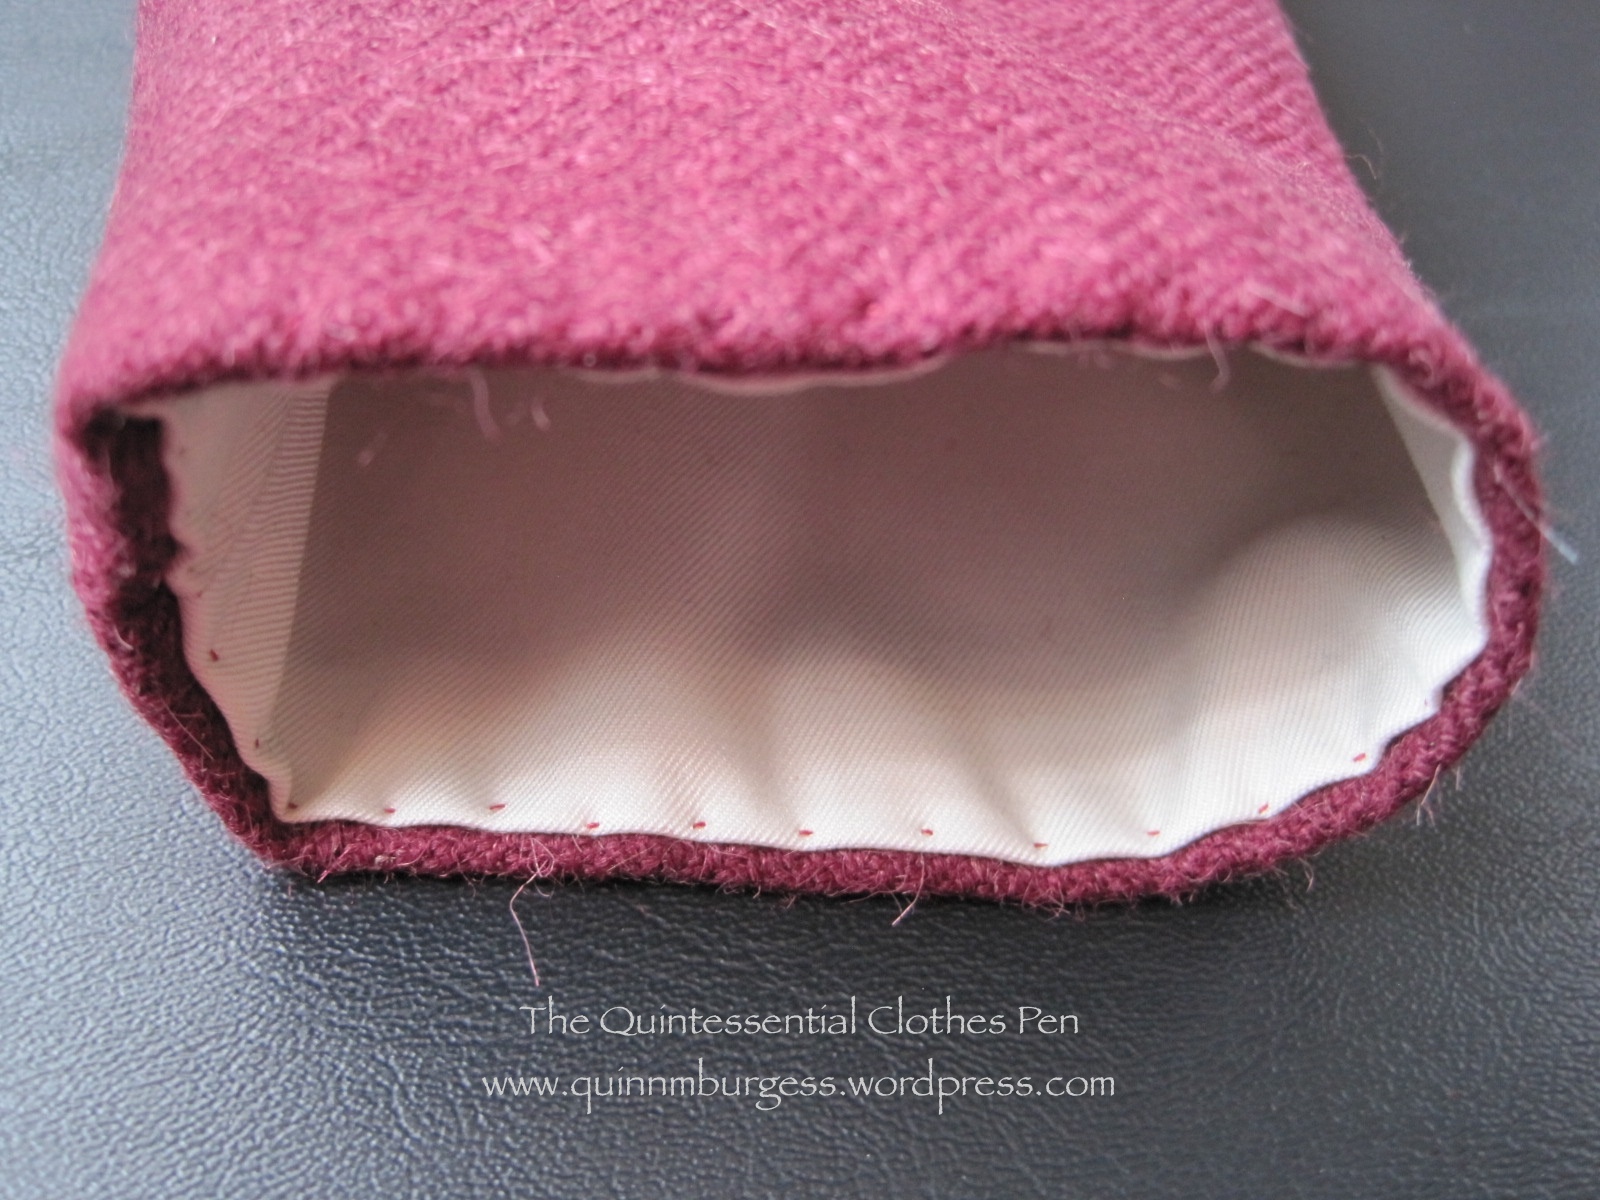
Fabric: 5 yds of ivory wool, about ⅓ to ½ yd of dark brown faux fur, probably about 3 yds of scrap muslin for flat lining the jacket, a bit of scrap canvas to stiffen the collar, and a bit of ivory flannel to line the inside of the collar.

Pattern: Made by me and based on my inspiration jacket as well as patterns published in Authentic Victorian Fashion Patterns (a Dover book).

Year: c. 1895.

Notions: 5 yds of brown braid, thread, a bit of high loft polyester batting to keep the sleeves puffed out, about 1 yd of ivory hug snug to finish the bottom of the jacket, hooks and bars for the skirt, and thread.

How historically accurate is it? Pretty darn good. Definitely recognizable by someone in the 1890s. The construction is accurate, aside from the use of hug snug instead of bias and faux fur instead of real fur. So, 95%.

Hours to complete: Um… As usual, I did not keep track. I definitely spent at least 15 hours the few days before the event sewing on my braid and fur trim… Plus full days of pattern making, fitting, cutting, and sewing. Maybe 30-40 hours? I care so much more about the finished project than the time it takes to get there! And I loved sewing this, so I didn’t mind that it took time!

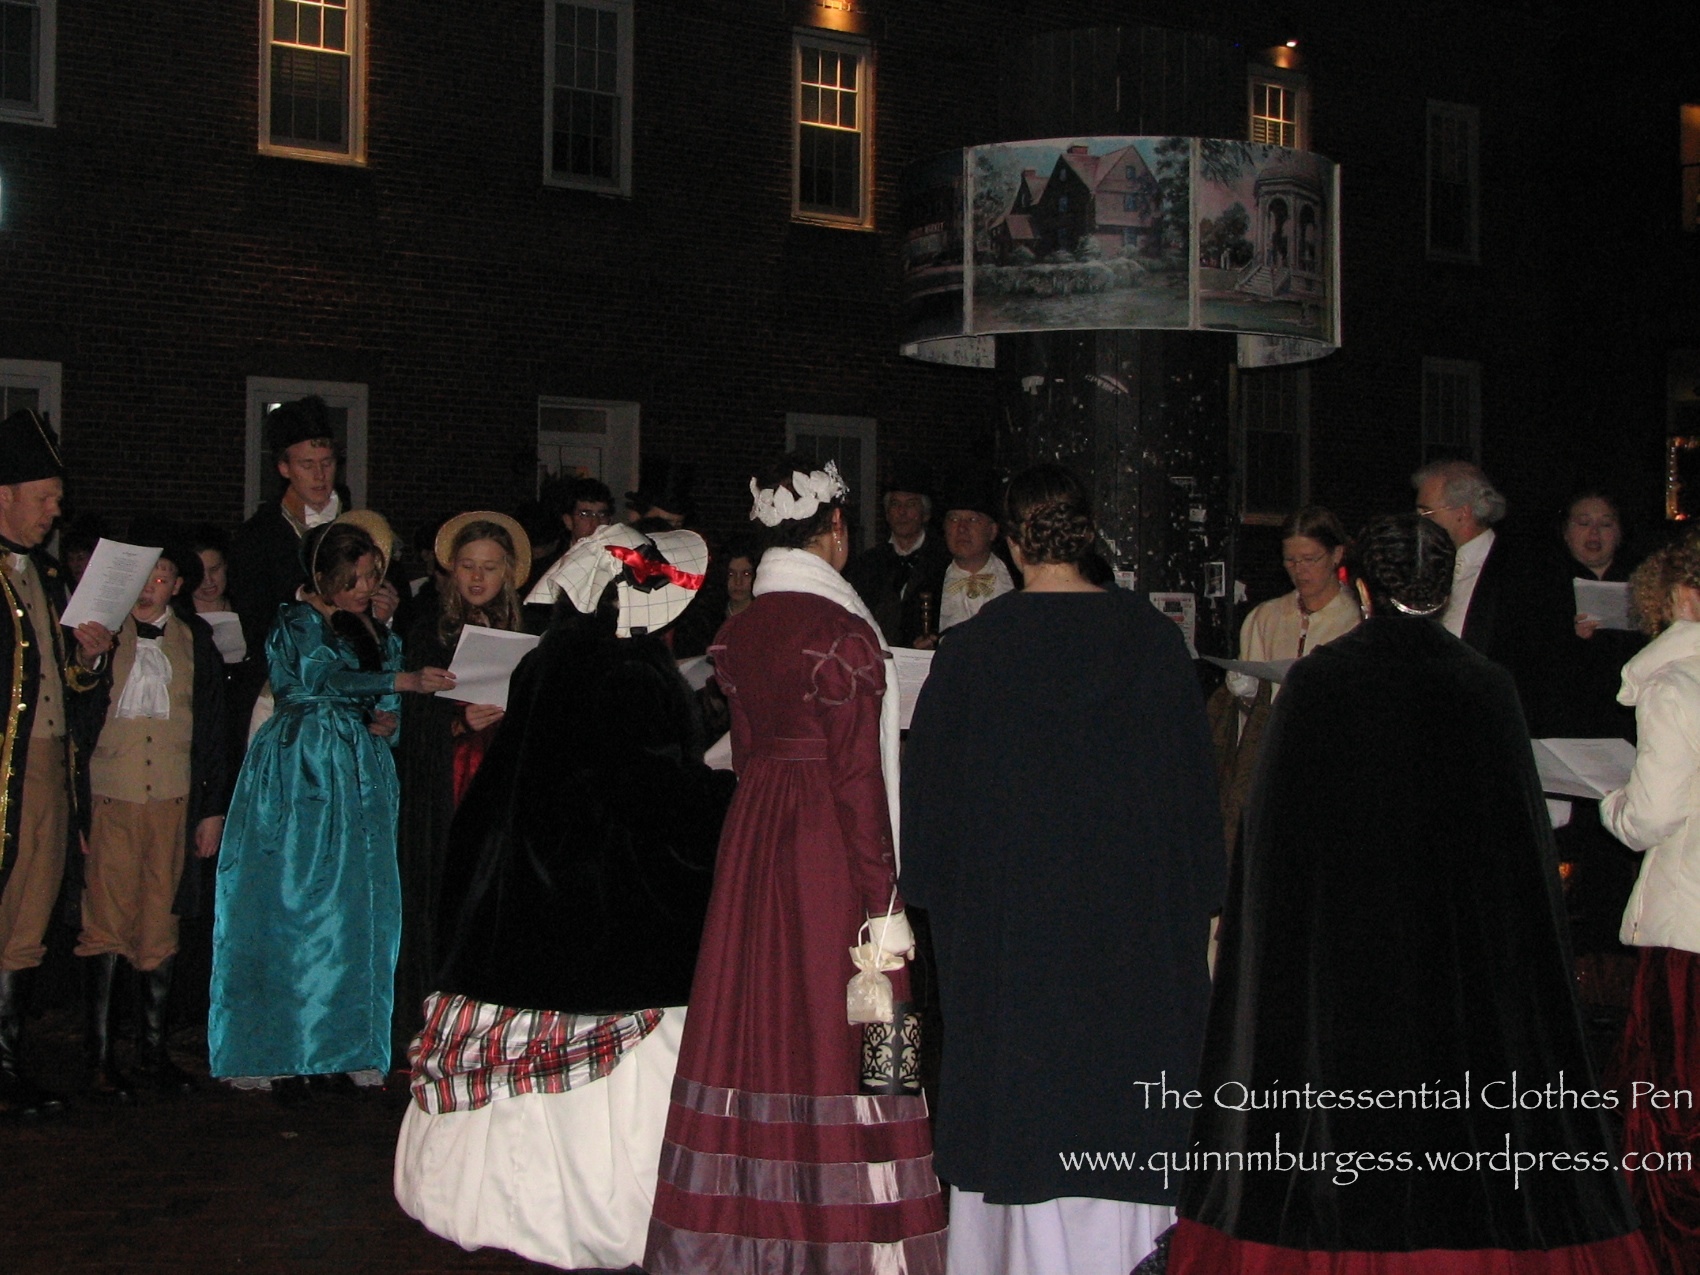
First worn: To a skating party that was part of the Commonwealth Vintage Dancers‘ 1890s weekend in January.

Total cost: $75 for the wool, probably about $8 for the fur yardage I used for this project, $4 for the braid, and the rest from the stash = $87

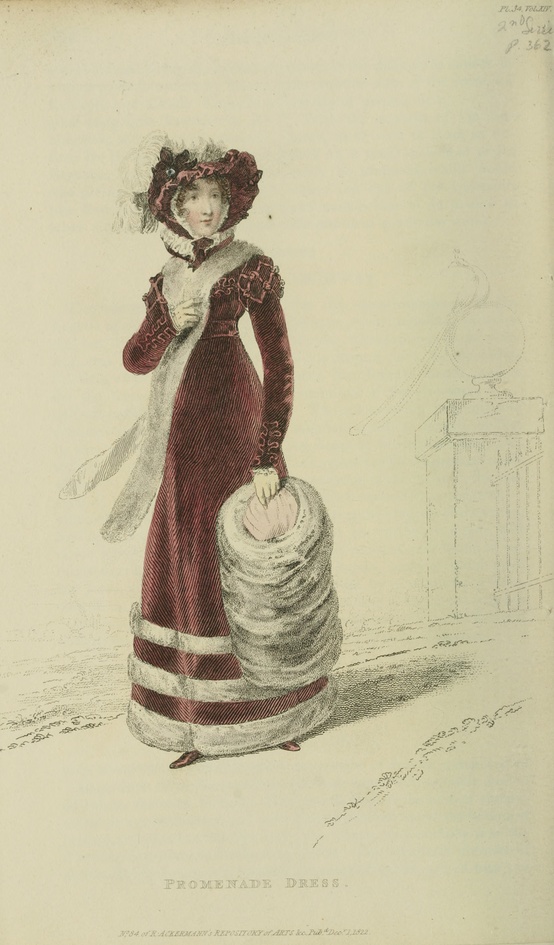
My accessories were a matching fur muff that I made a few years ago and wore once for caroling (with my as-yet-undocumented 1860s winter cape) but more often with my 1917 winter ensemble and a revamp of my 1883 wool hat. I didn’t have time to make a new hat because of all the last minute fur and trim sewing, so I pinned a fur scrap around the 1883 hat and added some feathers to stand up a bit more like 1890s hats and called it good. My main inspiration (and the reason I feel it was an acceptable looking style to have the squashy fedora hat look in the 1890s) was this image.

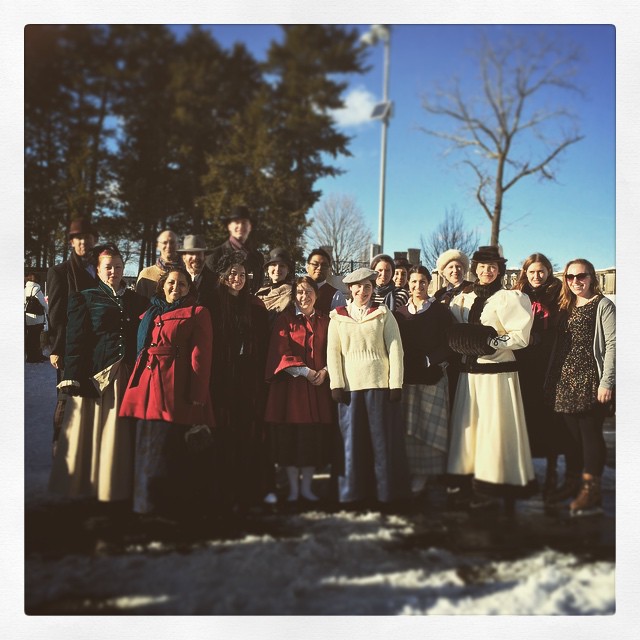
For good measure, here’s my Pinterest board for the entire project. And here are pictures of us skating (with ice skates: all our snow and cold weather does occasionally come in handy here in Boston)!

IMG_1911

IMG_1903

IMG_1942

IMG_1949

IMG_1947

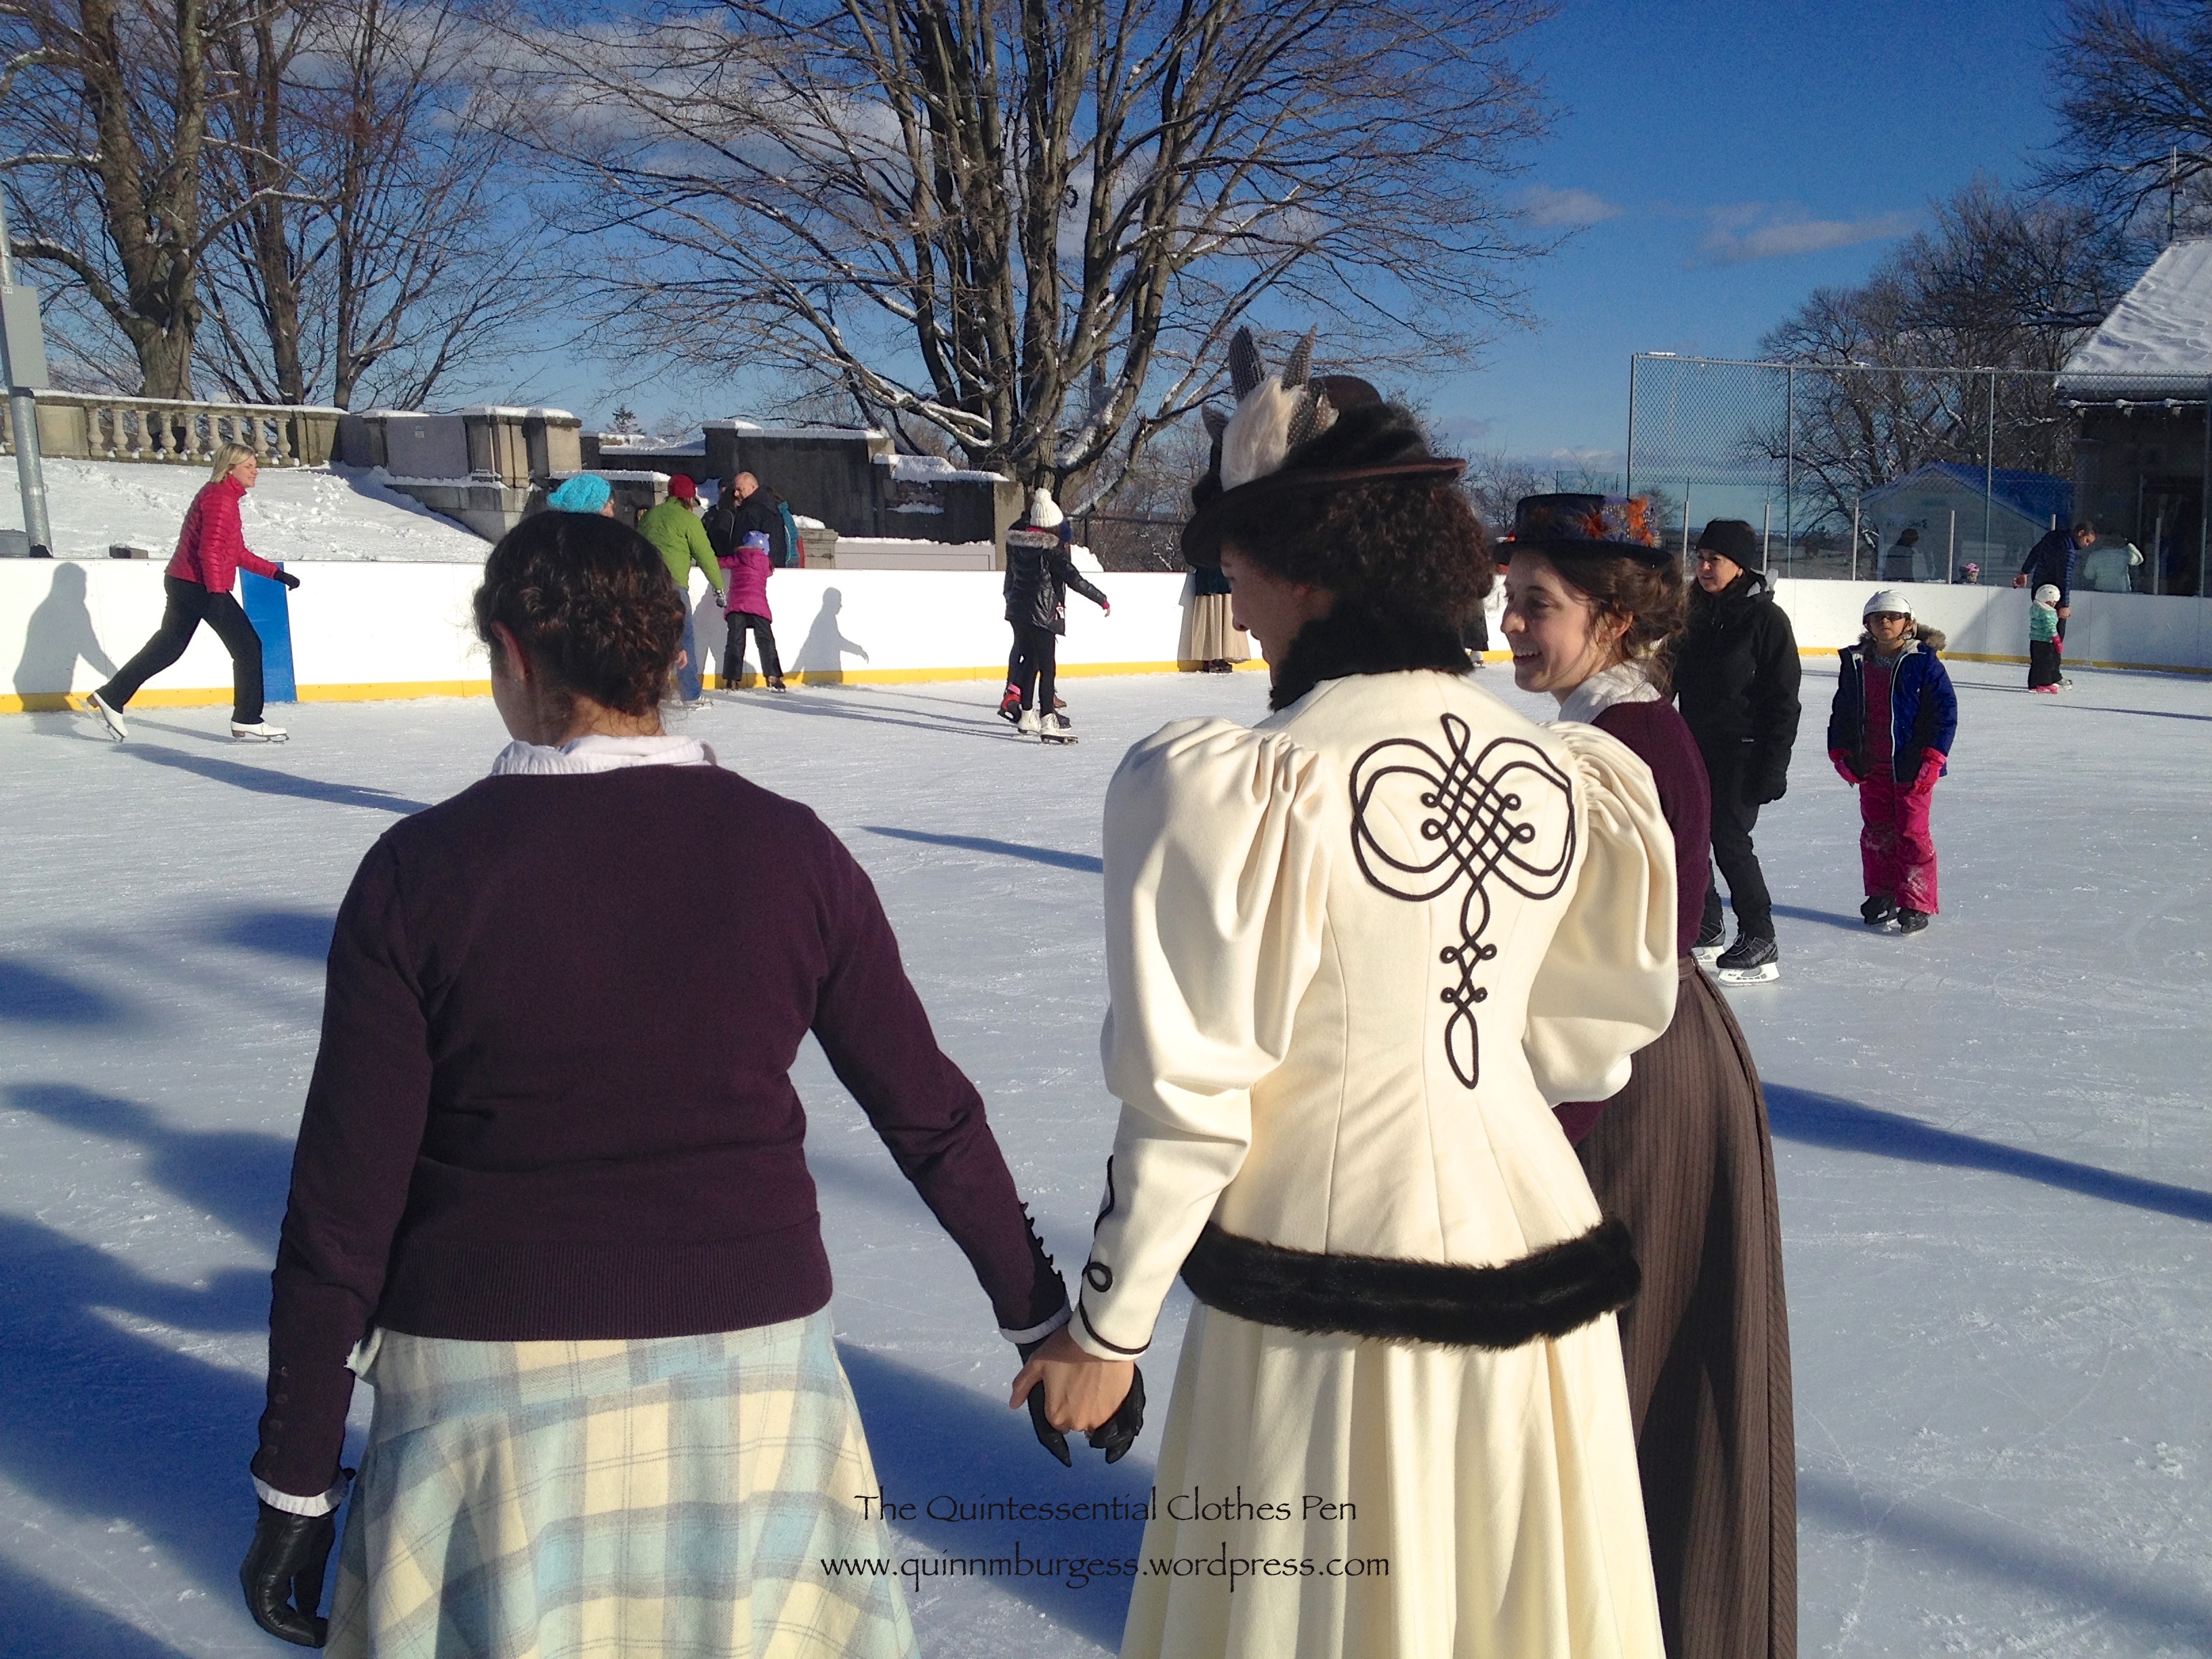
Yes, we just crashed a local outdoor ice rink on a Sunday afternoon. One of the attendees even wore vintage skates! Turns out they can be hard to skate in because they’re not very supportive… but they looked fantastic! We got lots of comments from people asking what we were doing, why we were dressed up, and that we looked good. I was asked by multiple groups of young girls why I was dressed up and one group in particular asked what the swirly thing was that I had, which I got to explain was a muff to keep my hands warm!

10906529_10203571494468255_4785896006596651774_n
Here’s our skating group. People came in a variety of late 19th century and early 20th century winter outfits as well as modern clothes.

With my skating ensemble I wore fleece lined tights (modern, but warm so I didn’t care), knee high bamboo socks (modern again), my 1903 silk petticoat (super useful for the 1890s, also), a modern tank top (instead of combinations, because I needed to go to work later in the afternoon and change out of my outfit in the back seat of my car without being indecent…), my 1895 corset, and a long sleeve modern waffle tee (mostly to shield my skin against the wool seam allowances and also for warmth). And I was perfectly warm wearing this out for skating on a day that was sunny and right around freezing. In fact, with the muff and wool hat I actually was too warm at times.

IMG_1920
Pleased, chuffed, and smiling all afternoon! So fun! Maybe we will get to go skating again this winter!

A Dress Suited For Eve

I know I promised pictures of the two balls at the Regency Intensive Dance Weekend in my last post, and I still promise that those are coming, but we’re going to take a quick detour before we get to ball pictures, to look at…

IMG_8442
“A Dress Suited For Eve” (Elusive blue ball gown, 1811)
When dressed for the evening the girls nowadays
Scarce an atom of dress on them leave;
Nor blame them; for what is an evening dress
But a dress that is suited for Eve?
-1818
Quoted from page 42 of C. Willett Cunnington’s Fashion and Women’s Attitudes in the Nineteenth Century.

I came across this quote as I was either planning or starting this dress and I so enjoyed the curmudgeonly generation-gap thoughts expressed in it that it has stuck in my head as a sort of motto. I should explain that this quote occurs as Cunnington is discussing the new Classical style of gowns between the years 1800-1820. These dresses are usually not quite as scandalous to our modern sensibilities as they would have been to people at the time, especially those of older generations. Interestingly, this quote is from 1818 although in my opinion the often sheer muslin dresses from 1800-1810 are generally more revealing than those from 1810-1815, and especially more revealing than those from 1815-1820. Regardless, the idea of these dresses being so revealing that one is dressed as Eve would have been (i.e., wearing nothing!) is amusing to me.

This new gown is actually two separate gowns: a dark blue sleeveless underdress and a lightweight sleeved overdress in a color I call “elusive blue.” Both dresses are a mixture of hand and machine sewing, though all the finishing was done by hand on both pieces.

The underdress is simple and without a waist seam: it is gathered to a yoke in the back and gathered by a drawstring in front. The waist is created by tying the overdress. The overdress, however, is more complicated. The skirt is a simple rectangle with rounded front corners (two widths of fabric wide: there’s a seam at center back), but the bodice has front pieces, shoulder straps, and an interestingly gathered back piece, as well as sleeves. In addition to having more pieces, the overdress is edged all around with lace and faux pearls, as well as having puffs edged with lace and trim sewn on to the sleeves.

IMG_8465
Back view (you can see the gathers on the back bodice piece).

I did indeed sew all the pearls on by hand, individually, and good thing, too! You see, if each pearl is sewn on individually then if the thread breaks you might loose a few pearls, but you won’t have your entire pearl job go spilling all over the dance floor (that could be catastrophic for the dancing and your hard work!). I did wear this to the Grand Ball on the Sunday evening of the Regency Dance Weekend, and by the end of the night I had lost a very small section of pearls along the back hem of my dress. Thanks to all my fastidious pearl sewing, that was all I lost and there were no comical/catastrophic scenes with pearls spilling on to the dance floor! If you look closely at the wavy lines you can see that they get a little wobbly at times, but I did do my best to be symmetrical despite the wobbles. I also did my best to estimate the wavelength of the pearls and replicate it as best I could while eyeballing as I went along. (In fact, I think my wavy lines of pearls are actually more regular than those on my inspiration dress.)

My dress is a direct interpretation of the ball gown at the Met from 1811 (pictured below). The most obvious difference is the colors I chose to use (partly because I found the fabulous elusive blue overdress fabric in the perfect light weight fabric for $1/yard!). I’m sure there are other small differences, too, but I did my best to follow the construction methods I gleaned from the zoom feature when making my dress. (The zoom feature on most of the Met’s pictures is so amazing! I love it.)

C.I.66.38.1ab_F
Ball gown, 1811, the Met.

As is usual with the first wearing of a new garment, there are things I am unsatisfied with and want to change. There are also things that didn’t quite get completed and need to be addressed.

First, the sleeves. My sleeves didn’t quite turn out like the ones in the inspiration photo, but they also didn’t get completed before I wore the dress (if you look closely, you’ll see that my sleeves are just raw edges on the bottom!). I ran out of time, but I also wasn’t sure that I would like how my sleeve puffs look and I didn’t want to spend time completing the sleeves if I was going to wind up disliking them in the end. Each puff is edged in the narrow bit I cut off of the wide edging lace and then also edged in a bit of trim that perfectly matches the elusive blue fabric (and that I purchased for about $2!). I don’t think my puffs look quite as elegant as the original, but they were a lot of work and I don’t have any more of that elusive blue trim to change things up. Also, if you look closely at the sleeves of the dress on the Met you’ll see that they are not displayed in the same way. I prefer the sleeve that is more puffed up (on the right), but I examined the pictures really closely and I think that it is just caught up on the mannequin and is intended to look like the other sleeve (on the left). So I have to decide, and that will help me determine how to finish the bottom of my sleeves.

Other things that bothered me were the length of my underdress (seems to have a similar length ratio to the inspiration, but I think I want my underdress to be about 2″ longer), the fact that I realized after sewing on all the lace that I had put in on with the wrong side facing out (oops! but I am absolutely not changing that!), and the fact that the blue underdress is a super bag without the overdress holding it in (I think part of the problem is my skirt shaping–I tried something new and it did not work–but the skirt kept wanting to poof out from between the fronts of the overdress, which I didn’t like). I’d like to address the underdress problems, but I’m not going to bother with that lace problem!

IMG_8446
The lighting in this photo captures the colors of the dress much better than in the other photos.

I tried a new thing with my hair for this event which I think was quite successful. The poof is normal, but in front of it and my pearl hair “tiara” (it’s really a necklace!) are two narrow braids, one coming from each side of my head. I managed to hide the ends under the braids and my natural highlights allowed the braids to stand out from my front hair, in the right light (as with the picture, above). The only odd thing was covering up the points where the braids started. I liked it and I think I’ll try it again sometime. I also was able to wear some new earrings: green gems with little fake diamonds set around the edge of the teardrop shape. Despite not matching exactly, I think they suited the dress.

Ok, now the next post in this series really will be about the balls themselves!

Variety Please: Regency Ribbon Sashes

In modern interpretations of Regency costume, there is a widespread use of what I am going to call the “ribbon sash.” By this I mean a length of ribbon, in a contrasting color to the dress and not used to trim any other part of the dress, tidily tied or sewn under the bust, and terminating with long hanging ends. I understand that this style provides an easy way to adorn a dress of any color or add color to a white dress, but I believe that the style is much too often used relative to the occurrences we see of them being worn in portraits, fashion plates, and built into extant gowns. I would like to encourage all of us to have variety in the ribbon sash styles we wear with Regency clothing.

When looking at portraits, fashion plates, and extant gowns, you do find the sort of ribbon sash I described in the beginning of this post, but you don’t find them in anywhere near the same proportion with which they are used today. You do see these types of sashes, but it is a small proportion of the styles worn and you see a variety of other sash styles, too. I would like to share a variety of ribbon sash styles with you and encourage you to pick one of these less used styles if you decide to wear a ribbon sash yourself or if you have the influence to encourage others in their own ribbon sash wearing. By expanding the styles of ribbon sashes worn, hopefully we can all more accurately represent clothing worn in the Regency period.

Generally speaking, there are 4 large categories of ribbon sash styles. I’ve included an example image of each style underneath the accompanying description and I’ve included links to other good examples (below the four sash style descriptions) so you can look at them for more ideas.

1: The Ribbon Sash (as described in the beginning of this post): a length of ribbon, in a contrasting color to the dress and not used to trim any other part of the dress, tidily sewn or tied under the bust, and terminating with long hanging ends approximately 24″-36″. It is very rare to see this style used in a fashion plate or painting with the termination of the sash in any location other than center back.

f718f40238cfc85cf02418565c440a52
Henri François Mulard, Portrait of a lady, circa 1810

2: The Short Sash: a length of ribbon, in a contrasting color to the dress and not used to trim any other part of the dress, tidily sewn or tied under the bust, and terminating with short hanging ends approximately 6″-18″. I have seen this style with the termination of the sash in center back, center front, and  occasionally off to one side of the front.

39b5c0d0d643bba771d16242bc7cd001
Costume Parisien, 1817

3: The Belt Sash: a length of ribbon, in a contrasting color to the dress and not used to trim any other part of the dress, tidily sewn or tied under the bust, and with very short hanging ends or without hanging ends at all. This style is sometimes plain or sometimes adorned with a buckle or bow. The buckle or bow with short ends is often at center front.

bf13efcf8156d526622fc6126c7b045b
Portrait de Laure de Berny ca. 1810 by Henri-Nicolas Van Gorp

4: The Trim Sash: a much more common variant of any of the first three sash styles. Any of the first three sash styles can fall into this category if the sash matches and coordinates, in a harmonious fashion, with trim elsewhere on the dress (neckline, sleeve openings, or hem).

6d79a16093d852e426ea43901059fa9c
Costume Parisien, 1812

All of these sash styles are seen with different styles of termination. I’ve most often seen a variety of bows as well as tidy arrangement of loops. Often, the belt style seems as though the belt sash is actually sewn to the dress, but for the sake of options, I can easily see a ribbon sash made with a closure such as hook and eyes so the sash can be easily added or removed from any outfit. It’s worth noting that there are a substantial amount of images showing ladies from the front who appear to be wearing a ribbon sash of some sort. The trouble is that we often can’t see what’s going on in the back, so we can’t know with certainty what style of ribbon sash is actually being represented, though we can make educated guesses.

Here are more examples of each of the sash styles shown above:

1: The Ribbon Sash

Portrait of a lady, ca. 1810: ribbon sash on a white dress (ties in back)

Costume Parisien, 1813: ribbon sash on a white dress (ties in back)

2: The Short Sash

Auguste-Amalie de Baviere, ca. 1815: short sash (ties in front)

Costume Parisien, 1817: short sash (ties in back)

3: The Belt Sash

Laure de Berny, ca. 1810 (bow in front)

A young woman wearing gloves in a park, 1813

Anna Maria Magnani, 1814 (bow in front)

Woman knitting in a blue dress, ca. 1819 (bow in front)

4: The Trim Sash

Dress, ca. 1810, The Met: belt sash

Dress, ca. 1810-1811, Gemeentemuseum Den Haag: belt sash

Costume Parisien, 1812: belt sash

Costume Parisien, 1812: belt sash

Dress, ca. 1810-1815, Rijksmuseum: belt sash

Family Portrait, 1813: short sash (ties in front)

Of course, these are only a starting point. My pinterest boards have hundreds of pins from the 1800s and 1810s that you are welcome to look at for other ideas. Keep the contrasting ribbon sashes in mind, but don’t forget that you can make sashes out of your dress fabric, too (see below). Sashes made from self fabric are quite common. Look around and see what you can find that inspires you. This Regency Portraits board has a lot of great images showing all sorts of sashes as well.

Here are some great examples of dresses with sashes made from self fabric (meaning that fabric used in the dress was also used to create a ribbon sash look):

Désirée Bernadine Eugénie Clary, ca. 1810: long sash

Costume Parisien, 1810 short sash (ties in front)

Costume Parisien, 1811: short sash (ties in front)

Costume Parisien, 1811: short sash (ties in front)

Costume Parisien, 1812: short sash (ties in front)

Costume Parisien, 1814: short sash (ties in back)

Costume Parisien, 1817: short sash (ties in back)

In looking at my pinterest board covering 1800-1809, I do find that there are some very cute sashes then, too, that are relevant for a potential sash look. In  this period it seems that most sashes match the trim used on the dress, though it is not an absolute rule. I’ll include a few examples of this sort below, so you can look if you’re curious.

Costume Parisien, 1799: short sash (ties in front)

Costume Parisien, 1800: short sash: (ties in front)

Costume Parisien, 1800: trim ribbon sash with long ends

Young Woman Drawing, 1801: short sash (ties in back)

La Belle Assemblee, 1807: trim ribbon sash with long ends

Costume Parisien, 1808: belt sash

Felicite de Durfort von Merry, 1808: belt sash

Charlotte Bonaparte, 1808: belt sash

For the record (and because I always forget!), the official “Regency” is referring to England during the years 1811-1820, following the Prince of Wales being named regent for George III in 1810. In France, the Napoleonic Empire spanned the years 1804-1814. So there is some overlap between Empire and Regency, but not a whole lot. (And just to add another date to the mix, the Federal period in America roughly spanned the years 1780-1830.) For the purposes of this post, I’m using the word Regency to specify the 1810s, but my points about variety in sash styles are relevant for the first decade of the 19th century as well.

As a final note, let me encourage you to use color in Regency dresses (color in trim as well as color in the fabric), especially in those dresses intended to represent the 1810s rather than 1800s. By the 1810s, not all dresses were in white tones, as they were much more predominantly in the first few years of the 19th century. Colors were used often, some of the colors even being rather vivid in tone (don’t get too carried away with very bright colors, though, because chemical dyes weren’t invented till the middle of the 19th century). Check out these great resources that describe and show colors used in the Regency:

Colours used in the Regency and Georgian eras

Regency Colors and Fabrics

Project Journal: 1822-1824 Ensemble Part VII: Trimming Complete (Fezziwig’s Ball 2013)

I am very excited to share that I am finally done sewing the trim on my 1822 Walking Dress and 1824 Ball Gown. I actually finished sewing the trim on both garments about two months ago. Yay me, for being ready for a ball a full month ahead of time!

The walking dress has a previous post from when I completed sewing the trim. The ball gown has previous posts about being worn partially trimmed last year and about sewing on the hem appliques. Here is the link to the category that shows all the posts related to this ensemble.

I wore both garments this year at Fezziwig’s Ball, hosted by the Commonwealth Vintage Dancers, just as I did last year. Last year, however, I didn’t have enough time to trim them like I wanted to and I didn’t really have time to look into proper hair styles either. So this year, in addition to adding trim, I also decided to try out a different hair style that would be much more early 1820s.

I looked at lots of fashion plates and noted what elements made the styles look 1820s. This is the look, from 1823 (also pictured a little farther down). The style required a new hair wreath, so that was the only last minute sewing for this year’s event. I did the same style as the fashion plated: crossed braids on top of my head and little curls around my hair line. When you have long hair and no bangs like me it’s quite a challenge to get curls around the hair line. I managed to make the little curls happen, but I still want to improve my methods. The hair wreath was essential for hiding my long hair and only showing the curly ends. It is made of wired millinery flowers sewn to a length of millinery wire. The front bits are small flower sprays and the back is velvet leaves.

IMG_3222
Caroling before the ball.
IMG_3213
This is a great view of the back of my walking dress and the back of my new hair wreath.
IMG_7406
Here we are: 1822 walking dress with trim, worn with a chemise, corset, corded petticoat, muff, tippet, gloves, and my new hair wreath. (If you want to see/read more details about these garments you can view the entire Project Journal for this ensemble.)
Ser3 v1 1823 Ackermann's fashion plate 29 - Evening Dress
1823 – Ackermann’s Repository Series 3 Vol 1 – May Issue (My inspiration for my hair wreath, hair style, and for the picture below.)
IMG_7416
Changed for the ball: 1824 ball gown with finished trim on the sleeves and front. Same undergarments with different accessories (long leather gloves with red stockings and burgundy shoes to be in the holiday spirit!).
IMG_3272
Lining up for a grand march during the ball. I loved the garlands hanging in the background.

I was amused throughout the night that people kept commenting on how much they liked the sleeve appliques on my green dress. I didn’t realize they were so exciting, but I do think they balance out the skirt nicely. By the end of the night my curls were looking a bit crazed… but it was fun, and I do enjoy wearing these garments and the style of the 1820s, in general. Oh, and I was able to wear my refreshing apron, too, though we were too busy refilling refreshments to take pictures. So yay for completion! It’s nice to get these things off the sewing list to make room for other fancily trimmed things!

HSF #26: Curtain Along Jacket, Finally!

The theme of the final HSF challenge of 2013 is “Celebrate”:

Make something that is celebration worthy, make something that celebrates the new skills you have learned this year, or just make something simple that celebrates the fact that you survived HSF ’13!

This challenge gave me the inspiration to finally finish my Mineral Felicite jacket!

Here’s the story… I bought the fabric over a year ago, but didn’t really start thinking about the project until this summer. I made a mock-up of my chosen 1760s pattern and thought I’d sorted out the fitting issues, but after I’d cut and sewn the real fabric I had many more unexpected problems! I was discouraged, but recieved some really wonderful opinions about what I should do to proceed from you lovely readers. I decided to go with a stomacher front jacket with self fabric pleated trim around the neckline/front opening and around the cuffs on the sleeves, like this jacket at the Met. Then, back in September, the HSF inspired me to make a stomacher to match my jacket for challenge #19. After that, my jacket languished, because I really wasn’t very excited about finishing the sewing for the other decisions I’d made and the alterations that needed to be done to make the jacket the way I wanted it. But I really wanted to finish the jacket in this calendar year. And that brings us to the present, with the jacket finally completed. Yay! I am SO ready to celebrate that this jacket is finally done!!!

IMG_7431
Front. The pleated trim easily hides the pins used to attach the stomacher!
IMG_7432
Back. It’s wrinkly and without a waist on the hanger. You’ll just have to believe that it looks better on a body!

The facts:

Fabric: Almost 2 yds Waverly Mineral Felicite printed cotton and 1yd (I think) peach linen

Pattern: Heavily altered, but I started with the 1760-1790 jacket pattern in Janet Arnold.

Year: Well… 1760s is what I was aiming for in the beginning.

Notions: Thread and cane boning.

How historically accurate?: 60%. This definitely falls in the historic costume category of my wardrobe. The Waverly fabric is in the spirit of the 18th century, but not accurate, though the linen is accurate as are the methods of construction. The trim is based on extant garments but not specifically reproduced. The jacket is 100% hand sewn.

Hours to complete: So many! With all the problems and alterations and re-sewing I completely lost count.

First worn: Has not been worn yet.

Total cost: $30 maybe? I don’t remember exactly what I paid for the fabrics.

Hopefully, I’ll get some more pieces of an 18th century ensemble done at some point and get pictures of the jacket on me. Don’t hold your breath, though, it could be awhile!

HSF #21: Trim For Evie In Time For A Ball

I’m taking a quick break from the 1950s adventure posts to insert my HSF #21 post into the mix. More 1950s coming soon!

It’s been on my sewing list for a few months to add a bit more trim to the sleeves of Evie, my most recent Civil War era dress, but I’ve been working on knitting my sweater and completing other projects, like my 1822 Walking Dress, so I hadn’t really been inspired to complete the trim. However, the Commonwealth Vintage Dancers were asked to run a ball as part of recent Civil War reenactments in Worcester, MA, and that gave me the perfect incentive to finish up trimming Evie! She also happens to be green, so this is my entry for the HSF Challenge #21: Green.

Oh yes, I forgot I had some other minor changes to make to Evie since I last wore her in March as well. Boring things, like changing out the boning at center back, and enlarging the armsceye a bit under the arm, and adding hooks and bars to connect the bodice to the skirt. I got all those things done, too, though they don’t get their own photographs. I really like the added trim. It gives the bodice a little bit more interest and helps balance out the immense skirt.

IMG_4987 - Version 2
Here is Evie, with her new sleeve trim.
IMG_4988
Another view. The sleeve trim is a smaller scale version of the trim on the skirt.
IMG_4988 - Version 2
A cropped version of the picture above. I can’t decide which way I like it better, so I’m including both.
IMG_0138
And here is what the bodice of Evie looked like before I added the sleeve trim.

Most of the trim on this dress is based on two images I discussed in this previous post: a fashion plate from 1864 and a costume made by Tirelli Costumi. The sleeve trim is based off of yet a third inspiration source: the painting, below, of Princess Helena in the Royal Collection. It’s perfect that it’s from 1864, just like my inspiration fashion plate. It’s even better that it echoes the bertha trim I already had and the zig zag on my skirt.

b5e346822ebb9589dd64aca144479f35
This is a copy by William Corden (1819-1900) of the portrait of Princess Helena by Albert Graefle (RCIN 403988). The original was painted for Princess Helena as a birthday present for Queen Victoria on 24 May 1864. Princess Helena (1846-1923), nicknamed Lenchen, was the fifth child and third daughter of Queen Victoria and Prince Albert. She was lively, outspoken and something of a tomboy. In 1866, two years after this portrait was painted, she married Prince Christian of Schleswig Holstein and in 1916 they celebrated their Golden Wedding anniversary; she was the only child of Queen Victoria to do so. Queen Victoria recorded in her Journal that ‘Lenchen’s picture by Graefle, is extremely good & pretty’.

Now, the facts:

Fabric: small bits of leftover gold silk shantung and green silk taffeta from the construction of the dress.

Pattern: none.

Year: 1864.

Notions: only thread.

How historically accurate?: Well, shantung is not accurate, but silk is (and this doesn’t look very shantung-y). I give this trim a 98% on accuracy.

Hours to complete: 4? All hand sewn.

First worn: With the new trim, on October 11, to a Civil War ball.

Total cost: $0, because it’s leftovers!

Now for the bonus part of this post where I include pictures from the Civil War ball.

IMG_4993
The entrance to the building had these fabulous doors.
IMG_4991
Each section looked like this.
IMG_4941
Dancing a waltz.
IMG_4934
Swinging skirts are fun!
IMG_4943
People looked very nice.
IMG_4946
And it was nice to see unfamiliar faces and meet new people.
IMG_4947
There was a constant swishing sound of skirts brushing against one another.
IMG_4961
The Commonwealth Vintage Dancers interspersed short performances throughout the evening.
IMG_4964
This is the Triplet Galop Quadrille.
IMG_4955
The ball room had large, dark, seriously-faced portraits around the perimeter. I’m not sure they approved of all the dancing!
IMG_4954
There were also Civil War era flags that the reenactors had brought to help decorate the room. And here’s a full length shot of Evie with her new sleeve trim.

I had a lovely time. This ball was nicely different than our usual evening balls with all the new faces. My senses were most struck by the abundance of rather more sturdy and thick wools worn by the military gentlemen than I am used to feeling at most balls, when there are more gentlemen in smoother wool tailcoats. The occasional feel of the thicker wool on my left arm was a tangible, and rather transporting, connection to the past. It seems quite likely that at a ball held during the Civil War a lady would have felt more thick wool on uniformed gentlemen than she might have felt at a ball pre or post war when there would have been more civilian tailcoats at a ball.

Have I inspired you to want to learn 1860s dancing and attend a ball? I’ll end with this small encouragement for your attendance at the Commonwealth Vintage Dancers’ next Civil War events. The Commonwealth Vintage Dancers have a Civil War Dance Weekend coming up in November, 2013. It’s super reasonably priced and includes lots of dance classes, two balls, and a German. There’s no experience necessary. If you’re at all interested and in the New England area you should check it out, because we’re doing lots of awesome Civil War dancing in 2014 as well (they are listed at the bottom of the Civil War Dance Weekend link, above), and why not get started learning or brushing up sooner rather than later? I’d love to see you there!

HSF #20: Finally Finished 1822 Walking Dress

…It’s only been a year! Or pretty close to a year. I posted an overview of my early 1820s project last November. The project included a petticoat, 1824 ball gown, 1822 walking dress, muff, tippet, bonnet, and chemisette. Some of these things are still in the UFO pile or on the to do list, but I’m super pleased that this post is about the completion of the 1822 walking dress!

The image below is my inspiration for the now complete walking dress. I wore it last December to go caroling outside before Fezziwig’s Ball, but at that point my time had run out and though the construction was complete there was no trim. Below the image of my inspiration is an image of the walking dress as it looked last December with no trim. And below that is an image of the now completed walking dress with trim! It certainly fits me better than the hanger, but you’ll have to wait a few months to see it on me.

19562579602401776_TvaRkZoN_c
Promenade Dress. Ackerman’s Repository. December 1822.
IMG_4083
December 2012. Unfinished early 1820s ensemble.
IMG_4889
Yay! All the trim is on!

Before I share some close ups of the trim and construction, let me share the facts:

Fabric: 4-5 yds of dark pink wool, 4-5 yds of ivory super soft and thick cotton twill, 1/2 yd-ish of lavender polyester velvet, 1/2 yd-ish of lavender silk shantung,  and a bit of canvas for the collar.

Pattern: Adapted from my 1822 green ball gown pattern, I think. It’s pretty much exactly the same except that it has a higher back, collar, and sleeves. The ball gown pattern is based off of a pattern in Janet Arnold.

Year: 1822.

Notions: Pink and lavender thread, polyester batting in the hem, and hooks for the waist.

How historically accurate?: Very, having used modern materials and a few very nice looking modern fabrics . The pattern is from Janet Arnold, so you know it is good on accuracy and the trim scale and pattern is taken from a fashion plate from 1822. As a historic costume I give it 98%.

Hours to complete: Oh goodness… I’m sure the main construction took at least 40 hours and the trim took probably 50ish hours to cut, press, and hand sew. I didn’t keep track at all on this project.

First worn: To Fezziwig’s Ball in December 2012, though with trim it will debut at Fezziwig’s Ball in December 2013!

Total cost: $40 perhaps?

Ok, now for the trim and construction shots.

IMG_4892
Top of the sleeve. First I had to sew the bias into a tube so the raw edges would be finished and the bias could “float” without having to be sewn down all along the edges. Then I tacked the bias tubes in a zig zag then crossed and tied other zig zags to get the finished pattern.
IMG_4891
The front. The pattern looks very much like an oak leaf to me. The bias is stitched in a tube with the raw edges showing on the back, then the edges are stitched down all around to create the pattern.
IMG_4890
The sleeve. The bias is stitched on the same way as it is on the front. The motifs are sewn on the front of the arm rather than the outside.

I actually had forgotten that I’d taken these construction shots. In fact, I had totally forgotten the method I had used to construct my sleeves until I saw the picture again! These pictures where the wool looks more pink than maroon show the color best. It’s really much more vibrant, and much less brownish, than some of the pictures make it look.

IMG_3946
The canvas pad stitched into the collar before sewing the pieces together.
IMG_3949
The top of the sleeve before the gathered sleeve top was sewn on. I didn’t want to waste wool where it wouldn’t be seen, so it stops part way up the lining, then the gathered cap is sewn on and hides the raw edge of the wool.
IMG_3951
The lining is stab stitched to the wool at the cuff.

And just in case you want to read more about my entire project from the early 1820s, here’s a link to that category of entries on my blog. As I continue to finish up other bits and pieces I’ll keep adding them to that category, and it’s neat because the category filters only those posts so there’s a nice continuity.

Trouble In Curtain Land

A few weeks ago, I was super excited and motivated that I had time to work on my Curtain Along jacket. I made the changes I had deemed necessary from my last fitting and was feeling good about getting it done and how much I liked it… but then I tried it on again to determine center front and decide about trim… and there were new problems, and I was so discouraged!

The problems sum up in the following way:

Problem #1- The sleeves that go with the jacket in Janet Arnold just do not work for me without serious alteration. The crown isn’t large enough for me to be able to move or be comfortable, and the sleeve is at least 4 inches too short. With the sleeves set in the jacket was pulled all over the place and was so unbearably uncomfortable! And the annoying thing is that in the mockup the sleeve worked!

After ripping the sleeves out, and being thankful that, at least, they were what was causing the bodice to do all sorts of wonky things, I bounced back and came up with a solution. I’ll use the sleeve pattern from my 1780s Robe A La Anglaise and recut the sleeves. I’ve got extra Mineral Felicite fabric, so that’s no problem. On the other hand, I have only tiny matching linen scraps left. Of course, it would be totally period correct to use a different linen to line the sleeves than what I used to line the bodice. But piecing is also period correct, and I decided to use all my tiny matching linen scraps to piece together pieces big enough to cut out the new sleeve pattern.

IMG_4850
Extreme piecing. I’m amused by it at this point. This sleeve is only partially completed (there is more piecing to be done!) but you can see the original pattern shape.

I haven’t finished piecing, or cut out the new Mineral Felicite sleeve, or sewn the new sleeves in… but I think that my solution will work, so we’ll call that problem solved. Whew!

Problem #2- After my initial fittings, I had to add an extension to my center front pieces to get the jacket to close comfortably and without wrinkles. It barely closed in my mockup and I thought it would be enough, but in the real fabric it just wasn’t. So I pieced on extensions. Piecing is totally period correct, but this piecing is so… obvious and symmetrical.

IMG_4841
Center front piecing. The yellow headed pins are my center front line. I haven’t done anything about center front since I put those pins in!

This problem is still unresolved. Plus, I can’t decide how I want the jacket to close, anyway. Pins? Hooks and loops? If you have any thoughts about the piecing problem or the closure indecision, please do share!

Problem #3- Trim! I was going to trim the jacket with box pleated blue silk ribbon around the neck, front, hem, and cuffs. I thought I had enough ribbon (6yds), but in the end I think I have not quite enough to trim all of those edges. AND, the blue didn’t seem to pick up the blue in the print as much as I originally thought it did, and I’m worried that even if I do less pleated trim (say, not the sleeves, or something) the trim will look super costume-y and not 18th century. I also have a gold silk ribbon (5 yds). Not enough to trim the whole jacket, but what if I scrap the idea of trimming the edges and instead do some sort of center front bow trim/something of some sort to hide the piecing using the gold? I think the gold looks nice… but what sort of trim would I do that wouldn’t look made-up and costume-y???

IMG_4847
Blue silk ribbon. There’s blue in the flowers, but perhaps not enough blue to make the blue ribbon make sense???
IMG_4848
Gold silk ribbon. Too match-y?
IMG_4844
Blue and gold together, for comparison.

I  have no idea what I’m going to do about the ribbon issue. Bows at center front seem to be used on stomacher front jackets, and stomacher front jackets seem to be exclusively pet en l’air styles. This jacket is not a pet en l’air, though it could be altered to have a stomacher front (thus eliminating the piecing issue). Sigh. I just think myself around in circles. So again, I appeal to you! If you have any thoughts, please share!

Help! I’d really appreciate it!

HSF #16: Eugenie Inspired 1857 Straw Hat

I recently participated in an outdoor mid-century dance performance for which the weather was an un-obliging 90-something degrees + humidity. Yup, not kidding. It was HOT! And we were dancing on asphalt. Luckily, we were out on an island in the Boston harbor and had a breeze. But it was HOT!

Anyway, more on that performance soon, because it involved a new cotton print day dress made from one of my recently acquired historic cotton prints! In addition to the dress, I also restyled a straw hat to go with the outfit and keep some of the sun off of my head. The hat has been used with various other clothes (1780s and Regency come to mind), but I had only ever added a simple ribbon to it rather than really styling it. This was the perfect opportunity to really make something of the hat!

I wanted to keep it simple and in the 1850s/60s, so I started by adding inspirational images to my pinterest board for this project. I visited the board many times before making a decision that I loved the shape of Eugenie’s straw hat in this painting. The hat has that nice downward curve in the front that sort of frames the face and accentuates the fashionable heart shape. The gauzy/tulle trim was a little whimsical for my purposes, so I opted for a more subdued and practical trim style on my hat.

Empress_Eugénie,_Hillwood_Museum,_1857
Franz Xaver Winterhalter (1805–1873) Eugénie of Montijo, Empress of France Date 1857

I started by wetting my hat in the bathtub then tying it with string so it would dry with the curve that I wanted to achieve in the brim. I also wanted the back to curve under a bit, so I let the hat curve on both sides.

IMG_4612
Tying the hat to create curves.

Once the hat had dried all that was left was to trim it! I chose to use green silk left over from Evie, my 1864 ball gown, and some silk millinery flowers. The silk is narrow hemmed on both sides and the ends are fringed, showing gold threads (the fabric is green/gold shot taffeta). The long ends hang down the back while the hat is worn, a style like the one below which you can see in the images on my pinterest board. I also added a bow on the front like you see in the images. Turns out that the bow is not quite centered… whoops!

56737fd6fd819eb71c2360fd4be5679f
LAPL, Magasin des Demoiselles, August 1858

And here is the result of my labors, and my fulfillment of the HSF Challenge #16: Separates. “Make a non-matching garment which can be paired with other items in your historical wardrobe to extend your outfit choices.”

IMG_4729
You can’t see the curve since the hat is sitting flat on the table… but you can see the trim!

Just the facts:

Fabric: A 4″ width of green silk 60″ wide plus a few scraps.

Pattern: None.

Year: 1850s generally, 1857 specifically.

Notions: Straw hat, silk flowers, thread.

How historically accurate?: I give it 98% (and that’s pretty high for me!). Straw, silk, more silk… The sewing machine was even invented by 1858, so the machine sewn hat isn’t totally out of the realm of possibility. The -2% is for the polyester thread.

Hours to complete: 2, not including time for the straw to dry.

First worn: July 20 for a vintage dance performance on George’s Island in the Boston harbor.

Total cost: I bought the hat a few years ago for probably about $25, the silk was leftover from another project, and the flowers cost some small number of cents since I got them as part of a large box for only $5! Let’s just say $26 total.

IMG_4617
Back view of the hat on my head. See how the front dips? This is also a sneak peak of my new gown, Georgina, to whom you will be formally introduced soon.
IMG_4623
Front view. See the dip?

At first I thought I had made the curve too pronounced, but when I look at the pictures again, I think I was pretty darn spot on! Woo! Completed new separates accessory for my historic wardrobe: check. Oh, and did I mention I’m in early on this project? The deadline is August 12!

Regency Dance Weekend Part II: Archery And Outdoor Lounging

Not very long ago, I shared the first section of Regency Dance Weekend photos: Settling In–about dance classes, an 1807 house, and an informal dance. Now it’s time for Part II: relating to archery (yay!) and outdoor lounging. These outdoor events took place on Sunday afternoon at Pioneer Village in Salem, MA. The village had been opened specifically for our use, so we had our run of the place!

Archery was the major activity and took up most of the time allotted before preparing for the Grand Ball and Reception that evening. Given that it was a Regency period event, there were plans made (and executed) to use images of Napoleon as targets, which was super silly and fun. I think there were perhaps 30-40 people who took part in this daytime event.

IMG_0510
Our instructor teaching us basics and safety.
IMG_0613
I think most people were pretty successful at hitting the target at least sometimes.
IMG_0601
There he is! Napoleon is lurking on the left.
IMG_0588
Archery in a bonnet is an extra challenge, but we made it work.
IMG_0567
Recognize that dress and bonnet? And perhaps the spencer? This is your first glimpse of my new clothes!
IMG_0680
We got him, and the tubes he was hiding behind!
IMG_0579
There were replacement Napoleons for when the first few had been well hit.

It was pretty cold out, actually, especially when we weren’t distracted by archery! Nevertheless, we prevailed for hours and were still willing to stay outside and lounge for more pictures even after archery was complete.

IMG_0714
New clothes amongst the trees.
IMG_0728
Striking a pose on the footbridge.
IMG_0751
Climbing a fence. Perhaps while out on a stroll? I feel like this is something the more athletic Jane Austen characters do.
IMG_0829
New long sleeved day dress and a new bonnet. You know how it is when someone is wearing something new. It always requires pictures!
IMG_0624
I was very pleased with how my new dress and bonnet look and feel, and I’m so pleased that they coordinate so well with the spencer. Yay!
IMG_0840
Spencer time. It’s so neat that we’ve built up our wardrobes and are well equipped with dresses and spencers! Bonnets are on most sewing lists, too, which is so much fun!

Next up is a post specifically dedicated to my new tree gown!