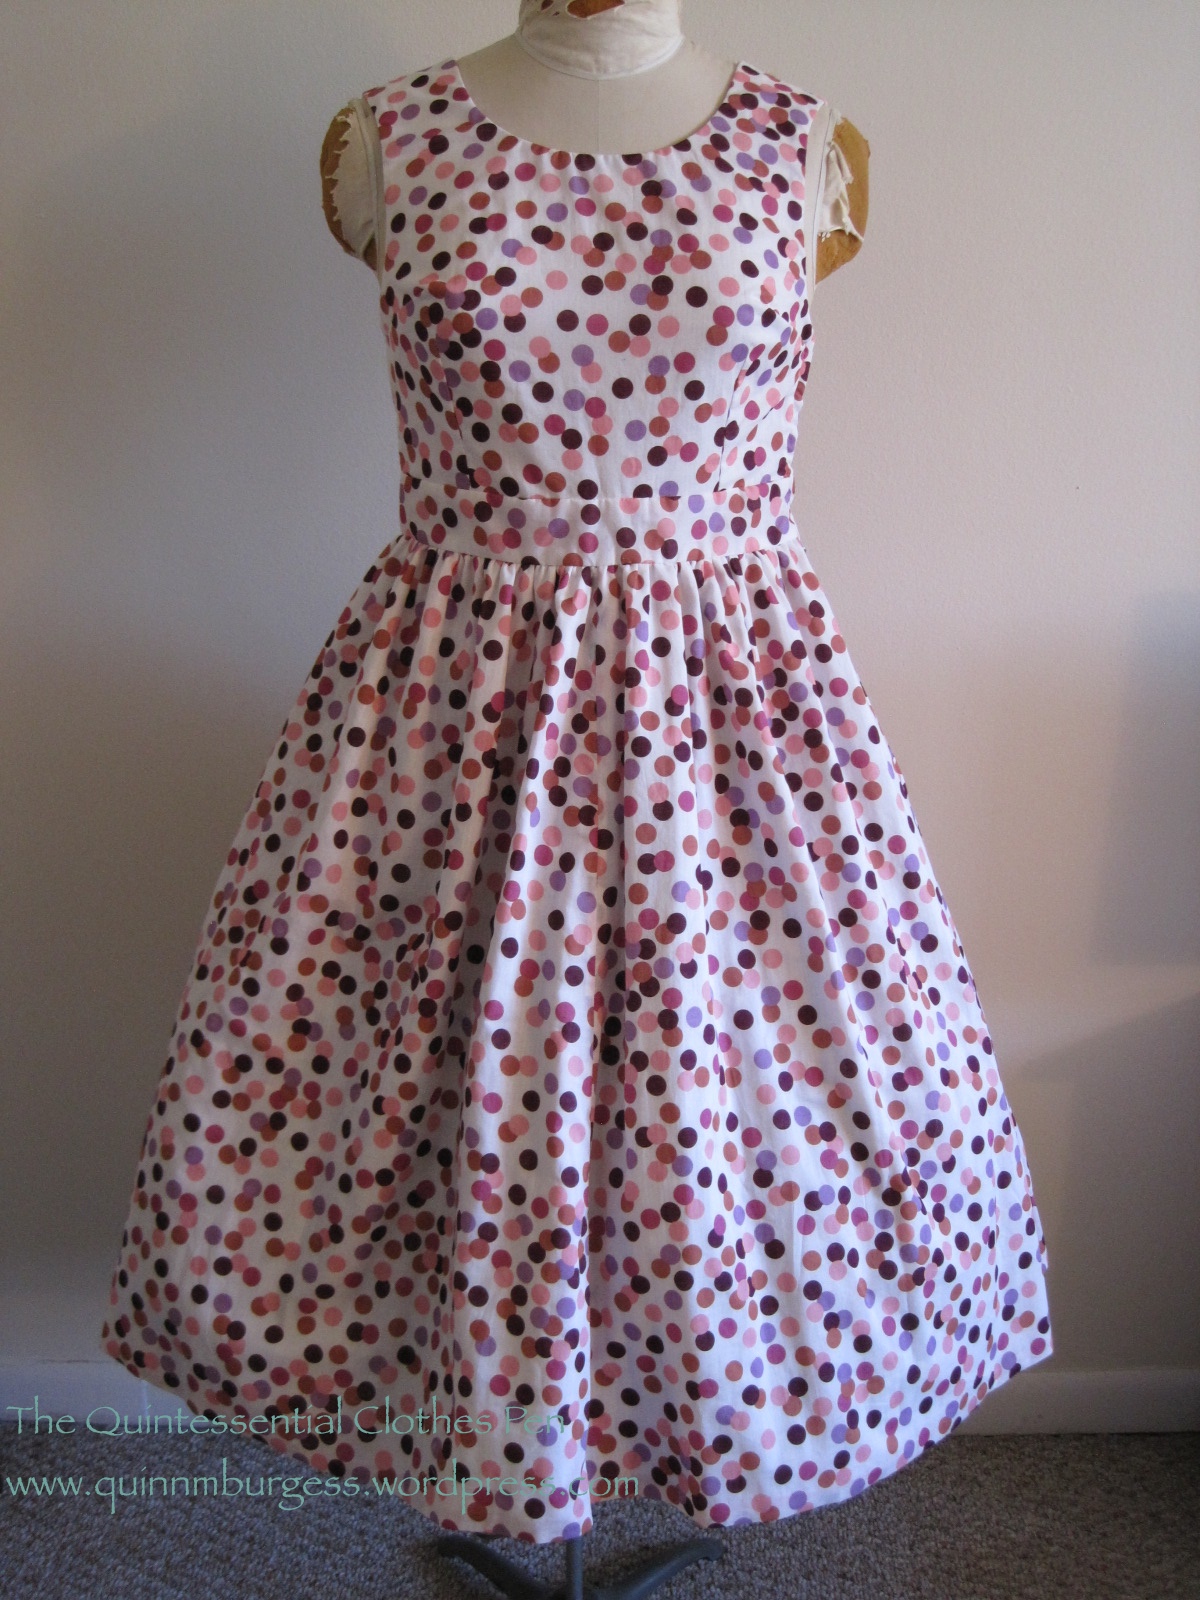
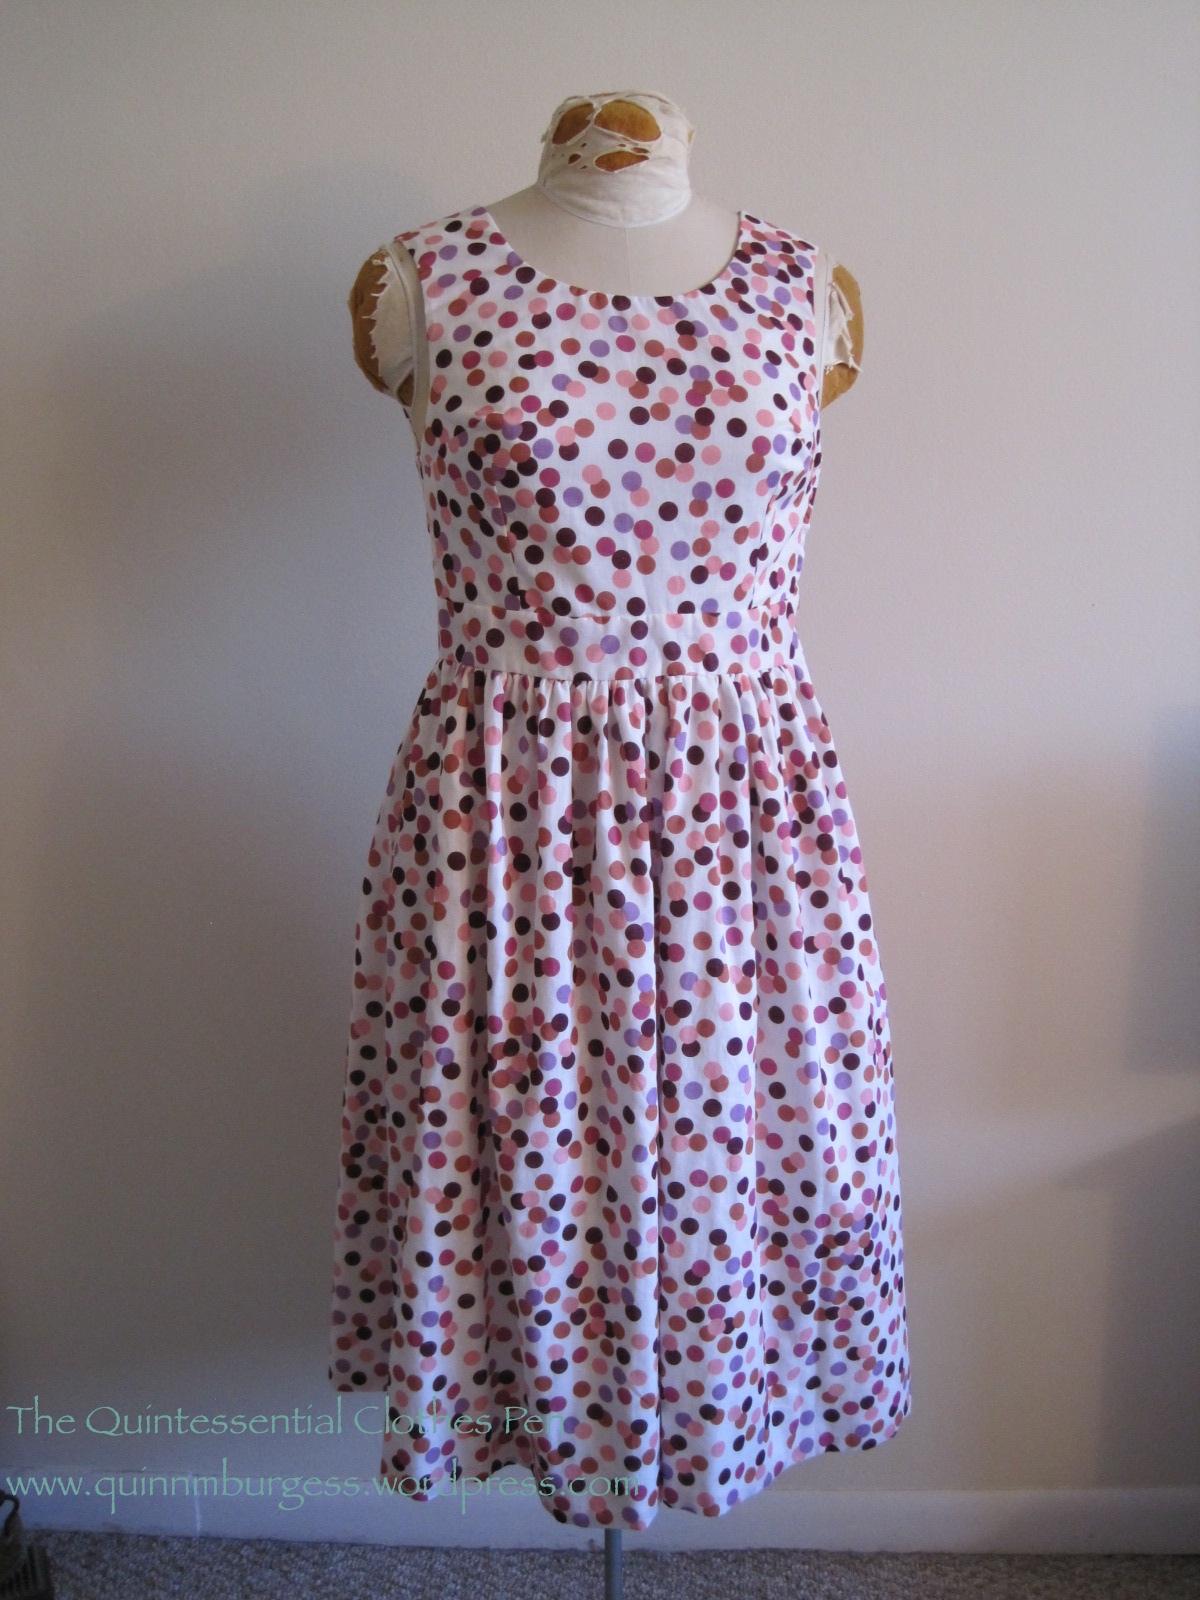
It’s been months since I bought the fabric for this dress (I actually had to look back to see when I purchased the fabric: it was February). I bought it rather on a whim, with the goal of expanding the number of patterned dresses in my historic wardrobe. Well, success! My 1953 dot dress is complete!
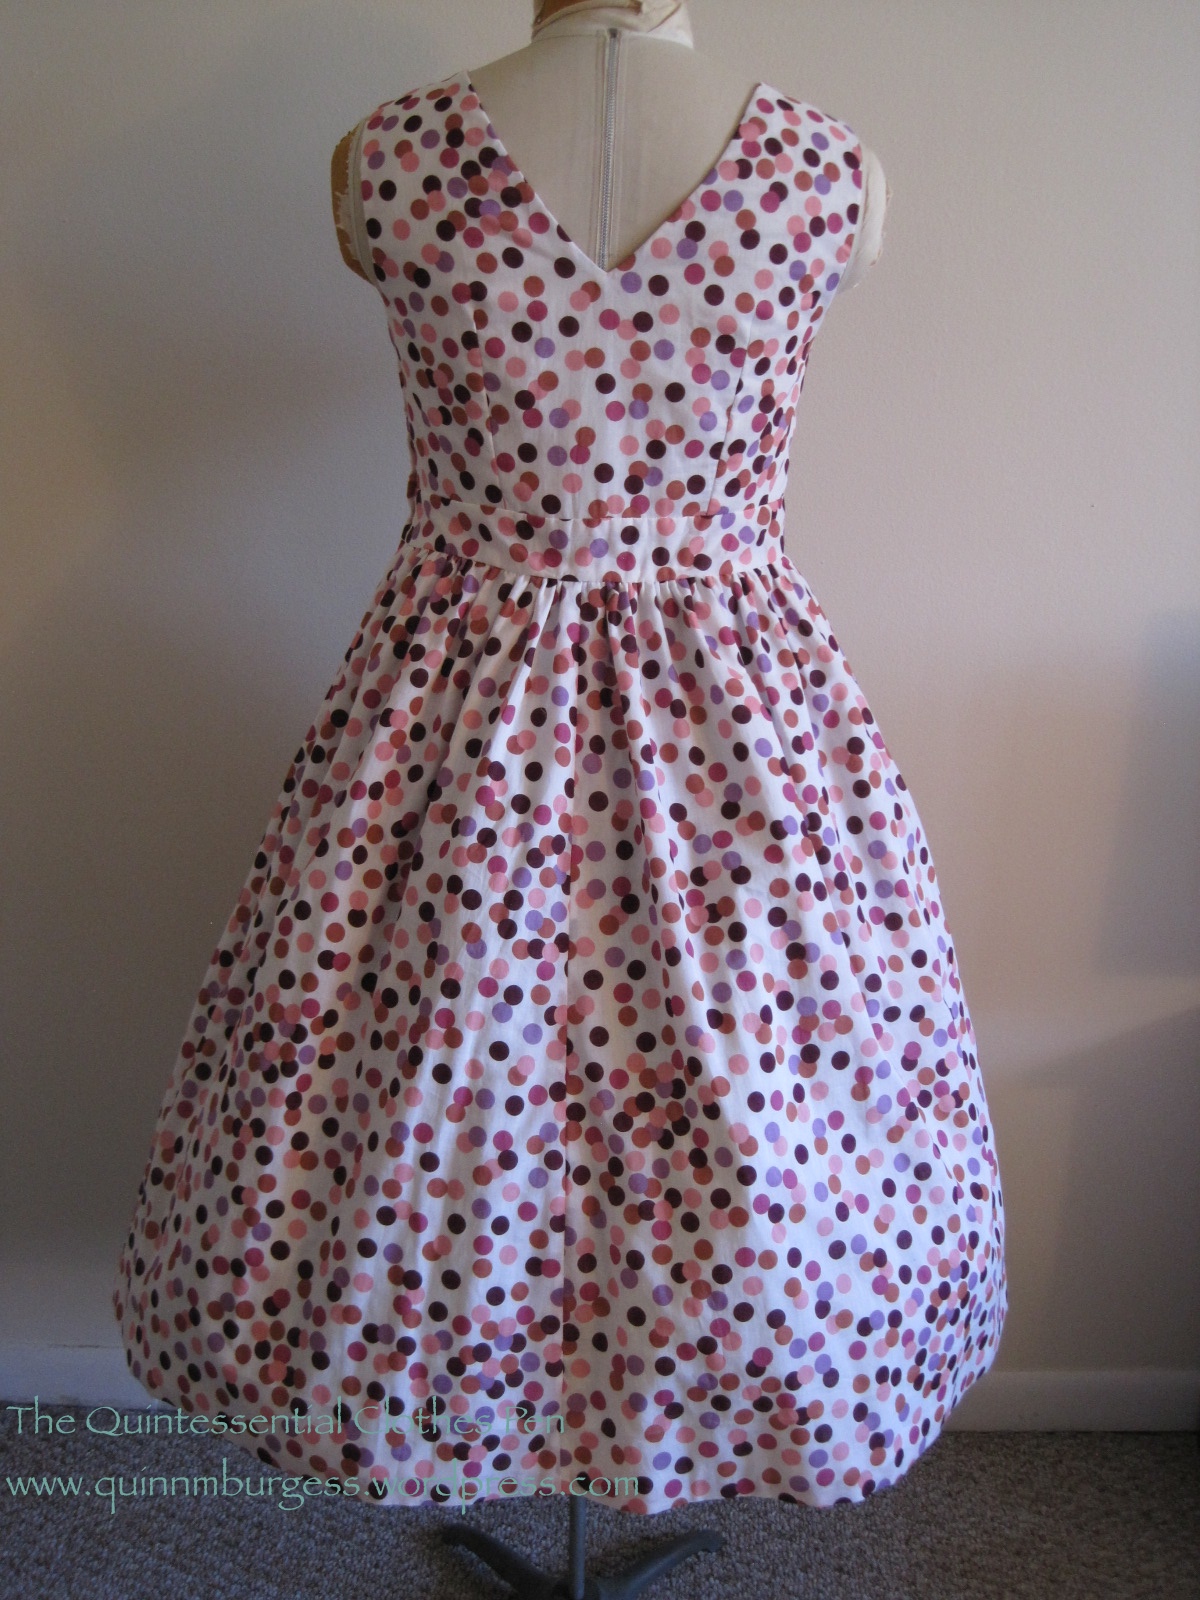
Yay!And the back.
I think it looks more flattering on me than it does on Squishy, but the opportunity I’m hoping to use to wear it and take pictures has been postponed due to the busy lives of my friends. We’ve got a grand plan involving roller skating, a 50s diner, and ice cream. All of those things just scream for pictures!
But for now, the facts (a la the HSF, though unfortunately the cutoff for the HSF is 1937, so this doesn’t qualify!):
Fabric: The dress is constructed from about 3 yds of lightweight cotton lawn printed with dots and lined with some of my white striped $1 a yard cotton fabric. It’s a perfect pairing, because it creates opacity but keeps the lightweight feel of the lawn.
Pattern: The skirt pattern is from a Vogue pattern I bought at Vintage In Vogue last year. The bodice pattern is a simple darted bodice pattern I draped for myself with the neckline adjusted to be a scoop in front and a v in back.
Year: 1953.
Notions: 10-12 yds of pink Hug Snug; white, off white, and pink thread; and an off white plastic zipper (It was all I had that wasn’t dark since I don’t use zippers much for historic sewing…).
How historically accurate?: I give it 95%. Cotton is entirely reasonable for the 1950s. I’m not sure when Hug Snug was first marketed, but the design on the spools certainly looks vintage (and rayon had been in use for at least 20 years by the 1950s). If they didn’t have Hug Snug, they probably had something similar. The pattern was printed in the 1950s and a basic darted bodice is seen on many 1950s dresses and patterns. The sewing machine was in widespread use by the 1950s. The only thing is that my plastic zipper is probably a bit modern (in the 1950s zippers were still metal, I believe).
Hours to complete: 30: lots of interior finishing by machine and hand .
First worn: By Squishy for pictures.
Total cost: My entire 50 yd roll of Hug Snug was only 50 cents, the fabric was about $15, and the zipper was probably about $2… Total: about $17.
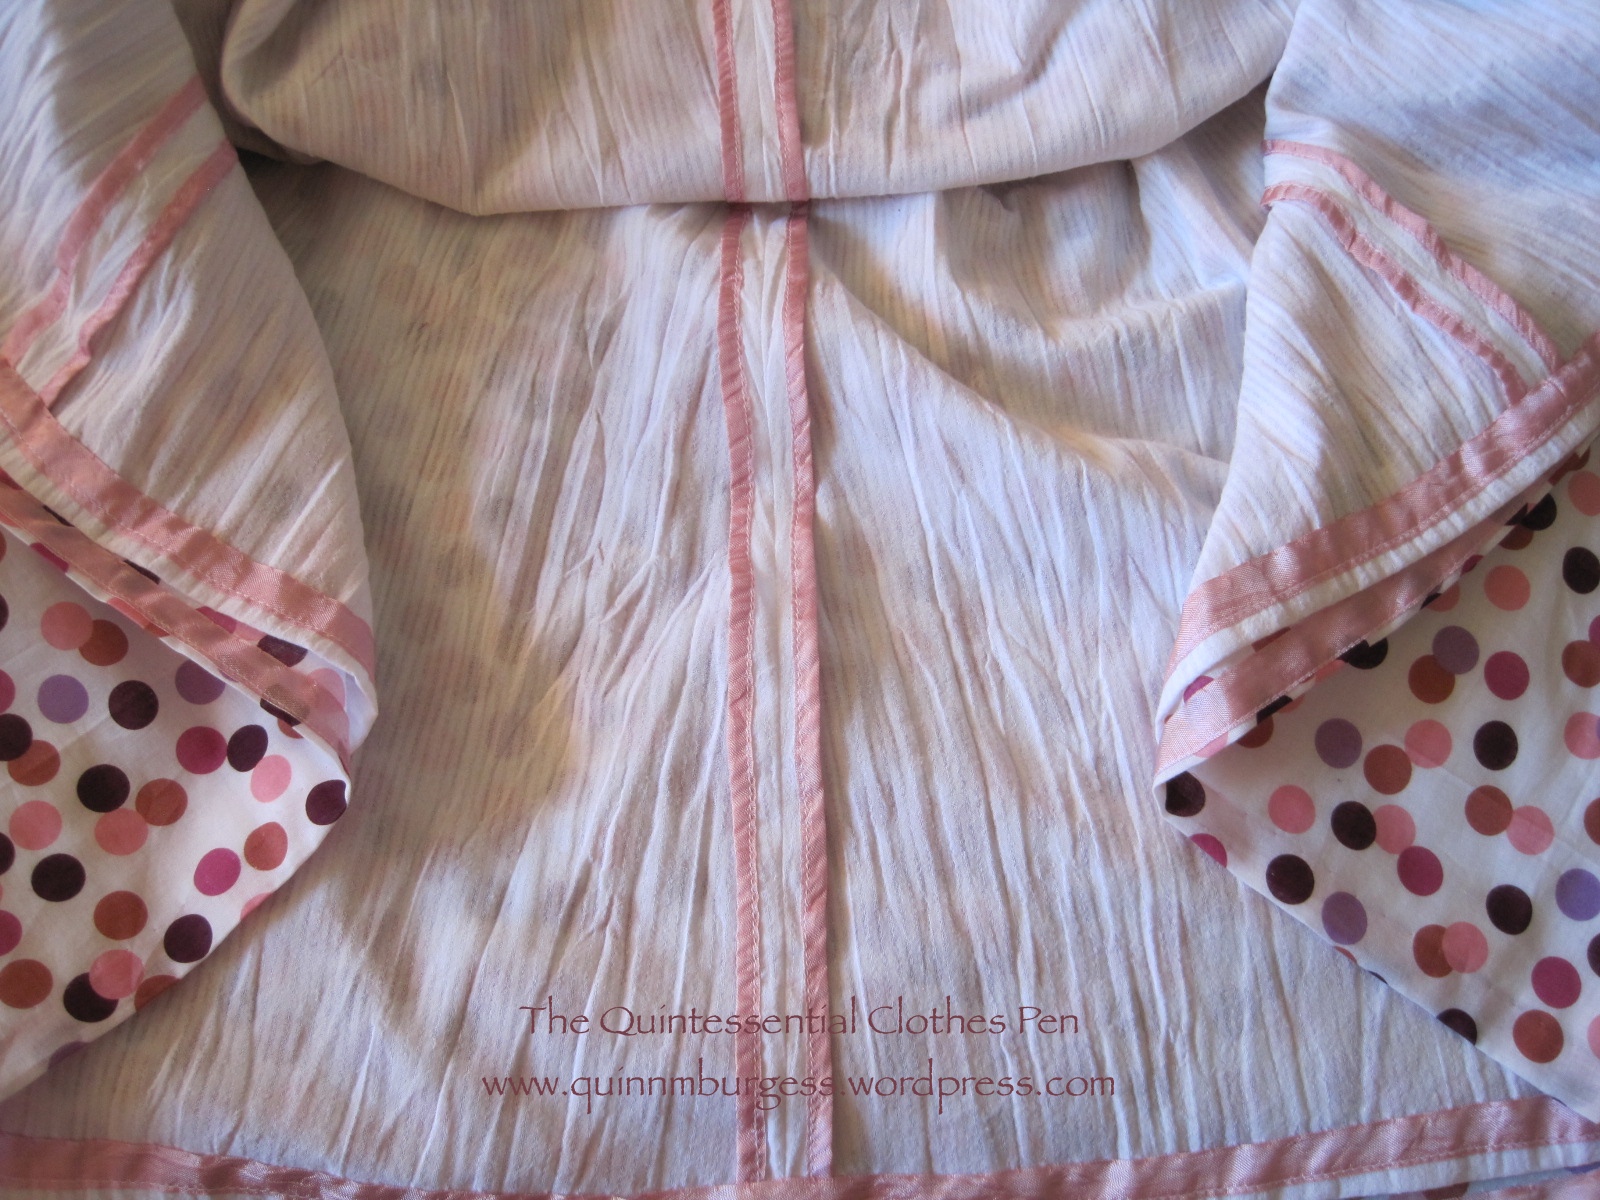
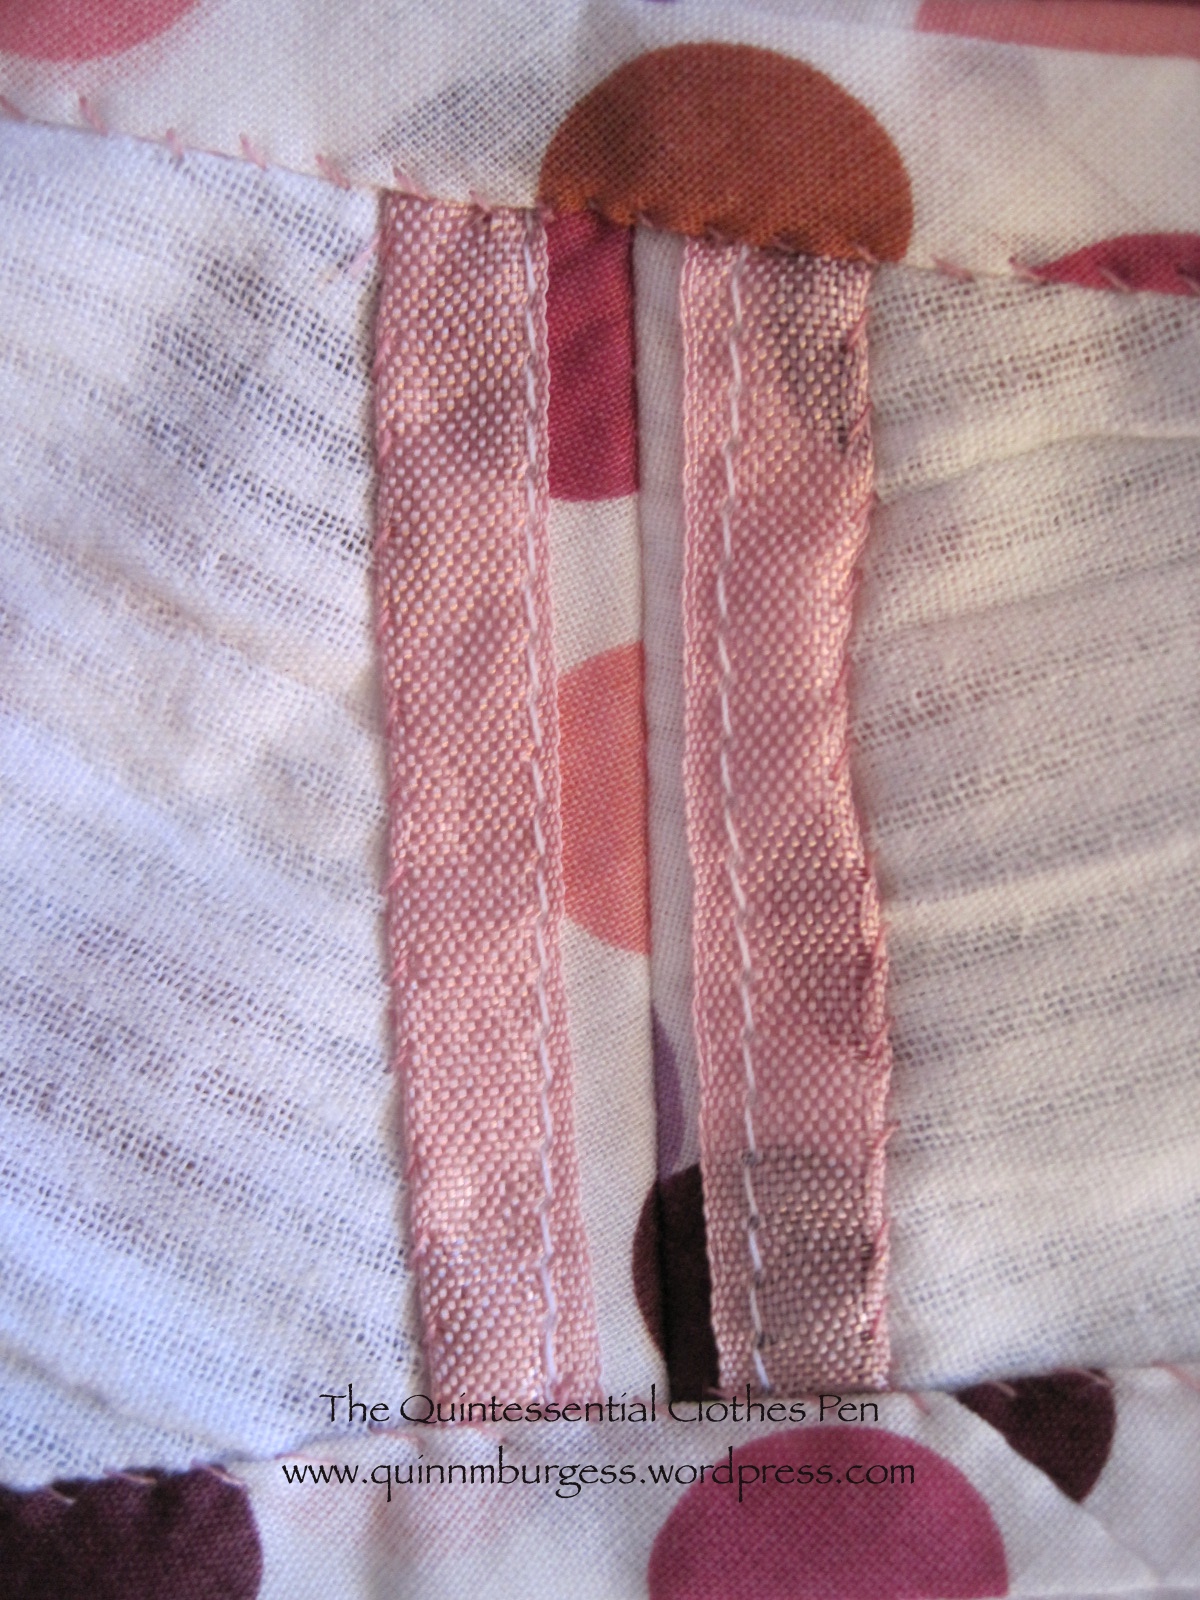
Now, you know that I love paying attention to details. I had a lot of fun spending time on the interior details of this dress. Unfortunately, they won’t be visible, but I know that this dress is as cute inside as it is outside, and now you will, too!
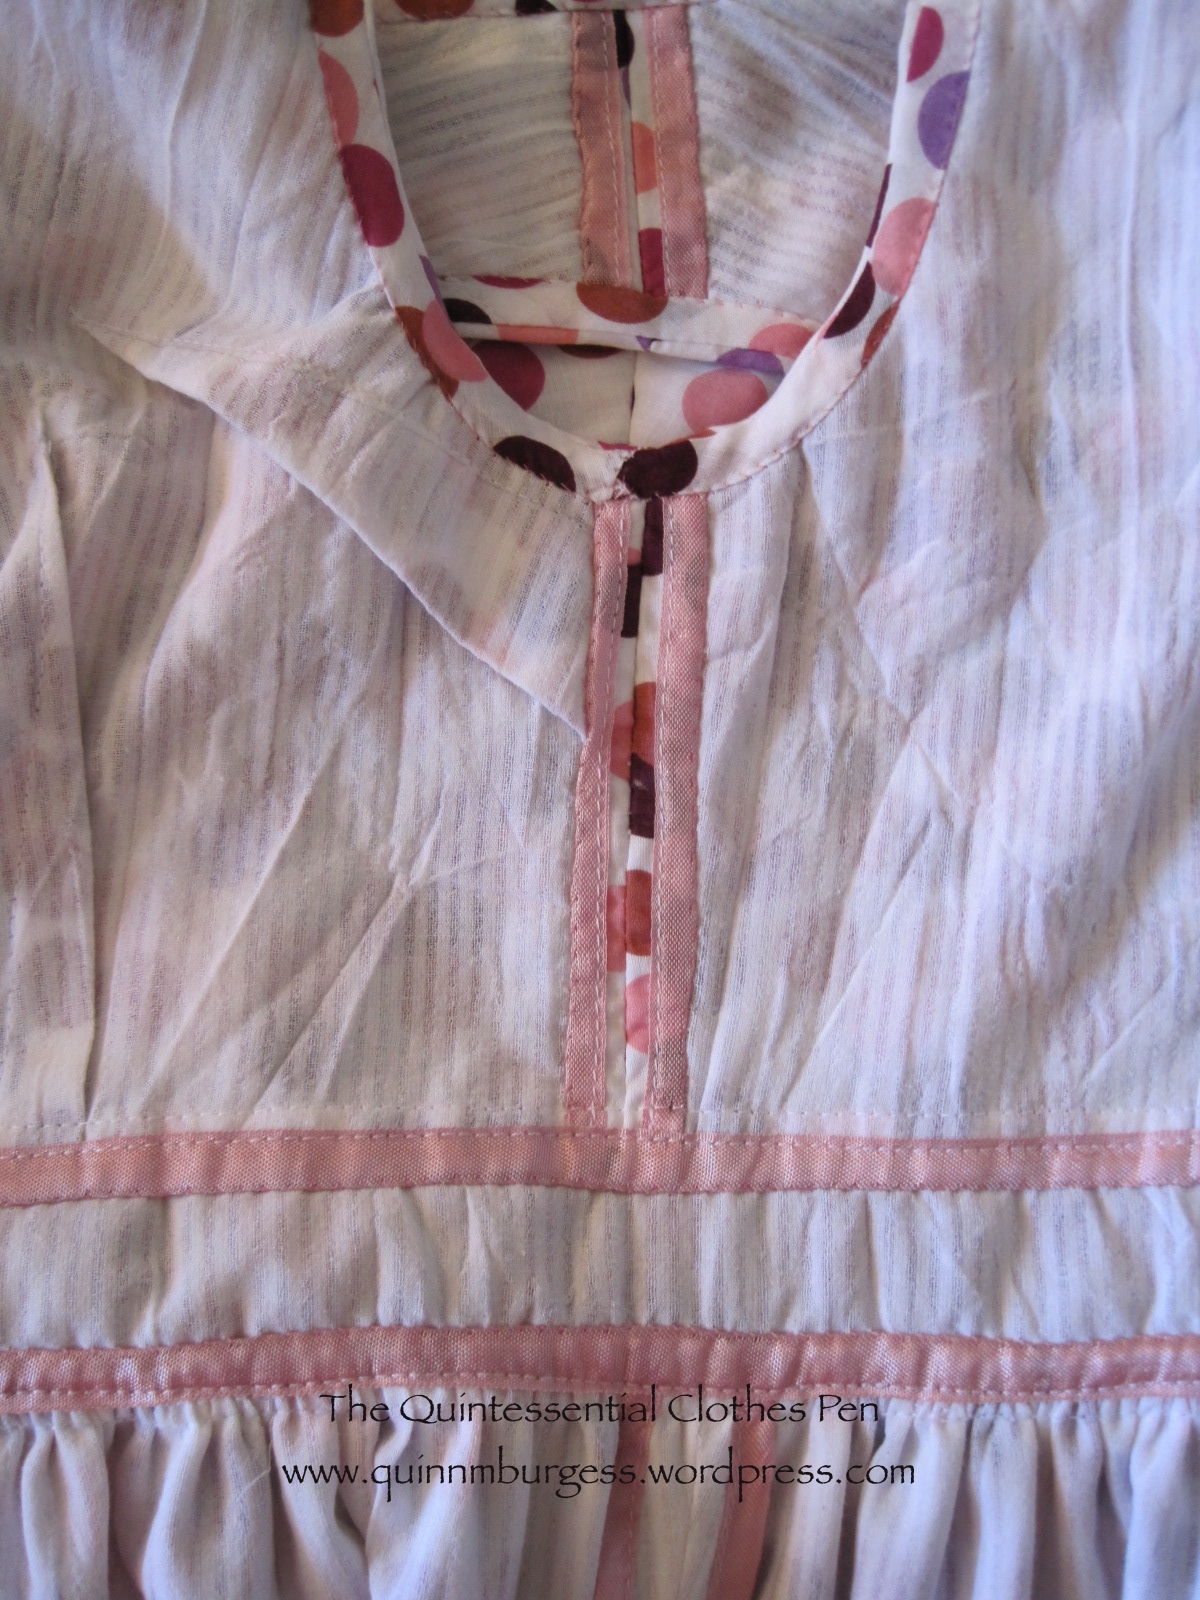
The hems flipped up to see the interior finishing. Both hems are finished with Hug Snug and I also used Hug Snug to bind the seam allowances of the white lining. The seam allowances of the dot fabric are turned and zig zagged (the Hug Snug showed through to the exterior too much when I did a sample using Hug Snug on the dot). The first side of the Hug Snug is machine stitched to the hem and the second side is hand sewn with only tiny prick stitches that go through to the outside fabric so it’s almost invisible.More of the inside of the skirt. It’s like candy, with all the pink Hug Snug seam binding on the white fabric! I love it!Here’s the side seam of the bodice that doesn’t have the zipper. On the bodice the dot and the white stripe fabric are treated as one, unlike on the skirt. All of the seams are bound with Hug Snug. The armhole (at the top of the photo) and the neckline are bound with self fabric bias strips.Here’s a close up of the shoulder seam showing the Hug Snug and the self fabric bias. All of the bodice seam and edge bindings are stitched down to the white stripe lining by hand using whip stitches.Here’s what it looks like without skirt support.
I might even like the inside more than the outside… I’m really looking forward to wearing this at some point! I was even thinking that perhaps I could wear it in my modern life without a crinoline petticoat under it, but I think the skirt is a little too long and the waist is a little too high. If I had more of an every day vintage style I might be able to pull it off, or if I was getting dressed up, but for normal days, unfortunately, I don’t think I’ll be wearing it around my everyday life. All the more reason my friends need to clear their calendars!!!
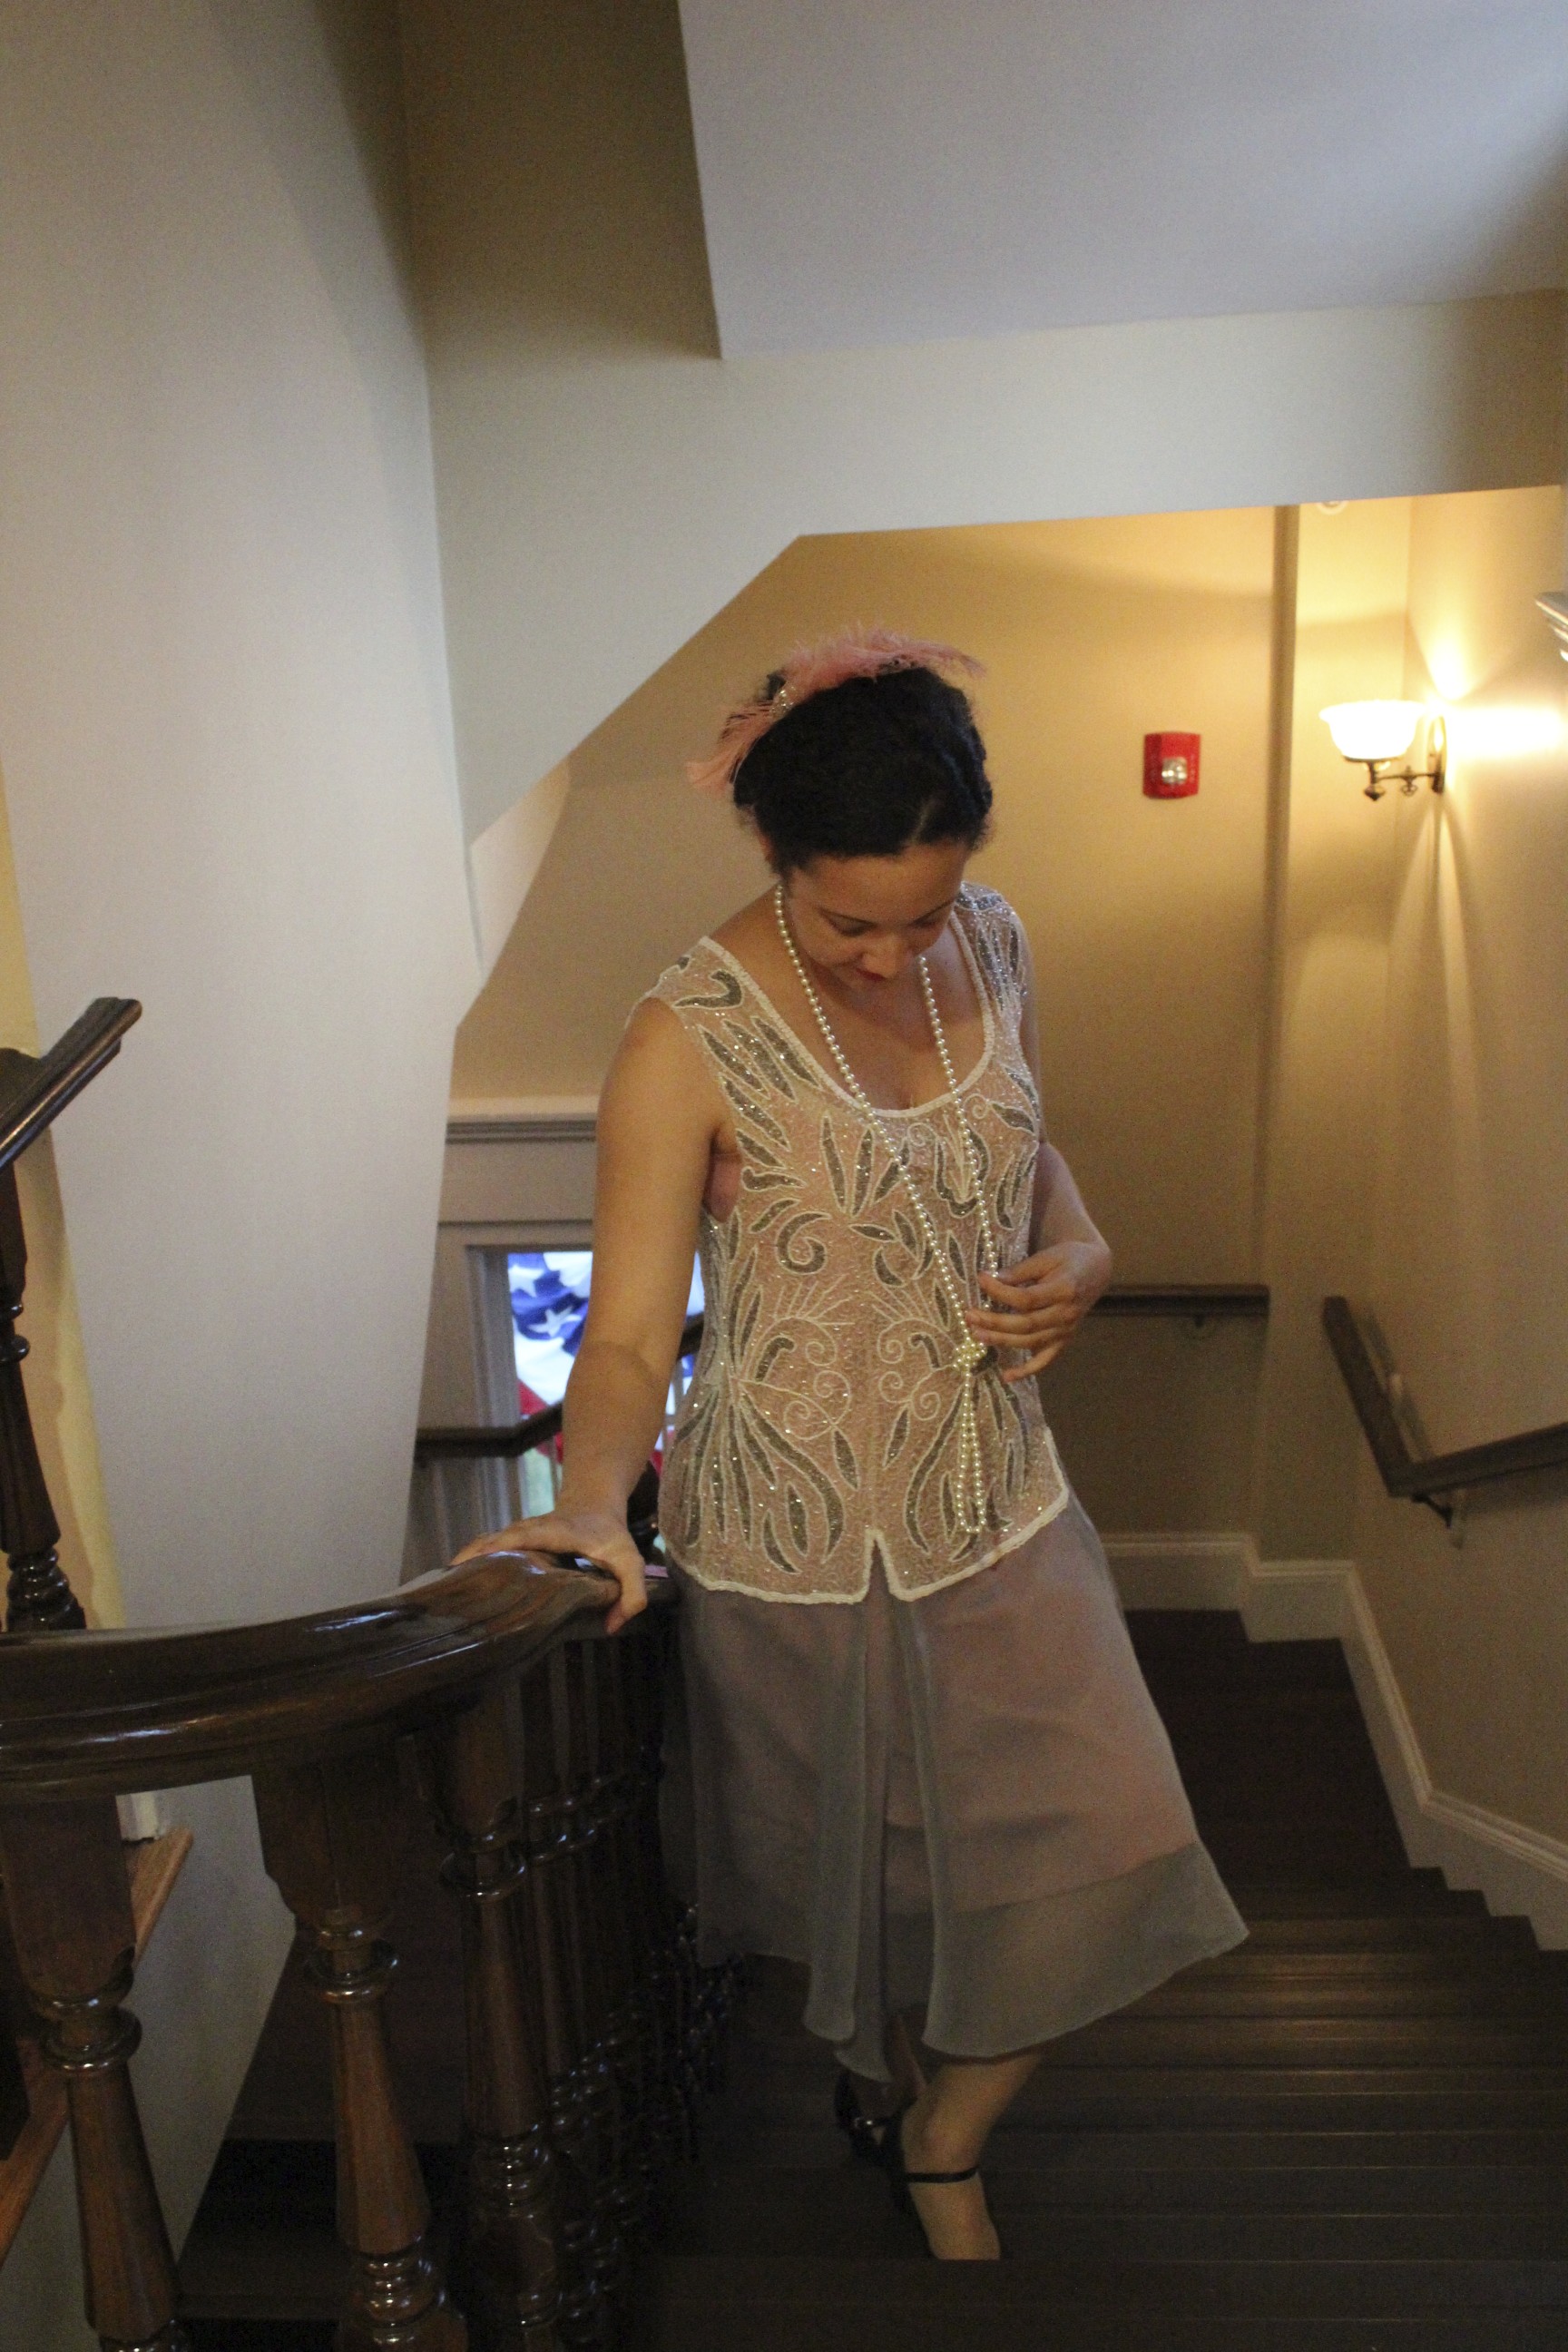
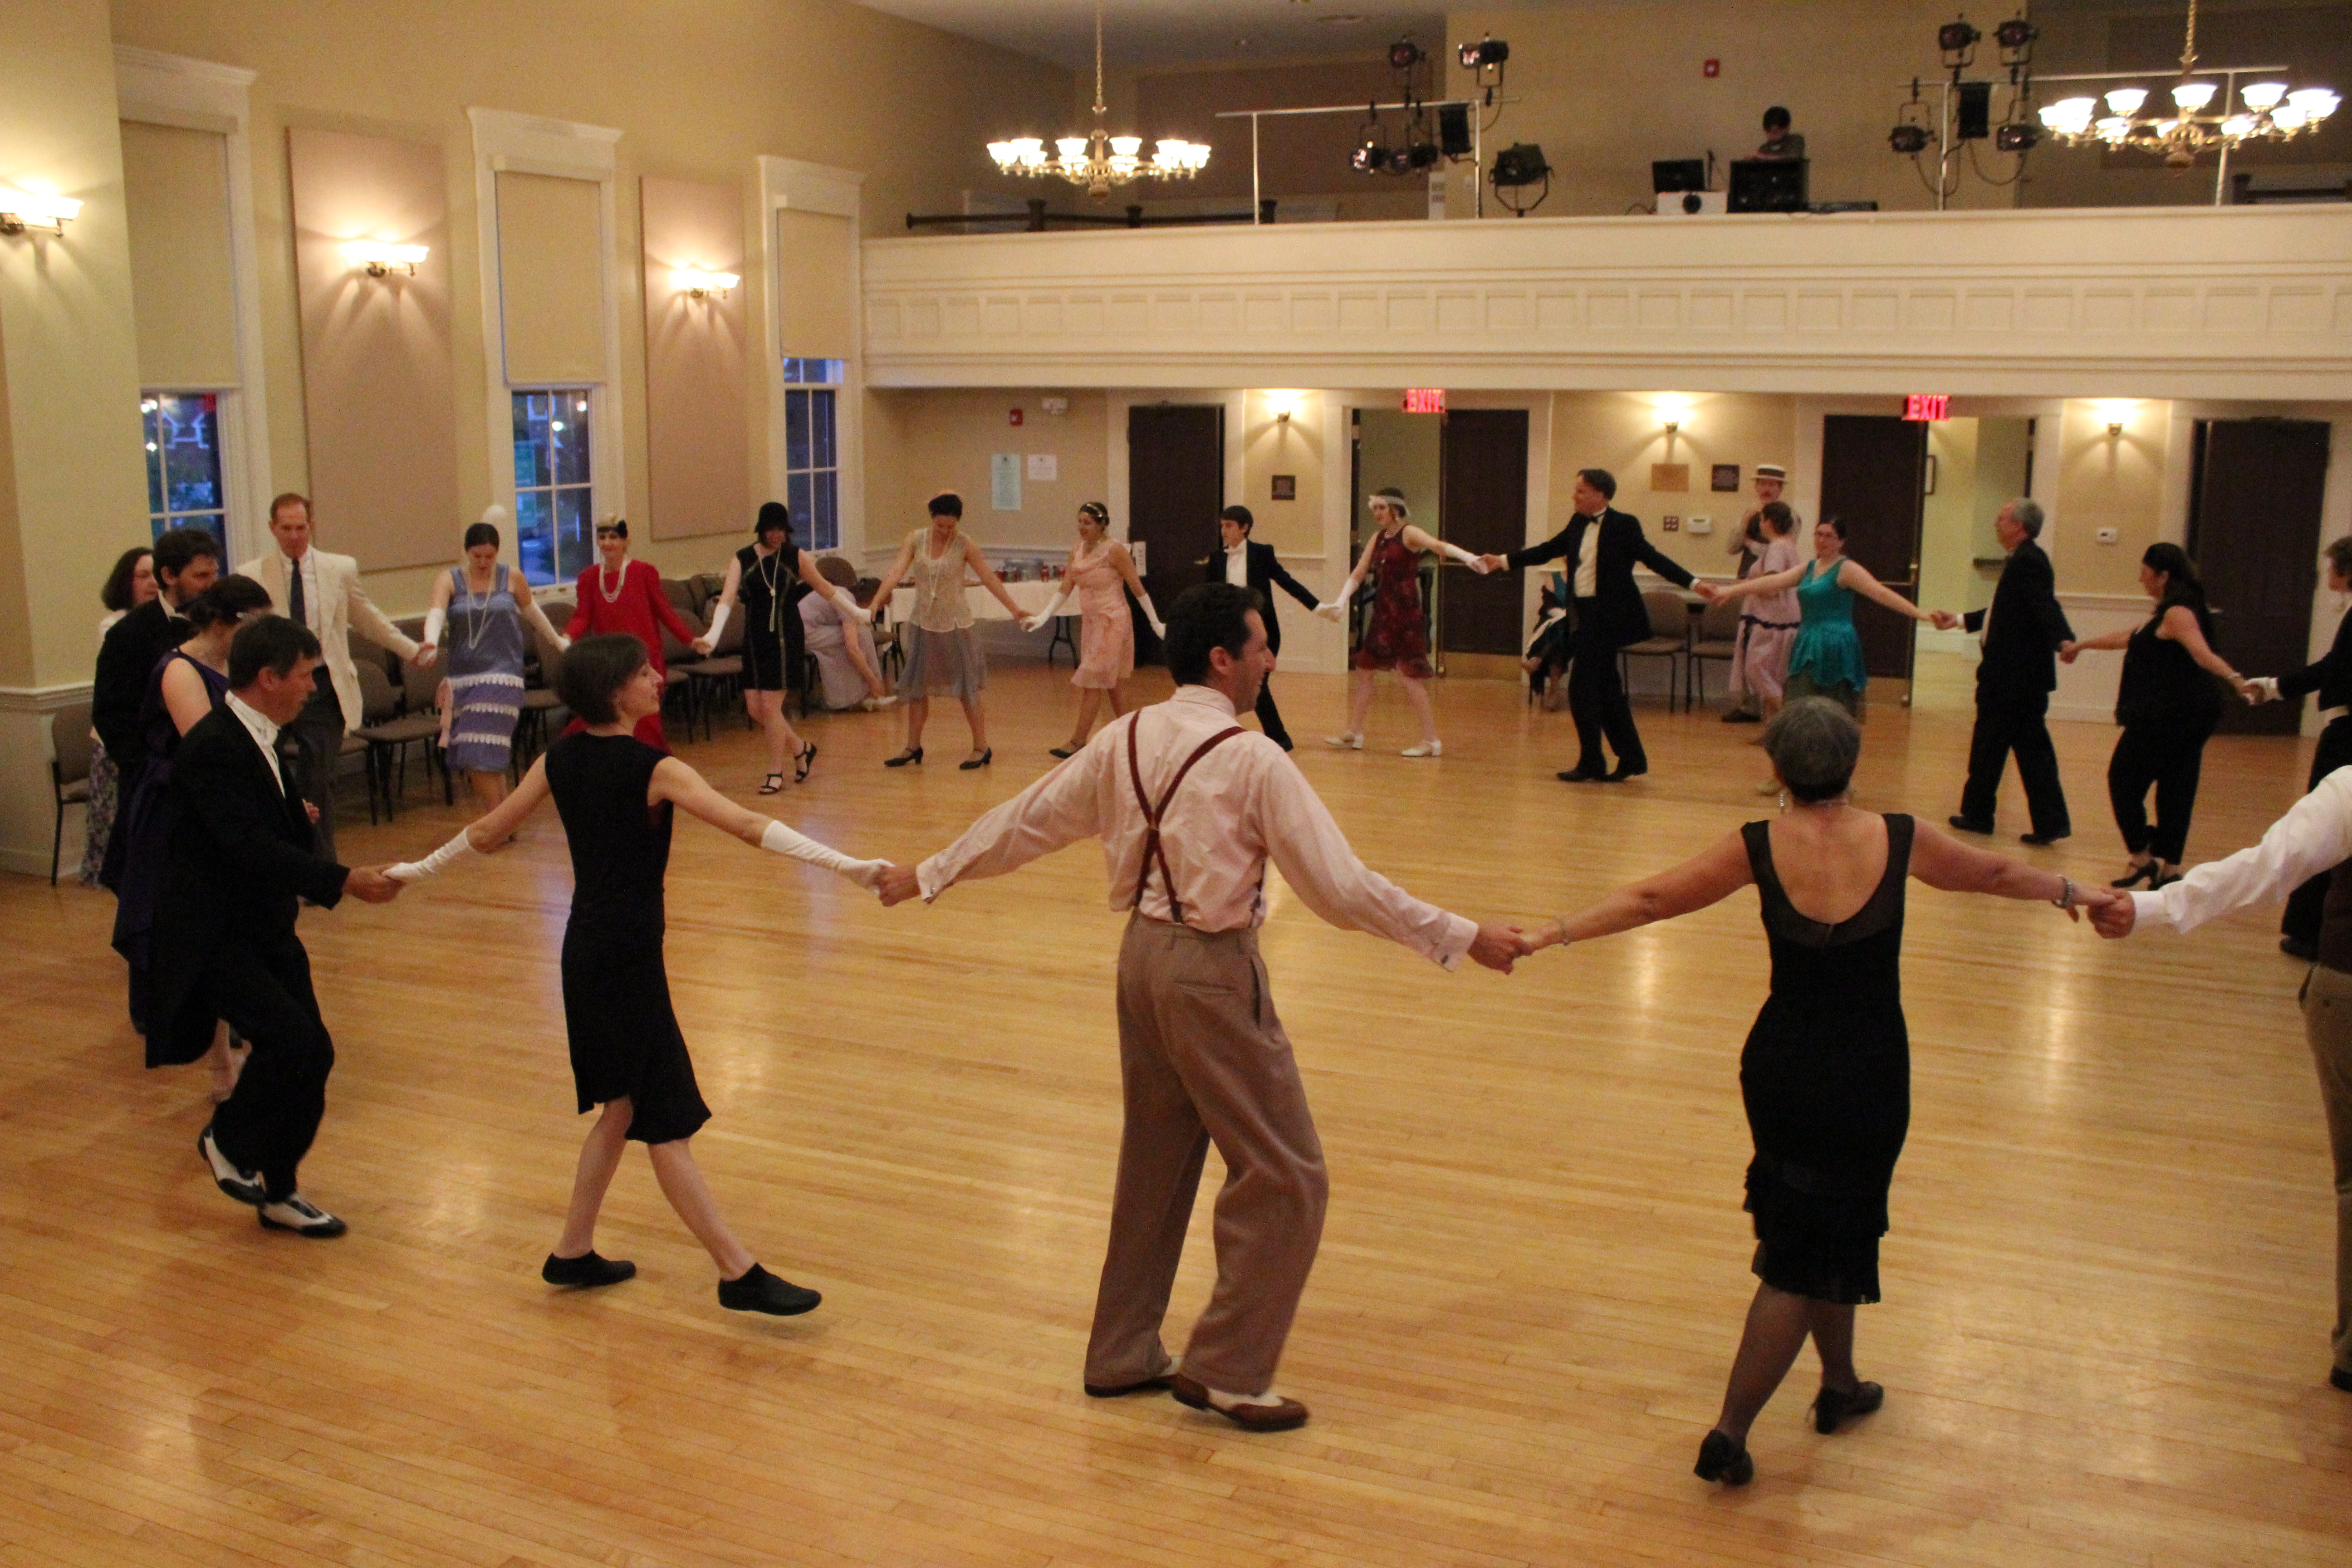
Only one week after I attended the 1920s Lawn Party, I was immersed in the 1920s again, this time at a Prohibition Ball in Chelmsford, MA. I would guess the attendance at maybe 40-50 people total, though I’m not sure we were ever all in the ballroom at the same time. It was a nice, social group of people and I saw everyone meeting and greeting new people, dancing with a variety of people, and generally being social and having a good time with everyone around. It was also nice to see some of the new people we had met at the 1920s Lawn Party at the ball. The venue, the Chelmsford Center for the Arts, was a lovely place I’d never seen before.
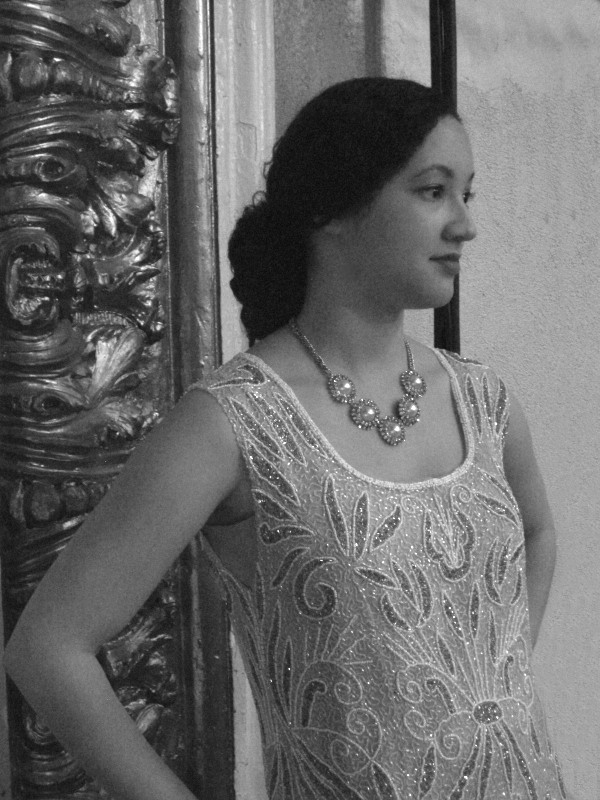
I wore my 1925 beaded dress and accessorized with a long string of pearls and jeweled/feather hair decoration.
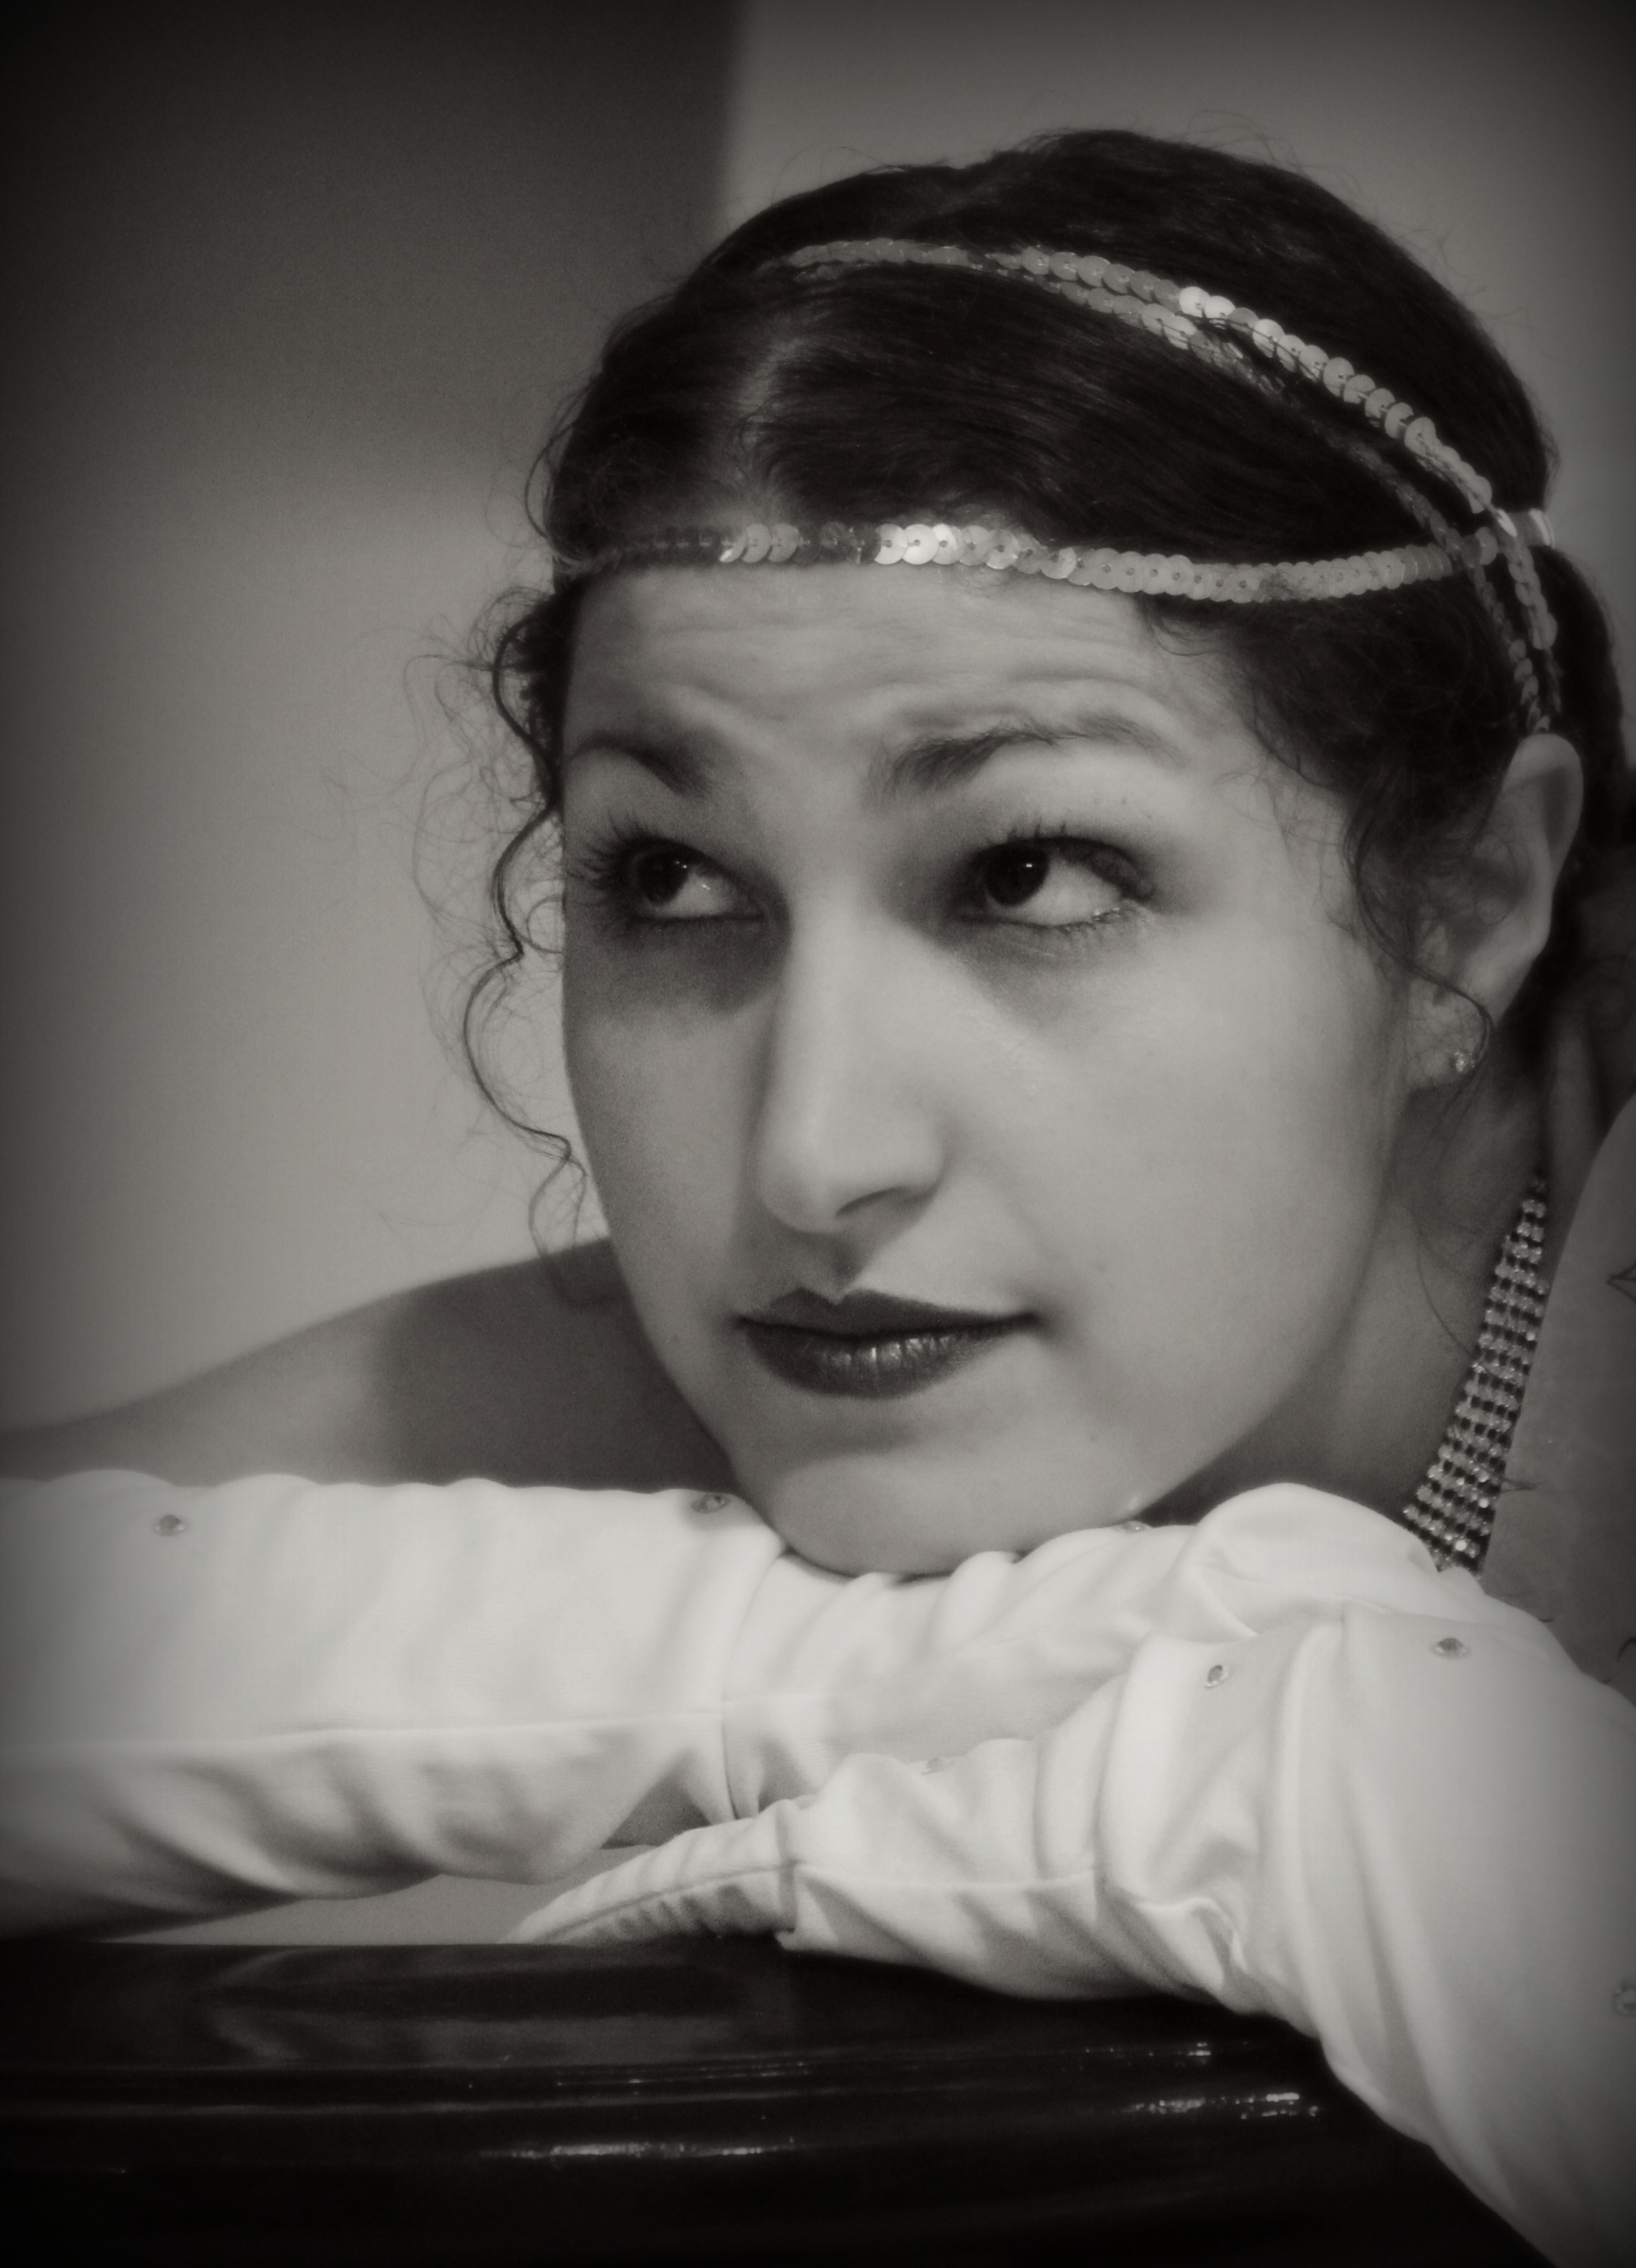
I tried a new style with my hair! I did my now usual 20s thing, where I gel the front sections and use a fine tooth comb to create waves in front while my hair is wet. Then I secure it to my head and let it dry. Usually, I’ve taken the back and put it in a tight bun at the base of my head (like when I’ve worn my not-quite-sailor dress). The idea in doing that is that it makes my hair close to my head and thus, maybe, more bob-like (I know, I’m kidding myself, it does not actually look like a bob!). This time however, I did something totally different with the back. It seems counter-intuitive, so be prepared… I took my curly hair, and curled it with a curling iron. Yup. Actually, the curling iron eliminates all my usual frizz (that alone is amazing!), but it also creates nice, even, wide curls. I was in a super hurry to get my hair done, so I just did some rather messy curling iron curls then pinned them up in a mass at the back and added my jeweled/feather clip. I love the defined curly mass (different than my normal frizzy, curly mass)! I’m excited to try out curling ironed styles for other events, too!
Defined curls coiffure surmounted by feathers and jewels.
The other cool thing about the feather/jeweled clip is that from the front I have a small halo of feathers showing. I like that it is visible from the front and packs a big punch in the back! Success!
Glamour shot! I often make really silly 20s faces, but I think this one works! I love the defined eyelashes, the red lips, the feathers, the pearls…More glamour! I’d call this a more sultry shot than mine, which is more playful. It’s got those same fun elements, though, eyelashes, lips, sequins, jewels…
I did mention that this was all for a ball, right? And the ball did include dancing! In addition to normal couple dancing, and large group Charelstons (you can dance the Charleston in a circle like you used to dance in high school!), there were also a lot of mixer-type dances, where participants changed partners, or danced with unknown partners…
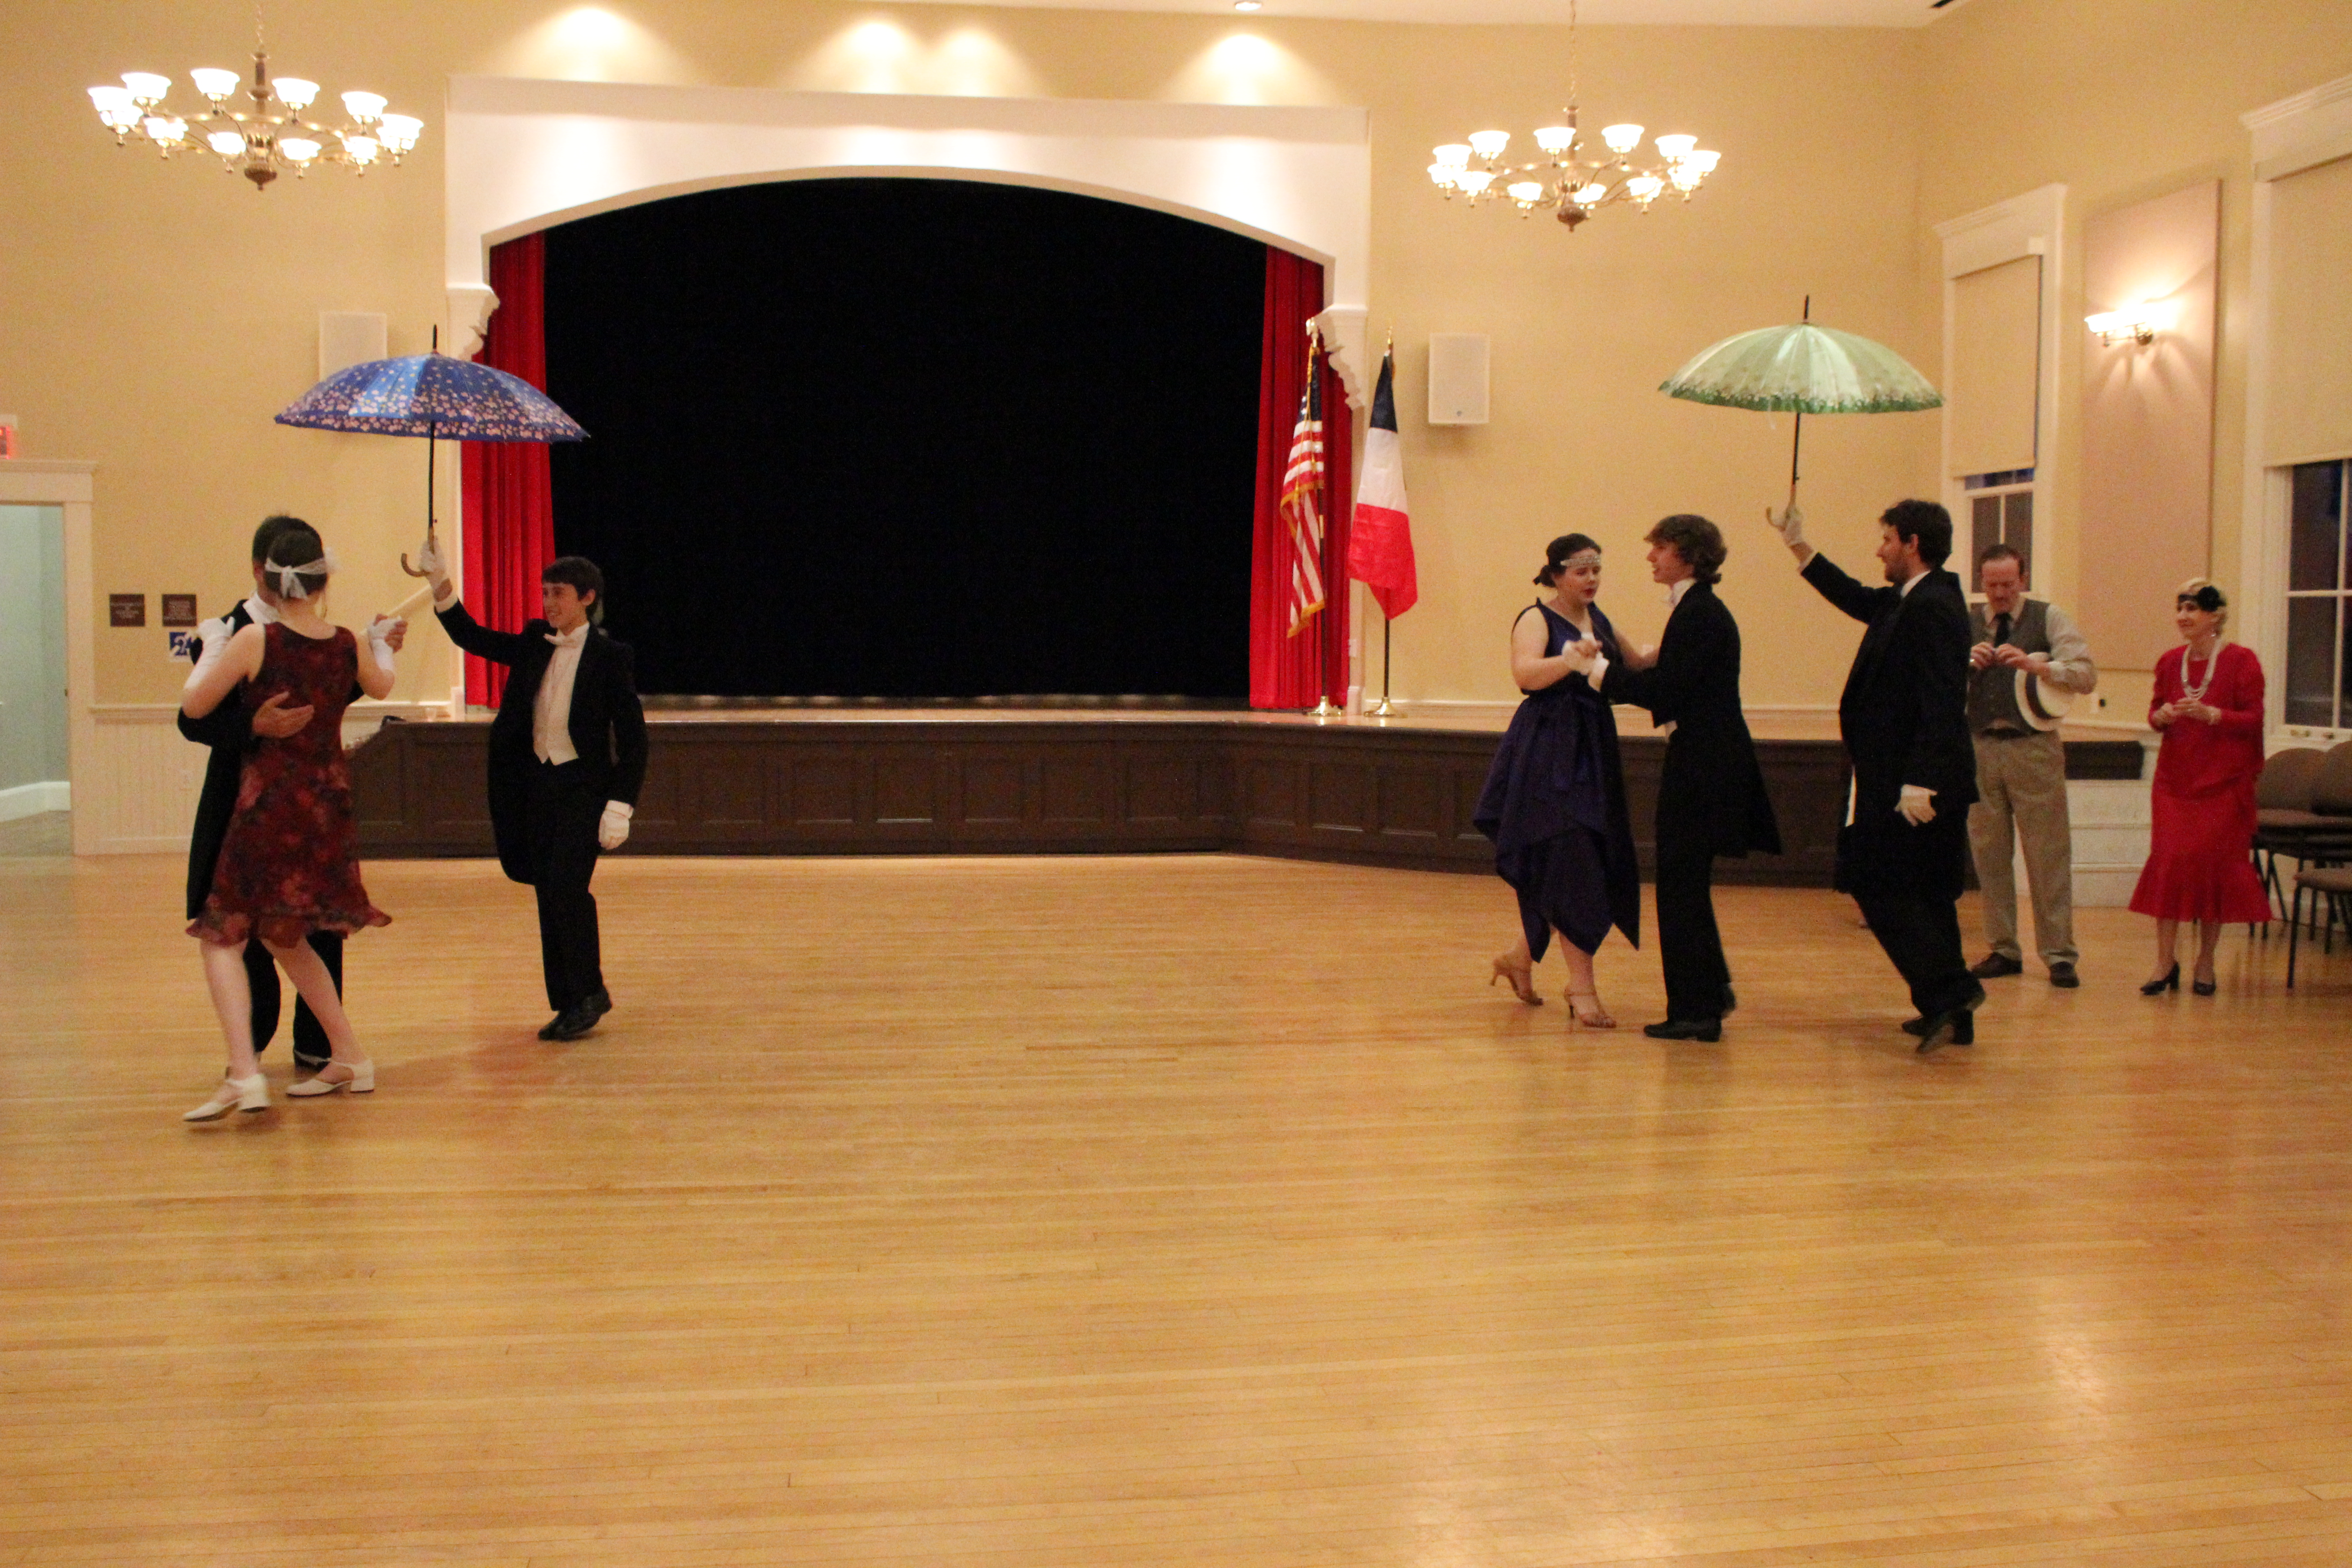
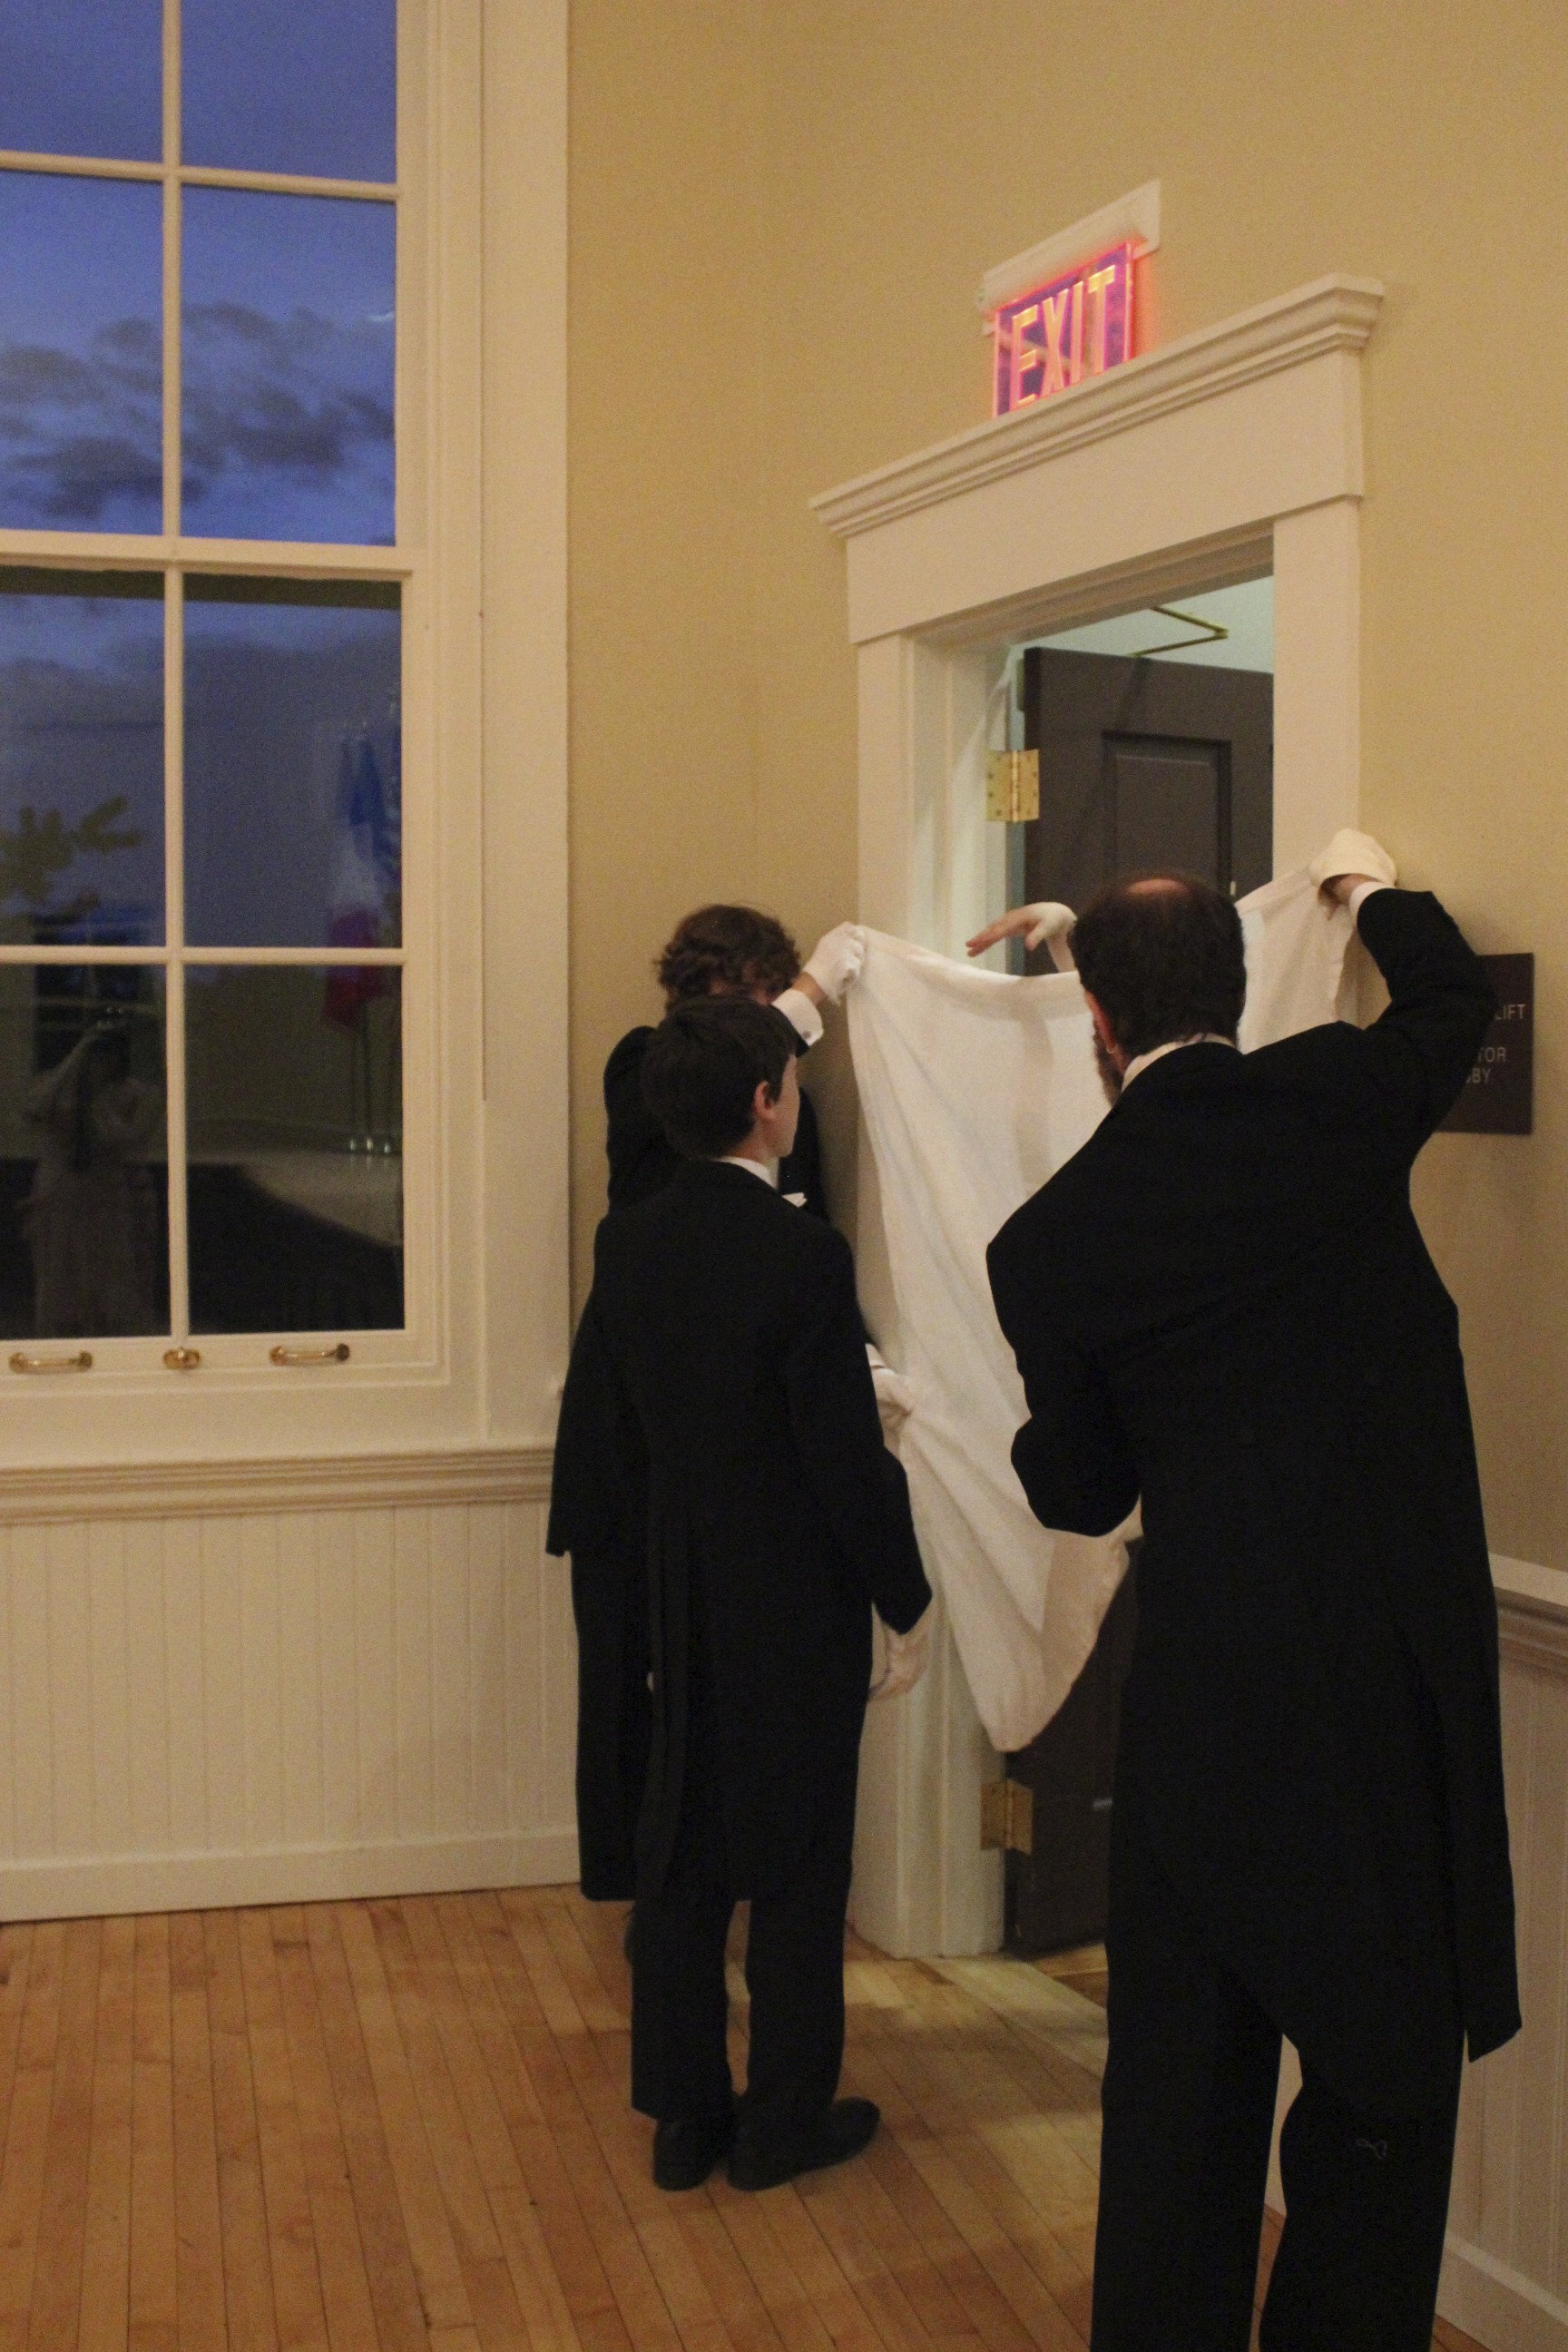
Attendees chatting with each other and looking great.Dancing… A foxtrot or one step, perhaps?Dancing!One of the mixers with a name like “Paul Jones” or something similar.The dancing couples trying to escape the gentlemen with umbrellas.Another mixer. See the hand over the sheet? Neither gentleman nor lady knows who his or her partner will be.Surprise!
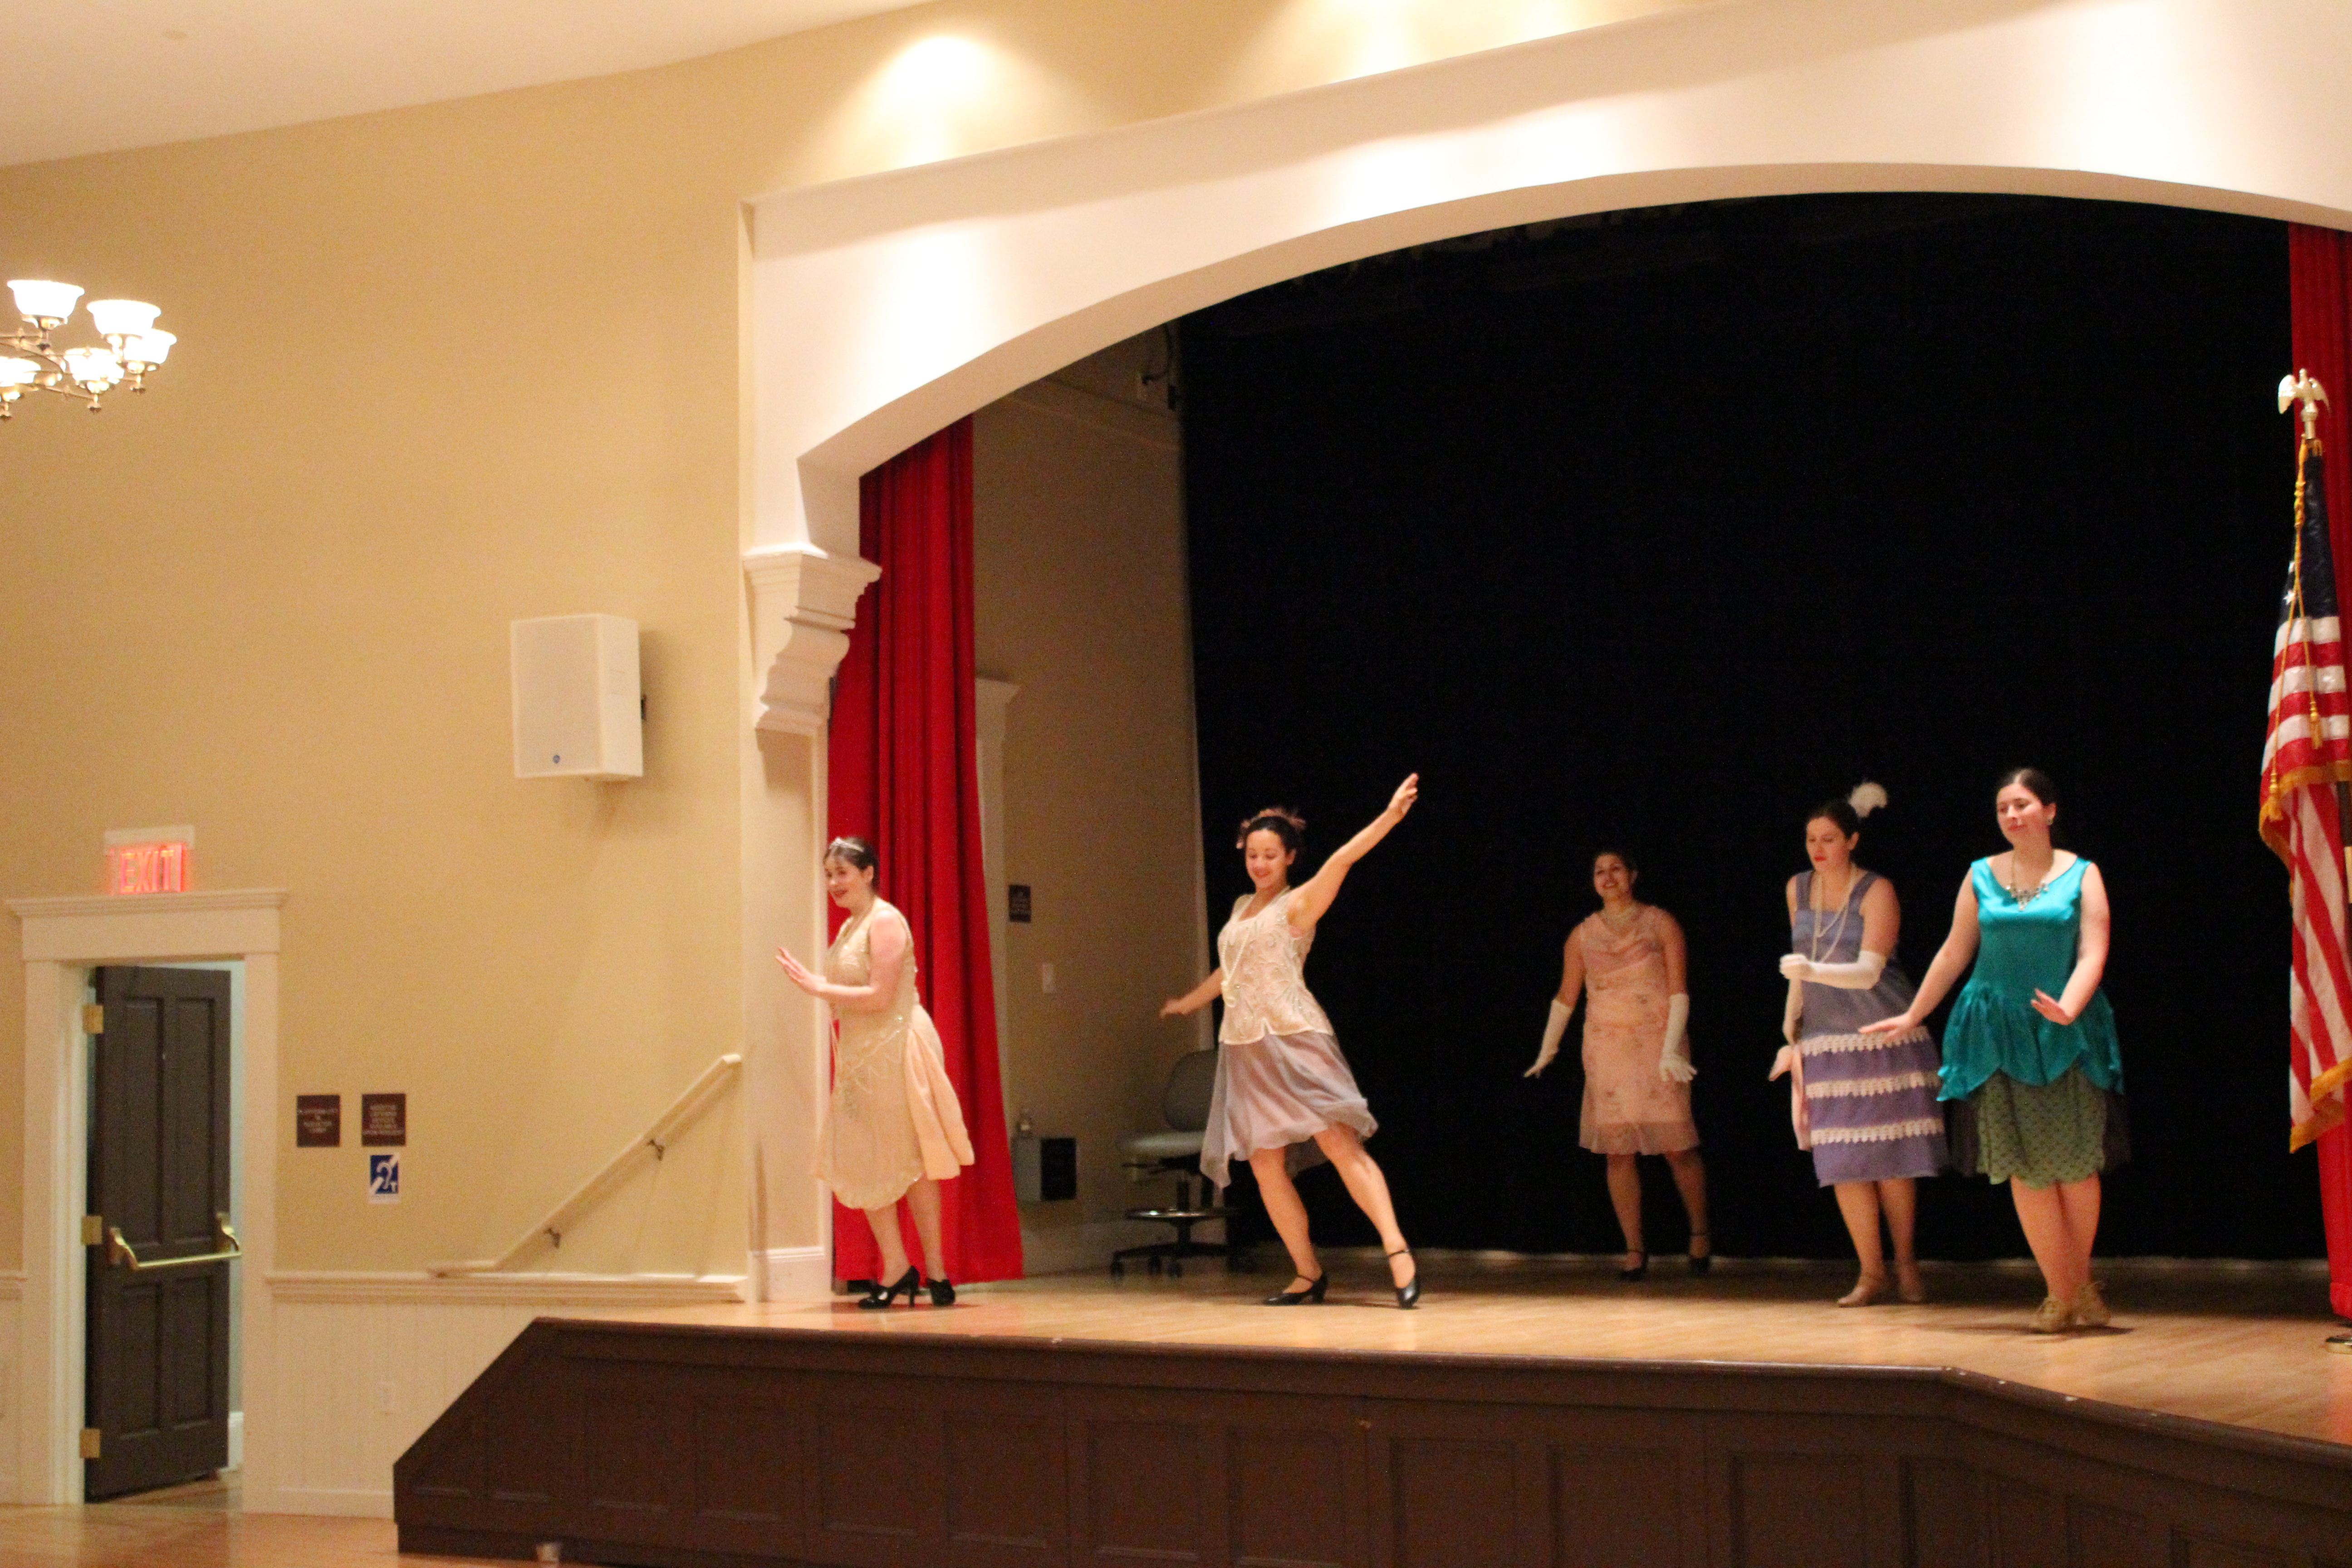
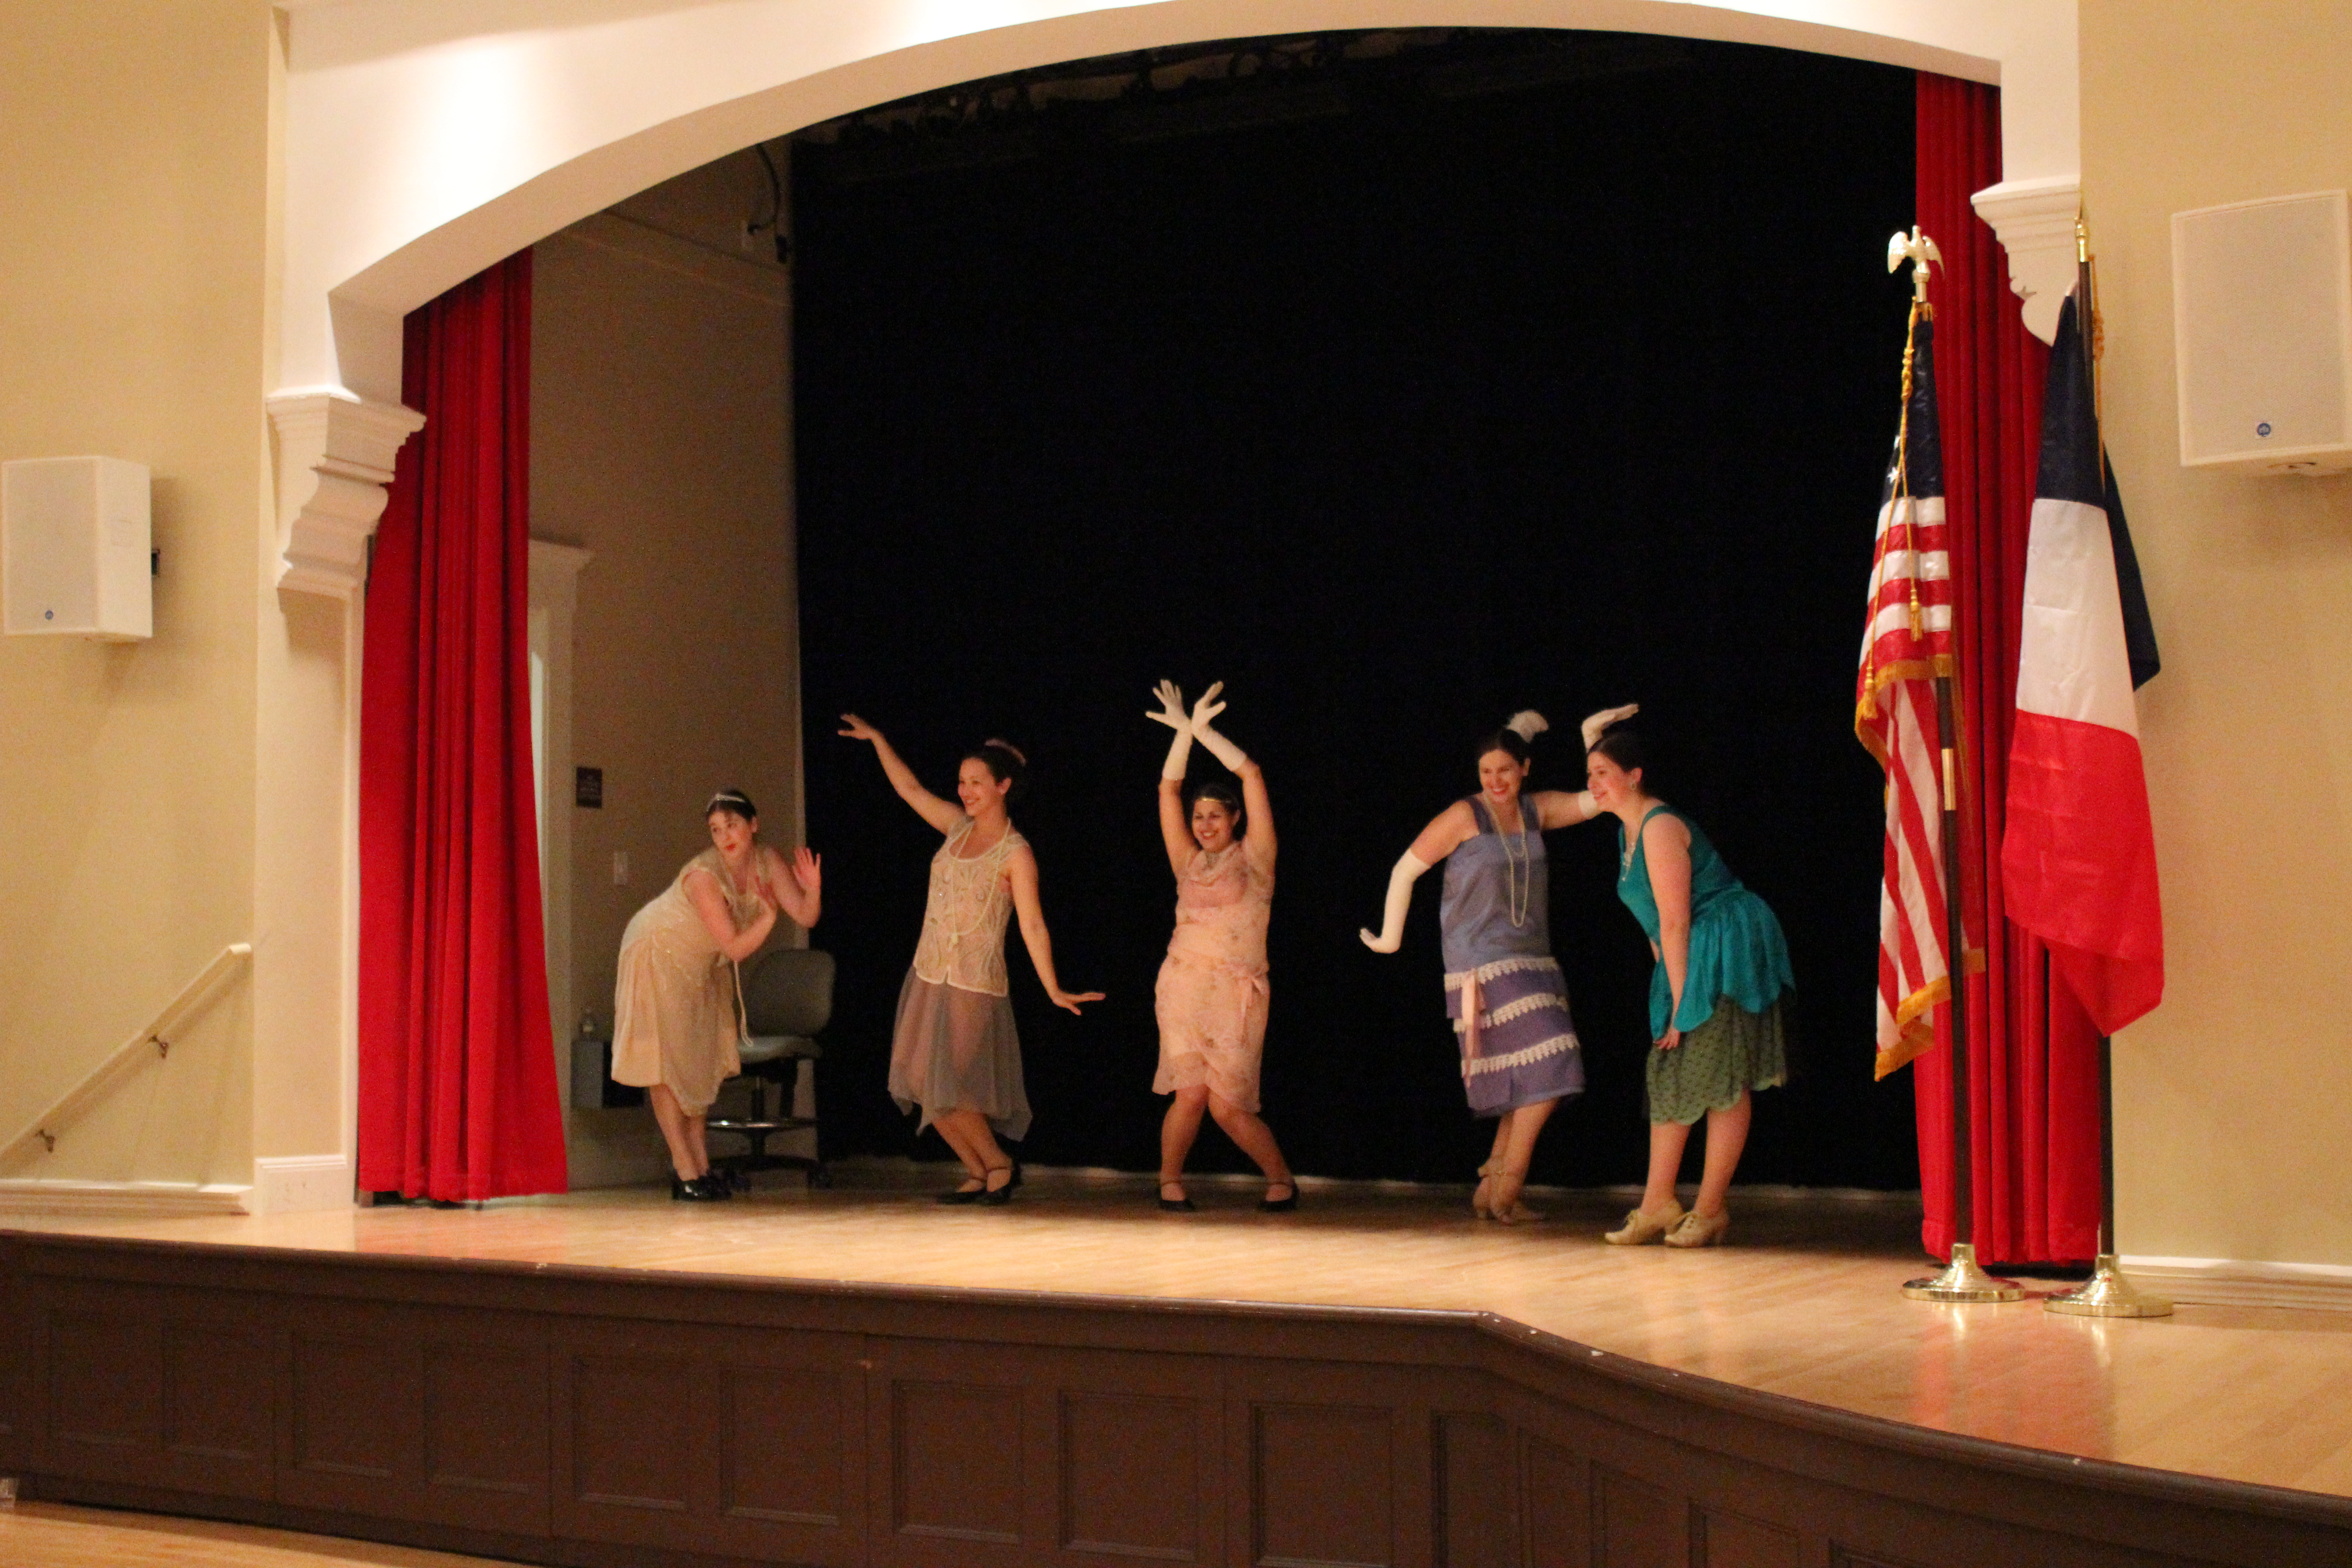
There was also a slightly unplanned performance of our five lady Charleston (the same one we performed at the Great Gatsby in May). People really enjoyed it, and it’s always a pleasure to dance a Charleston to the song Egyptian Ella. The Great Gatsby performance post includes a video you can listen to that has the song we performed to, if you’re curious. It’s a fun song!
We sort of look like penguins in this shot… At least we’re on the same feet!There are little bits where we do solos: here I am washing the windows.Then I turn and back up. There really isn’t a good way to describe it… looks fun though, right?Another solo (well, duo, I suppose). I don’t actually know what this figure is called, but it’s super fun to watch.Starting to do the shimmy! (I think it’s the shimmy… It’s really just wiggling, it’s not as shimmy-like as you’re probably imagining!) It was super scandalous in the 20s!Final pose.
And of course, there was silly-ness. That’s to be expected when I’m around.
The “Hello Charleston”… (I made it up…)How low can you go?
I had the added bonus of my parents being available to experience, in person, their first vintage dance event. They’ve seen thousands of pictures but have never been able to attend. It was fun to share the experience with them and to Charleston with them! I sure had fun, I hope that you’ve had fun reading about it!
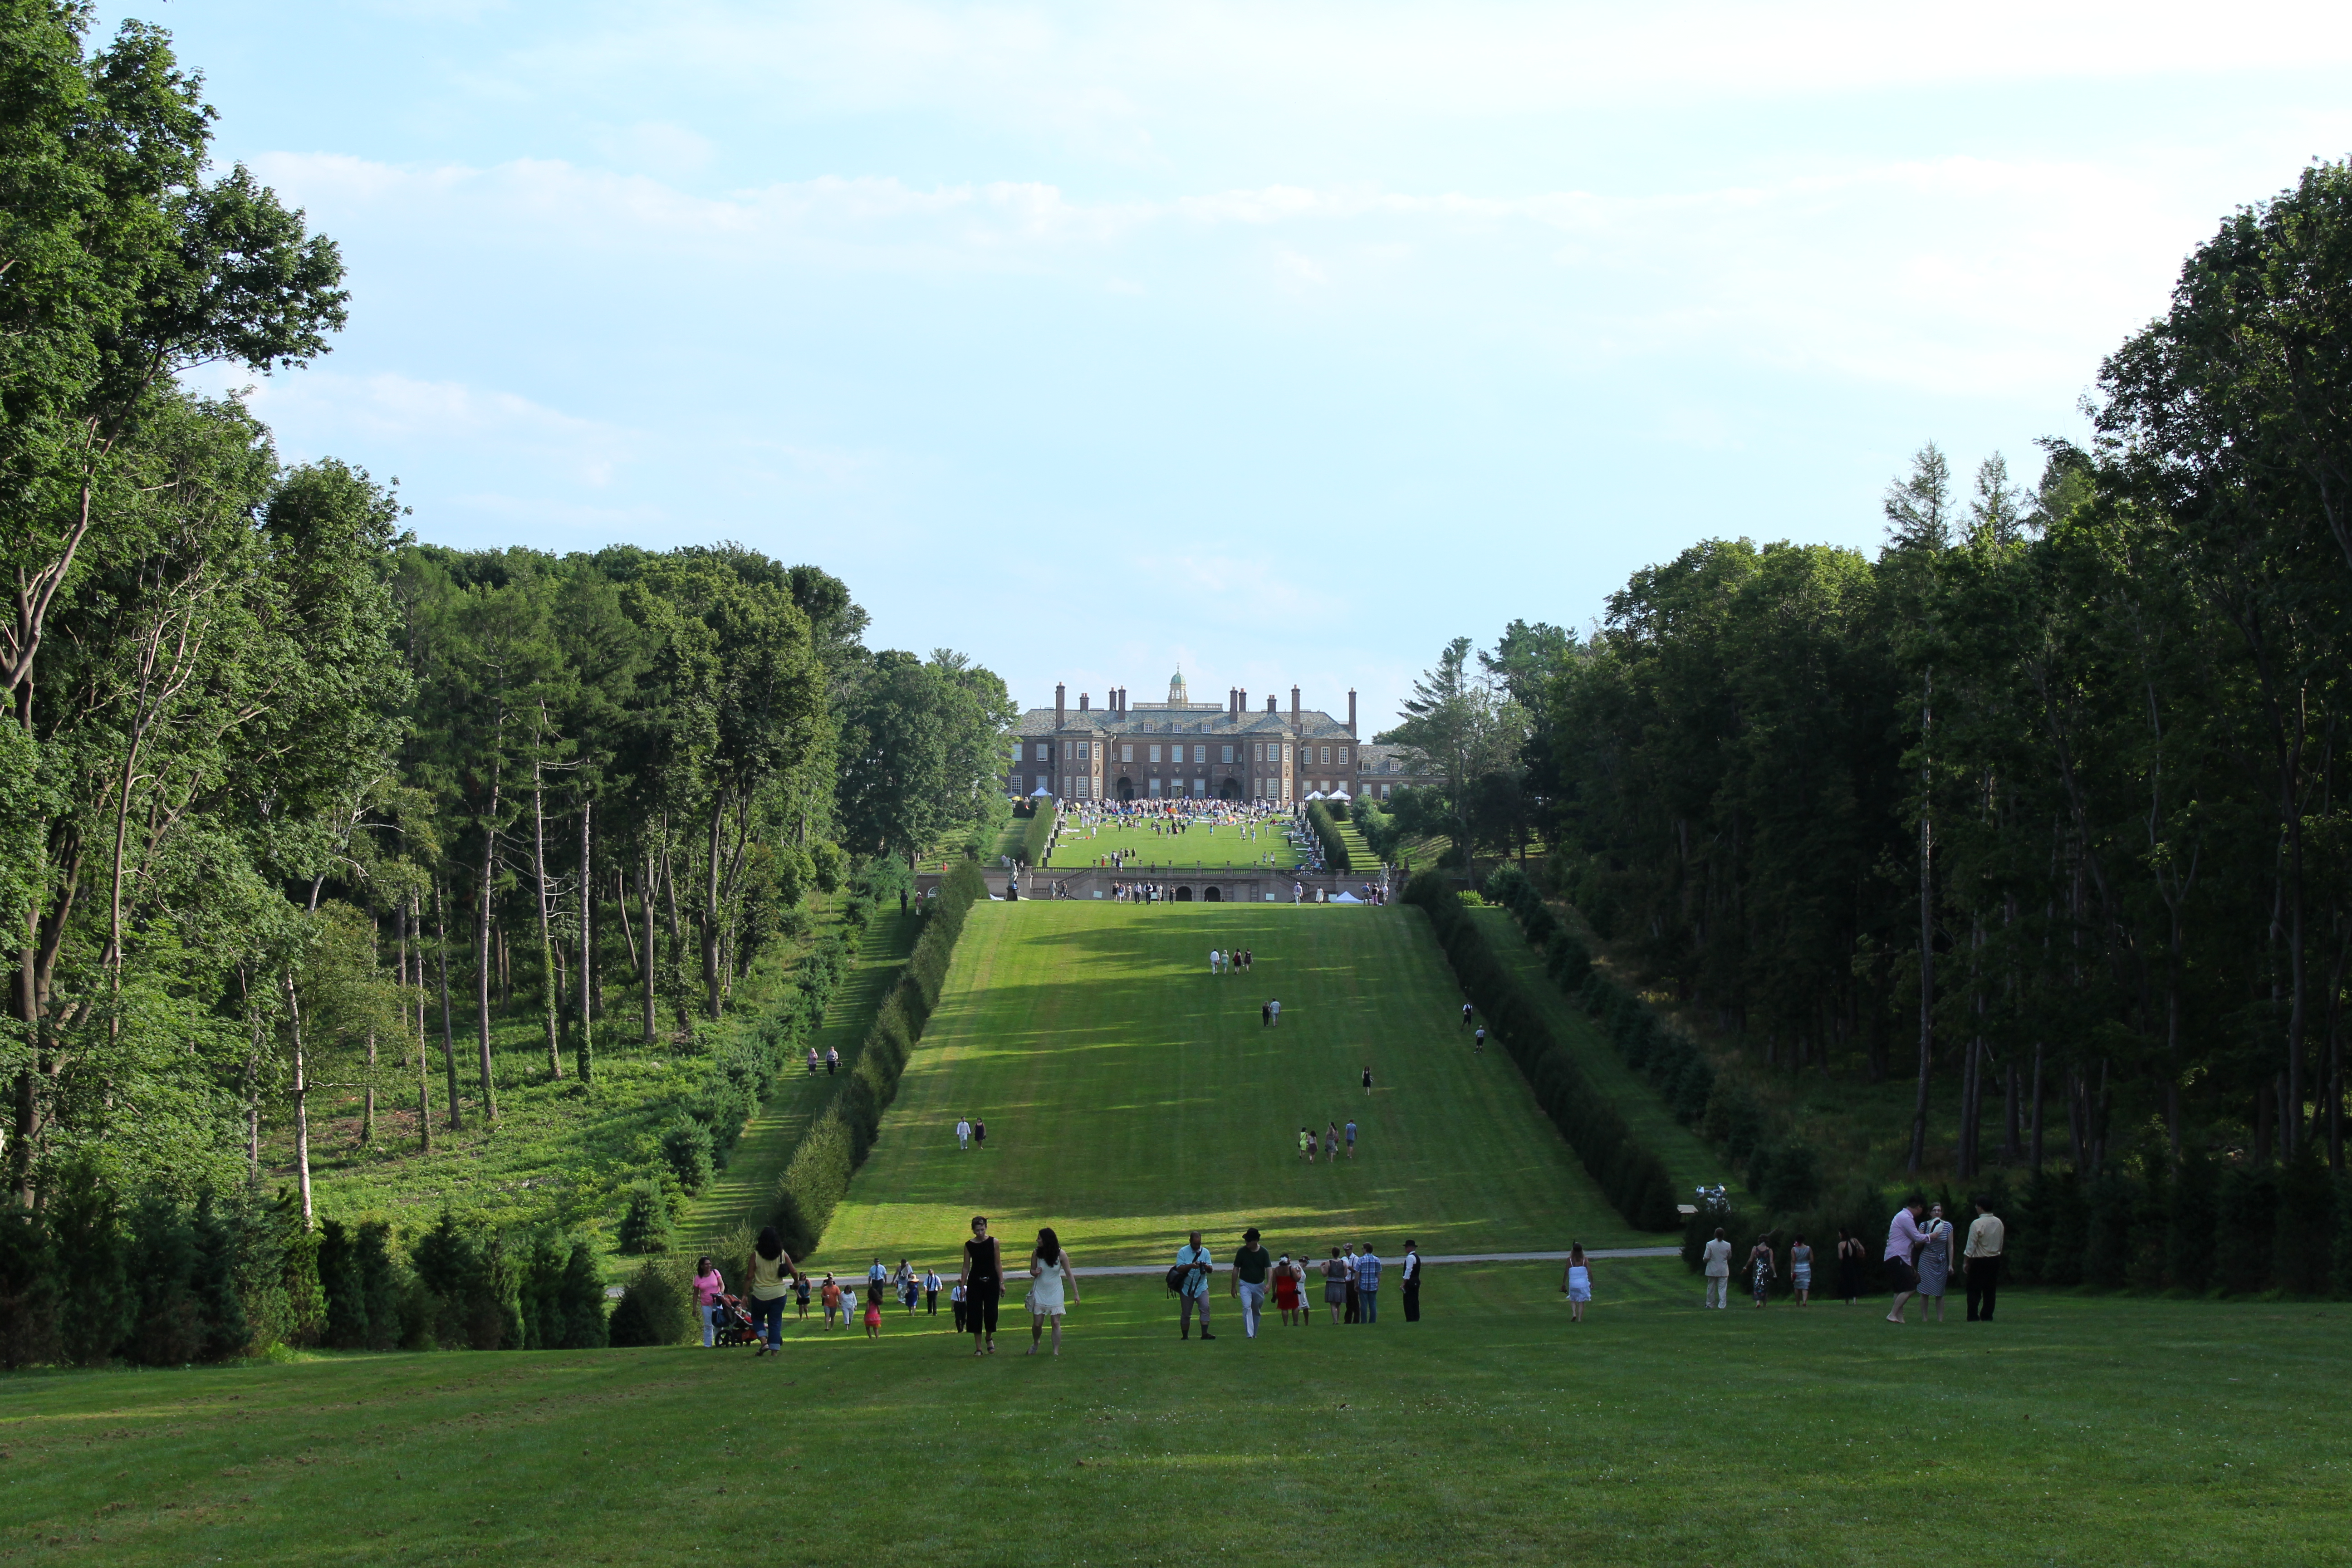
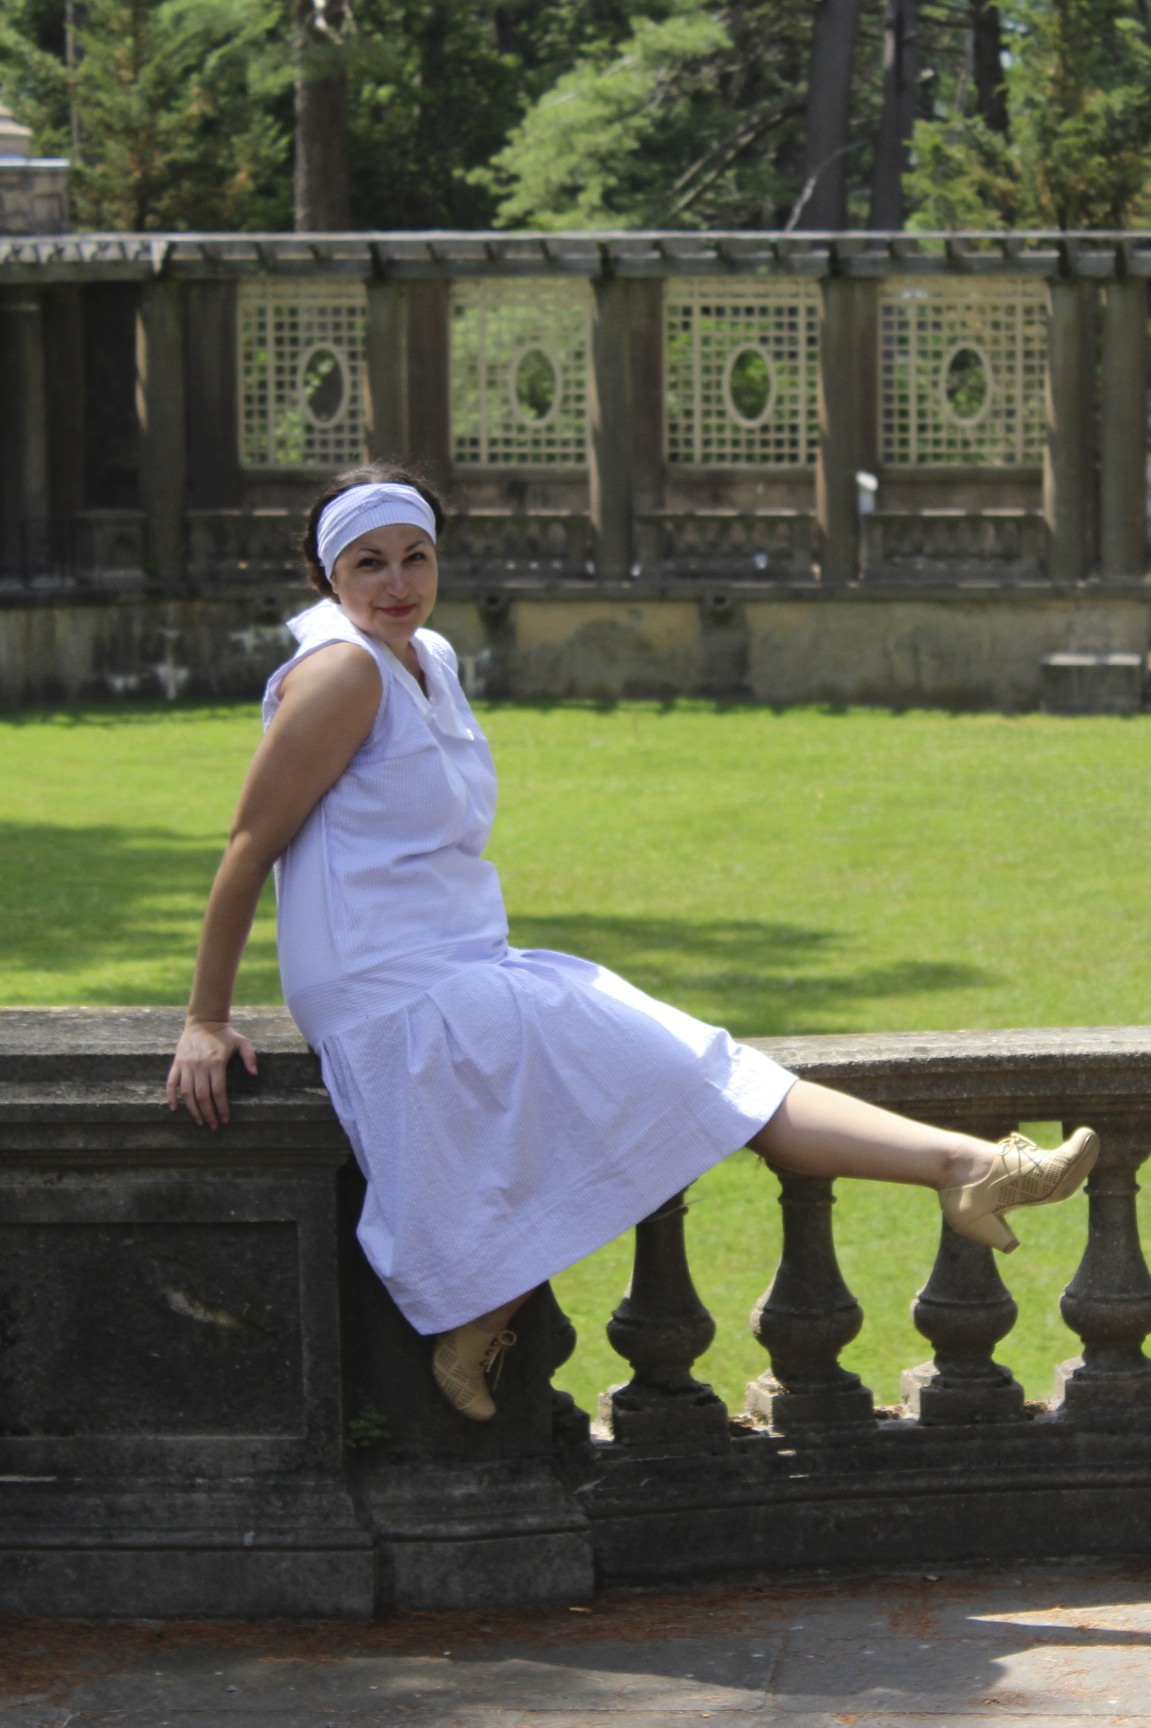
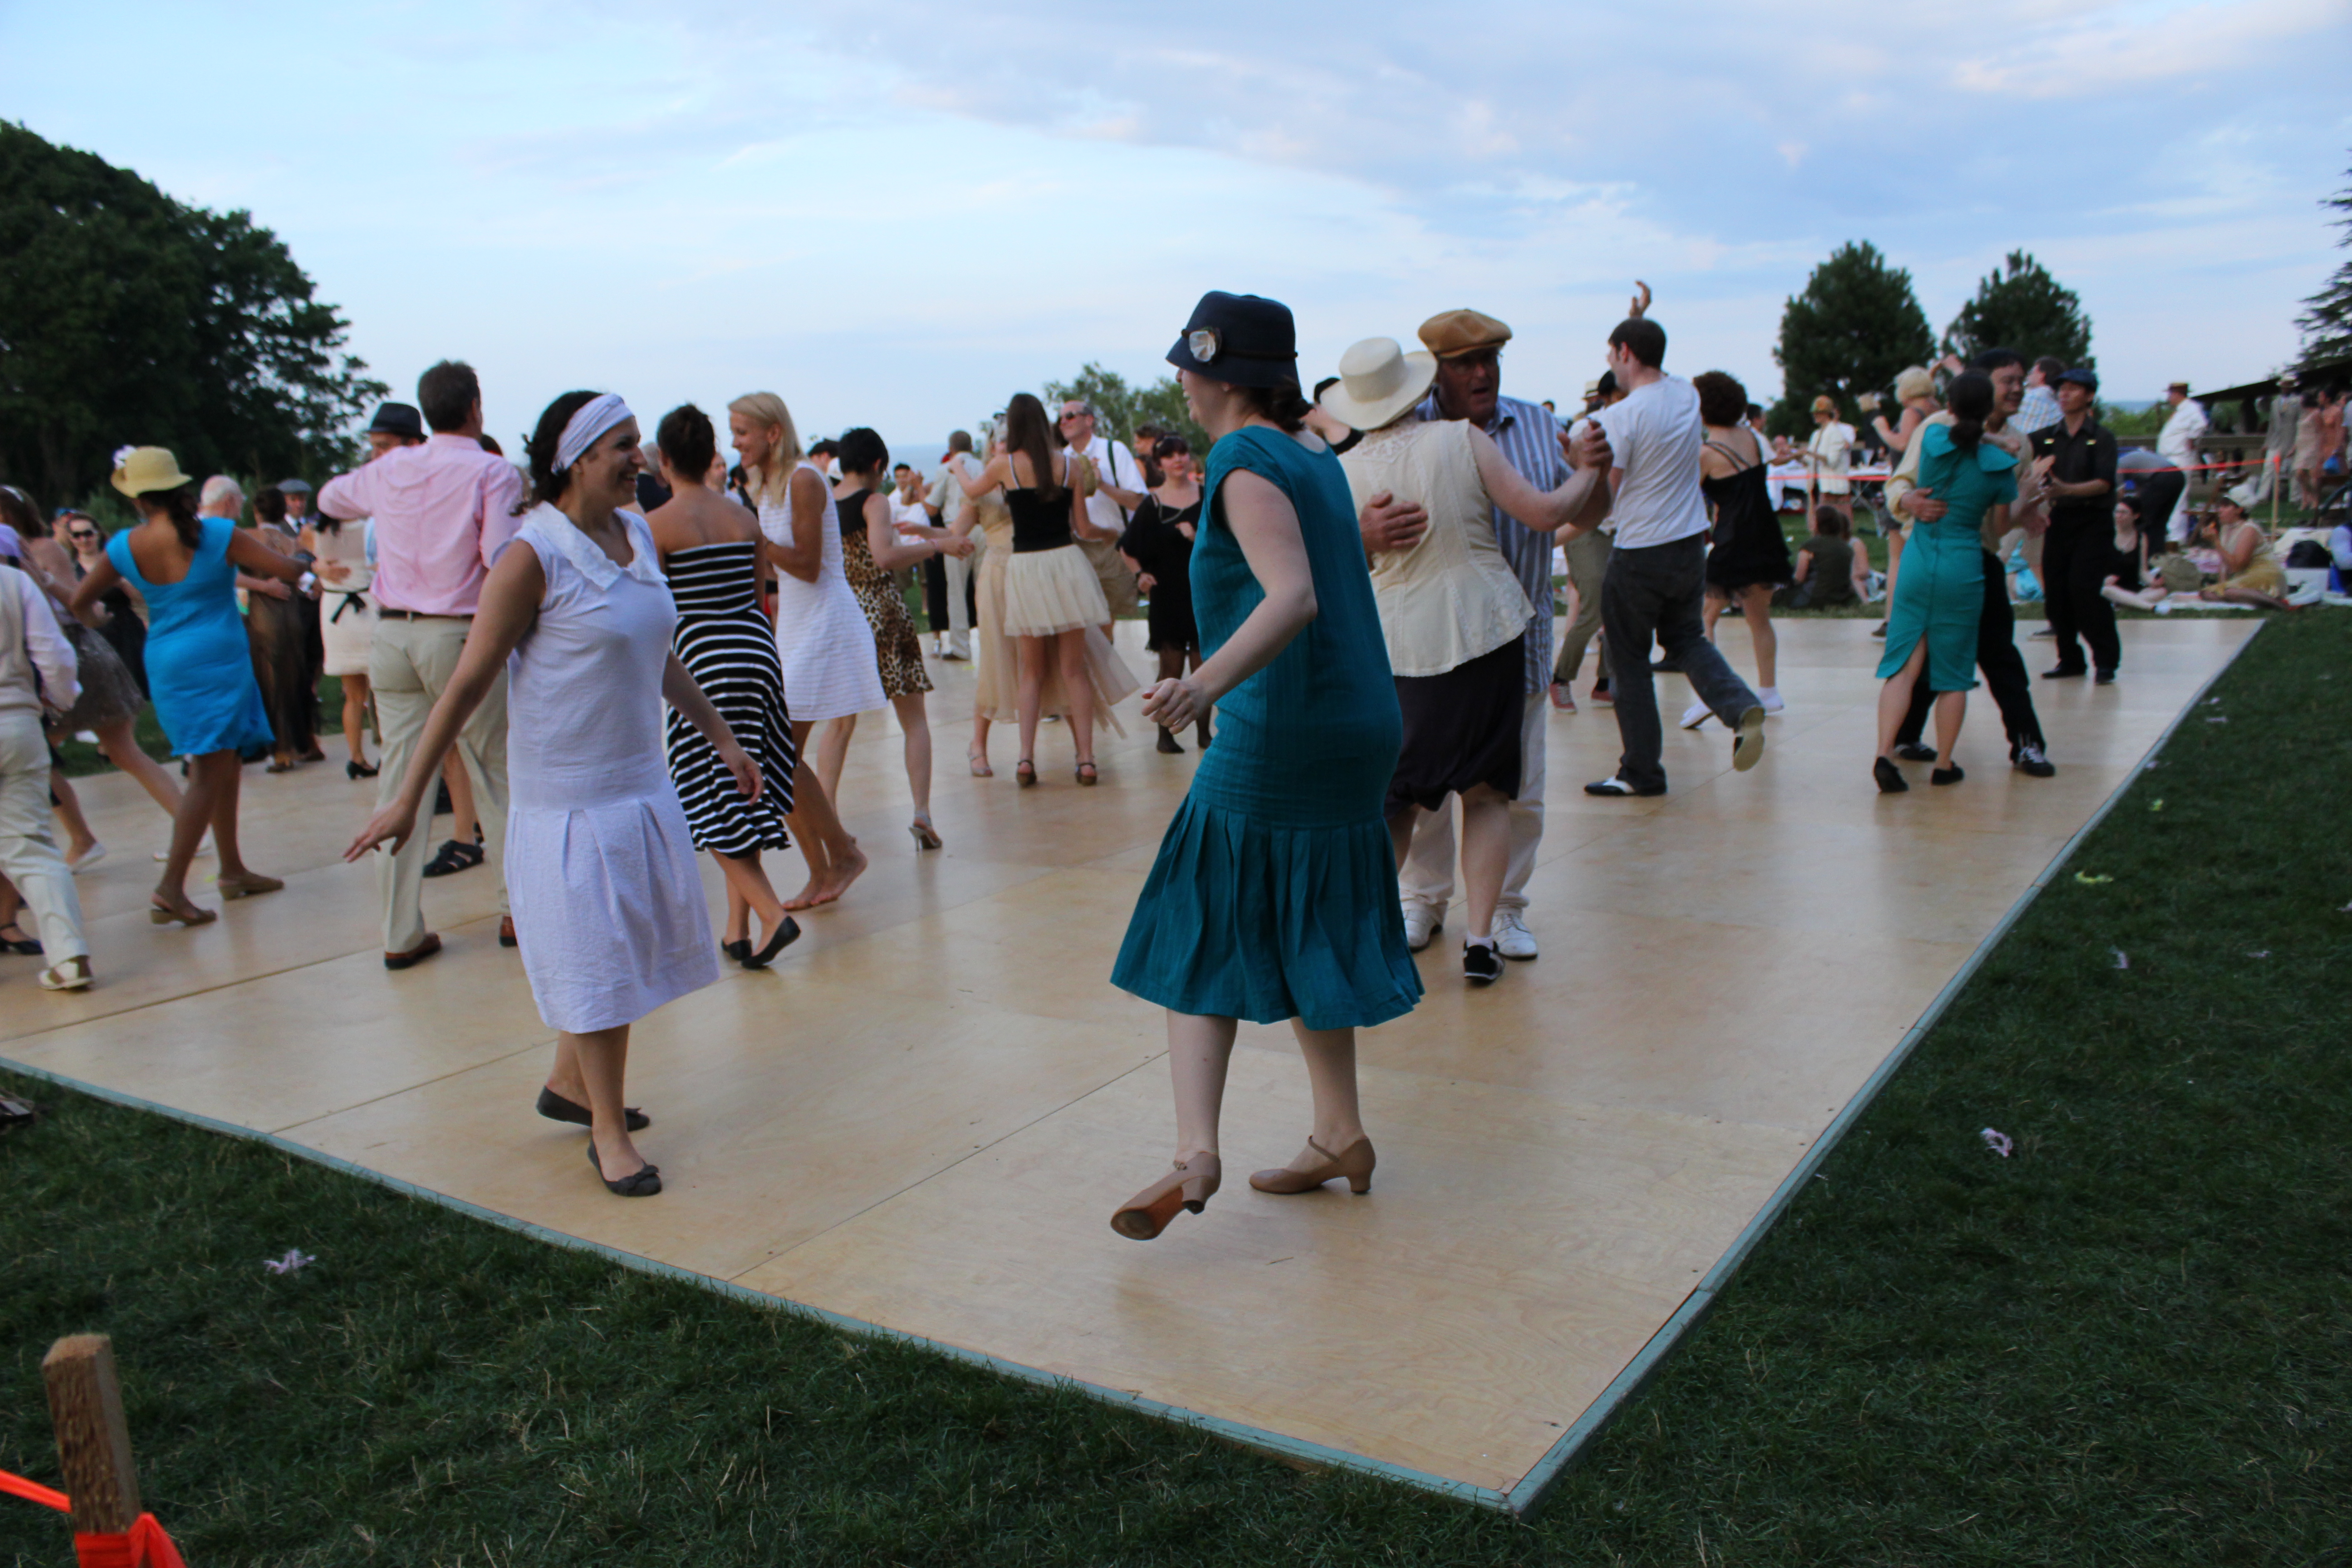
I had the opportunity to attend a 1920s Lawn Party at the Crane Estate in Ipswich, MA, the day right after I participated in the George’s Island Vintage Dance Performance. Luckily, the weather wasn’t so hot. In fact, when we first arrived we were thinking sweaters would have been nice, given the sea breeze, but that thought didn’t last for long as the day heated up.
The lawn party was hosted by Boston Swing Central and included live music by the Baby Soda Jazz Band. The music was lovely and the venue was lovely, as you’ll soon see, but I have to say that I wished for more 20s dancing and less swing… of course, that’s because I’m biased towards older styles of dancing, but I did feel that the event had a vague “I’m not sure what decade I’m in” feel to it rather than strictly as 20s as I had hoped. Ah well, we made our own fun 20s atmosphere.
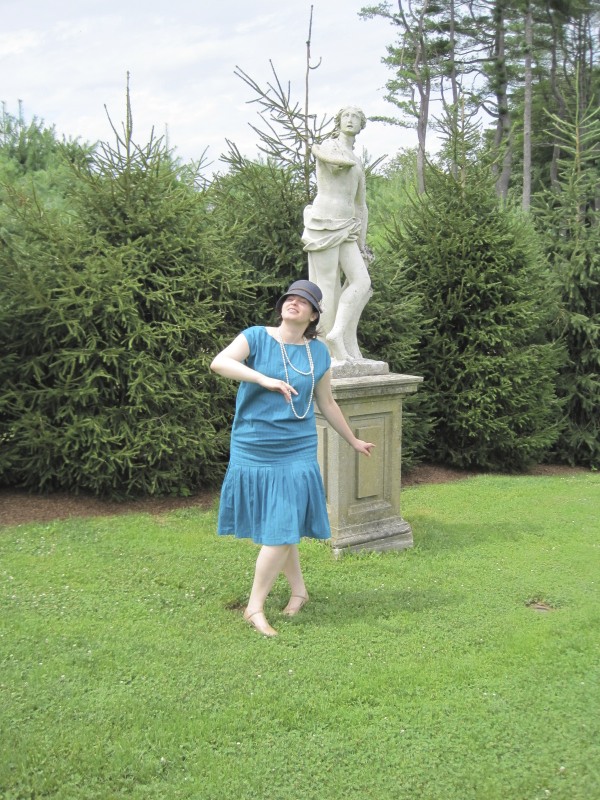
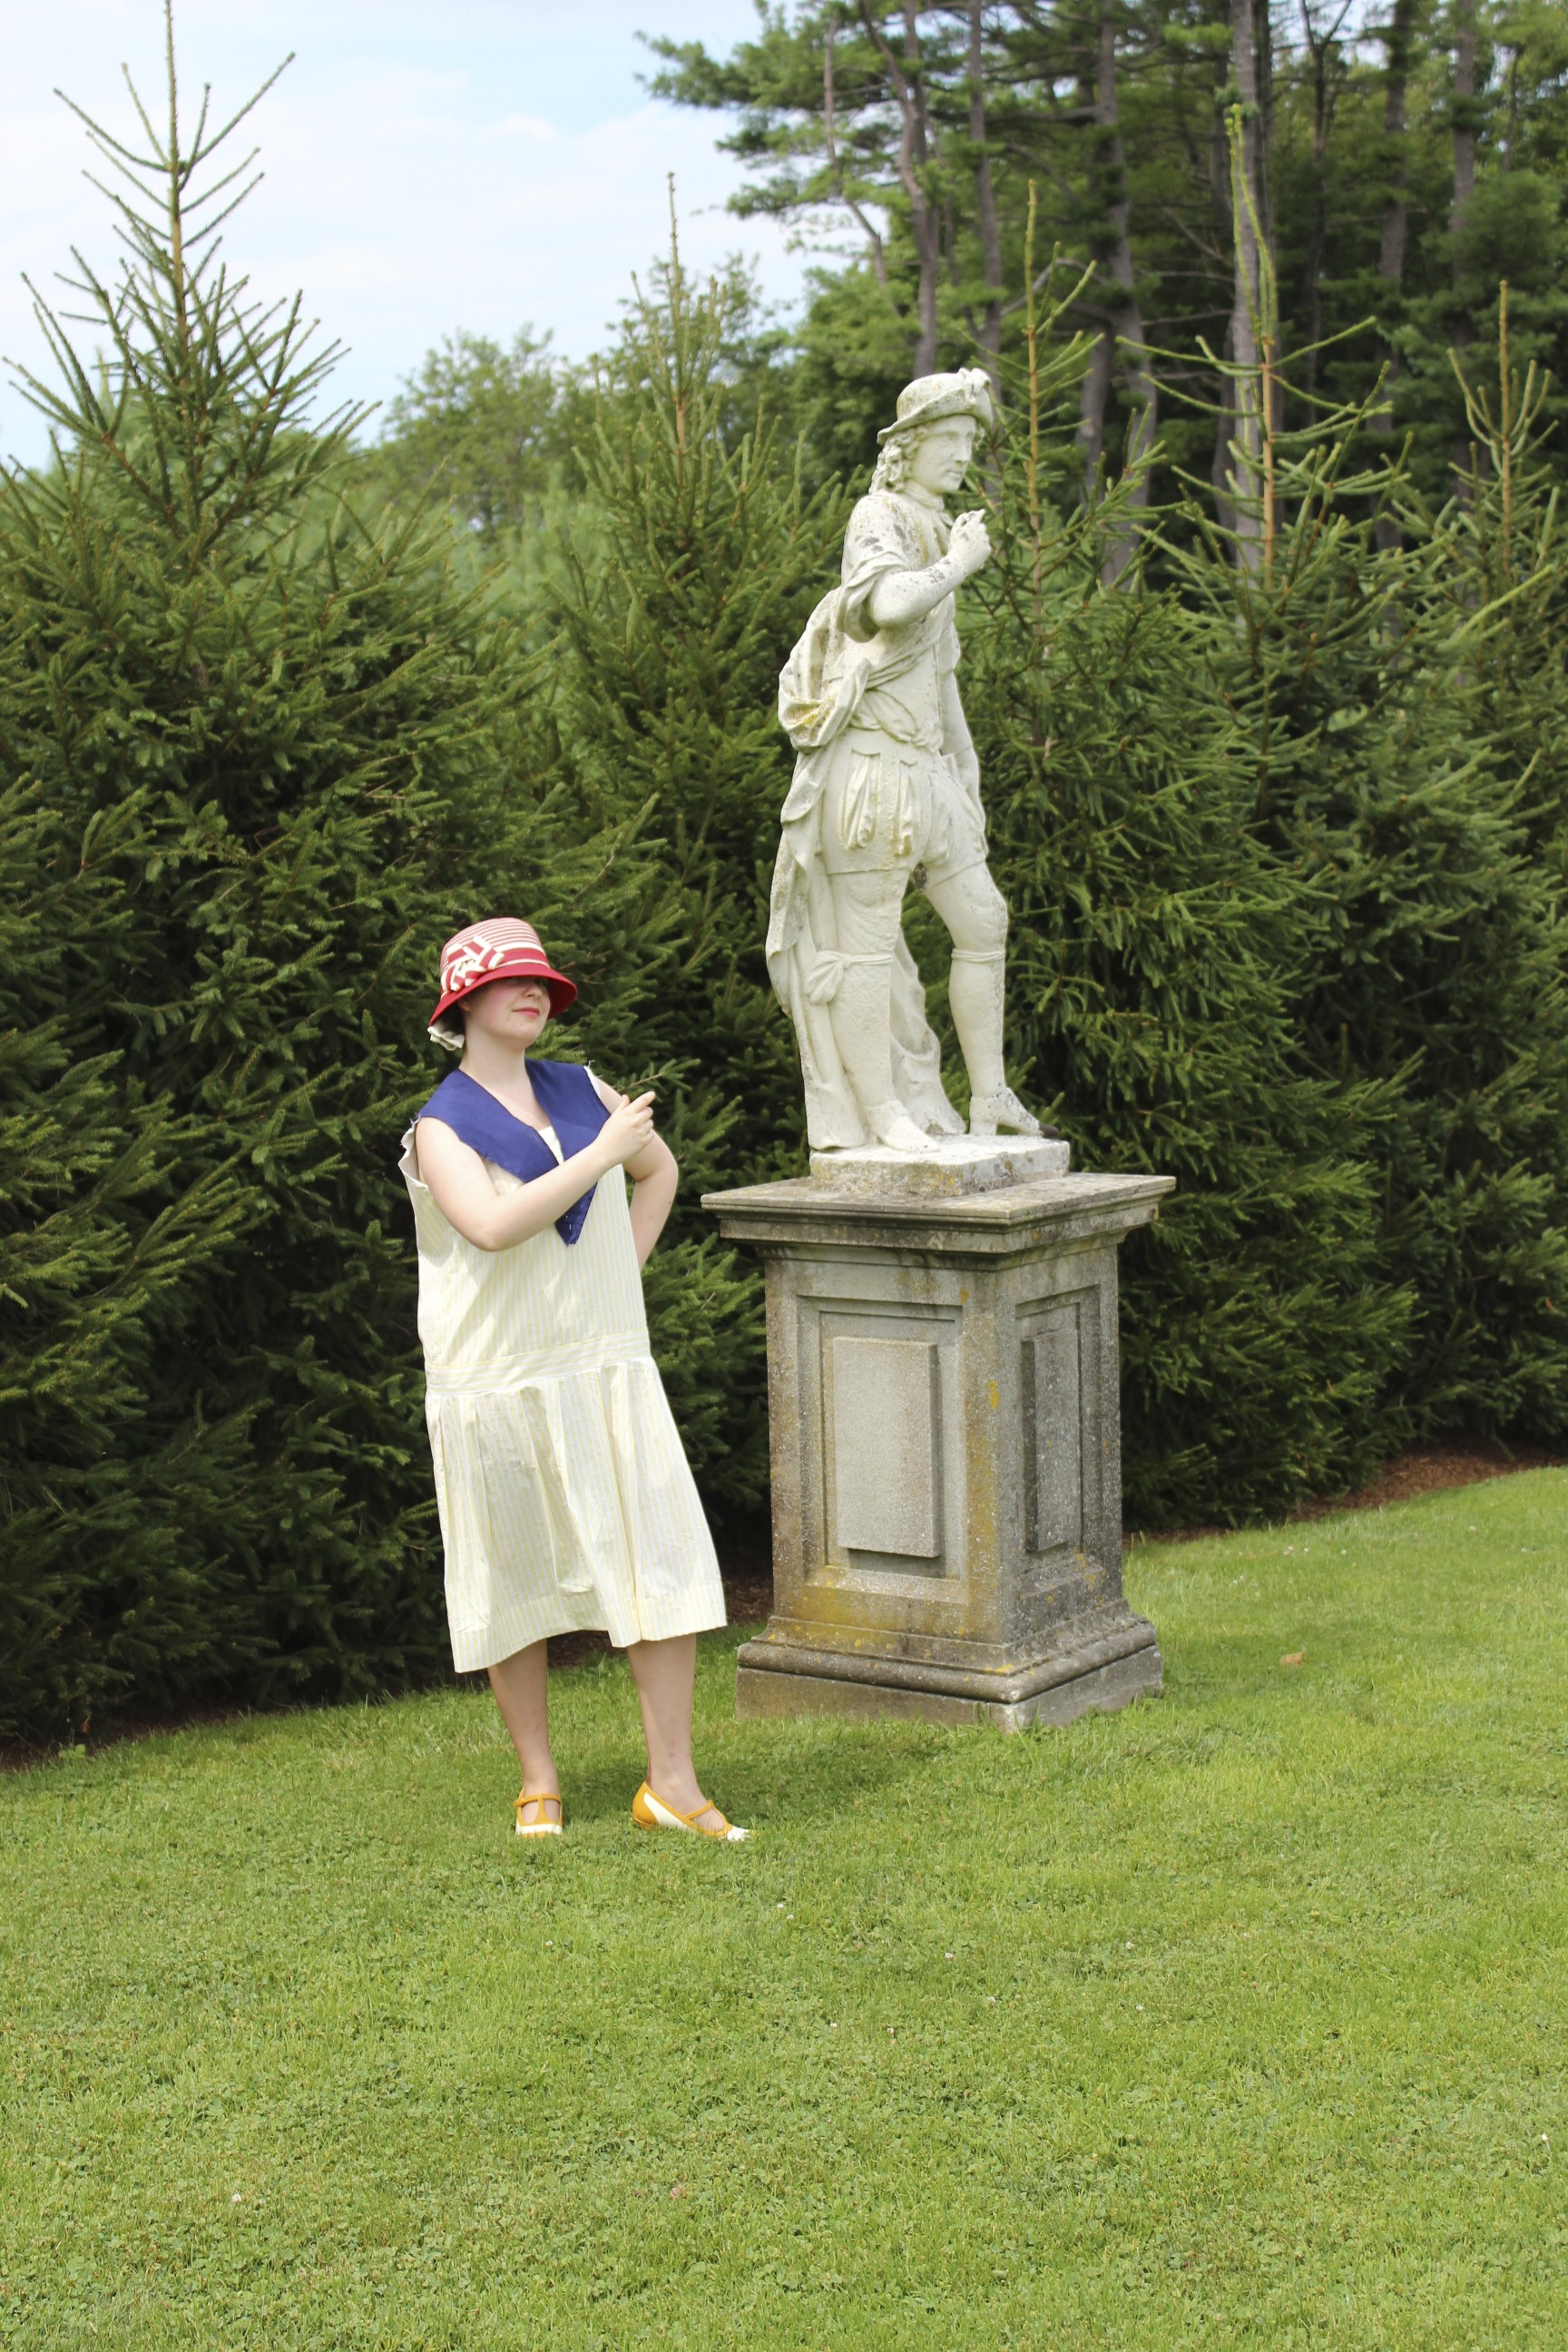
I wore my 1926 cotton not-quite sailor dress and American Duchess Gibsons, and it was nice to see friends with new 1920s day dresses! I think I had the most fun just walking around the lovely estate and taking pictures, so that’s what most of these pictures are.
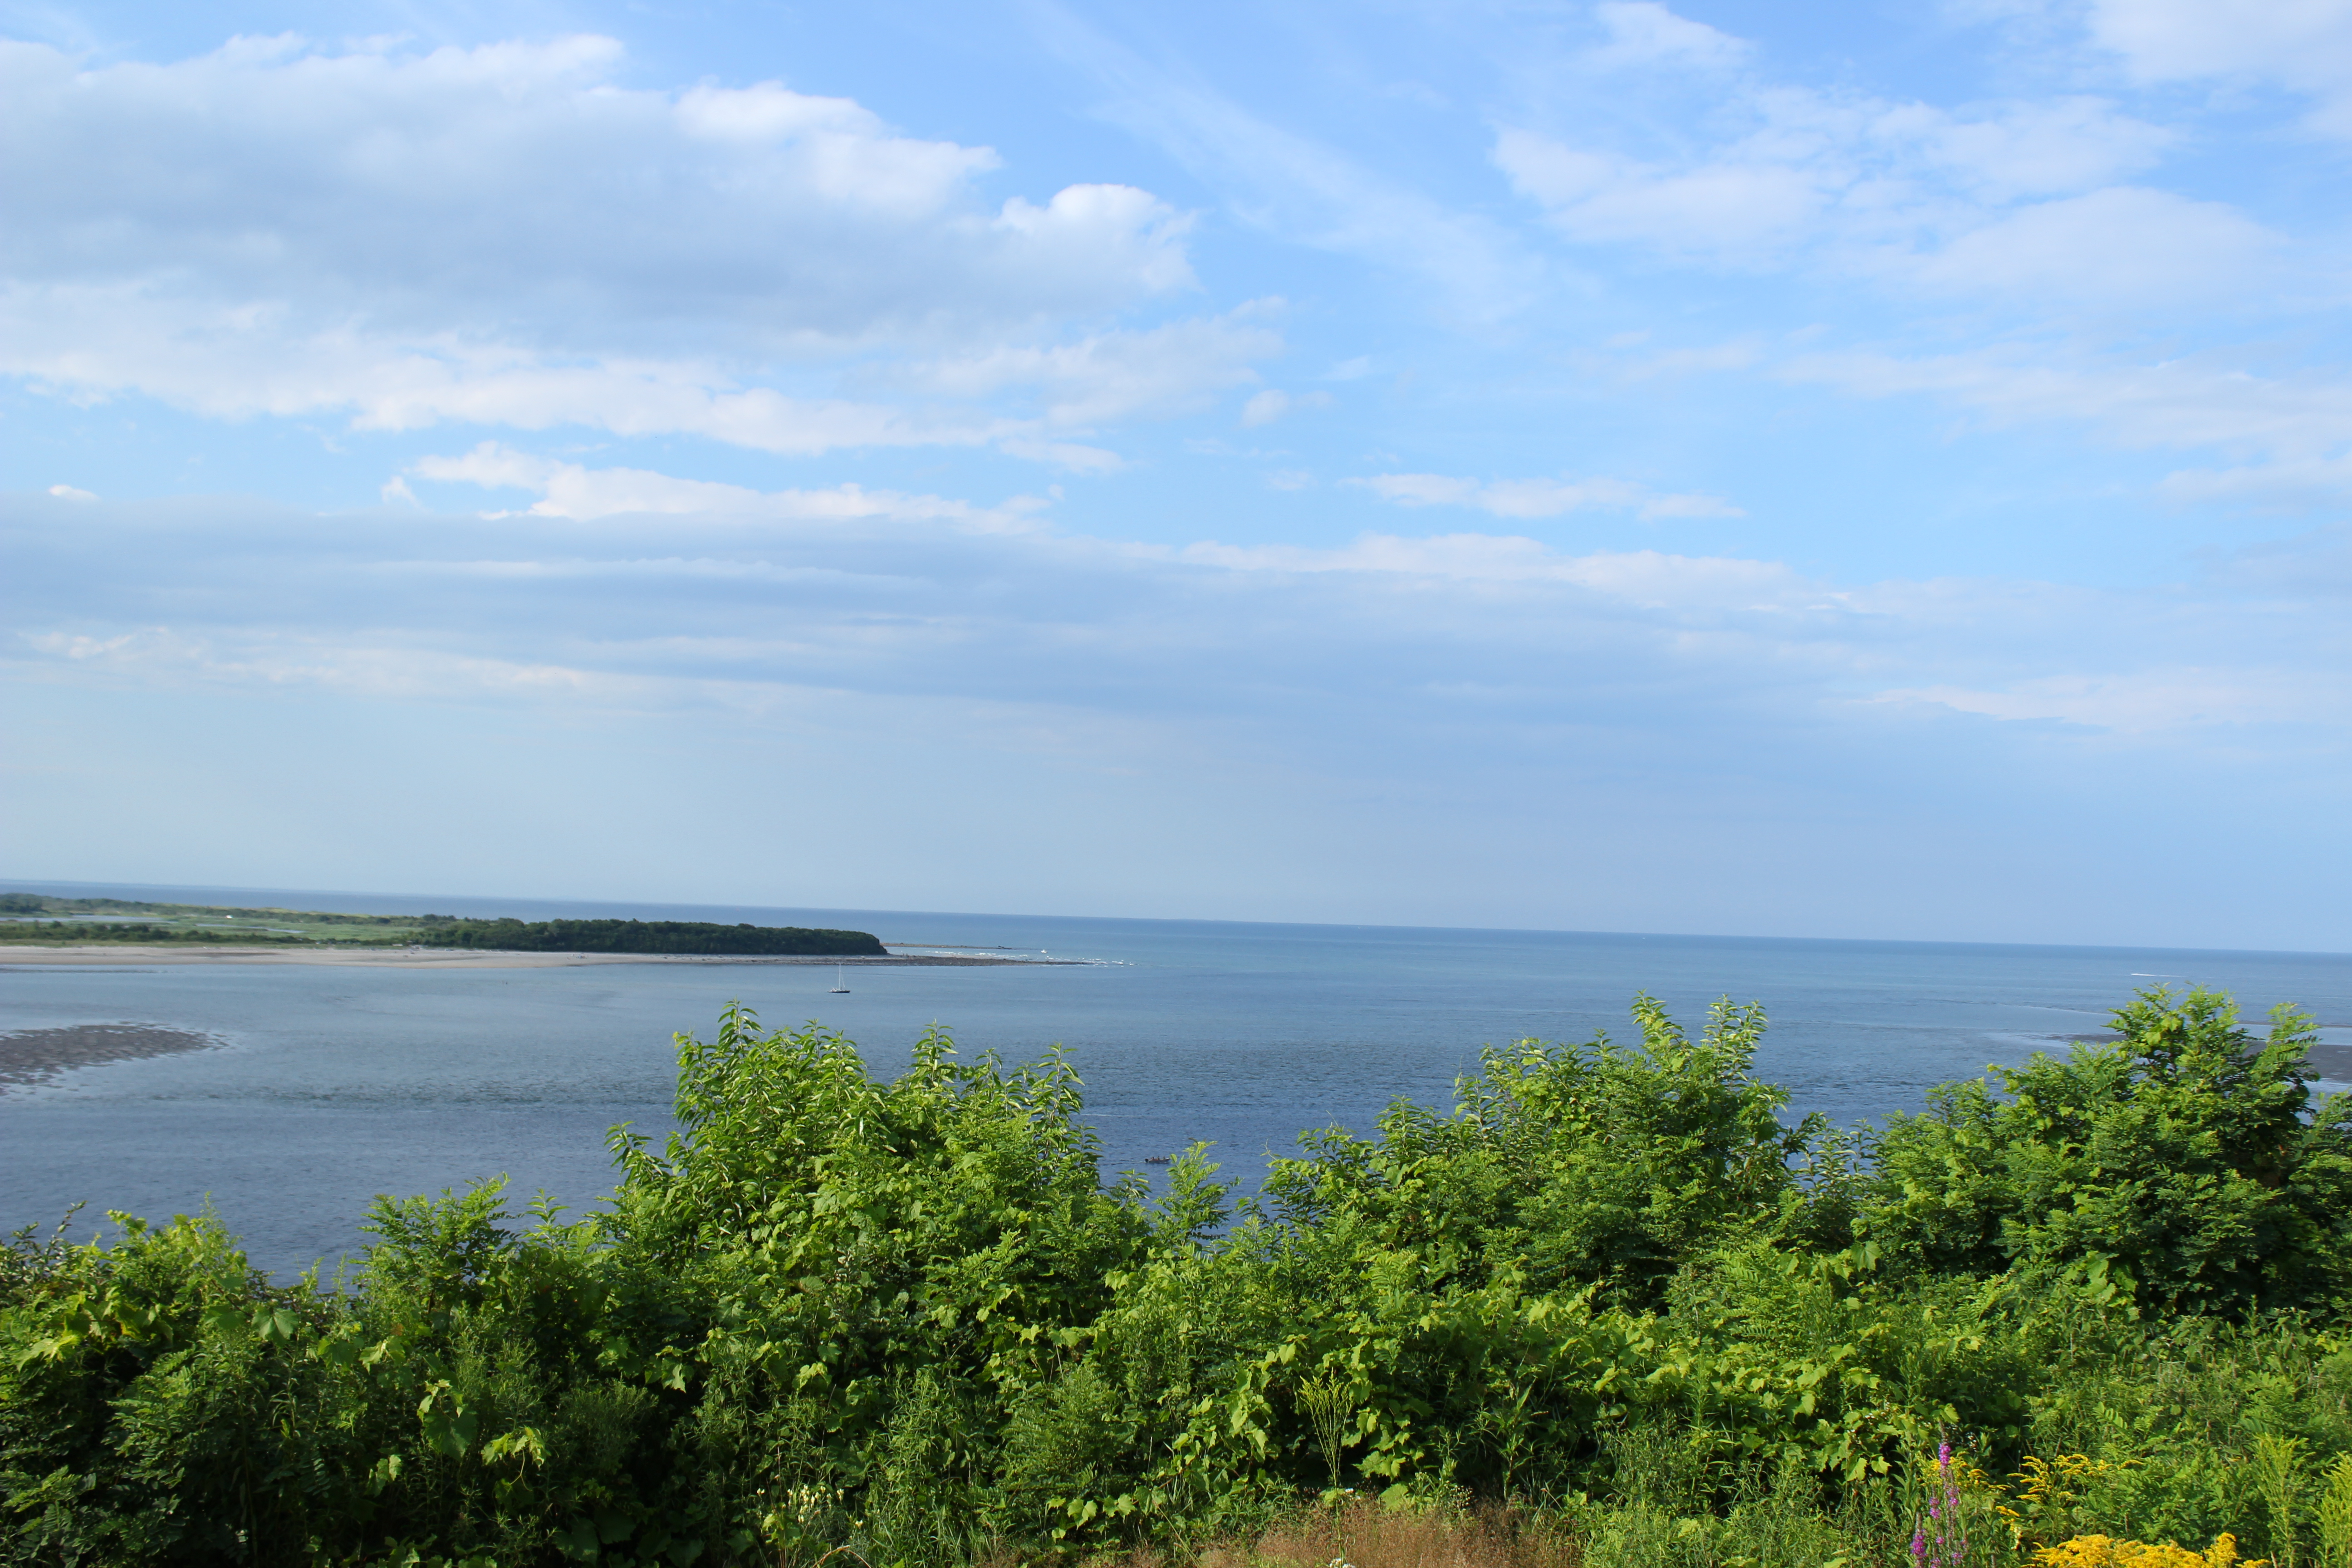
Practicing our 20s poses with the Crane Estate behind us.The view from the house looking out towards the ocean. Those lovely rolling hills don’t look that big, but I promise you they are!Did you happen to notice the statues along the edges of the grass?Well you know silly-ness often happens when I’m around…So we each took turns imitating the statues.When you’ve walked all the way to end of the hills, this is the view that greets you.Lovely!Looking back at the house from the farthest point with the grounds full of people.Looking over the Italian garden tucked away from the main house.While in the garden we took the opportunity for fun photos: telling secrets…Lounging on the rails…Posing with sporting equipment…Admiring the flowers…And playing with accessories and wrought iron gates!There were vendors of vintage items, which were fun to look through. I especially like this dress!And we met some well dressed new people!We also took part in the dancing, especially when there was a song to which we could dance a Charleston!By the end of the day I was feeling pretty tired along with everyone else I was with. We took the opportunity to explore the side of the house that had parking space rather than dancing action, which was quiet and relaxing. This side of the house looks out over marshes.
Not long after that the event was over and it was time to return home, feeling like I needed a weekend to unwind from my weekend!
Product links in this post contain an affiliate code, which provides a small benefit to my shoe fund. This does not affect my impressions and reviews of this product.
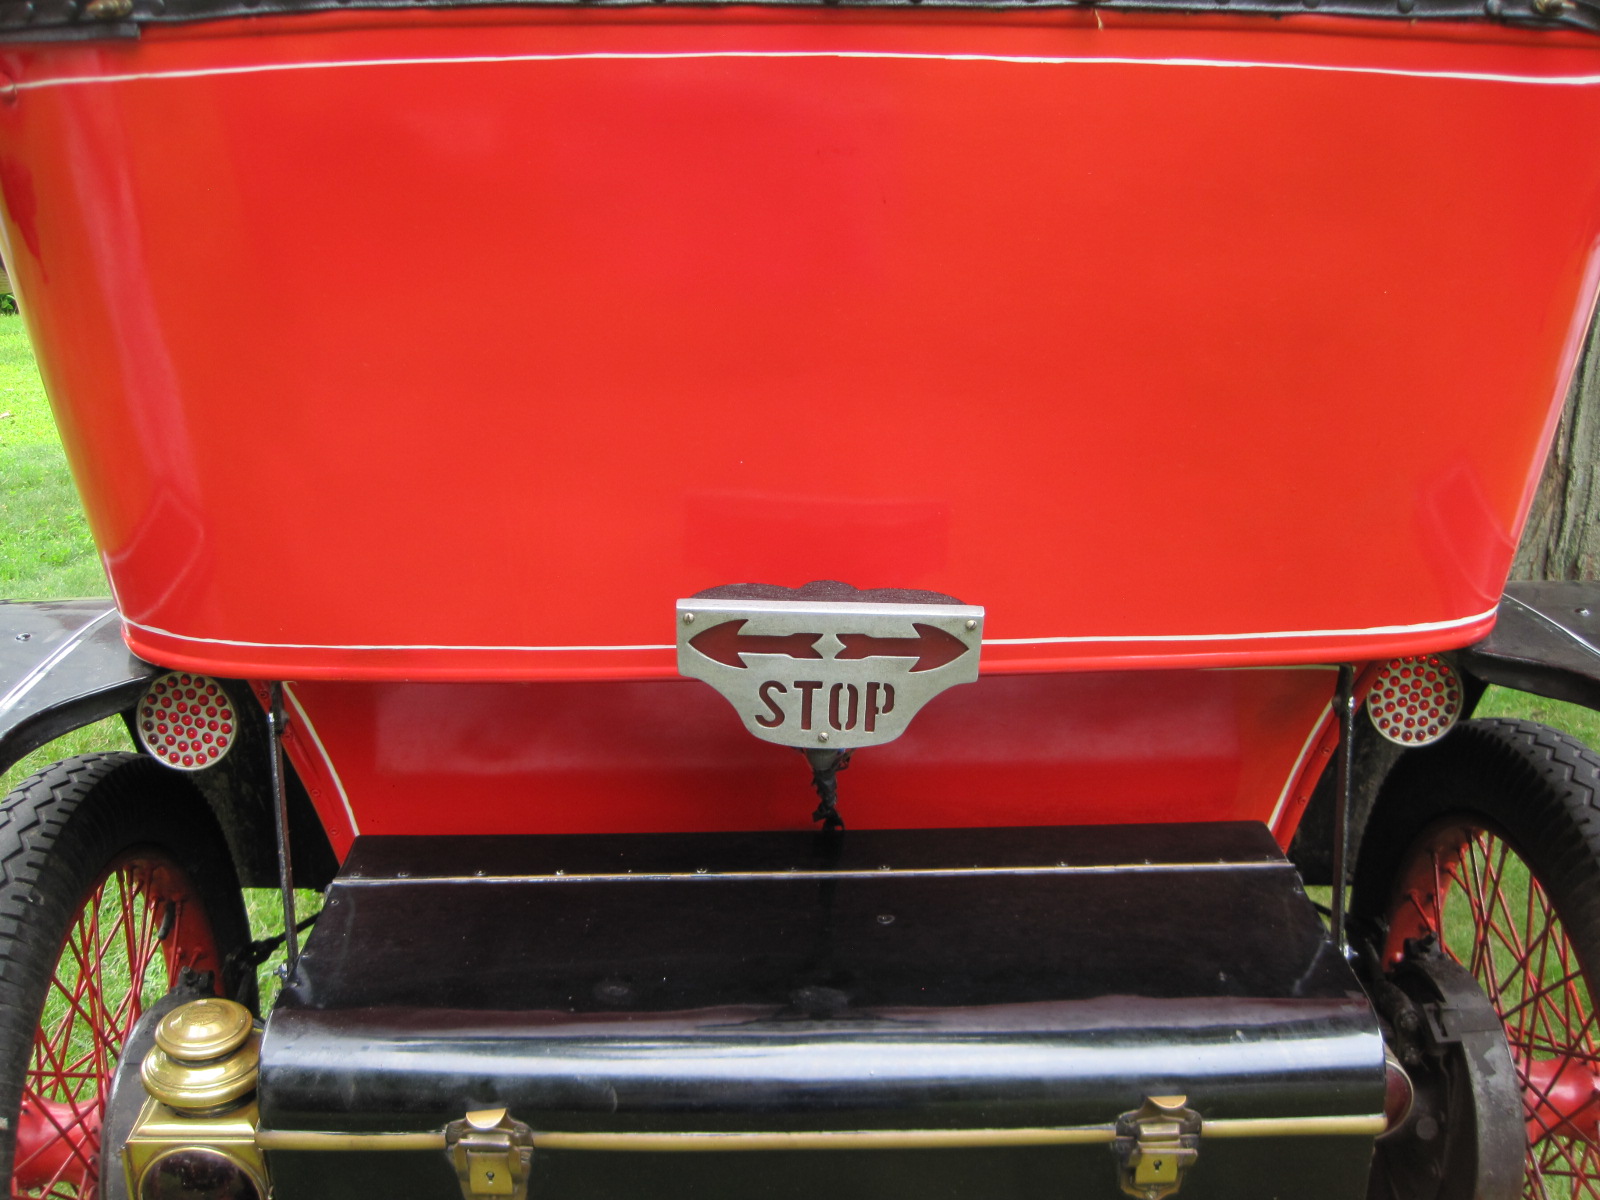
Remember last post, I told you I was going to share some “artsy” photos from the Model T event that occurred recently? Here we are, it’s time.
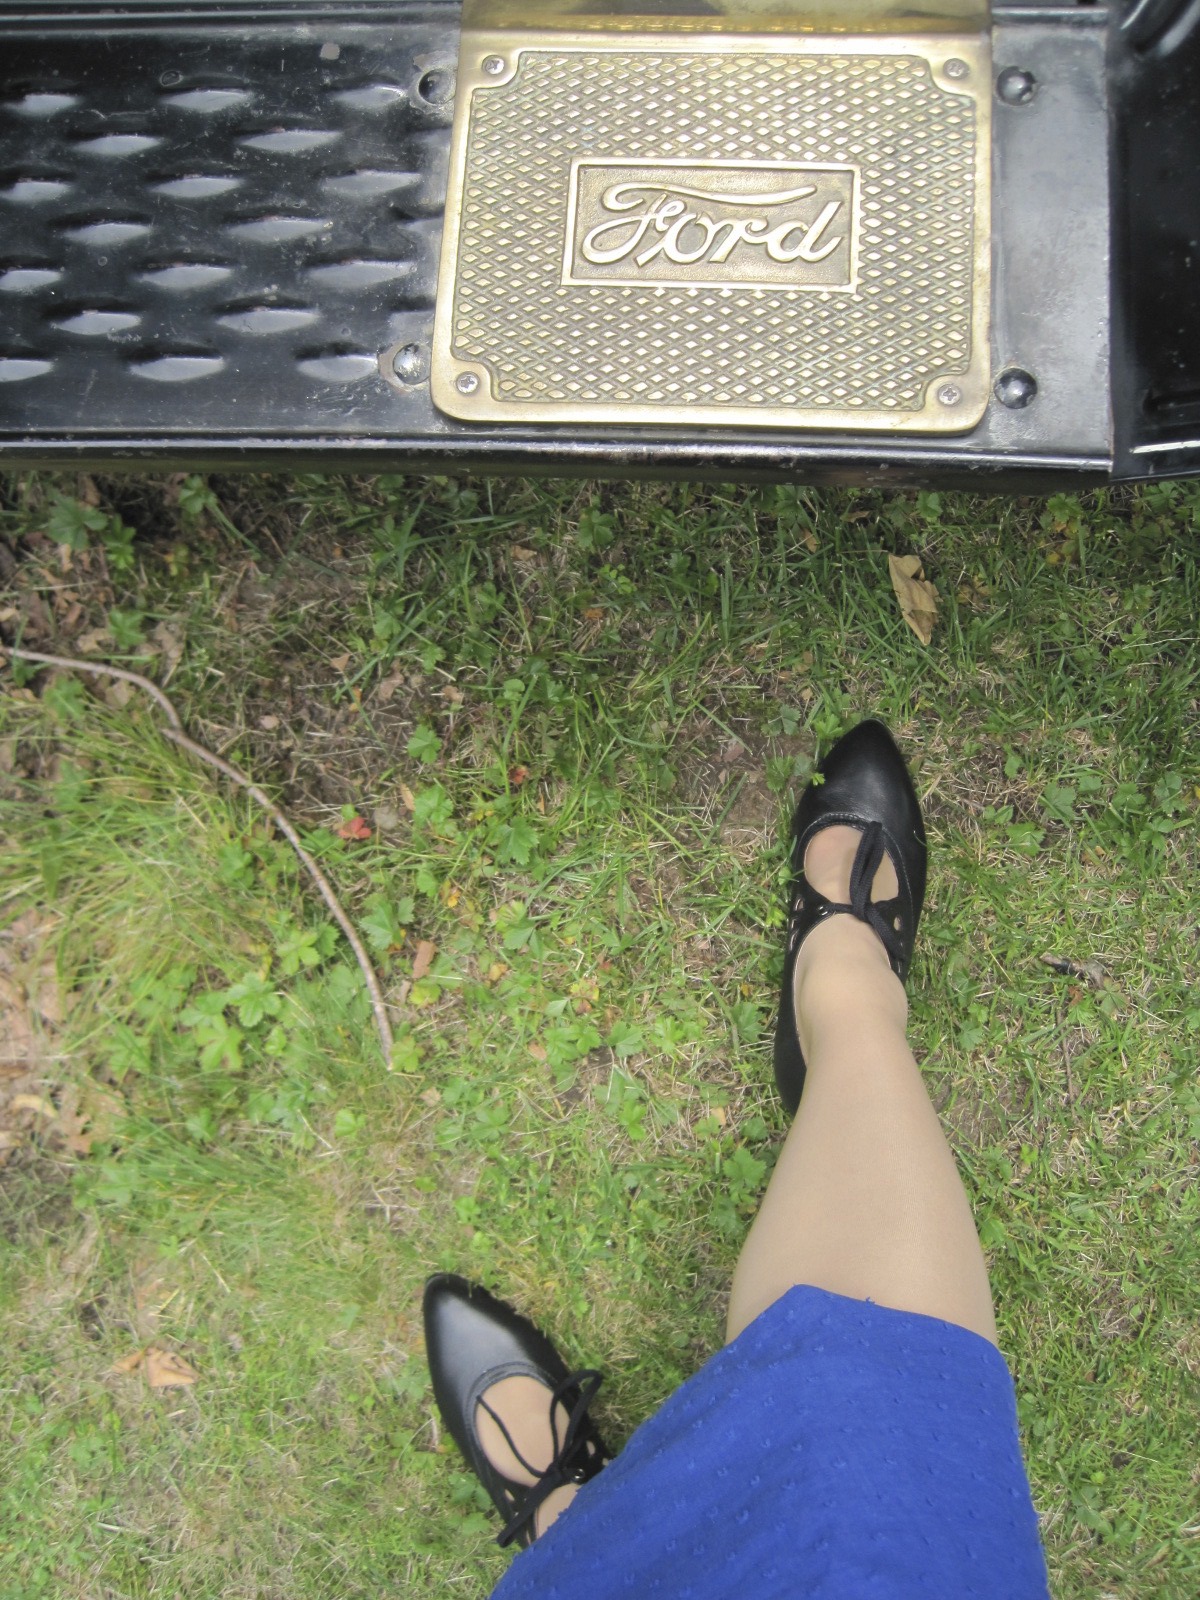
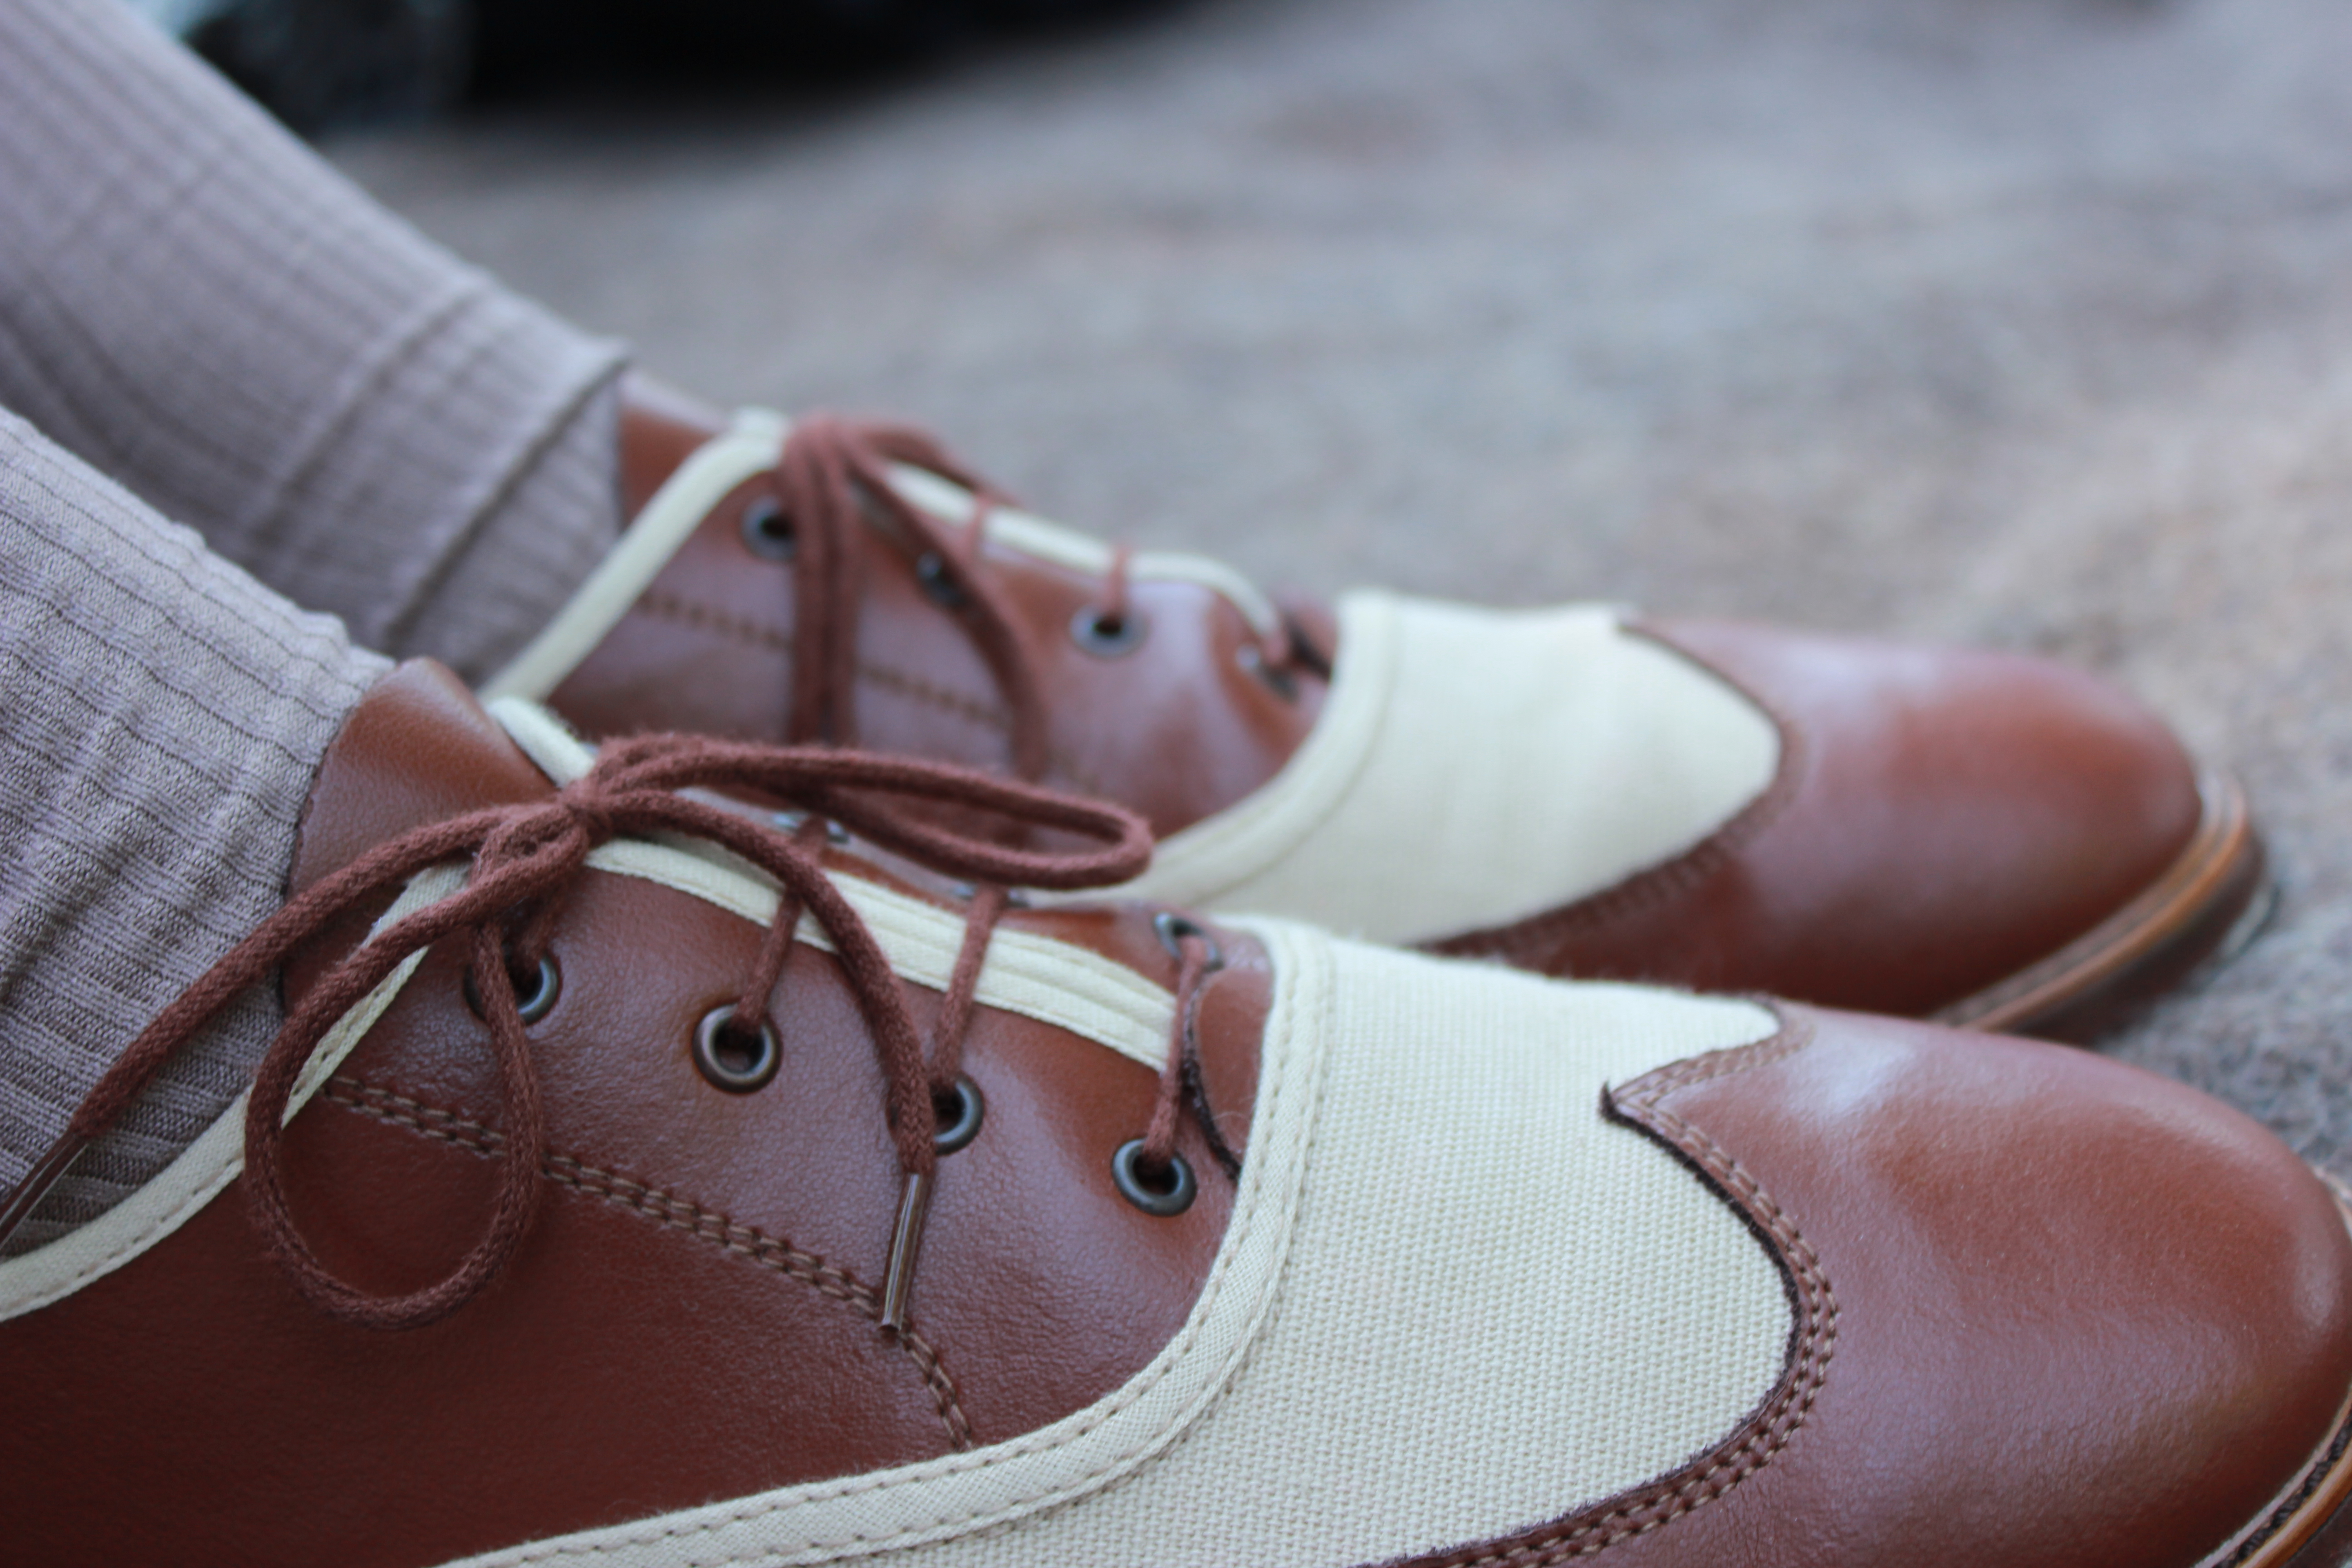
Close up of a wheel with the Ford logo in the center.Isn’t the stop/brake light situation cute? I love it!I like the spare tire on this green car.And the glass in this headlight has a lovely pattern.I wanted to get this shot of the Ford logo with my new shoes, American Duchess Gibsons.
This link contains an affiliate code, which provides a small benefit to my shoe fund. This does not affect my impressions and reviews of this product.
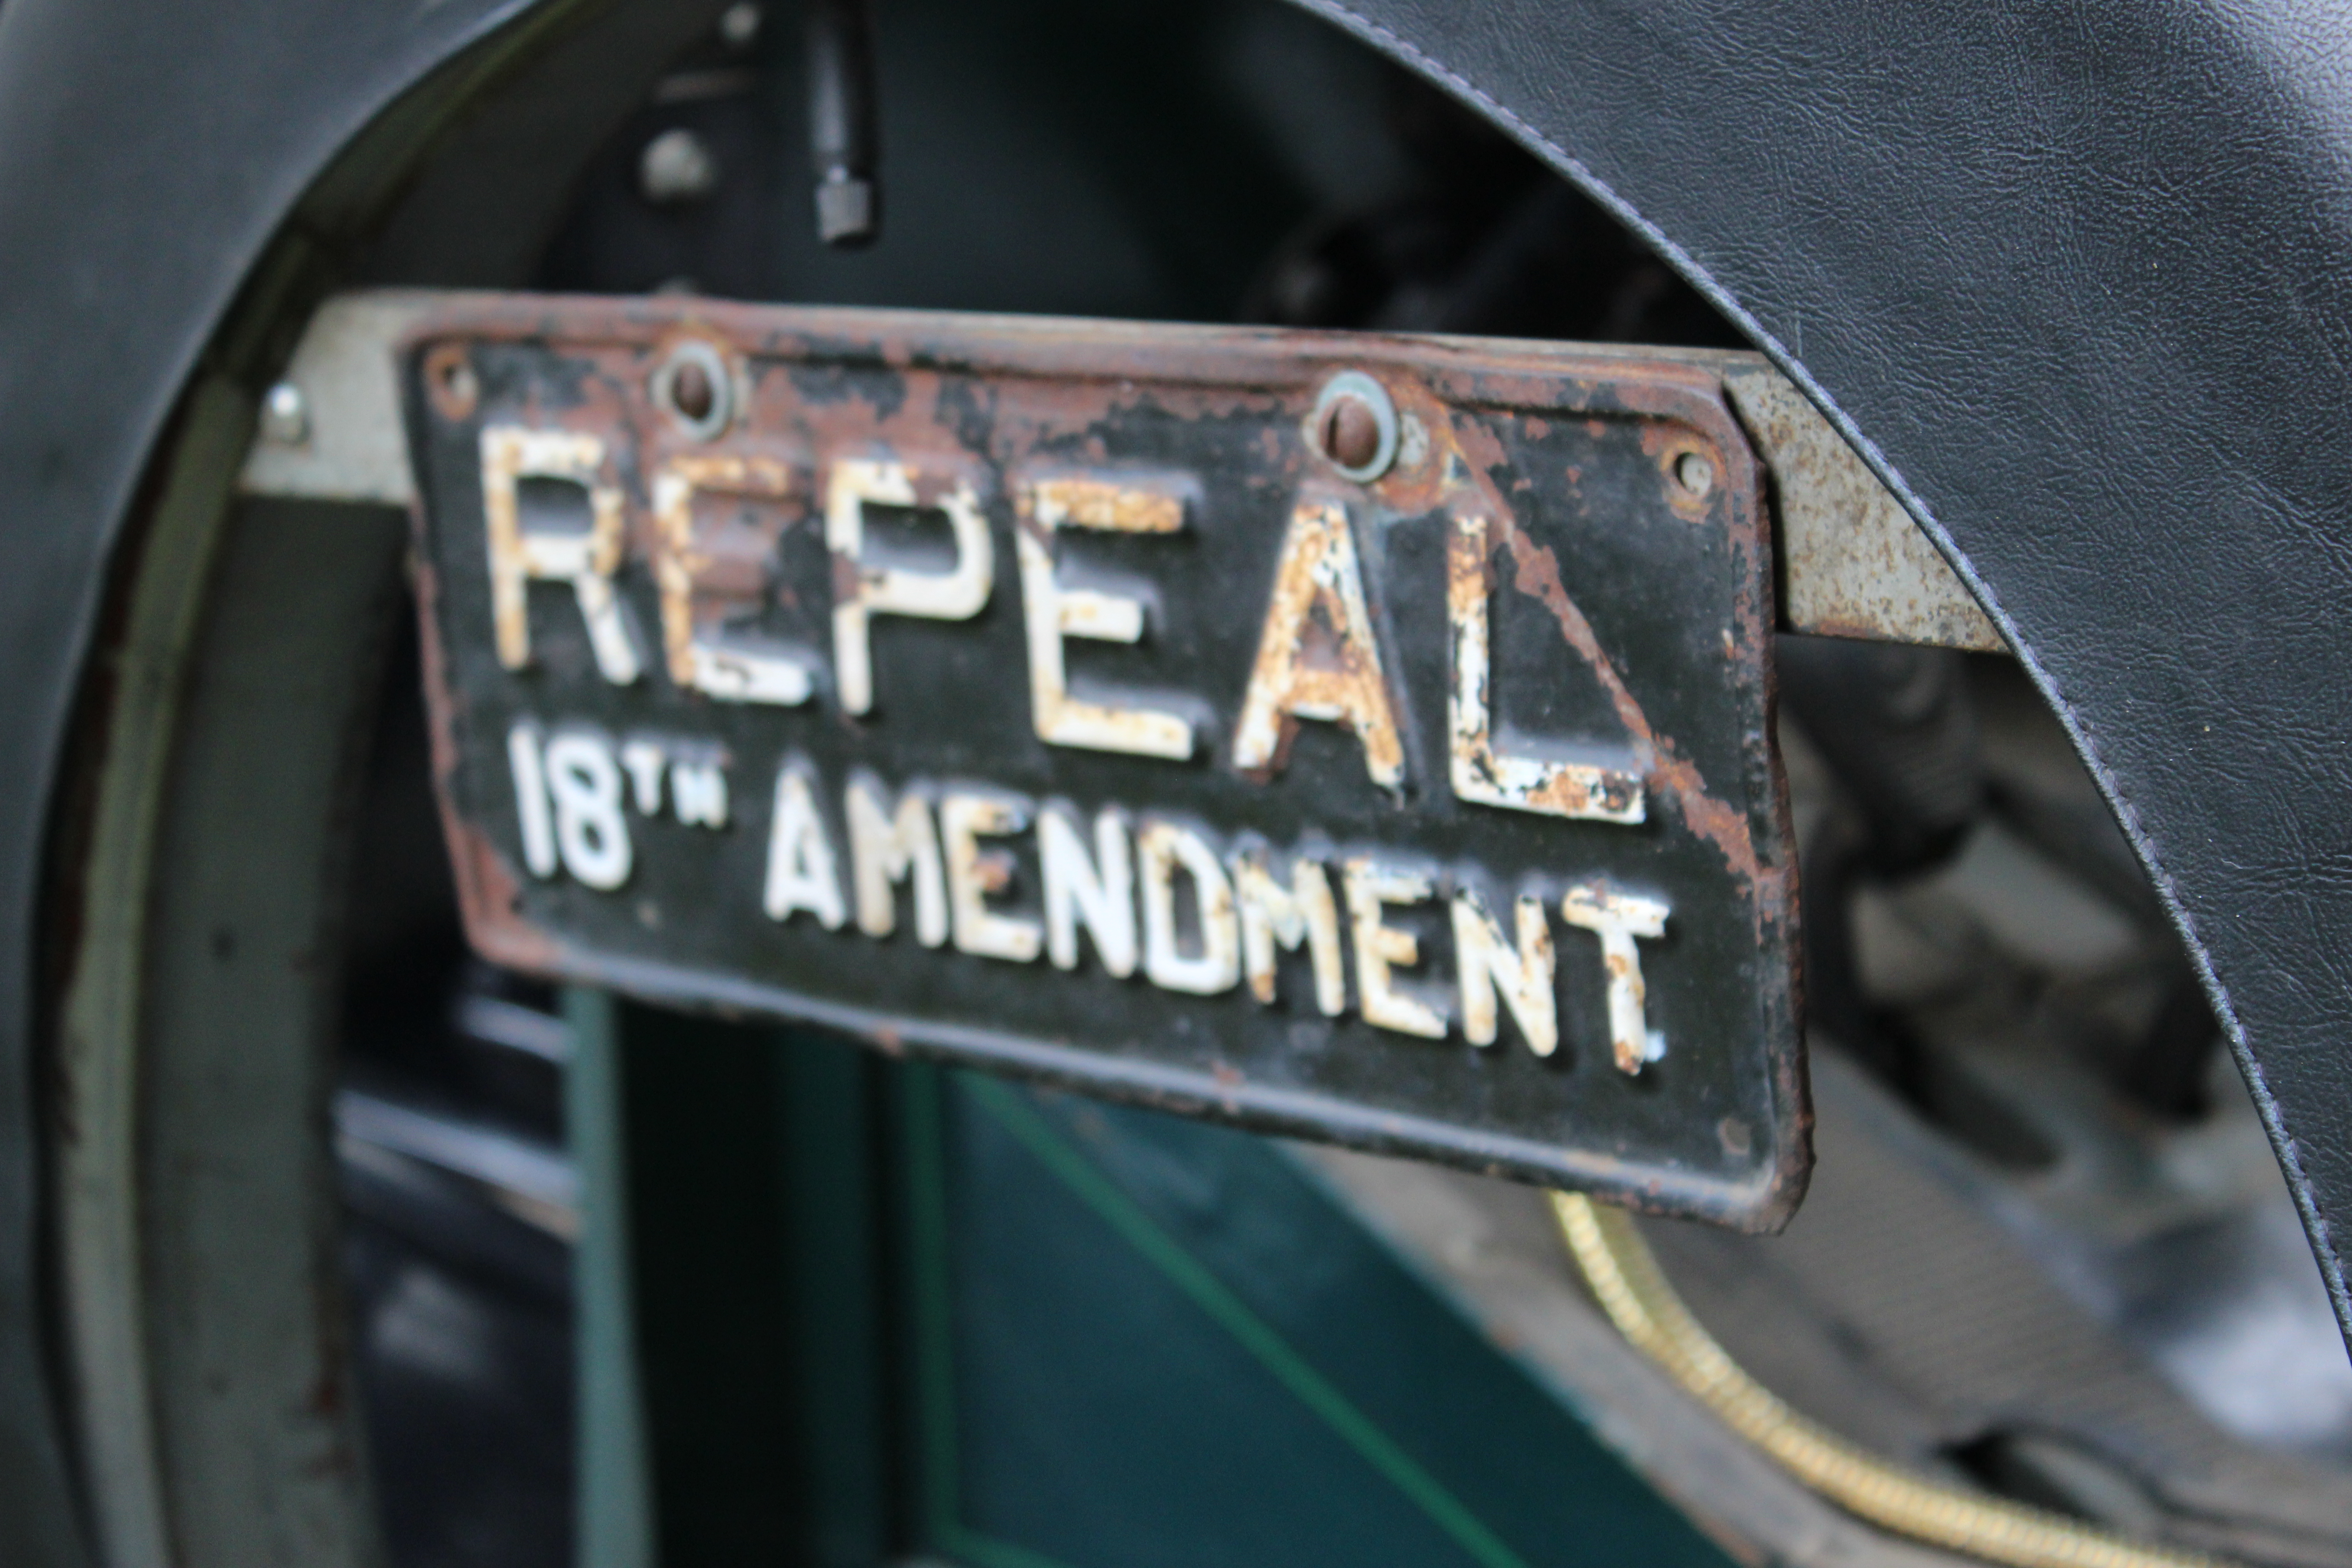
Here I am! Someone else got me getting my feet!Speaking of shoes, we were playing with focus in this shot and the next.Same photo, but in one the focus is the wheel and in the other it’s my feet.Attached to one of the cars. (The 18th Amendment is the one that established Prohibition.)See us reflected in the windshield? We tried to look like we were driving, but that didn’t work, so we had to settle with this.
That’s it! I hope you enjoyed this 1920s Model T adventure. I sure did!
A few posts ago, when I introduced The First Picnic Of The Summer, I mentioned my involvement with other events that same weekend. It’s time to share pictures of another event from that weekend: an afternoon of music, dancing, and Model Ts at the Braintree Historical Society in Braintree, MA.
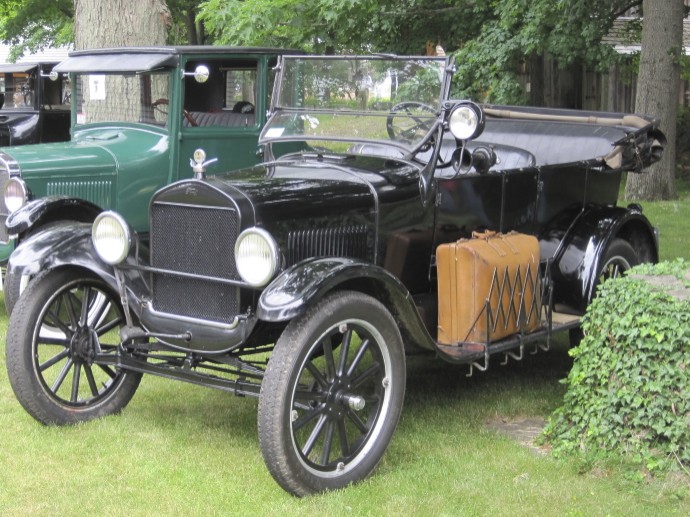
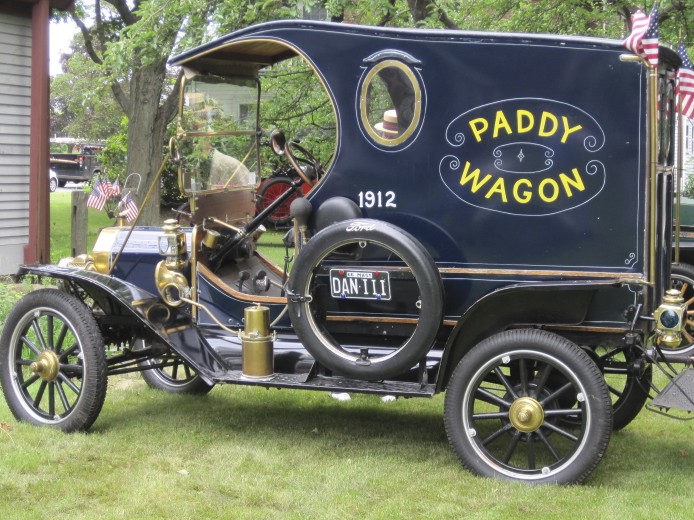
Let’s start with atmosphere: some Model Ts! Model Ts were produced between the years 1908 and 1927 by the Ford Motor Company. My grandfather worked for Ford years ago (though not on Model Ts!) and I have family members who still live in Michigan, so I feel a special connection to that part of car history. As far as I could observe, all of these Model Ts were still operational, drivable, and licensed to drive on the street! Neat!
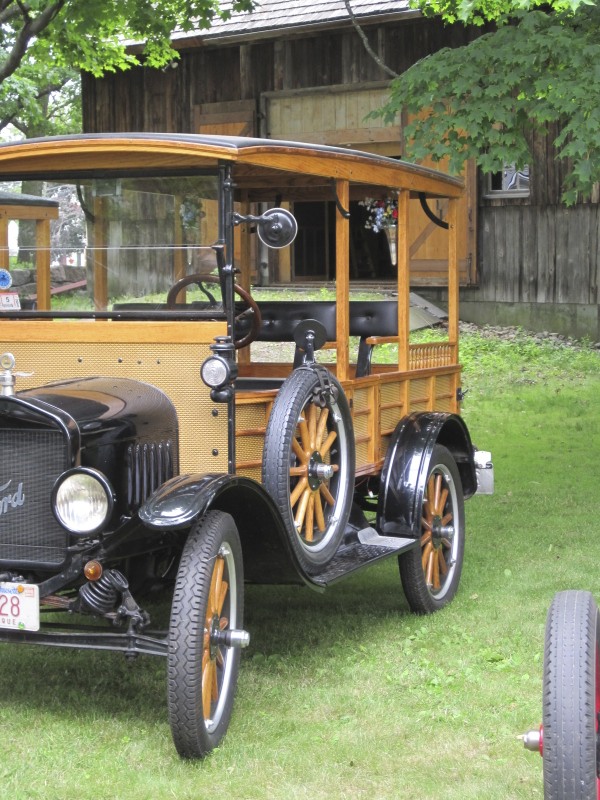
Front view of a Model T.I love the luggage storage on this one!Pretty swanky, with all that gleaming wood!I like that this picture has a modern car in the background!Need I say more? It’s labeled!“R. I. Brow & Son; Oil Dealer” I love it! Especially with the canisters attached.Two Model Ts parked in front of the barn.A pretty fabulous red Model T with be-boater-ed gentlemen lurking behind it… (They had no idea I was taking a picture! bwhaha!)
The reason we were in attendance at this event was to do a few small dance performances. We did the same 20s dances that we performed at the Great Gatsby: the Charleston, Tango, Foxtrot, and One Step. I don’t have pictures of the performances… but in between performances we had time to wander amongst the Model Ts and have a picnic lunch.
Oh yes, and I wore a new 1926 dress and my all new American Duchess Gibsons! I also attempted some “make-do finger waves” in my hair. Basically, that means that I didn’t try for real finger waves… I just put some gel in my hair and used a fine tooth comb on the top bits. Since my hair has natural waves it just dried in a sort of wavy way and I put up the back in a low bun. I think it turned out pretty well, though, for not trying that hard!
This link contains an affiliate code, which provides a small benefit to my shoe fund. This does not affect my impressions and reviews of this product.
The dress was made because we needed day clothes for this event and my other two 20s evening dresses are not appropriate. As I mentioned in the post May Fabric Stash Additions when I shared this fabric, I wanted a cotton so it would be lightweight and washable… and this is what I wound up with. I thought it might be to sailor-y, but in the end I don’t think it is! I like that it’s a rather striking color and not something I would normally pick out for myself.
I didn’t use a pattern for the dress, I just sort of used my measurements and made it up while referencing a lot of 20s patterns in the COPA archive for skirt shape, mostly. The front and back bodice and sleeves are all one piece cut in the kimono style. It’s all french seamed and the skirt and sleeves are finished with hug snug. The waistband is a little messy on the inside, because I haven’t taken the time to finish it and because the sides were doing a weird thing I had to fix with a wonky side dart. But eh, no one will see the inside! I’m glad it’s done and I like the faked tie-collar.
Gibsons!
The Gibsons are comfortable and cute. I like that the sole is a little thicker than on my Astorias, because it means the pointy toe shoe leather isn’t getting scratched while I walk (as it is on my Astorias). The toes are pretty pointy but they are starting to stretch to my foot shape, so that’s good.
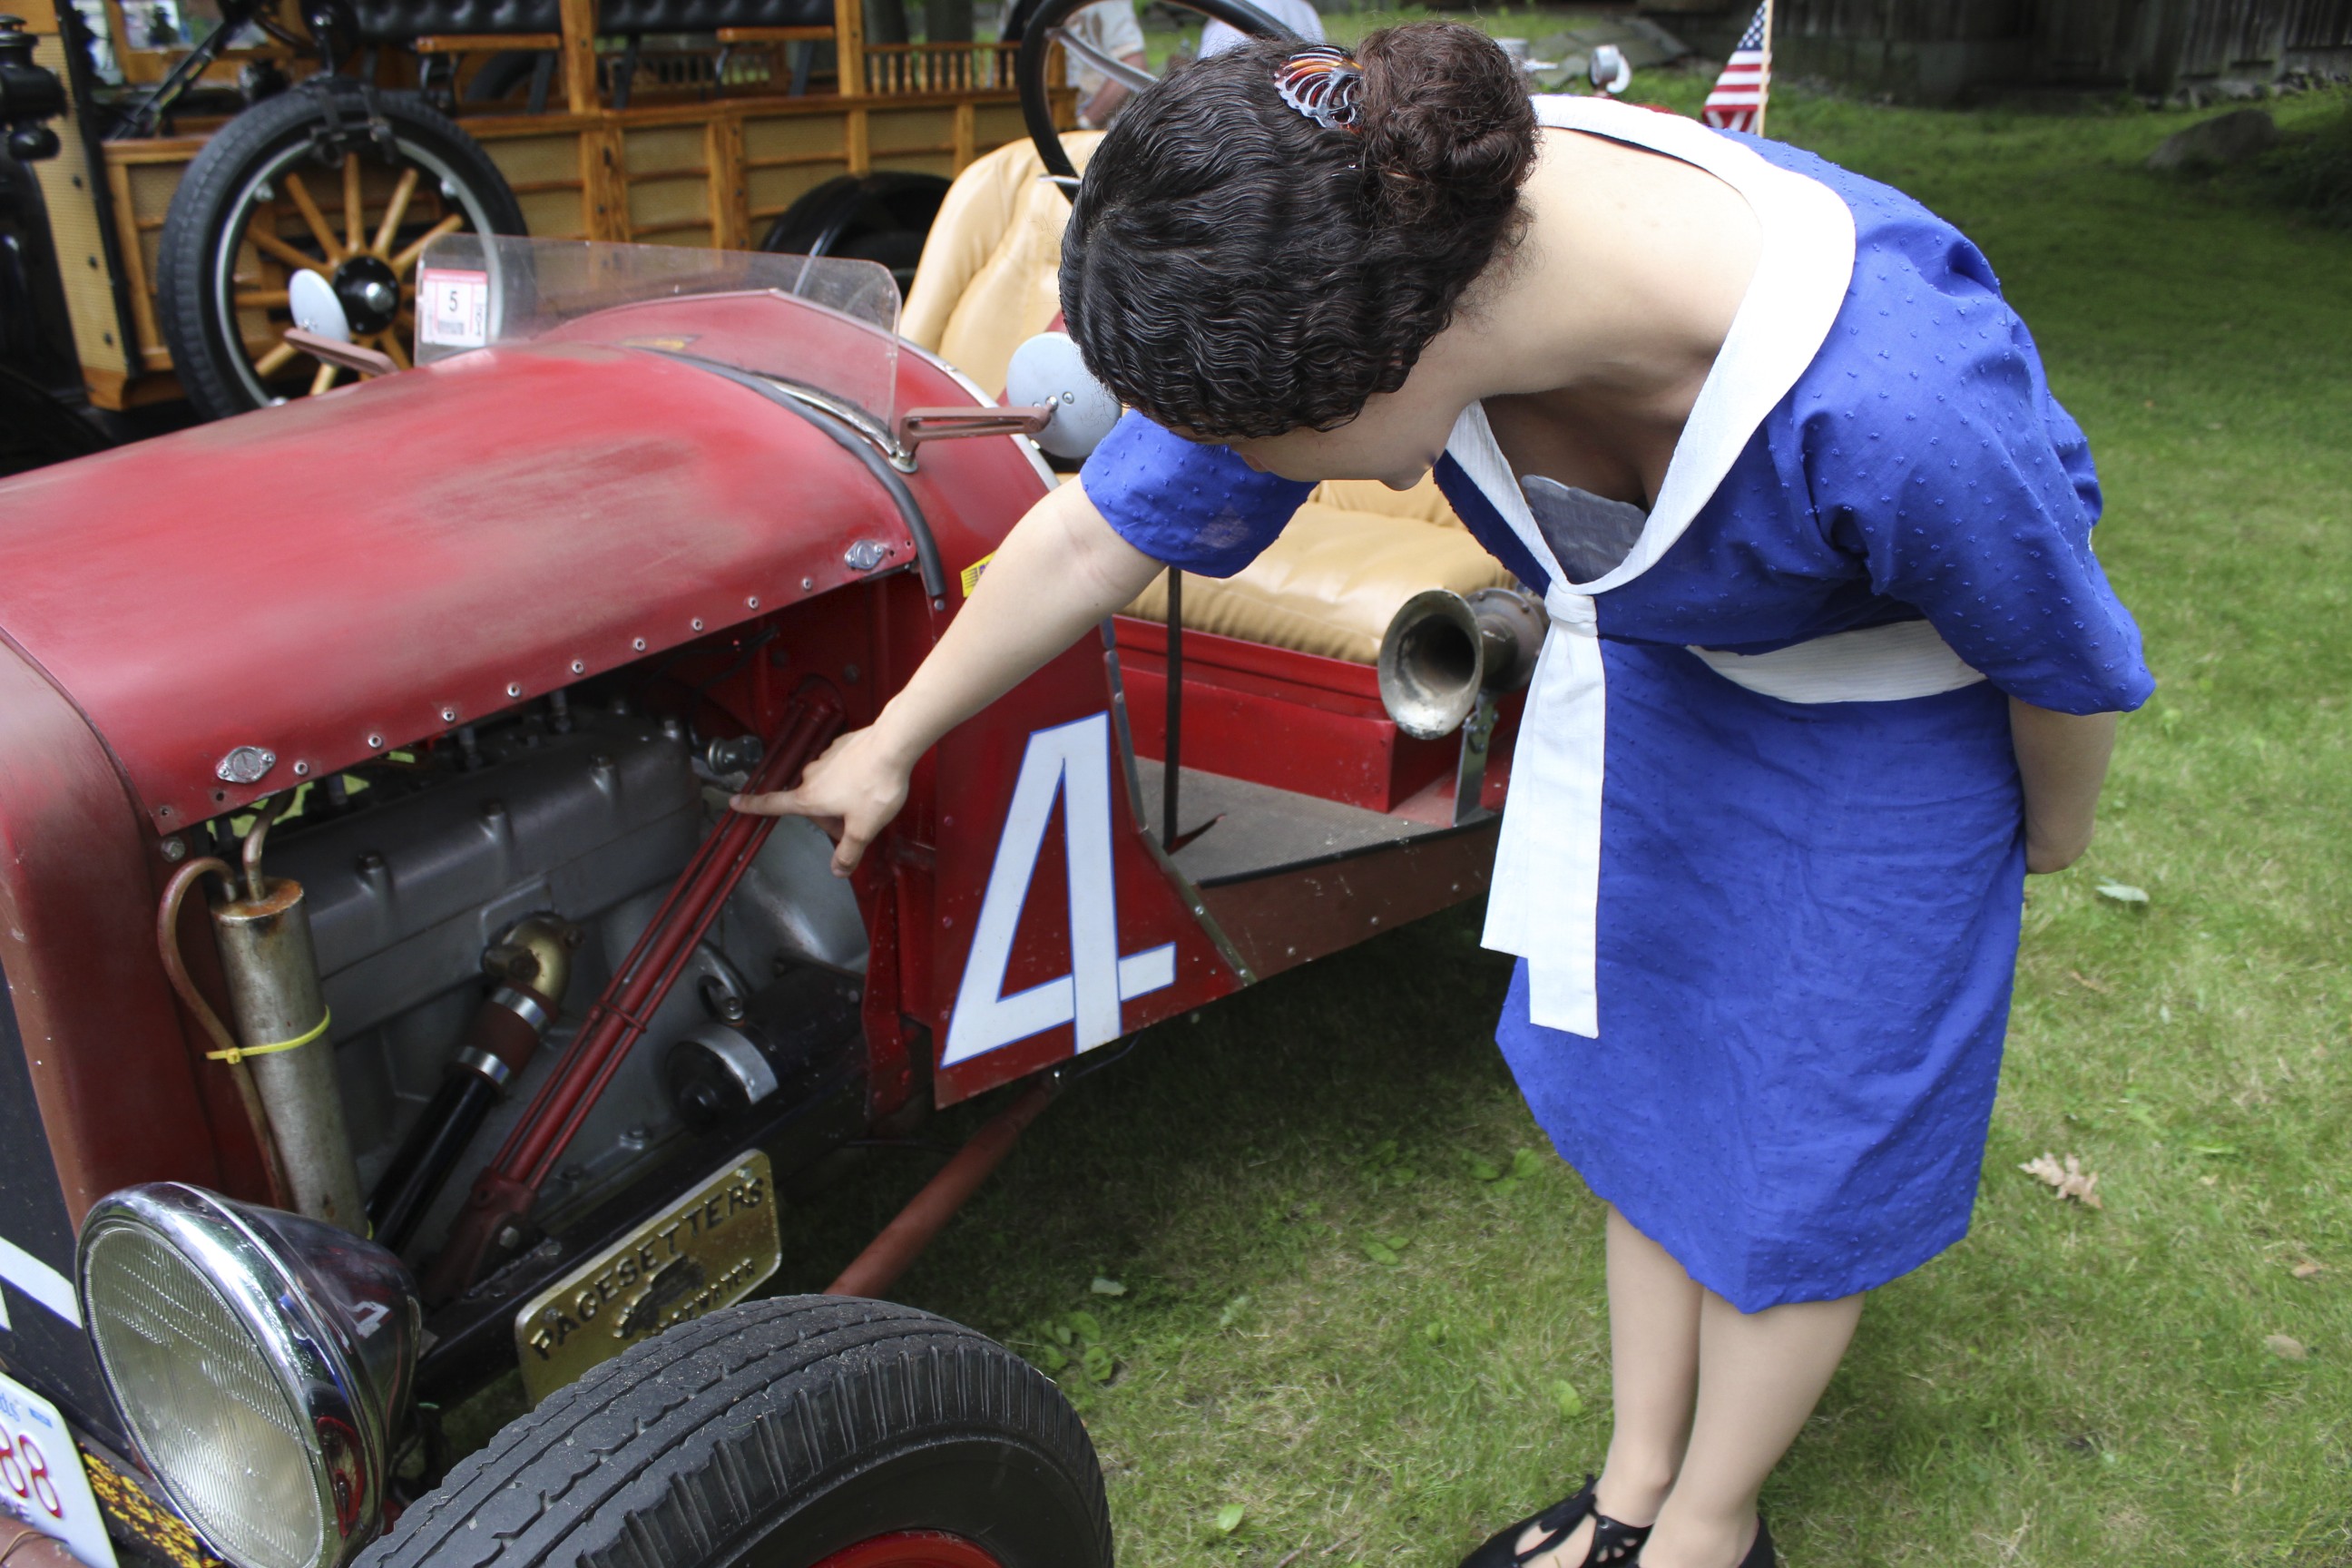
Trying to pose… “This is an engine. It moves the car.” Plus, new dress and a good view of my hair!Looks a lot different from a modern car engine, doesn’t it?A better view of my new 1926 day dress and Gibsons.Another view. The red car is fun, too!
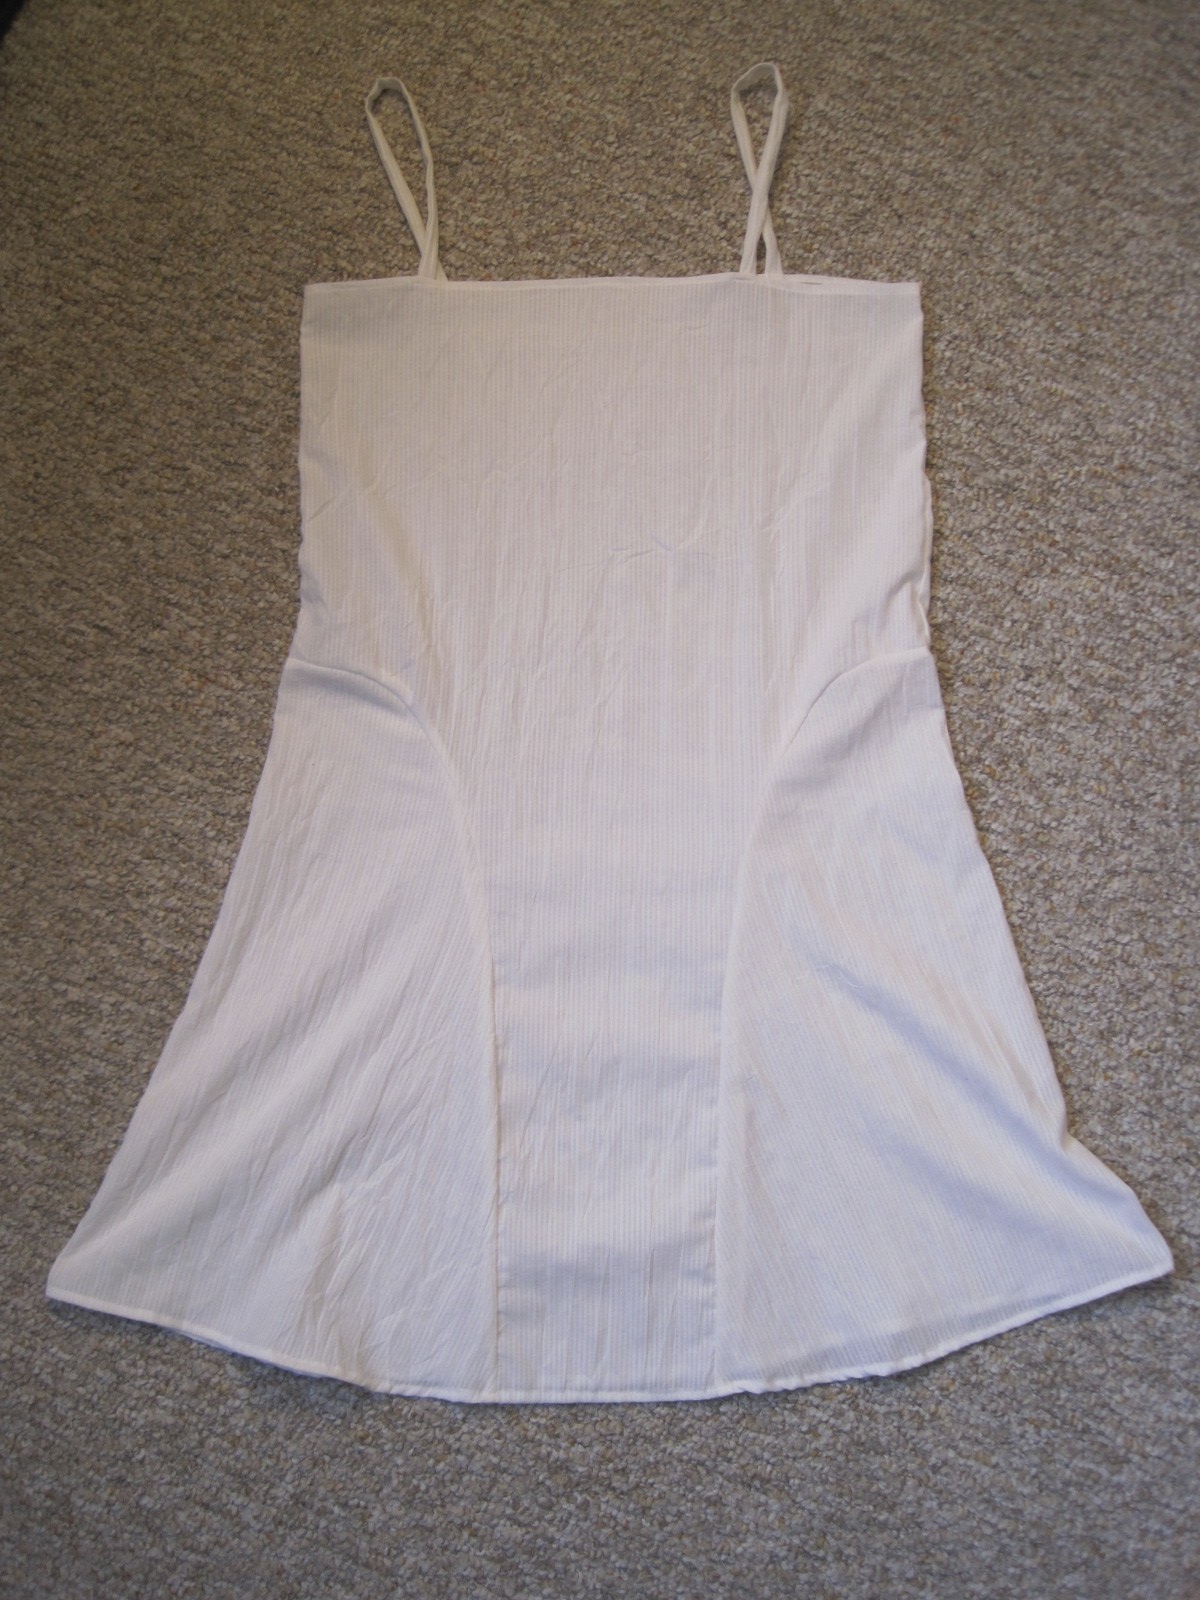
The blue cotton is slightly sheer, so I made a cotton slip to wear under the dress to add opacity. It’s made of the same $1/yd white cotton that the trim on the dress is made of, so if it shows at the neck or elsewhere it just blends right in. I used the same measurements I used for the pink slip of my 1925 beaded dress. I was inspired by looking at 1920s patterns to add the curved panels on the side instead of having another straight slip.
White slip to go under the 1926 day dress.
As I said, in addition to looking at cars and dancing, we also had a picnic lunch.
1920s picnic!After eating we listened to some stories read aloud.And read some 1920s magazines!
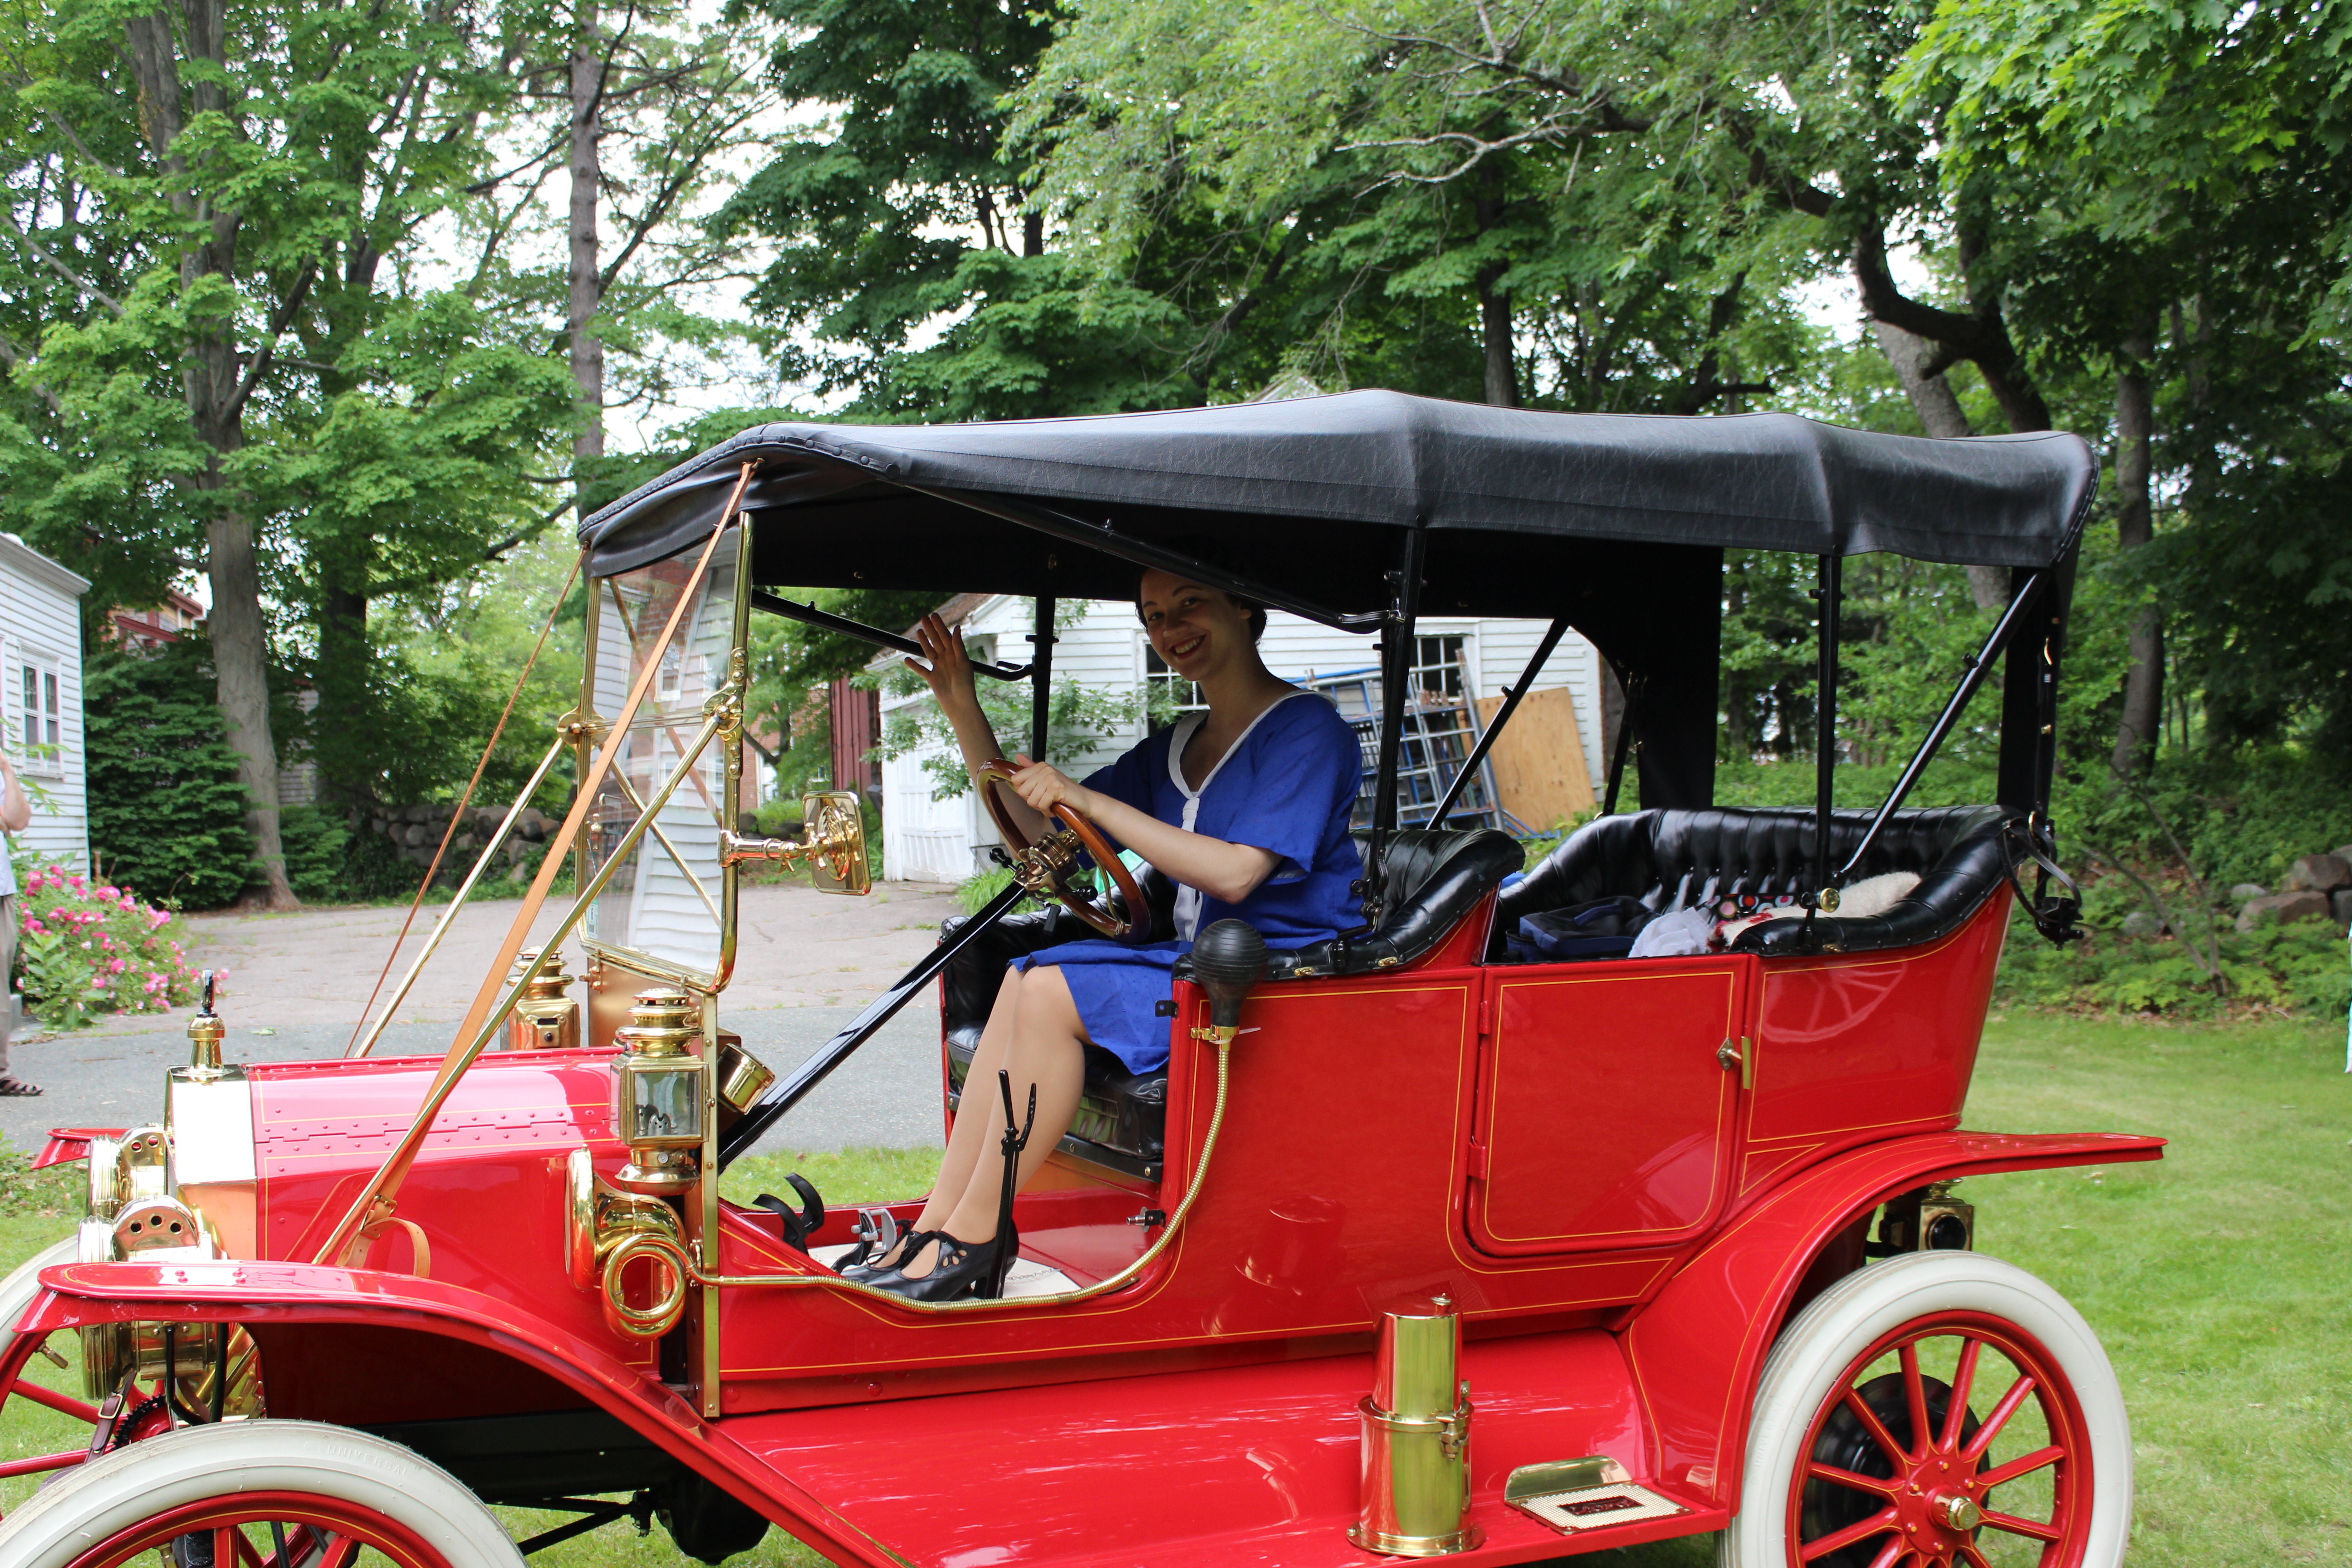
One of the most exciting parts of the afternoon was when one kind gentleman asked if we would like to sit in his 1920s car! Of course we said “Yes!”
“How do I drive a car?”Practicing my princess wave.
All in all, it was a pretty fun, low-key event. Next post I’ll share some of the more “artsy” photos from the day, as I did in The First Picnic Of The Summer: Part II.
You might have noticed that my last post was titled “First Picnic Of The Summer: Part I” but I didn’t actually mention what the next part would be. While the last post had general pictures of the day and of our outfits, this post is going to be filled with more artsy, detail shots. We had fun playing with the cameras that were available and working on our photography skills.
These links contain an affiliate code, which provides a small benefit to my shoe fund. This does not affect my impressions and reviews of these products.
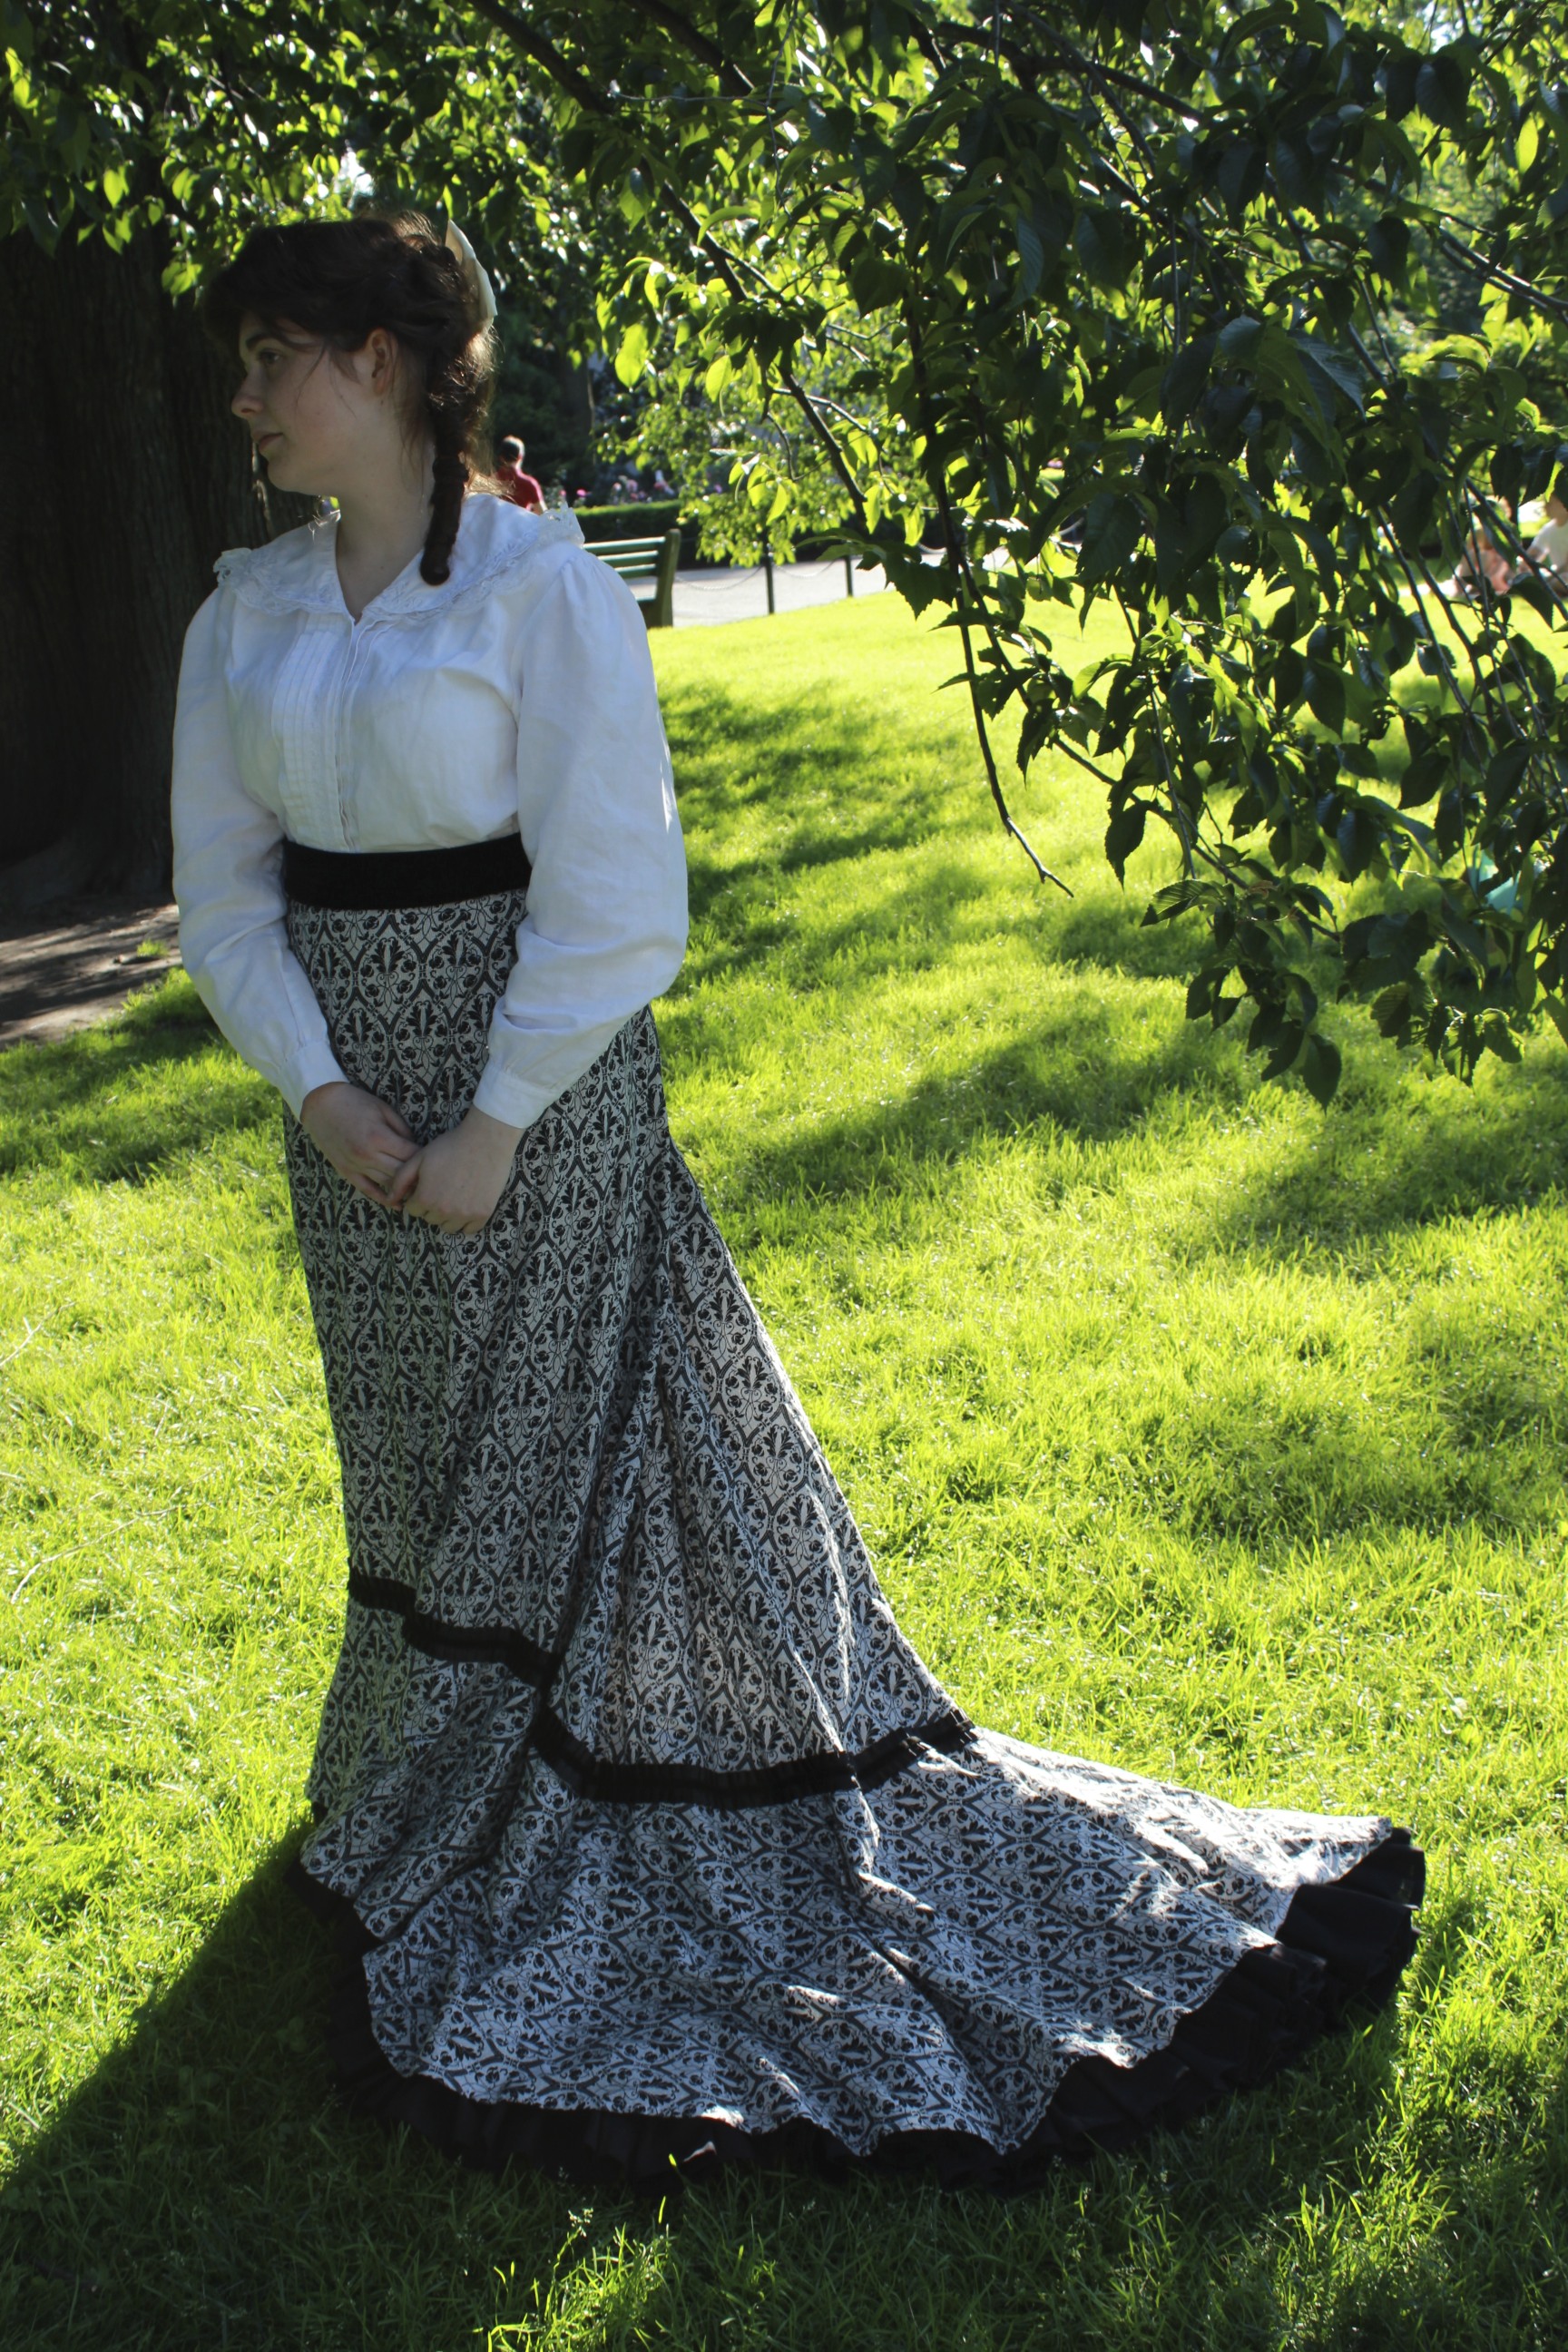
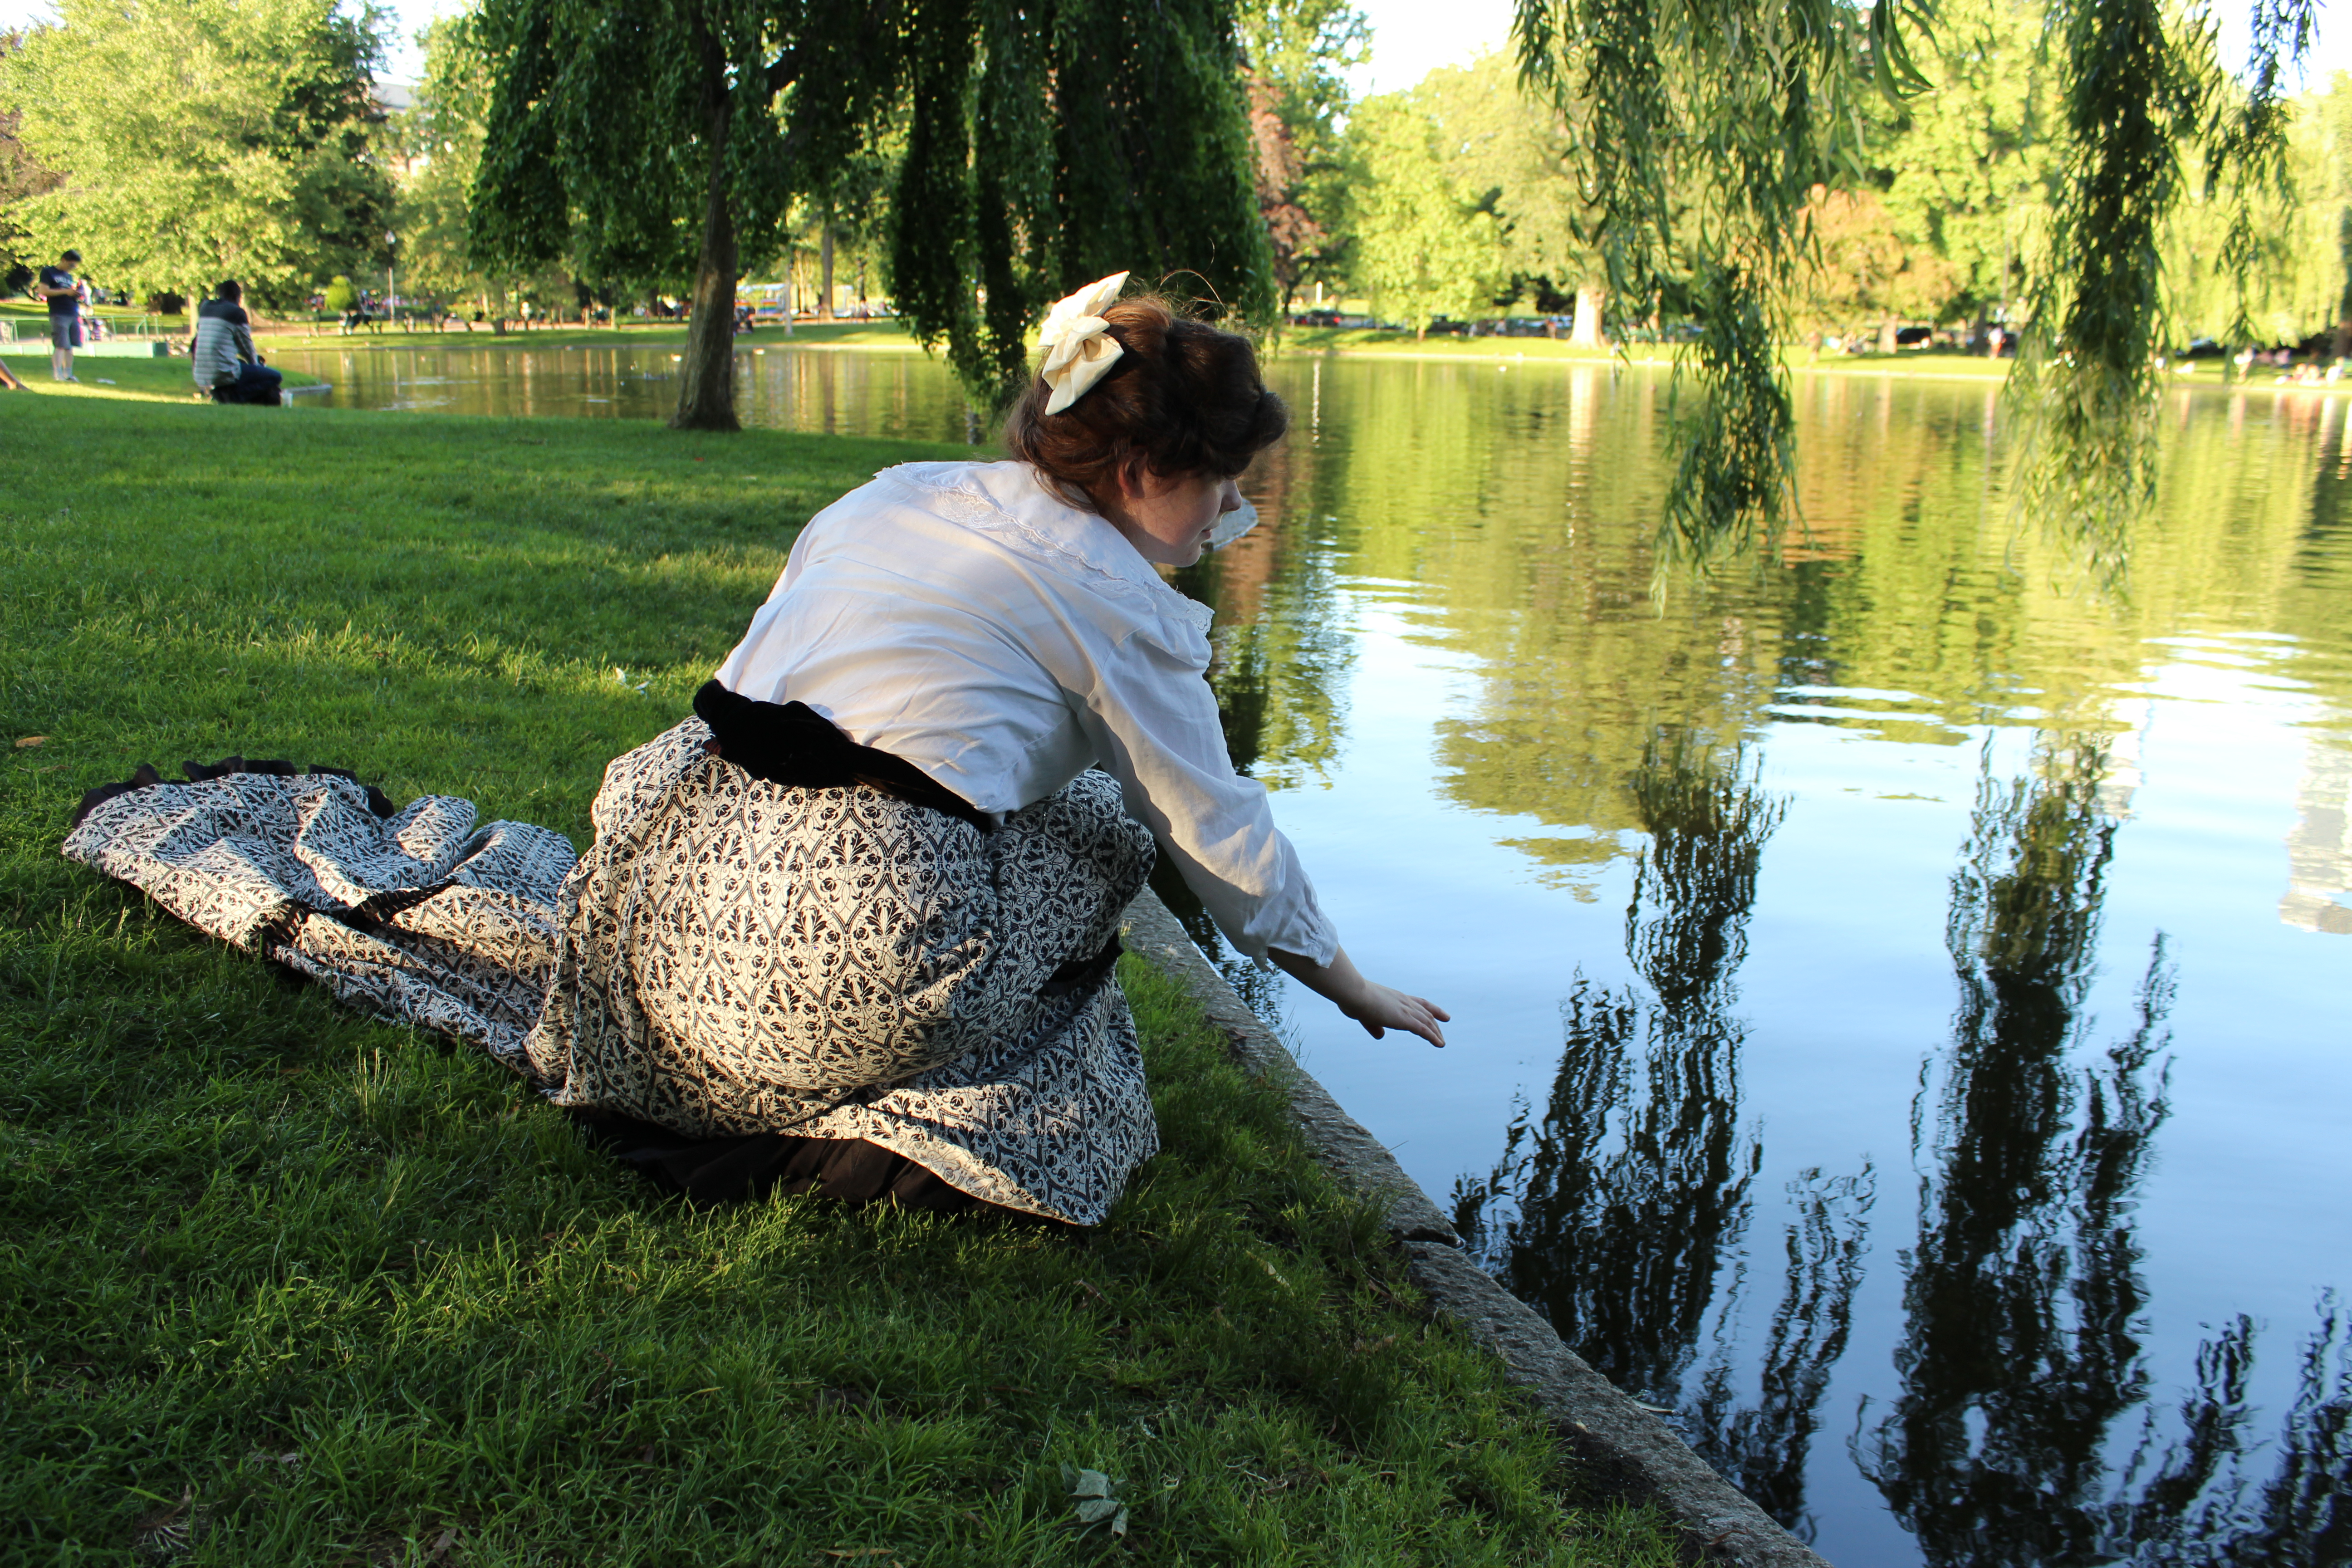
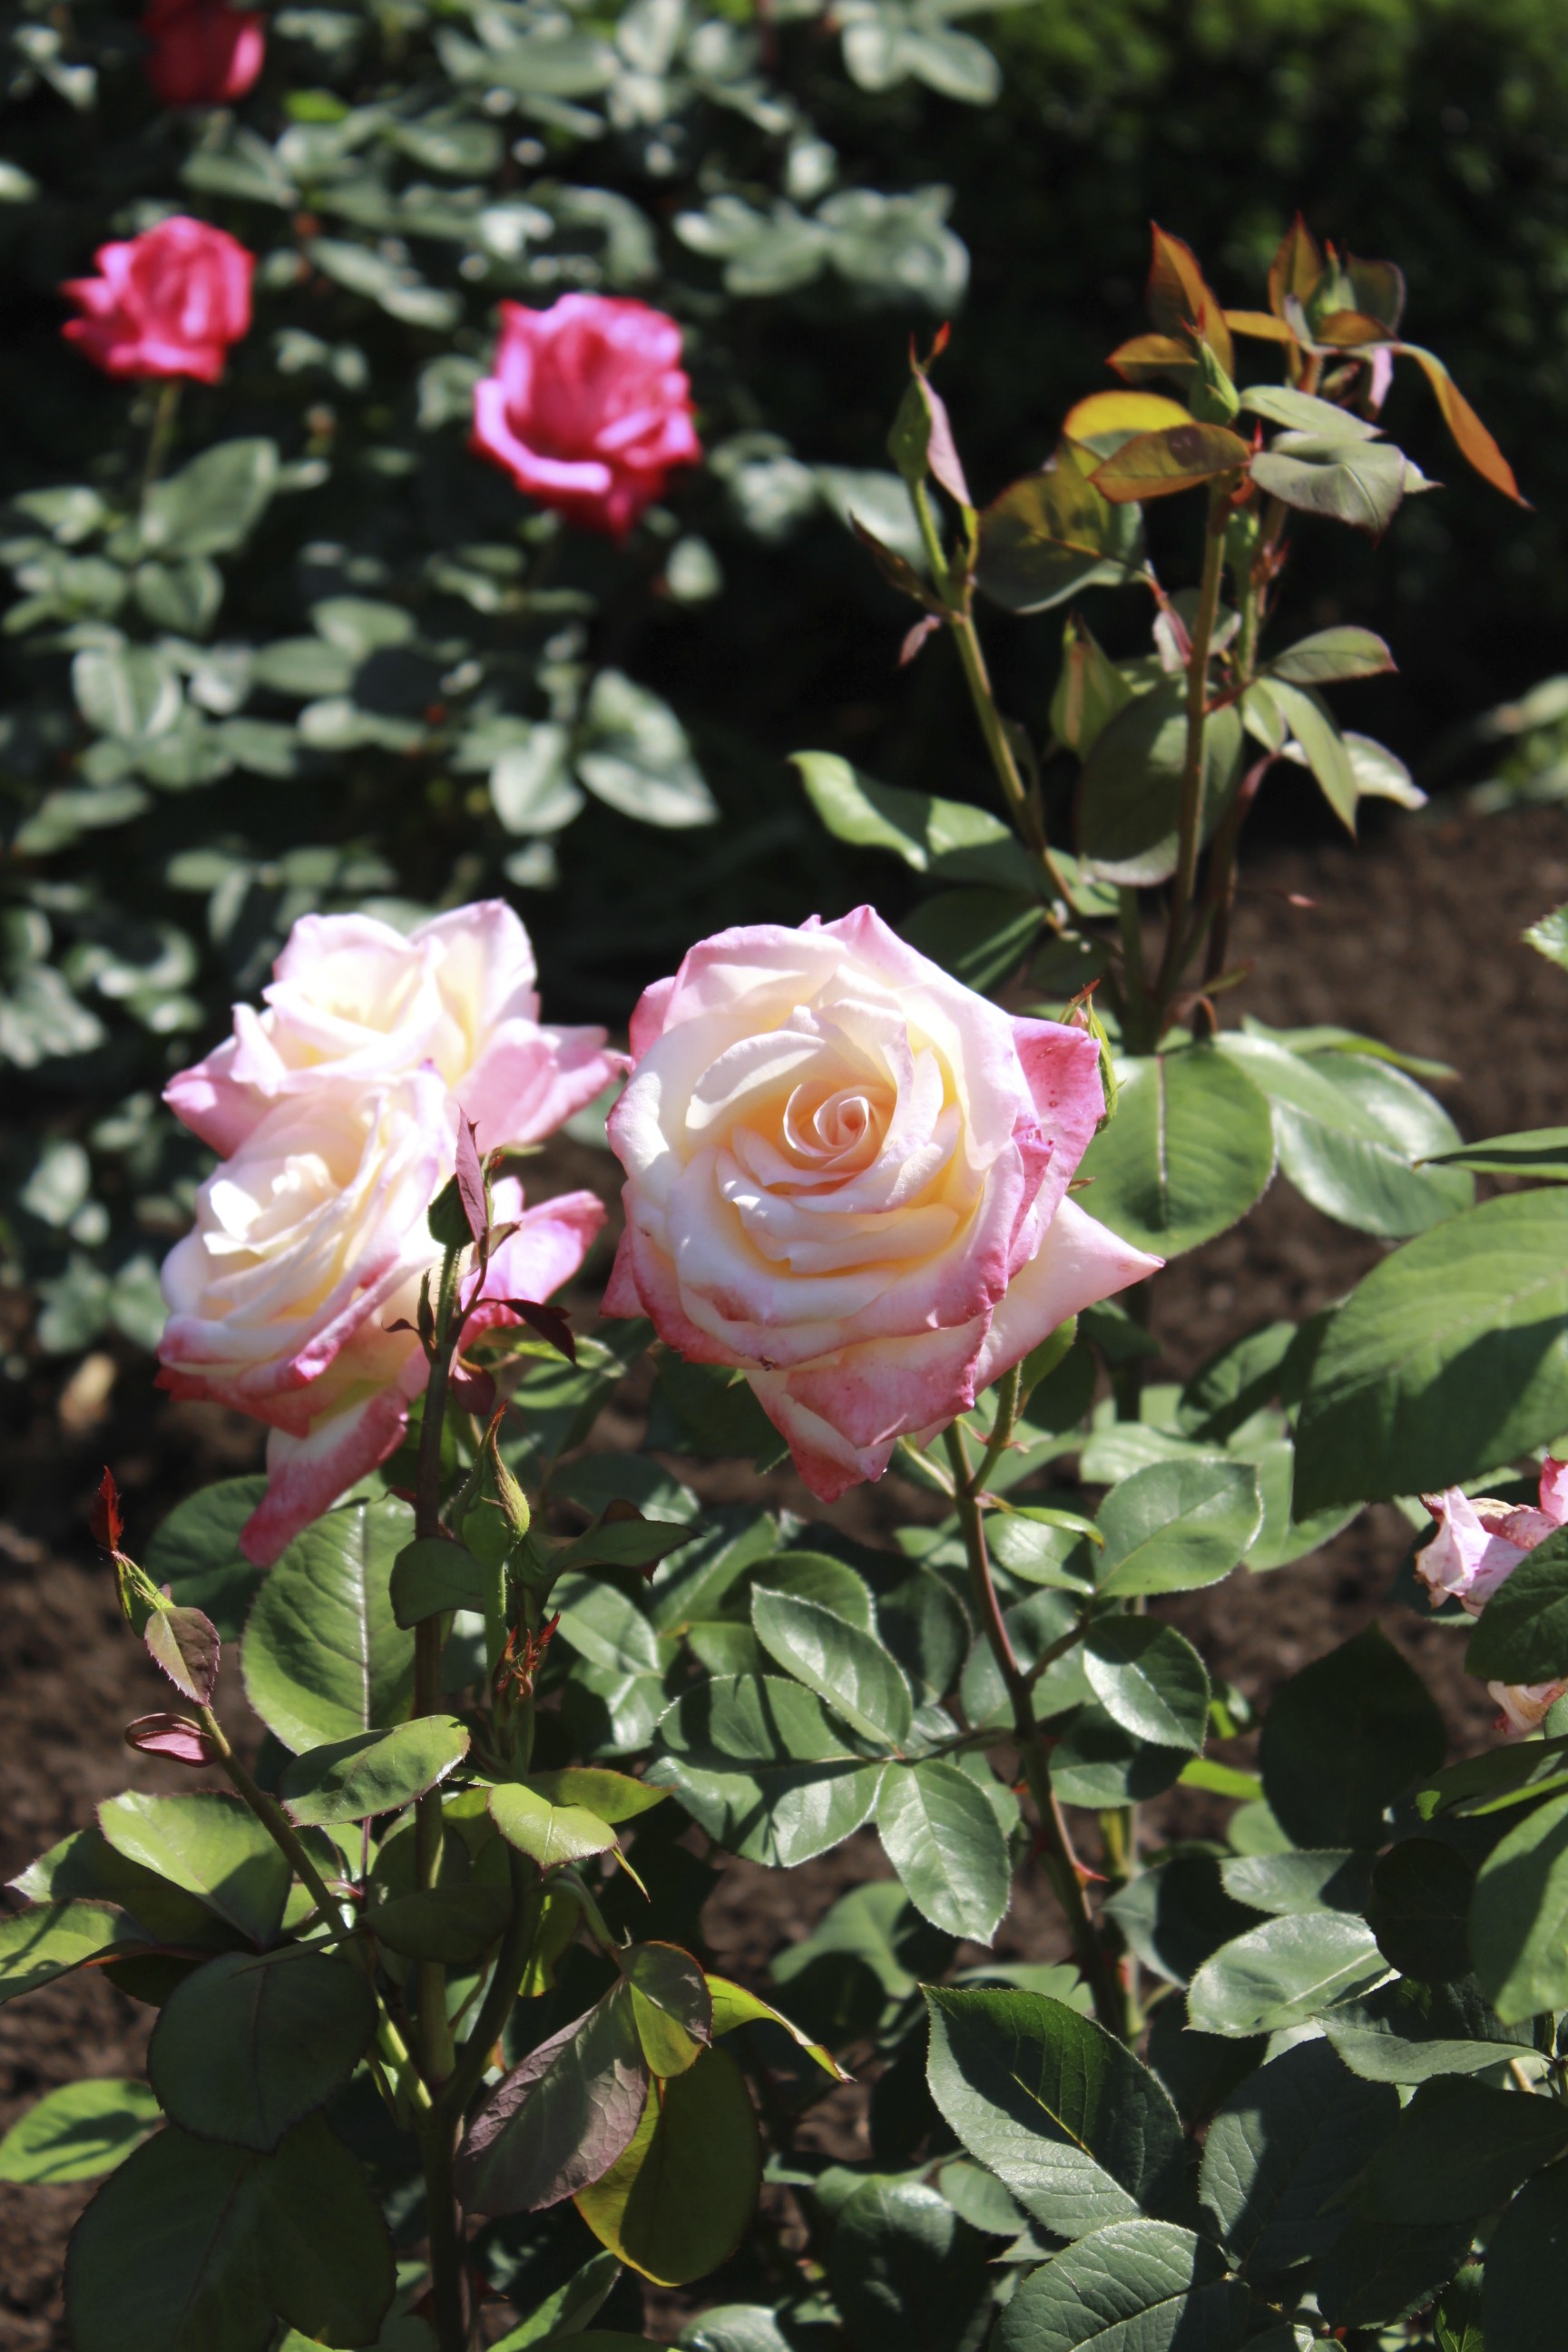
More feet. It’s fun to play with the focus of the photo in these detail shots.Hats!The willow and the trained skirt have similar qualities that make this photo neat.I enjoy how the branches fill in the background space and create complimentary curves with the skirt.This was intended to be casual bench lounging, but it looks very Sleeping Beauty c. 1900 to me. Where’s a prince when you need one?I love the longing reach for the reflection of the willow. That’s a good metaphor for life sometimes… reaching for reflections.This is pretty, too, with the skirt and tree having similar qualities. Also, I love the pop of red on the ground. Could be that those are flower petals… but I actually think they’re the remains of some child’s balloon animal.Playing with the focus on some lovely roses.Baby ducks! I enjoy that they are not what your eye is first drawn to in this photo and I like the super bright green of the tree.My favorite: a close up of the allium flowers!
Last weekend was a whirlwind of events and that means I’ve got lots of pictures to share! The pictures will be coming in small-ish groups. I do hope you’ll be able to vicariously enjoy the nice weather and fun through them.
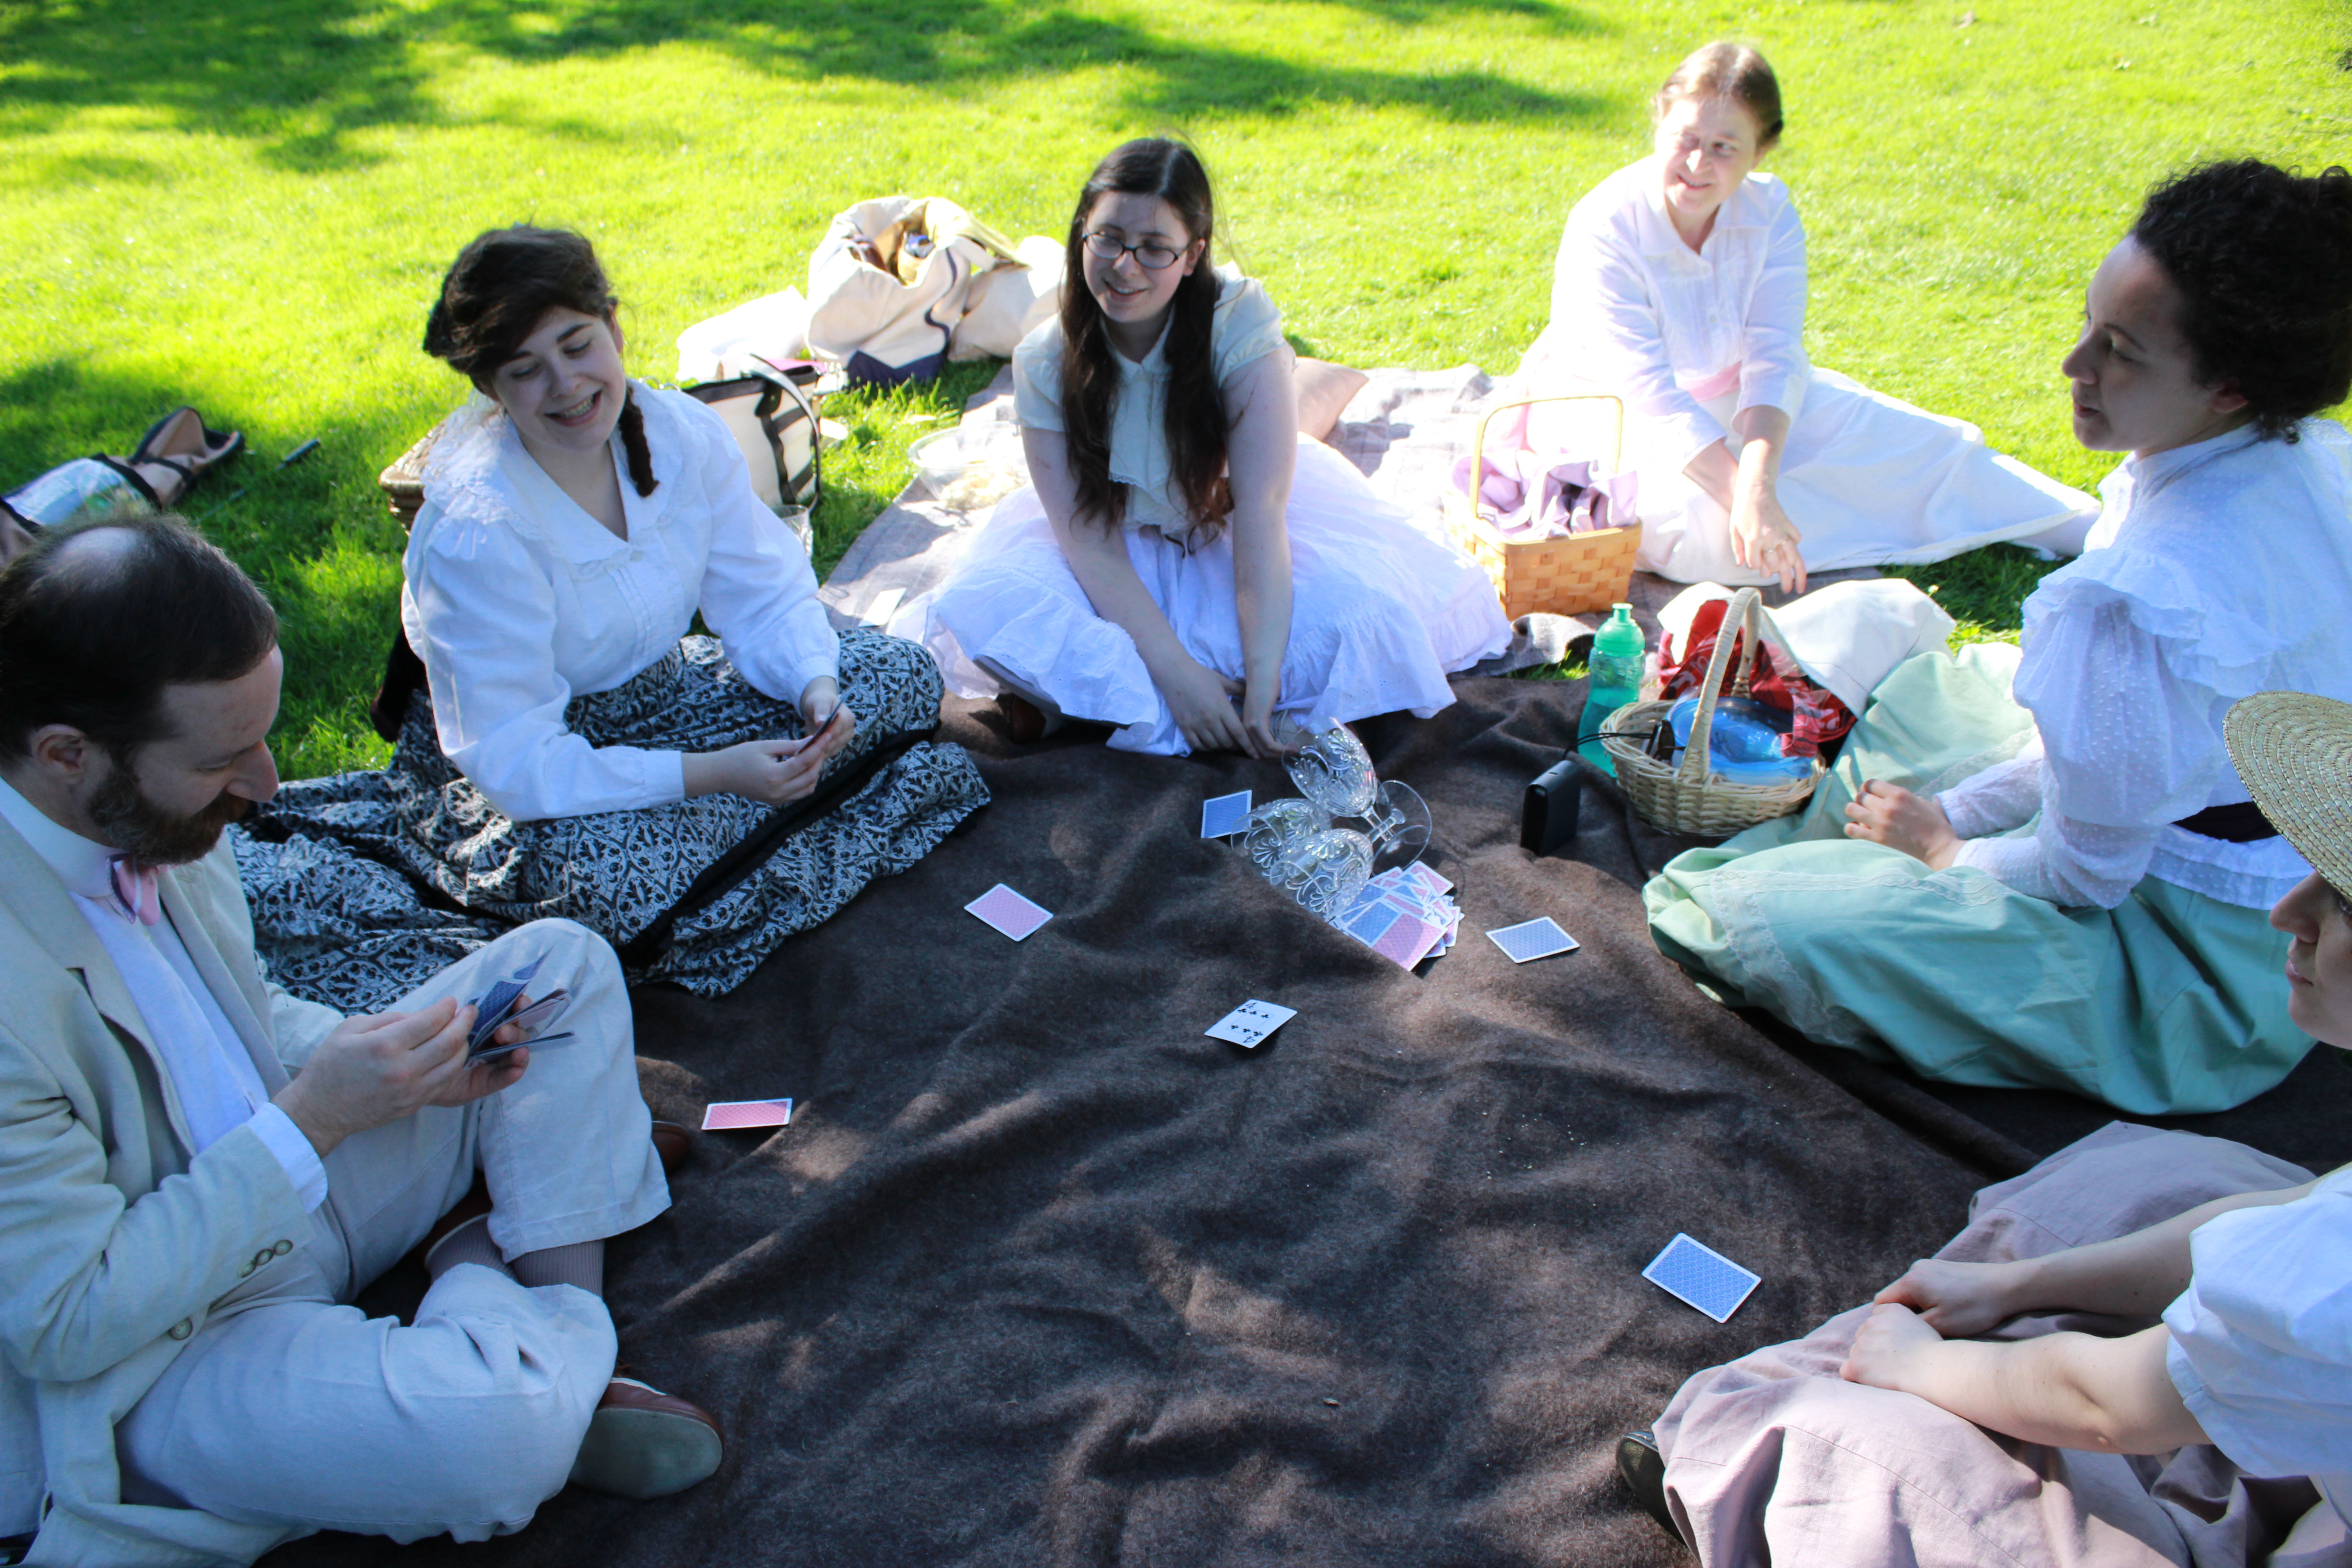
The first event was a low-key turn of the 20th century picnic in the Boston Public Garden. You might remember that last year we did a Regency picnic in the same place? We were out to have a good time and get some fresh air without worrying about 100% historical accuracy, hence the low-key part of the description. So without further ado, pictures!
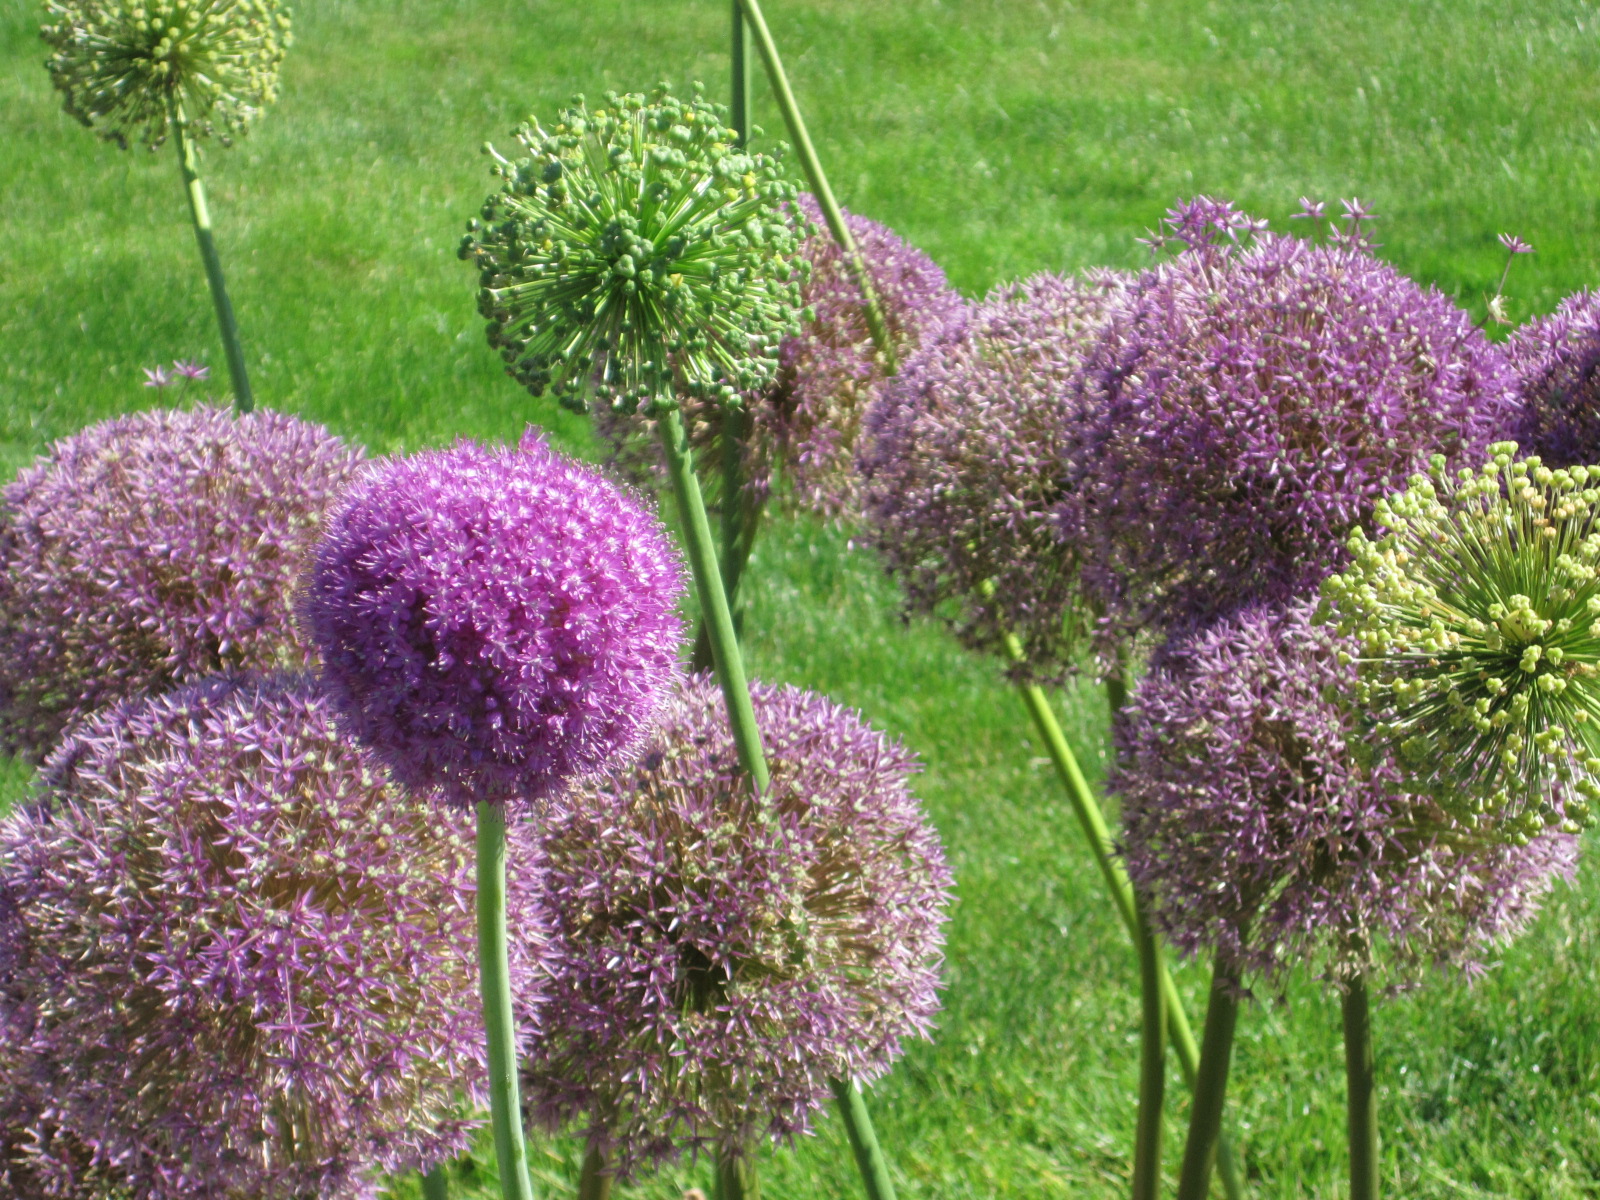
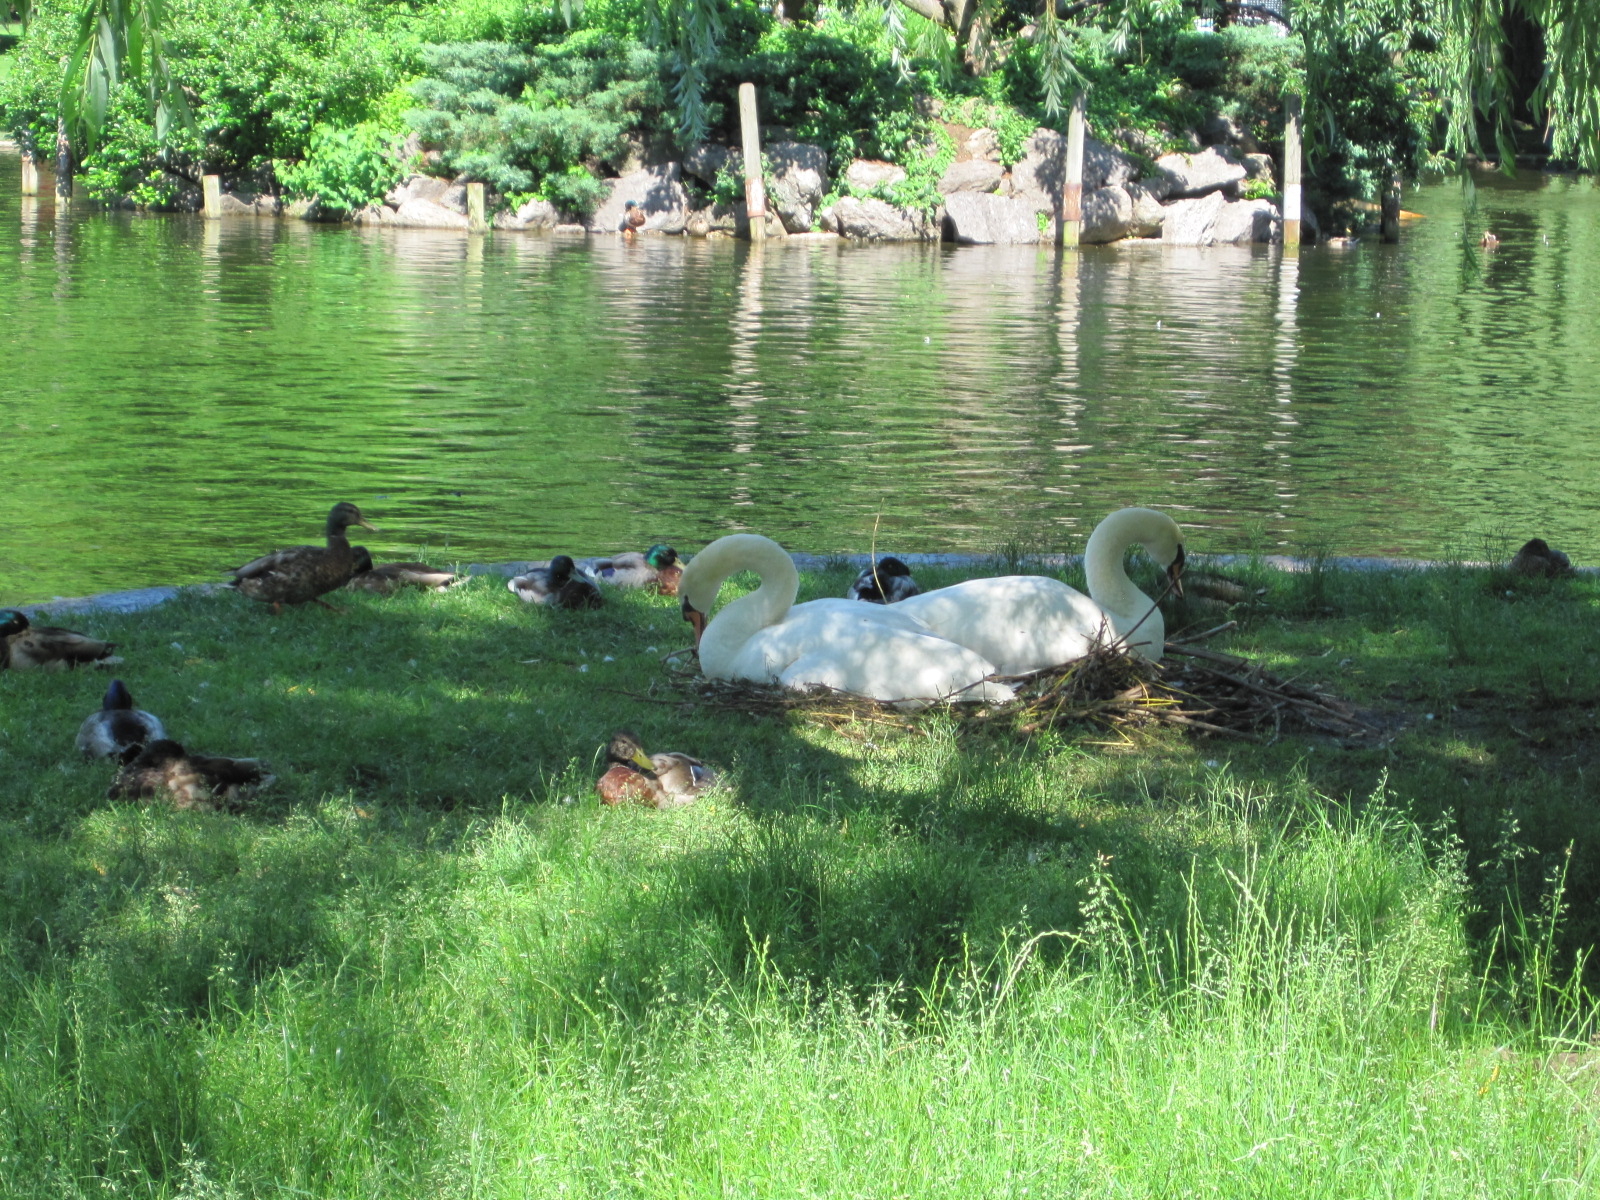
Taking a turn about the garden.There are lots of ducks in and around the swan pond in the center of the garden and this time of year you can also see baby ducks! There were 9 of them in this bunch. Aren’t they cute?There are also swans around the swan pond. These ones were nesting in a fenced off area. Pretty, but you wouldn’t want to get too close. Swans are big, and mean.There are lovely old trees around the garden as well.The trees make great backdrops for photos.Walk a bit away from the swan pond and you are likely to encounter George Washington, who happened to be showing off his Bruins spirit this past weekend. (I love that the city, presumably, had a custom all-weather jersey-cape made, since Washington can’t actually move his arms to put on a jersey, given that he’s bronze…)All around the statue of Washington are lovely flower beds. The flowers get changed out pretty regularly so they’re always blooming and pretty. These flowers are my favorite though! They’re called allium, and I love the colors, and the size, and the circle-y-ness of them.I believe I have a weakness for circle-y things. And, my outfit matched the flowers! I think my gibson-y hair turned out pretty well, too.I know this picture is similar to the last one… but I can’t decide which one I like best. I’m hoping maybe you have an opinion that will sway me one way or the other?It got warm promenading about the garden, so we returned to the blankets in the shade to play cards.After the rest, we broke out the croquet set we had brought along. Apparently we were more interesting while playing croquet than we were at any other time during the day, because we actually gathered a crowd of people who were watching us play.Contemplating my next shot. I was getting out of the metal panel obstacle…I was the pink ball! I think it was supposed to be red, but it looked awfully pink to me!My outfit choice was inspired by an image in the KCI collection. I did my best to imitate it in spirit, despite my lack of a boater.When revisiting the image I realized that it does not include a croquet mallet. Be that as it may, I tried, and I think the inspiration is clear, even though my memory is not!Picnic-ers!
I think I like them better as pictures, though perhaps not as much for showing off the dress. They really have more of a 1920s feel to them, don’t you think?
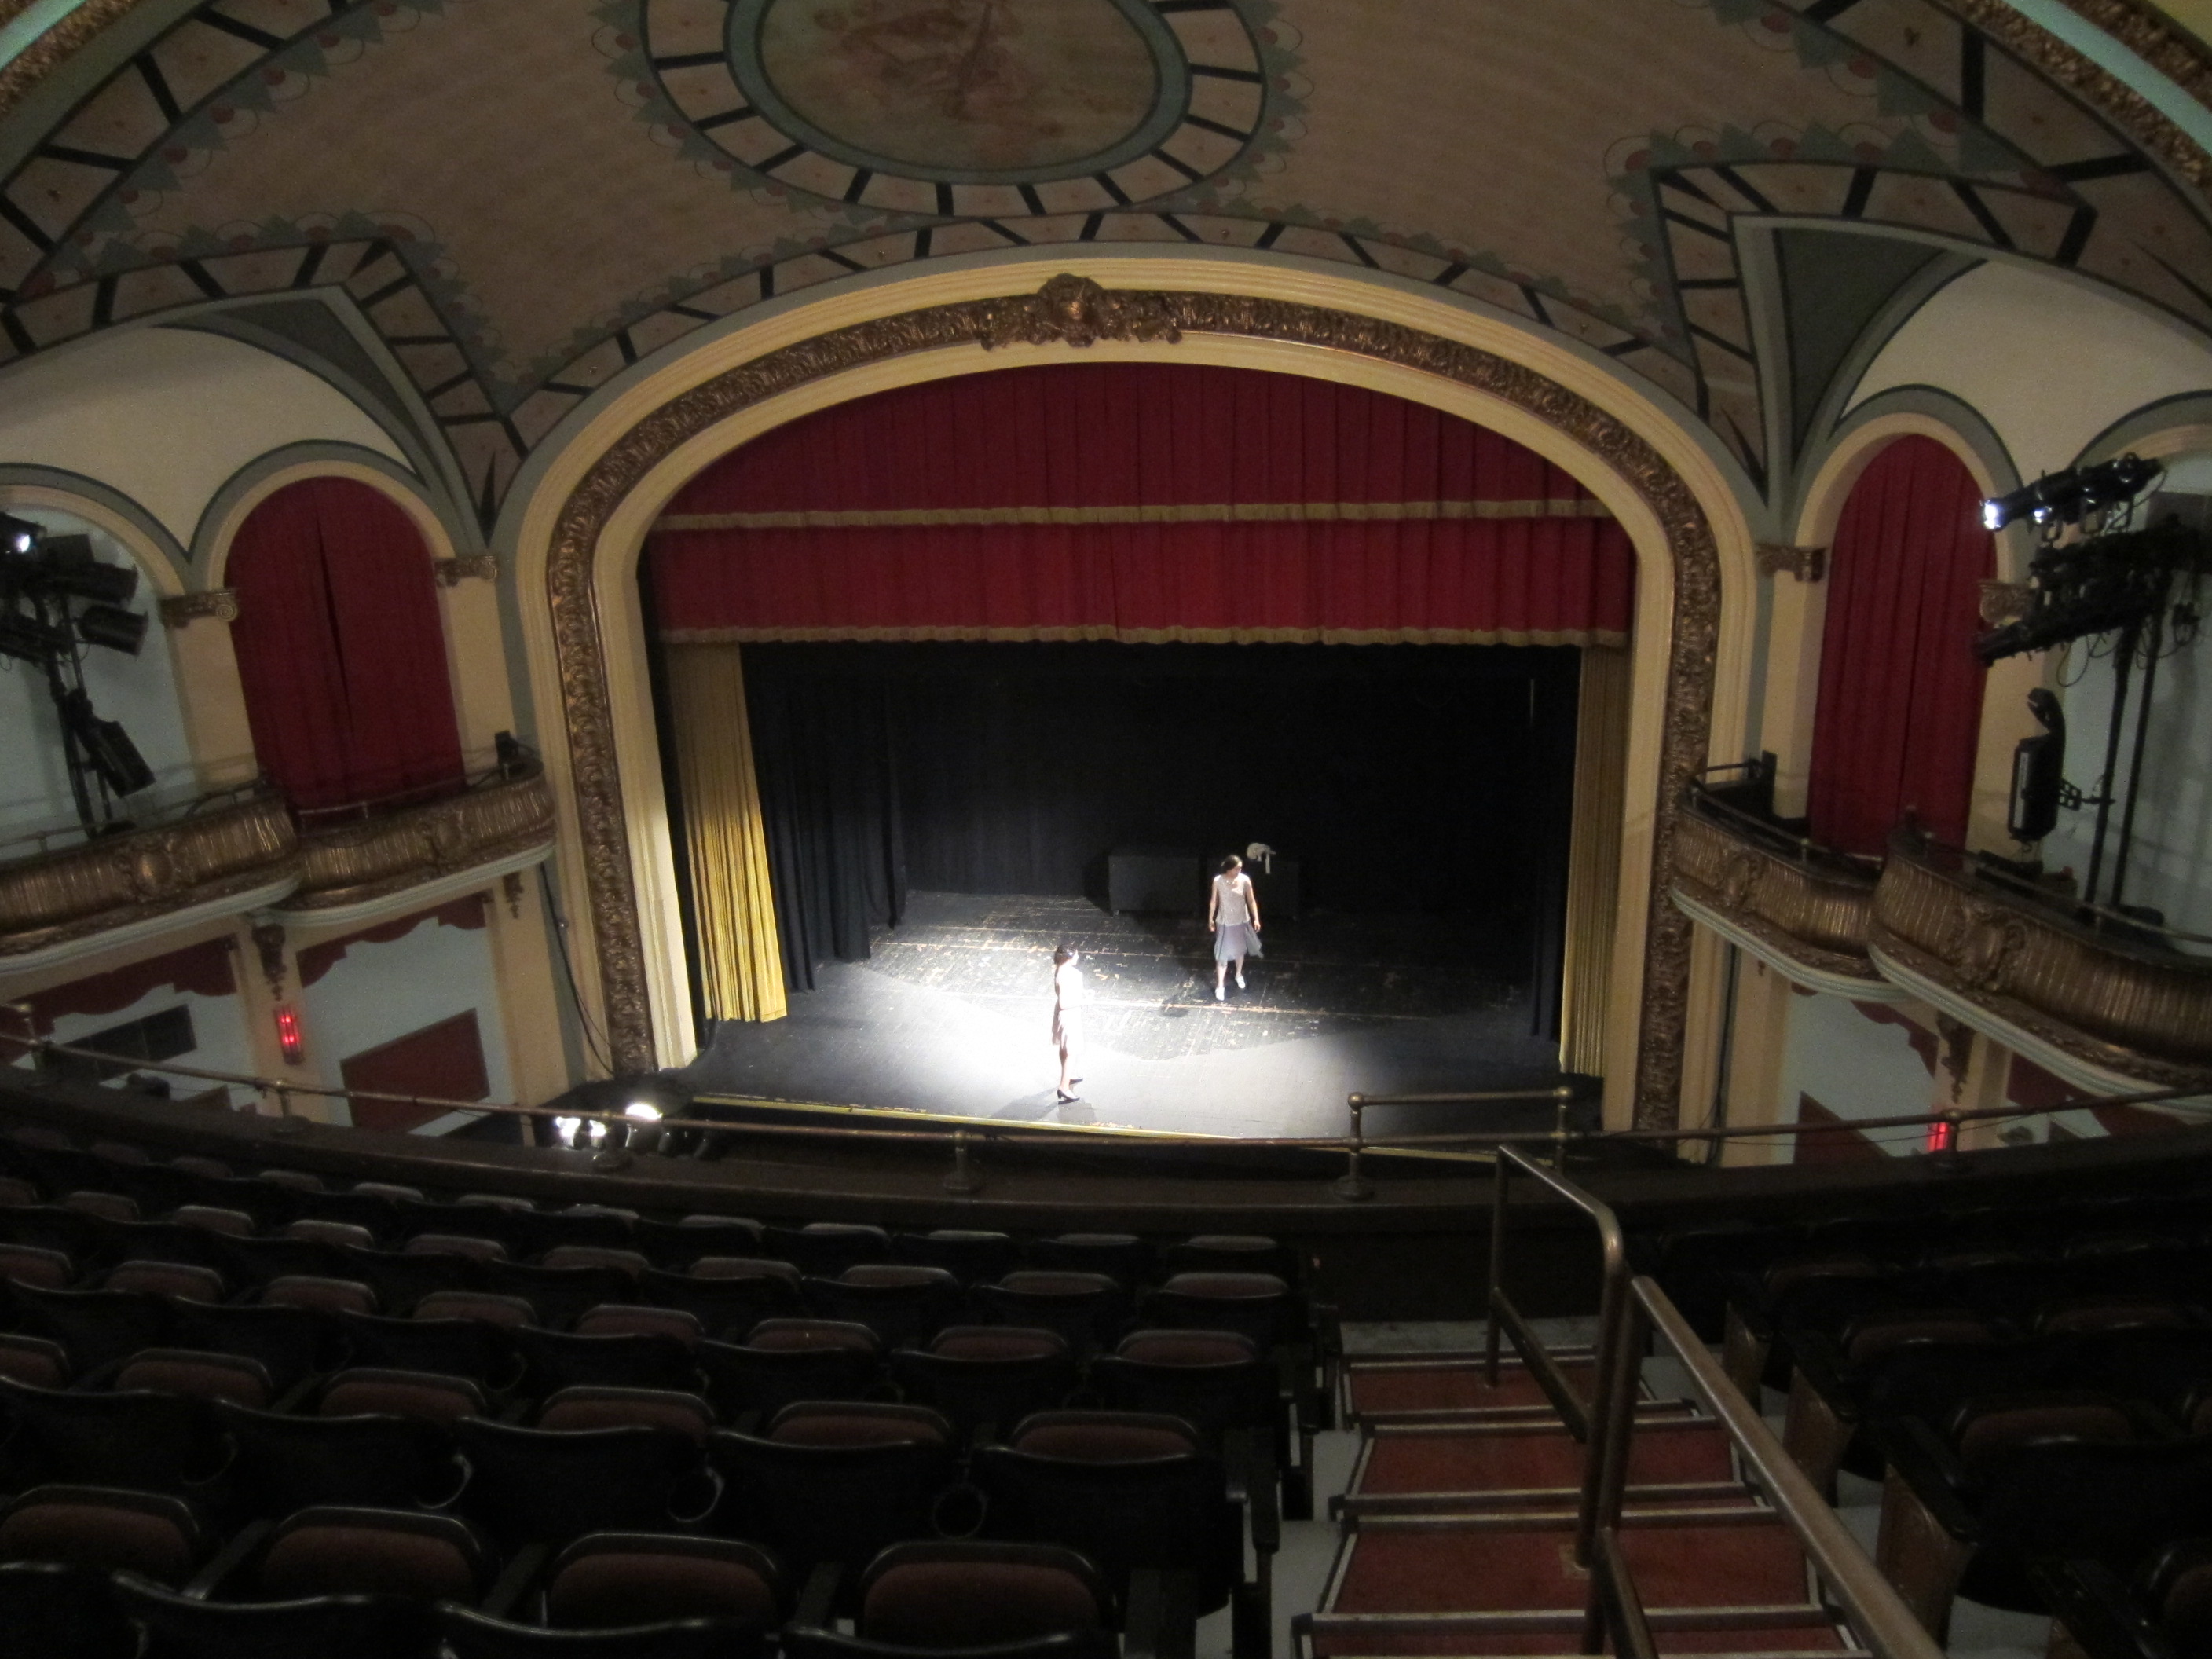
View from the balcony. It’s quite grand and those curtains on the stage are functional!
I never did like reading The Great Gatsby and I didn’t enjoy the movie much either (especially all the modern music! I don’t think it worked!), but it was still fun to be there with my friends having a good time and looking great.
Standing around during our rehearsal.
The stage was a fun place to take pictures, and you know we always like to take lots of pictures of ourselves!
Some people are much better at making picture faces than I am!
We performed a one-step, a tango, a foxtrot, and two Charlestons! One Charleston was a silly silent-video-like story of a girl trying to teach a guy how to Charleston and ending with the two of them plus an extra five ladies doing Charleston-in-a-line. (You can see some pictures of Charleston in a line from last year when we went to Newport.) The other Charleston was five ladies facing the audience and doing various Charleston things in a row.
The best pictures I have are from the five lady Charleston. We danced to the song Egyptian Ella, which you can hear in this video (there is a 30 second-ish introduction first). Our version was a little faster but this gives you the idea. I strongly recommend that you listen to the song while you look at these pictures: it makes them to come to life! (The lyrics are pretty amusing, too!)
Charleston basics to start.Moving on to fancy steps. Each of us did different solo bits.This is my favorite! Hard to see what’s going on in a still picture… It’s a kick to one side, then the second, then twice on the first side figure. As your leg comes in to kick your arms cross, and then they uncross when you kick. I don’t actually know what it’s called, but it’s super fun! Each kick has only one beat, so it’s pretty fast.Final pose! It is EGYPTIAN Ella, after all!
We’ve got more Jazz Age things coming up soon, so there will be more opportunities to Charleston! In addition to some performances, there will also be a Prohibition Ball in Chelmsford, MA in July. If you’re in the area you should consider coming! If you’re not in the area, I’m sure I’ll have lots of pictures and you can live vicariously through them. Maybe you’ll also be super inspired and go find people in your area to Charleston with!
Since there will be more Charleston-ing in my life, I’ll have to learn more Charleston steps! Lauren, at American Duchess, posted some great Charleston videos awhile back. Some of them include some steps I just might have to learn and dance… who knows, maybe some of them will make it into our next performance, too! In the meantime, I hope you enjoyed the pictures.
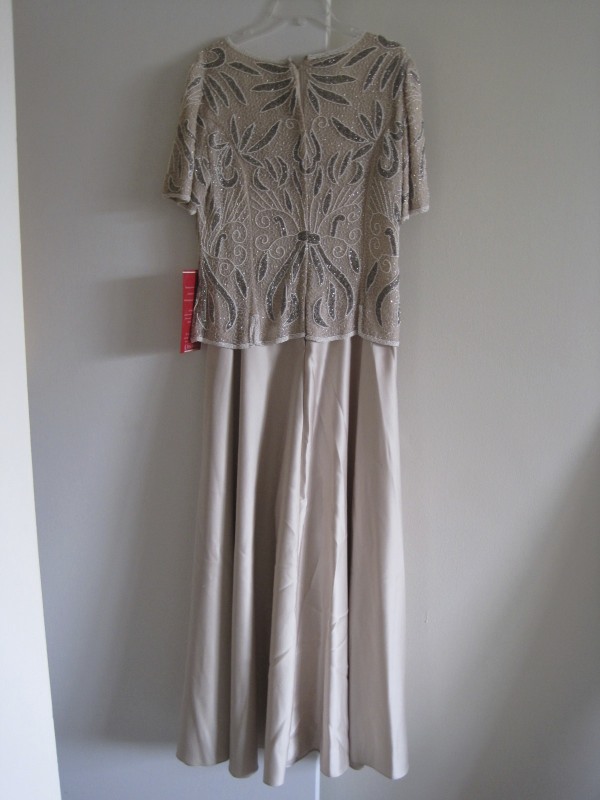
During the swap and sell at last summer’s Newport Vintage Dance Week, I came across a rather awful 80s or perhaps 90s evening gown while browsing. I had been considering trying to hand bead my own gown for the Gatsby Ball during the dance week, but had determined that I was not devoted enough to the 1920s and had settled for a less time intensive green silk gown. This 80s/90s dress, though, got my brain going. What if I used the beaded section to make a beaded 1920s evening gown? No hand sewn beading required! I dithered about the decision for maybe 20 or 30 minutes and asked for lots of opinions from my friends (none of whom were very decisively helpful, I must say), but then I hurried back to buy the dress before someone else did! It was only $10 or $15, not bad, for not having to bead it myself!
Size 14 beaded evening gown with princess seams and a giant zipper.Full length glory.
The whole thing was rather bleh colored with the pale lining. I decided that when I remade the dress it would need more color than the original, but I wanted to keep new fabrics in line with the beading colors so they wouldn’t look out of place. I picked grey for the skirt to bring out the beading and I picked pink for the slip to add some color under the grey but not distract from the beading.
First thing was to cut off the skirt. I kept it because I hate throwing things away, but it’s heavy and polyester… My thought is that one day I might need some sort of petticoat base or lining for a dress that is so great on the outside that this skirt won’t detract from it if it’s not seen. In the meantime, it’s taking up space in my stash. Oh well. After the skirt was cut off I removed the sleeves. They really were contributing to the dowdy look of the beaded section and they did not add to the sleeveless 20s evening dress look I was going for. I kept those too… I have no idea what I’m going to do with them! Beaded evening bag one day, perhaps?
No sleeves! It’s getting better already.
I debated for awhile about taking out the zipper (because it would add work, you know). In the end I decided I really didn’t want to see the lap of the zipper in the back, especially since it was pulling the beading around and making it not match up symmetrically. I also removed the nude lining in the bodice to expose just the silk gauze with the beads. I’m so glad the beading was done on silk! It really adds to the look. Of course all those interior seams were french seamed and I didn’t want to actually take apart all those seams in the silk gauze. So I carefully cut the lining away along the seams then was able to pull out the lining seam allowance because it would just fray where the stitches are. That part wasn’t super fun…
Cutting away the lining to expose the beaded silk gauze, then pulling out the lining seam allowance.
But I was left with a sleeveless top of beaded silk gauze! There was more hand sewing required to get it looking nice (there was no way to get a machine in there with all those beads!): I whip stitched the arm and neck openings; sewed up the back seam where the zipper was; whip stitched all of the seam allowances down on the inside; whip stitched the seams on the outside to close up un-beaded gaps on the seams so the princess seam lines weren’t so visible… Not all of this sewing was necessary to make the top wearable, but it was necessary to make it durable. I want to be able to wear this dress for a long time and not have problems with the beading or the silk gauze, so durability was important.
Completed beaded top.
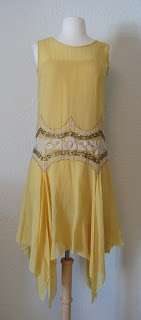
After getting the top finished up nicely I had to figure out a pattern/plan to make the grey skirt. I scoured my 1920s pinterest page to look for ideas. I liked the idea of an uneven hem and a skirt with extra fullness at certain points. This lovely yellow dress was my main inspiration.
1920s. Pictured on All The Pretty Dresses blog.
My points aren’t quite as long as this, though I wanted them to be… I didn’t have quite enough fabric for that. I had the added challenge of making sense of those little cut ups in the bottom edge of the beading in conjunction with the skirt. I didn’t want to sew those cut ups closed because the edge beading continued up them and it looked weird, so I had to figure out a way to work them into the skirt.
I think the yellow dress had rectangle pieces that are just left free at the dippy points. My skirt, however, has four a-line panels at front, back, and sides with diamond shaped pieces in between that go up into those cut ups. The skirt pieces are french seamed by machine. The hem was serged and then turned and topstitched by machine. The finished skirt was then attached to the beaded top by hand. First I sewed it along the beaded edges, then I turned the raw edge under on the inside and whip stitched that in place to keep the skirt from fraying.
After I replaced the zipper in the back with a seam I was able to get the beading to match up really nicely! The skirt hem with the serged edge turned inside and topstitched.Attaching the skirt to the bodice. Running stitches on the edge of the beading and then the raw edge turned under and whip stitched. (These are those cut ups in the bodice I was talking about!)
For the slip, I measured my waist and bust to determine the trapezoidal shape I would need to use. I just guessed at a length (which turned out to be about 6″ too long!). I added a few inches of ease to the waist and bust measurements to make sure I could easily put on and take off the slip without any closures. The side seams of the slip are french seamed by machine. I made tubes for the straps and machine sewed those on. The neck and hem were finished by hand because I had time and didn’t feel like pulling out my machine.
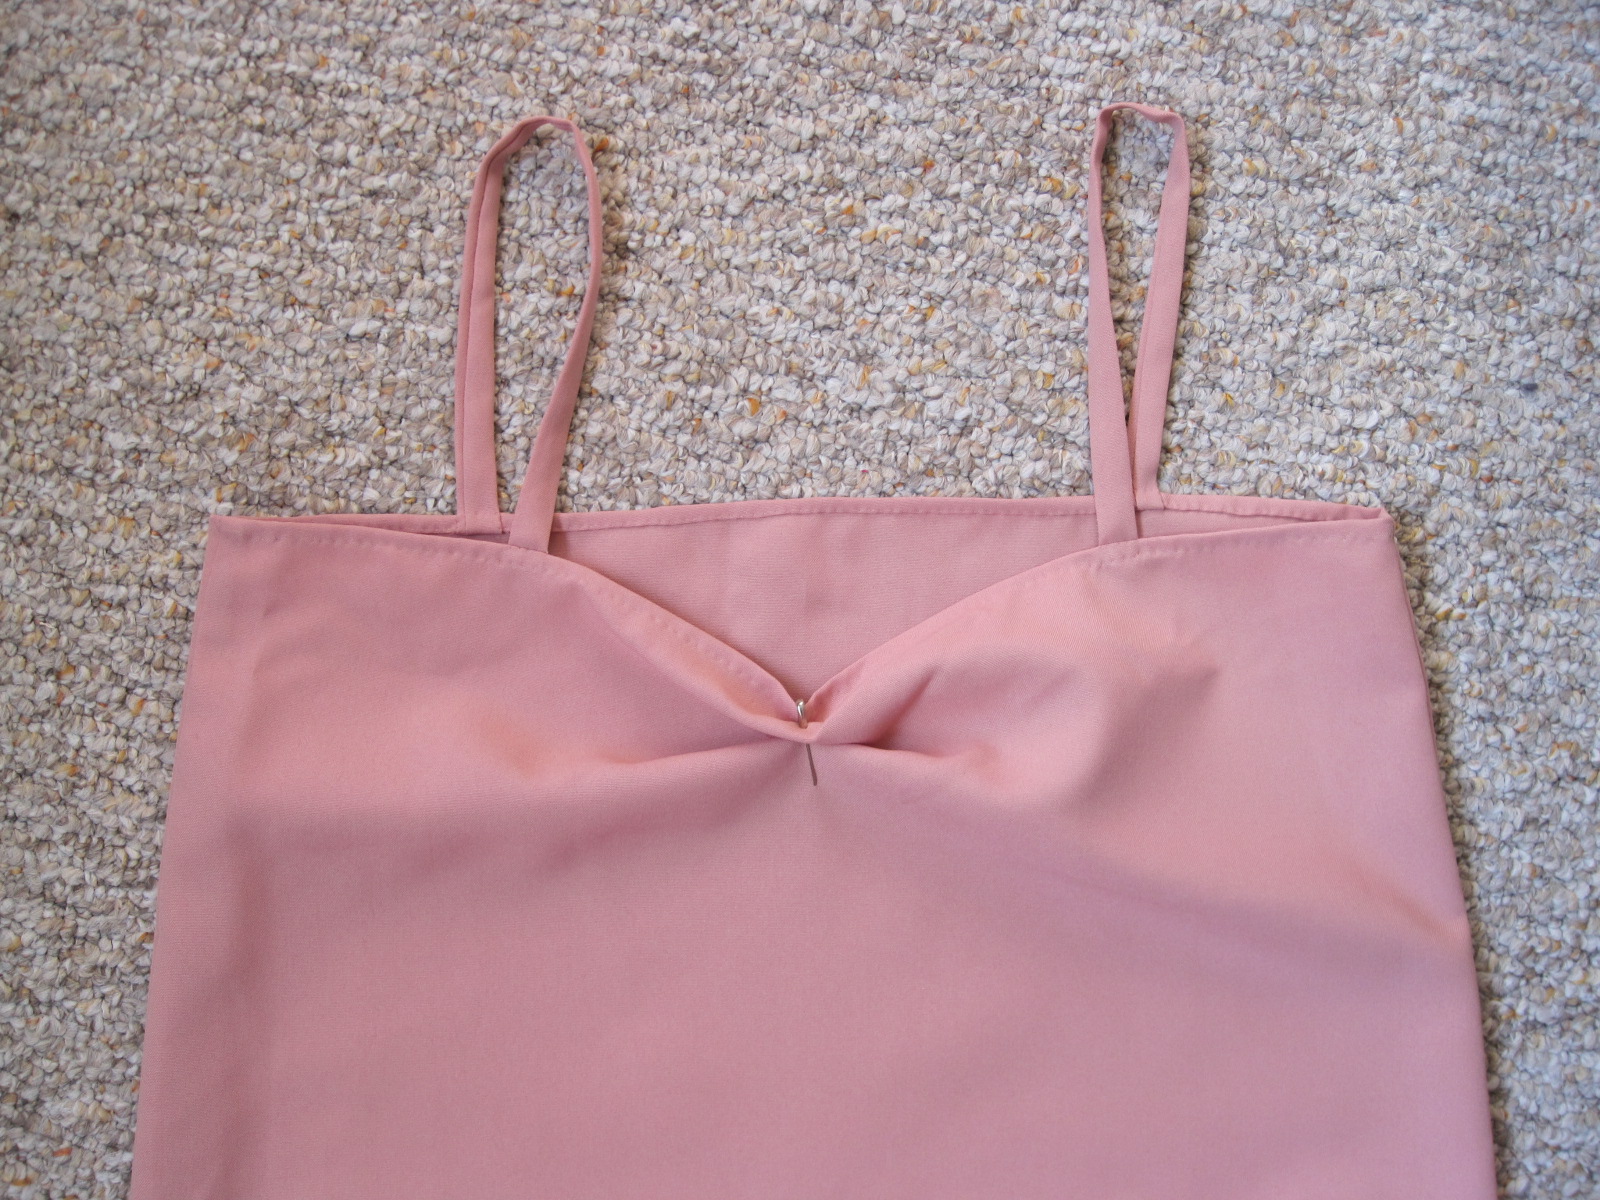
A pretty boring slip.
While wearing the slip I noticed it was showing at the underarms and front neck. The underarms were expected and I’m totally ok with that. But I didn’t want to see the slip at the front (I think part of it is because the beaded section is heavy and pulls down in front when I move), so I bunched it down with a safety pin. Will I ever sew it for real? Probably not. Sometimes safety pins are your friends.
Now i know which way is front on the slip! Not that it matters, since it’s the same front and back aside from the safety pin…
Ready for some more facts?
Fabric: ~1yd pink polyester medium weight crepe, ~1.5 yds grey polyester chiffon, and the beaded silk gauze section of an old evening dress.
Pattern: none.
Year: 1925.
Notions: thread.
How historically accurate?: I give it 85%. Polyester was definitely not in use in the 1920s and the princess seams on the bodice aren’t really accurate for these dresses either as far as I know.
Hours to complete: 20-25. Lots of hand sewing or it would have been faster.
First worn: To the opening of the Great Gatsby, old sport! I was part of a dance performance before the movie. More on that soon!
Total cost: $18-$23 depending on what I paid for the original dress, which I can’t remember!
This is the description for this HSF challenge:
The written word has commemorated and immortalised fashions for centuries, from the ‘gleaming’ clothes that Trojans wore before the war, to Desdemona’s handkerchief, ‘spotted with strawberries’, to Meg in Belle Moffat’s borrowed ballgown, and Anne’s longed for puffed sleeves.In this challenge make something inspired by literature: whether you recreate a garment or accessory mentioned in a book, poem or play, or dress your favourite historical literary character as you imagine them.
Oh wait, did I mention that my literary inspiration for this is The Great Gatsby?
Woo! 1920s beaded dress!
It was super fun to wear this to the opening of the Great Gatsby and dance in it. I was able to wear my ivory American Duchess Astorias (not for dancing, but for walking around) which made me happy, as well as a necklace recently given to me by my mom! And in the end, it’s great that the original dress was a size 14, because it gives the top that roomy/boxy/no waist 20s style on me!
This link contains an affiliate code, which provides a small benefit to my shoe fund. This does not affect my impressions and reviews of this product.
I’ve got these two related final notes:
The safety pin was patented by Walter Hunt on April 10, 1849. “Hunt’s pin was made from one piece of wire, which was coiled into a spring at one end and a separate clasp and point at the other end, allowing the point of the wire to be forced by the spring into the clasp. It was the first pin to have a clasp and spring action and Hunt claimed that it was designed to keep fingers safe from injury – hence the name.” From about.com’s entry on Walter Hunt as an inventor.
Serging/overlocking/merrowing was invented by the Merrow Machine Company in 1881. From wikipedia’s entry on ‘overlock’. It has been used to finish seams since at least the 1920s, according to the Vintage Fashion Guild (they’ve got a whole page of neat vintage clothes dating information that has good dates for when different sorts of construction styles and methods came into use!).