(I thought I was very clever when I came up with the name for the post… and then a few days later I couldn’t remember what I was thinking the content should be! I guess if I confuse myself that easily I should certainly explain my cleverness so you can appreciate it, too!)
“It is recommended that the lady, when waltzing, leave herself to the direction of her partner, trusting entirely to him, without in any case seeking to follow her own impulse. A lady who should endeavor to avoid an encounter with other dancers, would risk interfering with the intention of the gentleman, to whom alone should be trusted her security amid the crowd surrounding and crossing her in every direction.”
I thought, “Hm! Trusting myself entirely to my partner’s care is something I rarely do! I’m often giving non-verbal hints about my opinions on where we should go, how much we should rotate, etc… and depending on the ability of my partner, my hints sometimes come down to downright back-leading.” I’m sure this partly comes from eight or so years of competitive modern ballroom dancing, in which the leader is in charge, but the lady has the duty to do her part to see what’s going on around the floor and help ensure that crashes, etc. don’t occur, as well as my independent-modern-woman mindset. However, despite these reasons, I imagine Hillgrove would have taken exception to my dancing style!
I started thinking about whether it made sense for me to attempt Hillgrove’s method while dancing historical dances. I dance in three settings, at private rehearsals when the dance troupe I am part of is practicing for performances, during performances with said dance troupe, and at public balls when I am dancing with guests of varying abilities or with members of the dance troupe.
I think it boils down this way: when dancing in a performance there are goals of elegance, nice spacing between couples, etc. that we are aiming for, and my interpretation of our artistic directors’ instruction in addition to my own feeling is that every person dancing should contribute to these goals, so a bit of hinting makes sense for the context. I feel similarly about hinting while dancing at balls depending on the ability of my partner, and if the goal is to ensure the safety of myself, my partner, or other people who might cut us off, etc. I also feel justified in back-leading a partner who needs some assistance to stay with the music, avoid crashes, or know how much rotation to complete in a given step, etc… but it sounds like I don’t really ever follow with trust!
With these thoughts in mind at a recent ball, I attempted to follow partners (whose abilities I have faith in) with trust. It was surprisingly uneventful! I think it really comes down to the ability of a partner in order to determine if I’m comfortable with that level of trust. Do you entirely follow your partners with trust at historical dance events? Or are you like me, picking and choosing when you feel comfortable doing so?
Success! Time to go home.
(As another side note, it’s been just about a year since my last 19CBRE post. If you’re not sure what that’s all about, check out this introductory post. You can see all of the posts relating to 19CBRE here. Perhaps this year I’ll get around to posting more of the interesting tidbits I’ve been thinking of posting over the last year!)
Back in March, I was again able to attend The Commonwealth Vintage Dancers‘ annual strictly-Civil-War ball (this is the 5th year I’ve been there, wow!). It’s been a joy every year I’ve attended and this year was no exception. Unfortunately, I only had my phone to document the evening, which means my pictures came out rather blurry. Here’s just a few.
Obviously, the most important thing to document was that I was able to wear my Refreshing Apron for the first time with a mid-century dress.Also, I danced. In this case, a schottische. (Other people danced, too, and looked quite elegant and lovely.)
Evie is always special to wear and was accompanied by the usual accessories and undergarments. The only thing I did when I came home was to mark front on the skirt, because every time I wear this gown I struggle to remember where front is! (It makes a difference when your skirt hooks to your bodice–without everything lined up properly it just doesn’t work!)
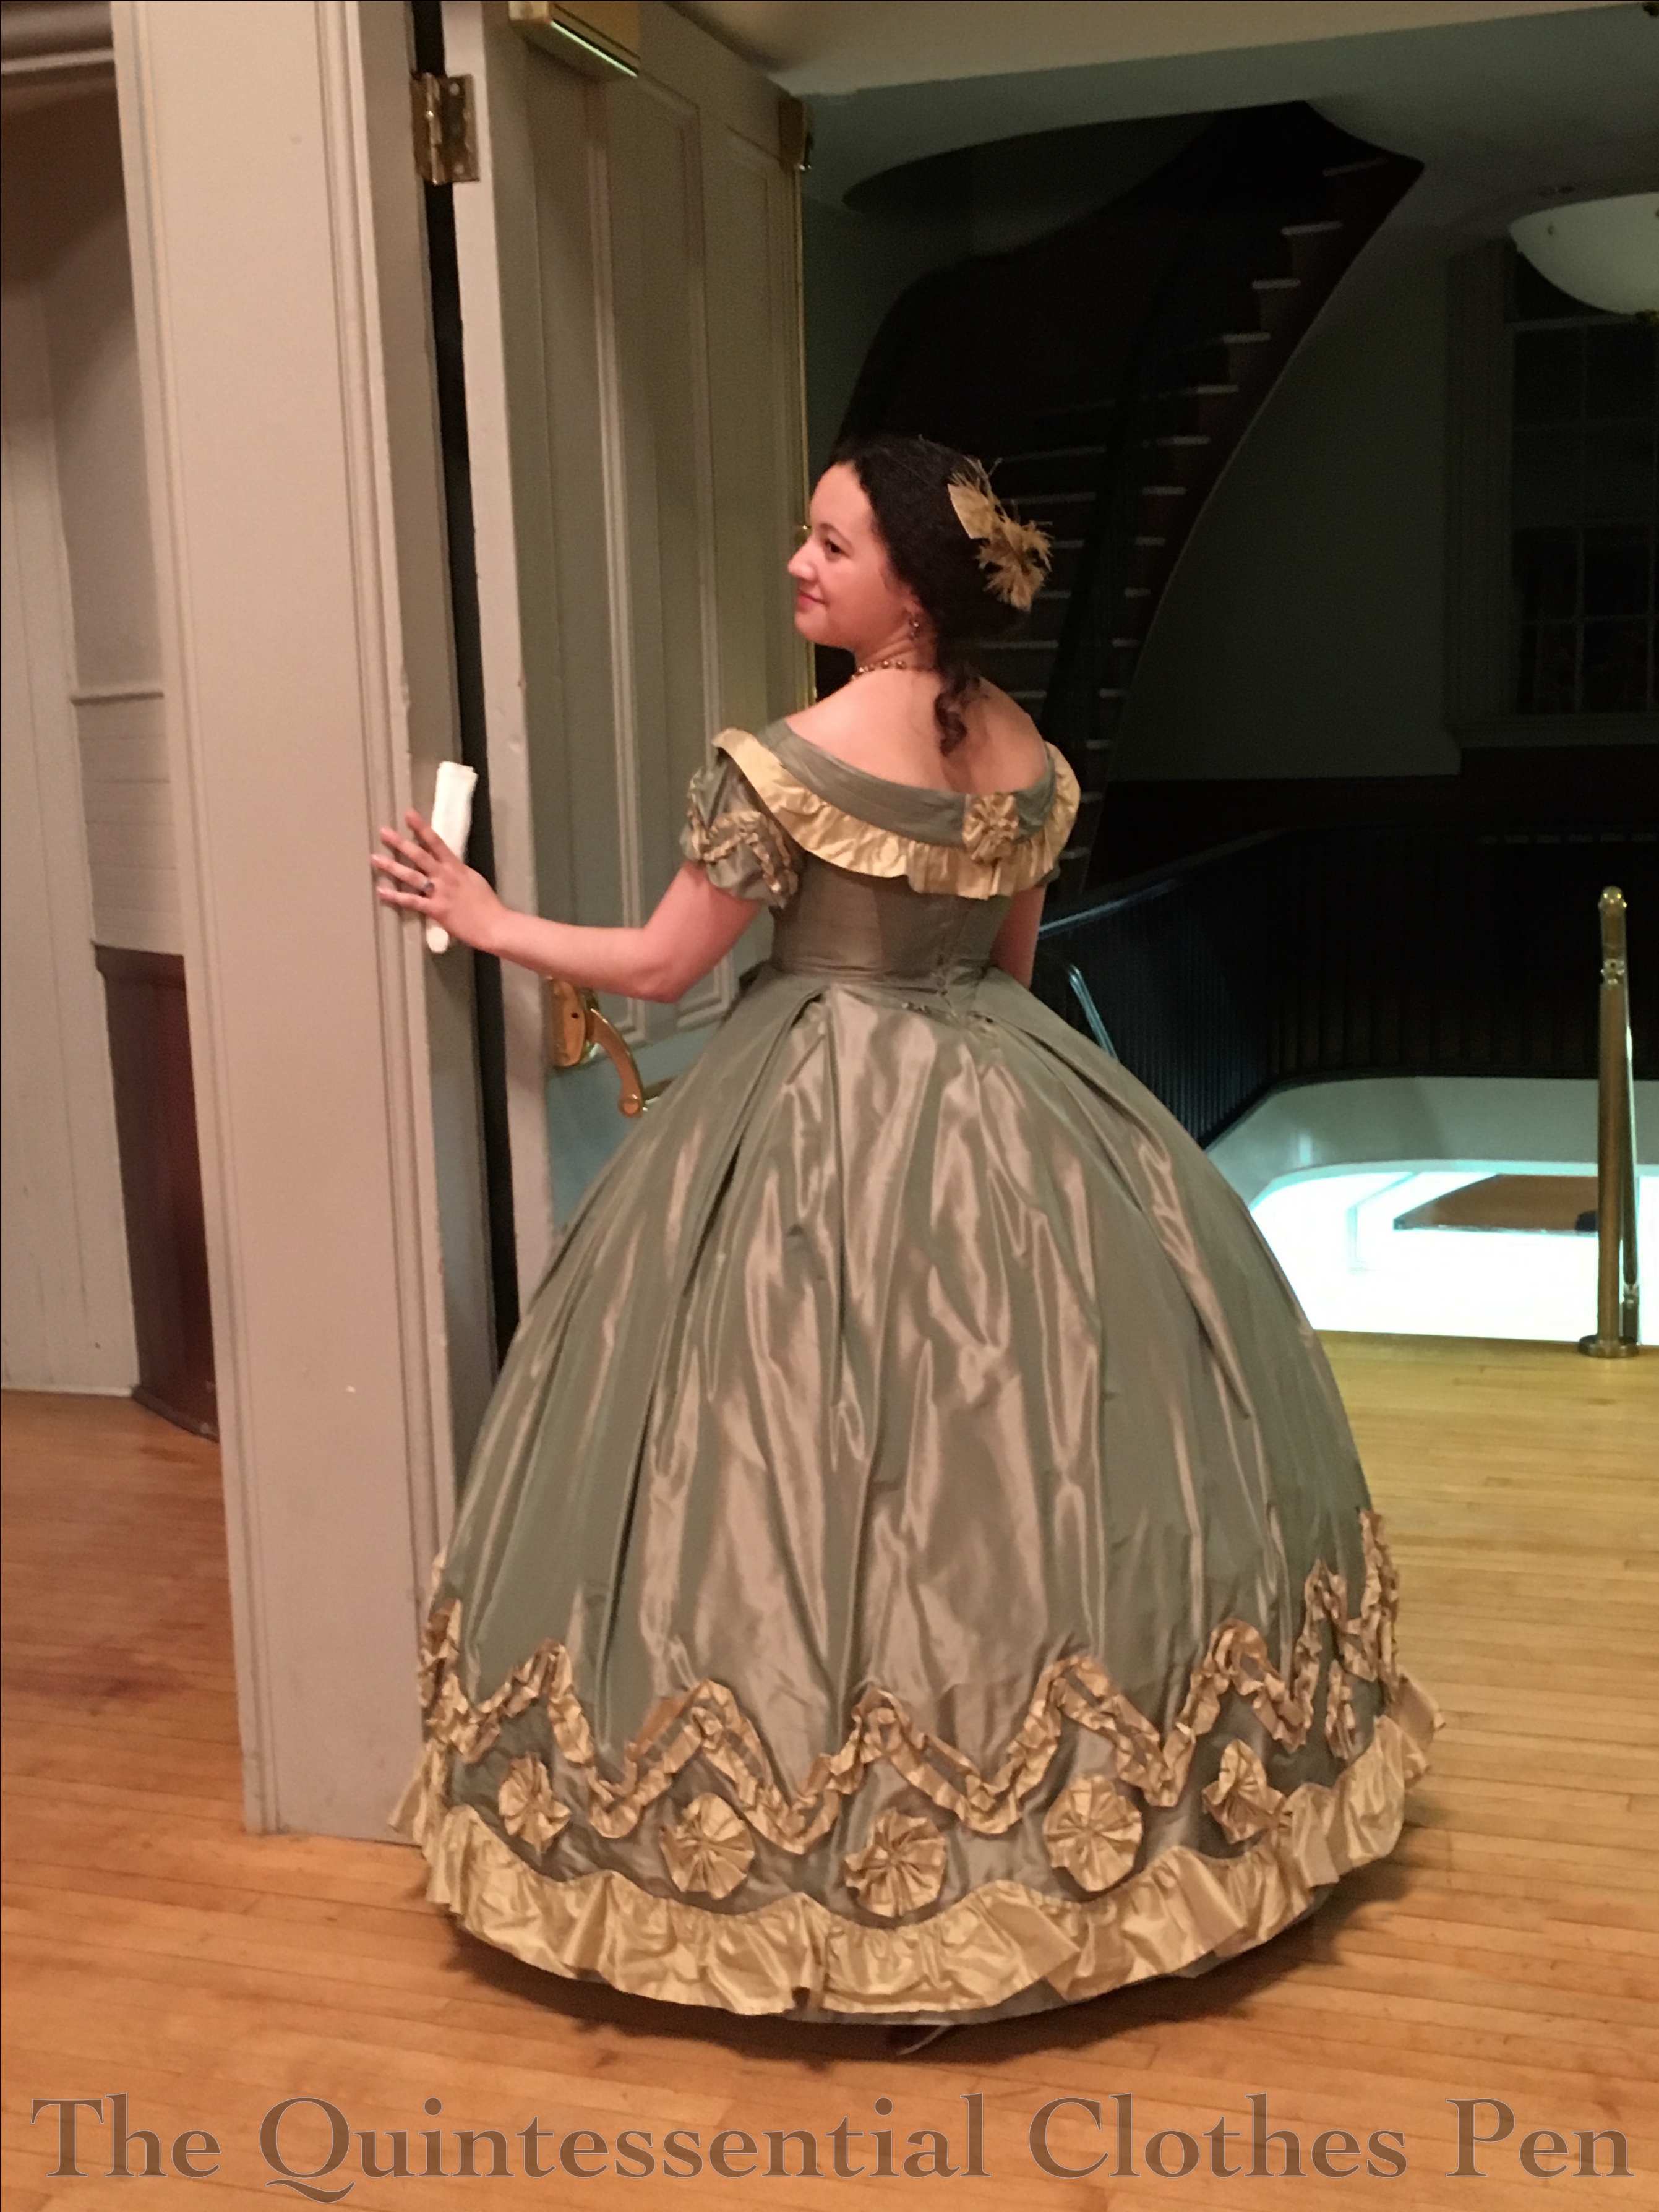
A few weekends ago now, I went to an event at The Down Town Association in New York. It was an event out of my usual ordinary line of events and so I took the opportunity to create something out of the ordinary to wear. The title of the post rather gives it away… but I only had a week to put my outfit together!
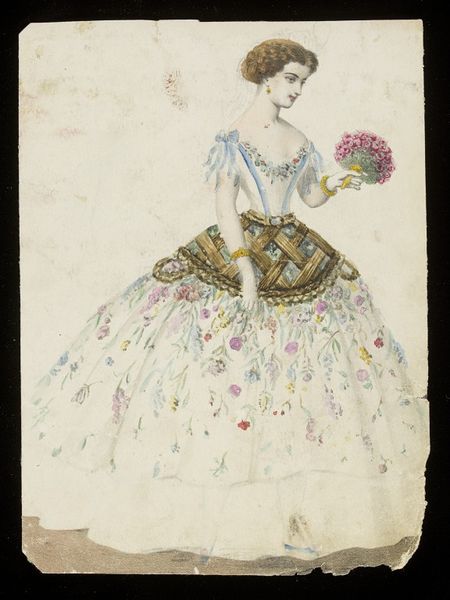
Flower Basket, 1860s. This design was created by Jules Helleu or Léon Sault, possibly for Charles Frederick Worth.
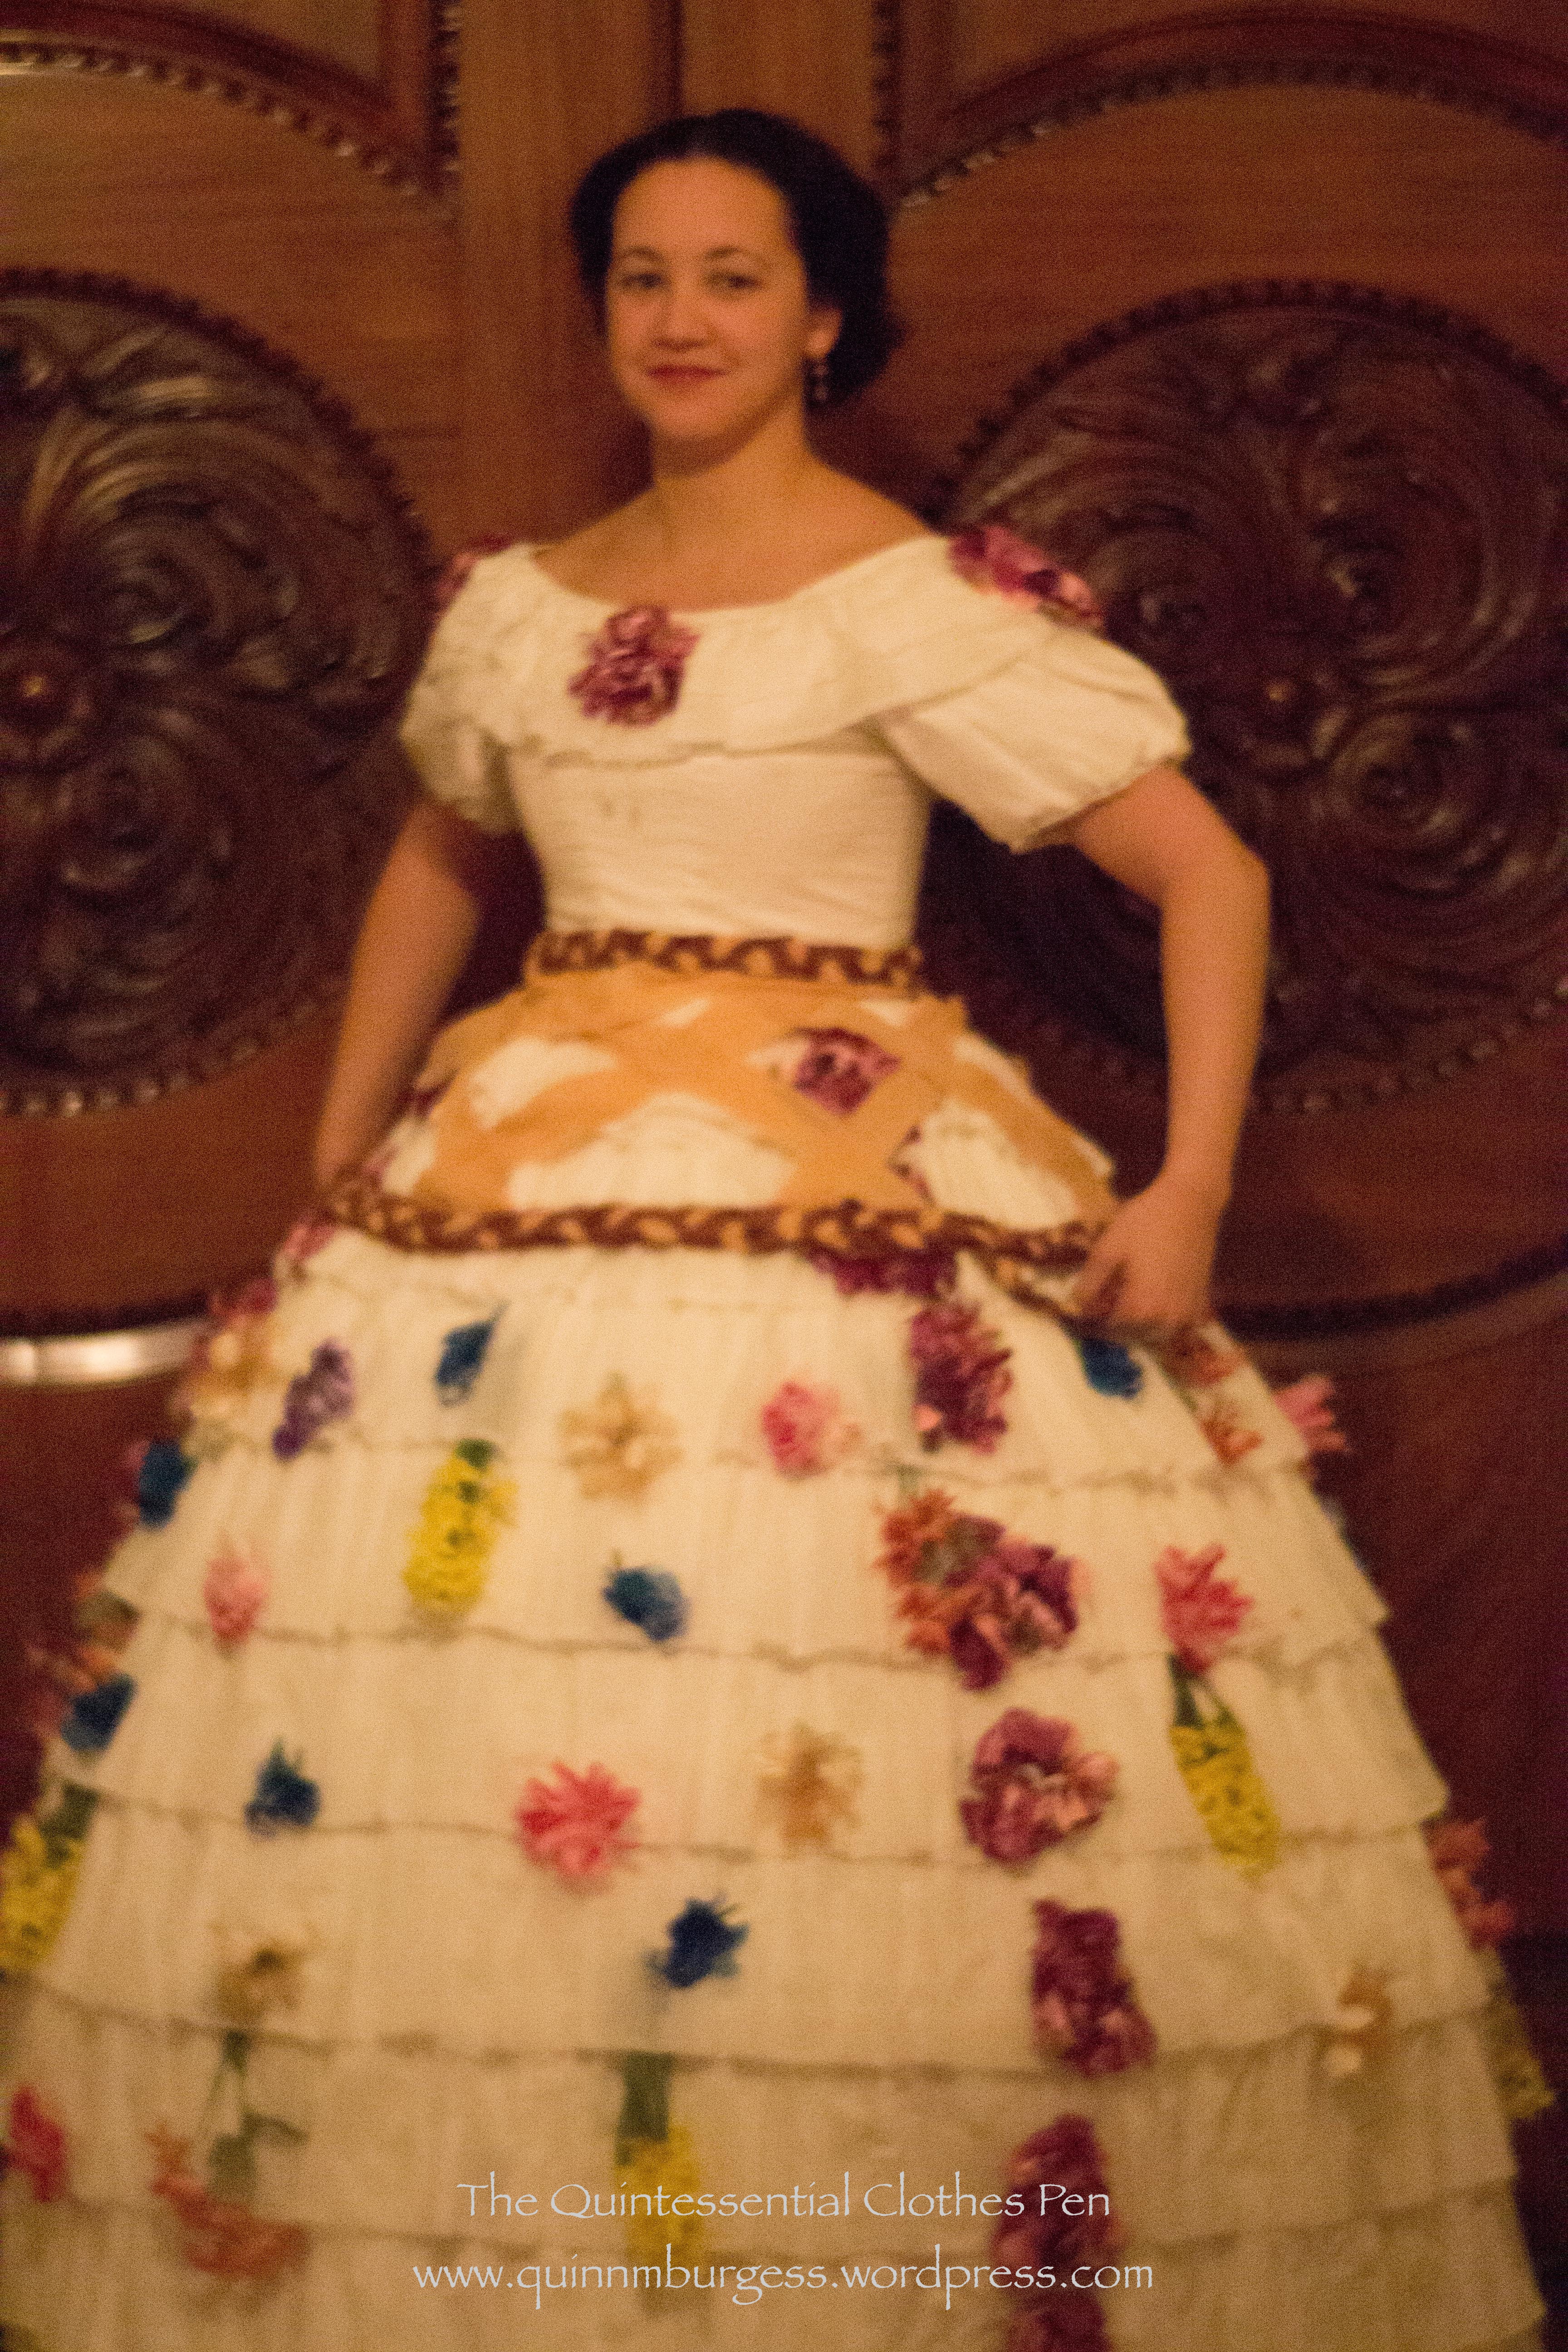
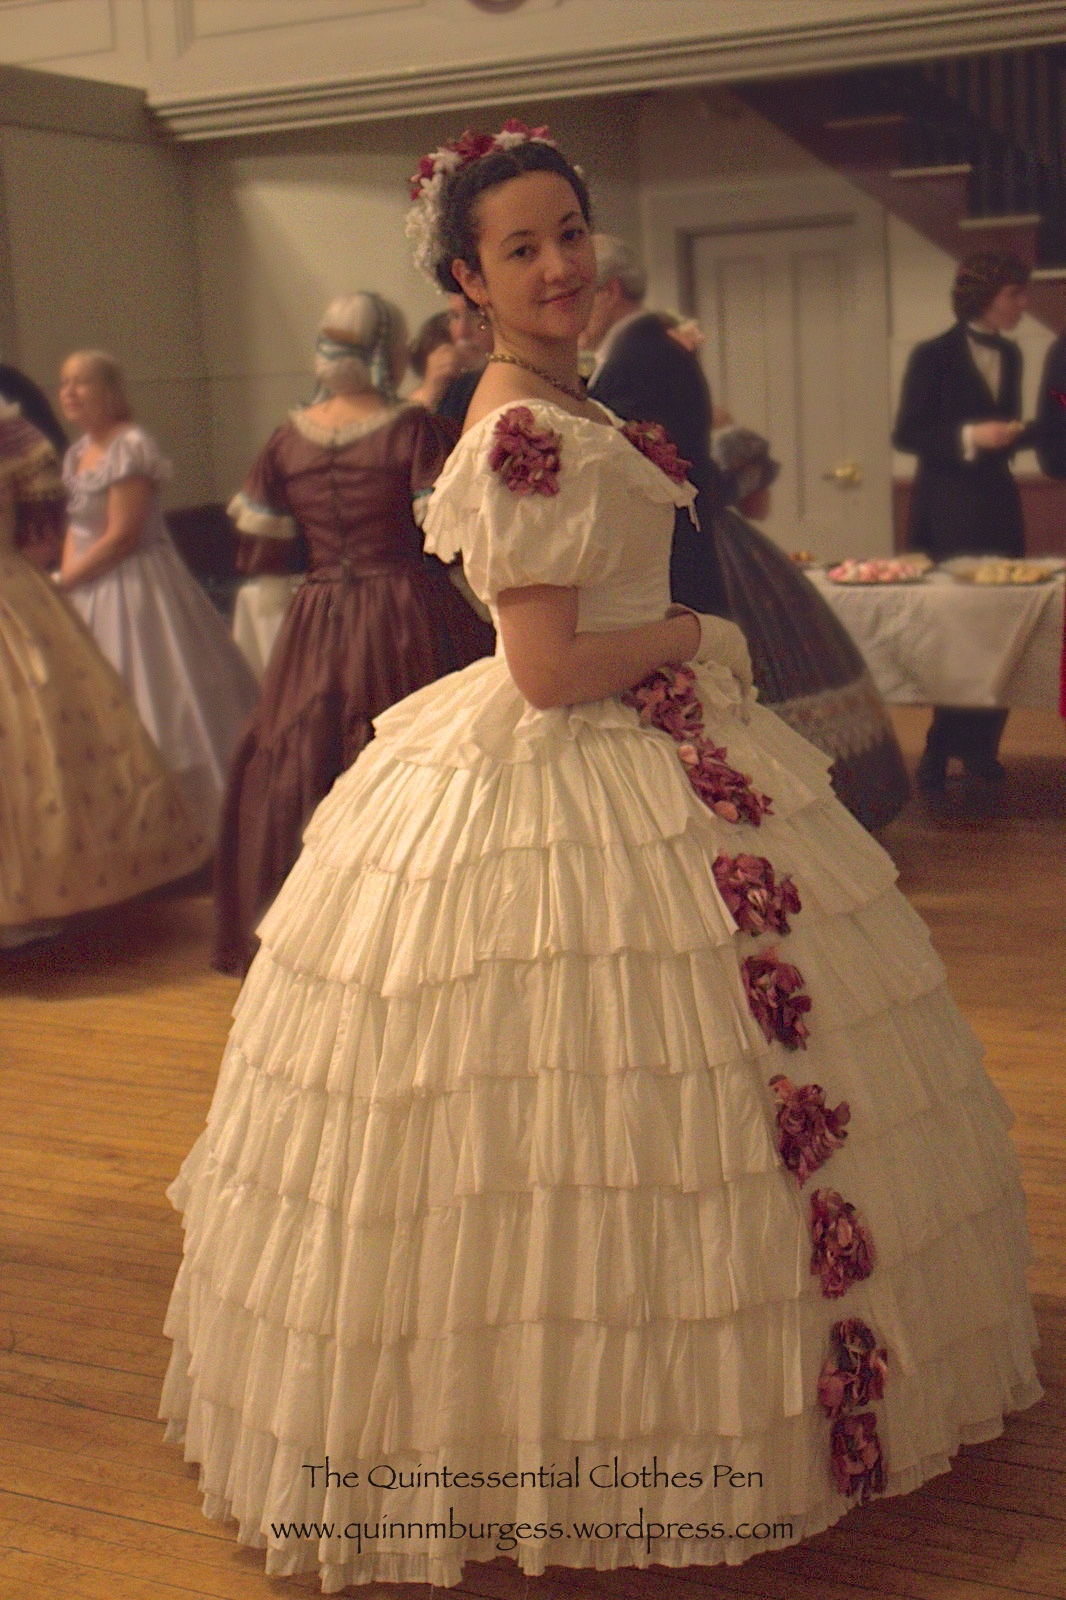
Using this image as my inspiration, I determined that I needed to make a flower basket, but that I could use Annabelle as the base for the floral dress. I also wanted to use only items from my stash, thus limiting my options a little bit. So I spent my weeknights creating a fabric basket that fit over my hoops and then furiously pinned flowers to my skirt the day we were leaving for New York in the hopes that they would look good and at least a little like my inspiration image…
(What does a flower basket do with her hands without a bouquet?)
In the end, I enjoyed my flower basket very much, but didn’t like the fact that my furious pinning job didn’t really achieve the cascading flower look I was going for and that Annabelle’s pre-existing flowers were rather heavier looking than I had hoped, also contributing to the lack of cascading flower look. Maybe someday I’ll try again with the same basket and a different, or differently modified dress, but it was fun to do something different even if the results were not as great as I hoped for.
I like the basket when you don’t see the skirt flowers.(Maybe a flower basket holds her handles?)
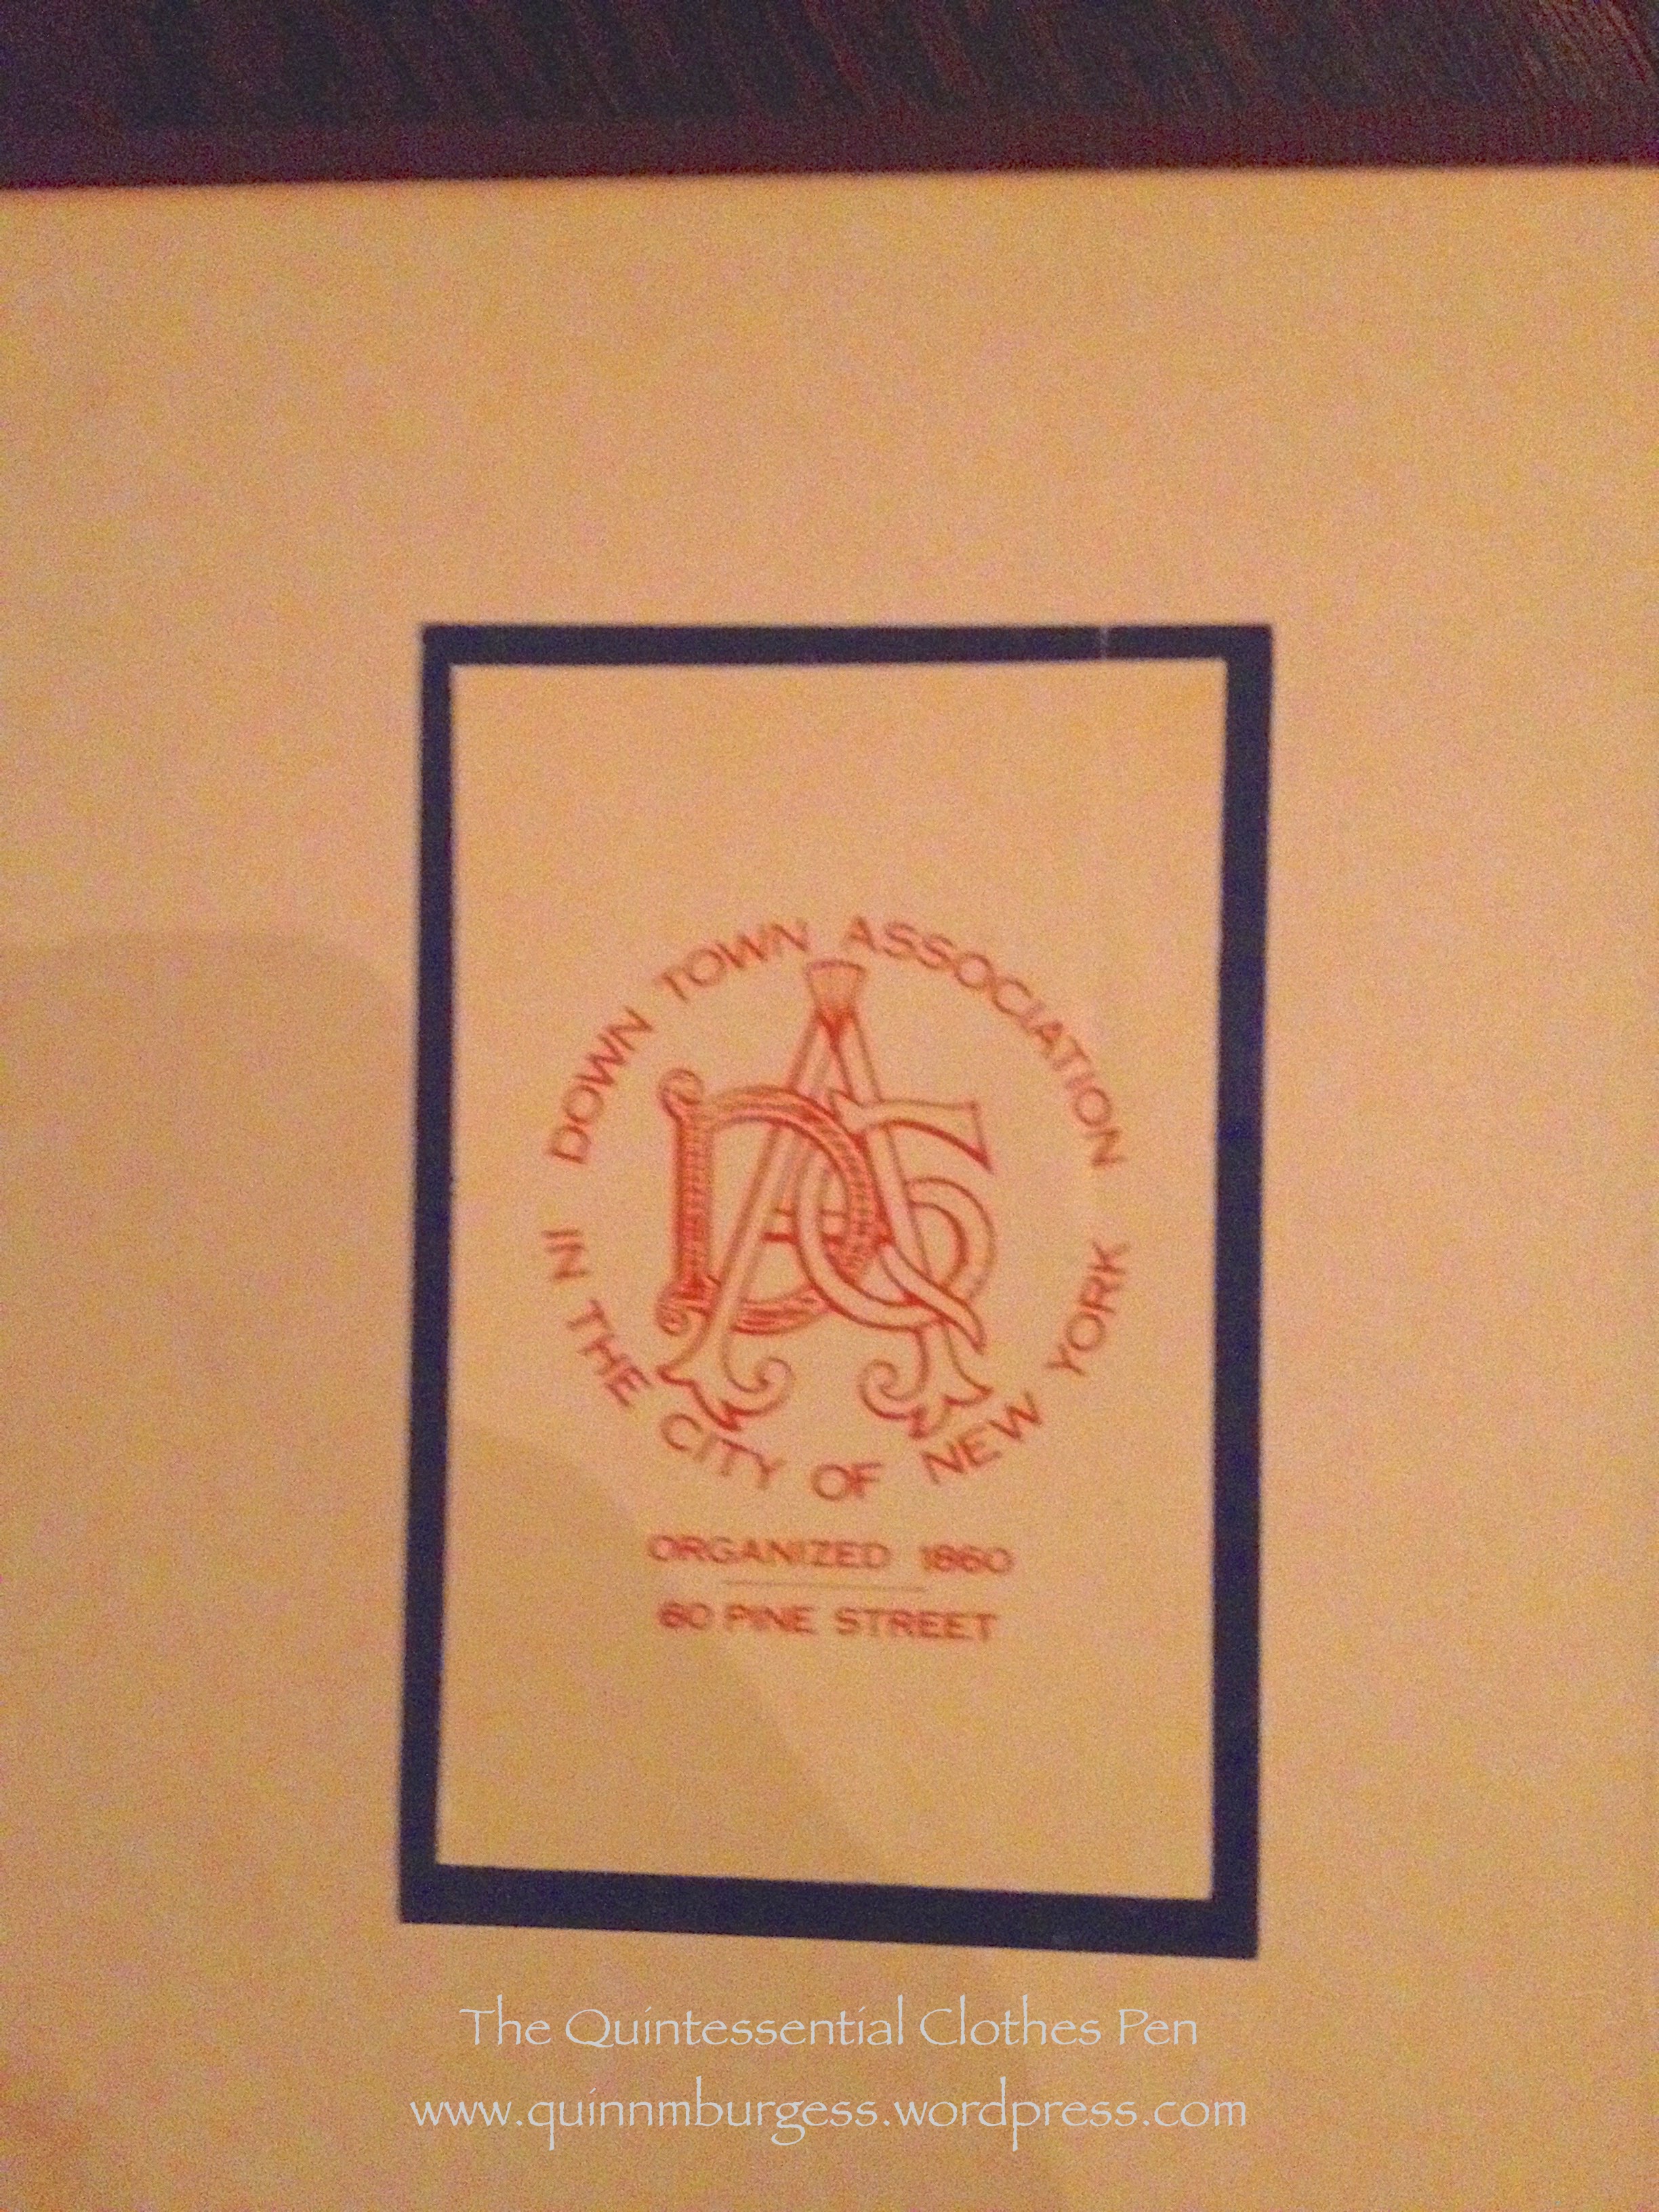
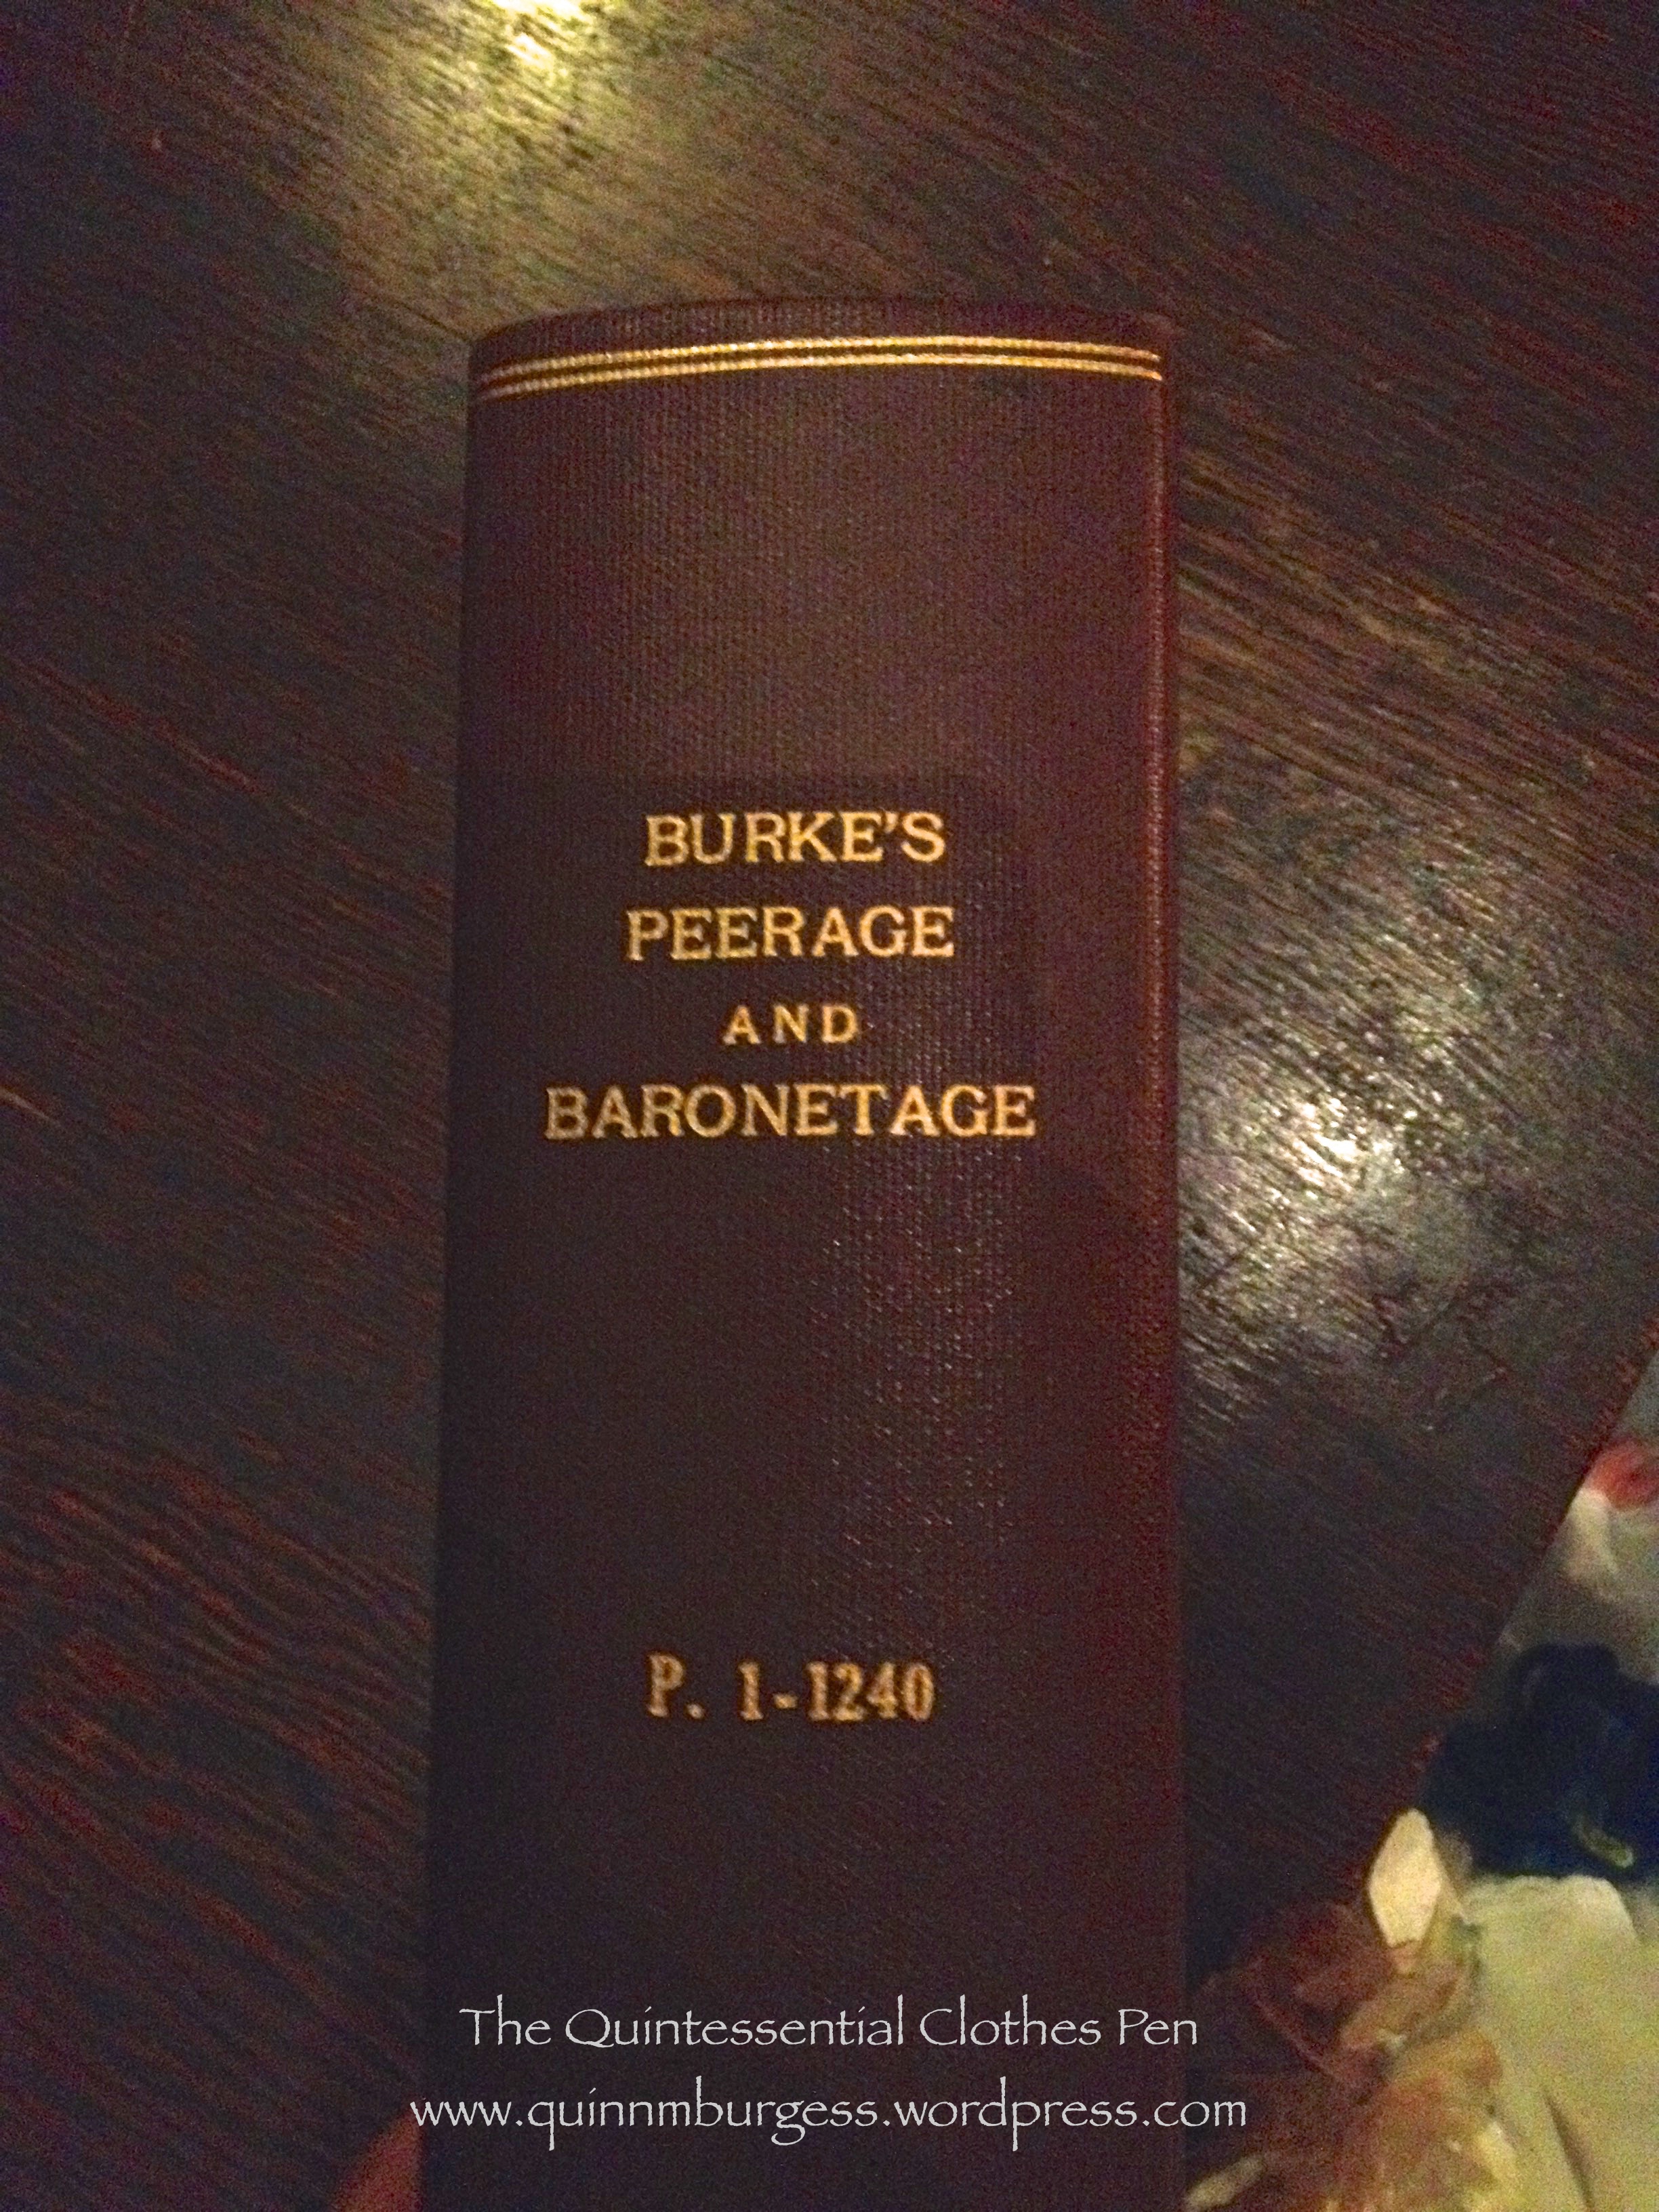
As I mentioned, this event was held at The Down Town Association in New York, which was established in 1860 (perfect for my fancy dress!). As far as I can tell the association is still housed in the same building they’ve been in since 1860. It was quite lovely inside, with detailed architecture and beautiful rooms. One room was a library full of a rather random collection of books. I enjoy perusing books and so proceeded to examine the titles closely. And guess what I found? A volume of Burke’s Peerage and Baronetage from 1912!
This excited me quite a bit, not only because it was from 1912, but I think also because it reminded me of Persuasion, in which Mr. Elliot is described as putting Burke’s Peerage in a position of honor in his estimation of important things in the world. Regardless, I got distracted and insisted that I needed to take pictures and look through.
Here I am, reading Burke’s Peerage!
Burke’s Peerage certainly is an undertaking, and this volume only covered the alphabet through letter L! Unfortunately, I didn’t spot a second volume in the library, but I hope it’s there somewhere.
Well, I went to the fabric store today looking for fabrics to cover some gifted pillow forms to grace our newly redecorated rooms (they’re still not quite done after two weeks of work, but hopefully soon they’ll be done and I’ll have pictures!). I found some truly horrendous fabrics like the one below… (don’t worry! I didn’t buy it. I can only imagine this being in a farmhouse kitchen and even then I wonder about all the mixed motifs…)
Roosters, and damask motifs, and sunflowers, and gingham, and words…
I did find a few pillow possibilities that I liked, but they all had oatmeal/neutral backgrounds that would not look good in our space, so I didn’t purchase any of those. (I’ve got more places to check out, so I’m not concerned on that front, yet.)
And I did look through the silks, as I always do. Danger!!!! I found lovely plaid smooth silk taffeta (no slubs, hooray!) and it just wanted to come home with me to be made into an 1850s/60s evening gown. I finished off the bolt, which was just under 7 yards. Hopefully enough to make a skirt, possibly both day and evening bodices, and also maybe self trim. Someday (maybe next year?).
A very kind and enabling friend who happened to be with me helped convince me that the silk was a good idea. So in the grand tradition of all my 1850s/60s gowns which have names, when I get around to building the new plaid one I affectionally plan to name the new gown “Johanna” after her. It’s actually a bit more subdued in person. More of a “bruise palette” collection of colors than my usual jewel tones, but “bruise palette” is Johanna’s go to for color choices, so that is perfect. And it’s patterned, which is in keeping with my need to add more patterns to my wardrobe. I think I’ll play up the purple in this rather than the green, since I already have a green 1860s ball gown.
Fabric! (Because obviously I don’t have enough of it in my stash or enough to accomplish in my life right now…)
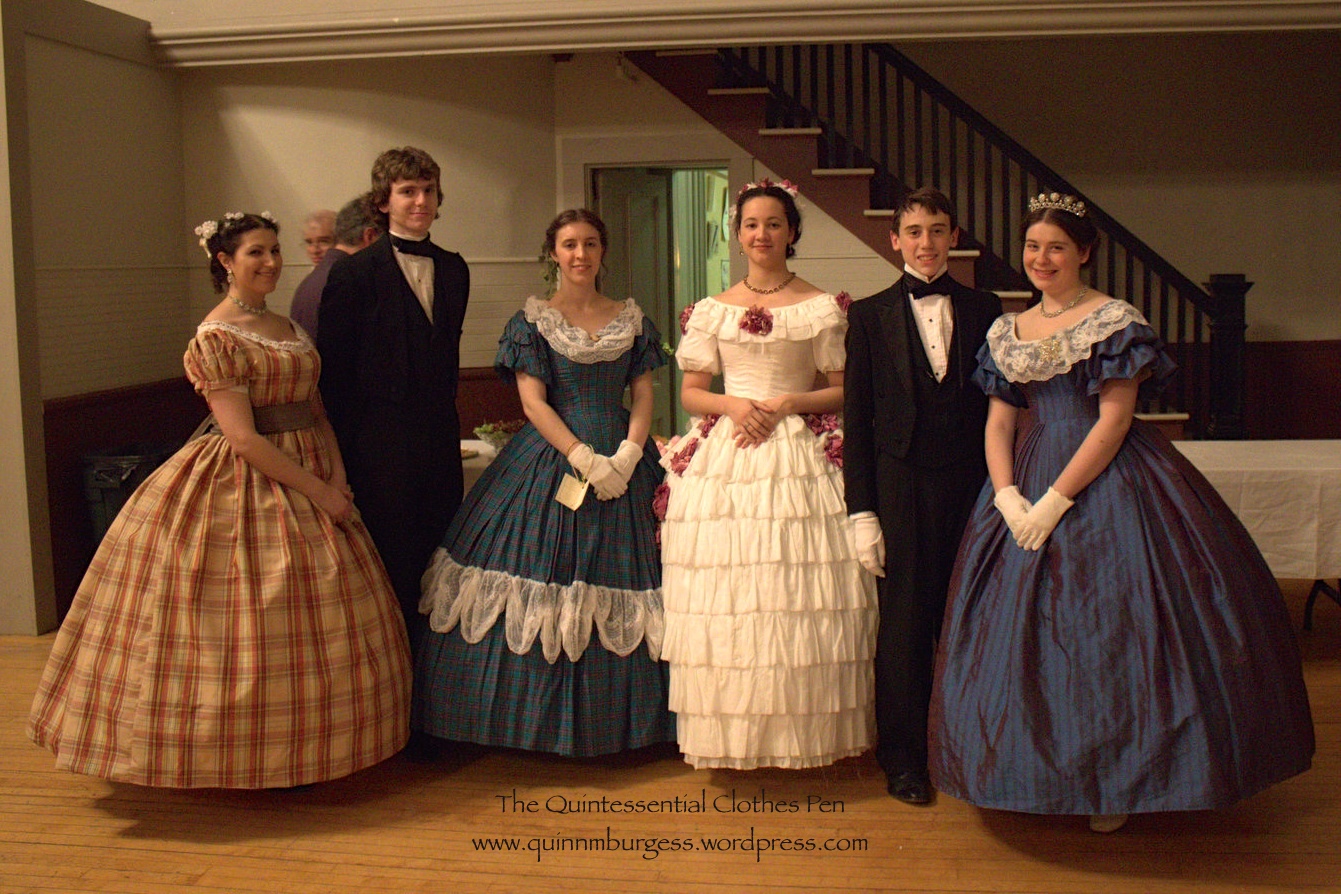
Here are a few group pictures from the recent ball at which Georgina’s new evening bodice made her first appearance. As I mentioned before, it was a lovely ball with enthusiastic and elegant dancers. I had a fantastic time.
Four of us wearing cotton dresses. You might remember that the print dresses (Georgina, the green dress, and the purple dress) were all made from mid-19th century historic cotton prints and worn with day bodices last summer at our George’s Island performance.
And remember this picture, from Newport Vintage Dance Week back in 2012? Different time period, obviously, but The Next Generation of vintage dancers is still going strong, so we thought we’d take a TNG picture at this ball, too!
At Newport Vintage Dance Week in August 2012.A more recent group of TNG.
It’s very rewarding to be continuing the legacy of historic dancing in beautiful clothes with lovely companions and in stunning places. Next weekend, Georgina’s day bodice will be making another appearance on George’s Island for another vintage dance performance. I’m sure we’ll have pictures!
Not too long ago, I was again able to be part of the annual Returning Heroes Ball hosted by The Commonwealth Vintage Dancers. I decided to wear Annabelle again this year, even though I’d worn her last year, because I’d just worn Evie and Belle at the 1860s Dance Weekend in November.
Annabelle at Returning Heroes Ball 2014.
Each time I’ve worn Annabelle, I’ve been slightly disappointed with the various incarnations of flower hair wreaths I’ve attempted to match her: the first wreath and the giant mass of flowers. So this year I decided to try again to see if I could get something I like. There are quite a number of evening dresses decorated with flowers right about 1860 and many of them are depicted in fashion plates and portraits with matching flowers in the hair. Here are some examples: 1859 fashion plate, another 1859 fashion plate, a third 1859 fashion plate, 1861 fashion plate, 1861 portrait, 1862 fashion plate, and 1863 fashion plate. For this new incarnation, I decided to try a different style from what I have for my other two evening dresses (Belle has a crescent and Evie has a hair wreath). The style I settled on I’m calling a headband. It creates a halo around the face and extends down towards the ears, but does not connect across the back of the head. Instead, the hair must be interestingly arranged to fill in the back of the head. Here’s an example of the headband style using flowers that match the dress from 1862. And here is the fashion plate that Annabelle is based on which shows a headband style hair wreath worn with the dress.
Here is Annabelle’s new floral headband.Back view of my hair style. I needed something dramatic to fill in the base of my head. I wanted to do a sideways oval surrounded by rolls, but that didn’t work out and this is what I ended up with. I was dubious at first, but I think it worked. (It’s hard to see, but there’s one big central roll/puff and one smaller one above and below that.)
In addition to my new headband, I was also able to wear my new ca. 1860 corset and my still rather new purple paste jewels (a matching collet necklace and drop earrings) from Dames a la Mode. They worked wonderfully with my outfit (of course, I did pick the purple knowing it would match multiple outfits…!) and I enjoyed wearing them again.
The ball was lovely, as usual, and filled with well dressed people and more uniformed gentlemen than we have seen in recent years. The dancing was well executed and the intermission boasted a lavish spread of refreshments that both looked and tasted scrumptious.
Bowers, during the Grand March.Bowing at the end of a polka.One small portion of the refreshments table.Looking lovely and dashing.
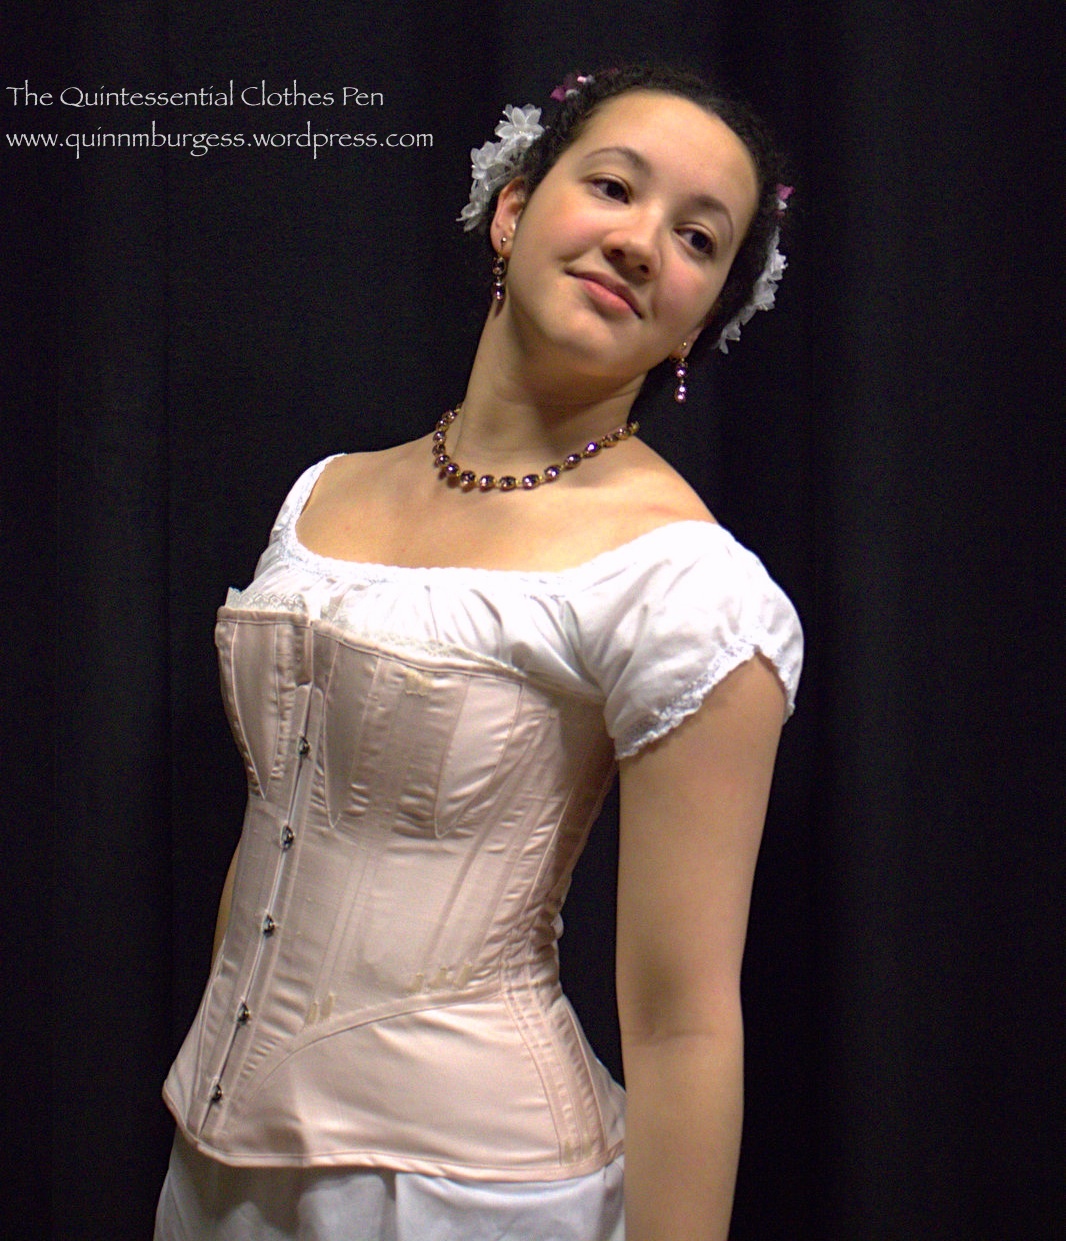
This is a follow-up post to my last post: ca. 1860 Corset For Me! (HSF #4). That post has a short background on my reasons for building the corset, but it doesn’t mention other details, so that’s what this post is for!
My new ca. 1860 corset.
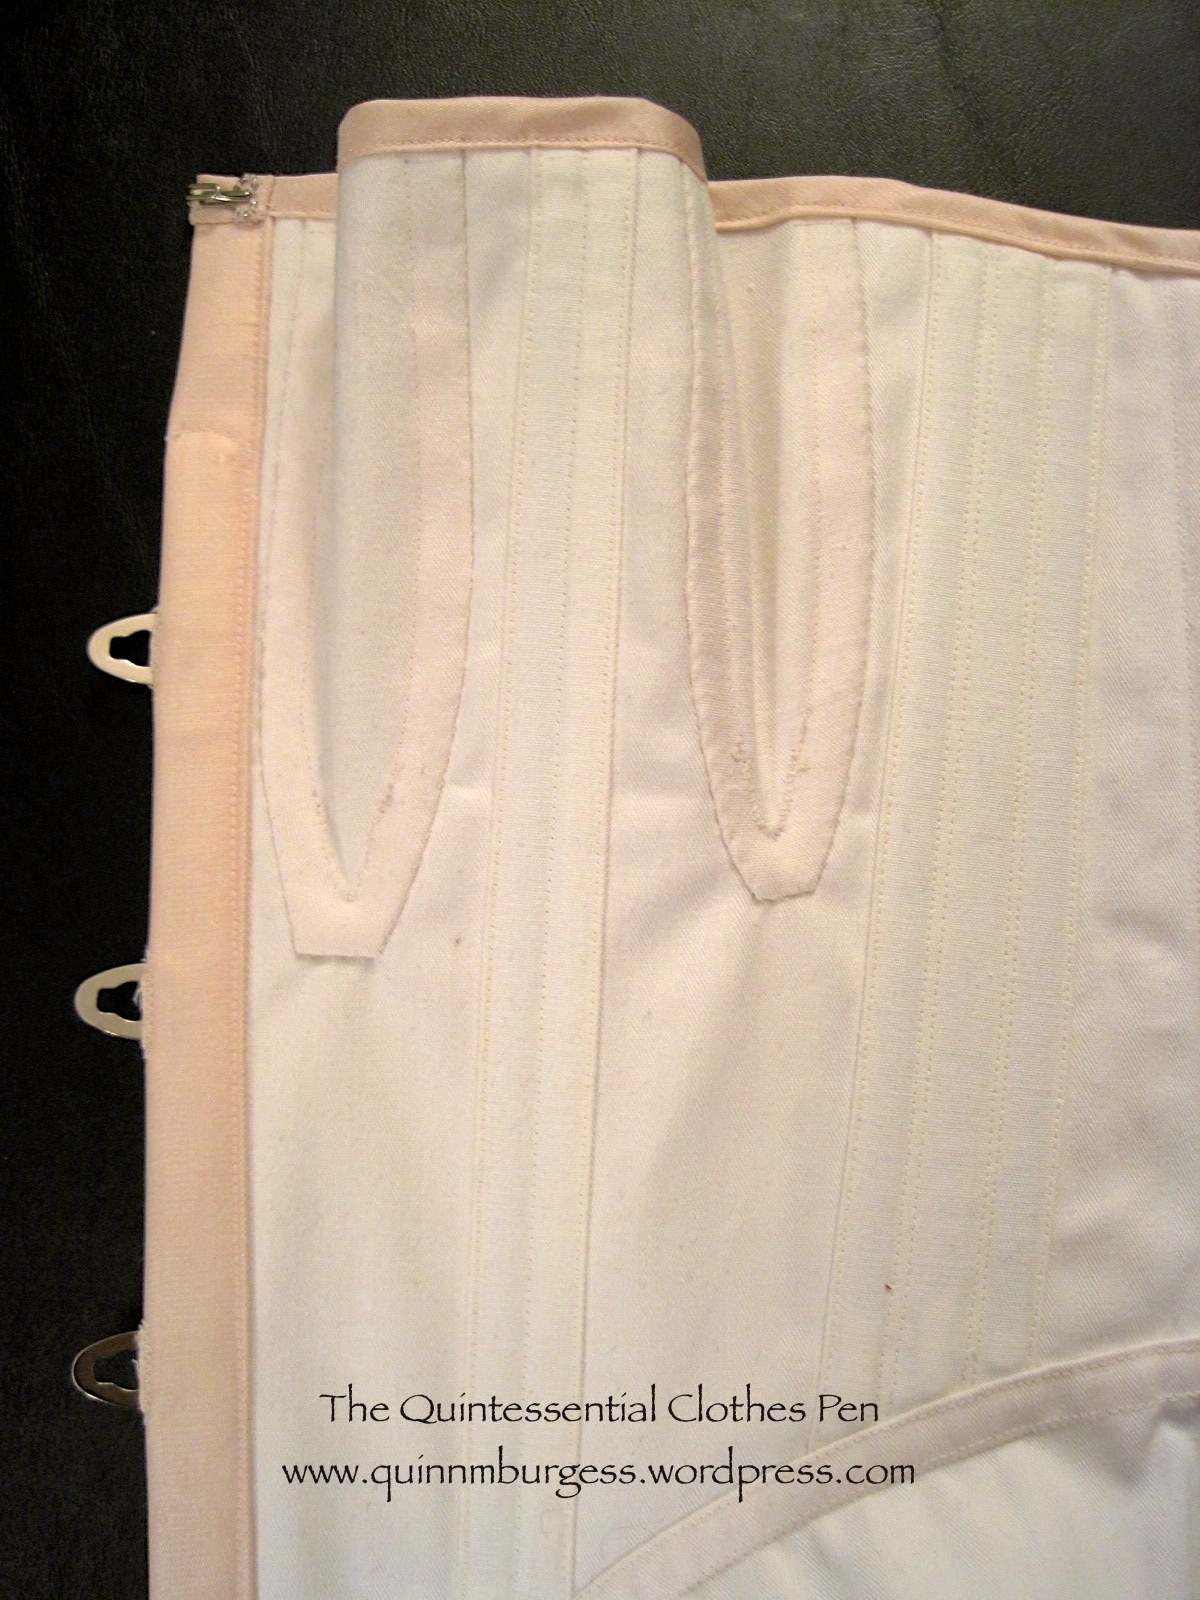
So let’s start with more background, since this post is all about intense amounts of details! We’ll start with the pattern I made for this corset: you’ll notice it has bust and hip gores as well as that curved piece on each side of the front. The bust gores aren’t so unusual for a modern 1860s corset recreation, but I don’t see too many corsets made (and certainly not many corset patterns) with hip gores and I’m not sure I’ve ever seen anyone reproduce an 1860s corset with that curved piece in front. I found these details intriguing and wanted to make this style for two reasons: 1, because it’s a style I haven’t seen recreated, but which I have multiple examples of in my research, and 2, because it seemed like it would fit into a new thought I absorbed a few months ago.
1865-1867 corset, The Met
First, a discussion about the style. It seems like a lot of modern ca. 1860s corsets are cut with vertical seams that run from top to bottom of the corset to create shaping, sometimes with the addition of bust gores. (The corset on the right is an example of one from the 1860s that uses this style of seaming to create shape.) These corsets are cut with shaping in the seams to create space for the bust and hips, but an alternative to this is to use bust and hip gores to achieve shape for the body. The interesting thing is that hip gores do not seem to be very commonly used in historic corsets made by modern people, despite their use in historic clothing. I attribute this to the fact that shaped seams are easier to execute than inserting gores of any type, but especially gores that are not in a seam (like the gores in my corset). Also, I would think that pattern companies have an easier time grading patterns using the shaped seams, because the gores (particularly hip gores) really need a lot more individual adjustment and fiddling on a body than shaped seams do.
Second, about this new thought that I absorbed. While reading Merja’s most recent blog posts about corset construction, I was rather surprised by a simple statement that makes so much sense but which I haven’t necessarily followed in corset making in the past (here are Merja’s gusseted 1870s corset, which has the sentence which mentions this magical new thought, as well as her 1880s purple corset and 1860s white corset with seaming like the Met corset, above, which exhibit the thought without it being explicitly stated). Essentially, she says that she always makes adequate space in the corset for bust and hips, so that the corset is only constraining her waist. Duh! A related thought is that when you tighten your corset you displace some bits to your bust and hips, so your corset really does need adequate room there to accommodate the normal and the extra. That makes so much sense and sounds so much more comfortable than having a corset that digs into your hips or pushes your bust around uncomfortably. I made the goal to take this approach for the new corset and all future corsets! and this new corset was my first attempt at really following this sound piece of information.
So given that the style I set out to make is one that I haven’t ever seen a pattern for, where did I get mine? Well, it’s loosely based off of one in Corsets and Crinolines by Norah Waugh (the pattern is ca. 1873, pg. 80). I say loosely, because I started there, but then began combining pieces and changing the shape of them to suit my measurements and the seam placement that I wanted (most importantly the hip gore and that curved front piece). Interestingly, Waugh notes on a different corset pattern (ca. 1860, pg. 78) that the 1860s style of corset without bust or hip gores (more like what I seem to see in modern made ca. 1860 corsets like the one from the Met at the top of this post) was a style preferred in France. The English preferred the style of corset I am making with gores. (Merja’s white 1860s corset I mentioned in the pervious paragraph uses this French corset pattern in Waugh, if you’d like to see what it looks like made up.)
I wound up making two mockups to get the pattern the way I wanted it even after adjusting the pattern from the beginning (and still made a few alterations before cutting out my real fabric). The original pattern in the book had a waist that was much too small and a bust that was a little large relative to my measurements. Despite my changes, the first mockup was too short waisted, needed bigger and longer bust gores, smaller hip gores (I had overestimated how much ease I needed there), and a little bigger waist. The second mockup was still a little short (I added another ½” to the top), the hip gores were still just slightly too big, and the lacing gap between the back pieces was wider than I wanted it to be by about 3″. Ugh! I actually determined that last fact after cutting out and sewing up my actual fabric. Turns out my shoulder blade area is bigger than I thought. I had an inner struggle about if I wanted to take out the small stitch size flat felled seam to insert a piece or if I wanted to just let it go. Adding a piece won in the end, because I figured that I was spending so much time on the corset that I really wanted to be pleased with it and not have nagging doubts for the next number of years until making a replacement. (The piece I added is between the front and back pieces. You can see it easily in the first picture in this post. It’s a v shaped piece that extends from top to bottom.) Adding the piece actually wasn’t so bad, despite all my inner complaining and I’m very pleased I did it, because I am happy with the result.
1864 corset, The Victoria and Albert Museum.
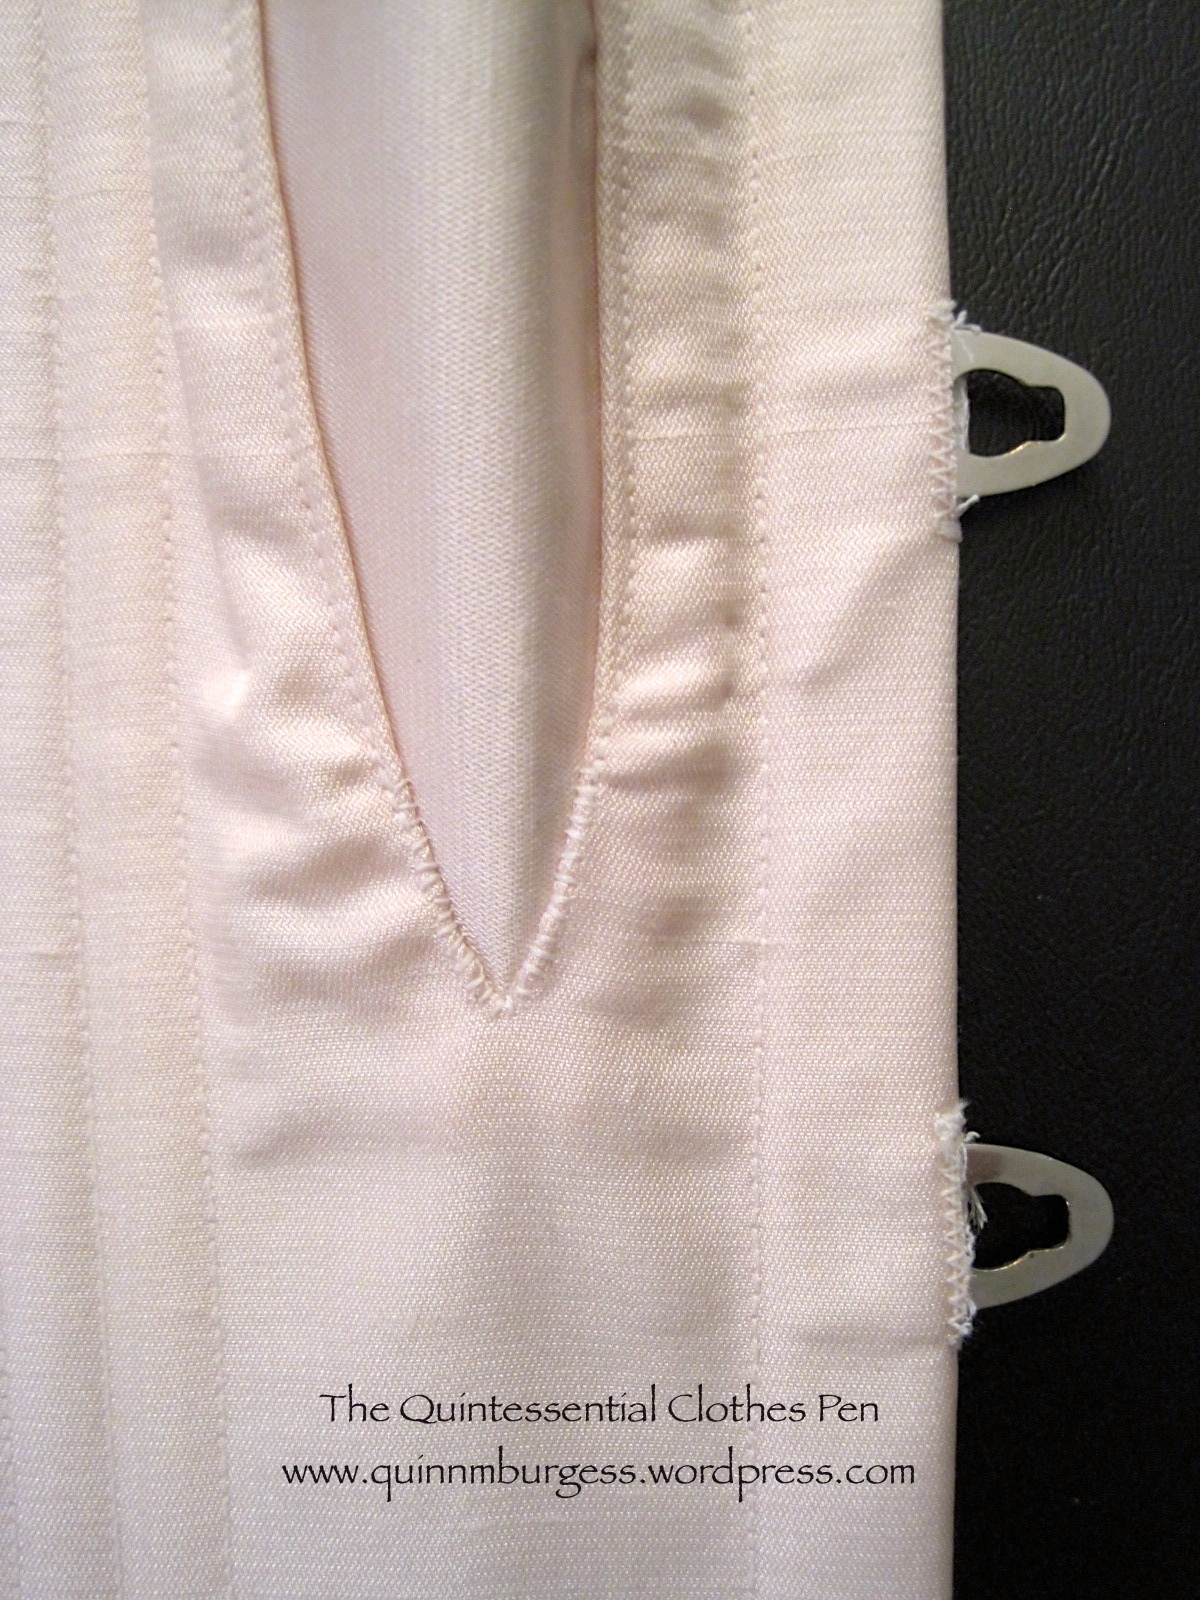
That’s all the aspects of choosing the pattern and executing it. Now I can move on to my inspiration for creating it. This blue corset at the V and A is the most thoroughly photographed piece of inspiration (click through, there are lots of different angles of the corset, and close up pictures!). As you can see, the blue corset has bust gores, that curved front piece, (and if you look at the pictures of the back…) hip gores, as well as useful close up construction photos showing the flossing, how the busk is sewn in, how the binding is sewn on, etc. You can also see great detail for things like how to sew the points of the bust darts and the tops of the hip gores: they are overcast near the tips of the bust gores and tops of the hip gores before being machine sewn with topstitching to the binding. I used this method in my corset, sewing the overcasting by hand. I found that it was very useful on the bust gores (since mine are set into a slit in the fabric, not a seam) because the amount of seam allowance near the points is negligible (like, less than ⅛”) and that would have been extremely frustrating to try and machine sew! Also, the overcasting kept the edges from fraying as I was working with them. It also adds an extra measure of stability and sturdiness to those areas.
1839-1841 corset, The Met.
Other very useful images to me were this orange 1860s corset front and side views (with generally similar lines as the blue V and A one) and this 1862 Godey’s image of a corset (with very similar lines as the blue V and A one). (As a side note: Does anyone know what collection houses the orange corset? I’ve only been able to find images, but no real source.) These corsets provide a nice end date range for my corset pattern, because in the 1870s the corset begins to change shape. But to determine a good start date for my corset I had to look elsewhere. The Met has a corset dated 1839-1841 with similar hip gores and the front curved piece (great zoomable pictures including an interior view, click through the image!), but it does not have separate bust gores (they are cut in one with the front pieces as is usual for 1840s corsets) and it does not have a front opening busk (those weren’t in general use until 1849). The 1839-41 corset is more curvy than the 1860s ones, as you would expect from an 1840s corset, but it still looks like a forerunner to me! Waugh has an 1844 corset pattern (pg. 77) that has similar lines to the 1839-41 Met one, with bust gores but without hip gores or the curved front piece. These 1840s corsets are useful for determining the start point of my date range, which seems to safely be the 1850s. Thus, my corset is dated ca. 1860, which is just a shorter way of saying 1850-1870. That makes sense looking at the silhouette of the dresses from these decades, as well, since neither the 1850s or 1860s require the curvy shape of 1840s or 1870s corsets.
EDIT: The orange corset mentioned above is in the collection of the Manchester Art Gallery via this link.
I used all of these different images to look for construction details to use in my corset. Specific things I was looking for include: stitch size, width of the binding, method of sewing the binding, placement of bones, design of flossing, seam placement, method of setting bust and hip gores, location of topstitching, placement of eyelets down the back, finishing of the interior of the corset, and length of the busk. Some of these things can be determined by looking at the extant corsets I’ve shared in this post, but others required other helpful research. Specifically, the gusset construction method I used came from this image that Merja shared in her 1870s corset post. It’s from 1872, but is still relevant for my corset, because if you look at the blue and orange corset pictures you will see it used on the overcasting at the bust and hip gores. This image, from 1868, shows similar methods as well (and has a selection of mostly French and a few English style corsets if you’d like to see more examples of those).
And now, here are the close up construction details of my corset that I promised.
An interior view of my corset. It’s important to me that the inside of garments is as nicely finished as the outside, as you can see. It’s a little hard to see, but the grommets near the waist are set closer together than the ones a the top and bottom.Details: Hand sewn overcast stitches at the bast of the bust gore and machine top stitching above that. Machine sewn button holes for the busk hooks (I’ve found this method to be much sturdier than leaving a gap in a seam on the edge).Details: The busk is top stitched around the top curve to keep it from moving. There is flossing at the top of the boning channels (every boning channel is flossed at the top and bottom). Machine sewn top stitched binding.Details: The top hook of my busk is a few inches below the top of the corset, so I added a hook and thread loop at the top to keep it closed. I used coutil cut on the straight of grain for my boning channels: the edges are pressed under and then they are topstitched into place and into the proper number of channels (keeps the inside tidy and doesn’t require extra notions!). The seam allowance of my bust gores is turned under and flat felled by hand with a whip stitch that only catches the coutil. The curved front piece is flat felled by machine.Years of use have caused my busk to have a bend in it at my waist line. See how it curves up from the table in the middle? Impressive, really, that my body can permanently change the shape of metal.
I’m hoping to get pictures of the corset on me this weekend at its first ever wearing. Hopefully I’ll be able to share those in the near future!
Unfortunately, I’m a few days late completing my project for the HSF Challenge #4: Under It All. I tried really hard on this one and was definitely motivated to keep working consistently by the fact that I wanted to get it done for the HSF challenge. I was held up by a severe cold that took me out for about a week and other dealing with life things. So while I’m late, I’m super glad and excited to be done with this project (especially because the last two days have included a lot of flossing, and my fingers/hand muscles are so done with that for awhile)!
The last ca. 1860 corset I built for myself was made in 2006 or 2007 (you can see it in this post). It’s been worn more times than I can count and has stood up to the test of time and tension well, especially considering it was the first corset I ever made! But the time has come for a new corset for this period–one that is made to fit me using all the skills in pattern making and construction that I’ve gained over the last 7 or 8 years.
I realized while working on this corset that aside from building my first corset to fit me in 2006 or 2007, the only other stays or corsets I wear with my historic clothes that were made to fit me are my 18th century stays, my short Regency stays, and my c. 1825 long stays. I wear other corsets from 1895 (hm, I don’t think there are pictures of this on the blog), 1903, and 1913 but none of them were constructed to fit me (though I did construct them beautifully!). I’ve made them work and they sort of fit me, but all of them have problems because they were made to fit other people: a busk that’s too long, being a little small, especially in the hips, or being too big and needing a tuck. So it occurred to me that I should probably invest in making a few more corsets made to my measurements for the Victorian and Edwardian periods. Sounds obvious, but it was a revelation to me when I sat down and thought about it!
So that’s what this project is: a ca. 1860 corset made to fit me!
Hard to see the details in this picture, I know. There will be detail shots and lots of commentary in an upcoming post!
I have lots of other thoughts and inspiration to share with regard to this project, but I expect it to be lengthy, so I’ll be writing it up in a separate post. Plus, I want to post about my completion of the challenge as soon as possible. So for now, the very much condensed details.
Fabric: 1/2 yd ish of white herringbone cotton coutil and ½ yds ish of slightly slubby pale pink silk satin.
Notions: Metal boning, metal grommets, a recycled metal busk from my old ca. 1860 corset, regular weight ivory thread, and heavy weight ivory thread for flossing.
How historically accurate?: Pretty darn accurate, I’d say. I wanted to create a corset using the seam lines found in extant garments, but which don’t seem to be much recreated. I used construction methods that are accurate as far as I know. Let’s say 90% because you can’t ever quite make it to 100% if it’s modern, can you?
Hours to complete: A lot. I didn’t keep track, but I’ve been working on this for at least 2 or 3 weeks, and some of those days have been a full day’s work on the corset, not just evenings.
First worn: Has not been worn yet, but will be worn to a ball in March.
This is part two of a series of posts about a recent 1860s dance weekend hosted by The Commonwealth Vintage Dancers. The first post, which was about the Saturday of the weekend can be viewed here. This post is about the second day, Sunday. Unfortunately, we didn’t take as many pictures of dancing on Sunday as we did on Saturday. We did, however, continue our tradition of taking lots of pictures of us not dancing, but doing other things. So you’ll just have to humor me during this post filled with a little bit of dancing and a larger proportion of other things.
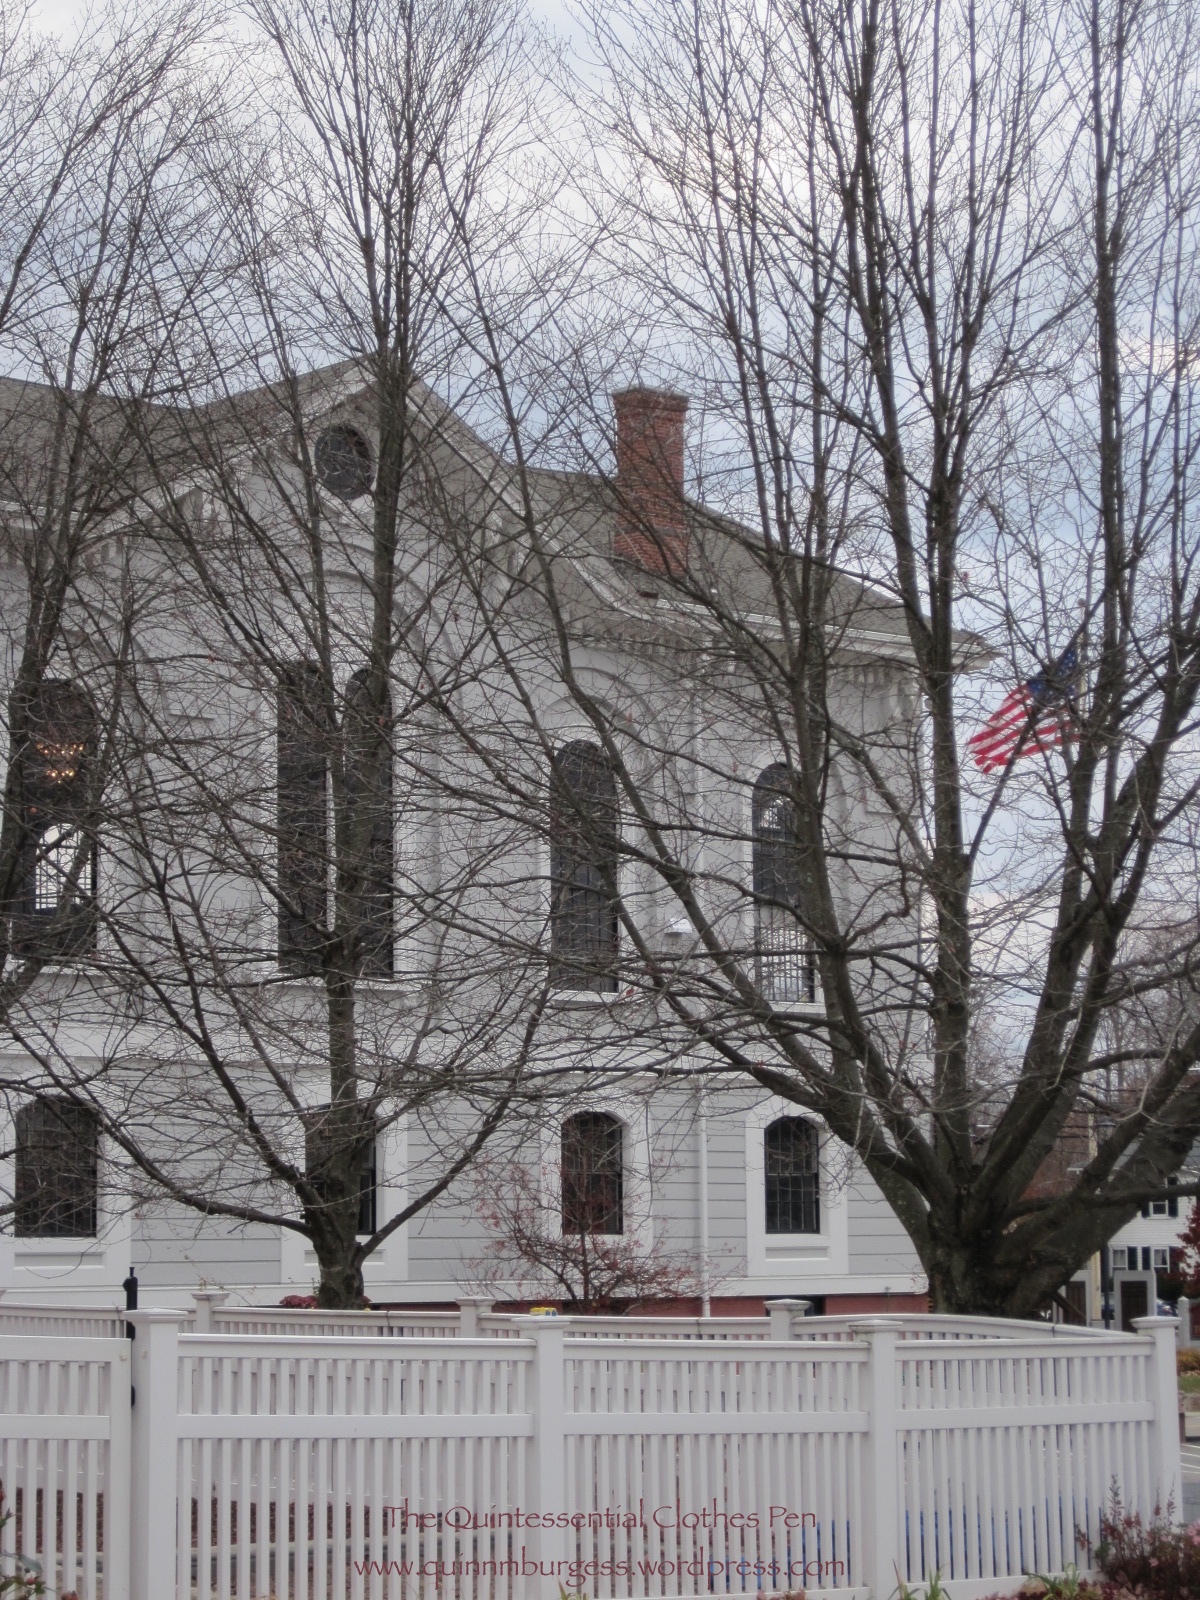
Before I get started on pictures of dresses and dancing, I’m going to share a few pictures of the building the event was held in, so you can get a sense of the atmosphere. Think cold New England winter… blue sky and a cold breeze… no leaves left on the trees…
One of the lovely tall windows reflecting the slightly cloudy blue sky, with leafless branches joining the scene.Looking through bare trees at the lovely windows of the hall.I’m sort of cheating here. This pictures is from Saturday, when we were in a hall next door to the one pictured above. But I just loved the berries on the bare tree and the very New England style window and building behind them!
Now that you’ve got a sense of the venue, let’s proceed to the ball:
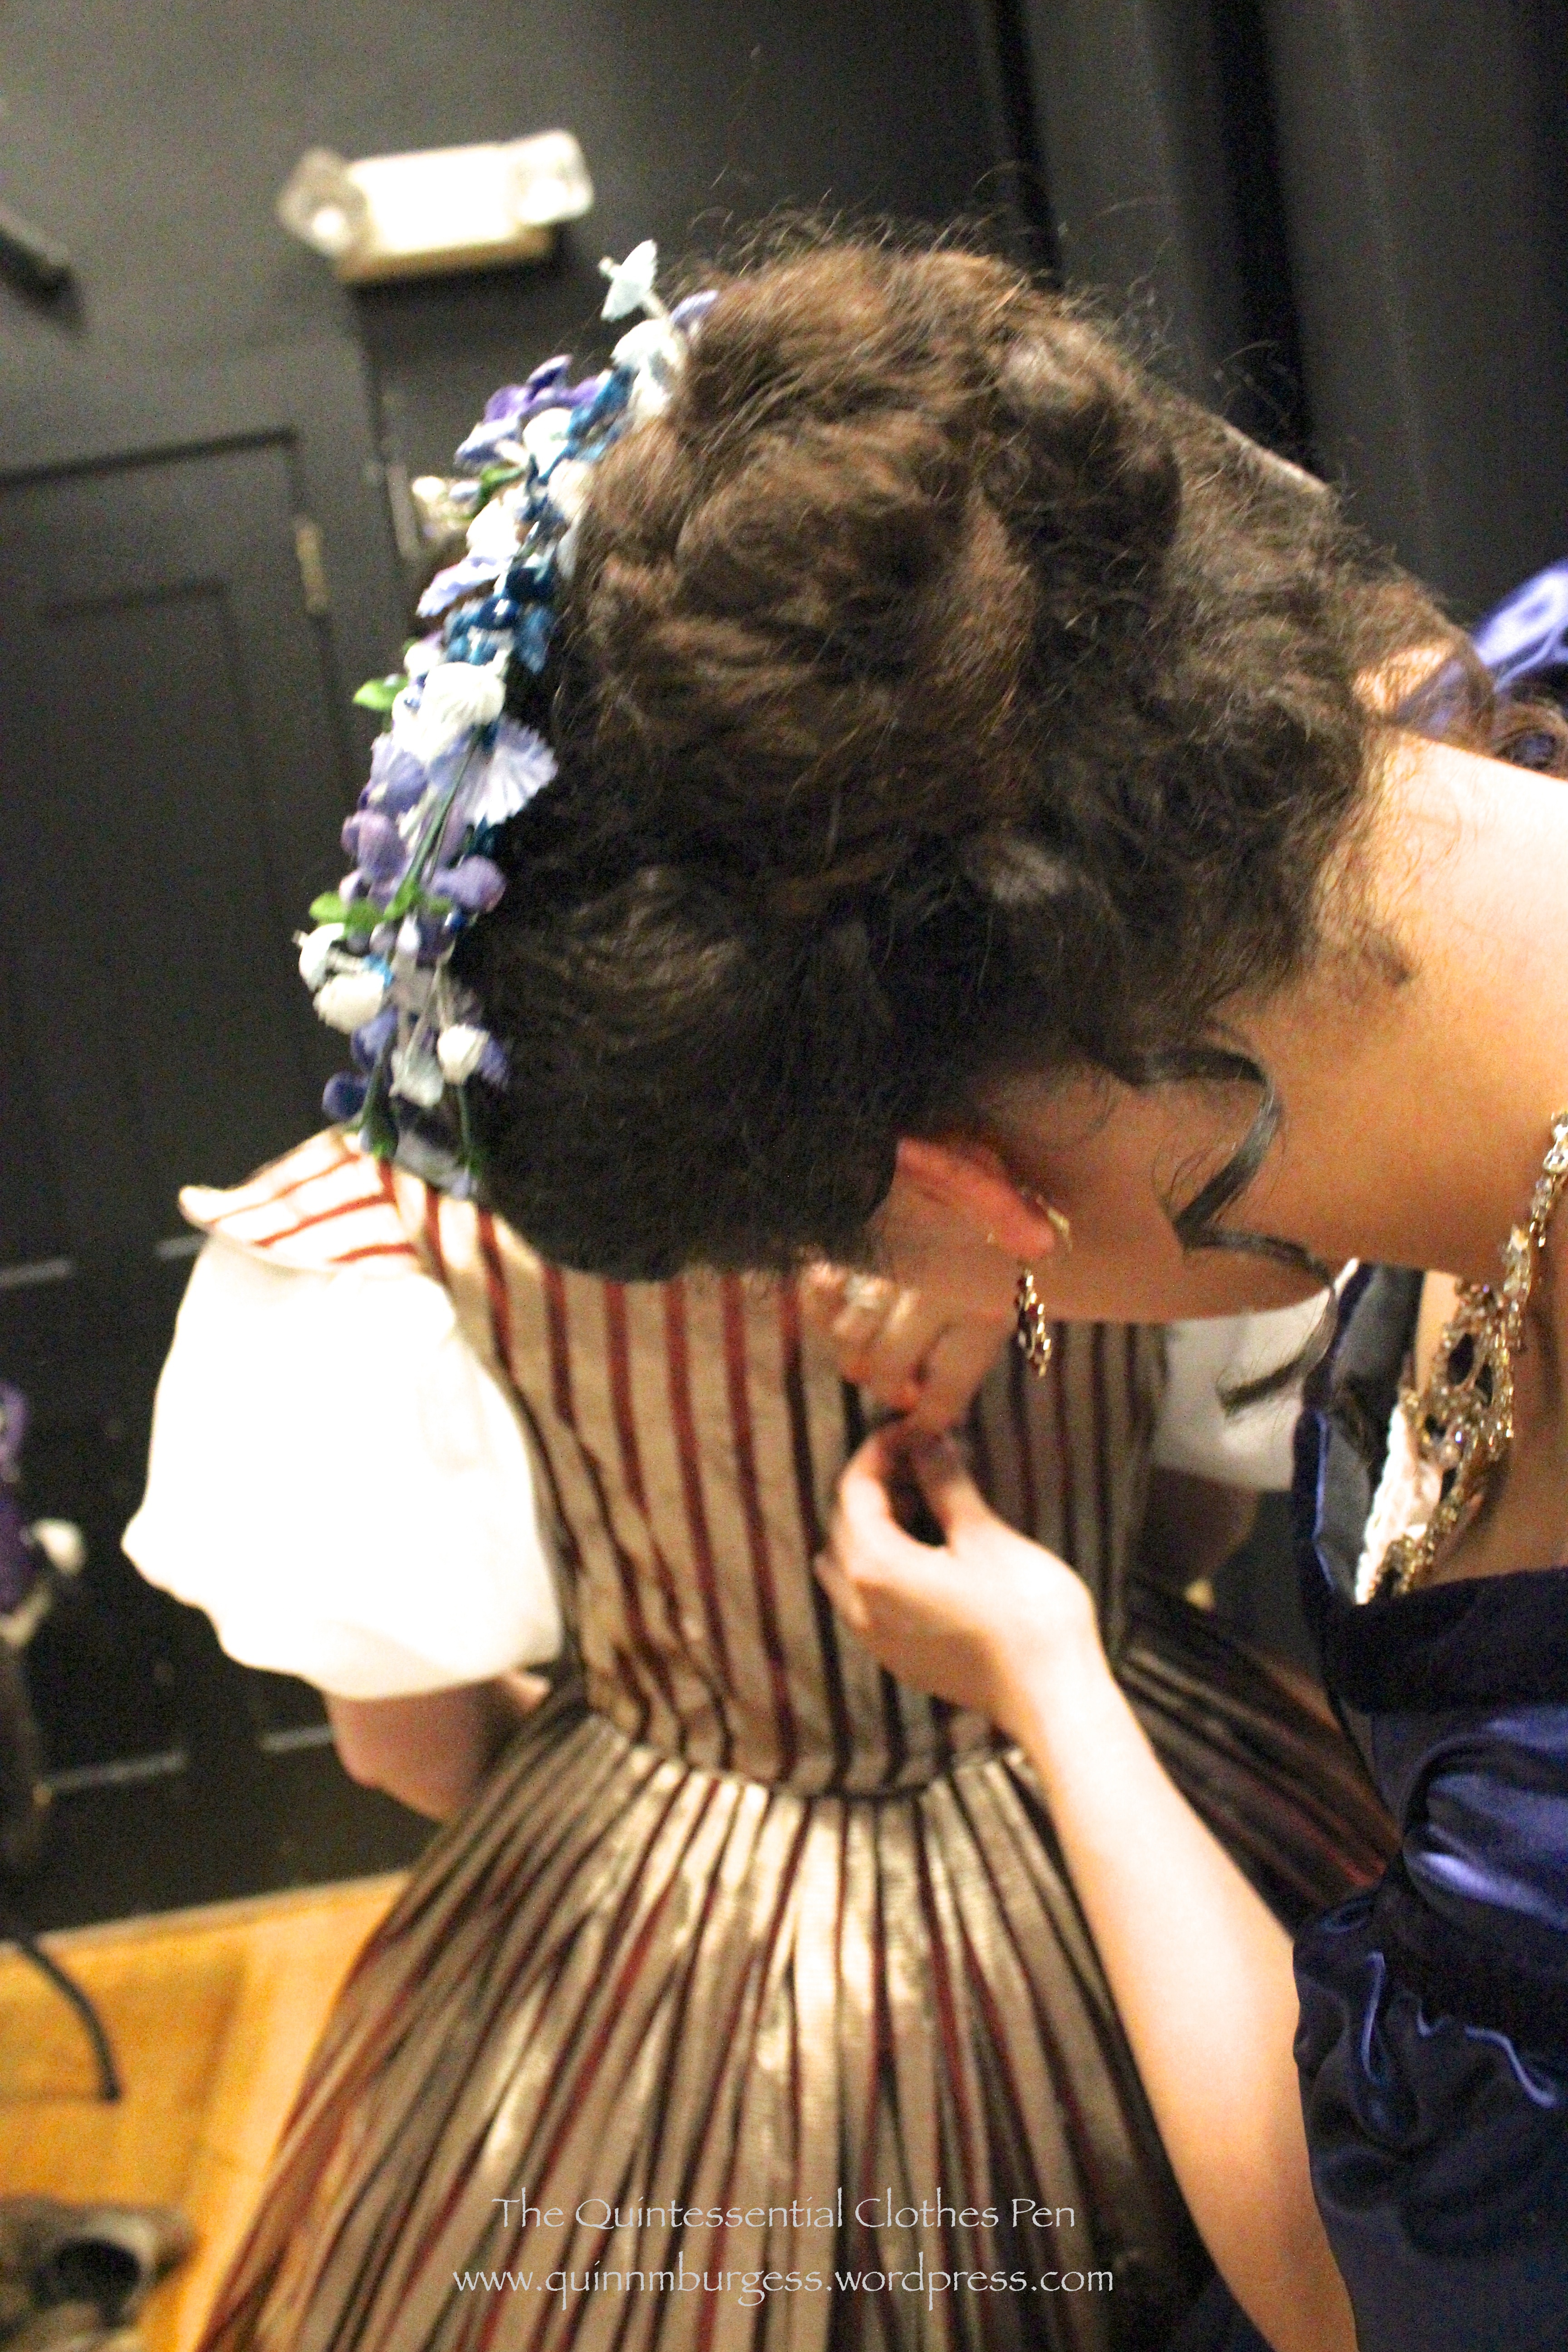
Sewing a friend into her dress. I include this because it is an excellent shot of my hair!
I tried to do something different than my usual 1860s style for this ball, and I must say that I like the results. The more you try out different hair styles, the easier they become! I’d brought my curling iron and I wanted to make use of it for this ball. (I have naturally curly hair, so it’s quite ironic when I use a curling iron. My curls are quite frizzy, a bit wild, and untamed rather than cork screw like, so the curling iron acts as a taming agent.) In the end I had two curls, one hanging on either side of my head. I wouldn’t do this for every ball, but it worked well with the amount of crazy bling I had and with the heavy quality of my dress.
See? Crazy borrowed bling! (The necklace is much more sparkly in person than in pictures!) I was quite dazzling, or blinding, depending on your perspective.
Anyway, in addition to the curls, I did my usual poofy side roll on either side of my center part. I tried to be imaginative in the back but ran out of time. It’s hard to remember now, but I’m pretty sure I braided the back section and made a bun with the braid. Or perhaps I wrapped my braid around a bun that was made with the ends of the poofy side rolls. Either way, there was a bun and a braid. My Belle hair crescent was mounted over the result. I rather like that it was a little higher on my head than in previous wearings. It was a little more visible from the front.
As you can see, I wore Belle. She was my first historic dress, ever. I wore her more often when I first began vintage dancing a few years ago, but I got a little tired of wearing her and so she’s been living in my closet for over a year. She’s super heavy, which I remembered, but I hadn’t remembered that the weight of the skirt pushed my hoops into an awkward diagonal elliptical shape. I have a bum pad that fixes the problem, but since I’ve been wearing Evie so much and she doesn’t need it I’d forgotten to bring it! Oh well. It was exciting to bring Belle out again, and though I’m not the same size I was about 7 years ago when I made her, she still fits and is still stunning.
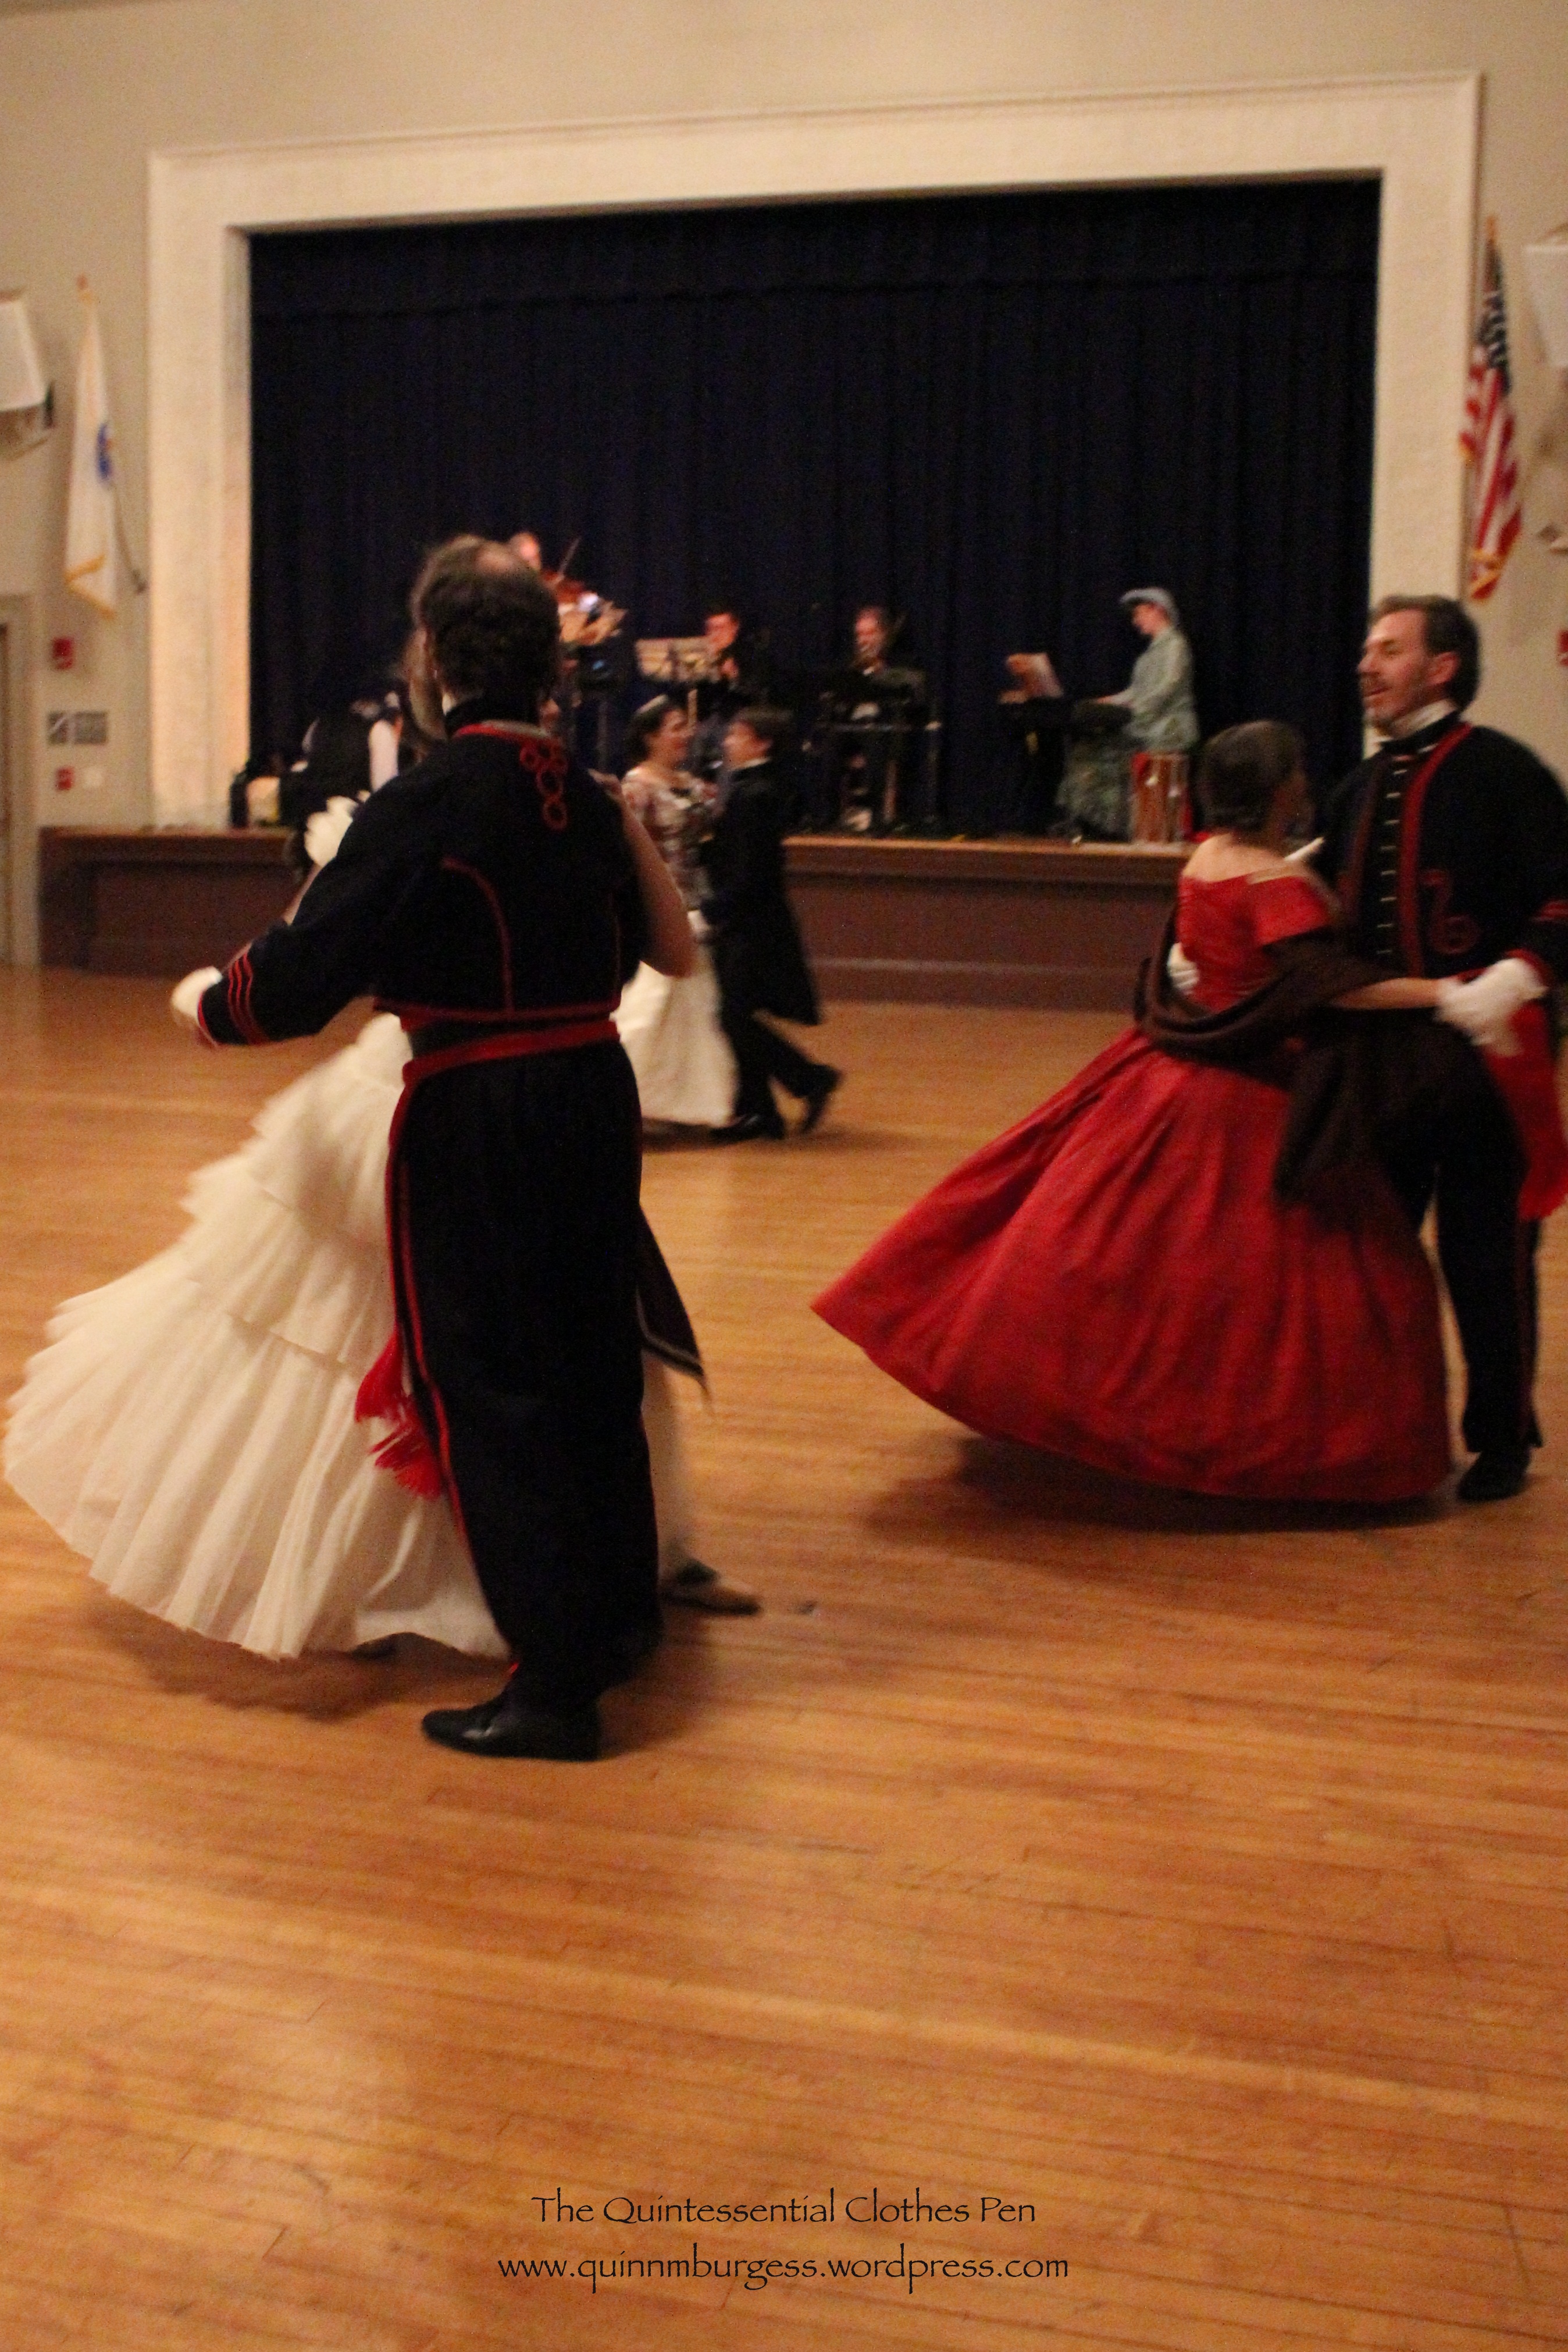
Here are some dancing shots from the ball:
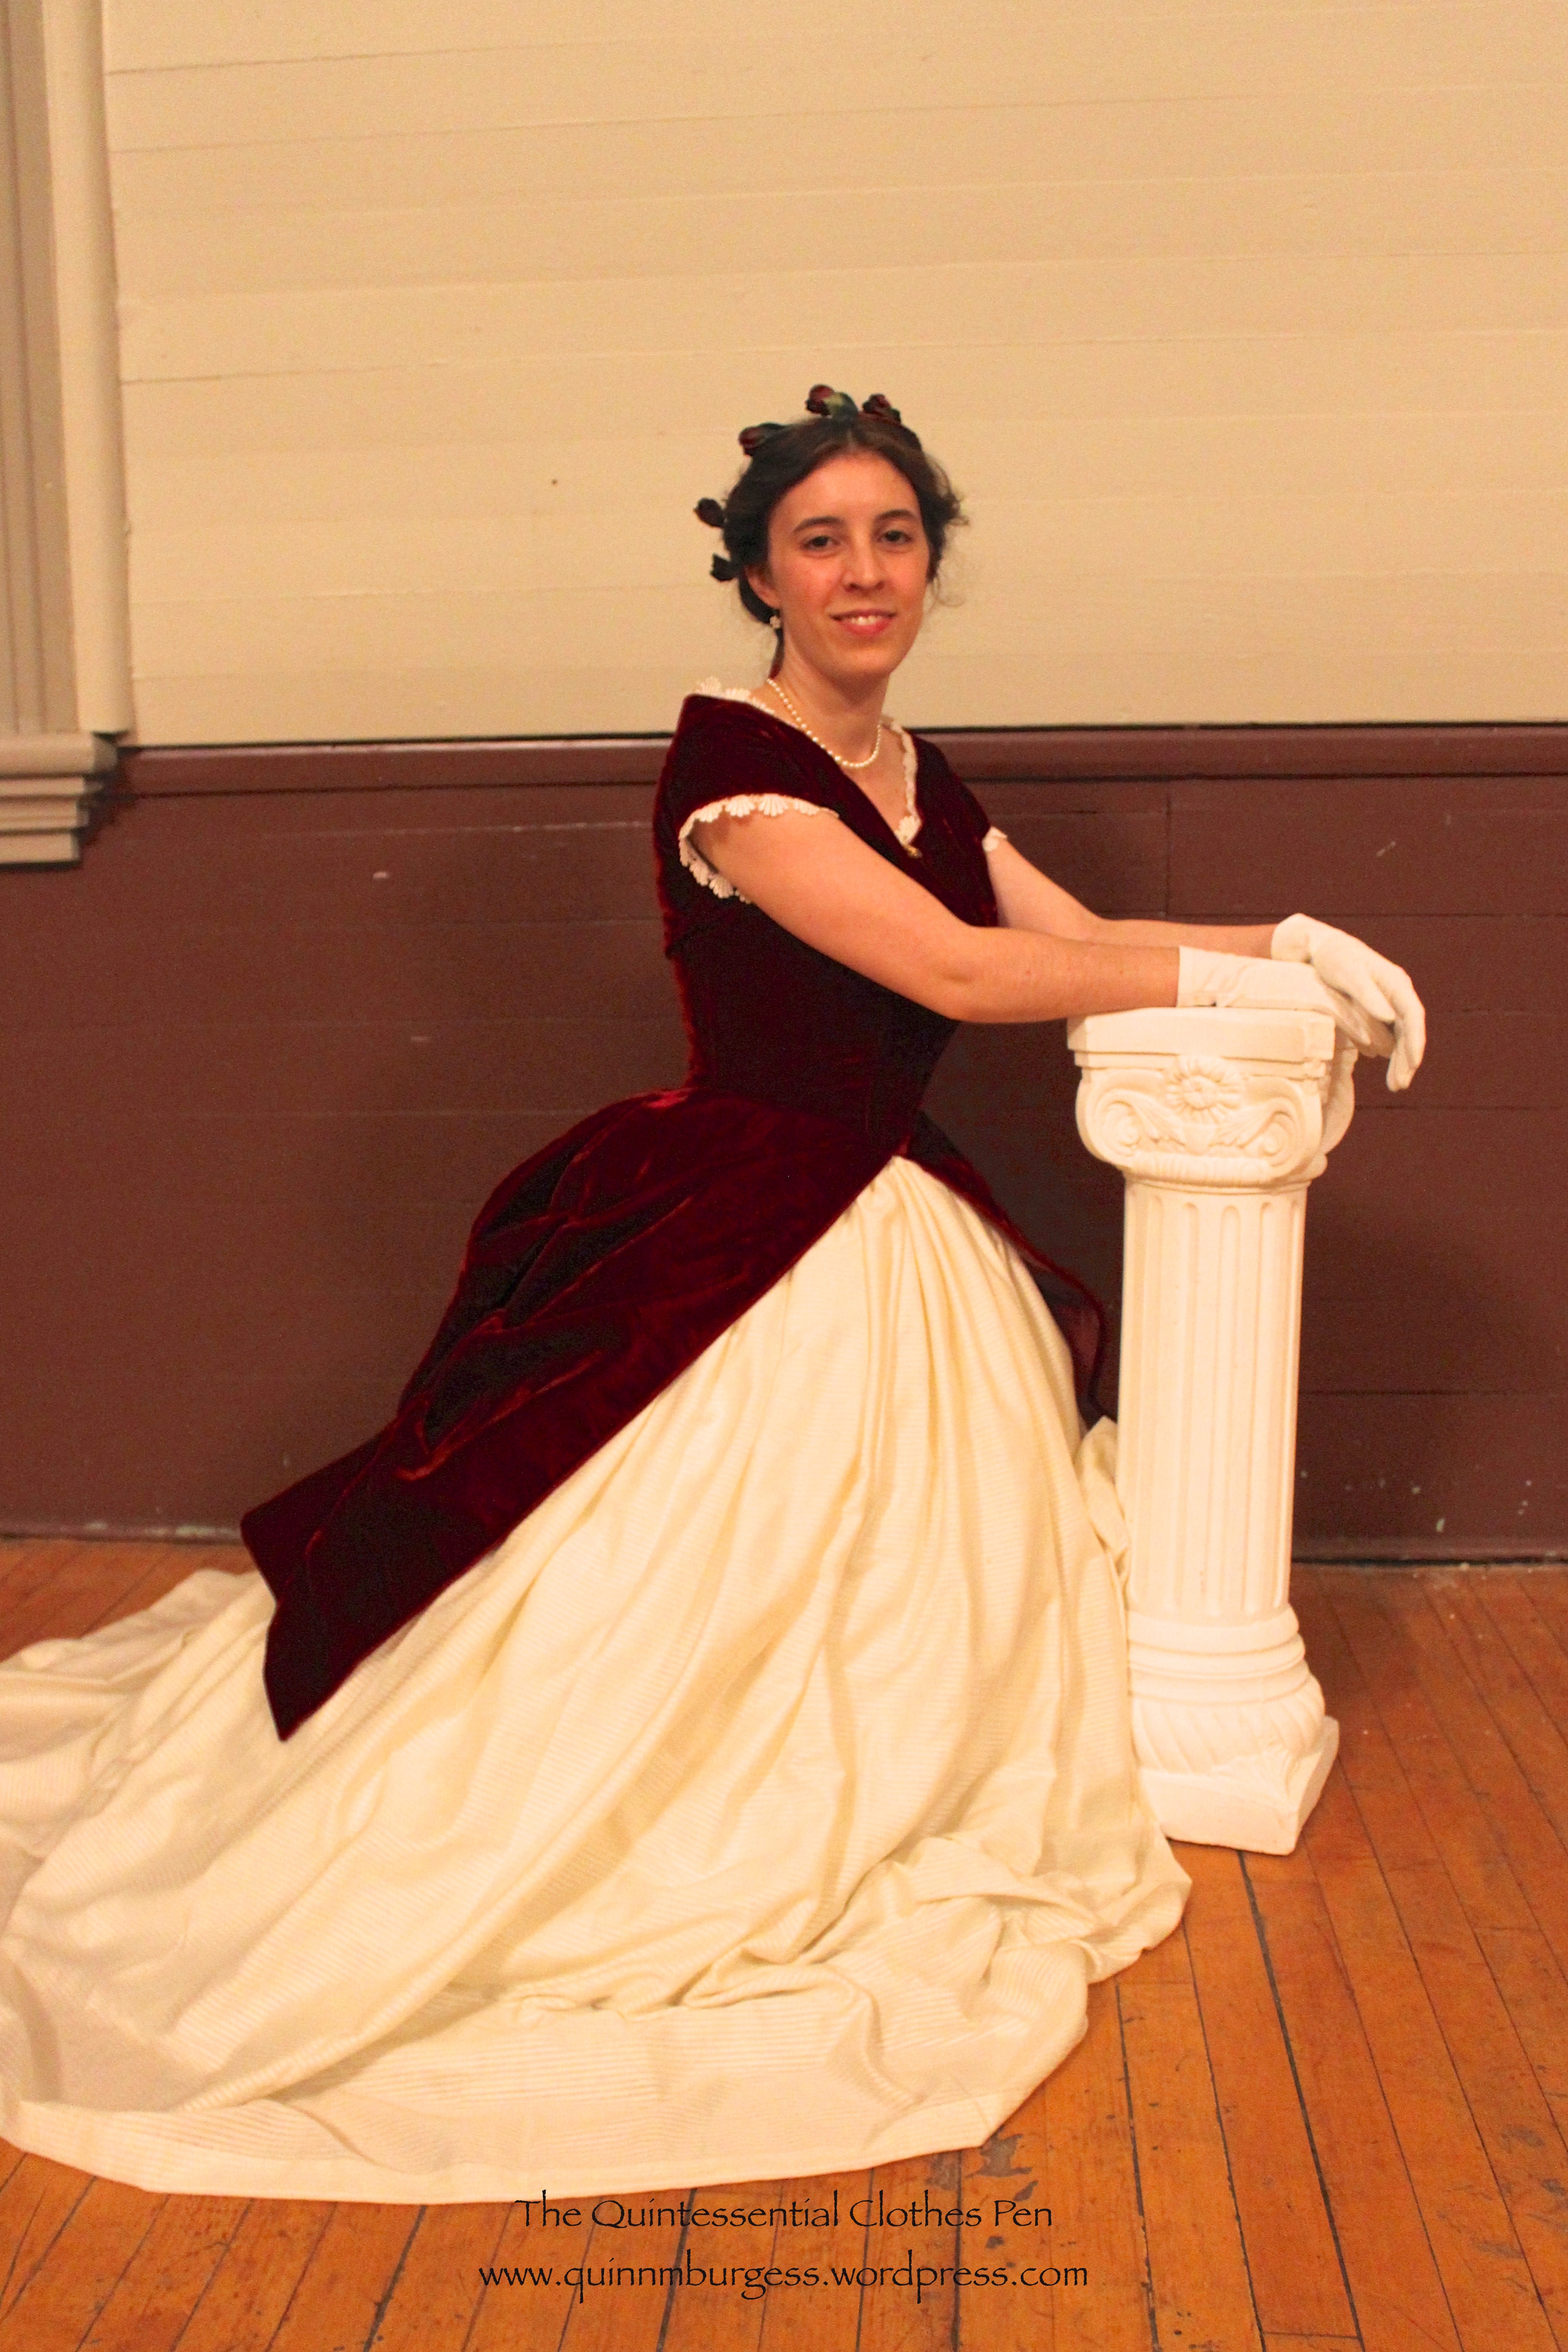
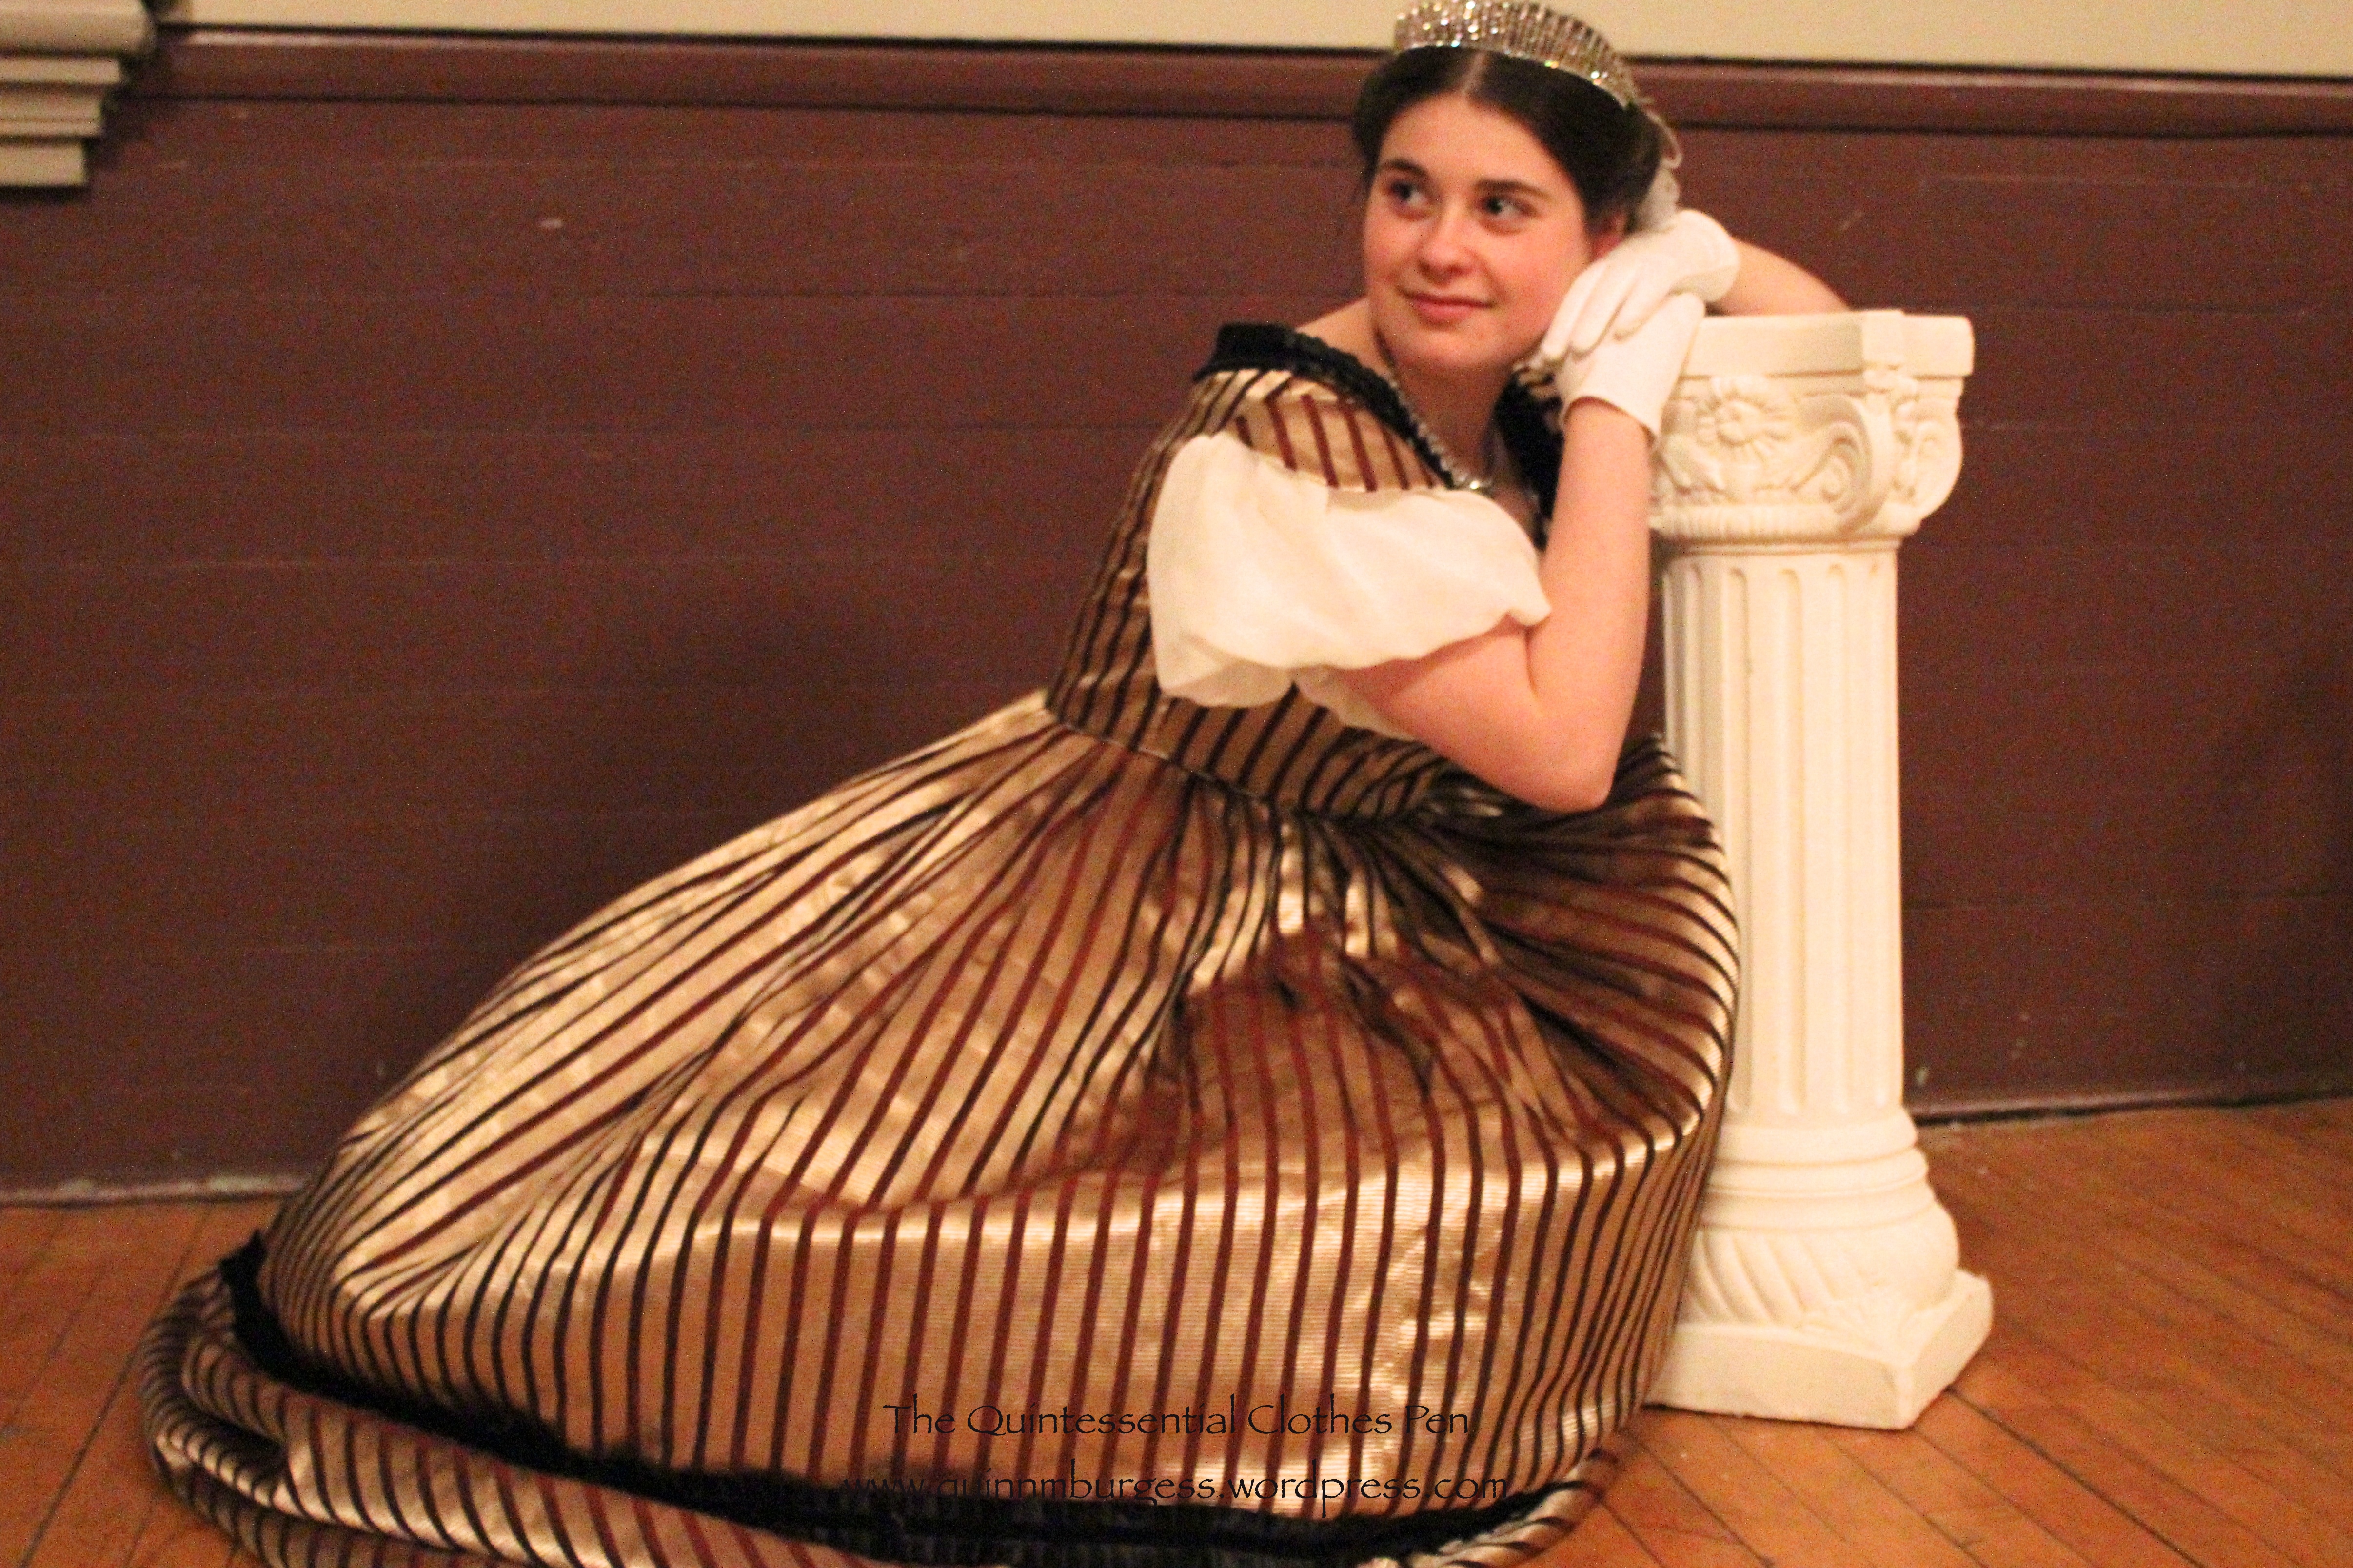
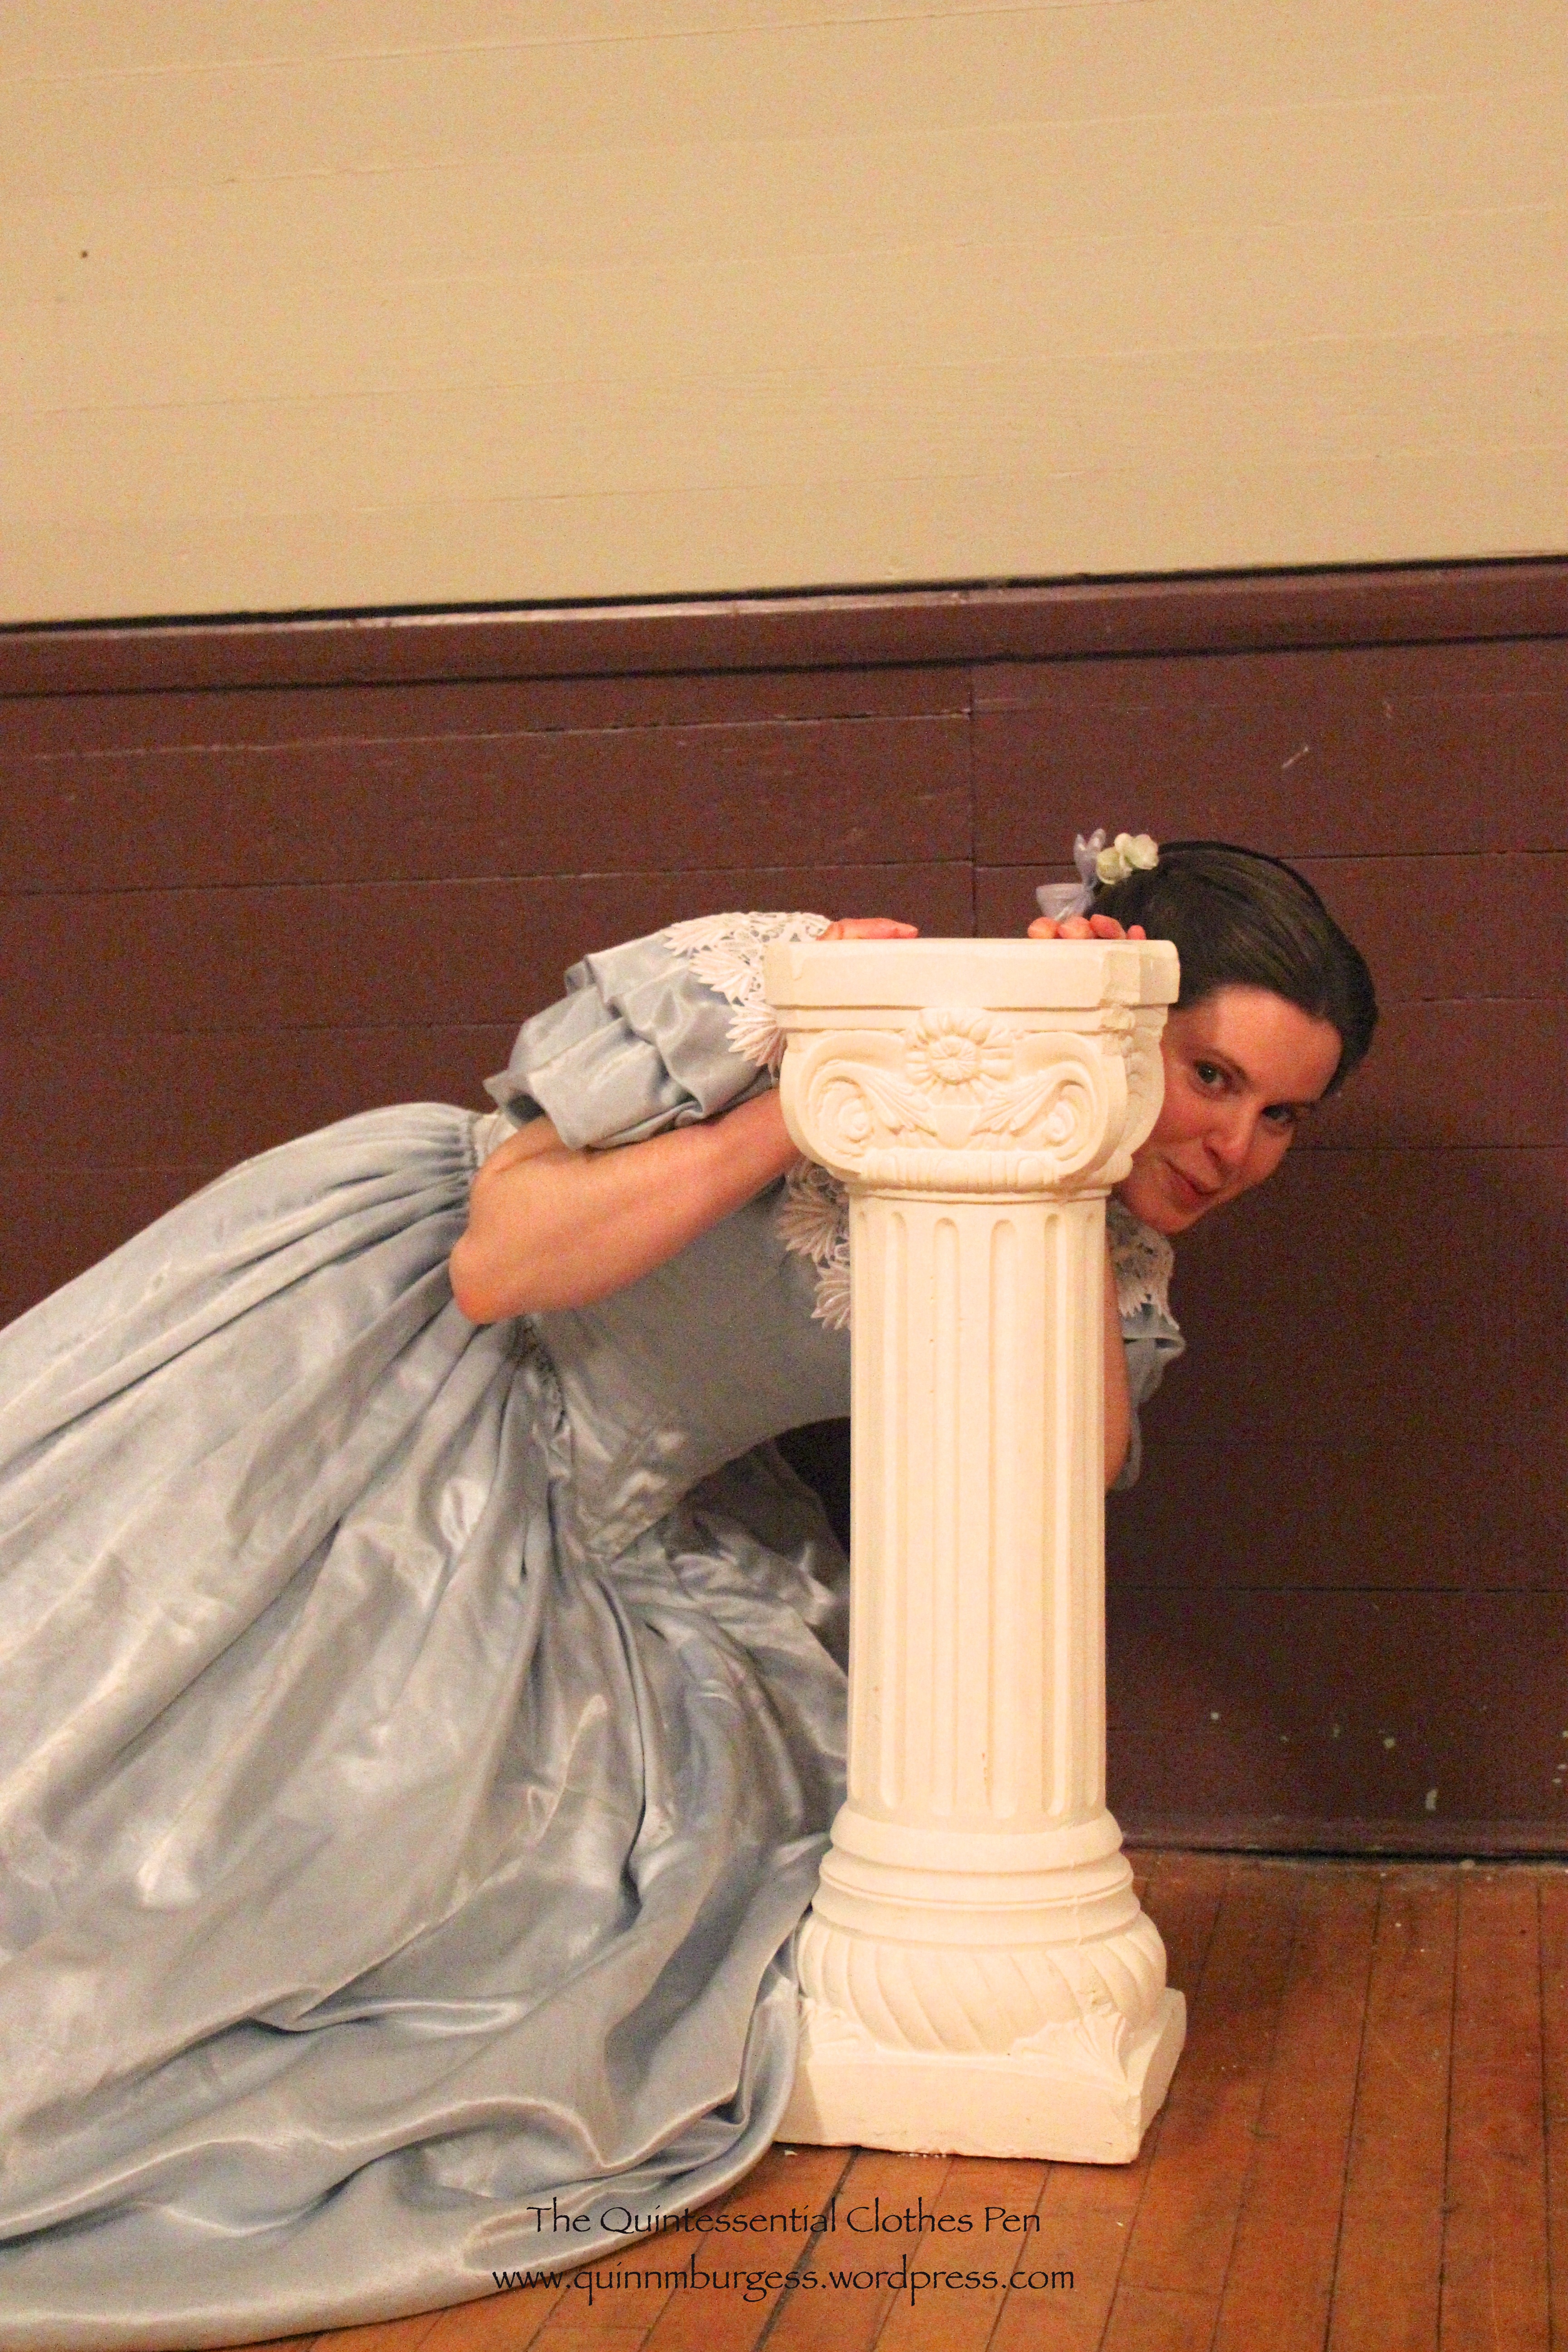
After the ball we took some more not dancing photos. Our prop for the night was a rather short column. And so I present to you a series of column shots:
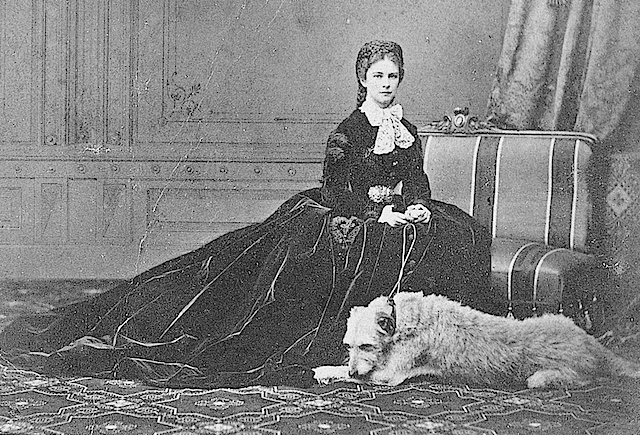
This is my end of the weekend “I’m tired” pose. I love how my tiers fan out and create an elongated effect. It’s quite regal! (The heavy fabric flowing across the floor reminds me of the image below of Sissi–Empress Elisabeth of Austria.)
1867 Sissi in famous pose with her dog ‘Shadow’ by Emil Rabending
Well, there you have it. An 1860s dance weekend. I do hope you enjoyed it!