

Just a quick post to note that this blog recently hit 100 followers! Yay! I’m so pleased that you’re each reading and following my blog. I know there are some of you who also follow my blog via rss feed or some sort of other thing that doesn’t list itself on my side bar, and I don’t want to leave you out of my thanks. I appreciate each of you for your valuable insight, encouragement, and interest in my adventures. Thank you!
Summary of 2013: Looking Forward to 2014
2013 flew by. Really, it’s hard to believe it is 2014 already… As I did in 2011, and 2012, here is the year 2013 in review and a look at the upcoming year 2014.
Completed projects in 2013:


Whew! And that’s only the list of things I made for fun and for myself (no work or commissions included in that list!). As I look forward to 2014, here’s what my confirmed sewing list is looking like:
February: Late Regency evening turban
March: new Annabelle hair wreath
April: 1814 pelisse and hat, 1811 evening gown
June: Georgina evening bodice
December: 1830s or maybe 1840s evening gown
At some point: 18th century court gown and grand panniers
There are lots of other things that may or may not be started or finished, including (but absolutely not limited to) and in no particular order: an Anne Adams pattern 1930s-does-modern dress, an 1885 summer dress and hat, an 1860s corset, an 1820s bonnet, painting and decorating my Kensingtons, adding a giant bow to my 1928 evening dress, an 18th century hand quilted petticoat, more Regency reticules, and a whole host of other possibilities.
Looking at what I thought I would complete in 2013, I think I did a pretty good job of sticking to my plans. Some of the things that were on my to do list are on the 2013 to do list again because I didn’t start them, or I started them but didn’t finish them. And as usual, there are some things that have been dropped off of my list entirely because I decided I didn’t need them or I used the fabrics for some other project.
To recap other things, this blog was awarded three different blog awards in 2013!
2013 was also the first year of The Historical Sew Fortnightly hosted by The Dreamstress. My goal was to complete as many challenges as I could without making things just for the sake of making things. Out of 27 challenges, I completed 21 of them. There was a stretch of time over the summer where the projects I needed/wanted to sew didn’t line up with challenge themes or the things that I hoped to finish didn’t get done… Some of those things are still on my UFO pile, even at this point in the year! And there were a few other challenges throughout the year that just didn’t fit with anything I had planned or had the time and materials to build. 21 out of 27 is pretty good, though, considering I made lots of other things that didn’t qualify for the HSF.
And how many events did I attend? 22 total, I think. This breaks down as 10 balls, 4 performances (I feel like I must have done more than this, but I can’t think of what they were), and 7 other events including picnics, archery, kite flying, roller skating, etc. Multi-day extravaganzas include a Regency Intensive Dance Weekend and an 1860s Dance Weekend.
Here’s looking forward to 2014. Blessings!
Project Journal: 1822-1824 Ensemble Part VII: Trimming Complete (Fezziwig’s Ball 2013)
I am very excited to share that I am finally done sewing the trim on my 1822 Walking Dress and 1824 Ball Gown. I actually finished sewing the trim on both garments about two months ago. Yay me, for being ready for a ball a full month ahead of time!
The walking dress has a previous post from when I completed sewing the trim. The ball gown has previous posts about being worn partially trimmed last year and about sewing on the hem appliques. Here is the link to the category that shows all the posts related to this ensemble.
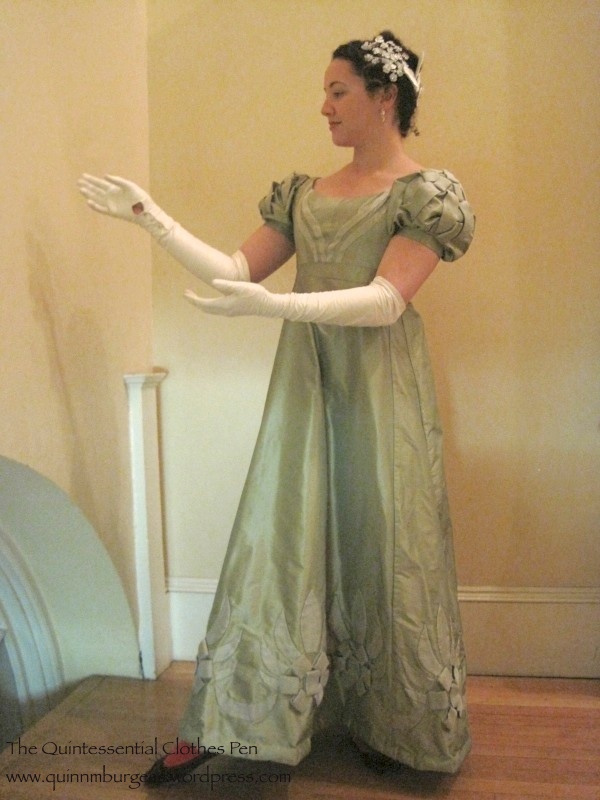
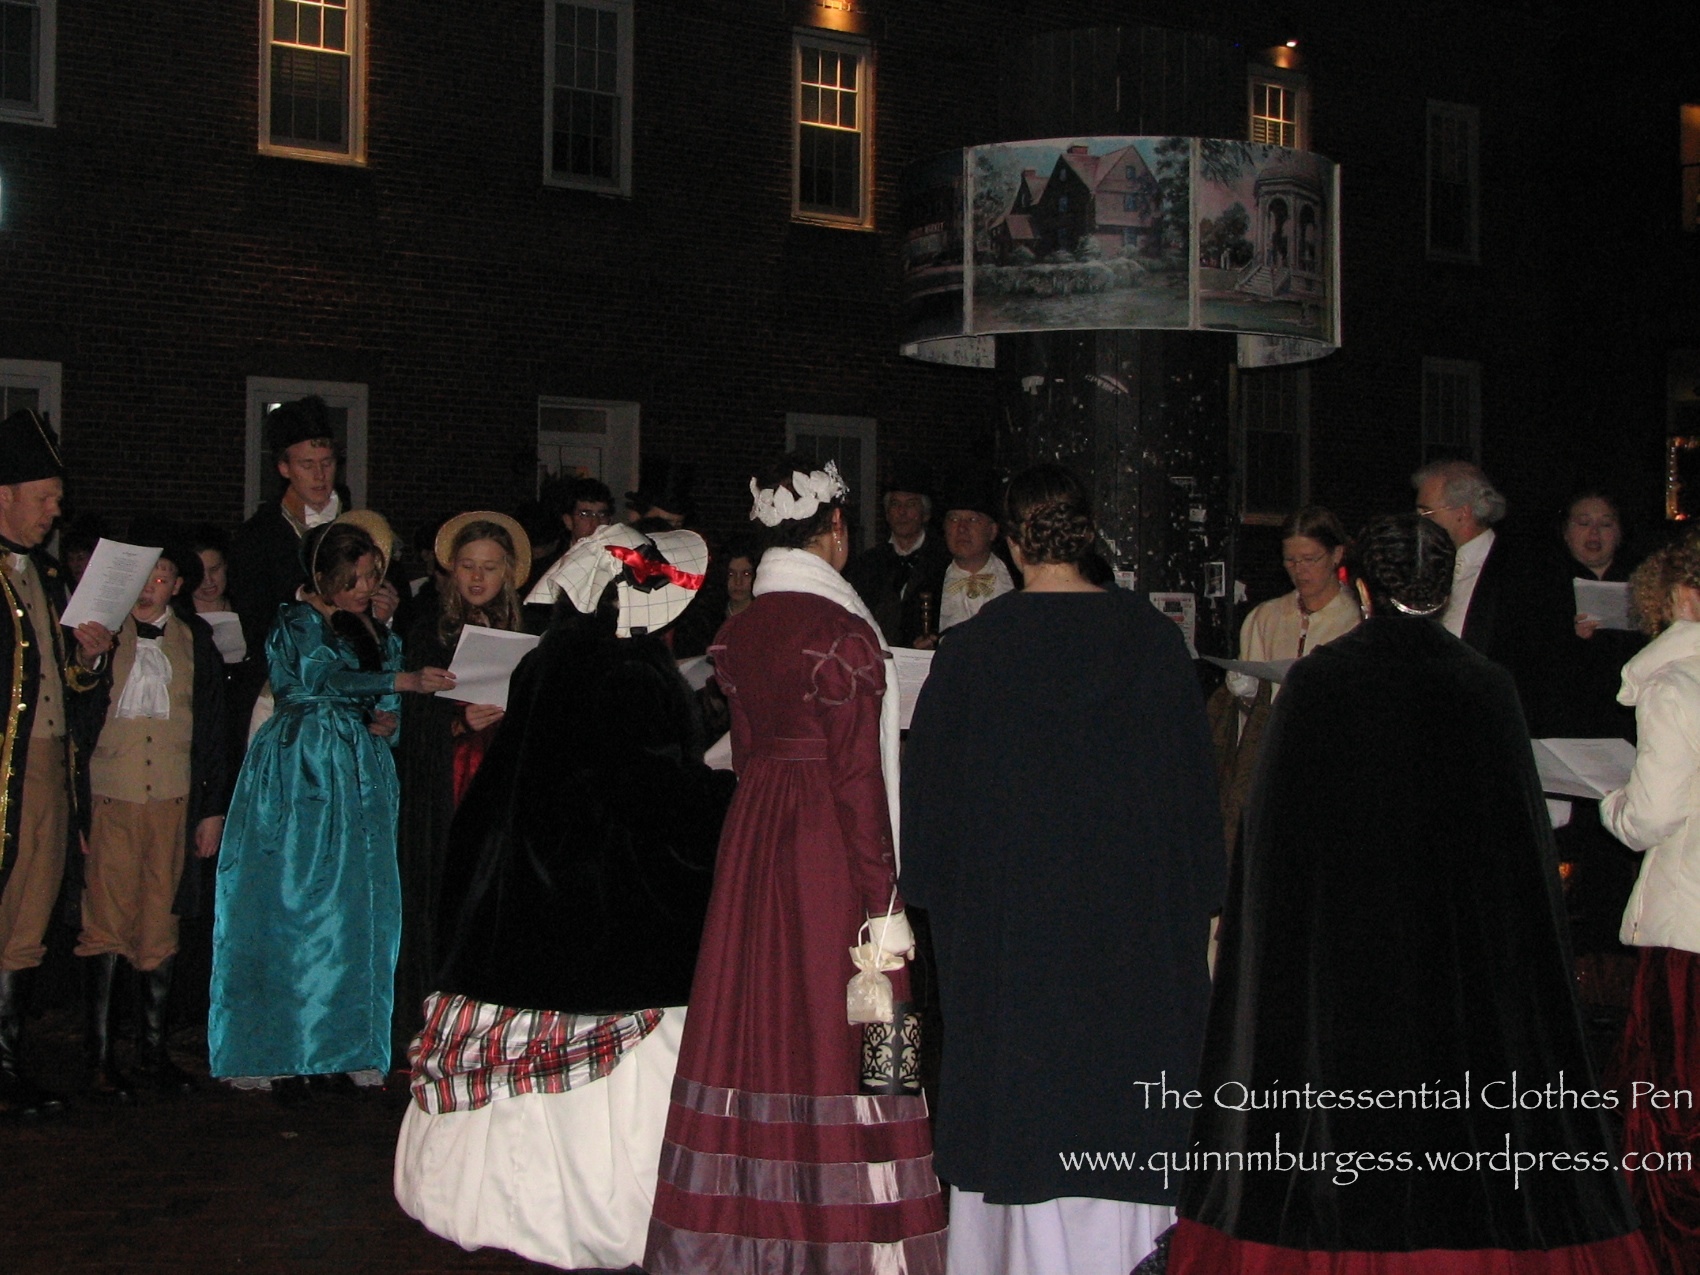
I wore both garments this year at Fezziwig’s Ball, hosted by the Commonwealth Vintage Dancers, just as I did last year. Last year, however, I didn’t have enough time to trim them like I wanted to and I didn’t really have time to look into proper hair styles either. So this year, in addition to adding trim, I also decided to try out a different hair style that would be much more early 1820s.
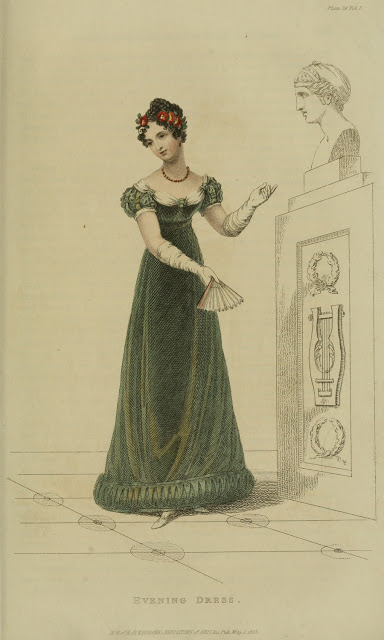
I looked at lots of fashion plates and noted what elements made the styles look 1820s. This is the look, from 1823 (also pictured a little farther down). The style required a new hair wreath, so that was the only last minute sewing for this year’s event. I did the same style as the fashion plated: crossed braids on top of my head and little curls around my hair line. When you have long hair and no bangs like me it’s quite a challenge to get curls around the hair line. I managed to make the little curls happen, but I still want to improve my methods. The hair wreath was essential for hiding my long hair and only showing the curly ends. It is made of wired millinery flowers sewn to a length of millinery wire. The front bits are small flower sprays and the back is velvet leaves.


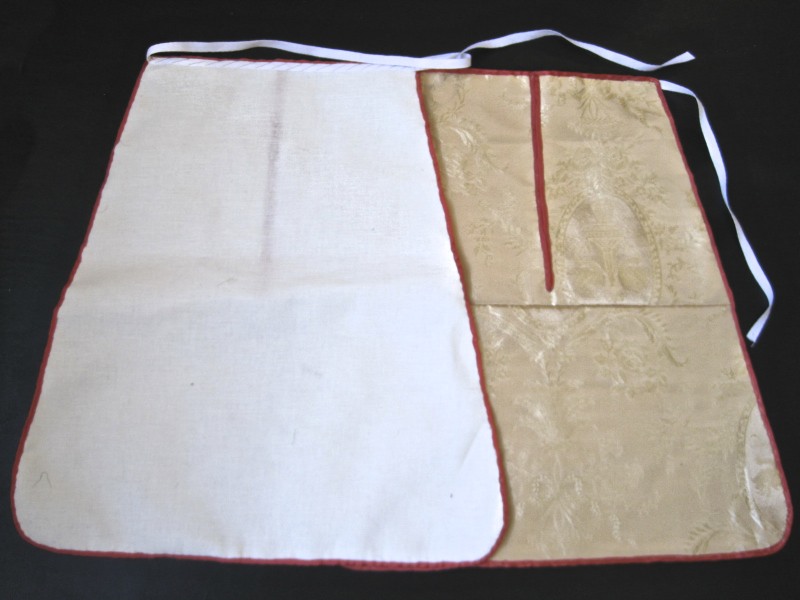
I was amused throughout the night that people kept commenting on how much they liked the sleeve appliques on my green dress. I didn’t realize they were so exciting, but I do think they balance out the skirt nicely. By the end of the night my curls were looking a bit crazed… but it was fun, and I do enjoy wearing these garments and the style of the 1820s, in general. Oh, and I was able to wear my refreshing apron, too, though we were too busy refilling refreshments to take pictures. So yay for completion! It’s nice to get these things off the sewing list to make room for other fancily trimmed things!
HSF #26: Curtain Along Jacket, Finally!
The theme of the final HSF challenge of 2013 is “Celebrate”:
Make something that is celebration worthy, make something that celebrates the new skills you have learned this year, or just make something simple that celebrates the fact that you survived HSF ’13!
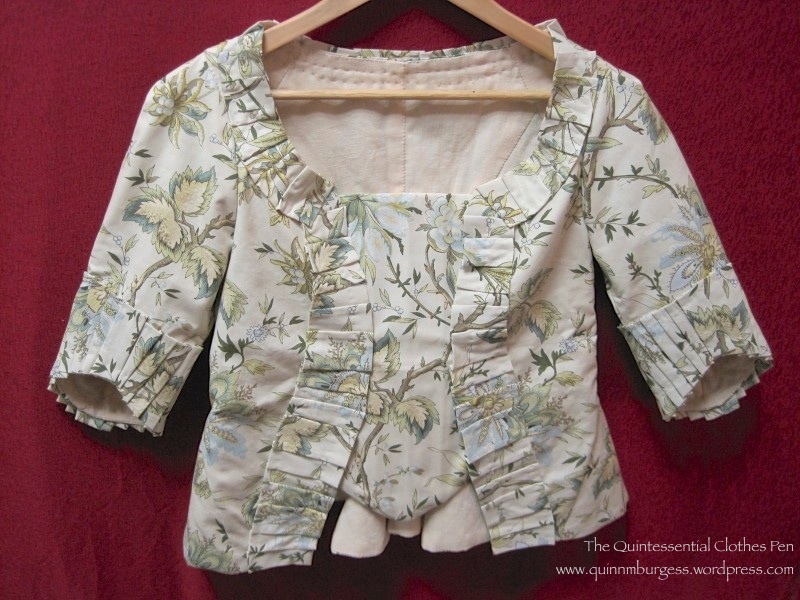
This challenge gave me the inspiration to finally finish my Mineral Felicite jacket!
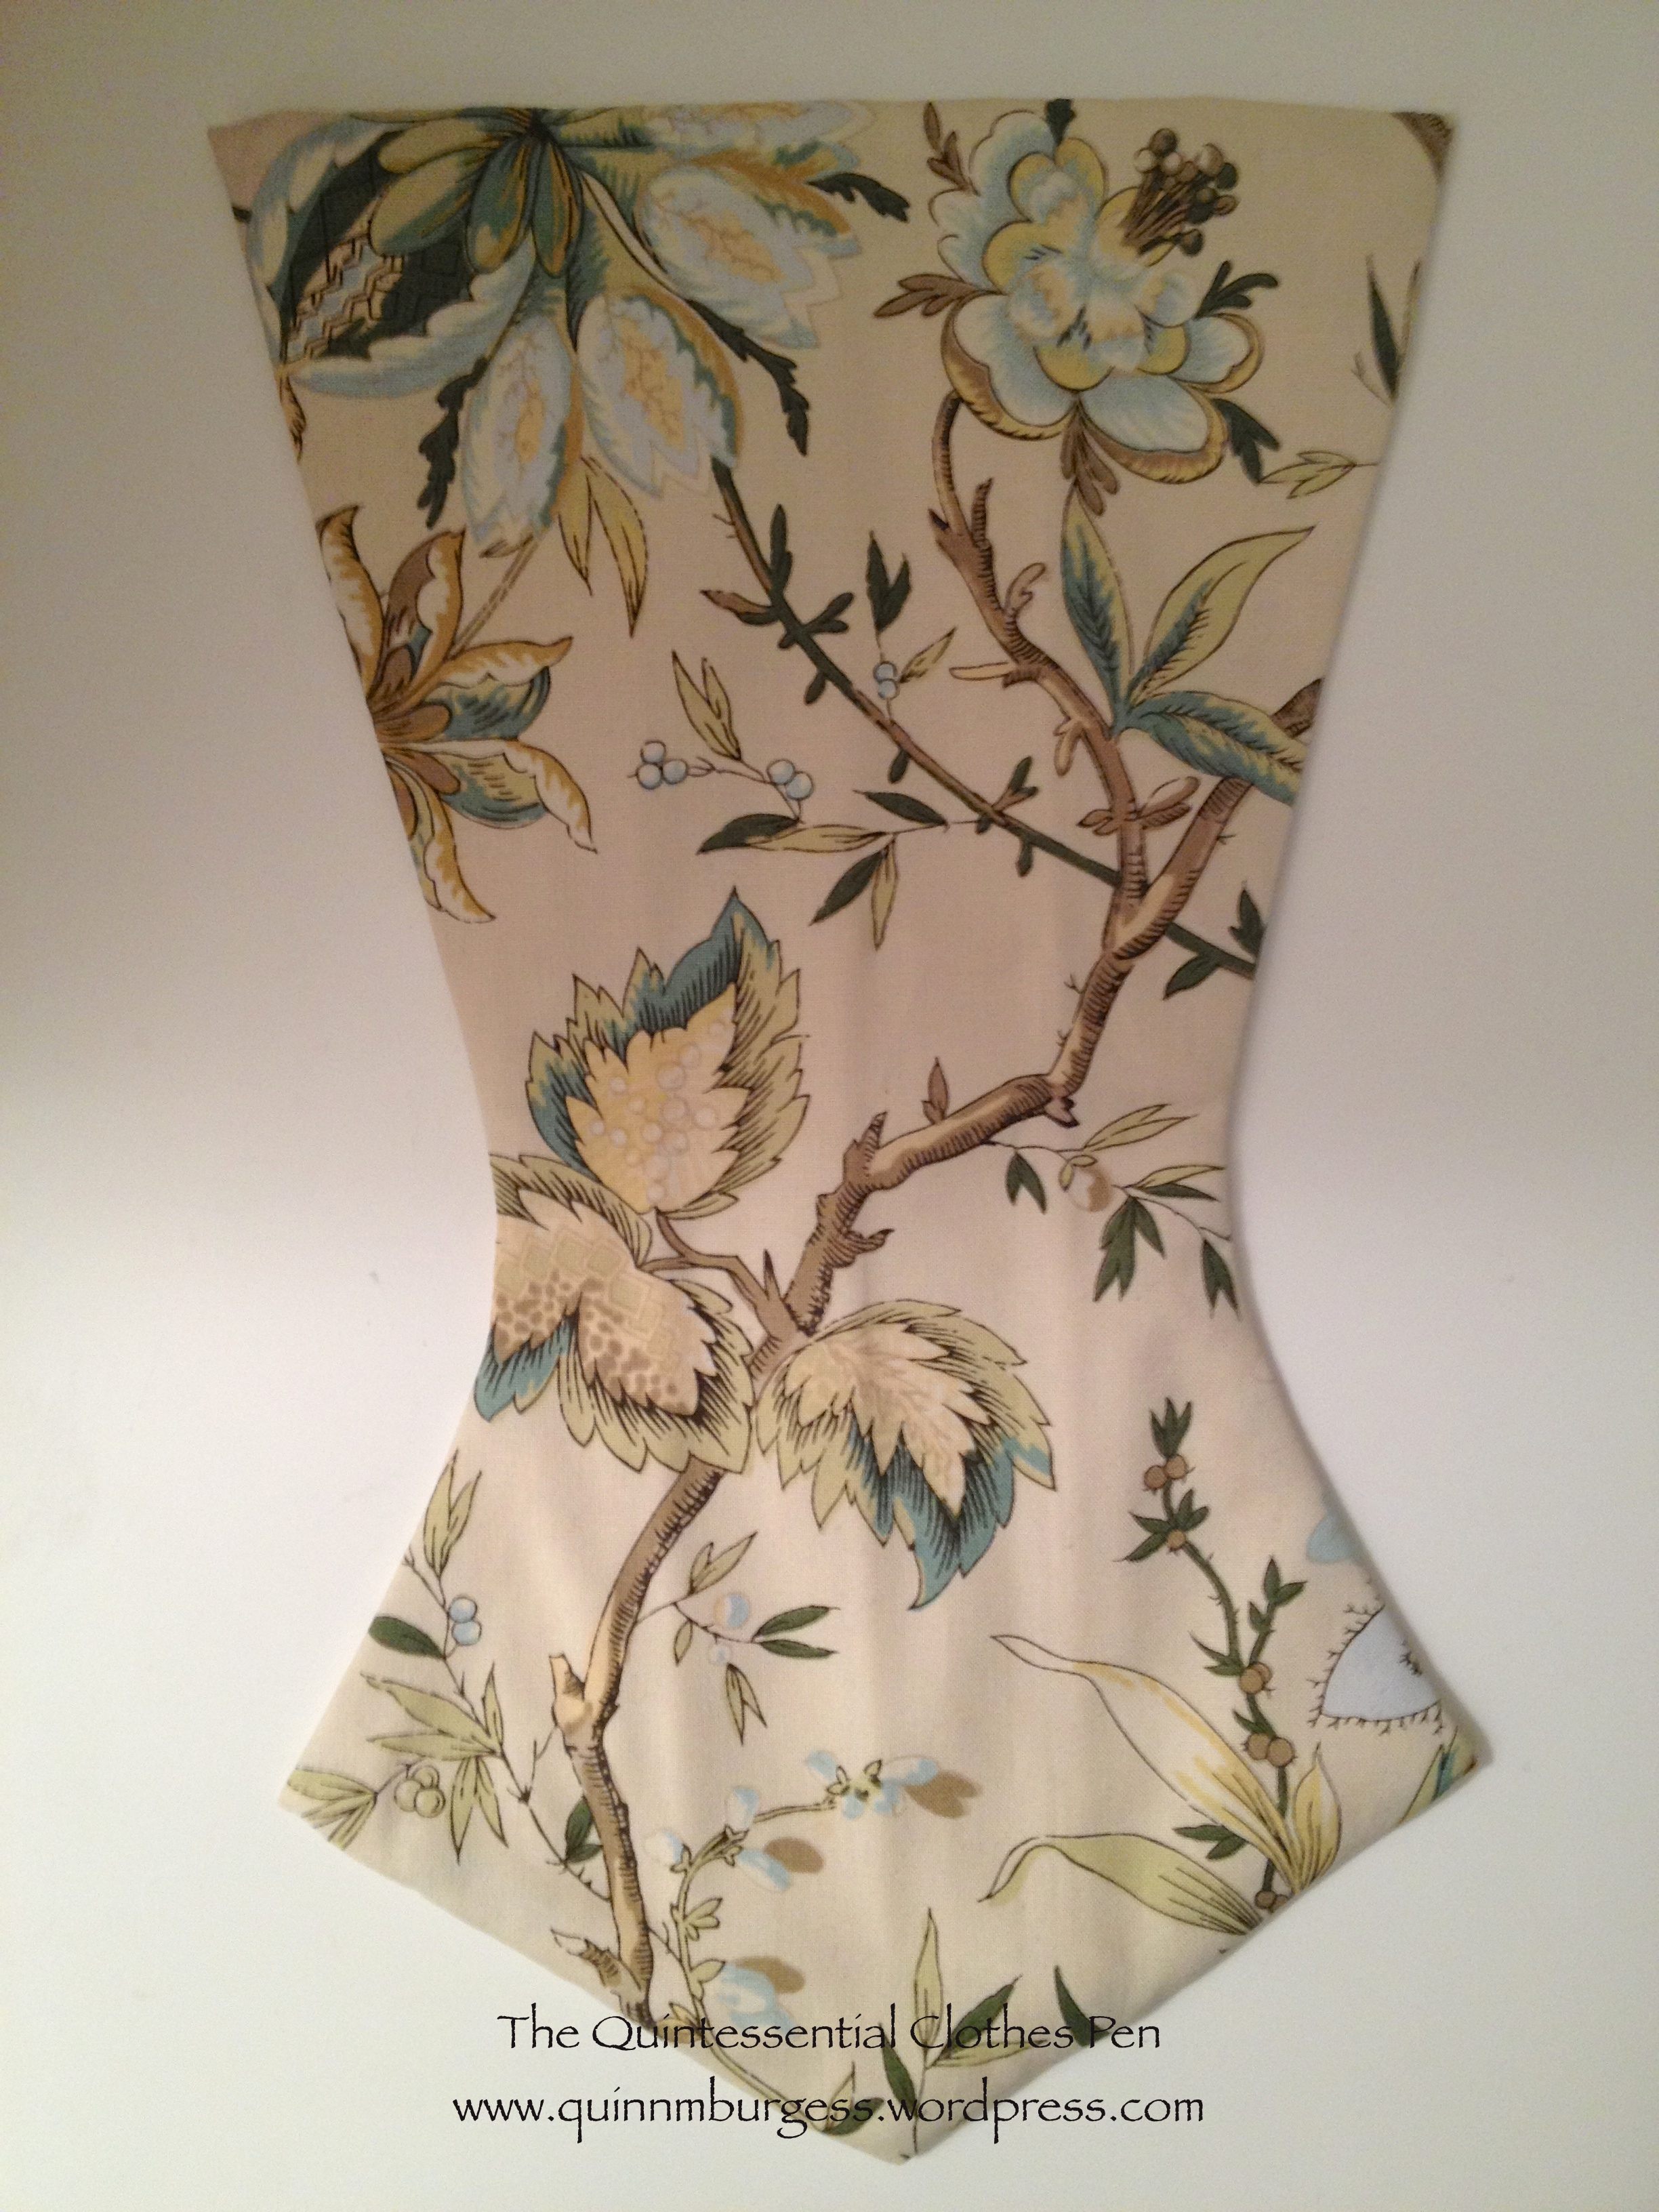
Here’s the story… I bought the fabric over a year ago, but didn’t really start thinking about the project until this summer. I made a mock-up of my chosen 1760s pattern and thought I’d sorted out the fitting issues, but after I’d cut and sewn the real fabric I had many more unexpected problems! I was discouraged, but recieved some really wonderful opinions about what I should do to proceed from you lovely readers. I decided to go with a stomacher front jacket with self fabric pleated trim around the neckline/front opening and around the cuffs on the sleeves, like this jacket at the Met. Then, back in September, the HSF inspired me to make a stomacher to match my jacket for challenge #19. After that, my jacket languished, because I really wasn’t very excited about finishing the sewing for the other decisions I’d made and the alterations that needed to be done to make the jacket the way I wanted it. But I really wanted to finish the jacket in this calendar year. And that brings us to the present, with the jacket finally completed. Yay! I am SO ready to celebrate that this jacket is finally done!!!

The facts:
Fabric: Almost 2 yds Waverly Mineral Felicite printed cotton and 1yd (I think) peach linen
Pattern: Heavily altered, but I started with the 1760-1790 jacket pattern in Janet Arnold.
Year: Well… 1760s is what I was aiming for in the beginning.
Notions: Thread and cane boning.
How historically accurate?: 60%. This definitely falls in the historic costume category of my wardrobe. The Waverly fabric is in the spirit of the 18th century, but not accurate, though the linen is accurate as are the methods of construction. The trim is based on extant garments but not specifically reproduced. The jacket is 100% hand sewn.
Hours to complete: So many! With all the problems and alterations and re-sewing I completely lost count.
First worn: Has not been worn yet.
Total cost: $30 maybe? I don’t remember exactly what I paid for the fabrics.
Hopefully, I’ll get some more pieces of an 18th century ensemble done at some point and get pictures of the jacket on me. Don’t hold your breath, though, it could be awhile!
Problem Solving In 1893
It’s been over a year since I attended an event that allowed me to wear my bronze and pink 1893 ball gown. The last time I wore it, at Newport Dance Week in August 2012, there were a few minor problems: it was wrinkly and the shoulders kept falling down. I was able to solve both of these problems for this wearing. Ironing was easy and to solve the shoulder problem I did as one of the readers of a previous post suggested and ran a drawstring through the bias neck binding. The drawstring is sewn down in the back and exits the casing at center front, so it’s easy to adjust while I’m wearing it. The technique worked wonders! The shoulders stayed up all night with no problems. I look like so much more put together when my dress isn’t falling off!

I had fun doing my hair in a different way than last time, too. This time I opted for a more poofy style with a small high bun in the back rather than a more severe style with a poofier bun behind the tiara as I did last time. I really like how my hair turned out. I think the poof on the sides helps balance out the dress. And with a suitably haughty/benevolent face, the overall effect is quite regal!

Unfortunately, the lighting in the venue was very low and not good for taking pictures, so this is it. A brief post.
HSF #25: Spat-Boots, Or Gaiters

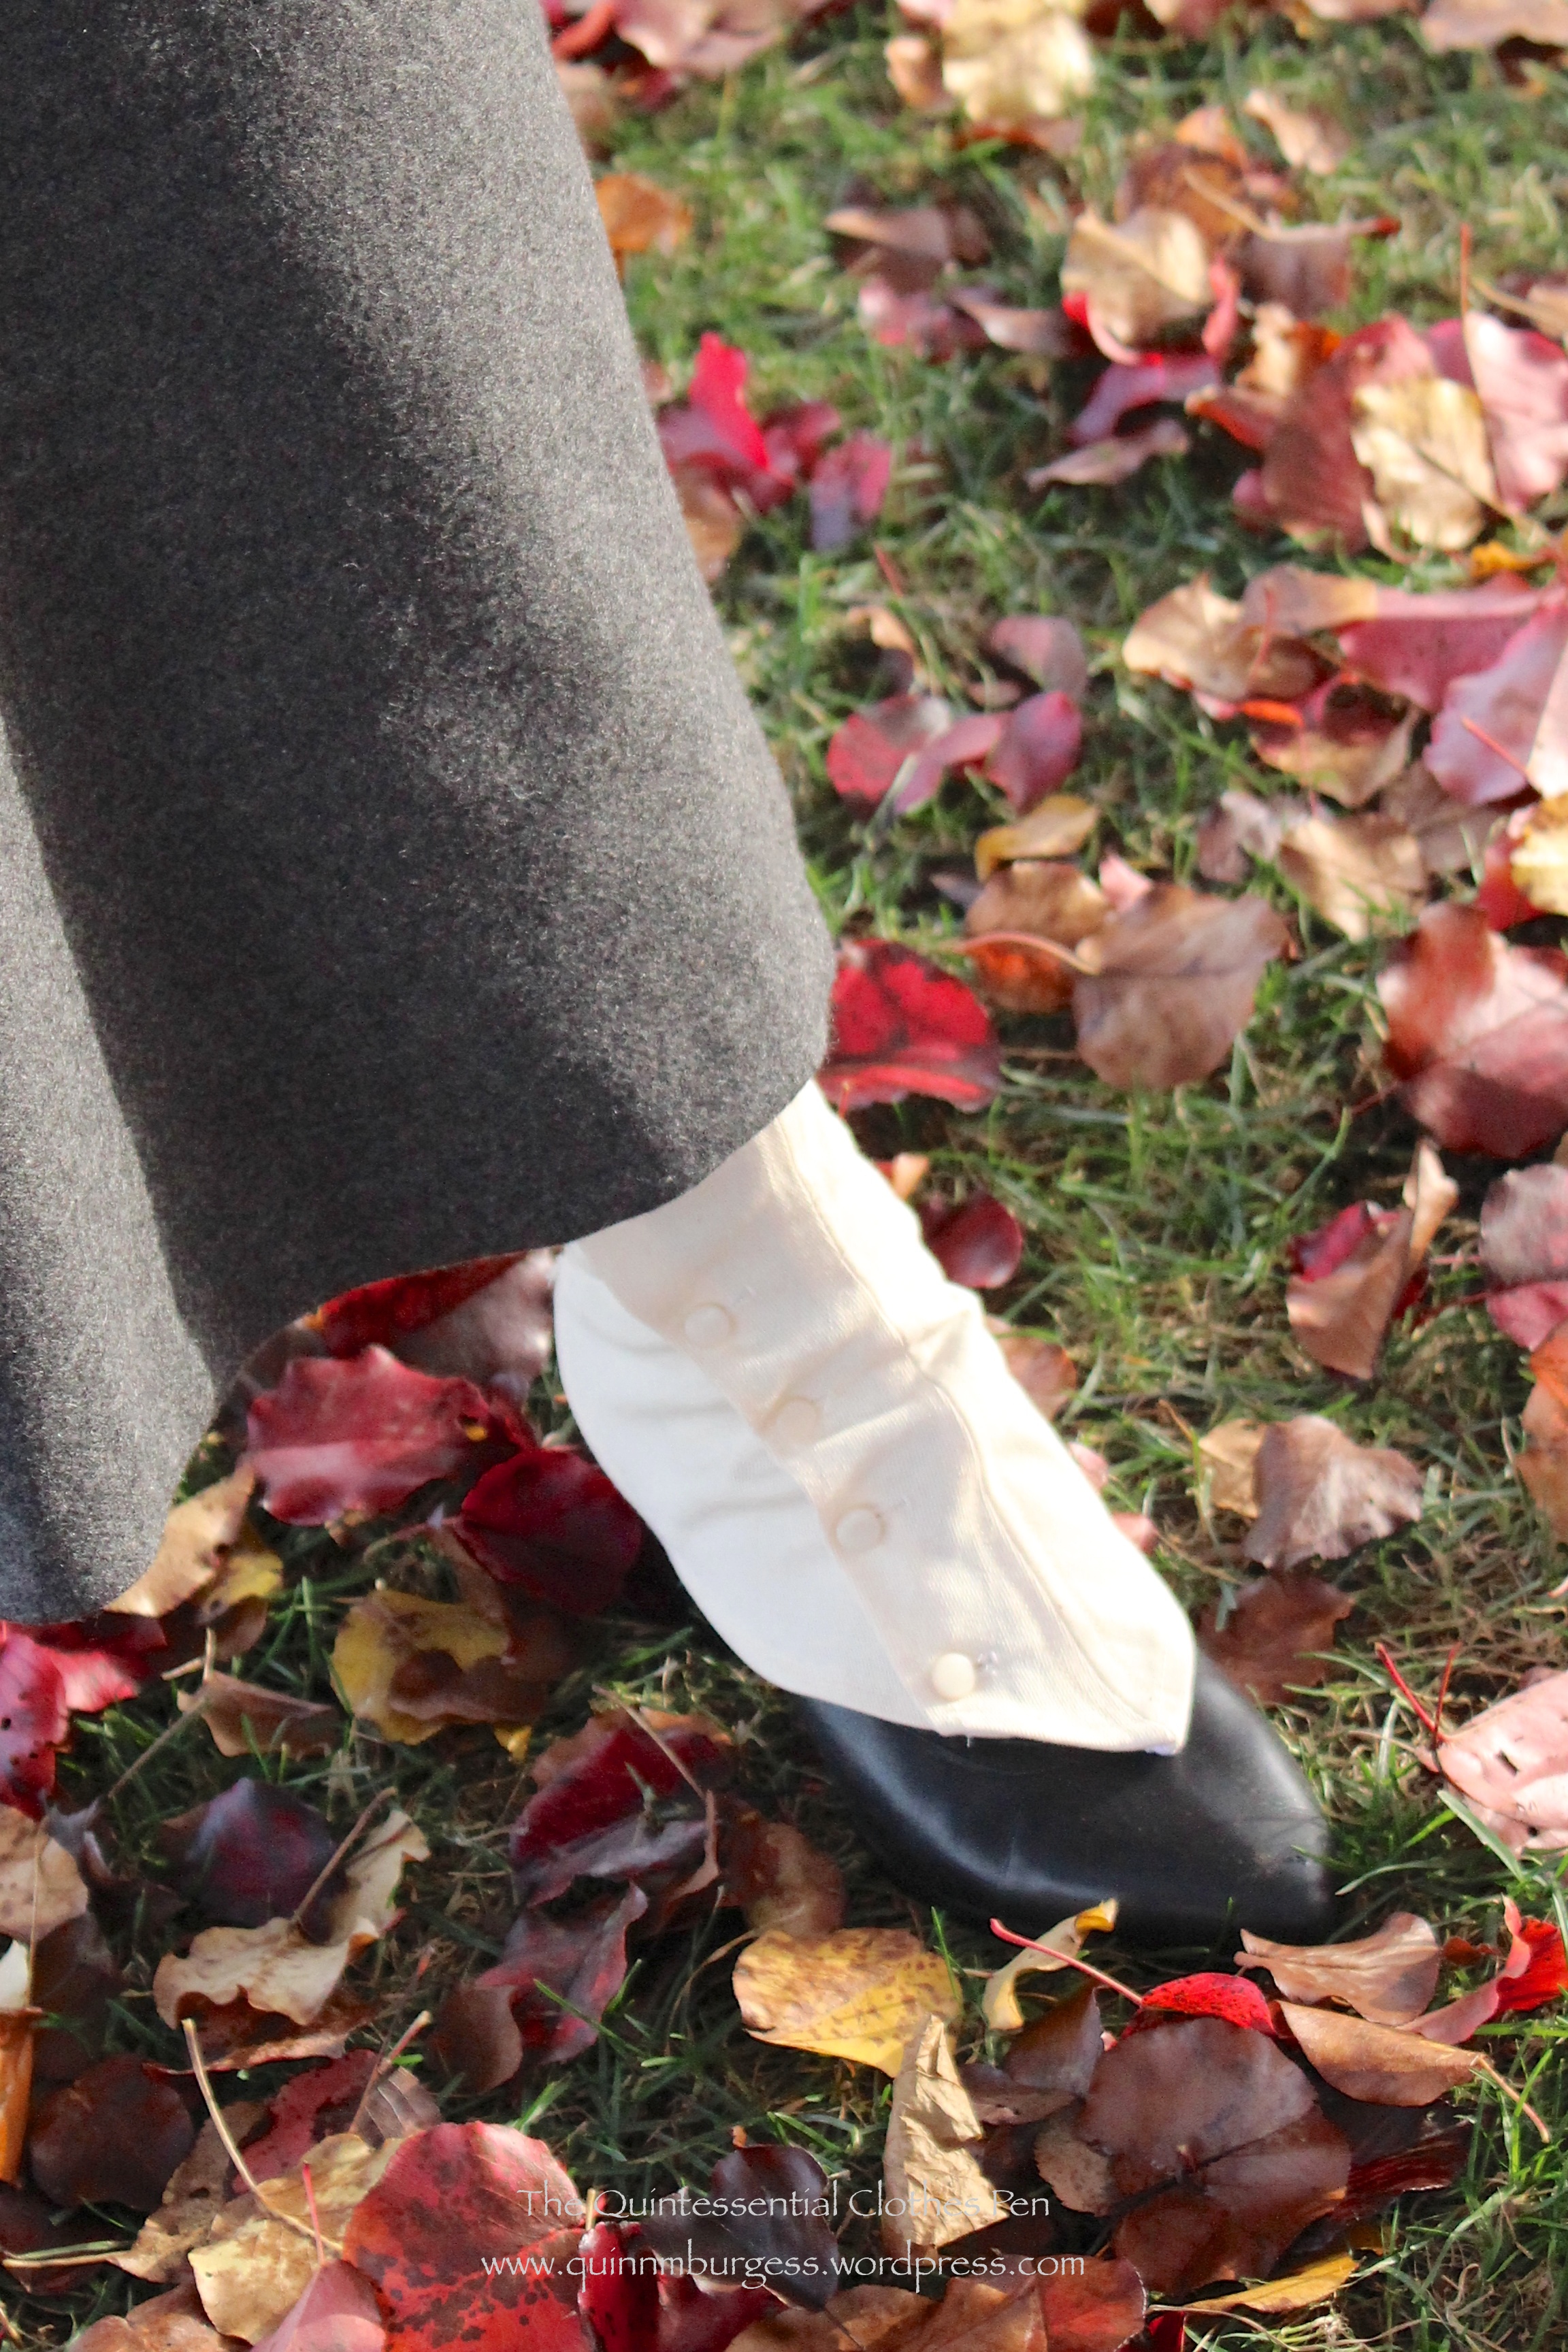
It’s time for the details about my entry for HSF challenge #25: One Metre. I prefer saying I’m wearing “spat-boots” though the actual items I’m really wearing are shoes and “gaiters.” Spat-boots has more of a ring to it, I think.

The gaiters very effectively turn my sort-of-1910s-but-more-1920s American Duchess Gibsons into very 19-teens spat-boots! If you look at the first black and white image of suffragists in this previous post you can clearly see some similar spat-boot styles. And if you look at the images on my Sewing Project: 1917 Blouse and Accessories Pinterest board you can see multiple examples of the spat-boot style. Some boots, like these from 1917 at the Met, were made in two different colors of leather. That’s the look I was trying to imitate, except that I was doing it with a separate garment rather than as a part of my shoe. The Met actually has quite a number of early 20th century gaiters, made out of leather and cotton. If you’d like to see these examples, I’ve pinned many of them to my Early 20th Century Accessories Pinterest board.
The facts, you ask?
Fabric: Scraps of heavy unbleached cotton.
Pattern: Created by me.
Year: 1917.
Notions: Thread, black elastic, cotton twill tape in various widths, and plastic buttons.
How historically accurate?: 90%. The look is right but the materials are a mix and match of right and modern.
Hours to complete: 6-8? Took a few fittings to get them ready to sew. Then finishing and sewing on buttons took awhile.
First worn: At a Thanksgiving event in Plymouth.
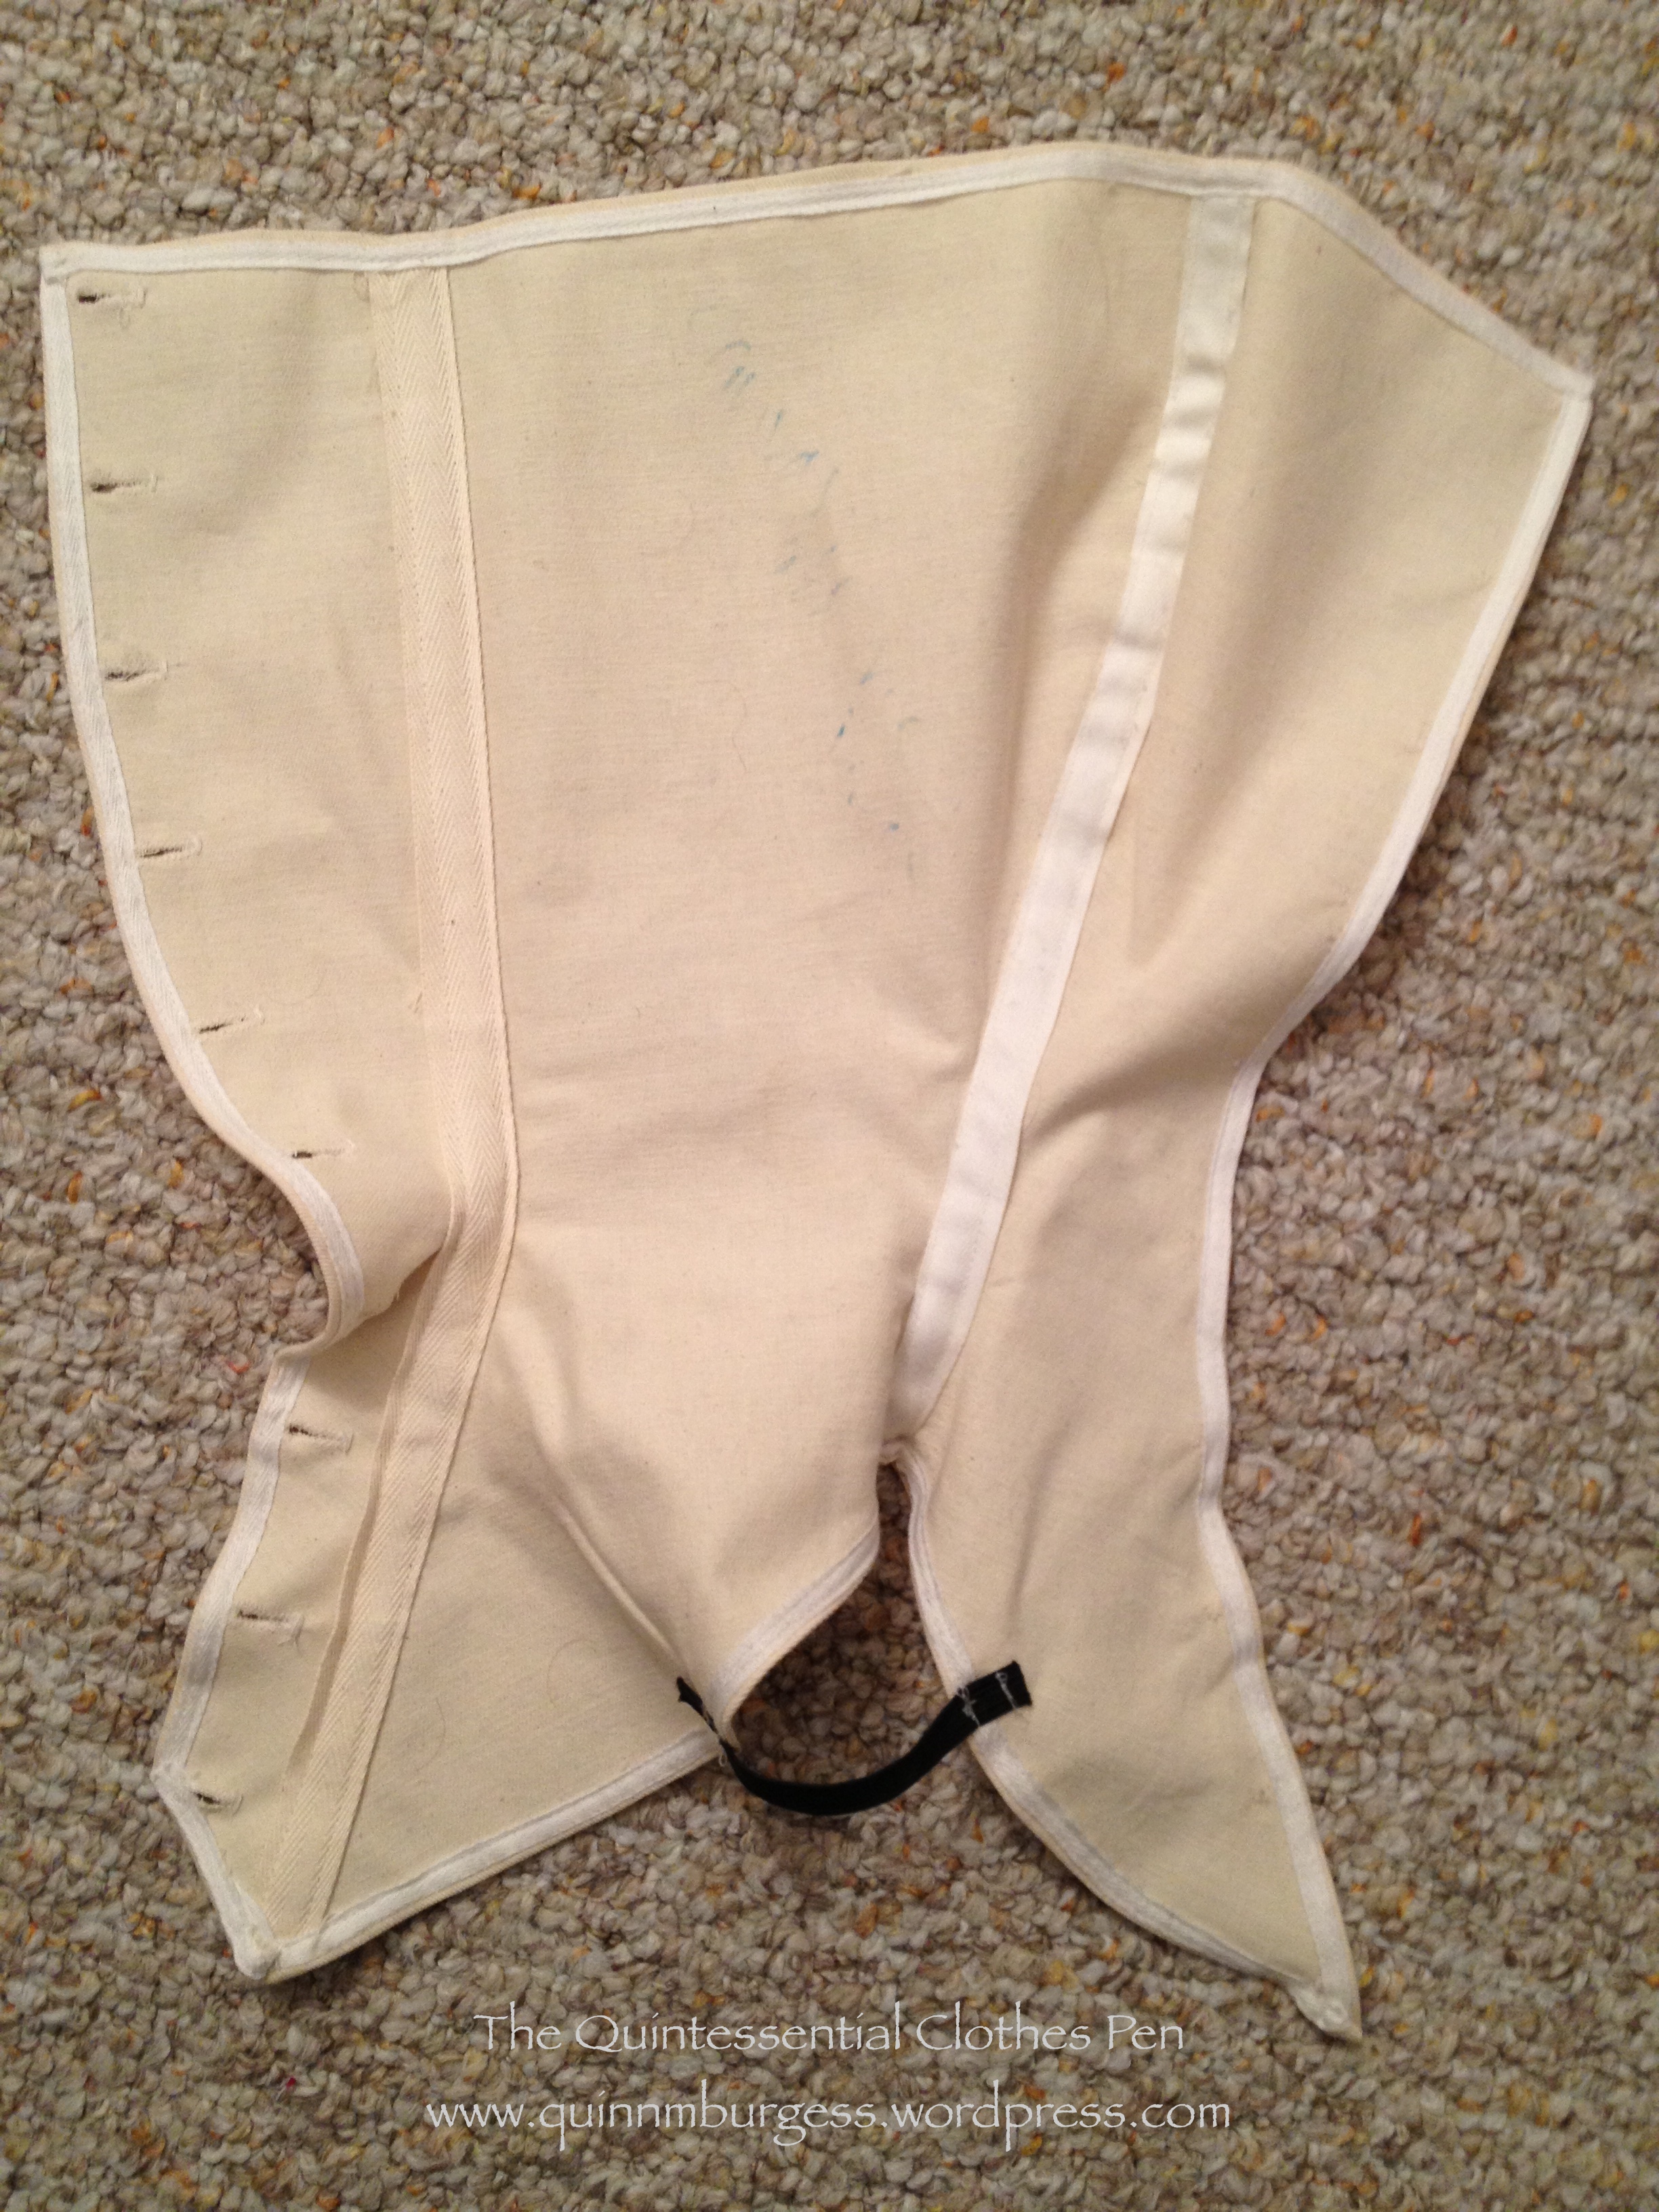
Total cost: None. The fabric was left over from a grad school mock up and the notions were all from my stash. (See that odd marking in the middle of the center piece? That’s blue sharpie that soaked onto this part of the fabric from notes I wrote on the mock up… There was a lot of blue sharpie, and I couldn’t cut around it and still have enough fabric. Doesn’t show on the outside though!)
There are a few things that I would change consider changing if I made these again in some other reality. #1: Having my buttons spaced closer together, as the extant gaiters and boots do. But in this case I only had a limited number of buttons to work with! #2: Potentially putting a strap with a buckle to go under the foot rather than elastic, since the buckle method is what extant gaiters have. But the elastic worked so well and you really couldn’t see it… so I probably wouldn’t actually change this, especially since I don’t have the right sort of buckles in my stash. #3: Making the back part that comes down over my heel longer. I was aiming for a nice swoop up from the part held down by the elastic, but the back of the gaiters kept popping up over the edge of my shoes, which was a little uncomfortable. I spent a lot of time during the day I wore these pulling the back of the gaiters down.

Product links in this post contain an affiliate code, which provides a small benefit to my shoe fund. This does not affect my impressions and reviews of this product.
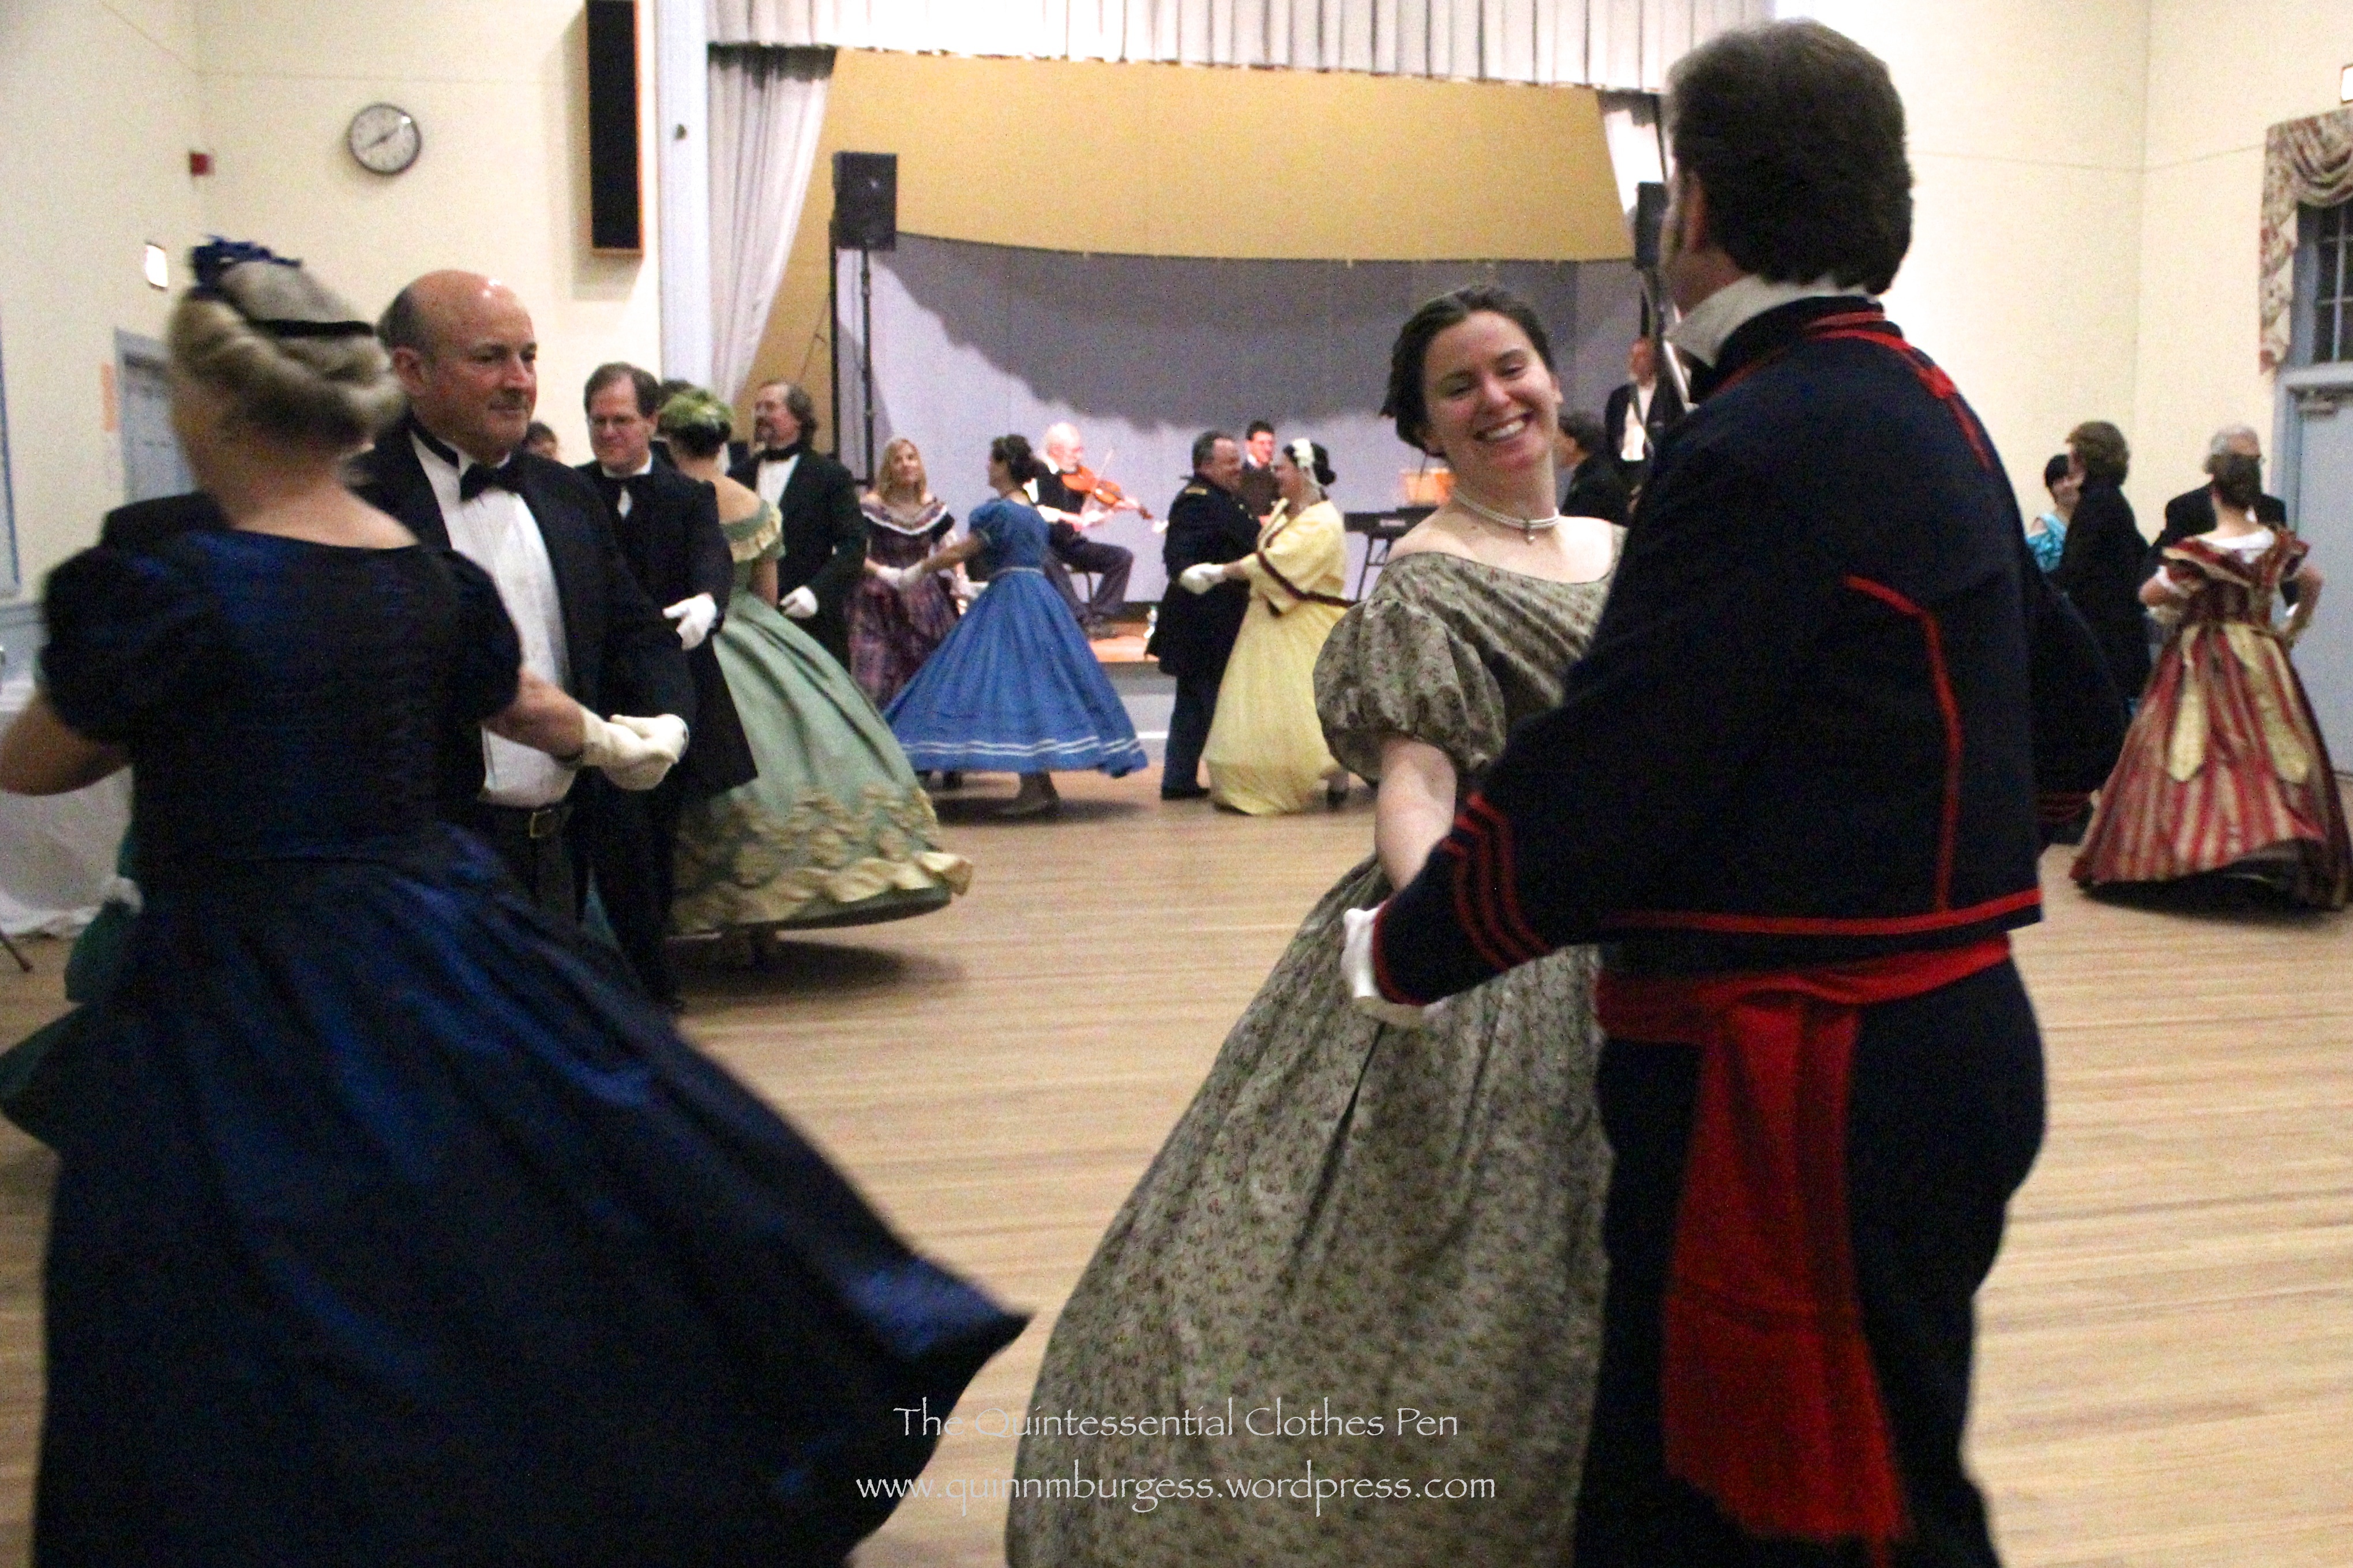
1860s Dance Weekend: Part II, Sunday
This is part two of a series of posts about a recent 1860s dance weekend hosted by The Commonwealth Vintage Dancers. The first post, which was about the Saturday of the weekend can be viewed here. This post is about the second day, Sunday. Unfortunately, we didn’t take as many pictures of dancing on Sunday as we did on Saturday. We did, however, continue our tradition of taking lots of pictures of us not dancing, but doing other things. So you’ll just have to humor me during this post filled with a little bit of dancing and a larger proportion of other things.
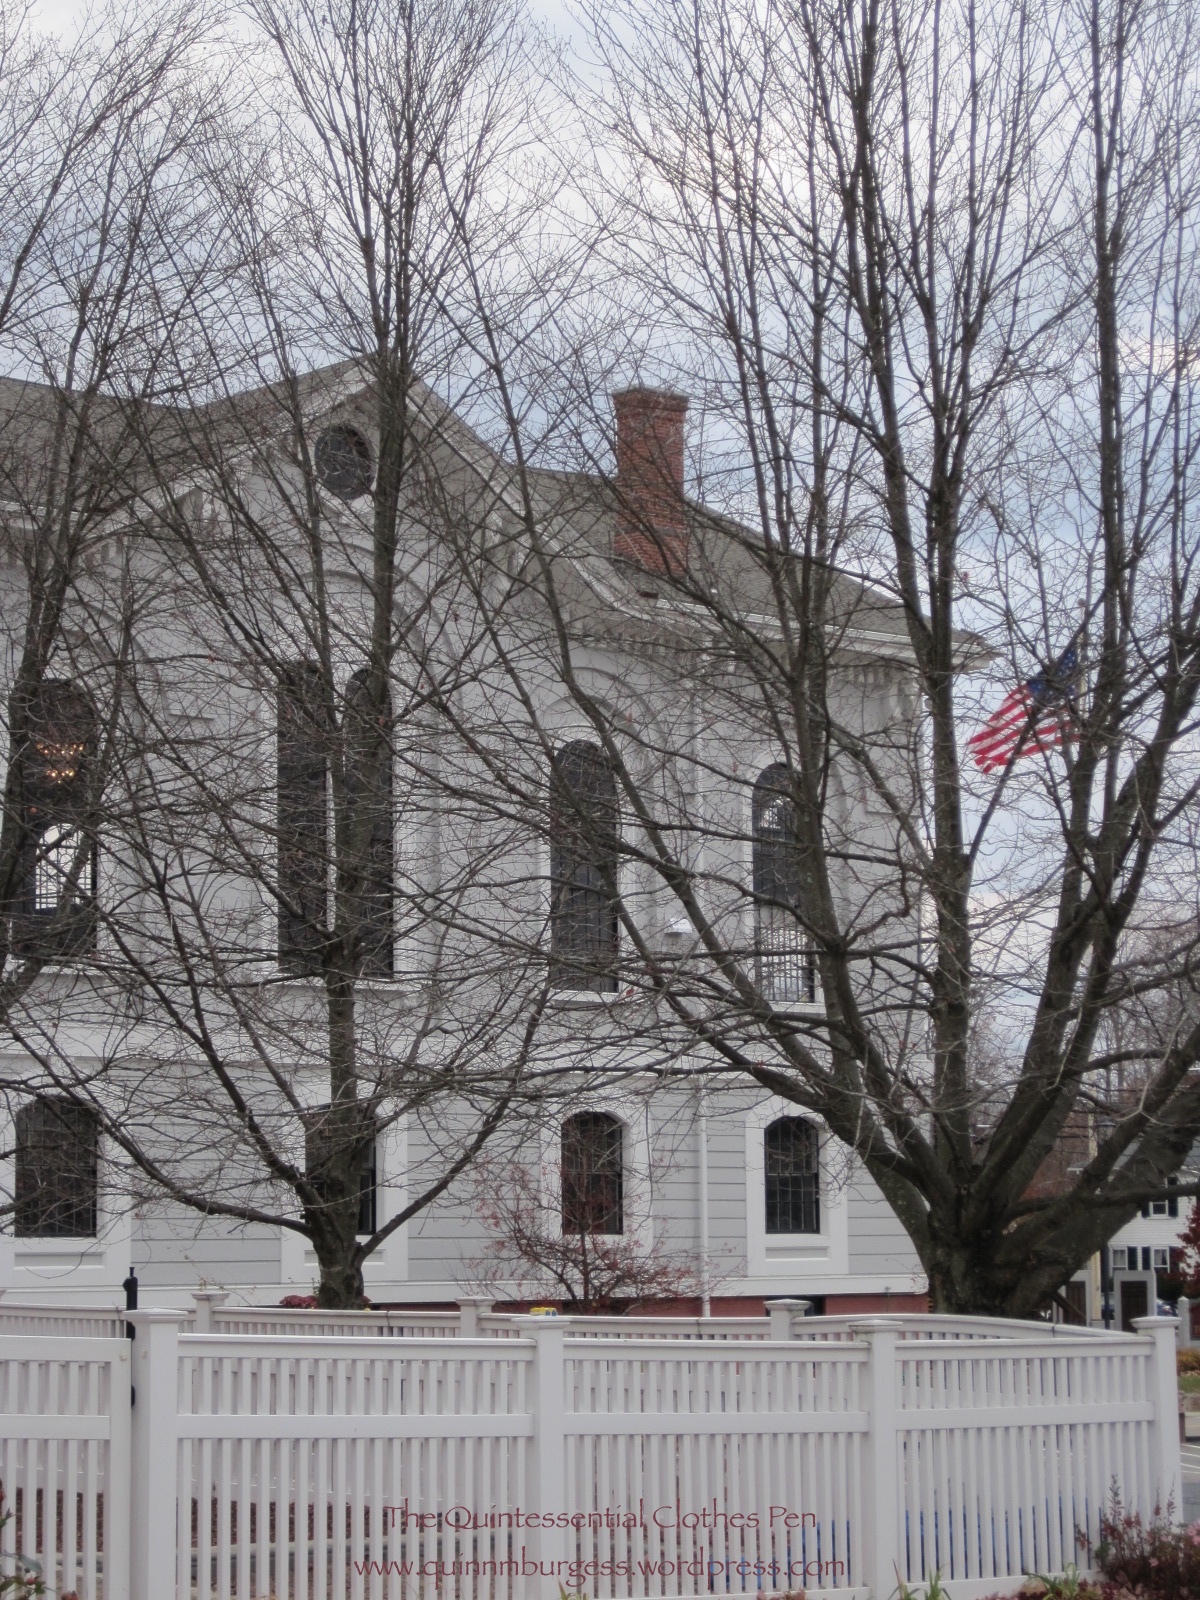
Before I get started on pictures of dresses and dancing, I’m going to share a few pictures of the building the event was held in, so you can get a sense of the atmosphere. Think cold New England winter… blue sky and a cold breeze… no leaves left on the trees…


Now that you’ve got a sense of the venue, let’s proceed to the ball:
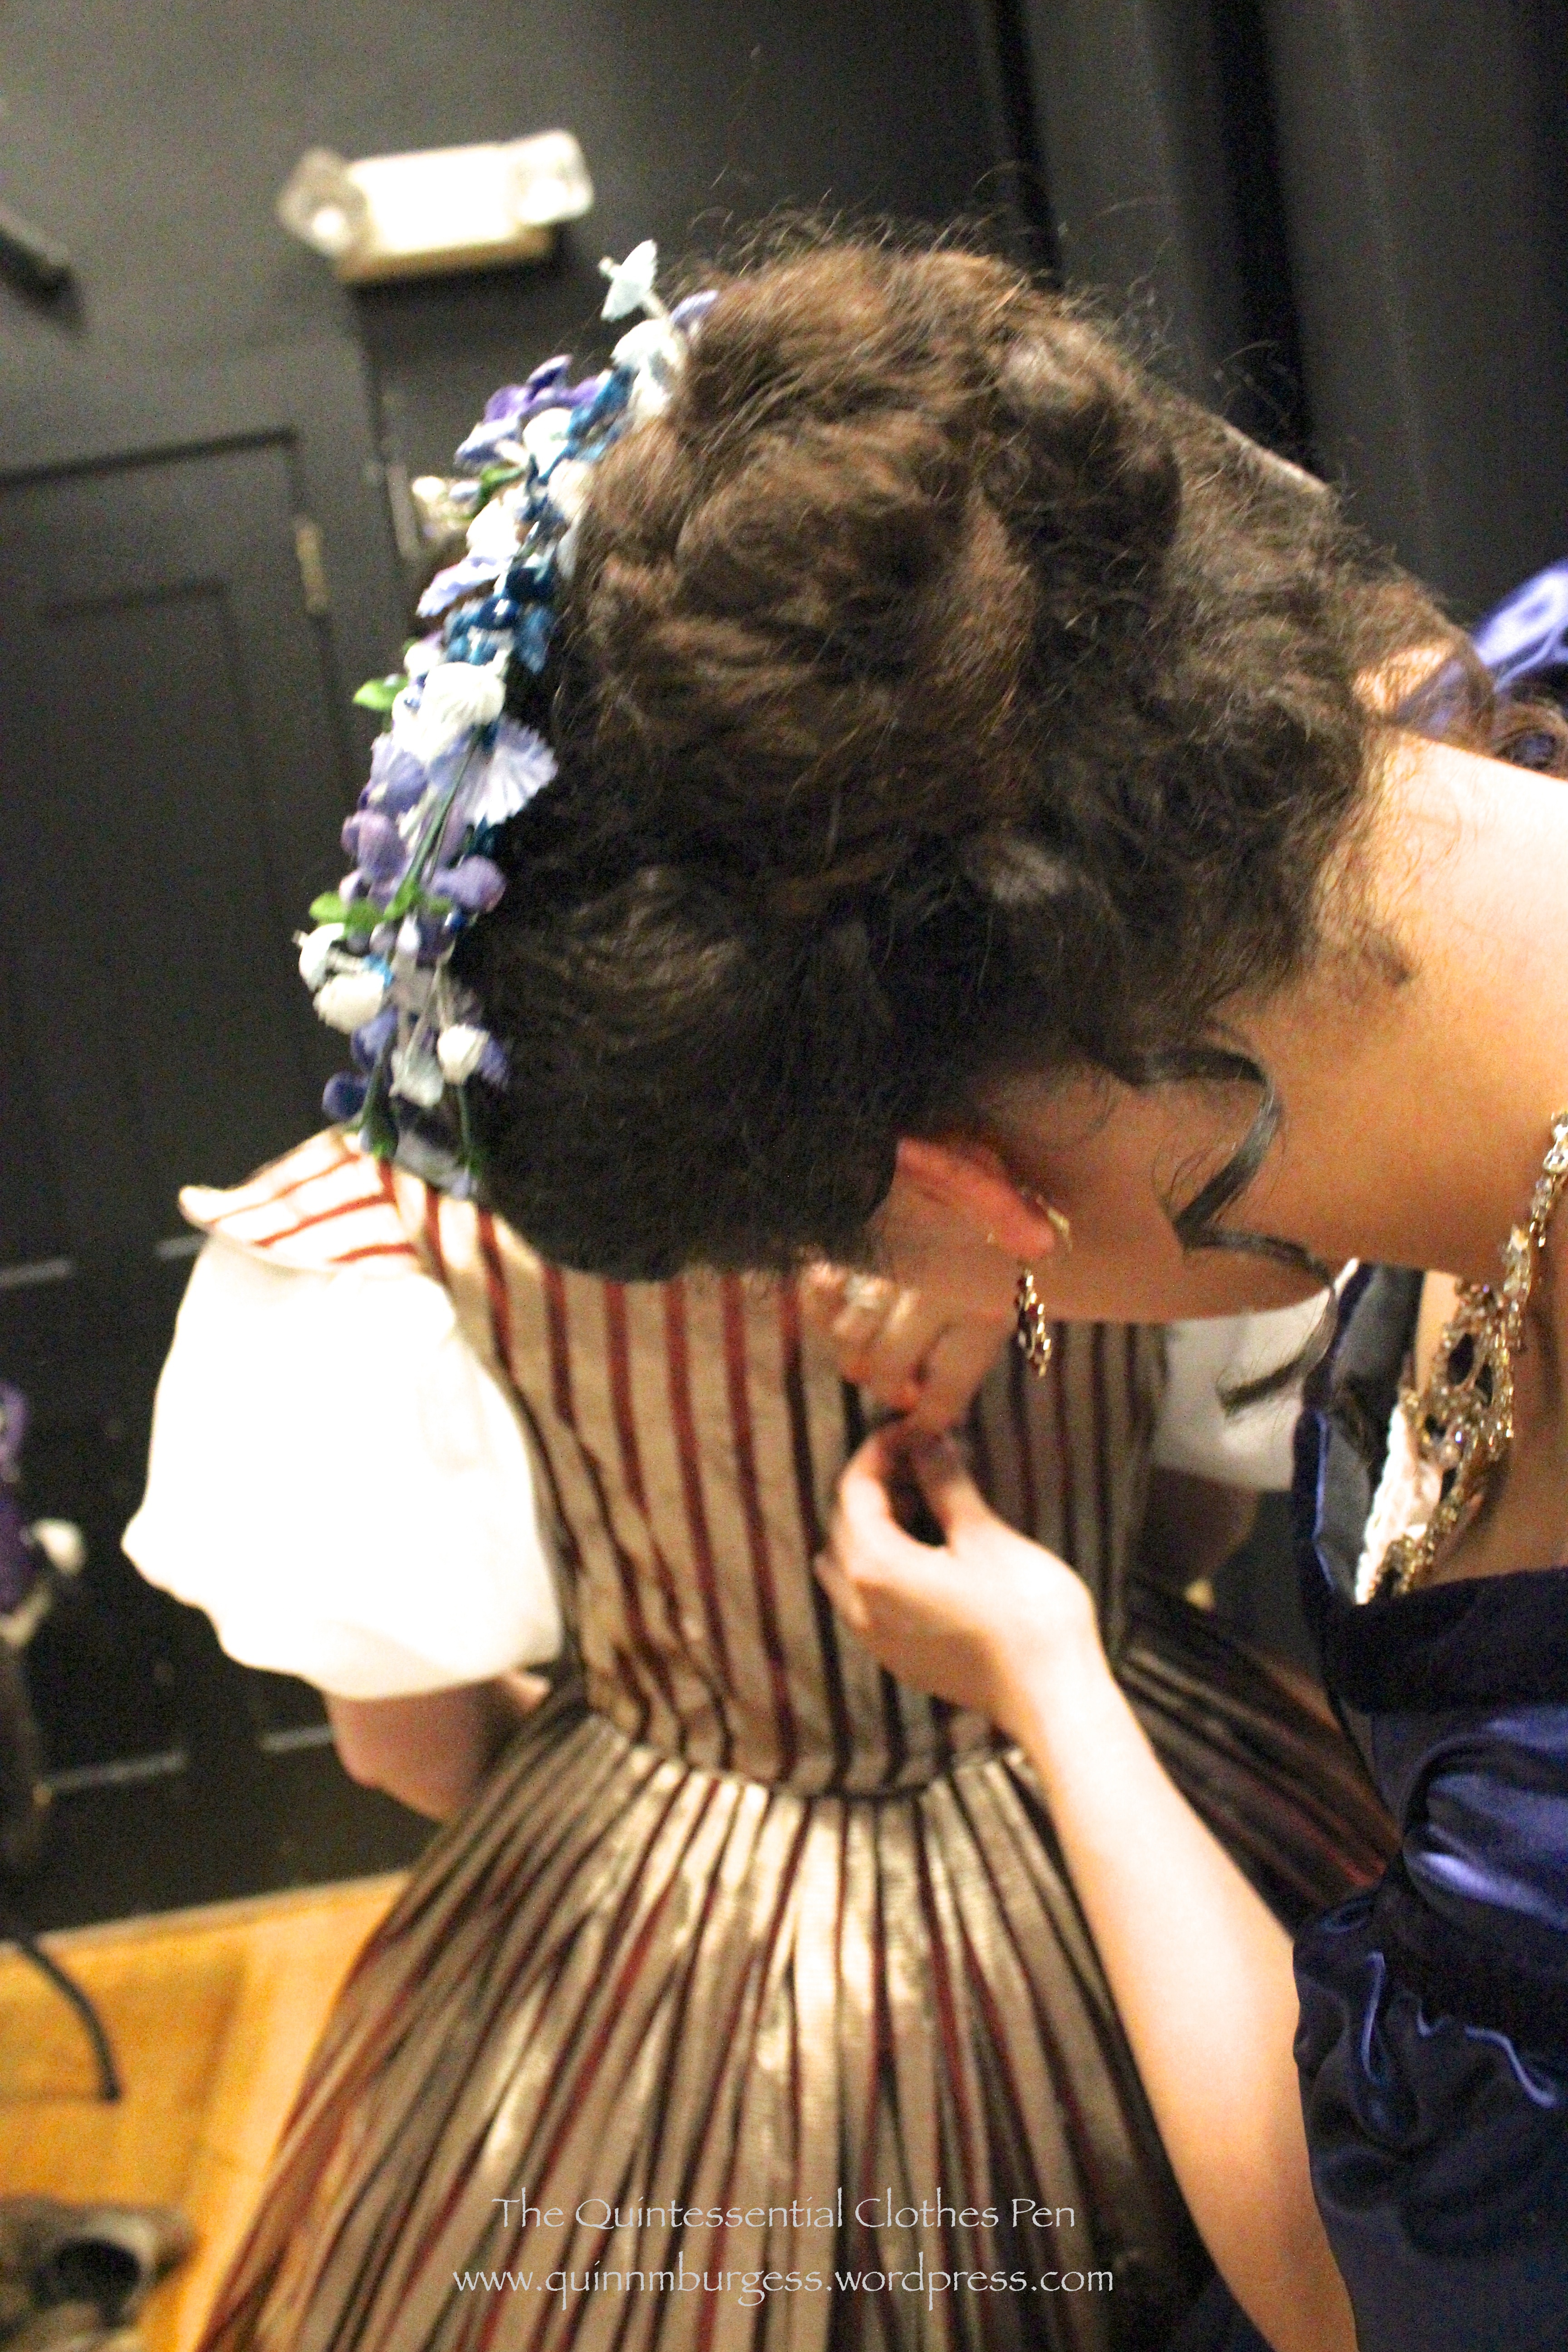
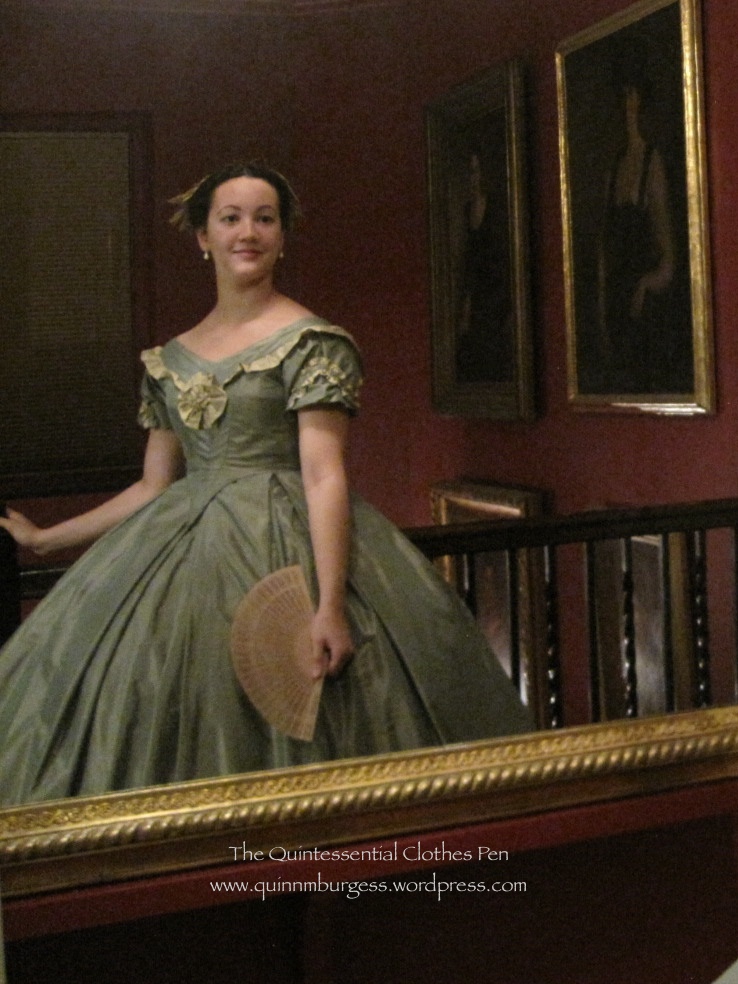
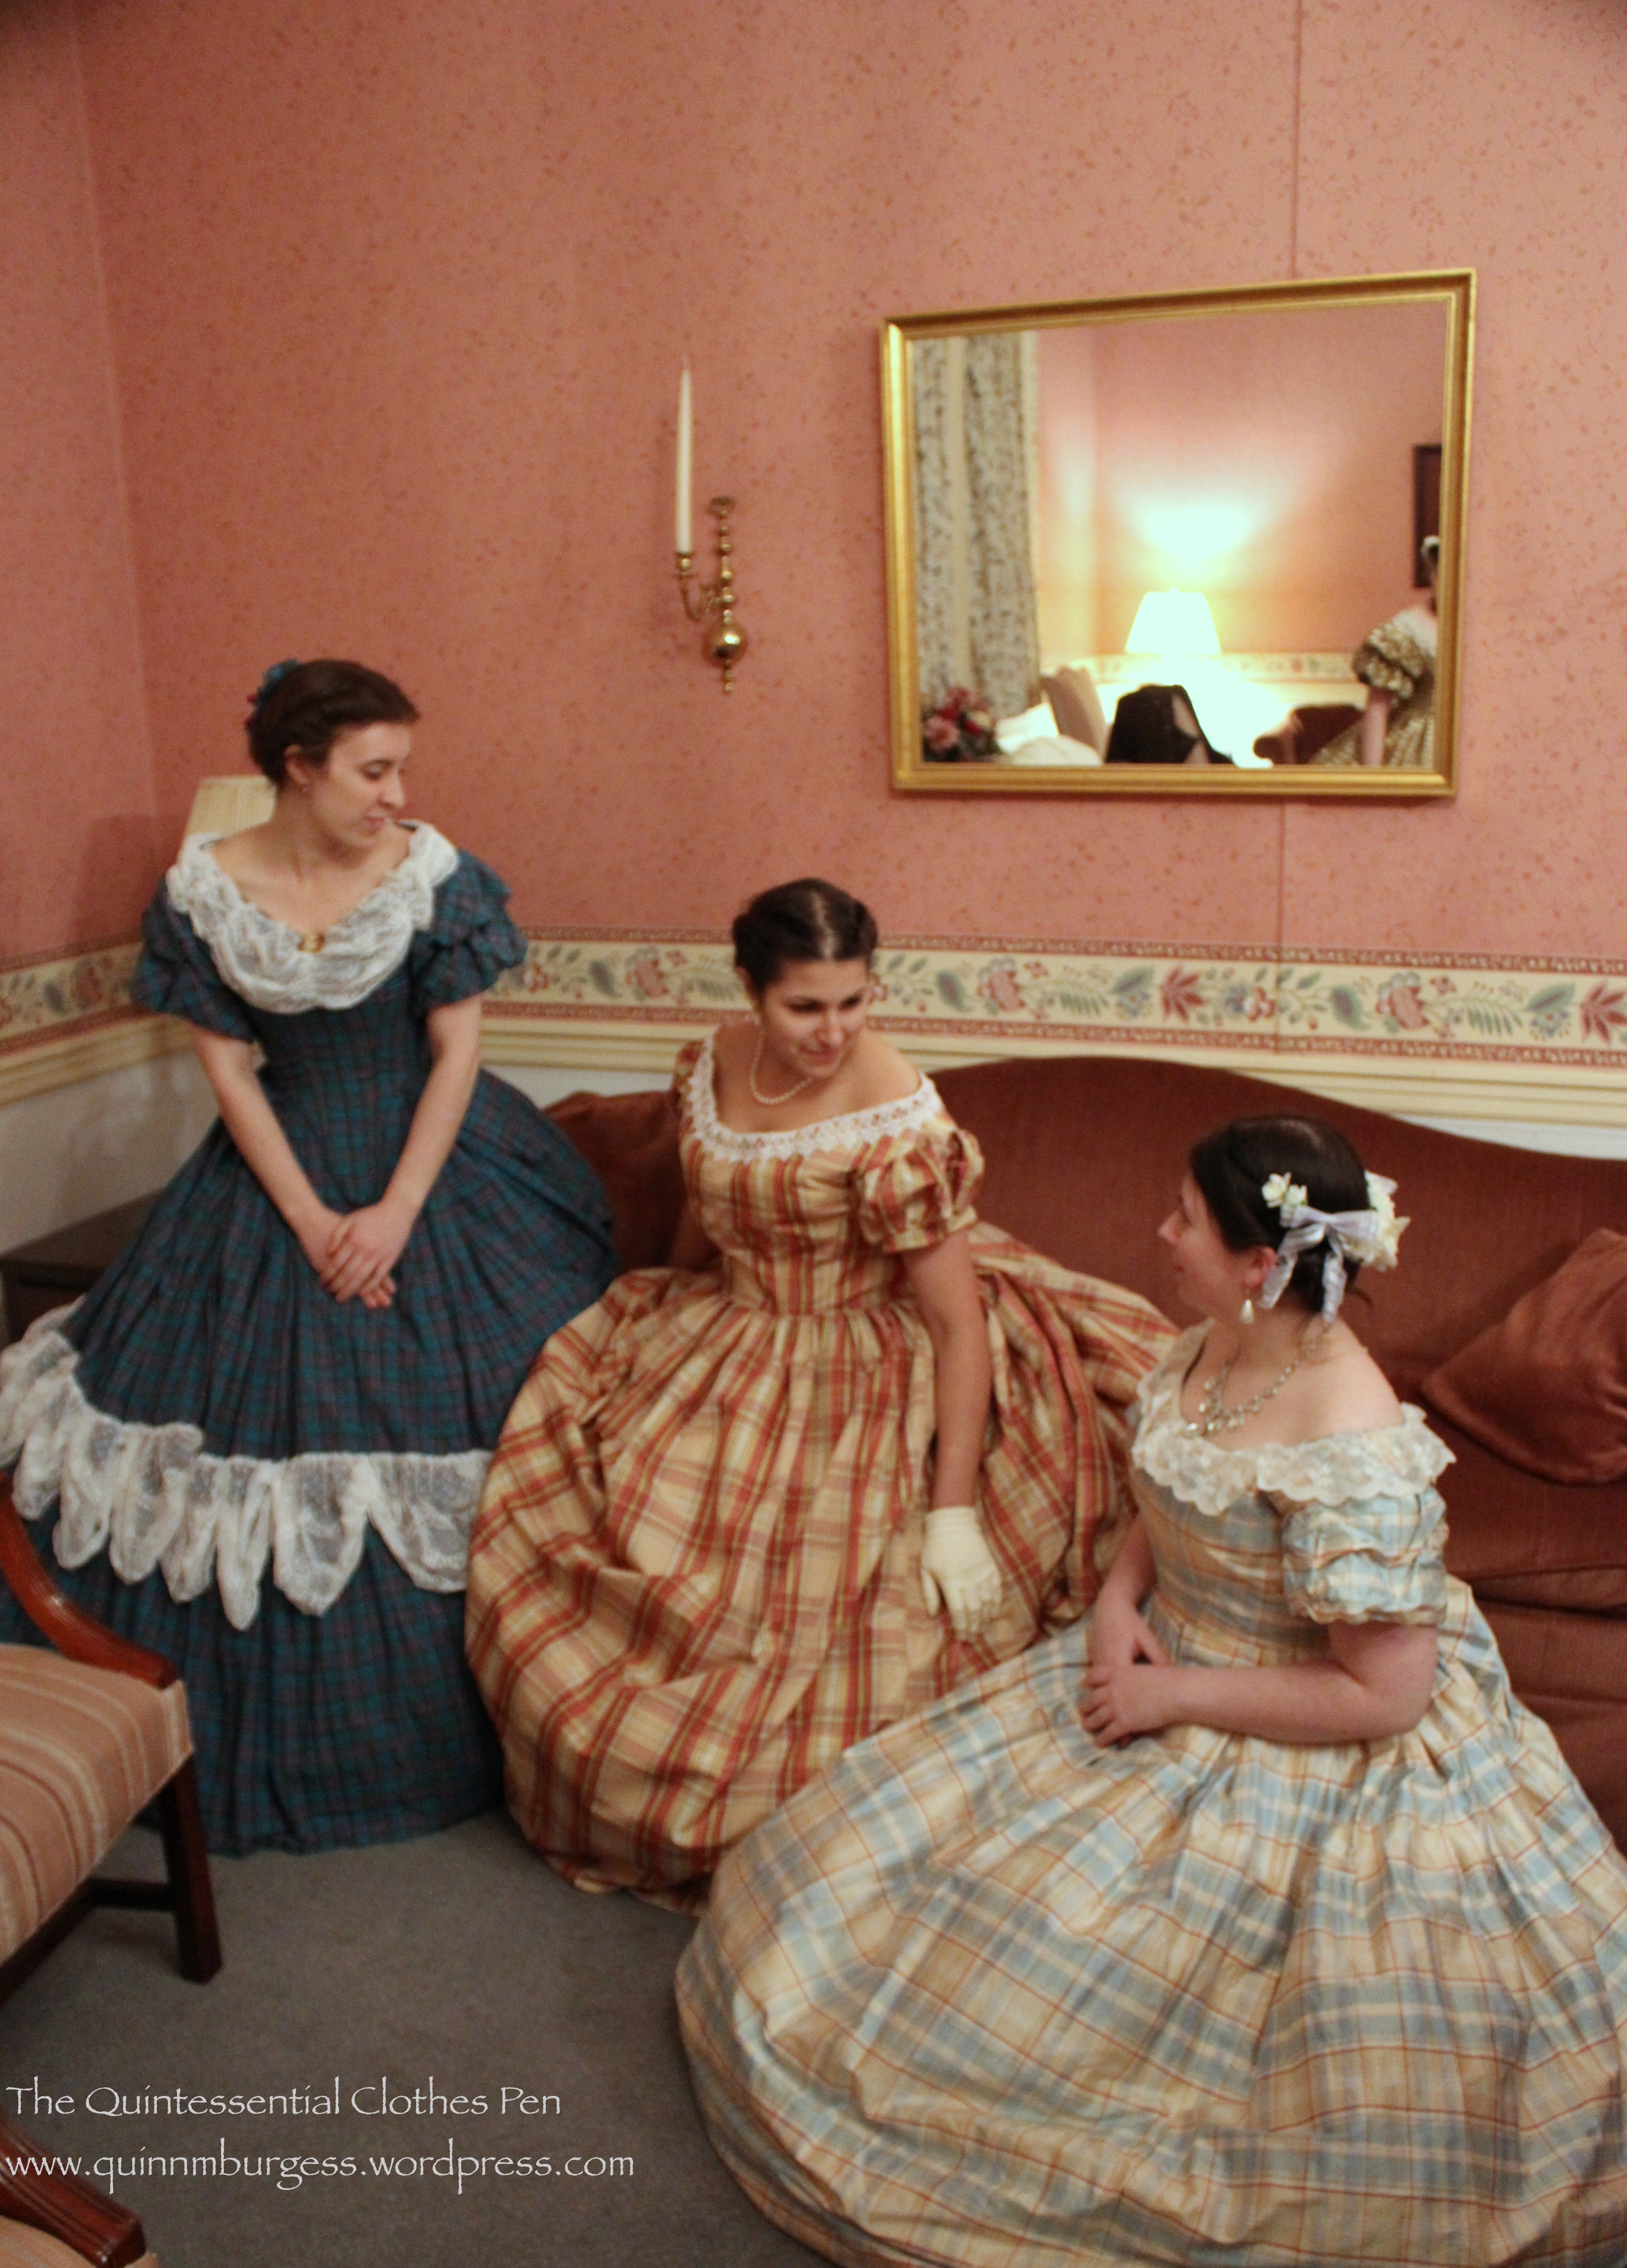
I tried to do something different than my usual 1860s style for this ball, and I must say that I like the results. The more you try out different hair styles, the easier they become! I’d brought my curling iron and I wanted to make use of it for this ball. (I have naturally curly hair, so it’s quite ironic when I use a curling iron. My curls are quite frizzy, a bit wild, and untamed rather than cork screw like, so the curling iron acts as a taming agent.) In the end I had two curls, one hanging on either side of my head. I wouldn’t do this for every ball, but it worked well with the amount of crazy bling I had and with the heavy quality of my dress.

Anyway, in addition to the curls, I did my usual poofy side roll on either side of my center part. I tried to be imaginative in the back but ran out of time. It’s hard to remember now, but I’m pretty sure I braided the back section and made a bun with the braid. Or perhaps I wrapped my braid around a bun that was made with the ends of the poofy side rolls. Either way, there was a bun and a braid. My Belle hair crescent was mounted over the result. I rather like that it was a little higher on my head than in previous wearings. It was a little more visible from the front.
As you can see, I wore Belle. She was my first historic dress, ever. I wore her more often when I first began vintage dancing a few years ago, but I got a little tired of wearing her and so she’s been living in my closet for over a year. She’s super heavy, which I remembered, but I hadn’t remembered that the weight of the skirt pushed my hoops into an awkward diagonal elliptical shape. I have a bum pad that fixes the problem, but since I’ve been wearing Evie so much and she doesn’t need it I’d forgotten to bring it! Oh well. It was exciting to bring Belle out again, and though I’m not the same size I was about 7 years ago when I made her, she still fits and is still stunning.
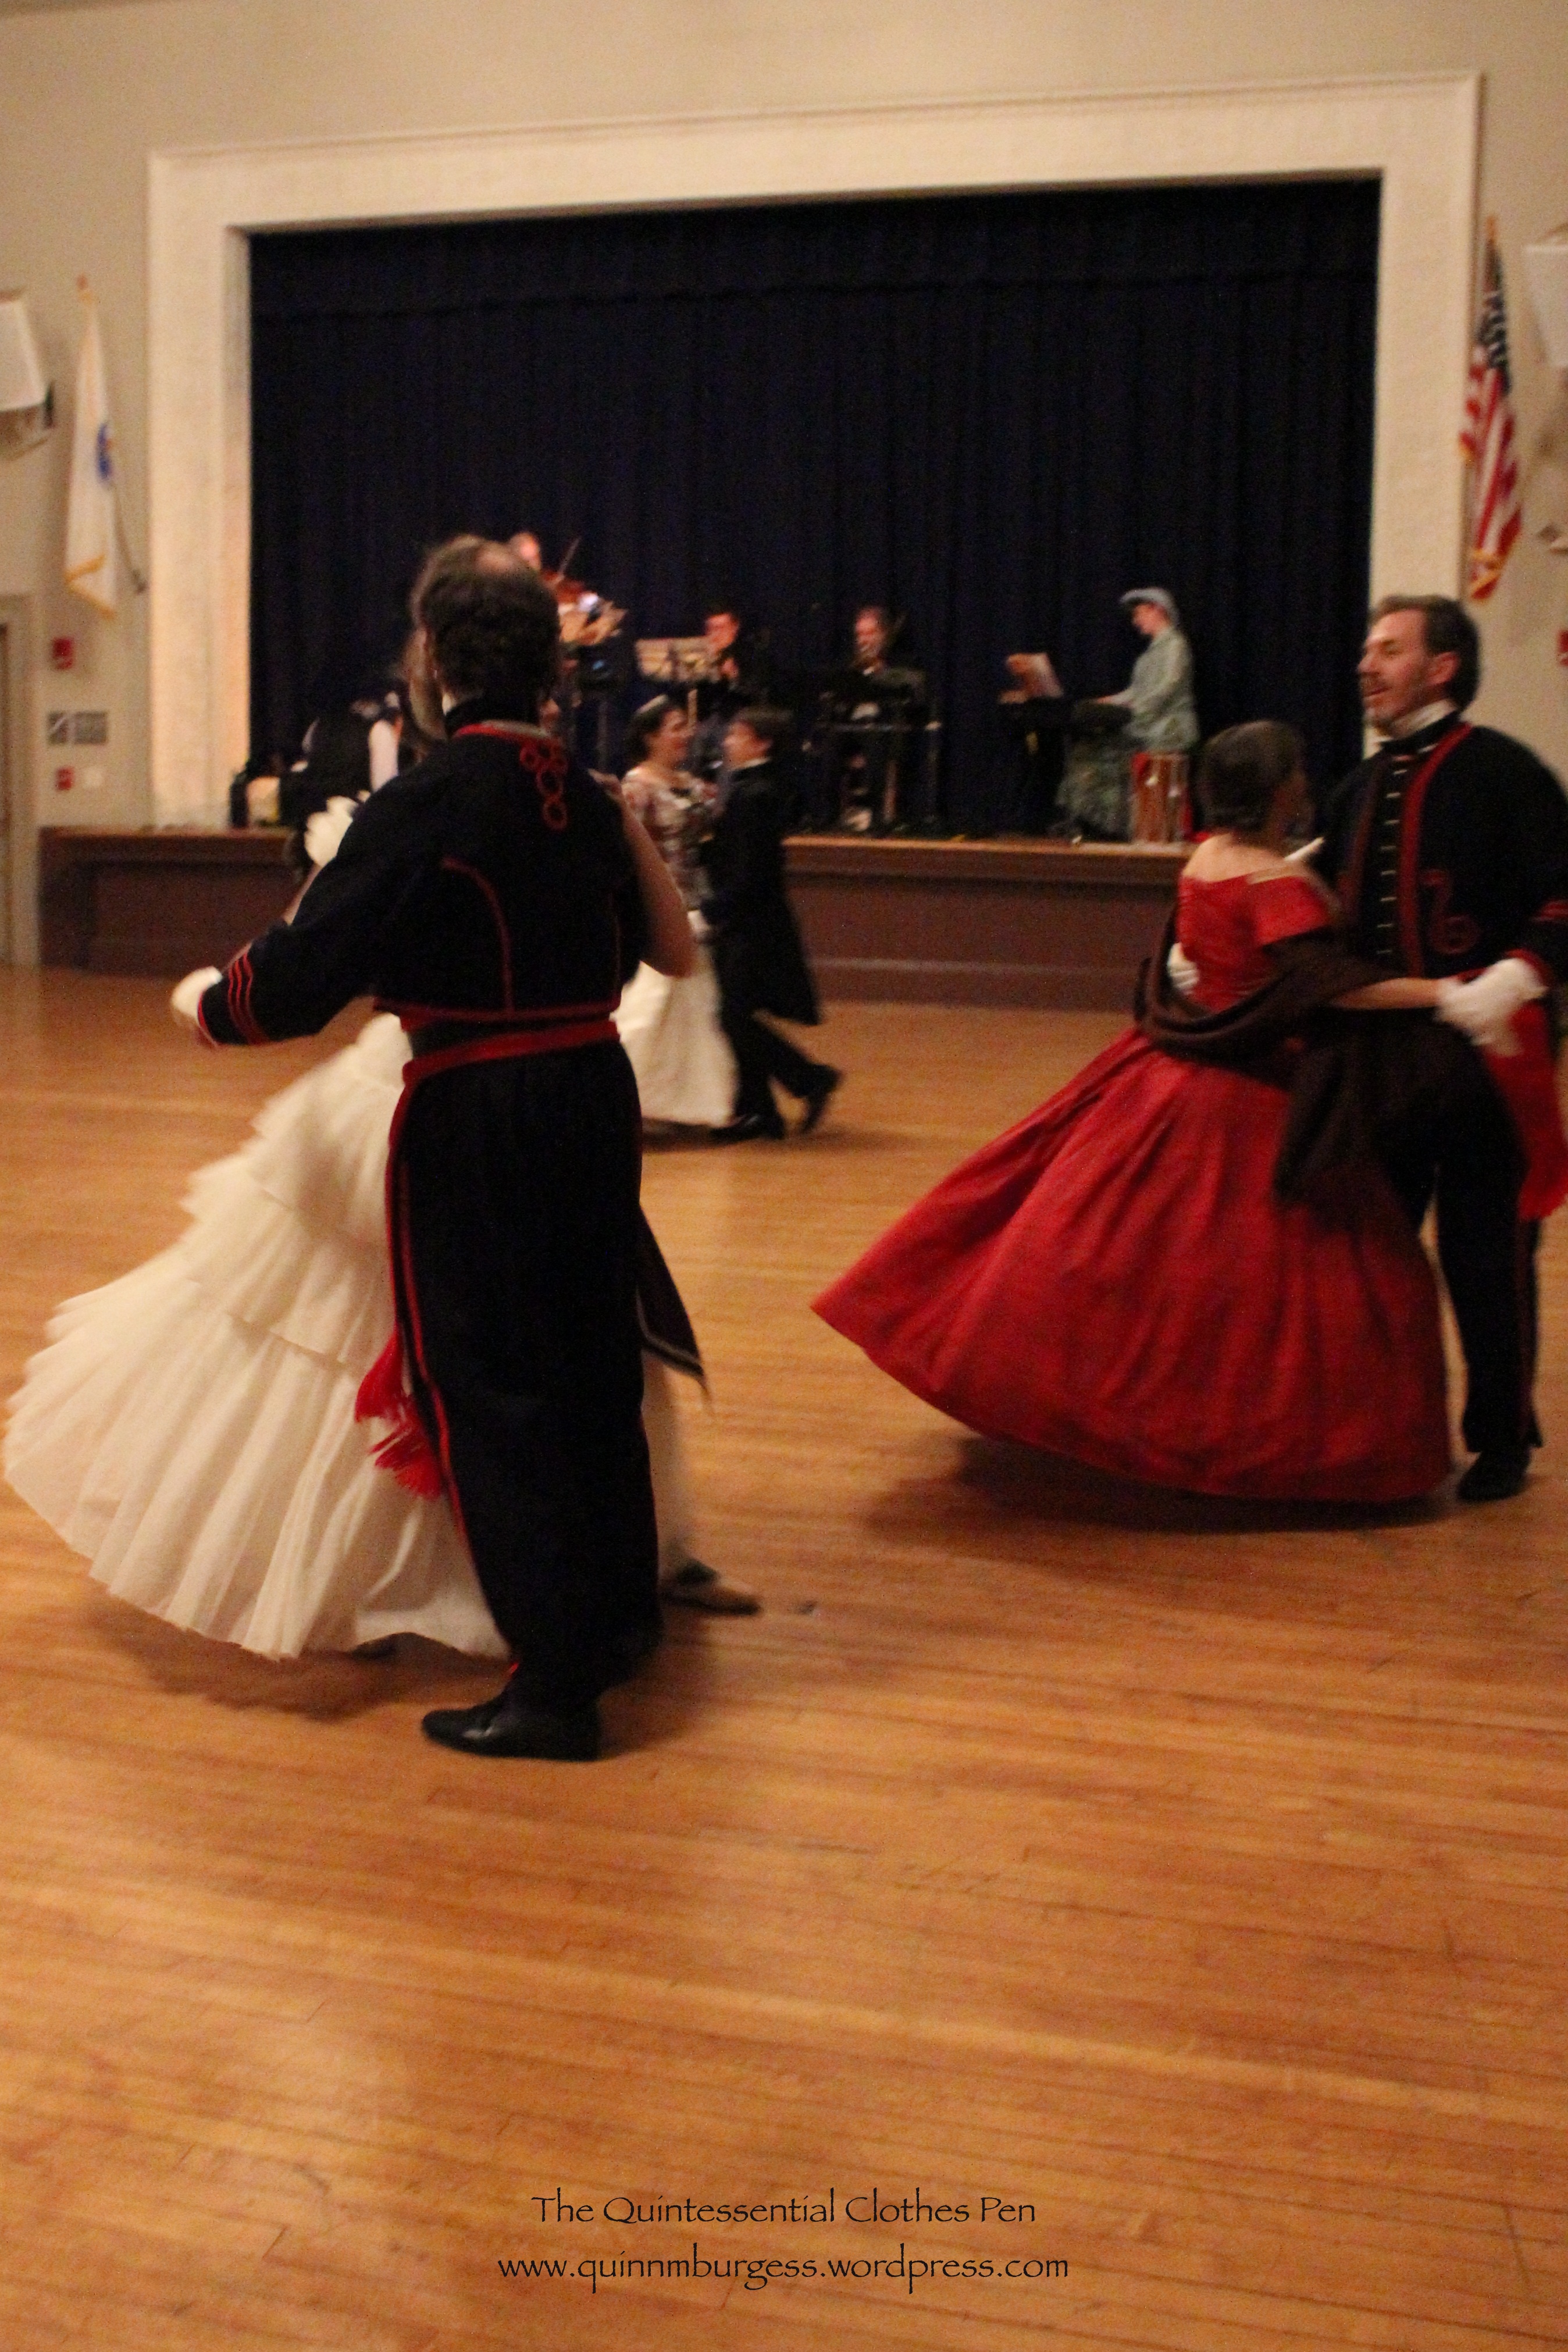
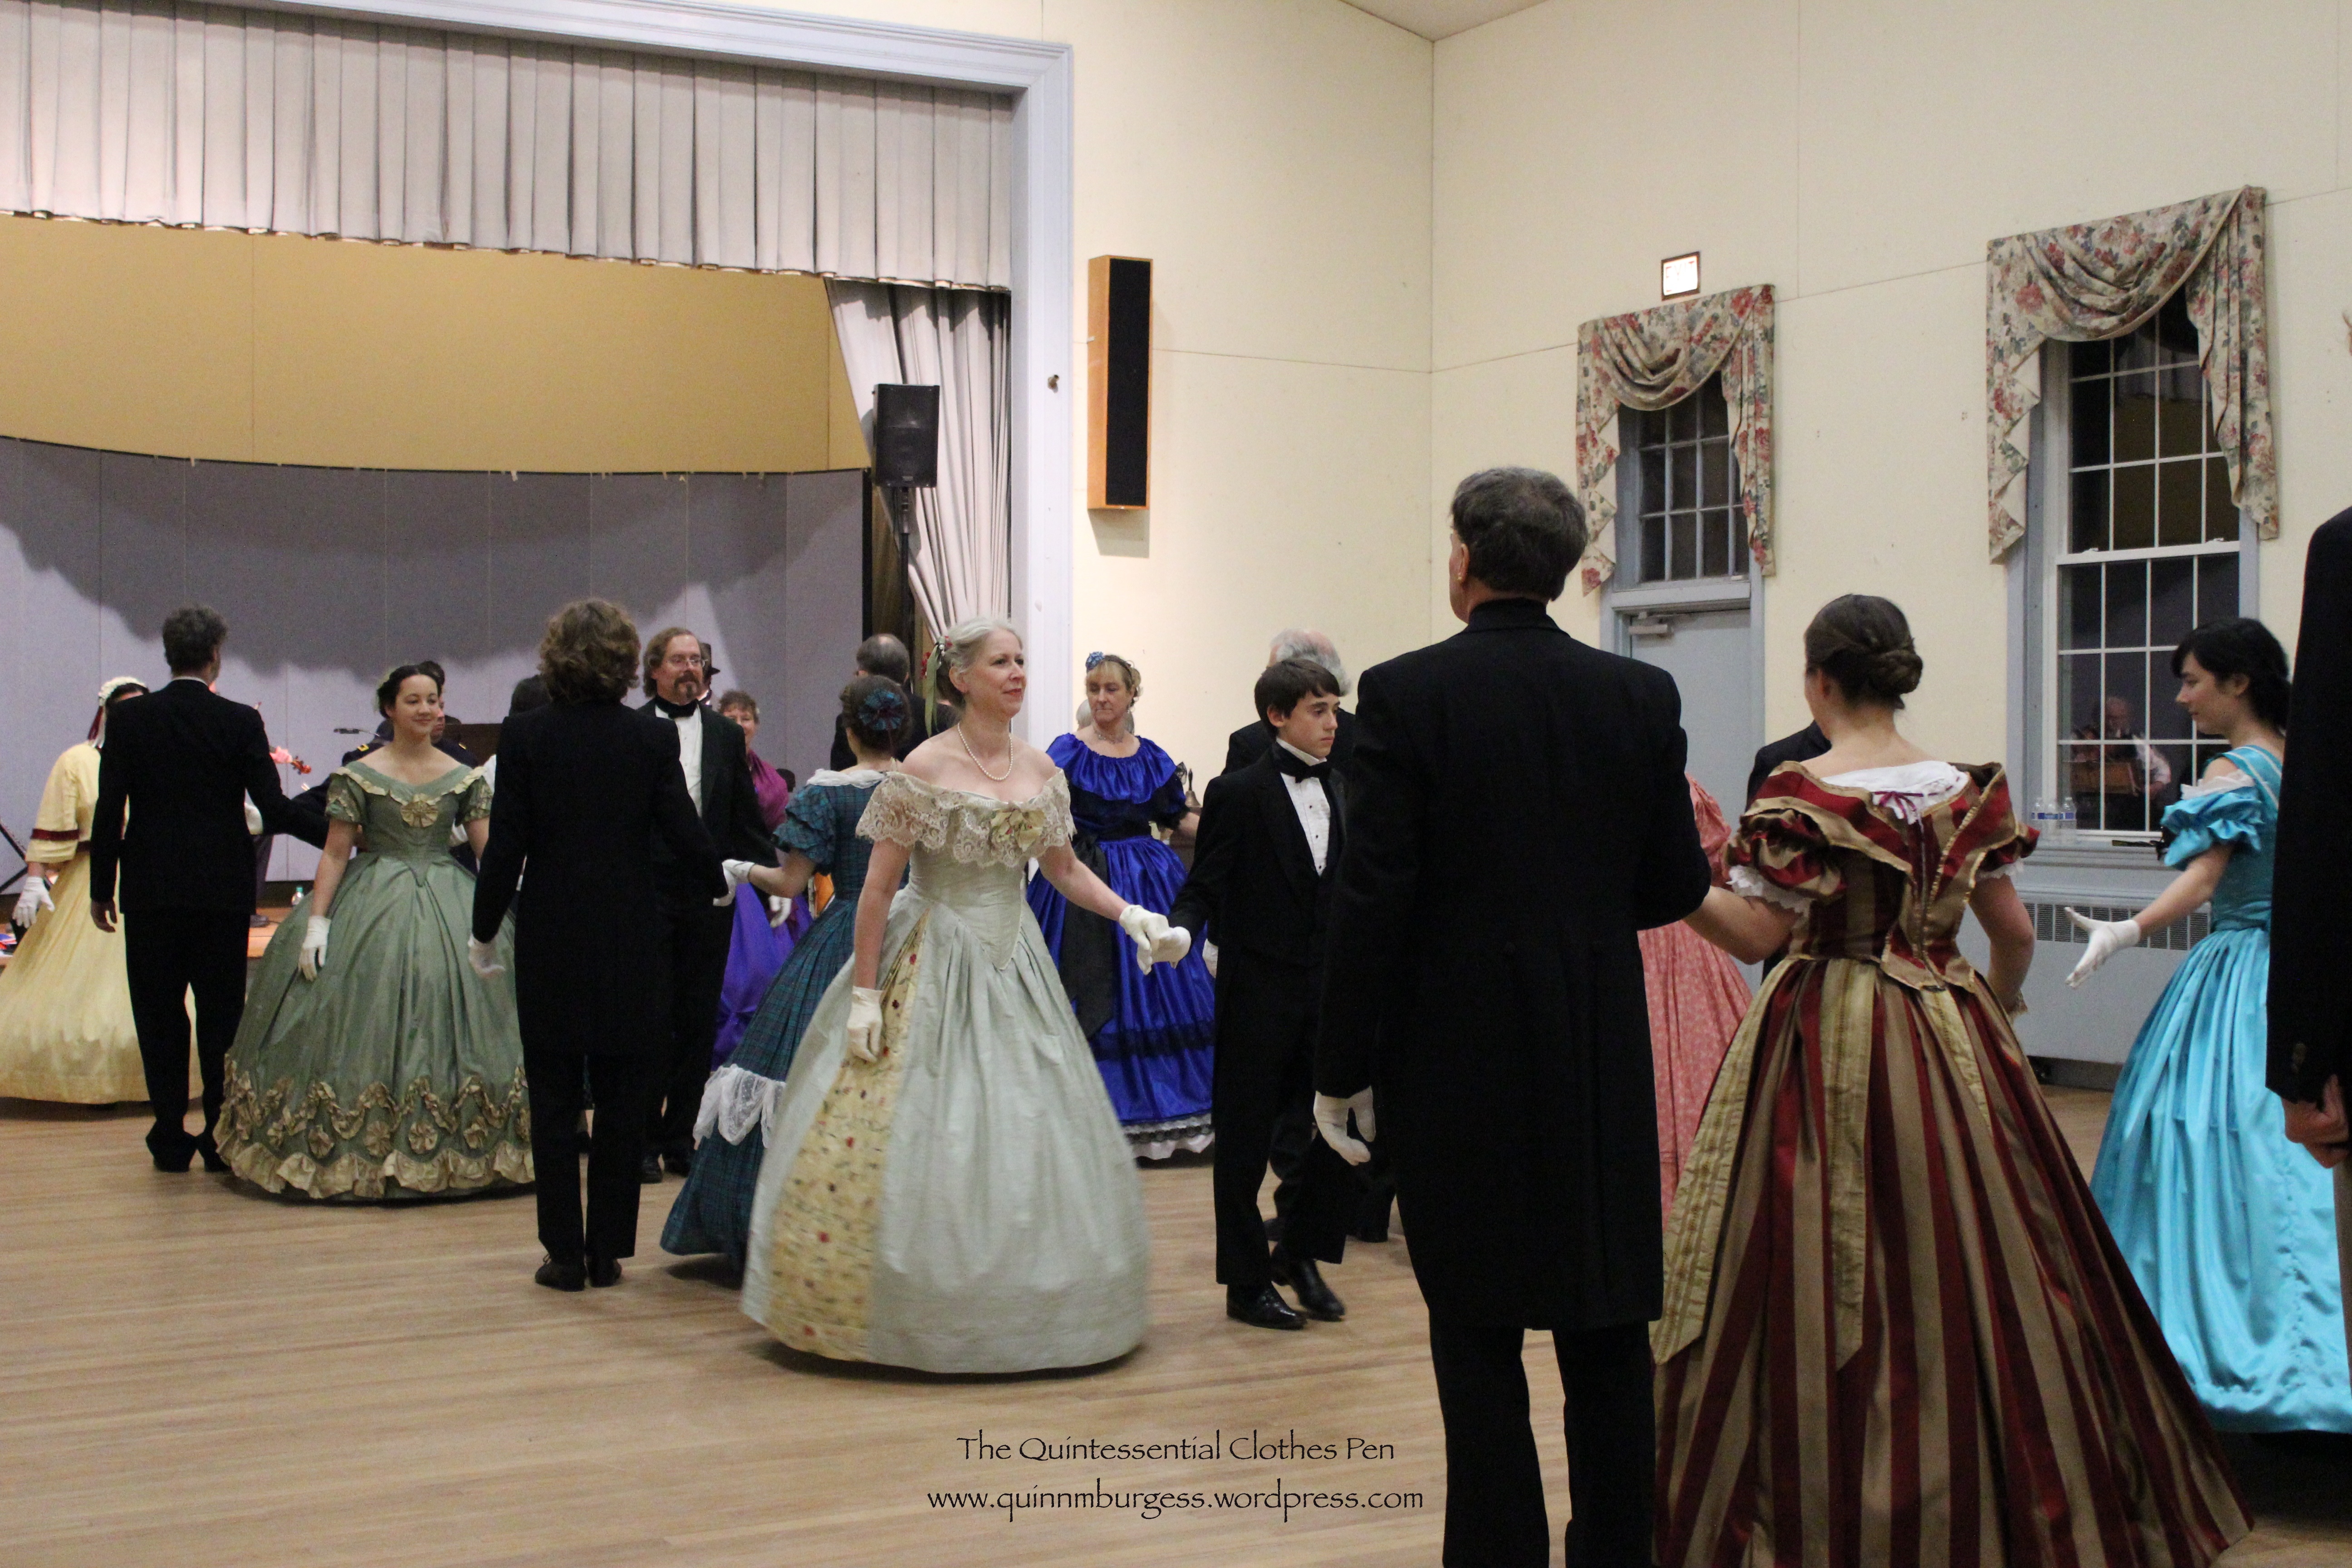
Here are some dancing shots from the ball:


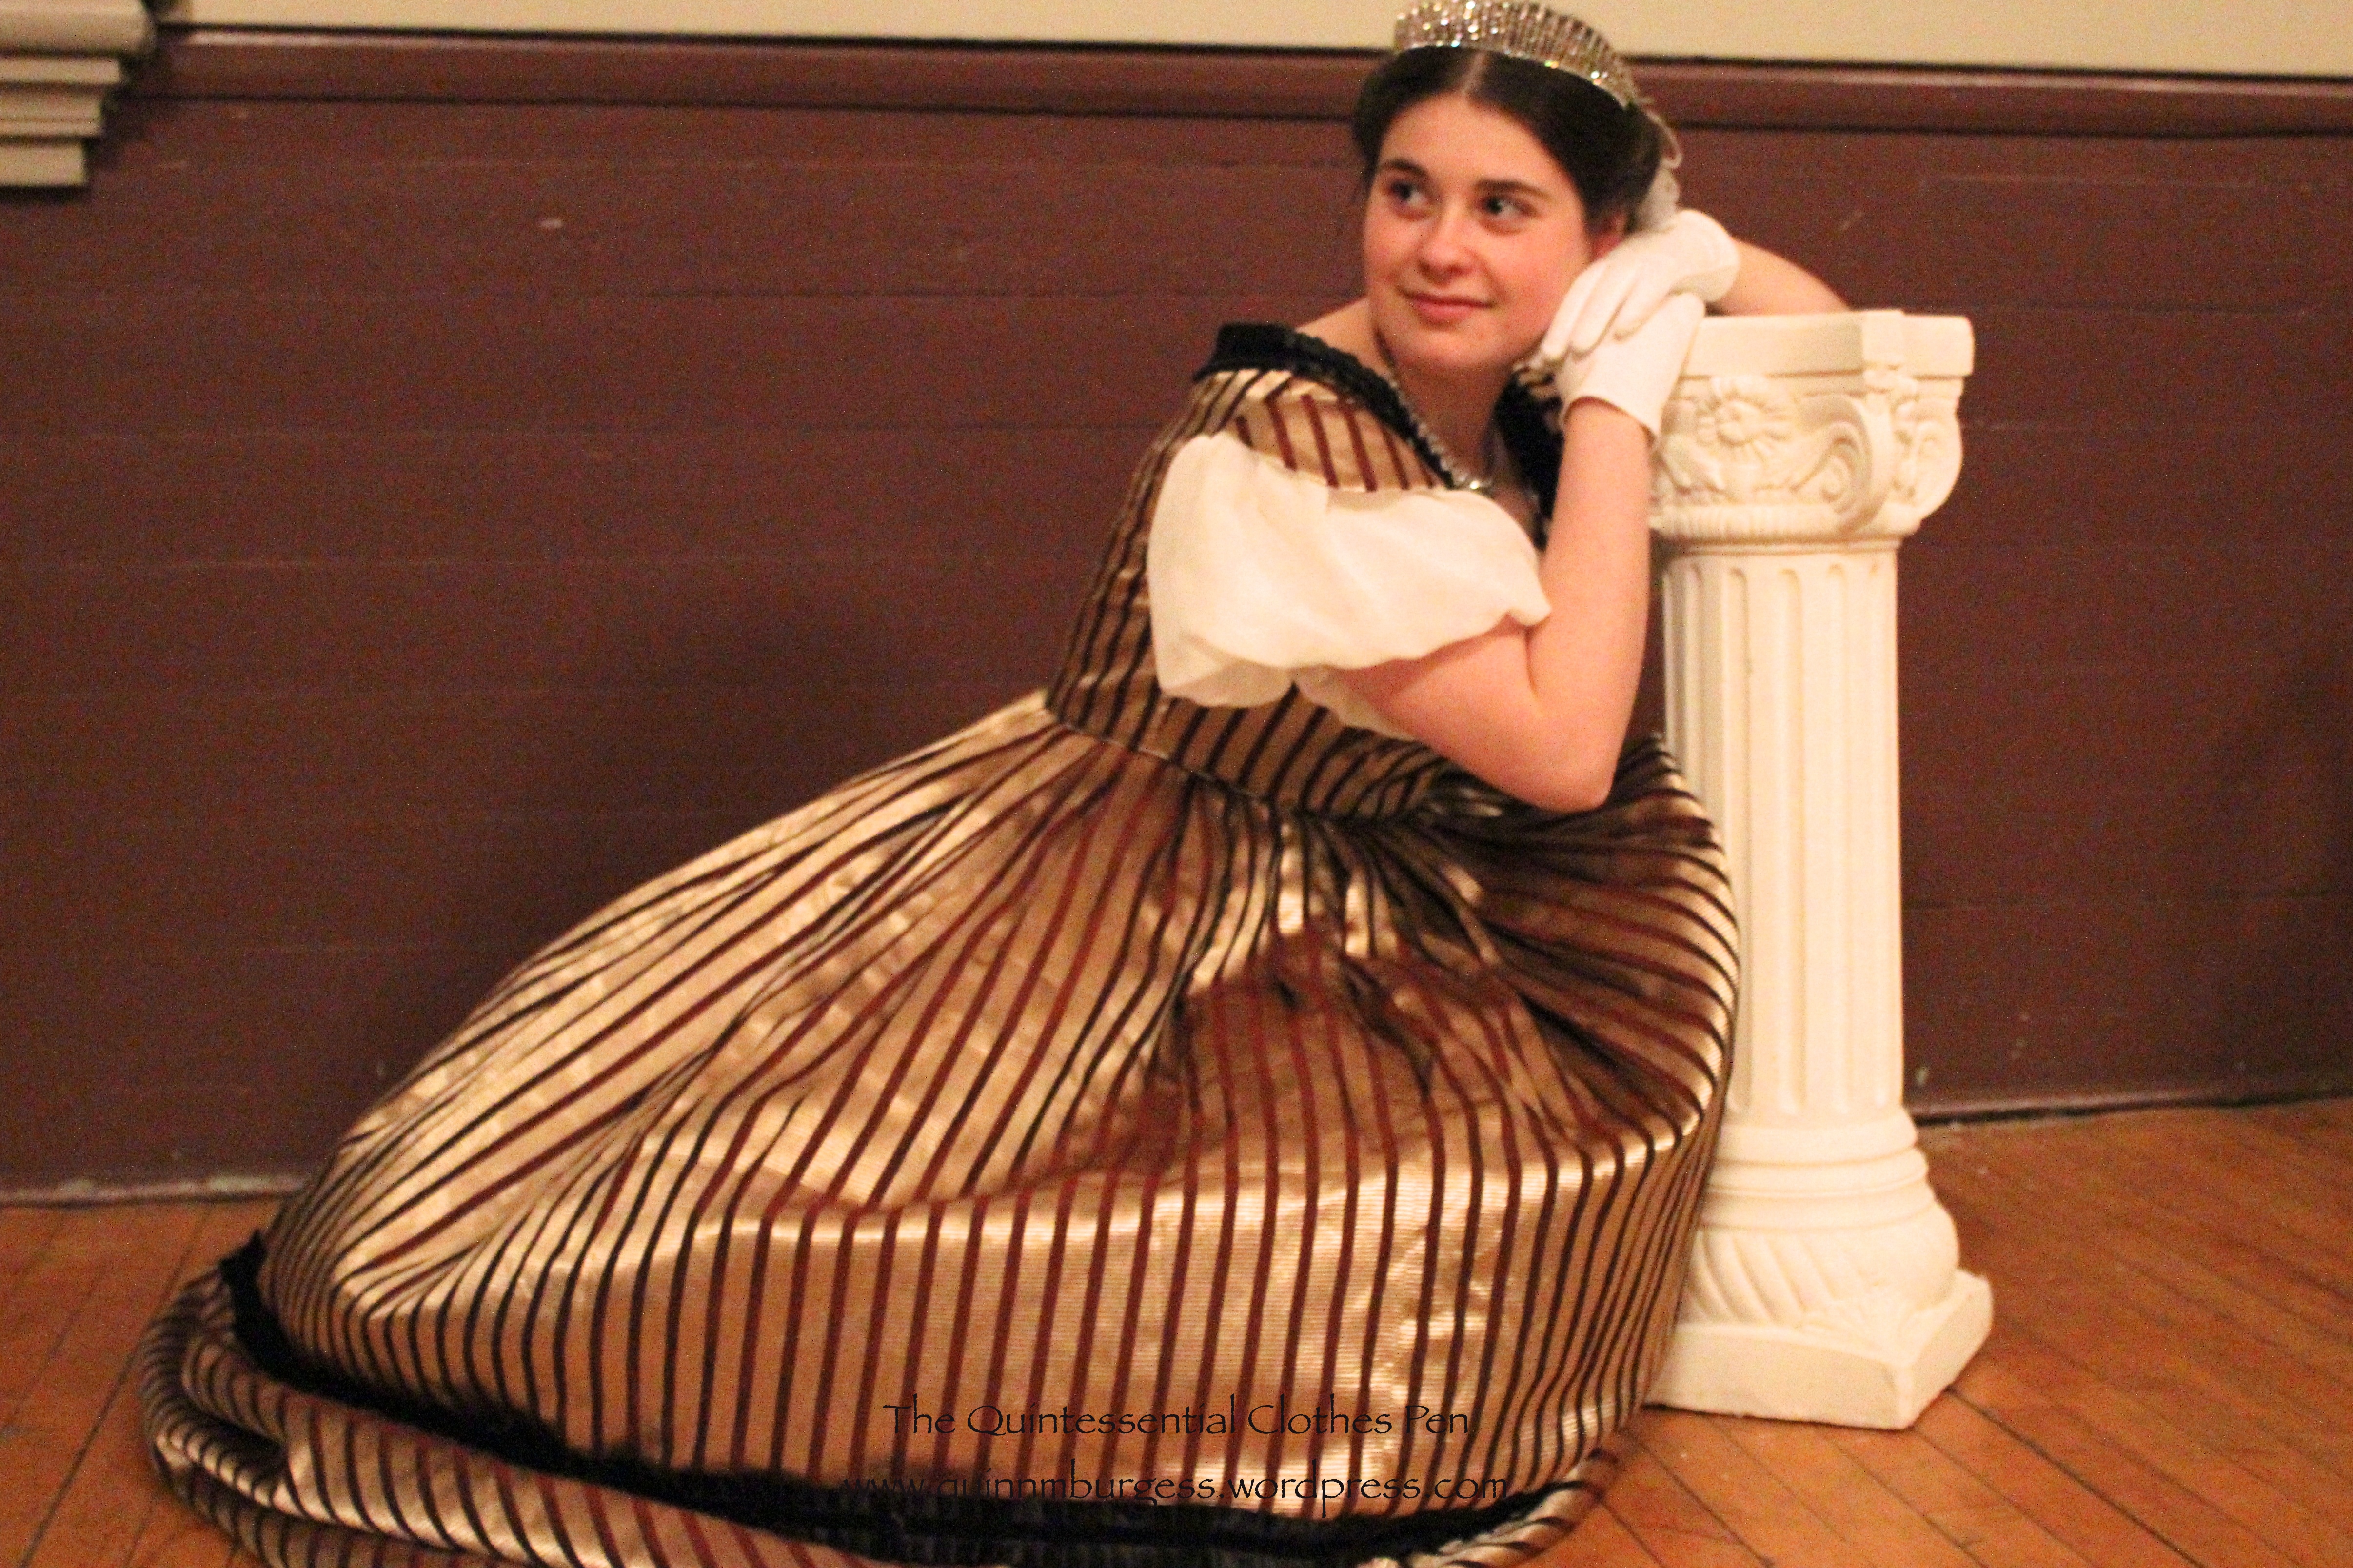
After the ball we took some more not dancing photos. Our prop for the night was a rather short column. And so I present to you a series of column shots:
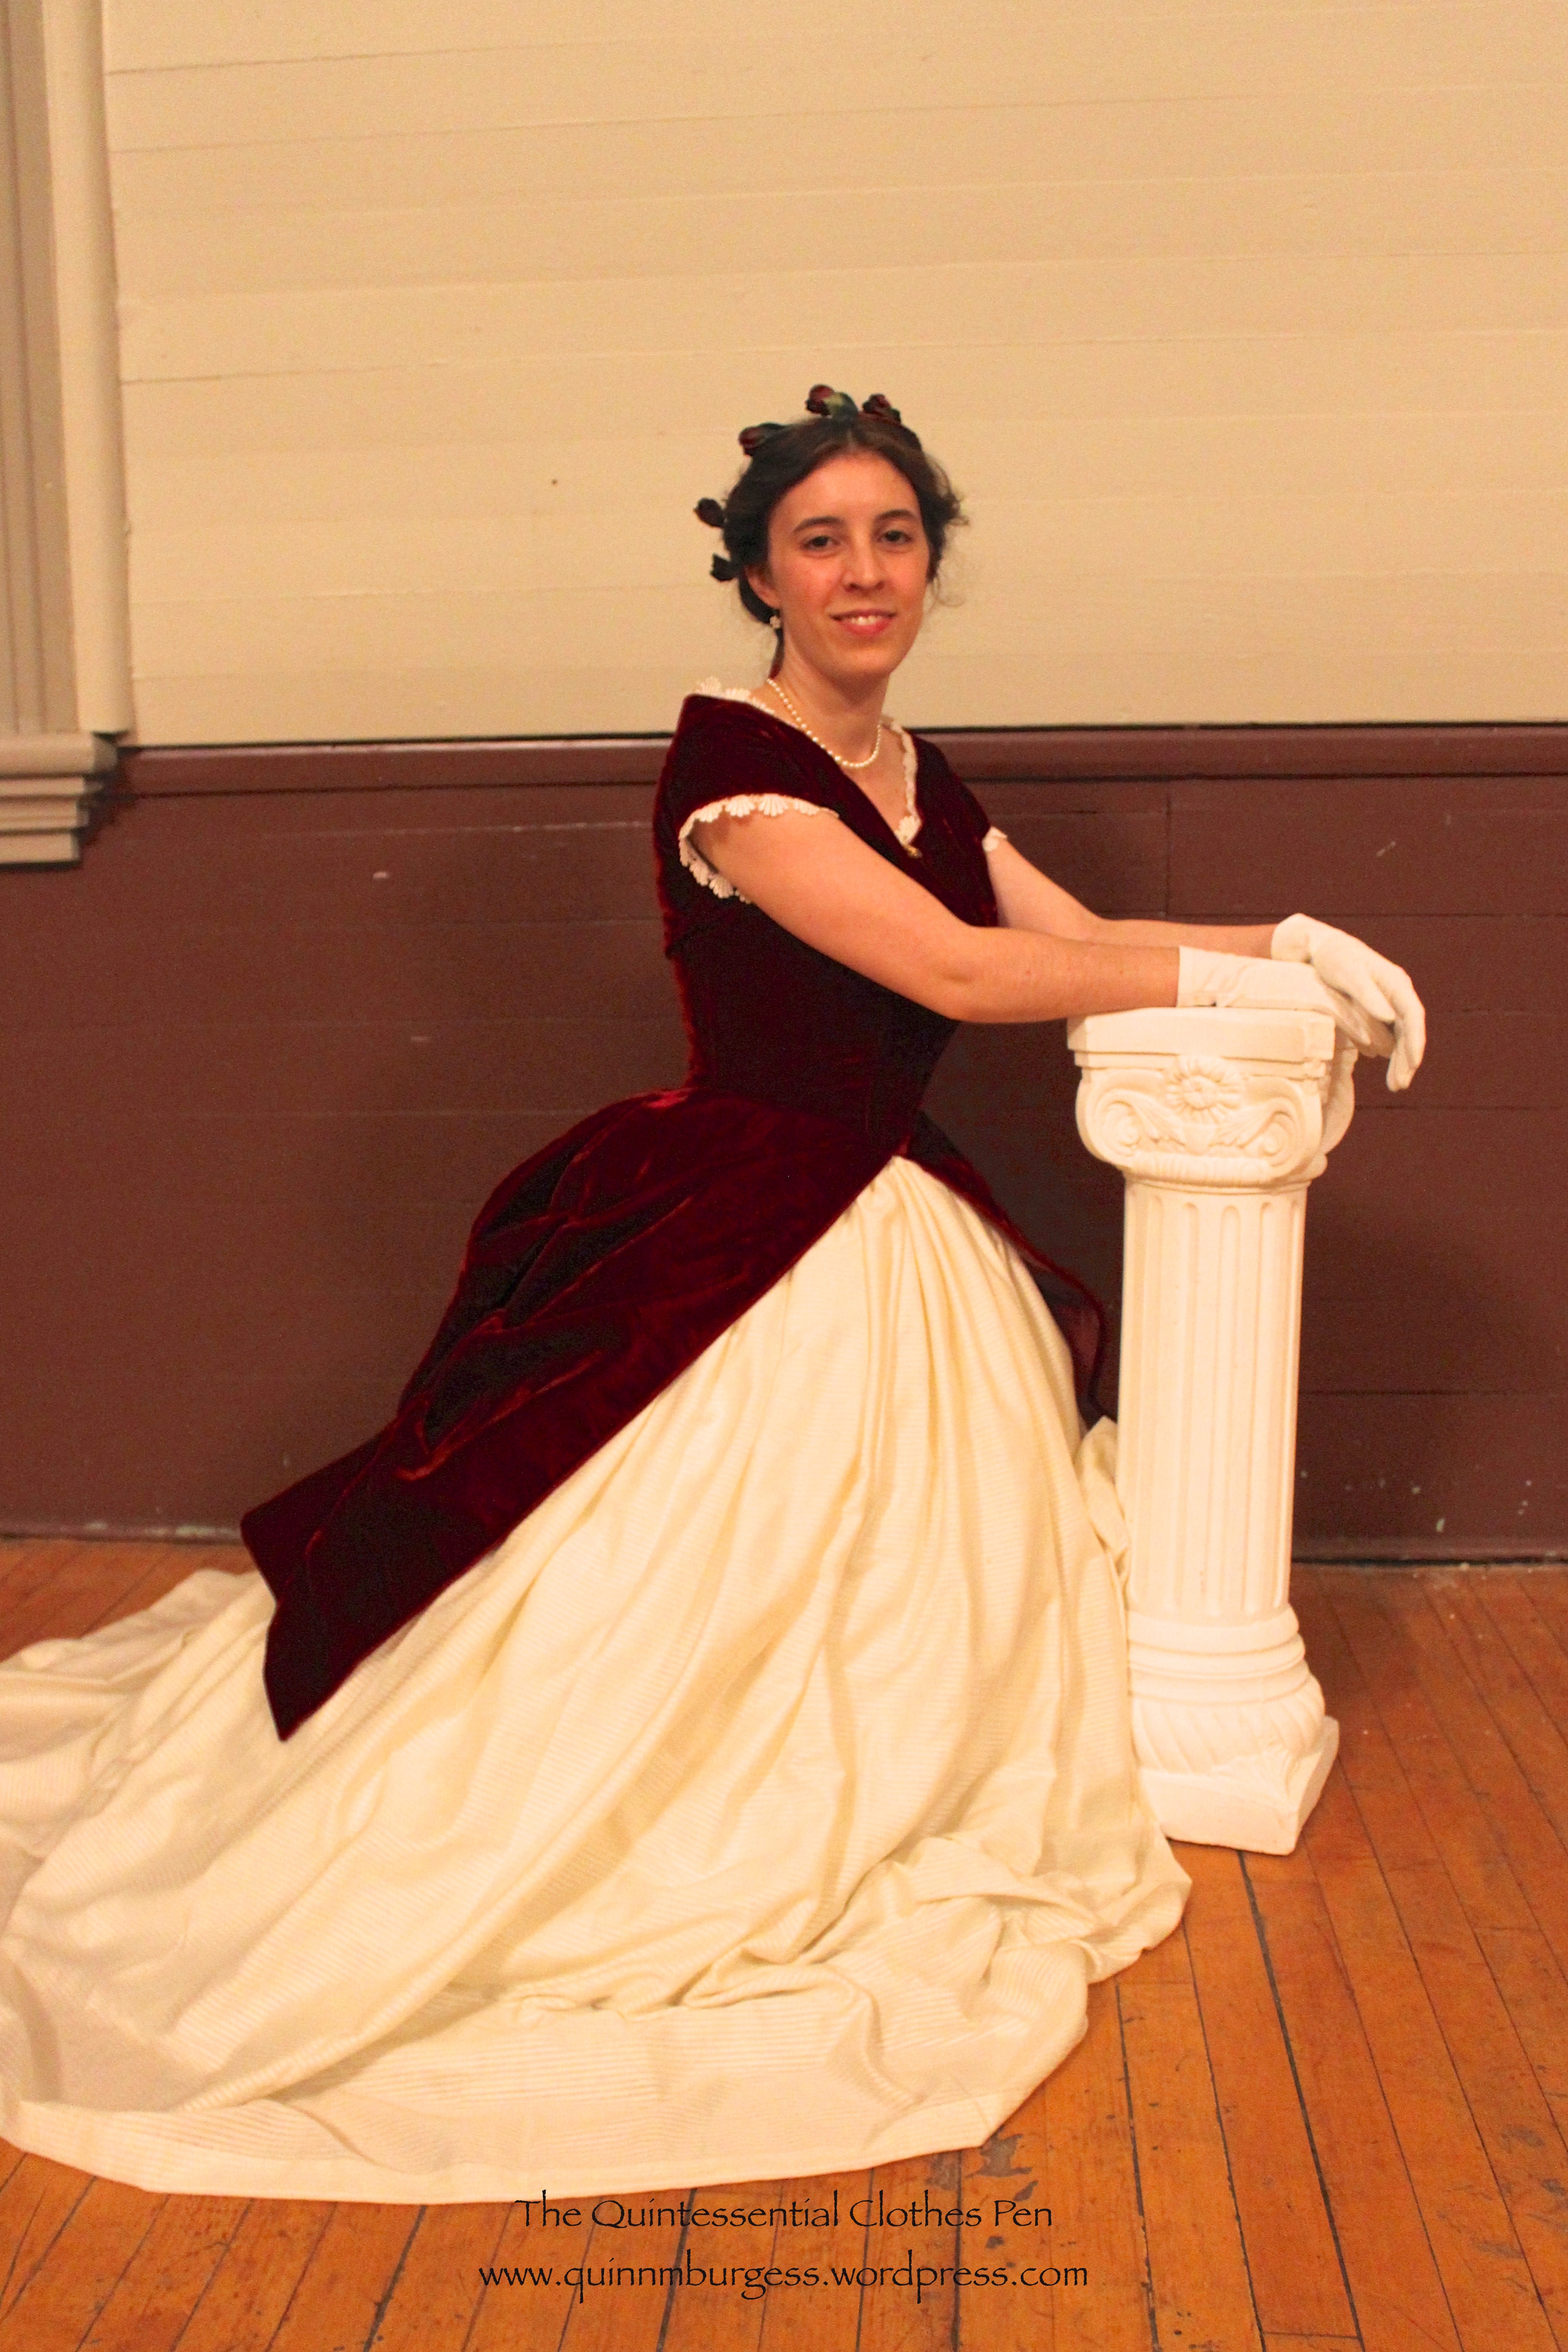
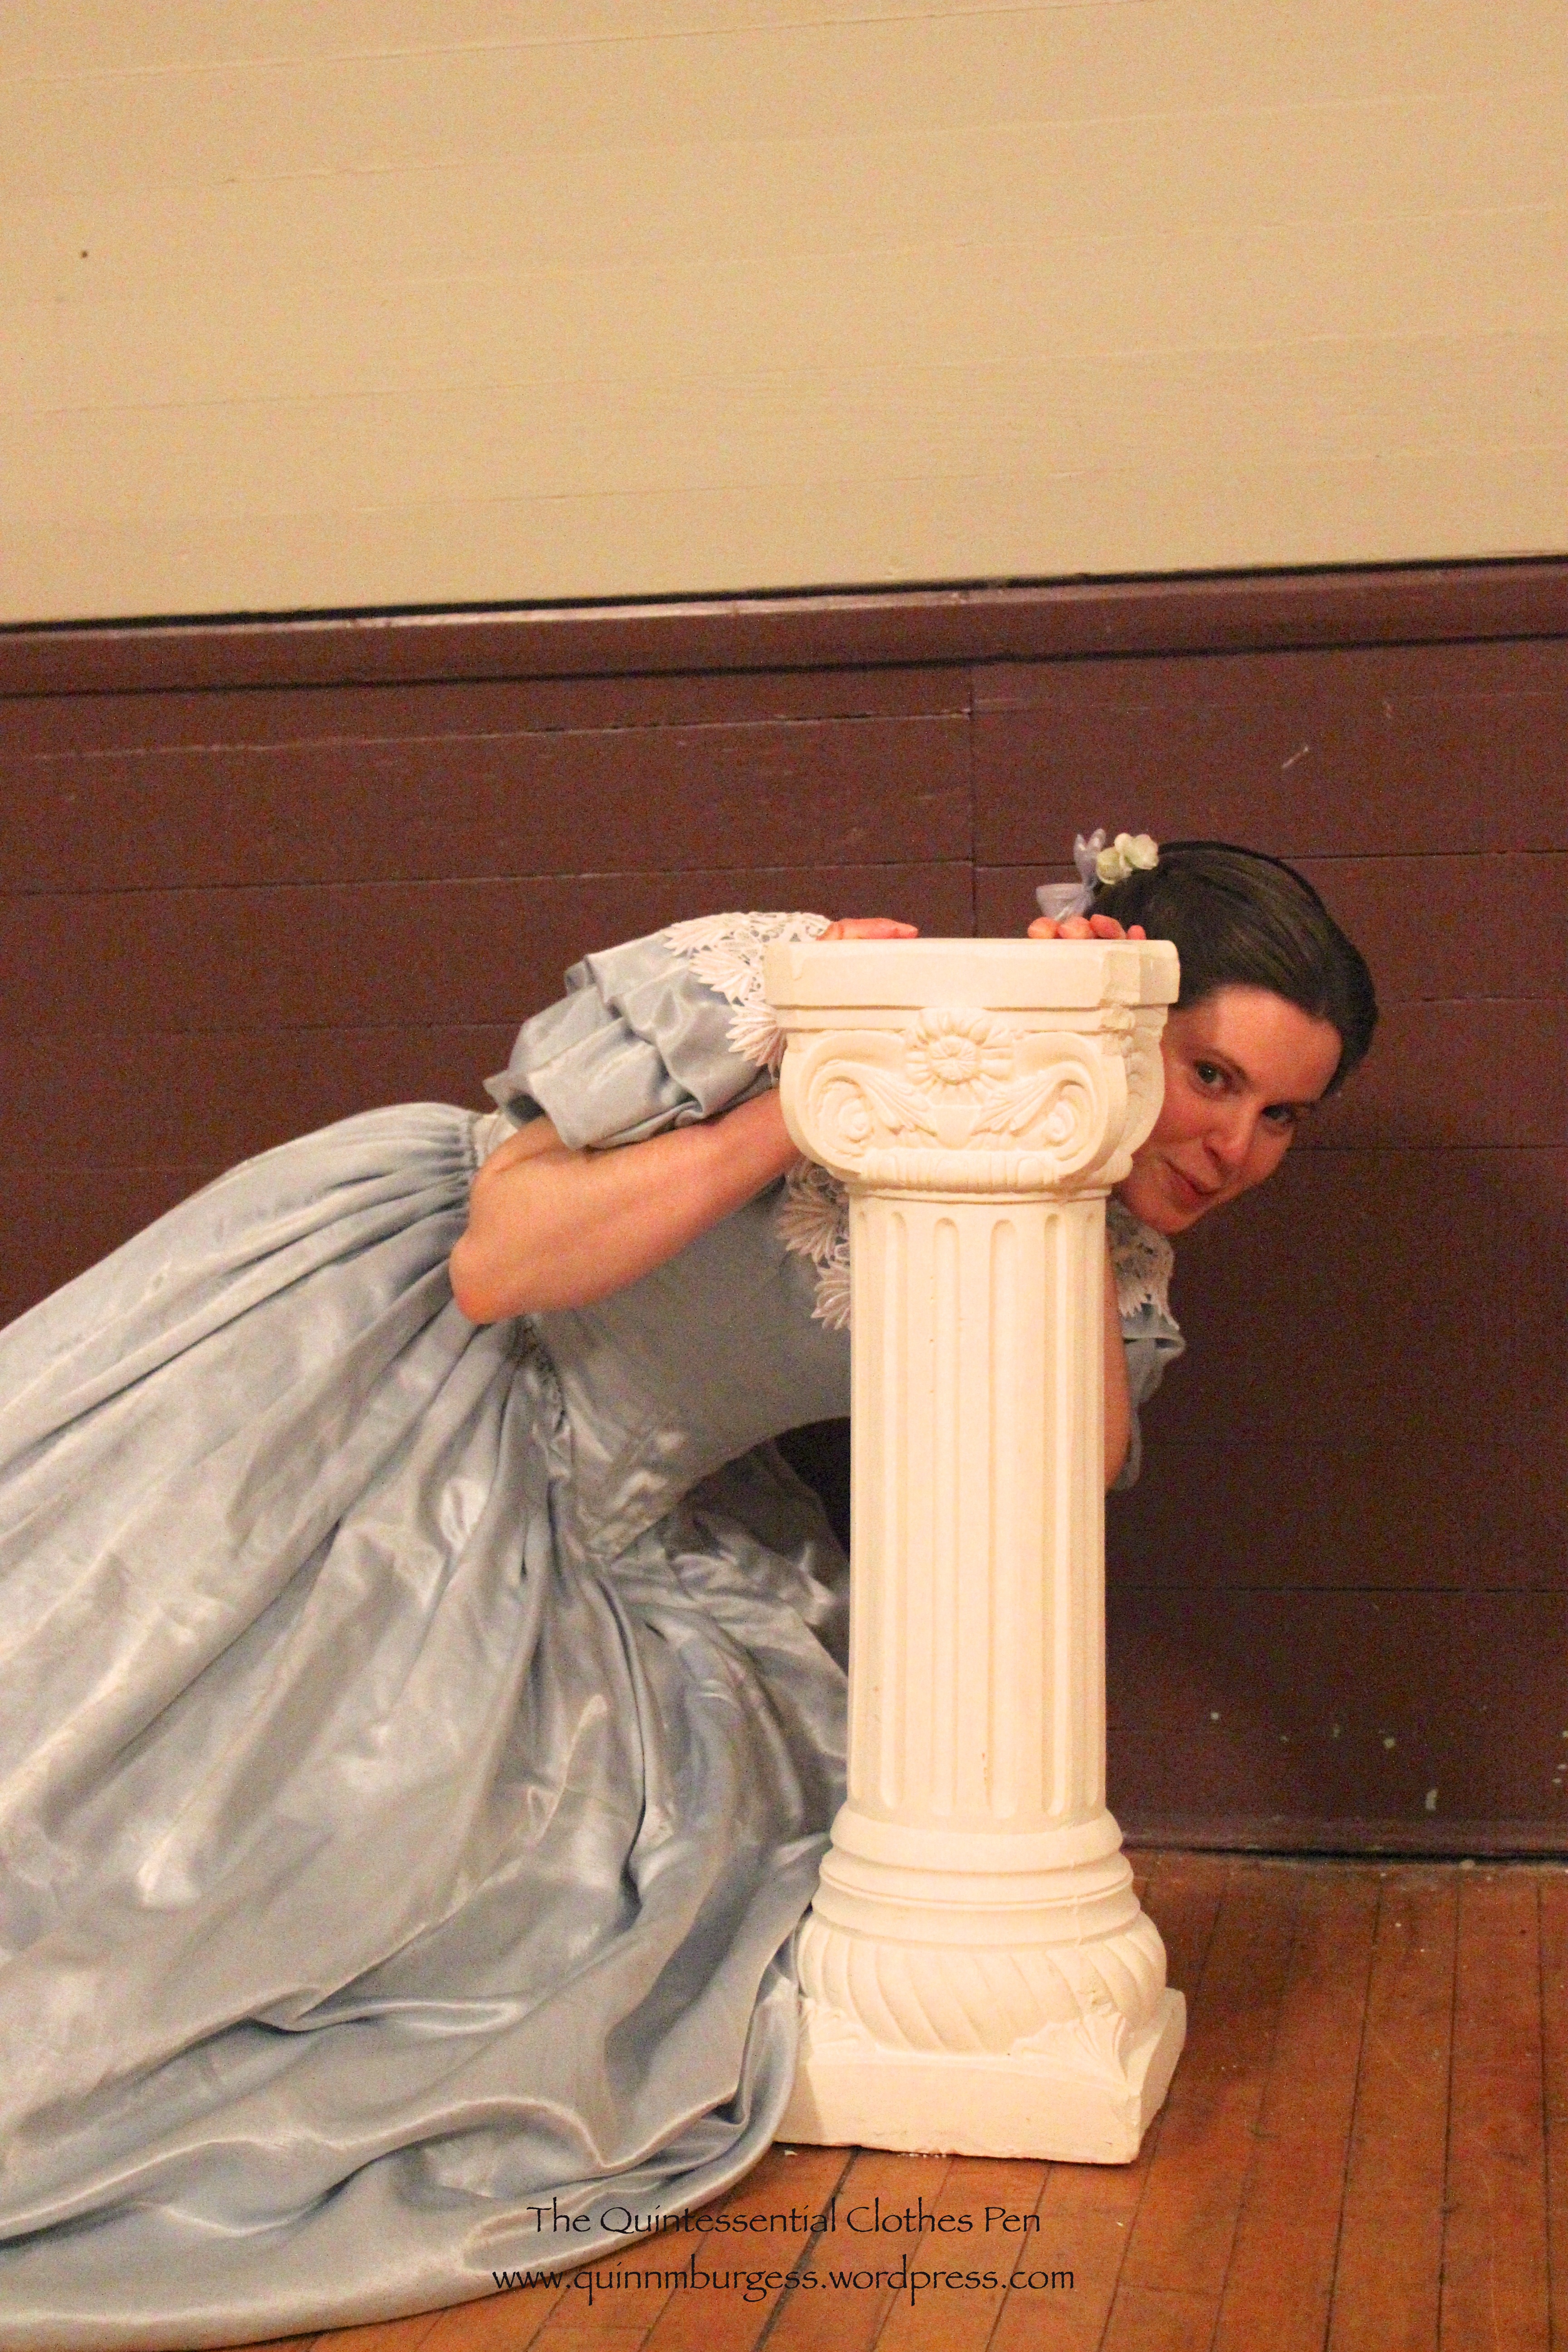


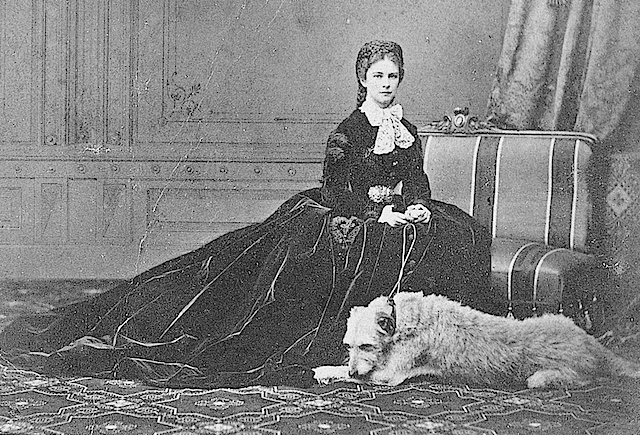
This is my end of the weekend “I’m tired” pose. I love how my tiers fan out and create an elongated effect. It’s quite regal! (The heavy fabric flowing across the floor reminds me of the image below of Sissi–Empress Elisabeth of Austria.)
Well, there you have it. An 1860s dance weekend. I do hope you enjoyed it!
1860s Dance Weekend: Part I, Saturday
December is going to be a whirlwind of HSF posts and posts about events, so I need to hurry up and get started by sharing pictures of an event that actually happened in November but which I haven’t shared pictures of yet. The event was a 1860s Intensive Dance Weekend, hosted by the Commonwealth Vintage Dancers, featuring two days of dance classes, two evening balls, and a German (an after ball party of fun dance games). I’ve got lots of pictures, so I’m going to split this up into two posts. In today’s post, I’ll share pictures of the Saturday of the dance weekend and Part II will be pictures of the Sunday of the dance weekend.


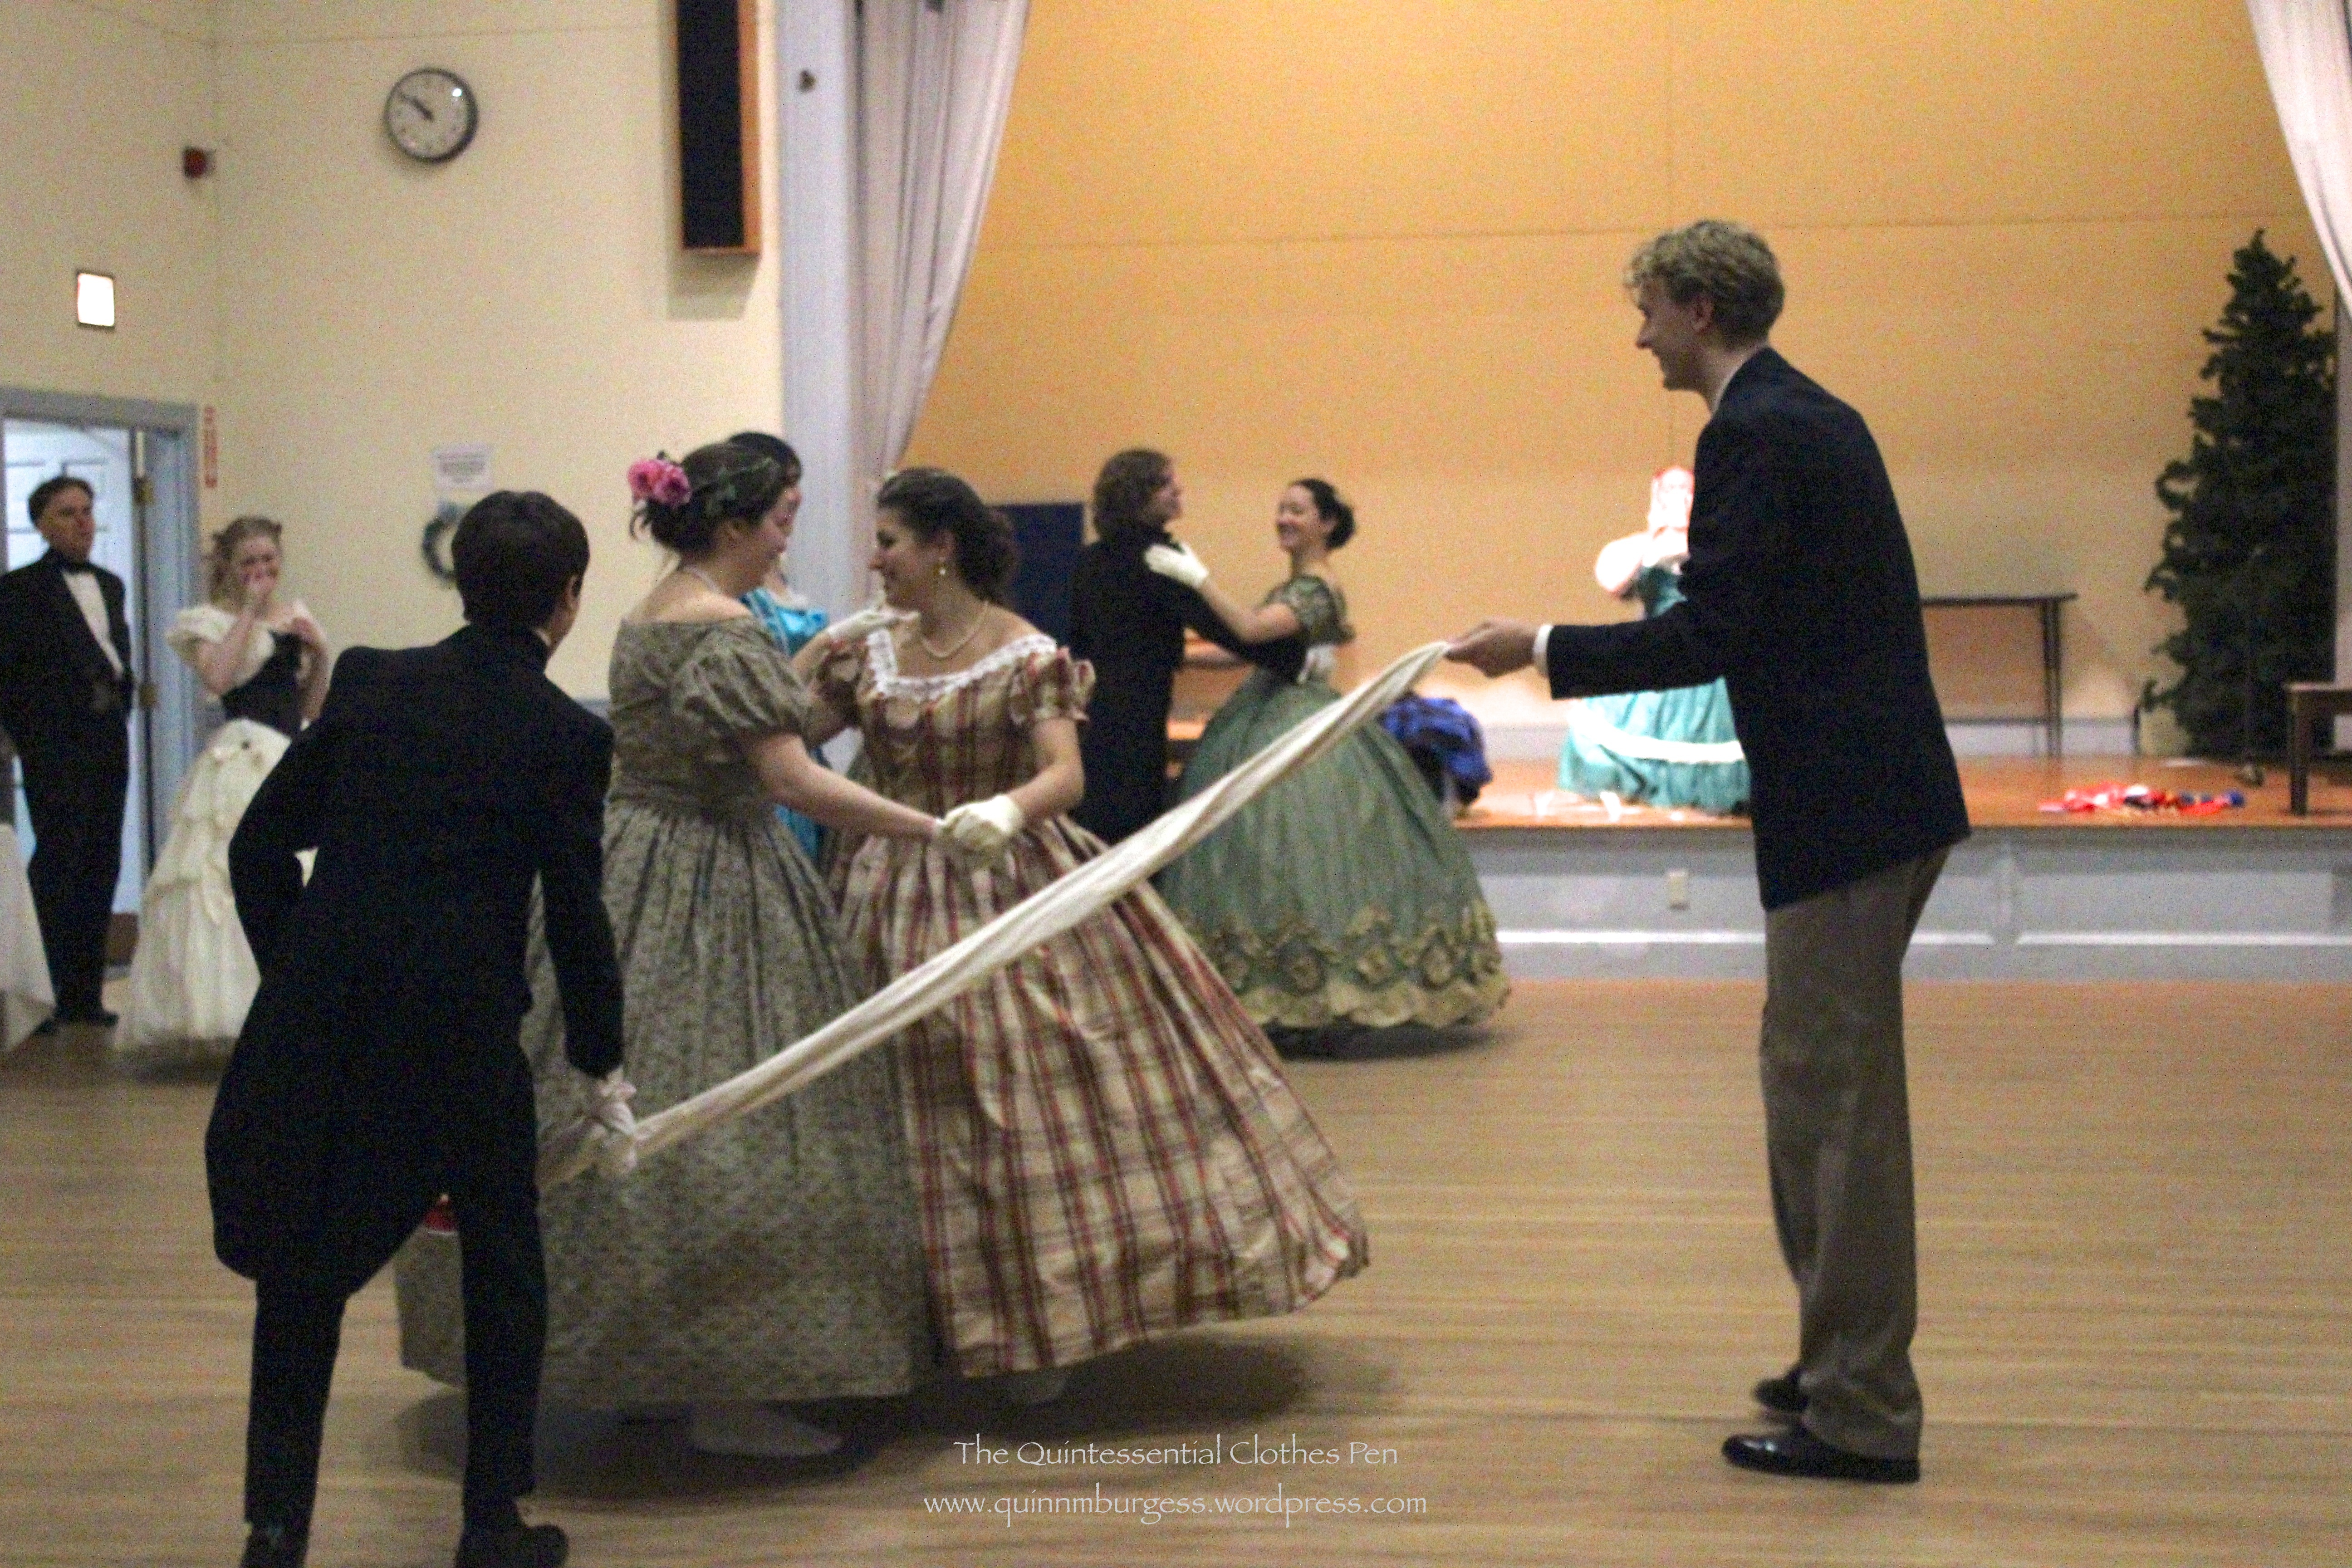

All in all a fun and energetic day and night of dancing, especially with the German that was directly after the ball. I hope you enjoyed these.
HSF #24: 1917 Fur Hat (And Revised Muff)
The theme of this HSF challenge is Re-Do, in which you re-do a previous challenge for a second time or you re-do a challenge you didn’t complete the first time around.
I’m using my recently completed 1917 fur hat and recently revised matching muff as my entry for this challenge. I think the hat and muff best qualify for a re-do of Challenge #20: Outerwear, which I did complete with my 1822 Walking Dress (so this would be a re-do of a challenge I already completed). So, the facts:
Fabric: About 1/4 yd of faux fur and about 1/4 yd cotton flannel.
Pattern: Created by me.
Year: 1917.
Notions: Thread, polyester batting.
How historically accurate?: 90%. Tall round hats of this sort were popular in 1917, though they were likely made of real fur rather than faux fur. The revised muff has a great shape for lots of periods, including this one, and is pretty accurate, aside from the fact that it is also faux fur. Oh, and neither hats nor muffs were insulated with poly batting… but it is so warm! And no one will know except me, and those of you reading this!
Hours to complete: Unknown. I was pretty tired while working on the hat, so I know it took longer than it should have. The muff was quick (like 2 hours) but that’s just the revision. I don’t remember how long it took to make it originally.
First worn: At a Thanksgiving event in Plymouth.
Total cost: None, since I bought the fur and the flannel specifically for the muff over two years ago I count it as a stash project.
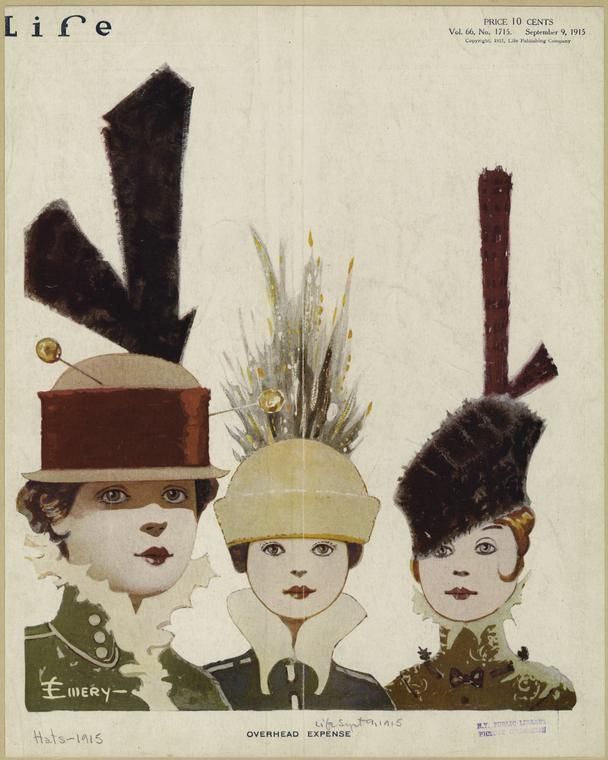
Here’s my inspiration for the hat. I was aiming for the exaggerated shape on the right. I don’t think I quite achieved that, unfortunately. I did actually spend a lot of time patterning the hat so it would look right sitting at an angle rather than straight. I think I was so cold when I was wearing it that I pulled it down to cover more of my head and thus pulled it off of its angle. Sad! But also, the thick fur rather obscures the shape anyway. I chose not to do the sticky-up bit, partly because I ran out of time, and partly because I just didn’t know what to make it out of, since the hat was already fur. Oh well. I really like that middle hat, too…
I originally made the muff for an 1860s event a few years ago. I had a plan to use gathered silk for the two ends, but it turns out it looked cooler in my head than when I executed the plan. Also, the muff was a little longer than I liked, so I decided that for this event I would shorten the muff by taking off the silk ends and folding the fur over to cover the ends. Here’s my Pinterest board of inspiration for this project. You’ll see that there are various shapes and sizes of muffs c. 1917. Mine is somewhere in the middle in terms of size and shape.
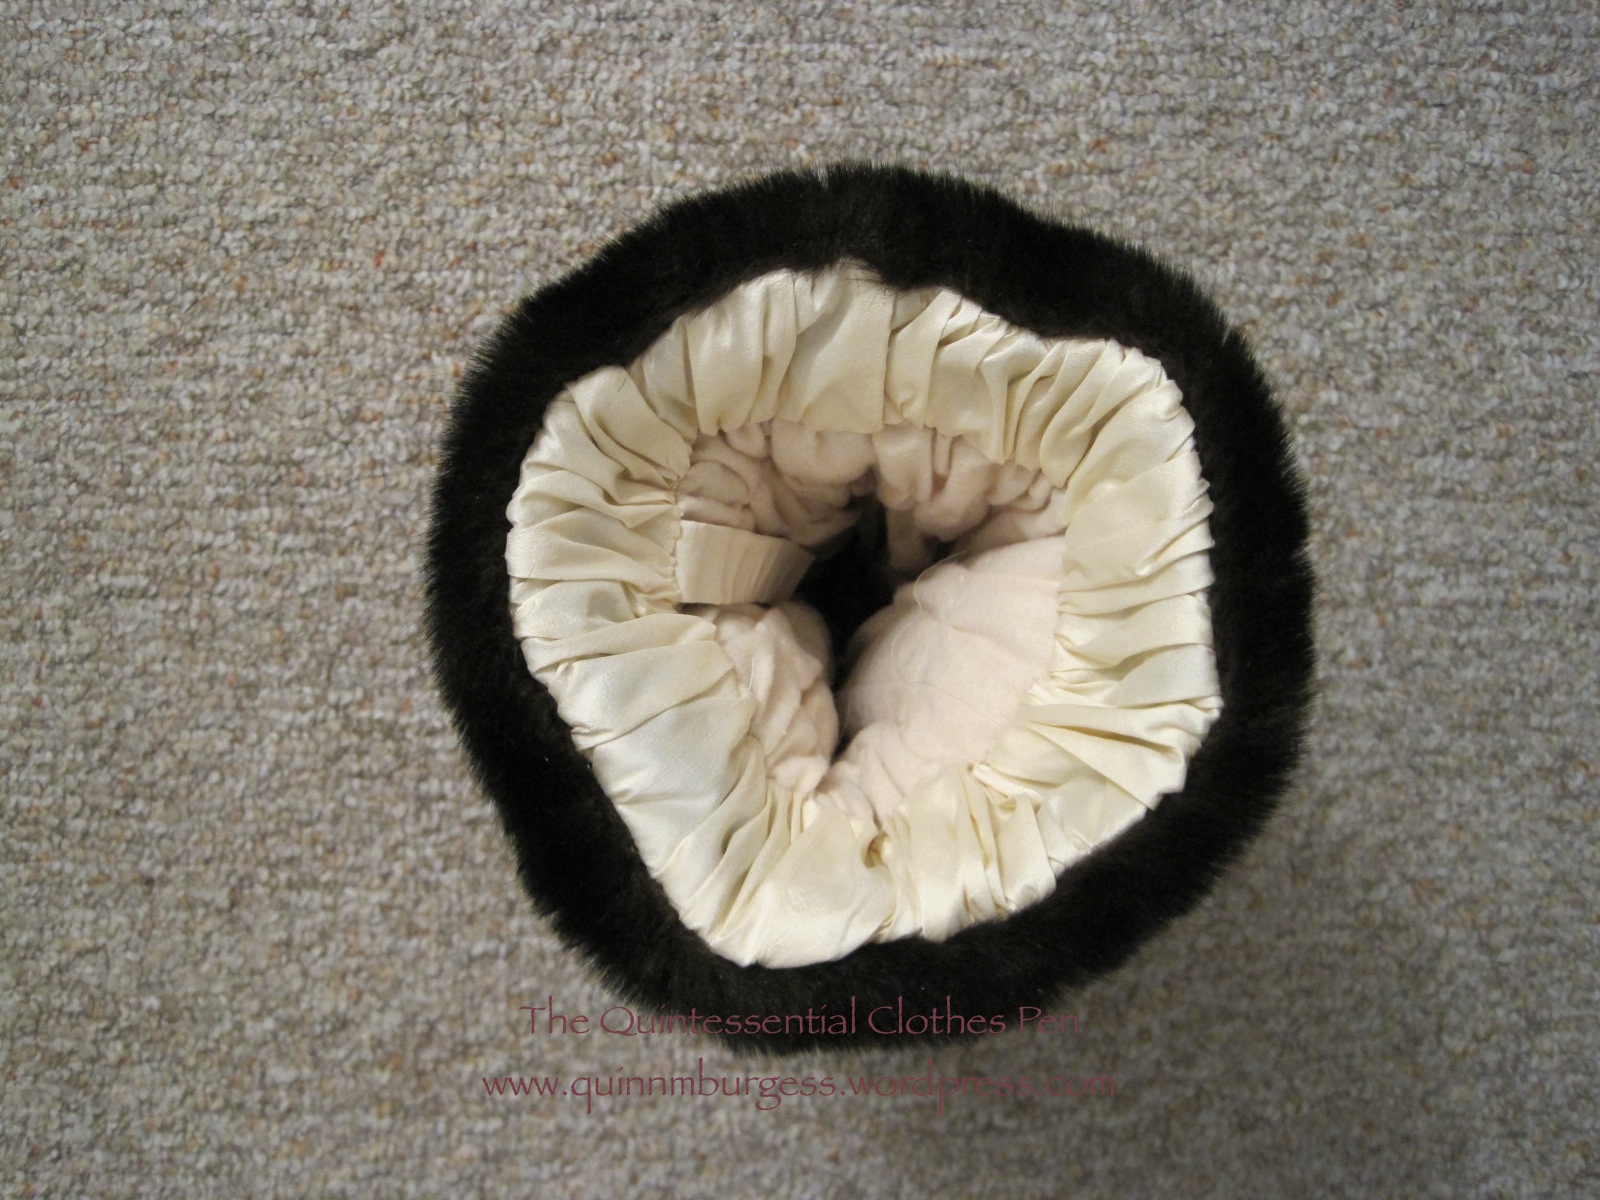
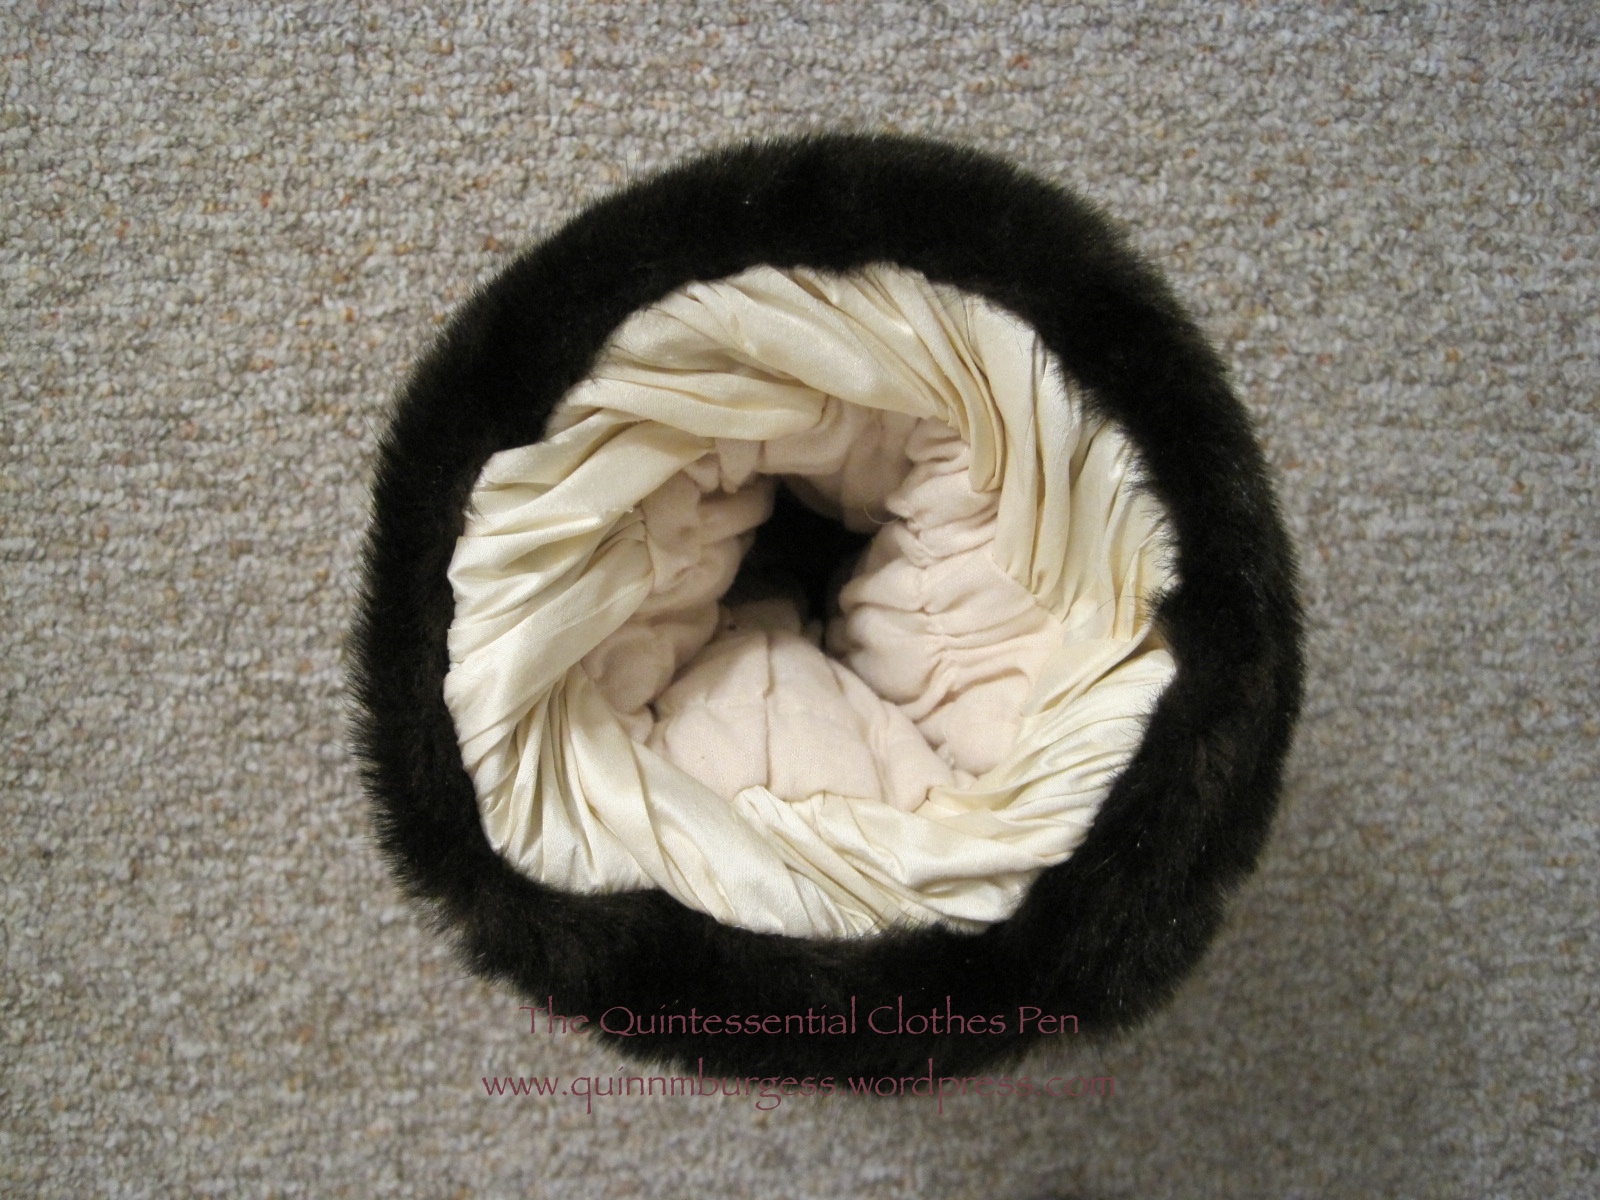
But as I said, I took the silk off, folded the fur down over the ends, and sewed it directly to the flannel. (I have plans to use the silk for a Regency reticule at some point in the future… yay recycling!) You can see the results in these next few pictures. I’m quite happy with the results! The muff is about 3″ shorter and I like the look of the fur on the sides.


Thankful For Suffrage
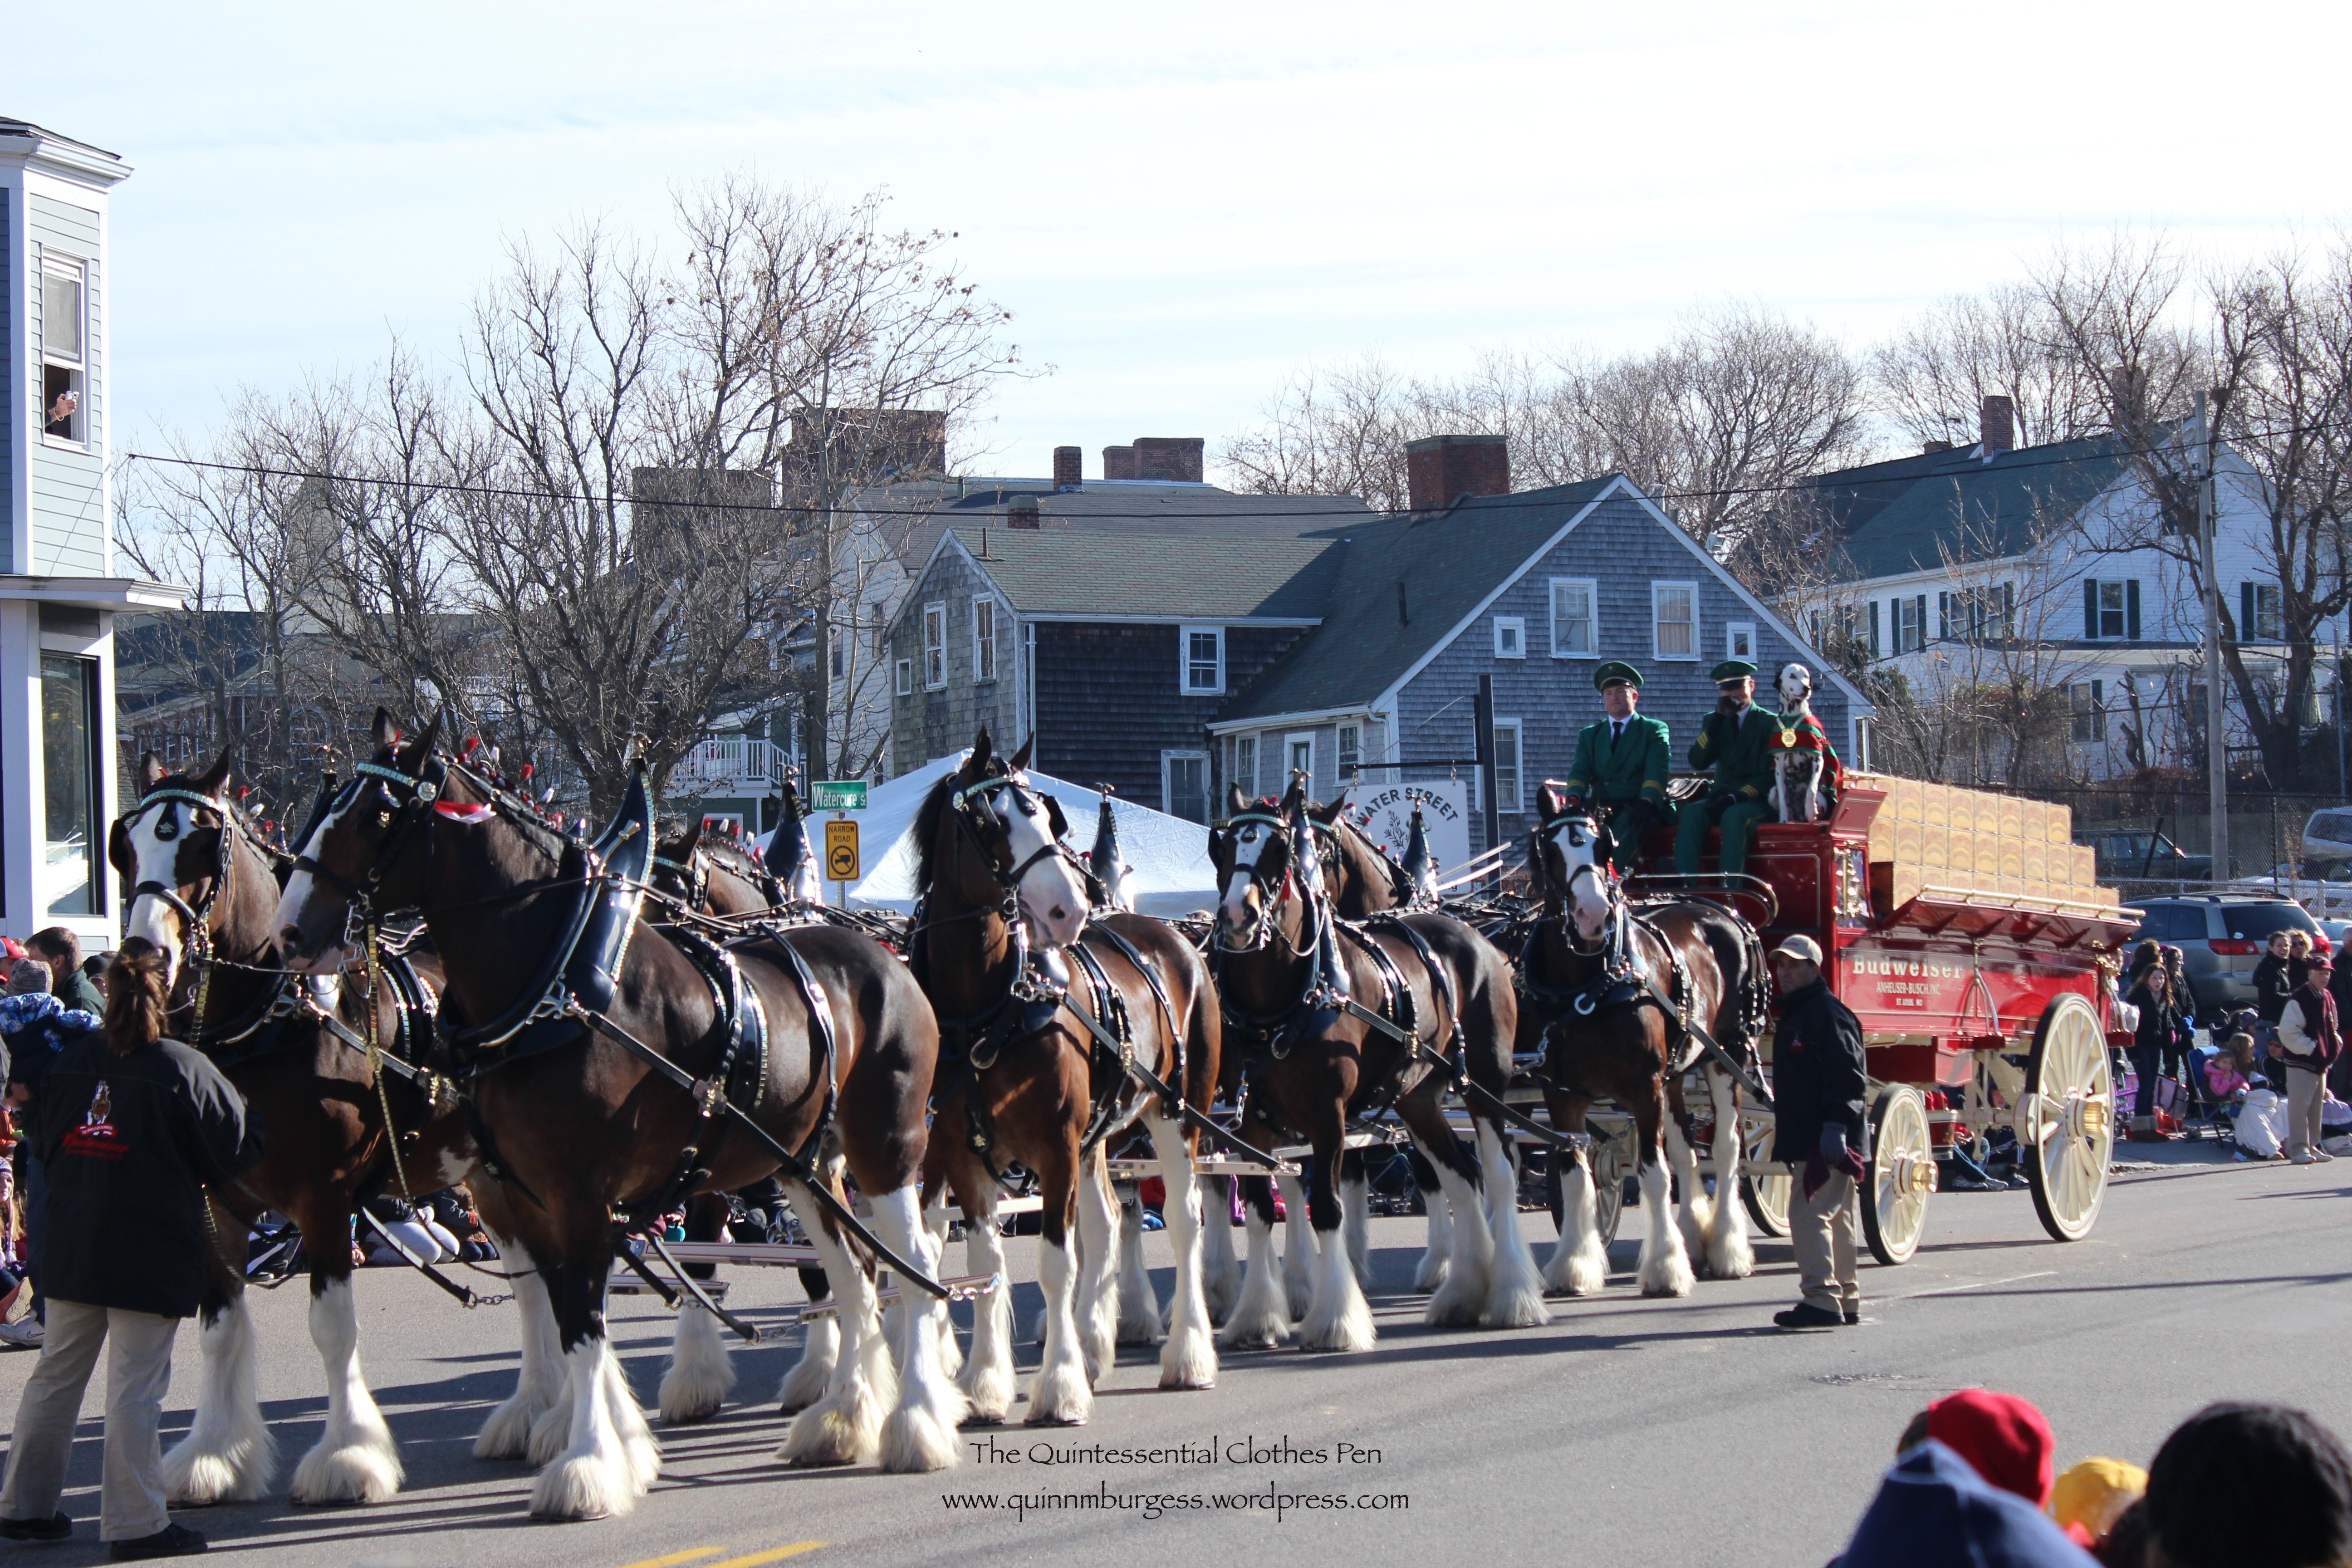
If you saw my last post, you were left guessing as to what event I was furiously sewing for. I think most you guessed that it had to do with women’s suffrage… Yay you! The entire event wasn’t really about suffrage, but suffrage was a part of it. We went down to Plymouth, MA to be a part of a historic village event that was linked to the main Thanksgiving parade in town.
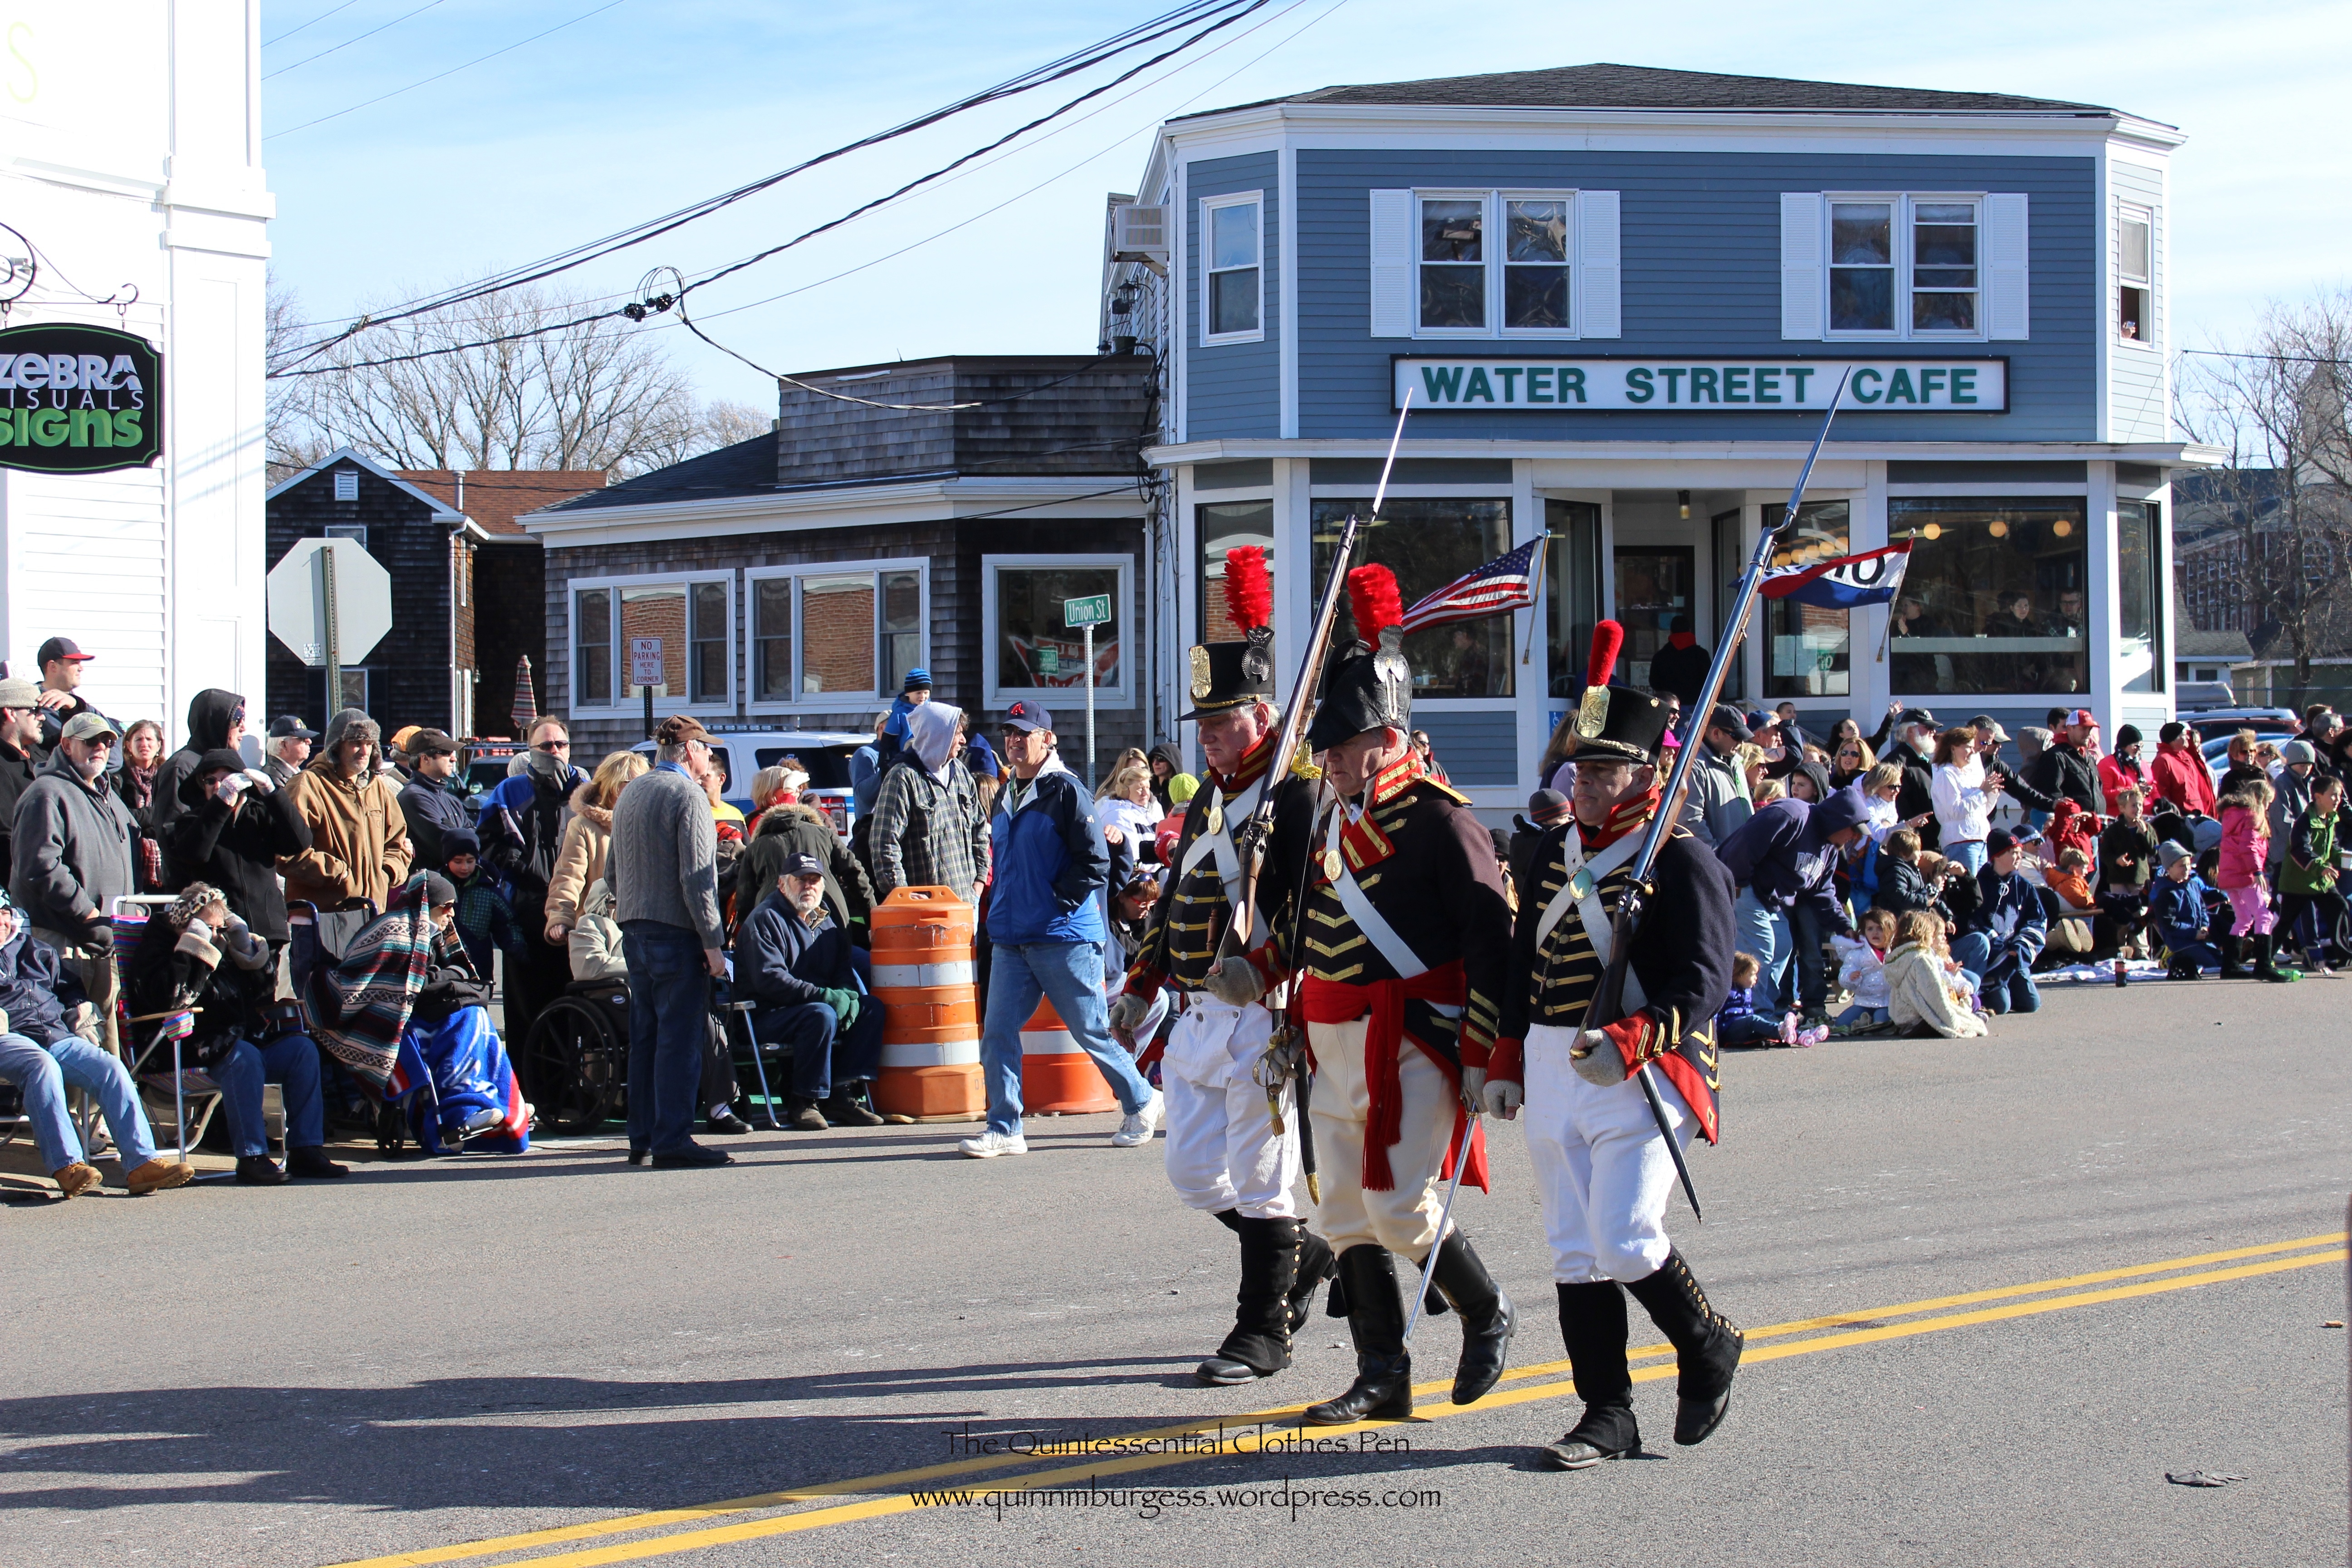
The historic village contained various groups from the early 17th century, groups from the 18th century, Marines from 1812, a unit from the Civil War, my usual dancing friends and I representing women’s suffrage c. 1914, and paratroopers from the 1940s. The parade was…a parade. There were historic groups in it (including some of the military groups I just mentioned), there were marching bands, there were floats, there were unicycles, and there were horses doing various things.
And I’ve got pictures! To start, here are some images of the parade:


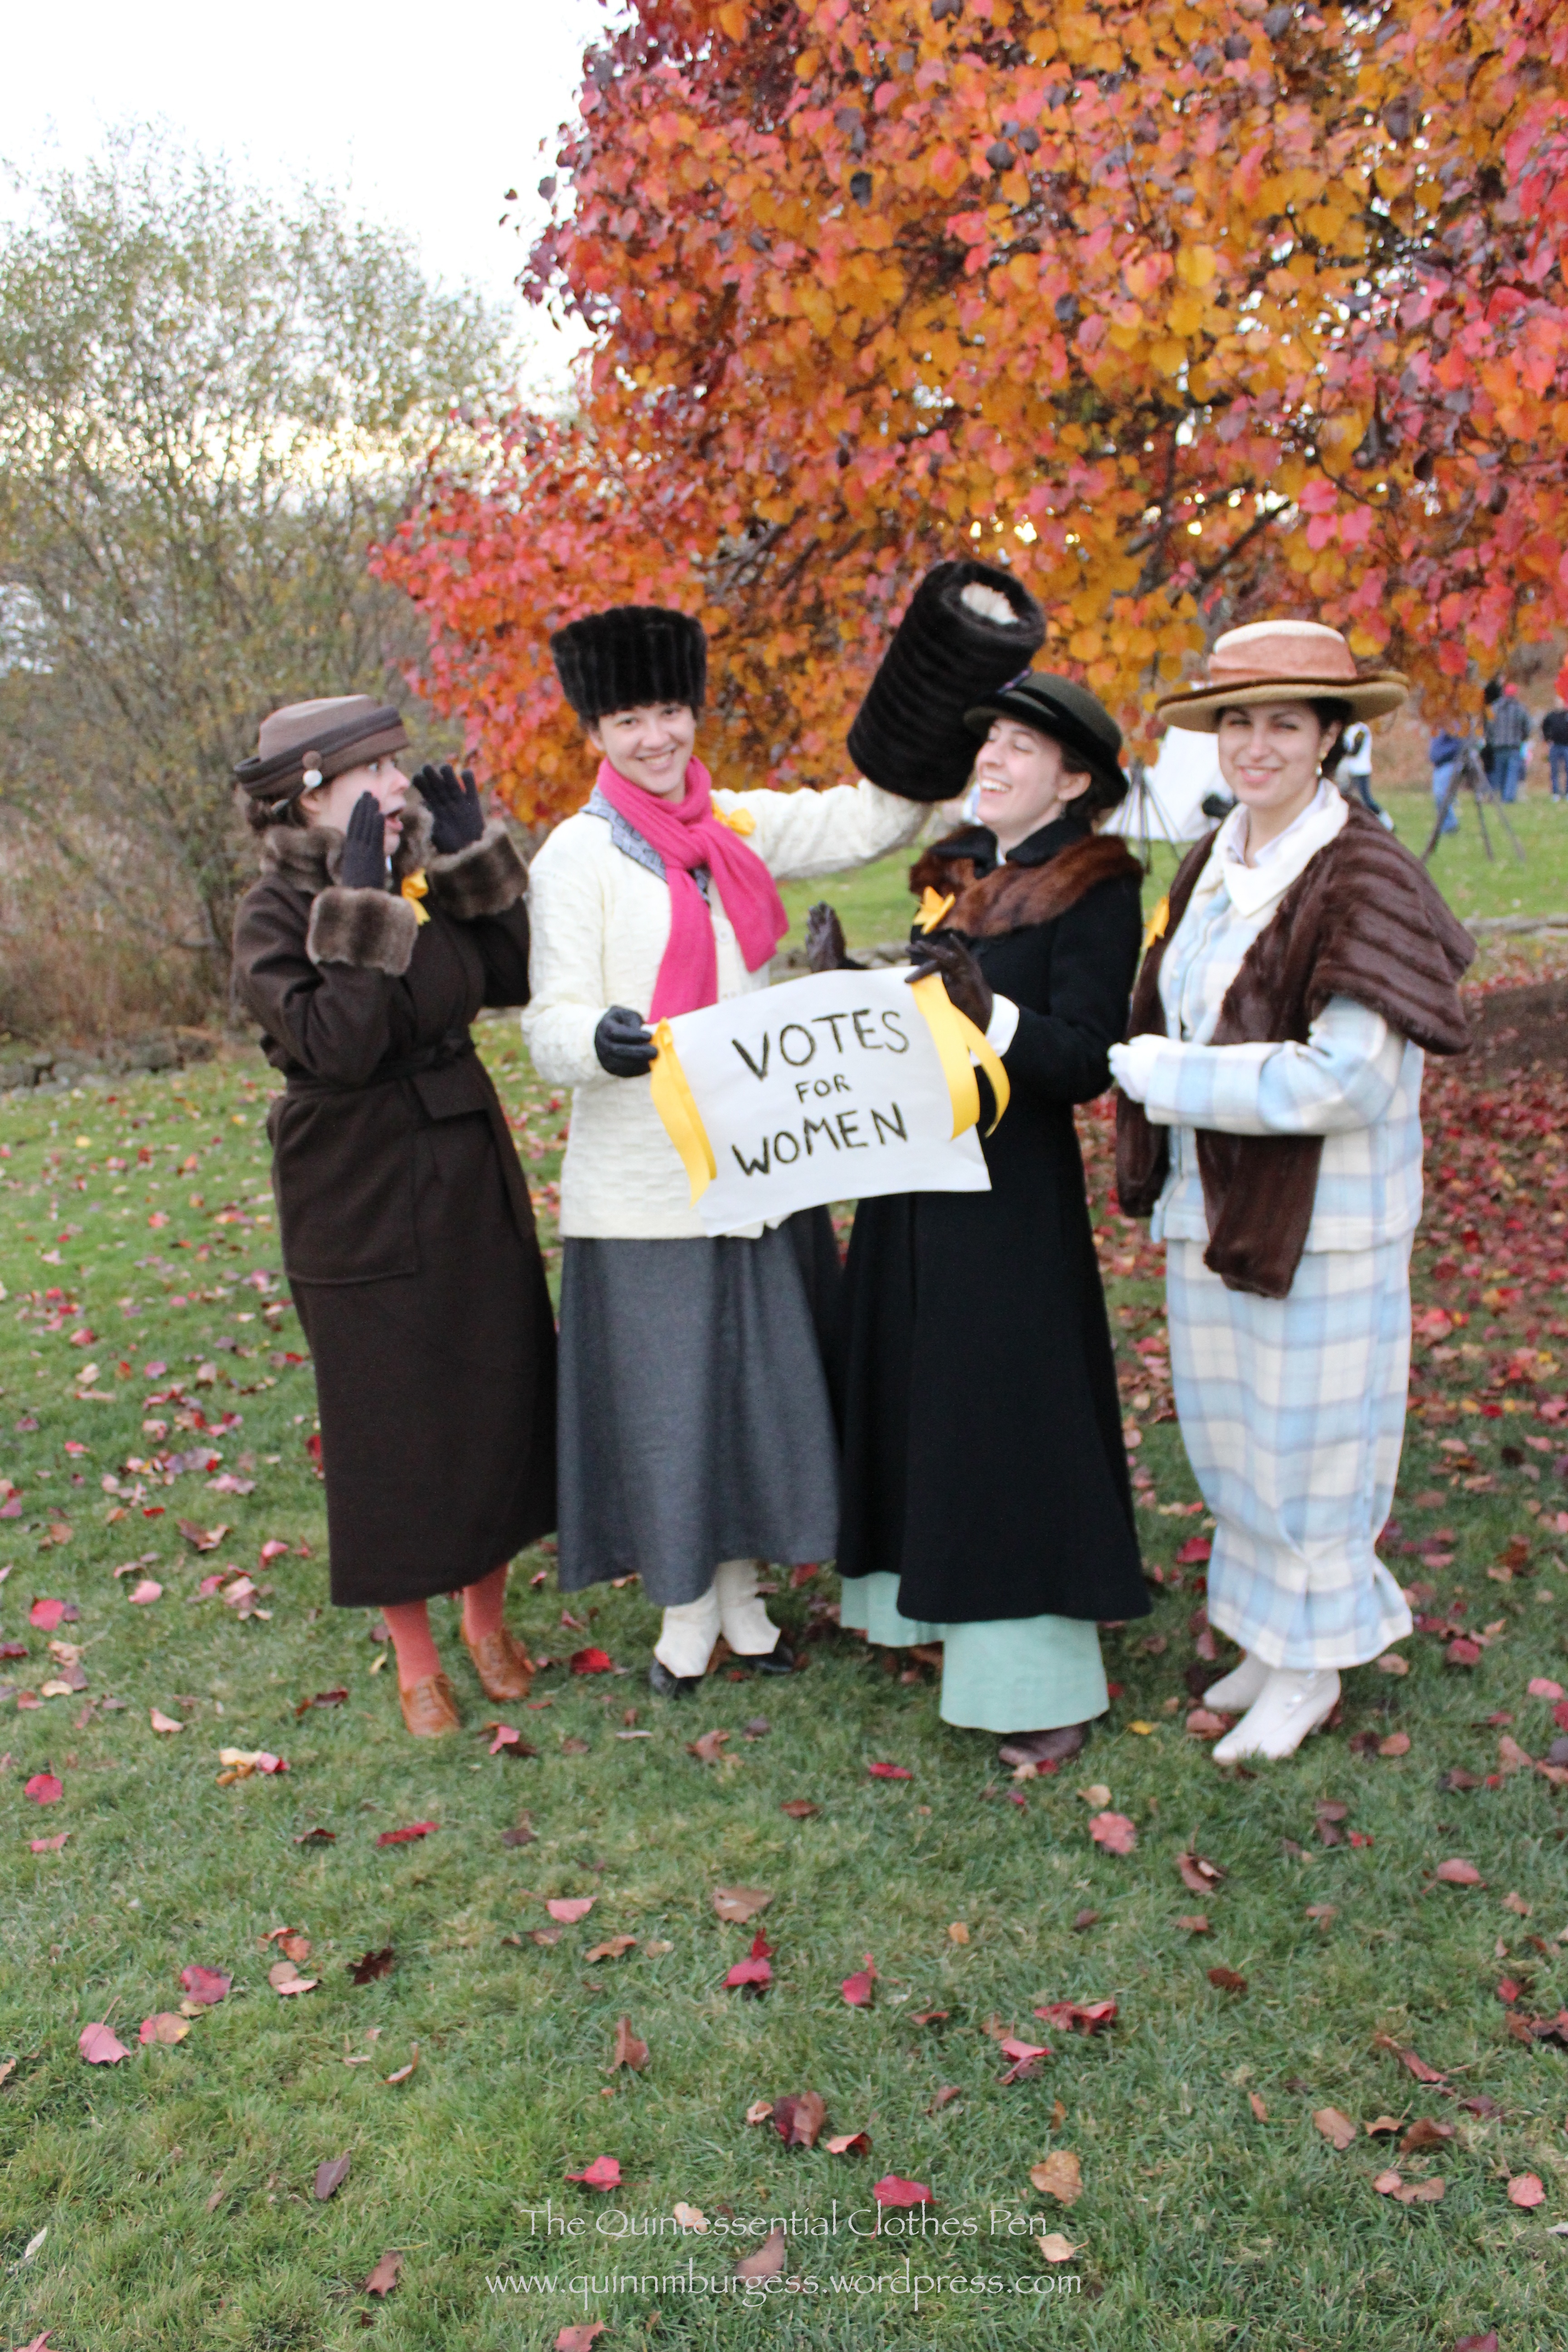
Next, here are some images of our representation of Suffragists and our setup in the historic village:
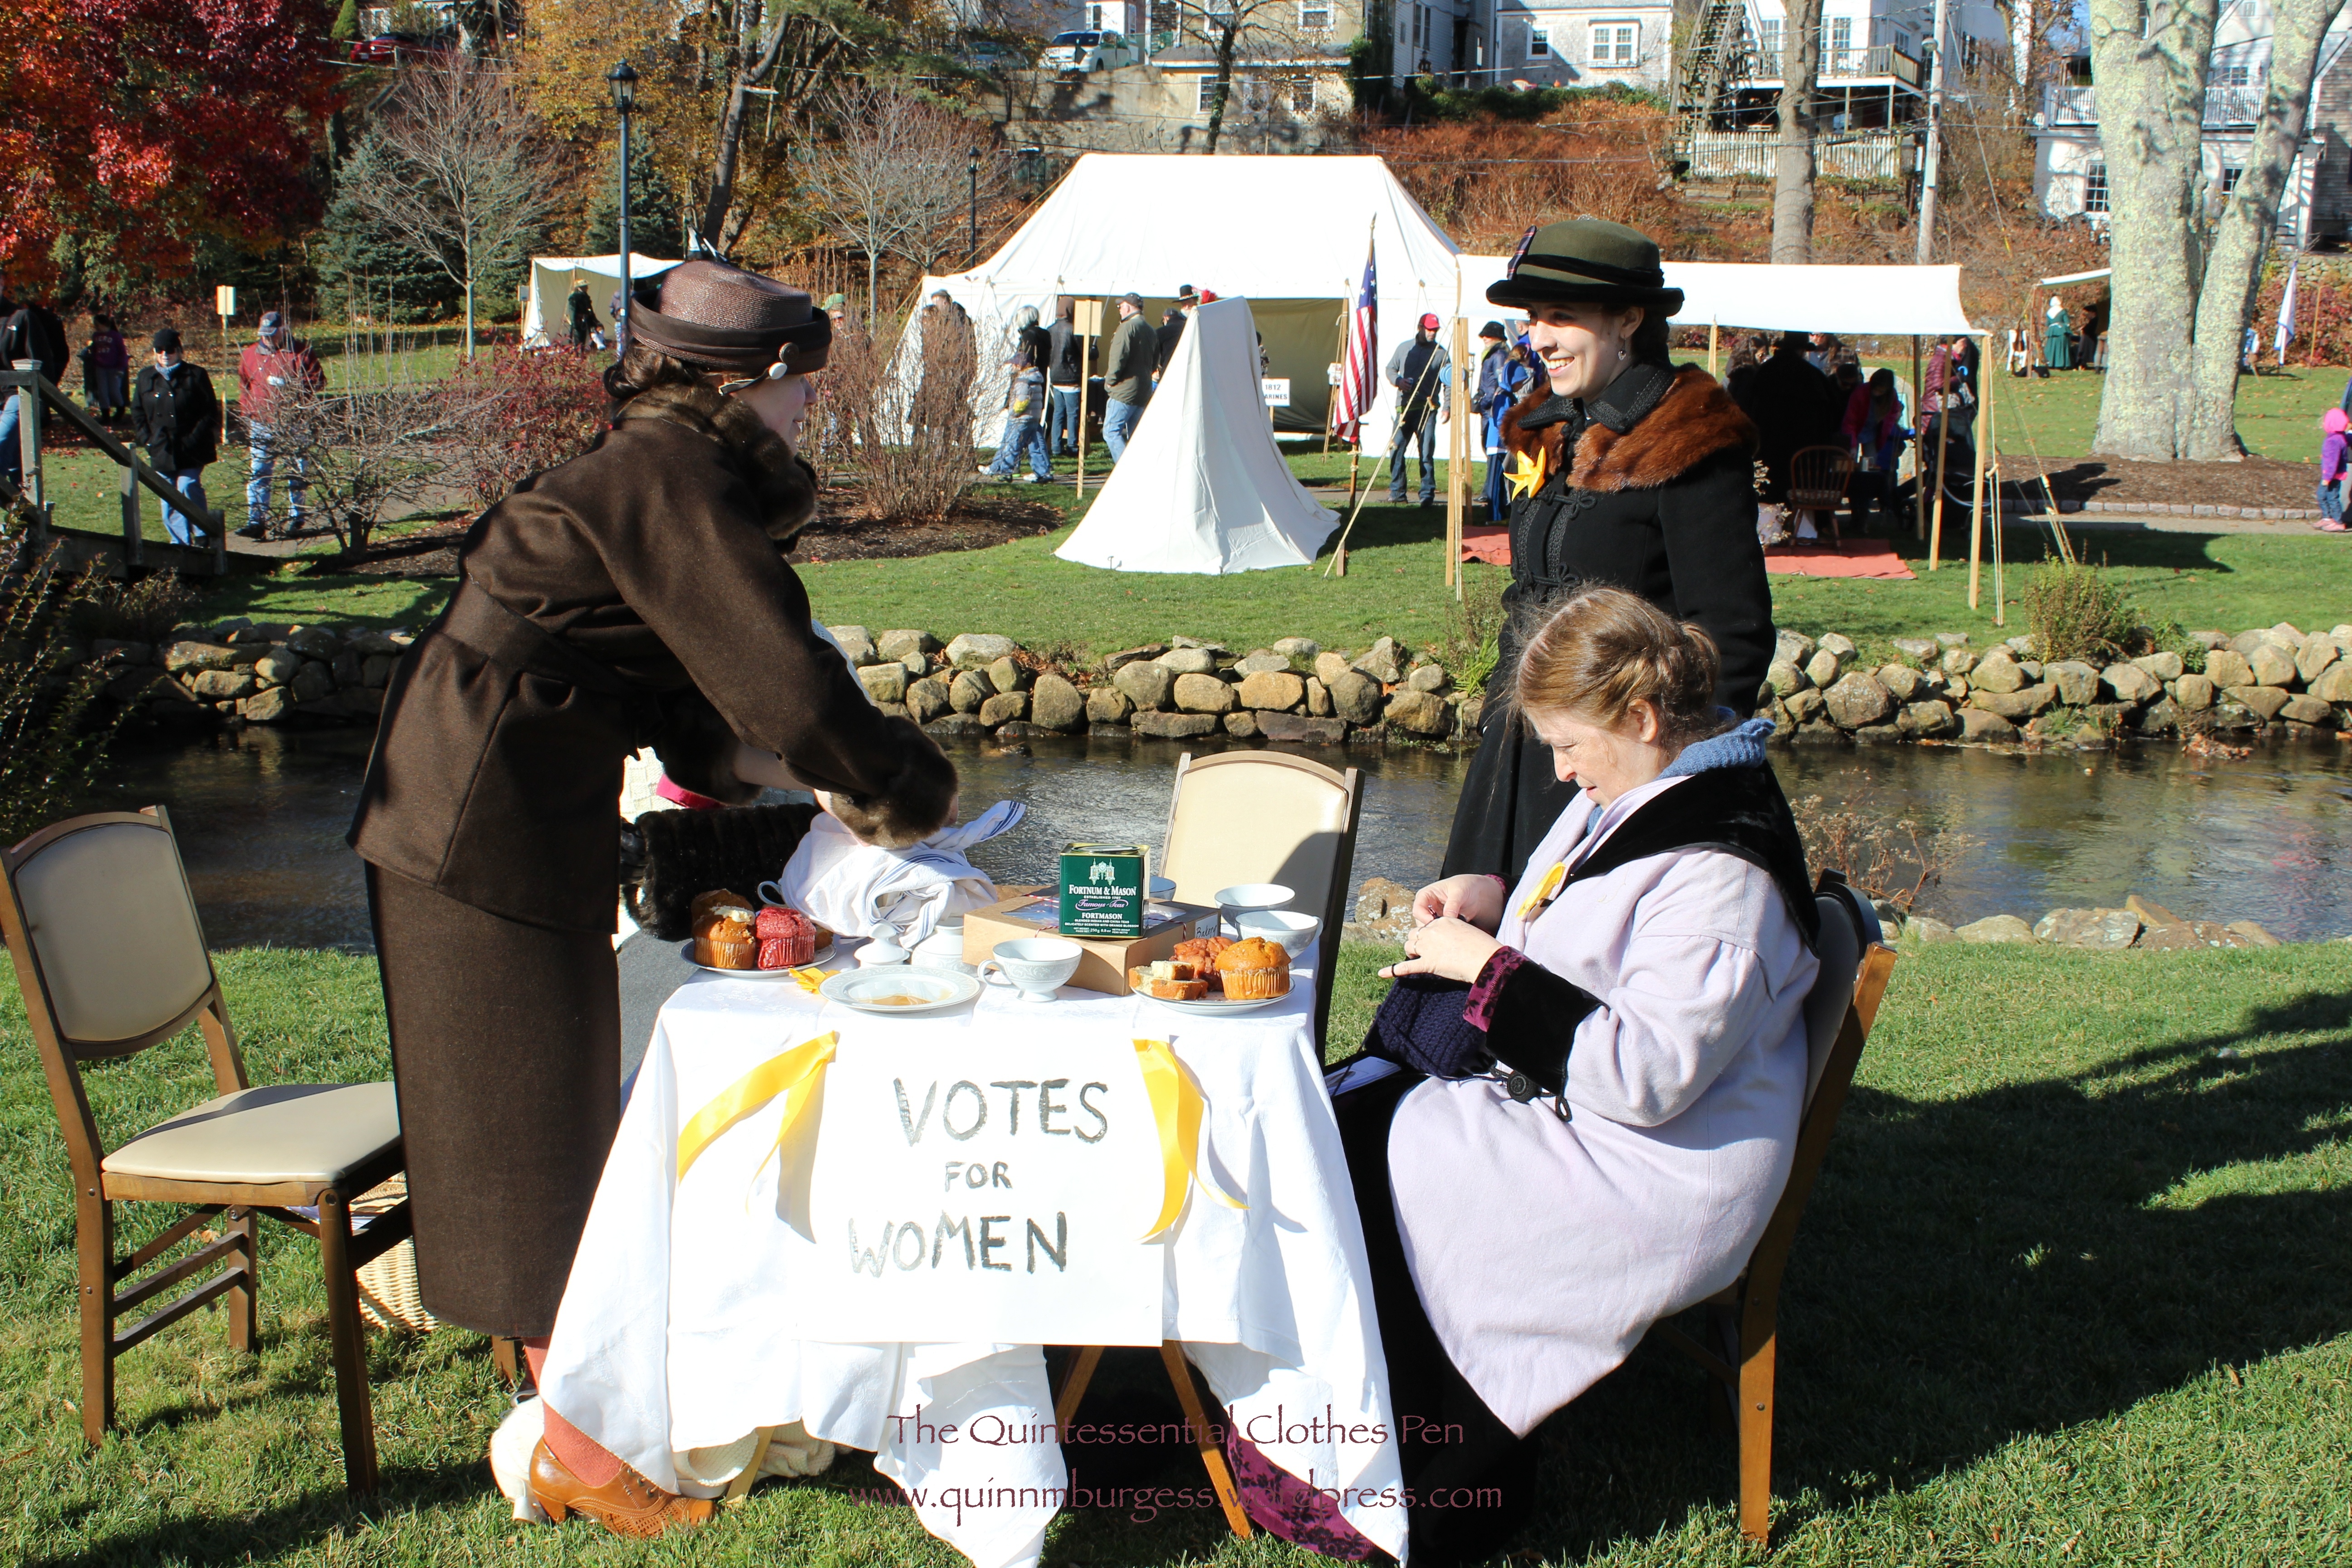


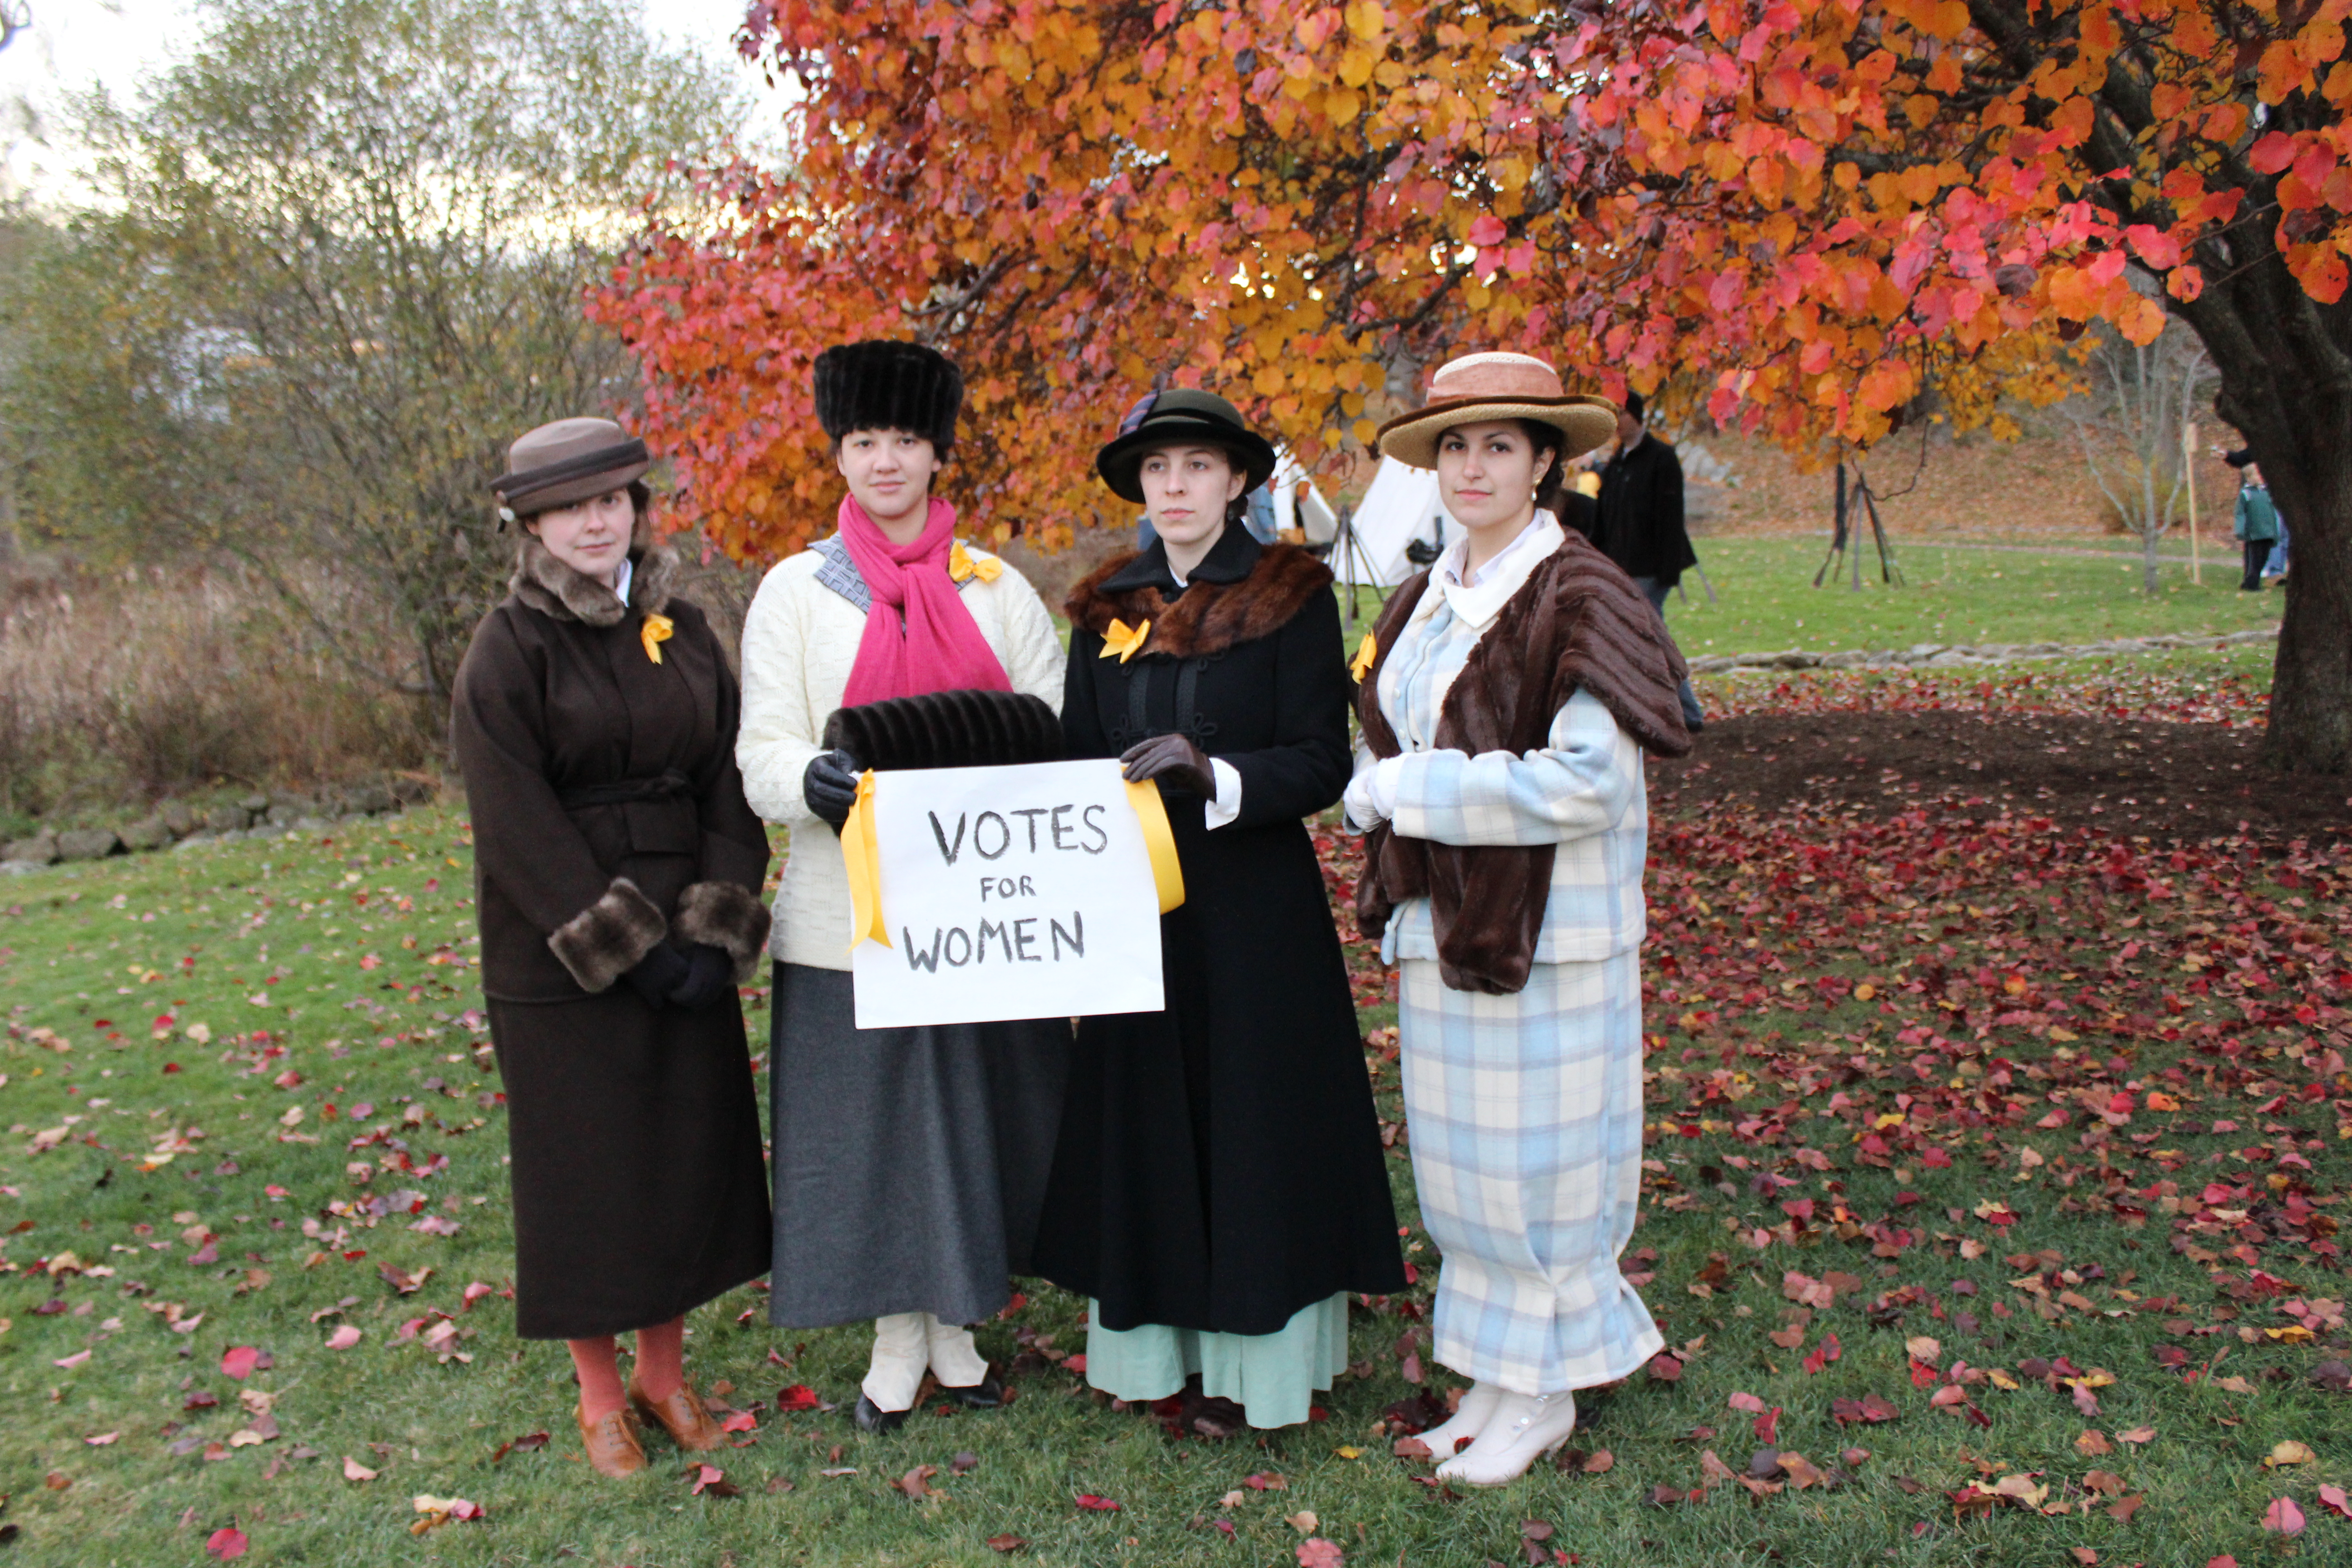

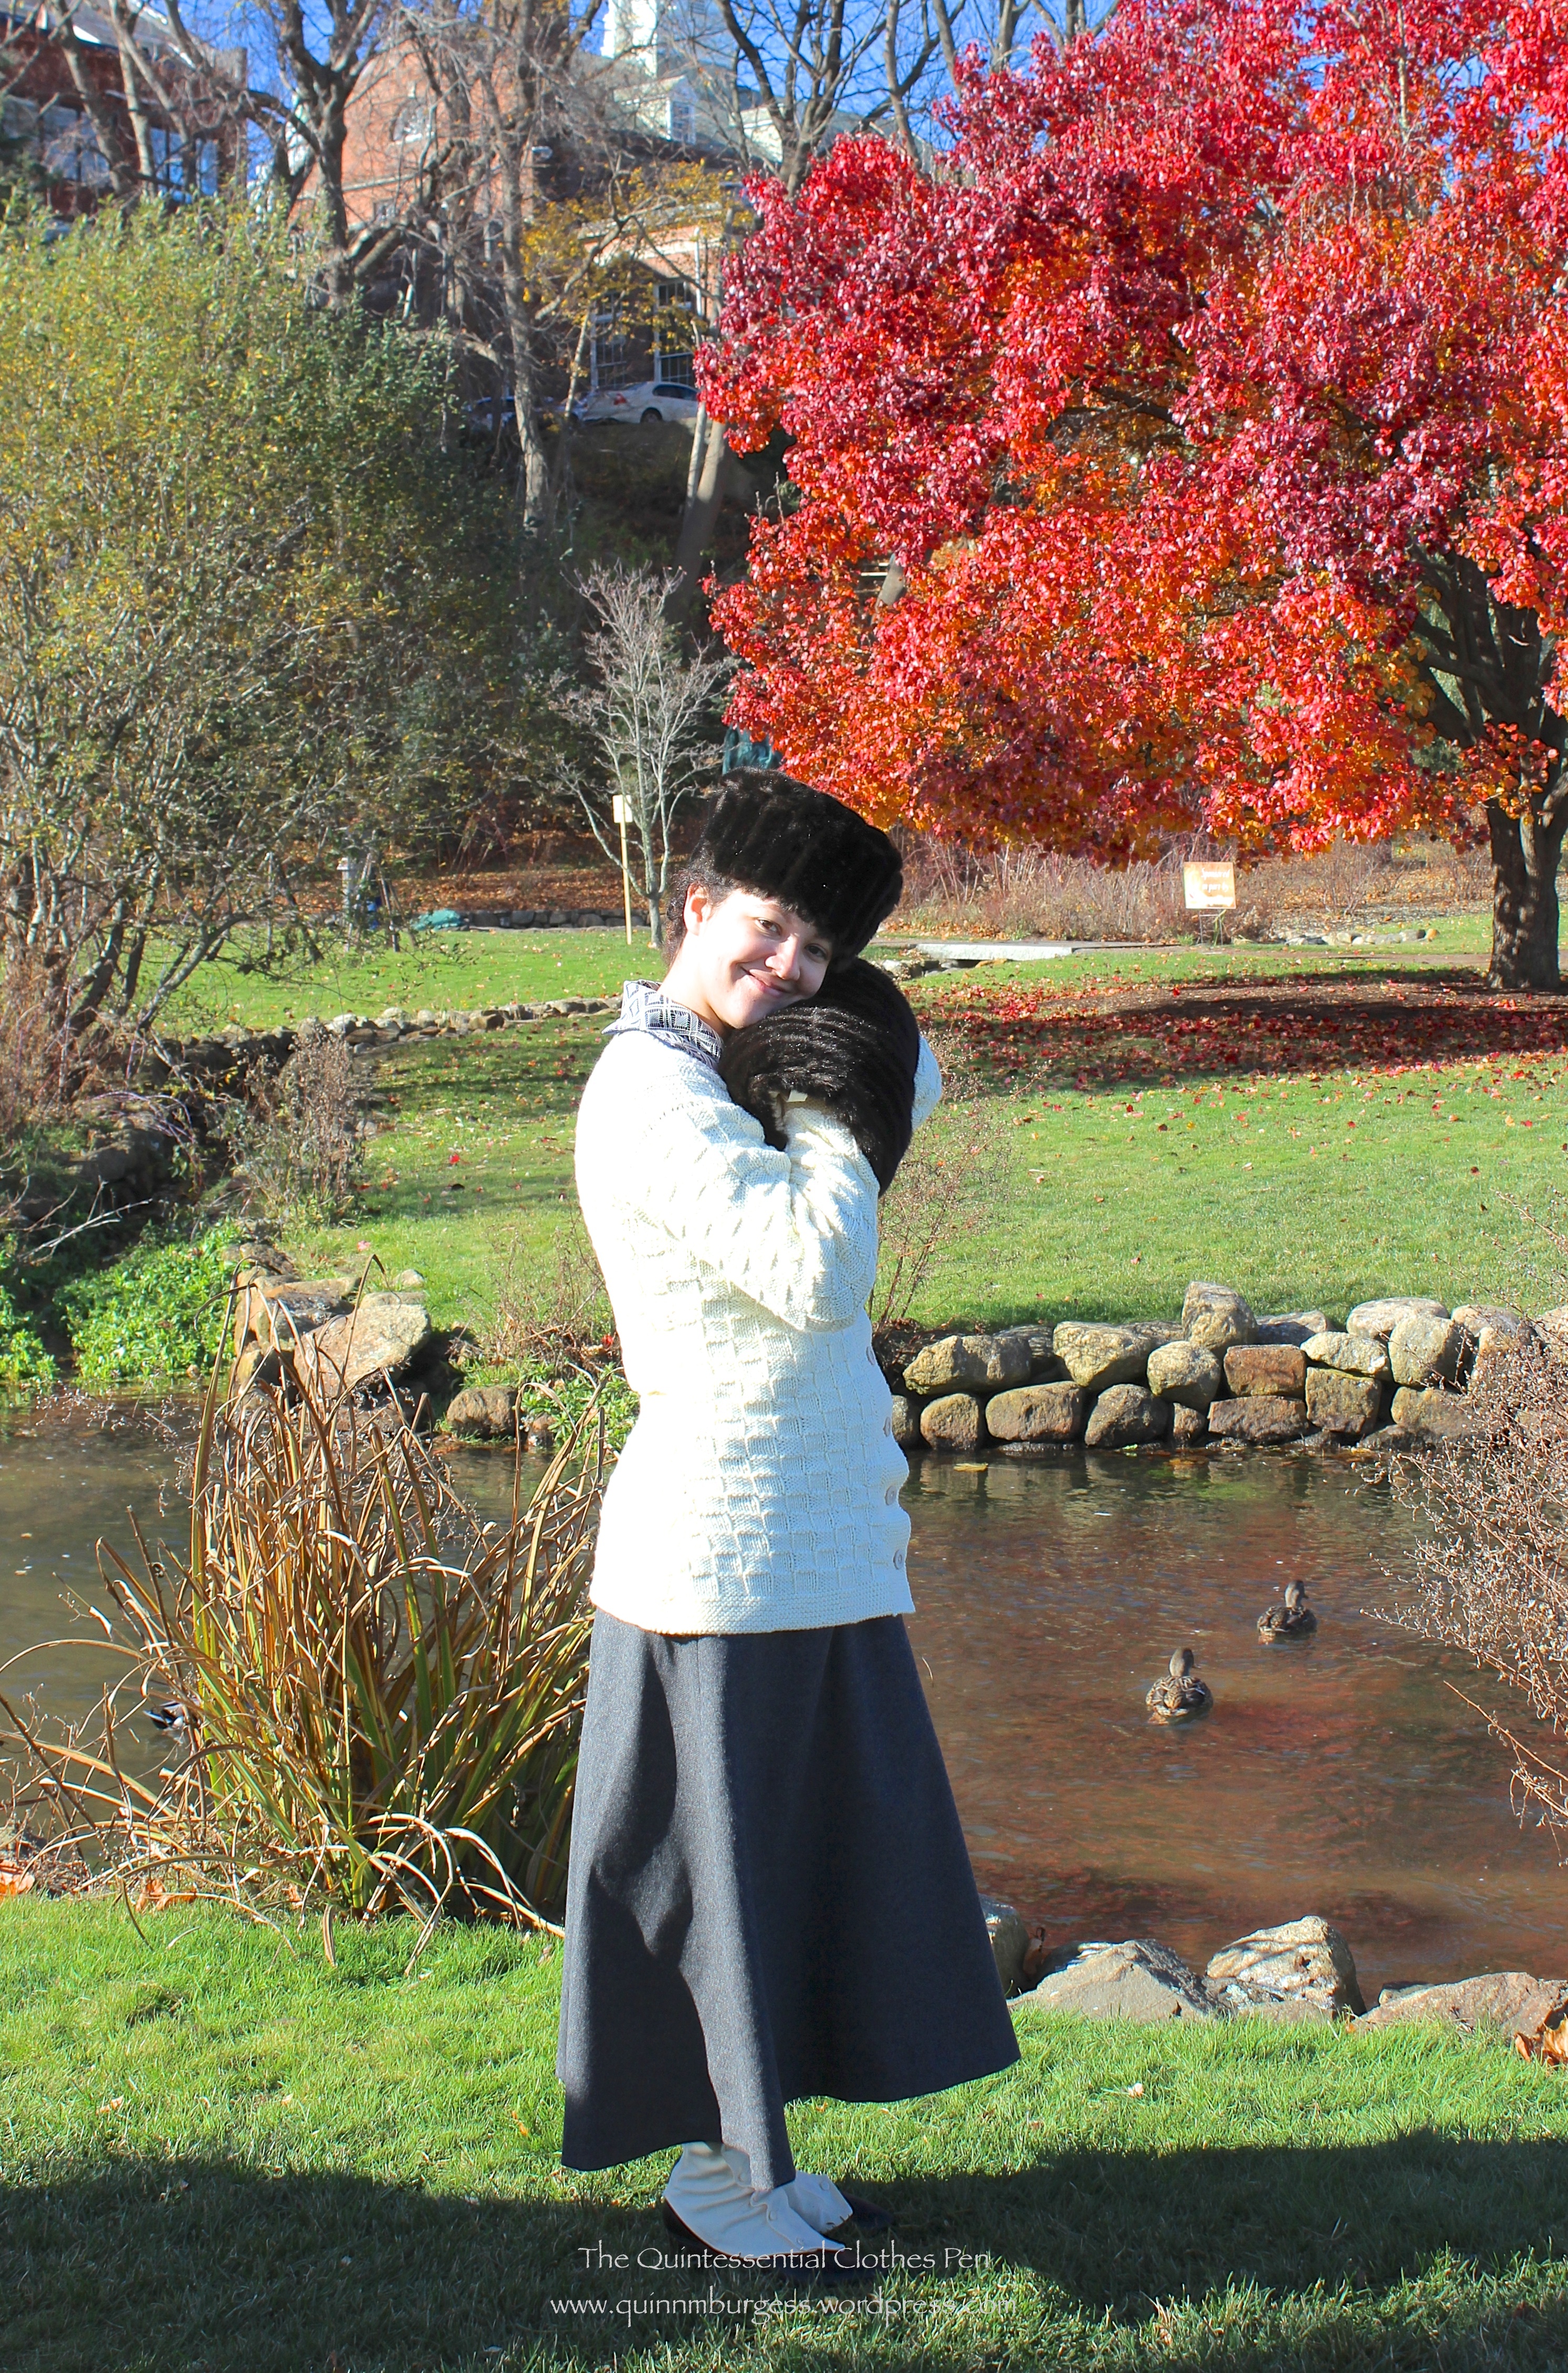
The best part is that in addition to sharing a little bit about history with the public and getting to watch the Thanksgiving parade in all its glory, I was able to use this opportunity to build and wear an outfit showing off my recently completed 1917 Knitted Sweater of Angorina. I had to plan for cold weather, but I didn’t want to cover up my sweater! So I planned a faux fur hat to match an existing muff, a wool skirt, a polyester crepe blouse (in this case, the polyester was a great choice, because the fact that it wouldn’t breathe would help me stay warm and use up a random bit of fabric in my stash that had no other project in its future!), and did a mostly unnoticeable revamp on my 1860s/can-look-like-other-decades fur muff (which was essential, it turned out, for keeping my hands warm!). And to look stylish, I made gaiters to turn my 1920s American Duchess Gibsons into 19-teens looking spat-boots. And all of the fabrics were from my stash! The gaiters might just be my favorite part of the outfit, and both they and my fur hat will qualify for the next two HSF challenges, so you’ll see more detailed information on those soon! All in all, I managed to stay warm, except for my feet! I wore thick tights, but I didn’t think to wear extra socks, and my toes and feet were SO cold! Note to self: wear thick socks next time an all day outside event in the cold is on the horizon…
And here is my brand new 1917 outfit:
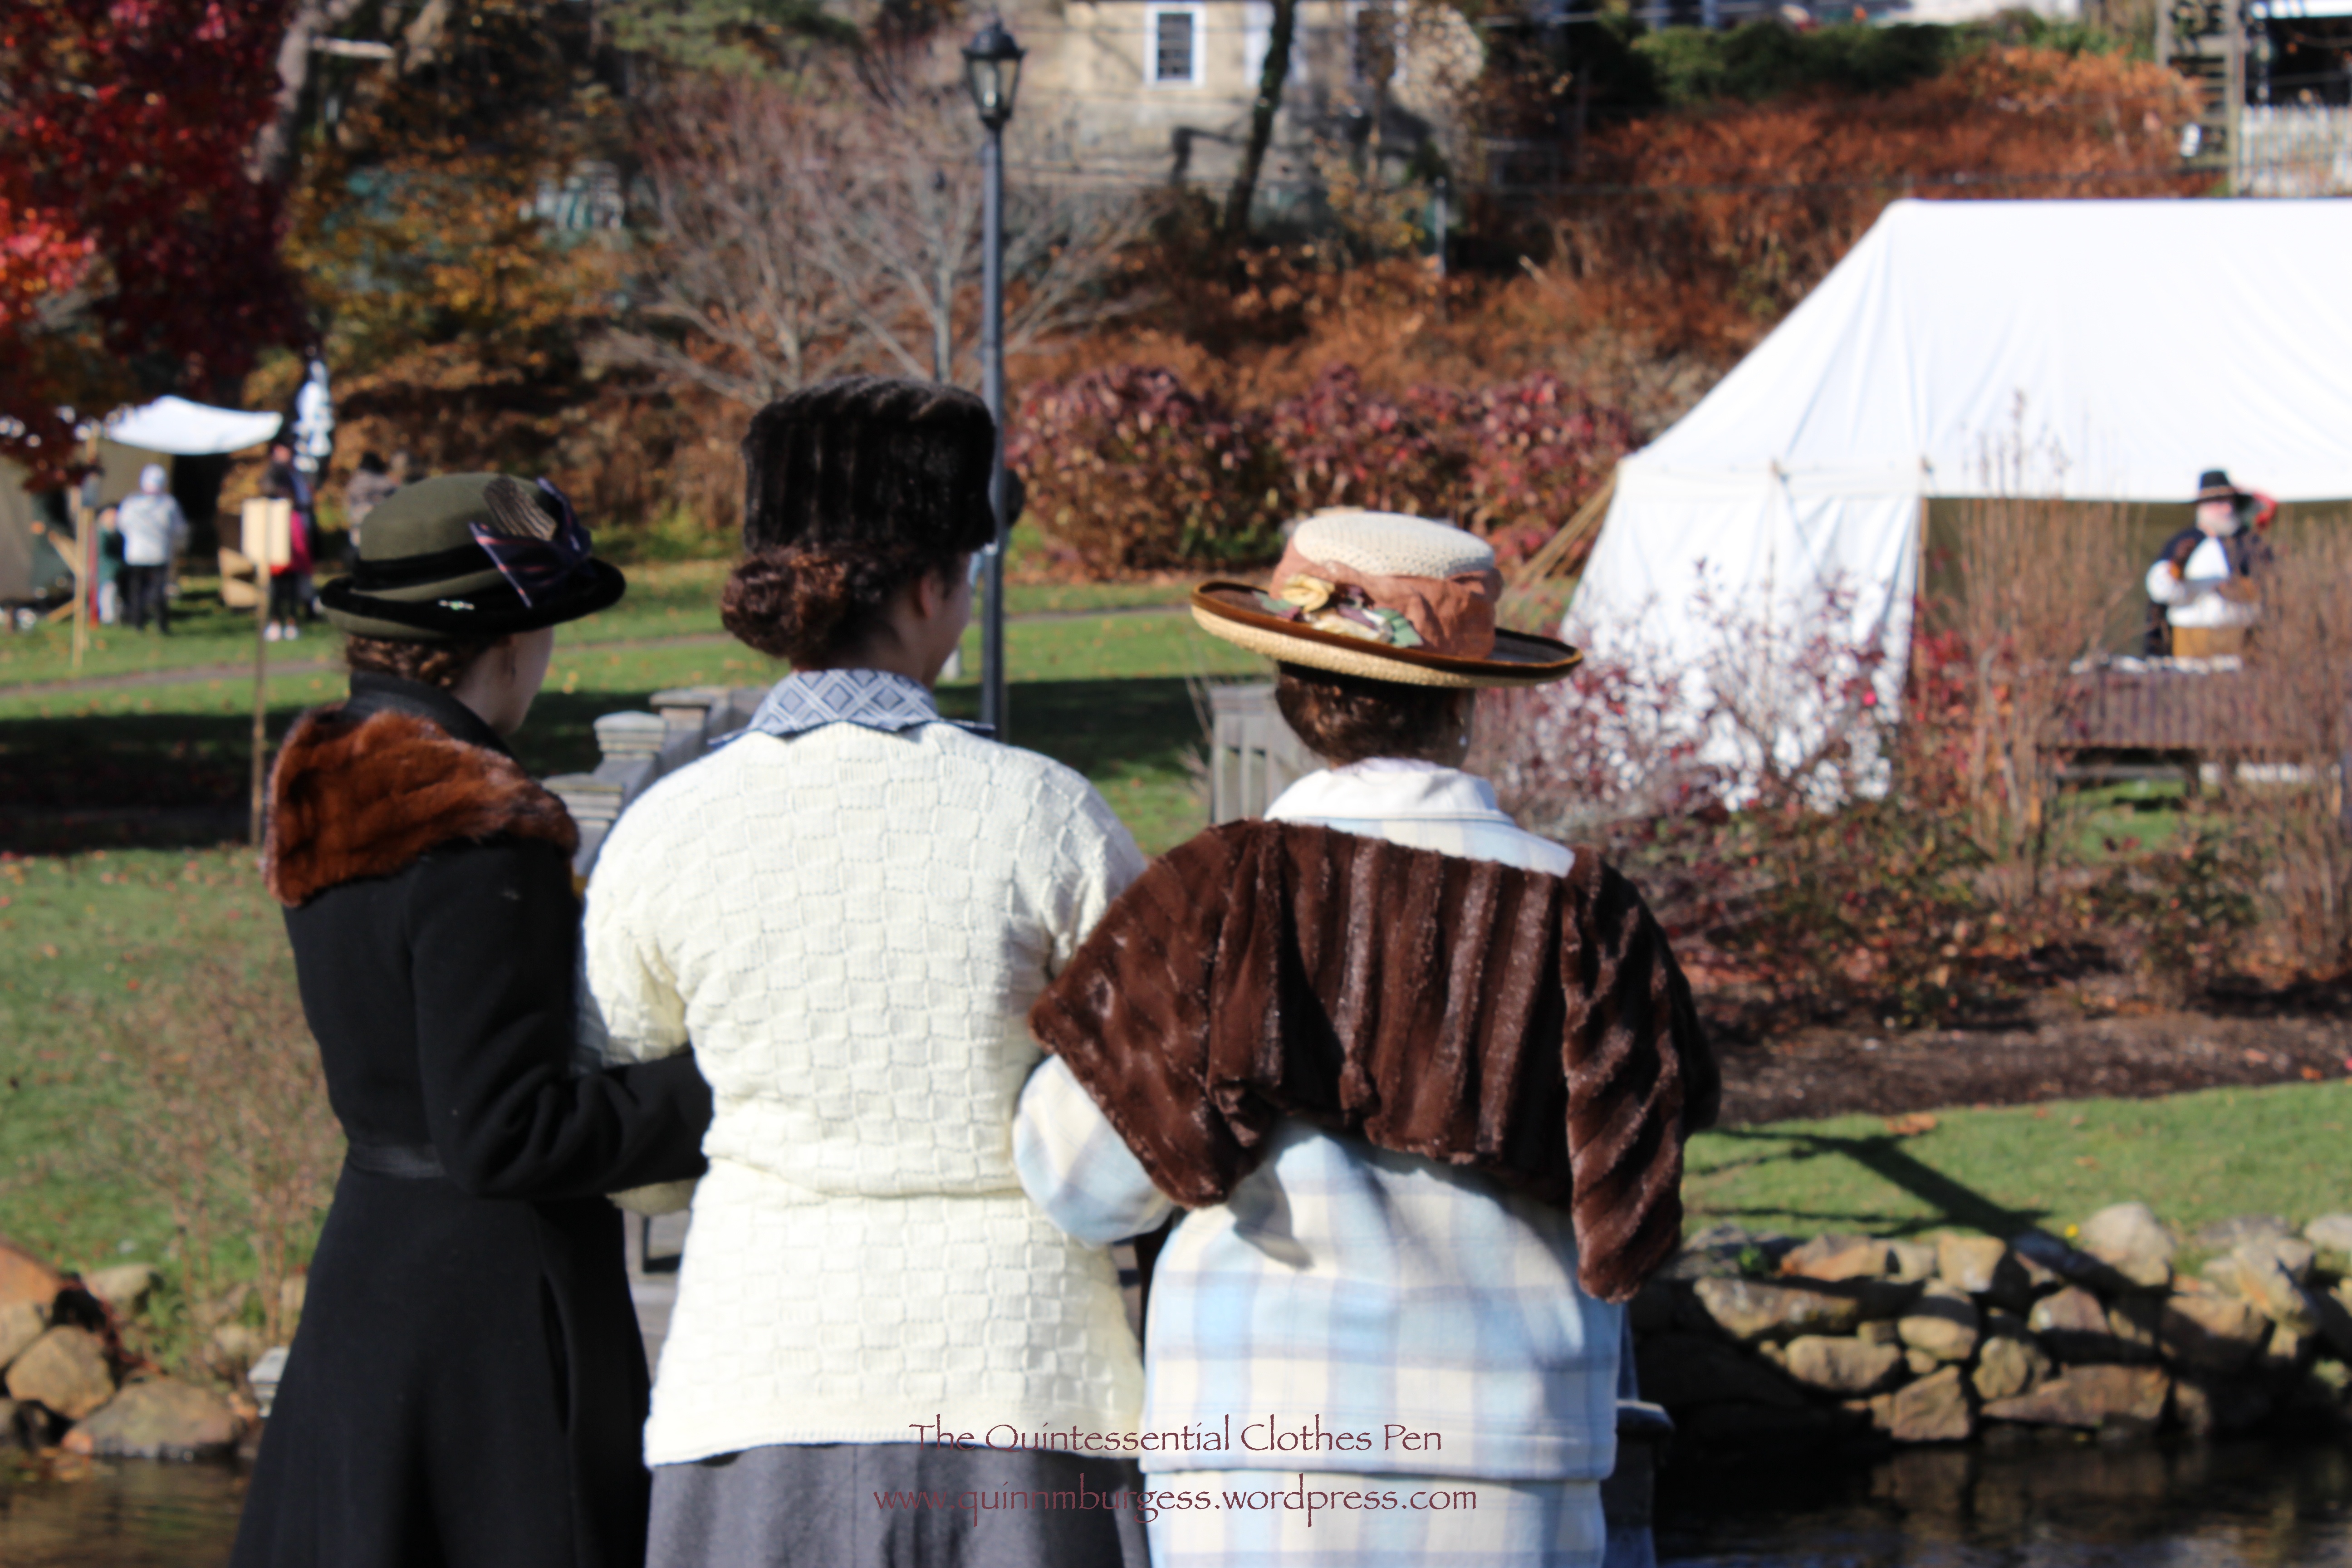
Despite last minute sewing for all of us, we all looked good and had fun wearing clothes from the 1910s while sharing a bit of important history with the public:


The 19th Amendment, which gave women the right to vote in the US, was ratified in 1920, after over 70 years of struggle. I think it’s fitting that Thanksgiving and women’s suffrage were related events for us ladies this year. In addition to many other things, we’re thankful for those who fought to get women the right to vote!
