Subdued “Coeffure a la Chinoise” In Red And Gold

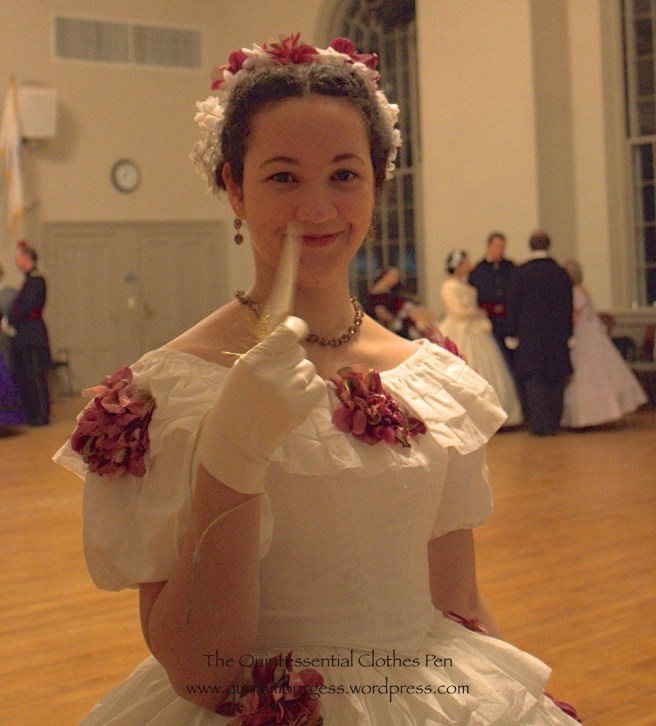
I attended a small Regency ball last weekend. It was charming and not nearly as packed full of people as I have grown accustomed to at these events in recent years. The smaller crowd made for a much more subdued (but still pleasant) evening than I was expecting.

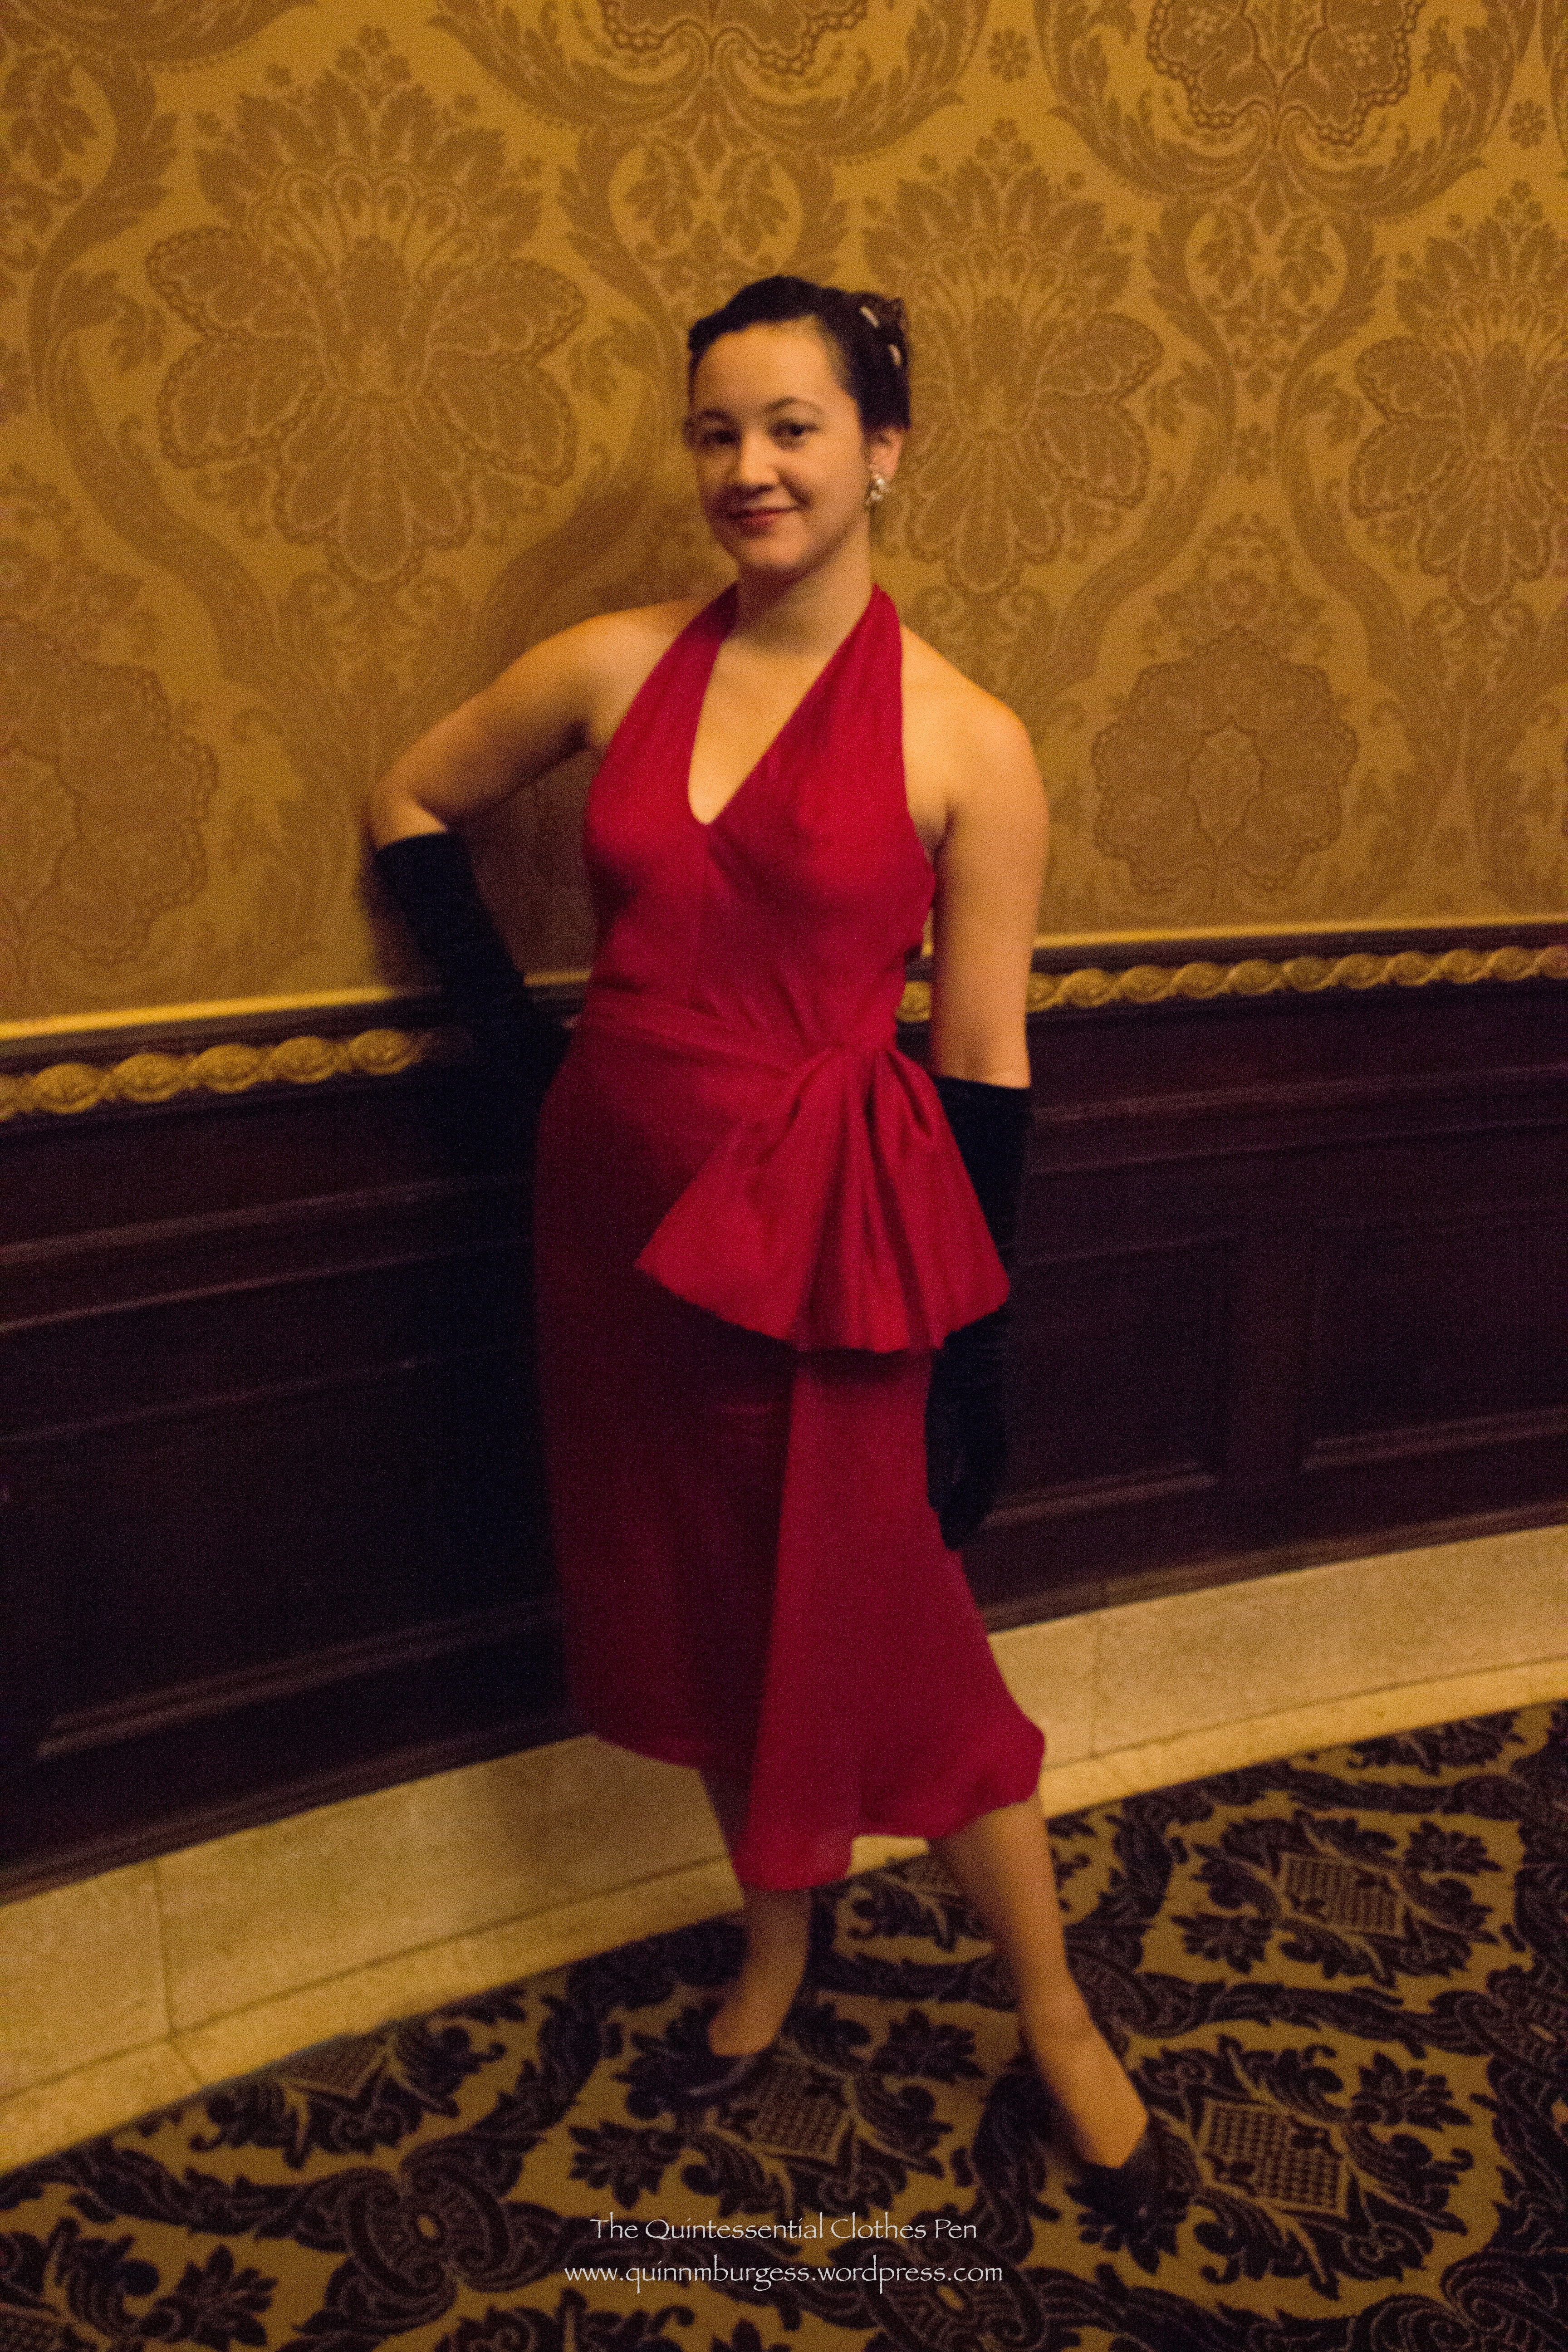
The only downside was that the hall was exceptionally cold and not being full of people did not warm up very quickly! Few of us had planned for the situation and we were mostly scrambling to find any scarves or sweaters to wrap ourselves in. Many of us were resorting to items that we’d worn to keep ourselves warm outside, sacrificing fashion for warmth (it’s been below freezing here in Boston for at least the last three or four weeks consistently). I, for example, wrapped up in my pink cashmere scarf despite wearing a red dress. I thought it looked odd, though I was told that the colors looked good together. But there were a few lucky solutions that were both fashionable and warm: a large paisley shawl and a plaid scarf/wrap that looked very Scottish were the two most fashionable looks in my opinion. After some dancing and about midway through the evening, many had warmed up enough that scarves were being discarded, though I do believe I kept my scarf wrapped over my shoulders and chest throughout the entire evening.

IMG_1973
Elegant, fashionable lounging during the refreshment break.
IMG_1972
Delicious refreshments alluringly laid out.

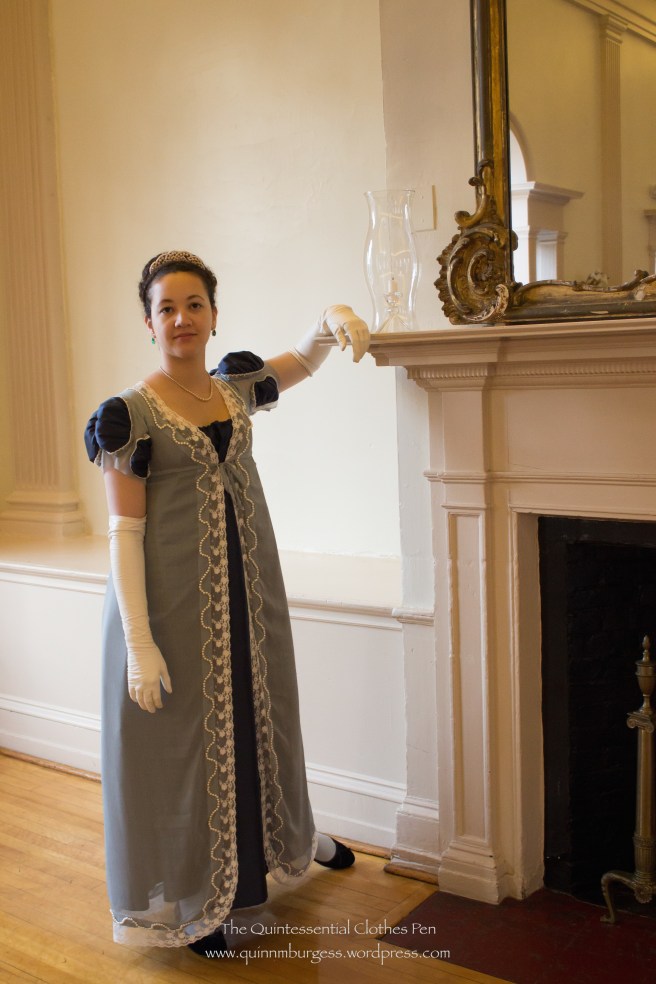
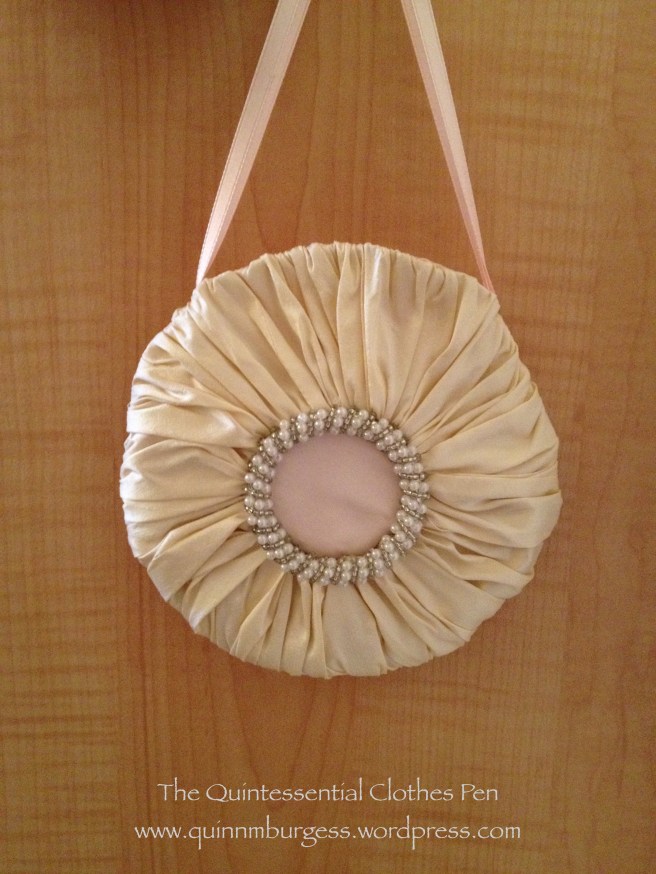
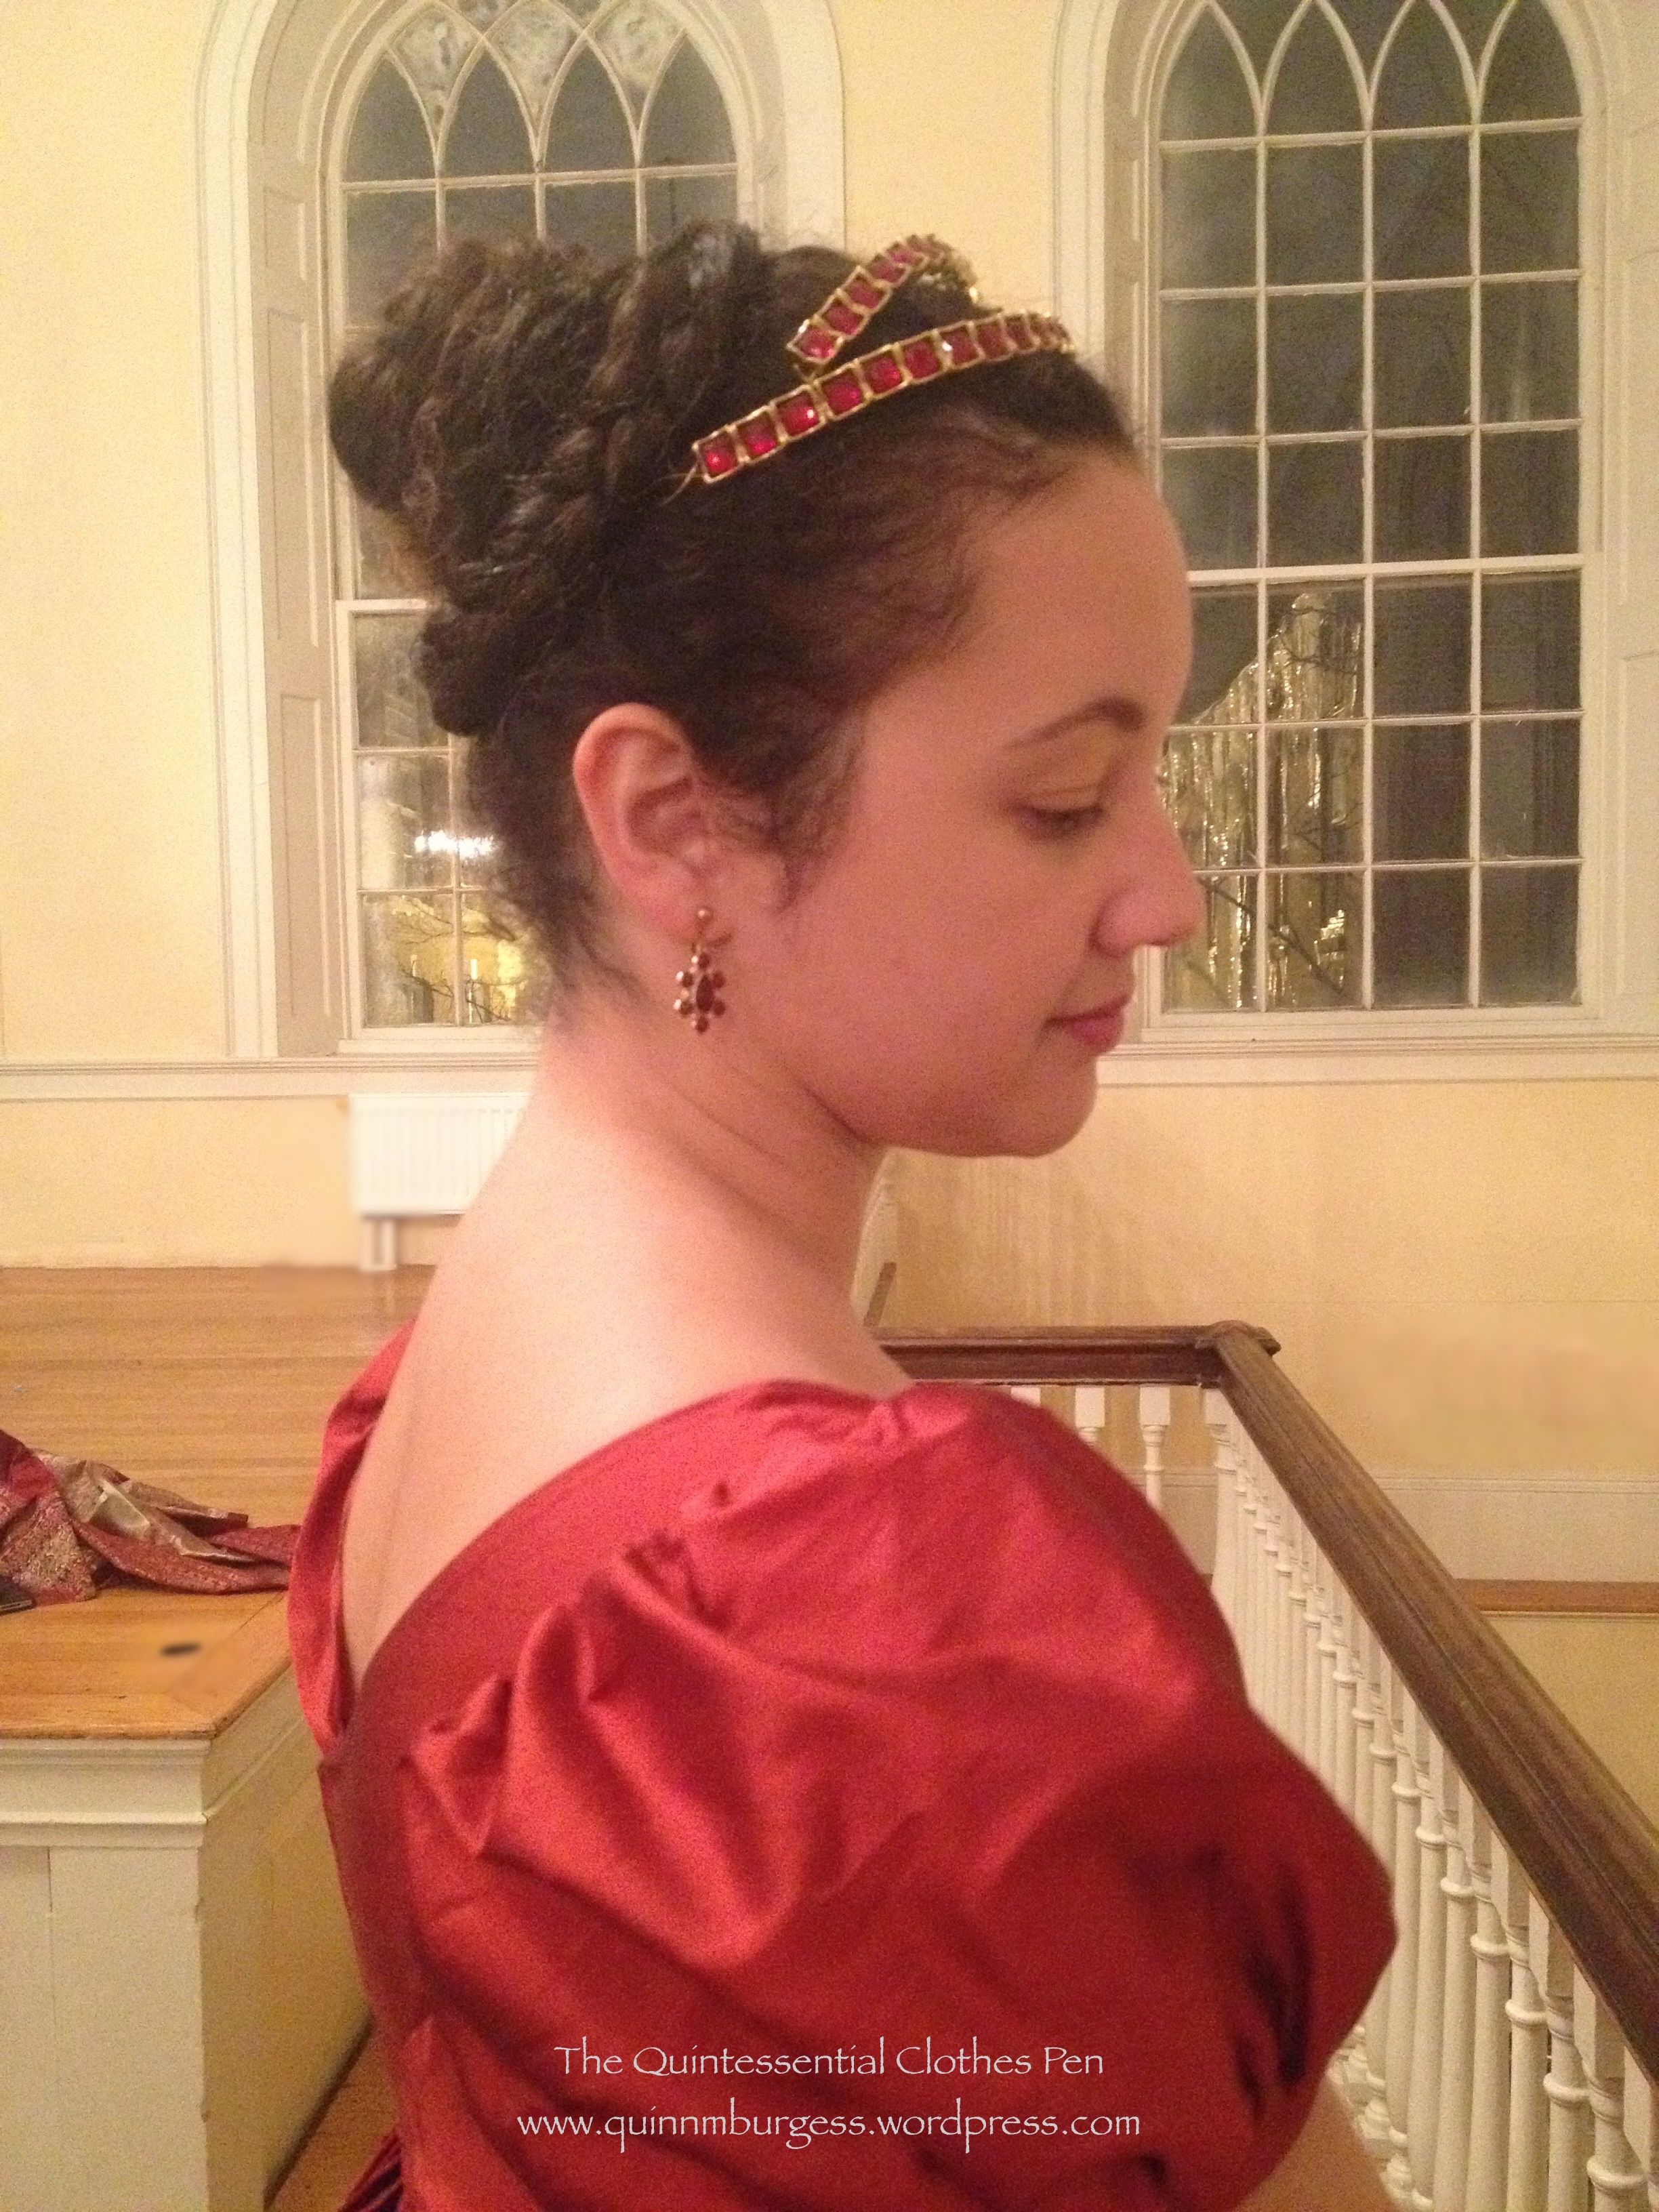
I wore my red 1813 evening gown and my homemade red and gold tiara. (I had hoped to finish and wear my 1811 elusive blue evening gown, but I would have had to do a lot of last minute sewing to finish it in time and after my recent skating costume last minute sewing adventure I was not inclined to do so again so soon. It is very satisfying to have a closet of options for an event, especially when plans to complete something new go awry.) I also brought along my red and gold reticule, because it matches the outfit so perfectly (although the only thing I kept in it was my phone… which is the reason for the slightly blurry, grainy photos).

IMG_1976
All the red and gold Regency pieces in my wardrobe put together in one outfit!
IMG_1980
It was so cold getting dressed that I was not inclined to do a complicated hair style. Heeheehee, fake hair to the rescue! I just put my hair in a pony tail, braided it, and wrapped it around itself. Simple! The big braid is what makes it look complicated, but it is pre-braided fake hair. I think it completes the style perfectly and has a bit of a “chinoise” look to it, too.

What do I mean by “chinoise”? The word itself is from the French adjective meaning Chinese. In terms of fashion, there are scarce references to “chinoise” styles in Regency fashion plates (compared to the abundance of Regency fashion plates showing other styles). Here are a few examples. This Merveilleuse from 1814 has a “Coeffure Chinoise,” this lady from 1812 has a “Coeffure a la Chinoise,” and this fashion plate shows “La Toilette Chinoise.” (I do sort of wonder how some of these attributes, and the hairstyles in particular, said “Chinese” to people during the Regency, but of course the world was perceived very differently then and people had access to vastly different quantities and types of information than I do today.)

I’ve often noticed that “chinoise” hairstyles make use of braids that wrap around the head. In addition, there seems to often be a vertical emphasis to the hair and to a bun, if one is present in the style. It is these attributes that say “a la chinoise” when I look at my own coiffure from last weekend. Sometime, I’ll have to try to make a more exaggerated “chinoise” style with a very tall and flyaway bun such as the Merveilleuse from 1814 has. I’m pretty sure my hair will have no trouble with that since it is naturally curly and wanting to fly away!

19CBRE: Etiquette For The Ballroom ‘Quick List’

For your 19th century ballroom edification today, we have a list of etiquette points from The Royal Ball-Room Guide and Etiquette of the Drawing Room, 1877 (available through The Library of Congress). This is a great digest of lots of  etiquette points on a variety of topics.

I believe many modern ladies and gentlemen could take note of many of these points when attending recreations of 19th century balls. My top choices for attendees and personal favorites are numbers 4, 11, 18, and 22.

Do you have a favorite (or two)? Did any surprise you? Have you been to a recreated 19th century ball and longed for any of these points to be adopted by modern ball guests?

0037

0038

0039

0040


HSF/M #1: 1895 Hug-able Skating Costume

This is one of my favorite outfits of all time. I just want to hug myself, with all the fur, and I love the trim on the back! The whole thing is so cozy and so hug-able and the skirt has such a nice drape and the accessories work so well… and I actually got to go skating in it! I am just utterly chuffed (to use a British word) with the whole thing!

IMG_1952

IMG_1955

IMG_1956

I was on the fence about whether this outfit would apply to the Historical Sew Fortnightly/Monthly Challenge #1: Foundations, but then I read Leimomi’s teaser post about her foundation entry in which she reminds us about different interpretations of foundations and the intent of this challenge to create loose guidelines open to interpretation.

I was convinced (or pushed off the fence, if you prefer to think of it in that amusing way). I’m claiming my all new 1895 skating outfit for the first challenge of the new year! It does rather stretch the idea of foundations. Is the skirt a foundation because it is literally worn below the jacket, thus being a foundation as you would think of one in a building? Or is the bodice a foundation, because my direct inspiration is a lonely jacket without a skirt and therefore it is the foundation of the outfit because I wouldn’t have made the skirt without having the jacket? Either way, there is an element of a foundation in there.

Just the facts:

Fabric: 5 yds of ivory wool, about ⅓ to ½ yd of dark brown faux fur, probably about 3 yds of scrap muslin for flat lining the jacket, a bit of scrap canvas to stiffen the collar, and a bit of ivory flannel to line the inside of the collar.

Pattern: Made by me and based on my inspiration jacket as well as patterns published in Authentic Victorian Fashion Patterns (a Dover book).

Year: c. 1895.

Notions: 5 yds of brown braid, thread, a bit of high loft polyester batting to keep the sleeves puffed out, about 1 yd of ivory hug snug to finish the bottom of the jacket, hooks and bars for the skirt, and thread.

How historically accurate is it? Pretty darn good. Definitely recognizable by someone in the 1890s. The construction is accurate, aside from the use of hug snug instead of bias and faux fur instead of real fur. So, 95%.

Hours to complete: Um… As usual, I did not keep track. I definitely spent at least 15 hours the few days before the event sewing on my braid and fur trim… Plus full days of pattern making, fitting, cutting, and sewing. Maybe 30-40 hours? I care so much more about the finished project than the time it takes to get there! And I loved sewing this, so I didn’t mind that it took time!

First worn: To a skating party that was part of the Commonwealth Vintage Dancers‘ 1890s weekend in January.

Total cost: $75 for the wool, probably about $8 for the fur yardage I used for this project, $4 for the braid, and the rest from the stash = $87

My accessories were a matching fur muff that I made a few years ago and wore once for caroling (with my as-yet-undocumented 1860s winter cape) but more often with my 1917 winter ensemble and a revamp of my 1883 wool hat. I didn’t have time to make a new hat because of all the last minute fur and trim sewing, so I pinned a fur scrap around the 1883 hat and added some feathers to stand up a bit more like 1890s hats and called it good. My main inspiration (and the reason I feel it was an acceptable looking style to have the squashy fedora hat look in the 1890s) was this image.

For good measure, here’s my Pinterest board for the entire project. And here are pictures of us skating (with ice skates: all our snow and cold weather does occasionally come in handy here in Boston)!

IMG_1911

IMG_1903

IMG_1942

IMG_1949

IMG_1947

Yes, we just crashed a local outdoor ice rink on a Sunday afternoon. One of the attendees even wore vintage skates! Turns out they can be hard to skate in because they’re not very supportive… but they looked fantastic! We got lots of comments from people asking what we were doing, why we were dressed up, and that we looked good. I was asked by multiple groups of young girls why I was dressed up and one group in particular asked what the swirly thing was that I had, which I got to explain was a muff to keep my hands warm!

10906529_10203571494468255_4785896006596651774_n
Here’s our skating group. People came in a variety of late 19th century and early 20th century winter outfits as well as modern clothes.

With my skating ensemble I wore fleece lined tights (modern, but warm so I didn’t care), knee high bamboo socks (modern again), my 1903 silk petticoat (super useful for the 1890s, also), a modern tank top (instead of combinations, because I needed to go to work later in the afternoon and change out of my outfit in the back seat of my car without being indecent…), my 1895 corset, and a long sleeve modern waffle tee (mostly to shield my skin against the wool seam allowances and also for warmth). And I was perfectly warm wearing this out for skating on a day that was sunny and right around freezing. In fact, with the muff and wool hat I actually was too warm at times.

IMG_1920
Pleased, chuffed, and smiling all afternoon! So fun! Maybe we will get to go skating again this winter!

Vernet Project: Have You Ever Head Of A Witzchoura?

I hadn’t!

164-0000-021 (1)

The text reads: “Toque de Velours. Witz-choura de Satin.” I’ve looked at enough fashion plates to guess the meaning of most of the text. After some quick reference to translation programs, I confirmed my suspicions and translated the text as: “Hat of velvet. ____ of satin.” The question is, what does “Witz-choura” mean?

First, let me tell you that I originally read the plate as “Toque de Velours. With-choura de Satin.” That z looks remarkably like an h, despite the fact that I don’t think “with” is a word in French (also, I don’t really associate the letter z with French words, so I was happy to interpret it as an h). I followed this path for awhile, though, despite the fact that it didn’t quite make sense. Assuming “With” meant what it does in English, I proceeded to try to figure out what “choura” meant. I looked at English dictionaries, including the Oxford English Dictionary, with no luck. And in French dictionaries the closest thing I found is that “choura” is conjugation of “chouraver” or “chourer,” a verb which seems to mean “to steal” or “to rob” in English. But that didn’t make any sort of sense! The only other reference to the word “choura” I found was that it has a connection to an Arabic word relating to the parliament of an Islamic state. Again, no connection. So then I thought, what’s the word for shoes in French? Maybe “choura” is an older form of that word? Turns out that “les chaussures” means shoes in French.

I was about to pursue this train of thought, when Mr. Q interrupted me. When I complained about my lack of useful results he suggested I try, amongst other ideas, a search of Google Scholar. My initial search turned up lots of science related publications with authors whose last names were Choura. But then, when I added the word “fashion” to my search, I was returned one result which was to the point and clarified the whole business (at least a little bit!). Mr. Q broke the mystery wide open!

The clarification comes from the book Empire Fashions by Dover Publishers. The relevant sentence can be found here and reads: “Around 1808, a high-waisted, fur-lined woman’s coat appeared, the witzchoura [wi choo ra].” Ohhhh, I thought, that’s not an h it’s a z!

Upon searching for it with the now-corrected spelling I finally found relevant information! All that will be in future posts, though. I thought I’d break it up to avoid having one really long post. So you can look forward to a post with descriptions of witzchouras and then also a post with images of them. At least I was on the right track!

(Click here for my original post about the 1814 Vernet Project, to which this post refers.)

Our Apartment Redecoration Project Part III: Bathroom

The last bit of our Apartment Redecoration Project that I want to share is the bathroom (we did the bedroom, too, but it’s hard to get pictures that show the changes, so you’ll just have to believe that it has improved).

IMG_3926

As you can see, a lot of the bathroom is finished with pink tile (and a matching tub, who thought that was a good idea?) and unfortunately that was something we couldn’t change. But Mr. Q had the idea to put in a floating floor of tile-look laminate over the old pink tile floor with the grungy grout that you can see below. It’s semi-permanent–something we can remove when we move out if necessary.

IMG_0027
Laying the grey/brown floating floor over the pink tile.

In addition to that project, which involved a lot of sawing of pieces and patterning around the toilet, we also: re-caulked the join between the tub and shower tiles, put up a new shower curtain rod and shower curtain hangers, hung a floating shelf over the toilet, replaced the light fixture, replaced the medicine cabinet, replaced the outlet cover, painted the walls, and tried to replace the fan in the ceiling (that idea was foiled by the way it was installed–the fan base was bigger than the fan blade area, we think it was installed before the ceiling was put in). Oh, and I reorganized everything under the sink and added storage solutions to make better use of the space.

IMG_0028
Wall in progress: clearly there is no light fixture, medicine cabinet, or outlet cover, and we were preparing to paint, all by the light of a work lamp.

There was a day or two when the power was cut off to that room so Mr. Q could deal with the electrical stuff and we were showering and working on the bathroom by the light of a hanging work light… a bit of an inconvenience but not the end of the world.

IMG_1471

In the end, all the work paid off and the bathroom looks a lot nicer and less pink. And all in all, our apartment looks more put together and designed than it did before. I’m also pleased that the furniture we jettisoned from the living room and bedroom found it’s way to a new home within ten minutes of being put in the lobby with a “free” sign! We’ve had our days of taking advantage of free things in the lobby and I’m glad someone else will be able to make use of the things we no longer need rather than just throwing serviceable and nicely cared for things in the trash. We received, we give… I appreciate the circle of sharing!

Summary of 2014: Looking Forward To 2015

Ahh! It’s halfway through January and I feel rather behind on posting my 2014 summary. It seems like everyone else is so much more on the ball with that than I am this year. Well, without further ado…

Completed projects in 2014:

IMG_0672
January: The Make Do Shift (HSF #1)
IMG_9921
February: A Pink Regency Belt Style Sash (HSF #3)
IMG_7441
March: ca. 1860 Corset For Me! (HSF #4)
IMG_7827
March: New Annabelle hair wreath
IMG_8442
April: 1811 Elusive Blue Regency Dress (well, mostly finished)
IMG_0791
April: Red/Gold Regency Reticule (HSF #5)
Robe with slip (1)
May/June: Anne Adams Dress
Robe with slip
May/June: Round Regency Reticule
9359
July: Georgina Evening Bodice and Hair Crescent (HSF #13)
IMG_1075 (1 of 1)
July: Orange Parasol
IMG_9688 (1 of 1)
July: 1850s Collar
IMG_0122 (1 of 1)
August: 1920s Sinamay Hat (HSF #15)
IMG_9660
November: 1917 Cranberry Red Scarf (HSF #23)
IMG_1584
November: Our Apartment Redecoration Project
IMG_0038
December: 1950 Baroness Dress

Looking forward to 2015, I’m planning the following for certain:

  • 1890s skating ensemble
  • New Regency hair decoration/turban/thingy
  • A secret Vernet ensemble

Other projects might include:

  • A modern dress made of black patterned rayon
  • An 1850s plaid ball gown
  • A 1910s “tango” corset
  • A new 1910s evening gown
  • An 1880s corset
  • Modern capris
  • Modern tops
  • Finishing a modern cotton dress I started last year
  • Finishing a 1910s evening dress I started last year
  • Finishing an 1880s day dress I started in 2013
  • A 1900s evening gown
  • An 1830s evening gown
  • Knitted red gloves
  • A robe de style
  • A late 1910s day dress
  • Finishing an 1814 pelisse and day dress I started at some point

Of course, I have lots of other ideas in mind, too! A lot of it depends on how busy I am, how much time I have to sew, and what events pop up.

As usual, I completed some things on my looking forward to 2014 list and some things just totally fell by the wayside. In particular, while I started panniers for the court gown project, I didn’t finish them, nor did I start any other part of that ensemble. I’m a bit sad that I didn’t work on this project very much. I’m pondering whether to leave it on my list of things to do or to reallocate the fabrics for some other project. I was so excited to participate, but I have so many other things to make that I can actually wear to events… and I wasn’t boosted along in my enthusiasm by the general blogging world because it seems lots of other excited people were busy last year also. Alas, life takes up so much time!

I did exceed 100 followers and 200,000 views on the blog this year. And I announced my engagement (and to be fair, planning a wedding is definitely something that is keeping me busy in my spare time!). I was also awarded the Liebster Blog Award for the second time. This time by Susan, of the blog Threading Through Time.

I participated in the Historical Sew Fortnightly 2014, but only completed 7 challenges out of 24. I think I was mostly busy with life or busy with other projects that didn’t line up with the HSF for most of the year. I will likely participate in the HSF 2015 this year, though as in the past two years I won’t go super out of my way to make projects just to satisfy challenges if they’re not also being made for another purpose.

And in terms of events… 22 for 2014: 9 balls, 8 other events (teas, picnics, outings etc.), and 5 performances.

IMG_1693
We spent the beginning of this month vacationing in the Caribbean. As we continue to sail along on our life adventure, I hope to create many more fond memories and retain the relaxation from our Caribbean escape. I hope your year is full of the same!

19CBRE: The Height Of Ill-Breeding

4a8c317e9d77bb6eebfcfc1502a96598
The Soiree by Jean Beraud

Never anticipate the point or joke of an anecdote told in your presence. If you have heard the story before, it may be new to others, and the narrator should always be allowed to finish it in his own words. To take any sentence from the mouth of another person, before he has time to utter it, is the height of ill-breeding. Avoid it carefully.

Be careful always to speak in a distinct, clear voice; at the same time avoid talking too loudly, there is a happy medium between mumbling and screaming. Strive to attain it.

This particular quote is from page 14 of the The Ladies’ Book of Etiquette, and Manual of Politeness (1873), source here. Warning to all: avoid the “height of ill-breeding” in the new year! And, happy new year!

1950 Baroness Christmas Dress!

Success! I not only finished my 1950 Baroness Christmas dress the weekend after Thanksgiving, but we also managed to line up our schedules and go see The Boston Ballet’s Nutcracker at the beautiful Boston Opera House, where we took pictures! There were brass bands playing outside and carolers in silver down coats on our walk to the theatre. It was all very festive. And, of course, there was The Nutcracker with a live orchestra.

As you might be expecting, I wore my Christmas dress and took pictures for Edelweiss Patterns’ Virtual Christmas Dress Party. The original inspiration image is in this post. The dress is made from rayon and lined with polyester. I made an attempt to do a 50s stylized up-do, too, though I don’t have any close up head shots… but without further ado, here it is:

IMG_0025

IMG_0026

There were a few changes from the original, like adding a slit behind the front drape for ease of movement, adding a self fabric belt over the waist seam, and not quite making the pleats across the front deep enough to read once the bow was attached. I’m quite pleased, however, and love how festive the dress is! (And it’s quite formal, with that low back…)

Our group was very well balanced in having two greens and two reds, and three hats, and four  gloves (two pairs, you know)… (It sounds like One Fish Two Fish Red Fish Blue Fish or The Twelve Days of Christmas, doesn’t it?)

IMG_0033
3 hats!
IMG_0024
5 of us in 1950s inspired Christmas outfits!
IMG_0038
Merry Christmas!


Our Apartment Redecoration Project Part II: Pillows

The new couches that sparked our apartment redecoration project also came with four feather pillows. They were rather squashed and sad when we received them, but I decided to give them a fluffing and make new covers for them to accent our newly decorated room. (After all, feather pillows are quite nice and there was no sense in discarding them.)

IMG_1584
Our recently redecorated living room.

It was a challenge to find fabric that would match the colors of our room, was a design we both liked, and was not $40/yard. At the very last store I went to I found three fat quarters with this fairytale tree design for about $1.50 each.

IMG_1589

I scoured the store looking for more but to no avail. What to do with four pillows and only three pieces of fabric? Also, the fat quarters weren’t quite big enough to cover the entire front of the pillows…

IMG_1590

Luckily, I had an off-white cotton in the stash that perfectly matched the background of the fat quarters. I used it to make the backs of the pillows, including the bit that wraps around to the front and makes those bars top and bottom. For the fourth pillow, I made a cover entirely out of the solid fabric. It lives on our red circle chair, where it is a nice contrast. And the off-white looks fine with the white couches, since there are other off-white things in the room, like the walls, which are large! And really, our two seater couch would have been overwhelmed with two patterned pillows anyway. These 22″ pillows are not small! It worked out perfectly!

IMG_1576
Inside a pillow cover. I serged all the seams, because serging is fun, and easy!

I followed this tutorial to make my pillow covers, adjusting for the extra seams I needed to add to use my fat quarters. I also flat lined all the pillow covers with muslin to help keep the feathers from poking through, to provide opacity, and to help disguise the seam allowance from the fat quarter seams. I love that this style cover does not require closures and is easy to remove if necessary. We love that the pillows give an interesting spark to the room, jazzing up our couches a bit with their non-solid fabric.

Our Apartment Redecoration Project Part I: Living Room

I mentioned a few posts back how busy I was. Things have mostly settled down, our redecoration is complete, and now I have time to share pictures!

IMG_3919

The redecoration project was rather unplanned. It all started because we were gifted two very nice couches. When Mr. Q suggested that we take the couches I will admit that I was dubious. Our purple Ikea couch has supported us well over the last few years and I didn’t know if the new ones would be that much nicer. But they are much nicer… higher quality foam stands up much better to use over time and deeper cushions are just more comfortable–there’s more space to tuck your legs up on the couch or surround yourself with blankets and pillows!

IMG_1584

Our before and after pictures aren’t quite at the same angle, but you get the idea. The dining area didn’t change a whole lot, so I didn’t feel it needed to take up as much space in the picture. You can see that we’ve gained furniture and “stuff” over the last three or so years (and that before picture was very early on, but I thought we’d go for the most drama in terms of change).

Those white couches you see came to us with country-farm style red covers on them. It was the right sort of color but not at all the right style for our modern jewel tone living room. After lots of stressing about the potential of having to recover the new couches, I realized that the shape of them wasn’t much different than our ikea couch. And that led us to Ikea-hack covers for our new couches.

We bought 3 white cotton twill Ektorp couch covers (a 3 seater, a 2 seater, and one extra 3 seater for extra fabric), chopped them up as needed so they could expand to fit the new couches, then chopped up the extra fabric cover to fill in the gaps, and finally sewed all the unusual seams to create a new couch cover that would fit. It’s not a beginner level sewing project, but it’s certainly do-able if you have an idea of draping and are creative about problem solving how to expand a couch cover to fit a larger couch than it was intended for. I think this will all be easier to show in pictures.

IMG_0008
Thankfully, the cushion covers fit our new couch cushions pretty perfectly! (Mr. Q notes that he wouldn’t say “perfectly” but maybe “with some coaxing.”) The foam is a little stuffed in, but it was so much better than having to make the cushion covers from scratch. The prospect of doing it from scratch was just overwhelming!
IMG_1440
Here’s our new 2 seater couch with the chopped up Ikea cover on it. You can see that there is a significant gap between the pieces along the seat seam and around the back of the arms.
IMG_1443
But that’s why we purchased an extra cover, so that I could chop it up and piece it in where needed. I’ve got my sewing tools out: seam ripper, snips, pins, sewing measuring tape, tool-type measuring tape, sharp fabric scissors, more pins, pencil, and a ruler. And you can see that I was in the process of measuring out a section to piece in.
IMG_1439
It’s very clear in this picture that the ikea cover was not deep enough for the new couch. So we have a seam that runs over the arm of each couch and down the side, but with the cushions on you really don’t see them at all.
IMG_0004
It’s hard to see in the last picture, but I also had to adjust the top corner of the cover on the 2 seater couch. The Ikea covers have darts along the back that you can just make out in this picture (I’ve unpicked them), but the back of this couch was shorter than the cover (odd, because the 3 seater fit perfectly). So I needed to reposition the darts differently for this couch.
IMG_0001
I also needed to take in the center seat section on the 2 seater couch. It was between 1″-2″ too wide and looked sloppy. I made a fuss but decided to take it in the right way, on the seams between the seat and the arm section, and I’m glad I did, because you can’t tell at all on the finished couch that I had to do that alteration.
IMG_0017
Now on to the 3 seater couch. It needed the same addition for depth that the 2 seater did. You can see that I’ve sewn the addition to the bottom seat section but haven’t sewn it to the top/back yet. I had to do some interesting piecing over the arm, which is what I’m doing in this photo.
IMG_0019
Here’s another view after I’ve attached that depth extender to the seat/back and am working on the seams to piece in the weird bit over the arm of the couch. If you look closely you will see that there are actually two oddly shaped pieces near my hands.

It was a long Saturday of shopping at Ikea and sewing until late into the night. Mr. Q doesn’t have the sewing skills to help with that part but he was engaged the entire time in positive encouragement and occasionally seam ripping or other assigned jobs.  He also put all of the cushion covers on while I was madly seam ripping and taking large white bundles to my sewing table.

I didn’t take the time to nicely serge or finish the new seams. We actually had to wash the 2 seater cover one day after finishing it (oops! but at least the stain came right out along with the wrinkles!) and the seam allowances frayed as you would expect, but not enough to cause any alarm. So I’m not worried about it. There was also nice velcro on the old red cover that held the cover to the couch under the curve of the arms and also along the back seat area. We kept the velcro but didn’t get around to sewing it on. I think it would be nice under the arms, but I’m not inclined to do it anytime soon. The bit along the back doesn’t seem to have made a difference–our new cover stays in place without a problem.

IMG_1448
Ta da! Finished ikea-hack couch covers, with all new pillows and throws (that make such a fuzzy mess on our white couches… we definitely did not think that one through!).