I’ve been slow to post my final group of pictures from this event. Sorry! You’ll remember that I first posted Three Series of Photos of my new green 1864 ball gown, Evie, and her undergarments? Then I posted A Second Series of Photos of friends? It’s finally time for the final installment of posts from the Commonwealth Vintage Dancers’ Returning Heroes Ball back in March.
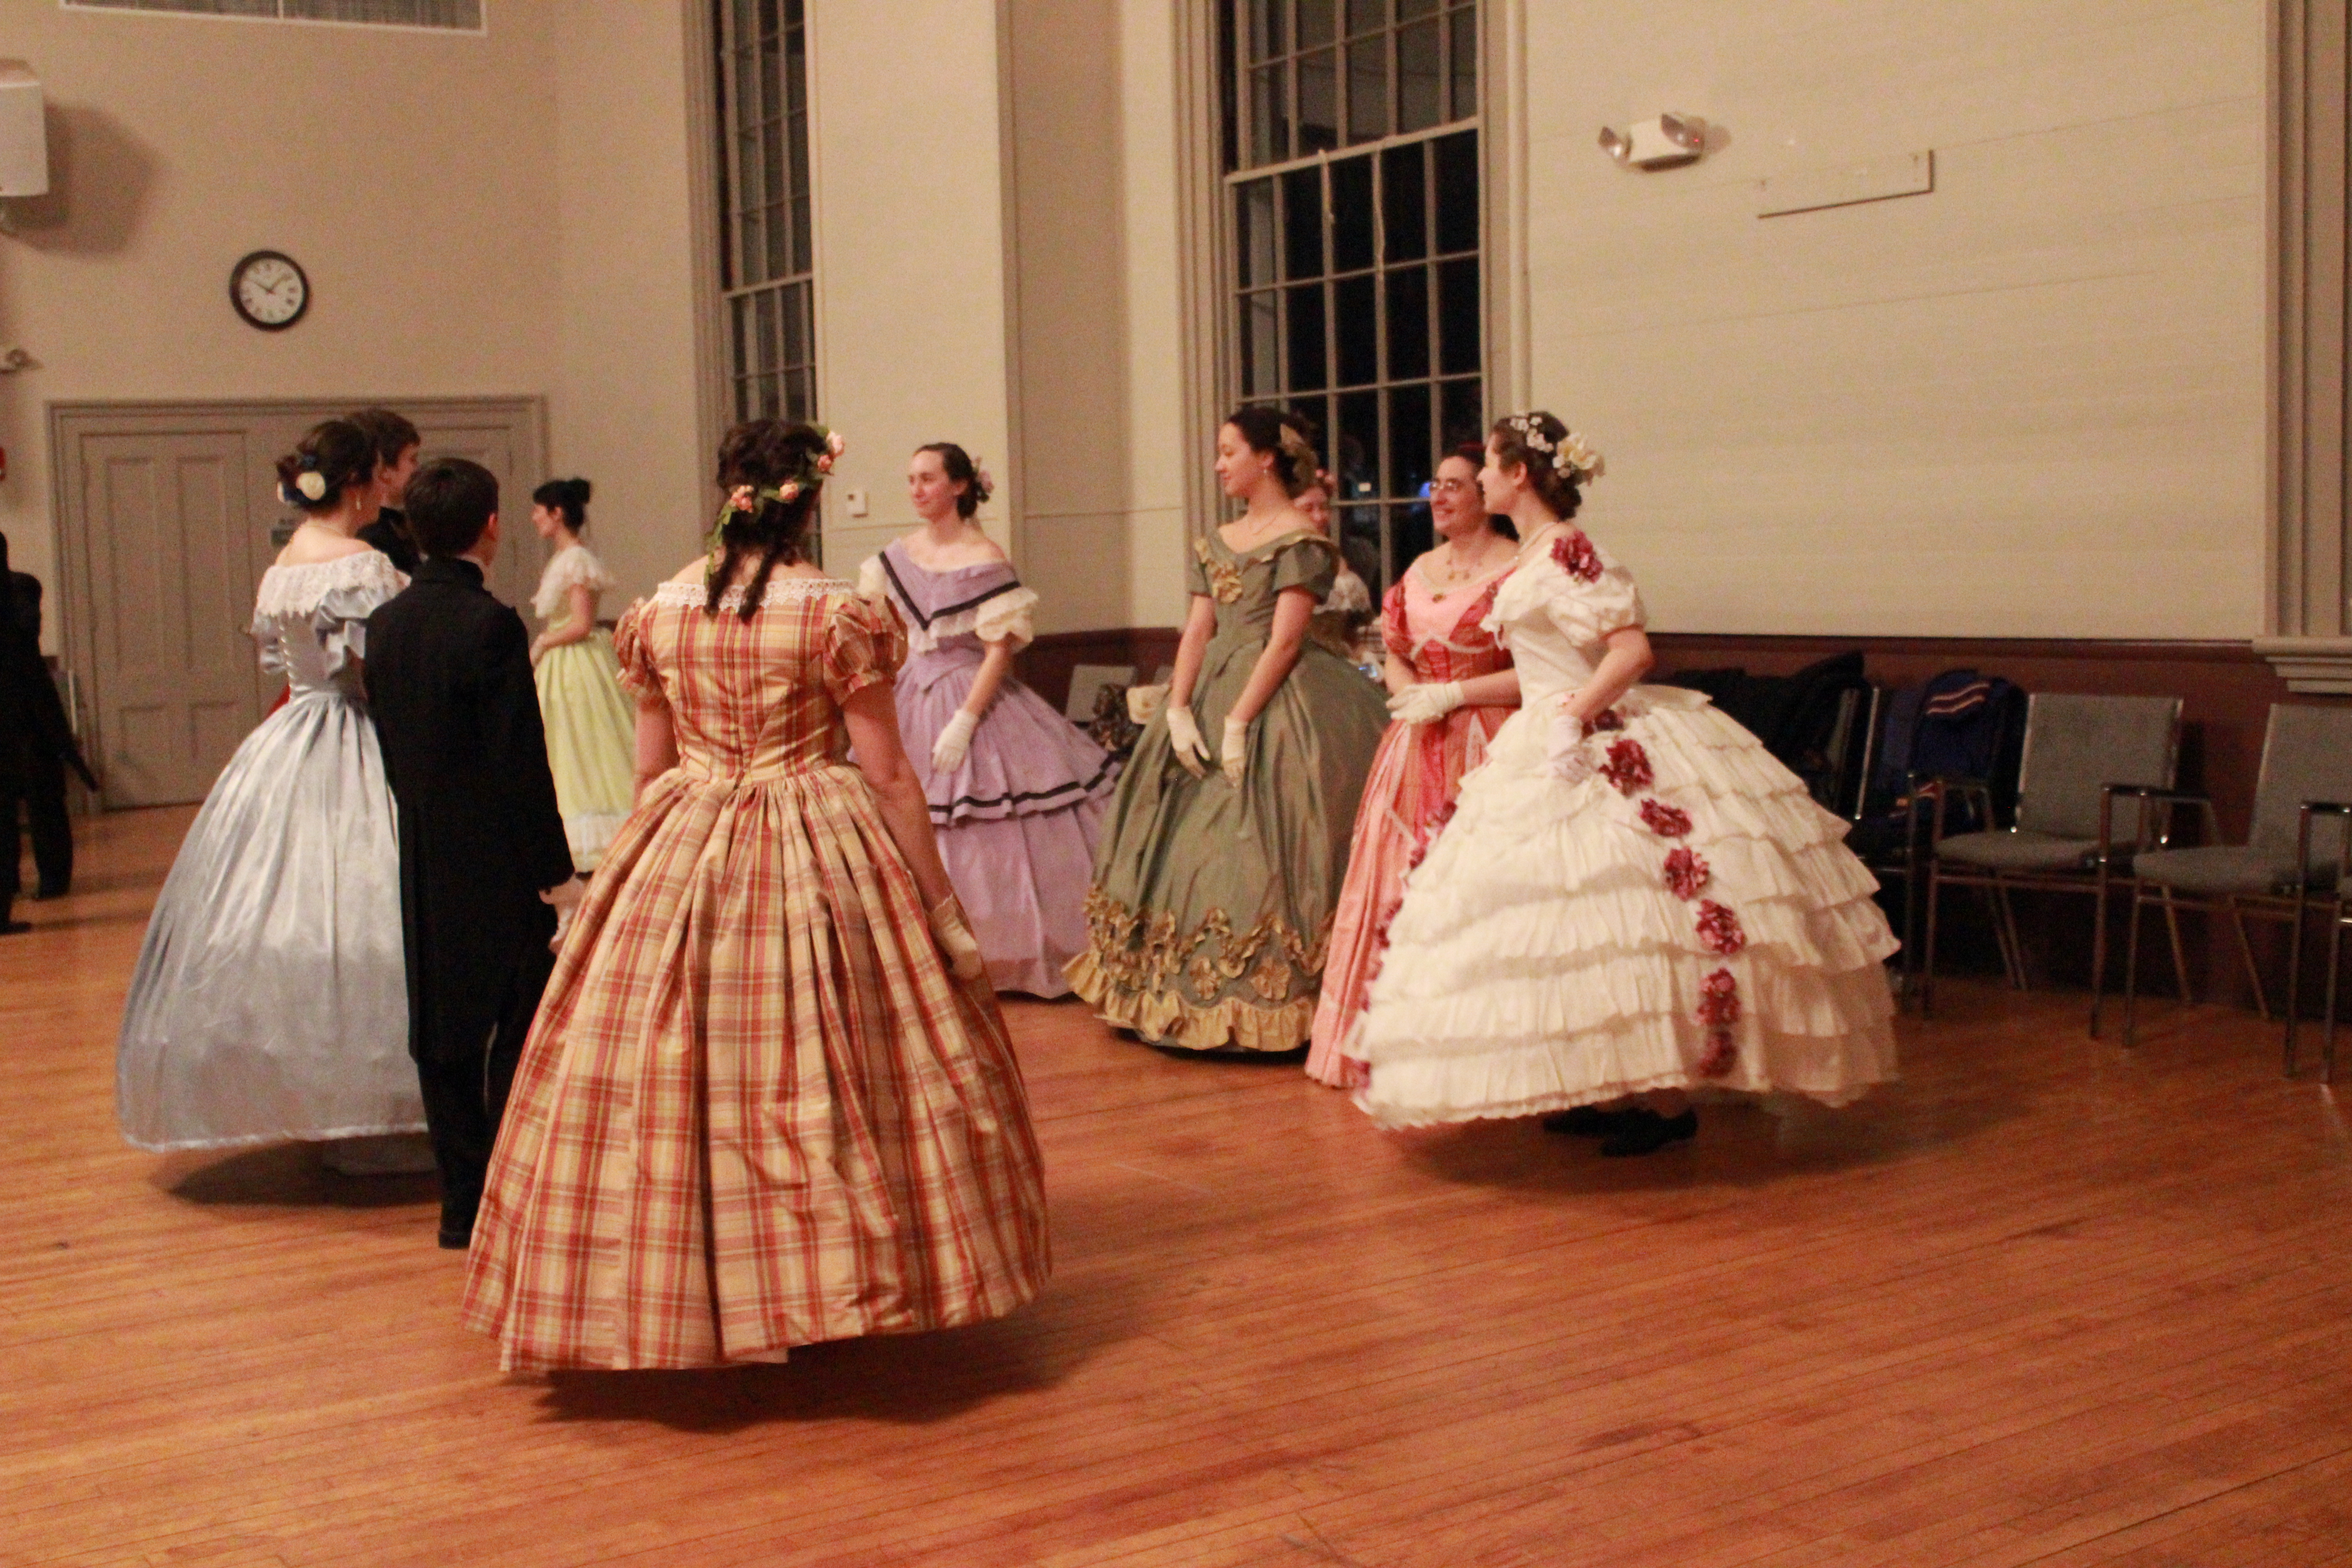
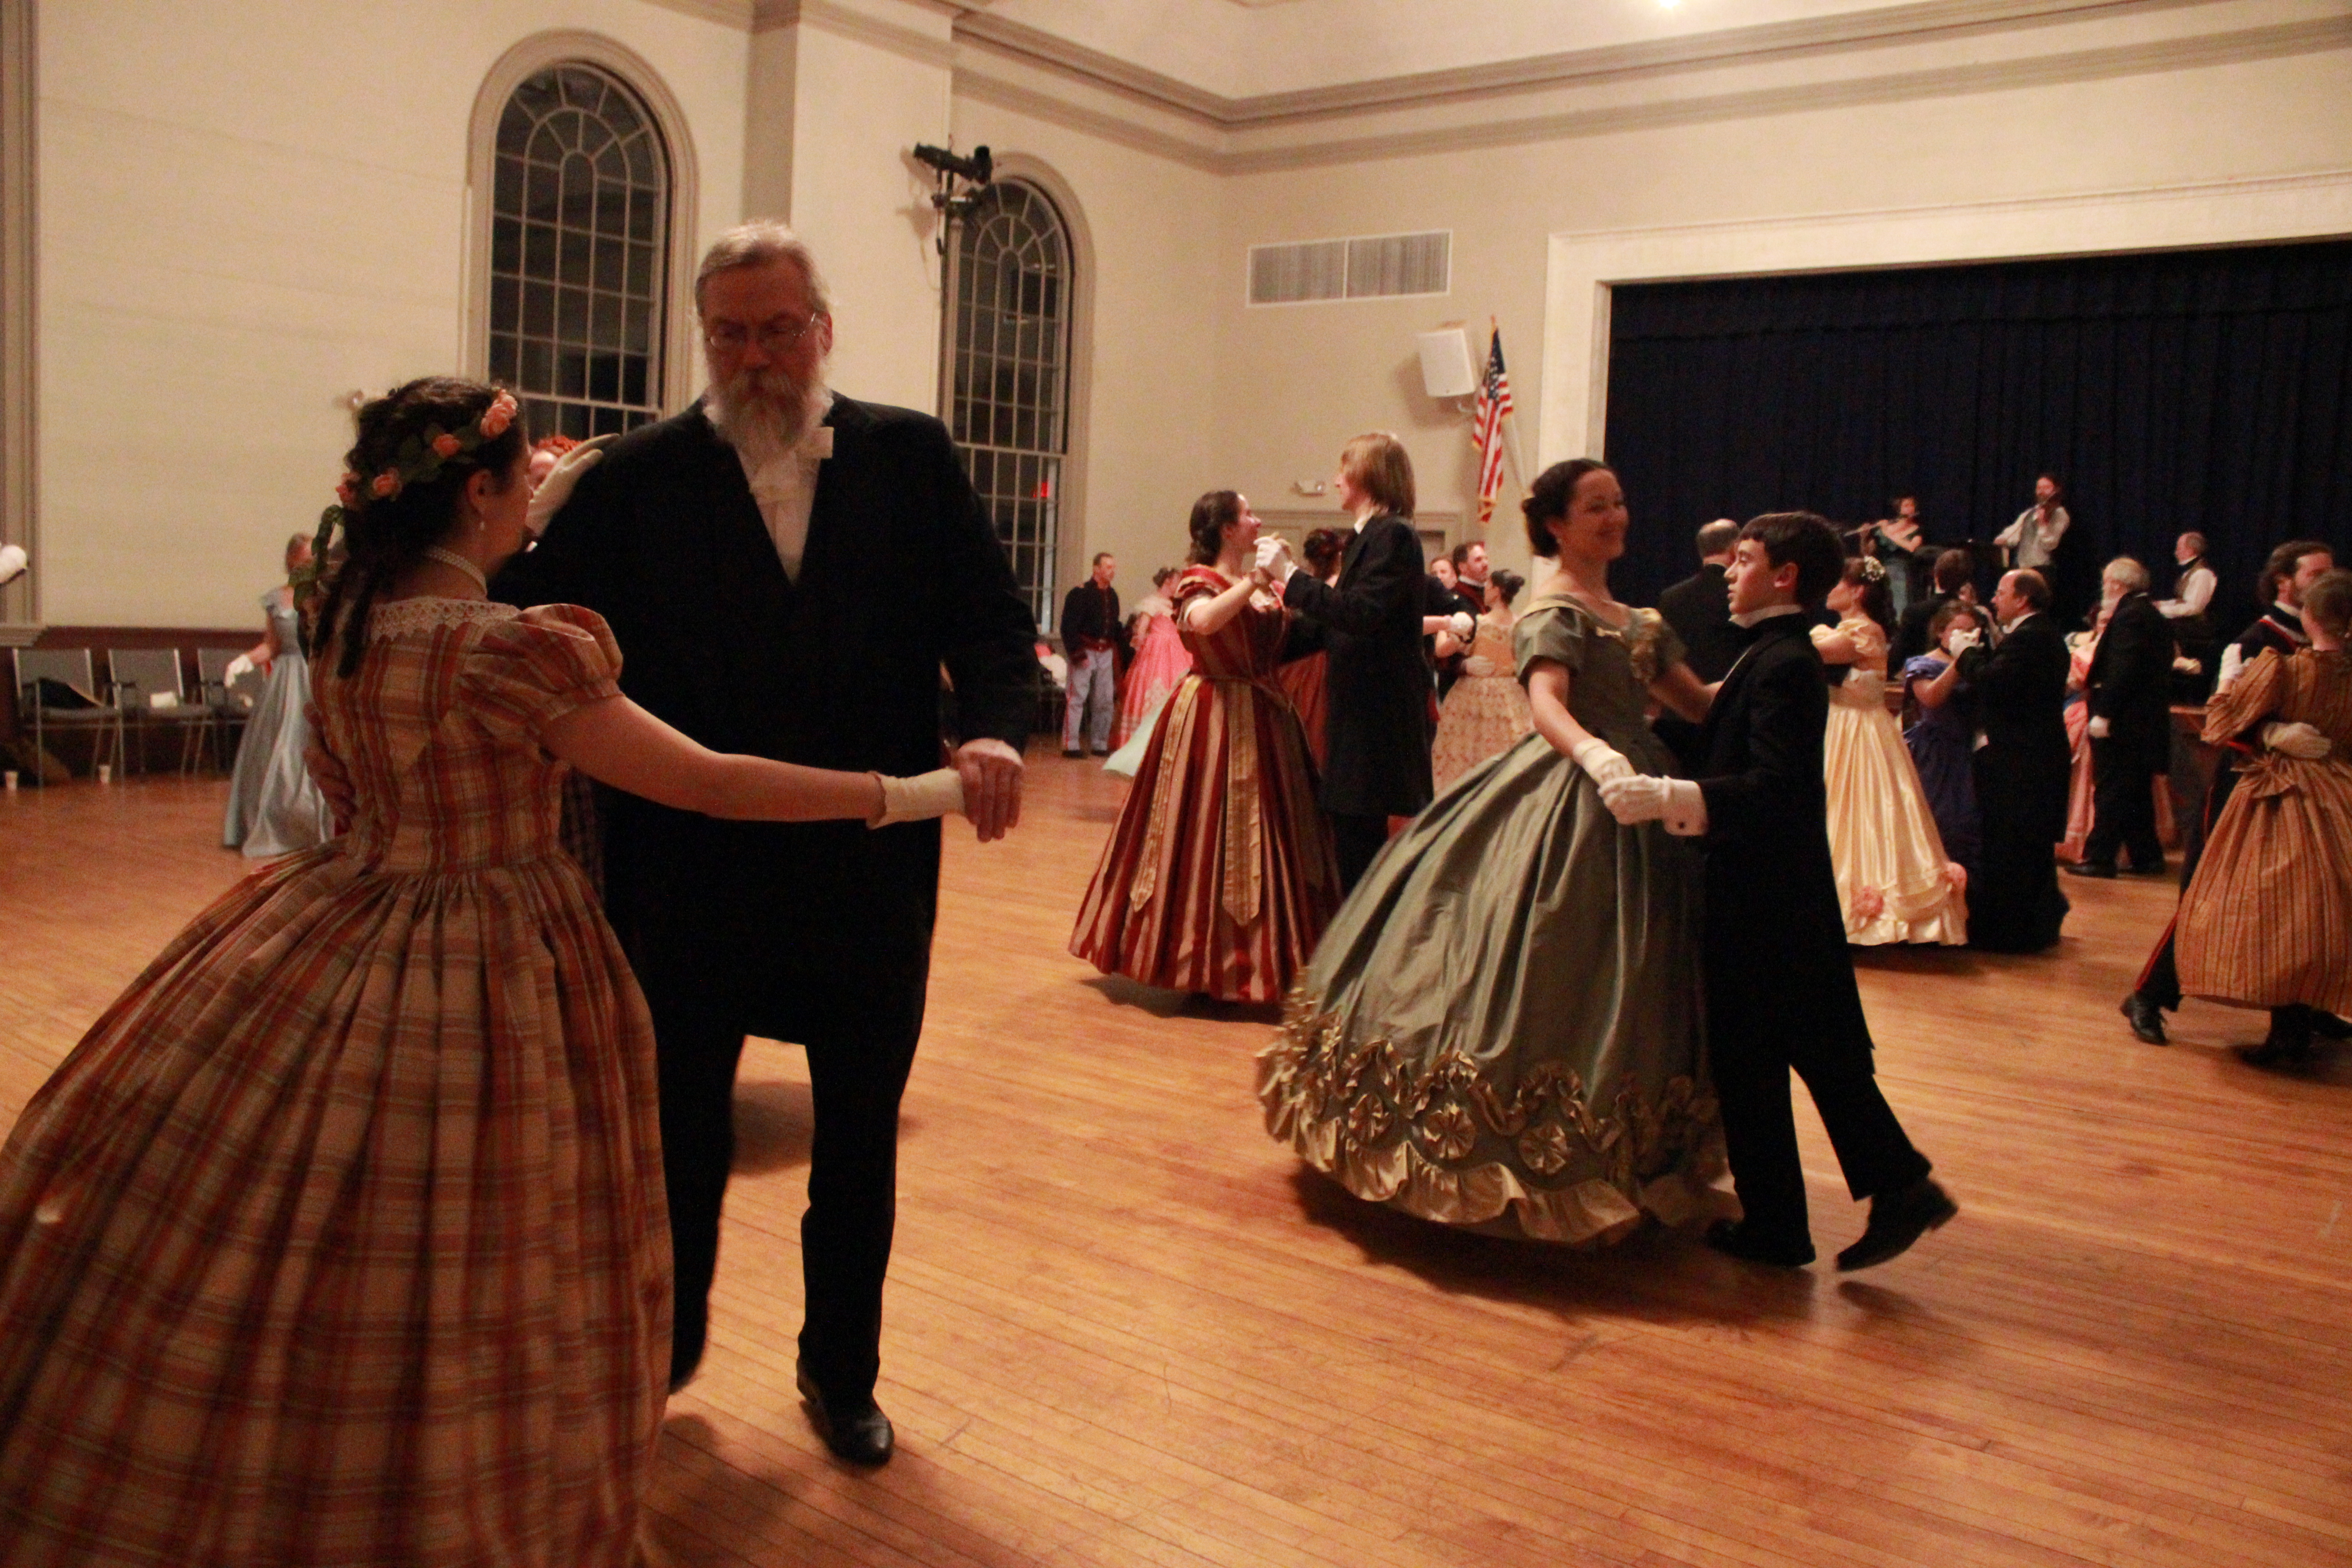
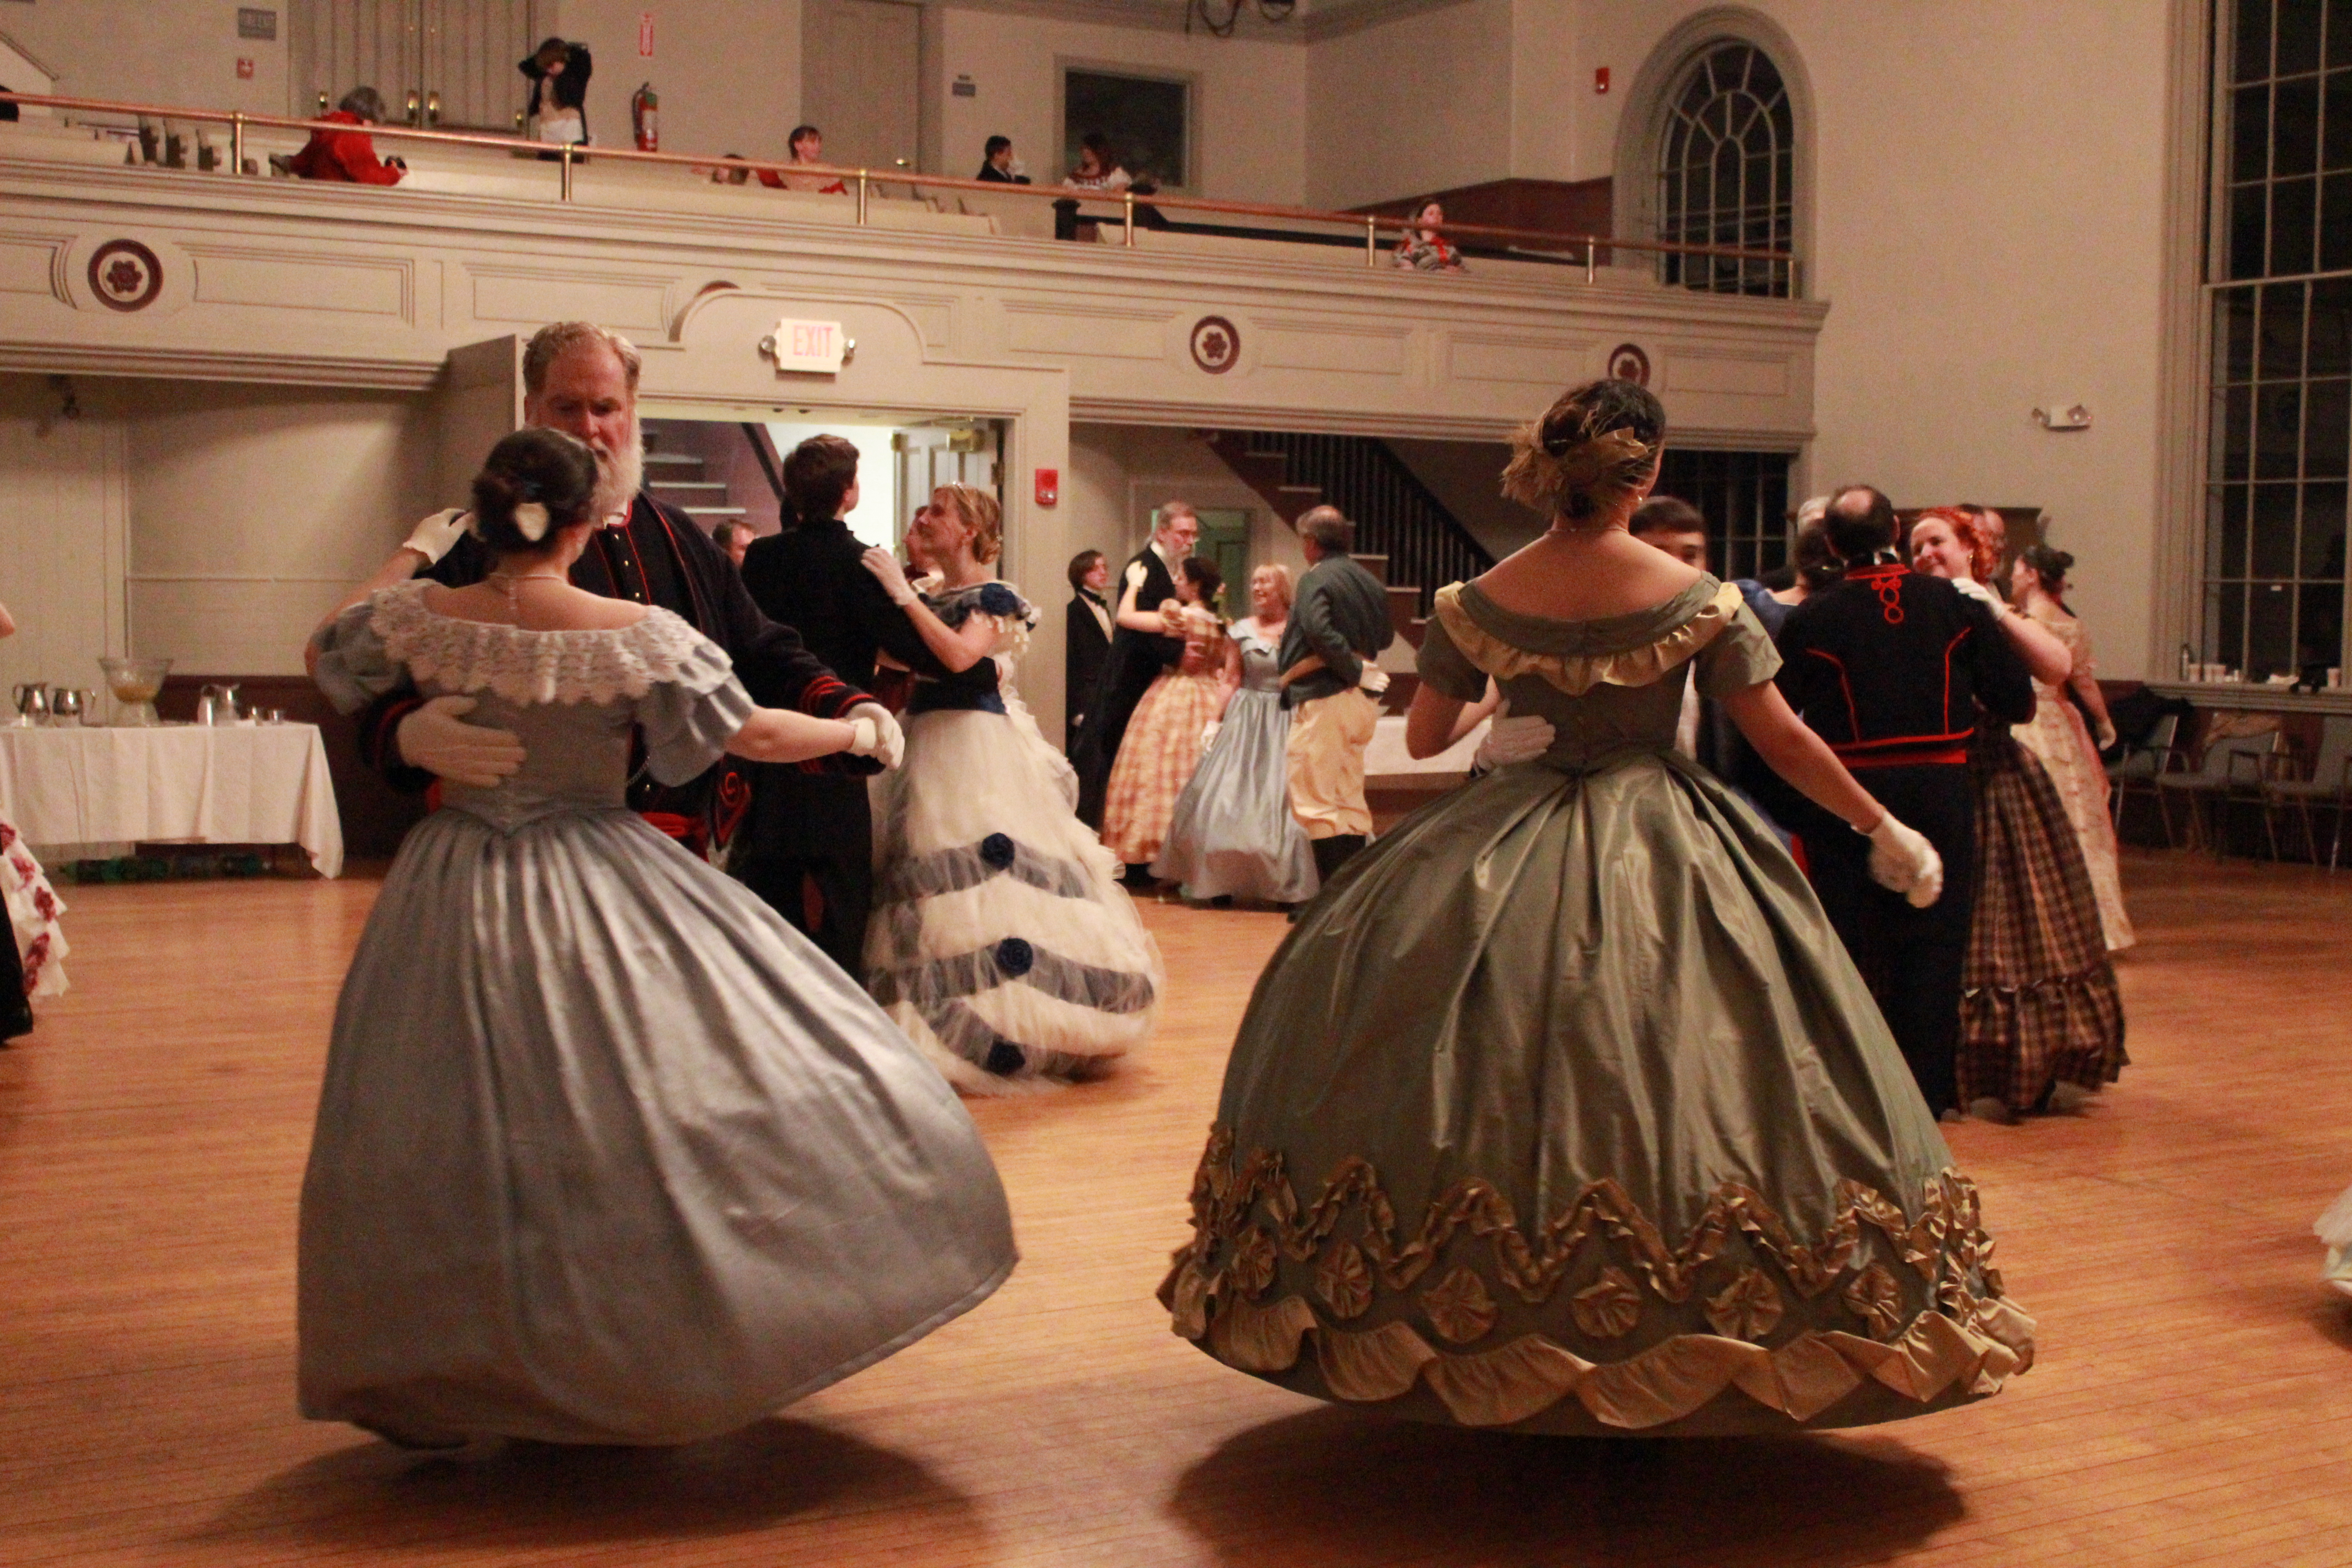
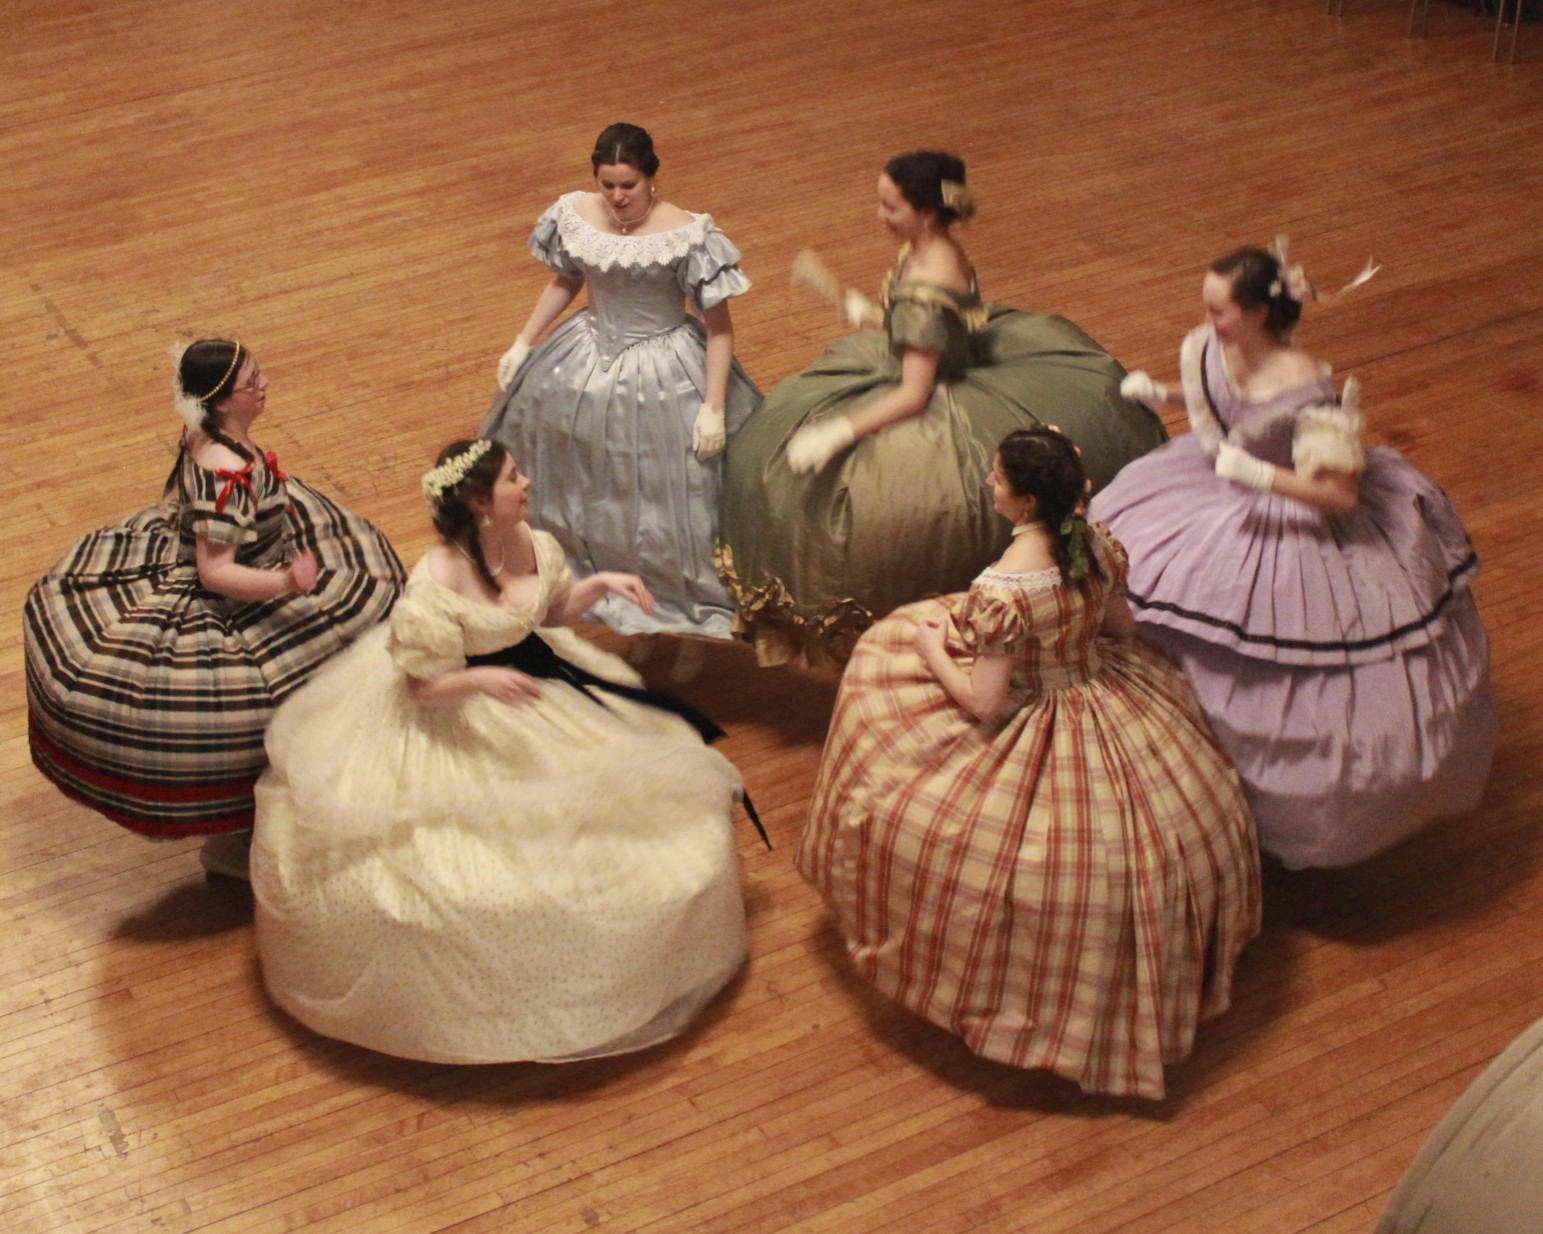
A ballroom full of hoop skirted ladies and suited gentlemen.A lovely set of dancers. Don’t we all look nice in our light colored dresses?Dancing a waltz.A “German Cotillion” dance game during intermission, in which the two young men vied for the young lady holding the candle, each trying to blow it out first. Whoever blew it out was rewarded with a waltz.More dancing after intermission.Caught on camera!Do The Jellyfish! There are more Jellyfish pictures from Ochre Court last year.The chandelier is perhaps not the loveliest style, but I like the artsy style of the photo. The coffered ceiling is great!
Last post, I shared the three series of photos of Evie with you. Now it’s time to expand the focus of the camera to include other lovely people from that night!
First: Series Of A Friend
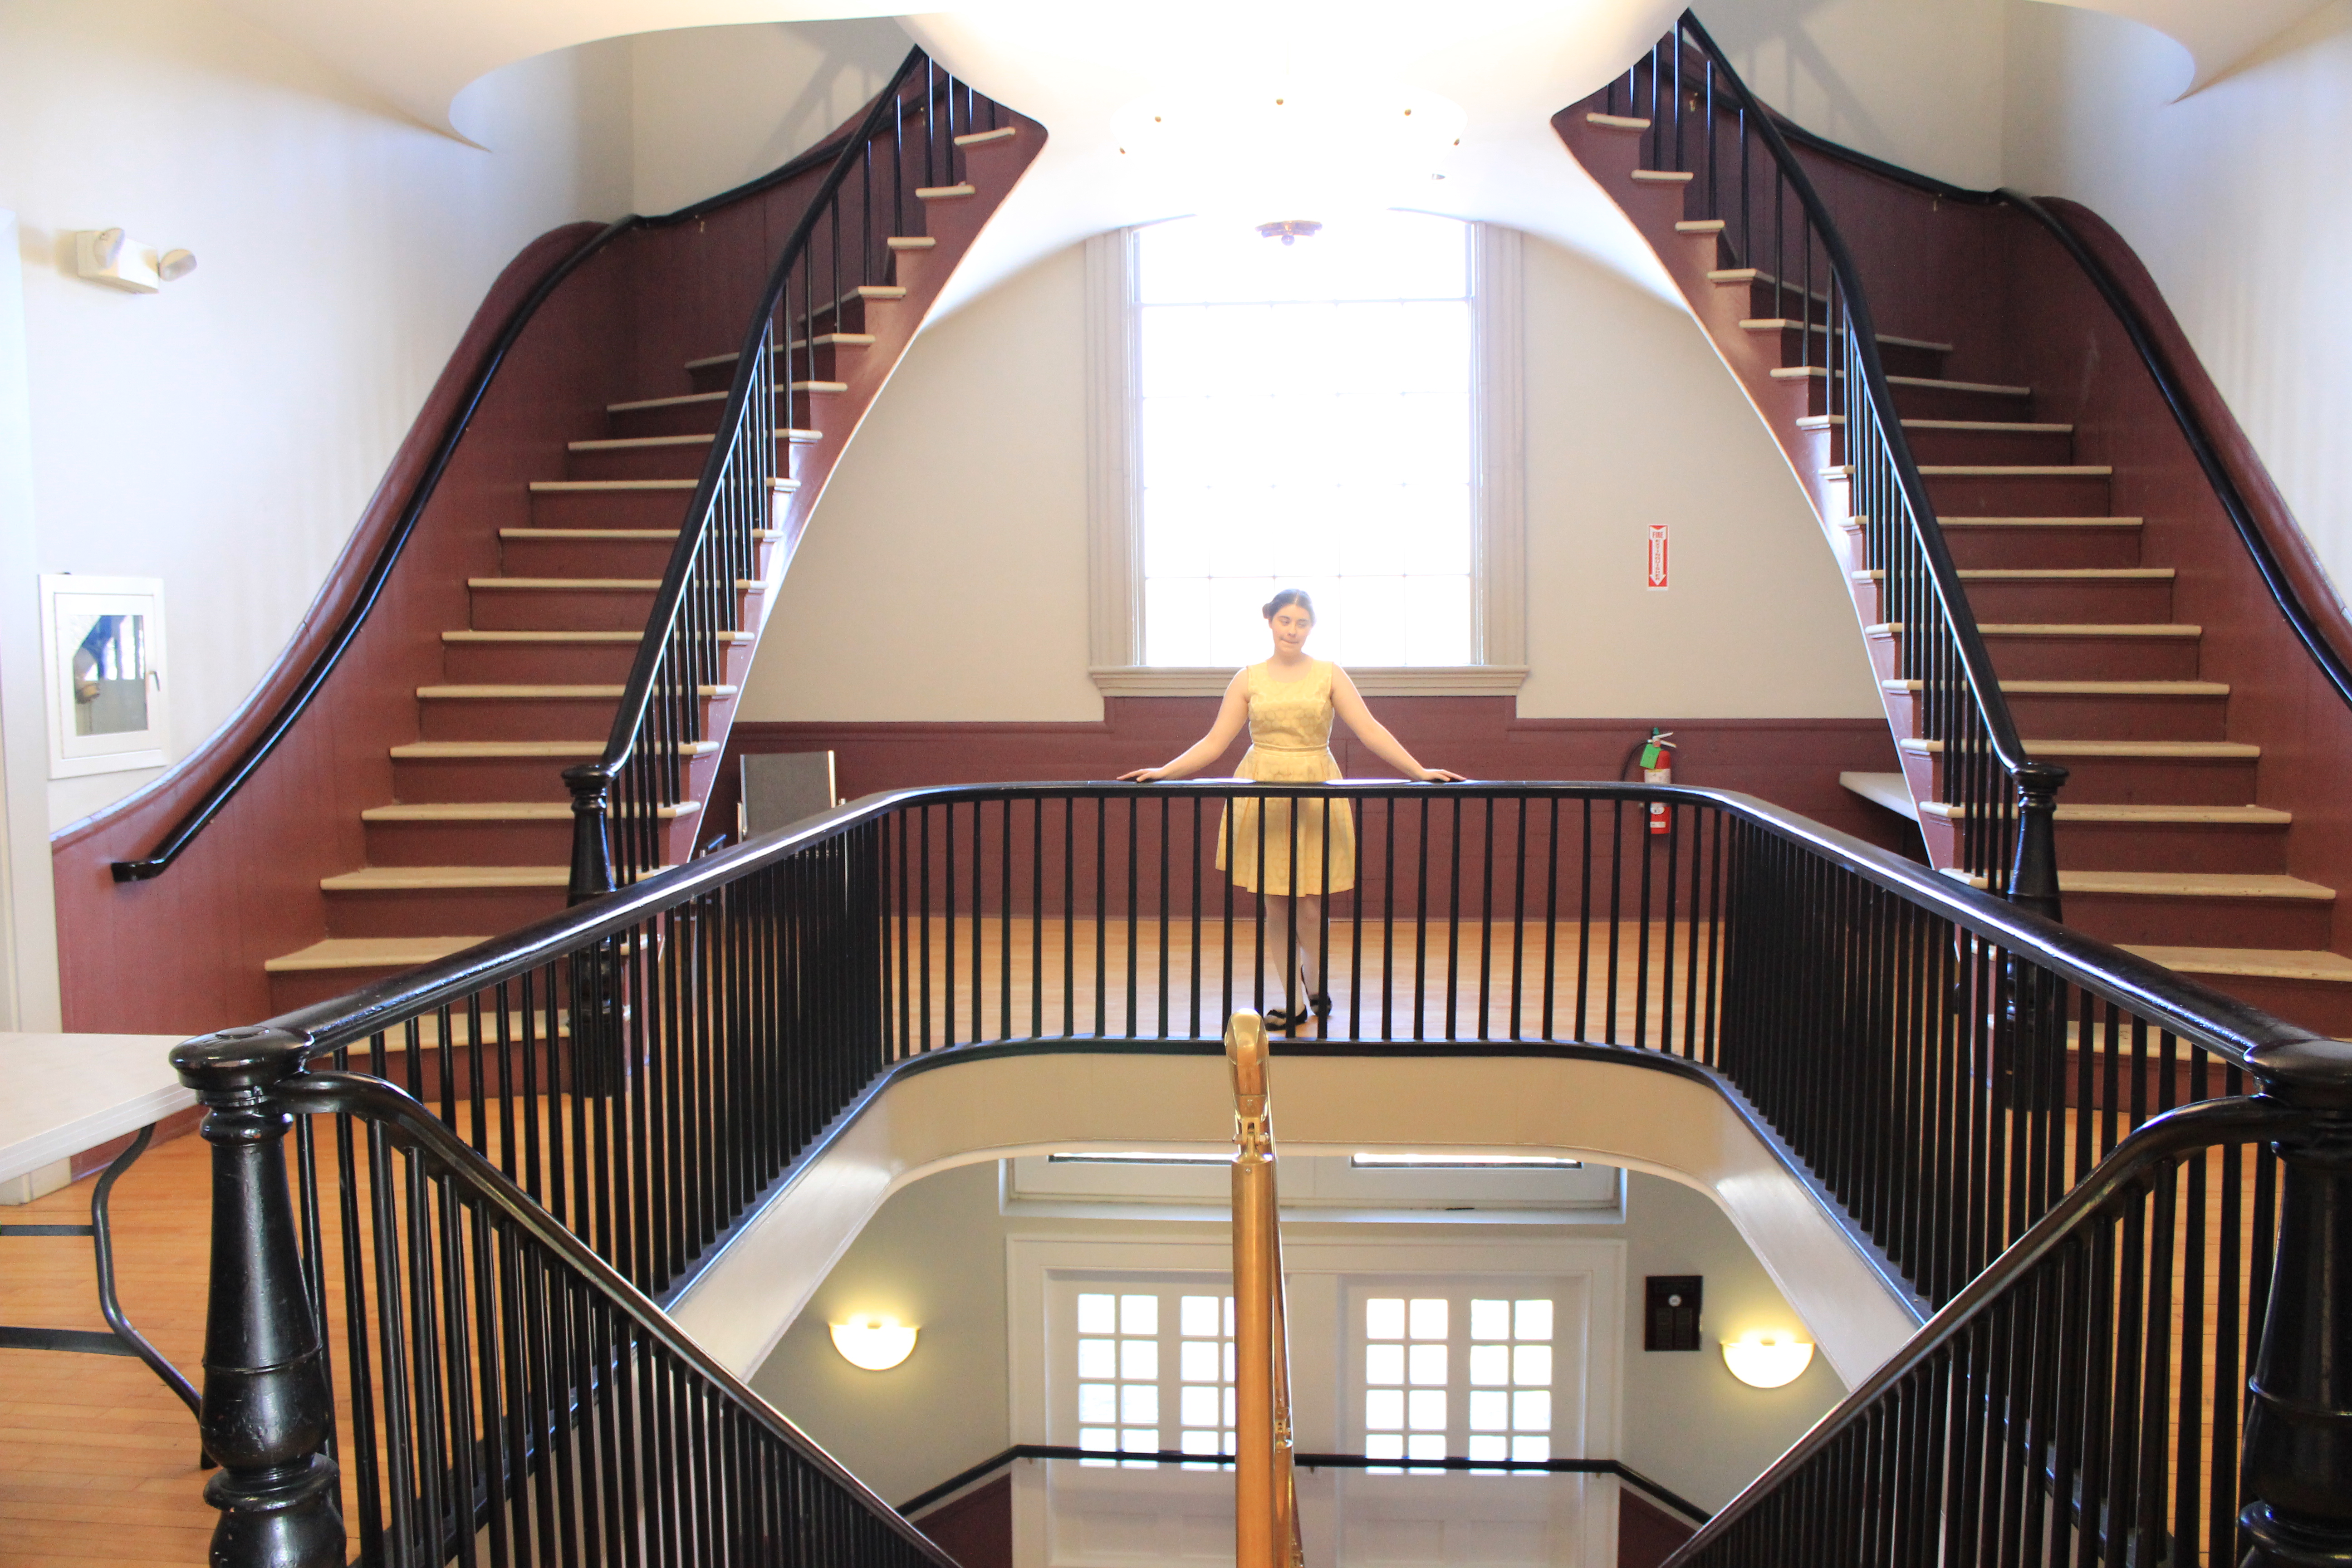
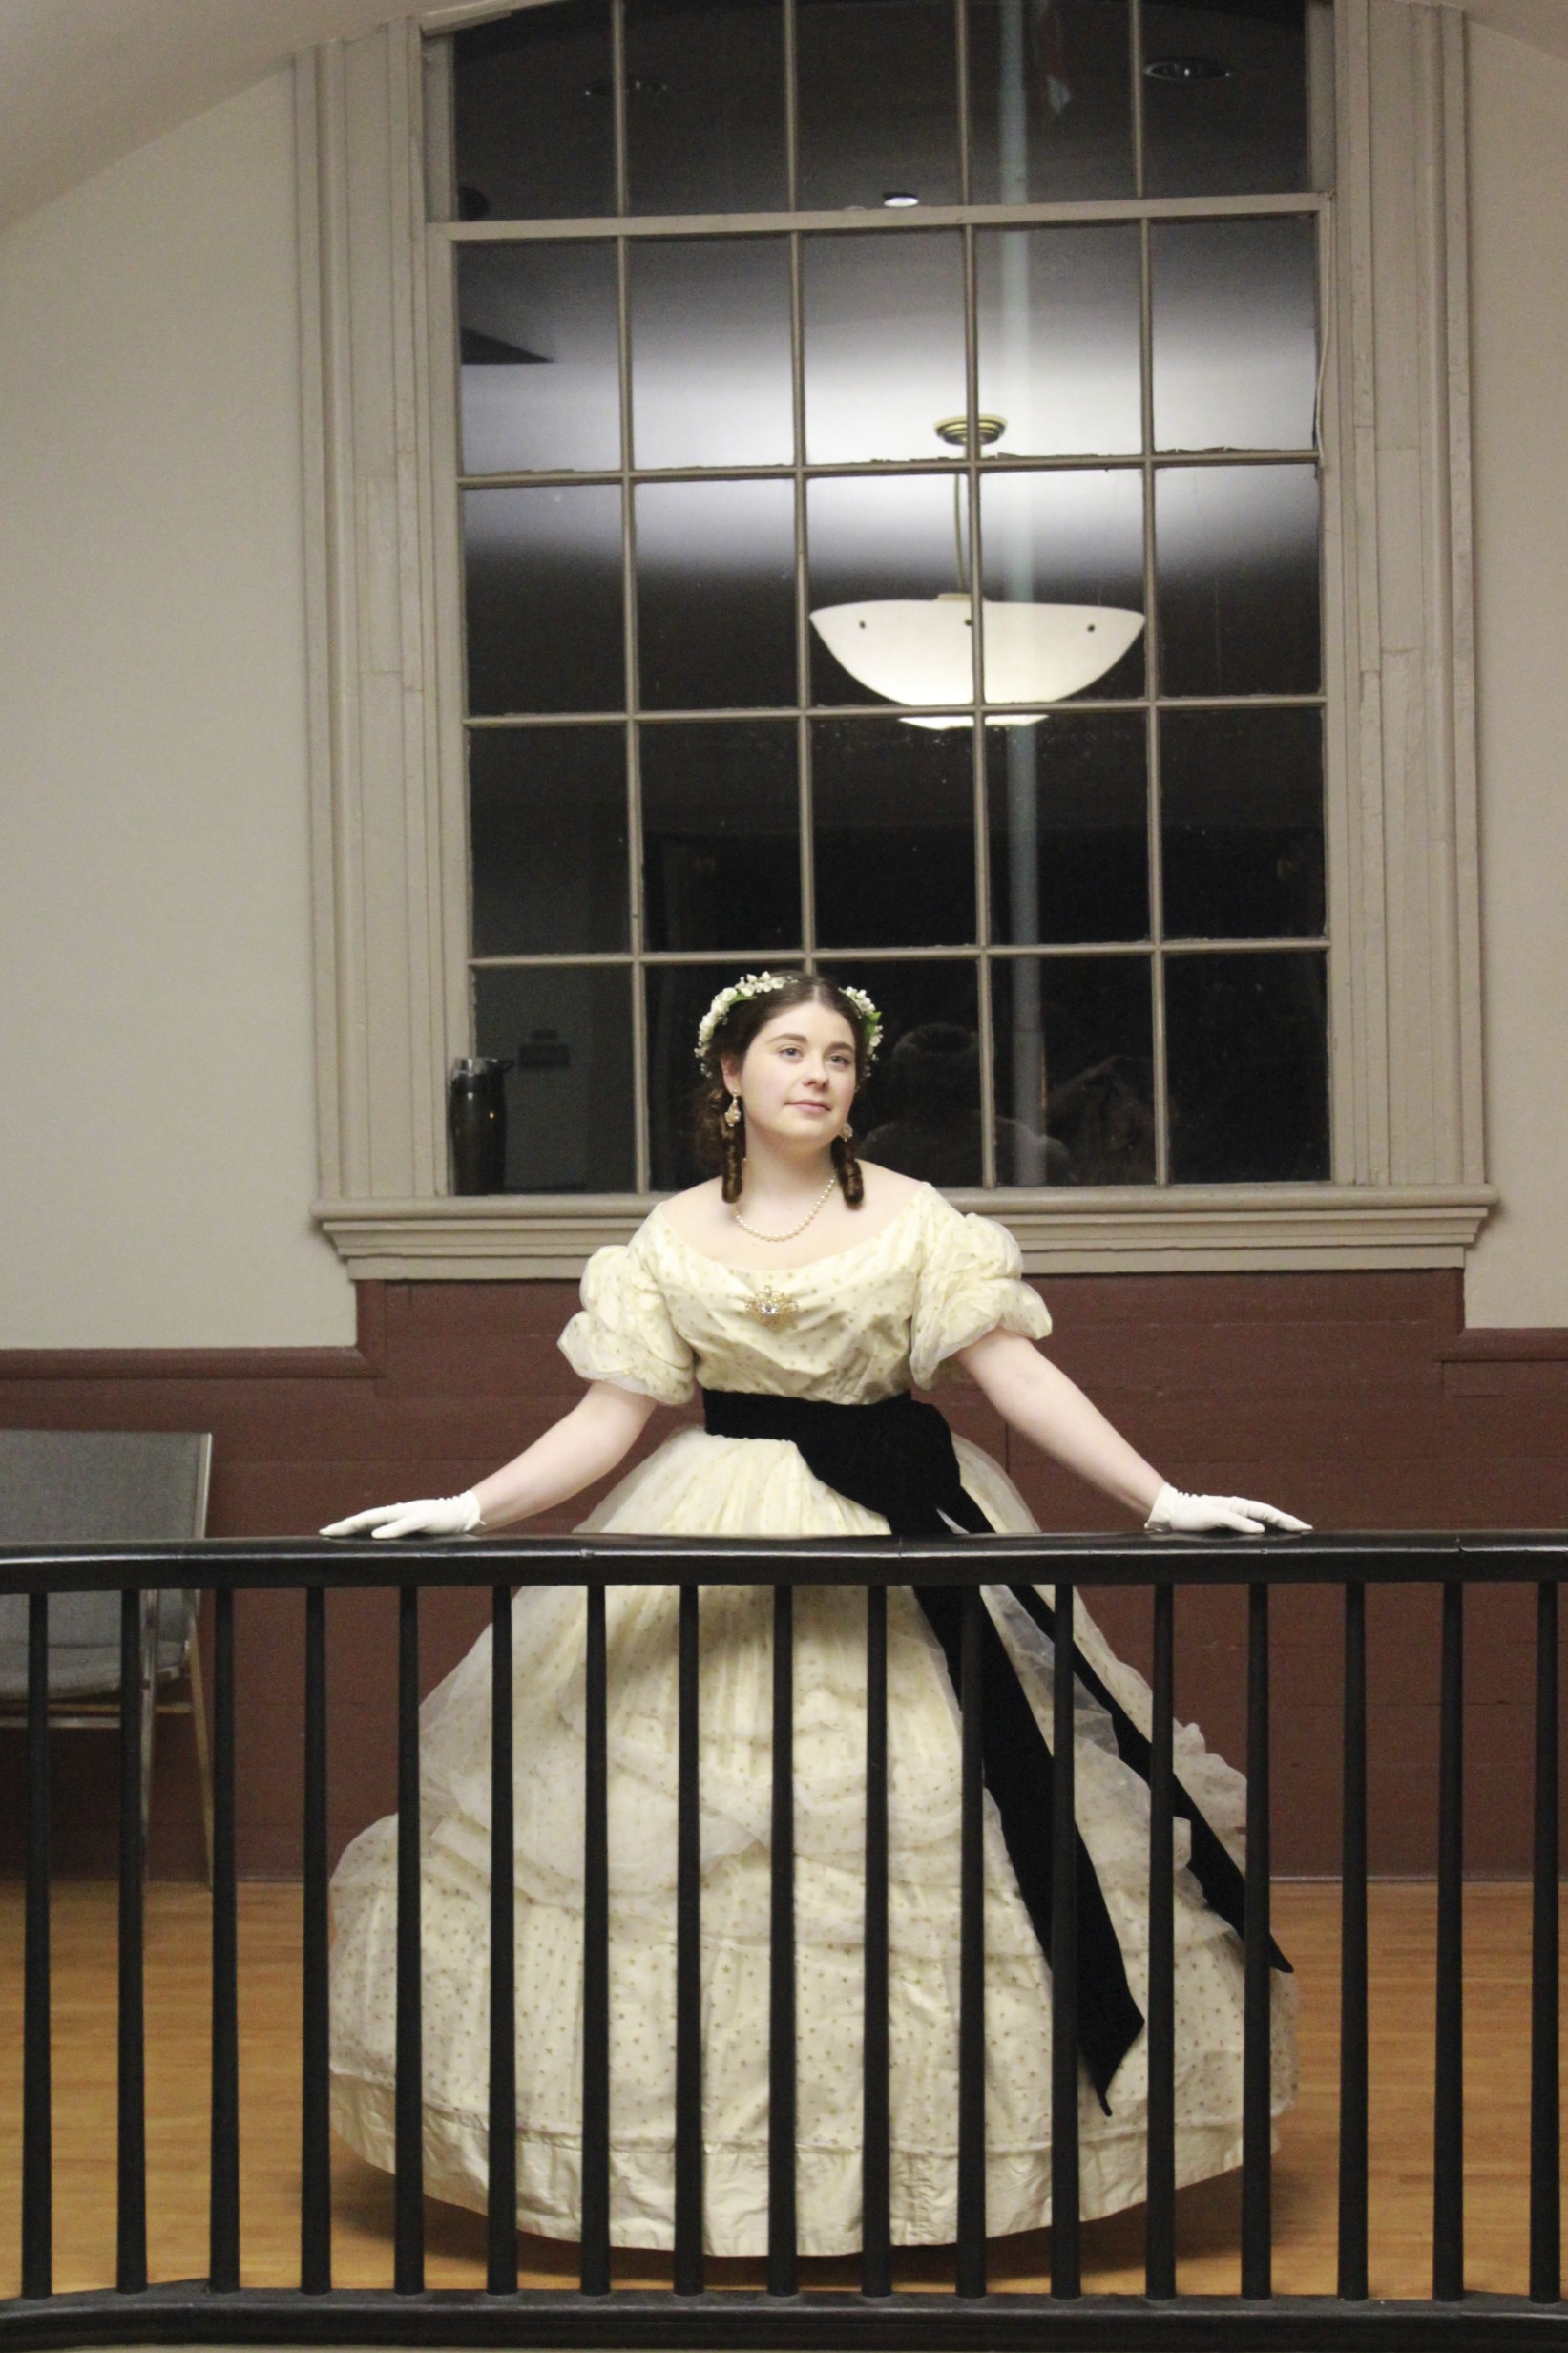
First layer (aka modern).Second layer. Isn’t this entry area gorgeous (even with the modern fire extinguisher!)?Third layer. All dressed up.
Second: One More Quick Series
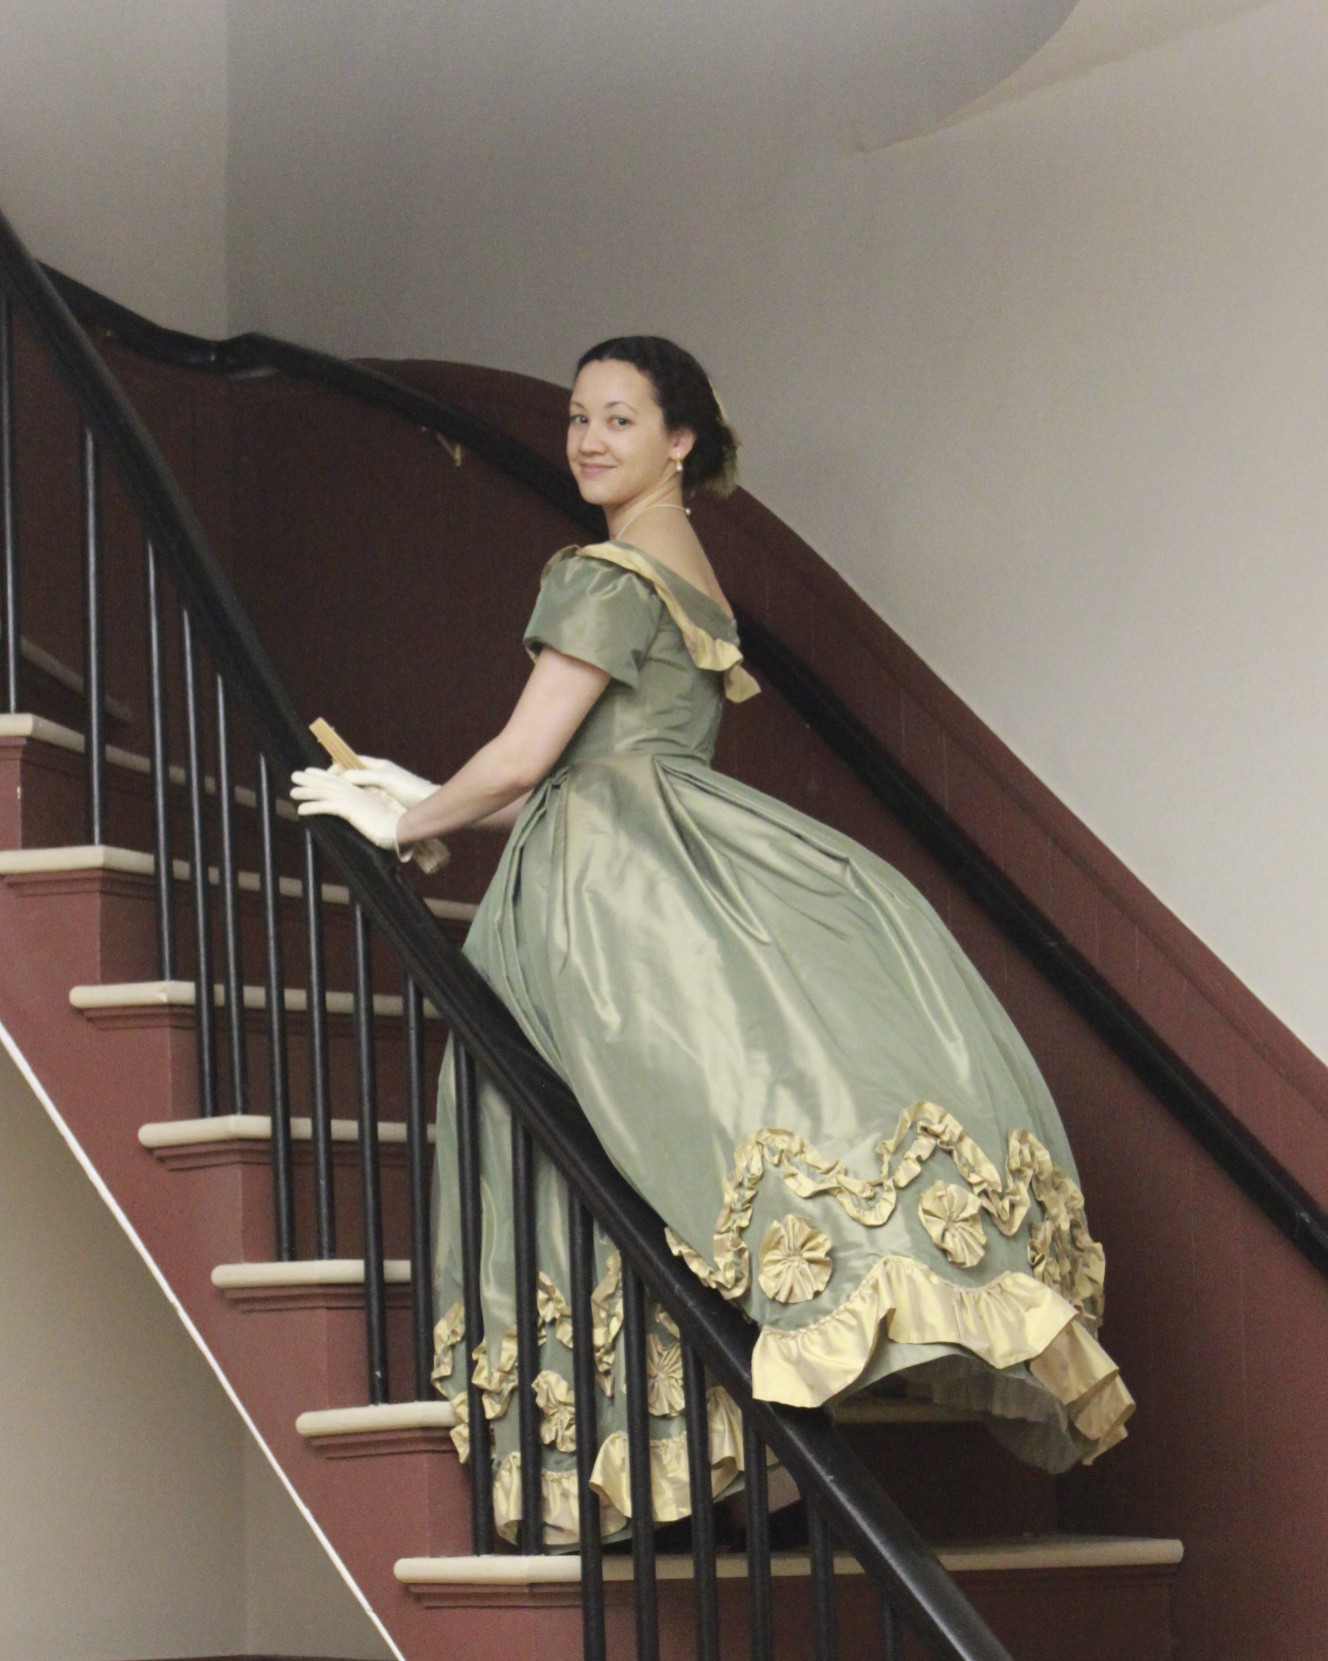
First layer.Second layer. I just wish that table in the background wasn’t there!
Finally: A Few More Non-Series Photos
First time in hoops. She had so much fun!A chat on the stairs.New dress!And an artsy shot to end this series.
I have one last grouping of photos to share from this event: photos of the ball itself! They’ll be coming soon and they’re lovely/super cute!
Remember in my last post I promised pictures of the finished ball gown now known as Evie? The time has come! I had a hard time narrowing down the options (because of course I wanted to share ALL of the good pictures), but I’ve tried to limit myself to only the best of the best. This post will focus on the completion of my dress, Evie, but there are two more posts coming soon that will share some of the other photo series as well as pictures of the ball itself!
These photos are the idea of my friend with the camera. She wanted to take series of pictures of us in our modern clothes, 1860s undies, and then dressed in our 1860s ball gowns: all in the same location and the same pose. It’s a neat idea and the results are great, not only because it provided lots of pictures (yay!) some of which are of things I don’t have pictures of (like my 1860s undies), but also because you can see the time passing through the evening by looking at the light in the photos. They start in the afternoon, proceed to early evening, then finish at night. Not all the series are a complete set, but all around, it’s pretty cool. Which series do you like best?
Series 1: To The Right
To The Right: first layerTo The Right, second layerTo The Right, third layer
Series 2: What A Change
What A Change, first layerWhat A Change, second layerWhat A Change, third layer
Series 3: On The Stairs
On The Stairs, first layerOn The Stairs, second layerOn The Stairs, third layer
I’ve never been able to get pictures of my 1860s undies before, so this is exciting! I’ve got a chemise, corset, drawers, cage crinoline, and petticoat (in addition to stockings, shoes, jewelry, hair wreath, gloves, fan, and gown). The crinoline is entirely hand sewn, except for the waistband. The measurements of the hoops are taken from an extant crinoline, and I believe the circumference of the bottom hoop is about 120″. The crinoline closes with a hook on the waistband. The other pieces are machine sewn and trimmed with lace, pin tucks, and ribbon. The chemise slips over the head and the drawers close at the back with a button and loop arrangement. (And that poor petticoat does need a press… but I threw it in the washer and dryer a while ago and since it doesn’t usually get seen I haven’t taken the time to press it.) The petticoat ties around the waist. As you can see, the crinoline stops mid-calf, so the intense petticoat ruffle really helps keep the shape for the skirt below that point, in addition to keeping my hoops from showing as horizontal lines through the skirt of the gown.
Want to be further amused? Look at the apparently changeable feathers on my hair wreath. Sometimes they’re brownish/gold and sometimes vivid green! They really do seem to change color depending on the light!
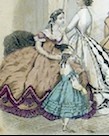
I don’t think I’ve mentioned it yet, but the basic pattern for this gown is essentially taken from Janet Arnold’s Patterns of Fashion 2. The trim however, is based on two things. Thing 1: the skirt trim is from the fashion plate I shared with you in the first post of this project journal. Thing 2 : the bodice trim is based on this gown, below. I went through a lot of phases trying to decide how to trim the bodice, since I didn’t really like the fashion plate bodice trim. In the end, I decided on this look: a graduated ruffle (just one, in my case, to match the one ruffle on the skirt) that gets longer toward center back, a triple pleated bertha that has a swoop towards center front rather than being straight, and a big trim thing right at the center (in my case, a rosette to match the skirt, rather than a bow). It’s pretty hard to see the front of my dress in these pictures I’ve shared so far, but there are some coming up in the next two posts which will show off the front of the gown better, so stay tuned for that!
A costume from the movie Il Gattopardo (1962, costume design by Piero Tosi). It’s lovely, despite the fact that it is not an extant gown from the 1860s.
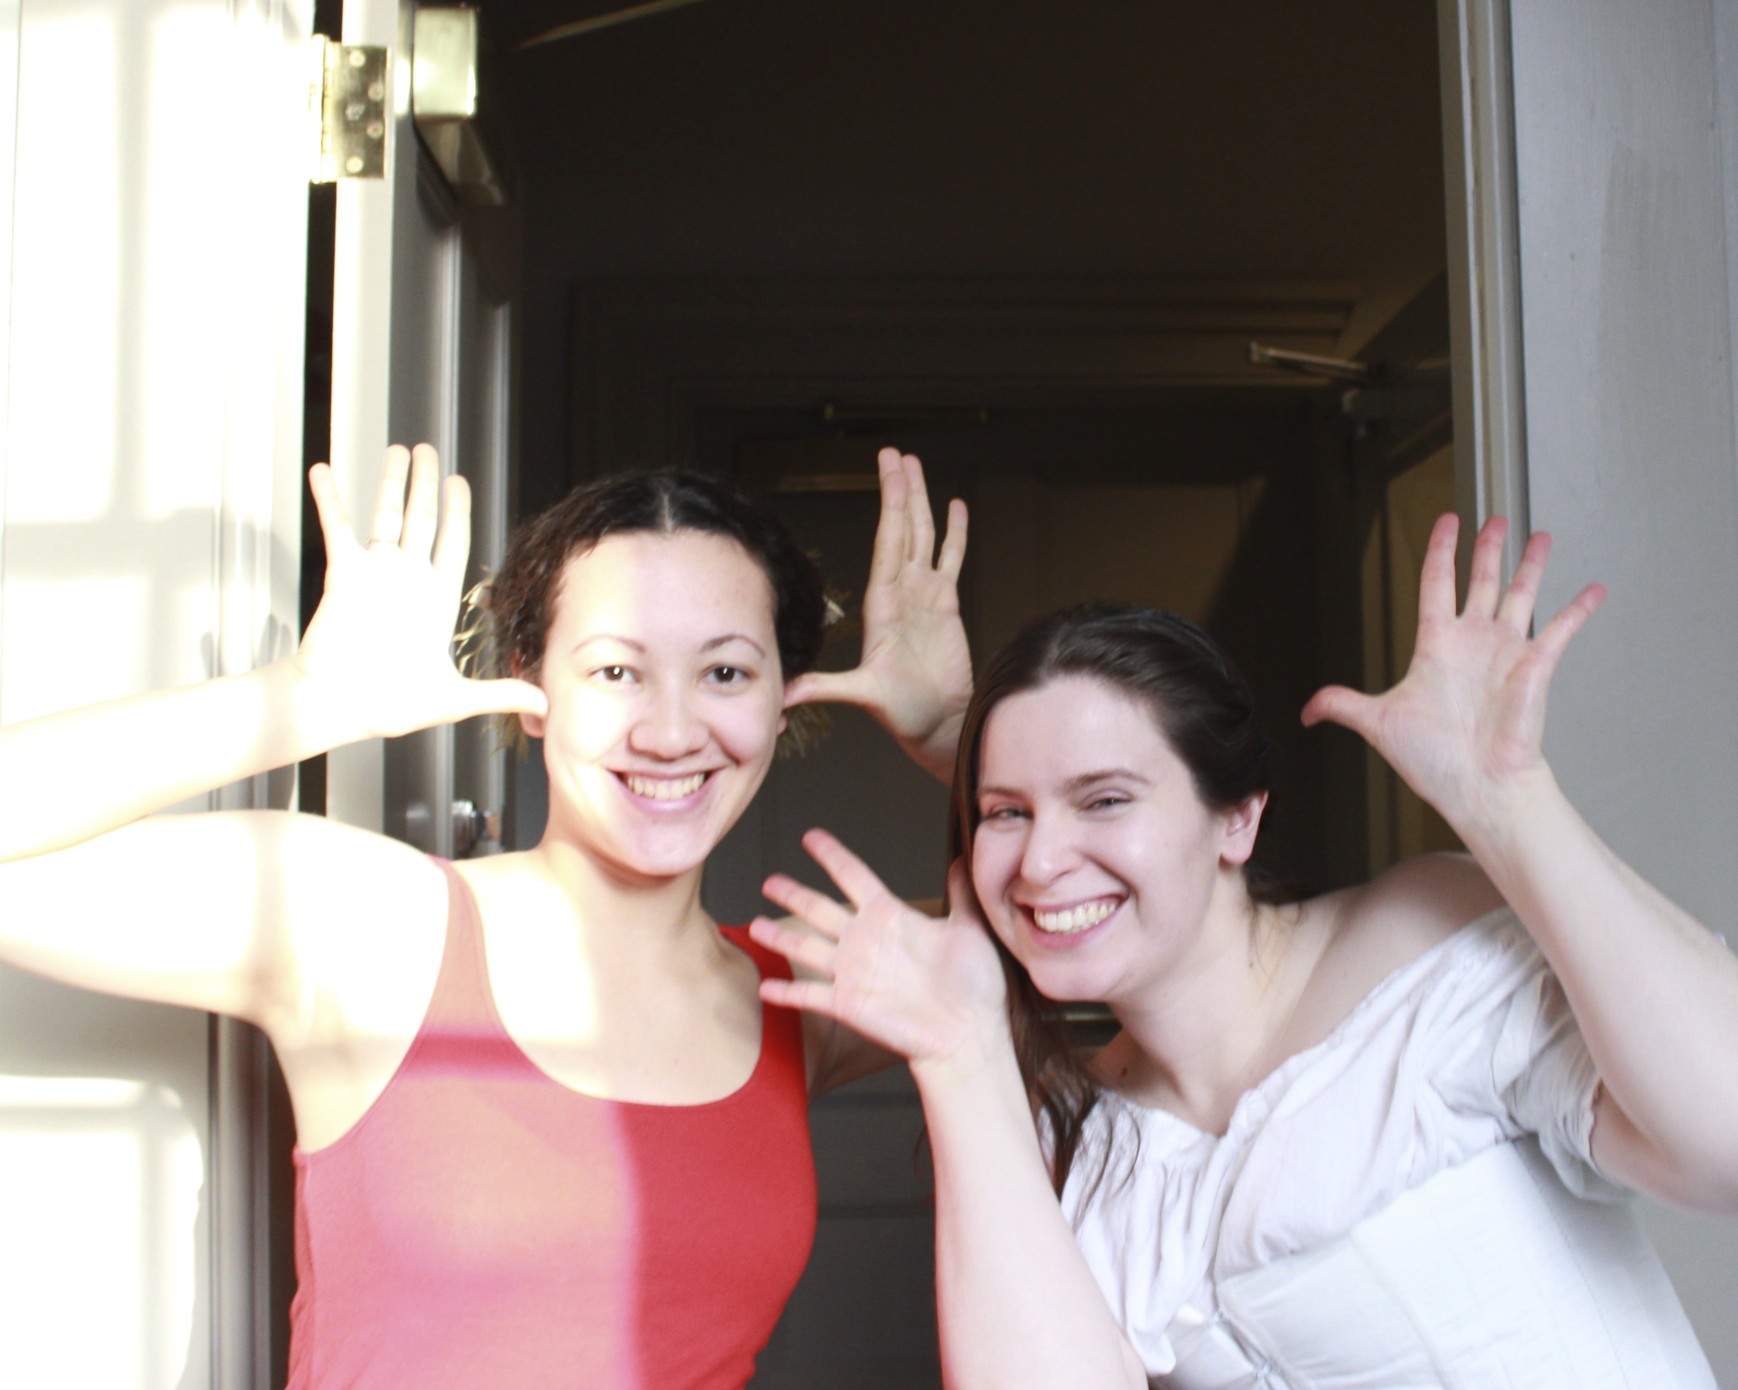
While getting dressed we might have been making silly faces for the camera while the owner walked away…
Haha! Moose making companion! In case you don’t know, this is my favorite silly face to make. Don’t believe me? Look here and here!
It’s been a little while since I posted about my new 1864 ball gown. Over a month, I think, because in February I posted about the plan/inspiration and then about the progress I made on the trim. I was steadily working on it during the month of March and had it ready to go for the Returning Heroes Ball a week ago. That’s not to say there wasn’t a little bit of last minute sewing the afternoon of the ball. My last minute sewing was gloves and hair piece, though, not dress, so that’s an accomplishment! And I wasn’t alone in my afternoon sewing… friends were sewing with me! There are lots of upcoming pictures but for now I’m going to post about the insides of the skirt and bodice. It’s a sneak peak, since you have to wait for the others pictures to see the full ensemble!
Completed skirt trim! I was SO ready to be done with it by the time I was sewing down the green zig zag (the last step of the skirt trim).
My other 1860s dresses have names: Belle is my dark blue gown and Annabelle is my white gown. I haven’t really been thinking of this dress by name until recently. Upon consideration, I’ve decided that she’s named Evelyn, or perhaps Evie for short. Why that name? I just like it, it’s old fashioned, and it has Y, and I have a fondness for the less commonly used letters of the alphabet. So here she is: Evie.
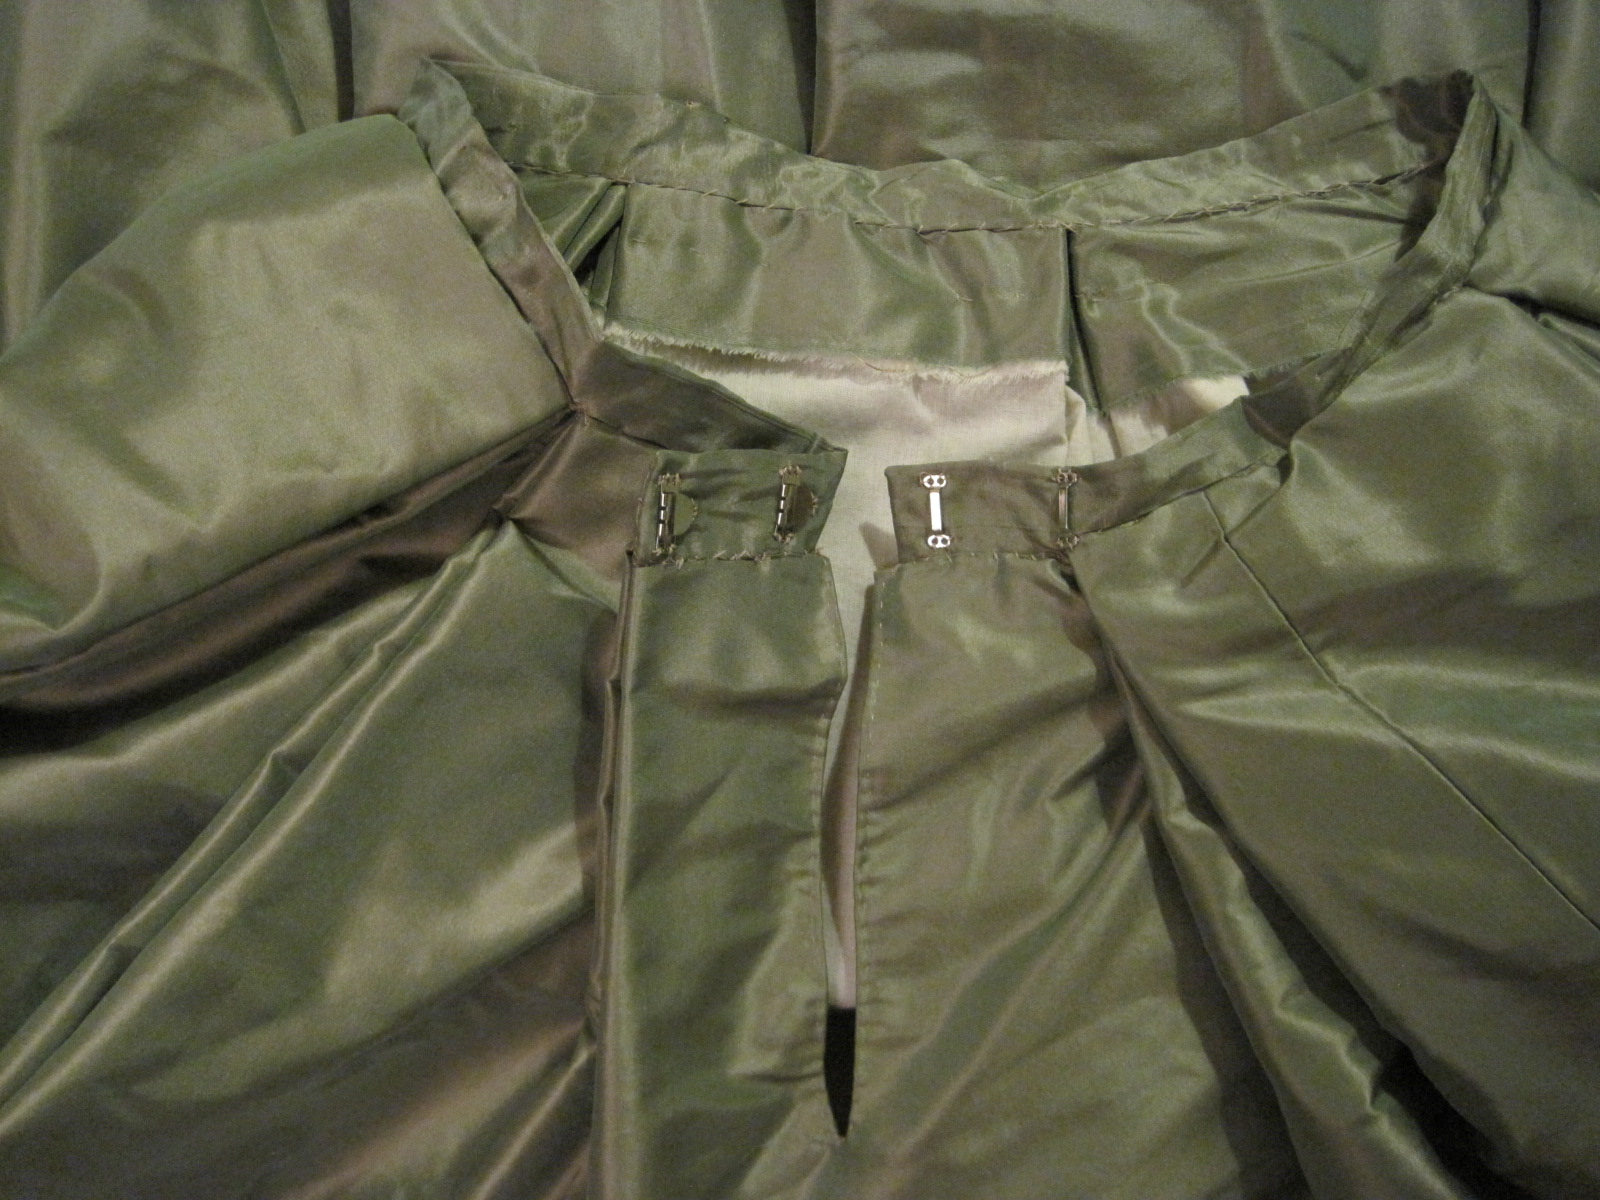
Skirt waistband of self fabric, to which the box pleated skirt is sewn. There is a cleverly hidden opening on the fold of one of the pleats.Magic! The pleats are deep enough that you can’t see the opening when the skirt is hooked closed, even with my hoops underneath.
The raw top edges of the skirt are just turned to the inside and left alone. The silk skirt is flat lined with muslin, which helps give it some body, preventing creasing, and some stability at the hem for all that trim. There are six double box pleats evenly spaced around the skirt, as you can see. I haven’t tried this evenly distributed method on an 1860s skirt before (my previous dresses have knife pleated fronts and cartridge pleated backs, which makes them much heavier in the back than the front… I suppose I could divide the skirt in half and do that method, but given how those skirts are weighted, I’m sure there’s more fabric in back than in front). All that to say that I love how evenly weighted this skirt is! It means I don’t need a giant bum pad to keep my hoops level with the floor. (Come to think of it, I suppose I could remount the skirts of my other dresses onto new waistbands and redistribute the fabric… hm… I’ll have to think about that!)
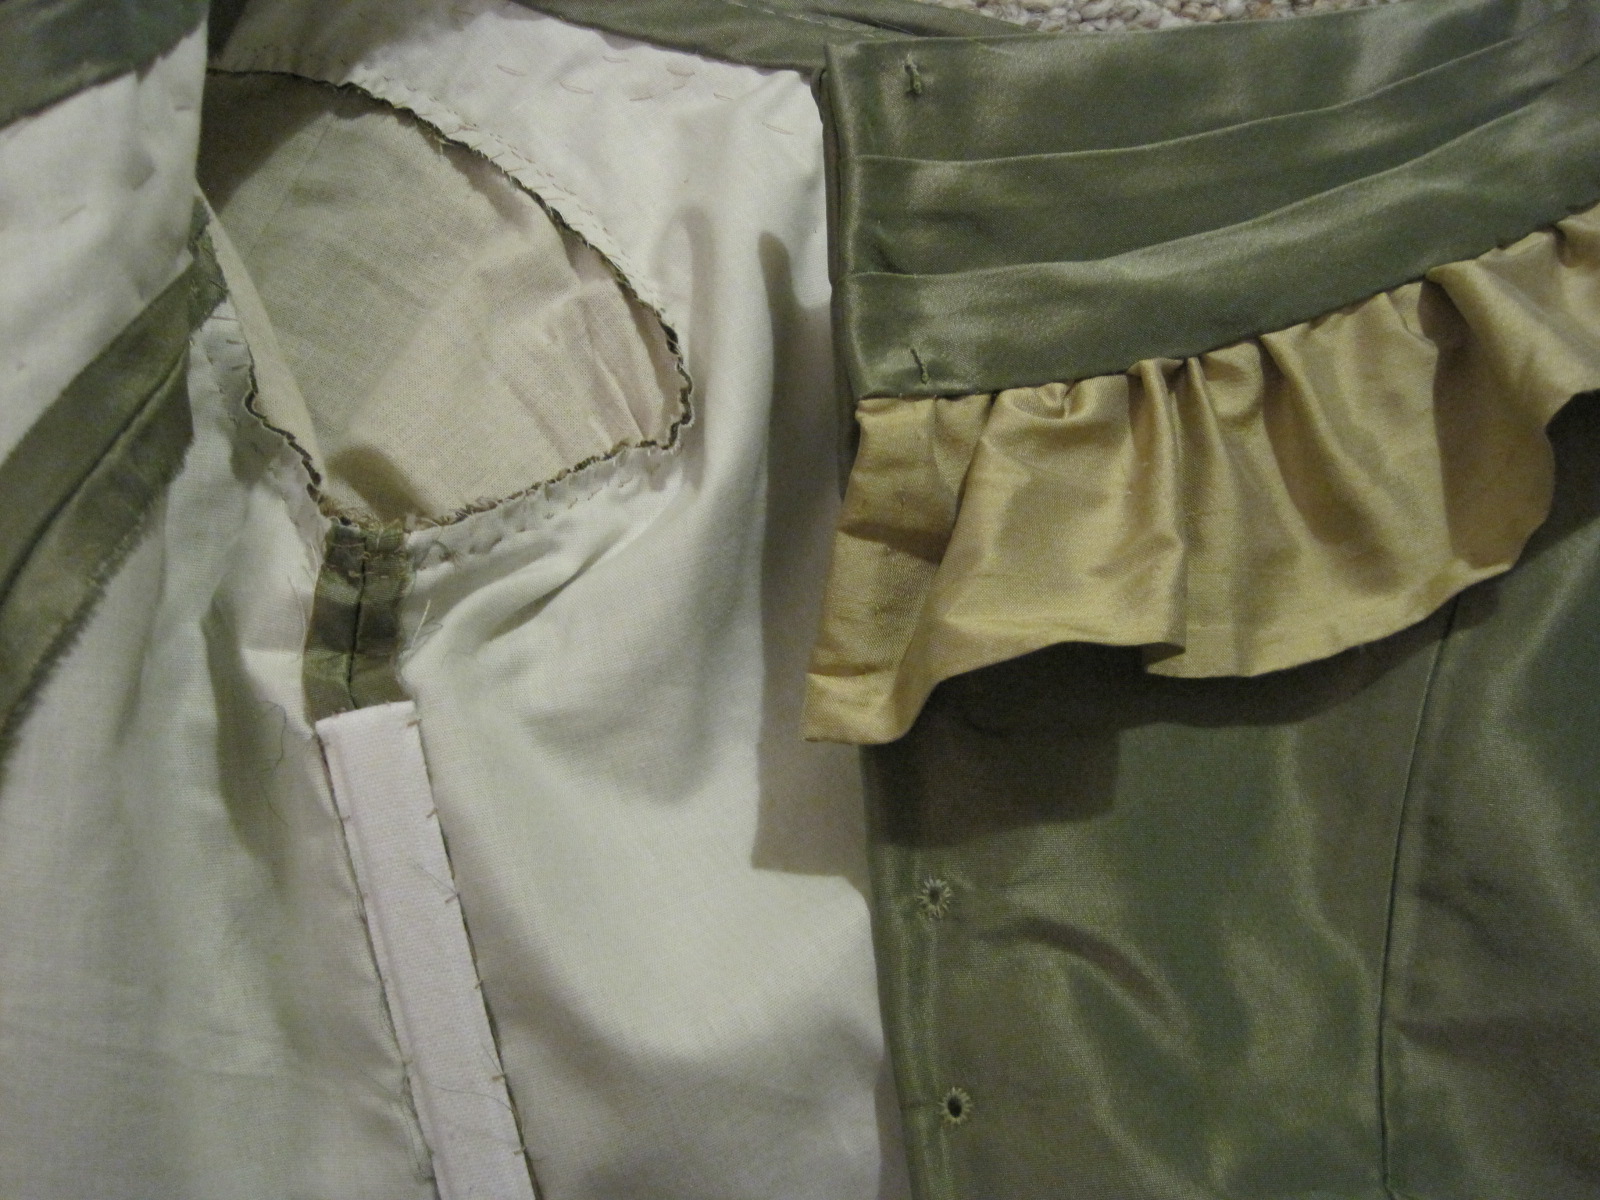
Inside of the bodice at center front. The bodice is flat lined in ivory polished cotton. The edges are finished with cording (even the top edge, which you can’t see on the outside because it is hidden by the bertha, grrr, but oh well!).Inside of the left front and outside of the right back.
The sleeve is lined in muslin. I originally intended that it wouldn’t be seen, but then changed the sleeve design so now the muslin is visible on the inside of the bodice. It doesn’t matter, though, but I do like it when everything matches. The seam allowances of the bodice are just left unfinished (I might whip stitch over the edges some day, but that’s unlikely, since I’ll probably be sewing something else!). The armhole seam allowances are whip stitched together to keep them from fraying and to keep all those layers together. The armholes also have cording in them. The bodice closes at center back with lacing. The eyelets, like everything else, are hand sewn. The bertha also closes at center back (unusual, since a lot of them close on the shoulder, but I didn’t want my bertha pleating to be able to move or show the top of the ruffle). You can see the stitching holding the bertha in place in the first bodice picture, because those stitches go right through to the inside of the bodice.
I stopped keeping track of how many yards of hand sewing went into this dress… but now I’m curious again. So when I finished stitching the gathering stitches I was at 86 1/2 yds just for the trim. I’d estimate about another 22 yds of stitching to attach the trim and about 12 yds of stitching to construct the skirt before attaching it to the waistband. Waistband attachment was probably about 7 yds (it’s quite sturdy and all those pleats are well sewn!). That puts the skirt at a total of about 127 1/2 yds of hand sewing. Then there’s the bodice, which is maybe 12 yds of hand sewing total? That’s a harder one to estimate. That brings Evie to a total of approximately 140 yds of stitching.
I’m proud to say that every single stitch is hand sewn. Next time, though, I’m planning on machine stitching the inside seams. It’s super satisfying to have an entirely hand sewn dress, but it took about two months, and that could have been much sped up with the use of a sewing machine, which means I could have made more things! Who knows, I might change my mind, but right now even I am tired of hand sewing that dress.
Well, I hope this isn’t too much of a stretch (or maybe interpretation is a better word), but I’ve finished preparing all of my skirt trim and I’m going to call it my project for the HSF #4 Challenge: Embellish. I say it’s a stretch because my completion of this project is the preparation of the trim, rather than the attachment to the garment. To be fair, just the prep has been a lot of sewing, so I think it counts. Here it is, below: gold trim on the rather wrinkly skirt of green and gold shot silk taffeta. Because the gold is shot with silver, and the green is shot with gold, they are both photographing more washed out looking than they appear to me when not looking through a camera. Hopefully one day I’ll be able to get a picture where they look a little less silvery.
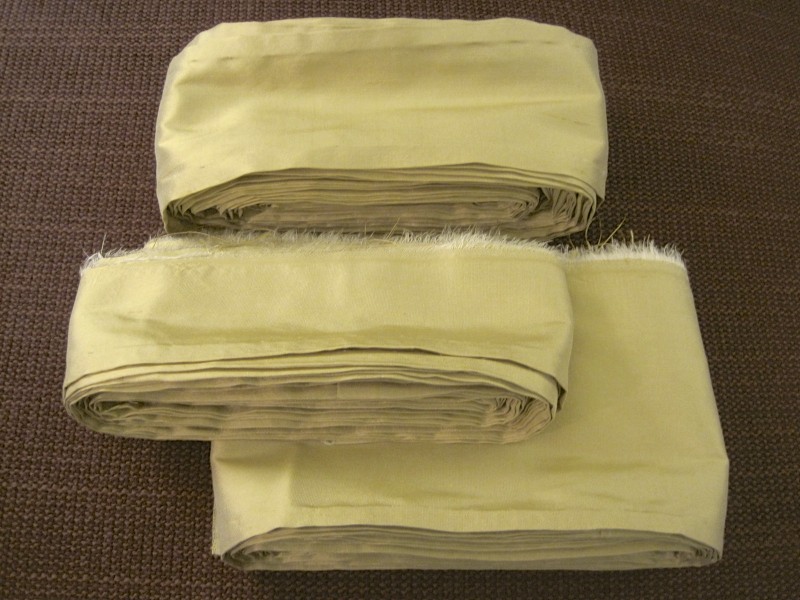
All the skirt trim, gathered and ready to be attached!
The top pile of trim (that rather resembles a ruffly brain, don’t you think?) is for the zig zag. The two piles on either side are the 18 rosettes. The section on the bottom center is the ruffle that goes at the bottom. You can see the inspirational fashion plate here, in this previous post, to see what these different trim sections look like in their actual context.
My favorites are the rosettes. Aren’t they cute?Here’s all of them laid out like an accordion, or a slinky. They look so adorable!
Anyway… here are the facts:
Fabric: almost 1.5 yds of gold shot with silver silk shantung.
Pattern: none, just a lot of math.
Year: 1864.
Notions: none, just thread.
How historically accurate?: Well, shantung is not accurate, but silk is (and this shantung is pretty smooth and not slubby, so I don’t think anyone will know it’s shantung unless I tell them). The trim layout is from a fashion plate, so super accurate. The stitching is accurate. Overall, I give it a 90%.
Hours to complete: Um… a lot. It’s all hand sewn. I started in January, so… 50 hours to get to this point? I really have no idea. I think in terms of months or weeks usually, not hours or even days.
First worn: Not yet, but will be worn in March.
Total cost: $9, because the silk was a remnant.
And while I’m keeping count, let me also note the yards of stitching currently sewn into the trim. When it was all hemmed I was at 45 yards. Now I have the addition of gathering stitches (31 1/2 yds) and ruffle binding (9 yds). That ups the total yards stitched for trim to 86 1/2 yds, and that’s before attaching it! Nice.
It’s time. I’ve been wearing Annabelle, my flounced not-so-new-anymore white 1860 ball gown, to all Civil War events for about a year straight, with no relief on the horizon. Not that I dislike Annabelle, I just want options, and a change. I have Belle, a dark blue 1860 ball gown, as well, but I haven’t worn her since 2011, and since most of the women in our dance troupe have blue dresses it’s not likely that I’ll get to wear her soon, and anyway, she’s too heavy for summer, and summer is coming up. So it’s time. Time for a new 1860s gown! Yay!
This gown was included back in autumn of 2012, when I made my 9 month sewing plan. It’s my goal to have it finished by mid-March, for the annual Commonwealth Vintage Dancers Returning Heroes Ball. My inspiration is this fashion plate from 1864 (pictured below).
From The Bartos Collection. 1864.
Specifically, I’m going to be making the dress on the left. Or one inspired by/sort of like it. As I’ve been working on it I’ve made changes to my plan, as you’ll soon see. My dress will be green silk shot with gold and with gold silk trim. I bought the silk remnants for the project months ago, so I have had to make my plan work with the yardage I have. The green isn’t an issue, but the gold had to be carefully considered to make sure I have enough for all the trimmings. After lots of math, I realized I didn’t have enough to do all the trim, so I thought about what was visually most important and decided to eliminate the vertical lines of trim, as well as the waist trim. Here is the same fashion plate, with my changes:
Of course, me being me, I’ve decided to hand sew the entire gown! Yes, sometimes I like my big projects. But I’ve got time (I think). I’ve sewn the skirt and the polished cotton lining and hemmed them, though the skirt isn’t attached to a waistband yet. I’ve sewn the bodice seams, so now it needs boning, and cording, and trim, and closures in the back. And, most importantly, I’ve cut and hemmed the MANY yards of gold trim for the skirt.
Skirt trim: on top is the zig zag, in the middle is the rosettes, and on the bottom is the ruffle. Not gathered yet, but all hemmed!
Did I mention I’m hand sewing all of this? All of these trim bits on the skirt will be gathered to a ratio of just over 1 1/2 to 1 (that was all that my yardage would accommodate). The zig zag is hemmed on both sides and will be sewn onto the skirt with a band of green silk running down the middle. The rosettes will be gathered in the middle and the raw edges hidden, which is why that bit is hemmed on only one side. The ruffle at the bottom will be bound at the top, which is why only one edge is hemmed.
Hem-age: 13 1/2 yds of zig zag, hemmed on both sides equals 27 yds of hem; 10 1/2 yds of rosette hem (there will be 18 finished rosettes on the skirt, if all goes according to plan); and 7 1/2 yds of ruffle hem. Total hem-age: 45 yds, and that’s just the skirt trim!
I love hand sewing, which makes me excited about that total, rather than bored. And I really enjoy the sense of satisfaction I have when I’ve completed the different pieces of this project, so I can only imagine how great it will be when the entire gown is complete!
I’ve been meaning to post about my new 1893 ball gown since Newport Vintage Dance Week back in August… Well, I’m slow about getting it done, but but this is going to be a post with mounds of great detail, so I think the wait was worth it!
This gown is constructed of bronze shot silk shantung with pale pink slightly slubby silk satin. It is flat lined throughout with ivory waxed cotton. It is stabilized with cotton canvas at the hem and in the waistband. The bodice is trimmed with ivory net and bits of metallic bronze/gold net that have sequin motifs on it (in fact, it’s the same metallic net as the top sleeve section of my 1912 burgundy silk evening gown, which I also wore at Newport). The sash is trimmed with the metallic bronze/gold net. The sleeves have layers of ivory tulle inside them to help maintain the full shape.
I wore this dress with a combination, a corset, a slight bum pad, two petticoats (one silk, one cotton), stockings, and shoes. Exterior accessories include cotton/poly elbow length white gloves (I have lovely leather ones that come up above the elbow, but they are getting soiled from being worn while dancing with men who are not wearing gloves (breech of decorum on their part!), so I chose not to wear those to this ball); my handy Battenburg lace fan; my faux pearl drop earrings; a long strand of faux pearls (originally bought to be worn with my 1928 green silk evening gown); a nice bling-y necklace borrowed from a friend for the evening; and my fabulous almost-Victorian tiara from eBay!
My tiara shares a general design with the Lover’s Knot Tiara, below. Both tiaras have round elements connected by jeweled arches above a second row of round elements, both rows of which are surmounted by tear shaped pearl elements which are set above a final row of further round shaped elements around the base. Additionally, in both tiaras there is a high point in the center which then diminishes toward each side. Obviously, the two are not exactly the same, but I think they’re similar. Of course, wearing mine for an 1893 look is slightly earlier than the given date of the Lover’s Knot Tiara, which is c. 1913. But isn’t that excusable, when the tiara looked so wonderful with my dress and accessories? There’s a closeup of my tiara below so you can compare.
Lover’s Knot Tiara by Garrard c.1913.My eBay tiara.
It took a bit of work to come up with a hair style I liked that also worked with the tiara, I can tell you. I wanted to have a puff of hair not directly behind the tiara, but close enough that it would provide a dark background for the tiara to stand out from. Unfortunately, I don’t have any great pictures of my hair. Oh well! It also took A LOT of bobby pins to secure the tiara. I think I used about 20 for the tiara alone. I put one between each of the base pearls, then another to cross the first one. I also secured the ends of the tiara with extra pins. It was really stable and didn’t move at all during the entire night, so that part was successful!
Here’s a closeup of the jewelry.
In the picture above you can see the jewelry better. You can also see the one major flaw in this dress. The wide neckline wasn’t shaped quite right, so the sleeves started slipping off my shoulders, making the sleeves look slightly less impressive. This is one of those things that was perfectly fine in all my fittings. It’s during those pesky balls, when you move and sweat, that you really discover the flaws in your clothes! I’ll have to do something about that before I wear the dress again.
A full length view. This was the end of the night, and the end of the week, so that’s why I look tired.A full length back view. Again, you can see how the sleeves just didn’t want to stay on my shoulders.
Now on to the specifics of patterning. The bodice (and especially the sleeves) of this dress are from Janet Arnold’s Patterns of Fashion 2, as is the skirt. The decorative sash and bodice trim were inspired by an image in Norah Waugh’s The Cut of Women’s Clothes. I looked at many images that had similar sashes with bows, so I’m sure I was influenced by those as well.
The next thing to discuss is the construction of the dress. It is in two pieces: a plain bronze silk skirt and a decorative bronze and pink silk bodice. The wonderful thing about this arrangement is that I can make other bodices to go with the skirt (I’ve got extra bronze and pink silk). For example, I plan to one day make a day bodice to go with the same skirt. Since the skirt takes the biggest bulk of fabric, this is an economical and practical plan in addition to adding to my wardrobe!
I’ve got some great closeup pictures of the bodice construction, but I didn’t take any close up pictures of the skirt, come to think of it. Honestly, though, it’s not as interesting. The skirt is gathered in back and set into a waistband which closes at the back with hooks. There is a placket opening that is hidden in the gathers. The entire skirt is flat lined with ivory cotton. In addition, the hem has a 12″ band of bias cut canvas tacked between the silk and cotton. The canvas helps the skirt form those wide folds at the hem as well as providing a certain weight and gravity to the lightweight silk. Finally, it also helps provide a clean sharp edge over which to turn the hem. For the hem, the bronze silk is folded to the inside over the canvas, turned again, and stitched to the cotton lining. The hem is about 1/4″.
The bodice, by itself. As you can see, the sash is a part of the bodice.Here is the net applique on the sash ends. The net is great because it doesn’t fray, so I simply had to cut out the motif I wanted and then stitch it around all the edges to the sash. The sash is a tube of bias finished at an angle on the ends with a slip stitch.A closup of the shoulder and top of the sleeve. You can see the ivory net trim around the neck of the bodice, which terminates in those cute bows on the shoulder. The bronze part of the sleeves are rectangles that are knife pleated radially at the shoulder, which you can see in this photo. And finally, you can see the gold net applique which is stitched over the ivory net around the neck opening.Then comes the question, where are the closures on this bodice? Well, the sash is stitched to the bodice from the right side front around the left side to center back. Then the bodice opens up center back.To keep the sash in place around the right side, there are three hooks that correspond to thread loops on the bodice. This keeps the sash in place. You can see the canvas backing of the sash in this picture.One of the thread loops on the bodice that holds the sash in place.The center back closure is hooks and thread loops. I like thread loops better than the metal eyes or loops because you can’t see them when the bodice is pulled tight, like you can with the metal. You can see that I added a placket that extends farther than the loops just in case something pops open.The inside of the bodice. I LOVE to make the insides of garments pretty, and I think this is one of my finest examples! Aside from the fact that it is modern materials, it looks just like an extant garment from the 19th century. The bodice is boned up center front, the front darts (which create a V-shape on either side of center front), the side seams, and each of the four side back seams. The neck and hem are finished off with self fabric bias with is then nicely whip stitched to the cotton flat lining. The armholes are bound with self bias. Then there is also a waistband, to help alleviate the tension on the center back closure. This waistband is cross stitched to each boning channel and closes with hooks and eyes.The right side of the bodice. You can see the bias bindings, the boning channels, cross stitched waistband, and hooks. Oh, and I just noticed that I also finished the exposed seam allowances by turning them back on themselves and whip stitching. (The seam allowances under the boning channels are trimmed and left raw.)Center front. The boning channels were whip stitched to the cotton lining along the sides. It was a bit of a logistal problem to determine how to nicely bind off the edges of the bodice with bias, since there is a sash part of the way around. You can see that there is a separate piece of bias covering the join between the sash and the bodice from the right side where the sash opens.The left side. On the waistband I did use the metal bars instead of thread loops, since I knew they wouldn’t be seen from the outside. You can also see how the sash was attached. It was flipped up and topstitched to the bodice (avoiding bones!), then flipped down to cover the raw edges and joined to the bottom of the bodice with bias.The interior of the pink under sleeve. The silk is gathered into a cotton lining. Of course, you can’t see up into the sleeve when there is an arm in it!
It makes me feel all warm and fuzzy inside, to have such a beautifully finished bodice. And I felt like such a princess at the 1890s Soiree, to be wearing an all silk dress with silk petticoat and a fabulous tiara!
This is another case of the delays… The Commonwealth Vintage Dancers performed at an event in June (cough, cough… I am so slow!) that was called something like A Picnic for Teddy, Mommy, and Me. It was at the Salem Athenaeum, a private library, and was targeted toward young girls, their mothers, and their teddy bears! Cute!
We performed in 1890s whites. I had been dragging my feet about constructing my own whites, so I took this opportunity to go for it.
Dancing “Teddy Bear’s Picnic.” It’s really a ridiculous dance, but it fit the theme of the event perfectly!It was super hot that day! Sitting, in the shade, was wonderful. As was my fan…CVD on the steps of the Athanaeum.After the event we walked across Salem to get some lunch. Of course, Salem often sees people dressed in odd clothes, so we didn’t surprise people, but they were curious about what event we were going to.
I’m not totally sold on the white skirt I made. It’s a gored skirt and it works fine, it’s just not super eye catching (aka, it’s great for performances, but won’t get worn for other things… maybe it will be a petticoat if needed?). Oh, and I also threw the hat together, thinking that the white and blue would be nautical and good for Newport. But then I totally re-trimmed the hat at Newport because it didn’t have quite enough oomph with the white and blue. But the blouse… I love the blouse! It’s super comfy and lightweight, it closes in front (yay!), is washable, and I like the fabric. Win!
It is based off of a fashion plate in one of my many books. I draped a basic blouse pattern and adapted the pattern as needed to add the gathers in the front and back. The exterior is mounted on a lining made from the basic blouse pattern so that they gathers will stay where they are supposed to be. It is constructed of cotton with swiss dots for the exterior and a lightweight woven stripe cotton for the base (which I bought for $1 a yard a while ago! Love that price!). It closes up the front with concealed hooks and thread bars. The sleeves are quite large gigot sleeves, but because they are not lined they sort of just droop. Here are some pictures! I think I got pretty close to that inspiration image, don’t you? I love the feeling of success that comes with really nailing the look in reproducing a garment! Don’t we all?
The inspiration image.Front of the blouse, on Squishy, the mannequin.Back of the blouse on Squishy.In the garden.
This photo was taken the day of the filming of the documentary that I spoke of in my last post. The first photo is the original photo as it came out of the camera. The second photo is a version that I altered (thinking, “The photo is so dark. I need to lighten it up a bit to see the details!). However, now that I’ve seen both images, I’m torn! I think both are wonderful! Each is striking in a different way. I’m curious to know what you think? Version 1 or Version 2? Why that choice?
Version 1 (original)Version 2 (brightened to show detail)
Oh my goodness! This is such a cool and huge collection of photographs and fashion plates! Lauren over at American Duchess has been referencing images from the Bartos Collection for awhile now, but I didn’t get a chance to check it out for myself until just recently. It is WONDERFUL!
The collection focuses on the mid-19th century through the early 20th century. There are fashion plates and mounds of period photographs and pictures of extant clothing… If you love historic clothes and hats and hair you MUST VISIT! Here’s the link, again, because you must go visit and drop your jaw with me!