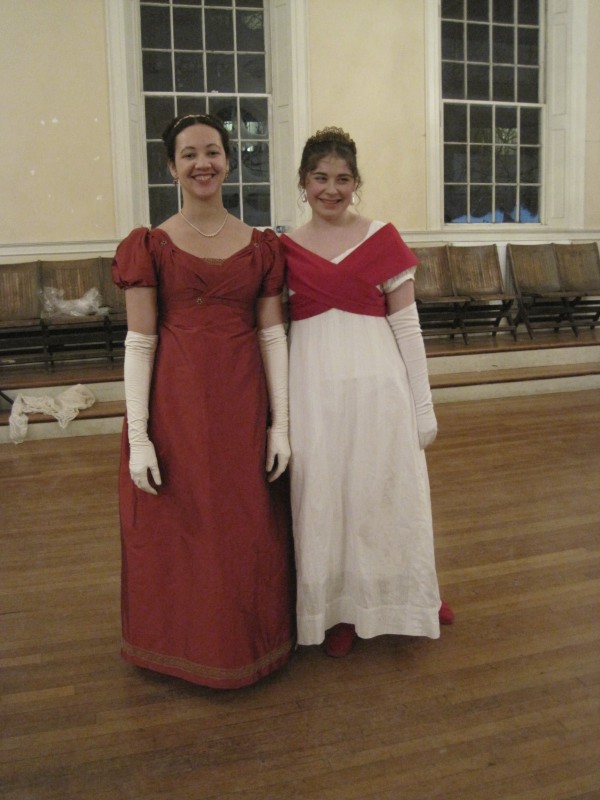
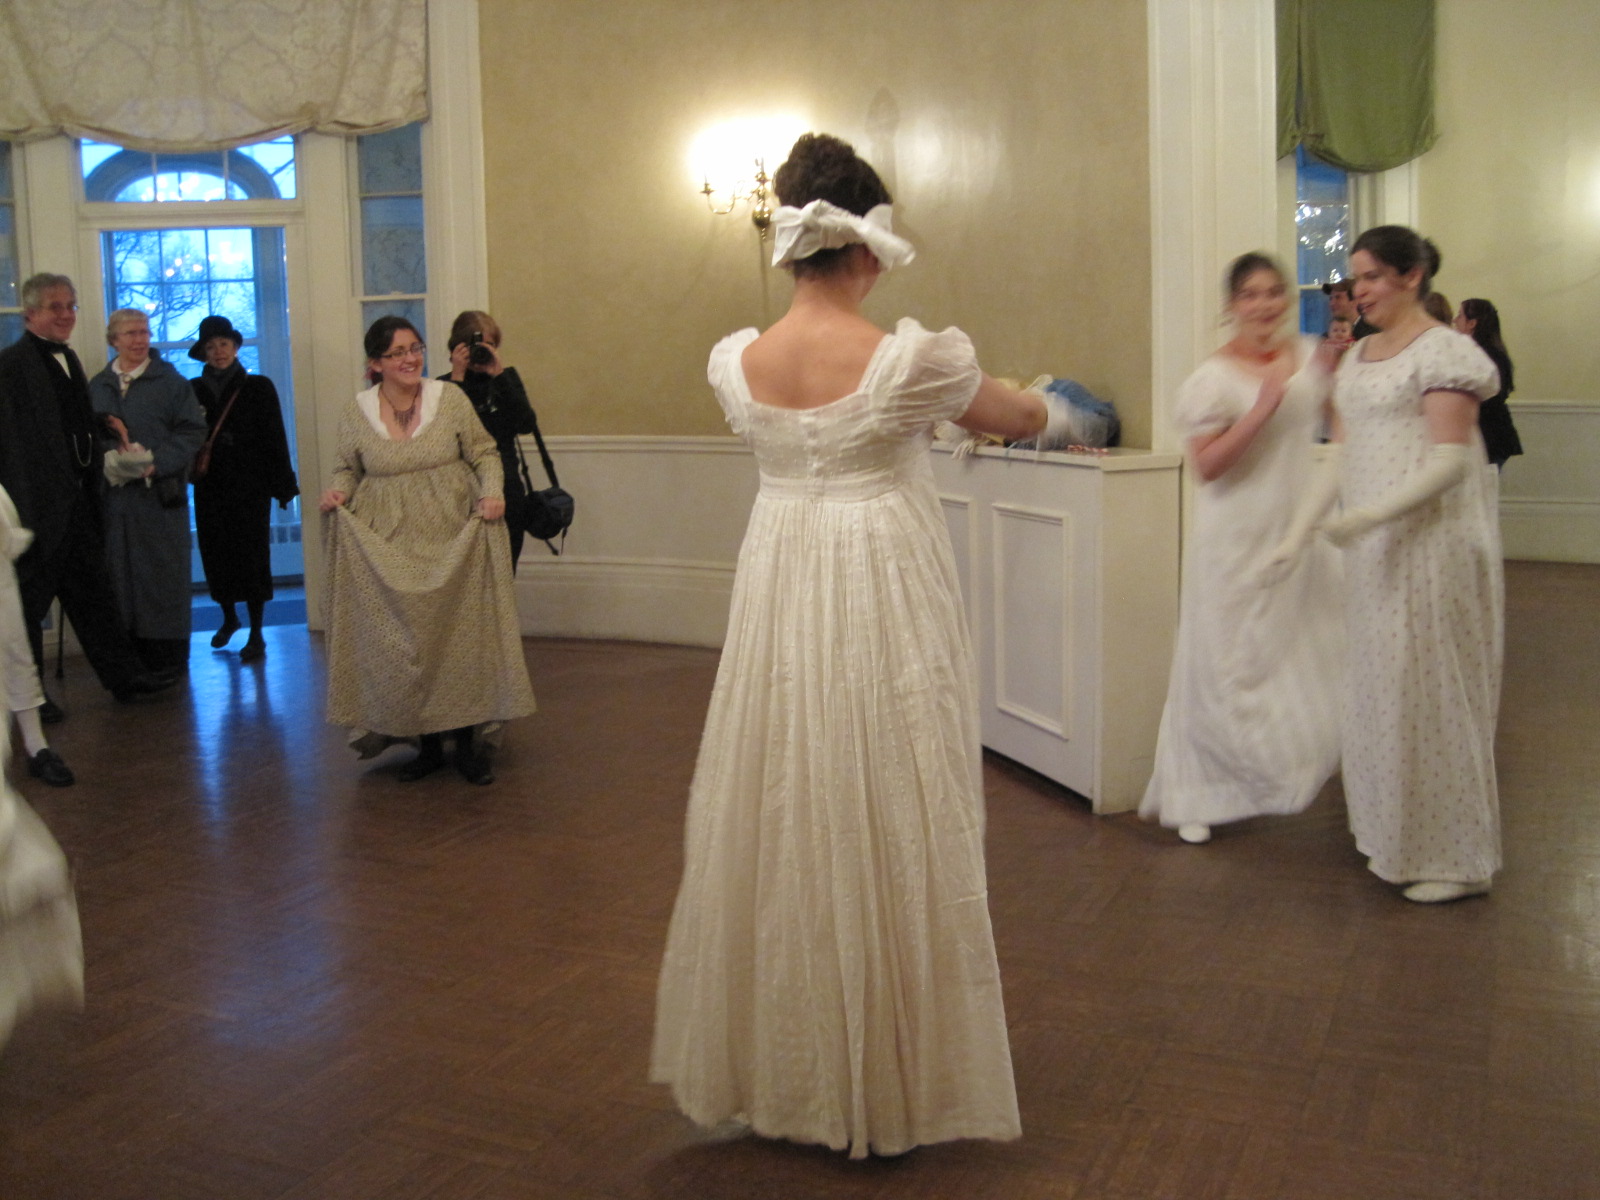
Another thing that the Nemo blizzard affected was the Commonwealth Vintage Dancers‘ Pride and Prejudice Ball. Luckily, the ball was able to be rescheduled for this past weekend, which means that I did wind up having an opportunity to wear my new 1813 red gown (my HSF #1 project) after all! And that means pictures! Lots of pictures, in fact. I think I’ll split this into two posts… To start: the clothes!
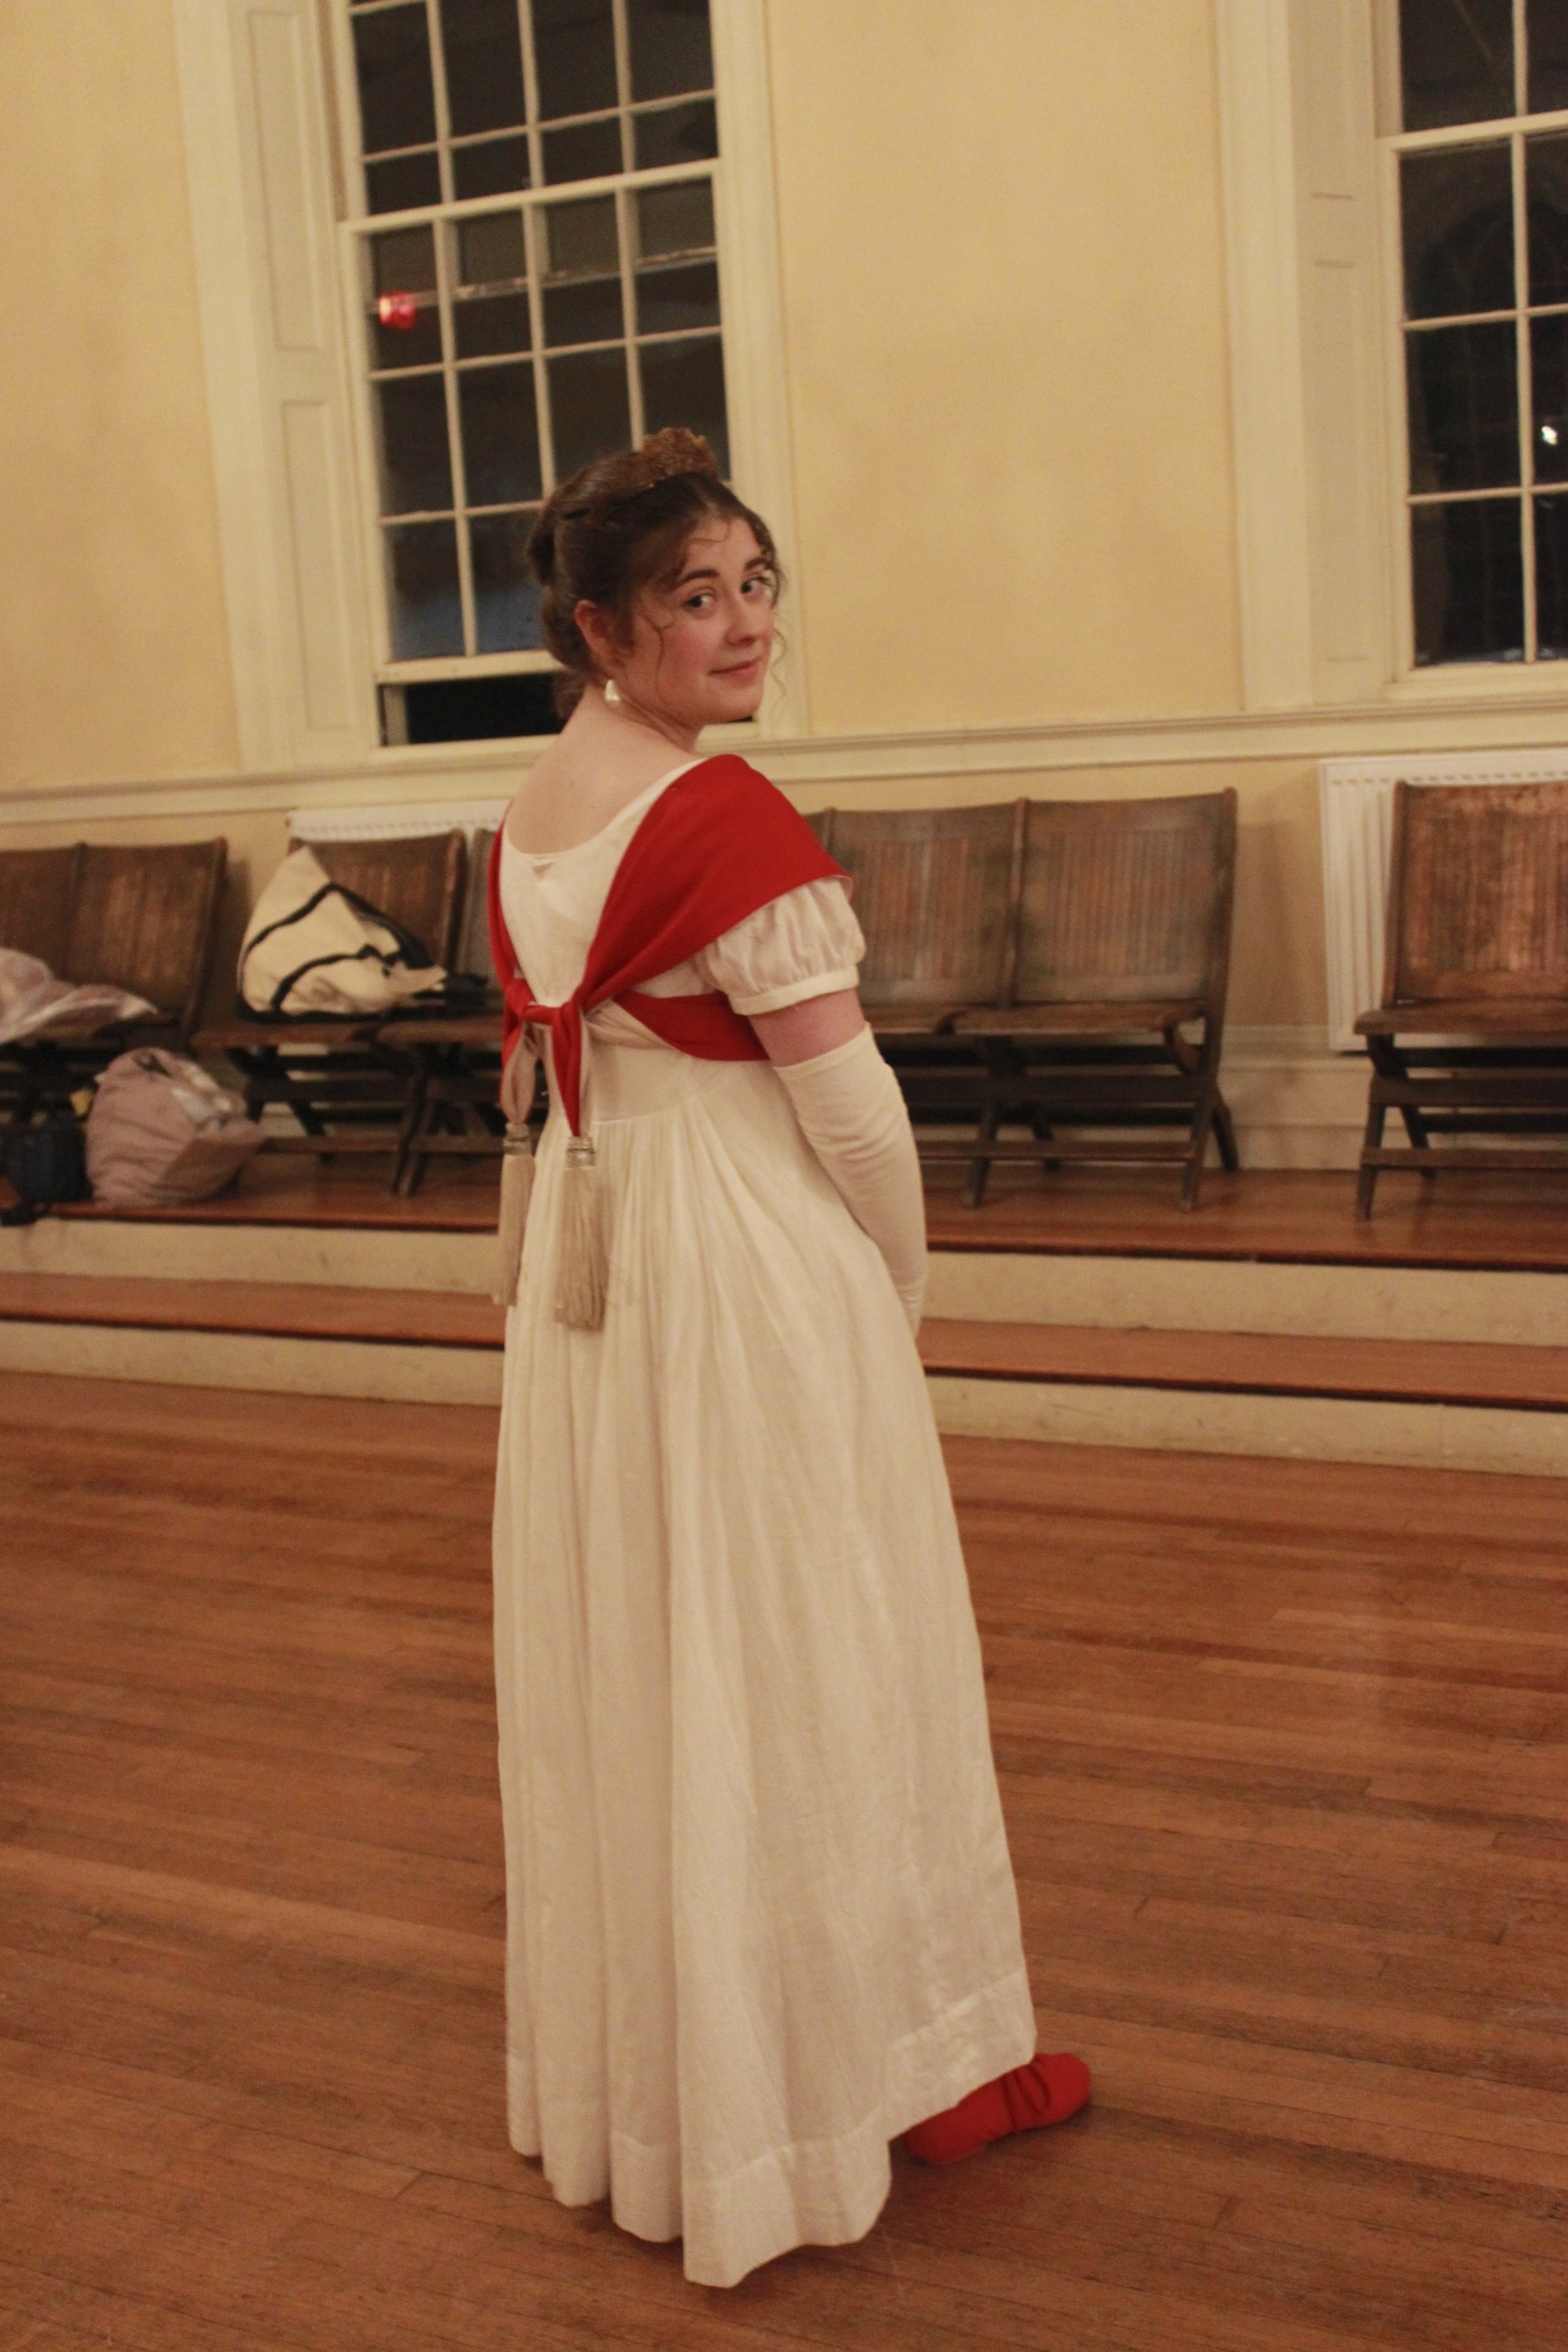
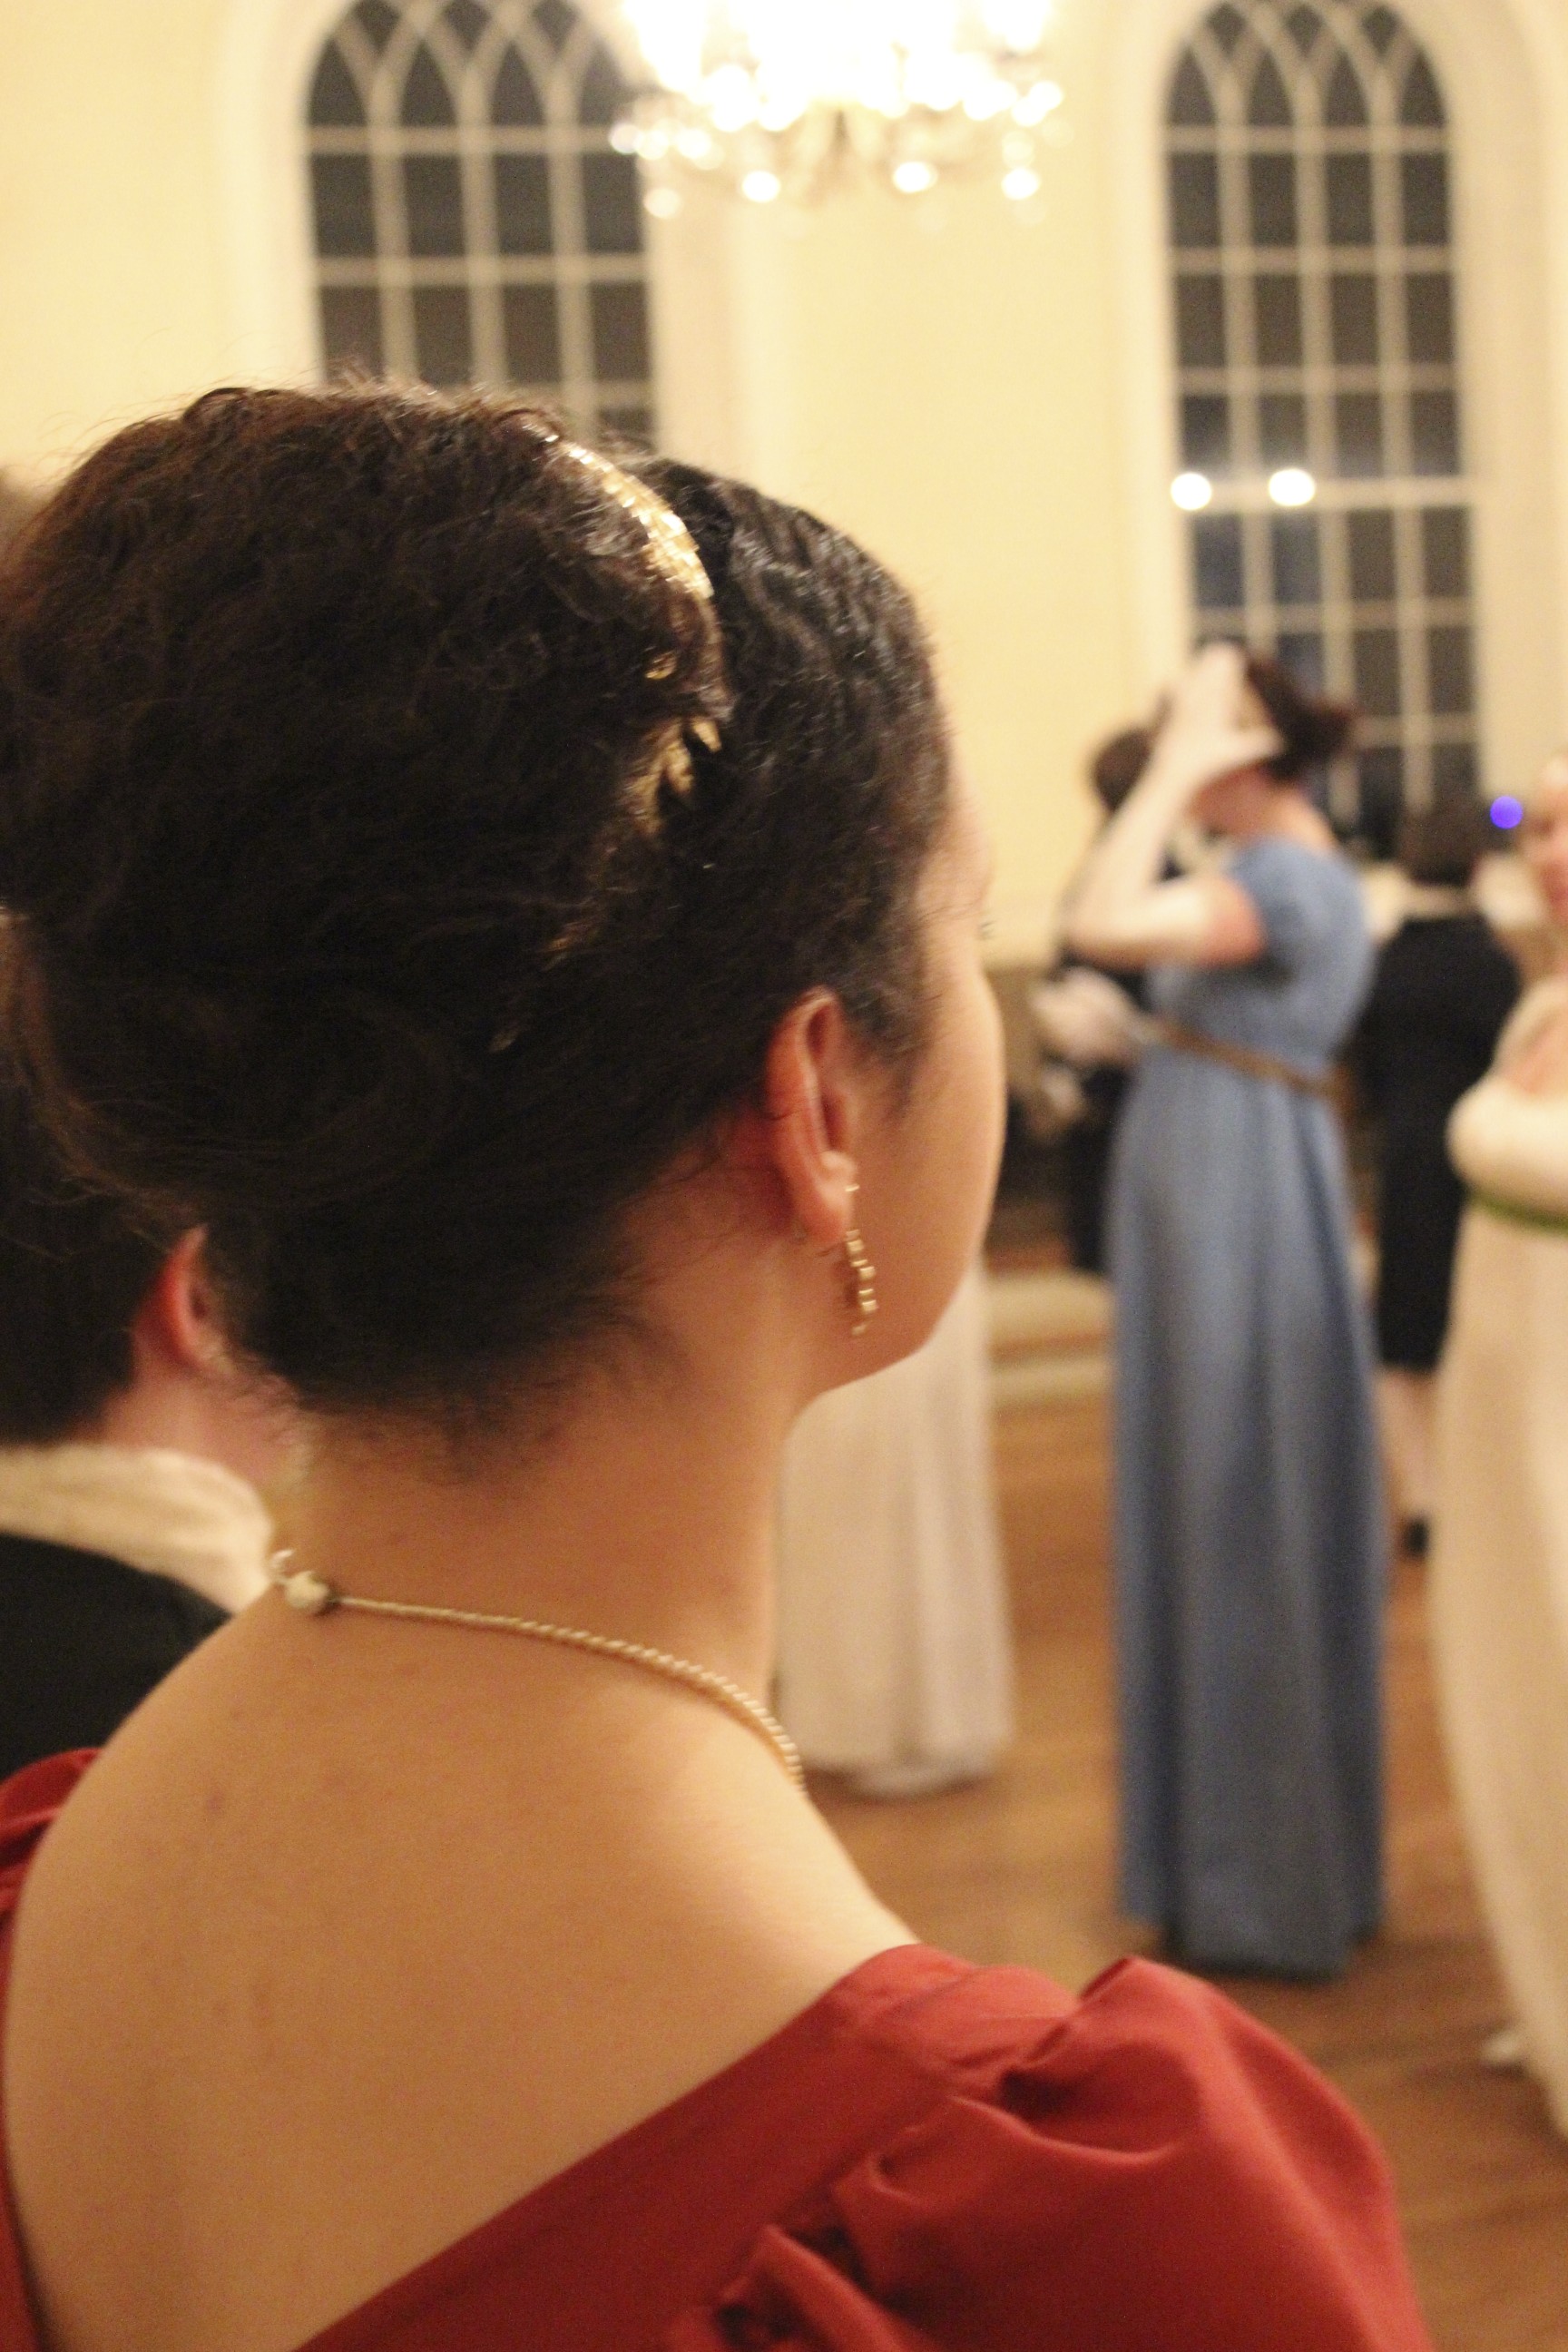
New dress!These pictures capture the color much better than my original pictures from January.Accessories: opera length kid gloves, white stockings and shoes, a gold laurel tiara, earrings to match the trim on my dress, and pearls.I wore the petticoat I built to go under my 1812 square neck gown, which is apparently a little longer than this new dress, because the hem of my petticoat was sticking out! Luckily, I had a needle and a friend had white thread, so I quickly basted up the hem of my petticoat so it wouldn’t show.Our colors match! So cute!The back of the creative Grecian sash wrapping. It was a great way to jazz up a white dress.More cuteness in the family.Great hair!Those face curls are hard to achieve without bangs. These look lovely!I tried the face curls, but it looked foolish. In the end I really liked how my hair turned out though! Super regal!More lovely face curls.
I thought everyone outdid their Regency selves and looked fantastic! I have to say, though, that not all these pictures are mine. Some are from a friend who caught all sorts of gorgeous moments! Thanks for sharing! More to come soon, with actual dancing and during the ball pictures.
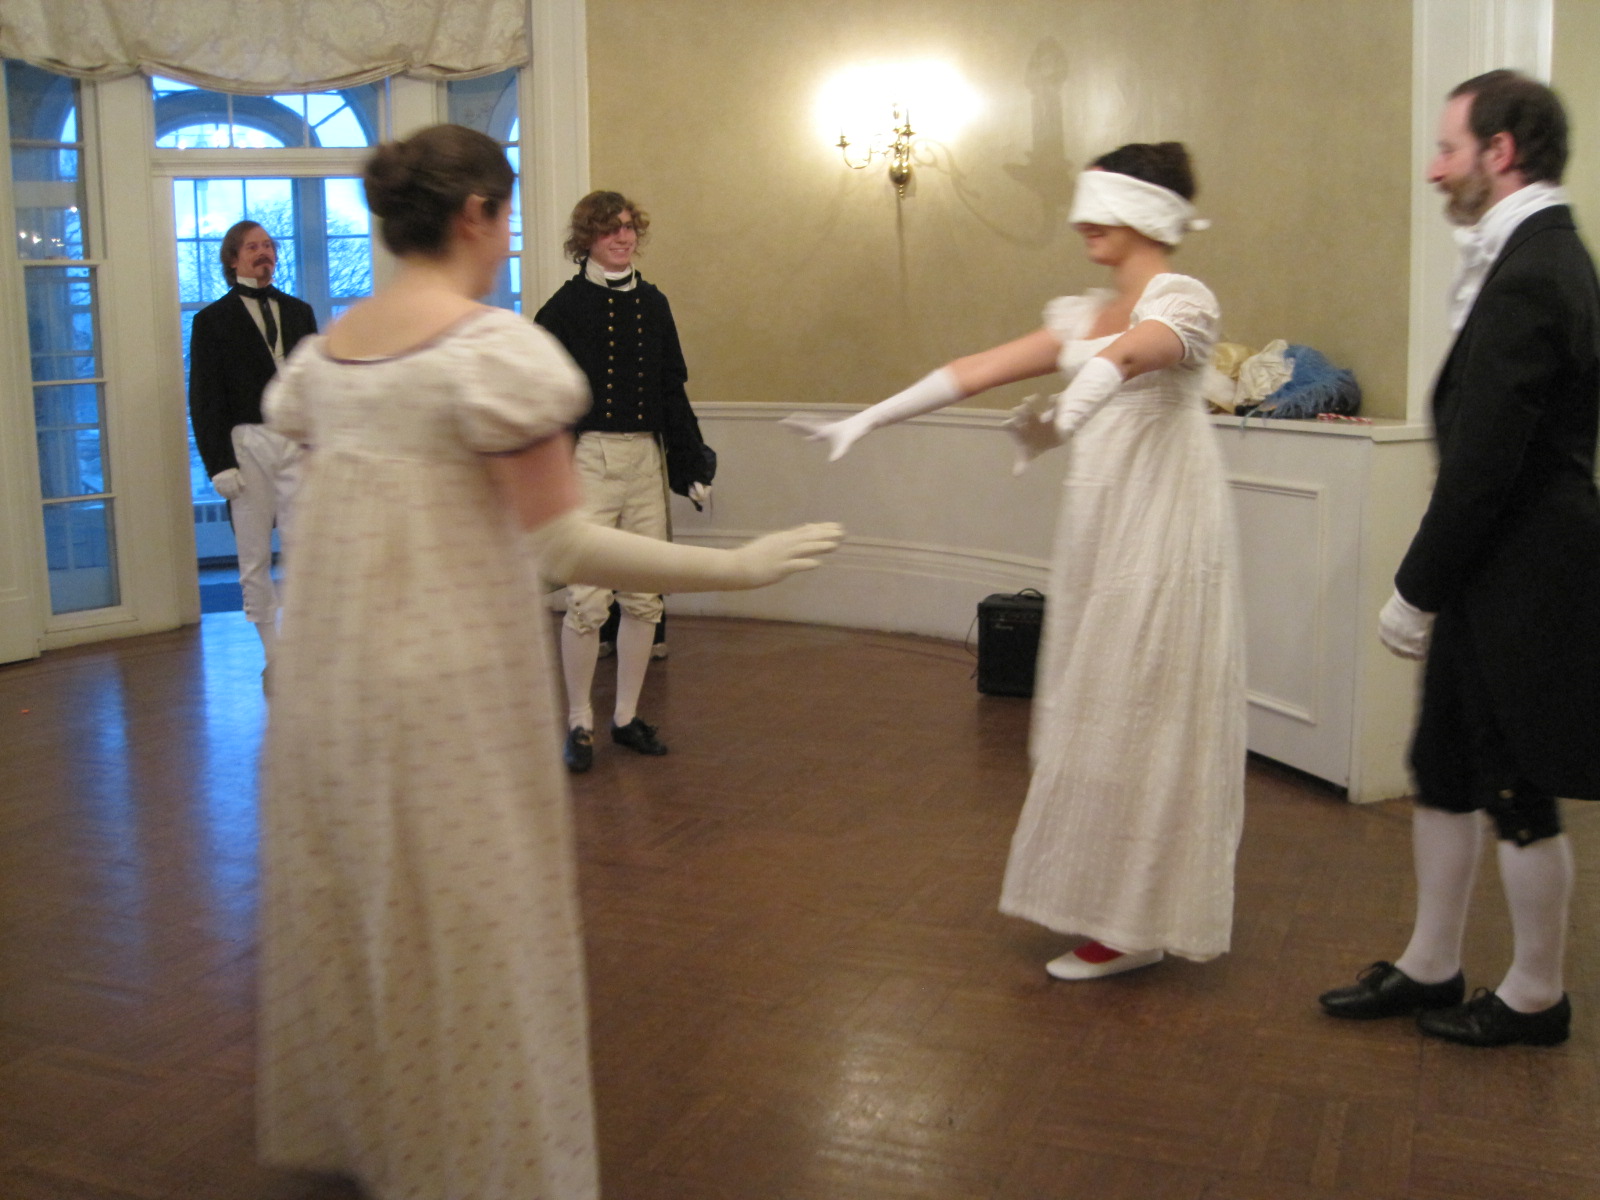
This past weekend, the Commonwealth Vintage Dancers participated in a Regency Christmas party for a public event at the Charlestown Navy Yard. It’s the same venue as the Guerriere Weekend we participated in a few months ago. I wore the same 1812 hand sewn gown I made for that event, which you can read more about in this post. We danced and played games while the public wandered through, watching and taking pictures, and eating the delicious cookies and punch we provided. We love that space, so of course we enjoyed being there again. I took the opportunity of the Christmas party to try out my red clocked stockings from American Duchess... they were perfectly fitting for the Christmas cheer!
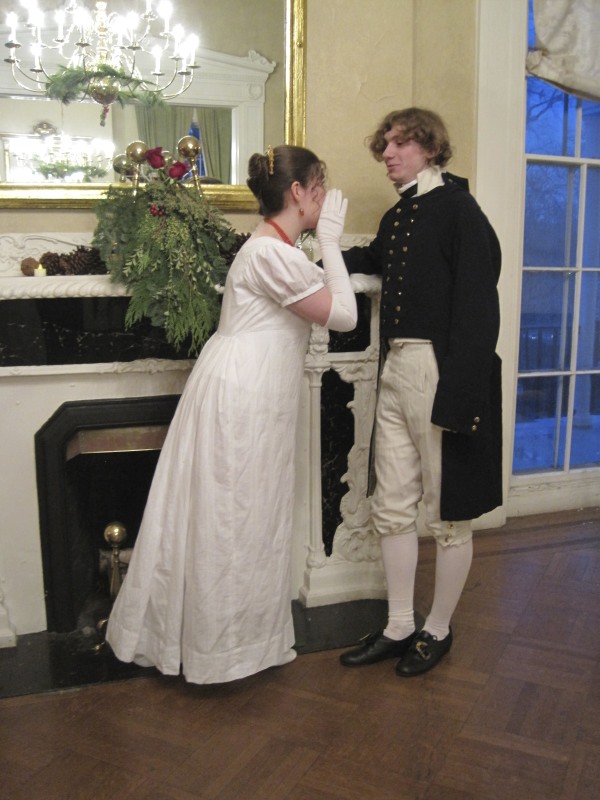
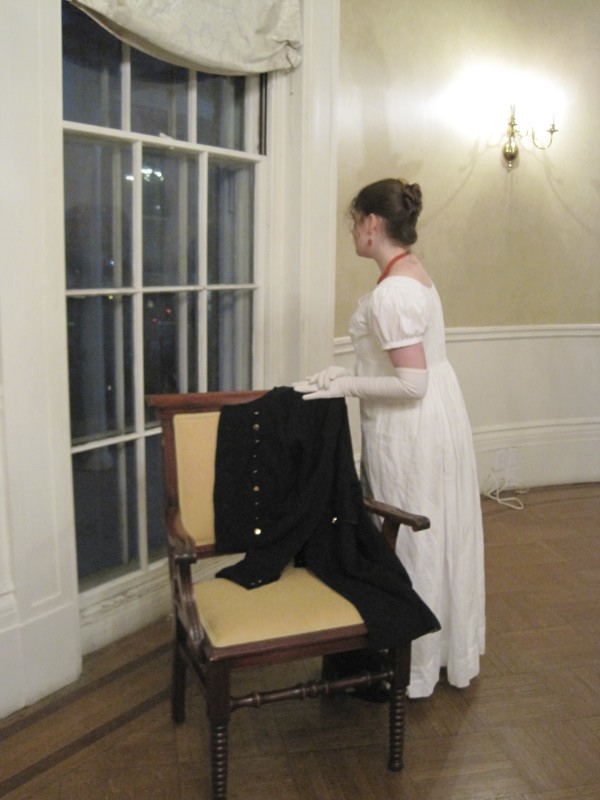
Posing with the lovely tea set that was set out to add ambiance to the scene.Playing Blind Man’s Bluff.I was having trouble finding a person…But I had cute stockings!So someone had to be made a sacrifice!Yay! I caught someone!Another glimpse of my red stockings as I passed off the blind fold.After the party we stuck around to get some extra pictures. I had to get a real pose with my stockings!Then we staged a few fake scenes to take pictures for possible CVD advertising opportunities.It was one of those “look into each other’s eyes” scenes, which I somehow get put in rather often… Anyway, I like this picture because you can see my hair. I took a long time (and a lot of bobby pins) putting it up and really liked the result.Then I grouped some of the dancers to get some nice “as though you are dancing” shots. This is how we would begin and end a dance.Back to scenes. Aren’t these scenes by the fireplace super cute?Last one. Missing Mr. Darcy, perhaps?
As you can see, it was a fun Christmas gathering. We look forward to participating in more events at the Commandant’s House next year!
I’ve been meaning to post about my new 1893 ball gown since Newport Vintage Dance Week back in August… Well, I’m slow about getting it done, but but this is going to be a post with mounds of great detail, so I think the wait was worth it!
This gown is constructed of bronze shot silk shantung with pale pink slightly slubby silk satin. It is flat lined throughout with ivory waxed cotton. It is stabilized with cotton canvas at the hem and in the waistband. The bodice is trimmed with ivory net and bits of metallic bronze/gold net that have sequin motifs on it (in fact, it’s the same metallic net as the top sleeve section of my 1912 burgundy silk evening gown, which I also wore at Newport). The sash is trimmed with the metallic bronze/gold net. The sleeves have layers of ivory tulle inside them to help maintain the full shape.
I wore this dress with a combination, a corset, a slight bum pad, two petticoats (one silk, one cotton), stockings, and shoes. Exterior accessories include cotton/poly elbow length white gloves (I have lovely leather ones that come up above the elbow, but they are getting soiled from being worn while dancing with men who are not wearing gloves (breech of decorum on their part!), so I chose not to wear those to this ball); my handy Battenburg lace fan; my faux pearl drop earrings; a long strand of faux pearls (originally bought to be worn with my 1928 green silk evening gown); a nice bling-y necklace borrowed from a friend for the evening; and my fabulous almost-Victorian tiara from eBay!
My tiara shares a general design with the Lover’s Knot Tiara, below. Both tiaras have round elements connected by jeweled arches above a second row of round elements, both rows of which are surmounted by tear shaped pearl elements which are set above a final row of further round shaped elements around the base. Additionally, in both tiaras there is a high point in the center which then diminishes toward each side. Obviously, the two are not exactly the same, but I think they’re similar. Of course, wearing mine for an 1893 look is slightly earlier than the given date of the Lover’s Knot Tiara, which is c. 1913. But isn’t that excusable, when the tiara looked so wonderful with my dress and accessories? There’s a closeup of my tiara below so you can compare.
Lover’s Knot Tiara by Garrard c.1913.My eBay tiara.
It took a bit of work to come up with a hair style I liked that also worked with the tiara, I can tell you. I wanted to have a puff of hair not directly behind the tiara, but close enough that it would provide a dark background for the tiara to stand out from. Unfortunately, I don’t have any great pictures of my hair. Oh well! It also took A LOT of bobby pins to secure the tiara. I think I used about 20 for the tiara alone. I put one between each of the base pearls, then another to cross the first one. I also secured the ends of the tiara with extra pins. It was really stable and didn’t move at all during the entire night, so that part was successful!
Here’s a closeup of the jewelry.
In the picture above you can see the jewelry better. You can also see the one major flaw in this dress. The wide neckline wasn’t shaped quite right, so the sleeves started slipping off my shoulders, making the sleeves look slightly less impressive. This is one of those things that was perfectly fine in all my fittings. It’s during those pesky balls, when you move and sweat, that you really discover the flaws in your clothes! I’ll have to do something about that before I wear the dress again.
A full length view. This was the end of the night, and the end of the week, so that’s why I look tired.A full length back view. Again, you can see how the sleeves just didn’t want to stay on my shoulders.
Now on to the specifics of patterning. The bodice (and especially the sleeves) of this dress are from Janet Arnold’s Patterns of Fashion 2, as is the skirt. The decorative sash and bodice trim were inspired by an image in Norah Waugh’s The Cut of Women’s Clothes. I looked at many images that had similar sashes with bows, so I’m sure I was influenced by those as well.
The next thing to discuss is the construction of the dress. It is in two pieces: a plain bronze silk skirt and a decorative bronze and pink silk bodice. The wonderful thing about this arrangement is that I can make other bodices to go with the skirt (I’ve got extra bronze and pink silk). For example, I plan to one day make a day bodice to go with the same skirt. Since the skirt takes the biggest bulk of fabric, this is an economical and practical plan in addition to adding to my wardrobe!
I’ve got some great closeup pictures of the bodice construction, but I didn’t take any close up pictures of the skirt, come to think of it. Honestly, though, it’s not as interesting. The skirt is gathered in back and set into a waistband which closes at the back with hooks. There is a placket opening that is hidden in the gathers. The entire skirt is flat lined with ivory cotton. In addition, the hem has a 12″ band of bias cut canvas tacked between the silk and cotton. The canvas helps the skirt form those wide folds at the hem as well as providing a certain weight and gravity to the lightweight silk. Finally, it also helps provide a clean sharp edge over which to turn the hem. For the hem, the bronze silk is folded to the inside over the canvas, turned again, and stitched to the cotton lining. The hem is about 1/4″.
The bodice, by itself. As you can see, the sash is a part of the bodice.Here is the net applique on the sash ends. The net is great because it doesn’t fray, so I simply had to cut out the motif I wanted and then stitch it around all the edges to the sash. The sash is a tube of bias finished at an angle on the ends with a slip stitch.A closup of the shoulder and top of the sleeve. You can see the ivory net trim around the neck of the bodice, which terminates in those cute bows on the shoulder. The bronze part of the sleeves are rectangles that are knife pleated radially at the shoulder, which you can see in this photo. And finally, you can see the gold net applique which is stitched over the ivory net around the neck opening.Then comes the question, where are the closures on this bodice? Well, the sash is stitched to the bodice from the right side front around the left side to center back. Then the bodice opens up center back.To keep the sash in place around the right side, there are three hooks that correspond to thread loops on the bodice. This keeps the sash in place. You can see the canvas backing of the sash in this picture.One of the thread loops on the bodice that holds the sash in place.The center back closure is hooks and thread loops. I like thread loops better than the metal eyes or loops because you can’t see them when the bodice is pulled tight, like you can with the metal. You can see that I added a placket that extends farther than the loops just in case something pops open.The inside of the bodice. I LOVE to make the insides of garments pretty, and I think this is one of my finest examples! Aside from the fact that it is modern materials, it looks just like an extant garment from the 19th century. The bodice is boned up center front, the front darts (which create a V-shape on either side of center front), the side seams, and each of the four side back seams. The neck and hem are finished off with self fabric bias with is then nicely whip stitched to the cotton flat lining. The armholes are bound with self bias. Then there is also a waistband, to help alleviate the tension on the center back closure. This waistband is cross stitched to each boning channel and closes with hooks and eyes.The right side of the bodice. You can see the bias bindings, the boning channels, cross stitched waistband, and hooks. Oh, and I just noticed that I also finished the exposed seam allowances by turning them back on themselves and whip stitching. (The seam allowances under the boning channels are trimmed and left raw.)Center front. The boning channels were whip stitched to the cotton lining along the sides. It was a bit of a logistal problem to determine how to nicely bind off the edges of the bodice with bias, since there is a sash part of the way around. You can see that there is a separate piece of bias covering the join between the sash and the bodice from the right side where the sash opens.The left side. On the waistband I did use the metal bars instead of thread loops, since I knew they wouldn’t be seen from the outside. You can also see how the sash was attached. It was flipped up and topstitched to the bodice (avoiding bones!), then flipped down to cover the raw edges and joined to the bottom of the bodice with bias.The interior of the pink under sleeve. The silk is gathered into a cotton lining. Of course, you can’t see up into the sleeve when there is an arm in it!
It makes me feel all warm and fuzzy inside, to have such a beautifully finished bodice. And I felt like such a princess at the 1890s Soiree, to be wearing an all silk dress with silk petticoat and a fabulous tiara!
I recently met up with friends from the Massachusetts Costumers to attend a colonial faire. It was a cold, damp, day so we had the opportunity to pull out warm clothes and accessories like mitts, muffs, and cloaks.
First, I made a matching petticoat out of the remaining bit of striped fabric I had. I had enough to make the front stripes run vertically, but in the back the stripes are only vertical for about 12″ and then I hd to do lots of piecing to even have enough fabric. Right above the vertical stripes are stripes that run horizontal, and above that are remnants of my green 1900 skirt from Newport. And I really do mean remnants! There are 3 rows of pieced in remnants, some of those are even pieced together with vertical seams to be wide enough! Of course, you can’t see all of the crazy piecing, since the skirt of the anglaise covers it. And I was rather in a hurry while doing all of this, so I have to confess that I did not iron any of my seams… or my hem… Bad behavior, I know!
Robe a la anglaise worn a la polonaise.
Second, I decided to wear the anglaise a la polonaise. I did this in part to keep it out of the mud in the fields we would be wandering through, and partly because I found multiple examples of striped robes a la anglaise with matching petticoats that were worn a la polonaise.
Robe retroussee dans les poches. KCI. c. 1780. French. In “…the “retroussée dans les poches”… [The] gown’s hem is pulled out from slits in either side, and draped on the back.” (From KCI) Okay, not actually a polonaise, but very similar.Robe a la polonaise. KCI. c. 1780. French.
Third, I decided against wearing the straw hat I wore last year. The shape of the brim is good, but the crown is too high for the 18th century and the ribbon wasn’t sewn on in an 18th century decorative way. I thought of adding that same blue silk ribbon to my 1912 ivory mushroom hat since that hat shape also appears in the 18th century… but it seemed a bit too much to have an ivory silk hat to wander around muddy fields. Plus, after completing my hair style, I realized that I hadn’t made my hair big enough to support the hat (and I didn’t want to cover up the rolls I had attempted in the back!).
Bun roll hair.
Fourth, I attempted a new hair style with rolls in the back. I don’t think I quite made it, since it kind of looks like edible buns on the back of my head… But it was an experiment, and I learned some things, so it wasn’t a total bust. I separated the hair on the front part of my head and brushed it out and hair sprayed it upside down to add volume. Then I actually put it into a pony tail on the back of my head, which I pinned in place to create the poof in front. I then separated the pony tail into those three sections and rolled them individually. I took the remaining bottom section of hair, brushed it out a little, and pinned it up so it would fall from the bottom roll, rather than the base of my scalp.
Rather sad petticoat, but fabulous new muff!
Fifth, I wore my new 18th century muff! The muff is from one of the classes I took at Dress U this summer, with Stephanie Pool. It’s stuffed with 100% down and is super warm. The blue silk cover is removable, so I can make lots of covers and have interchangeable muffs! I was hoping to have the blue silk ribbon on my head to complement the muff, but that didn’t happen. Incidentally, muffs make rather good pockets… I was able to put a little bag with my phone, money, etc. in it as well as my camera inside my muff!
You can see the down filled pillow inside. The two ends have a silk ribbon running through a channel. You simply pull the ribbon to gather the ends and then tie them to secure the gathers. You simply have to untie the ribbons to loosen the gathers and change the cover!
I did sort of give up and not try super hard for accuracy when I was getting dressed. I decided not to wear stockings, because I didn’t want them to get dirty. I couldn’t find any shoes that were remotely 18th century-like. I clearly need to make some under petticoats and readdress my bum pad/roll situation (I had also made my bum pad smaller, since it seemed so large last year… but this year my skirts looked a little sad and droopy… so maybe I went too far?). I need to actually hem the silk tucked into my bodice, so it’s not a full square of fabric… Oh also, I guess I need to make some simple pockets, until I learn embroidery and make some fancy embroidery pockets as I mentioned earlier this year.
At this point, I am going to freely admit that I rather failed at creating an outfit that is historic clothing, rather than a historic costume. Certainly, there are some aspects of this ensemble that are correct. For example, I’m very pleased that I cut my sleeves so that the stripes go around my arm, not vertically. I think my trim is well done and really makes good use of the fabric I selected. And I like the scale of my stripes, but feel that the fabric is really not the right choice for a piece of historic clothing, rather than a historic costume. In addition to that knowledge, I have learned a lot about the construction of 18th century clothing, which I did not know when I made this last year. For example, I now know how to make petticoats the correct way, and how to construct the bodice of the robe the correct way, and how to sew the shoulder straps the correct way. I plan to make more 18th century things in the next year, so I will be sharing these sources with you as I go so that you will be able to gain this knowledge as well.
In the end, I’ve chalked this green anglaise up to experience, as every seamstress has to do, now and again. We all have to start somewhere. It’s pretty rare that the first thing you make from a totally new era is as correct as you want it to be!
Here’s a few more shots from the day, of me and my companions. Enjoy!
New caraco and quilted petticoat.New jacket! In a day! You can read more at Jenni’s blog: here.I really enjoy this pond. That willow on the right is the very same one we took pictures at last year!It was chilly, so we stopped in the tavern at the inn to warm up a bit.In front of the real fire! It was really pleasant.Of course, I took this picture to be silly. There was a lot of picture taking and iphone-ingShoe shot! With our “chaperone,” who was obviously not wearing historic clothes.
Oh yes, and I’ve realized I don’t have any shoes that are remotely 18th century-like. So I need to deal with that too… I want yellow ones!…
I recently returned from a successful Titanic-themed weekend of events, including multiple vintage dance opportunities. I’ve been working on some new clothing for these events since January, which you can read more about in my past posts relating to the 100th Anniversary of the Titanic. I’ve been rather remiss in posting updates about the progress of the new dresses I constructed for these events… So my first task is to share pictures of my attire and explain the inspiration and construction of the garments.
I created two new 1912 ensembles: an evening gown and a day gown with accompanying hat. Let’s start with the evening gown!
My camera had a challenging time capturing the colors and shimmering sequins on this gown, but this is a good representation of the colors. Look! I wore my ballroom dance shoes, which worked well, and my white kid opera gloves and pearl drop earrings... fabulous!Fabulous painted backdrop! Perfect for taking photos, although my camera didn't quite catch the colors so well in this photo. I think this gown is so much more fabulous in person! I was told that the sequins just shimmer in subdued mood lighting.
This gown is burgundy silk charmeuse with a gold silk charmeuse underskirt. The bodice is gold silk layered under gold sequined net. The sleeves are the same gold sequined net flat lined with nude colored tulle: the tulle provides unnoticeable stability for the net layer. The burgundy layers are pleated up and held in place in two places by gold silk and sequined net covered buttons. The bodice and skirt are lined with brown cotton and the entire dress is mounted on a foundation of some extra white cotton which I have an excess of in my fabric stash. The foundation layer is essential to the drape of the dress, because it provides stability as well as a layer to attach all of the pleats and drapery points to. The foundation allows the burgundy silk to effortlessly hang and artfully fold without looking heavy or as though it serves to hold an weight. The foundation layer also supports the underskirt which is attached at about knee height (thus not extending all the way up to the waist and saving fabric). If you plan to create a draped Edwardian gown I strongly suggest that you include a foundation layer: the practice is historically accurate and will help your dress look effortless rather than heavy. This gown closes center back with hooks and eyes along the gold sequin area and a complicated series of further hooks and eyes at the top of the burgundy back drape. The hooks and eyes help create the tension that is required to keep the waist carefully draped in elegant folds across the waist.
There is not a hat associated with this gown because hats were not worn for formal evening events. I did create a wonderful Edwardian coiffure with loops and puffs of hair on the crown of my head surmounting the two front sweeps from the front as they swooped around the base of the back of my head. Unfortunately, I didn’t get any closeups of the style. I feel it is necessary to encourage you by saying that the more often I practice my Edwardian hair styling the faster I am and the better the styles look. You, too, can have fabulous Edwardian hair! Practice! Practice! Practice!
I draped the pattern for the foundation, bodice, and sleeves. The underskirt is a mix of information from the usual pattern book culprits (Janet Arnold and Norah Waugh) that I took in and then kept in mind while flat patterning a knee high underskirt pattern. The outer draped layer is just that: draped. It was a good challenge–I would have a hard time creating a flat pattern of that layer. All I can say is that it is just one rectangular piece of fabric that was sometimes frustrating and draped with many references to my inspirational images.
It turns out that the evening gown is a mash-up of two gowns (pictured below) at the Metropolitan Museum of Art. I think I started by aiming for the pink dress but wound up moseying my way along to the pale blue dress. Do you see the influence of both the pink and pale blue dresses? I do…
1914 Callot Soeurs evening dressSide/Back of the same.1911-1914 Callot Souers evening dress.Side/Back of the same.
Oh my goodness! This is such a cool and huge collection of photographs and fashion plates! Lauren over at American Duchess has been referencing images from the Bartos Collection for awhile now, but I didn’t get a chance to check it out for myself until just recently. It is WONDERFUL!
The collection focuses on the mid-19th century through the early 20th century. There are fashion plates and mounds of period photographs and pictures of extant clothing… If you love historic clothes and hats and hair you MUST VISIT! Here’s the link, again, because you must go visit and drop your jaw with me!
Alliterative, agreed? Ok, I’m done… Honestly, the words just came–I didn’t spend long on them! Last weekend I attended the Returning Heroes Ball hosted by the Commonwealth Vintage Dancers in Holliston, MA. As usual, it was full of fun and laughs. There were fabulous dresses all around (because of course one of the joys of a ball is to observe dresses–old and new) and wonderful refreshments as well. I don’t have pictures of other people, but I have pictures of me!… You can see a variety of people in the photos on Antonia’s blog, Experiments in Elegance…
Me, in Annabelle. I really, really love hoop skirted dresses! And flounces! Whee!!!
I recently gained a new accessory: a deep purple burnout silk velvet scarf, big enough to use as a shawl. The shawl was decommissioned from a friend’s modern wardrobe because it is rather intense for a modern look; however, it works wonderfully as a 19th century piece, I think! I’ve been waiting for about three months to try it out with this outfit… I think it is fabulous and nicely complements the purple in the flowers. Do you think it works for an 1860s look?
Ooo... Purple silk velvet shawl. So cosy! (and stylish to boot!)Thanks for taking the photos, gentlemen (you know who you are)!
I’ve been trying out more complicated, poof-filled hair styles in preparation for early 20th century styling and I put some extra effort into this hair-do to try out more poof-ing. From the front my hair has it’s normal 1860s style with a center part where each from section is slightly poofed and rolled back to join the low rolled chignon at the nape of my neck (above, left and right)… but from the back this most recent style has extra poof-age!
See the extra poof at the top of my head? Poof close-up
In terms of the hair-styling itself, I think I like the extra poof as it gives more dimension and adds a regal feel to the overall look. Do you like the added poof?
I also decided to rework the hair wreath I’d made for the German Cotillion back in October (left). I’m not sure I like it as a giant mass of flowers, I might rework it again into a crescent shape like the flower piece that matches Belle, my other 1860s ball gown (above right). In terms of the flowers, giant mass or crescent shape?
Now that we’ve seen my re-made 1819 dress (woohoo!), let’s look a little closer at my hair. Despite the fact that I have naturally curly hair, Regency hair styles are not as easy for me to achieve as you might think. Many Regency styles have short curls (bangs, really) that surround the face, like the one below.
1813 Ackermann’s fashion plate from EK Duncan’s blog: look at those curls that frame her face!
However, in this modern world, curly bangs are just not the thing to have… so thus my regular, un-period hairstyle is long, with no trace of bangs! (So I don’t even have pieces I could curl with a curling iron to get the ringlets at the front.) I dug through my books to look for Regency hair styles that did not have the face framed in curls and I did find some in Cunnington’s English Women’s Clothing in the Nineteenth Century. Luckily, many of the non-face-framed-curly styles were from the same year as my dress: 1819. I also had the good fortune a few months ago to come across a gold laurel leaf headband that fits the Regency period wonderfully. It’s actually plastic, but I think it looks the part. I used it as a tiara.
You'll remember this picture from my last post.
In terms of styling my hair, I wound up trying out a few of the techniques that Lauren (of American Duchess) has been discussing recently in terms of early Edwardian hair styling. The question for me with these sorts of styles is always what to do with the back? Once the top poof has been achieved something has to fill in the back or it just looks weird. Lauren’s posts have been quite illuminating for me in solving this problem.
I started by parting my hair from ear to ear over my head, to separate the front bits: this I parted down the center to form a left and right side, then I clipped these out of the way to save for later. I then took the back section and divided it into a top and bottom section. I put the top section in a super high pony tail and then rolled it to create a poof at the top of my head, to fill in the laurel tiara.
You can see the top poof and rolled up back sections.
Once that section had been pinned, I divided the remaining back section into three sections: one by each ear and one in the middle at the nape of my neck. Each of these was separately rolled up and pinned below the poof on the top of my head, to fill in the back section. Now remember, I didn’t want to curl the area around my face… but I had the left and right front sections still. The image that I used had wings (almost like an 1860s look)… and so that’s what I did with the front sections. Each one swooped over my ear and was pinned in the back bottom section. Big sigh of relief… An hour later, having used 20 bobby pins, and a lot of super duper hair spray (to contain my frizz, you know), Regency hair! I felt very Josephine-like with such an up-do and regal tiara! I’m not totally sold on the wings. I think they were a little too poofy. Maybe next time I can smooth them down more?
Side back view.
Below is a great example of a Regency up-do from a fashion plate. I think I created a similar style, if not more complicated style, although without those face-framing curls…
1813 Ackermann's fashion plate from EK Duncan: a great view of a Regency up-do from the back