Vintage-Inspired Book Dress

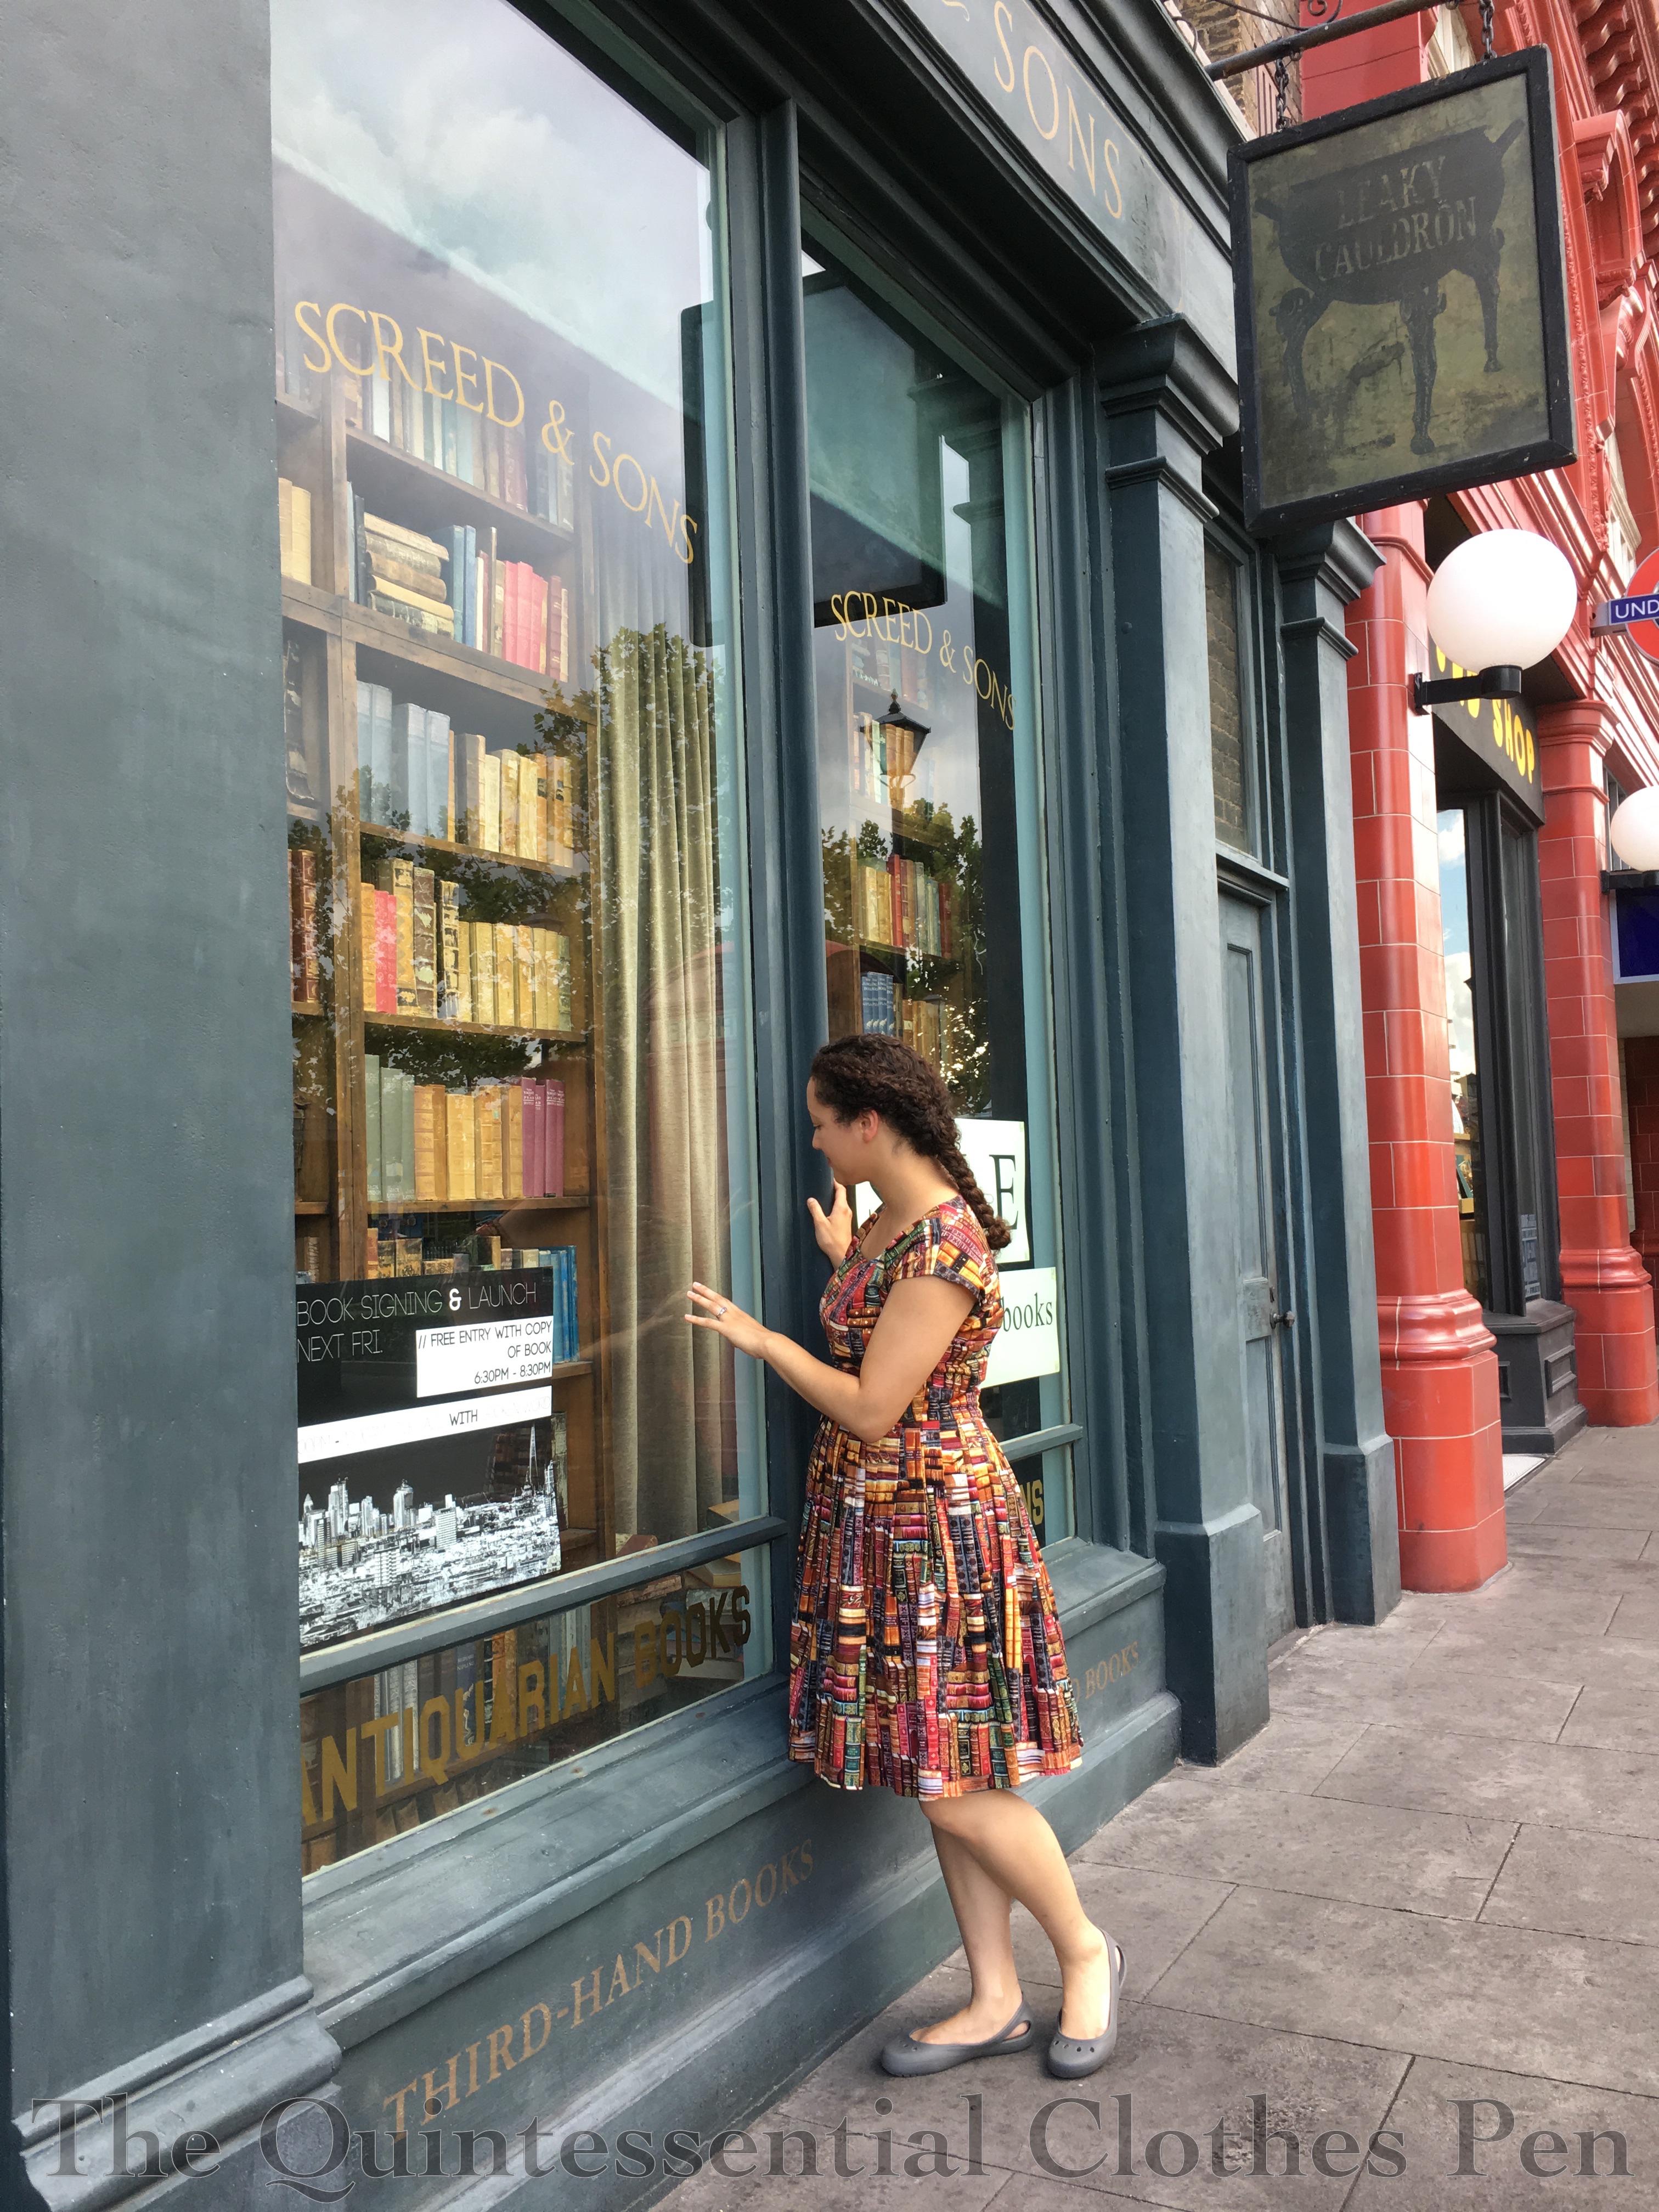
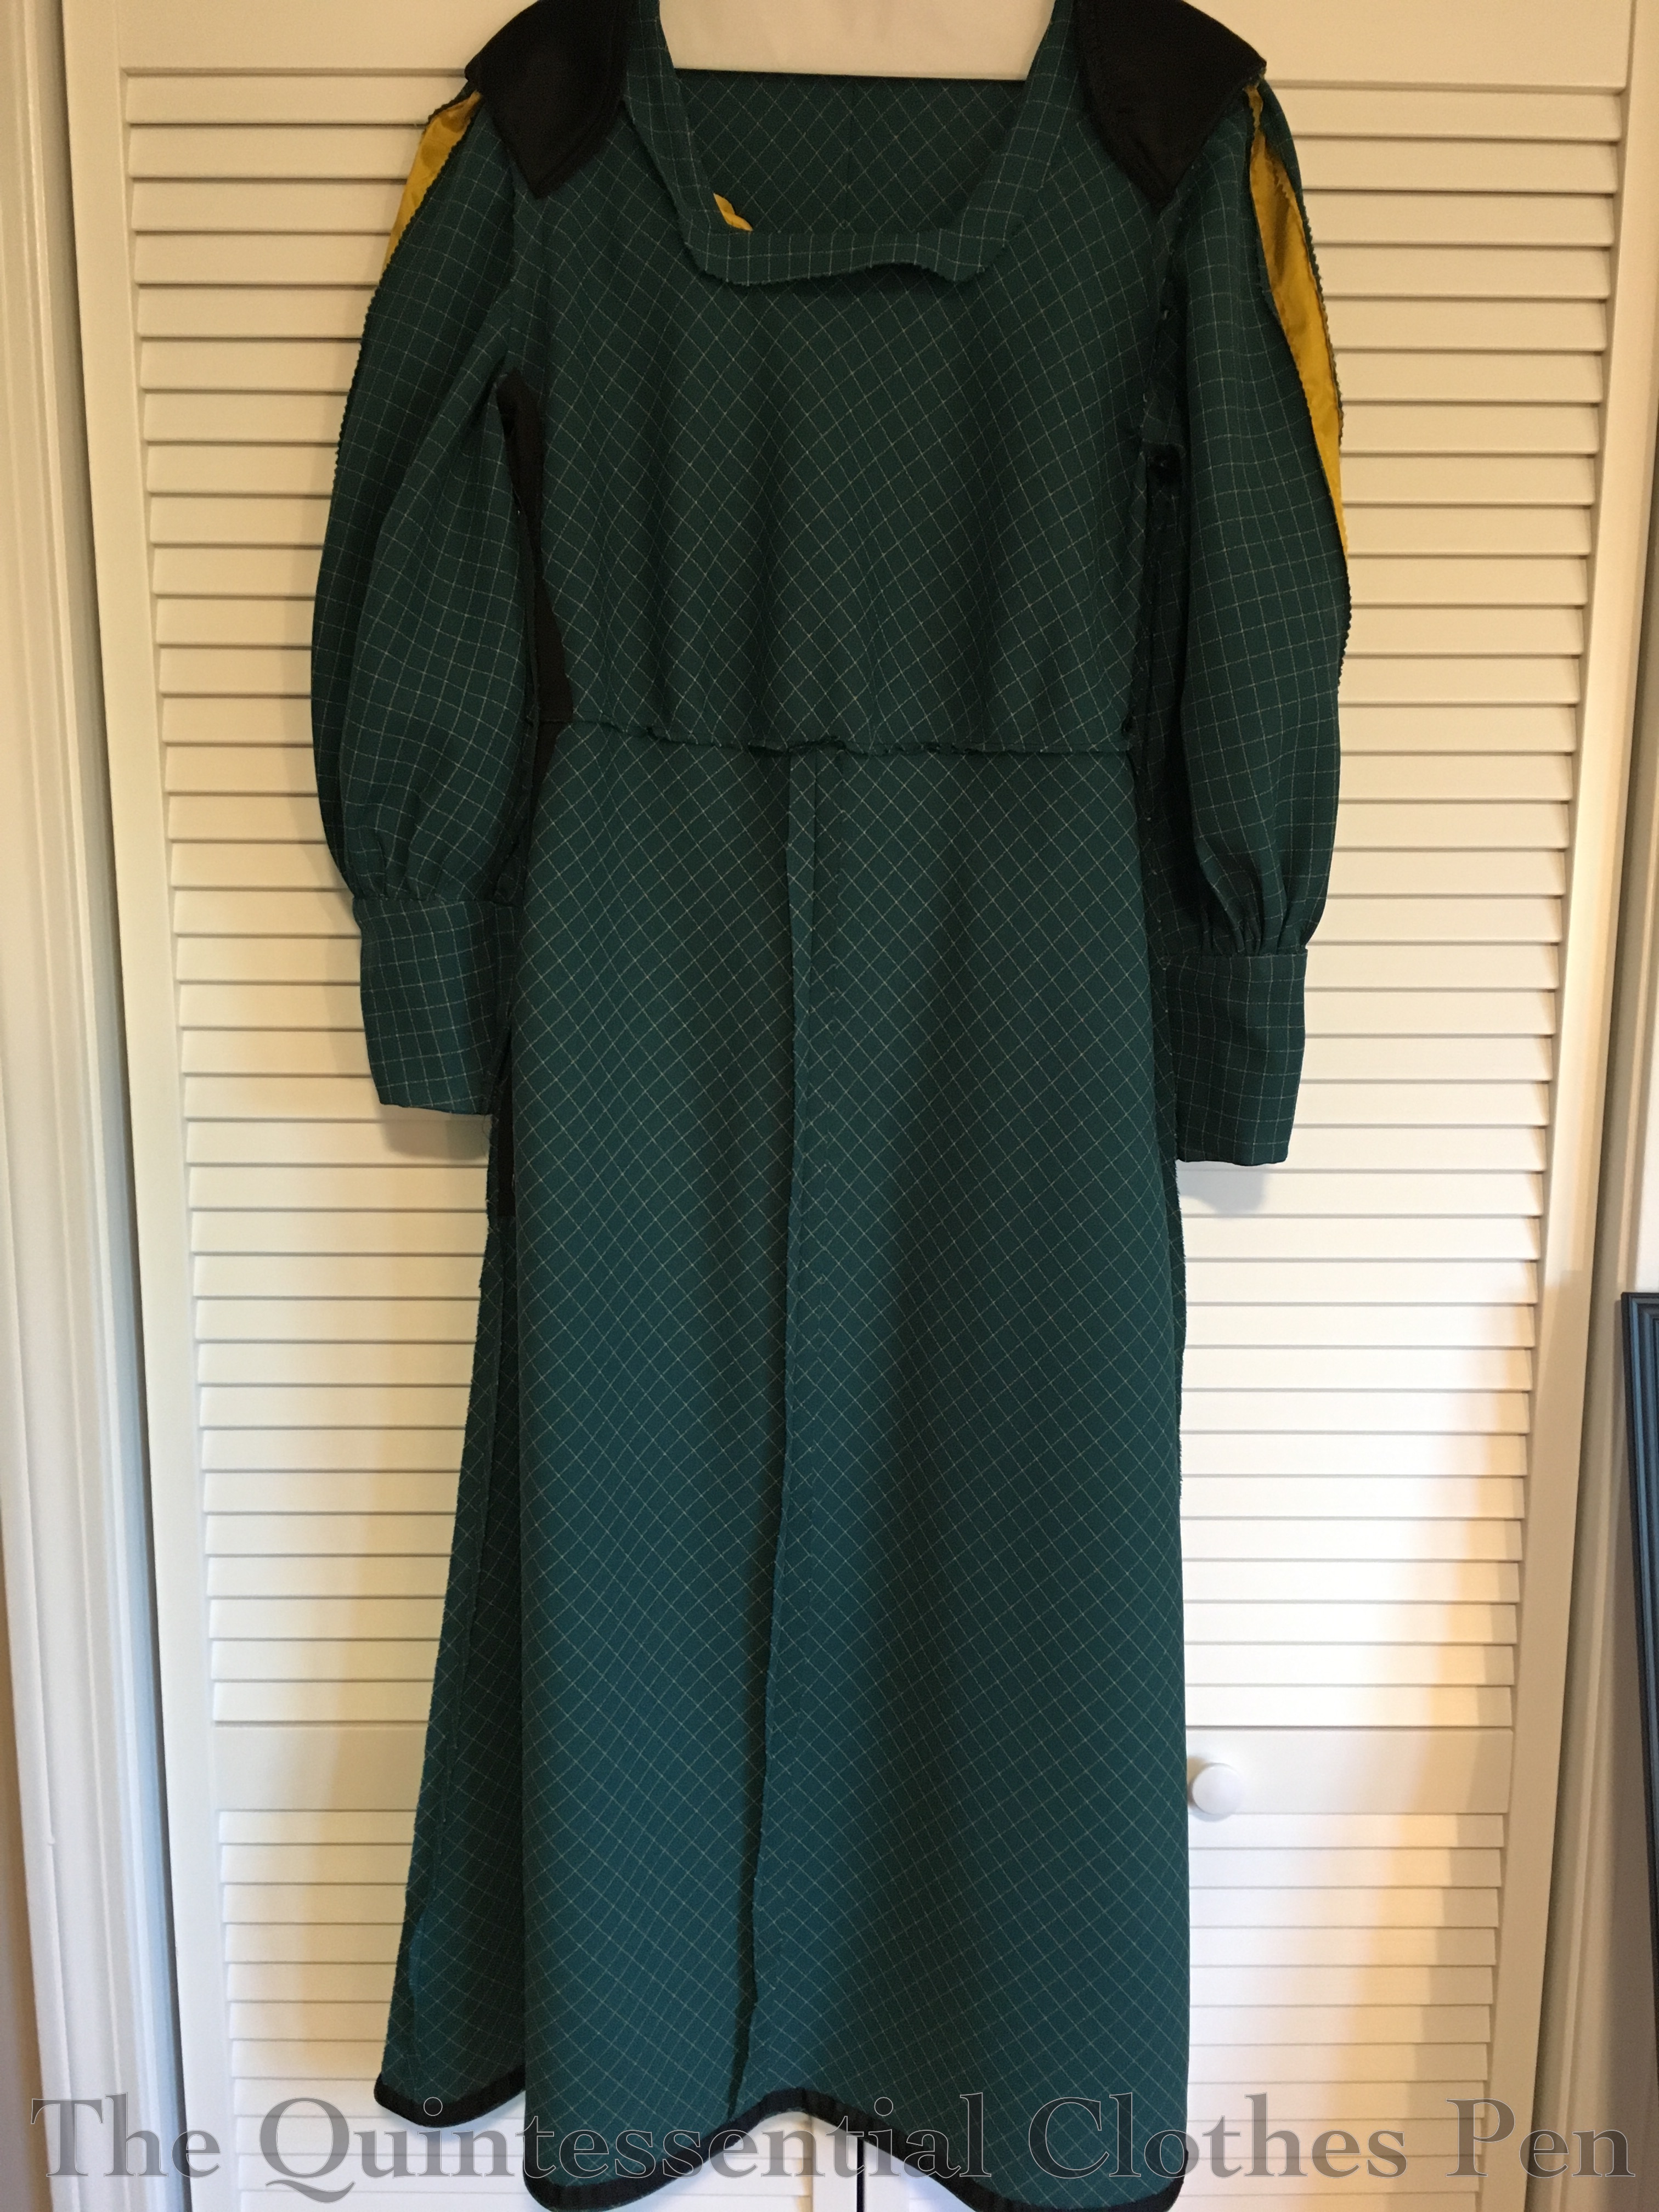
Two or so years ago, I came across this dress as I was poking around the internet. I loved the print, but the style was not for me. The peter pan collar, in particular, isn’t really my style. However, I got it in my head that maybe I could make my own version of this dress, with style details that suited me better.

This led to a hunt for the fabric. With a little bit of searching, I was actually able to find the exact cotton print fabric used in the dress I originally liked! I bought mine from Fabric.com, but it was (and still is) also listed on Etsy. It has a little bit more stiffness than your average quilting cotton, which makes for a dress with nice body. It also has little hints of metallic gold in the book titles, some of which are readable. This makes it a little festive and fun without being over done.

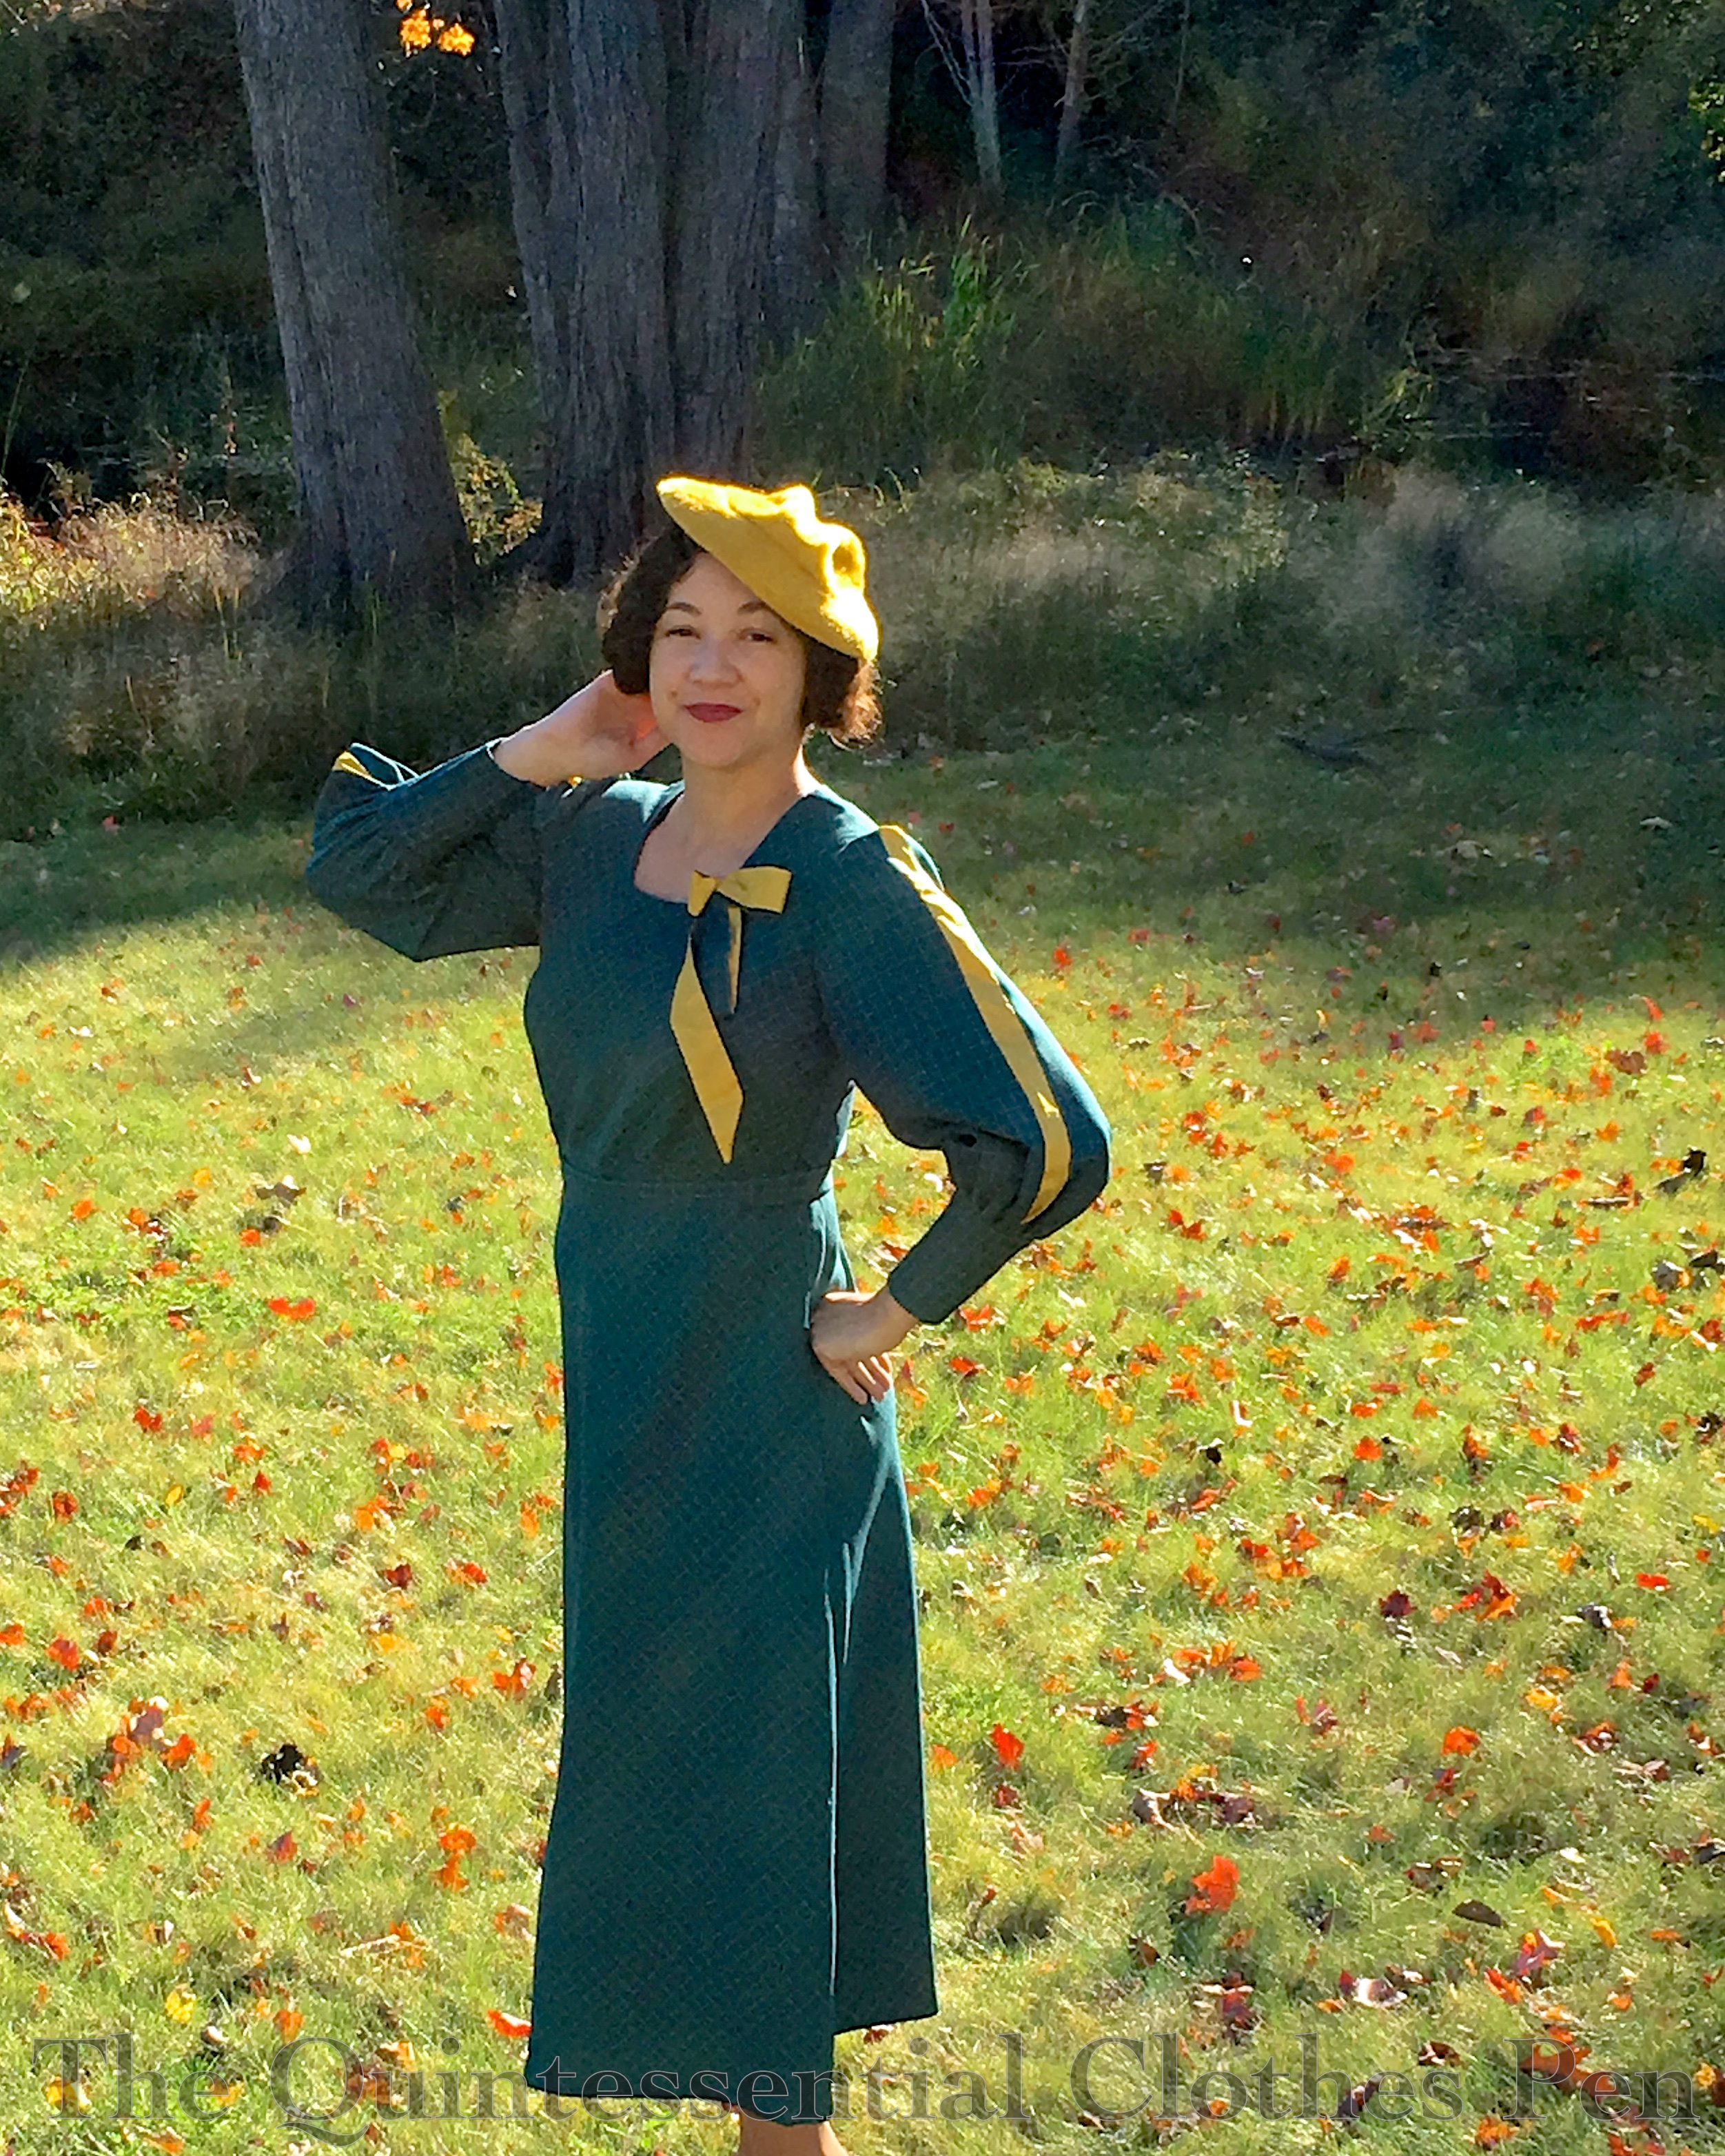
That was back in 2016. It took me about a year to get around to making the dress, but I finished it in late 2017. And I’ve been wearing it! It just took another year to wear it somewhere that was good for taking photos. (I still hold out hopes of taking photos of it in a fabulous wood paneled library, while holding my hardcover copy of Gone With The Wind. That’s one of the readable titles on the dress! Not sure when that will happen, though.) In the meantime, I’m very pleased with these photos from my trip to Universal Orlando, where we took photos of this dress in various Harry Potter locations.

I used Butterick 5880 (a retro pattern from 1951) for the bodice of this dress. This is the same bodice I used for my Happy Clover Dress, which I finally finished in 2017 as well. Both of these dresses have a different neckline than the original pattern. I’ve found that this is a great basic pattern for me. It fits well, I like the all-in-one-with-the-bodice sleeve, and different necklines work with it to change it up from one dress to the next!

The square neck inspiration for this dress came from a blog reader in 2017, who commented on my Happy Clover Dress post and suggested that a square neckline might be a nice vintage touch. I thought the idea made sense with the square corners of the books in this print and decided to give it a try!

As with the Happy Clover Dress, I did not use the Butterick skirt pattern, instead opting to create my own. My vintage inspired skirt is simply a tube that is 122″ in circumference, knife pleated to fit the waist size of the bodice. I carefully cut and seamed the panels to maximize my fabric use and have side seams as well as a center back seam. Part of the reason I had to maximize my fabric use was that I used up pretty much all of all 2.5 yards that I bought. In fact, I didn’t even have scraps big enough to make pockets out of after cutting out the bodice and skirt pieces! I used what I had and pieced the rest of my pocket bags with fabric left over from my 1860s Flower Basket Fancy Dress project. I had dyed the fabric a mottled brown, had only had small scraps left, and the look reminded me of book leather, so it seemed like a fitting thing to use.

Pockets in a dress is excellent! And you can do that when you make your own clothes. Actually, while I was on my trip I was asked whether I’d made the dress. The giveaways were the fact that I had my hands in my pockets and the knife pleated skirt, both of which struck the person who asked as being vintage and self-made details–not a combination that would be easy to buy in a store. I thought that was fun!

I made this dress using modern techniques. All of the inside seam allowances are finished using a serger/overlocker. There is an invisible zipper in the back. It is almost entirely machine sewn, including the hem and armholes. The only hand stitching is the finishing of the brown bias tape that finishes the neckline, in order to keep that nice and invisible. On the hem and armholes the black machine stitching blends into the print and is hardly noticeable.

I have fun wearing this dress and pairing it with different cardigans in the colder months! Black and red are my favorites. And I can report that it was very enjoyable to be dressed in slightly-vintage-style to visit Diagon Alley and Hogsmeade. I had no trouble on the rides and was as comfortable in the heat of Florida as I would have been in shorts or capris and a tee shirt, which is what most people were wearing. I felt more put together and enjoyed the themed dress! I might have to do things like that more often!

1925 Lace Cloche

I knew I wanted a cloche to go with my 1925 Blue Coral Dress from early on in the process of making it. It was going to be hot when I wore the dress, so I knew I wanted something that would both look and feel lightweight. Turns out any hat was warmer than a bare head (well, one with hair on it!), but that being said, I think this was on the right track with a lightweight hat.

I considered making the cloche from fabric, but couldn’t decide on a style with seams that I liked. However, as I was browsing my Pinterest board, my eyes kept settling on straw, horsehair, and lace hats. It seemed like that was the way to go.

I didn’t have any particular materials on hand or in mind for that type of hat but I had come across a modern cotton lace cloche on Amazon for $14 that seemed like a good starting point. It’s no longer available, but I’m sure a careful search could find something similar. To the right is what it looked like before I started changing it up.

Generally, modern cloches have such a deep crown that they don’t leave any space for hair arranged on the back of the head. I have long hair, so that just doesn’t work for me. Cloches from the 1920s frequently have a cutout in the back to allow for your neck… or hair! They also have more interesting brims than modern cloches often do. Perfect. That’s what I wanted. An interesting brim and a cutout for my hair.

With my design plan in place, I started disassembling the modern cloche. First, I removed the braided band and flower. Then, I started unwrapping the lace on the brim, taking out the stitching that held one circumference to the next. I stopped at the bottom of the crown. I removed the inner hat band for most of the way around the hat, so I could stitch the new brim shape and the back cutout without stitching through the hat band.

Next, I played with the lace I had unwrapped for the brim to decide on a new shape. Once I made some decisions I had to make a few shorter pieces out of the lace, but most of it I tried to keep intact. In the back, I decided where I wanted my cut out to be… and cut it! Then I bound the edge using the lace and topstitched it down to encase the edges.

It was a bit tricky to find an acceptable shape for the new brim. The first few tries were so similar in shape to the crown of the hat that they hardly showed when I put it on my head. I ended up with a brim that flares out a bit so it stands away from the crown of the hat, especially in the front. I had to be careful to cover the ends of the plastic horsehair braid that backs the cotton lace, as it is very poky when cut. I covered the ends either by turning them under or having the inner hat band cover them.

After sorting out the brim and back cutout it was time to reattach the inner hat band. Then I sewed on my trim. Here’s what the hat looked like on the inside after all that.

I’ve loved Leimomi’s cloche decoration in this post since she posted about it in 2014. Having that in mind, I thought of what bits of trim I already had in my stash and what might work for this hat. I decided on a random yard of navy grosgrain ribbon, which I cut into thirds, pleated, and attached in imitation of this hat.

When I styled my hair, I tried to have hair come down to my jawline more than I usually do. I think cloches look less silly if there is some hair showing around them. My hair didn’t really look like a bob, but at least there was some hair showing in the front. In the back, it was pinned into a low twist-y mass of curls.

The great thing about the materials of this hat is that they are intended to be flexible for packing and traveling. Not only is it easy to store this hat but it’s also easy to remove it at a picnic and leave it on the blanket or put it in a bag without worrying that it will be damaged. It can get crushed and bounce back into shape!

In the end, I continue to think my head looks like an egg when I wear a cloche. I like styles that don’t hug my head better! That’s my own feeling–other people don’t think it’s nearly as egg-like as I do! But as egg-heads go, this was better than some attempts, so I think we’ll call it a success! It certainly looks cute on the fence!

1925 Blue Coral Day Dress (HSM #8)

The summer has been very busy and I don’t feel like I’ve completed very many sewing projects for myself. Really the only reason I’ve completed anything is because I’ve been live streaming my sewing, which forces me to make things from the list of the-things-I-want-to-make-that-I-never-make-time-for. Do you have a list like that? Mine is lengthy!

One of the first of these things-I-don’t-usually-make-time-for projects was a dress made out of one of the fabrics I bought earlier this year. I really wanted to have it for events this month as they are generally quite hot and the fabric I found is nice and lightweight while still being opaque. I found this fabric at a local discount store for the awesome price of $2.99/yard and then later saw it at a regular price store for somewhere closer to $10/yard, which really made me feel like I got a deal!

The pattern for this dress is a Quinnpen special (ie. made by me). I took my inspiration directly from this extant dress at All The Pretty Dresses. Due to that, it qualifies for the HSM Challenge #8 Extant Originals (copy an extant historical garment as closely as possible)!

To start, just the facts:

Fabric: 2.5 yards cotton lawn.

Pattern: My own.

Year: 1925.

Notions: Small bits of contrasting fabric for bias binding, thread.

How historically accurate is it?: I’d say this one is about as close as I can get to 100%!

Hours to complete: Approximately 8 hours.

First worn: August 5, 2018.

Total cost: $10.50 (including the fabrics I used for decorative sash options).

For the bodice of this new dress, I started with my 1927 Blush Sparkle dress (that dress started life as a tube before I added a head hole, armholes, and side seams/darts to about the hip level). For the skirt, I made a circular pattern that had the zig zag top edges that are featured in the extant dress. It was a bit of trial and error process to get the zig zags just right, but I made it in the end! You can see the topstitched zig zag detail on the extant inspiration if you look at the pictures carefully.

The zig zag top edge of the skirt is pressed under and topstitched onto the bodice. On both my dress and the extant dress that detail gets lost in the pattern, but it allows the skirt to have a lovely drape and fullness while the top can stay that straight 1920s shape that is so iconic. Here’s a closeup of my topstitching. Not bad on the pattern matching!

I finished my dress armholes and neck hole using bias, as I believe the original did based on looking at the photos. My only changes here were to use a contrasting color so I could actually see where the openings are (before I put on the orange binding the blue on blue pattern just made a big indistinguishable pile!) and to turn the bias binding to the inside of the openings (given that I was using a contrasting color). Aside from that the only other detail I omitted was a center back seam on the bodice since I had enough fabric not to need it when I was cutting out the pieces.

The photo above shows the dress with two different sash options that I made for it: pink and orange. I bought the orange when I bought the blue, but when I got home I thought it might be too bold and decided I might like the pink better. But I really couldn’t decide, so in the end, I made both!

When I wore the dress, I was still undecided… so I took pictures with all three options: no sash, pink sash, and orange sash. See each look below!

The idea behind a sash was this inspiration: Wilton Williams, The Bystander, August 12th 1925, though after wearing it my preference is no sash! I think that the bold, large scale patterns in the fabrics of the inspiration dresses lend themselves better to a sash than this blue dress.  The bonus part of not having a sash is that the dress is easy to wear, there’s no fussing with keeping a sash in place, and the dress really does have a nice 1920s shape to it even though the detail of the zig zag is lost from more than a foot or two away. What do you think? Does one style of sash (or no sash) speak most to you?

It’s fun to have a new dress to wear, discuss, and document! There are more dresses in the live stream queue, so if you want to stay in touch with what I’m making I would love to have you join me for one of my virtual sewing circles. You can join me on Wednesdays and Fridays from 9-10:30pm EST!

A New Old(er) Dress

Today, I present a new version of an old dress.

(Well, not old in the usual way on this blog, which is a dress that is often 100+ years old. In this case, the ‘old’ dress is about 8 years old. I couldn’t pass up the colors in the flowers, though the cut and fabric was more ‘junior’ than adult woman, especially with the built in underskirt of tulle which I promptly cut out as soon as I reached home. However, worn with a waist length or otherwise cropped cardigan, the original dress saw me through a number of summers.)

And then my shape changed and the the dress became a bit too small and a bit too tight. This is the standard my-clothes-shrunk-in-the-closet problem. Boo! But I still loved the colors, so when I happened to see a similar fabric at the fabric store I snapped it right up with the goal of making a new, older (as in, not ‘junior’ style) version of the original dress, so I could retire the original from my wardrobe and send it on to a new home. (In fact, when Mr. Q saw me working on the new dress he confused it with the old one because the colors are so similar!)

I decided to use New Look #6143 as a starting point for a pattern for the new version of the dress. It’s got a basic bodice that would be good for other things if I liked it made up and a variation on a basic skirt, which never hurts to have either. I believe the only thing I changed from the original pattern design was the neckline in the front. Of course, it took me probably two years to actually get around to finishing the darn thing. I started it, realized it was too big, got frustrated by the amount of alterations needed, and let it languish (for years…).

This year, however, I was determined. Turns out I had just cut a size larger than I needed. (P.S. I hate figuring out commercial pattern sizing. There is so much ease that the size the pattern envelope claims I should be is often too big, as in this case. Do you ever have that struggle? When I took apart my bodice pieces and traced out the lines for a smaller size, the bodice fit perfectly. Nice, but it would have been so much better if it fit perfectly the first time!) I had already pleated the skirt and added side seam pockets when I started the dress years ago-I wasn’t going to change that–so instead I angled the side seams from the pockets up to the waist to take in the excess amount. Not the most perfect solution, but in a full skirt you can’t see the fudge.

I love how tidy the insides of Carolyn’s modern dresses are (like this and this) and I wanted similar tidiness for this dress. The bodice of my dress is fully lined in lightweight cotton and the skirt edges are all overlocked to keep them from fraying.

Oh, and as I mentioned, I added pockets! Most dresses are better with pockets! (I would say all, but some lightweight dresses just pull in awkward ways with things in the pockets, so really, why bother adding them?)

The dress closes in the back with a (pink!) invisible zipper that is carefully sandwiched between the floral exterior and the bodice lining. The pink zipper matches perfectly and amuses me greatly. It’s a fun color!

At the bottom of the bodice lining the seam allowance is turned up and whip stitched to the waistband seam allowance to create a tidy finish. Tidy finishes like this make my heart pitter-patter with glee!

I’m very pleased with the new version of this dress and so pleased that it is off of the UFO pile! My only slight complaint is that I wanted an everyday dress, but the fabric is a little satin-finish-y rather than matte, even though it’s cotton, which takes it more in a ‘dinner’ or ‘event’ direction rather than ‘wear to work’. Oh well! It’s cute, it fits, and the colors are perfectly me.

I’m looking forward to trying this pattern out in other variations! I have plans to make another version of this dress soon–probably during August!

SaveSave

SaveSave

SaveSaveSaveSave

SaveSave

SaveSave

c. 1860 Crinoline Size Comparison & Tutorial

Back in October of 2016, I made a new, smaller crinoline (also called a hoop skirt) than the one I’d had for about the last 10 years. I thought it would be great, and it was… in terms of shape. Unfortunately, the new crinoline had a fatal flaw: the channels for the hoops were too wide for the slippery-ness of the hoops and therefore all the tapes would slide to one side while being worn, causing the hoops to drop down and create a trip hazard for the wearer. I had loaned these to a friend at a ball and was horrorstruck as I realized the problem and she attempted to dance without realizing the problem. It was such an awful feeling! We solved the problem for the night, but I resolved to fix the hoops before wearing them again and I learned a good lesson about trying out new garments myself before loaning them! I’ll get to my solution for the sliding hoops in a bit, but first I’ll start at the beginning.

The new crinoline was an experiment to see if I could use the hooping from a cheap Amazon hoop skirt like this to create a cage crinoline with smaller dimensions than my usual crinoline, the super-cupcake, which has a decidedly high fashion silhouette. The answer to that question is ‘yes’ it was easy to reuse the hoop steel from the Amazon crinoline to make a cage crinoline.

You see, the super-cupcake looks great with the right circumference of skirt and the right environment (high fashion daywear or a ballroom); however, under a cotton day dress I wanted a more subtle, practical, reasonable shape. I have to admit to liking a big skirt though, so a reasonable crinoline for me still has a larger circumference than what it might be for others. Also, at 5’6″ I am taller than the average woman, which allows me to carry off a larger circumference while staying within reasonable looking proportions. (For more thoughts on practical sized crinolines, Maggie May has shared useful research and an equation to help determine crinoline circumferences.)

Here’s a comparison of my two crinolines worn with cotton dresses: the super-cupcake is on the left and the newer reasonable crinoline is on the right.

Interestingly, the dimensions of these two crinolines aren’t terribly different. The lowest hoop is only about 8″ smaller  on the new crinoline. The biggest difference (and what alters the silhouette most) is that the new crinoline has a more tapered shape in the upper hoops.

I’ve provided the following size chart in an effort to help those who might be making or adjusting their own crinolines. Even if you don’t want to deal with all the vertical tapes, you can use these dimensions to adjust the hoop sizes in a ready-made modern crinoline to achieve the same effect.

Interestingly, both of these crinolines have the same vertical tape length that is short enough to keep the bottom hoop decidedly above the floor. The lowest hoop on these is about at my mid-calf height. This keeps my feet from getting tangled–especially useful while dancing! In order to keep my dresses from folding under the bottom hoop as I move, I have a cotton petticoat with a substantial ruffle around the hem which provides stability for the dress worn on top. You can see the length of the super-cupcake on me as well as the ruffled petticoat that I wear over both crinolines in this post.

Here are my two crinolines next to each other while the new one was still in progress. They have an overall similar construction (although I did simplify the new ones, using fewer hoops and fewer vertical tapes).

My old crinoline used ivory twill tape for the vertical supports. There are actually two layers of it that are hand sewn together to make channels for the hoops, creating channels along the lines of those seen in this 1859 hoop skirt patent filed by James Draper of New York (while the hoop circumferences are not provided in the patent, the silhouette of Draper’s hoop skirt is similar to that of my super-cupcake). This method used a ridiculous amount of twill tape, so I came up with a way to make the new channels that would use only one layer of twill tape for each vertical support. More on that in a moment.

The old crinoline’s hoops are made from cotton covered steel that was in a ribbon form originally. I had cut each ribbon in half (and over time, the fabric covering started to fall off, which caused me to painstakingly wrap each hoop all the way around with thread to make it more durable–a caution to anyone else using this to make a crinoline, although I’m not sure where you’d source this type of material these days as I believe this type of ribbon wire is no longer being produced). The fabric covering combined with the narrow channels in the twill tape means that the vertical ribbons only slide when I want them to, but that they otherwise stay in place nicely.

For the new crinoline, I machine sewed tucks into a single layer of twill tape to create channels for the hoops. You can see those tucks in the photo below.

I also machine sewed the vertical tapes to the twill tape waistband, because why not–I was machine sewing anyway. The waistband is two layers of twill tape sandwiched together.

That’s basically it for the construction before the awful incident of loaning them out. I cut the hoops to be the dimensions I wanted, slid them through the channels, and used the plastic joiners that had come with crinoline to secure the ends. Done! Or so I thought…

After realizing that these hoops were going to slide horribly, I went back to research to figure out how this problem was solved in the past. What I noticed are little metal dots on each join of hoop to vertical support. That makes so much sense! I wanted to add these to my hoops but I didn’t know what to call them while searching for materials.

It took me a little research to figure it out, but I did and now I’ll share that with you. They are called spots! Once you realize that then a whole world of spots becomes available to you. Decorative ones, bronze, copper, nickel, black… so many options! I got plain domed copper from this seller on eBay and am very happy with them. They’re easy to apply with a pair of pliers and seem quite durable. Now my hoops and tapes stay in place–no more sliding around!

And here is the finished result of the spots on the reasonable crinoline. I like the look as well as the practicality. I’m planning to add gold ones to the super-cupcake as well, for looks more than anything else.

SaveSave

SaveSave

SaveSave

SaveSave

SaveSave

SaveSave

SaveSave

SaveSave

SaveSave

SaveSave

Dressing Gown & Slip c. 1935

I made this robe about four years ago, for the same film that I made the 1934 Metallic Evening Gown I posted about recently. Like that dress, this robe and the accompanying slip were made and never worn, and so have spent the last four years languishing in my closet.

When I had the opportunity to attend Gatsby On The Isles in 2016 I thought it would be a great opportunity to wear these pieces for breakfast on the second day, and also to get some photos!

The robe is inspired by the silhouette of these robes from 1936. The pattern started life as Burda 7627, which I adapted to get the shape I wanted: a longer skirt with more fullness and sleeves with a little more flare. The slip is inspired by slips in this image from 1934. The pattern for this is actually the same as for my evening gown from 1934, just cut off around knee height and with a different strap situation.

The robe is made from a polyester jacquard. It’s not lined, just faced with more of the same fabric on the edges. The slip is made from polyester charmeuse and edged with lace. Both garments are entirely machine sewn.

I thought it would be fitting to pair these garments with my beautiful silver American Duchess Seabury shoes. These shoes are excellent–a unique historical shape, comfortable, sturdy for walking and dancing, and with gorgeous, lustrous silk exteriors. I even wear these in my modern life–they’re a quirky, elegant shoe to wear for a dressed up event.

On the other hand, I don’t have the opportunity to wear this dressing gown that often (I mean, I could wear it around the house as a modern person, but I don’t, generally speaking), so when I do wear it I really enjoy how elegant and put together it makes me feel. It’s fun to have historical comfy clothes in addition to the day dresses and evening gowns!

SaveSave

SaveSaveSaveSaveSaveSave

SaveSave

SaveSave

SaveSave

1950s Queen Of Hearts

At the same sale that I purchased the base of my 1950s super-petticoat and the hat that I refashioned into a 1930s style I also purchased a rather sad 1980s style evening dress. I liked the brocade fabric and had an idea that I could remake the dress into a cocktail length 1950s style dress by removing the sleeves, changing the neckline, and shortening the hem.

I also had this dress in mind. I love the massive decorative butt bow and this remade dress seemed like a great opportunity to put the idea to use. The red had to wrap around the waist as well as making the bow, in order to cover up the original gold waistband, but I had a remnant of cherry silk in my stash that was nicely complimentary in terms of color and just the right size for the job!

From the front I feel generally ok about the dress, but from the back, I love it! Plus, that’s two things checked off the to-do list: I remade the 1980s dress into a wearable 1950s style and I put the butt bow inspiration into action. Plus the fact that I used up a fabric from the stash, which is a bonus!

But why the Queen of Hearts? I decided this was a dress I wanted to wear to an Alice In Wonderland themed event that I recently attended so I had to fit the dress into the theme. I decided on the idea of an elegant 1950s historical nod to Queen Elizabeth in The Crown (which I might have been watching right around the time I was looking for inspiration…). Aloof queen looks are totally my jam, so that works really well.

As long as I was going with a queen look, I decided that a royal order sash would be an easy way to say royalty and hearts all at the same time while also being easy to remove from the dress itself. I did some royal order sash research and decided I liked a sash with a narrow border of a contrasting color. Of course, mine needed to be made in Queen of Hearts colors: black, red, and gold seemed perfect. I pinned heart appliqués behind my shoulder brooch and on the bow to play up the Queen of Hearts theme.

It was fun to accessorize the dress and sash with long gloves, red drop earrings, a tiara, and my silver American Duchess Seaburys (the gold brocade fabric that makes up the back of the shoes complimented the gold brocade dress very nicely!). I think I like the butt bow with the sash even better than the butt bow by itself!

To make the sash, I googled ‘royal order sash’ and looked at lots of images to decide on a design. Mine is made of two rectangles, with an angled shoulder seam and tucks behind the bow loops for shaping. It’s made of red polyester with woven-in tiny black stripes and edged with sheer gold ribbon. For more detailed sash making information, Gina posted very detailed tutorial for making royal sashes that would probably be quite useful if you’re thinking of making one for yourself.

I’ll leave you with this silly shot of the Queen of Hearts with a flamingo. Croquet, anyone?

SaveSaveSaveSave

SaveSave

SaveSave

SaveSave

SaveSave

SaveSave

SaveSave

If At First You Don’t Succeed… (HSM #1)

I made this 1928 evening dress and first wore it in 2012. Back then it was simple, with just a small cascade of fabric and no sash or bow (I show the construction in detail in this past post). Three years later, I decided to add the sash, bow, and extra cascade of fabric (and wrote a post about it). I liked the effect but wasn’t pleased with the slippery silk moving all over and sliding around. The armholes were also a bit high under the arms from the beginning, causing the trim to dig in a bit which wasn’t very comfortable.

Due to these issues and the addition of other 1920s evening dresses to my wardrobe I hadn’t worn this dress in a few years. But for an event this January, I decided to give it another go. Luckily, the dress still fit and didn’t cling in unwanted places! The first HSM challenge of 2018, Mend, Reshape, Refashion, was the perfect complement for the updates I wanted to complete.

To be specific about the updates, this time I lowered the armholes about 1″ and then pieced in extra trim to fill in the gap, sewed the sash/bow in place, and added an interior waistband that supports the weight of the bow and keeps the dress from pulling down on one side.

Our hotel room had a bonus vanity table and stool that was a perfect prop for photos…

I did my hair like I did last year but added a gold hair comb I recently discovered at my parent’s house. I’m pretty sure my mom gave it to me when I was a child or maybe a teenager… It’s just been sitting there waiting for me to put it to use again!

Just the facts:

Fabric: The only new fabric was a scrap of tightly woven polyester for an inner waistband.

Pattern: My own, based on measurements.

Year: 1928.

Notions: Extra trim to piece under the arms, thread.

How historically accurate is it?: Let’s say 95%, with points lost for the polyester.

Hours to complete: The updates took about 4 hours. I felt like hand sewing most of it so I could watch Netflix!

First worn: With the updates in January, 2018.

Total cost: Free!

I love how this dress looks and fits now! Yay! It only took three tries… It’s a good lesson: if you don’t succeed the first time, try again! And keep trying…! Third time is the charm on this one!


SaveSave

1830s Sleeve Puff Tutorial

Why make sleeve puffs, you ask? In order to keep the large sleeves of 1830s dresses from deflating, of course! Here’s an example of my 1832 dress without puffs (on the left) and with puffs (on the right). They make such a difference!

I chose to use a sewing machine for much of the assembly of my puffs, but you could easily hand sew all of these steps instead.

To make these sleeve puffs you will need the following materials:

  • Fabric: ¾ yard of 44″ wide or ⅜ yard of 60″ wide (cotton, linen, and silk are the most historical options, but you can use whatever is comfortable on your skin, just make sure it’s not too loosely woven or too heavy in weight)
  • Stuffing: I used scraps of stiff net and organza, but you could also use batting, tulle, down, etc.
  • Thread

To begin, you’ll need to cut out your pieces:

  • Two rectangles: 25″ wide x 13″tall
  • Two shaped bases: 18.5″ wide x 7.5″ tall at the center and curved down to 2.5″ tall at the sides
  • Four end caps (two for each end of your shaped base): use the shaped base as a pattern and cut the end caps so they are 2.5″ wide

Next, you’ll assemble your puffs:

Step 1: Lay your end caps on each end of the shaped base. Sew around the three exterior sides, leaving the side towards the center unstitched.

Step 2: Trim your seam allowances, corners, and clip through seam allowance close to the end of your stitch line on the shaped base.

Step 3: Turn each end cap so the right sides face out–the clip through the seam allowance allows the end caps to sit nice and flat on the shaped base.


Step 4: Run gathering stitches along each individual side of the four sides of each rectangle (not one long gathering line that turns the corners).

Step 5: Pull up your gathering stitches on the long sides and pin to the curved edges of the shaped base. You want to pin the rectangle to the side of the shaped based that does not have the end caps on it.


Step 6: Sew the gathered rectangle to the shaped base and turn it right side out.

Step 7: Now pull up the gathering threads on one short side of each rectangle. Turn the raw edge under and pin the gathers in place. Hand sew these gathers through all the layers, making sure to take small stitches and catch the gathers in many places. Leave the other side open for now.

Step 8: Stuff those puffs!

Step 9: Now pull up the gathering threads on the remaining short side of each rectangle. Turn the raw edge under and pin the gathers in place. Hand sew these gathers through all the layers as well, making sure to take small stitches and catch the gathers in many places. (This is the same as step 7.)

Step 10: Overlap the end caps about ¼” and sew them together.

Ta da! Now you have some sleeve puffs of your very own!

Extra tips:

I strongly suggest taking a look at extant puffs. As a starting point, I suggest this pair at the MFA and this pair at the V and A.

If you’re worried about keeping your puffs in place, ties can be added to the puffs which would be secured to additional ties in the armholes of dresses. Take another look at the those two pairs of extant puffs and you’ll see ties.

I also suggest looking at the puffs other people have made. It never hurts to see more methods of construction. I referenced Fresh Frippery and Stepping Into History when creating my puffs. Have you come across other 1830s puff making resources? If so, please share!

SaveSave

SaveSave

SaveSave

SaveSave

SaveSave

SaveSave

SaveSave

SaveSave

SaveSave

SaveSave

1933 Dress & Hat In Green & Gold (HSM #10)

The summer was incredibly busy and the things I was making unfortunately didn’t fit into the HSM challenges, but I’m hoping to get back to it for the end of the year. In that spirit, I finished a dress that qualifies for the HSM Challenge #10: Out Of Your Comfort Zone. I’m a bit late posting about it because it took me two tries to have a successful photo shoot and then a bit of time to edit my photos, but nevertheless, the dress was completed within the deadline. It qualifies in that I’m expanding into 1930s daywear with the making of this dress.

Unlike some garments I make which have a specific wearing in mind, this was different in that I was trying the idea out to see if this 1933 shape would be flattering on me. I do like the silhouette a lot and so hopefully I’ll make more similar dresses in the future. The years right around 1933 are a great mix of awfully silly, with their big neck frills/bows and unusual sleeves, and wonderfully elegant, with long hems that look especially flattering on those of us blessed with height.

The inspiration for this dress came from looking through many books of 1930s clothing. I wanted to try out the longer length bias skirt and I liked the bust spray detail I found along the way in 1930s Fashion: The Definitive Sourcebook (page 308). It’s not as crazy as some early 1930s neck frills, making it a good starting point for getting into this decade. (Look at these examples of neck bows from 1934, for example. They make my dress look subdued.) I did add some interesting sleeves though, based on a 1933 pattern for different sleeve types.

As I mentioned, I did two photo shoots for this dress. The first one failed pretty horribly, as I was out in public, pressed for time, and my phone camera wasn’t cooperating with me. But the second photo shoot was much more successful! It may have taken over 300 photos to get ones that I like, but because I was using a timer with burst photos on my camera I could run back and forth across my yard to my heart’s content, practicing all my best dramatic poses and facial expressions. Unfortunately, my phone camera isn’t outstanding enough to have taken great photos with the slanting afternoon sunlight. I’m calling it ‘artsy.’ (What I really need is an event to wear this to in a good-picture-background-setting, so that I can get better quality pictures…)

Anyway, here are the facts (just for the dress, as the hat doesn’t really qualify for the HSM):

Fabric: Green and gold small windowpane mystery (but likely polyester) fabric and gold silk scraps.

Pattern: My own. I draped the bodice and skirt pieces and referenced images to flat pattern the sleeves.

Year: 1933.

Notions: Thread, zipper, hooks, and hug snug.

How historically accurate is it?: Let’s say 95%. It’s entirely recognizable in its own time and made in a way that is straightforward and consistent with historic garments. The materials are not 100% accurate.

Hours to complete: 5-10 sounds likely, although I spread making this out over about a year, so it’s pretty hard to remember!

First worn: October 2017, for pictures.

Total cost: $1/yard for the fabric and all the notions from the stash, so let’s say $4. Win!

The back of the dress is pretty plain. All the interesting details are on the front. But here it is, for the sake of documenting all of the angles.

On the inside, the dress looks like this. The seam allowances are either left raw if they are on the bias or pinked if they are on the straight of grain. The neck is finished with a facing which is tacked in place. There are moderate shoulder pads to help achieve the correct silhouette. The bottom edge is finished with hug snug and an invisible hem. The dress closes on the side with a hand sewn zipper. There is a self fabric belt as well.

Now for a bit about my hat and hairstyle. First, the hat is a remake of a wool velour hat I purchased for $5 at a theatre sale. It was a bowler shape originally. I cut off the brim, cut down the crown, reattached the two, and then took some tucks in the crown to give it a more unique shape.

Hair-style-wise, I was going to do my usual close to my head 1920s/30s style (I explained and documented it in this past post) but it didn’t seem to compliment my hat, so I decided to try a more down around the chin, lightly curled bob style.

My method for this is as follows: I started with wet hair and a bit of Tigi Small Talk. I parted my hair on the side and added wave clips (3 on the longer side and 1 on the shorter side). Then I braided the rest of my hair to keep it damp while the front dried. A few hours later, I removed the wave clips and ran my fingers through the front sections to loosen them up a bit. To create the chin length look, I looped up large sections of my hair and pinned them to the top of my head. The hat hid all the pinned up bits nicely. My hair has much less volume when it’s damp (and even after it’s dried in a not-voluminous way if I don’t touch it at all), so the chin length curls had a nice close to the head look to them.

I’m pretty pleased with this hairstyle. It will definitely get tried out again someday. The outfit is fun, too! I love that the hat matches perfectly and ties the whole thing together. Plus, it reminds me of autumn, my favorite season.

SaveSave