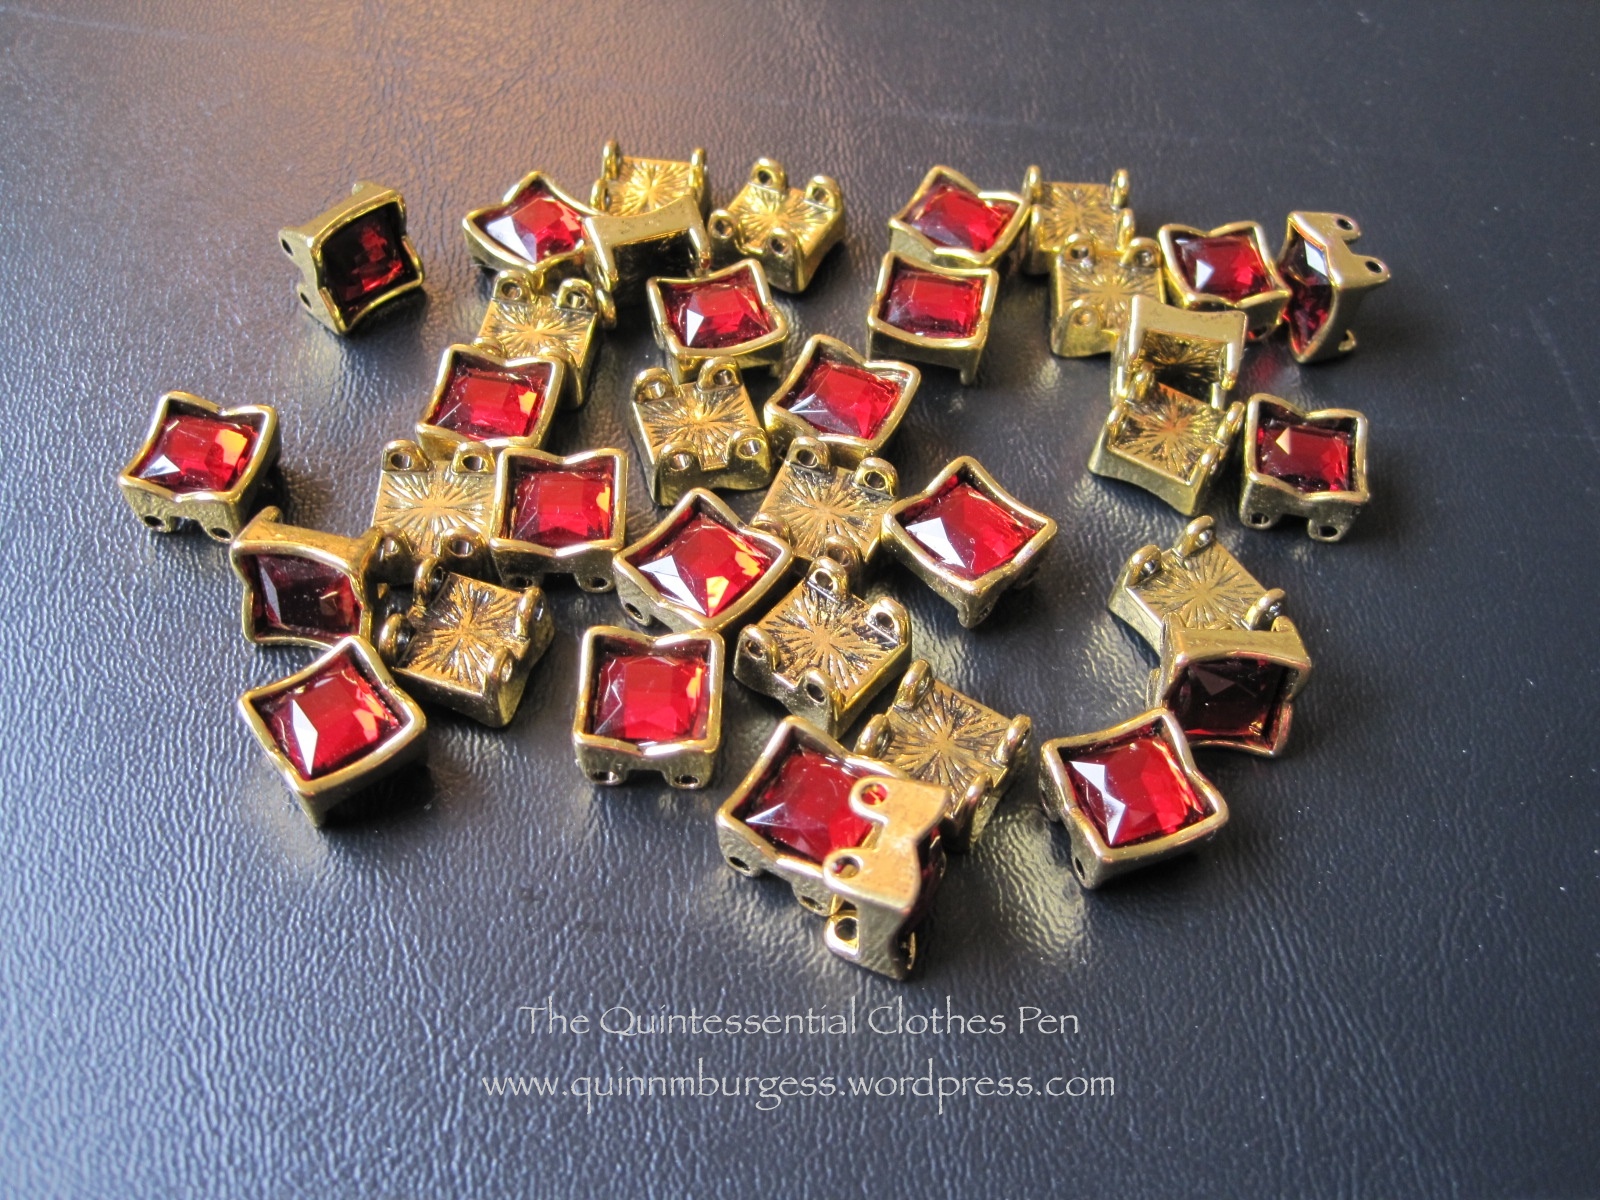
Fabric: None! But I started with two modern bracelets that were a gift from my mom.
Pattern: None.
Year: Loosely 1790-1820, but who knows, perhaps this will find a use in another period as well!
Notions: Gold wire and hot glue.
How historically accurate?: I give it 50%. This is absolutely on the more on the historically inspired side of things rather than the accurate historic costume side of things. The jewels are almost certainly plastic and the design is based on general Regency styles rather than any specific inspiration. Oh, they also did not have hot glue back then…
Hours to complete: 2.
First worn: Has not been worn yet, but will get worn to a Regency ball in Chelmsford, MA on October 5th!
Total cost: Free (the wire and the hot glue was in the stash)!
Here are some more shots of the construction of this tiara:
In the beginning: stretchy bracelets. Thanks mom!The loose jewels after I cut off the elastic.Another possible design. I decided against having some of the jewels turned on their corners. It would have been hard to engineer and, after all, simplicity was a popular style in the Regency!The back of the tiara, where you can see the wires holding it together. There is also a loop at the center of the bottom row of jewels so I can pin the tiara to my hair at that point to keep it from bouncing.There are wire loops at the ends of the tiara so I can pin it to my hair. The hot glue covers the ends of the wires so they don’t also catch my hair.
That’s all for now. When I wear this I’ll be sure to take more pictures!
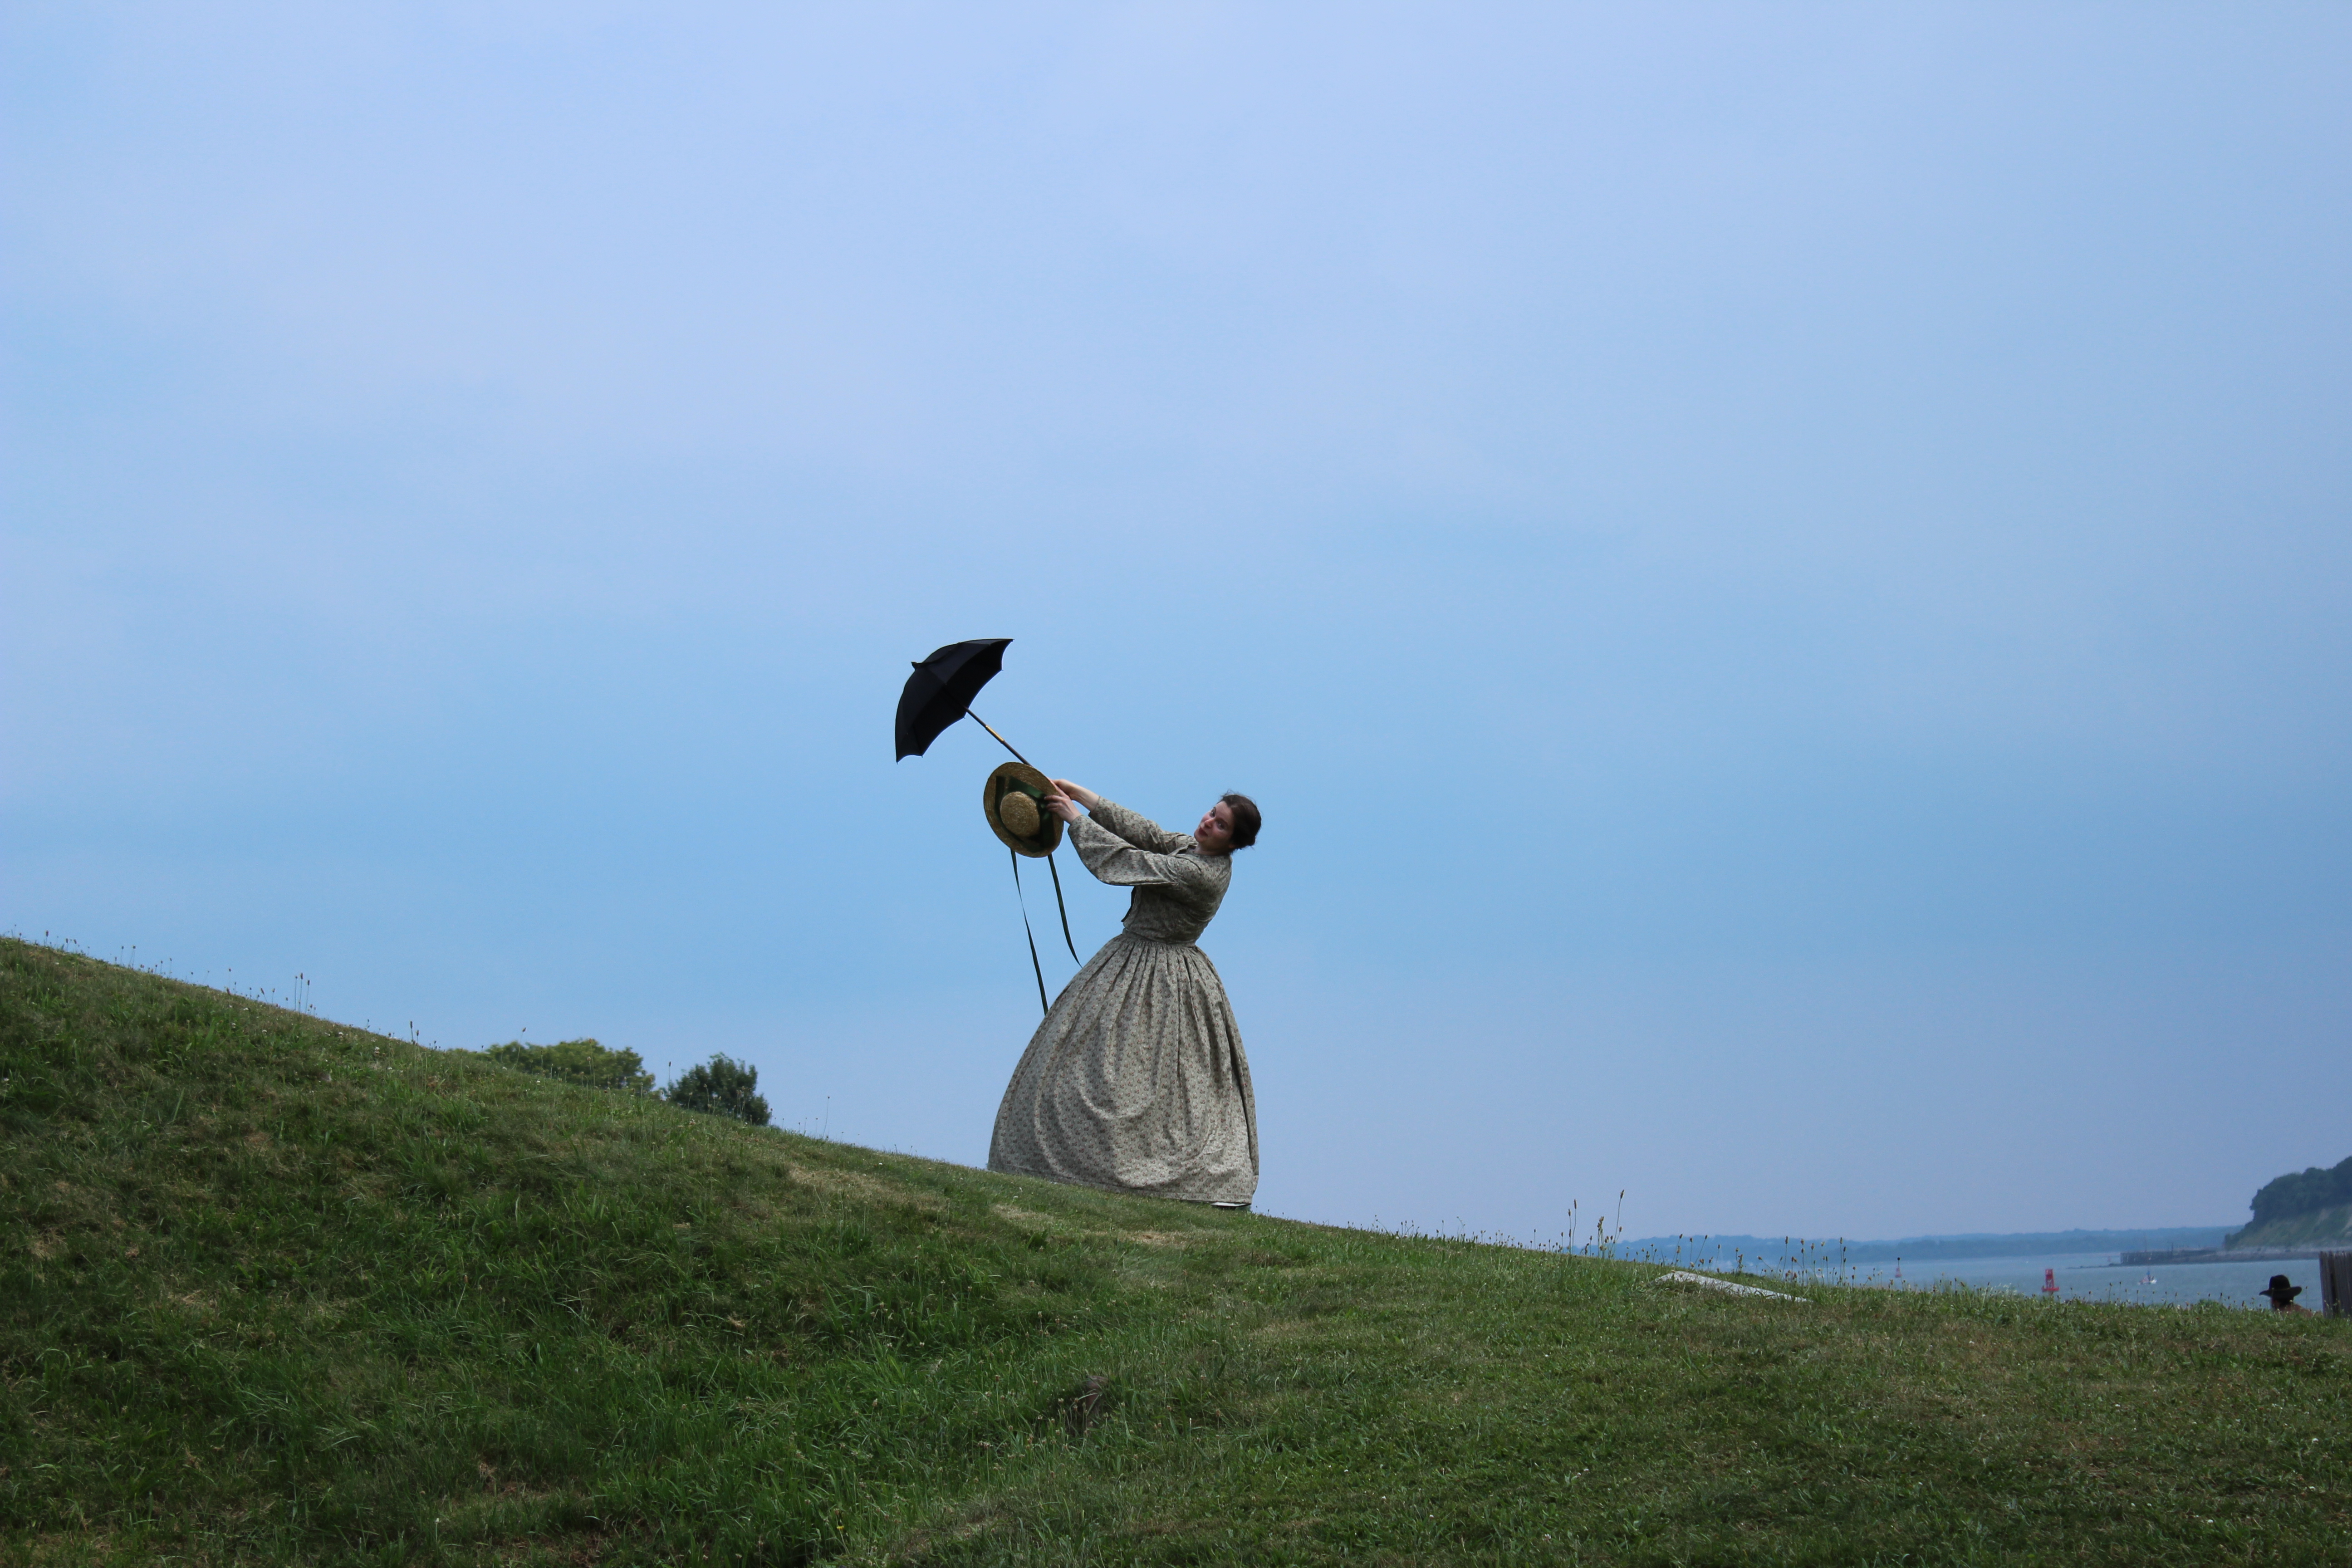
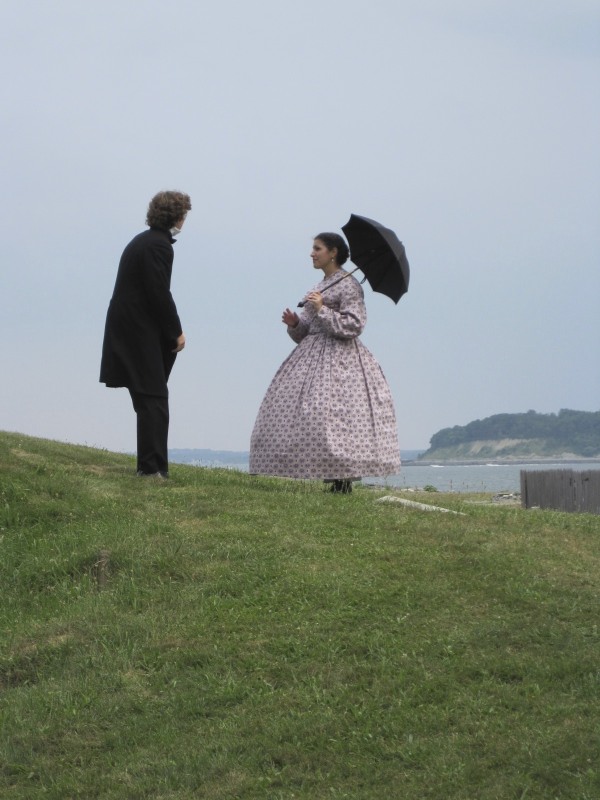
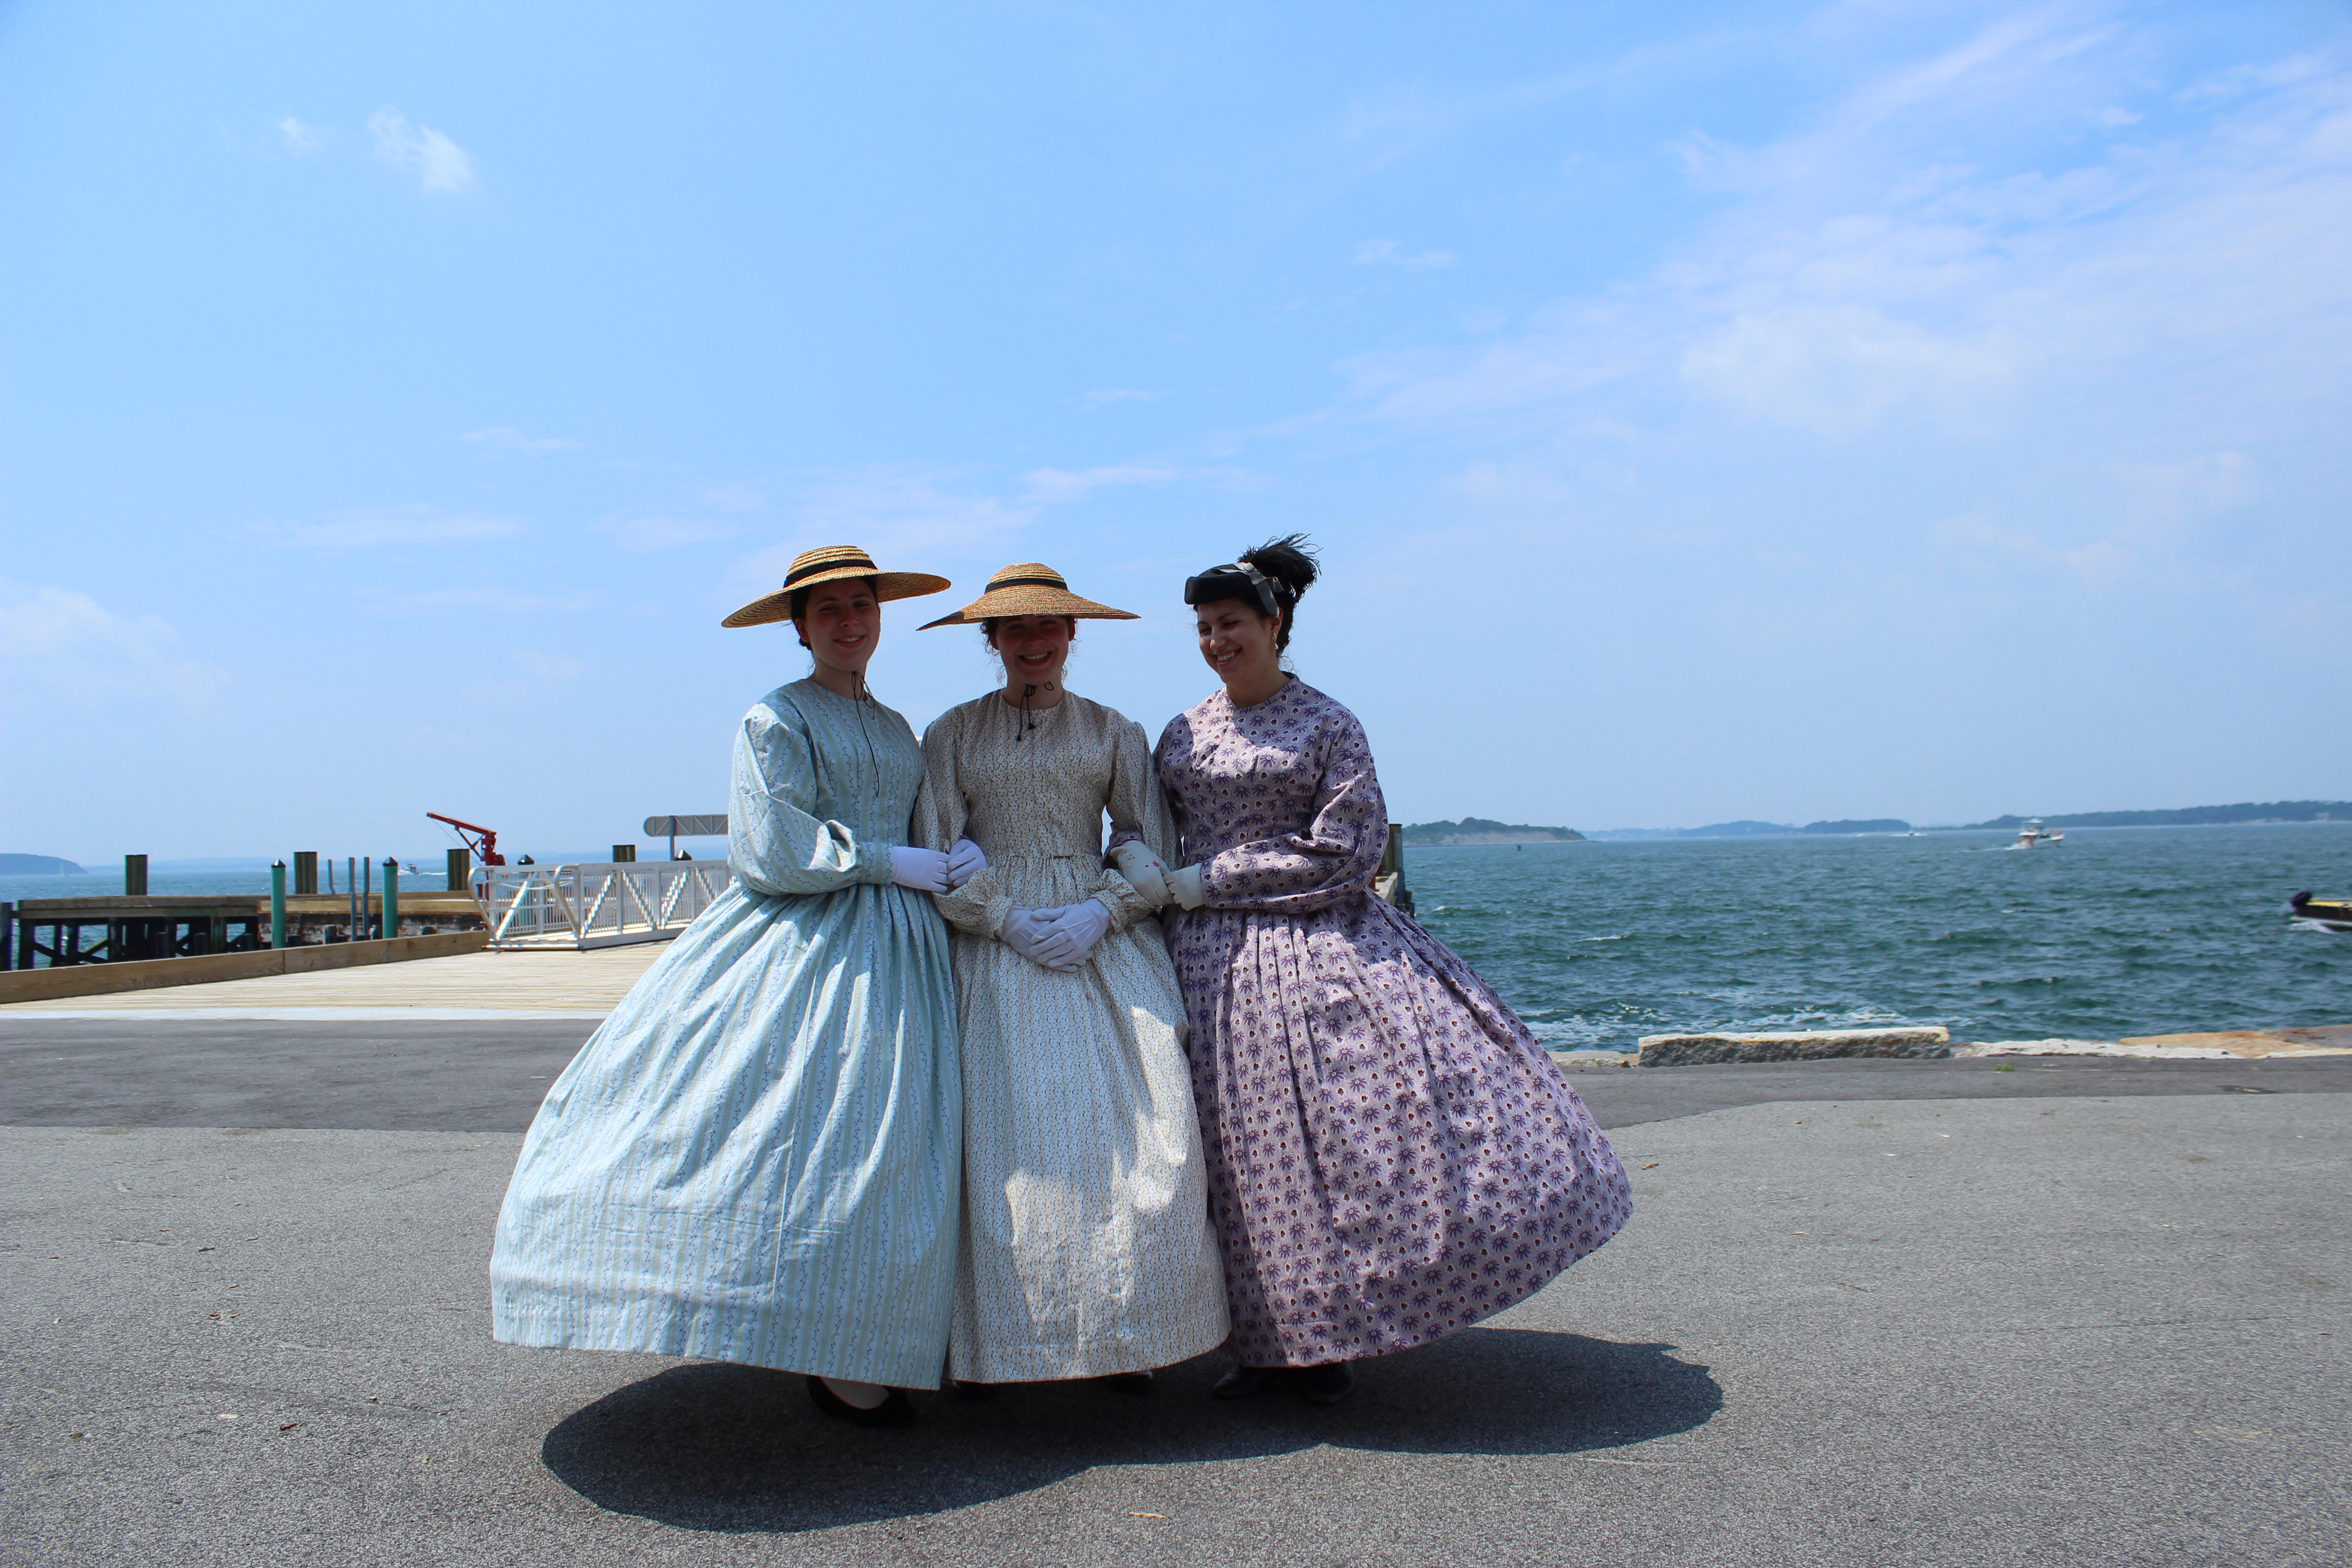
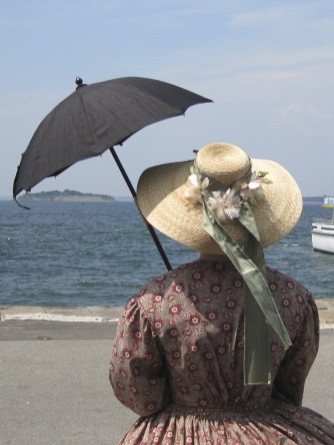
After our vintage dance performance on George’s Island, we had time to explore the island and express our silly-ness. Most of the island is occupied by Fort Warren. We were joined on our ramblings by someone with exceptional knowledge of the fort and stories of reenactments that have taken place there, so we basically got an insider’s tour, which was really fun and interesting.
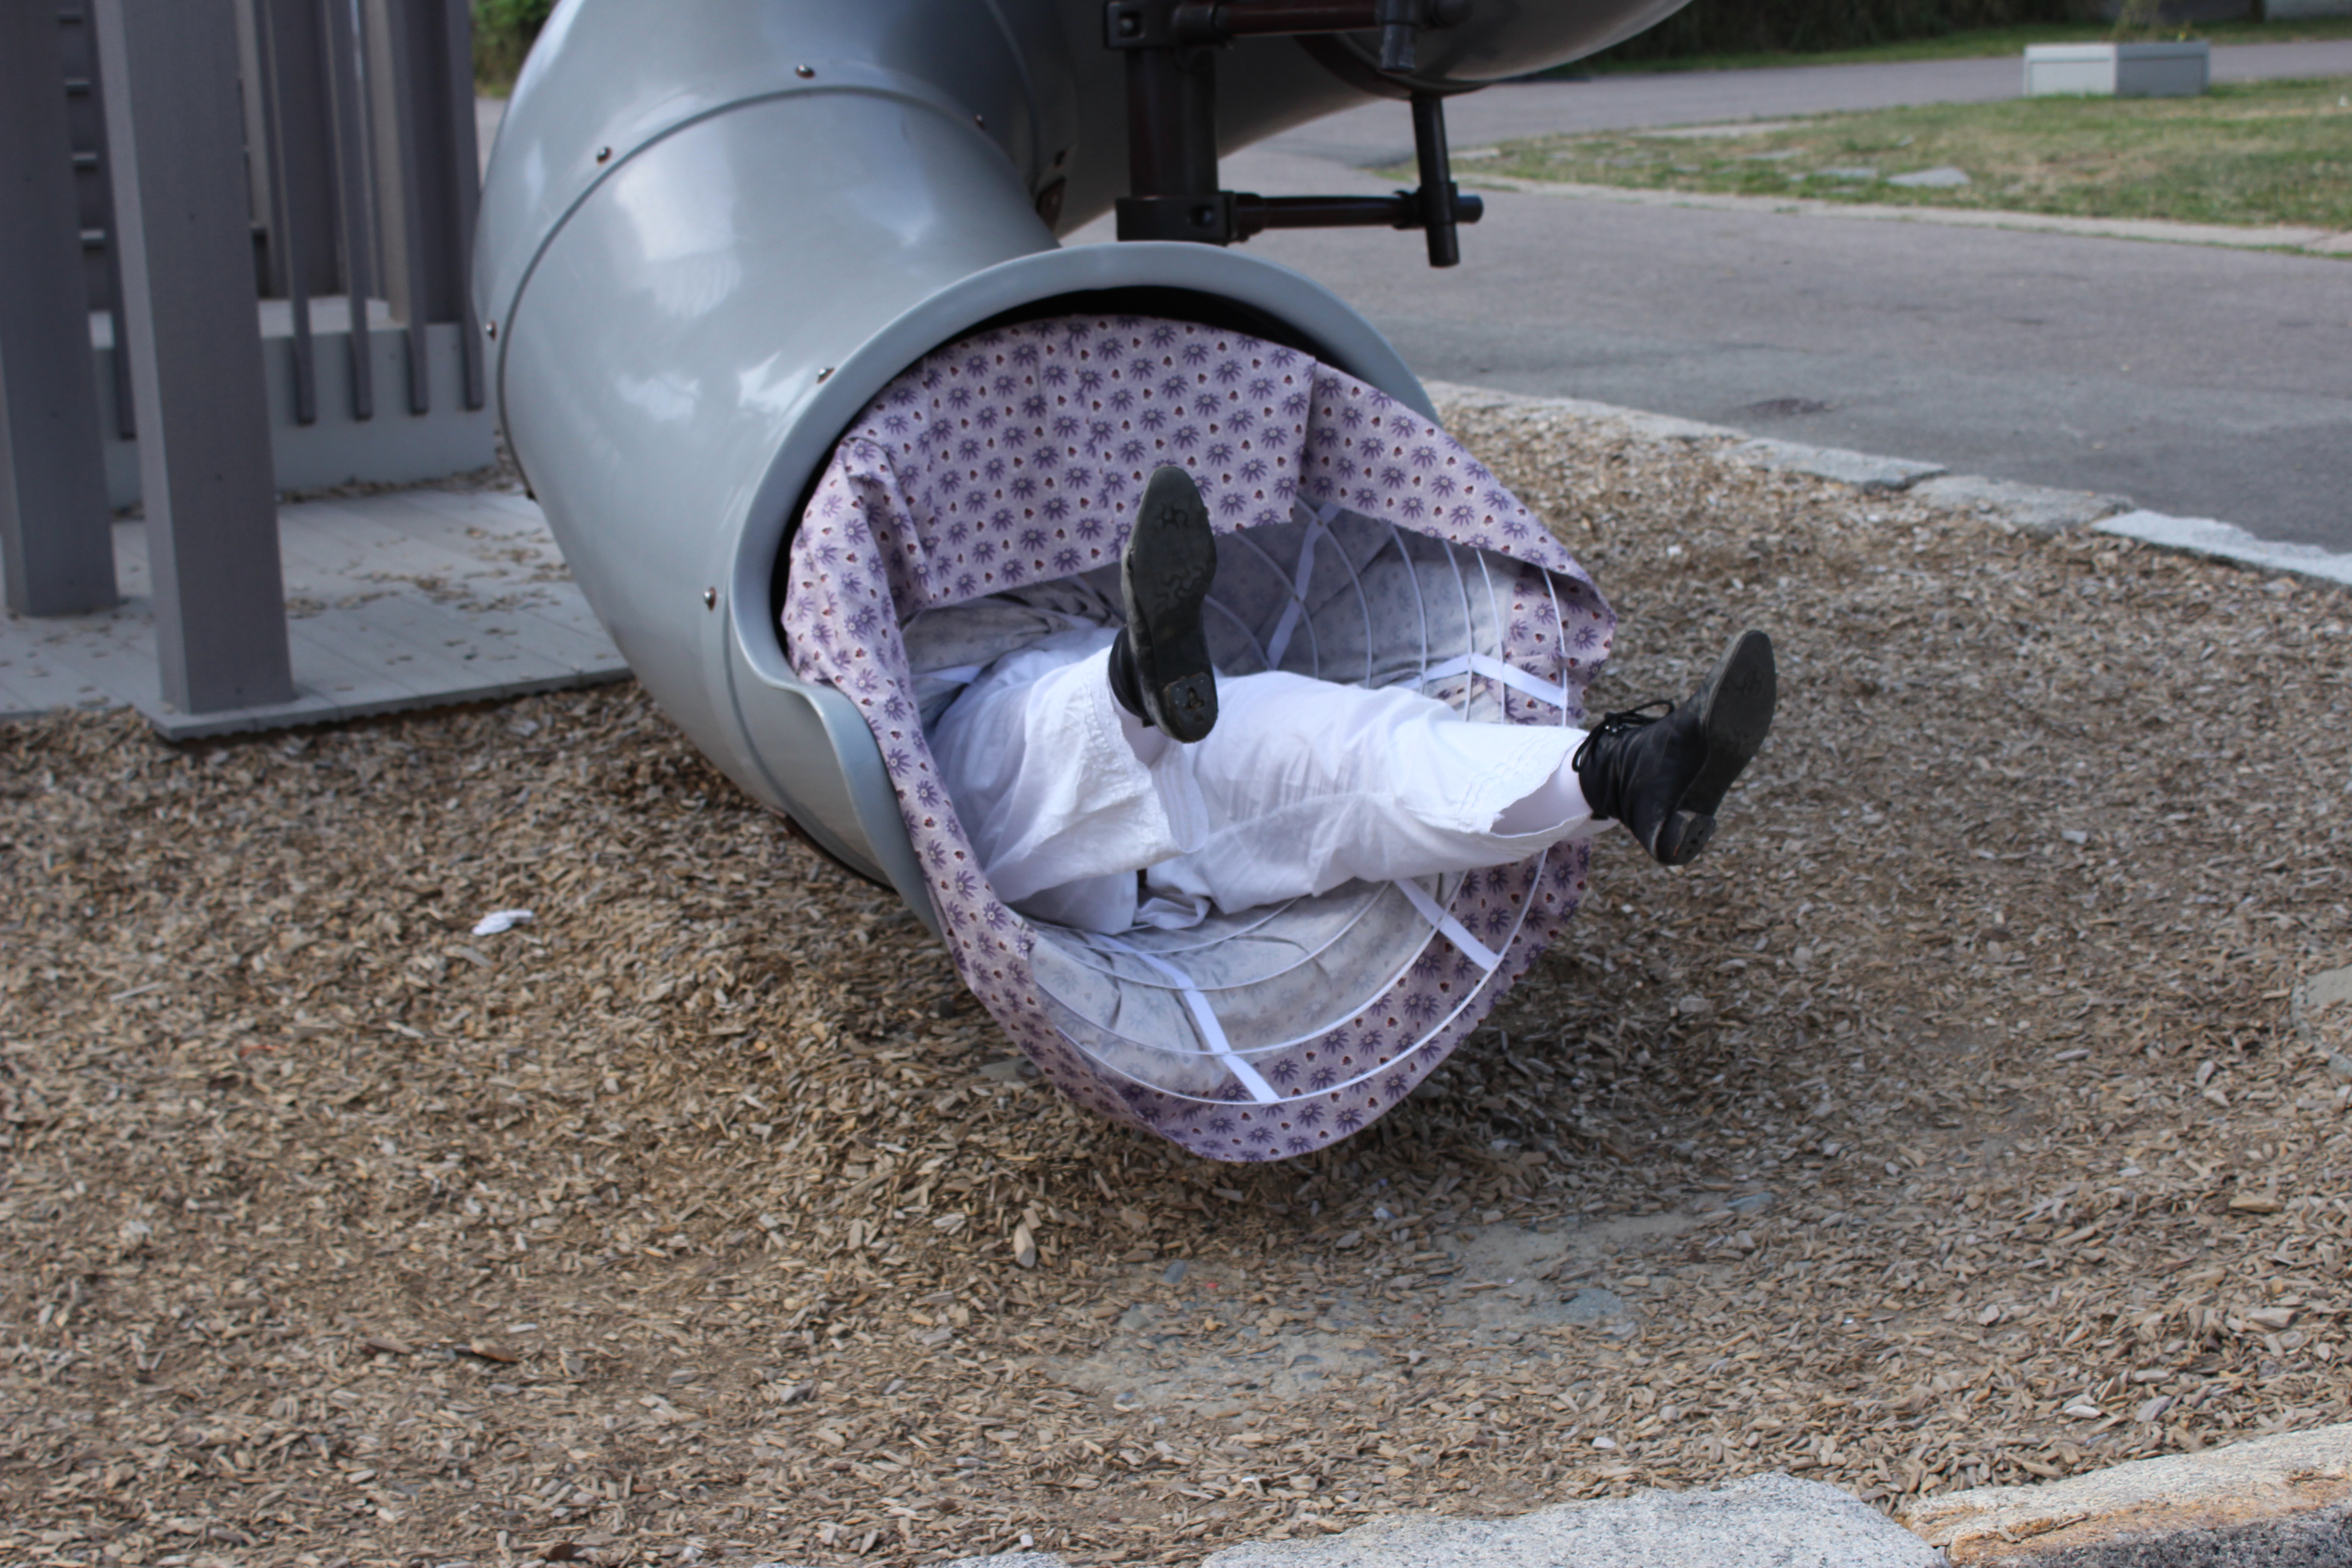
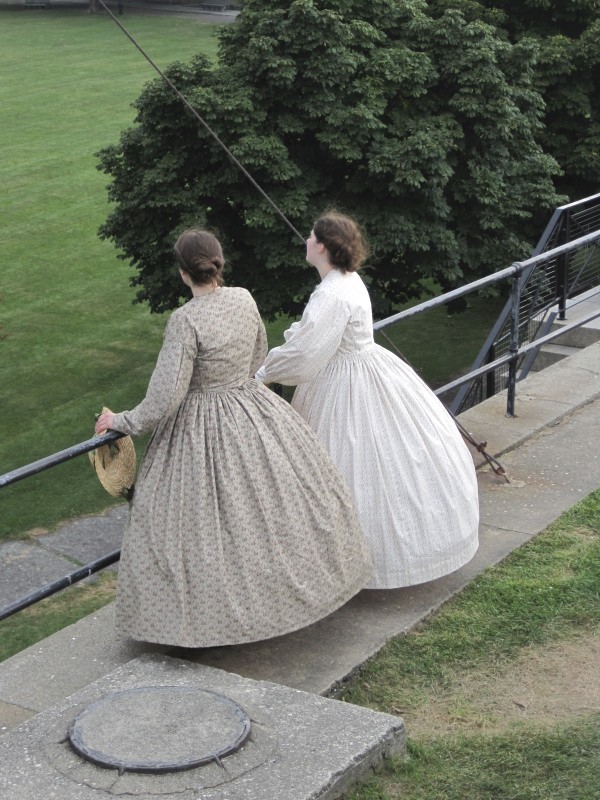
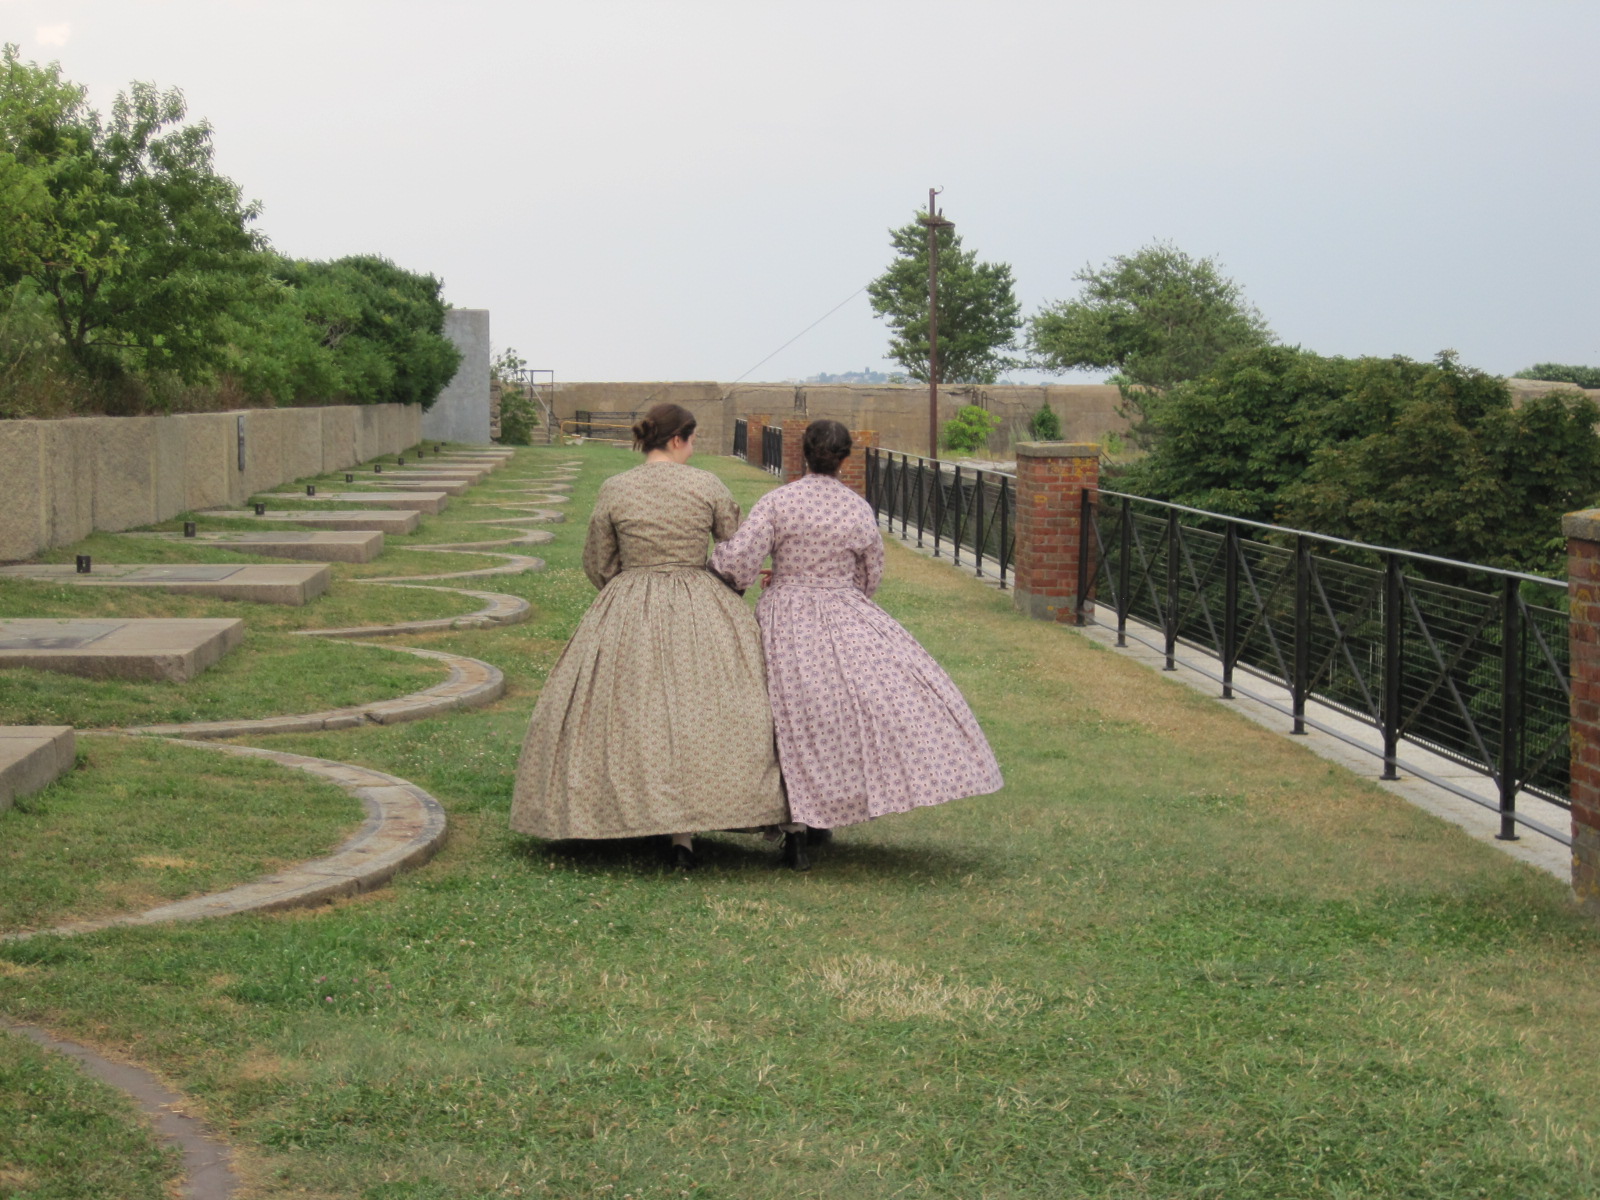
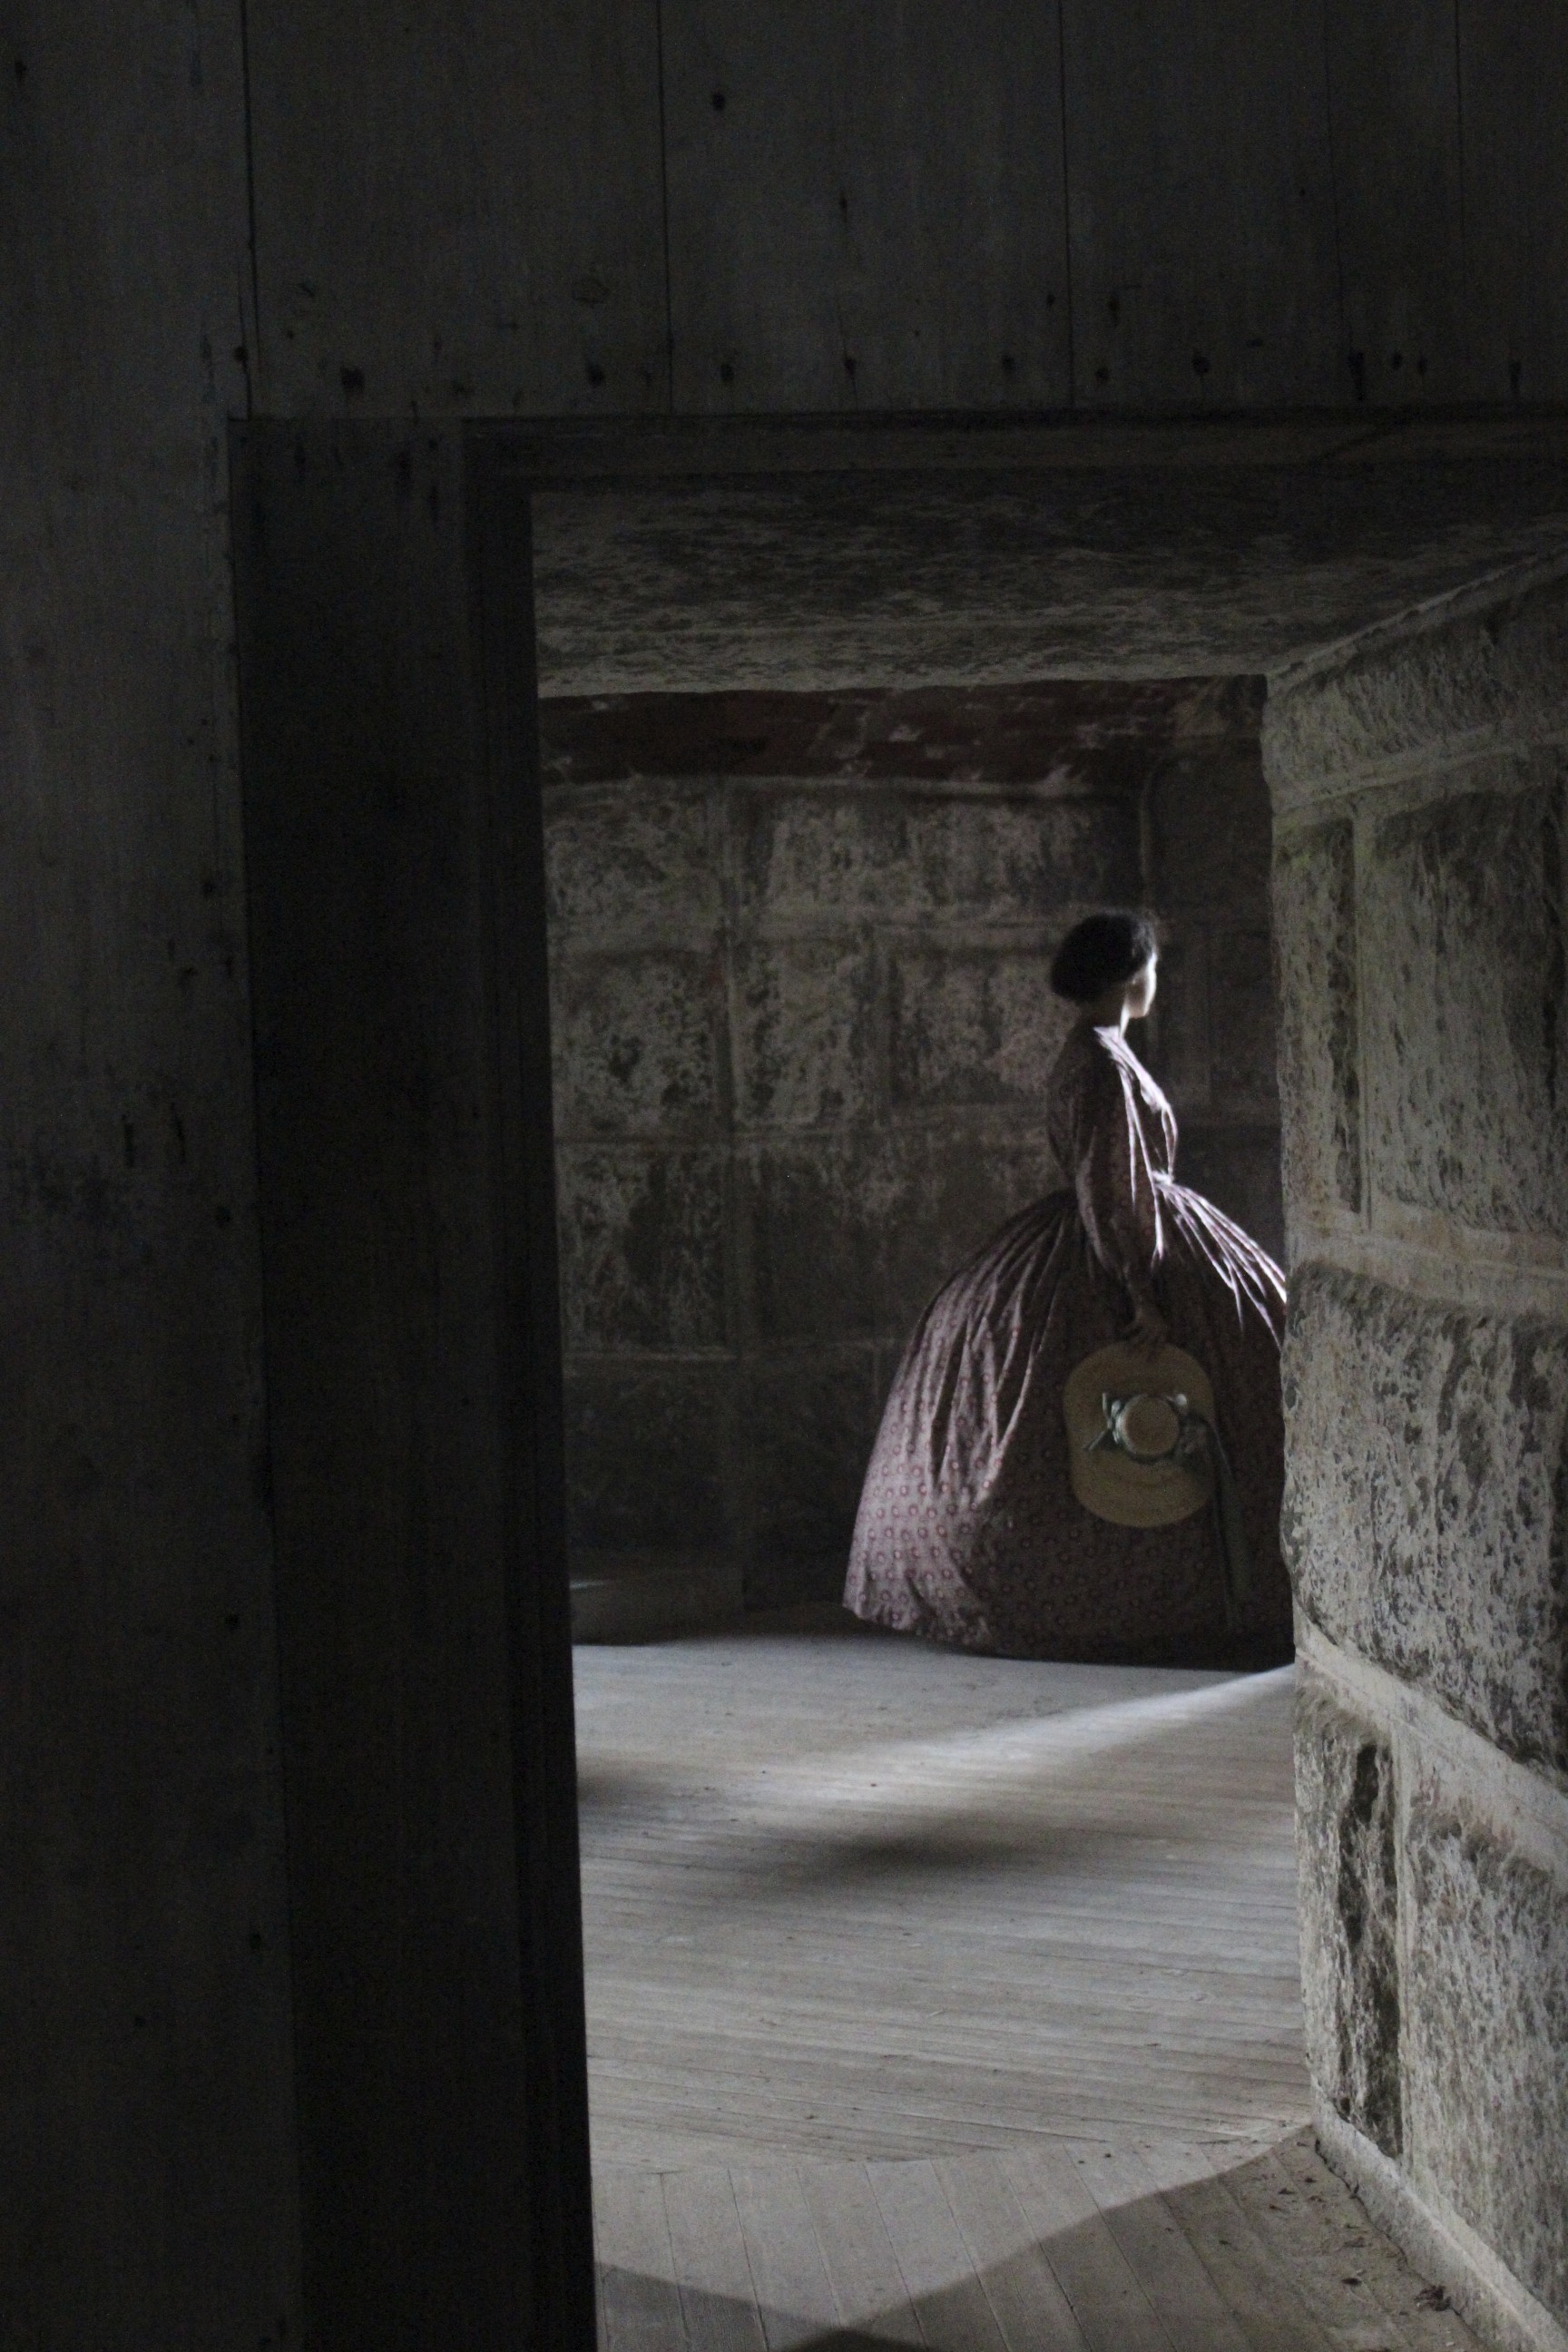
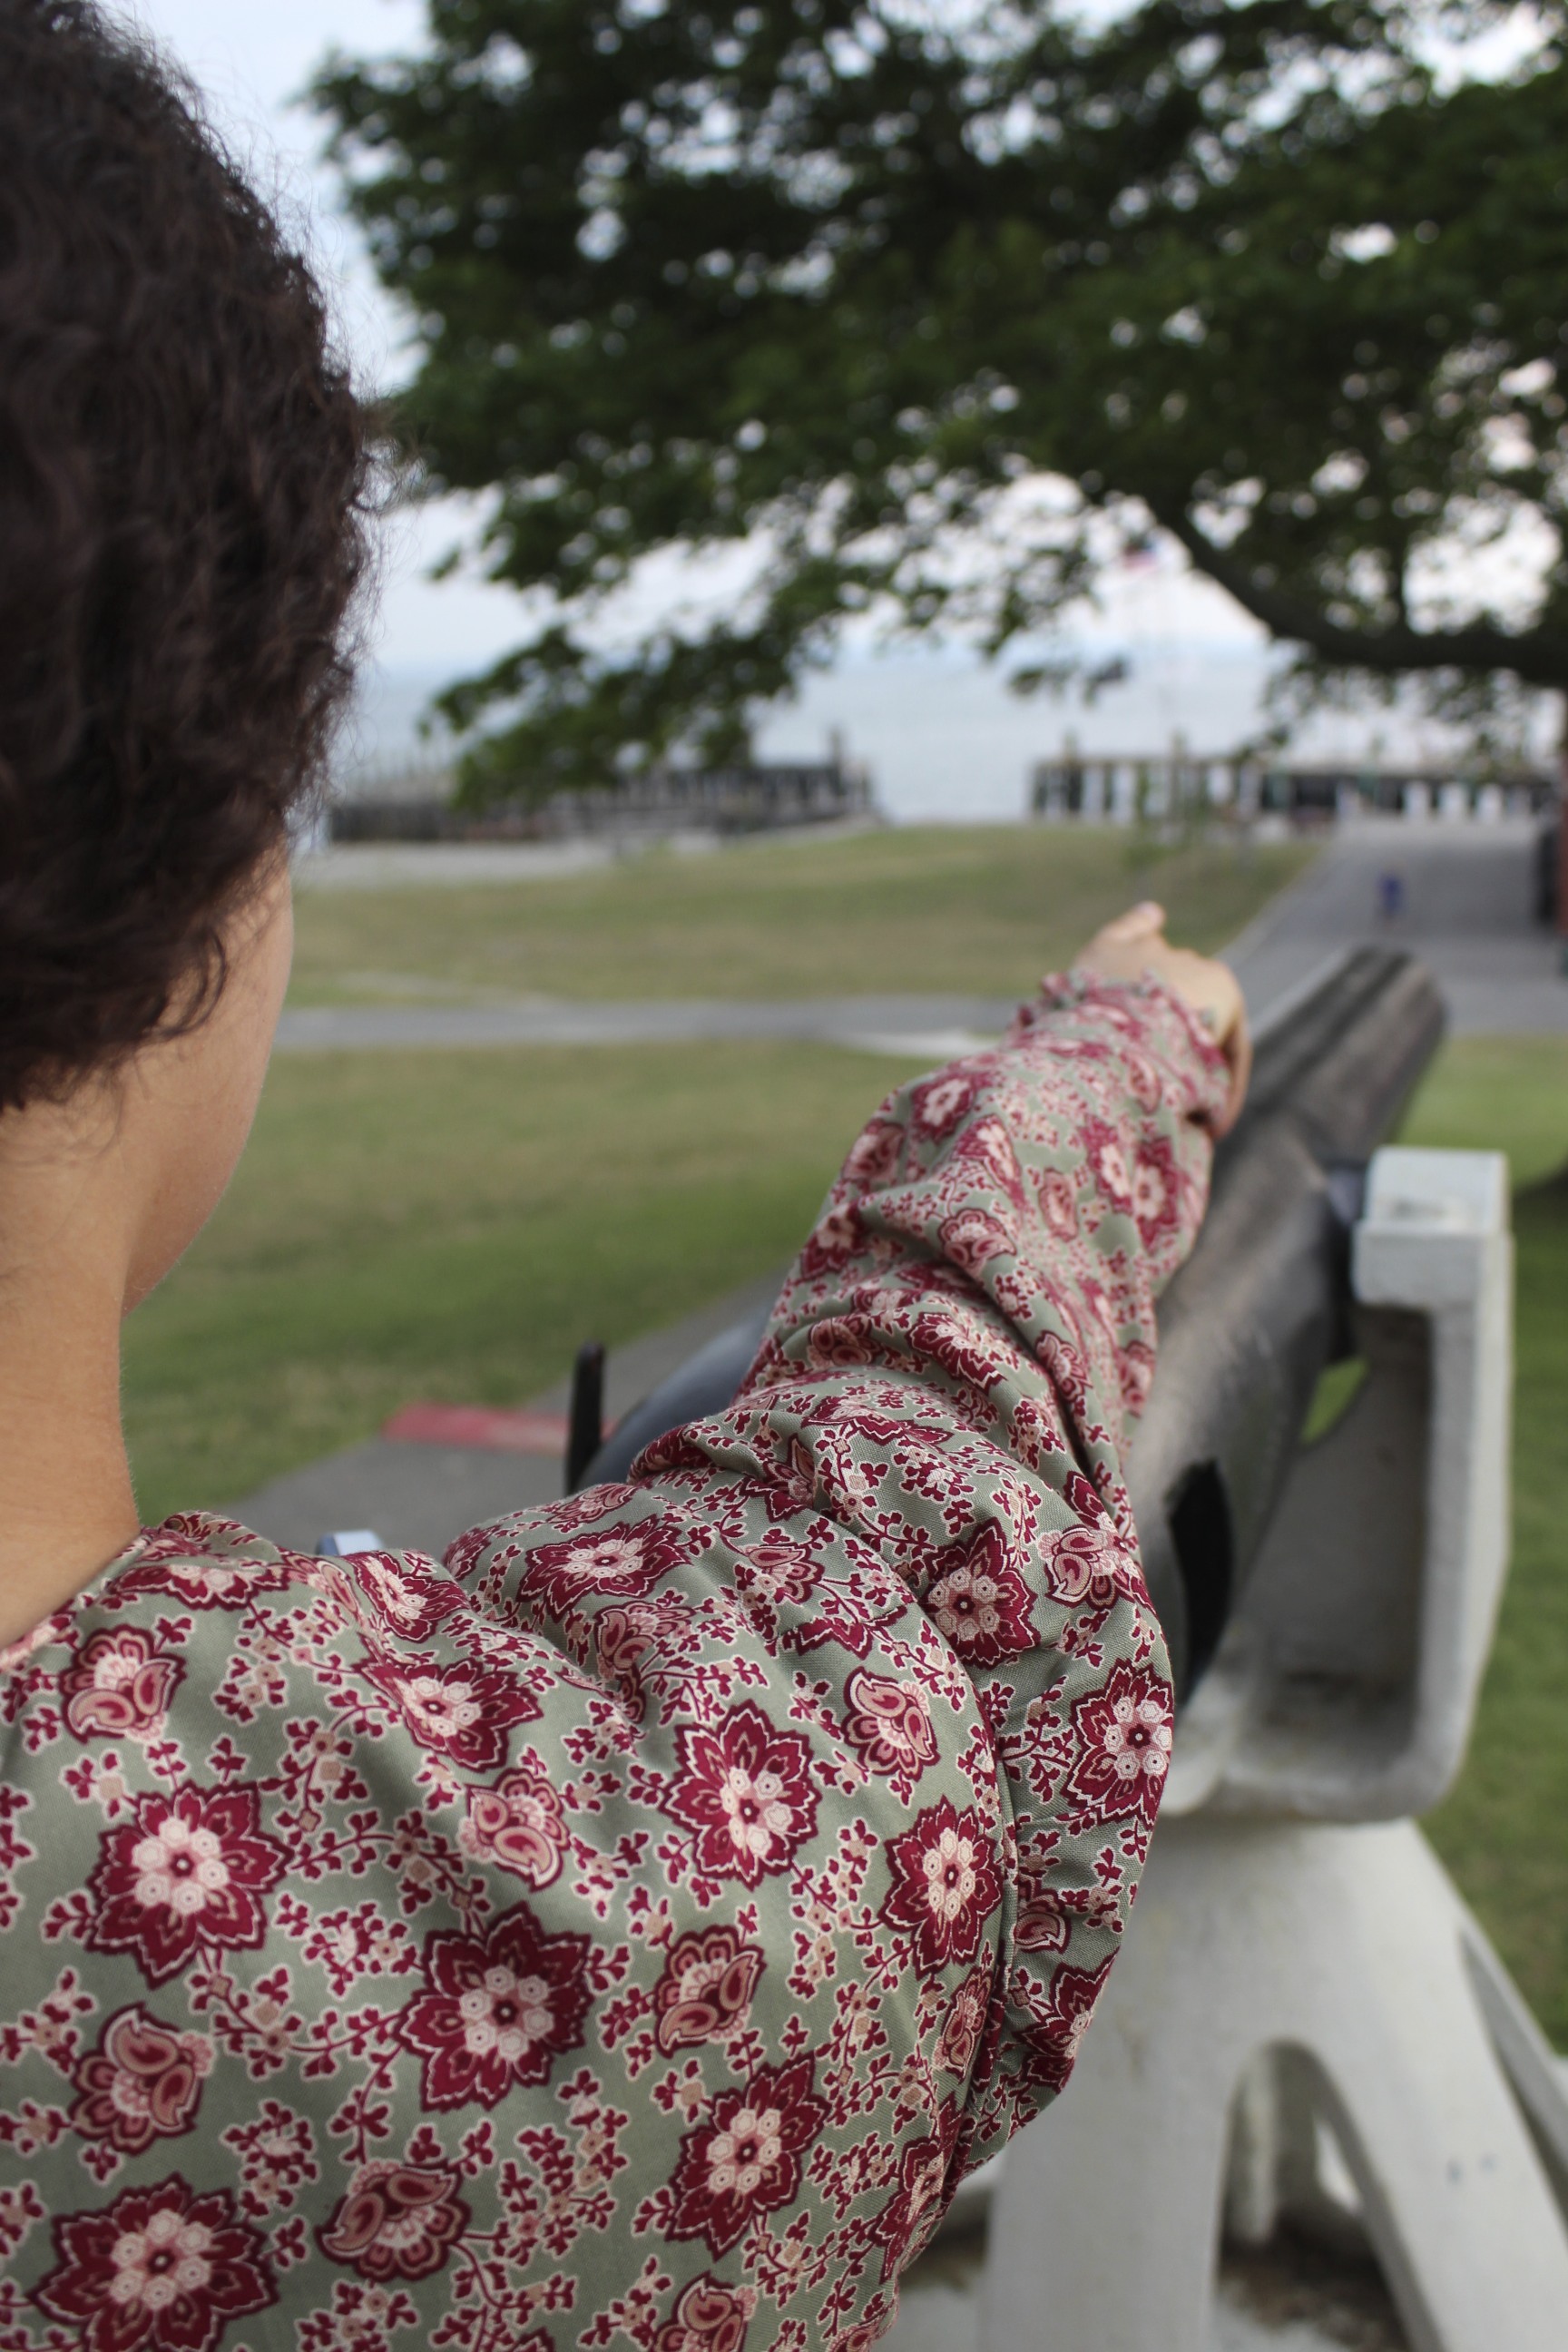
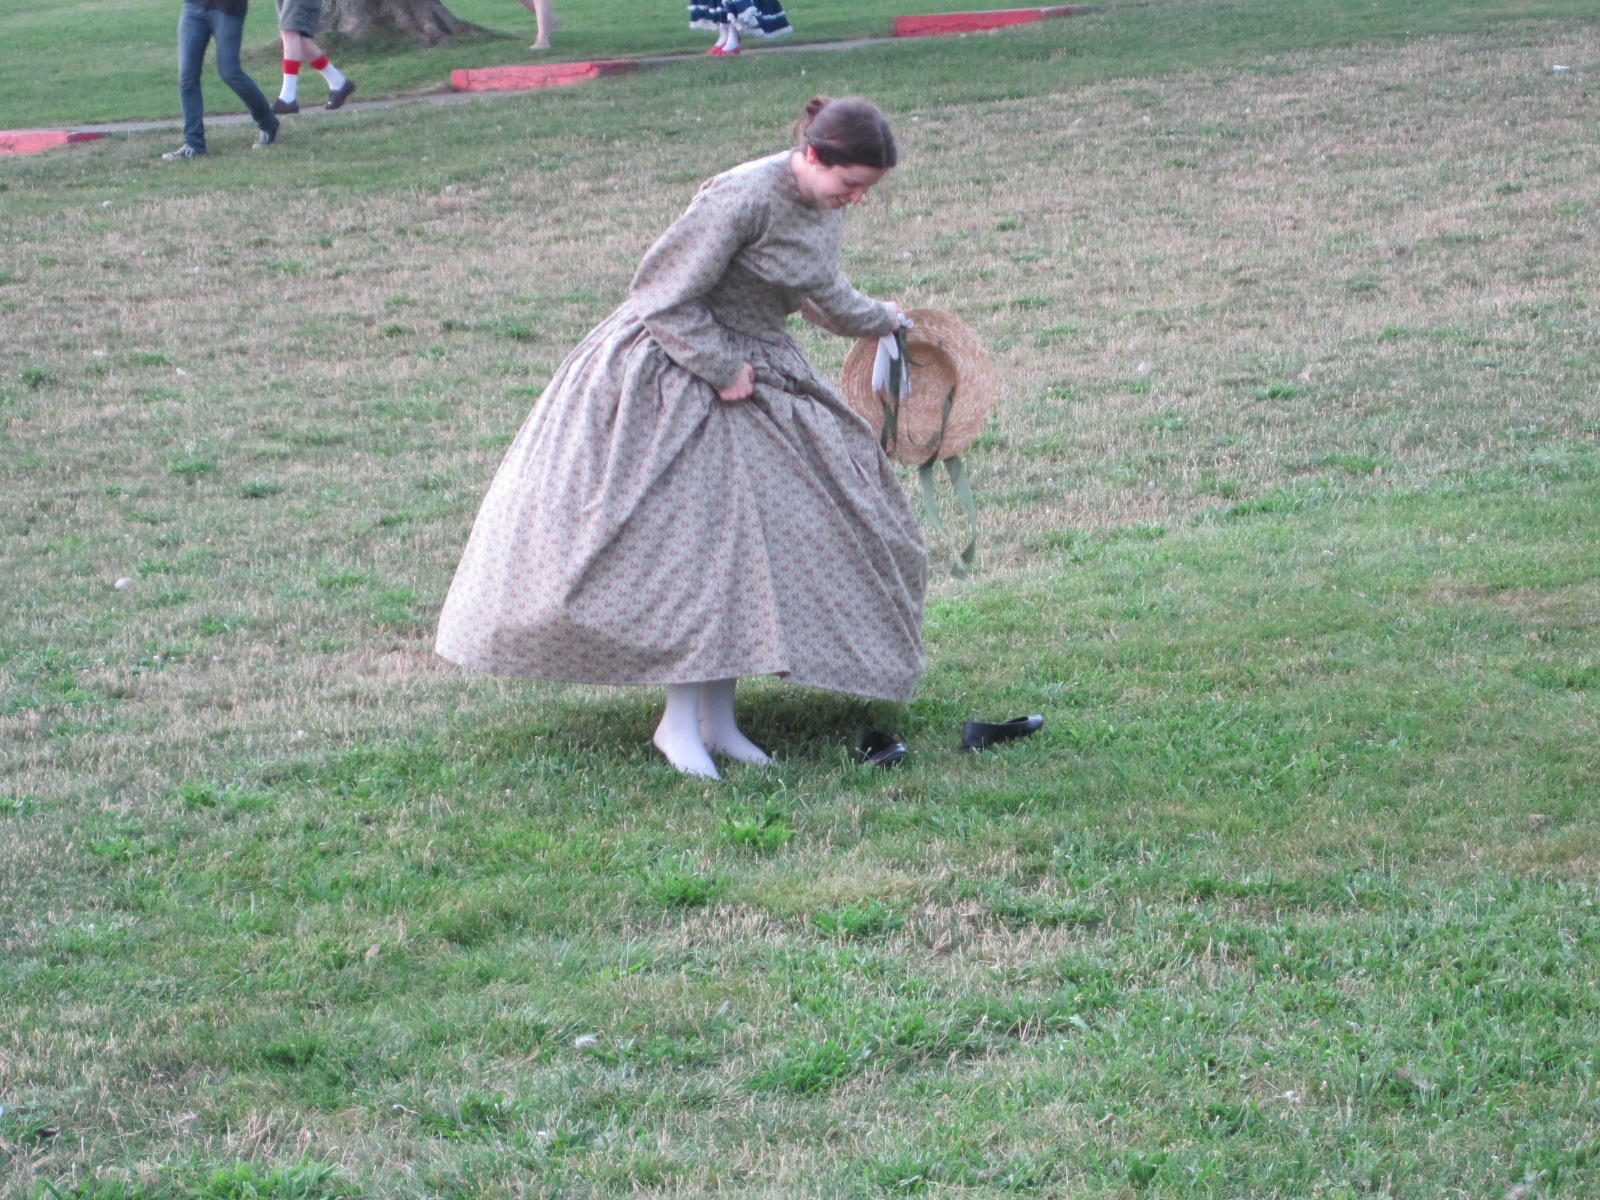
Oh no, don’t blow away! Silly-ness started before we even made it into the fort!Aside from the wrong-era clothing, doesn’t this look like a Jane Austen type scene?Lovely historic cotton print dresses along the water before entering the fort.There was also a jungle gym fort with a slide outside the main entrance to the actual fort. No one actually slid down, but this is what would have happened if one of us had tried it!After walking through the initial gate house, you have to pass through an outer courtyard area, two sides of which are walled with openings through which you could be shot at when the fort was active. Luckily for us no shots were fired!Apparently there was also a moat to the right, which could only be crossed by a drawbridge. Now there’s a solid bridge, but when the fort was in use there was a portcullis in addition to the drawbridge!After passing through the drawbridge/portcullis entry, you emerge into the main part of the fort (that large grassy area on the right of this photo). There are ramparts all around which overlook the ocean and originally were home to many large guns.The view looking out over the ocean-facing side of the fort.The view looking back towards Boston. That’s the Boston skyline.Historic cotton print dresses! The two dresses on the right are fabrics that I bought at the same time I bought the fabric for Georgina. The white dress is similar reproduction fabric. I think all of these dresses are variations on Past Patterns #701 and #702.Looking out over the main grassy area of the fort.Walking along the ramparts.Despite the sign’s warning, there was nothing behind it except grass…Interior room in the fort. There are lots of these dark spaces that you can walk and look through, though they all start to look the same if you don’t have someone there to explain the differences to you. Luckily, we did have someone to explain, which made the exploration a lot more interesting.We exited the fort in a different way than we entered and found new opportunities for silly-ness. Here, I’m aiming along a large inoperable gun.The gun was right at the top of a hill… You can see the sparkle in my eye as I thought “Let’s run down the hill!”And we’re off! The normal island visitors looked a little shocked to see four hoop-skirted ladies hurtling down a hill with hats and arms flying!But we had fun! Indeed, there were some shoes that got left behind part way down the hill!
Thankfully, there were storms that night (we were beginning to see lightening before we even left the island!). The intense heat broke and the weather became much more manageable, which is good for us, because the very next day we were at it again, this time at a 1920s lawn party. More on that soon!
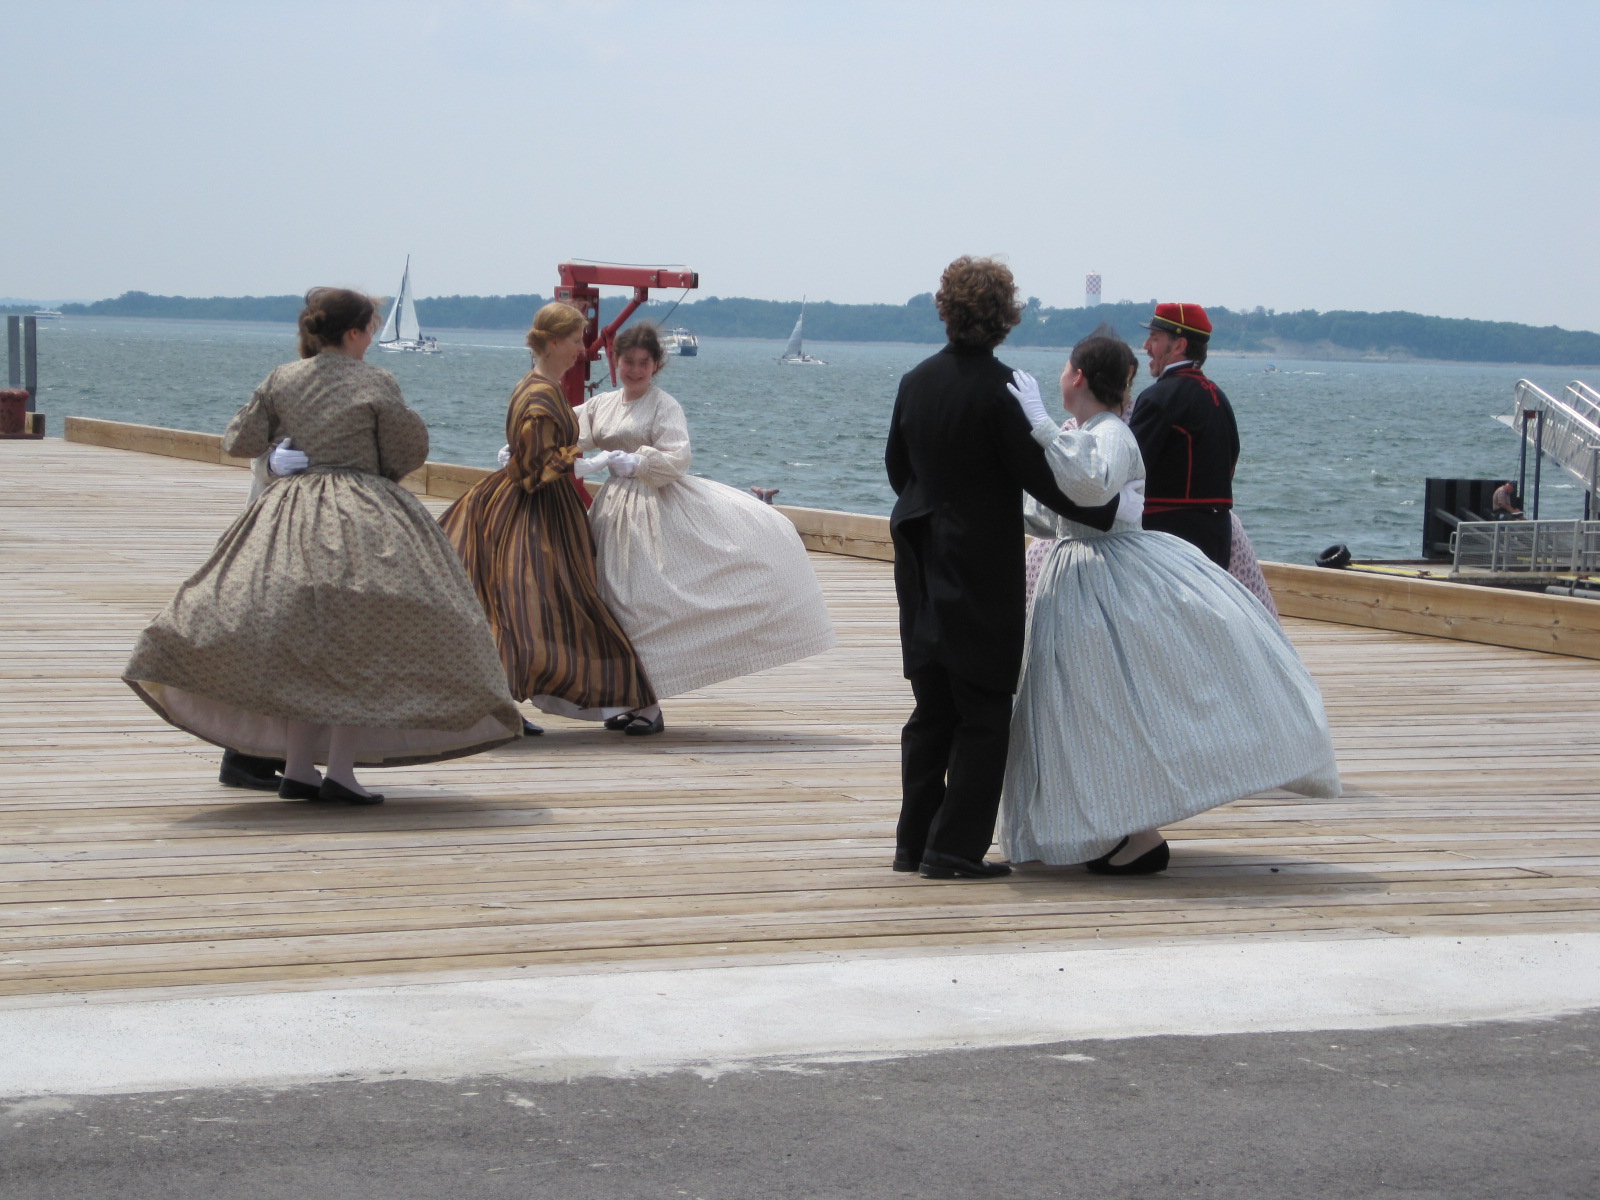
You’ll remember that I introduced you to Georgina in my last post? Georgina’s first outing was for at a mid-19th century vintage dancer performance on George’s Island in the Boston Harbor. It was a super toasty day and we were dancing mostly on asphalt or an uneven wood dock, but we all survived and looked lovely and dashing.
Members of the Commonwealth Vintage Dancers who performed on George’s Island. Look at all those awesome dress fabrics! Sheers and historic cotton prints galore!We were dancing right in front of the visitor center where visitors were being dropped off by the harbor ferries.Due to the heat and dance surface (a kind way to say “asphalt”) we did a lot of walking dances.Part way through the afternoon a strong breeze picked up. It didn’t alleviate the heat much, but it was nice, and certainly swung our hoops and skirts around a lot!Dancing in the sun and wind.Dancing on the dock.More dock dancing.
After the performance we had some time to explore the island, most of which is occupied by Fort Warren. We had lots of fun and took lots of pictures. So next post, look forward to Georgina’s Island Explorations!
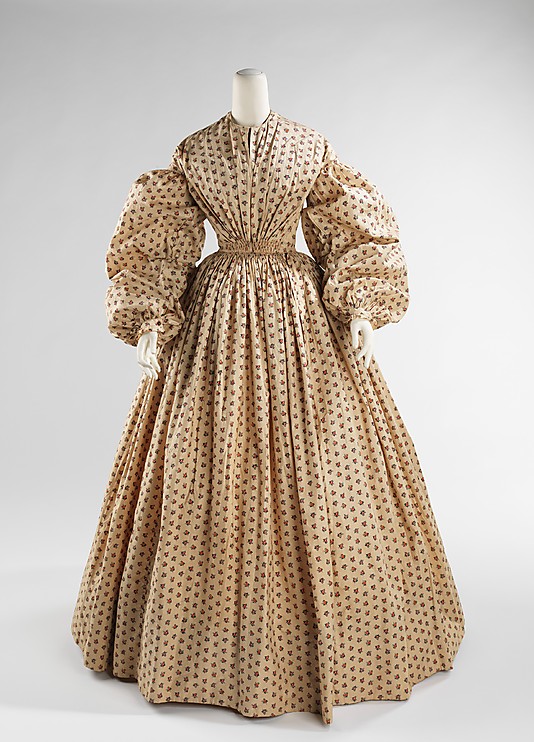
“Georgina” is the name I’ve chosen for my new 1858 cotton print day dress. Being a day dress from a new decade (the 1850s), makes her a fabulous new expansion in my wardrobe of historic clothes!
Georgina: 1858 cotton print day dress.Back view.
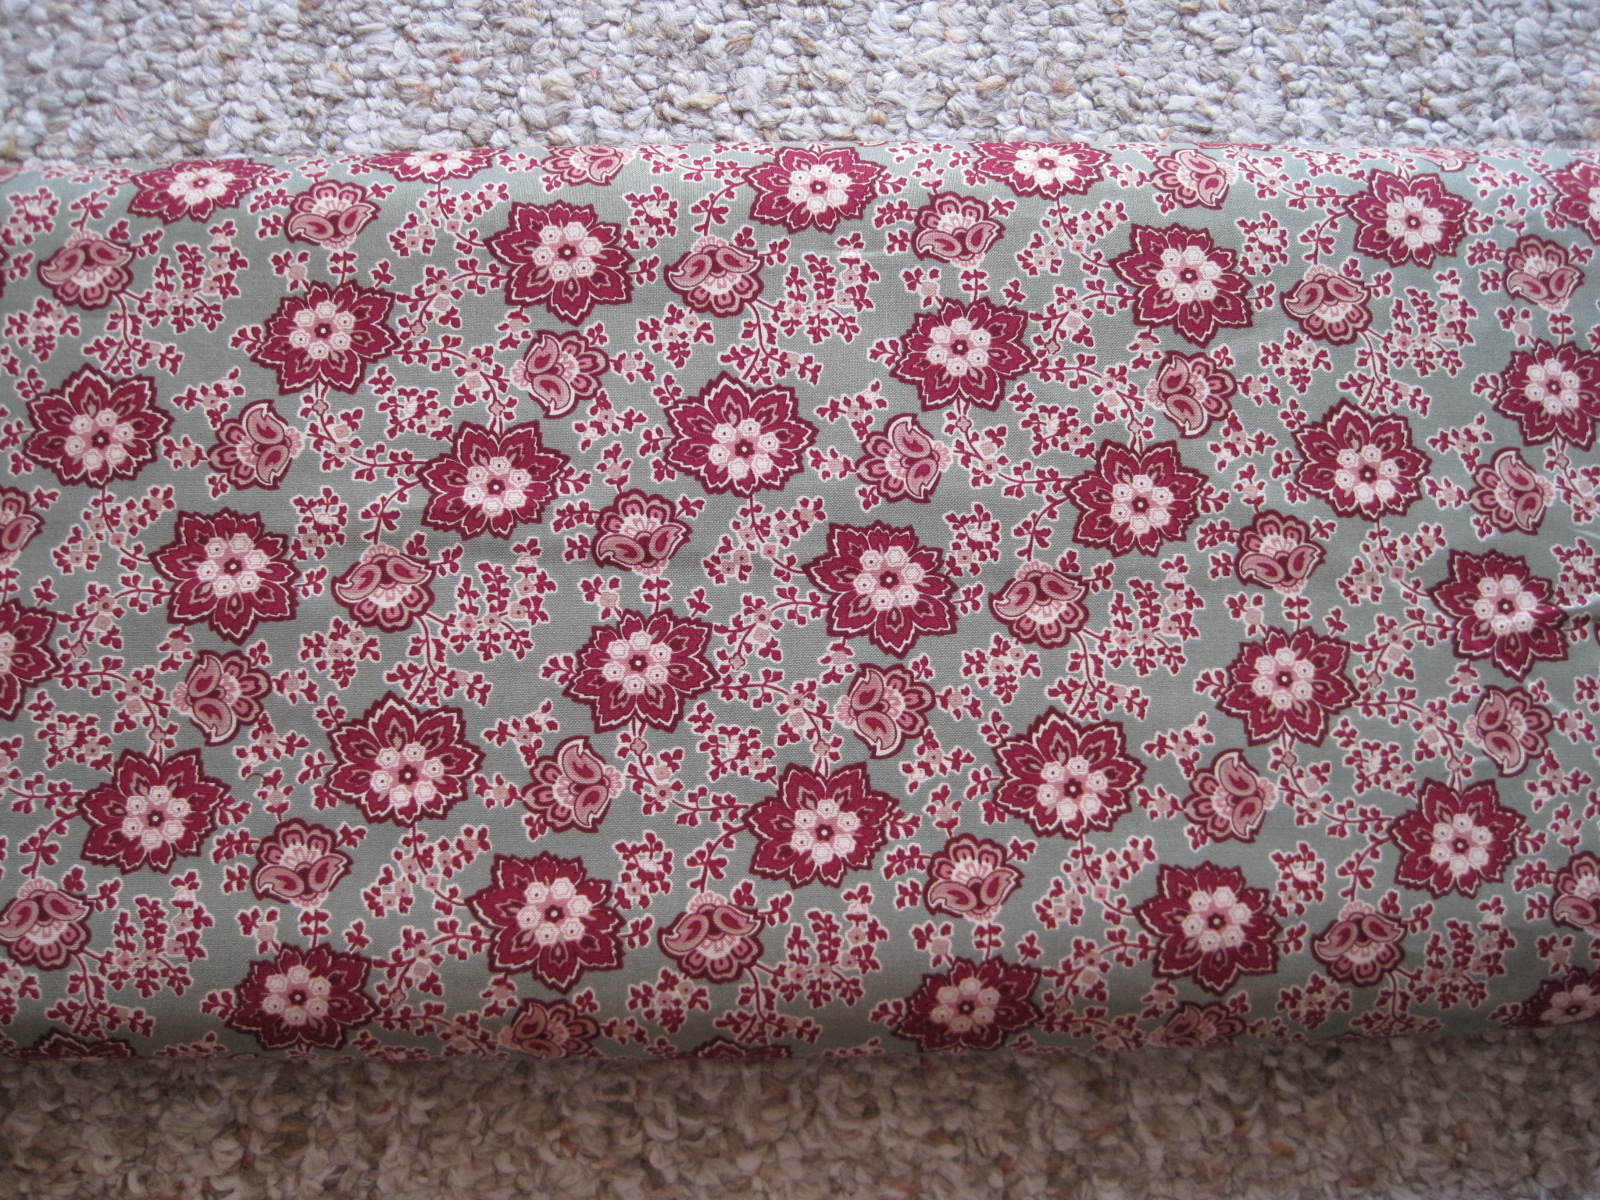
The dress is constructed from about 5yds of a Marcus Brothers reproduction historic cotton print I purchased earlier this summer. I used Past Patterns #701 and #702 bodice patterns as a starting point, though I had to make significant alterations to achieve a comfortable and pleasing fit, especially in the shoulder/armsceye area. I used the darted pattern for the fitted lining and the gathered pattern for the gathered exterior. The sleeves are the bishop sleeves from one of the patterns, though I totally changed the cuff design.
The cuff design and a lot of other fiddly details were taken from this c. 1852 dress at the Met (pictured below). If you zoom in on the cuffs on the Met website you can see that they look just like mine (pictured later in this post)! I also used the following design elements from the Met dress: piping at the neck and waist, gathers that are tacked down beyond the seam line, button closure on the cuffs, and cartridge pleating all around the skirt. I have a whole pinterest board of inspiring images for this dress and hat ensemble, but this dress is the one from which I took the most information and detail.
c. 1852 Dress, Met.
Here are a few pictures of the fiddly details I integrated from the Met dress:
Gathers at the center back that are tacked down beyond the seam line. I like the controlled look these extra stitches produce.Self fabric cuff finished with a small ruffle. The cuffs close with a hand sewn buttonhole and button.
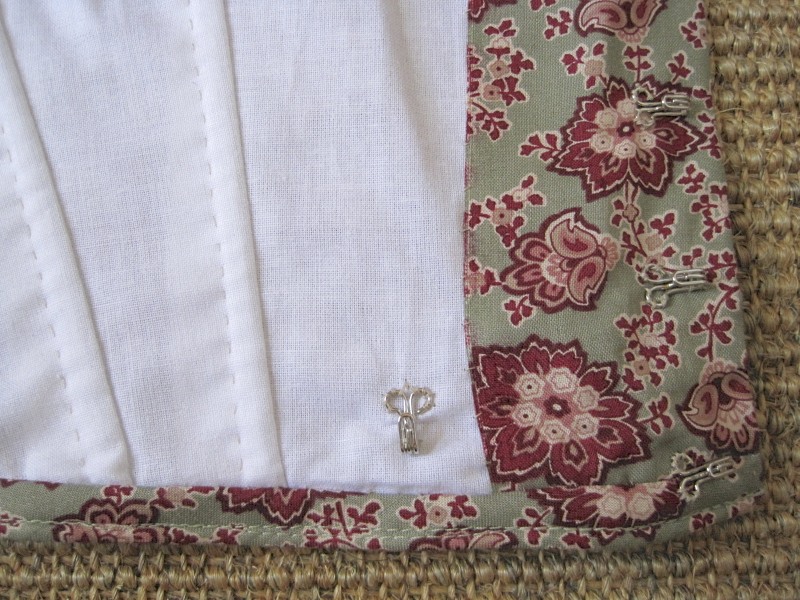
Georgina’s bodice is lined with white cotton. There are hand sewn boning channels sewn into the bodice in the front darts on each side and on the sides. The bones are then slipped in between the layers of fabric. I didn’t have the right length metal bones, so I used heavy duty plastic wire ties–but–I cut them in half the long way so they are much skinnier than normal (they just don’t look at all historically plausible in their normal width, in my opinion). Once they’re in the bodice, you’d never know they are plastic instead of metal.
The proper left side of the bodice: hand stitched boning channels in the darts, front hook closure, a hook to attach the skirt and bodice together, and nicely finished piping along the bottom edge.
The bodice is finished at the neck and bottom edge with piping that is nicely whip stitched to the inside. There is also piping in the armsceye seam. The sleeve seams are french seamed by machine with the opening seam allowance at the cuff turned twice and stitched by hand. The other bodice seams are all machine sewn and the bodice is hand finished. The bodice closes at center front with hidden hooks and bars. It also hooks to the waistband of the skirt to keep the two pieces from gaping while worn.
The skirt has a wide hem that is hand stitched. The long skirt seams are machine sewn. The waistband is the same cotton print with an interfacing layer of canvas to create stability. The skirt is cartridge pleated and hand sewn to the waistband. There is a single layer of lightweight flannel folded into the cartridge pleats to give them a little more bulk than the thin cotton had on its own.
I also took the time to add pockets to this skirt! This turned out to be really useful for storing gloves, sunglasses, chapstick, a fan… with two pockets a lady can store so many things! Here’s how I made them and sewed them into the skirt:
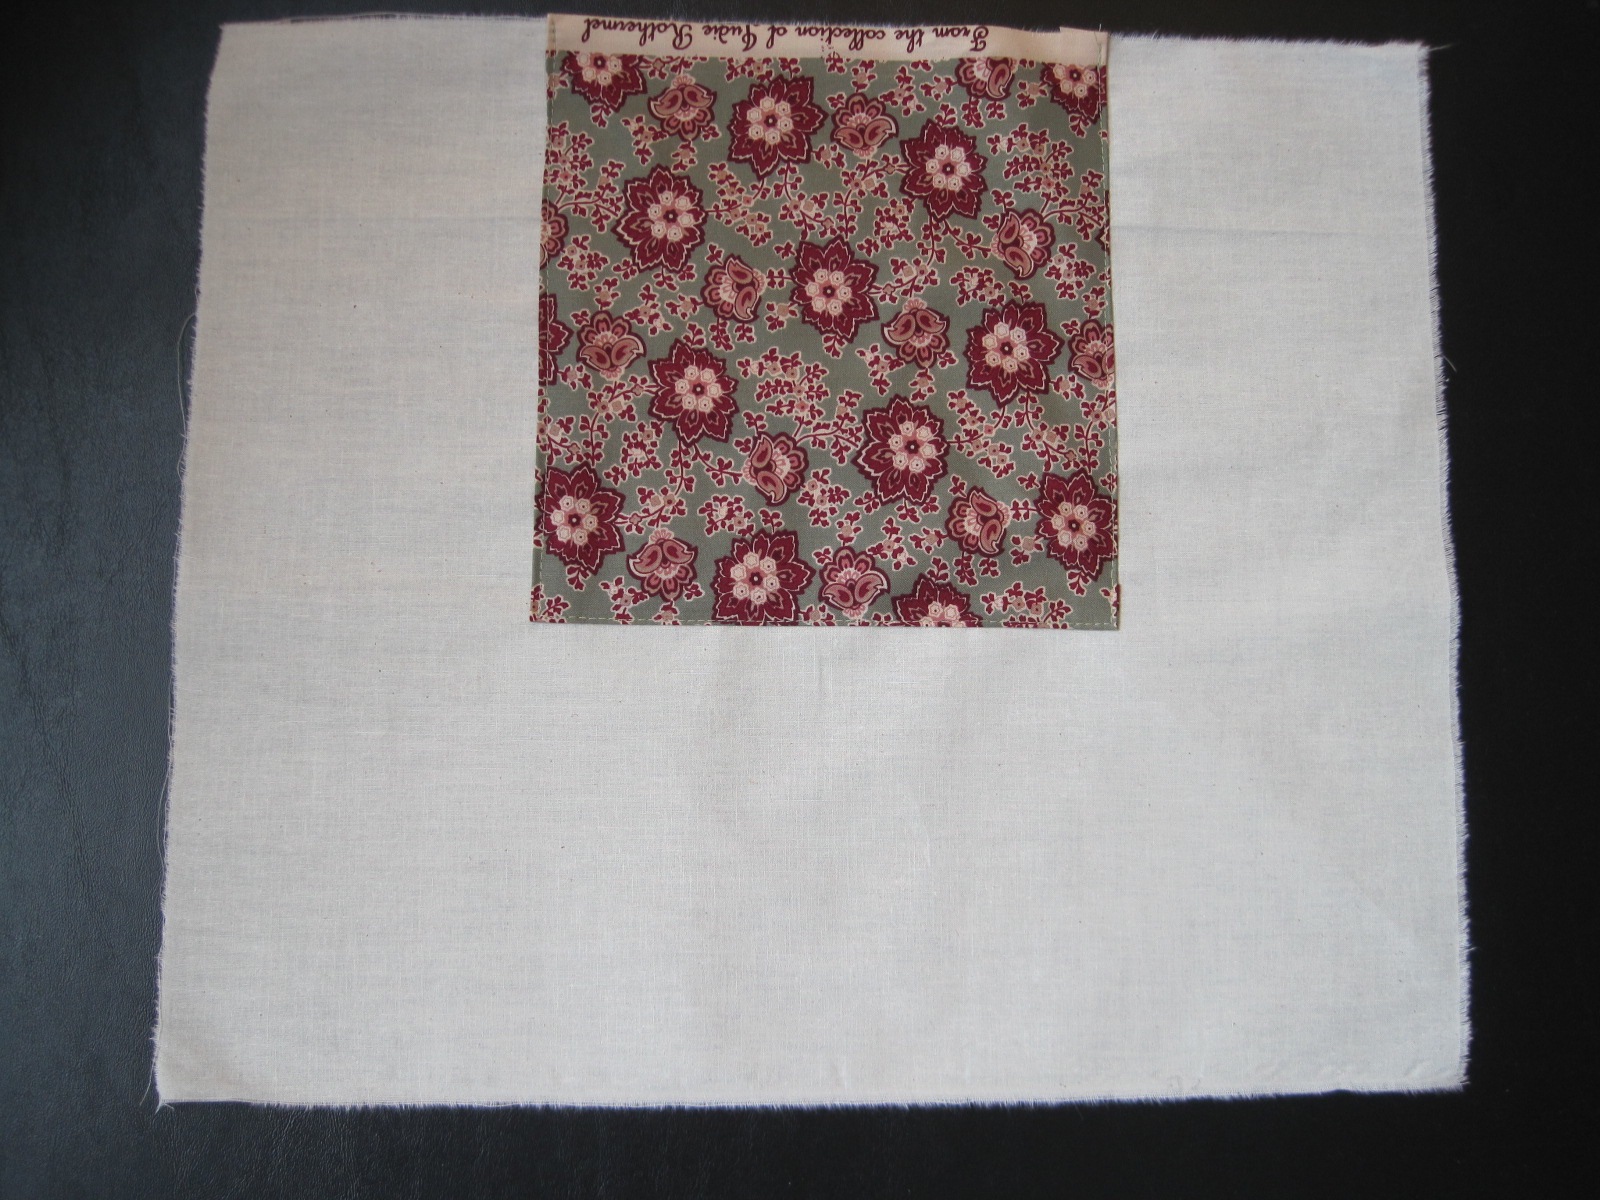
The pockets are muslin rectangles with a piece of the cotton print topstitched on the top center (this is the part of the pocket that can show while I’m wearing the dress and taking things in and out of the pockets).After the cotton print was sewn on I french seamed the vertical seam and then the bottom seam by machine, making sure that the cotton print stayed centered. On the left is what a pocket looks like with the french seams facing out. On the right is a pocket turned inside out to show the cotton print centered at the top.I left the top part of the vertical seam open and hand sewed that into slits in the skirt using a whip stitch through the pocket and the seam allowances (essentially under stitching the pockets, which keeps the muslin from rolling to the outside!). The pocket slits were made after the skirt was cartridge pleated and attached to the waistband, so the slits stop below the cartridge pleats (it was way too much thinking to try and figure out where the pockets should be before cartridge pleating the skirt!).It worked wonderfully, and the pockets blend right in and are hardly noticeable, even when they gap open! (I’ve turned the edges of the pocket so you can see the muslin pocket for this picture, but they don’t actually stay turned out like that, and you can imagine how the print fabric of the skirt blends right into the print section of the pocket).On the inside, the top edge of each pocket is stitched to the cartridge pleats to evenly distribute the weight of anything in them.
Georgina cost about $18: $15 for the fabric and about $3 for hooks and eyes. The various other fabrics (cotton lining, canvas interlining, etc.) were all in my stash from previous projects (yay!). I first wore Georgina last weekend to a vintage dance performance on George’s Island in the Boston Harbor. I’ve got pictures of the performance and pictures of island exploration coming up soon!
I recently participated in an outdoor mid-century dance performance for which the weather was an un-obliging 90-something degrees + humidity. Yup, not kidding. It was HOT! And we were dancing on asphalt. Luckily, we were out on an island in the Boston harbor and had a breeze. But it was HOT!
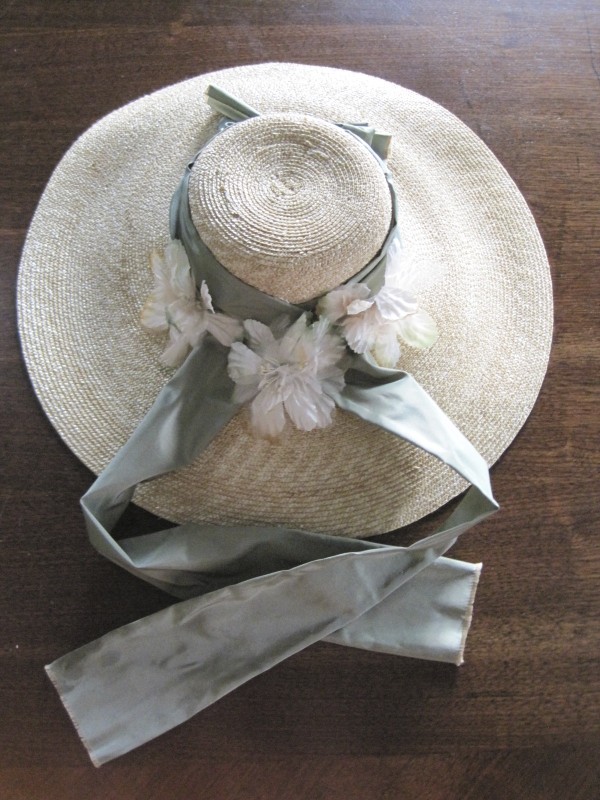
Anyway, more on that performance soon, because it involved a new cotton print day dress made from one of my recently acquired historic cotton prints! In addition to the dress, I also restyled a straw hat to go with the outfit and keep some of the sun off of my head. The hat has been used with various other clothes (1780s and Regency come to mind), but I had only ever added a simple ribbon to it rather than really styling it. This was the perfect opportunity to really make something of the hat!
I wanted to keep it simple and in the 1850s/60s, so I started by adding inspirational images to my pinterest board for this project. I visited the board many times before making a decision that I loved the shape of Eugenie’s straw hat in this painting. The hat has that nice downward curve in the front that sort of frames the face and accentuates the fashionable heart shape. The gauzy/tulle trim was a little whimsical for my purposes, so I opted for a more subdued and practical trim style on my hat.
Franz Xaver Winterhalter (1805–1873) Eugénie of Montijo, Empress of France Date 1857
I started by wetting my hat in the bathtub then tying it with string so it would dry with the curve that I wanted to achieve in the brim. I also wanted the back to curve under a bit, so I let the hat curve on both sides.
Tying the hat to create curves.
Once the hat had dried all that was left was to trim it! I chose to use green silk left over from Evie, my 1864 ball gown, and some silk millinery flowers. The silk is narrow hemmed on both sides and the ends are fringed, showing gold threads (the fabric is green/gold shot taffeta). The long ends hang down the back while the hat is worn, a style like the one below which you can see in the images on my pinterest board. I also added a bow on the front like you see in the images. Turns out that the bow is not quite centered… whoops!
LAPL, Magasin des Demoiselles, August 1858
And here is the result of my labors, and my fulfillment of the HSF Challenge #16: Separates. “Make a non-matching garment which can be paired with other items in your historical wardrobe to extend your outfit choices.”
You can’t see the curve since the hat is sitting flat on the table… but you can see the trim!
Just the facts:
Fabric: A 4″ width of green silk 60″ wide plus a few scraps.
Pattern: None.
Year: 1850s generally, 1857 specifically.
Notions: Straw hat, silk flowers, thread.
How historically accurate?: I give it 98% (and that’s pretty high for me!). Straw, silk, more silk… The sewing machine was even invented by 1858, so the machine sewn hat isn’t totally out of the realm of possibility. The -2% is for the polyester thread.
Hours to complete: 2, not including time for the straw to dry.
First worn: July 20 for a vintage dance performance on George’s Island in the Boston harbor.
Total cost: I bought the hat a few years ago for probably about $25, the silk was leftover from another project, and the flowers cost some small number of cents since I got them as part of a large box for only $5! Let’s just say $26 total.
Back view of the hat on my head. See how the front dips? This is also a sneak peak of my new gown, Georgina, to whom you will be formally introduced soon.Front view. See the dip?
At first I thought I had made the curve too pronounced, but when I look at the pictures again, I think I was pretty darn spot on! Woo! Completed new separates accessory for my historic wardrobe: check. Oh, and did I mention I’m in early on this project? The deadline is August 12!
I was recently able to visit a wholesale quilt fabric company to purchase historic dress fabrics for an upcoming mid-19th century performance on behalf of me and other members in my vintage dance troupe. It was such a treat! The majority of the fabrics we found were Marcus Brothers fabrics, but RJR also had a smaller number of really lovely fabrics.
Marcus Brothers Gettysburg Print 1840-1860. To make an1850s day dress.Windham Fabrics Colonies Archives Print c. 1850 and Marcus Brothers Charleston II Print. For other 1850s/60s day dresses.
There were so many lovely things, but the best part was the prices! All of the fabrics were between $2.50-$3.75 a yard! You had to buy a bolt, which varied between 7 1/2 and 15 yds, but at those prices it’s still outstanding! We came away with fabric for the 1850s/60s dresses and bit more besides… There were some things that were just so fantastic they couldn’t be left behind!
Marcus Brothers Old Sturbridge Village Print. To eventually make an 1840s dress! It’s going to be so pretty! I love this fabric and the colors (it’s actually yellow and pinkish flowers with brownish vines).RJR Print. I have no idea what I will make with this, I just love it. I find it to be so striking!Another sample of the lovely prints. These were purchased by a friend. One will be used for an 1860s dress, eventually, and the other will possibly be used for an 1840s dress, eventually.
Don’t worry, there will be upcoming posts with more on the 1850s day dress I’ll be making as well as the other much farther in the future projects. And I’m sure I’ll also have great pictures from the mid-19th century performance as well.
Last weekend was a whirlwind of events and that means I’ve got lots of pictures to share! The pictures will be coming in small-ish groups. I do hope you’ll be able to vicariously enjoy the nice weather and fun through them.
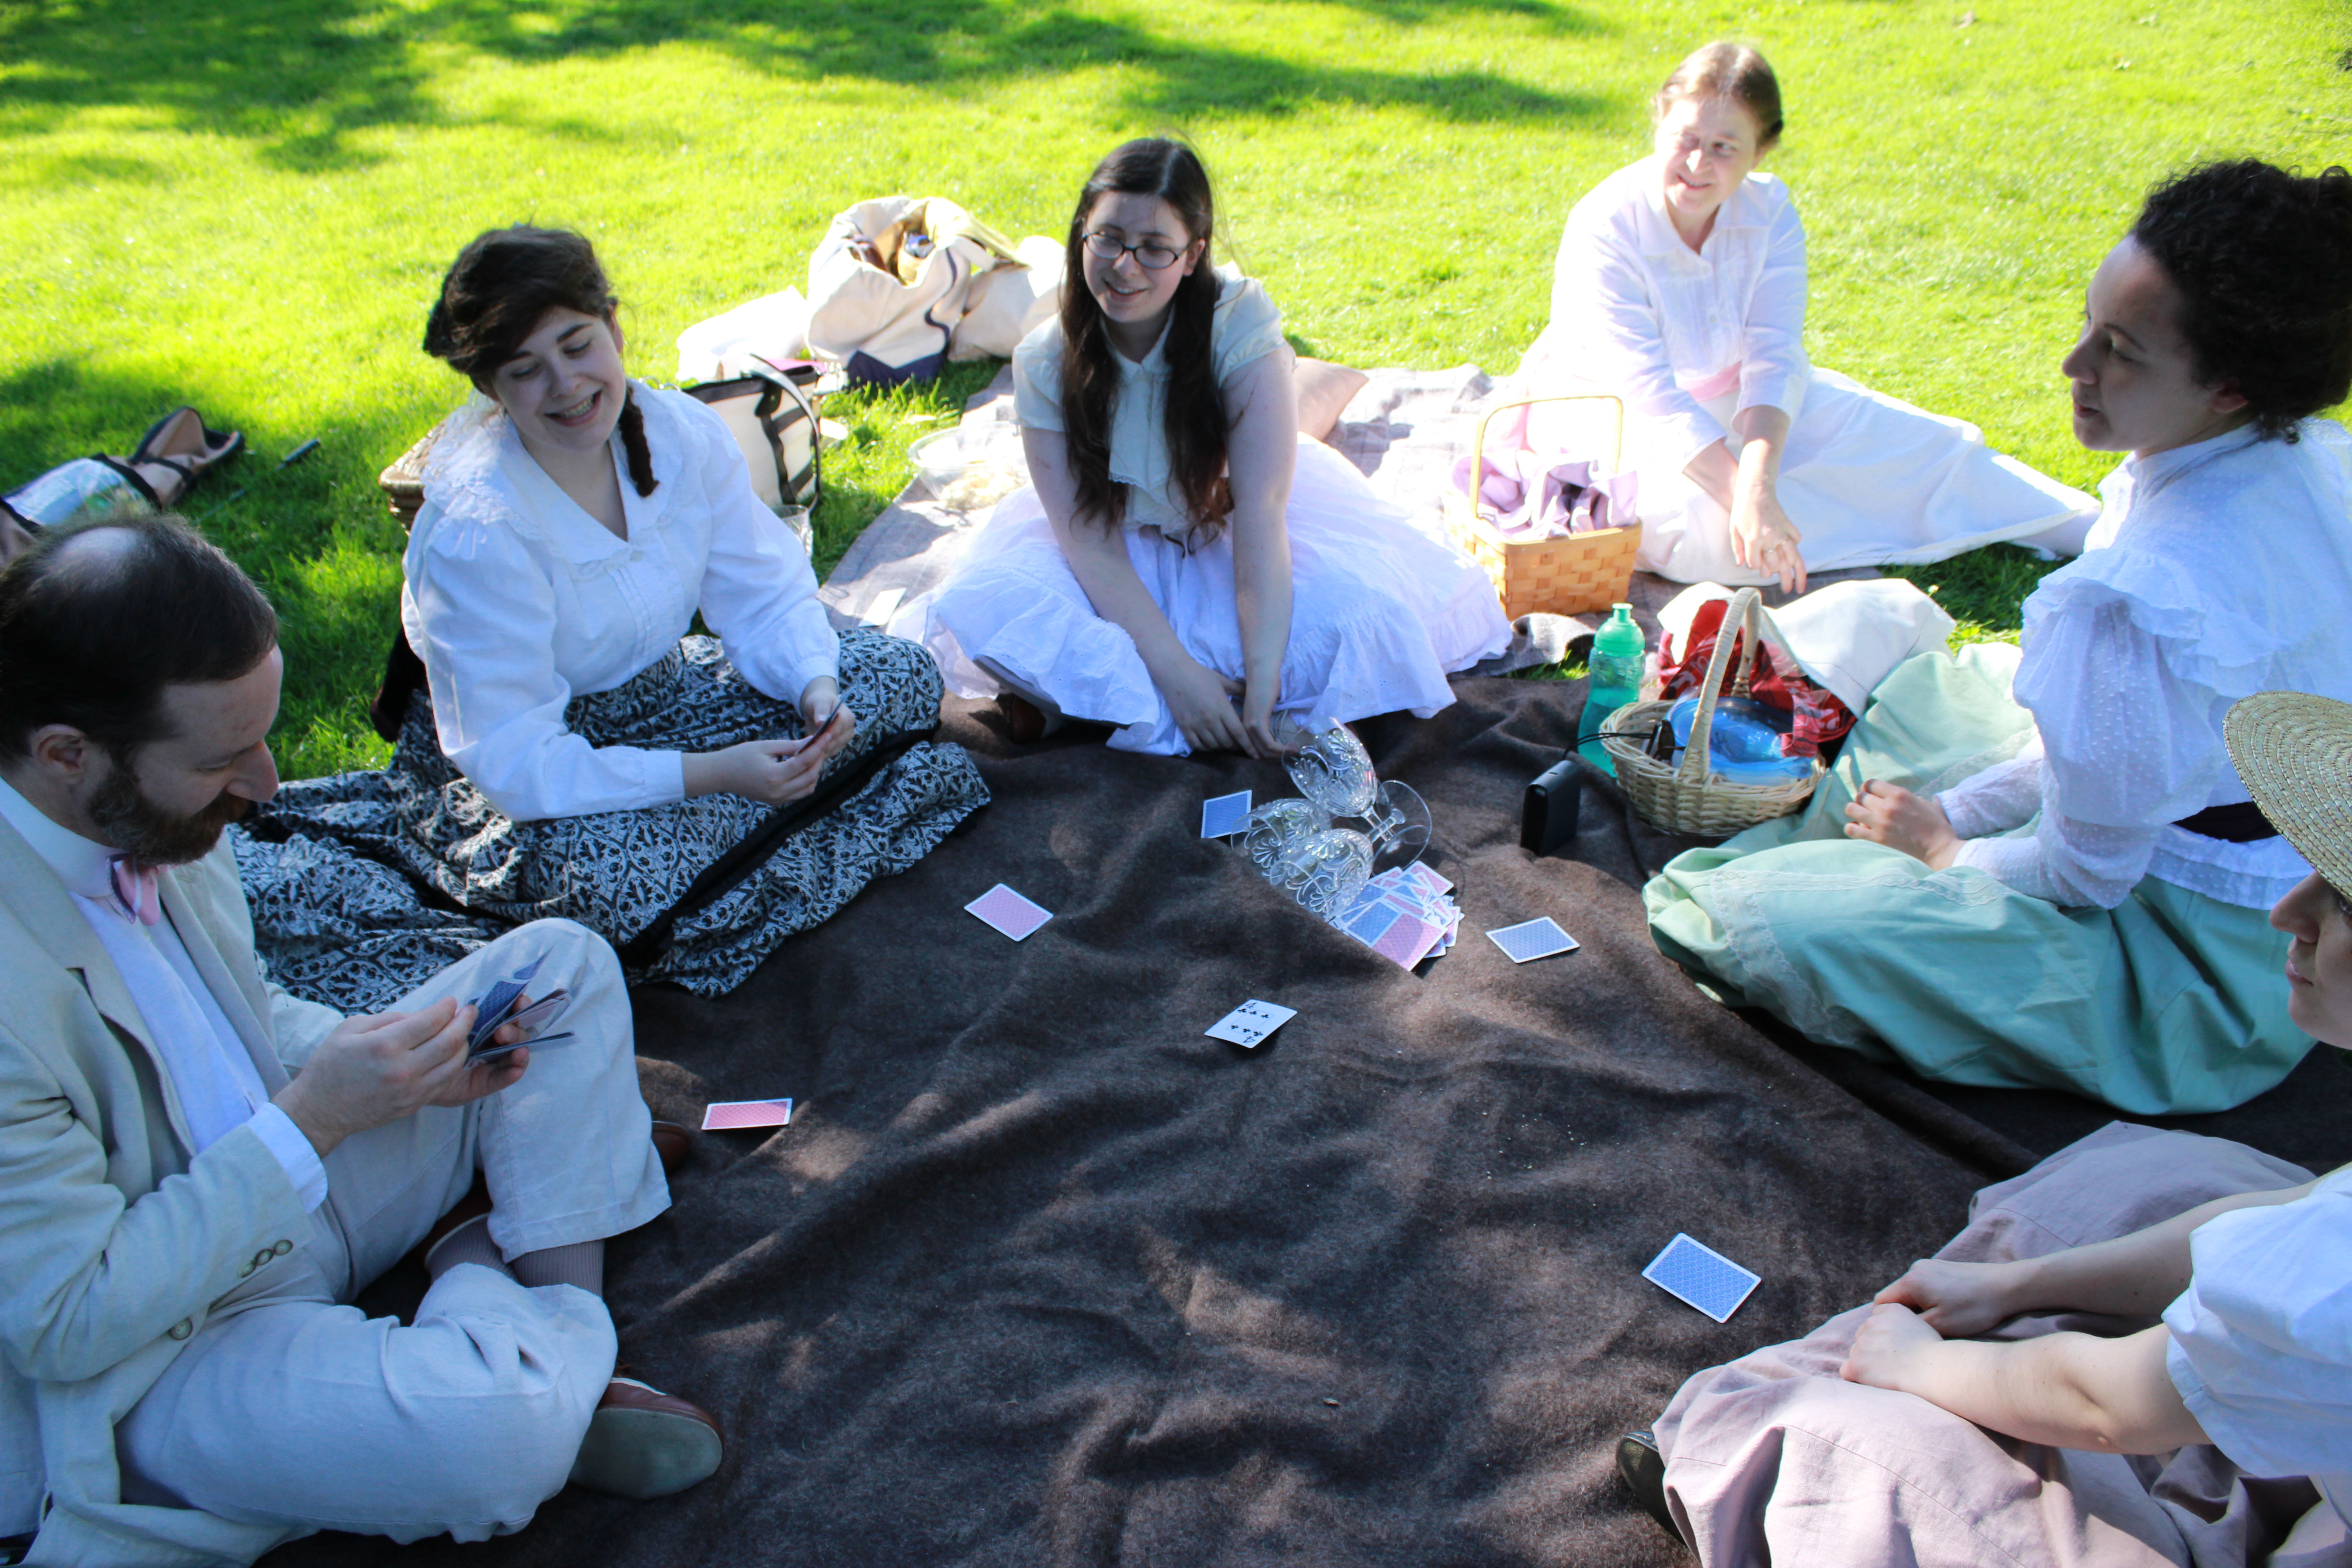
The first event was a low-key turn of the 20th century picnic in the Boston Public Garden. You might remember that last year we did a Regency picnic in the same place? We were out to have a good time and get some fresh air without worrying about 100% historical accuracy, hence the low-key part of the description. So without further ado, pictures!
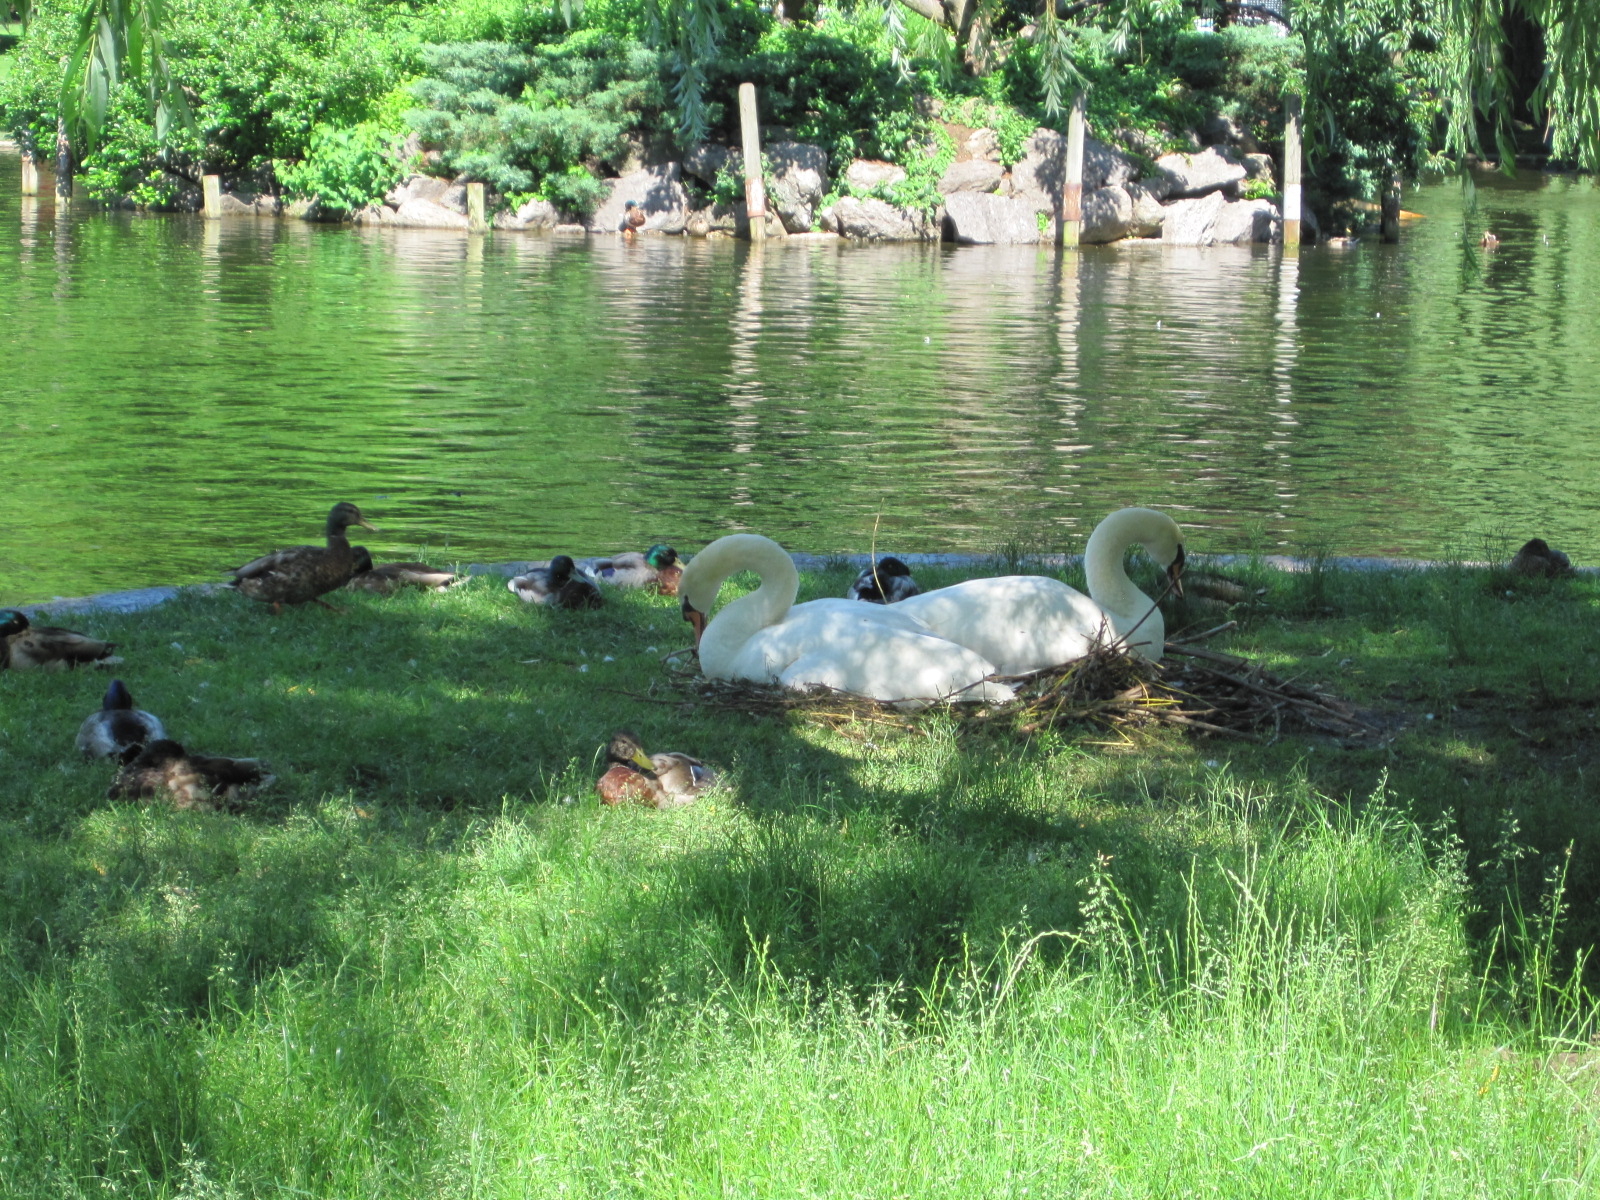
Taking a turn about the garden.There are lots of ducks in and around the swan pond in the center of the garden and this time of year you can also see baby ducks! There were 9 of them in this bunch. Aren’t they cute?There are also swans around the swan pond. These ones were nesting in a fenced off area. Pretty, but you wouldn’t want to get too close. Swans are big, and mean.There are lovely old trees around the garden as well.The trees make great backdrops for photos.Walk a bit away from the swan pond and you are likely to encounter George Washington, who happened to be showing off his Bruins spirit this past weekend. (I love that the city, presumably, had a custom all-weather jersey-cape made, since Washington can’t actually move his arms to put on a jersey, given that he’s bronze…)All around the statue of Washington are lovely flower beds. The flowers get changed out pretty regularly so they’re always blooming and pretty. These flowers are my favorite though! They’re called allium, and I love the colors, and the size, and the circle-y-ness of them.I believe I have a weakness for circle-y things. And, my outfit matched the flowers! I think my gibson-y hair turned out pretty well, too.I know this picture is similar to the last one… but I can’t decide which one I like best. I’m hoping maybe you have an opinion that will sway me one way or the other?It got warm promenading about the garden, so we returned to the blankets in the shade to play cards.After the rest, we broke out the croquet set we had brought along. Apparently we were more interesting while playing croquet than we were at any other time during the day, because we actually gathered a crowd of people who were watching us play.Contemplating my next shot. I was getting out of the metal panel obstacle…I was the pink ball! I think it was supposed to be red, but it looked awfully pink to me!My outfit choice was inspired by an image in the KCI collection. I did my best to imitate it in spirit, despite my lack of a boater.When revisiting the image I realized that it does not include a croquet mallet. Be that as it may, I tried, and I think the inspiration is clear, even though my memory is not!Picnic-ers!
I’ve been trying to be good about not buying more fabric… but sometimes things are just too good to pass up, or an event comes along that requires new clothes! I think I last bought fabric in January, so that’s a pretty good few months of no-new-fabric.
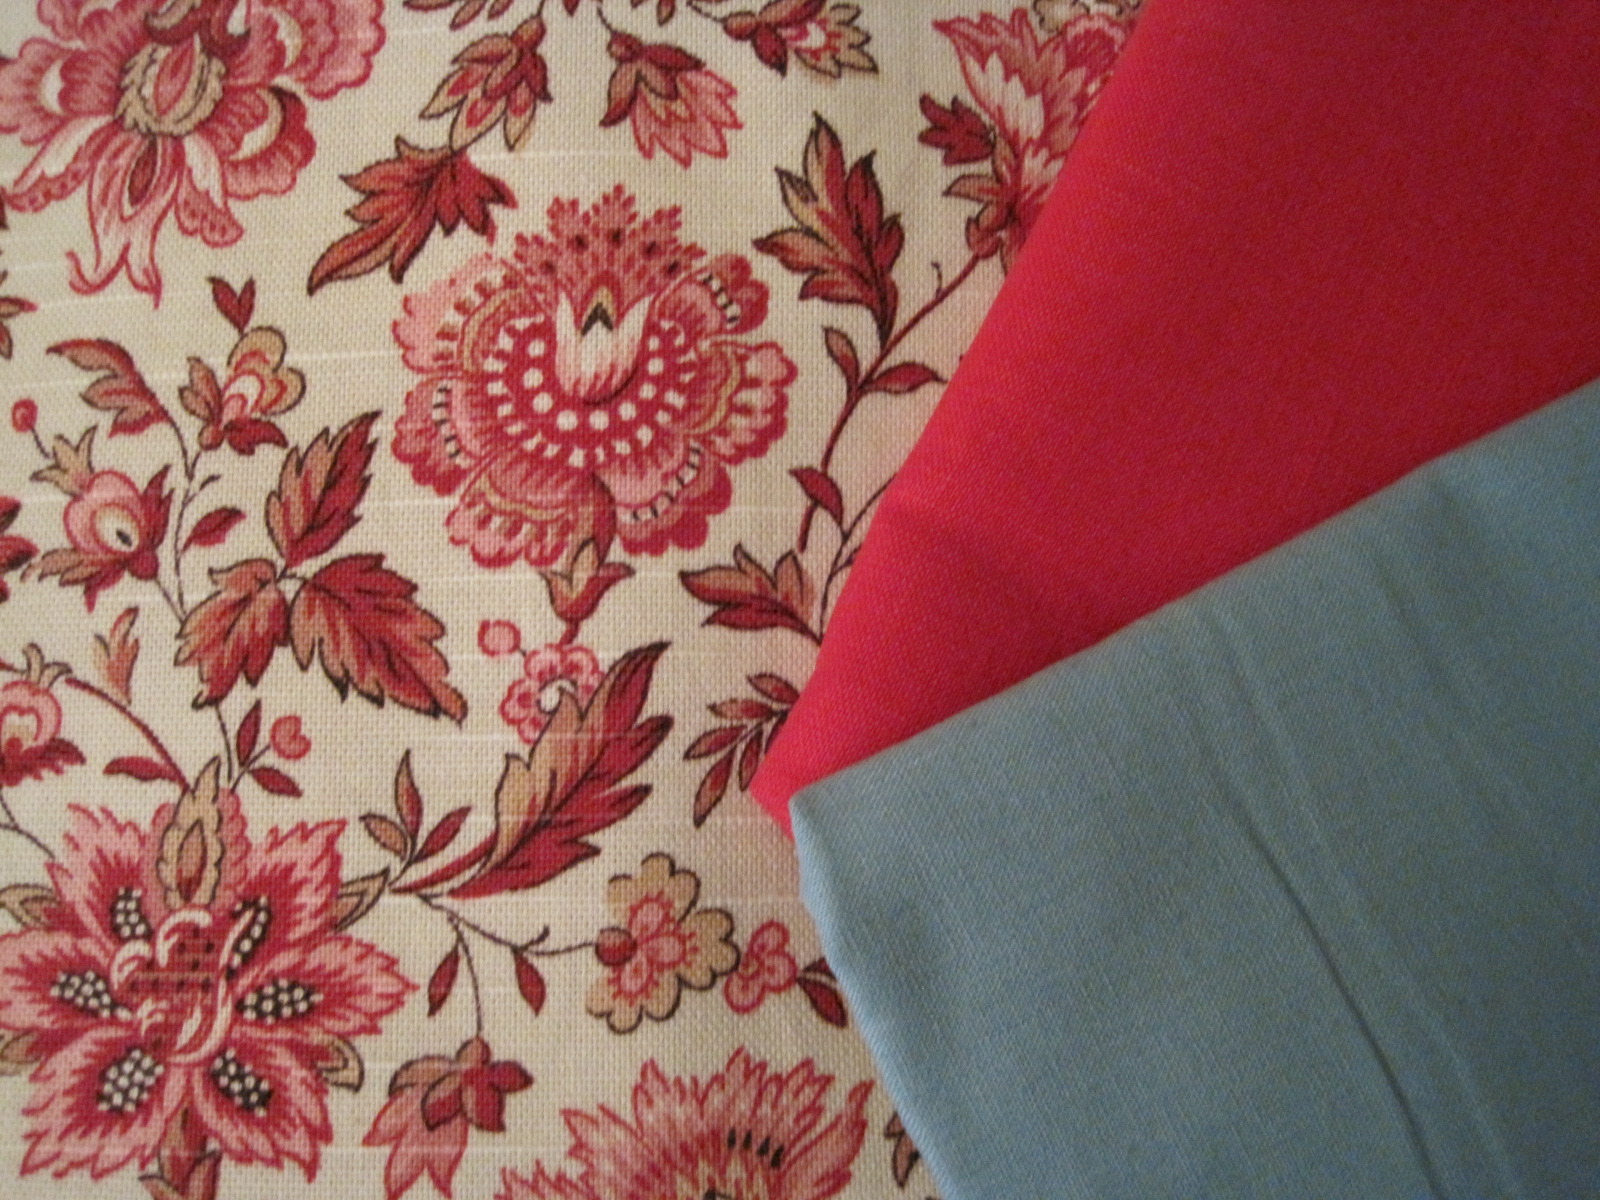
I wasn’t even looking for this fabric! But I happened upon this great red/pink/brown cotton chintz and couldn’t get it out of my mind. In the end, I decided I would regret it if I didn’t buy it. And there you are. I’m thinking of perhaps an 1790s/1800ish open robe eventually. The other two fabrics wouldn’t have been bought on their own, but with the chintz already being purchased… I tacked them on to the order. There is a small bit of the cherry red linen, to make a 1740s jacket some day, and a bit of that blueish cotton/linen blend. I was hoping it would be more teal colored, but it’s not. So it might get relegated to lining something else.
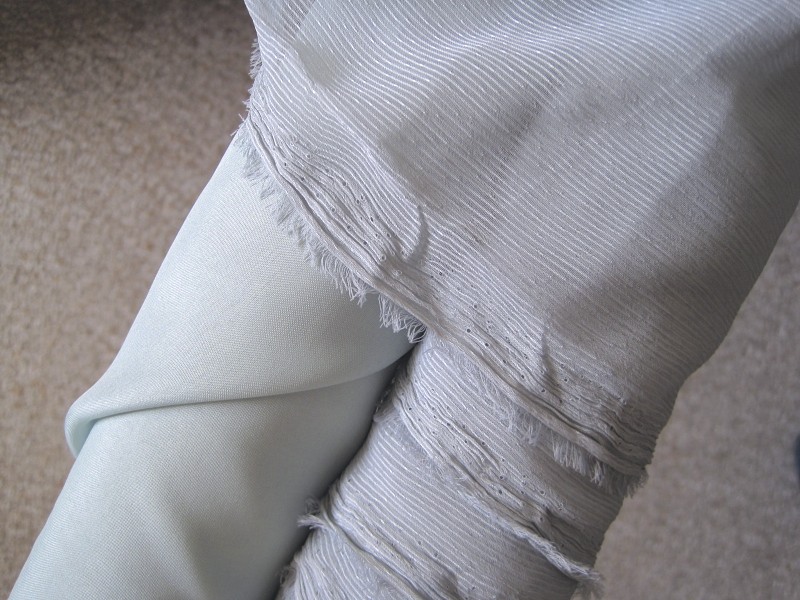
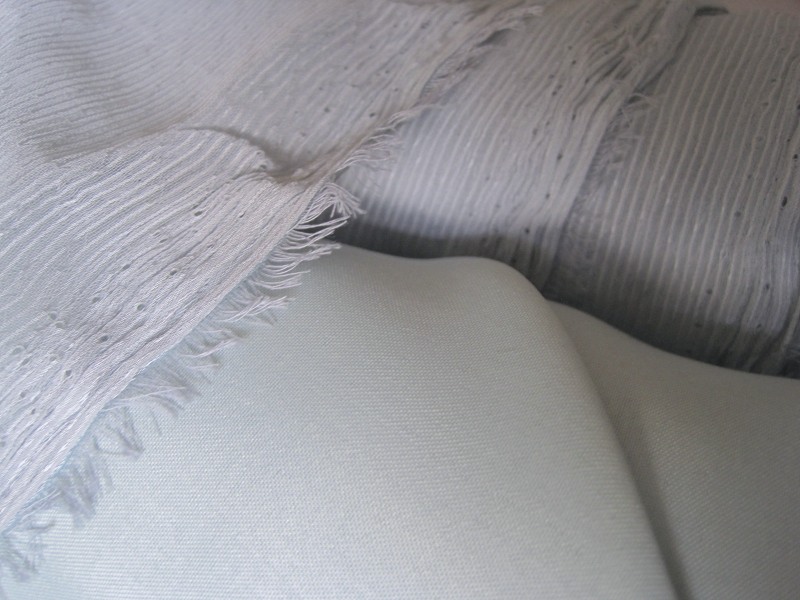
Later in the month, I was on a grand search to find fabric for an 1860s cotton dress and came across this fabulous light teal stripey fabric for $1/yd. I’m calling it the elusive blue green fabric in my head, because that color is sort of hard to find and I’ve been inspired lately to find it. At $1/yd I couldn’t pass it up!
The pictures don’t really do it justice. I’m thinking of making a new Regency evening gown using it and perhaps a 1906ish evening gown some day as well. I bought that similarly colored lining to go with the stripy for the 1906ish evening gown, because at $1/yd in the right color it’s just meant to be, even if it is polyester. I’m not sure what the fabric content of the stripy fabric is, but I’m guessing it’s probably man-made…
Lastly, I’ll be performing in another 1920s dance event next weekend during the day and I needed a 20s day dress. I wanted it to be washable and I didn’t have any appropriate fabrics in my stash. There weren’t a lot of options that I liked, but in the end I went with this royal blue cotton lawn swiss dot. The dress will have white accents on it (and is looking rather sailor-like, despite that not being my intent). I have to just claim the sailor look so I don’t feel foolish in it.
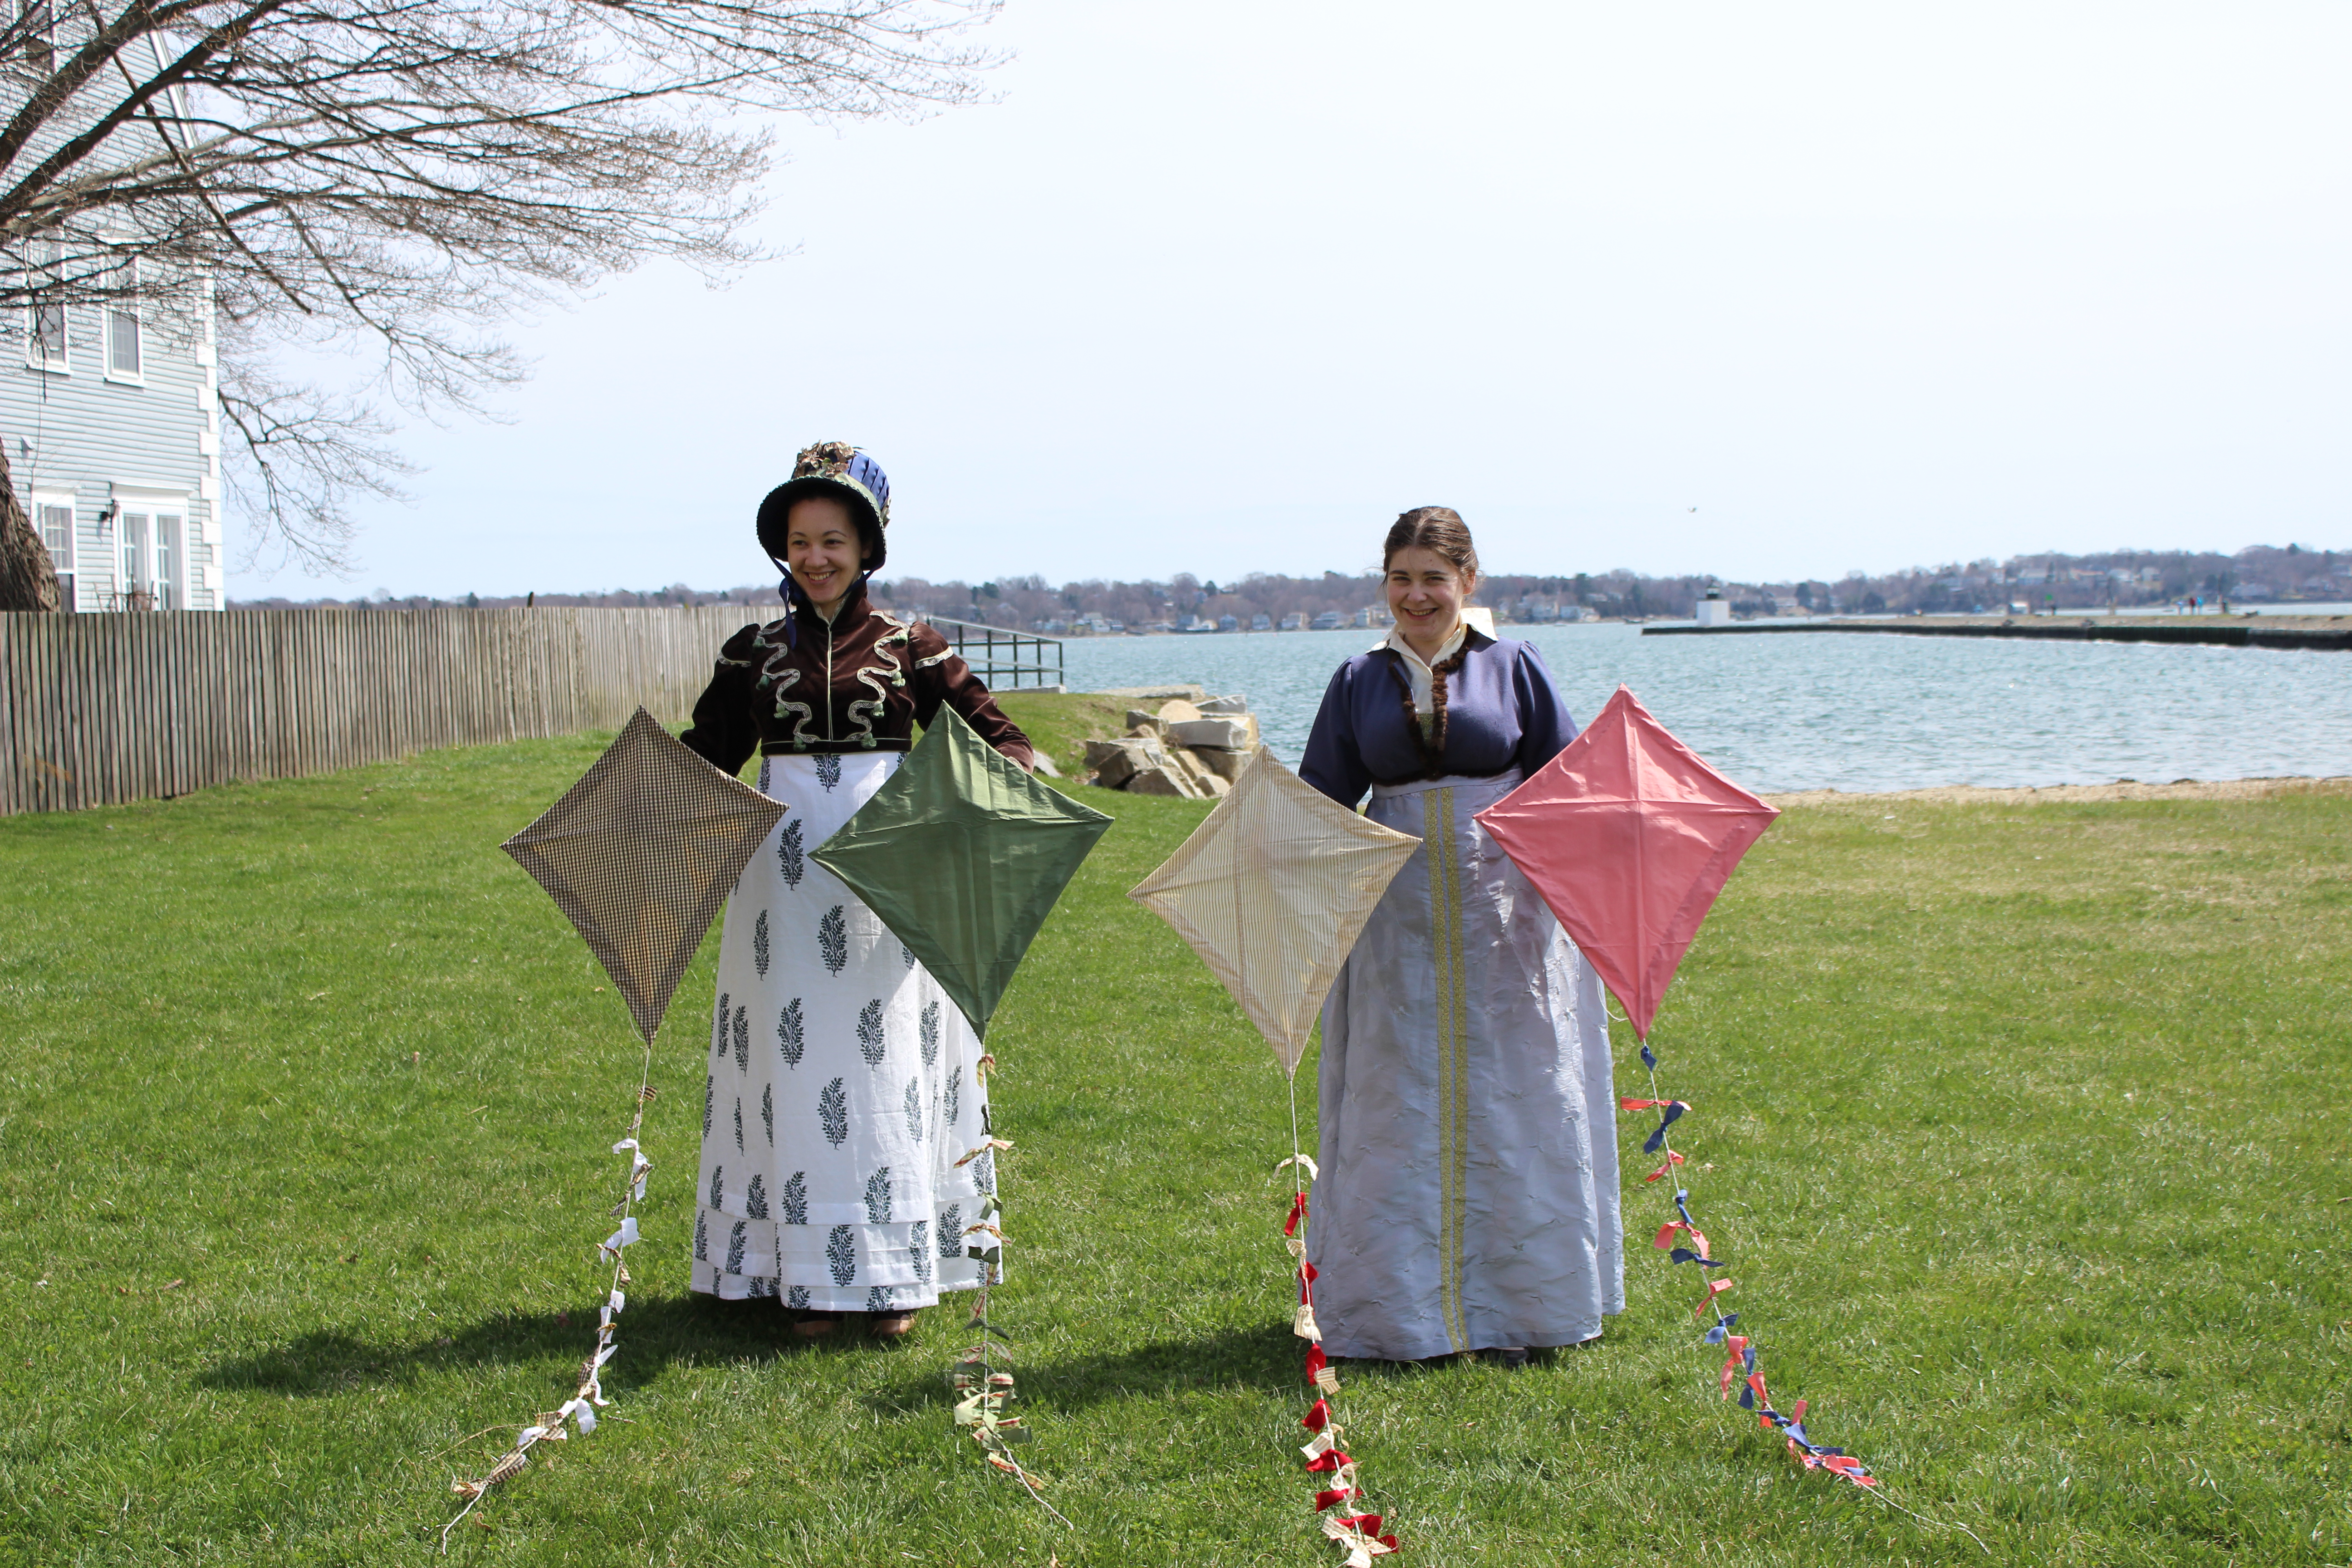
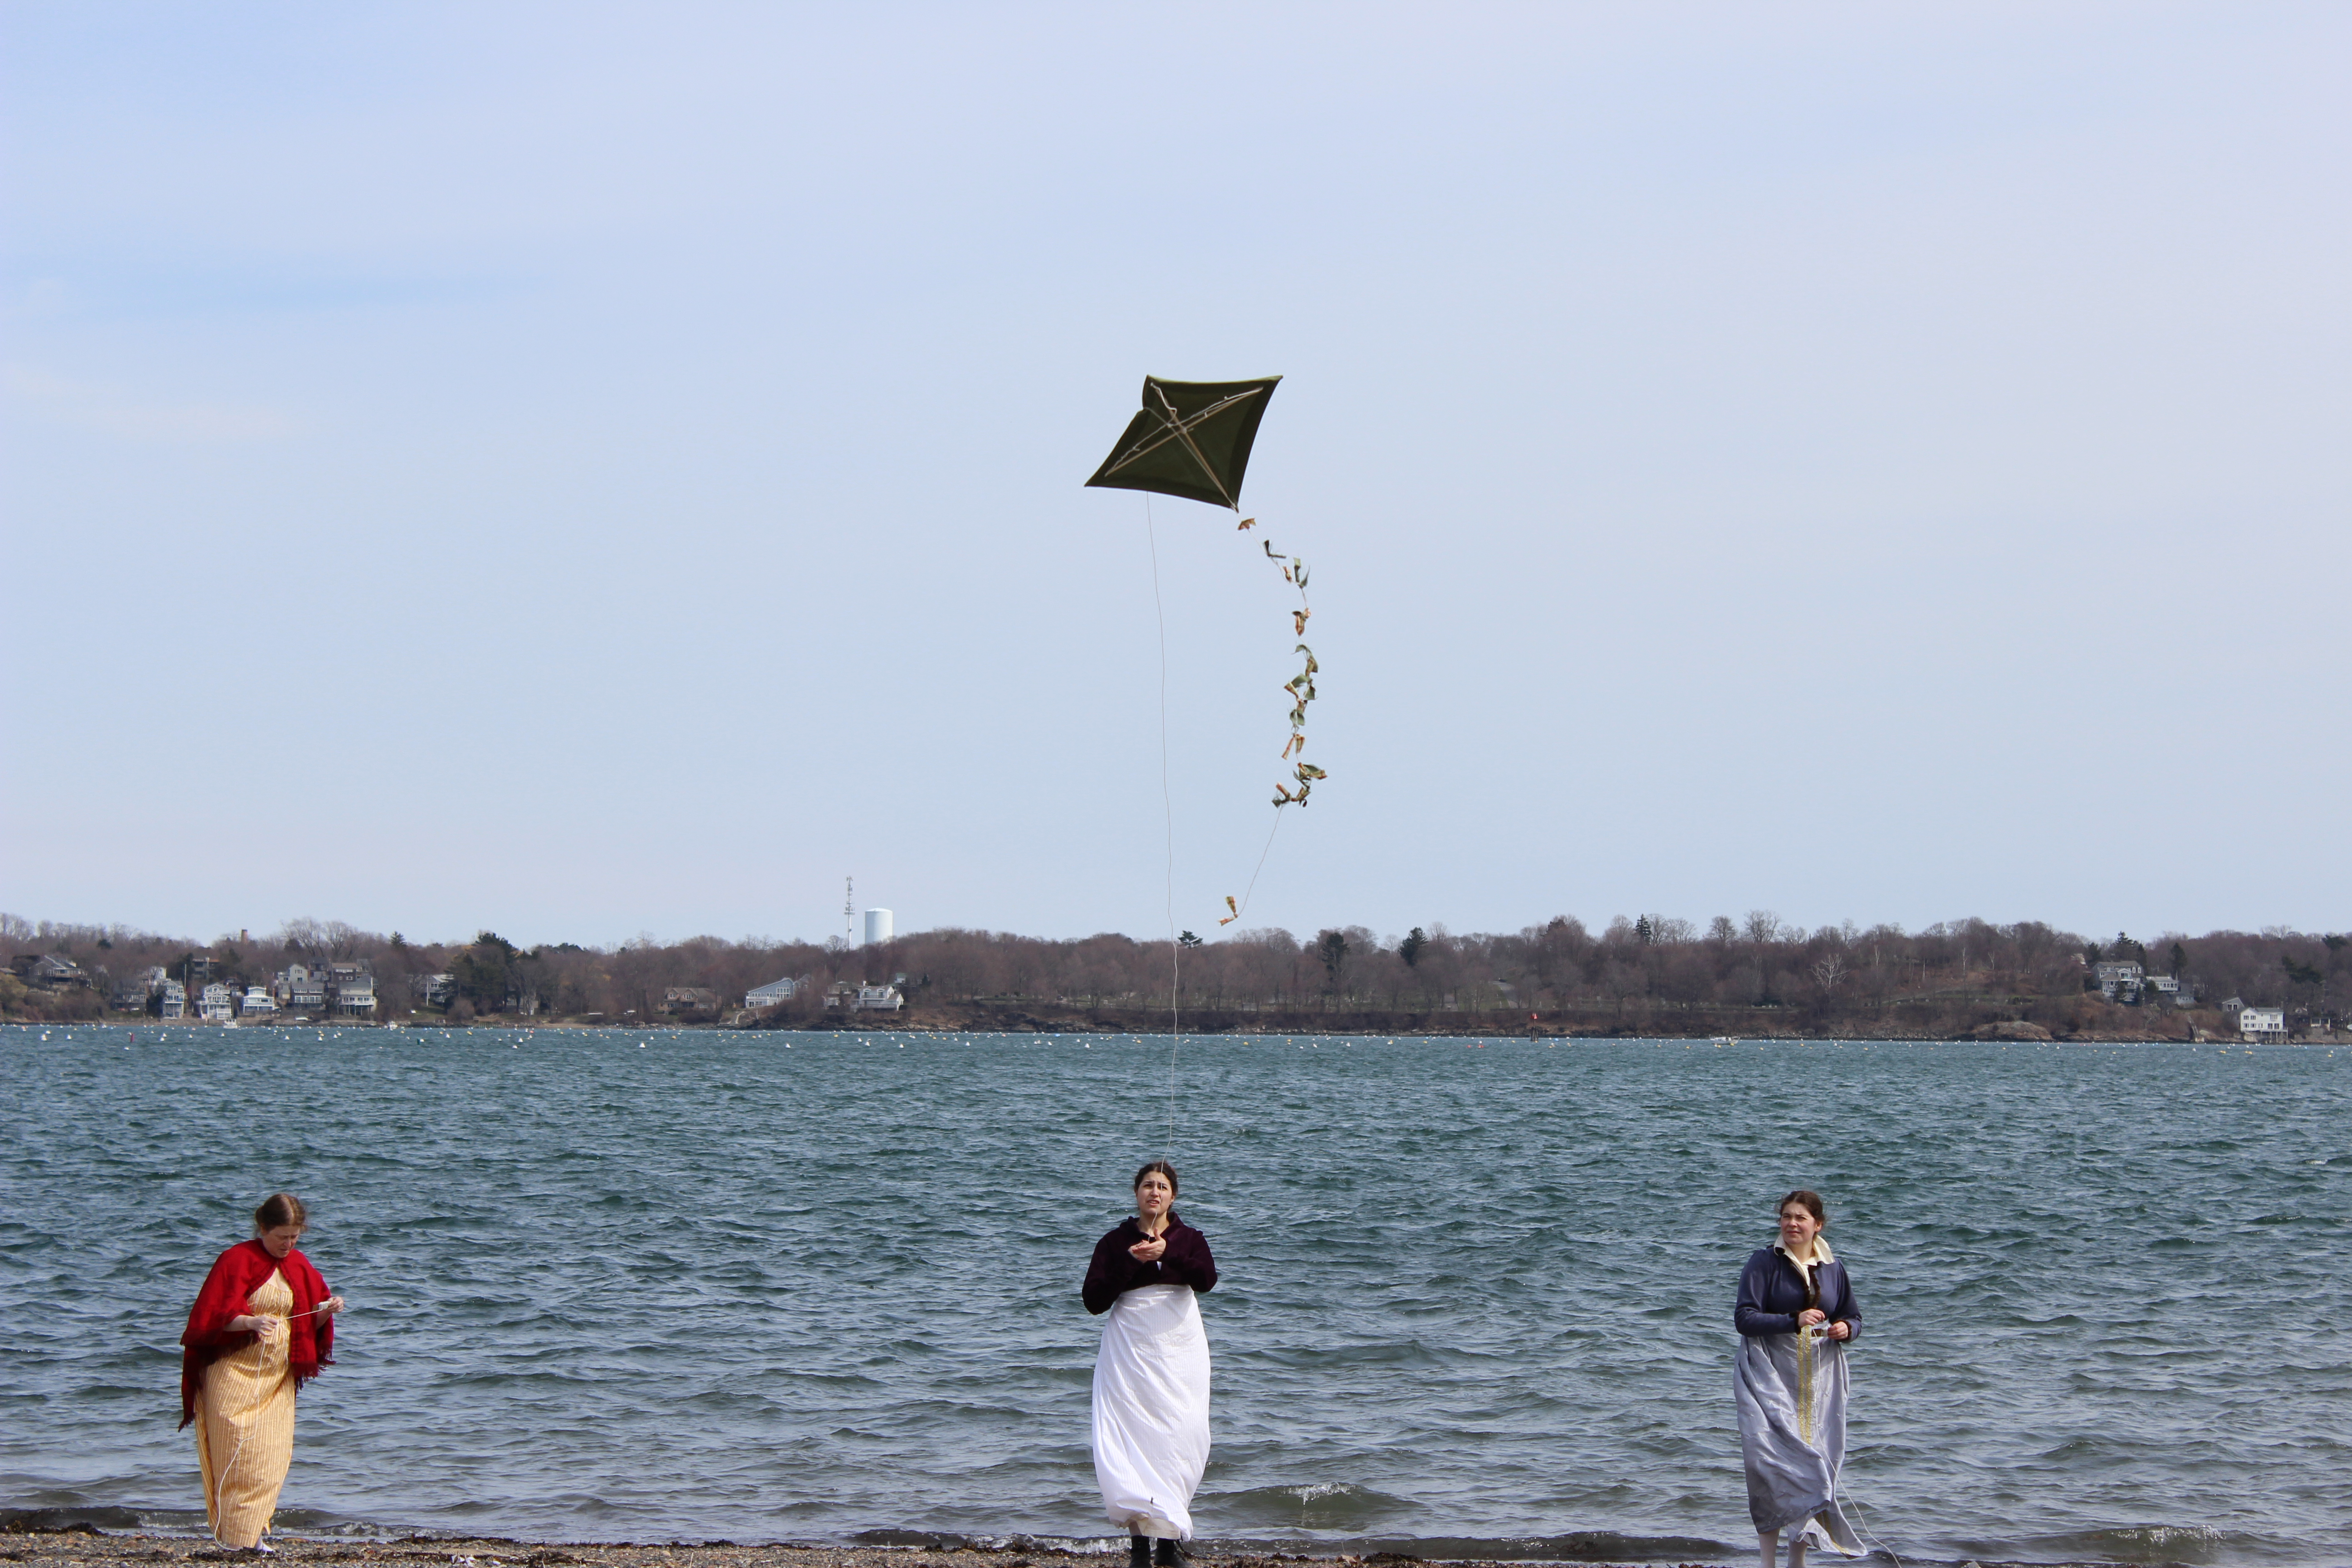
Well, it’s June now, and that means summer to me. I’ve been slow to post about my kite making adventures because I was busy posting about other things, but it seems fitting for this post to be the first one of June–summery, somehow.
After the official end of the Regency Dance Weekend I’ve been posting about recently, my friends and I stayed in the Salem area to relax a bit and have some further Regency adventures. We had been brainstorming about what sort of activity we might engage in that was outside of our usual occupations and had settled on the idea of flying kites!
I did some research into Regency kites and spent some of my evening time during the weekend sewing these four silk kites with some help from friends.
Plaid, green, striped, and pink.
I didn’t find much to go on with the kite making. The best source I found was Jen’s post about Georgian Toys on her blog Festive Attyre. The post includes a link to this kite making how-to as well as a link to this 18th century extant kite. Unfortunately, I couldn’t find more information on the extant kite than that which is on that one page. Jen’s post is great and includes fun information about other Georgian toys as well as kites. The how-to link is a good one as well, though I did sub out modern methods for more period ones. For example: there is no tape to be found, instead there are stitches.
Making the kites was fun. I went to Home Depot to buy the dowels for the kite frames. They were cheap and luckily you can saw the lengths to be what you need while you’re in the store (good for me since I don’t own a saw!). I also bought twine there. It’s a poly-cotton blend (boo), but it’s smooth on the hands, so that’s worth it! The kite tails are bits of the main fabric and a contrasting fabric just tied around the twine. Instead of notching the ends of the dowels after they were cut (I tried, and it failed, because the dowels just wanted to splinter) I just wrapped the twine around the ends enough times that it wouldn’t move. The method definitely worked and sometimes that’s all you need.
Despite the fact that it was super windy by the water, we had trouble getting the kites to stay in the air. I’ve surmised that my kite engineering skills are not super outstanding, because the kites did lots of circles near our head height and then dove into the ground… over and over and over again… It was a bit frustrating. These pictures capture the few times we got the kites up in the air. Trust me when I say they didn’t stay up very long!
Perhaps a running start?Perplexed but still trying.Clearly this kite did not want to go up.Triumph! (If only for the moment!)This kite had the best luck at staying in the air.Another successful moment.
There were some adjustments and kite injuries along the way. One of the dowels in the pink kite broke, so I have to figure out how I’m going to fix that. The other kites had things like alternate bridles made and pennies sewn into the edges to try to add weight. Some of those things seemed to work. I guess I just need to do some research about what makes kites stay up. I’m not sure the tails worked very well, either. They tangled easily and were hard to sort out again. If you know anything about kite making and have tips, I’d love to hear them!
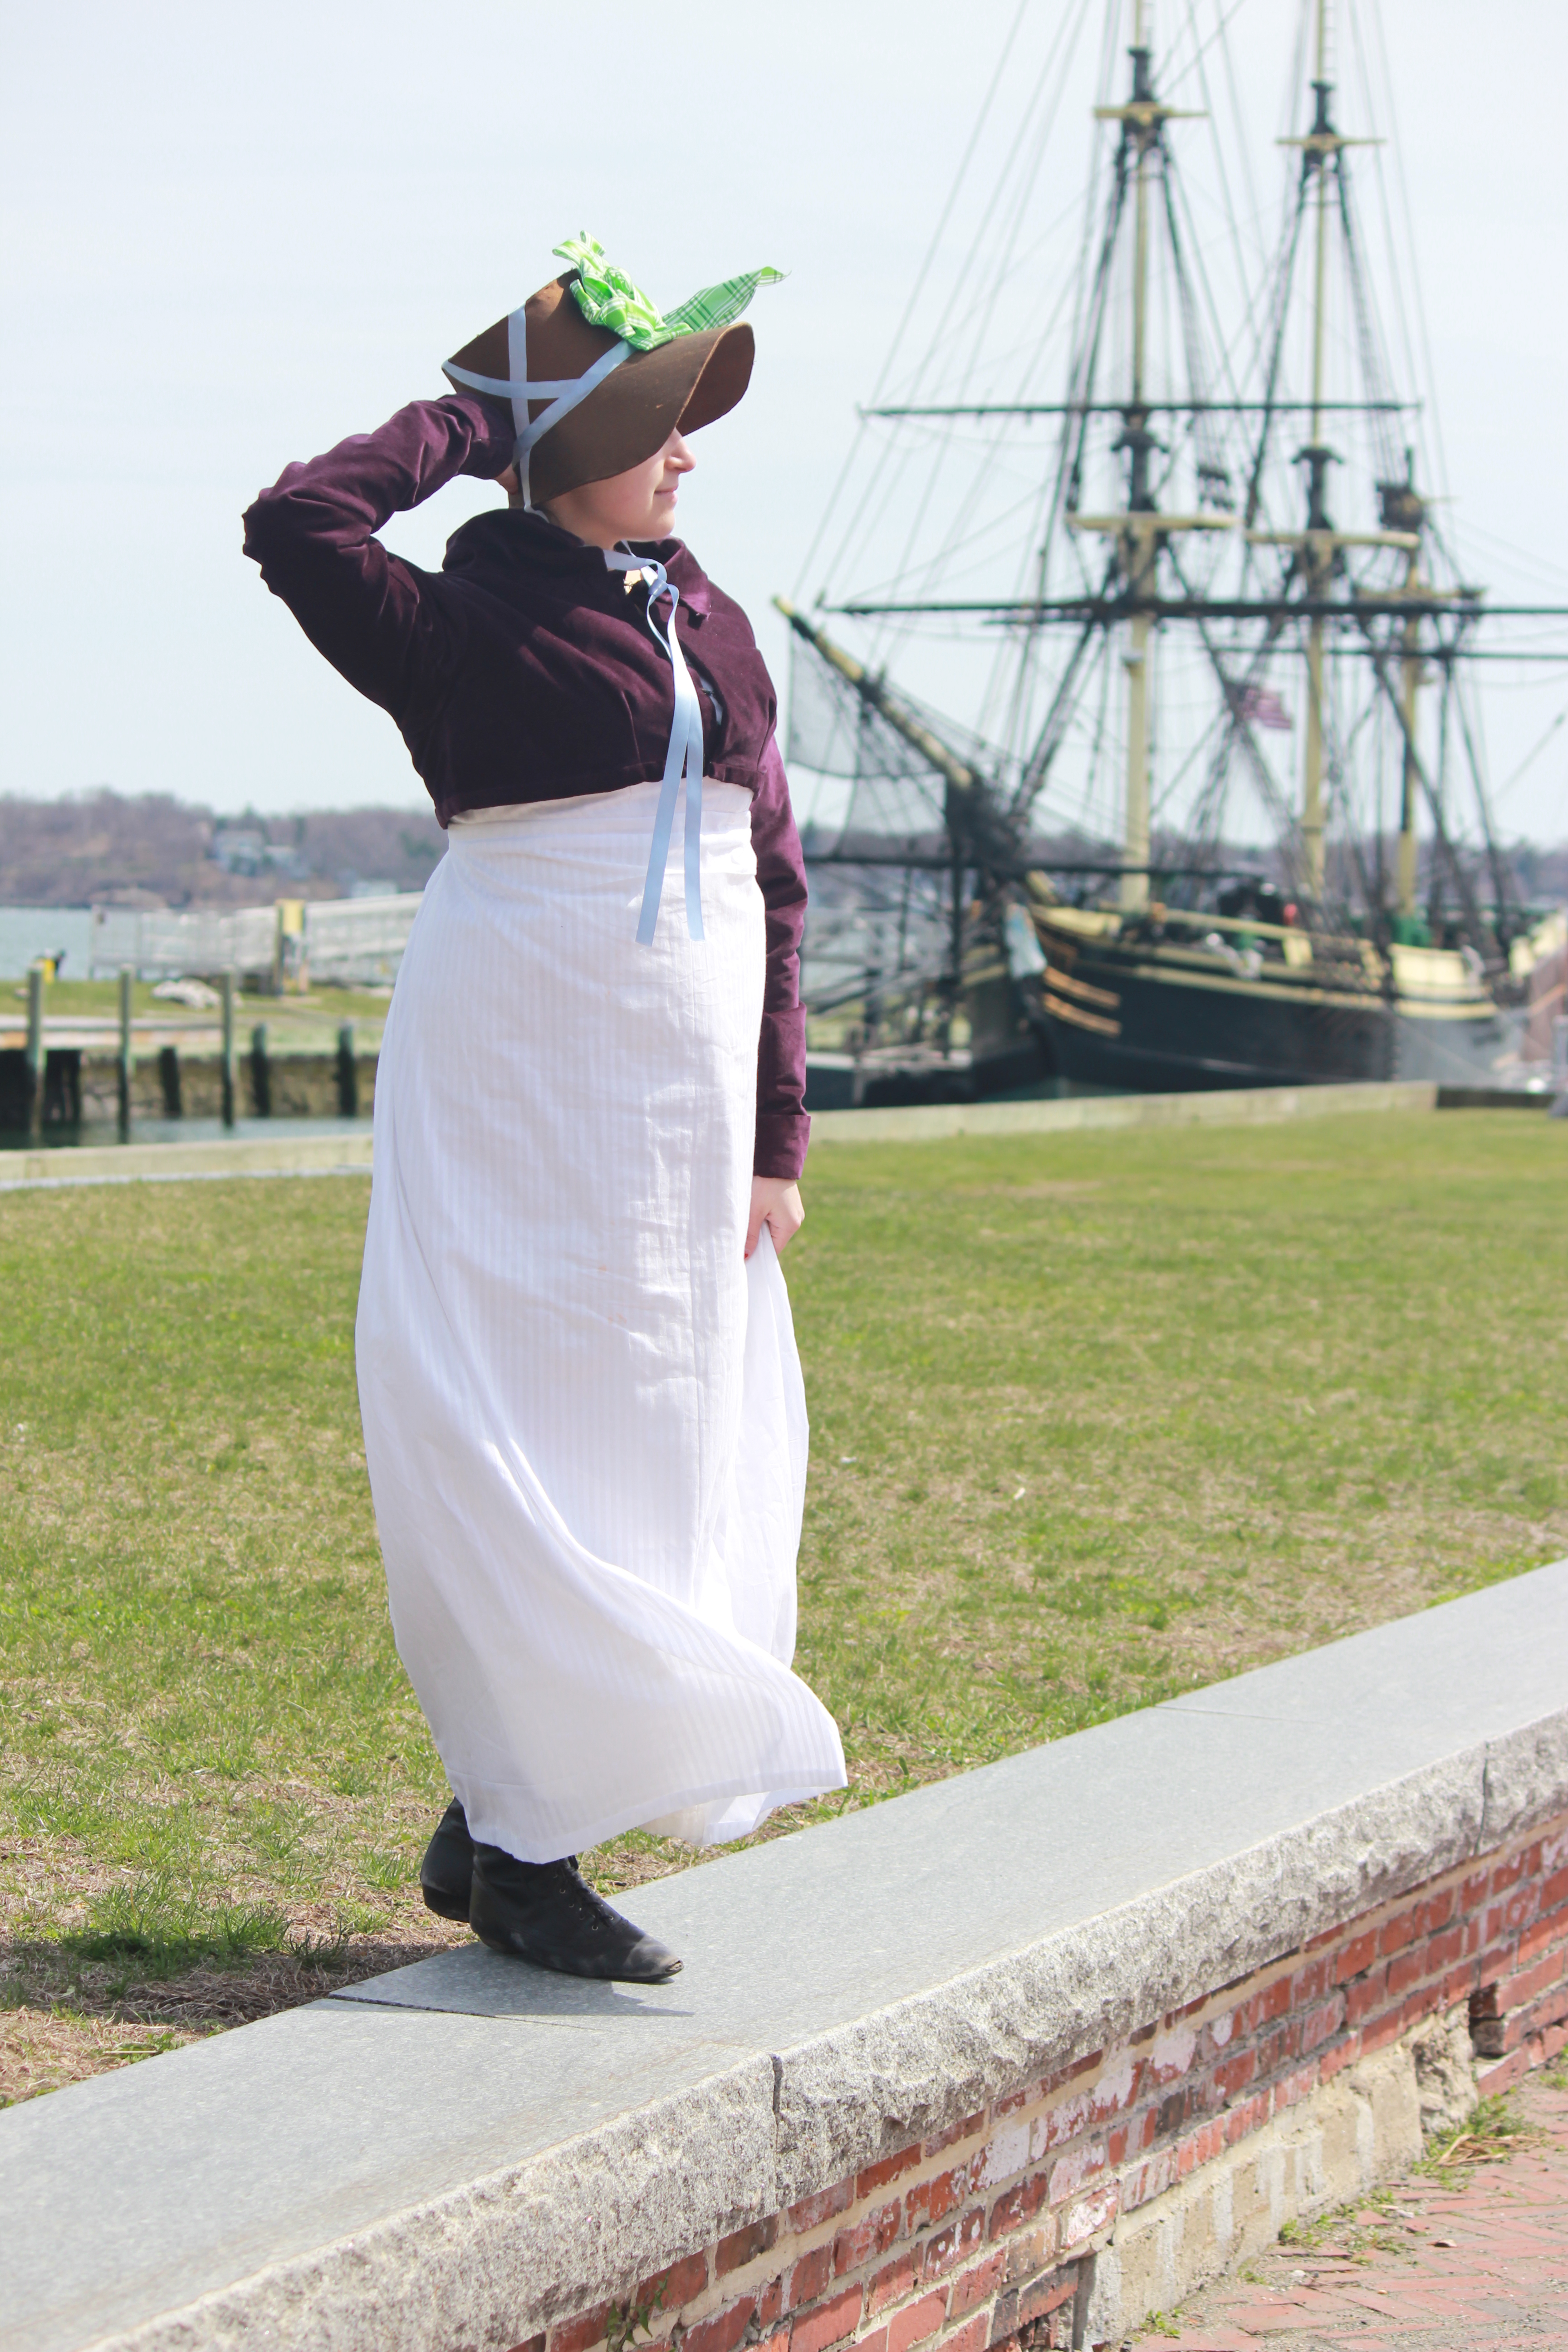
This is definitely something I plan to work on and try again. Perhaps at a summer picnic? We’ll see. It was a fun endeavor, despite the diving kites (and I had the opportunity to wear my new Tree Gown again!). Plus, there were pretty places nearby to take pictures!
Perfect photo opportunity.It was pretty windy, so hat holding was totally necessary!
In my opinion, it looks like a furry animal (goat, sheep, elk???) got entangled with a fringe machine. All those shades of brown are not pleasing together, to my eye. I imagine this must be very heavy.
What do you think? I’d love to hear from you if you have a differing opinon.