Meet Georgina!

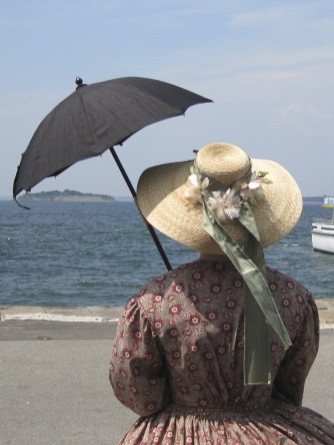
“Georgina” is the name I’ve chosen for my new 1858 cotton print day dress. Being a day dress from a new decade (the 1850s), makes her a fabulous new expansion in my wardrobe of historic clothes!

IMG_4675
Georgina: 1858 cotton print day dress.
IMG_4671
Back view.

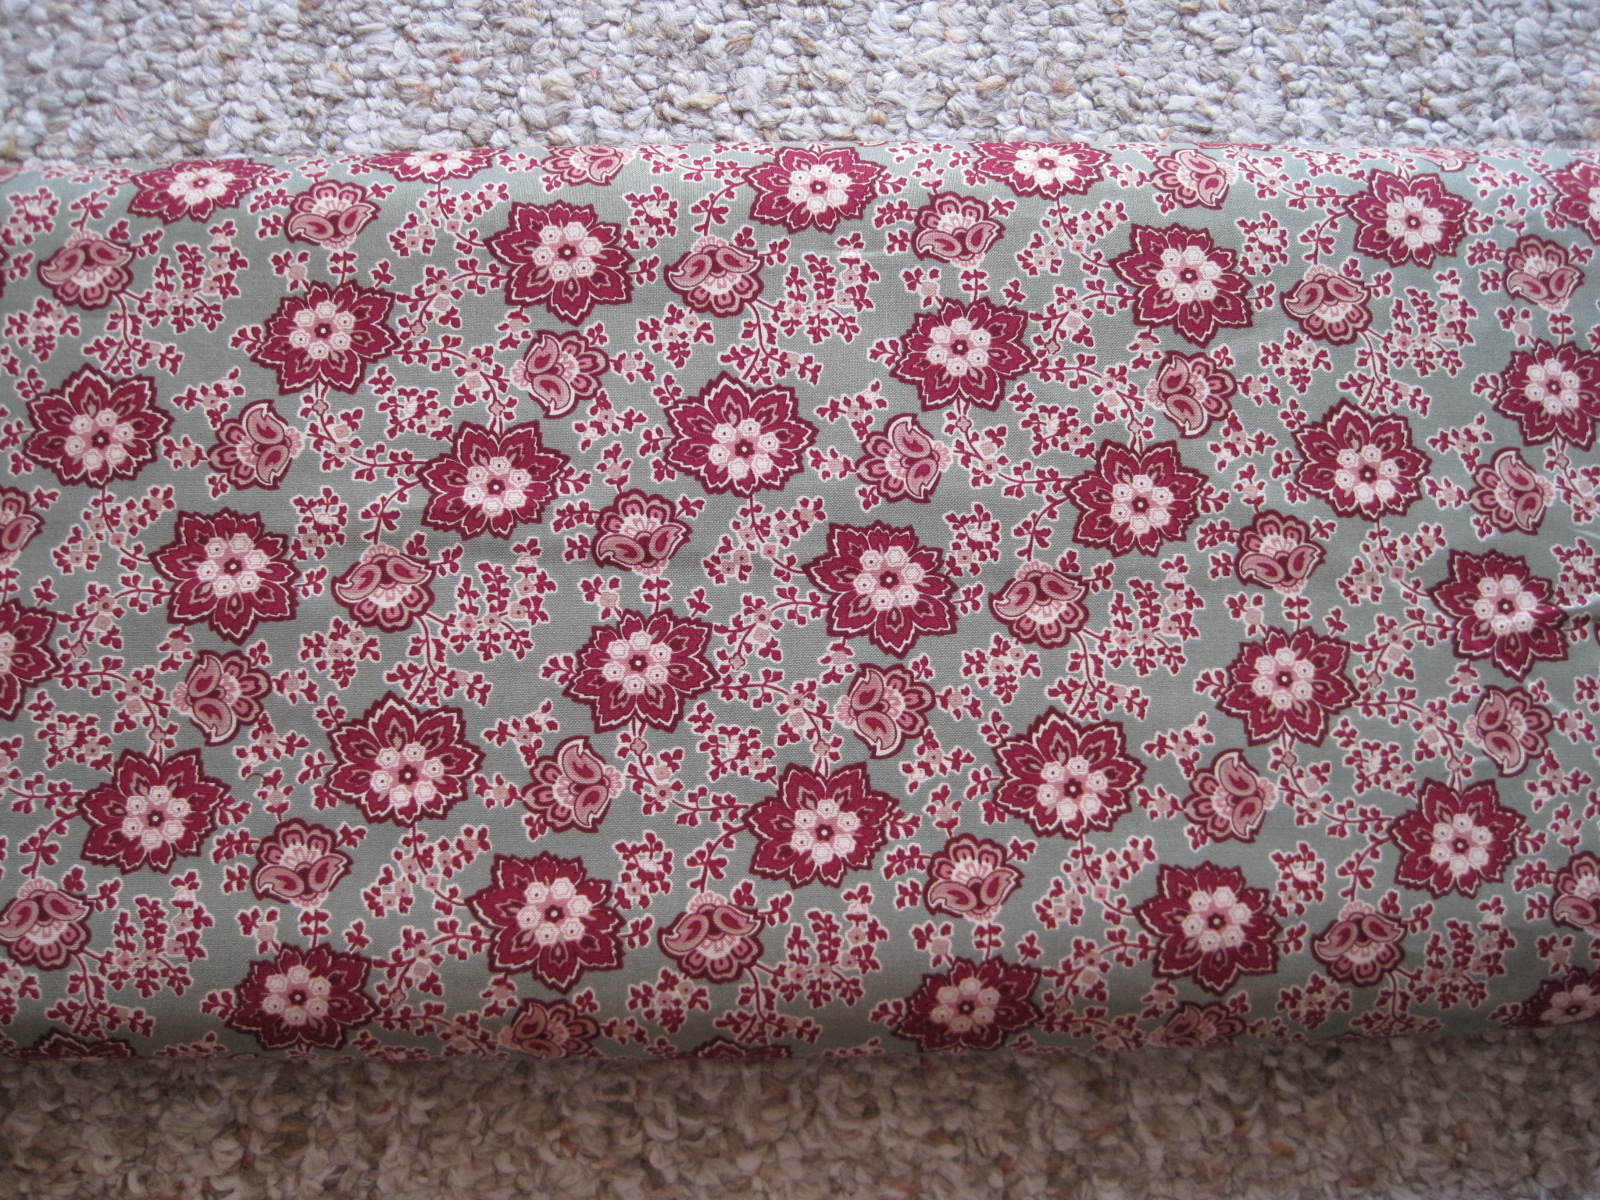
The dress is constructed from about 5yds of a Marcus Brothers reproduction historic cotton print I purchased earlier this summer. I used Past Patterns #701 and #702 bodice patterns as a starting point, though I had to make significant alterations to achieve a comfortable and pleasing fit, especially in the shoulder/armsceye area. I used the darted pattern for the fitted lining and the gathered pattern for the gathered exterior. The sleeves are the bishop sleeves from one of the patterns, though I totally changed the cuff design.

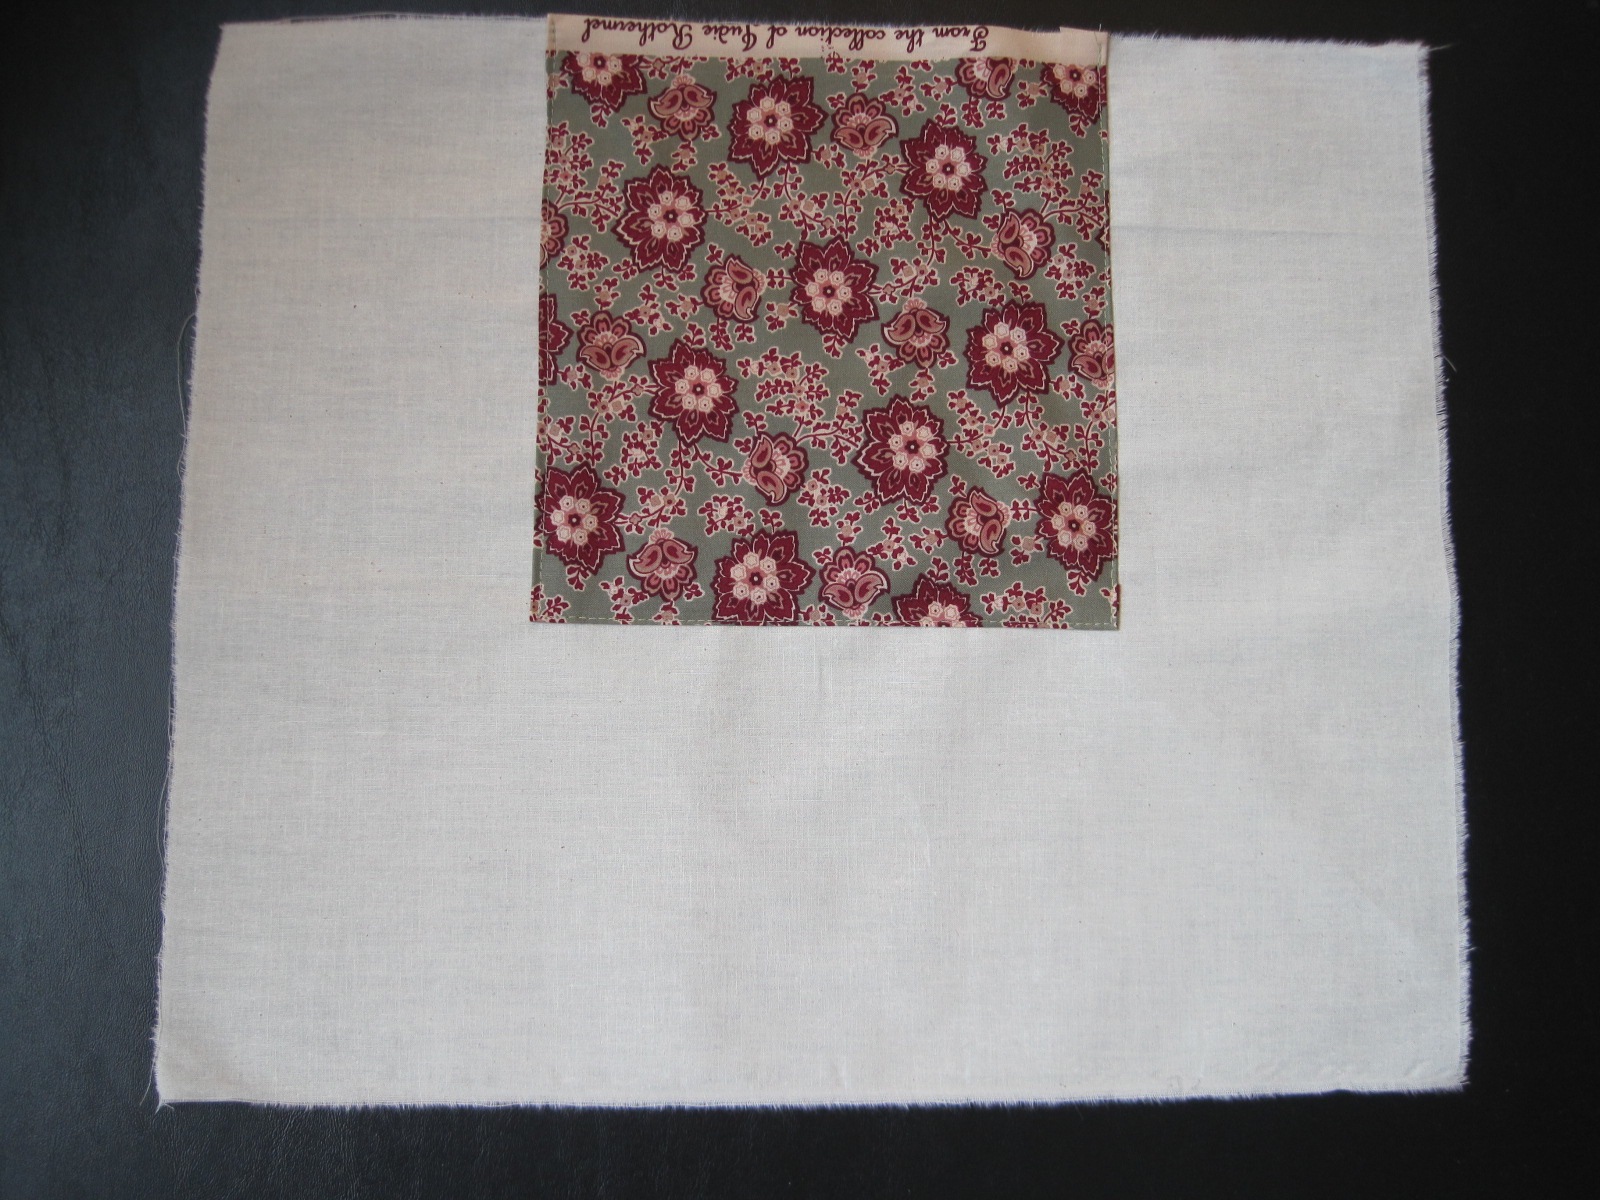
The cuff design and a lot of other fiddly details were taken from this c. 1852 dress at the Met (pictured below). If you zoom in on the cuffs on the Met website you can see that they look just like mine (pictured later in this post)! I also used the following design elements from the Met dress: piping at the neck and waist, gathers that are tacked down beyond the seam line, button closure on the cuffs, and cartridge pleating all around the skirt. I have a whole pinterest board of inspiring images for this dress and hat ensemble, but this dress is the one from which I took the most information and detail.

61.141.3_front_CP4
c. 1852 Dress, Met.

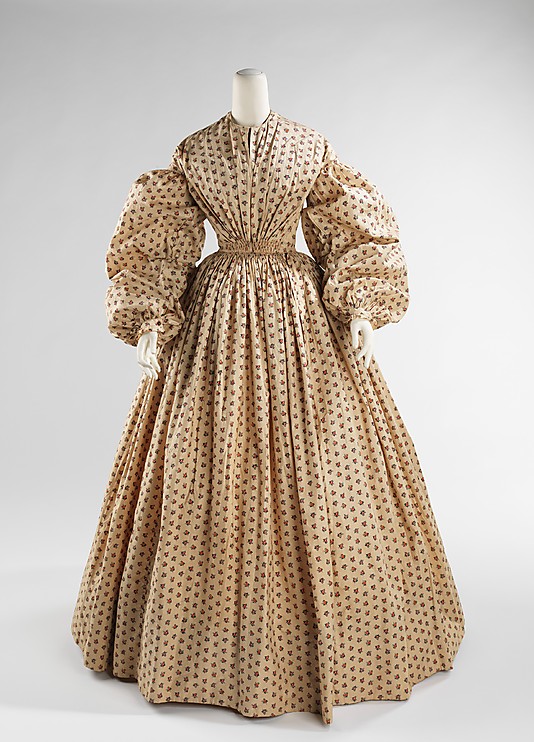
Here are a few pictures of the fiddly details I integrated from the Met dress:

IMG_4773
Gathers at the center back that are tacked down beyond the seam line. I like the controlled look these extra stitches produce.
IMG_4767
Self fabric cuff finished with a small ruffle. The cuffs close with a hand sewn buttonhole and button.

Georgina’s bodice is lined with white cotton. There are hand sewn boning channels sewn into the bodice in the front darts on each side and on the sides. The bones are then slipped in between the layers of fabric. I didn’t have the right length metal bones, so I used heavy duty plastic wire ties–but–I cut them in half the long way so they are much skinnier than normal (they just don’t look at all historically plausible in their normal width, in my opinion). Once they’re in the bodice, you’d never know they are plastic instead of metal.

IMG_4769
The proper left side of the bodice: hand stitched boning channels in the darts, front hook closure, a hook to attach the skirt and bodice together, and nicely finished piping along the bottom edge.

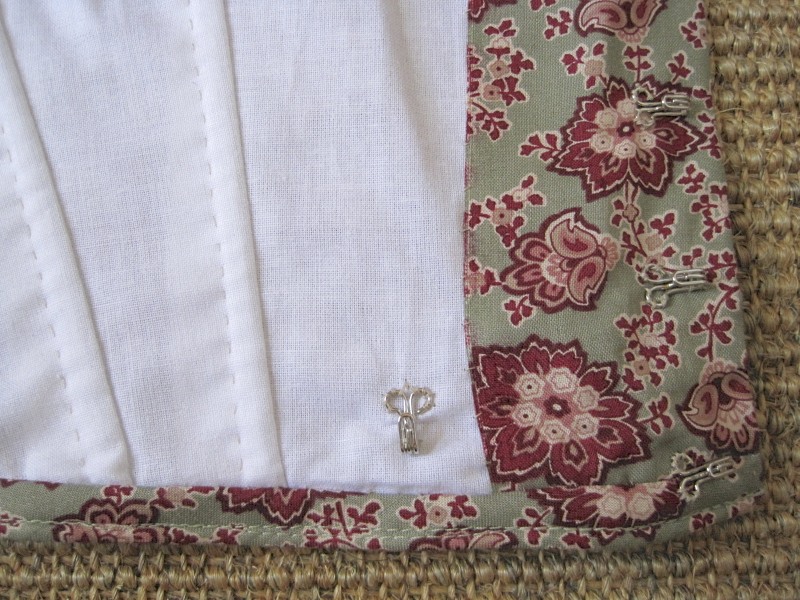
The bodice is finished at the neck and bottom edge with piping that is nicely whip stitched to the inside. There is also piping in the armsceye seam. The sleeve seams are french seamed by machine with the opening seam allowance at the cuff turned twice and stitched by hand. The other bodice seams are all machine sewn and the bodice is hand finished. The bodice closes at center front with hidden hooks and bars. It also hooks to the waistband of the skirt to keep the two pieces from gaping while worn.

The skirt has a wide hem that is hand stitched. The long skirt seams are machine sewn. The waistband is the same cotton print with an interfacing layer of canvas to create stability. The skirt is cartridge pleated and hand sewn to the waistband. There is a single layer of lightweight flannel folded into the cartridge pleats to give them a little more bulk than the thin cotton had on its own.

I also took the time to add pockets to this skirt! This turned out to be really useful for storing gloves, sunglasses, chapstick, a fan… with two pockets a lady can store so many things! Here’s how I made them and sewed them into the skirt:

IMG_4597
The pockets are muslin rectangles with a piece of the cotton print topstitched on the top center (this is the part of the pocket that can show while I’m wearing the dress and taking things in and out of the pockets).
IMG_4598
After the cotton print was sewn on I french seamed the vertical seam and then the bottom seam by machine, making sure that the cotton print stayed centered. On the left is what a pocket looks like with the french seams facing out. On the right is a pocket turned inside out to show the cotton print centered at the top.
IMG_4777
I left the top part of the vertical seam open and hand sewed that into slits in the skirt using a whip stitch through the pocket and the seam allowances (essentially under stitching the pockets, which keeps the muslin from rolling to the outside!). The pocket slits were made after the skirt was cartridge pleated and attached to the waistband, so the slits stop below the cartridge pleats (it was way too much thinking to try and figure out where the pockets should be before cartridge pleating the skirt!).
IMG_4778
It worked wonderfully, and the pockets blend right in and are hardly noticeable, even when they gap open! (I’ve turned the edges of the pocket so you can see the muslin pocket for this picture, but they don’t actually stay turned out like that, and you can imagine how the print fabric of the skirt blends right into the print section of the pocket).
IMG_4775
On the inside, the top edge of each pocket is stitched to the cartridge pleats to evenly distribute the weight of anything in them.

Georgina cost about $18: $15 for the fabric and about $3 for hooks and eyes. The various other fabrics (cotton lining, canvas interlining, etc.) were all in my stash from previous projects (yay!). I first wore Georgina last weekend to a vintage dance performance on George’s Island in the Boston Harbor. I’ve got pictures of the performance and pictures of island exploration coming up soon!

HSF #16: Eugenie Inspired 1857 Straw Hat

I recently participated in an outdoor mid-century dance performance for which the weather was an un-obliging 90-something degrees + humidity. Yup, not kidding. It was HOT! And we were dancing on asphalt. Luckily, we were out on an island in the Boston harbor and had a breeze. But it was HOT!

Anyway, more on that performance soon, because it involved a new cotton print day dress made from one of my recently acquired historic cotton prints! In addition to the dress, I also restyled a straw hat to go with the outfit and keep some of the sun off of my head. The hat has been used with various other clothes (1780s and Regency come to mind), but I had only ever added a simple ribbon to it rather than really styling it. This was the perfect opportunity to really make something of the hat!

I wanted to keep it simple and in the 1850s/60s, so I started by adding inspirational images to my pinterest board for this project. I visited the board many times before making a decision that I loved the shape of Eugenie’s straw hat in this painting. The hat has that nice downward curve in the front that sort of frames the face and accentuates the fashionable heart shape. The gauzy/tulle trim was a little whimsical for my purposes, so I opted for a more subdued and practical trim style on my hat.

Empress_Eugénie,_Hillwood_Museum,_1857
Franz Xaver Winterhalter (1805–1873) Eugénie of Montijo, Empress of France Date 1857

I started by wetting my hat in the bathtub then tying it with string so it would dry with the curve that I wanted to achieve in the brim. I also wanted the back to curve under a bit, so I let the hat curve on both sides.

IMG_4612
Tying the hat to create curves.

Once the hat had dried all that was left was to trim it! I chose to use green silk left over from Evie, my 1864 ball gown, and some silk millinery flowers. The silk is narrow hemmed on both sides and the ends are fringed, showing gold threads (the fabric is green/gold shot taffeta). The long ends hang down the back while the hat is worn, a style like the one below which you can see in the images on my pinterest board. I also added a bow on the front like you see in the images. Turns out that the bow is not quite centered… whoops!

56737fd6fd819eb71c2360fd4be5679f
LAPL, Magasin des Demoiselles, August 1858

And here is the result of my labors, and my fulfillment of the HSF Challenge #16: Separates. “Make a non-matching garment which can be paired with other items in your historical wardrobe to extend your outfit choices.”

IMG_4729
You can’t see the curve since the hat is sitting flat on the table… but you can see the trim!

Just the facts:

Fabric: A 4″ width of green silk 60″ wide plus a few scraps.

Pattern: None.

Year: 1850s generally, 1857 specifically.

Notions: Straw hat, silk flowers, thread.

How historically accurate?: I give it 98% (and that’s pretty high for me!). Straw, silk, more silk… The sewing machine was even invented by 1858, so the machine sewn hat isn’t totally out of the realm of possibility. The -2% is for the polyester thread.

Hours to complete: 2, not including time for the straw to dry.

First worn: July 20 for a vintage dance performance on George’s Island in the Boston harbor.

Total cost: I bought the hat a few years ago for probably about $25, the silk was leftover from another project, and the flowers cost some small number of cents since I got them as part of a large box for only $5! Let’s just say $26 total.

IMG_4617
Back view of the hat on my head. See how the front dips? This is also a sneak peak of my new gown, Georgina, to whom you will be formally introduced soon.
IMG_4623
Front view. See the dip?

At first I thought I had made the curve too pronounced, but when I look at the pictures again, I think I was pretty darn spot on! Woo! Completed new separates accessory for my historic wardrobe: check. Oh, and did I mention I’m in early on this project? The deadline is August 12!

Historic Cotton Print Eye Candy

I was recently able to visit a wholesale quilt fabric company to purchase historic dress fabrics for an upcoming mid-19th century performance on behalf of me and other members in my vintage dance troupe. It was such a treat! The majority of the fabrics we found were Marcus Brothers fabrics, but RJR also had a smaller number of really lovely fabrics.

IMG_4487
Marcus Brothers Gettysburg Print 1840-1860. To make an1850s day dress.
IMG_4486
Windham Fabrics Colonies Archives Print c. 1850 and Marcus Brothers Charleston II Print. For other 1850s/60s day dresses.

There were so many lovely things, but the best part was the prices! All of the fabrics were between $2.50-$3.75 a yard! You had to buy a bolt, which varied between 7 1/2 and 15 yds, but at those prices it’s still outstanding! We came away with fabric for the 1850s/60s dresses and bit more besides… There were some things that were just so fantastic they couldn’t be left behind!

IMG_4479
Marcus Brothers Old Sturbridge Village Print. To eventually make an 1840s dress! It’s going to be so pretty! I love this fabric and the colors (it’s actually yellow and pinkish flowers with brownish vines).
IMG_4481
RJR Print. I have no idea what I will make with this, I just love it. I find it to be so striking!
IMG_0422
Another sample of the lovely prints. These were purchased by a friend. One will be used for an 1860s dress, eventually, and the other will possibly be used for an 1840s dress, eventually.

Don’t worry, there will be upcoming posts with more on the 1850s day dress I’ll be making as well as the other much farther in the future projects. And I’m sure I’ll also have great pictures from the mid-19th century performance as well.

Of flounces and dance cards: Part II (Nahant Victorian Day 1860s Ball 2011)

Part II: …and dance cards

Dance Card from the Nahant Victorian Day Ball 2011

Last post, I shared with you my latest 1860s gown: Annabelle. This gown just recently had its debut at the Nahant Victorian Day Ball hosted by Vintage Victorian.

This ball included the use of dance cards, a practice I am aware of but have never participated in. It turns out that they are much more complicated than one thinks they might be! Why are the so complicated?

Well, it all sounds quite glorious and sophisticated. The Oxford English Dictionary defines a “dance-card” as “a card bearing the names of (a woman’s) prospective dance partners at a dance.” In stories and books, a dance card is a memento one can keep so that after the ball is over she can muse about beaus and flirtations. Practically, a dance card might help a person remember who his or her next partner is, what kind of dance the next dance is, or allow a gentleman to ask for a dance later in the evening.

But wait! There are complications and confusions! Does everyone have a dance card, men and women? Does a person take off his or her gloves before writing in a dance card? (I attempted this both ways: it is quite challenging to write your name while wearing gloves…) Does one exchange dance cards with a prospective partner or ask the name of the person and write it herself? (It seems more effective to swap dance cards with your intended partner to allow for ease of spelling, etc. and, in a more romantic sense, so that you have that person’s handwriting in your dance card.) How does one attach the card to her wrist so that it doesn’t get lost? How does one attach the card to her wrist without the pencil sticking out (so that her white dress isn’t marked!)? Really, a lot of questions popped up that would not have made themselves apparent without practical application. Also, at least at this ball, not having a prearranged partner did not necessarily mean that you were not able to dance. I was able to dance most of the dances of the night, despite my somewhat empty dance card.

Interior of my Dance Card from the Nahant VIctorian Day Ball 2011

Below you can see a few historic dance card images and below that some images of the ball! If anyone has any research on the use or history of dance cards, please share. I’d love to learn more about the etiquette of dance card use!

1884 Dance Card
1912 Dance Card
I believe this dance is the Contradance: Hull's Victory. (Nahant Victorian Day Ball 2011)
A different view of the same dance as above.
The Grand March. (Nahant Victorian Day Ball 2011)
More Grand March.

Here’s a video of the Grand March in action!

Of flounces and dance cards: Part I

PART I: Of flounces…

Flounced 1860s dresses seem to be pure confections: cupcakes iced with lace and frothy ruffles. That is the vision in my mind while I was looking for inspiration for my latest crinoline dress.

Fashion Plate from Godey's Lady's Book September 1859 "Dressed for a Party." (The dress on the right is the inspiration for my latest gown)

I already made one 1860s dress for myself. Named Belle, it is a dark blue satin and velvet gown with a three tiered skirt. It’s very heavy and a dark color: neither of those two features seemed fitting for a summer ball in temperatures around 80 degrees! And so I decided to create an all new gown… in my head this one is named “Annabelle.” (I hope you are also amused by the name!)

"Annabelle" my new 1860s ball gown

As you can see, there is one crucial element missing… the pink flowers! My goal is to make the flowers by hand from silk organza and to be perfectly honest, I ran out of time. I just decided to wear the dress as-is and finish the flowers later. I also ran out of time to bone the front, as you can see by the wrinkles along my tummy. No worries though, as I’m sure I’ll be able to wear this gown again.

"May I have this dance?" Side view of Annabelle.

In order to be to light and breathable, Annabelle is constructed entirely of cotton. The skirt has a medium weight cotton foundation to which cotton voile flounces are attached. The bodice is three layers of cotton for the sake of being opaque: two of medium weight cotton and one layer of voile. The layers are flatlined together and treated as one piece. The flounces on the skirt and bodice are cotton voile edged in narrow white lace.

This gown was flat patterned using research from books by Janet Arnold, Norah Waugh, and Kristina Harris.  View this post about patterning from my Project Journal: Women’s Tailoring to see which titles I used and get a smidgeon of bibliographic information. The skirt pattern is fairly simple: a big tube cartridge pleated at the waist. The bodice has narrow v-shape seams front and back with puffed sleeves and a flounced bertha. It is worn over a chemise, corset, double thickness bum pad, hoops, and petticoat.

While this dress is eventually intended to be a reconstruction of the dress in the 1859 fashion plate above, I was also inspired by these other, similar fashion plates for further information. Enjoy!

Fashion Plate from Godey's Lady's Book October 1859 "The Soiree"
Fashion Plate from Godey's Lady's Book August 1859 "Godey's Fashions for August"

Bolero and Zouave jackets of the mid-19th century

Throughout the 19th century, civilian clothing for men and women imitated all sorts of military uniforms in cuts, trim styles, and names. Let’s look at some women’s styles from the the mid-19th century inspired by military wear.

First: the Bolero style jacket

From Peterson's Magazine August 1865

Popular during the mid-19th century, the Bolero is simply a short jacket, usually worn open in front, often fastened at the neck. In the mid-19th century Bolero jackets were worn in all sorts of colors and with all sorts of trim; however, they were often seen in military uniform colors and with trimming styles reminiscent of military trimming, especially braiding.

1863 Bolero from the Metropolitan Museum of Art
c. 1860 Dress with Bolero Jacket and braid trimming

Second: the Zouave style jacket


From December 1859 Godey’s Lady’s Book

The Oxford English Dictionary defines a Zouave jacket as follows: “A woman’s short embroidered jacket or bodice, with or without sleeves, resembling the jacket of the Zouave uniform.” The following quotes are included in the OED definition:

1859    Ladies’ Treas. Sept. 285/1   One of the most decided novelties of the present season is the Zouave jacket.
1859    Ladies’ Cabinet Dec. 335/1   Nothing can be prettier for the interior than the little oriental jackets which we call to-day Zouaves.

During the 19th century, this style gained the most popularity during the 1850s, when French Zouaves were fighting in the Crimean War, and during the American Civil War in the 1860s. You can see a few images of Zouave uniforms by looking at this post from a few weeks ago.

The description of the above image from Godey’s is as follows: “Morning-dress for young ladies, of plain merino or cashmere; the skirt trimmed by an inserting of velvet, several shades darker than the dress, with a row of buttons passing through it, and bordered by a rich braid pattern, known as the Greek. The Zouave jacket, which we have before spoken of, forms the waist. It is modelled from the Greek jacket, and has a close vest, with two points; the jacket, itself, rounding over the hips, and fitting easily to the figure. A Gabrielle ruff, and neck-tie finish it.”

Further information about this style was included in the Chitchat section of the same issue of Godey’s: “The Zuoave jackets may be made in black cloth or velvet, for home wear, with skirts whose waists have “outlived their usefulness.” They are especially suitable with dark silks, and a waist of this kind with a black silk skirt will do any amount of street service. Black silks are trimmed with a combination of black and crimson, black and purple, etc. when intended for dress occasions.”

c. 1862 Dress with Bolero from the Metropolitan Museum of Art

Given the description (above)  from Godey’s about the Zouave jacket fashion plate, I think this c. 1862 dress from the Metropolitan Museum of Art falls into the category of a Zouave jacket rather than a Bolero. Clearly, this yellow dress has a jacket with a double pointed vest silhouette, rather than the Bolero style of the jacket with a blouse underneath. Regardless, this dress is quite fabulous! The pattern matches the trimmings exceptionally well in terms of style, and the whole ensemble is quite wonderful (including the crisscross braiding and tassels!).

The quotes are from the digital Godey’s excerpts at the University of Vermont, which can be viewed here.

A waltzing Zouave?

In my last post (Returning Heroes 1860s Ball 2011) I mentioned that one of my favorite moments of the night was dancing a waltz with a Zouave. First of all, what is a Zouave? Secondly, why would I be dancing a waltz with one at at 1860s ball???

In the 1830s, the French military fighting in North Africa incorporated a tribe of fierce fighters into their ranks. These original soliders were renowned for their skills. In fact, in 1852 the French created three units of Zouaves to be entirely of Frenchmen. These French Zouaves achieved legendary status for themselves during the Crimean War (1854-1855). More detailed information about their involvement can be found in this history of Zouaves (this site also has some great pictures of Zouave regiments). The French Zouaves were quite inspirational to American forces during the American Civil War: both the Confederate and Union armies formed Zouave regiments who wore imitations of the French uniforms.

114th Pennsylvania Infantry (1861-1865)
Zouave Music Sheet 1850-1865

Now we know what a Zouave is. Why would I be dancing with one? Well, the idea of the Returning Heroes Ball is that “Gentlemen in uniforms of both sides of that great conflict are welcome.” So it is perfectly reasonable for a Zouave be dancing alongside the formally clothed men at the ball. Fun!