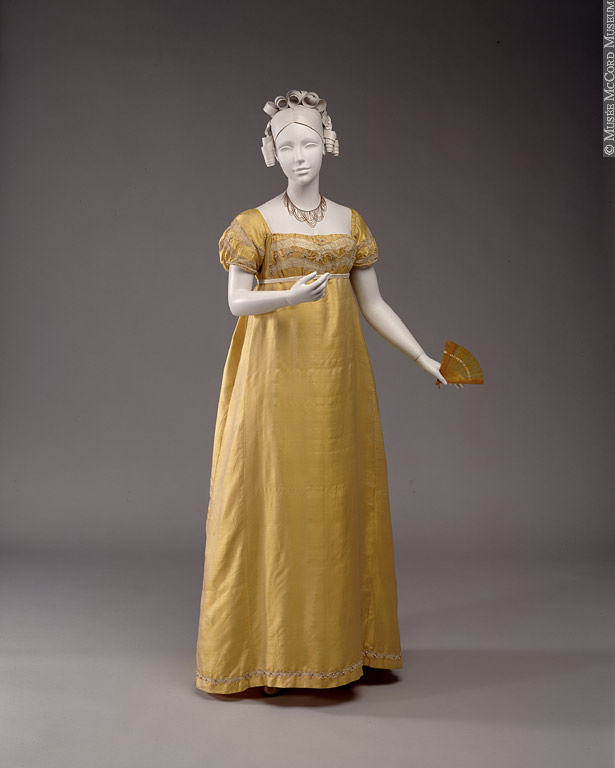
Isn’t this a cute fashion plate??? My favorite thing about it is her bright red shoes! My second favorite thing is that her bright red shoes match her red bodice! So cute!
First, this makes me want to wear colored shoes to a Regency ball. Often you see black or white in fashion plates, and our dance troupe tends to wear white to perform and also to balls out of habit, so without even thinking about it I usually pull out the neutral colored shoes… BUT! Extant shoes come in all sorts of colors, although maybe not quite as bright as these red ones. You can see some of them on my pinterest page here: Shoes: 1790-1829.
Second, that red bodice reminds me of this one that Natalie Garbett made for the HSF. Is it possible that this red one, like Natalie’s, is a separate piece from the dress? That would allow for more wardrobe options, certainly. I’m going to go on the assumption that it is, and congratulate this young lady in the fashion plate for being so coordinated and versatile in her wardrobe.
Separate bodice by Natalie Garbett. Lots of research information about this style on her blog: here.
So… I’ve got a new dress to wear to an upcoming Regency ball that doesn’t really need a separate bodice to jazz it up. Do we think I can wear I can wear fun colored shoes without a separate bodice? I think probably yes, given that there are lots of extant colored shoes and I know of other images that show colored shoes. And now I have an excuse to wear colored shoes with a white dress! Fun! Maybe I need to make a separate bodice, too?
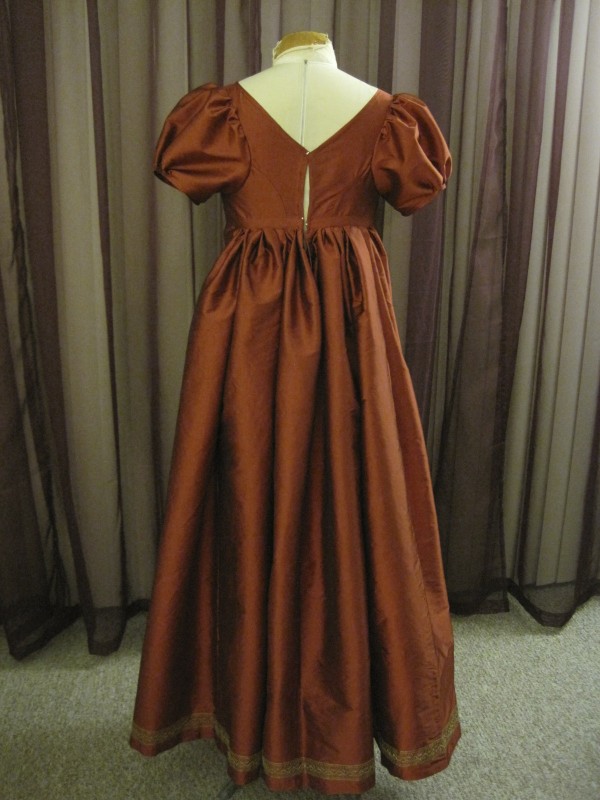
Historical Sew Fortnightly (HSF) Challenge #1 complete! It was actually completed a few days ago, which I am super pleased about. Even better is that it is for a Regency ball in February, and it is entirely complete a full month ahead of time! All the trim, all the closures, everything! All I have to do on the day of the ball is put it on. Wow! Usually when I wear a new dress to a ball I’m furiously sewing right up until the end and often all the trim doesn’t make it on (that’s what happened with my 1820s green dress back in December, remember?).
The facts:
Fabric: 4 yds red and black shot polyester
Pattern: The bodice front was draped, the back was adapted from my 1812 square neck Ikea gown, and the skirt is the same as the 1812 square neck Ikea gown, with the pattern originally from Janet Arnold’s Patterns of Fashion
Year: 1813
Notions: 3 yds metallic gold bobbin lace, hooks, and little brooch bits
How historically accurate?: The silhouette, cut, and style are accurate, as is the interior finishing (all flat felled and bound edges… it’s quite pretty!). The fabric is obviously not accurate and neither is the lace fiber content, though the style of it is. The closure is accurate. The little brooch bits are accurate in style, though not in materials.
Hours to complete: I’m so bad at estimating this. Let’s say 48 hours.
First worn: Hasn’t been worn yet! Its first wear will be in February 2013.
Total cost: Approximately $26
Now for other details!
Well, first, here’s a closeup of the bodice, so you can actually see the details and the little brooch bits. I’m super pleased with them, because I think they really finish off the bodice and add a little extra touch. I got them from New York and Company, actually. They were part of triple drop earrings, which I took apart. I kept the bottom drop and put them on clip backs (so now I have matching earrings for the dress!) which you can see in the picture below. And the best part is that one of the sections had a missing gem, so the cost of the earrings was refunded by NY&Co and so the total cost of the earrings is $0! Awesome! (It worked out perfectly, because I only used 5 sections of the triple drop earrings, so the damaged one wasn’t a problem.) Of course, the materials used in the earrings are not at all historically accurate, but I’m ok with that, for the cost (yay!) and the fact that they do have the right look.
Little brooch bits!Single drop! Clips! Perfect!
And here’s the back. As you can see, it doesn’t quite fit Squishy in the back, but it shouldn’t have trouble fitting me. I love the drape of the fabric! Now that all the raw edges are enclosed and the polyester can’t fray everywhere, I am totally happy with the fabric choice (bargain!). The photos don’t really do justice to the fabulous gold lace at the hem.
Aren’t those gathers and folds lovely?!?
The dress is entirely hand finished and mostly hand sewn. Originally, I was going to make it all by machine, but then I had sewing parties and things that required hand sewing, and I just didn’t feel like lugging out the machine, so I wound up hand sewing a lot of it, which was quite satisfying. There’s one side back seam sewn my machine, I think the long skirt seams are sewn by machine (though I can’t remember, because I started this dress back in October or November), and the waistband was sewn by machine. Actually, it was so much easier to keep the width consistent using the machine than when sewing it by hand.
The only other information to share is my inspiration for the dress.
For her neckline and sleeves: Comtesse de Tournon by Ingres, 1812.Another neckline inspiration: L’Art de vivre au temps de Josephine.For the overall silhouette and the trim style: 1810.One more neckline inspiration and another similar dress built by Natalie Garbett. Here is her post about her 1812 gown with a v neck.
Clearly, I need a Kashmir shawl to complete the ensemble… I have a pashmina that sort of looks the part, so I’ll have to try that out at the ball. Stay tuned for more pictures of this dress in about a month!
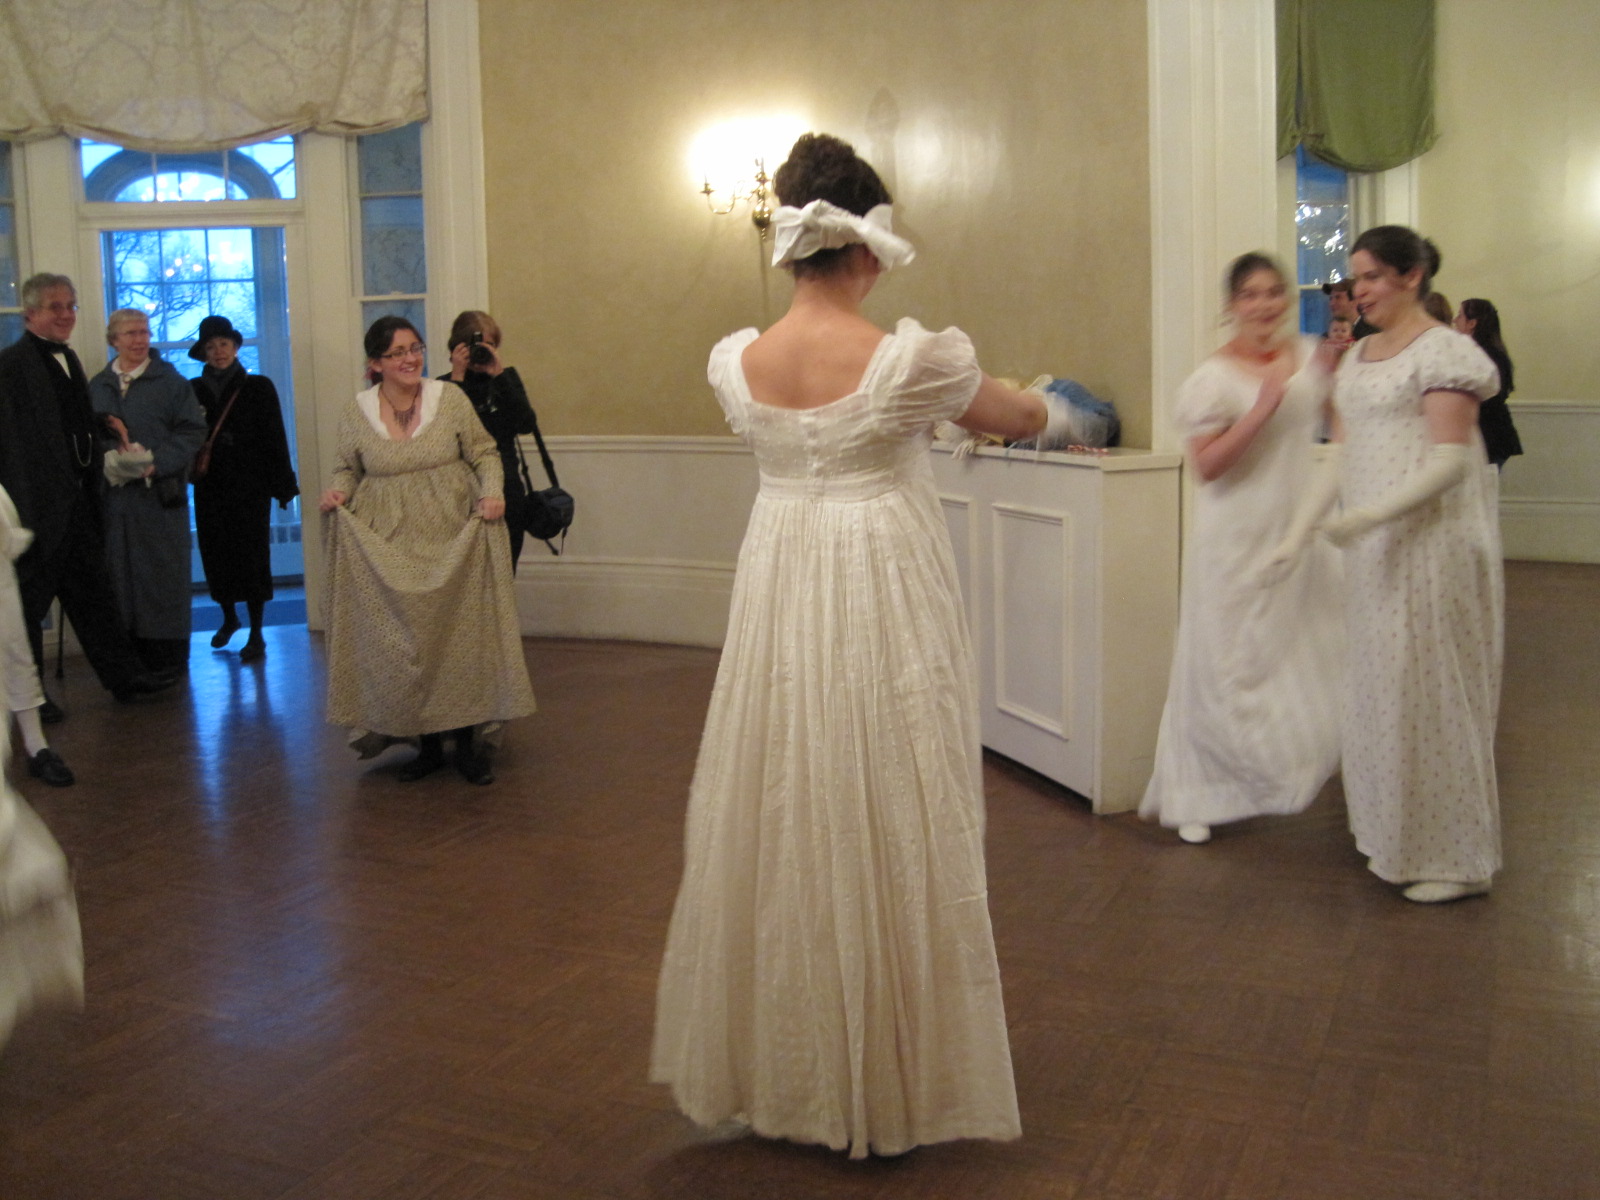
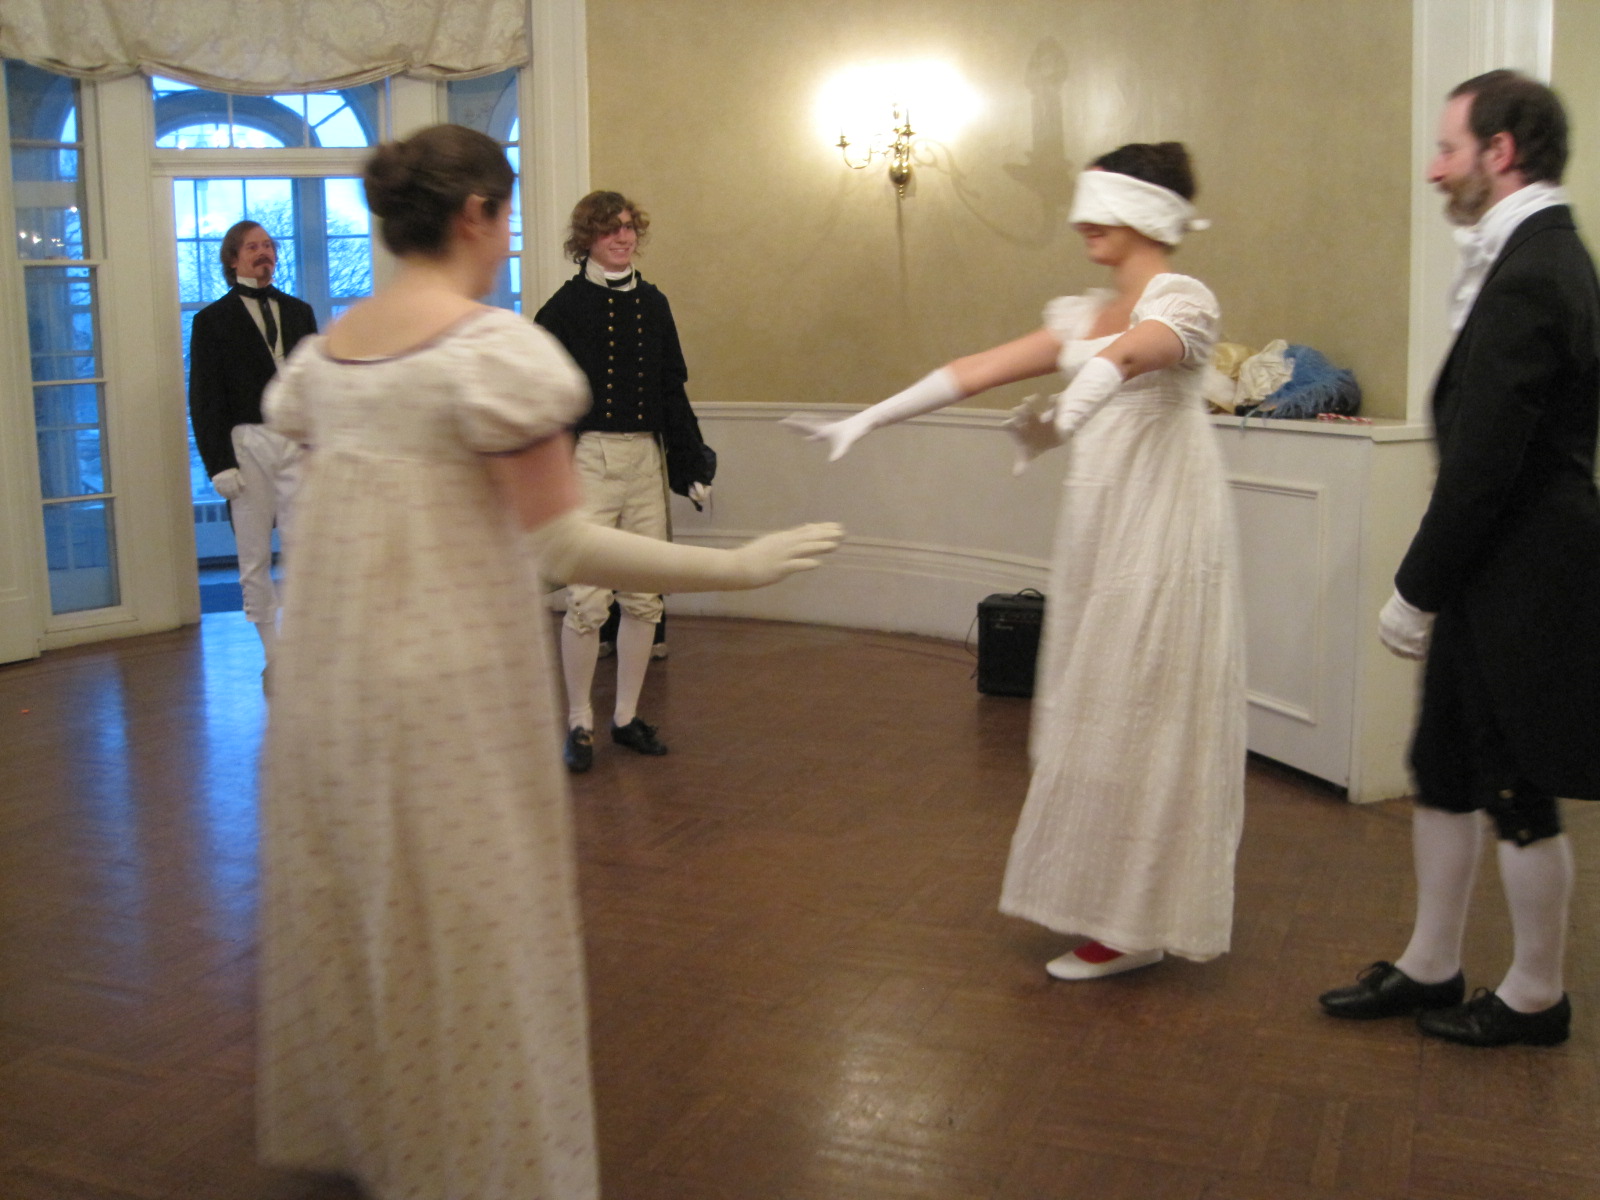
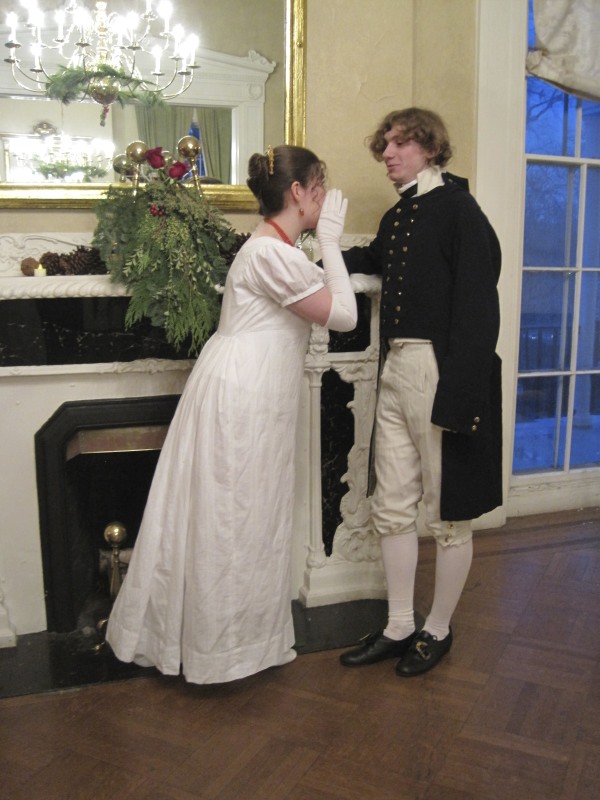
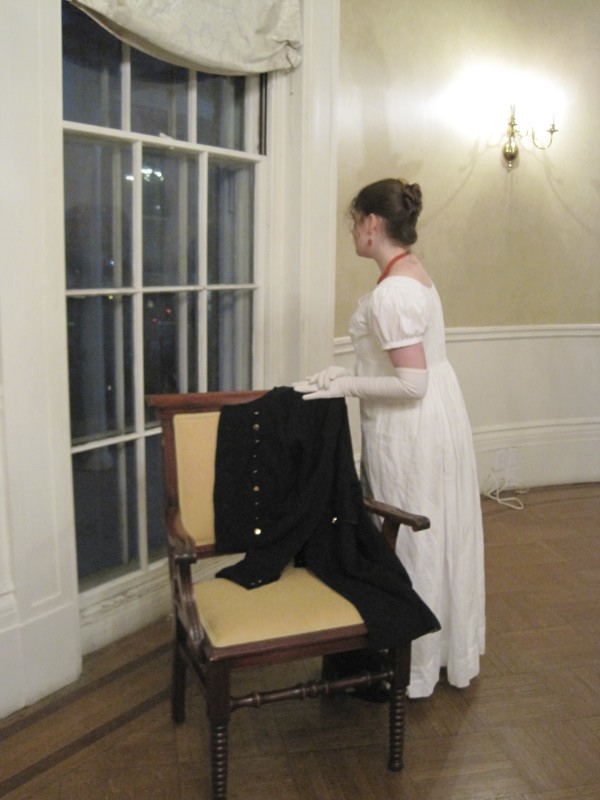
This past weekend, the Commonwealth Vintage Dancers participated in a Regency Christmas party for a public event at the Charlestown Navy Yard. It’s the same venue as the Guerriere Weekend we participated in a few months ago. I wore the same 1812 hand sewn gown I made for that event, which you can read more about in this post. We danced and played games while the public wandered through, watching and taking pictures, and eating the delicious cookies and punch we provided. We love that space, so of course we enjoyed being there again. I took the opportunity of the Christmas party to try out my red clocked stockings from American Duchess... they were perfectly fitting for the Christmas cheer!
Posing with the lovely tea set that was set out to add ambiance to the scene.Playing Blind Man’s Bluff.I was having trouble finding a person…But I had cute stockings!So someone had to be made a sacrifice!Yay! I caught someone!Another glimpse of my red stockings as I passed off the blind fold.After the party we stuck around to get some extra pictures. I had to get a real pose with my stockings!Then we staged a few fake scenes to take pictures for possible CVD advertising opportunities.It was one of those “look into each other’s eyes” scenes, which I somehow get put in rather often… Anyway, I like this picture because you can see my hair. I took a long time (and a lot of bobby pins) putting it up and really liked the result.Then I grouped some of the dancers to get some nice “as though you are dancing” shots. This is how we would begin and end a dance.Back to scenes. Aren’t these scenes by the fireplace super cute?Last one. Missing Mr. Darcy, perhaps?
As you can see, it was a fun Christmas gathering. We look forward to participating in more events at the Commandant’s House next year!
On the subject of summer picnics… We recently took advantage of a sunny Sunday afternoon to view two of the historic houses in nearby Waltham, Massachusetts: Stonehurst (completed in 1886) and the Lyman Estate (built in 1793). We ended the afternoon with a relaxing picnic on the lawn of the Lyman Estate. Pictures often say more than words, so without further delay… pictures!
On the walk up the drive to Stonehurst, I passed this street sign, which was just begging to be photographed!The main stair in the front hall of Stonehurst.Also in the front hall. Stonehurst has all these cute little nooks and benches. This one was my favorite!Then on to the Lyman Estate, which has a very different feel. Light, airy, and Grecian… perfect for Regency!The ballroom of the Lyman Estate house.A fireplace at the opposite end of the house. Those tiles are really neat.One of the bedrooms upstairs. This house is often used for weddings, so I think this is often the bride’s dressing room.A painting of the USS Constitution! Fitting, considering our summer adventures relating to the Constitution. 1805.Lovely flowers outside the front door.The greenhouses at the estate are open to the public year round. This was where I visited last year for the Regency Holiday Tea.Finding an appropriate picnic spot.Taking a turn about the garden. Isn’t this a super cute picture???
Summer is mostly over, here (although we did just have a nice, warm, sunny day that felt like summer…), but I haven’t finished sharing about summer picnics! To bring a little summer to you, here are a few pictures from a Regency picnic in the Boston Public Garden in August. The Boston Public Garden was established in 1837, so we were a little early, in our Regency dresses.
Laying out the simple fare on our wide expanse of blankets.Taking a walk around the garden, you run into all sorts of fun picture taking opportunities.I don’t think I’ve ever been to the garden in August. I have usually been there in May, when all of the flower beds are bursting with tulips. I didn’t realize they change the flower beds to tropical things! I was super surprised!I think that is George Washington.Not the usual Boston flora.Look at the size of those leaves!And hibiscus!I feel so tall sometimes…Squirrel? He was busy scrambling to get food for the winter.Watching the swan boats pedal by.It wouldn’t be Boston without the ducks and geese…
As I mentioned in my last post, the one where I shared pictures of my new 1812 under garments, there aren’t a whole lot of extant examples of sleeveless undergarments from the Regency period, so I had to take the research images I could find and extrapolate what was necessary for my dress from that information. Here are a few extant examples of sleeveless underdresses.
Early 19th century. Petticoat. The Met.Petticoat. 1800. Cotton. National Trust.Early 19th century cotton petticoat/underdress. MFA Boston.
It is fitting that this last one was worn by someone who lived in Boston, MA (that’s where I live). Neat! And isn’t the whitework at the hem lovely? Fashion plates and extant underdresses and petticoats from the early 19th century not uncommonly have hems that had white work and lace decorations. I didn’t incorporate that into my underdress… but maybe in the future I can make another such garment and include that detail!
Natalie Garbett also wrote a blog post about a sleeveless underdress that she made, which you can read by clicking this link. It’s super cute (and has hem trim)!
I actually didn’t find any sleeveless chemises, though I did come across mentions of them. I suppose a lady could have tucked up the sleeves of a normal chemise, or worn a sheer dress with the sleeves of the chemise showing through. Here’s an example of an early 19th century chemise with sleeves. This one is pretty ruffly, but the basic shape is the same, as is the gathering tie at the neck.
Remember I recently shared with you the square necked 1812 Ikea curtain gown? And I promised pictures of the accompanying undergarments? Now is the time! Please forgive the silly black and white checked walls in these photos… I took the opportunity of having people around to take photos of me in the garments, despite the lack of a fitting setting.
Chemise and short stays.
The chemise is constructed of linen, and despite its rather cute a line shape, it is actually just a tube with shoulder straps. The front has a draw string across it to help it shape over the bust, which I think is part of the reason the front looks so evenly distributed and full. As you can see, I chose to make a sleeveless chemise, specifically for the square necked gown.
Back view.
The back of the chemise is cut low and square to fit within the shape of the square necked gown. Next is a closeup of the stays so you can see more detail.
Short stays.
In this photo you can see the drawstring on the chemise. You can also see the front lacing stays better. They are essentially the same basic shape as my longer pink stays, with a few differences. The pink stays have a simple front, back, hip gusset, bust gusset construction, whereas these new stays have a back piece, side piece, and then front piece with the bust gussets. For this pair, I think I actually could do without one of the bust gussets, since it looks a little big. But it’s WAY too late now to change that! I had to cut the area under the arm pretty low to be comfortable, and I also had to move the straps a few times, especially in front. If they are too far out they cut into your arm joint when you try to move–not comfortable, let me tell you–but they needed to be pretty wide in order to accommodate the wide neckline of the square necked gown.
The stays are white cotton twill layered with two layers of cotton canvas, except the gussets and straps, which are just one layer of the canvas and one layer of the twill. The stays are bound with white cotton bias. They are boned (only at center front to stabilize the eyelets) with plastic wire ties. Despite the light boning they are quite stable when laced up. And let me just say how much easier it is to get dressed when your stays lace in front! So easy! Love it!
These stays were stitched by machine. I needed them done quickly and I wanted to be able to dance and sweat in them without having spent lots of hours hand sewing them. Also… at some point when I washed them (after the 1812 Guerriere weekend, when they were wet through from sweat) they got streaky. Now they are mostly off white, but still have bright white streaks. So I didn’t feel the need to make them super pretty and spend the time hand sewing them. I did hand sew the eyelets for the lacing. I thought about doing spiral lacing, but then when I made the eyelets I forgot to space them that way… so they don’t spiral lace.
Under dress.
The other new undergarment is this under dress–needed because of the sheerness of the dress fabric. So here it is. The skirt is the same dimensions as the square neck dress, and mounted to the bodice in the same way. The bodice also uses the same pattern, except that the front is not gathered. There is a small tuck on each side of the bust, but that’s it. The straps on the under dress are similar to the straps on the chemise and stays, so that they don’t interfere with the sheer sleeves of the gown. The under dress ties in back at the top and where the waist is. The day of these pictures one of the lower ties came off, so you can see the gap where a tie would normally be. Below the ties are an opening of about 8″ that allows me to get in and out of the garment. It all looks quite a-line in these photos, but with the dress on top the whole thing looks much more columnar.
Back of the underdress with the missing tie.
I think I’ll do another separate post with some of my research images for the sleeveless under garments. So for now, this is it!
My favorite picture of my new 1812 gown, from the Guerriere weekend at the Commandant’s House at the Charlestown Navy Yard in Boston.
Ok, I admit that it is not a very clever title, but it fits the subject matter perfectly!
First, some details. This 1812 reproduction gown is constructed from 100% cotton curtains from Ikea. Yes, Ikea. You never know where you’re going to run across fantastic fabric. In fact, these Matilda curtains were made in India, which is very fitting for a Regency gown, because cottons in the early 19th century were being imported from India. It is very lightweight, sheer gauze with a 1/8″ vertical stripe spaced every 1″ across the fabric and with woven in dots every 1″ vertically. I bought a package of two curtain panels, each 55″ wide by 98″ long.
Does it look like a curtain dress? I’m sad to report that Mr. Q didn’t realize, until I explained it to him, that the idea of a curtain dress is a famous theme from Gone With The Wind… How could I have attached myself to someone who doesn’t know that? Opposites attract?
The skirt for the gown is a two panel tube, 43″ long by 110″ circumference. The front is stitched flat to the waistband and the remaining fabric is tightly gathered into the back across 13″. Center front and center back are actually the middle of the panels, so that the two seams are lost in the back gathers. The gown opens center back with hooks and eyes on the bodice and a narrowly hemmed slit that extends 8″ down the center of the back panel. The slit is also lost in the gathers. The waistband is 1″ wide. It was cut on the cross and has long tucks taken all around it so that it has three stripes spaced close together.
You can really see the difference between the flat front and the gathered back in this side view.
The bodice pattern is taken from Janet Arnold Patterns of Fashion I “c. 1806-1809 frock” and adjusted for fit and so that the entire front panel has a 2:1 gather ratio at the top and bottom (essentially, just more gathers than the original dress). What I really love about that pattern is the simplicity of the neckline. The bodice is cut separately from the straps, and the straps are cut on the straight grain, thus they fit really well with a wide square neck that stays square and doesn’t fall off your shoulders! GENIUS! Sometimes those historic tailors and dressmakers really amaze me with their sensible-ness. The bottom gathers are sewn to the waistband, but the top gathers are adjustable with a tie at center front. The ties are stitched to the armsceye seam allowance and can be tightened from center front then tucked inside the gown. The shoulder straps are folded in half with the fold towards the neck so that I didn’t have to finish that edge (another 19th century smart trick!). There is a stripe in the middle of each strap.
Oooo, wait, I love this picture too! Sometimes I think my smile is dorky, but not here! And the leaves make a lovely background. Anyway… you can also see the bodice details better in this photo.
The sleeves are a conglomeration of various patterns… essentially they are just a normal Regency short sleeve pattern with about 6″ extra fullness at the top and bottom which is gathered into the armsceye and the sleeve band. The sleeve bands are cut on the cross, like the shoulder straps, and on the fold. They are placed so that the stripe runs around them. I wanted them to puff more, so after these pictures I took a few tucks in the underarm seams of the sleeves so they can’t hang as low on my arms. We’ll see how that looks next time I wear the dress.
With regard to inside finishing… The skirt seams didn’t need anything, because they are selvedge edges. The hem is 1″ turned twice and stitched down with a small running stitch (stitches every 1/16″ to 1/8″). The waistband is faced on the inside with a second waistband (without worrying about having three stripes running around it) that encloses all of the gathers on the top and bottom. The armsceyes are bound with self fabric bias strips. The few bodice seams are flat felled. The top edge of the back of the bodice has a narrow hem.
You can see the fabric pretty well in this photo.
The best part about this dress is that it is the first entirely hand sewn reproduction garment I’ve made (I think). I’ve come pretty close in work I’ve done in the past, but I’ve always used a sewing machine for inside seams and things that won’t be seen. Not so with this one. There were two reasons for hand sewing it: 1-I wanted to have the satisfaction of it 2-I had a week to make the dress and a long road trip for about half of the week I had… you can’t use a sewing machine in a moving car as far as I know… but you can hand sew! So the second best part about this dress: I whipped it up in one week, with undergarments!
I hadn’t mentioned that part yet. To accomodate the wide, square neckline and sheer sleeves of this gown, I had to make three other new pieces as well! A sleeveless chemise to accommodate the square neck and sheer sleeves, an underdress/petticoat to add some opacity which also needed to have a square neck, and a new pair of stays in white (because my only other regency pair are pink… and that would have not been subtle at all!). To be fair and honest, I didn’t get all the inside finishing done on these four garments the first time I wore them, and I did use a sewing machine for the undergarments. I was saftey pinned into the stays… I was madly hemming the underdress the day of our final dress rehearsal… and the chemise had unfinished edges… but you couldn’t tell once I put the dress on! I still need to finish some of the undergarments, actually… so hopefully once I do that I can take some pictures of them and do a post detailing their construction! Also in the works is another underdress that can be worn under this white dress. It will be a nice medium Regency-like blue.
Between our performances during the day on Saturday and the evening ball that night we had down time during which we wanted to escape the public eye and do a little modern relaxing. Lucky for us, the upper floor of the Commandant’s house was made available to us. The entire house is lovely, so I have pictures from various parts of the house, but the bulk of the pictures are from the upper floor.
In the front part of the main floor, an enclosed porch with lovely painted walls.The opposite wall from the last picture. The large windows overlook the Boston Harbor.We had a great view of reenactors and tourists from the windows. It was also a picturesque spot for photos.Inside the main floor at the house.Looking down on the stairs that led to the upper floor. I love this shot!On the second floor the main hallway was nautically themed, as you can see by the change in carpet. There was also a continuation of the stairway which led up to another floor.Unfortunately, that upper upper floor was not available to us and we couldn’t go much past this point.The different rooms on the upper floor had nautical names: Topside, Leeward, Port, Windward, and Starboard.There were also labeled servant bells all around. Unfortunately, the bells were not operational, but the bells still added a fun element of atmosphere.The most exciting room for photographs upstairs was this one.It had this lovely dressing table and mirror set with drawers and cabinets.These sorts of things make excellent props for photos.We all took turns trying out different angles and poses.Across the hall was a library, from which we borrowed a book to use as a prop.Doesn’t this just have that Jane Austen atmosphere?And it helped that this particular chair was quite comfy!Thinking of Mr. Darcy, perhaps? This settee was also in the same room.These wonderfully Regency poses were so easy to think of in this space!In another room (in my head it is “the Green Room”) were more comfortable photo options.It was really lovely!Our randomly chosen prop book: “The Works of Shakes-peare Volume VIII.” I am super amused when I say his hyphenated name aloud.The exterior of the Commandant’s House, looking up from the side with the harbor on it.Just one shot of the lovely hydrangeas that are planted all around the house.The side of the house. See that big stone wall? That’s actually the original front of the house: the original front door is about 4 feet from the wall. And right on the other side of the wall is the modern 4 lane street. So you can see why the back of the house is now what seems to be the front of the house.
And there we are! We have lounged in the Commandant’s House! The last installment of pictures will be a post highlighting the new gown I whipped up!
In this second installment of the Guerriere weekend, we’ll look at pictures relating to the USS Constitution and the USS Constitution Museum. As I mentioned in my first post about the weekend, I sorted the pictures into loose categories to break them up for blog posting purposes. These pictures are all from Sunday, when the USS Constitution was tugged out of Boston harbor and sailed out in the Atlantic under her own power (this is one of the first times this has happened in about the last century! She is tugged and turned around every year or so, I think, but she doesn’t sail under her own power at those times.). From the Charlestown Navy Yard we could see the tugging, but unfortunately the open Atlantic was too far away for us to see her sailing under her own power. Despite that sad fact, it was still exciting to see her move!
Waiting for the Constitution to get under way. If you look really closely you can see her name poking out from behind our heads.There she is, being tugged out of Boston Harbor.Watching her being tugged away.We wanted to be on the opposite side of the wharf for the Constitution’s return, so a few of us ran around (it was maybe 1/4 of a mile)… Along the way was a deserted parking lot we could either go around, or through… Of course we went through, which involved climbing/jumping/falling over the metal barricades… You should know that going around would have been an extra 90 feet or so of walking (ie. not much)…But we made it without injuries! Here is the Constitution being tug pushed back into alignment to return to her docking area. You can see the modern marines furling the sails, so clearly, she actually did use them.The four adventurous ladies who surmounted barricades to get great Constitution shots.As she slowly glided into place we took the opportunity to wave at the reenactors and modern marines aboard. Some of them even waved back!See all the people on the deck? Some of them, with the not modern shaped hats are the reenactors. It’s really cool that they were able to sail on the Constitution!On our way back to join our friends we had time to stop at this large anchor.In the museum. The banner states the whole purpose of the weekend’s celebrations.He’s not a cardboard cut out…Upstairs at the museum is a hand’s on walk through being aboard the Constitution in 1812. At this point, you get to hoist Billy the Goat aboard for food stores (he’s stuffed and makes loud goat sounds as you hoist him!).There were lots of paintings and informational signs to imitate.Then there’s this great spot, where you can stand on a rigging rope and furl a sail. This rope is only about 6″ off the ground, but obviously the real sails are much higher up.Yup. Here’s the real Constitution, with real modern marines in the rigging.There are other interactive things as well. Here, I am scrubbing the deck!In this room, you can climb into hammocks. The floor is super squishy, in case you fall out! The hammocks were actually pretty comfortable. And you see the guy in the corner? He’s another cardboard cut out.
Fun day! It’s so neat to be a part of interesting and exciting things like the sailing of the Constitution. The next post about the weekend is gong to be wonderfully picturesque photos of us Lounging in the Commandant’s House! Stay tuned!