Project Journal: 1863 Apricot Evening Gown Part IX: Braided Crown Hairstyle Details

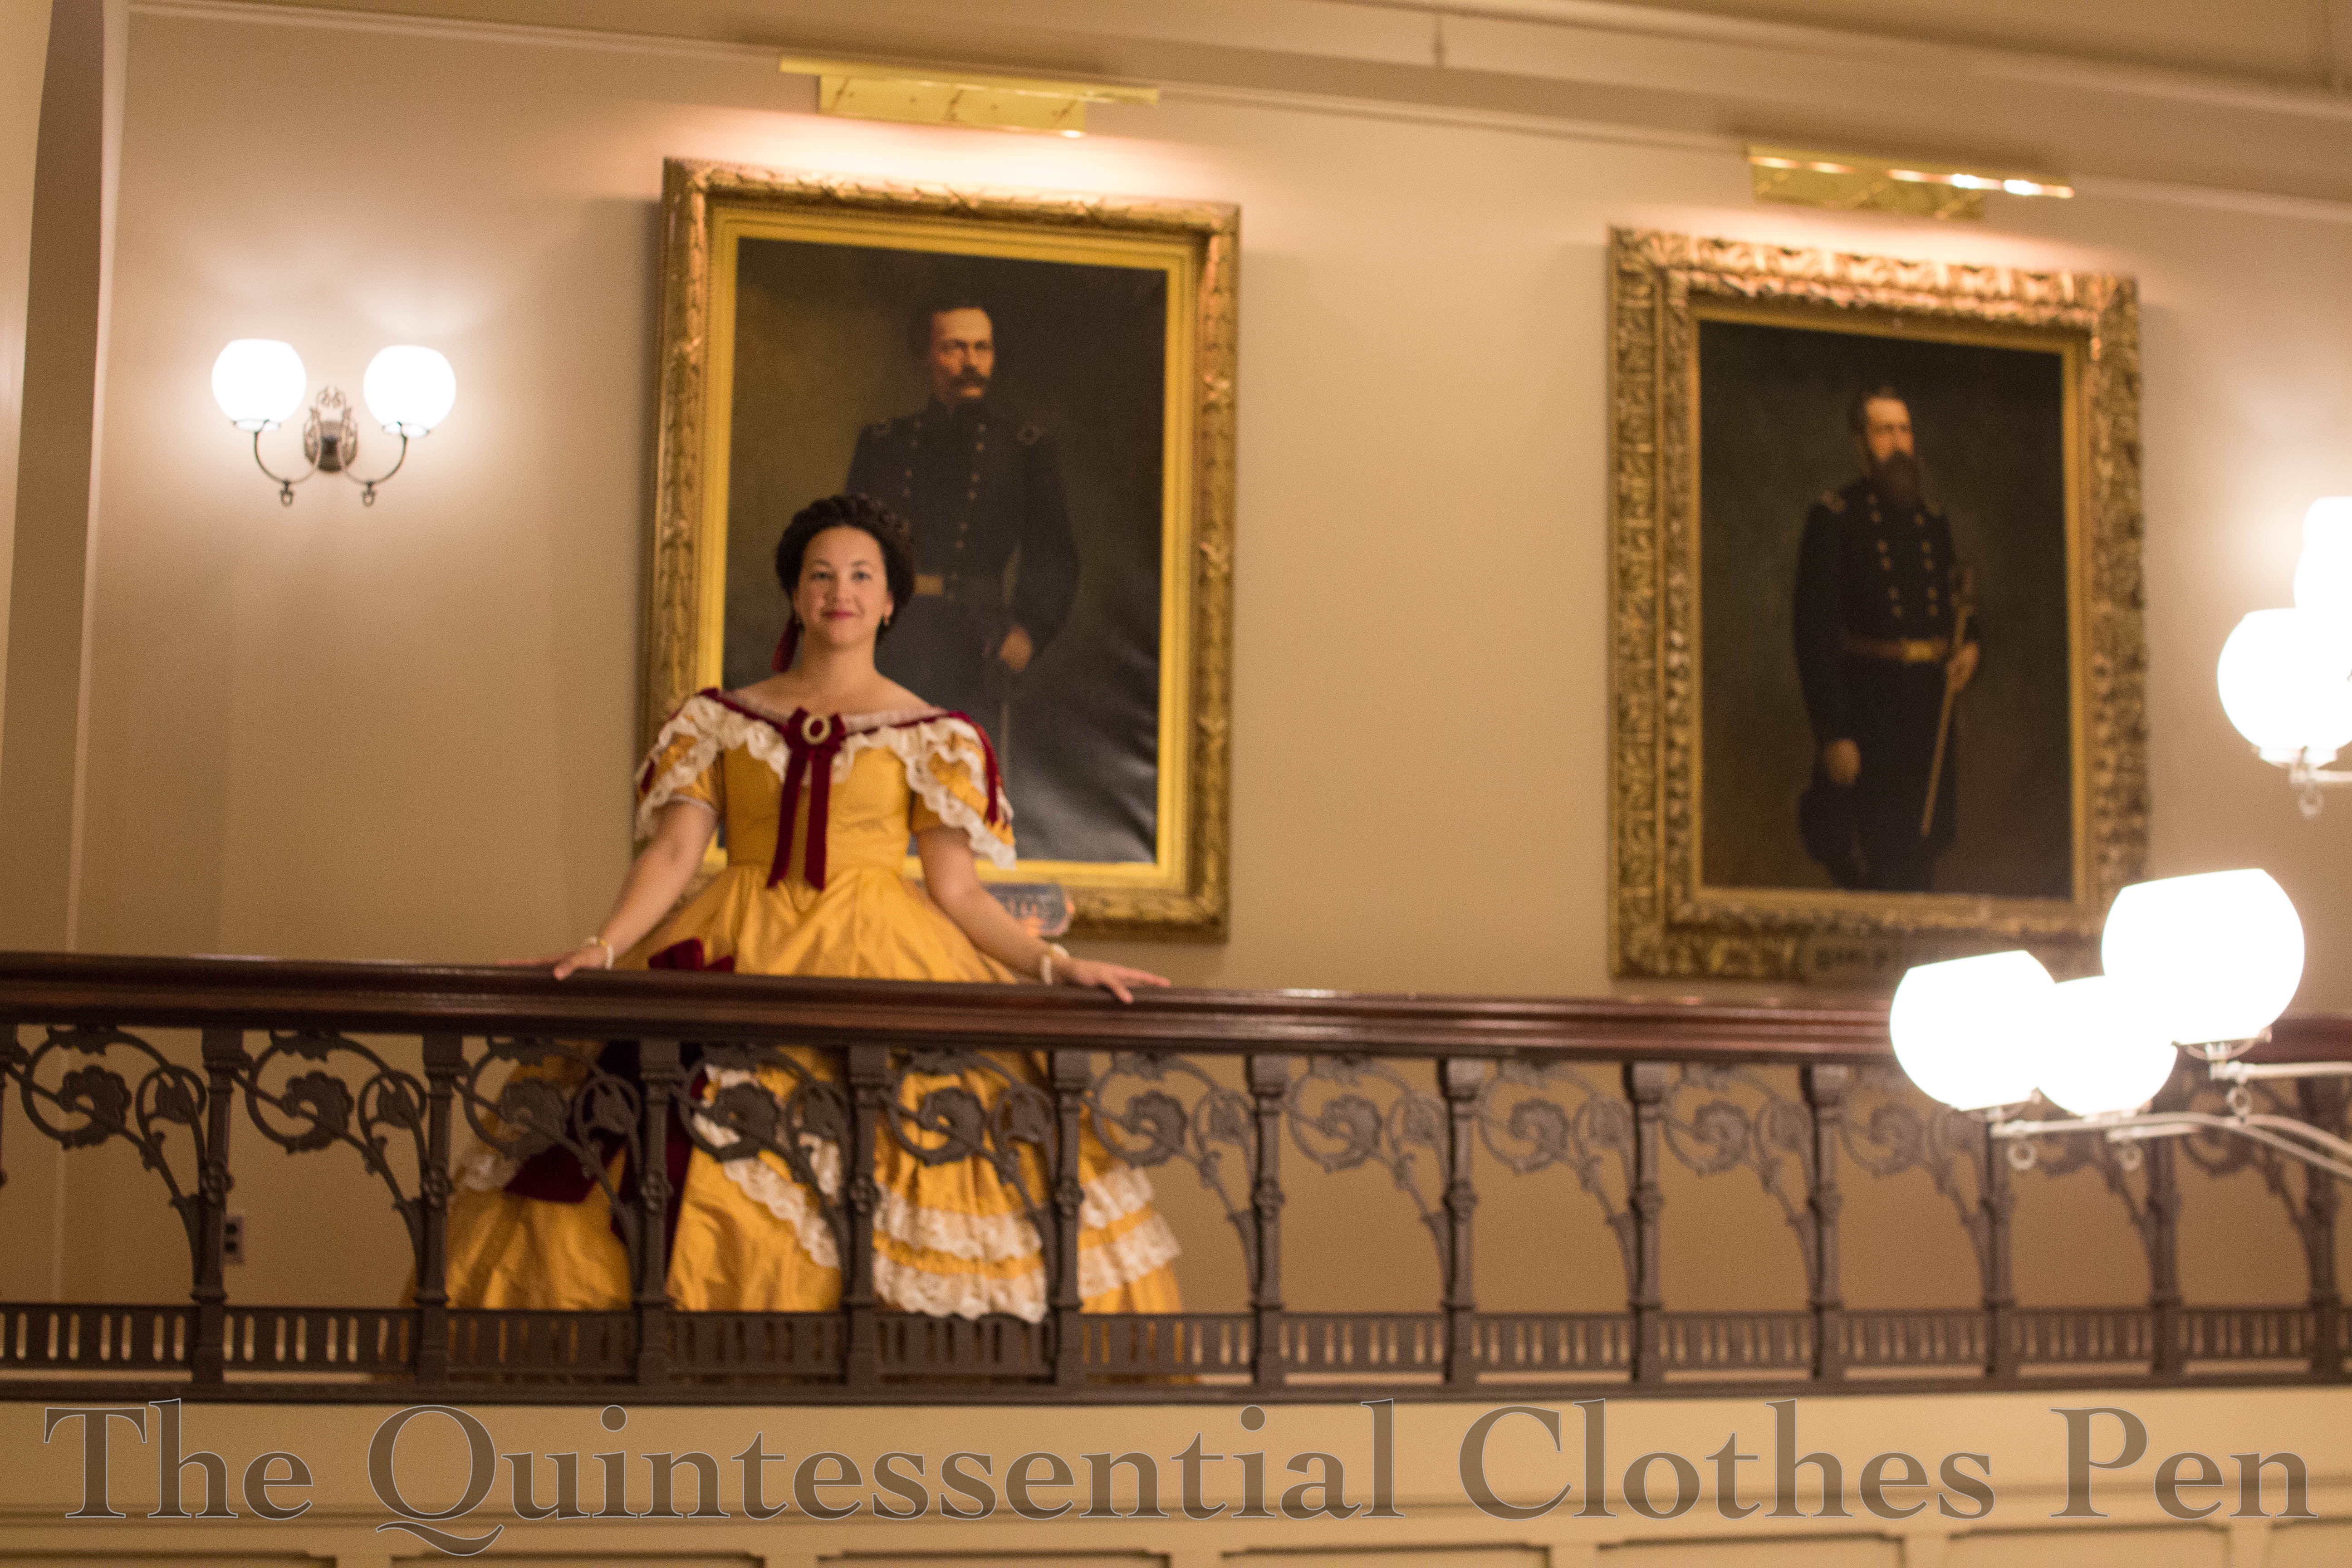
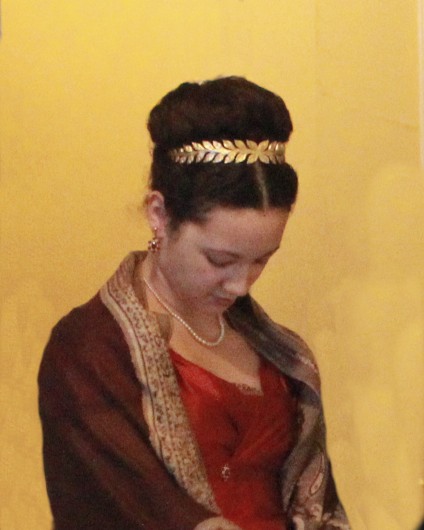
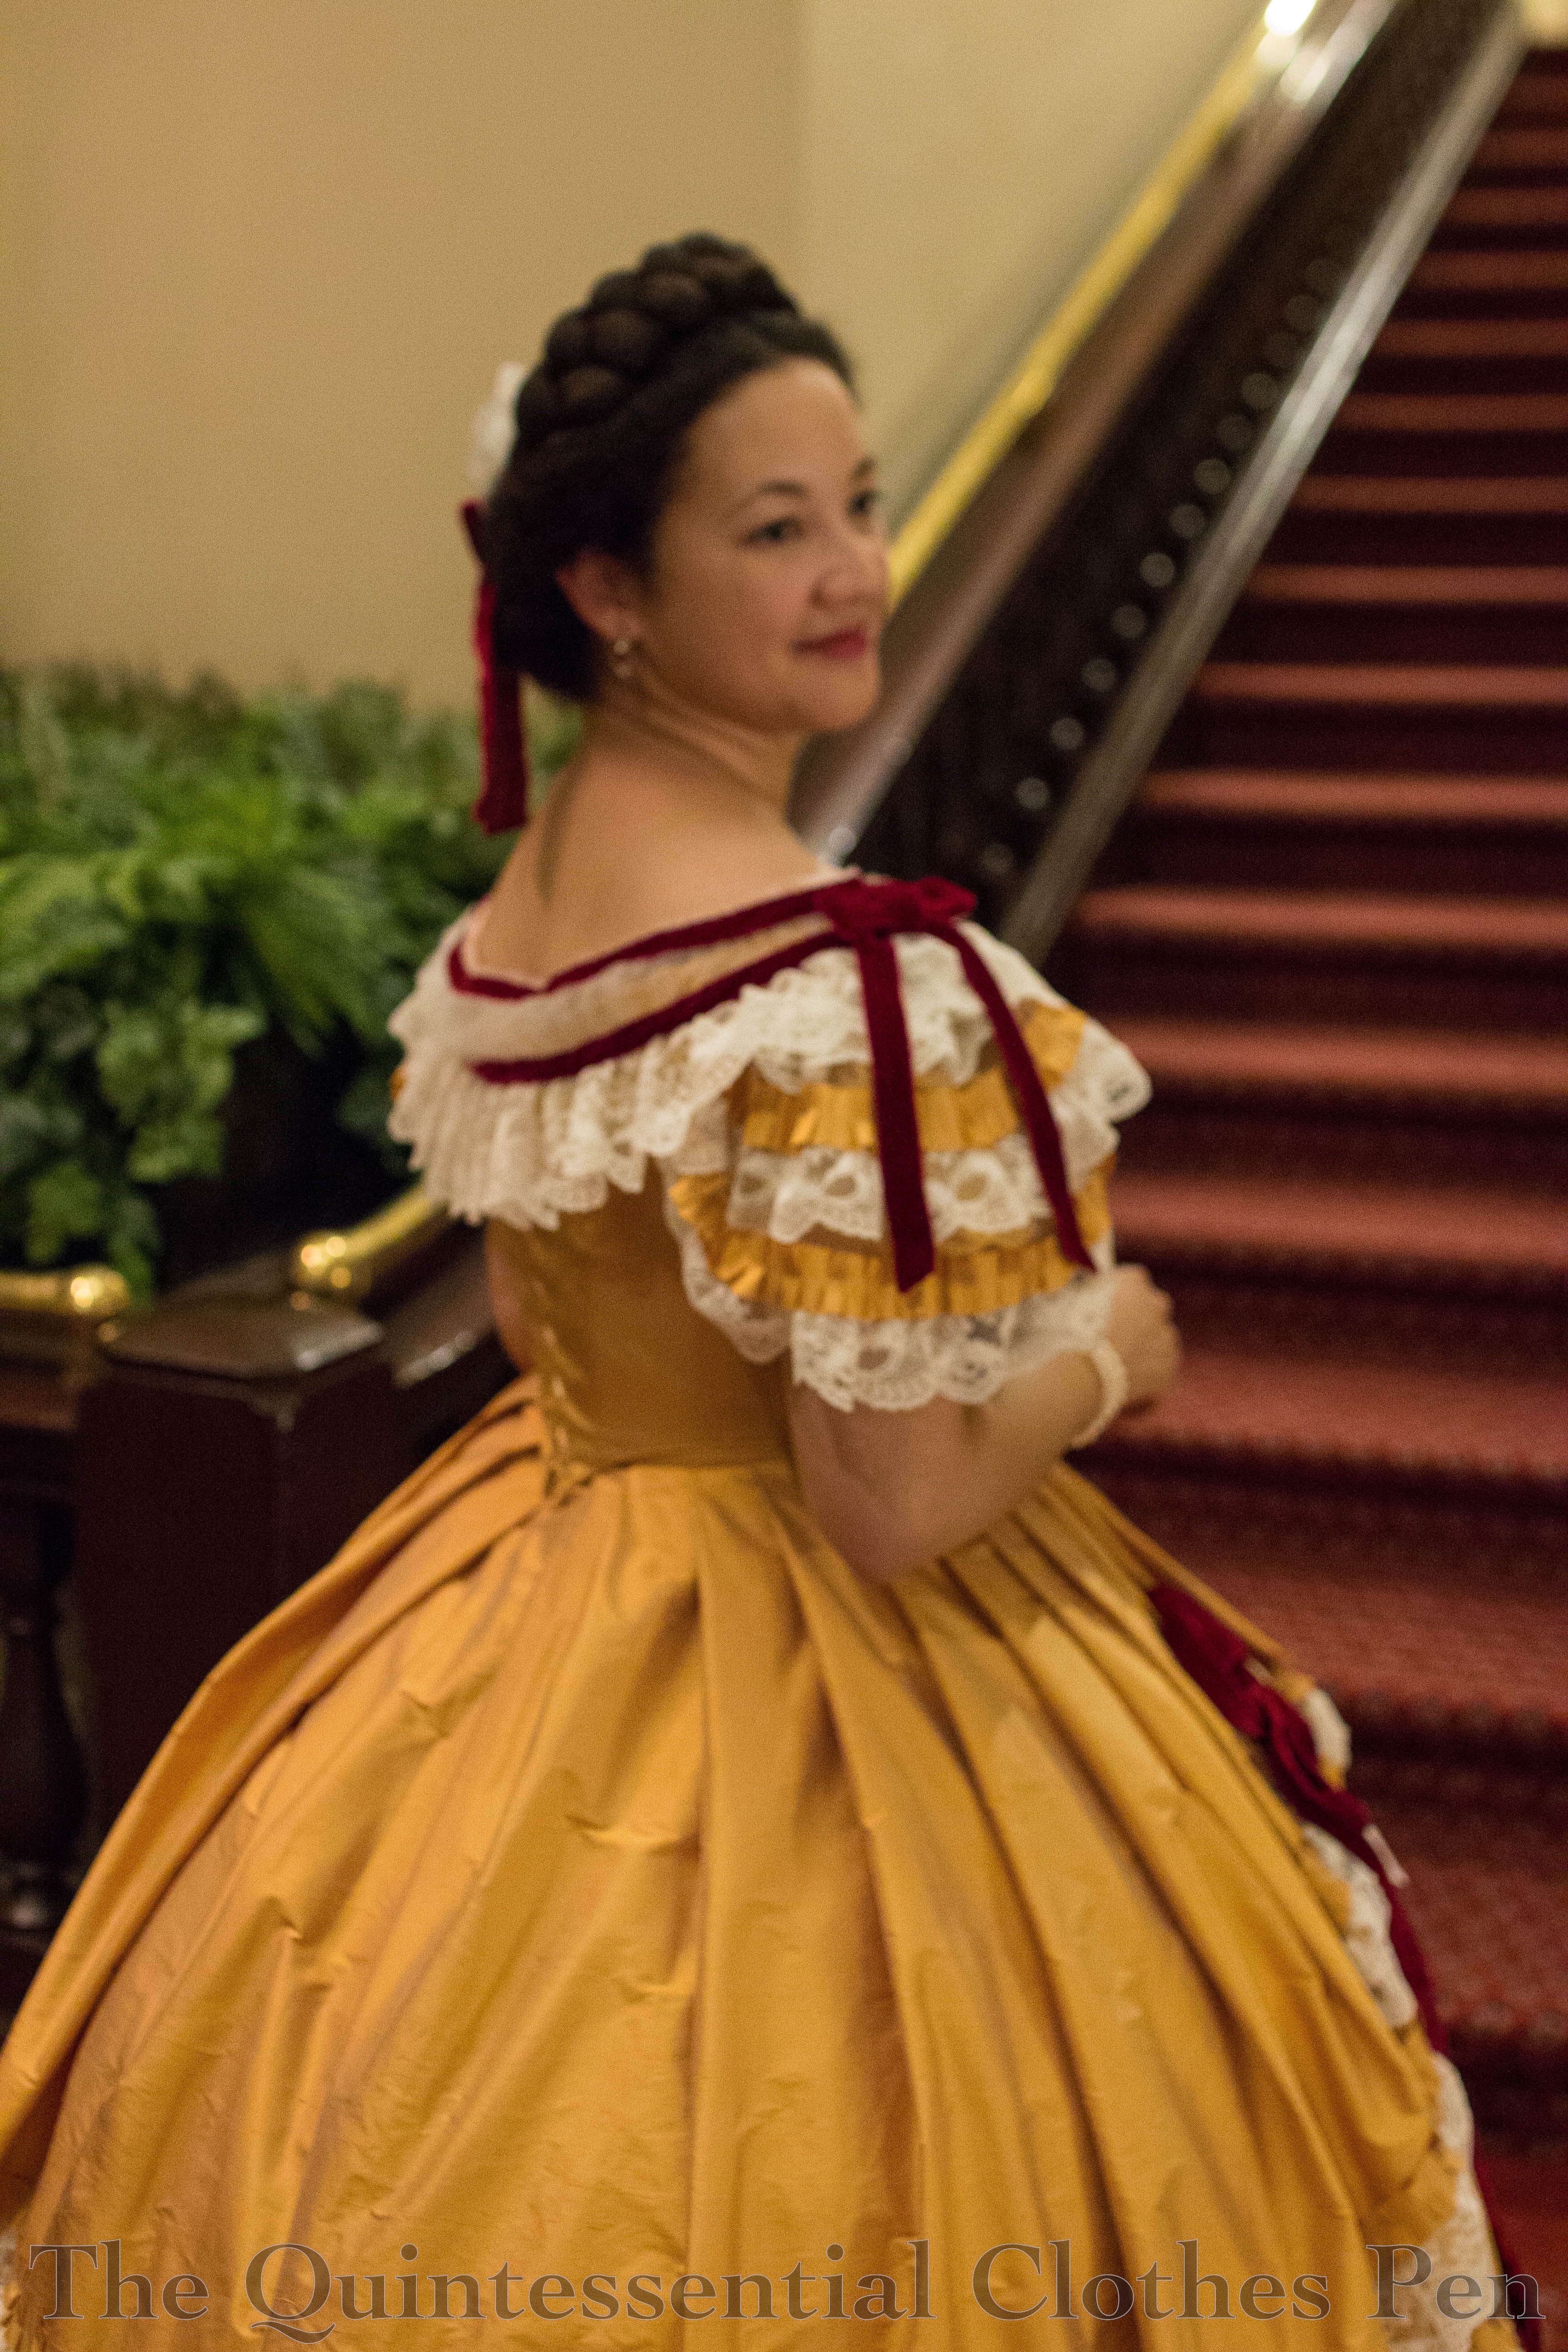
I am very pleased with how my hairstyle turned out for the first wearing of Genevieve, the 1863 dress I’ve been blogging about for the last few months. I took the idea directly from my inspiration drawing, though I changed the hair decoration that accompanied the style.

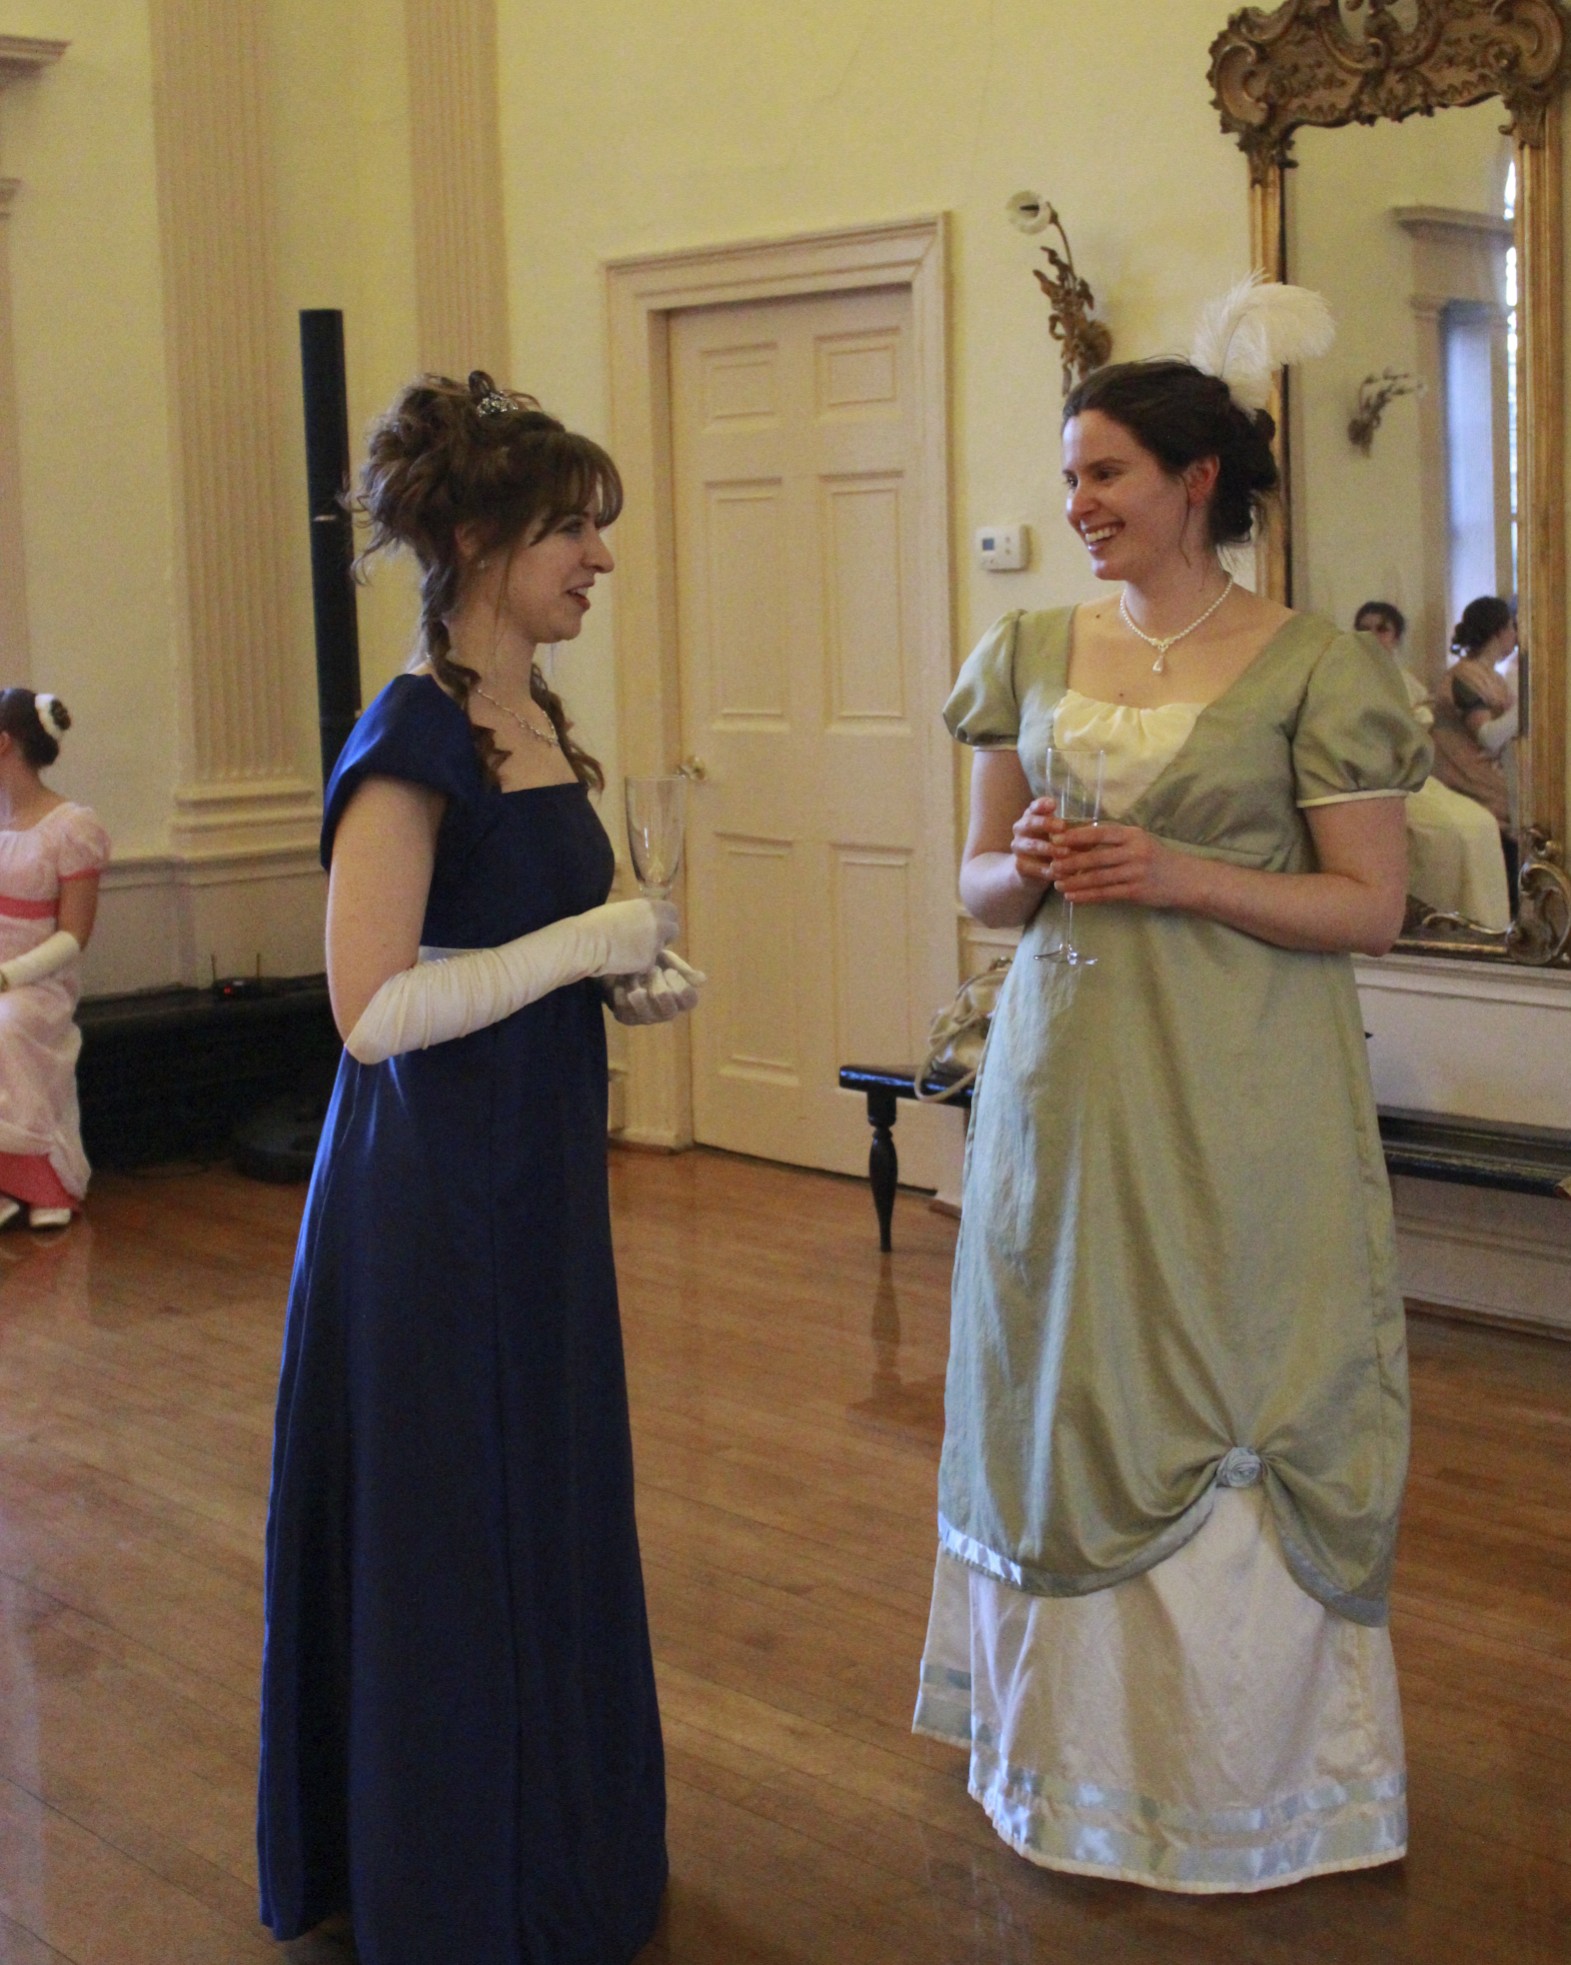
I’ve used false hair to have braided crown styles before (here’s an example of the same braid used for a Regency hairstyle), but that old braid is only about 1 ½” wide, which is a bit subtle for the look I wanted for this dress. It’s also long enough to wrap around my head about 1.5 times, which is longer than what I wanted for the new hairstyle.

So I decided to buy some new false hair and make a new, fatter braid. I used this hair in dark brown. It’s intended for African style braid extensions, so it has a texture that’s great for matching my curly hair–I don’t think it would work well for someone with straight hair. I also bought these black hair nets.

I used one bundle of the false hair for this braid. The hair comes braided already, but I took it out and re-braided it a little tighter than how it was originally. Then I cut the elastic on one of the hair nets so that it would stretch out to be as long as my braid.

I laid the braid on top of the hair net and wrapped the hair net around to the back side of the braid. Then I used large whip stitches to secure the net to the braid. You can see one of those stitches mostly centered in the next photo. Covering the braid with a hair net helps keep all the frizzies from making the braid look messy. (My old braid isn’t covered in a hair net, so it looks very organic, like my real hair… nice and frizzy!)

The final step was to go back and stitch the hair net down in the dips between each section of the braid. In the photo above you can see the hair net traveling between braid bumps, but in the finished photo below those are mostly sewn down and much less visible.

For the actual hairstyle, I secured the braid to my head behind the sections near my face that get swept back over my ears. (I also pinned the braid to the top of my head to keep it in place while dancing. Those pins were put into the back side of the braid (to keep them hidden) and secured into the roots of my hair.) After securing the braid I was able to arrange the front sweep sections on either side of my face. I made sure to cover the ends of the braid with these sections.

Then I arranged the back of my hair. I wanted to keep it simple to showcase the braid and the velvet bow, so I arranged the back of my hair into a low puff. It continues the ring of the braid around my head while being more unobtrusive than the braid itself.

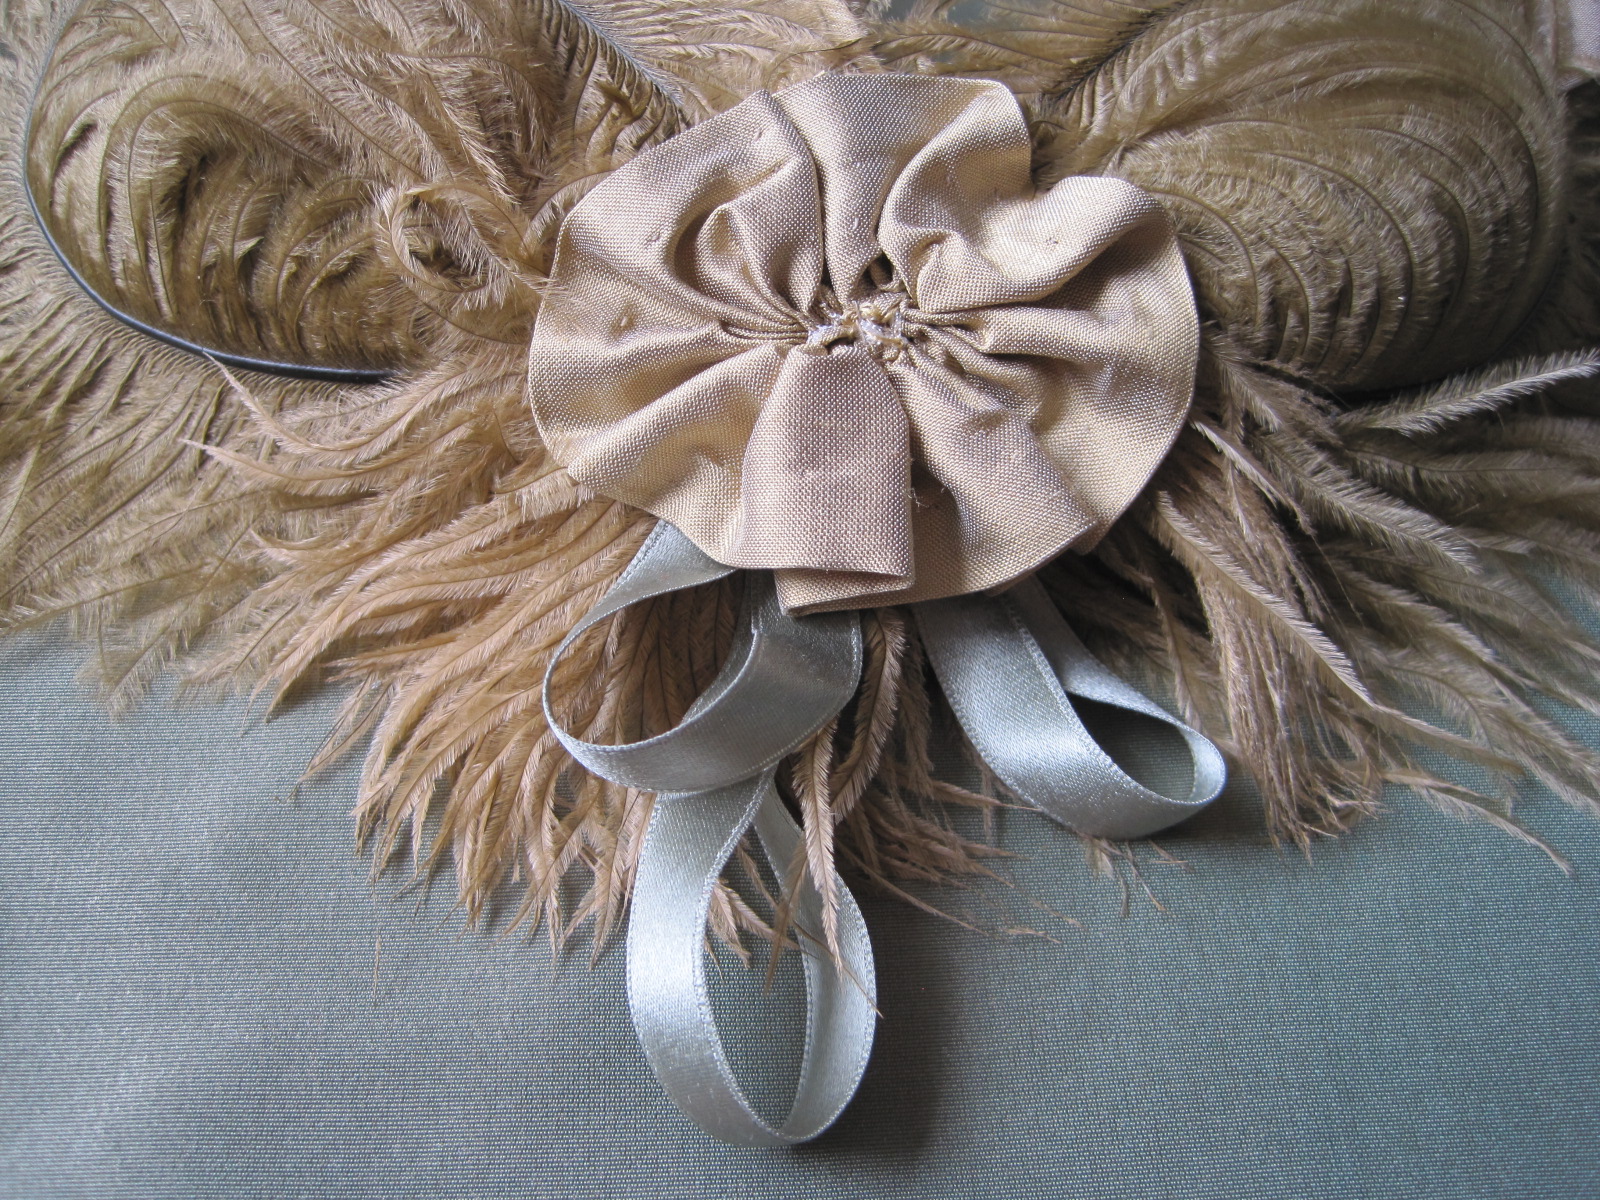
The final step was the bit of lace and the velvet bow. I opted for those instead of the lace framing the braid in the inspiration image. I wasn’t sure how I would accomplish that without essentially creating a cap… and that’s not the look I wanted. So I made up something else!

The bow is one I was able to make after my bow disaster. I think it adds a nice touch of color on my dark hair. I wasn’t sure what I was going to do with it and the lace until the ball, so I bobby pinned each piece in place for that first wearing. Then one of my after-the-ball tasks before I could put this away was to sew these two pieces together and add a comb so that it is now an official accessory that will be easier to put in my hair the next time I wear this dress.

Here’s a side view of what all of that amounts to. I intentionally placed the bow and lace off-center on my head in order to pick up on the asymmetrical bow on the skirt of the dress.

When I did a quick trial with the braid in modern clothes it felt very large and I was worried it would be too big, but once dressed in Genevieve I think the scale of this new braid is great–an excellent hair crown size and length, and the hair net keeps it looking super tidy and frizz free!


1864 Evie Hair (Returning Heroes Ball 2018)

In March, I again had the pleasure of attending The Commonwealth Vintage Dancers‘ annual Returning Heroes Ball (you can read about other years I’ve attended here). I decided to wear Evie, my 1864 ballgown, simply because it had been a year or so since the last time I wore that particular gown.

In order to change things up I did two things differently with this wearing: I wore different earrings and did my hair differently. Small changes, but it makes wearing an old dress feel new and exciting!

I don’t think I’ve ever worn these earrings for mid-19th century events before (only for things later and earlier than this period), though now that I’ve tried it I think they work quite well. I made them from triple drop earrings that I bought from a modern store (I forget now, but I think it was New York and Company). I just took off the bottom drop and attached them to clip hardware. They catch the light and sparkle nicely.

1860s and earrings together reminds me of the scene in Gone With The Wind in which a straggling soldier try to steal ‘ear bobs’ from the house. Not that these look at all similar (and luckily my story ends on a happier note than that scene), but a GWTW reference generally makes me smile.

I was going to do a simple hairstyle (my usual go-to c.1860 style with a center part and the hair in a low mass at the back of my head), but as I was getting ready I chanced a look at Pinterest and got excited about trying a more complicated style than I usually do. In particular, I liked the puffed fronts on some of these styles from 1864 and the curls on the sides like some of these from 1861.

I sort of mashed these two looks together, using small rats to puff the front sections of hair and a curling iron to get smooth curls for the sides. My hair is getting to be so long that I had to pin the hanging curls up to shorten them! The rest of my hair was just twisted and pinned on my neck without too much attention paid to it. I was running out of time and knew I’d be adding my hair piece on top, which would cover most of the back of my hair anyway.

I really like the end result for this particular dress of mine. I feel it compliments the hair piece and the silk dress nicely. Isn’t it lovely when all these little details come together to create one cohesive end result? Yay!

SaveSave

Regency Face Curls

Remember this post from last December about my green Regency shawl and the photoshoot for my Vernet project?

IMG_2080
From the wearing of my green Regency shawl.

For both of those Regency period hairstyles I took the time to create narrow curls to frame my face and I’ve been meaning to share how to achieve these perfect curls ever since, but am only just getting to it. However, I can’t take credit for the idea myself. I was inspired by Sanna and Noora during the Vernet project. I believe we had a conversation about it in the Vernet seamstress group but I can’t find the content at this point, so you’ll just have to take my word for it. (They both used straw curls for their hairstyles in this post of Sanna’s and this post by Noora, if you’d like to see how this technique can turn out on other hair types.)

IMG_1917
From my Vernet project photo shoot.

The secret to getting really lovely corkscrew curls? Drinking straws used as rollers. This works for shorter length hair to create the oft-seen small curls around the face, but it also works just as well for longer hair. Have you heard of using straws for curls before?

The look is achieved by rolling wet hair around a drinking straw (with or without product–I’ve tried it both ways and have achieved good results) and letting the hair dry. Sanna and Noora reported that after rolling hair around the straws they knotted the ends of the straws, pinned the rolls to keep them in place, and left them in overnight. My method was slightly different. I cut my straws in half, rolled my hair around the shorter straws, pinned them in place, used a hair dryer on them until they were dry, and then took them down.

You could also use this technique to create curls for other time periods. The ‘hedgehog’ styles of the later 18th century are one possibility. What types of hairstyles have you created  (or do you now want to try!?!) using this method?

1899 Gibson Girl Coiffure

I was very pleased with my hair for the 1890s ball! One of the reasons I liked the idea of an 1899 dress is because it is close enough to the turn of the century that a Gibson Girl hair style made sense. My hair loves cooperating in poofy styles, so this was perfect!

IMG_2184

I created the super poof using a pad made from one leg of a pair of tights. It’s stuffed with cheap “wizard beard” hair that would otherwise have gone in the trash. Being stuffed with synthetic hair, the pad is pretty warm. And I did struggle a bit to get bobby pins through the tights–I need to add loops to the ends for next time I think. Aside from those things, though, the pad was perfect!

IMG_2245

I also created a new hair ornament to finish off the coiffure. I had originally thought of bleaching the ostrich feathers to create an aigrette*, like this, but decided that I liked the ostrich feathers as is and didn’t feel like dealing with bleach. There are two feathers: a grey and a white. I found that the white helped create definition for the grey on my dark hair. The sparkly bit is a cheap eBay brooch. I sewed the feathers to it and then used the pin part to bobby pin it in place on my head.

IMG_0524 (1)

Success! Look at that haughty Gibson girl look (like this)!

IMG_2197

*An aigrette is a spray of feathers from an egret. Confusing!

Successful Regency Face Framing Curls (Dolley Madison Ball 2014)

f1dc373fbb99bc8d70ad756b4acd5614
Portrait of Maria Theresa of Austria (1801–1855), 1817

You know those face framing curls that Regency women often sport in paintings and fashion plates? Modern ladies with bangs have it so much easier than those of us with all around long hair when creating this style! Unfortunately, I’m one of those modern ladies with long hair all around. The only short pieces I have are frizz! Nevertheless, I wanted to try to create this style at the Dolley Madison Ball hosted by the Commonwealth Vintage Dancers earlier this month.

IMG_7440
A scene from the Dolley Madison ball. More pictures of the ball can be found at Plaid Petticoats blog and Dames a la Mode blog.

I’ve been pondering how to fake these face framing curls with my long hair for awhile. I’ve contemplated hiding the bulk of my hair length under a turban and having the curly ends come out from under that (which I still think would work, though I haven’t tried it…yet). I had the fabric for the turban picked out from my stash, but then I decided to wear my 1819 ruffle dress and when I looked at images for turban inspiration I didn’t find anything similar to what I was envisioning for that particular period. But I did find a lot of cute buns with braids and flowers (like the painting at the beginning of this post, and this portrait from 1813, and this fashion plate from 1819, and this fashion plates from 1816). So I changed course and decided to go in that direction, instead.

IMG_7629
Successful face framing curls surmounted by a braided bun and ornamented with a little flower bouquet!

All of the flowers and leaves used in my little bouquet are intended for millinery, meaning that each stem of blooms and individual leaf is wired. That makes it particularly moldable once it’s on my head! Originally, both flower sprays were bright white which I didn’t think would go with my ivory dress and lavender jewelry, so I decided to try dyeing the flowers to a more suitable color. After brainstorming for awhile I decided that going in a purple direction with the flowers would nicely complement the jewelry and make the entire ensemble look put together. So that’s what I did, using RIT. I wanted to be down and dirty about just getting the flowers dyed, so I used whatever colors I had (which included navy blue, wine, and purple). I made a few different cups of dye with different colors and then dipped the different stems in until I liked them, which also created variation within the sprays, which I think helps them look more lively. Unfortunately, some of the silk flowers lost their nicely cupped petal shapes after being soaked with dye, so the flowers do have a different style than before they were dyed. The more vertical sprays didn’t seem to droop at all after dyeing nor did they loose their shape. I’ll have to keep that in mind for next time!

IMG_7628
A better view of the bouquet.

So, how did I do it? First, I separated the hair at the front crown of my head to save for later. Then I put the rest of my hair into a pony tail. I curled bits from the pony tail (about three per side) and then pinned them along the top/side of my head so they terminated right below the separated crown bit I held out from the beginning. That took a lot of bobby pins… Once I was satisfied (which took a long time and included a melt down… sigh, it happens to even the best of us sometimes!), I parted the separated crown bit and brought those pieces down over the side of my head to cover all my bobby pins. Then I wrapped the ends of those bits up into the bun. I also braided some parts of the bun, though it’s hard to see that detail in the pictures.

IMG_7631
I had fun helping a friend make similar face framing curls for the ball, too. Here we are, being curly hair friends!

Note: My friend has shorter hair than I do–it’s maybe shoulder length (mine is at least 6-8″ longer than that)–so we were able to use the same method for her hair, but without the added extra effort of putting the front bits into the bun and then running them back to the front of the face. Basically, with my hair I had to zig zag back and forth to make the pieces short enough, but with her hair all she needed was a curling iron and the front parted bits to cover the bobby pins!

More 20s! (Prohibition Ball 2013)

Only one week after I attended the 1920s Lawn Party, I was immersed in the 1920s again, this time at a Prohibition Ball in Chelmsford, MA. I would guess the attendance at maybe 40-50 people total, though I’m not sure we were ever all in the ballroom at the same time. It was a nice, social group of people and I saw everyone meeting and greeting new people, dancing with a variety of people, and generally being social and having a good time with everyone around. It was also nice to see some of the new people we had met at the 1920s Lawn Party at the ball. The venue, the Chelmsford Center for the Arts, was a lovely place I’d never seen before.

IMG_4196
I wore my 1925 beaded dress and accessorized with a long string of pearls and jeweled/feather hair decoration.

I tried a new style with my hair! I did my now usual 20s thing, where I gel the front sections and use a fine tooth comb to create waves in front while my hair is wet. Then I secure it to my head and let it dry. Usually, I’ve taken the back and put it in a tight bun at the base of my head (like when I’ve worn my not-quite-sailor dress). The idea in doing that is that it makes my hair close to my head and  thus, maybe, more bob-like (I know, I’m kidding myself, it does not actually look like a bob!). This time however, I did something totally different with the back. It seems counter-intuitive, so be prepared… I took my curly hair, and curled it with a curling iron. Yup. Actually, the curling iron eliminates all my usual frizz (that alone is amazing!), but it also creates nice, even, wide curls. I was in a super hurry to get my hair done, so I just did some rather messy curling iron curls then pinned them up in a mass at the back and added my jeweled/feather clip. I love the defined curly mass (different than my normal frizzy, curly mass)! I’m excited to try out curling ironed styles for other events, too!

IMG_4164-001
Defined curls coiffure surmounted by feathers and jewels.

The other cool thing about the feather/jeweled clip is that from the front I have a small halo of feathers showing. I like that it is visible from the front and packs a big punch in the back! Success!

IMG_4199-001
Glamour shot! I often make really silly 20s faces, but I think this one works! I love the defined eyelashes, the red lips, the feathers, the pearls…
IMG_4202 close-001
More glamour! I’d call this a more sultry shot than mine, which is more playful. It’s got those same fun elements, though, eyelashes, lips, sequins, jewels…

I did mention that this was all for a ball, right? And the ball did include dancing! In addition to normal couple dancing, and large group Charelstons (you can dance the Charleston in a circle like you used to dance in high school!), there were also a lot of mixer-type dances, where participants changed partners, or danced with unknown partners…

IMG_4178
Attendees chatting with each other and looking great.
IMG_4150
Dancing… A foxtrot or one step, perhaps?
IMG_4204
Dancing!
IMG_4207
One of the mixers with a name like “Paul Jones” or something similar.
IMG_4276
The dancing couples trying to escape the gentlemen with umbrellas.
IMG_4320
Another mixer. See the hand over the sheet? Neither gentleman nor lady knows who his or her partner will be.
IMG_4321
Surprise!

There was also a slightly unplanned performance of our five lady Charleston (the same one we performed at the Great Gatsby in May). People really enjoyed it, and it’s always a pleasure to dance a Charleston to the song Egyptian Ella. The Great Gatsby performance post includes a video you can listen to that has the song we performed to, if you’re curious. It’s a fun song!

IMG_4378
We sort of look like penguins in this shot… At least we’re on the same feet!
IMG_4360
There are little bits where we do solos: here I am washing the windows.
IMG_4361
Then I turn and back up. There really isn’t a good way to describe it… looks fun though, right?
IMG_4365
Another solo (well, duo, I suppose). I don’t actually know what this figure is called, but it’s super fun to watch.
IMG_4375
Starting to do the shimmy! (I think it’s the shimmy… It’s really just wiggling, it’s not as shimmy-like as you’re probably imagining!) It was super scandalous in the 20s!
IMG_4388
Final pose.

And of course, there was silly-ness. That’s to be expected when I’m around.

IMG_4355
The “Hello Charleston”… (I made it up…)
IMG_0544
How low can you go?

I had the added bonus of my parents being available to experience, in person, their first vintage dance event. They’ve seen thousands of pictures but have never been able to attend. It was fun to share the experience with them and to Charleston with them! I sure had fun, I hope that you’ve had fun reading about it!

Regency Dance Weekend Part IV: Reception

Having successfully completed the first day of the Regency Dance Weekend and then archery on Sunday afternoon, we hurried off to prepare for the Grand Reception and Ball on Sunday evening. These events were held at Hamilton Hall in Salem, MA. This hall that was built in 1805: perfect for our Regency events!

The reception was to include a toast with sparkling cider, so we pre-filled glasses to have ready to go at the right time. In addition, we worked on laying out the refreshments in pretty glass compotes and on silver trays as well as making the punch and laying out all the necessary silverware and dishes. Preparation was a bit hurried and I have to confess to getting super grumpy at one point…

IMG_0867
Picturesque filling of the glasses.
IMG_0860
Picturesque grumpy face.

The alterations I made to my skirt to fix the rip created a new issue. Sigh. See those horizontal wrinkles on the rib area? Because the front of the skirt hangs differently now, the front skirt wants to wrinkle. I can fix this problem, but ugh! It’s so much easier when the clothes just fit perfectly!

IMG_0869
Partially completed spread of refreshments.
IMG_0925
When everything was ready we joined everyone else for some pictures in the lovely ballroom, where there were real candles in the windows! So pretty!
IMG_0958 - Version 2
These mirrors are stunning and beautiful, in addition to being wonderful places to pose for the camera.
IMG_0874
I thought my hair looked particularly regal for this event. Here’s a good picture of my poof and laurel wreath tiara.

It’s convenient for these sort of events to have hair that is easily made poofy. I don’t have any short bits of hair around my face (aside from frizz…) so curly tendrils for Regency hair styles don’t work for me. This had become my go-to Regency style: center part in the front with the front bits of hair saved for last; the back part of the hair put into a pony tail and brushed out to be super poofy, then rolled on itself to create a self rat and hide the ends. The poof is then pinned in place, the front bits are wrapped down and around the back which creates lovely lines on the back of the head, and finally the tiara is added to define the area between part and poof. The whole thing is finished off with a liberal douse of super hold hairspray to contain the frizz and keep the style in place.

But enough pictures of my dress and hair! After these reception pictures we all descended the stairs to the sidewalk, where we watched a celebratory champagne bottle be opened with a saber. Neat!

IMG_0905
Ready?
IMG_0913
Each person was served with a glass of sparkling cider on his or her way back up to the ballroom.
IMG_0966
And then we all had a bit of time to socialize and admire the room, the people, and the circulating cider refills.

When the cider was beginning to dwindle (which didn’t take too long), the time had come for the dancing to begin. And my, what dancing there was!

A Hair Wreath For Evie

Remember Evie, my 1864 green ball gown? I felt compelled to make a matching hair wreath to wear with her, and here it is! A ring of paper covered millinery wire colored black (to blend with my hair) with a sharpie, decorated with a bit of gold silk, some green silk ribbon, and the mysteriously changeable gold/green ostrich feathers. Here those feather look gold, but I assure you that they sometimes appear as green as the silk background (which is the silk the dress is constructed of).

IMG_4381

IMG_4382

I think I would like to trim the ostrich feather on the right so it is the same shape as the one on the left, but aside from that one change, this is good as is! It’s super easy to bobby pin the wire to my hair and it’s easy to hide the bobby pins under all that silk and ostrich feather business going on at the bottom.

Another Annabelle Adventure (Returning Heroes Ball 2012)

Alliterative, agreed? Ok, I’m done… Honestly, the words just came–I didn’t spend long on them! Last weekend I attended the Returning Heroes Ball hosted by the Commonwealth Vintage Dancers in Holliston, MA. As usual, it was full of fun and laughs. There were fabulous dresses all around (because of course one of the joys of a ball is to observe dresses–old and new) and wonderful refreshments as well. I don’t have pictures of other people, but I have pictures of me!… You can see a variety of people in the photos on Antonia’s blog, Experiments in Elegance

Me, in Annabelle. I really, really love hoop skirted dresses! And flounces! Whee!!!

I recently gained a new accessory: a deep purple burnout silk velvet scarf, big enough to use as a shawl. The shawl was decommissioned from a friend’s modern wardrobe because it is rather intense for a modern look; however, it works wonderfully as a 19th century piece, I think! I’ve been waiting for about three months to try it out with this outfit… I think it is fabulous and nicely complements the purple in the flowers.  Do you think it works for an 1860s look?

Ooo... Purple silk velvet shawl. So cosy! (and stylish to boot!)
Thanks for taking the photos, gentlemen (you know who you are)!

I’ve been trying out more complicated, poof-filled hair styles in preparation for early 20th century styling and I put some extra effort into this hair-do to try out more poof-ing. From the front my hair has it’s normal 1860s style with a center part where each from section is slightly poofed and rolled back to join the low rolled chignon at the nape of my neck (above, left and right)… but from the back this most recent style has extra poof-age!

See the extra poof at the top of my head?
Poof close-up

 In terms of the hair-styling itself, I think I like the extra poof as it gives more dimension and adds a regal feel to the overall look. Do you like the added poof?

I also decided to rework the hair wreath I’d made for the German Cotillion back in October (left). I’m not sure I like it as a giant mass of flowers, I might rework it again into a crescent shape like the flower piece that matches Belle, my other 1860s ball gown (above right). In terms of the flowers, giant mass or crescent shape?

Regency Hair Style: 1819

Now that we’ve seen my re-made 1819 dress (woohoo!), let’s look a little closer at my hair. Despite the fact that I have naturally curly hair, Regency hair styles are not as easy for me to achieve as you might think. Many Regency styles have short curls (bangs, really) that surround the face, like the one below.

1813 Ackermann’s fashion plate from EK Duncan’s blog: look at those curls that frame her face!

However, in this modern world, curly bangs are just not the thing to have… so thus my regular, un-period hairstyle is long, with no trace of bangs! (So I don’t even have pieces I could curl with a curling iron to get the ringlets at the front.) I dug through my books to look for Regency hair styles that did not have the face framed in curls and I did find some in Cunnington’s English Women’s Clothing in the Nineteenth Century. Luckily, many of the non-face-framed-curly styles were from the same year as my dress: 1819. I also had the good fortune a few months ago to come across a gold laurel leaf headband that fits the Regency period wonderfully. It’s actually plastic, but I think it looks the part. I used it as a tiara.

You'll remember this picture from my last post.

In terms of styling my hair, I wound up trying out a few of the techniques that Lauren (of American Duchess) has been discussing recently in terms of early Edwardian hair styling. The question for me with these sorts of styles is always what to do with the back? Once the top poof has been achieved something has to fill in the back or it just looks weird. Lauren’s posts have been quite illuminating for me in solving this problem.

I started by parting my hair from ear to ear over my head, to separate the front bits: this I parted down the center to form a left and right side, then I clipped these out of the way to save for later. I then took the back section and divided it into a top and bottom section. I put the top section in a super high pony tail and then rolled it to create a poof at the top of my head, to fill in the laurel tiara.

You can see the top poof and rolled up back sections.

Once that section had been pinned, I divided the remaining back section into three sections: one by each ear and one in the middle at the nape of my neck. Each of these was separately rolled up and pinned below the poof on the top of my head, to fill in the back section. Now remember, I didn’t want to curl the area around my face… but I had the left and right front sections still. The image that I used had wings (almost like an 1860s look)… and so that’s what I did with the front sections. Each one swooped over my ear and was pinned in the back bottom section. Big sigh of relief… An hour later, having used 20 bobby pins, and a lot of super duper hair spray (to contain my frizz, you know), Regency hair! I felt very Josephine-like with such an up-do and regal tiara! I’m not totally sold on the wings. I think they were a little too poofy. Maybe next time I can smooth them down more?

Side back view.

 Below is a great example of a Regency up-do from a fashion plate. I think I created a similar style, if not more complicated style, although without those face-framing curls…

1813 Ackermann's fashion plate from EK Duncan: a great view of a Regency up-do from the back