The first corset I ever constructed was from a modern historical pattern company. While the corset was fitted to my specific curves, the pattern pieces for it still created a basically cylindrical shape without a lot of hip or bust shaping visible when the corset was laid flat. (I’m wearing that first-ever corset in the pictures in this past blog post.) I’m not saying that shape is wrong for the 19th century, because there are extant examples, patents, and other information showing us that style, such as the corset below.
French corset c. 1885, The Met
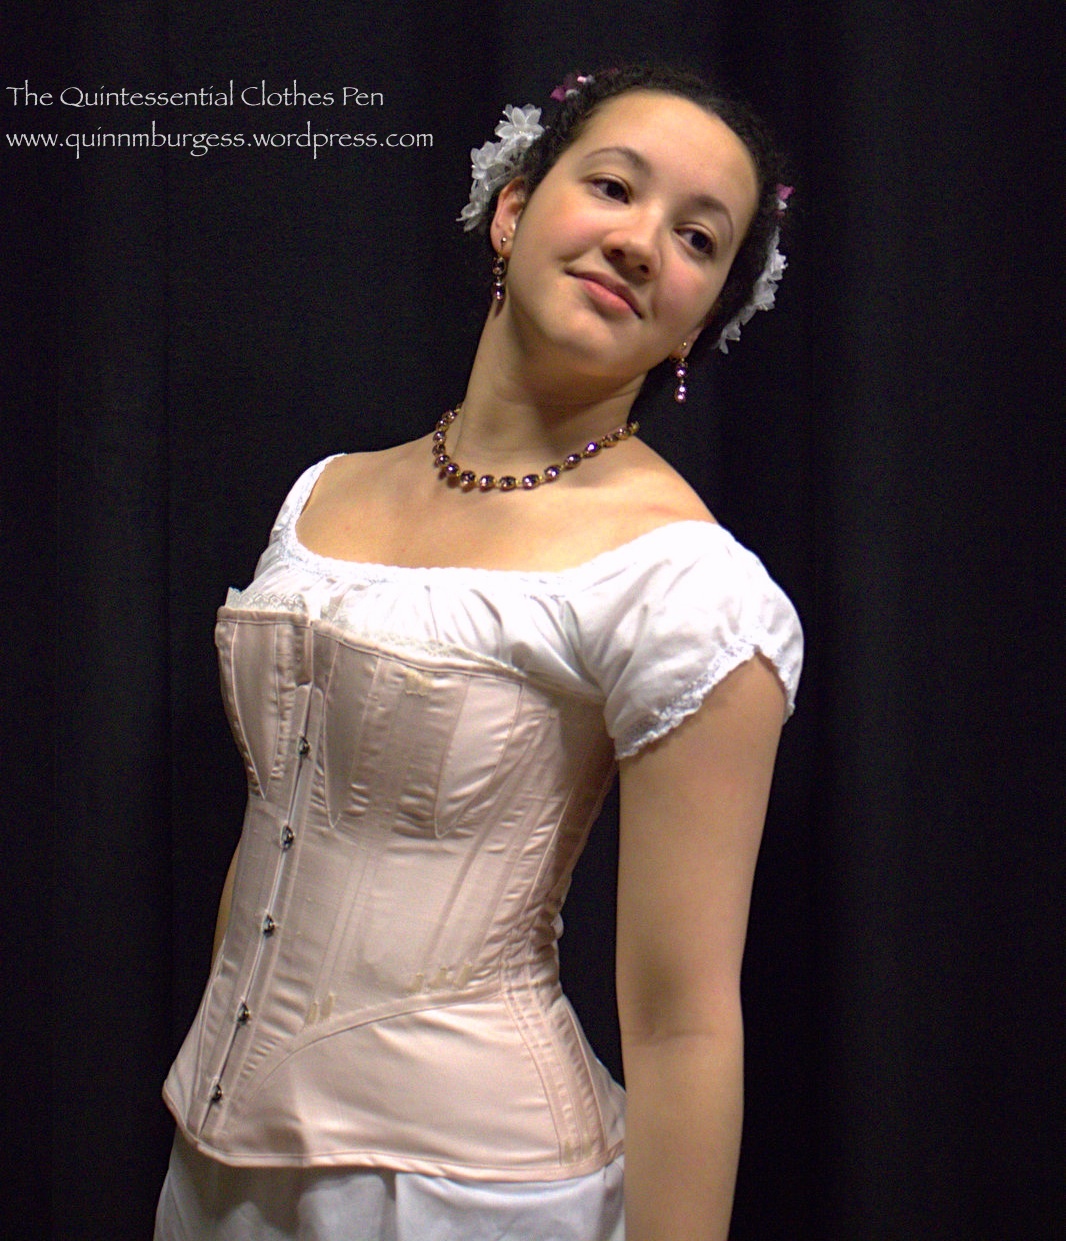
Looking at corsets from the last half of the 19th century, however, there are a variety of other styles that have more interesting lines and definitive flare at curvy points than the basic cylindrical shape. My c. 1860 pink silk corset is an example of a style of corset that uses bust and hip gores to create a more curvy silhouette. (I discussed this in detail in a post about that c. 1860 corset that you can read here. That post has examples of extant corsets showing that shape.) Here is a catalog page of corsets from the 1880s showing that same style.
In addition to the hip gore style corset, there are also a growing number of curvy seam corsets as the 19th century progresses. Some of these also make use of bust gores while maintaining the curvy seams to really provide shape. These all lead up to the s-shape corset of the early 20th century, but we’re not quite there yet in the 1880s.
Here are some extant examples of curvy seam 1880s corsets: black, light blue, and ivory (very similar to the one pictured above, but more extreme in its curves if you look carefully). The curvy seam corset style is what caught my eye for this project, because it is a style that brings new challenges in terms of patterning and because it will be a new style in my wardrobe when completed. Compare this to the the photo above and you can see quite a difference in terms of the cut of the pieces.
Edwin Izod corset, 1887, V and A.
This Edwin Izod corset from the V and A is my inspiration. I’m intrigued by the shaping of the panels and the completed silhouette, but also by the construction method. The V and A gives some tantalizing information about the steam molding process patented by Edwin Izod and used to create this corset, just enough information to make me want to see if I can create some form of steam molding and discover how it might change the finished silhouette and wearable feel of the finished corset when compared to other corsets I’ve constructed.
Fashion and technological innovation changed the shape of late ninteenth-century corsets. As the bustle replaced the crinoline and bodices contoured the figure, corsets became longer to achieve the desired hourglass silhouette. They encased the abdomen and enveloped the hips, and the amount of whalebone also increased to give a smoother outline and help prevent wrinkling of the fabric. This corset from the 1880s is composed of twelve separate shaped pieces and forty whalebone strips.
To improve shape, performance and comfort, manufacturers claimed numerous inventions. One of the most successful was the steam-moulding process developed by Edwin Izod in 1868, and still used in the 1880s to create elegant corsets such as this one. The procedure involved placing a corset, wet with starch, on a steam-heated copper torso form until it dried into shape. The result was a beautifully formed corset, whereby ‘the fabric and bones are adapted with marvellous accuracy to every curve and undulation of the finest type of figure’ (The Ladies’ Gazette of Fashion advertisement, London July 1879).
I’ll be coming back to the nuggets of detail contained in this description, because some relate to patterning and some relate to the steam molding itself, but those are topics for future posts.
* In case you’re wondering why I spell steam molding without a “u” but the V and A quote spells it with a “u”, check out this little bit of information.
I have a number of corsets, some made for me specifically and some made for other ladies but which I wear, but there are still periods for which I don’t have any corsets that are really perfect. When it comes to the later 19th century, I’ve got a corset intended for the 1860s, whose style continues to be seen through the 1890s, and a corset from the 1890s that wasn’t made for me and doesn’t fit as well as I would like it to, despite the fact that I wear it rather regularly. The 1890s corset is being worn under most of the 1890s/turn of the 20th century garments shown here on my blog, but I’ve never shared pictures of the corset itself here before.
1890s corset on the body it was constructed for in 2009. The pattern is from Corsets and Crinolines and has 4 elastic panels in the front.
Someday, I’ll make a new 1890s corset that is fitted for me using the features I like from the current one, such as the very comfortable elastic panels, but changing things such as the busk length (the current one is too long and pokes me in the legs when I sit or bend… it’s ok if I get it just between my legs, but has caused bruises when I’ve bent over unexpectedly in the past and dug the busk into my leg…) and creating more room the bust area. But I digress, because an 1890s corset is not on my to-do list for this summer.
What is on my to-do list is completing a summer dress from the 1880s (that I started back in 2013, yay for super overdue UFOs!). The skirt is pretty close to completion, but I’d been holding off on the bodice not only because the project has been generally on hold, which is most of the reason, but also because I really wanted to fit the mockup over the corset I planned to wear with the dress. The plan was to have a new specifically 1880s corset to wear. And now that the dress is on my to-do list again, the corset has joined in as well!
I’ll be doing a Project Journal series on this corset, because in addition to showing in progress pictures, I also plan to attempt to steam mold this new corset, so there will be lots of interesting information and success or failure updates. Next post in this series will be about my inspiration!
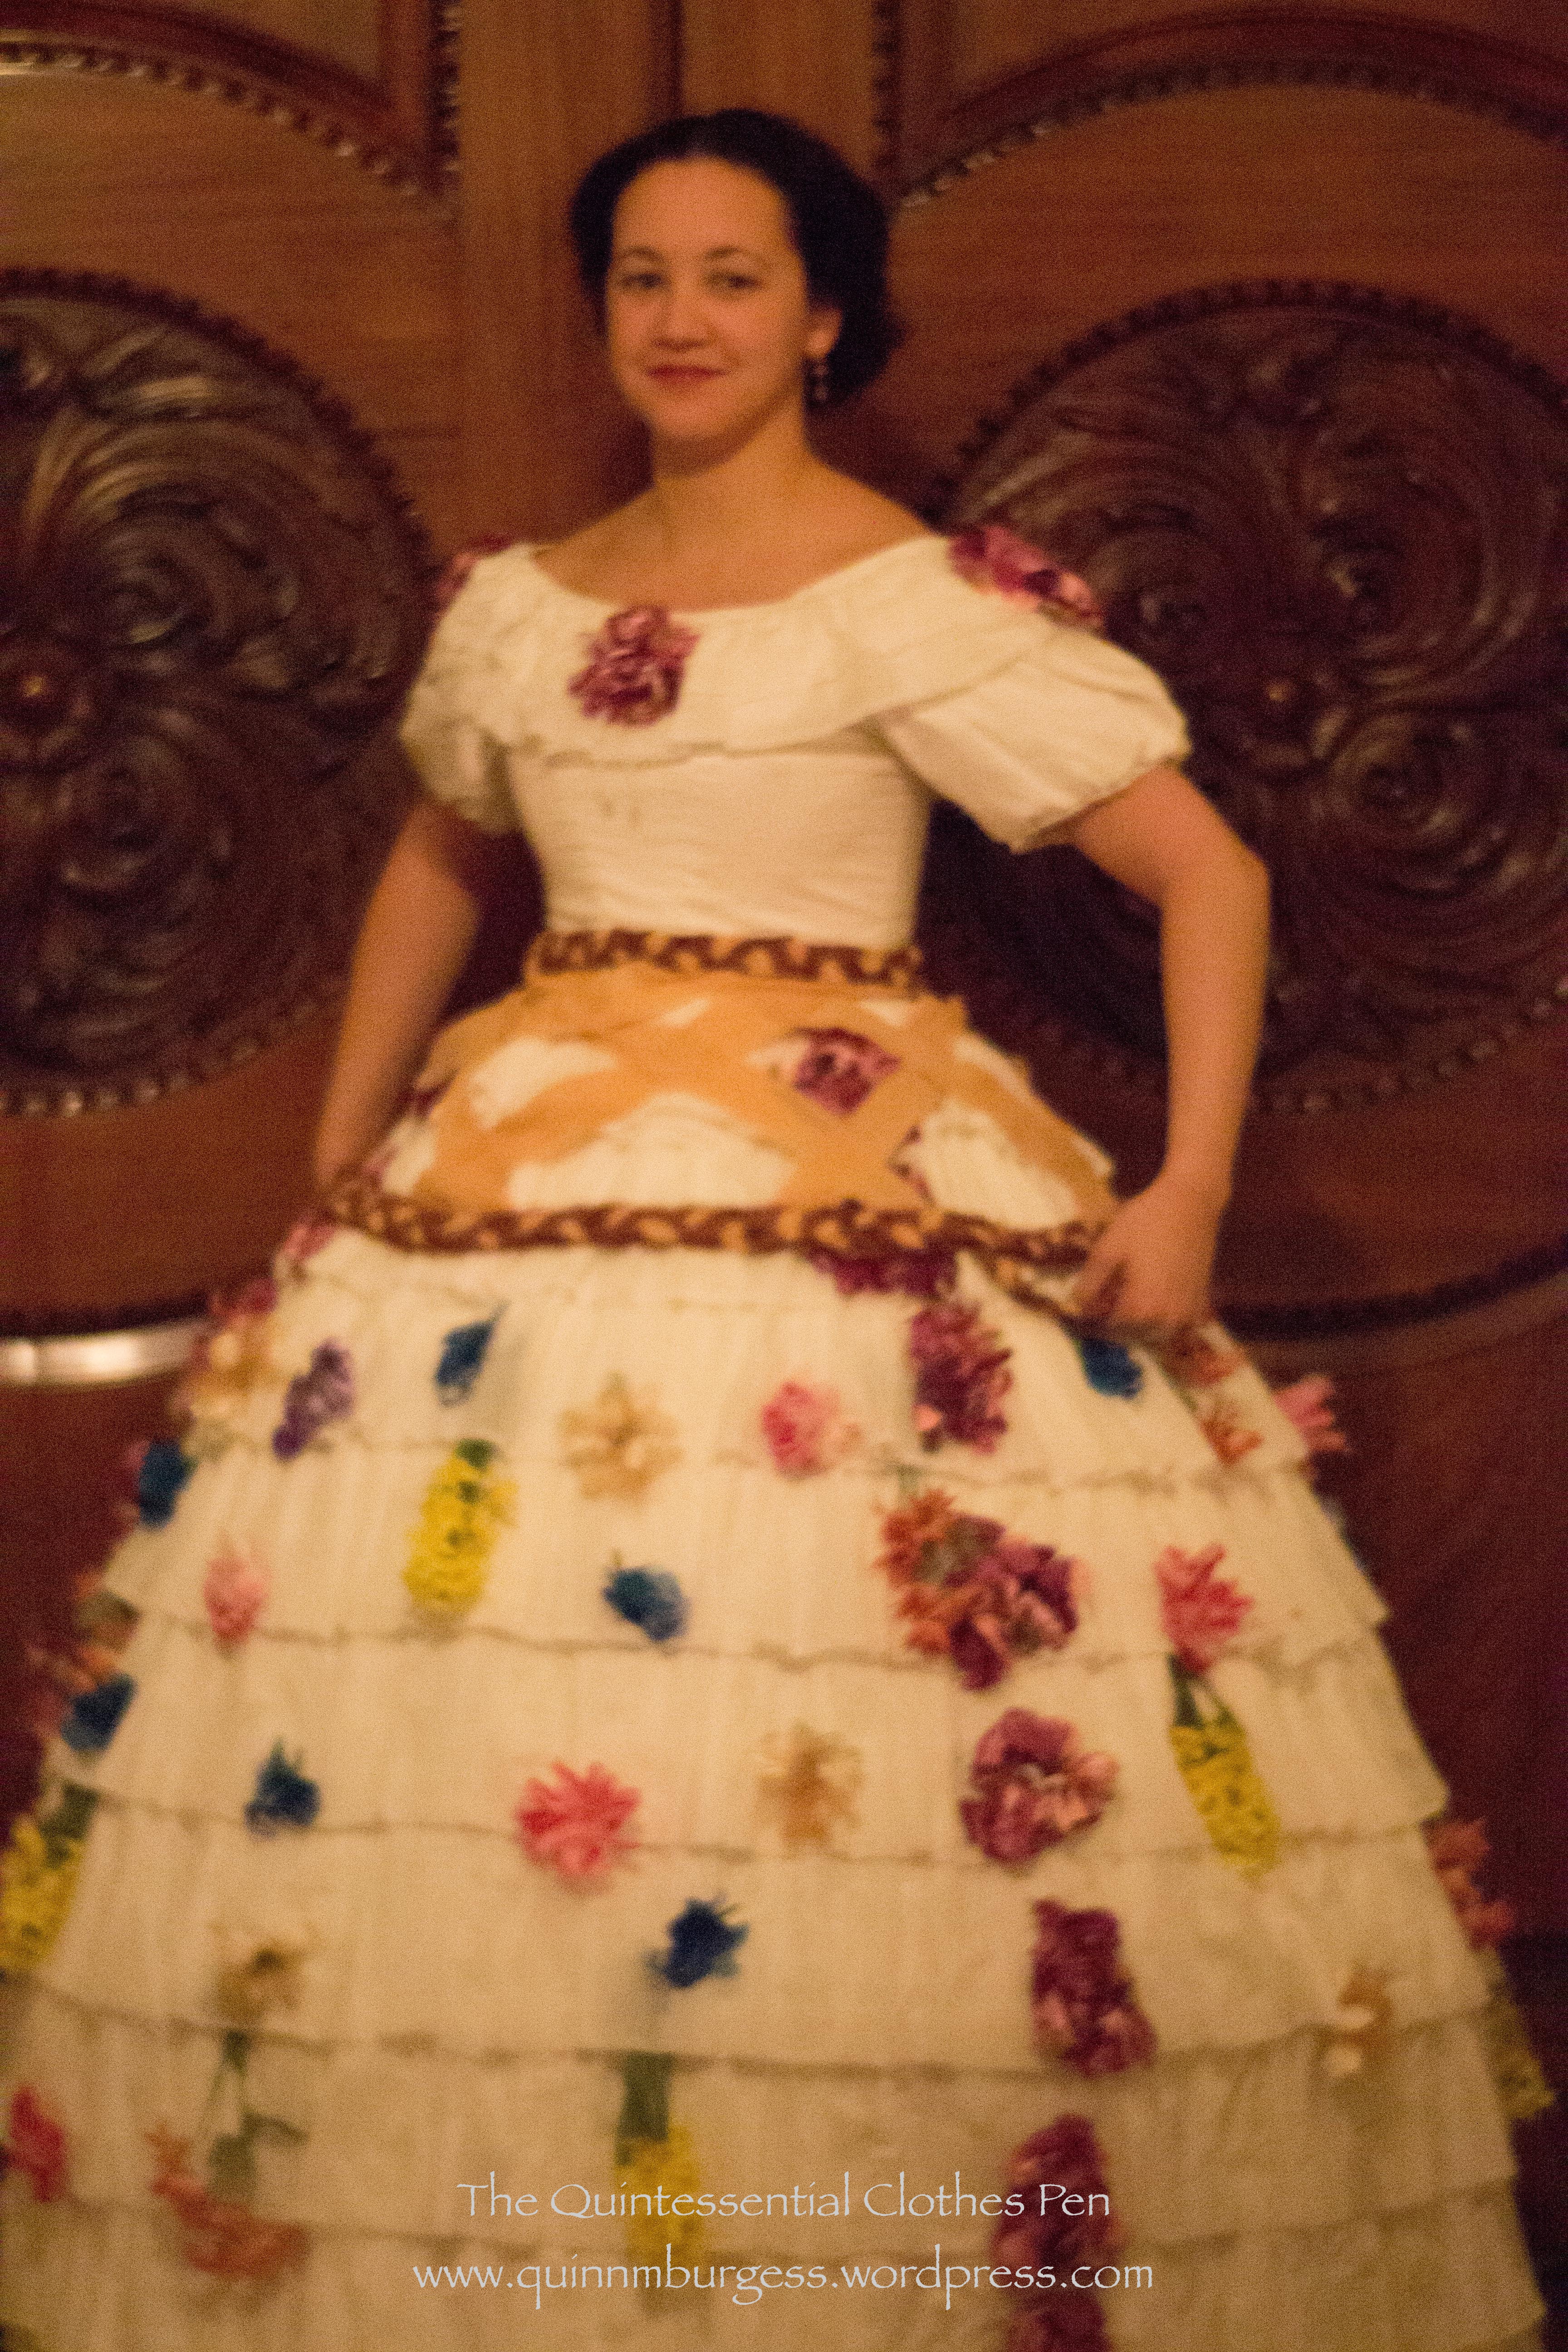
A few weekends ago now, I went to an event at The Down Town Association in New York. It was an event out of my usual ordinary line of events and so I took the opportunity to create something out of the ordinary to wear. The title of the post rather gives it away… but I only had a week to put my outfit together!
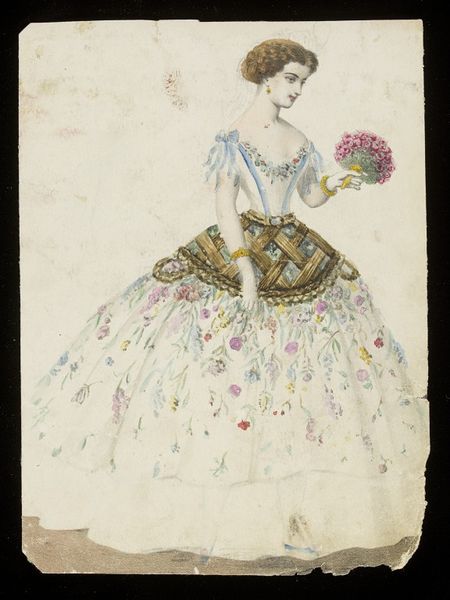
Flower Basket, 1860s. This design was created by Jules Helleu or Léon Sault, possibly for Charles Frederick Worth.
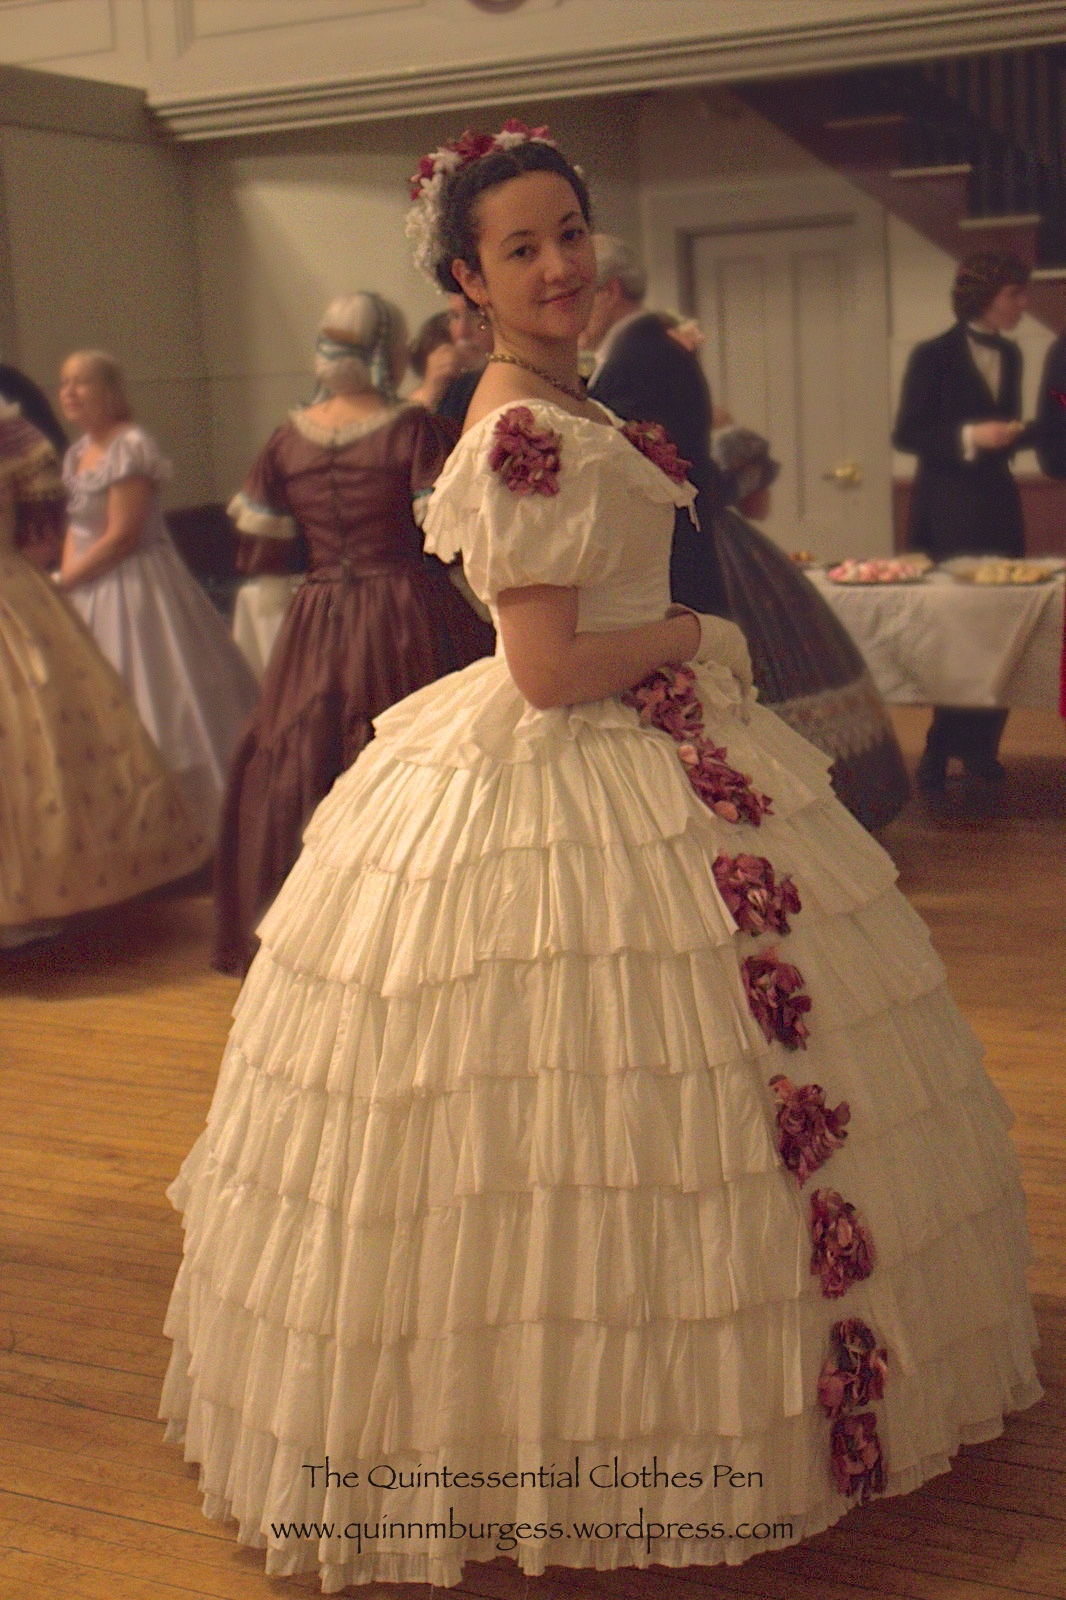
Using this image as my inspiration, I determined that I needed to make a flower basket, but that I could use Annabelle as the base for the floral dress. I also wanted to use only items from my stash, thus limiting my options a little bit. So I spent my weeknights creating a fabric basket that fit over my hoops and then furiously pinned flowers to my skirt the day we were leaving for New York in the hopes that they would look good and at least a little like my inspiration image…
(What does a flower basket do with her hands without a bouquet?)
In the end, I enjoyed my flower basket very much, but didn’t like the fact that my furious pinning job didn’t really achieve the cascading flower look I was going for and that Annabelle’s pre-existing flowers were rather heavier looking than I had hoped, also contributing to the lack of cascading flower look. Maybe someday I’ll try again with the same basket and a different, or differently modified dress, but it was fun to do something different even if the results were not as great as I hoped for.
I like the basket when you don’t see the skirt flowers.(Maybe a flower basket holds her handles?)
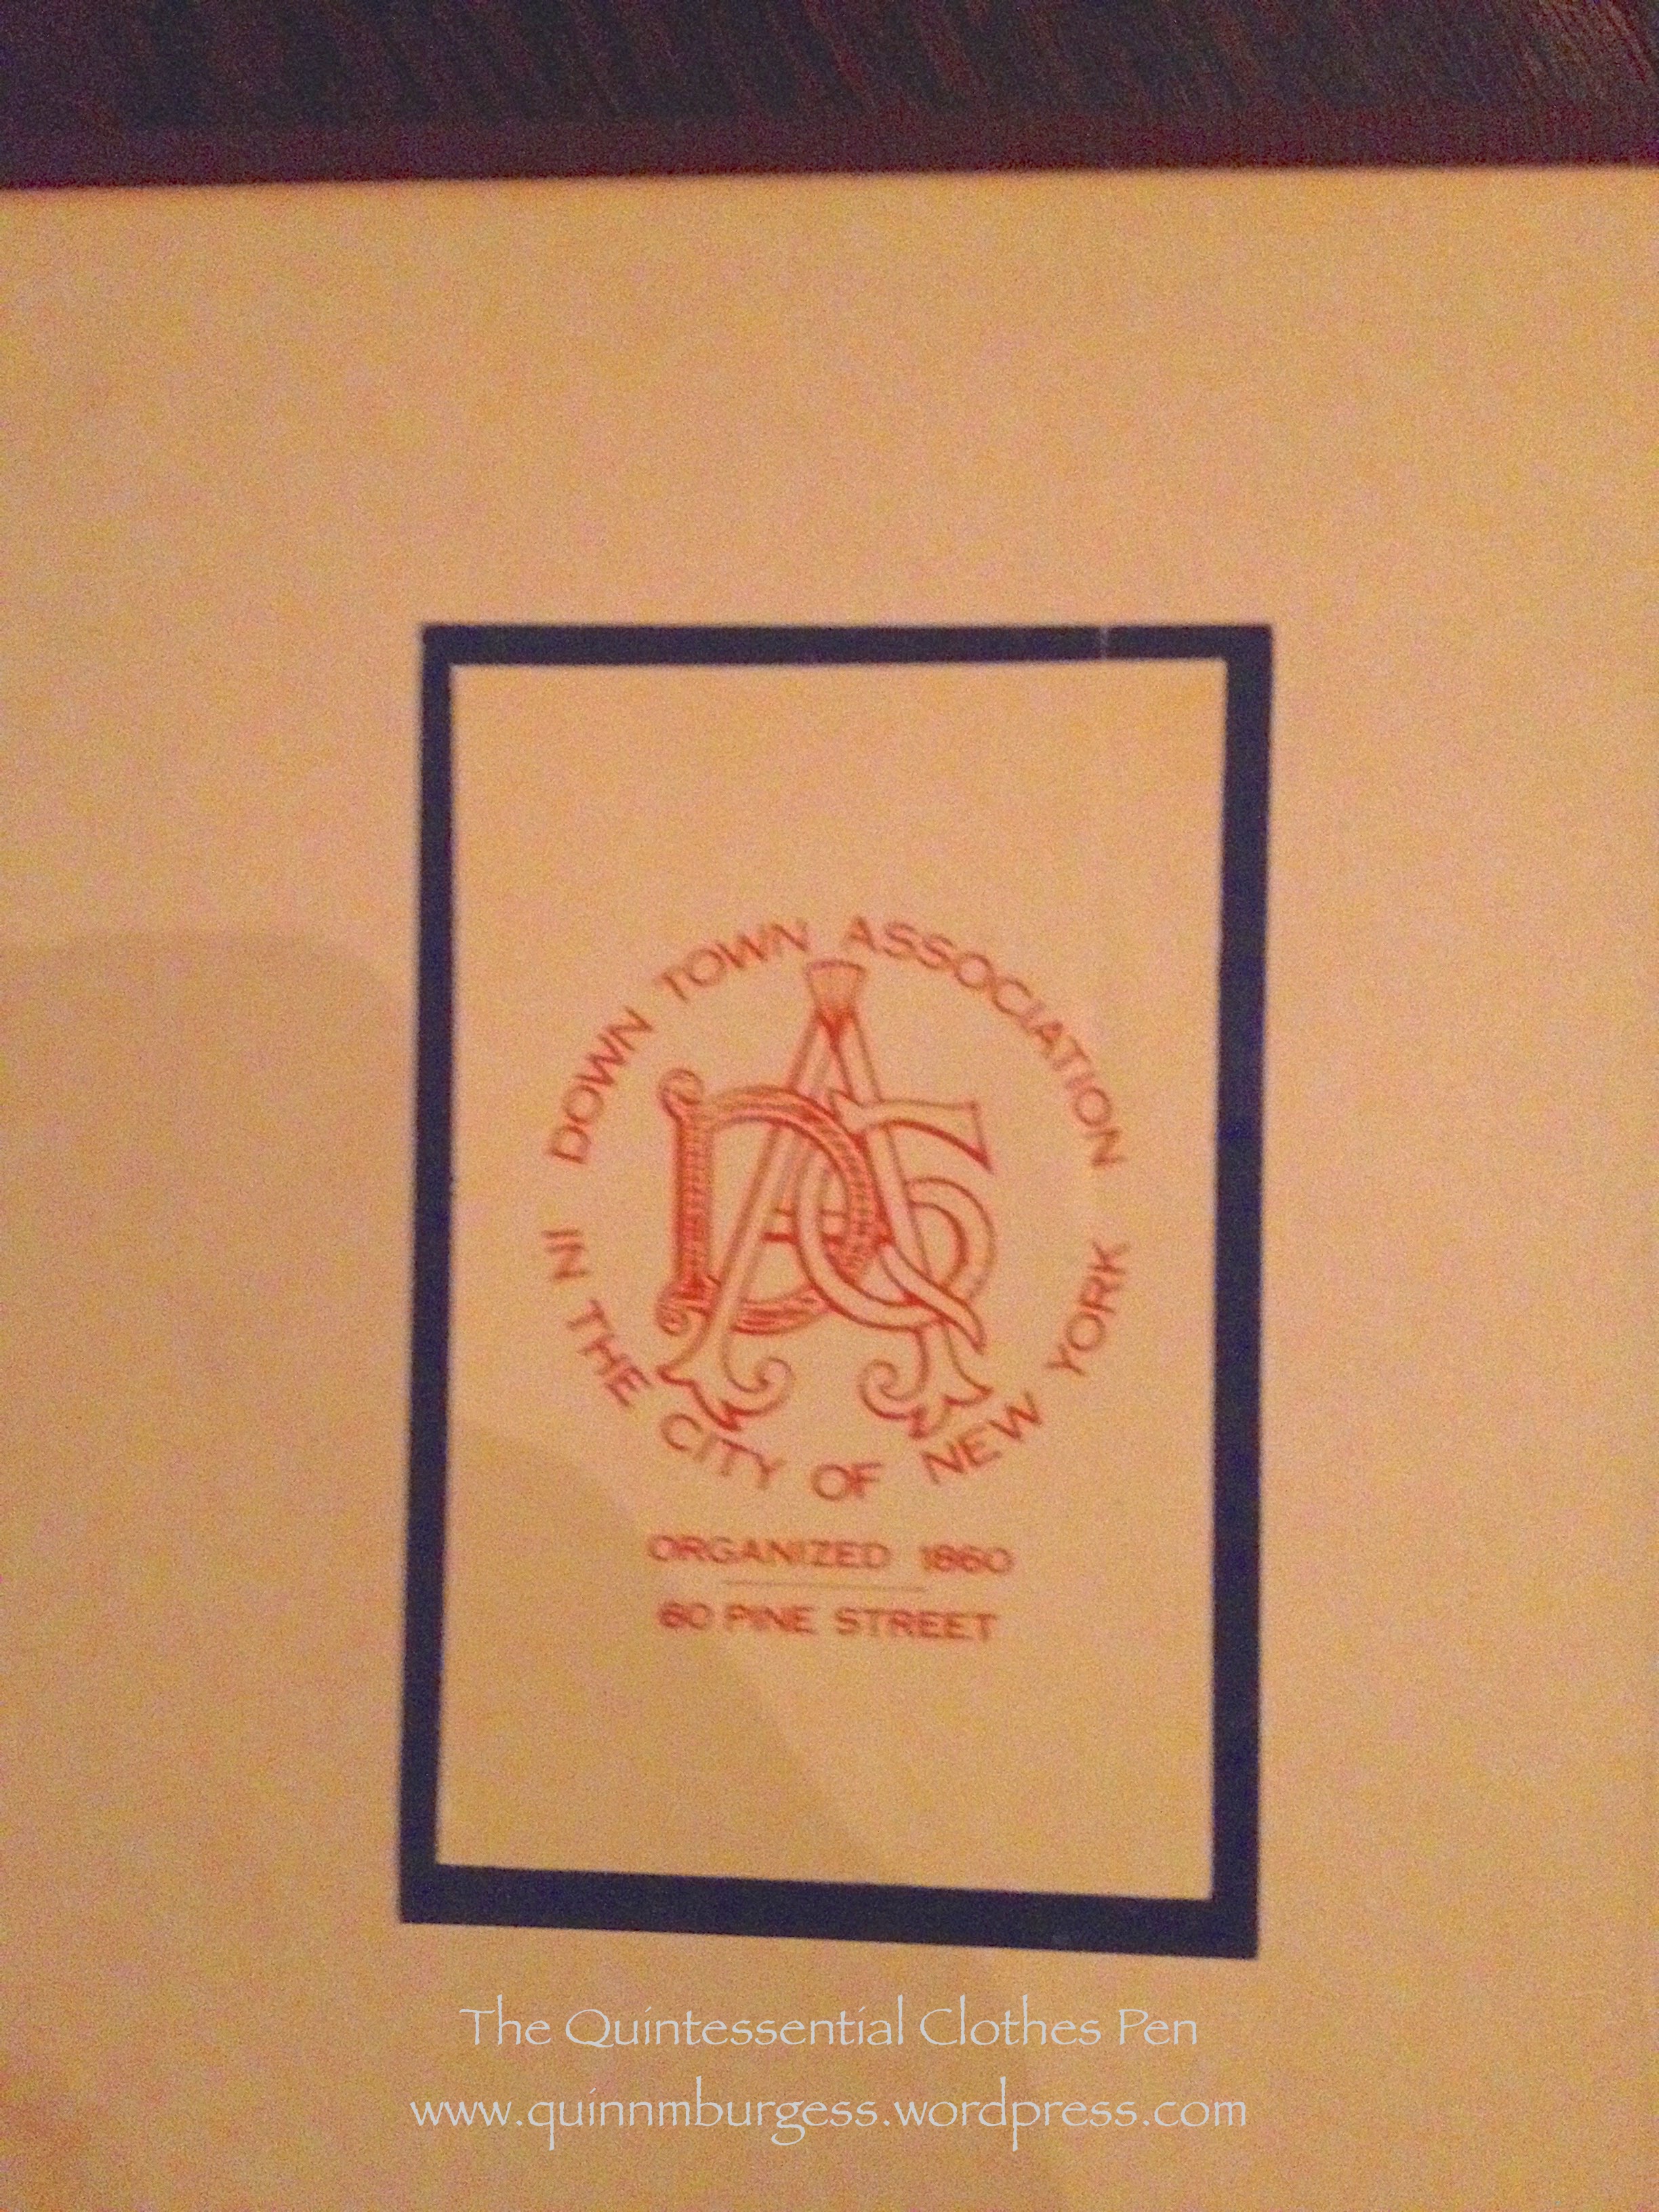
As I mentioned, this event was held at The Down Town Association in New York, which was established in 1860 (perfect for my fancy dress!). As far as I can tell the association is still housed in the same building they’ve been in since 1860. It was quite lovely inside, with detailed architecture and beautiful rooms. One room was a library full of a rather random collection of books. I enjoy perusing books and so proceeded to examine the titles closely. And guess what I found? A volume of Burke’s Peerage and Baronetage from 1912!
This excited me quite a bit, not only because it was from 1912, but I think also because it reminded me of Persuasion, in which Mr. Elliot is described as putting Burke’s Peerage in a position of honor in his estimation of important things in the world. Regardless, I got distracted and insisted that I needed to take pictures and look through.
Here I am, reading Burke’s Peerage!
Burke’s Peerage certainly is an undertaking, and this volume only covered the alphabet through letter L! Unfortunately, I didn’t spot a second volume in the library, but I hope it’s there somewhere.
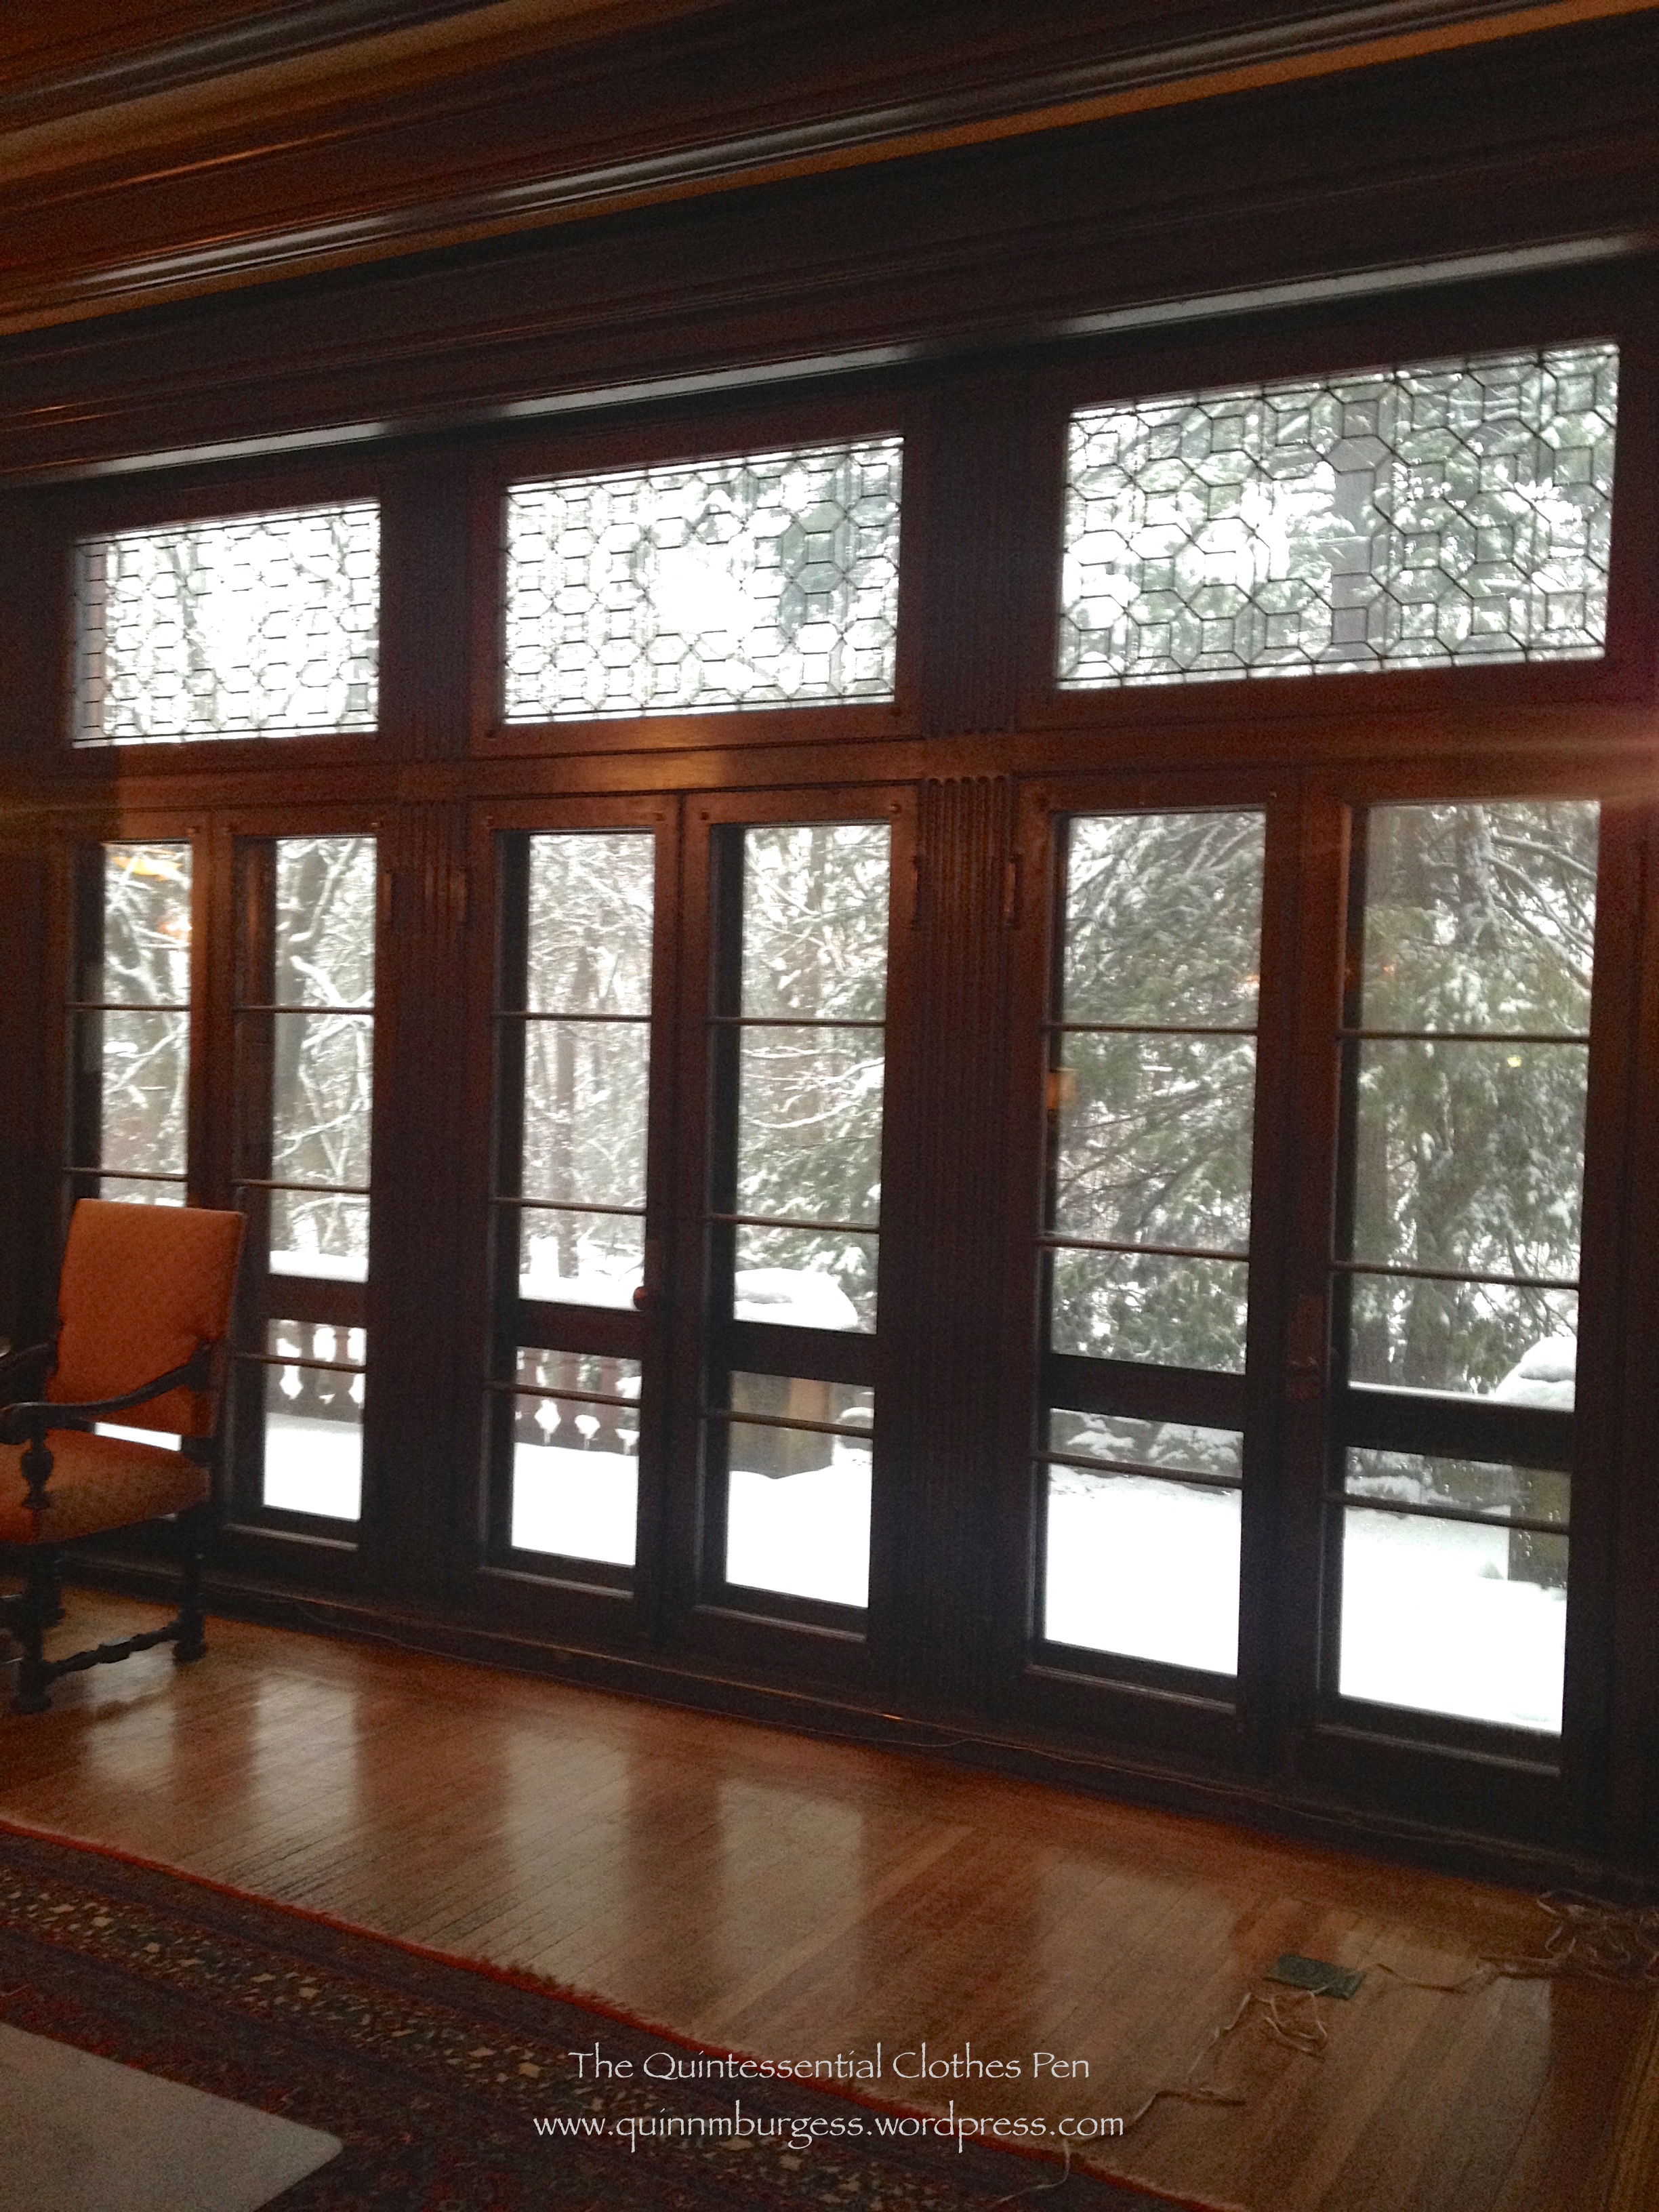
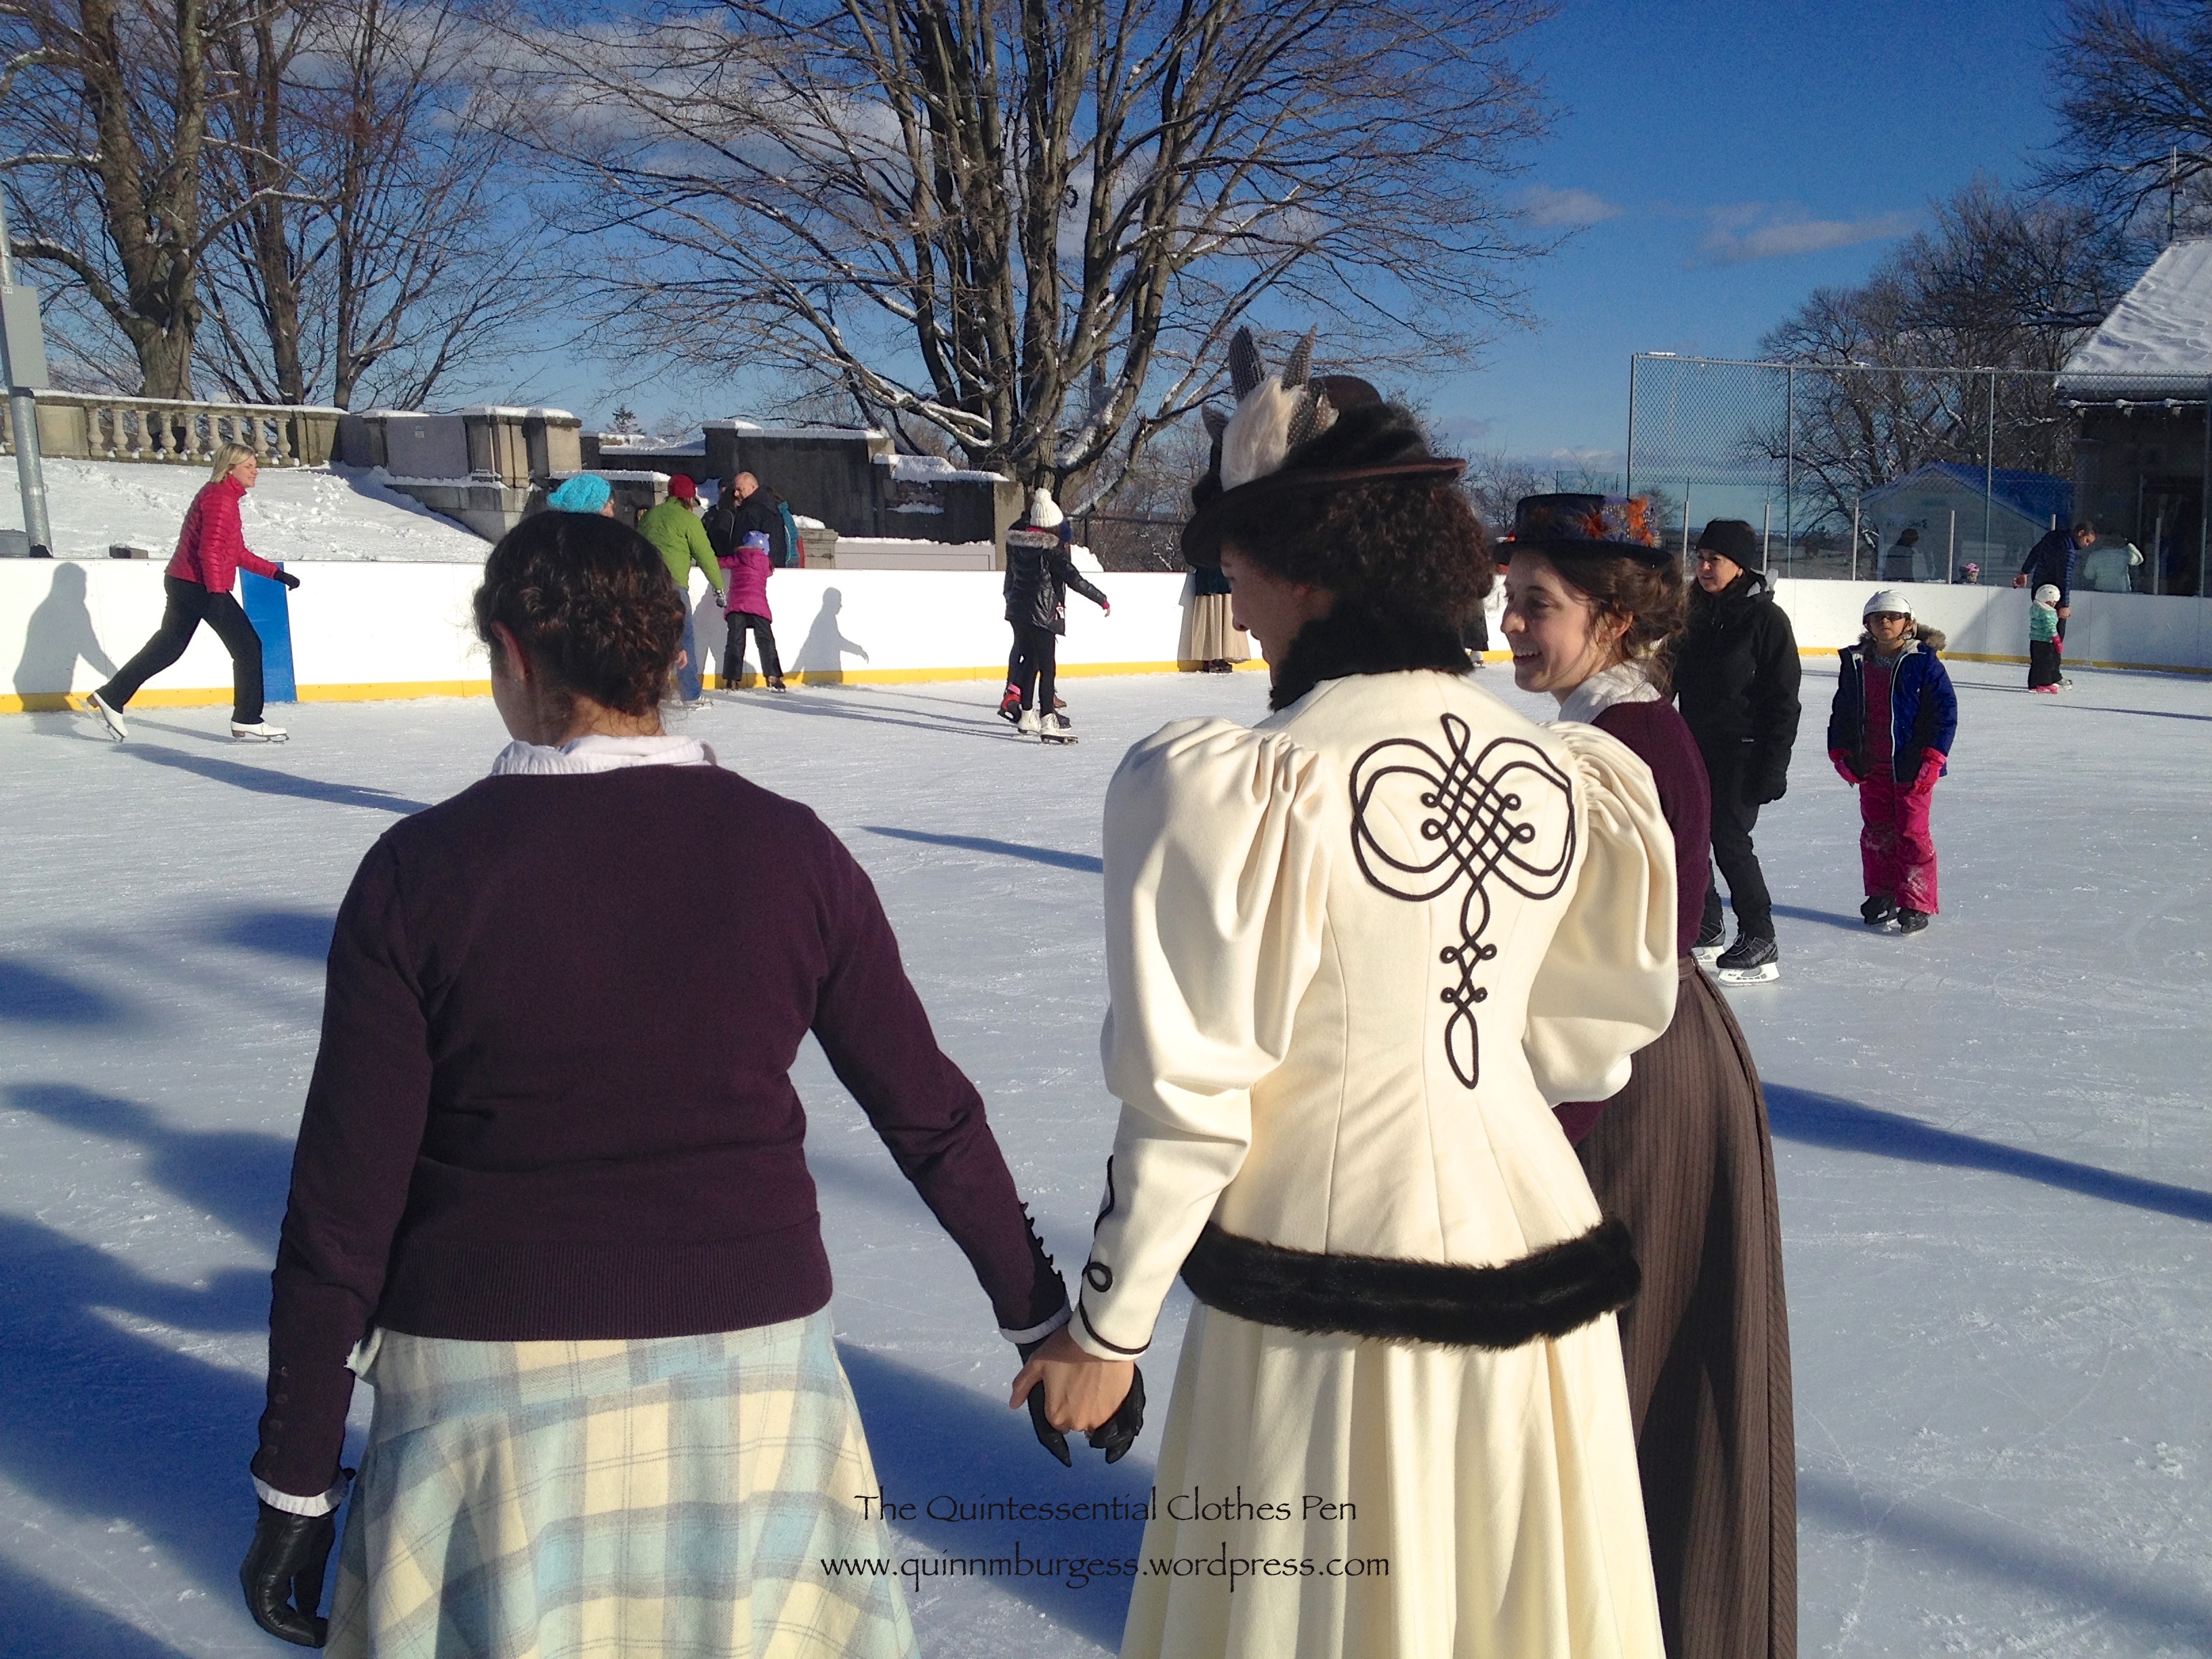
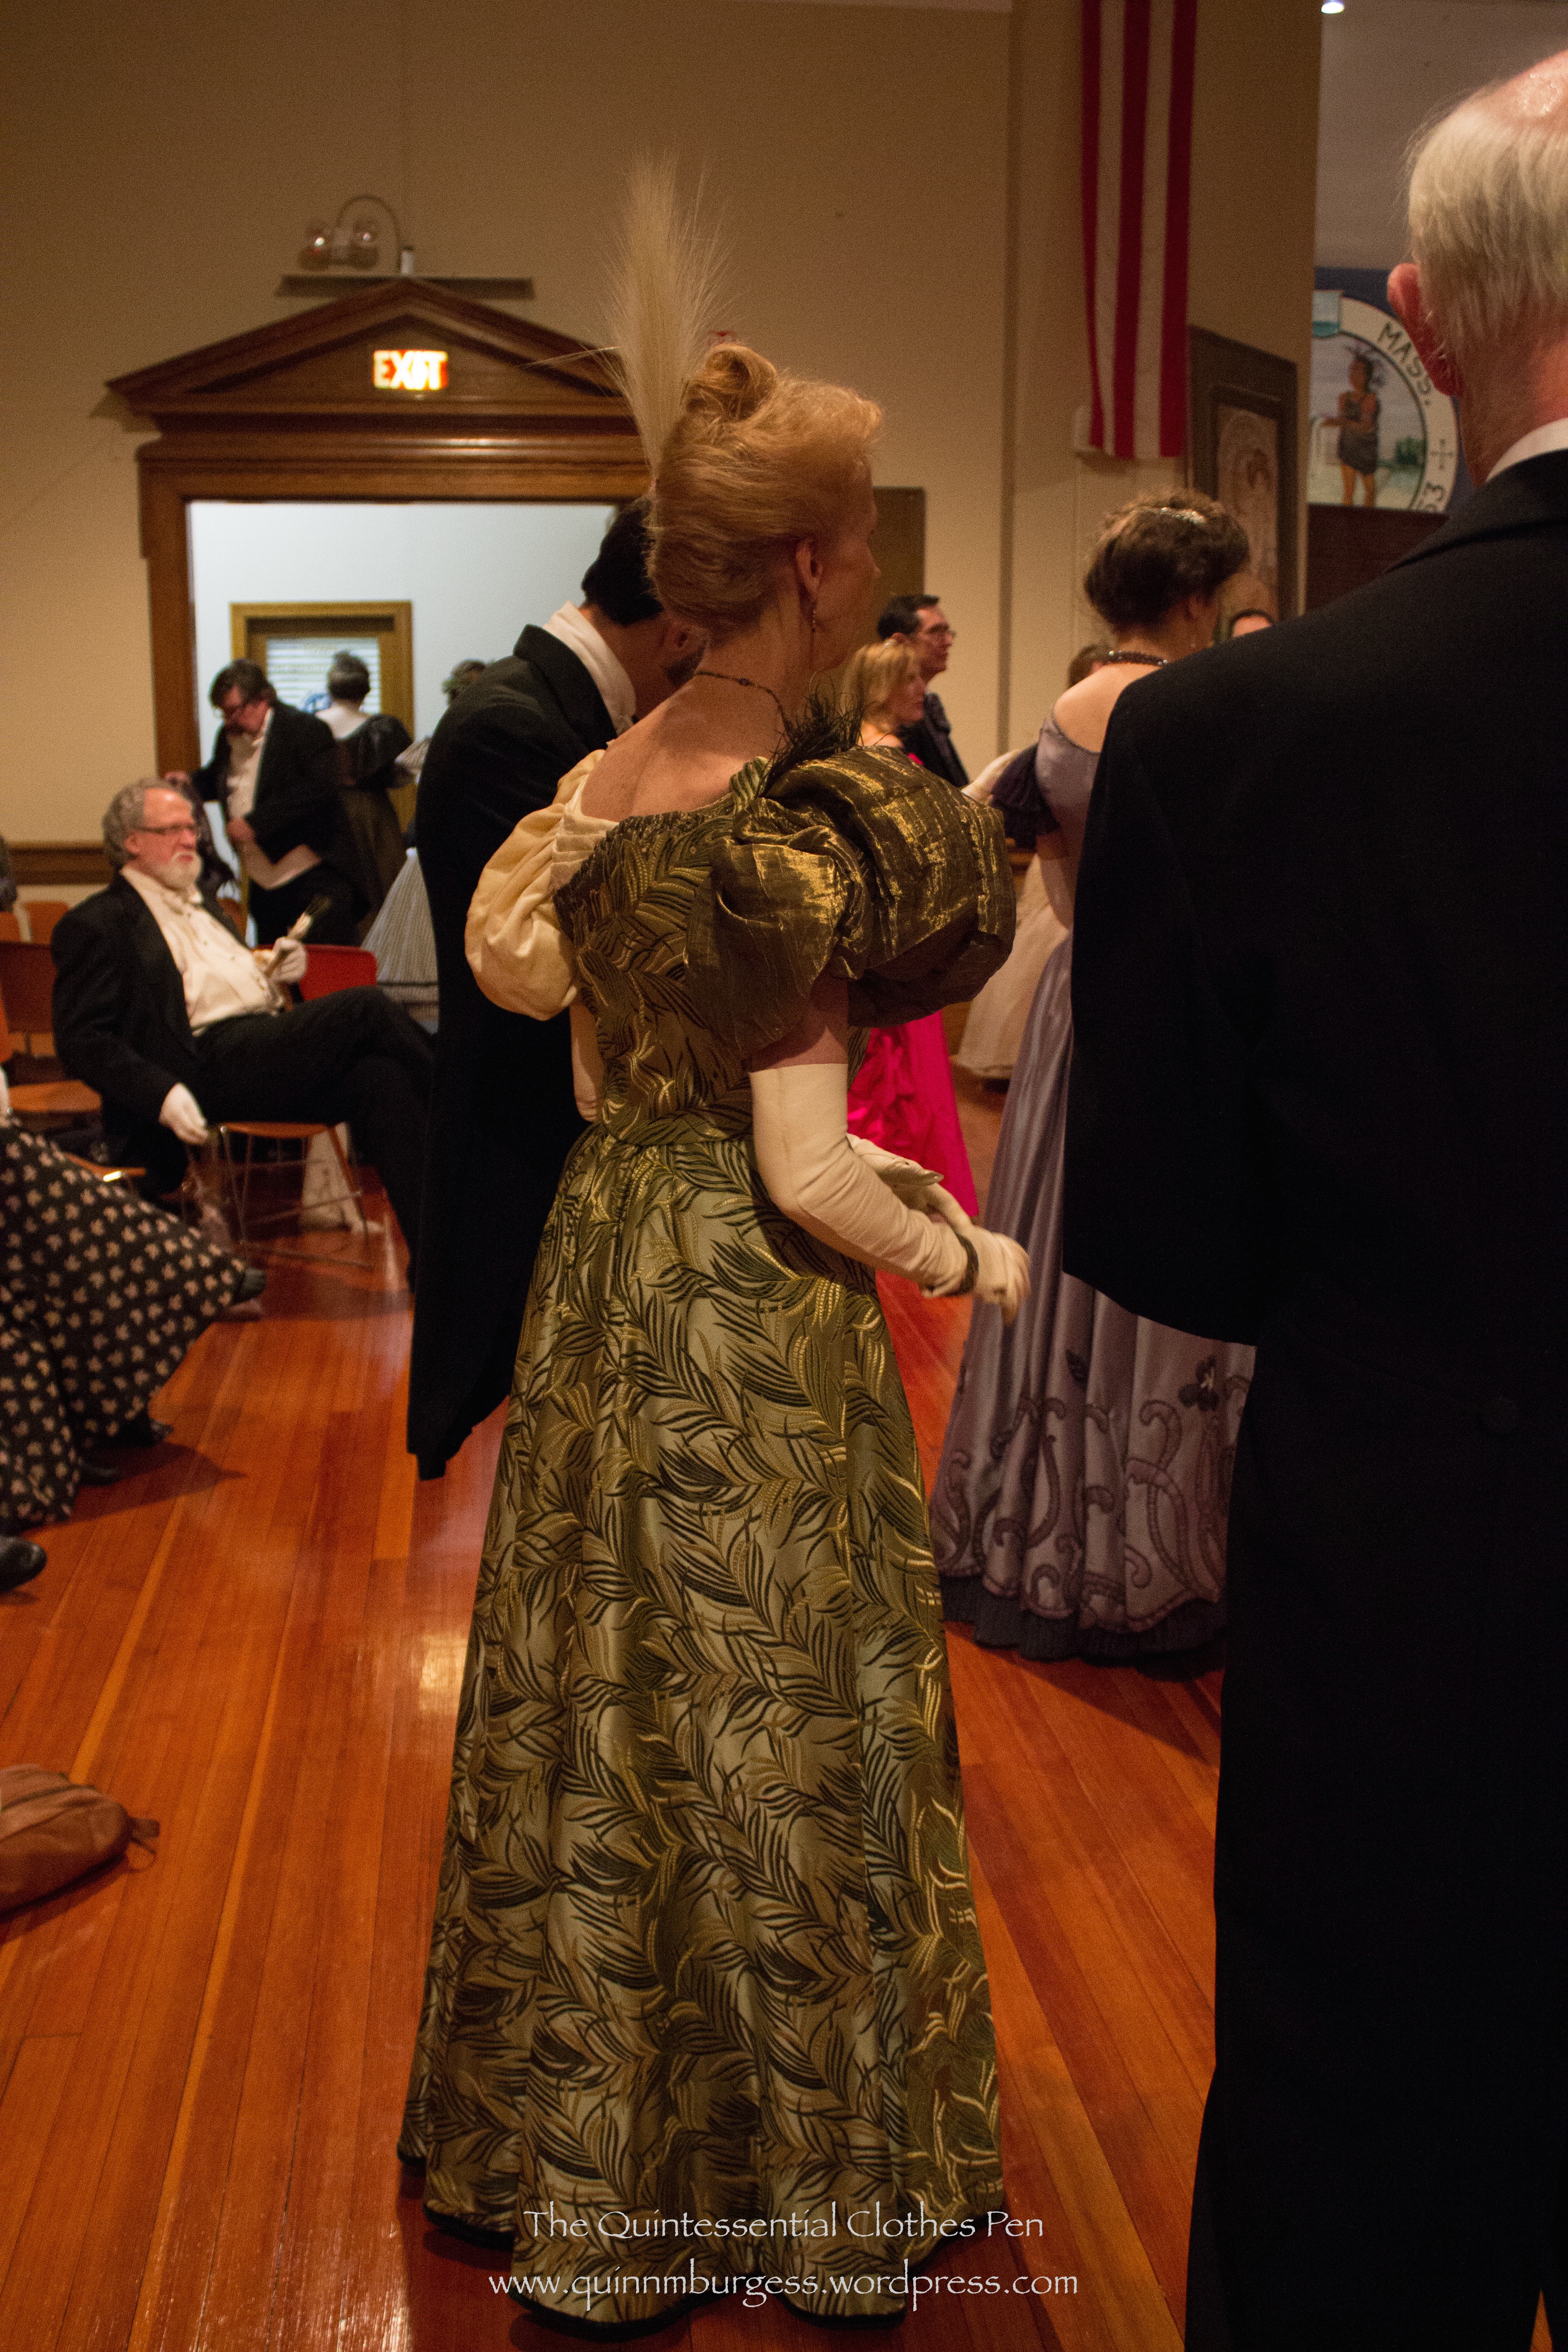
In January, The Commonwealth Vintage Dancers hosted an 1890s weekend (the same weekend that included an ice skating party that I blogged about a few weeks ago). Despite some snow during the day and into the evening, people were not kept away and the ball on Saturday was packed with dancers. Please join me on a little jaunt back to a snowy evening in the 1890s.
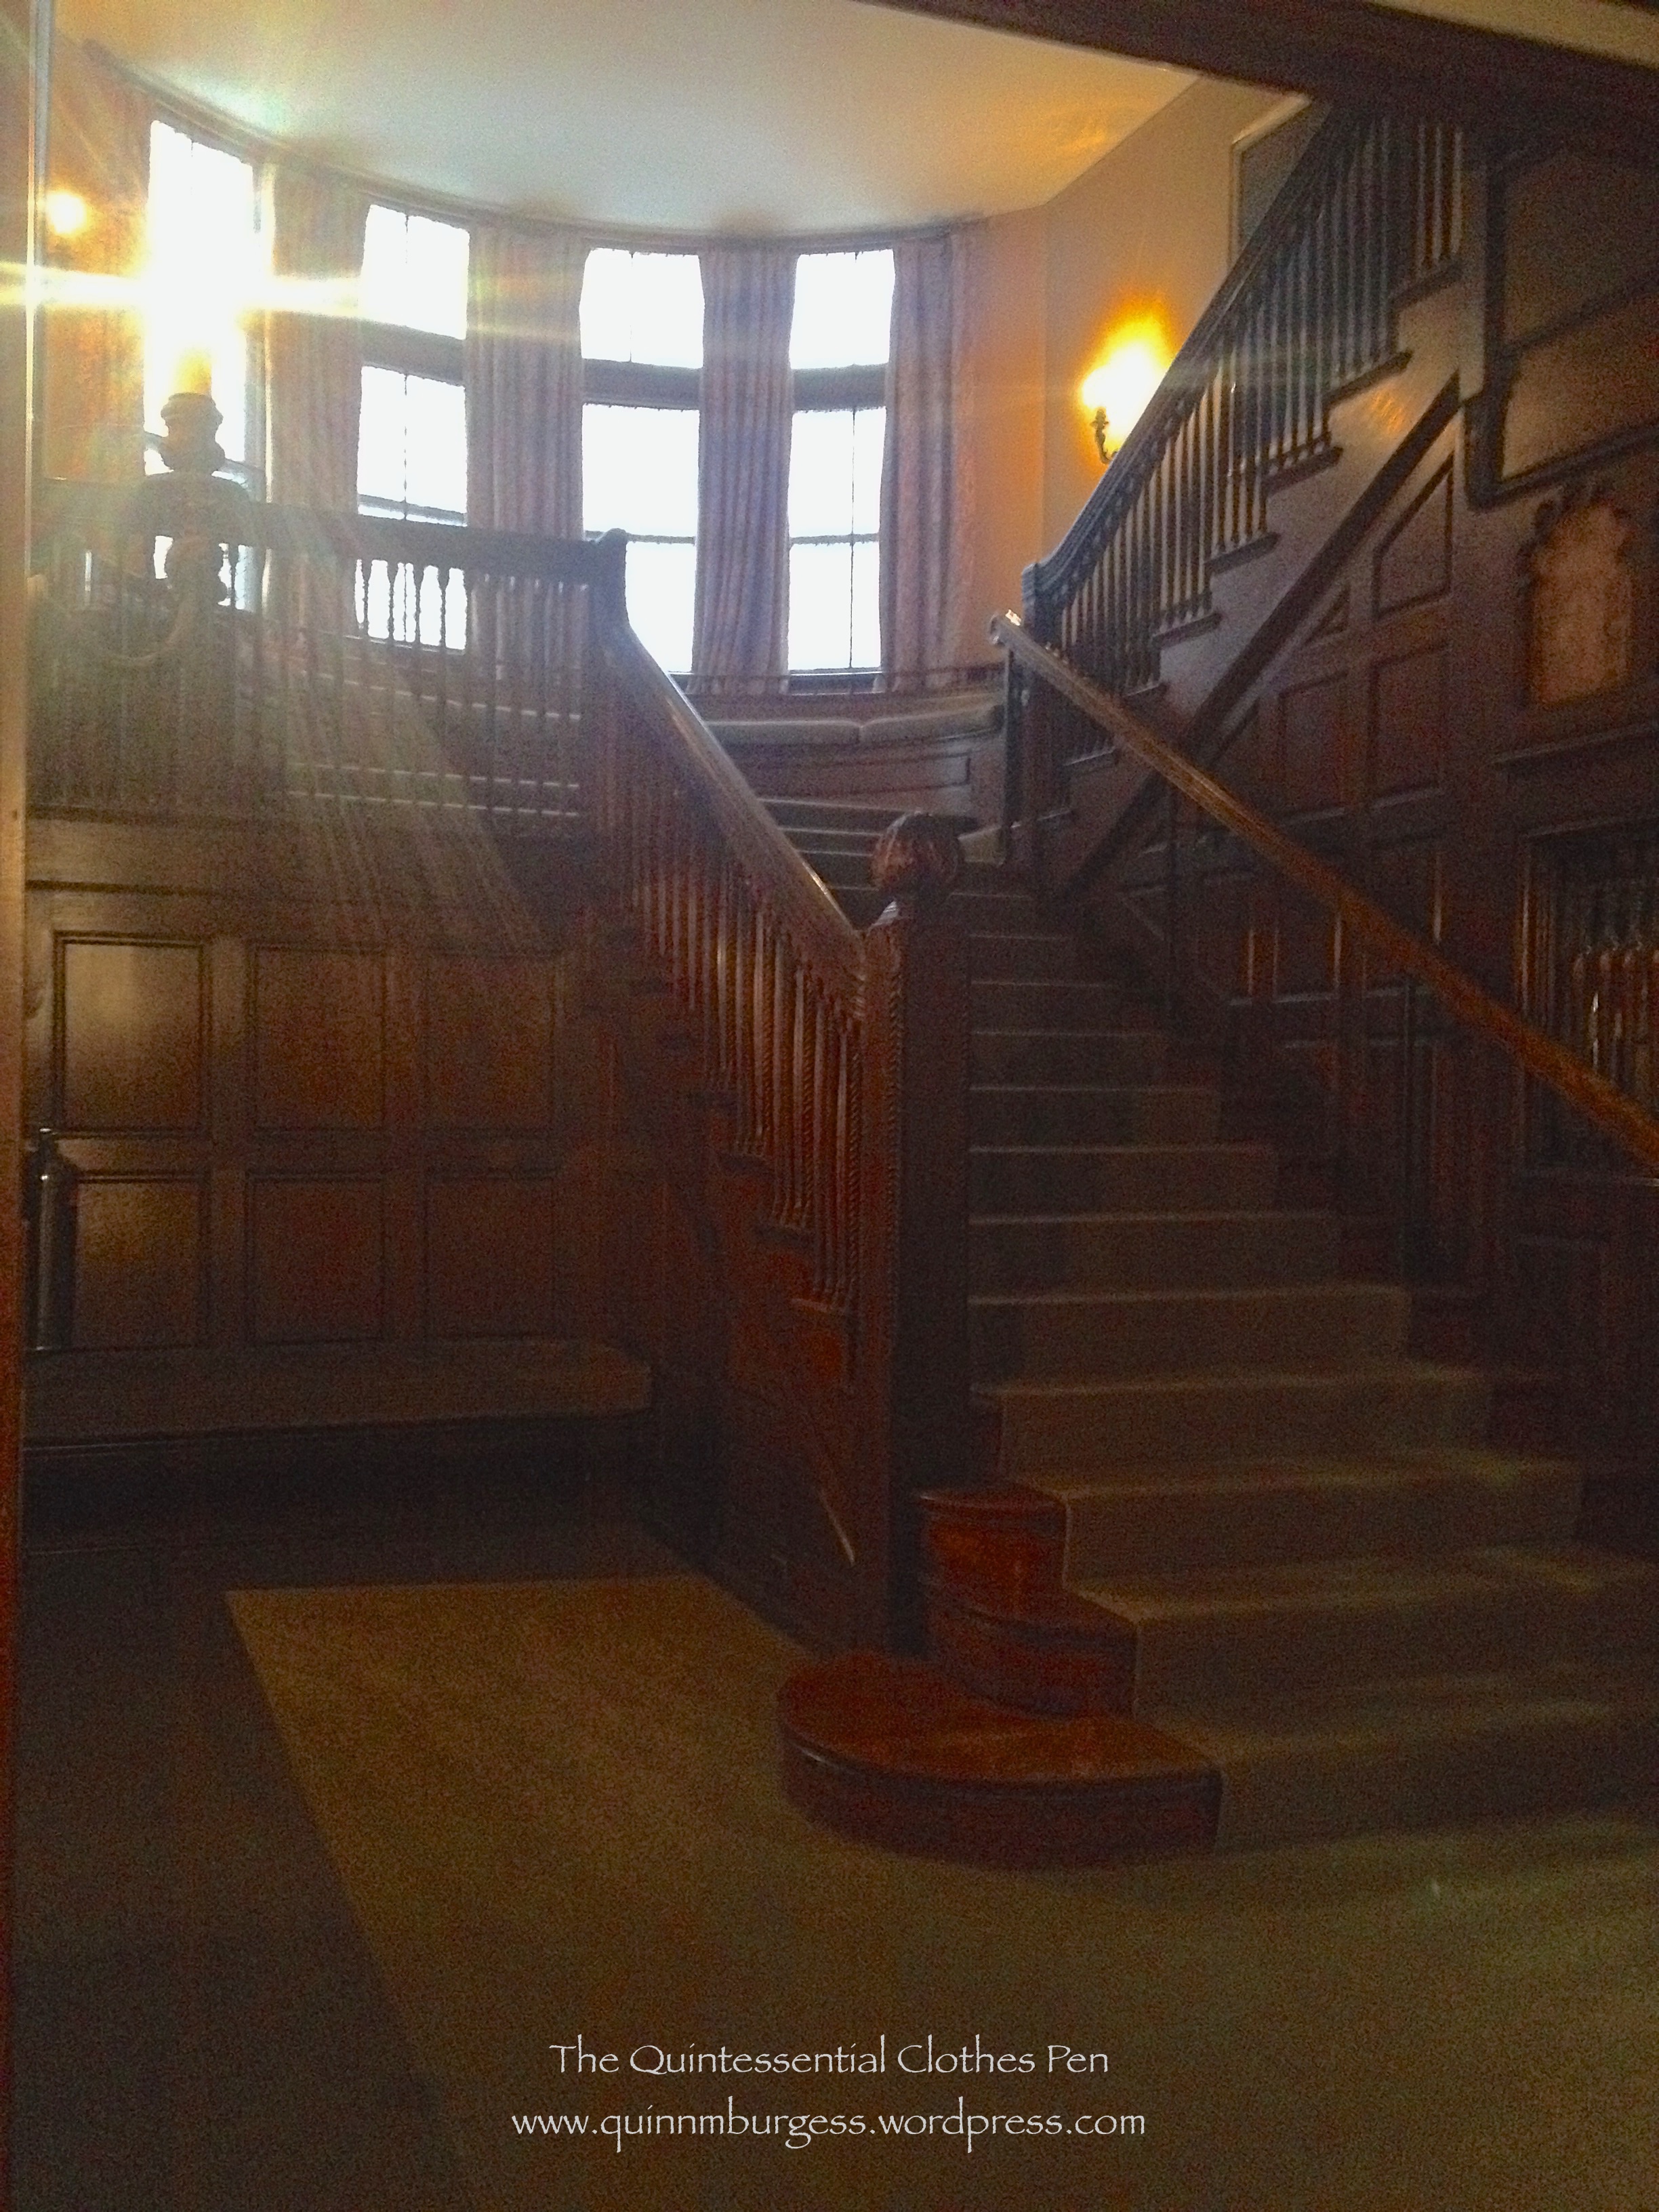
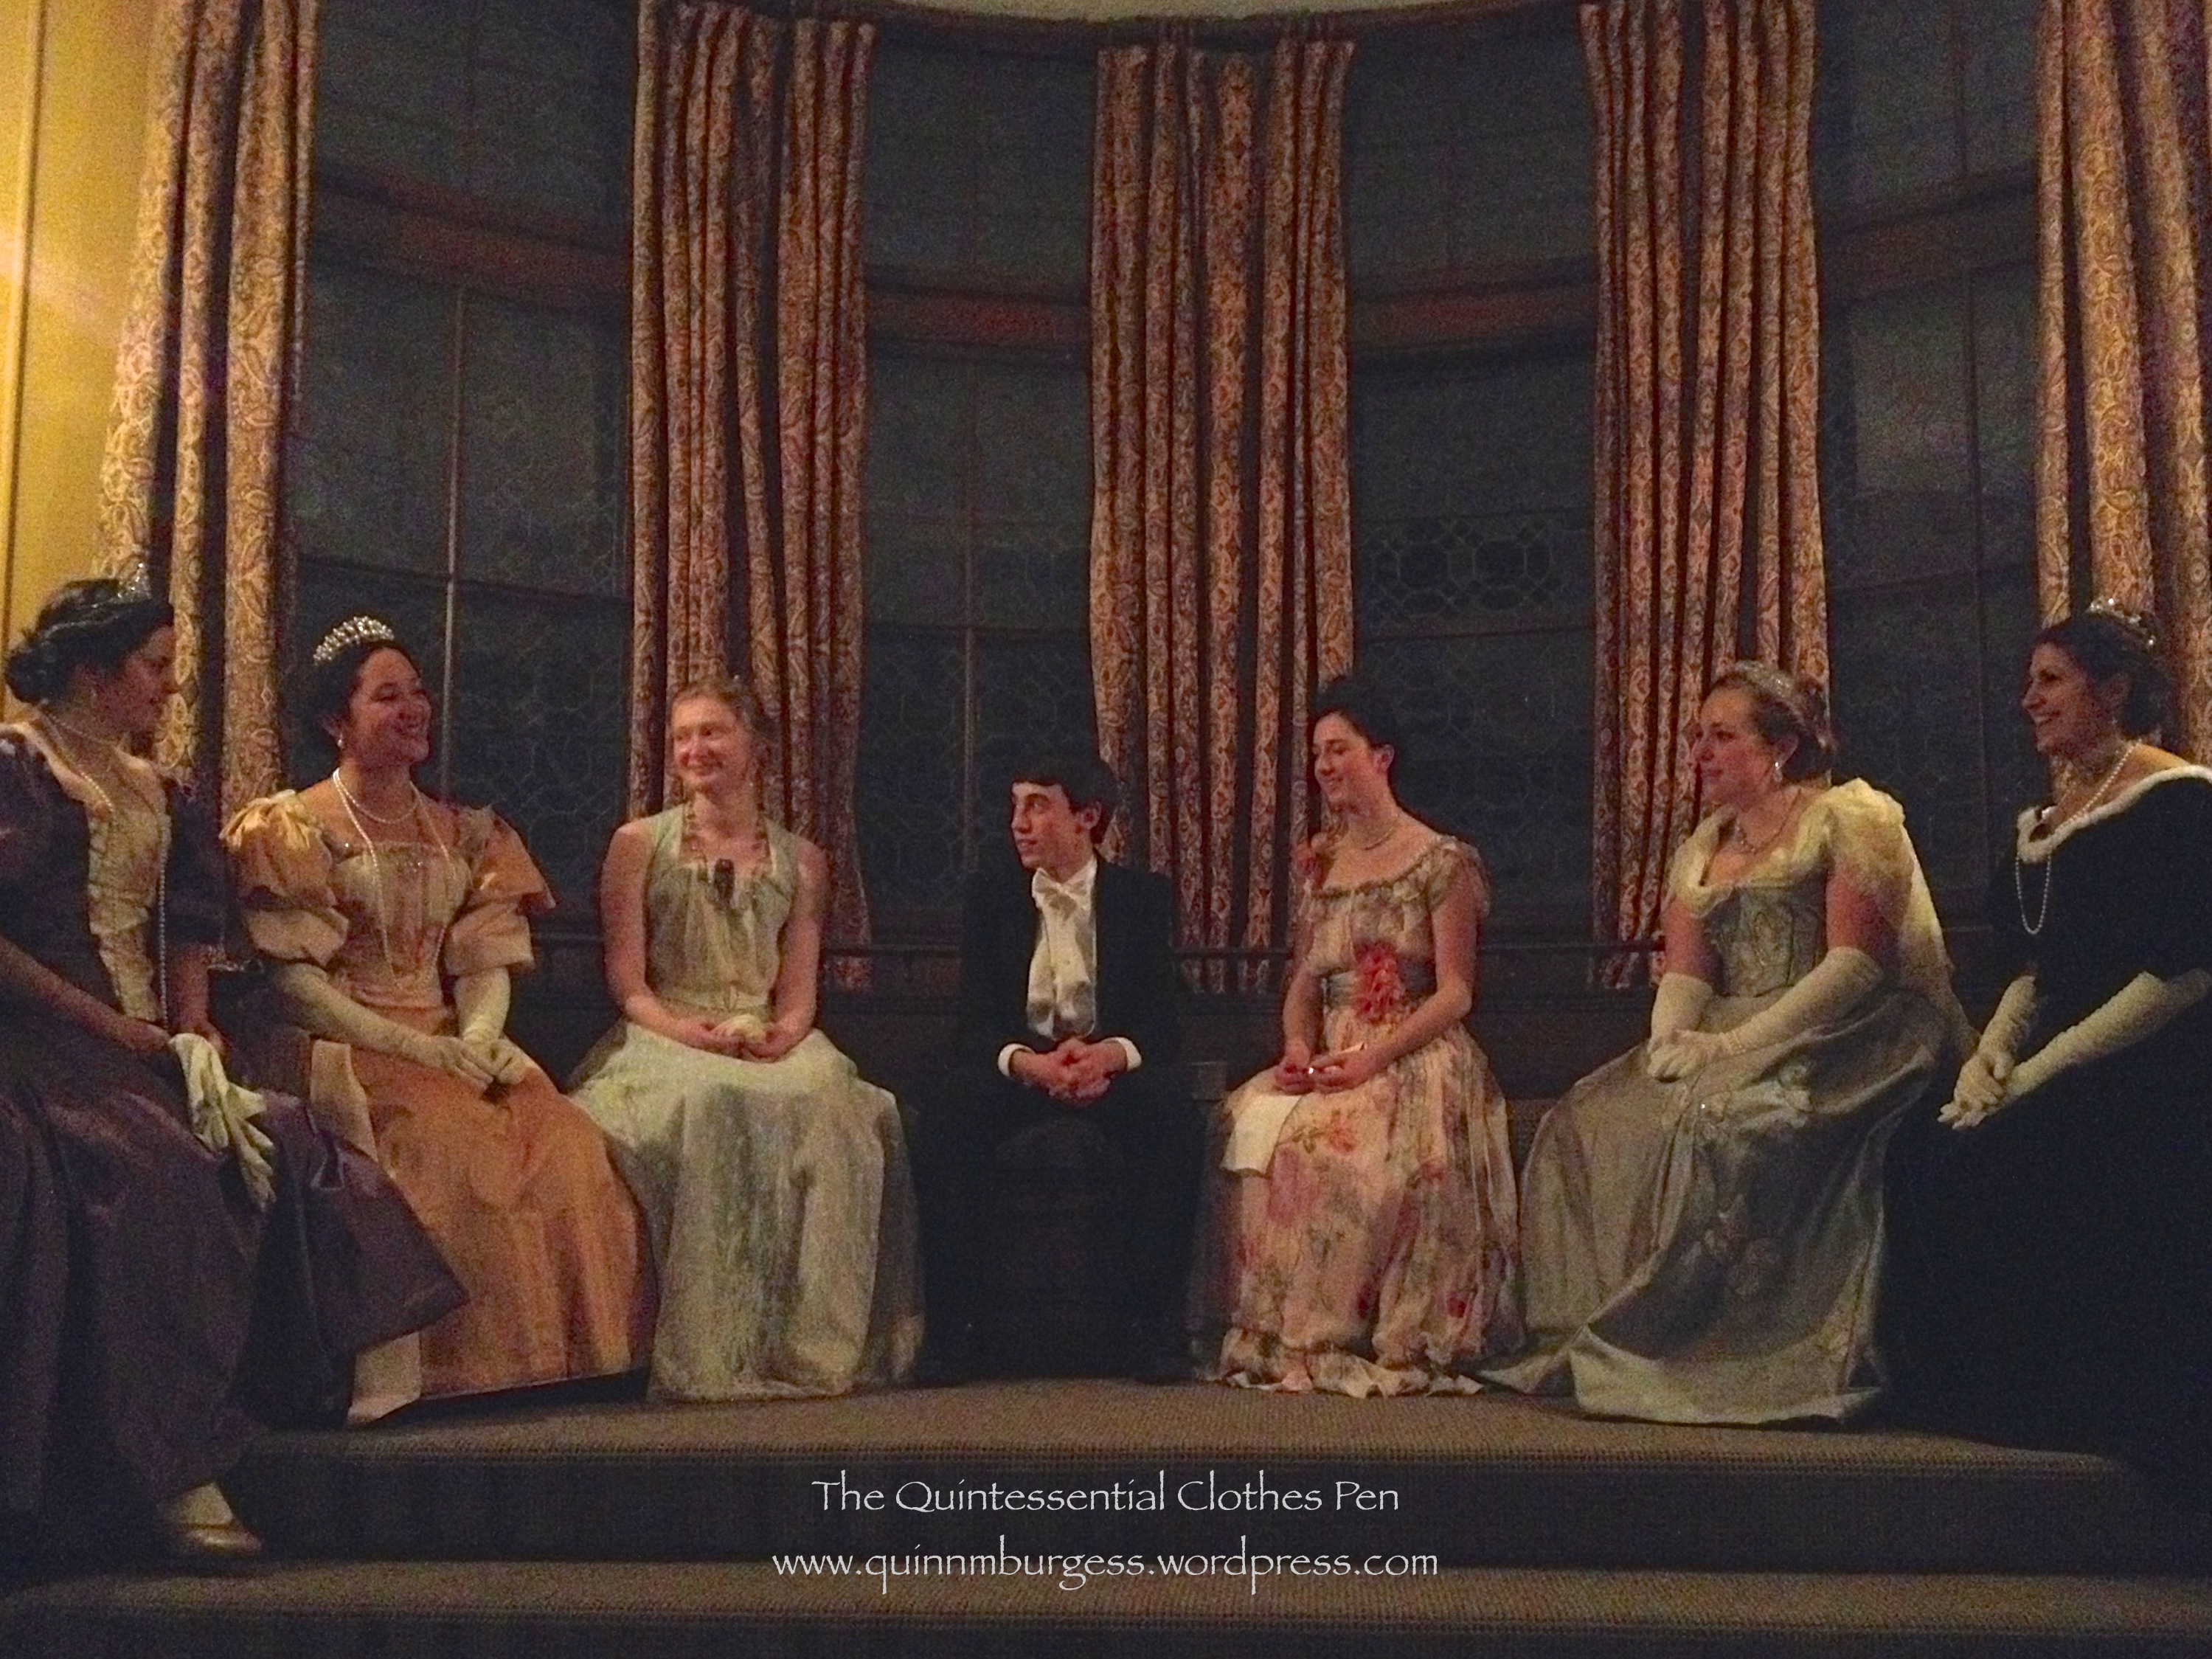
Arriving at the ball in the snow. (Well, sort of… I actually arrived in modern clothes, got dressed in my 1893 ball gown, borrowed a friend’s fur cape to keep the snow off my silk and the cold off my chest, and went back outside to take staged “arriving” photos.)The entrance hall’s view of the snow outside.The beautiful main staircase to the upper floors. There were lots of lovely sitting areas and nooks throughout the venue.There were also bookcases everywhere full of elegant hard cover books (my favorite!).In the ballroom, couples danced round dances including waltzes and polkas.What strikes me in this photograph are the black and white evening suits of the gentlemen. Everyone is nicely lined up to dance what I believe was the Opera Reel.
Videos are even more immersive than photos, and with this you can actually step into the ballroom that evening. Keep a look out for me partway through the video dancing a polka and then dancing a waltz at the end.
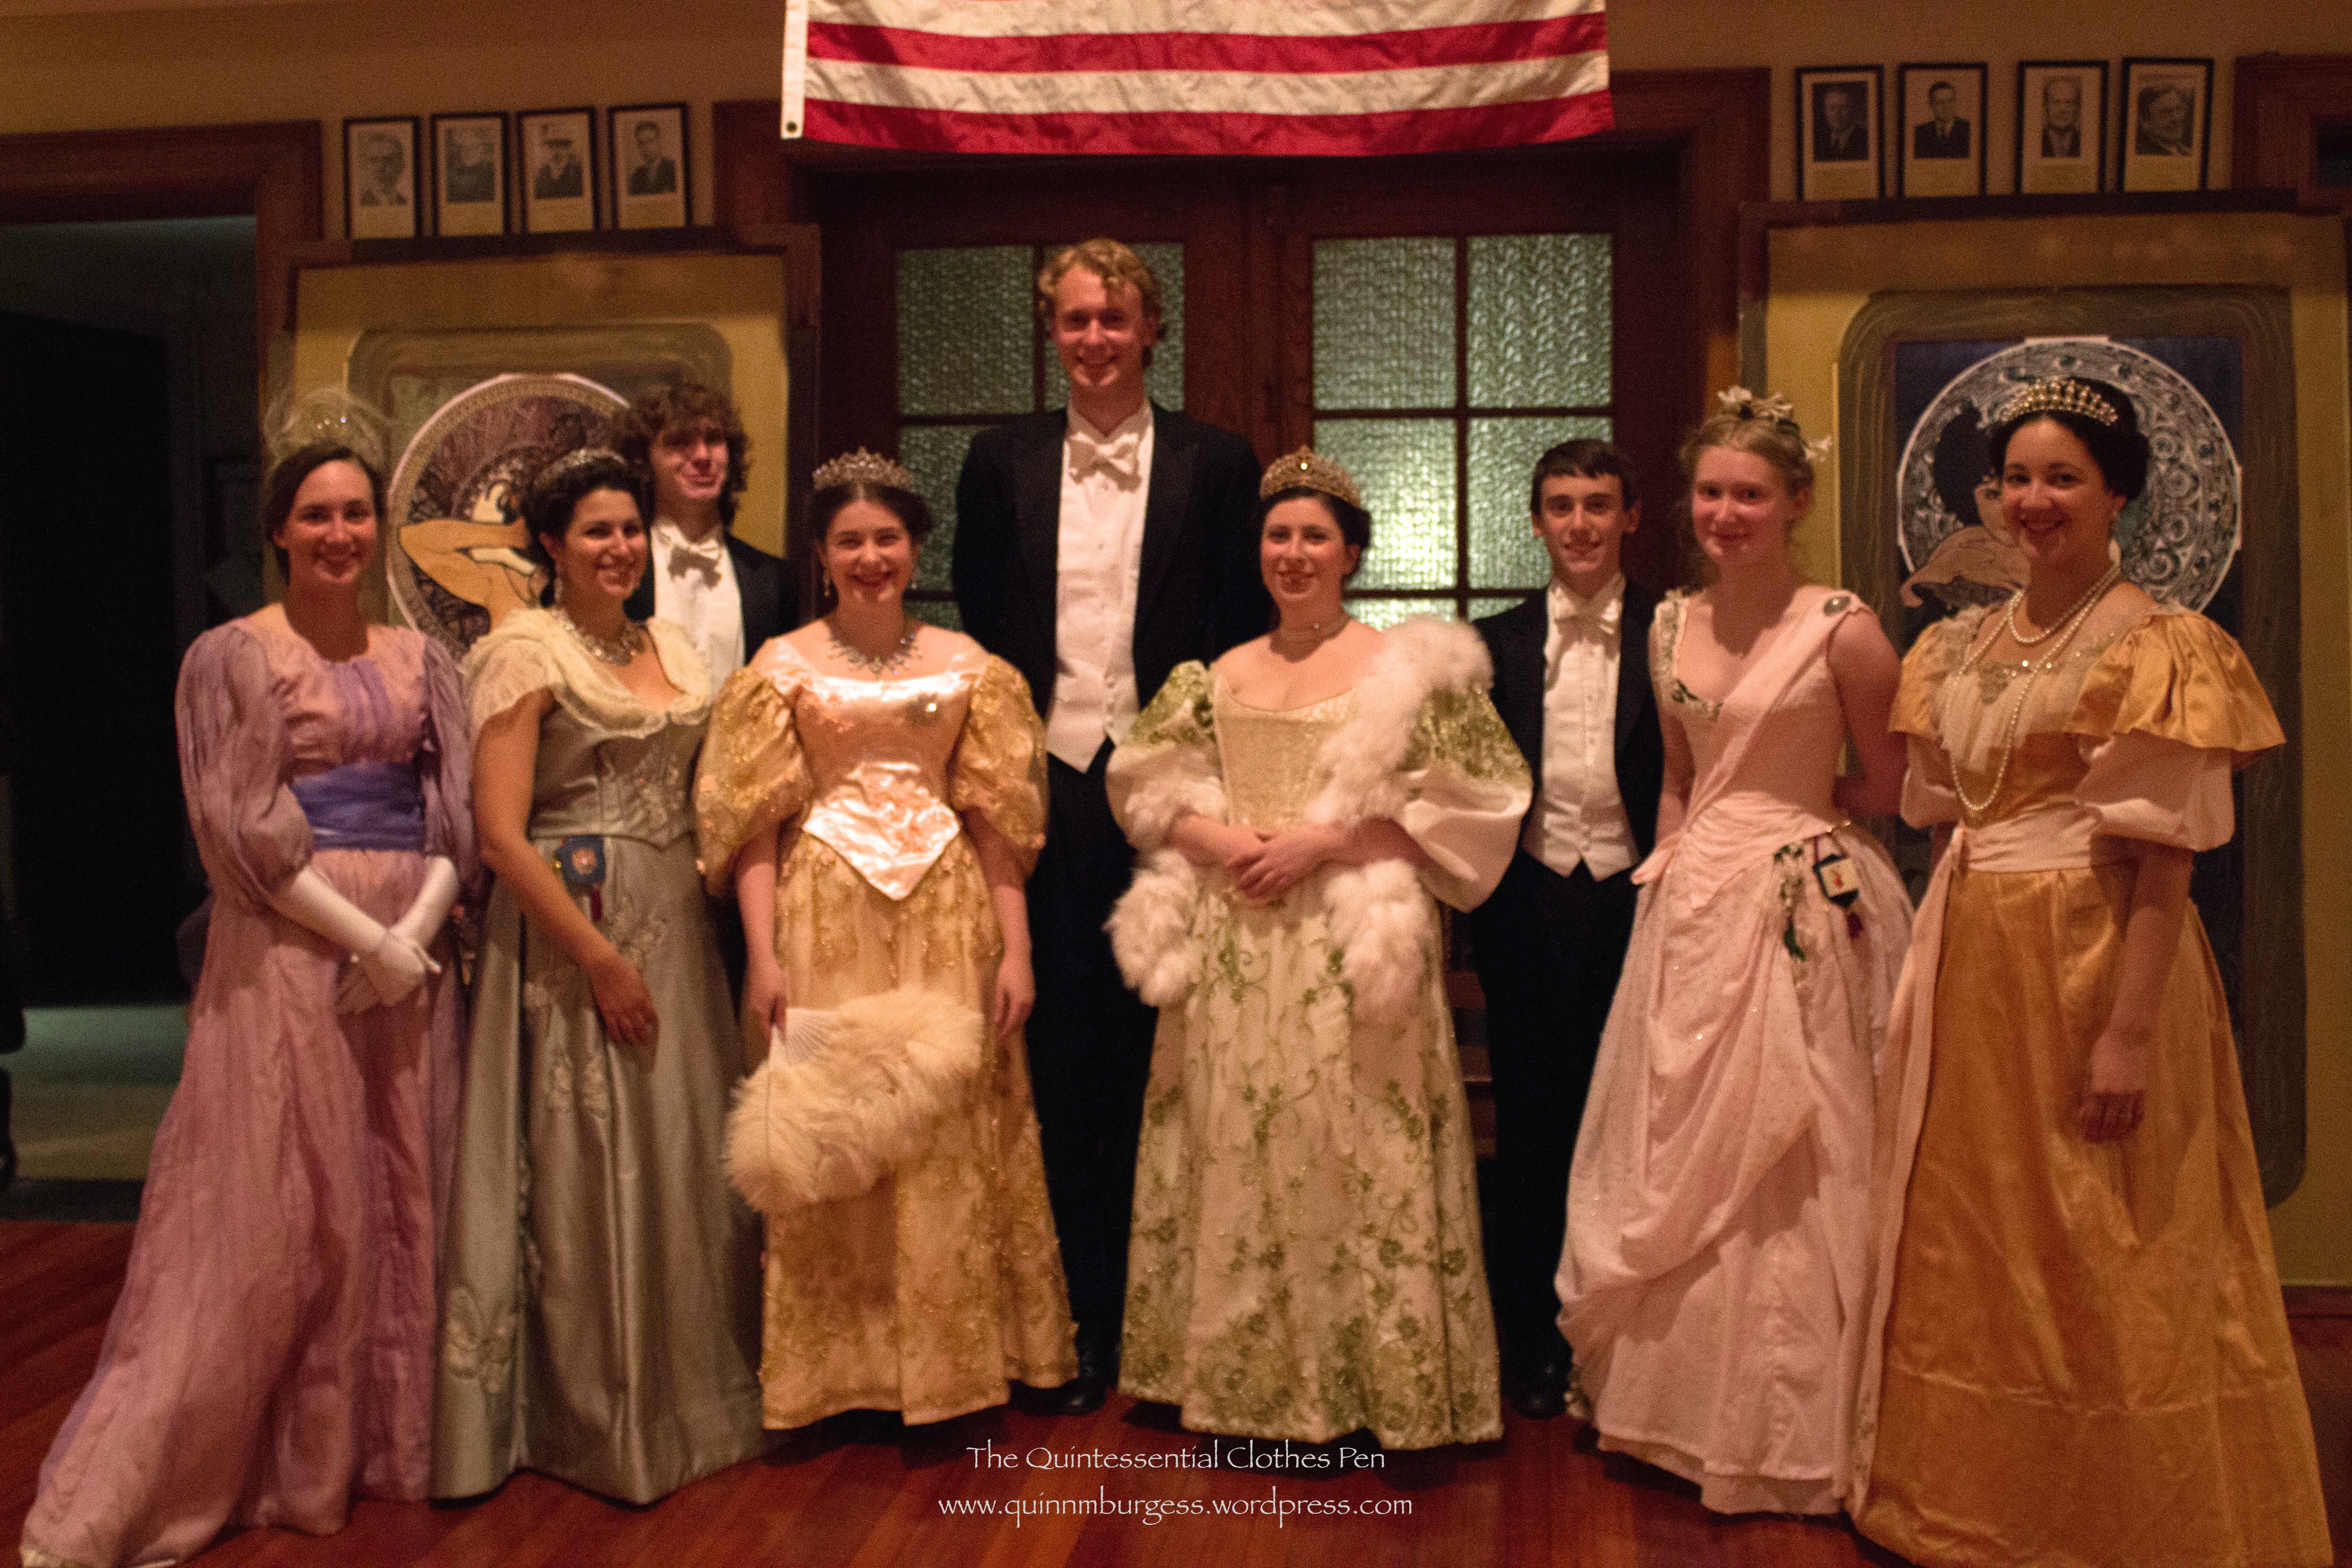
It became quite warm in the ballroom with all that dancing, so I stepped outside partway through to cool off and the snow had resumed in earnest!People spread through the house during the a break in the dancing. Here we are part way up the main staircase. Aren’t we well set up for a photo?And finally, being silly, because I blended very well with the curtains! Good night!
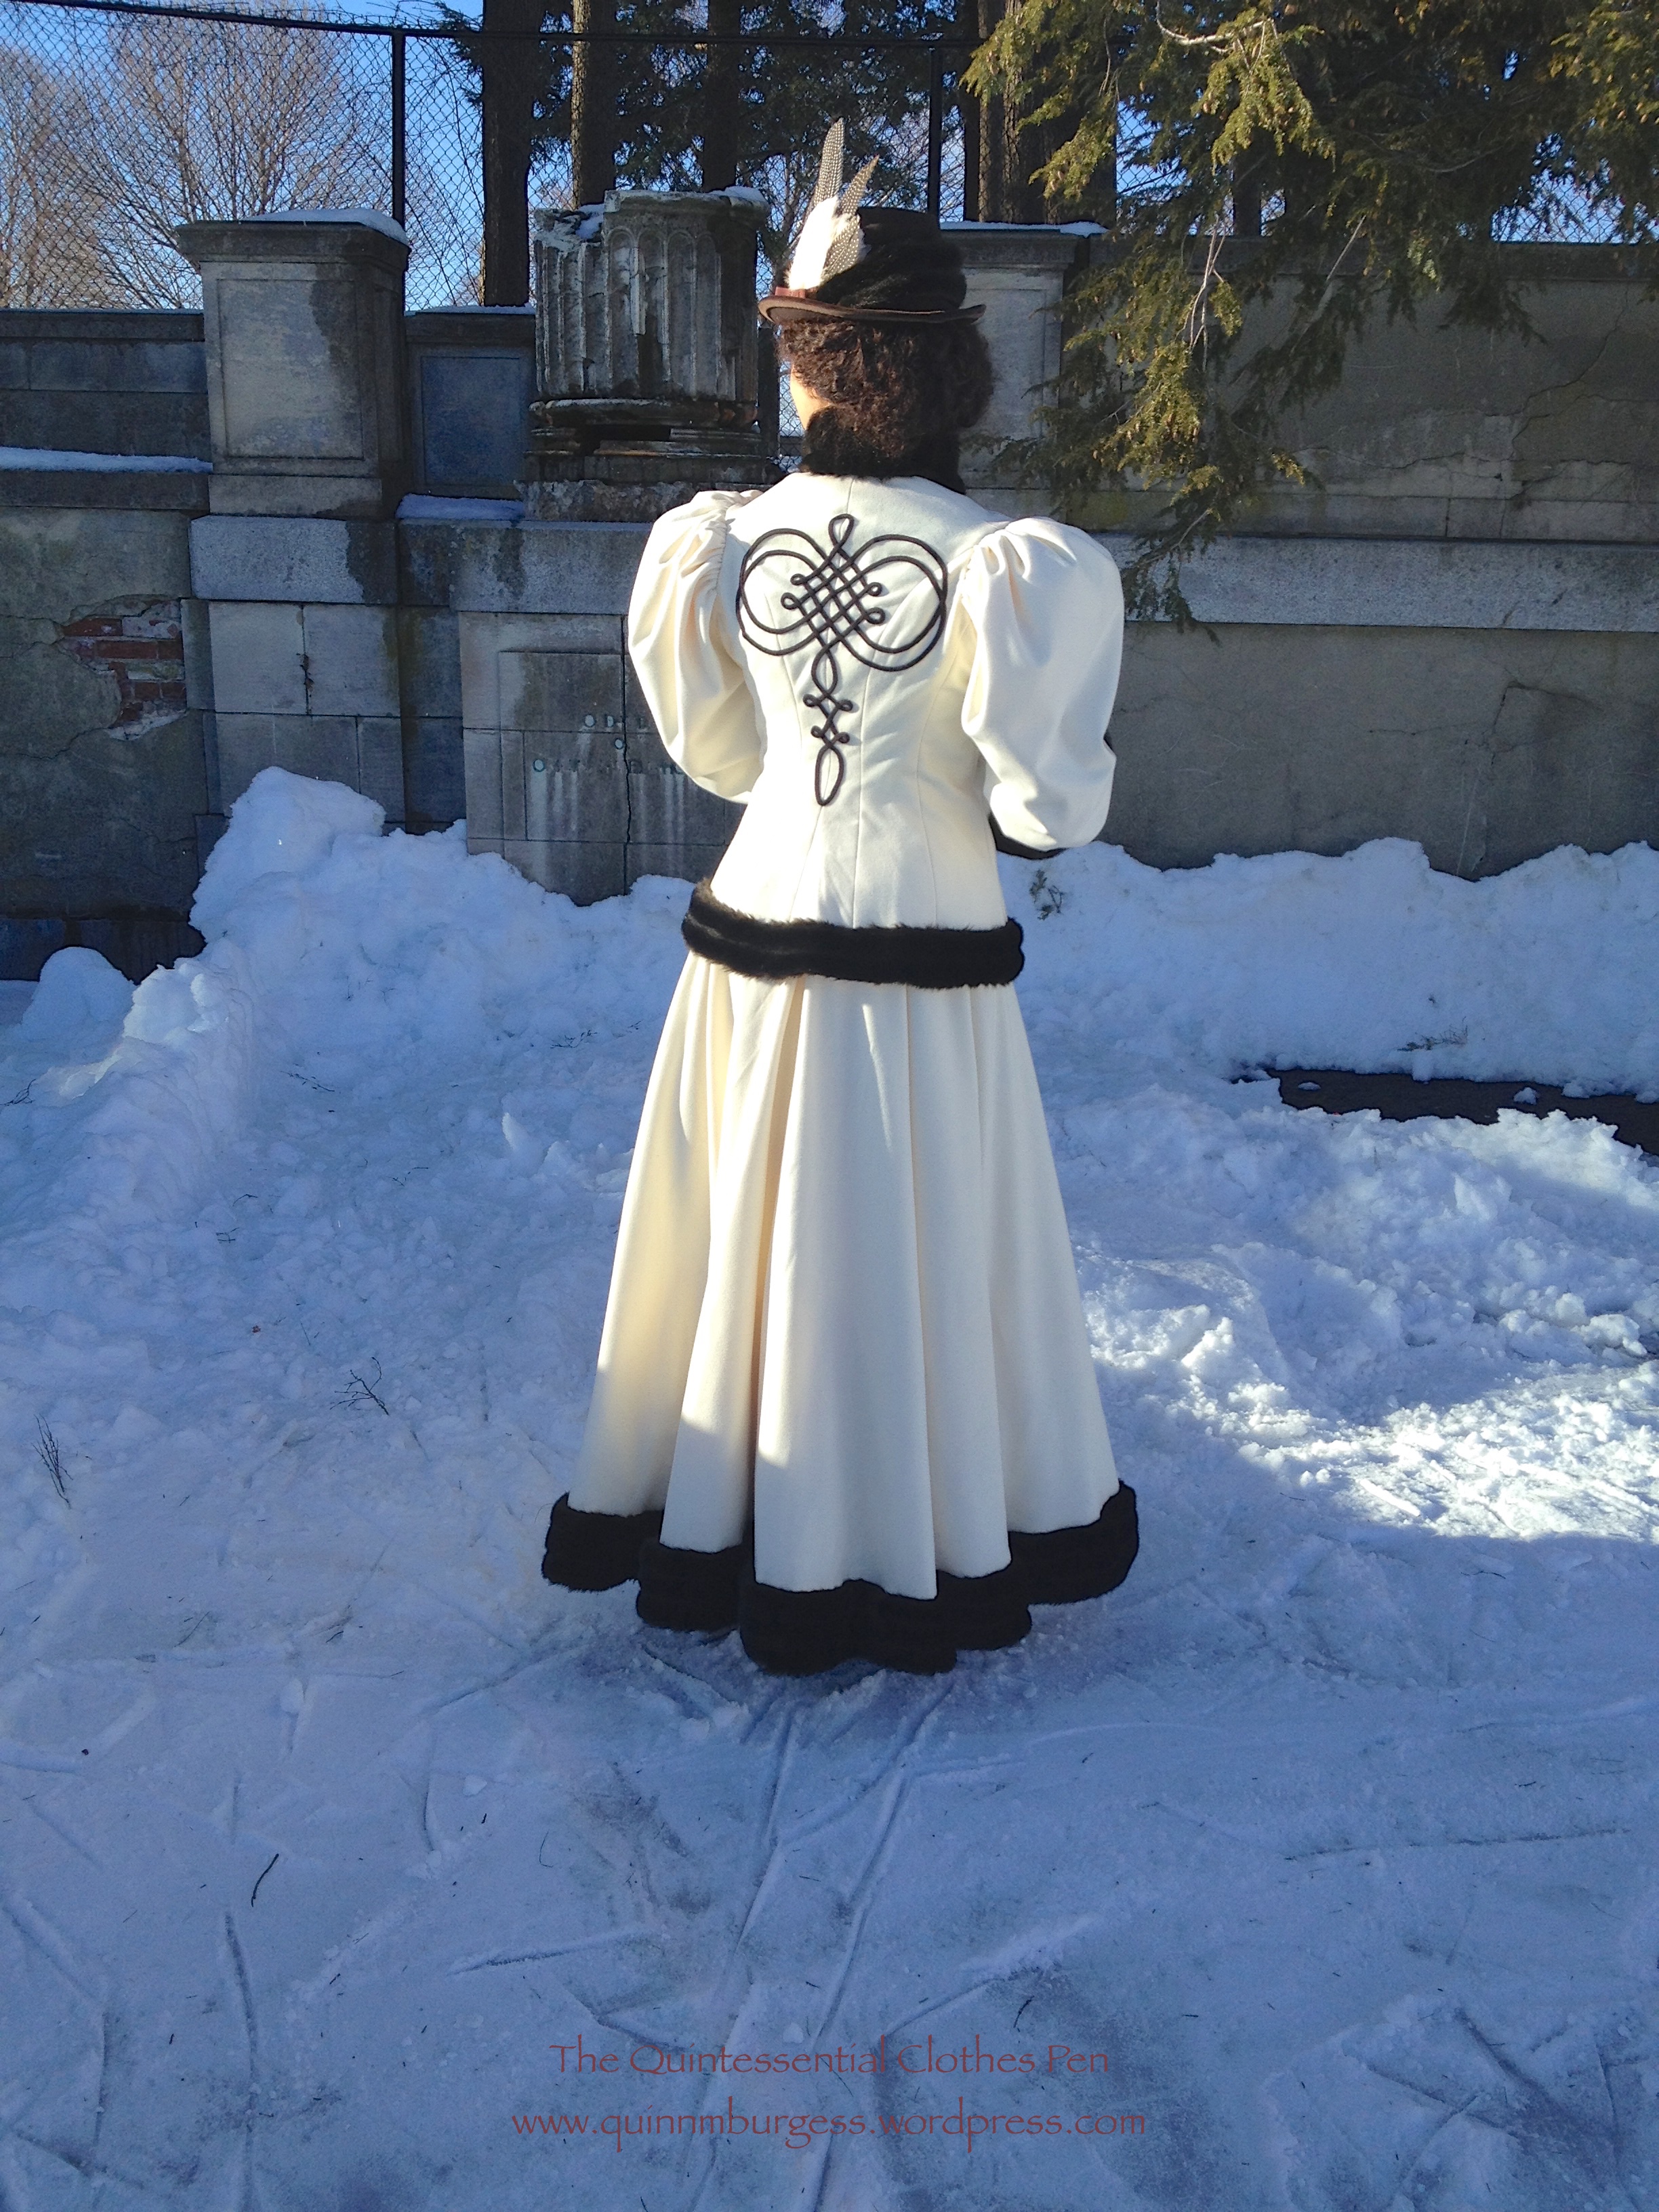
This is one of my favorite outfits of all time. I just want to hug myself, with all the fur, and I love the trim on the back! The whole thing is so cozy and so hug-able and the skirt has such a nice drape and the accessories work so well… and I actually got to go skating in it! I am just utterly chuffed (to use a British word) with the whole thing!
I was on the fence about whether this outfit would apply to the Historical Sew Fortnightly/MonthlyChallenge #1: Foundations, but then I read Leimomi’s teaser post about her foundation entry in which she reminds us about different interpretations of foundations and the intent of this challenge to create loose guidelines open to interpretation.
I was convinced (or pushed off the fence, if you prefer to think of it in that amusing way). I’m claiming my all new 1895 skating outfit for the first challenge of the new year! It does rather stretch the idea of foundations. Is the skirt a foundation because it is literally worn below the jacket, thus being a foundation as you would think of one in a building? Or is the bodice a foundation, because my direct inspiration is a lonely jacket without a skirt and therefore it is the foundation of the outfit because I wouldn’t have made the skirt without having the jacket? Either way, there is an element of a foundation in there.
Just the facts:
Fabric: 5 yds of ivory wool, about ⅓ to ½ yd of dark brown faux fur, probably about 3 yds of scrap muslin for flat lining the jacket, a bit of scrap canvas to stiffen the collar, and a bit of ivory flannel to line the inside of the collar.
Pattern: Made by me and based on my inspiration jacket as well as patterns published in Authentic Victorian Fashion Patterns (a Dover book).
Year: c. 1895.
Notions: 5 yds of brown braid, thread, a bit of high loft polyester batting to keep the sleeves puffed out, about 1 yd of ivory hug snug to finish the bottom of the jacket, hooks and bars for the skirt, and thread.
How historically accurate is it? Pretty darn good. Definitely recognizable by someone in the 1890s. The construction is accurate, aside from the use of hug snug instead of bias and faux fur instead of real fur. So, 95%.
Hours to complete: Um… As usual, I did not keep track. I definitely spent at least 15 hours the few days before the event sewing on my braid and fur trim… Plus full days of pattern making, fitting, cutting, and sewing. Maybe 30-40 hours? I care so much more about the finished project than the time it takes to get there! And I loved sewing this, so I didn’t mind that it took time!
Total cost: $75 for the wool, probably about $8 for the fur yardage I used for this project, $4 for the braid, and the rest from the stash = $87
My accessories were a matching fur muff that I made a few years ago and wore once for caroling (with my as-yet-undocumented 1860s winter cape) but more often with my 1917 winter ensemble and a revamp of my 1883 wool hat. I didn’t have time to make a new hat because of all the last minute fur and trim sewing, so I pinned a fur scrap around the 1883 hat and added some feathers to stand up a bit more like 1890s hats and called it good. My main inspiration (and the reason I feel it was an acceptable looking style to have the squashy fedora hat look in the 1890s) was this image.
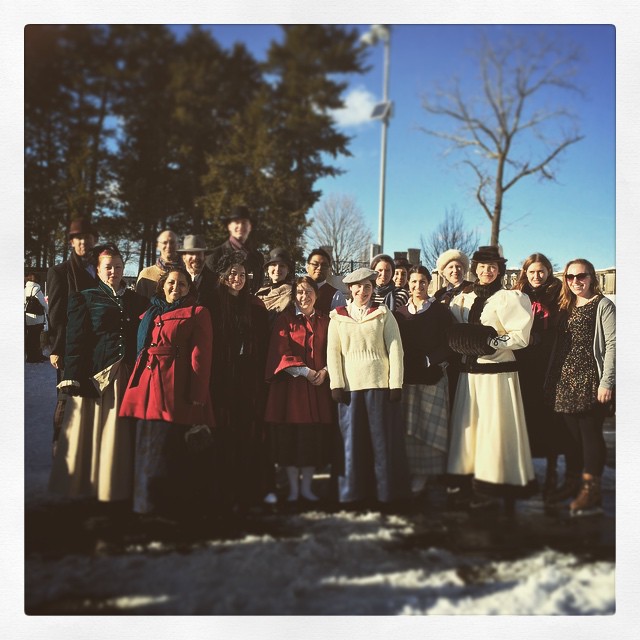
For good measure, here’s my Pinterest board for the entire project. And here are pictures of us skating (with ice skates: all our snow and cold weather does occasionally come in handy here in Boston)!
Yes, we just crashed a local outdoor ice rink on a Sunday afternoon. One of the attendees even wore vintage skates! Turns out they can be hard to skate in because they’re not very supportive… but they looked fantastic! We got lots of comments from people asking what we were doing, why we were dressed up, and that we looked good. I was asked by multiple groups of young girls why I was dressed up and one group in particular asked what the swirly thing was that I had, which I got to explain was a muff to keep my hands warm!
Here’s our skating group. People came in a variety of late 19th century and early 20th century winter outfits as well as modern clothes.
With my skating ensemble I wore fleece lined tights (modern, but warm so I didn’t care), knee high bamboo socks (modern again), my 1903 silk petticoat (super useful for the 1890s, also), a modern tank top (instead of combinations, because I needed to go to work later in the afternoon and change out of my outfit in the back seat of my car without being indecent…), my 1895 corset, and a long sleeve modern waffle tee (mostly to shield my skin against the wool seam allowances and also for warmth). And I was perfectly warm wearing this out for skating on a day that was sunny and right around freezing. In fact, with the muff and wool hat I actually was too warm at times.
Pleased, chuffed, and smiling all afternoon! So fun! Maybe we will get to go skating again this winter!
Back in August at the Nahant Vintage Dance Weekend, I was able to attend a soiree at Egg Rock (see that post here) as well as attend the Grand Ball of the weekend. I wore my 1893 bronze ball gown that I made back in 2012.
Unfortunately, I have to say that the crowds and the August temperature without air conditioning conspired for a very sweaty evening, which was not to my liking. However, everyone was very nicely attired and tasty refreshments were provided. In fact, sorbet was brought out at one point and was a tasty and cooling treat! (Hard to imagine being that warm as fall settles in and the air outside is crisp and chilly! I’ve been slow to get to posting about this event.)
Imitation is the sincerest form of flattery, right?Dancing a waltz, I believe.This time I’m smiling!I happened to be standing in front of a fan while explanations of a dance were going on and I have to confess to laughing more at my flying shoulders than listening to the explanation…A view of the crowded ballroom.Another view of the room.Everyone looked fabulous for the event.This was my favorite new dress I hadn’t seen before. It was quite sunning, with the bi-colored sleeves and tall aigrette. And in complimenting the wearer I was able to meet someone new, which is always nice.TNG. That’s that.
The entire Nahant weekend made the New York Times via the delightful Bill Cunningham (who was in attendance taking pictures for the weekend). I can be spotted in a few of his pictures in the Evening Hours section from August 15. There was also an afternoon of events that I did not attend, but which you can see pictures of here and watch a video with Bill’s narration of here.
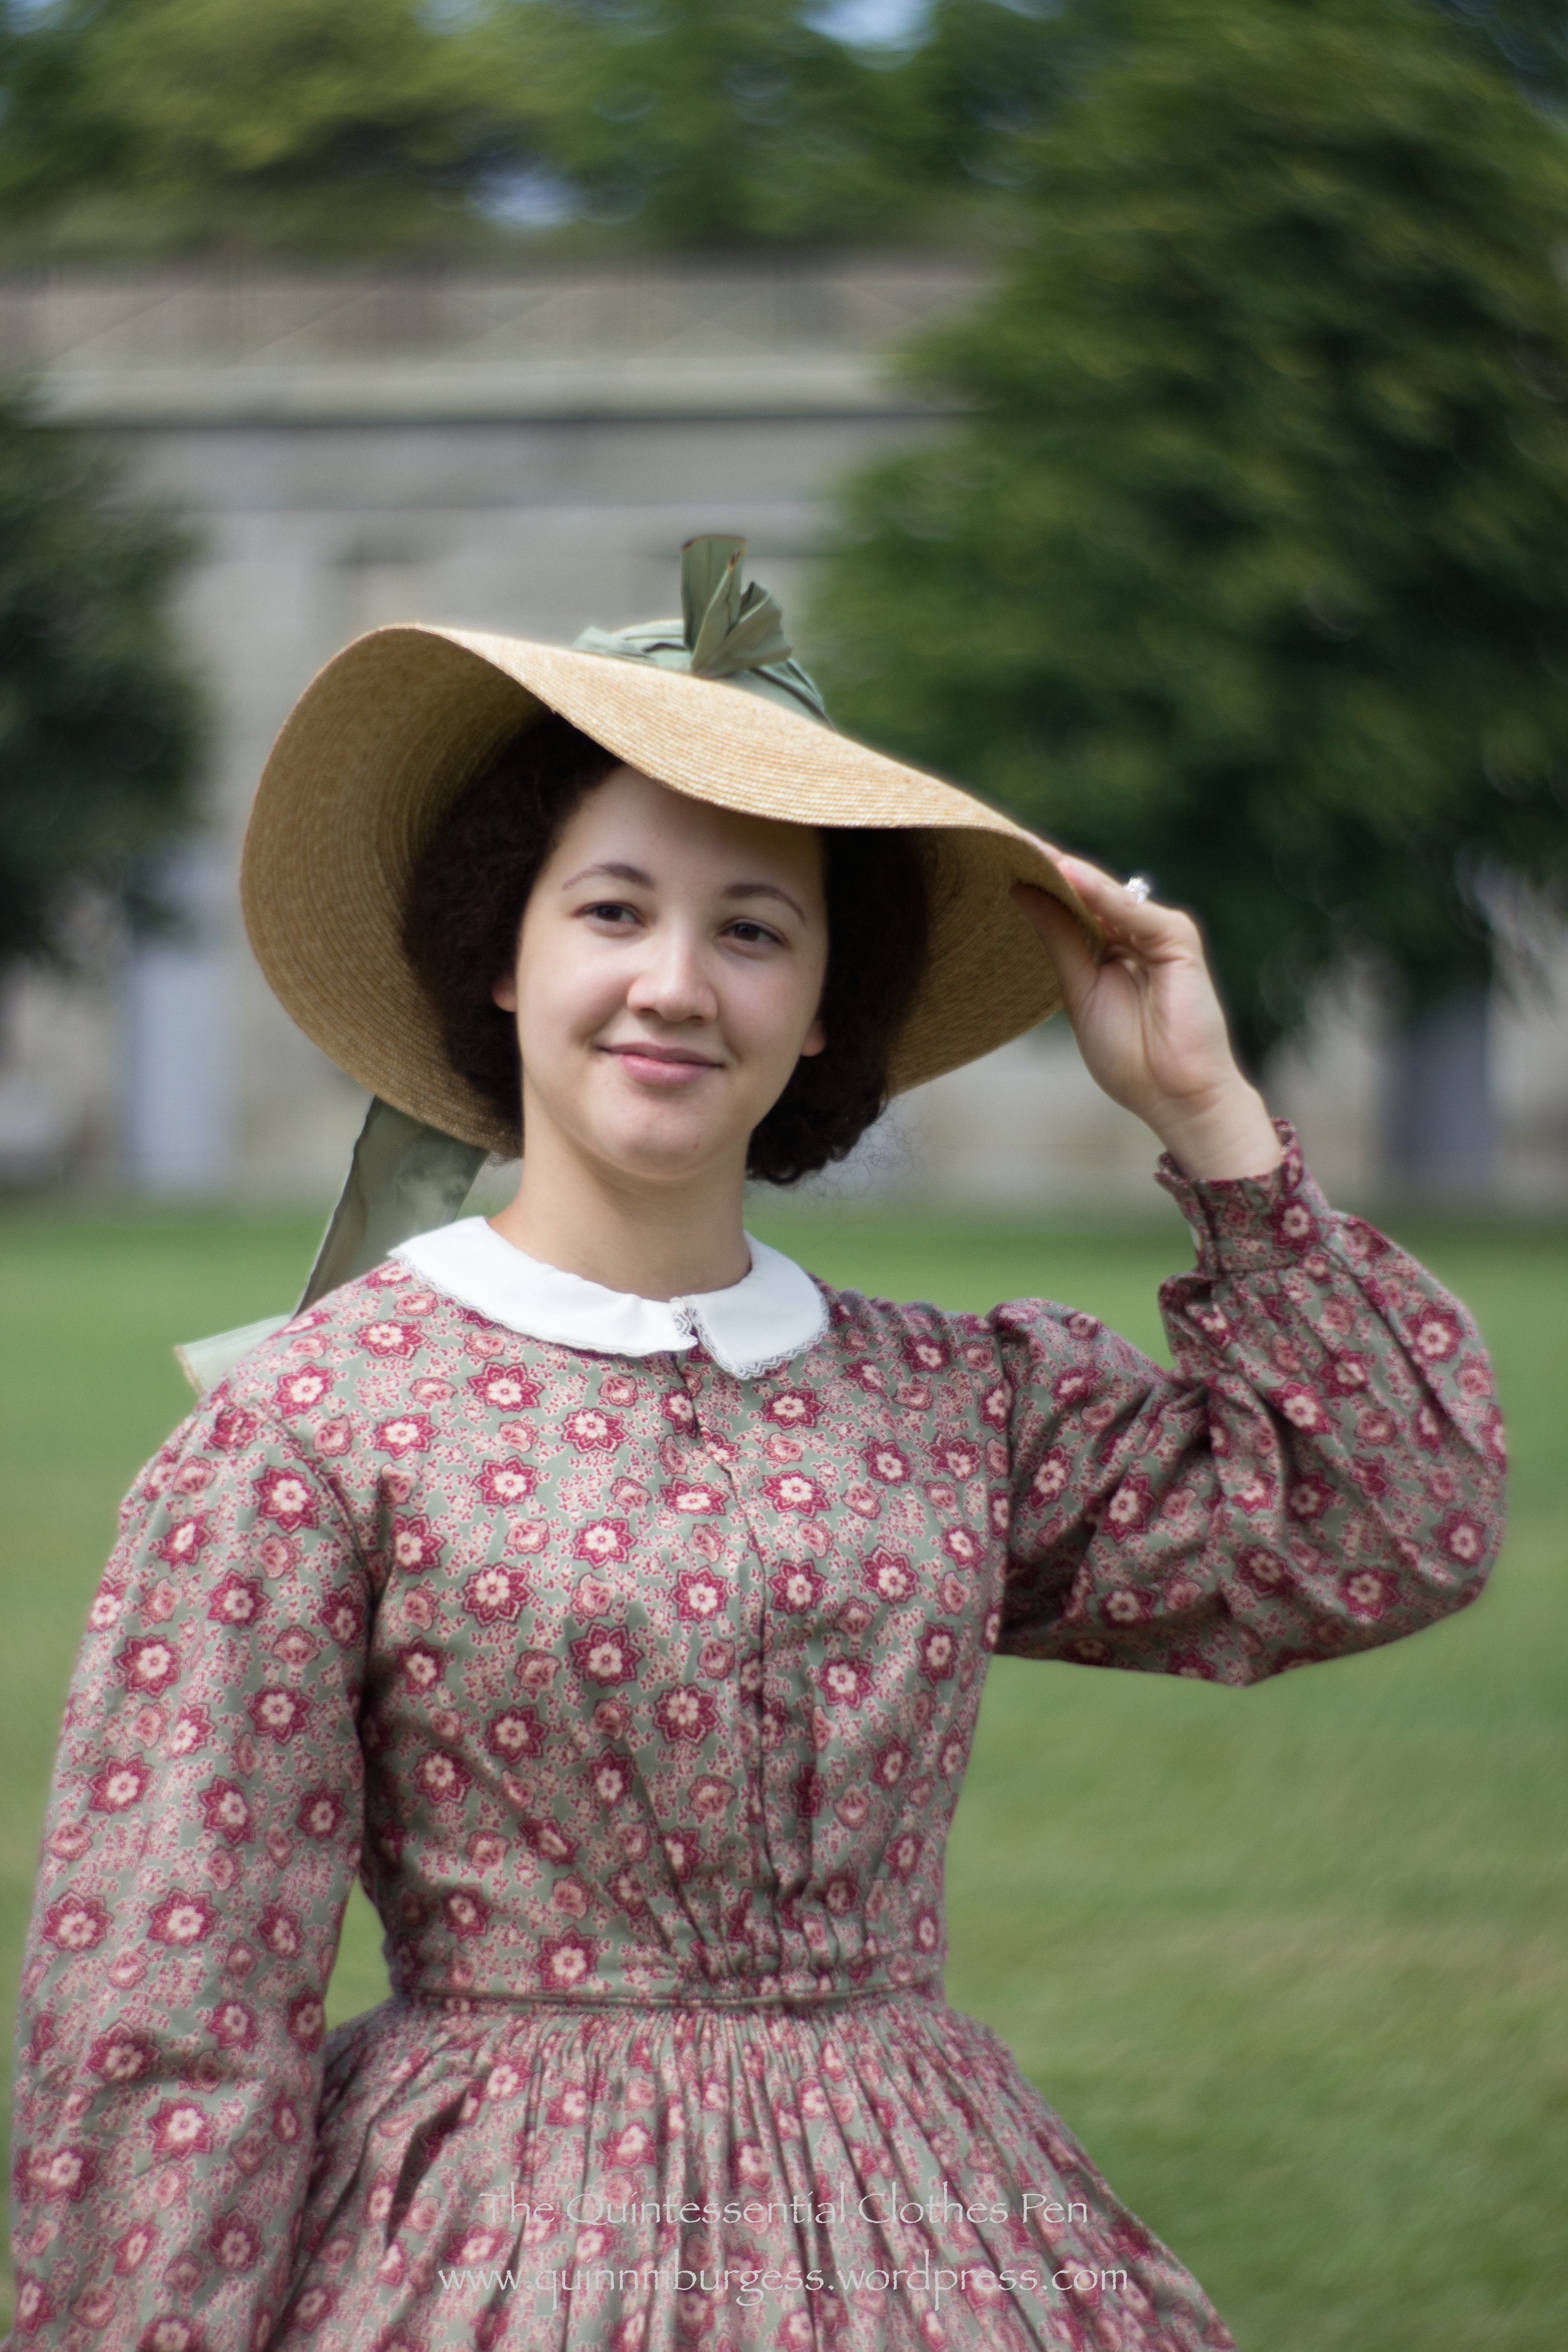
We performed on George’s Island again this year and were quite thankful that the weather was slightly cloudy and at least 15 degrees cooler than last year! It was a great opportunity for all of us to wear our cotton print day dresses again and it was neat to see the entire dance troupe all wearing cotton dresses with a pattern (no solids to be seen!).
I wore Georgina just as I did last year, the only difference being that I took a little bit of time to make a collar for this year. I had wanted to last year but ran out of time. It seemed more important to have the dress than to have a collar without the dress… But it was entirely feasible this year to add just the small item of the collar and I do think it really completes my outfit quite nicely.
New collar!
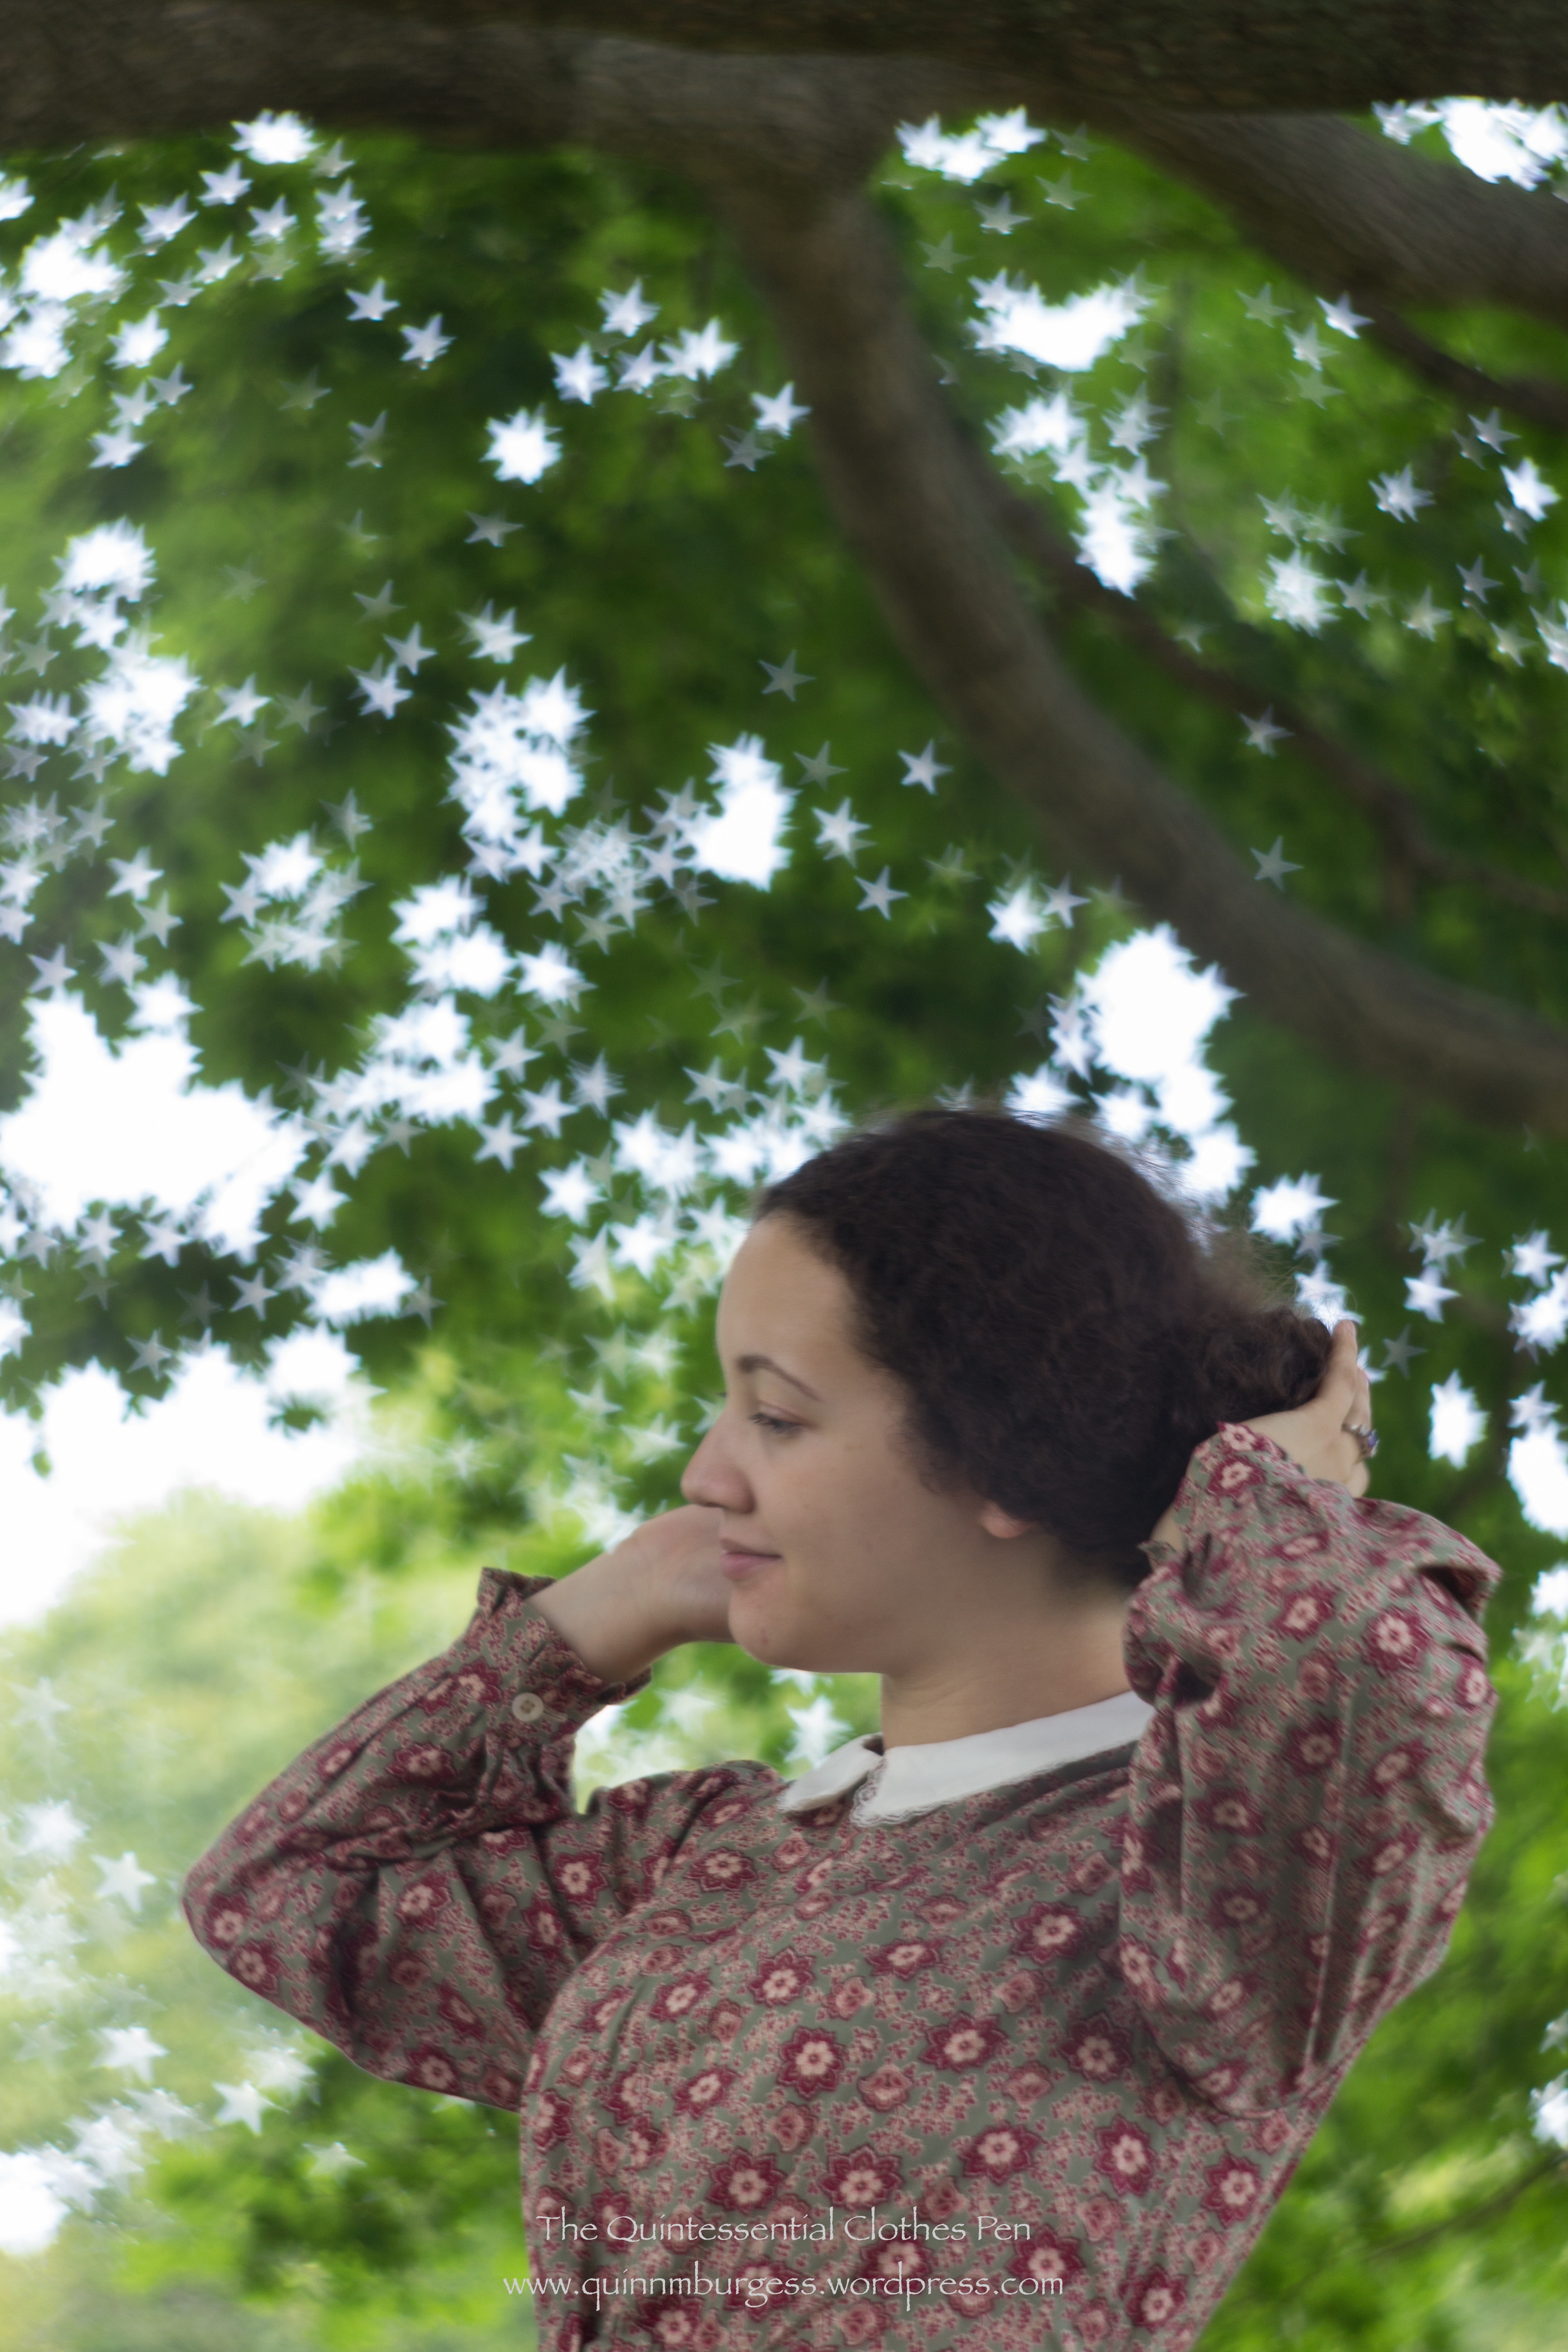
This year, our friend with the camera had purchased a new, special, Petzval lens (you can learn more about it and 19th century photography here at her blog). It’s a modern digital version of a historic lens. I love the pictures it produces! I’ve been told that the background is sort of swirled when the picture is captured, but to me it just looks nicely diffused and out of focus. It’s a lovely contrast to the foreground, which stays nicely in focus. All of these pictures were taken in color, but some of them are much more stunning in black and white.
This one captures the breeze and a bit of sun squint…This one a burst of joy and laughter…This one the tired desire for food during a picnic break…And this one just a simple stroll across the lawn.
This last one made use of a special part of the new lens. There is a piece which can be changed out and which creates the interesting background variations. All of the previous pictures were taken using the piece which blurs the background, but this last one was taken using the piece which causes the light in the background to be star shaped. Isn’t that neat?
Fixing my wind swept and straw hat frizzed hair… with stars in the leaves!
The collar is constructed from 2 layers of ivory cotton from my small bits stash (at least, it’s likely cotton… I don’t remember where it came from and there was the perfect amount, so I just went with it without knowing the details). It is edged with ivory lace. I made the pattern directly on Georgina’s day bodice so that it would fit the neck perfectly. It’s mostly machine sewn with hand finishing. It is lightly basted on to the piping at the neck edge of the bodice so that I can easily remove it if I want to in the future. I’m quite satisfied. I like the scale, the lace, and I think it adds a nice 1850s touch, completing the ensemble.
A few months ago, I had a master plan to use the leftover yardage from Georgina, my 1858 cotton print day dress, to make an evening bodice in addition to her current day bodice for versatility and washability. Luckily, I was able to complete the bodice and a new hair crescent before my life exploded in June and I was smothered under an immense amount of work. I am pleased to have work, don’t get me wrong, but I was so exhausted by the end of the month all I could do was sleep and be disoriented! I’ve just come back from a vacation and feel like I can peer out from under my rock and join the world again! So, to celebrate constructing historic clothing for myself rather than other people, here is a post about a really neat addition to my historic wardrobe! And it fits into the current HSF challenge #13: Under $10, a bonus since the HSF challenges haven’t lined up very well with a lot of my projects this year.
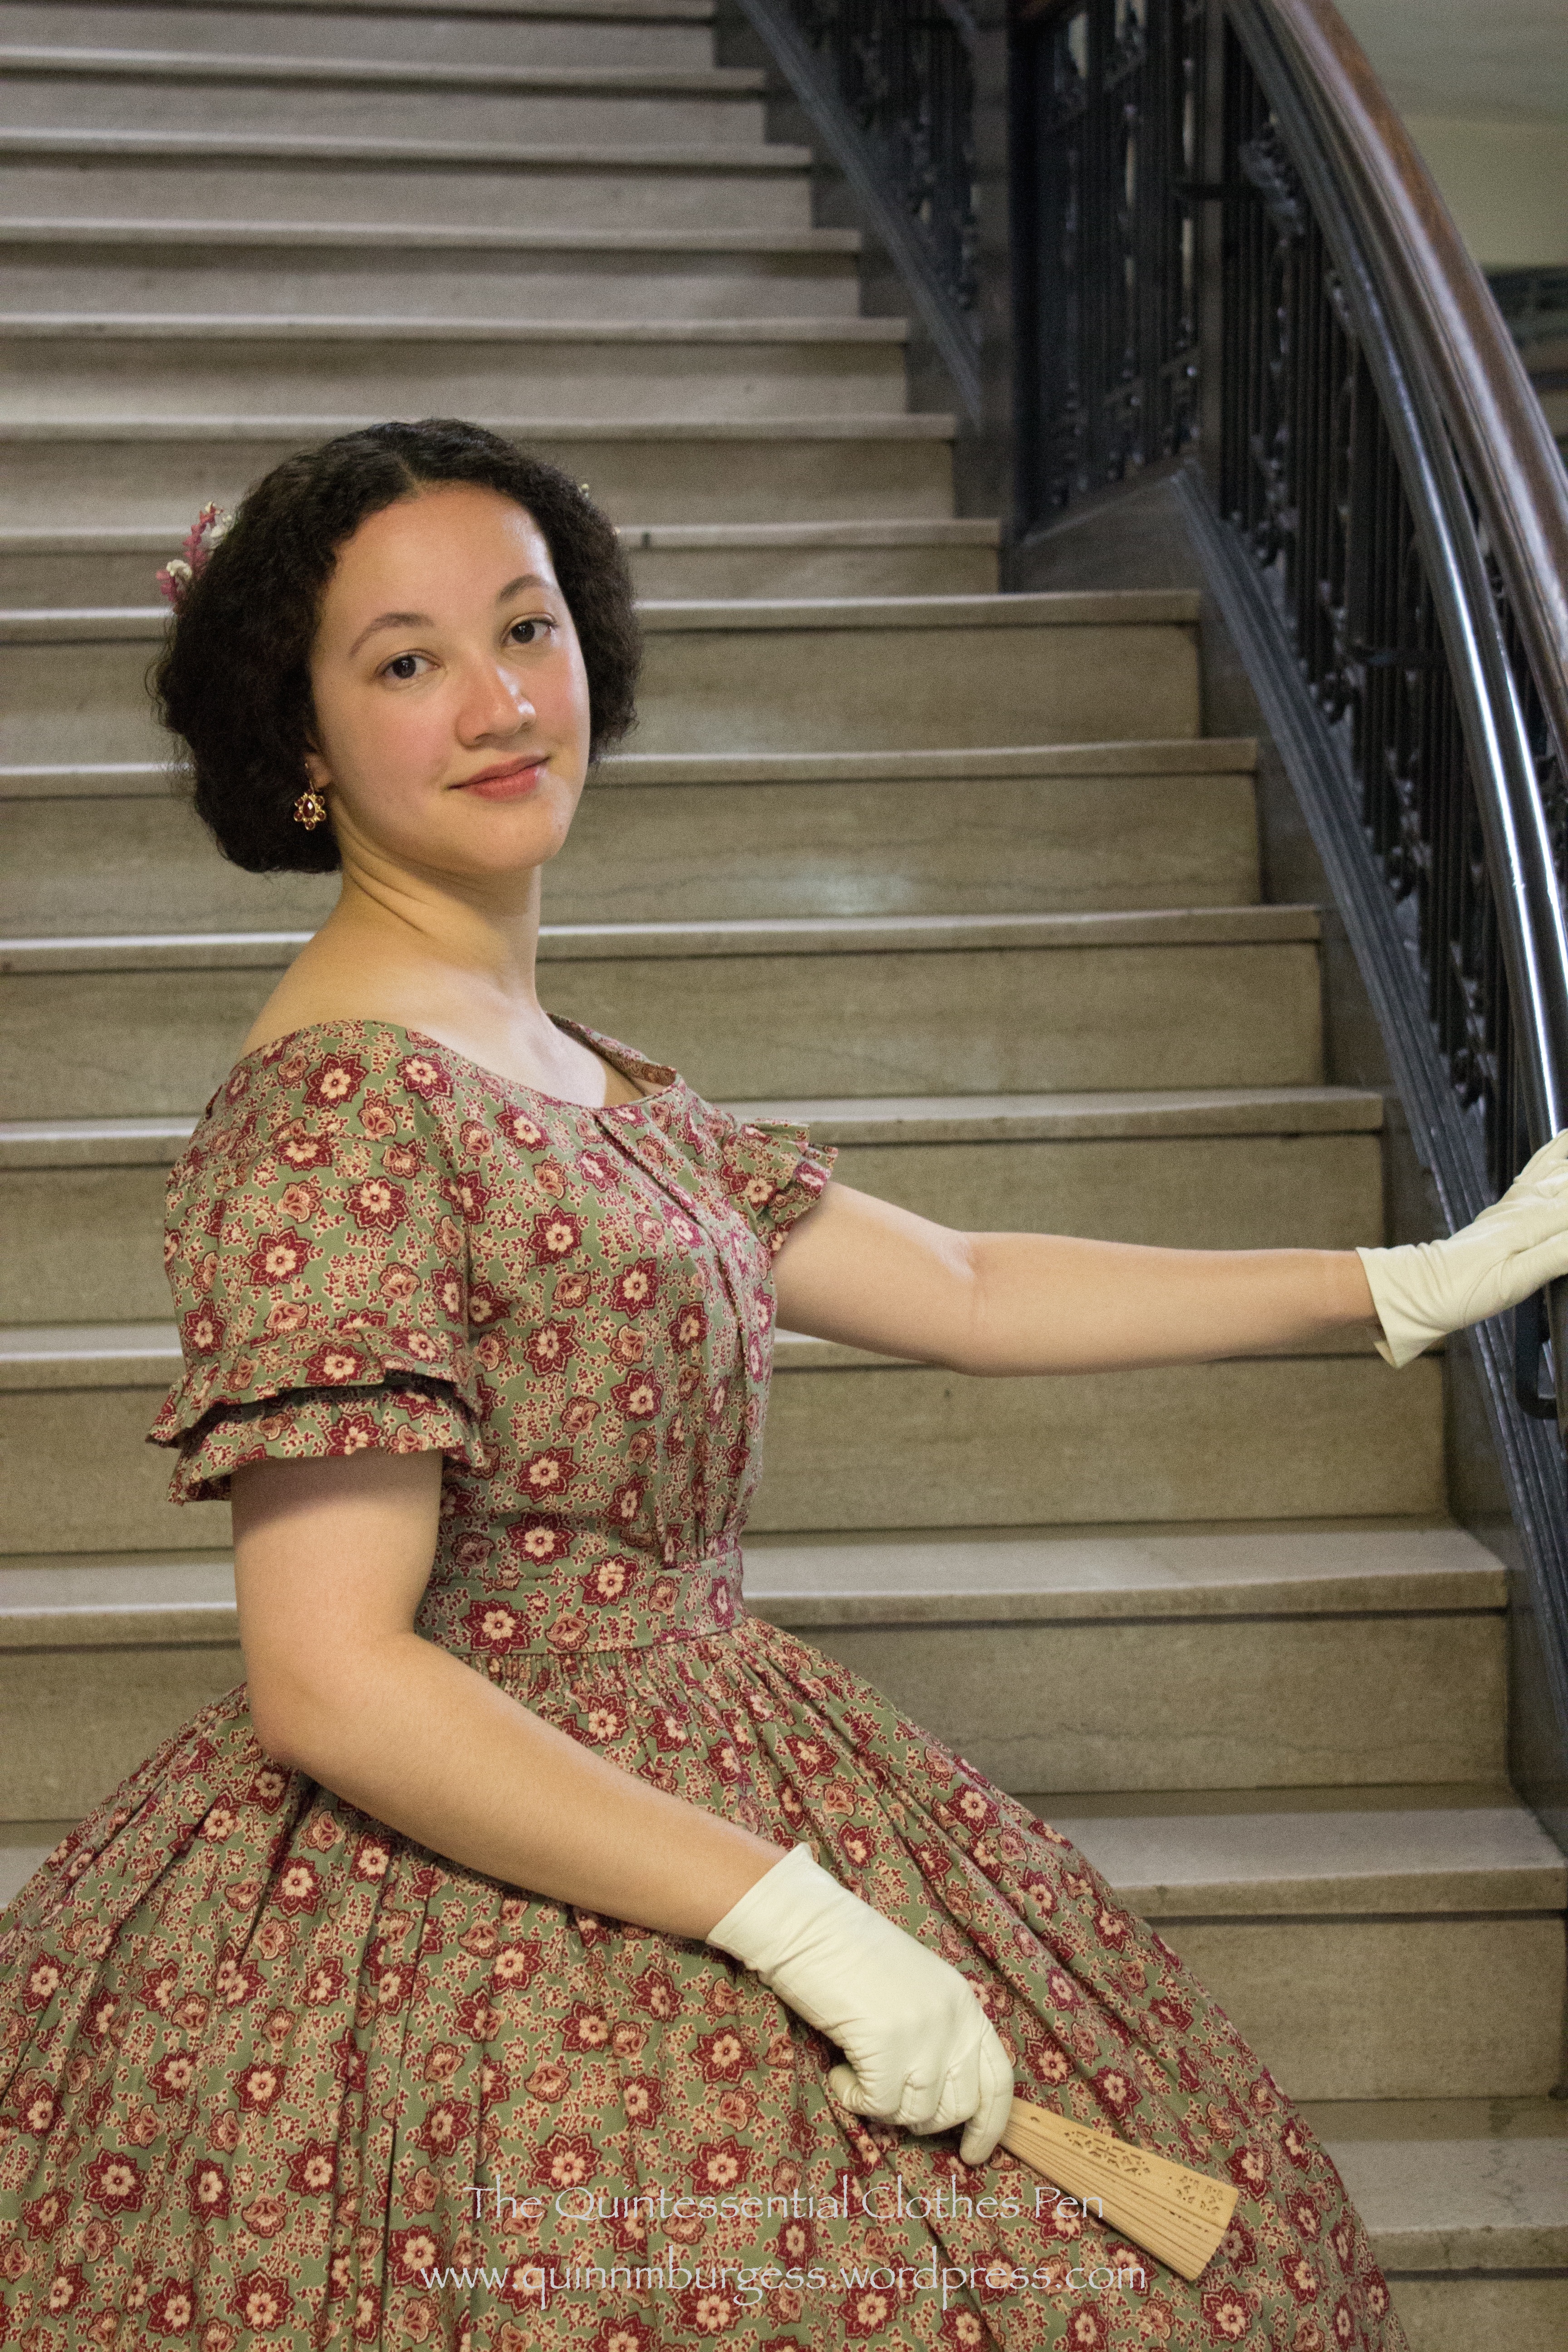
c. 1855 new evening bodice, with previously constructed skirt. Worn with all the usual underpinnings (chemise, my new corset, drawers, stockings, hoops, and petticoat) and accessorized with gloves, fan, earrings, and a new hair crescent. Oh, and I’m wearing burgundy velvet shoes! No picture of that, though.
Pattern: I began with Past Patterns #701 but altered it extensively to fit me, to have pleats and gathers on the exterior, and to have an evening neckline. The sleeve pattern was drafted by me.
Year: c. 1855
Notions: Thread, plastic wire ties for boning, hooks and eyes, and cotton cording.
How historically accurate?: Based off of historic examples, constructed with accurate details… I think the only compromise is the plastic boning, which I used because I didn’t have the right length in metal, and because plastic is easily washable (and I want this to be a garment that can be washed easily–that’s part of the goal in having a cotton evening bodice!).
Hours to complete: I have no idea… 32 hours maybe? I really didn’t keep track at all on this project.
First worn: To a mid-19th century ball in June (one of the few moments of respite in my crazy month).
Total cost: About $3 for approximately 1 yard of historic cotton print and a lot of stash materials, which count as free, since I have no idea what I paid for them at this point! Let’s call the total about $8.
Inside of the bodice.
As you know, I like things to be tidy. All of the seam allowances are either hidden between the layers of fabric or nicely finished. There are plastic bones in the darts and the side seams. The bodice is machine sewn and hand finished. (One amusing mistake is that I cut the lining with a center front opening for fitting purposes (and left lots of seam allowance, as you can see) but then forgot to leave seam allowance in the back… So the lining doesn’t extend all the way to the folded edge of the print, but it’s all covered up so no one will ever know and it fits just fine… it’s just one of those amusing things!)
From the back with the right side flipped open.
The bodice closes with hooks and bars. I wanted to use metal bars but make sure they wouldn’t been seen, so I let about ¼” of the print extend past the points of the hooks to create an overlap. I also left extra print extended past the bars, in addition to all the seam allowance, in case I want or need to adjust the size of the bodice in the future. The bars are especially hard to spot on the print, but if you look carefully on the left you can see them. The neck and armsceyes both have very narrow cording.
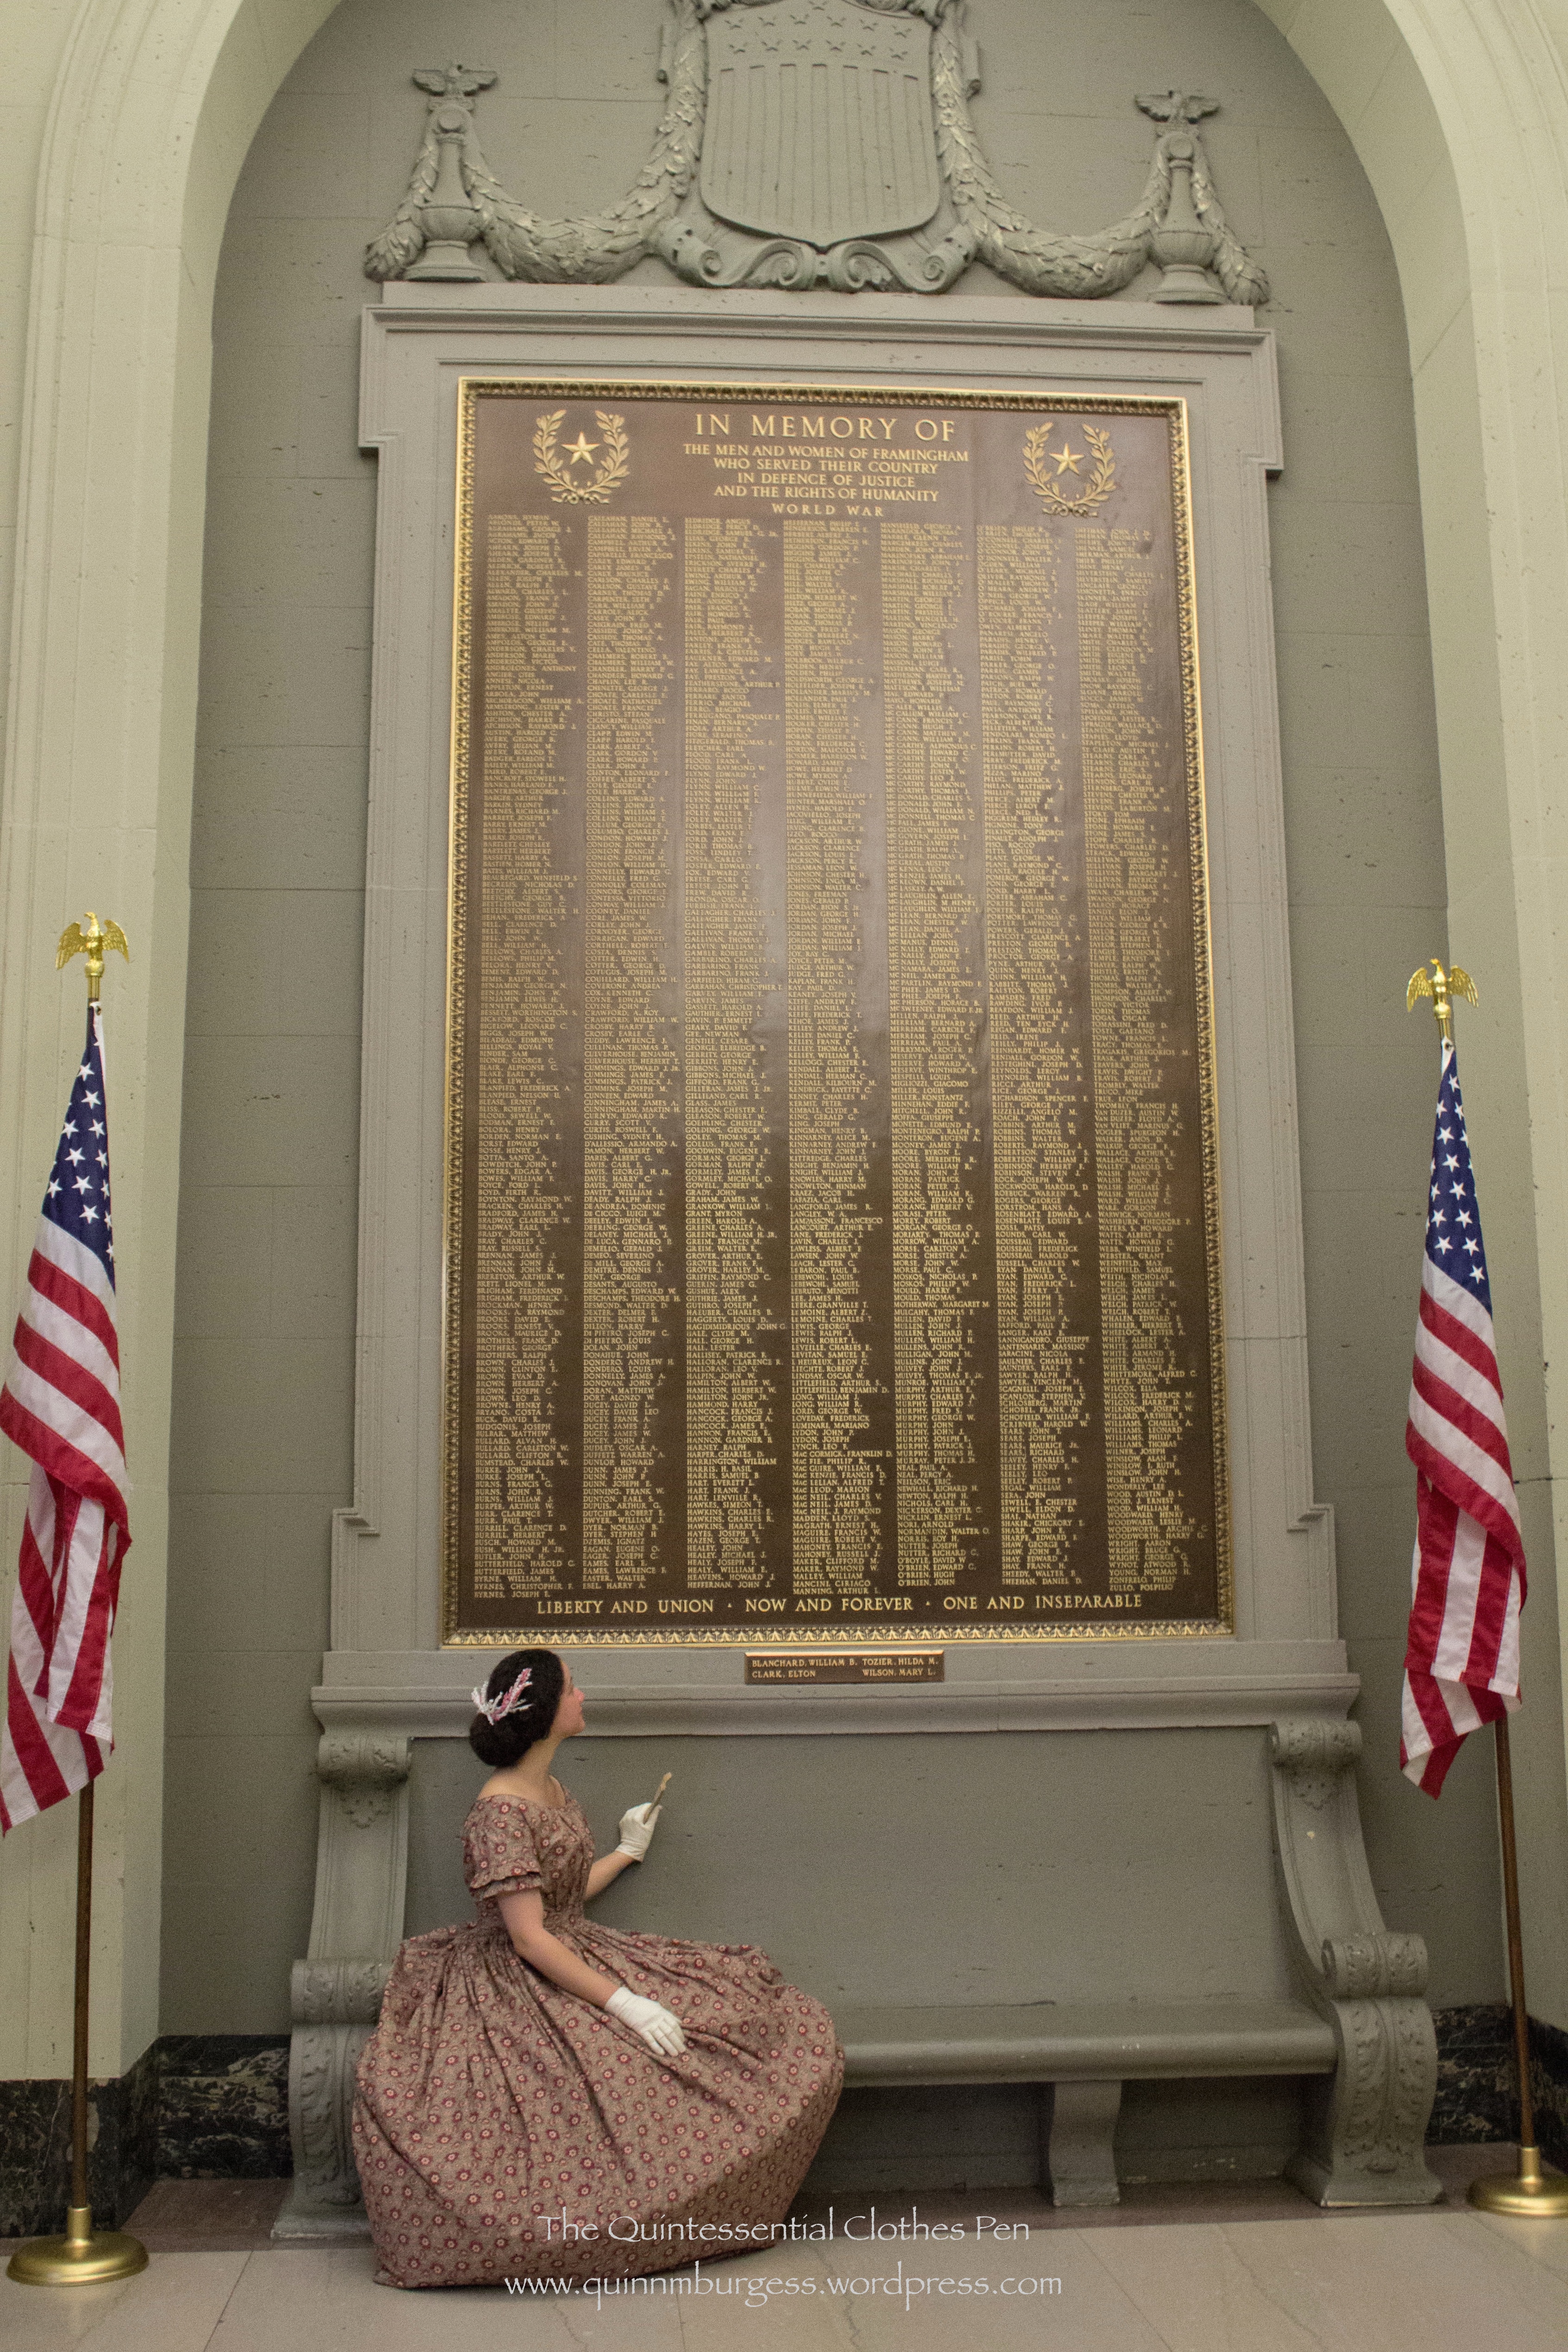
Appreciating those who have served our country. The ball was held in a local town hall which had lists for all the 20th century wars. I don’t think they have 19the century war plaques, but we thought it was a nice photo opportunity.
The defining design details were obviously the low neck and short sleeves, but there were other common details as well, such as double puffs or pleats to trim the sleeves, tubular sleeves without very much fullness at the top or bottom, 1.5″-2″ waistbands sitting on the outside of the skirt waistband, and gathered or pleated fullness on the fronts and backs (no darts on any of these cotton bodices). Some of the bodices have a yoke around the top so that only the bottom portion of the bodice is gathered, but this look says “young girl” not “grown woman” to me, so I opted for a bodice without a yoke.
In terms of construction, to have enough fabric in the print for the pleats and gathers on the print fabric, I first constructed and fit the lining. Then I separated one side of the lining to use as a pattern and added width to have space for the pleats I had planned. Once I had cut the print, I reassembled the lining and mounted the pleated print on top. From there on I treated the two layers as one.
Bodice closeup and a nice view of my successful 1850s round hair style!
As I’ve looked at 1850s images and fashion plates in comparison to early 1860s, especially, what I’ve noticed is that the 1850s really attempted to make a woman’s head look round or wide, whereas by the early 1860s the styles begin to grown upward and become vertically elongated. Here are some great examples of the round 1850s hair look: from 1851-53, c. 1855, from 1857, another 1857, yet another 1857, one more from 1857, and one from 1859. Here’s a super wide 1850s style and here is an example of the different shape of the early 1860s. The very round shape is what I was attempting to complement my 1850s bodice.
How? Well, I put gel right at the roots of my hair while it was still wet and then encouraged it to stand up from my head rather than being pulled back. I let it dry like that and it stayed all day. Later in the day, I styled it for my 1940s Anne Adams dress photos by brushing it out (and brushing my hair when it’s dry makes it big!!!). There was lots of added hair spray for that style, so when I went to restyle it there was plenty of fullness and air in my hair. I puffed the fronts and pinned them up and behind my ears then did a big roll with the rest.
The finishing touch was a new hair crescent that I made specifically to complement the colors in the cotton print. The crescent is made up of fully wired millinery flowers in ivory, some of which I dyed to be pinkish. Each extension is a singular stem and I just twisted them together until I liked the result. Lastly, I sewed a hair comb in the center to help attach it to my head and stabilize the wires. Each side also has a bobby pin to secure it to my head so the extended bits don’t flap around while I’m dancing.
Back view, and new hair crescent.
I’m super pleased with the end result: the bodice, the hair style, and the hair crescent! Oh, and the pictures (thanks!). And I had a marvelous time at the ball–it was one of the class of events which makes me feel radiant and at which I really enjoy myself (compared to those when I’m grumpy and grouchy at the world). And all the smiling and dancing gave me a lovely natural rosy glow in the pictures. The aloof face is my attempt at a 19th century portrait face (it took a long time to capture a picture then, which is my rationale for why everyone has a generally serious face!). You had to pick something you could keep still for a long time, and a big smile is hard to maintain without movement or looking staged.
Not too long ago, I was again able to be part of the annual Returning Heroes Ball hosted by The Commonwealth Vintage Dancers. I decided to wear Annabelle again this year, even though I’d worn her last year, because I’d just worn Evie and Belle at the 1860s Dance Weekend in November.
Annabelle at Returning Heroes Ball 2014.
Each time I’ve worn Annabelle, I’ve been slightly disappointed with the various incarnations of flower hair wreaths I’ve attempted to match her: the first wreath and the giant mass of flowers. So this year I decided to try again to see if I could get something I like. There are quite a number of evening dresses decorated with flowers right about 1860 and many of them are depicted in fashion plates and portraits with matching flowers in the hair. Here are some examples: 1859 fashion plate, another 1859 fashion plate, a third 1859 fashion plate, 1861 fashion plate, 1861 portrait, 1862 fashion plate, and 1863 fashion plate. For this new incarnation, I decided to try a different style from what I have for my other two evening dresses (Belle has a crescent and Evie has a hair wreath). The style I settled on I’m calling a headband. It creates a halo around the face and extends down towards the ears, but does not connect across the back of the head. Instead, the hair must be interestingly arranged to fill in the back of the head. Here’s an example of the headband style using flowers that match the dress from 1862. And here is the fashion plate that Annabelle is based on which shows a headband style hair wreath worn with the dress.
Here is Annabelle’s new floral headband.Back view of my hair style. I needed something dramatic to fill in the base of my head. I wanted to do a sideways oval surrounded by rolls, but that didn’t work out and this is what I ended up with. I was dubious at first, but I think it worked. (It’s hard to see, but there’s one big central roll/puff and one smaller one above and below that.)
In addition to my new headband, I was also able to wear my new ca. 1860 corset and my still rather new purple paste jewels (a matching collet necklace and drop earrings) from Dames a la Mode. They worked wonderfully with my outfit (of course, I did pick the purple knowing it would match multiple outfits…!) and I enjoyed wearing them again.
The ball was lovely, as usual, and filled with well dressed people and more uniformed gentlemen than we have seen in recent years. The dancing was well executed and the intermission boasted a lavish spread of refreshments that both looked and tasted scrumptious.
Bowers, during the Grand March.Bowing at the end of a polka.One small portion of the refreshments table.Looking lovely and dashing.