Project Journal: 1864 Ball Gown Part IV: Three Series Of Photos

Remember in my last post I promised pictures of the finished ball gown now known as Evie? The time has come! I had a hard time narrowing down the options (because of course I wanted to share ALL of the good pictures), but I’ve tried to limit myself to only the best of the best. This post will focus on the completion of my dress, Evie, but there are two more posts coming soon that will share some of the other photo series as well as pictures of the ball itself!

These photos are the idea of my friend with the camera. She wanted to take series of pictures of us in our modern clothes, 1860s undies, and then dressed in our 1860s ball gowns: all in the same location and the same pose. It’s a neat idea and the results are great, not only because it provided lots of pictures (yay!) some of which are of things I don’t have pictures of (like my 1860s undies), but also because you can see the time passing through the evening by looking at the light in the photos. They start in the afternoon, proceed to early evening, then finish at night. Not all the series are a complete set, but all around, it’s pretty cool. Which series do you like best?

Series 1: To The Right

IMG_9740
To The Right: first layer
IMG_9735
To The Right, second layer
IMG_0151
To The Right, third layer

Series 2: What A Change

IMG_9546
What A Change, first layer
IMG_9729
What A Change, second layer
IMG_0144
What A Change, third layer

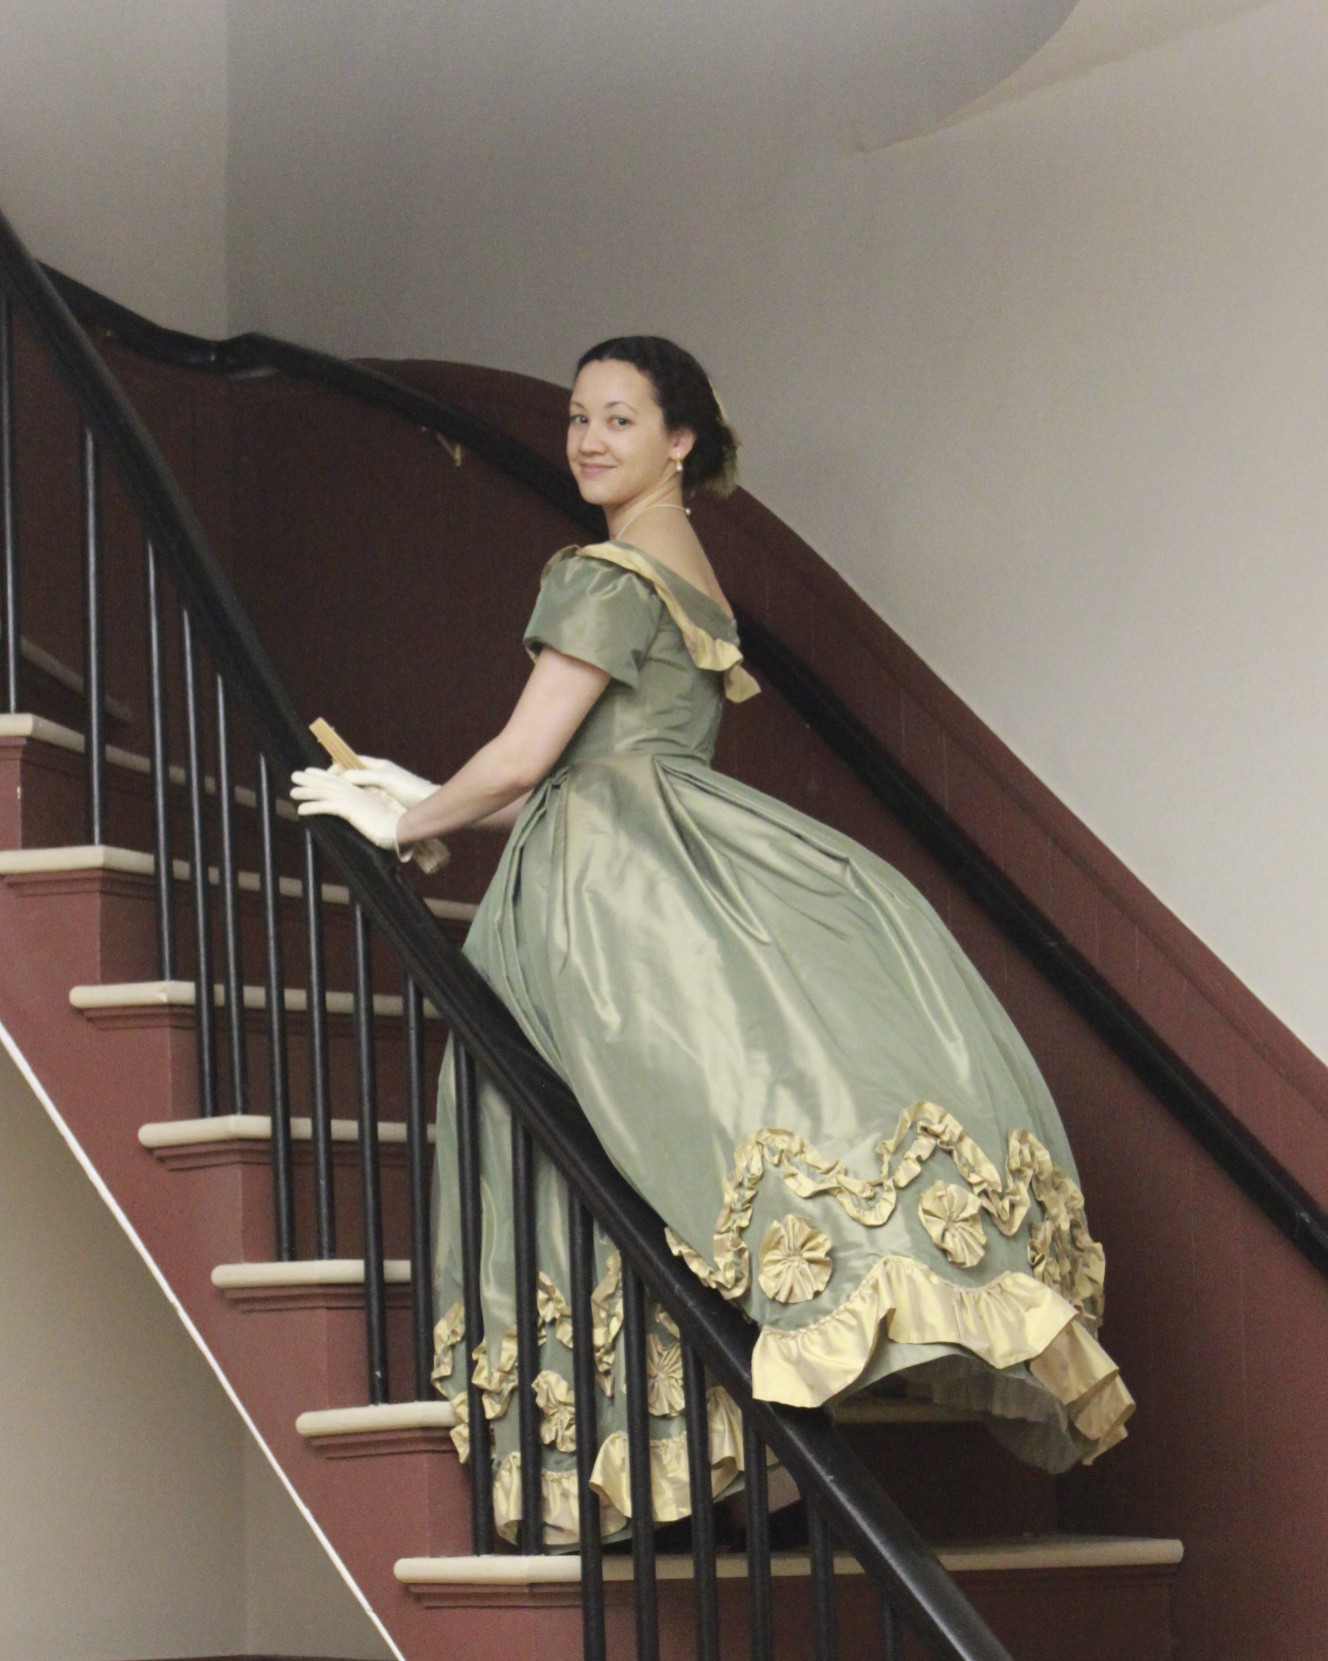
Series 3: On The Stairs

IMG_9693
On The Stairs, first layer
IMG_9714
On The Stairs, second layer
IMG_0130
On The Stairs, third layer

I’ve never been able to get pictures of my 1860s undies before, so this is exciting! I’ve got a chemise, corset, drawers, cage crinoline, and petticoat (in addition to stockings, shoes, jewelry, hair wreath, gloves, fan, and gown). The crinoline is entirely hand sewn, except for the waistband. The measurements of the hoops are taken from an extant crinoline, and I believe the circumference of the bottom hoop is about 120″. The crinoline closes with a hook on the waistband. The other pieces are machine sewn and trimmed with lace, pin tucks, and ribbon. The chemise slips over the head and the drawers close at the back with a button and loop arrangement. (And that poor petticoat does need a press… but I threw it in the washer and dryer a while ago and since it doesn’t usually get seen I haven’t taken the time to press it.) The petticoat ties around the waist. As you can see, the crinoline stops mid-calf, so the intense petticoat ruffle really helps keep the shape for the skirt below that point, in addition to keeping my hoops from showing as horizontal lines through the skirt of the gown.

Want to be further amused? Look at the apparently changeable feathers on my hair wreath. Sometimes they’re brownish/gold and sometimes vivid green! They really do seem to change color depending on the light!

I don’t think I’ve mentioned it yet, but the basic pattern for this gown is essentially taken from Janet Arnold’s Patterns of Fashion 2. The trim however, is based on two things. Thing 1: the skirt trim is from the fashion plate I shared with you in the first post of this project journal. Thing 2 : the bodice trim is based on this gown, below. I went through a lot of phases trying to decide how to trim the bodice, since I didn’t really like the fashion plate bodice trim. In the end, I decided on this look: a graduated ruffle (just one, in my case, to match the one ruffle on the skirt) that gets longer toward center back, a triple pleated bertha that has a swoop towards center front rather than being straight, and a big trim thing right at the center (in my case, a rosette to match the skirt, rather than a bow). It’s pretty hard to see the front of my dress in these pictures I’ve shared so far, but there are some coming up in the next two posts which will show off the front of the gown better, so stay tuned for that!

5178aec3e06e5f940a6b607a4b697fcc
A costume from the movie Il Gattopardo (1962, costume design by Piero Tosi). It’s lovely, despite the fact that it is not an extant gown from the 1860s.

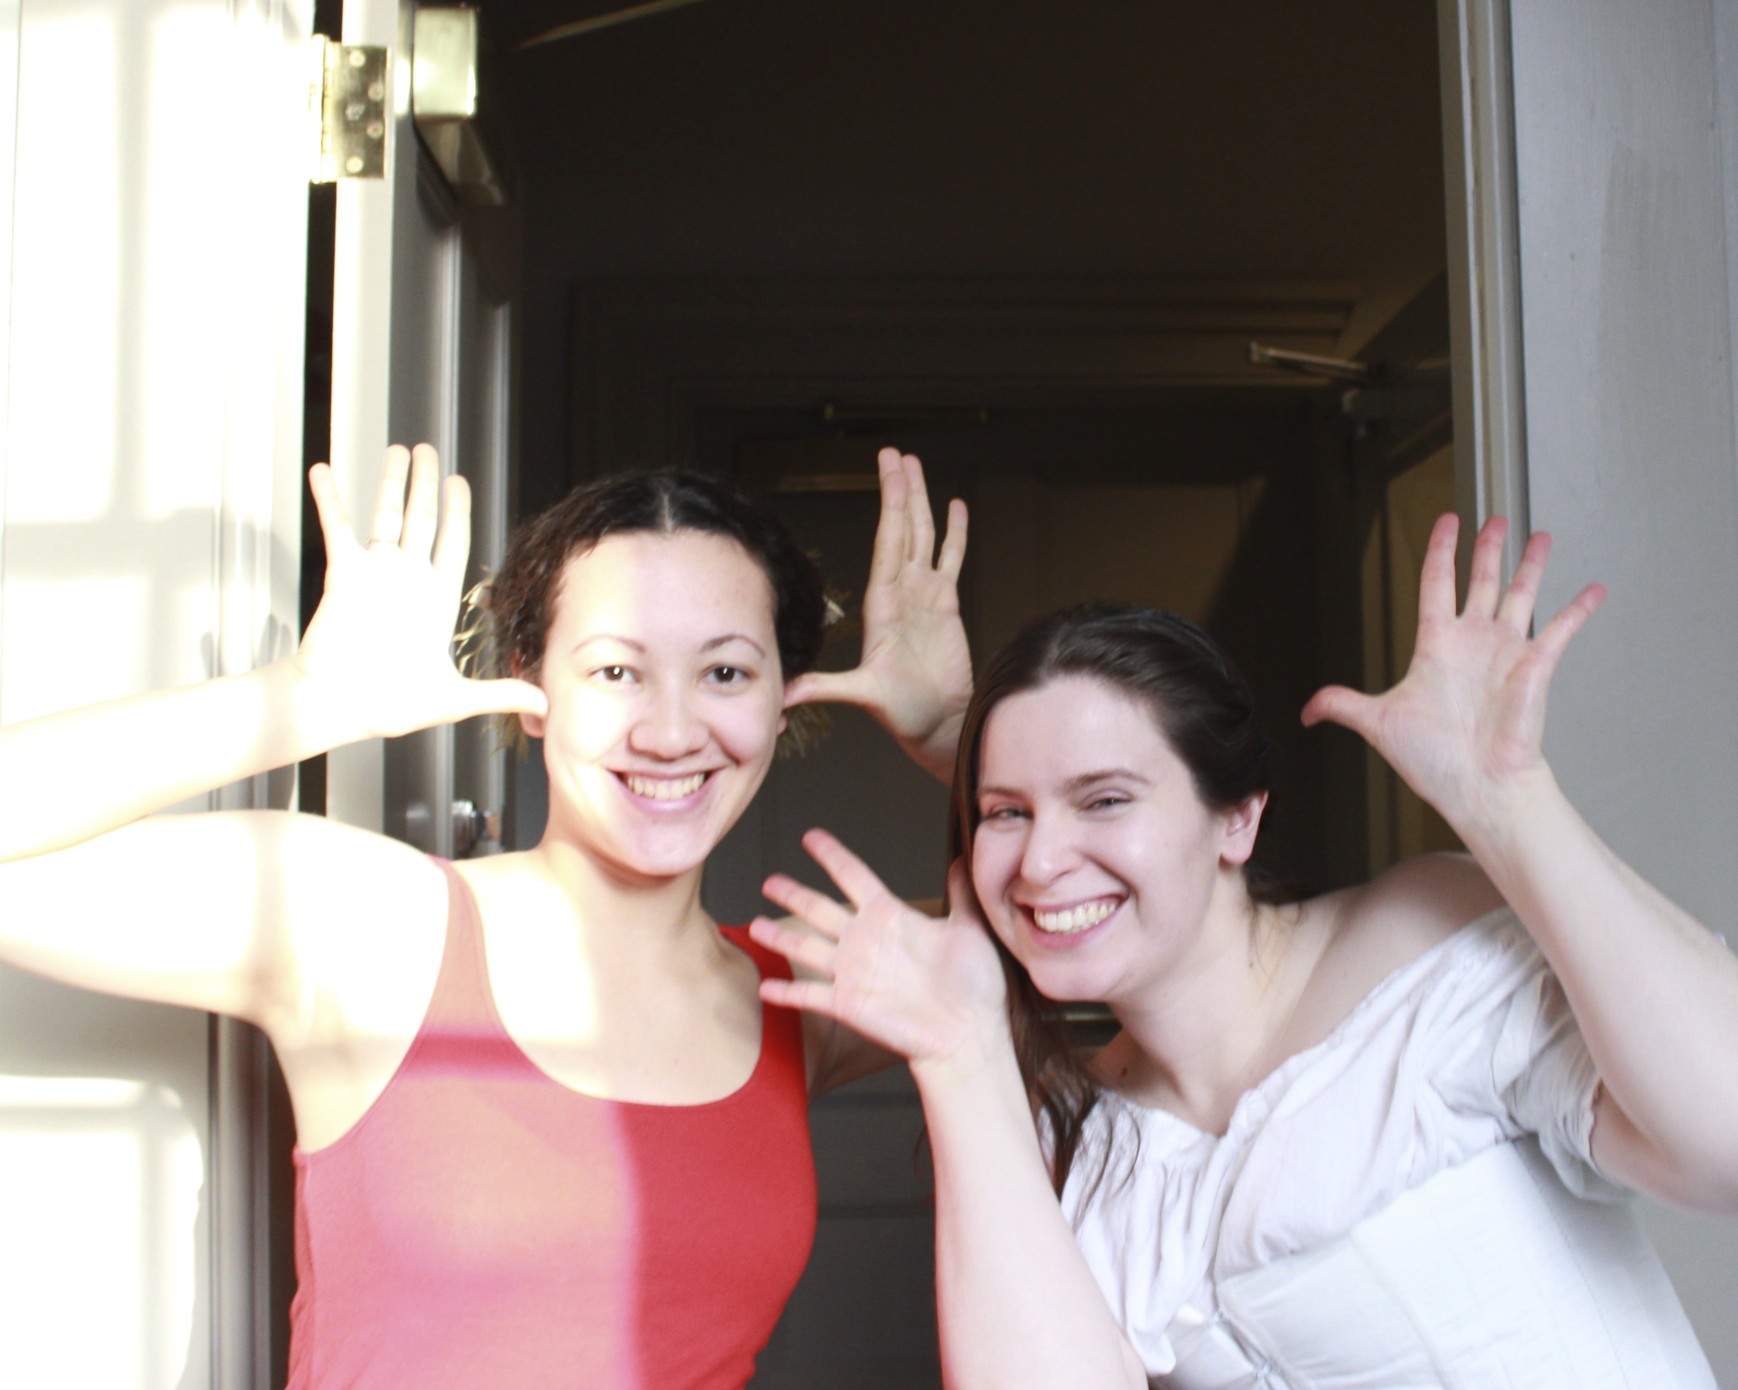
While getting dressed we might have been making silly faces for the camera while the owner walked away…

IMG_9674
Haha! Moose making companion! In case you don’t know, this is my favorite silly face to make. Don’t believe me? Look here and here!

HSF #5 & MpRSW #1: Blue Under Dress

The HSF #5 Challenge: Peasants and Pioneers. The MpRSW #1 Goal: Under Wear. This recently completed garment fits both!

Now remember, and don’t judge me, that this project is one of those “I just want this to be done quickly and no one will be able to see the details” projects.

IMG_4321
Here it is: an 1812 under dress.

First, the facts:

Fabric: Cotton-poly blend.

Pattern: The exact same as my 1812 white striped gown from last summer, which is adjusted from a gown in Janet Arnold’s Patterns of Fashion 1.

Year: 1812.

Notions: About 2 yds of 1/4″ cotton twill tape.

How historically accurate?: Accurate pattern, almost totally inaccurate fabric (that cotton counts for something, right?), and entirely machine sewn (not a single hand stitch, which for me is a rather unusual accomplishment). I give this one a 60% on historically accuracy. I think the pattern goes a long way towards being a saving grace. Ok, maybe a 65% if I count the cotton…

Hours to complete: Let’s say 16. All that gathering does add some time.

First worn: Not yet, but will be worn in April.

Total cost: Between $9-$12 (I can’t remember exactly how many yards I bought…)

How does this fit the HSF challenge? The simplicity of the fabric and style of the dress and lack of extra trimmings, puts this in the category of basic Regency clothing that could be worn by a pioneer-type. It’s probably still a little fancy for a peasant. It’s hard to make plain and simple clothing!

A few more pictures, then a little more explanation.

IMG_4322
Front.
IMG_4323
Machine stitching showing on the front. I have no problem with interior seams being sewn by machine on some garments, but I do prefer hand finishing on garments that are going to be seen.
IMG_4324
Back. It looks rather medical scrub looking, especially with those white ties… Regency hospital gown?
IMG_4325
Machine sewing galore!
IMG_4327
A closeup of the back.
IMG_4333
Here’s what it looks like on the inside. No raw edges: that makes me happy. There’s a drawstring along the top of the center panel so I can adjust it.
IMG_4334
Looking over at the armsceye.

Explanation time. I actually don’t like this color much on its own. In fact, I think it does absolutely nothing for my complexion. Actually, it just looks bad on me. So why did I pick it, you ask? Well, this is intended to be an under dress, not something I ever plan to wear by itself. I was at the fabric store looking for colors that worked under my 1812 striped square neck gown, and this is the one! The other colors looked too much like skin, or just awful pastel shades of ew. Also, I was probably influenced by this next picture. I couldn’t stop looking at the blues.

b5209c264d14c1b64b98866afa88cbf0
At the Hermitage.

Anyway, given how much I don’t like the color/am amused by the scrub-like quality of it and don’t plan for this to be really seen, I just wanted it to be done, quickly and without fuss. That’s why it’s totally machine sewn. Granted, I did do a nice machine sew job, so I suppose it might one day be worn without the over dress, but I don’t see that as a likely option, at least on my body. Funny contrast is that the white dress is entirely hand sewn, with not a machine stitch to be found.

IMG_4328
Here’s what the blue under dress looks like with the white striped dress over the top. (Oops, the blue hem was too long. Fixed that in a jiffy!)
IMG_4329
The blue fades to a soft grey-ish blue under the white.
IMG_4330
And it helps show off the stripes and the more opaque white areas of the white dress.
IMG_3562 - Version 2
For comparison, here’s what the white dress looks like with the original white under dress underneath.

Voila! One over dress, two different looks! One of the comments awhile ago mentioned the idea of the Regency LWD: Little White Dress. That’s been on my brain while I’ve been making this blue under dress. With different under options this LWD becomes more versatile and can change looks for different events. Nice!

Also, and this is really cool, my blue under dress is incredibly similar to this “slip” at the Met! The cool part is that I came across the slip in January, months after I had made the plan for my under dress. But look at the gathers on the sleeve at the sleeve band and at the crown, and at the shoulder strap construction of the bodice, and at the gathered top and bottom center front panel. It’s kind of uncanny, because this is not the dress that Janet Arnold based her pattern off of. Just goes to show that this construction style was used on more than one dress in the Regency period. Cool!

C.I.41.27.1_F
Early 19th Century slip at the Met.

As I dressed Squishy I realized that when I go to wear this blue under dress it would probably save me some fussing if I baste the shoulder straps of the two dresses together so the blue doesn’t poke out where I don’t want it it. That’s an easy thing to then take out again later. I’ll have to get on that before April!

Project Journal: 1822-1824 Ensemble Part V: Almost Finished Petticoat

Recently, at Fezziwig’s Ball, I was able to wear my almost-finished 1820s ensemble. You can see pictures of that event, which includes pictures of the ball gown, walking dress, muff, and tippet in this previous post. In that post, I didn’t get to share pictures of the petticoat that went along with these 1820s garments, so that’s what this post is about! For the record, after the ball I simply starting taking off layers and having my friends take pictures so I would have evidence of all my sewing (while I still was wearing the proper hair style and accessories!).

IMG_4147
Ok, I’m making a funny face (I think my eyes are closed)… but it’s full length picture of the petticoat! You can see the shape, and the cording, and the lace at the bottom.
IMG_4148
I didn’t get to finish the neckline before the ball… so you can see how that right shoulder seam is starting to split. I’ll have to repair it before finishing the neckline.

This simple white cotton petticoat has 16 rows of cording to help it stand out. It is entirely hand sewn and closes in the back with ties. Close up photos showing the construction of this petticoat are in this previous post.

With this petticoat I wore my short sleeve linen chemise and pink 1820s/30s corset. Both of these things were made last year and have been worn multiple times since then (especially the linen chemise, which gets worn often!). I finally have pictures of me (versus Squishy, the dress form) in the corset! Granted, it’s not a particularly exciting picture, but sometimes you just have to take what you can get.

IMG_4079
1820s/30s corset. You can read more about the inspiration and construction by clicking on the links. Clearly, I haven’t actually quilted a diamond pattern on the front like I planned to do when it was built…

And just for fun, I thought I’d include this fun picture of me getting ready for the ball. One of my friends is on an “artsy photo” kick… I didn’t even know she was taking this picture, but I like it! I especially like the mixture of modern and historic that is me in my chemise and corset putting on mascara… they had modern mascara in the 1810s, right?!?

IMG_6411
Hee hee! (My putting on mascara face…)

Project Journal: 1822-1824 Ensemble Part II: Initial Petticoat Details

Petticoat. 1828-1835. Manchester City Galleries.

This bodiced petticoat is the inspiration for the first piece of my 1822-1824 ensemble that I need for December events. You can read more about the overview of the ensemble by viewing my last post: here. Despite the slightly later date given for this garment (later than my target of 1822-1824), the shape and construction are consistent with garments from the earlier 1820s, so I have no qualms about using this for my purposes in this case.

The description from Manchester City Galleries:

White cotton with high waist. Low, wide, round neck edged with embroidery and lace frill; piped armholes; front in one bias-cut section, back in two shaped sections, centre back fastening with drawstring at top and bottom of neck edging and at high waistband and two buttons; skirt front in one slightly flared section, two sections each side flared towards back, slit at hip in right back seam, centre back in two straight sections, closely gathered at centre waist; sixteen lines of piping at hem; edging of finer cotton scalloped and with openwork embroidery.


I used this description in combination with the 1820s patterns in Janet Arnold to create the bodice and skirt patterns. My petticoat is constructed out of plain white cotton. It is entirely hand sewn and has 16 rows of cording in the skirt. There is a edging of white cotton openwork embroidery at the hem. The seams are all flat felled in the skirt. The bodice seams are turned twice and stitched on each side of the seam. The petticoat closes in the back with ties.

Bodice of the petticoat with unfinished neckline.
Near the hem: 16 rows of cording and embroidery edging.
Super close up of a flat felled skirt seam, narrow hem, and whip stitches attaching the embroidery. The embroidery is whip stitched to the hem at the very bottom, and the top edge is whipped again on the inside (that’s the top horizontal row of stitches).
Back of the bodice.

The only remaining work to be done is to add another tie between the current two since the back wants to gap open just below my shoulder blades, to finish the neckline, and to adjust the gathers across the back (secret tip I’ve learned through building these garments: to get that great 1820s triangle shape, your gathers have to be super concentrated at the center back area, not spread out across the entire back, as these currently are). I plan to finish the neckline with narrow white lace, but I want to determine the neckline of my ball gown before finishing the neck of the petticoat. You understand that desire, I’m sure!

Differences from the original include: that I have a seam up center front of the bodice (no particular reason, it’s just that’s how it turned out), my cording is spaced closer together (which I’m not sure I like as much as the original, but I’m not taking it out now!), my armholes are narrow hemmed rather than piped, and my skirt closes right in the middle of the gathers rather than off center at the side back seam.

Pictures of the entire petticoat will have to wait. It looks pretty foolish on hanger, doesn’t fit a dress form (because the bust is so high), and it’s super awkward to get a full length picture of oneself… so we’ll just have to wait until I’m wearing it!

Project Journal: 1822-1824 Ensemble Part I: Overview

Well, as you recently read, I have a 9 month sewing plan to get me through May of 2013. It’s not set in stone (which means that mostly I keep adding to it, not taking things away…), but it gives me a great overview of what I need to accomplish and by what month. Deadlines really help in getting things completed!

The first major portion of the sewing plan is an ensemble of clothing from about the year 1823. I’ve been doing lots of looking at fashion plates and extant clothing from the early 1820s, in books and online. Here’s a link to my pinterest board: 1820-1824. I had so many pins in the 1820-1829 board that I had to separate the decade, so I also have a separate pin board of 1825-1829.

The 9 month plan includes the following pieces: petticoat, ball gown, walking dress, muff, bonnet, and chemisette. I’ve added one more thing since the plan was created: a tippet to match the muff! Before I explain why I want these items (ie, where I plan to wear them!), let’s look at my inspiration for the items themselves!

Petticoat. Manchester City Galleries. (I’m making a petticoat out of white cotton. It is entirely hand sewn.)
Actually a Dinner Dress (but I’ll use it as a ball gown). Ackerman’s Repository. May 1824. (I guess I lied about the year… I’ve been looking at the images so much I haven’t even glanced at the date in ages! Anyway… I’m making this in apple green silk with hand sewn silk organza appliqués.)
Promenade Dress. Ackerman’s Repository. December 1822. (I am making this out of deep, rich pinkish burgundy wool with hand sewn lavender silk trim.) This is also my inspiration for the tippet. (I’m making the tippet out of white faux fur.)
Walking Dress. Ackerman’s Repository. March 1823. (I think this is where I got the year 1823 from… This is another influence on my walking dress design, especially at the collar.) This is also my inspiration for my muff. (The muff will be the same fur as the tippet, lined with pale blue silk shantung.)
Bonnet. C. 1820. The Met. (I plan to make this in lavender to match the walking dress.)
Chemisette. c. 1810-1825. Snowshill Collection. (Yes, this is one of the ones in Janet Arnold. I plan to make this out of lightweight cotton and use my fluting iron! However, I have to say that if one thing in my December-to-do doesn’t make the cut, this would be it. I really want to take my time on this and play with my fluting iron, and I’m not sure I’ll have the time on this one…)

What is all of this for, you ask? I plan to wear the whole ensemble in December when I attend Fezziwig’s Ball, a 19th century ball hosted by the Commonwealth Vintage Dancers in Salem, MA. Since it’s a ball, I’m sure you understand why the petticoat and ball gown are required! But why the outerwear? Before the ball begins, ball-goers have the opportunity to go caroling around the streets! It’s really fun, and usually pretty cold. I need to stay warm, hence the wool walking dress, tippet, and muff. The chemisette is to fill in the collar of the walking dress, and the bonnet is really icing on the cake to help pull the whole ensemble together! As an added bonus, later this winter my friends and I hope to go ice skating in 19th century dress, so this will also be my ice skating outfit!

1812 Sleeveless Undergarment Research

As I mentioned in my last post, the one where I shared pictures of my new 1812 under garments, there aren’t a whole lot of extant examples of sleeveless undergarments from the Regency period, so I had to take the research images I could find and extrapolate what was necessary for my dress from that information. Here are a few extant examples of sleeveless underdresses.

Early 19th century. Petticoat. The Met.
Petticoat. 1800. Cotton. National Trust.
Early 19th century cotton petticoat/underdress. MFA Boston.

It is fitting that this last one was worn by someone who lived in Boston, MA (that’s where I live). Neat! And isn’t the whitework at the hem lovely? Fashion plates and extant underdresses and petticoats from the early 19th century not uncommonly have hems that had white work and lace decorations. I didn’t incorporate that into my underdress… but maybe in the future I can make another such garment and include that detail!

Natalie Garbett also wrote a blog post about a sleeveless underdress that she made, which you can read by clicking this link. It’s super cute (and has hem trim)!

I actually didn’t find any sleeveless chemises, though I did come across mentions of them. I suppose a lady could have tucked up the sleeves of a normal chemise, or worn a sheer dress with the sleeves of the chemise showing through. Here’s an example of an early 19th century chemise with sleeves. This one is pretty ruffly, but the basic shape is the same, as is the gathering tie at the neck.

1810s linen chemise from the Met.

1812 Short Stays, Sleeveless Chemise, and Under Dress

Remember I recently shared with you the square necked 1812 Ikea curtain gown? And I promised pictures of the accompanying undergarments? Now is the time! Please forgive the silly black and white checked walls in these photos… I took the opportunity of having people around to take photos of me in the garments, despite the lack of a fitting setting.

Chemise and short stays.

The chemise is constructed of linen, and despite its rather cute a line shape, it is actually just a tube with shoulder straps. The front has a draw string across it to help it shape over the bust, which I think is part of the reason the front looks so evenly distributed and full. As you can see, I chose to make a sleeveless chemise, specifically for the square necked gown.

Back view.

The back of the chemise is cut low and square to fit within the shape of the square necked gown. Next is a closeup of the stays so you can see more detail.

Short stays.

In this photo you can see the drawstring on the chemise. You can also see the front lacing stays better. They are essentially the same basic shape as my longer pink stays, with a few differences. The pink stays have a simple front, back, hip gusset, bust gusset construction, whereas these new stays have a back piece, side piece, and then front piece with the bust gussets. For this pair, I think I actually could do without one of the bust gussets, since it looks a little big. But it’s WAY too late now to change that! I had to cut the area under the arm pretty low to be comfortable, and I also had to move the straps a few times, especially in front. If they are too far out they cut into your arm joint when you try to move–not comfortable, let me tell you–but they needed to be pretty wide in order to accommodate the wide neckline of the square necked gown.

The stays are white cotton twill layered with two layers of cotton canvas, except the gussets and straps, which are just one layer of the canvas and one layer of the twill. The stays are bound with white cotton bias. They are boned (only at center front to stabilize the eyelets) with plastic wire ties. Despite the light boning they are quite stable when laced up. And let me just say how much easier it is to get dressed when your stays lace in front! So easy! Love it!

These stays were stitched by machine. I needed them done quickly and I wanted to be able to dance and sweat in them without having spent lots of hours hand sewing them. Also… at some point when I washed them (after the 1812 Guerriere weekend, when they were wet through from sweat) they got streaky. Now they are mostly off white, but still have bright white streaks. So I didn’t feel the need to make them super pretty and spend the time hand sewing them. I did hand sew the eyelets for the lacing. I thought about doing spiral lacing, but then when I made the eyelets I forgot to space them that way… so they don’t spiral lace.

Under dress.

The other new undergarment is this under dress–needed because of the sheerness of the dress fabric. So here it is. The skirt is the same dimensions as the square neck dress, and mounted to the bodice in the same way. The bodice also uses the same pattern, except that the front is not gathered. There is a small tuck on each side of the bust, but that’s it. The straps on the under dress are similar to the straps on the chemise and stays, so that they don’t interfere with the sheer sleeves of the gown. The under dress ties in back at the top and where the waist is. The day of these pictures one of the lower ties came off, so you can see the gap where a tie would normally be. Below the ties are an opening of about 8″ that allows me to get in and out of the garment. It all looks quite a-line in these photos, but with the dress on top the whole thing looks much more columnar.

Back of the underdress with the missing tie.

I think I’ll do another separate post with some of my research images for the sleeveless under garments. So for now, this is it!

Project Journal: 1815-1820 Regency Ensemble Part IX: Completion of the Re-made Dress! (1812 Ball 2012)

I am so pleased with my re-made 1819 dress. You can get the background here or read the sewing update here! In short, the new style shares only the skirt with its former self. The new ruffles are all hand hemmed and hand sewn on. The dress seams are a mix of machine and hand sewing, depending on if I felt like digging out the sewing machine or not. All of the bodice seams are flat felled by hand. The dress closes in the back with 4 mother of pearl buttons. Oh, and let me not forget that the dress no longer has built in petticoats. Part of the re-make was to create a separate petticoat from one of the two petticoat layers built into the dress. The petticoat ties under the bust and has a single button to close the top of the bust. It is just a sleeveless, simple version of the gown. I’ll have to take pictures sometime so I can share them. But the dress… It fits! It is ruffly! It has so much more style than it did before! Just to compare, the first picture is your first glimpse of its current style, and below that is from before the re-make.

The re-made 1819 dress, with ruffles!
The 1819 dress in its first incarnation.

Isn’t it more stunning than it previously was? I wore it to the Commonwealth Vintage Dancers’ 1812 Ball (ok, so my dress was a little forward thinking… maybe I have a time machine?). I had a lovely time, as expected. I made some new acquaintances and renewed some old ones, I was able to wear my recently purchased kid leather opera-length (which means over the elbow) gloves and a beautiful shawl one of my aunts gave me a few years ago, I got to practice my historic hair styling techniques (more to come on that point soon), and I danced! But let me stop writing, because really this post is about sharing pictures.

The back view of the re-made dress.
Friends: don't we make a lovely group? Ok, wait, but there's a funny face...
How about this one? Same group, but now I'm making the funny face. Rather a severe expression, don't you think?

 I’d just like to insert a comment here: looking again at these pictures, all the ruffles on the bodice of my dress really manage to make me look much more busty than I actually am… Hm… there are a lot of ruffles going on there!

My friend made this beautiful fan to go with her dress! It's hard to see the detail in this picture, but it's absolutely lovely.
Front of her new dress. She also has the super cute tiara, that is much more sparkly in person...
Back of her new dress.

I’ll leave you with this image: a teaser for a soon-to-come post about the creation of this hair style!

Quite picturesque, I think. Thanks for taking the photos, Carly (and Mark)!

A future project: 18th Century Pockets

For the last month, I have been pondering the idea of making 18th century pockets. It was my idea to wear them to an 18th century ball and use them  as a place to store my modern items (cell phone, credit card, cash, car keys, etc.). I was thinking of making simple linen ones, without embroidery, but once I started researching them I realized that I really wanted to go the full distance. In this case, the full distance meant hand sewn silk embroidery… The realization hit me just a few days before the ball that this plan was flawed. There was no way I was going to complete hand embroidered pockets in the time I had left. My choices: to fudge it and be stressed out while trying to complete hand embroidery with cotton thread or to wait, source my products and make a plan, and enjoy my time hand embroidering. What to do? Well, I decided to do the latter and I am glad to say that I am thankful to have used common sense and avoided stress! For now, the plan to make pockets has been added to my list of things to make in my leisure sewing time (when other, more time sensitive projects are lacking… Does that ever happen???). These charming pink, green, and blue ones are my goal.

Early 1700s pockets, linen embroidered with silk, trimmed with silk ribbon and with silk ties (V and A)

Pockets in the 18th century were often made of linen and elaborately embroidered in colorful silk or wool thread, as with the example above and the following examples. Aren’t these yellow trimmed ones adorable? It looks like the pocket slits are smiling!

Mid-1700s pockets, linen embroidered with silk, trimmed with silk and with silk and linen ties (Manchester City Galleries)

This next pair of pockets has beautiful (and intense) embroidery.

Mid-1700s pockets, linen embroidered with wool, with linen ties (Worthing Museum and Art Gallery)

This next pocket has a lovely embroidered pattern that looks much simpler to replicate than the previous examples. This is my back up plan if the other, more complicated embroidery proves to be too much.

1718-1720 pocket, linen embroidered with silk, with linen ties (V and A)

The pockets with unfinished red embroidery are an excellent example of pocket construction. You can see the manner in which the design is marked as well as the embroidery being completed prior to the pocket being cut out and assembled.

1718-1720 pockets, linen with silk embroidery, the pattern drawn in ink (V and A)

There are also some pockets constructed of silk, such as these, below. These pockets were acquired with a quilted silk petticoat and the Victoria and ALbert Museum assumes that they were intended to be worn together. They look puffy and super cute, but because they are assumed to have such a specific purpose I don’t think they are the right idea for me. Also, I wouldn’t get to embroider!

Mid-1700s pockets, silk with silk ribbon (V and A)

Pockets continued to be used in the 19th century, but they were often constructed of cotton rather than linen and were not as elaborately embroidered as in the pervious century. Some 19th century pockets were constructed of cottons with woven patterns, such as stripes or diamonds as well as the occasional pocket of satin weave cotton fabric. In the middle of the century embroidery was again used as decoration, though the motifs were changed from the 18th century. These next few pockets are just a few 19th century ones I like, either because they use interesting fabrics, or because they are smiling at you!

Late 1800s pockets, twill weave cotton (Oxfordshire Museum Service)
I like this one especially, because it really does look like a smiley face pocket! Early 1800s pockets, ribbed cotton, with cotton tape (Cheltenham Art Gallery and Museum)
Early-mid-1800s pockets, satin weave cotton (Maidstone Museum and Bentlif Art Gallery)
early 1800s pockets, figured silk satin, trimmed with silk (Cheltenham Art Gallery and Museum)

Do you have a favorite pocket amongst these? Does any pair stand out to you?

All of these pockets were recently available at here, at VADS: the online resource for visual arts; however, VADS appears to no longer be operable (perhaps because of recent US government action to curtail internet copyright infringement?).   Alternatively, the Victoria and Albert Museum has a pretty good selection of pockets, including some of the ones featured on VADS.

Project Journal: 1815-1820 Regency Ensemble Part II: Corset Construction

Well, it’s been a little bit of time since I shared with you my research and plan to build a Regency corset to accompany my 1819 gown. I’m excited to say that I was successful! The corset is complete, although I still plan to quilt a diamond pattern along front rib section within the next few months (I’ll share photos of that once it is complete). You can see the diamond quilting in the photos in the link, above.

The dummy isn't quite the right shape for this corset, but here it is!
Corset back

This corset is constructed of two layers of pink cotton twill with a layer of coutil sandwiched between them to provide stability and support. I began construction by flatlining the coutil to the outer layer of twill. I sewed the non-gusset seams (the front and back pieces) together in these flat lined pieces, leaving the inside twill layer for later. Each gusset had all three layers flatlined together and sewn into place with the seam allowances pressed away from the gussets themselves. Then I went back and basted the inner twill pieces into place that had been left aside. I turned under the seams on these pieces and hand sewed them over the seam allowance of the gussets so that no seam allowance was showing.

After completing the inside construction I bound the edges with purple bias silk taffeta, scraps from another project. The final step was to create eyelets. I decided to do these by hand in purple cotton embroidery floss. Each eyelet is reinforced with a metal jump ring that is caught under the thread on the inside of each eyelet. This reinforces the edge of each eyelet and keeps them from stretching out of shape when laced. The jump rings are only visible on the inside of the eyelets, where the stitching is bulkier because it passes over the rings.

Hand sewn eyelets, on the outside

The corset is lightly boned at center front and center back. I struggled over what material would be best to create the 2″ wide center front bone. Eventually I remembered a suggestion from a friend, Carly, who had used a creative option for boning that I decided would be perfect for this project. Home supply stores such as Home Depot and Loew’s sell plastic wire ties that are about 3/8″ wide and which come in lengths up to about 20″. The ties are a good 1/8″ thick, strong, but still bendable. They have a similar tension to a steel bone, but are a little thicker. And the nice thing is that you can cut and shape them easily with scissors! Of course, plastic boning is not historically accurate, but it is functional and affordable (a pack of these wire ties is about $5, and there are about 12 per pack) and creates a boned garment that feels similar to one boned with steel bones (and once you finish the garment, who would know?).

In this corset, each side of center back has a single bone. The 2″ wide center front bone is actually 5 wire ties attached to one other with (shhh!!!) masking tape! This is an experiment that I hope will work (I have slight fears that body heat might one day cause the tape to lose its grip and the bones to start to move around in funny ways, or worse, that the tape will leech sitcky goo onto the fabric that will stain the exterior). I put the center front bone in between the layer of coutil and the inside twill, so even if the masking tape does one day create stains, it is unlikely that the stains will make it to the outside of the corset.

For now, success and wearability!