I’ve been making rather slow progress on bigger projects lately, but my stack of recently started UFOs was causing me stress and I really felt the need to finish a project entirely. I had a bit of time today and used it to finish up 3 small projects, as well as fitting a final mockup so I can move on with making a pair or two of modern capris (depends on if I can squeeze two pairs out of my fabric or not) and realizing that another modern top pattern I’ve been trying to make work for me just needs to be left alone for now. If I make the conscious decision to let something go then I feel like I can take it off the to-do list and not feel like it’s a UFO, so all of these things feel like progress!
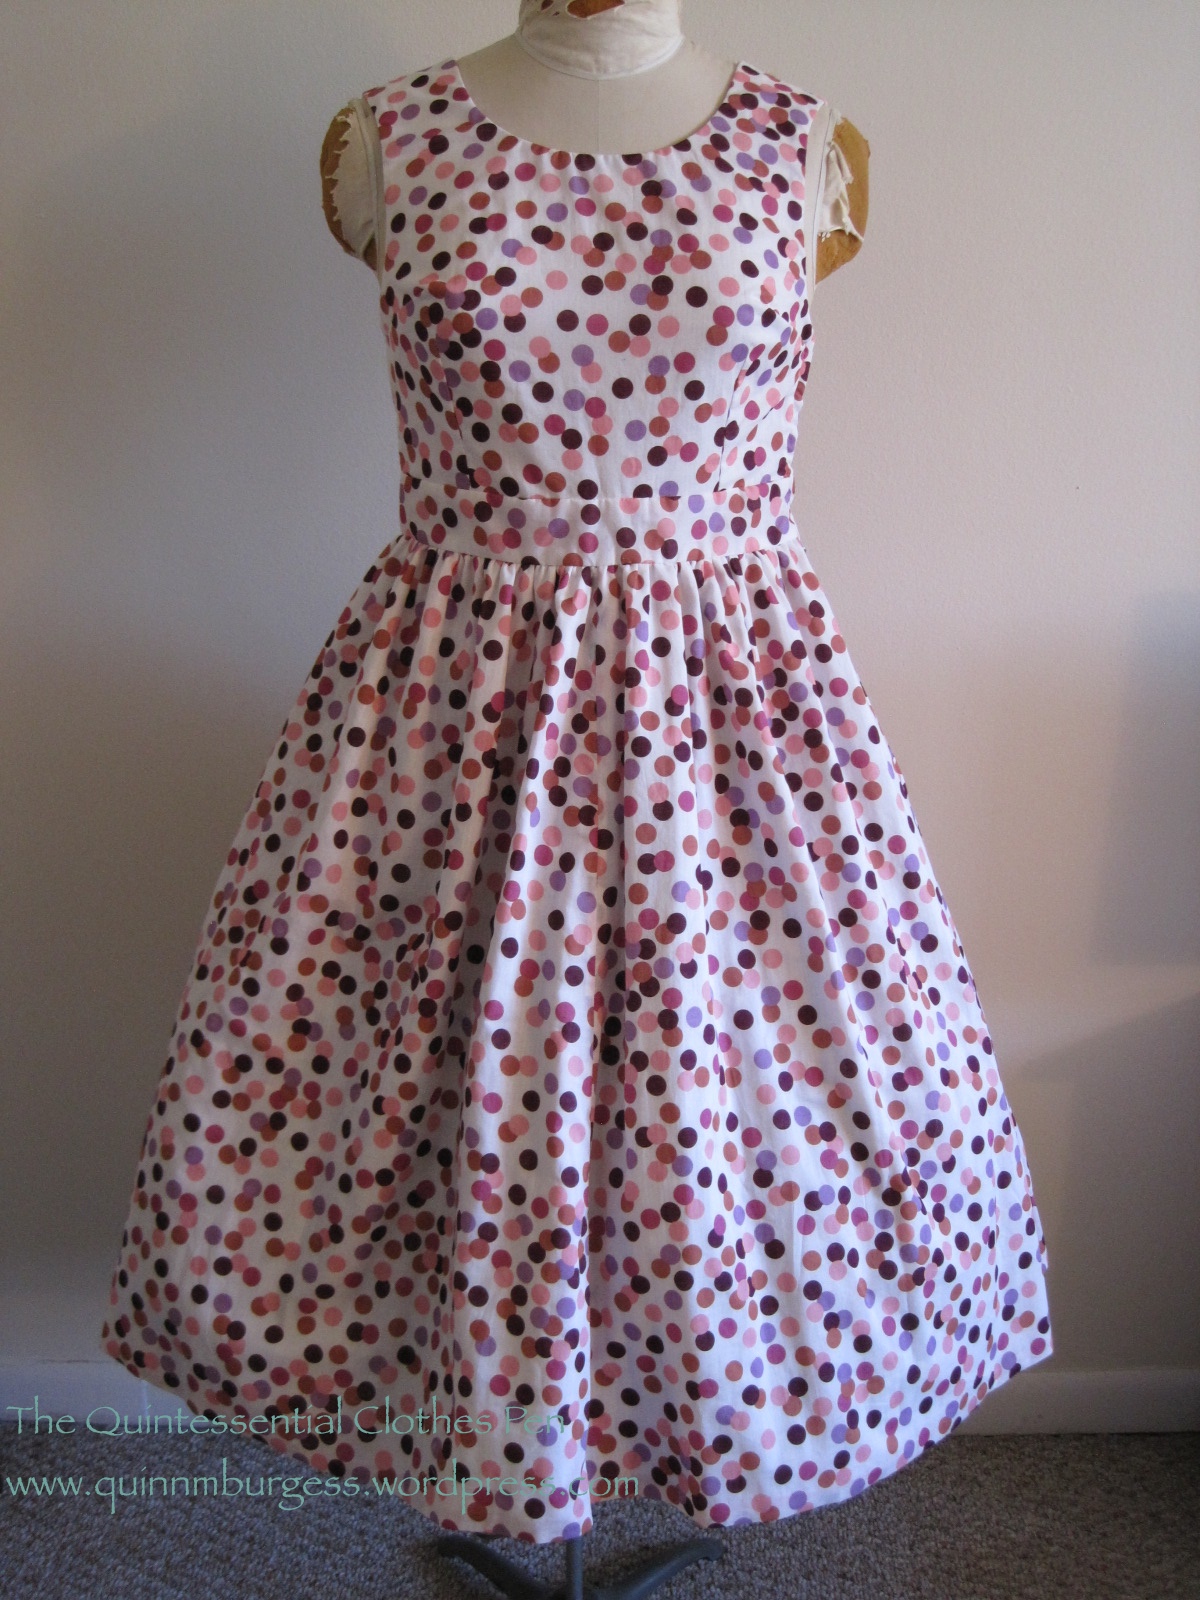
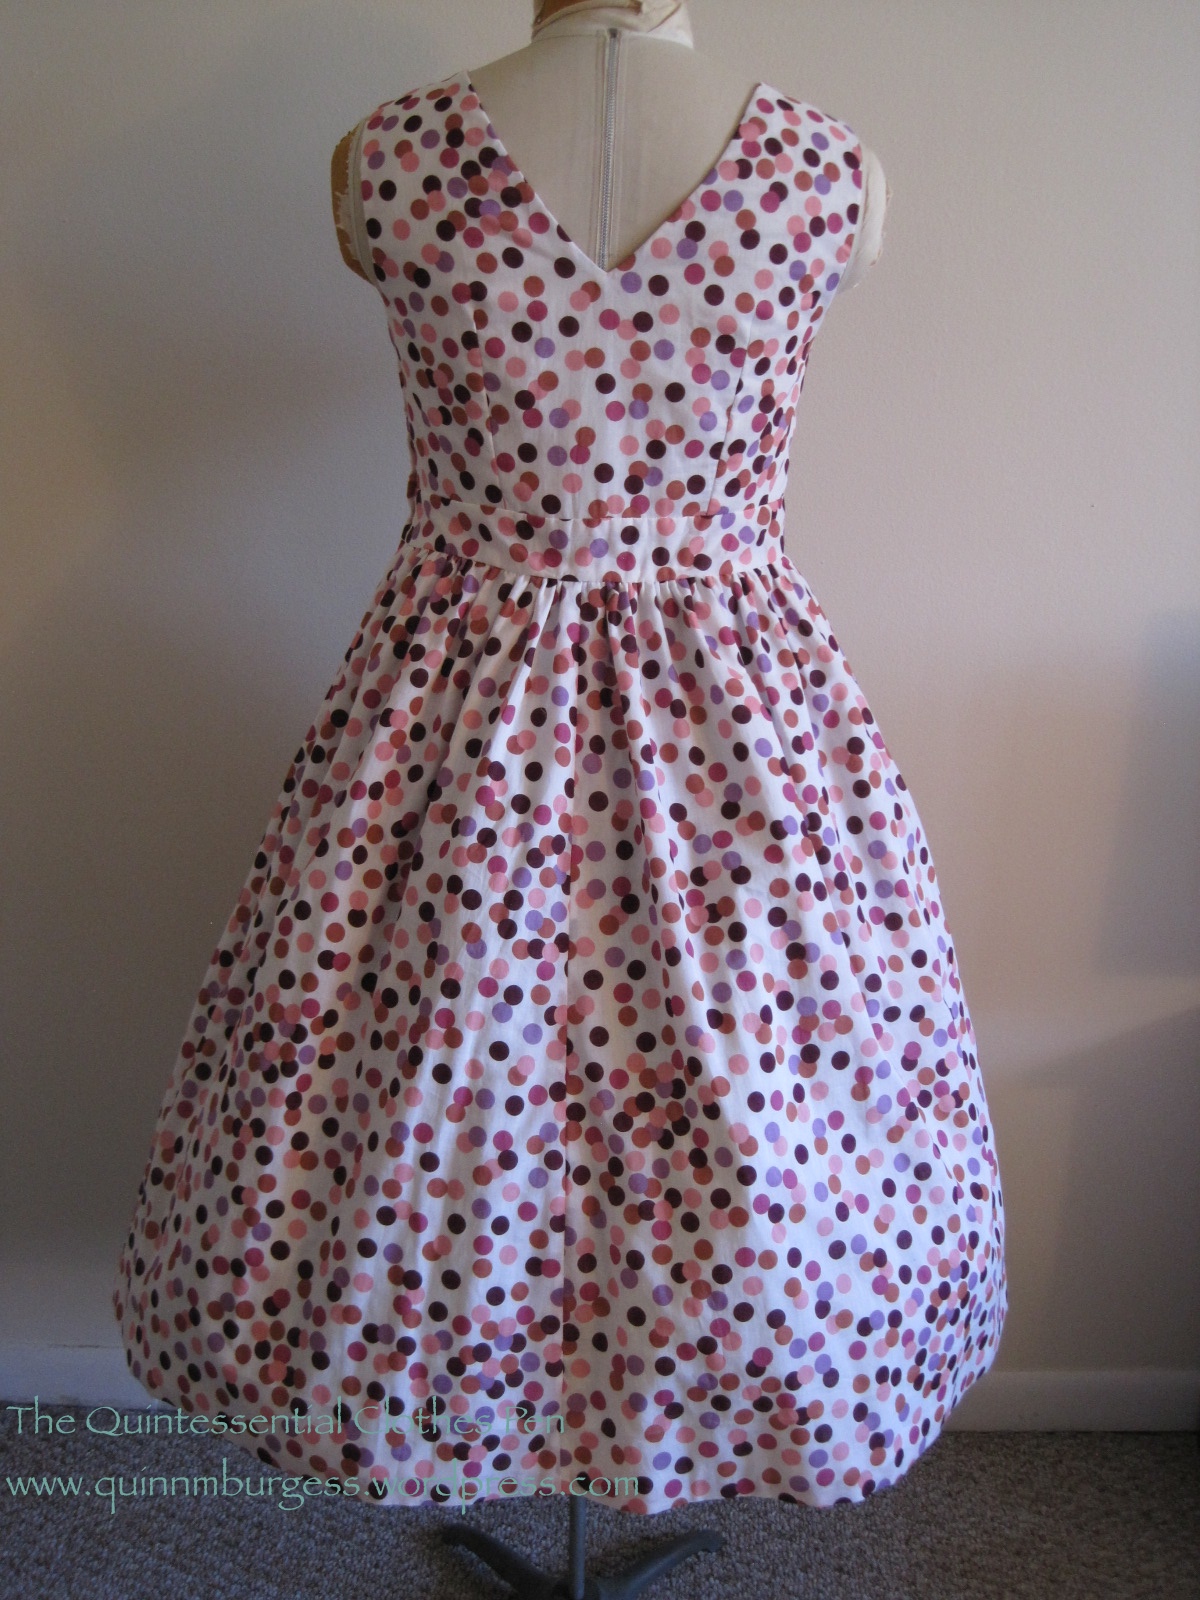
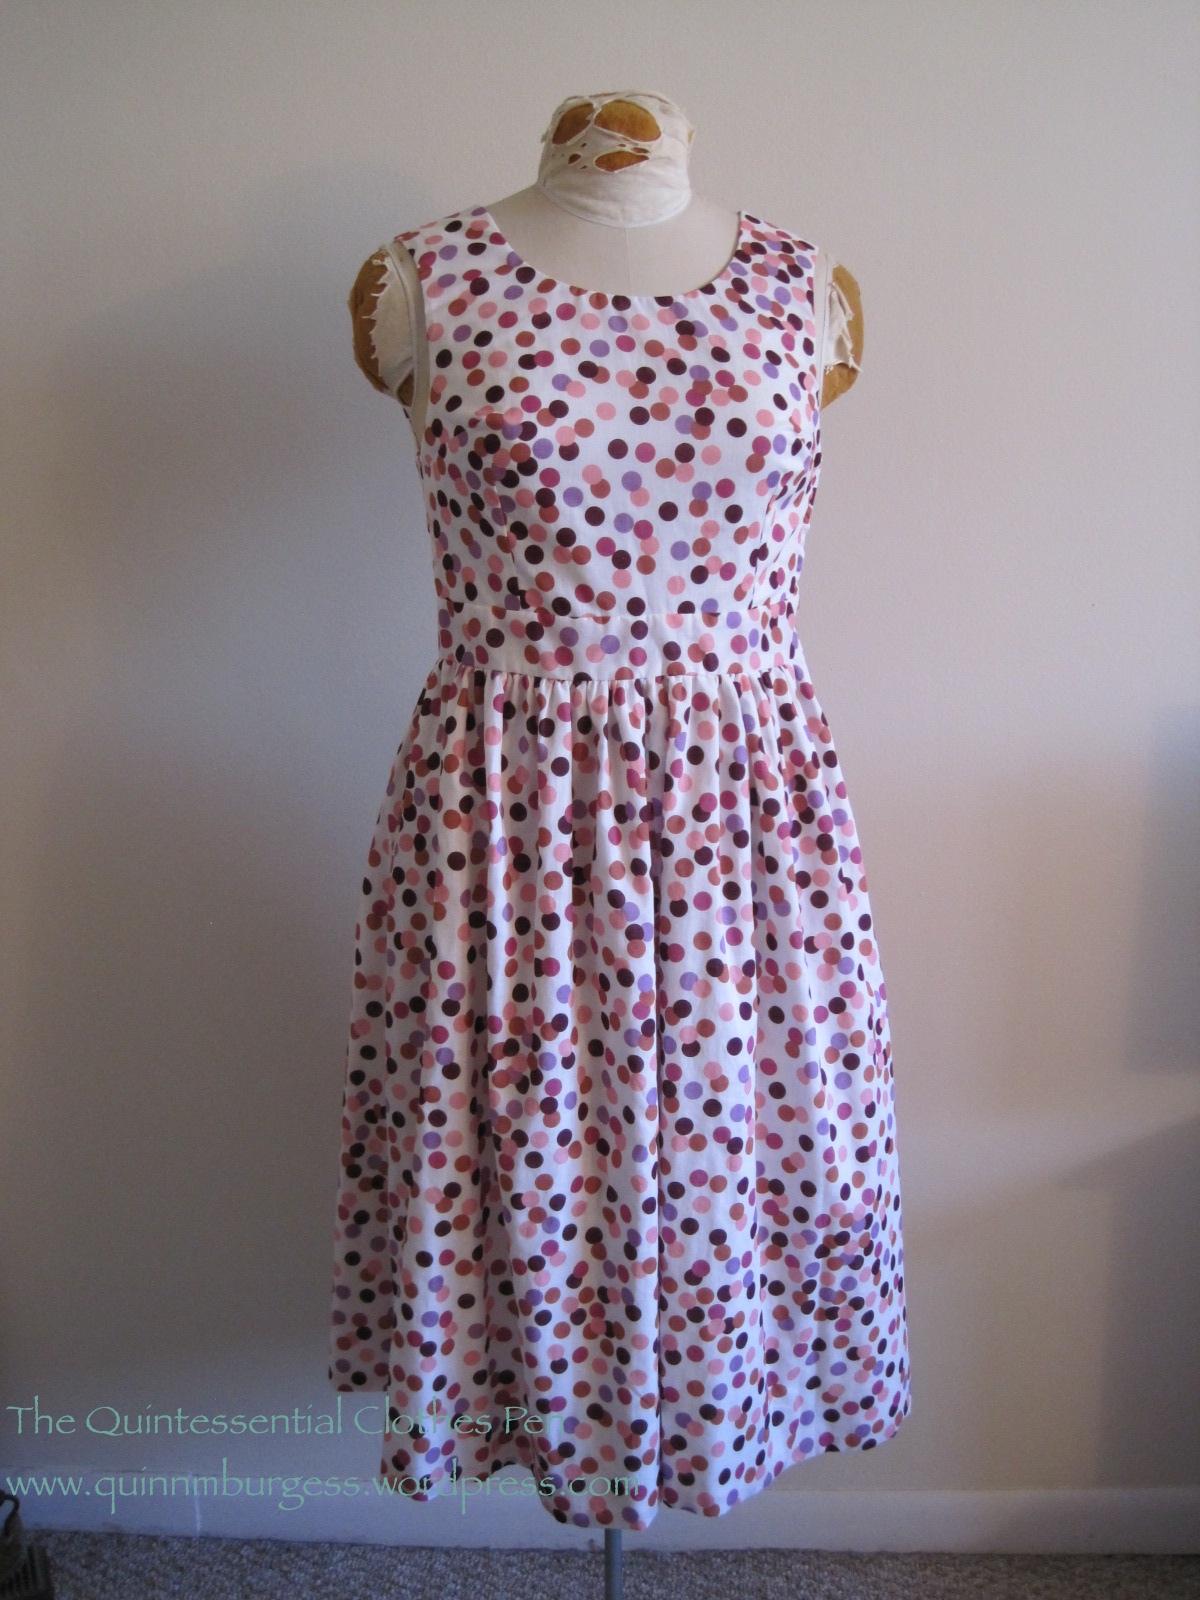
Two of my three finished projects are pretty much the same: two pairs of cotton dot printed tap pants to wear under modern and historical skirts during warm weather. They’re useful for soaking up sweat! I bought the fabric thinking I’d make a top, but then realized that I would never like a top made out of this fabric, so I decided to make these summer tap pants instead. And I really enjoy the result, because having dotty tap pants that no one will see brings me joy. Unless I’m changing at an event… and then some ladies out there might see them!
The pattern is Butterick #4289 from 1976. I made view C and altered it just slightly: eliminated the waistband, lengthened the inseam, lowered the top edge a bit, eliminated the darts, straightened the hips instead of curving them inwards to accommodate the fact that I did not include a fly, and finished the top edge with elastic. I have another pair of cotton tap pants I made sometime in the last few years that are complicated, with a fly and a waistband, but all of that is rather unnecessary, really. I was inspired to simplify the idea after purchasing some tap pants (like these, called petti pants, which are great for wearing over tights and under dresses in the winter!) and realizing how simple these garments could be.
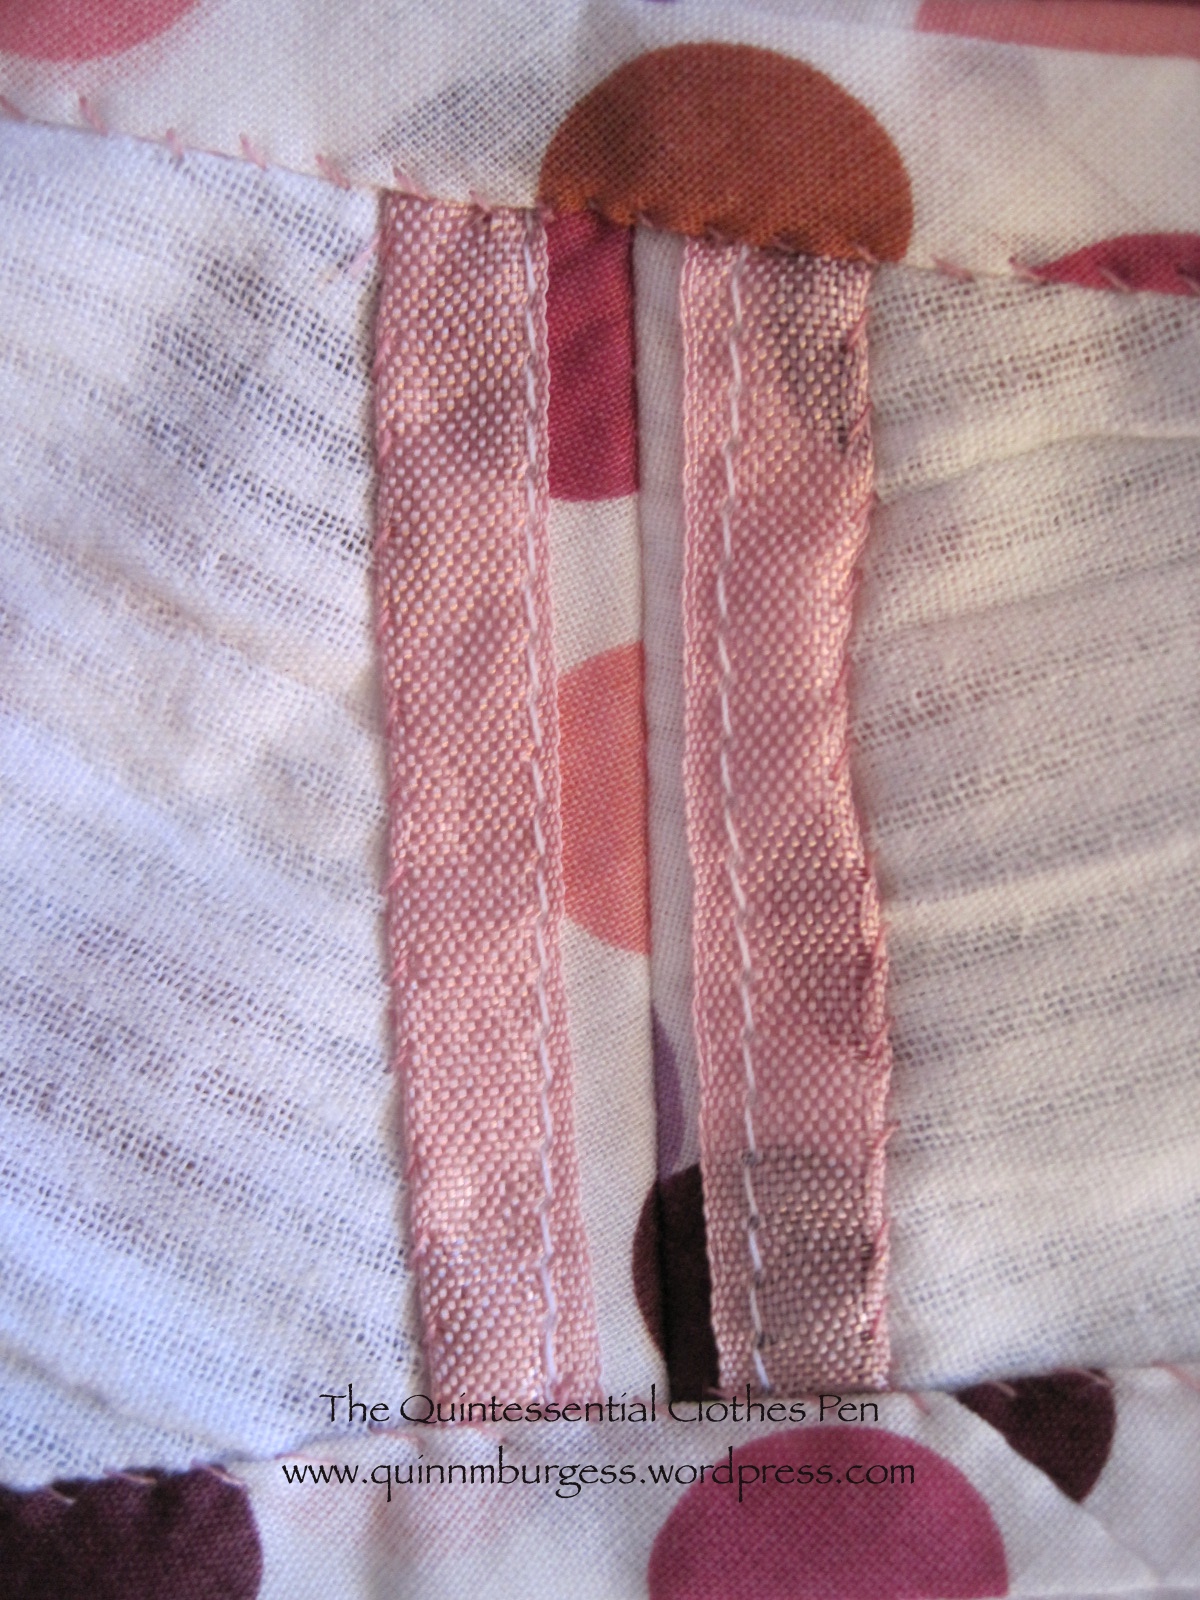
So these are my simplified version, with a pattern that fits perfectly. Hooray! These are all nicely finished on the inside with serged seams. As I pointed, out the top edgess are finished with elastic, though I tried different methods of attaching the elastic on each pair. We’ll see if I notice a difference when wearing these. The only other thing to note, which makes me quite happy, is that I included a little blank cotton twill tape “tag” on the back seam of each pair. Without a tag it’s hard to find the back when getting dressed and this makes it very easy!
(The other project I completed today is an old pair of jeans that I cut off, reshaped the legs of, and hemmed, thereby turning them into capris! If I get pictures of me wearing them someday I’ll share, but it’s not a super high priority. It’s mostly just that I haven’t been able to find ready made capris that I like in years and so I haven’t had any that fit for years, and during the summer that is just not an enjoyable situation. So I’m glad to have some capris again!)
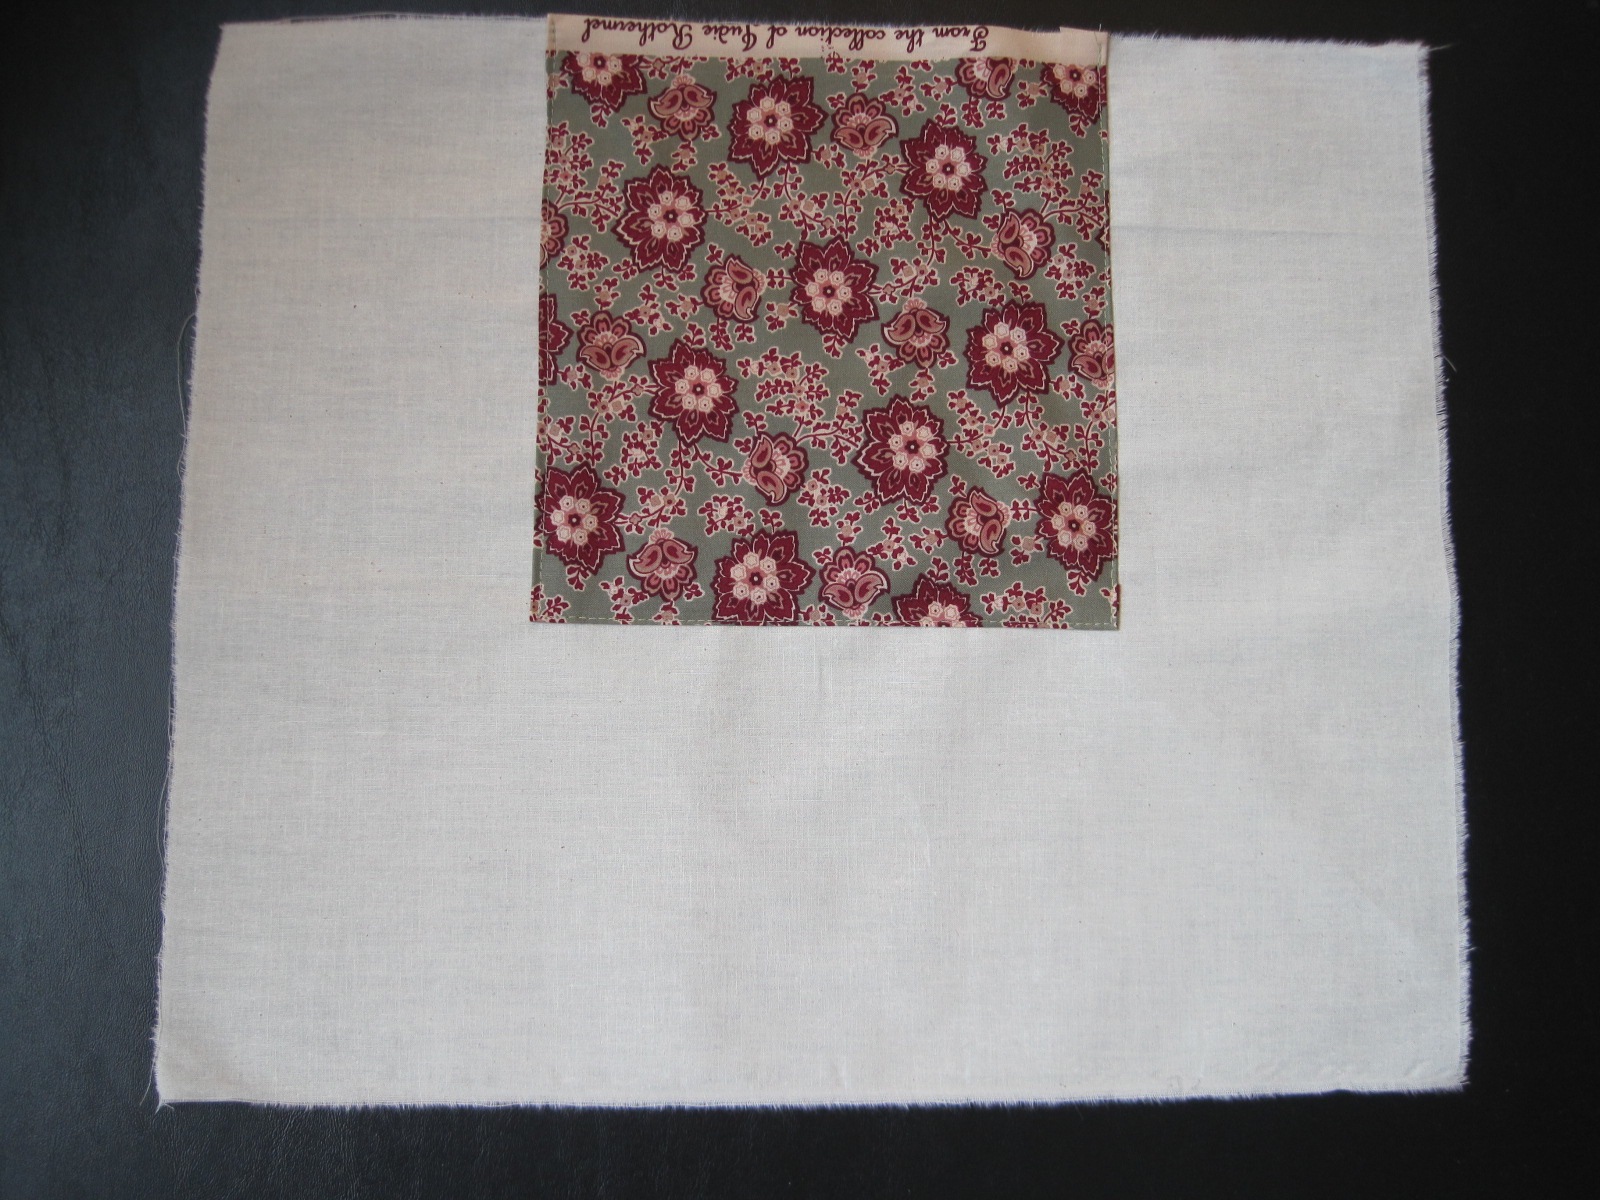
A few months ago, I had a master plan to use the leftover yardage from Georgina, my 1858 cotton print day dress, to make an evening bodice in addition to her current day bodice for versatility and washability. Luckily, I was able to complete the bodice and a new hair crescent before my life exploded in June and I was smothered under an immense amount of work. I am pleased to have work, don’t get me wrong, but I was so exhausted by the end of the month all I could do was sleep and be disoriented! I’ve just come back from a vacation and feel like I can peer out from under my rock and join the world again! So, to celebrate constructing historic clothing for myself rather than other people, here is a post about a really neat addition to my historic wardrobe! And it fits into the current HSF challenge #13: Under $10, a bonus since the HSF challenges haven’t lined up very well with a lot of my projects this year.
c. 1855 new evening bodice, with previously constructed skirt. Worn with all the usual underpinnings (chemise, my new corset, drawers, stockings, hoops, and petticoat) and accessorized with gloves, fan, earrings, and a new hair crescent. Oh, and I’m wearing burgundy velvet shoes! No picture of that, though.
Pattern: I began with Past Patterns #701 but altered it extensively to fit me, to have pleats and gathers on the exterior, and to have an evening neckline. The sleeve pattern was drafted by me.
Year: c. 1855
Notions: Thread, plastic wire ties for boning, hooks and eyes, and cotton cording.
How historically accurate?: Based off of historic examples, constructed with accurate details… I think the only compromise is the plastic boning, which I used because I didn’t have the right length in metal, and because plastic is easily washable (and I want this to be a garment that can be washed easily–that’s part of the goal in having a cotton evening bodice!).
Hours to complete: I have no idea… 32 hours maybe? I really didn’t keep track at all on this project.
First worn: To a mid-19th century ball in June (one of the few moments of respite in my crazy month).
Total cost: About $3 for approximately 1 yard of historic cotton print and a lot of stash materials, which count as free, since I have no idea what I paid for them at this point! Let’s call the total about $8.
Inside of the bodice.
As you know, I like things to be tidy. All of the seam allowances are either hidden between the layers of fabric or nicely finished. There are plastic bones in the darts and the side seams. The bodice is machine sewn and hand finished. (One amusing mistake is that I cut the lining with a center front opening for fitting purposes (and left lots of seam allowance, as you can see) but then forgot to leave seam allowance in the back… So the lining doesn’t extend all the way to the folded edge of the print, but it’s all covered up so no one will ever know and it fits just fine… it’s just one of those amusing things!)
From the back with the right side flipped open.
The bodice closes with hooks and bars. I wanted to use metal bars but make sure they wouldn’t been seen, so I let about ¼” of the print extend past the points of the hooks to create an overlap. I also left extra print extended past the bars, in addition to all the seam allowance, in case I want or need to adjust the size of the bodice in the future. The bars are especially hard to spot on the print, but if you look carefully on the left you can see them. The neck and armsceyes both have very narrow cording.
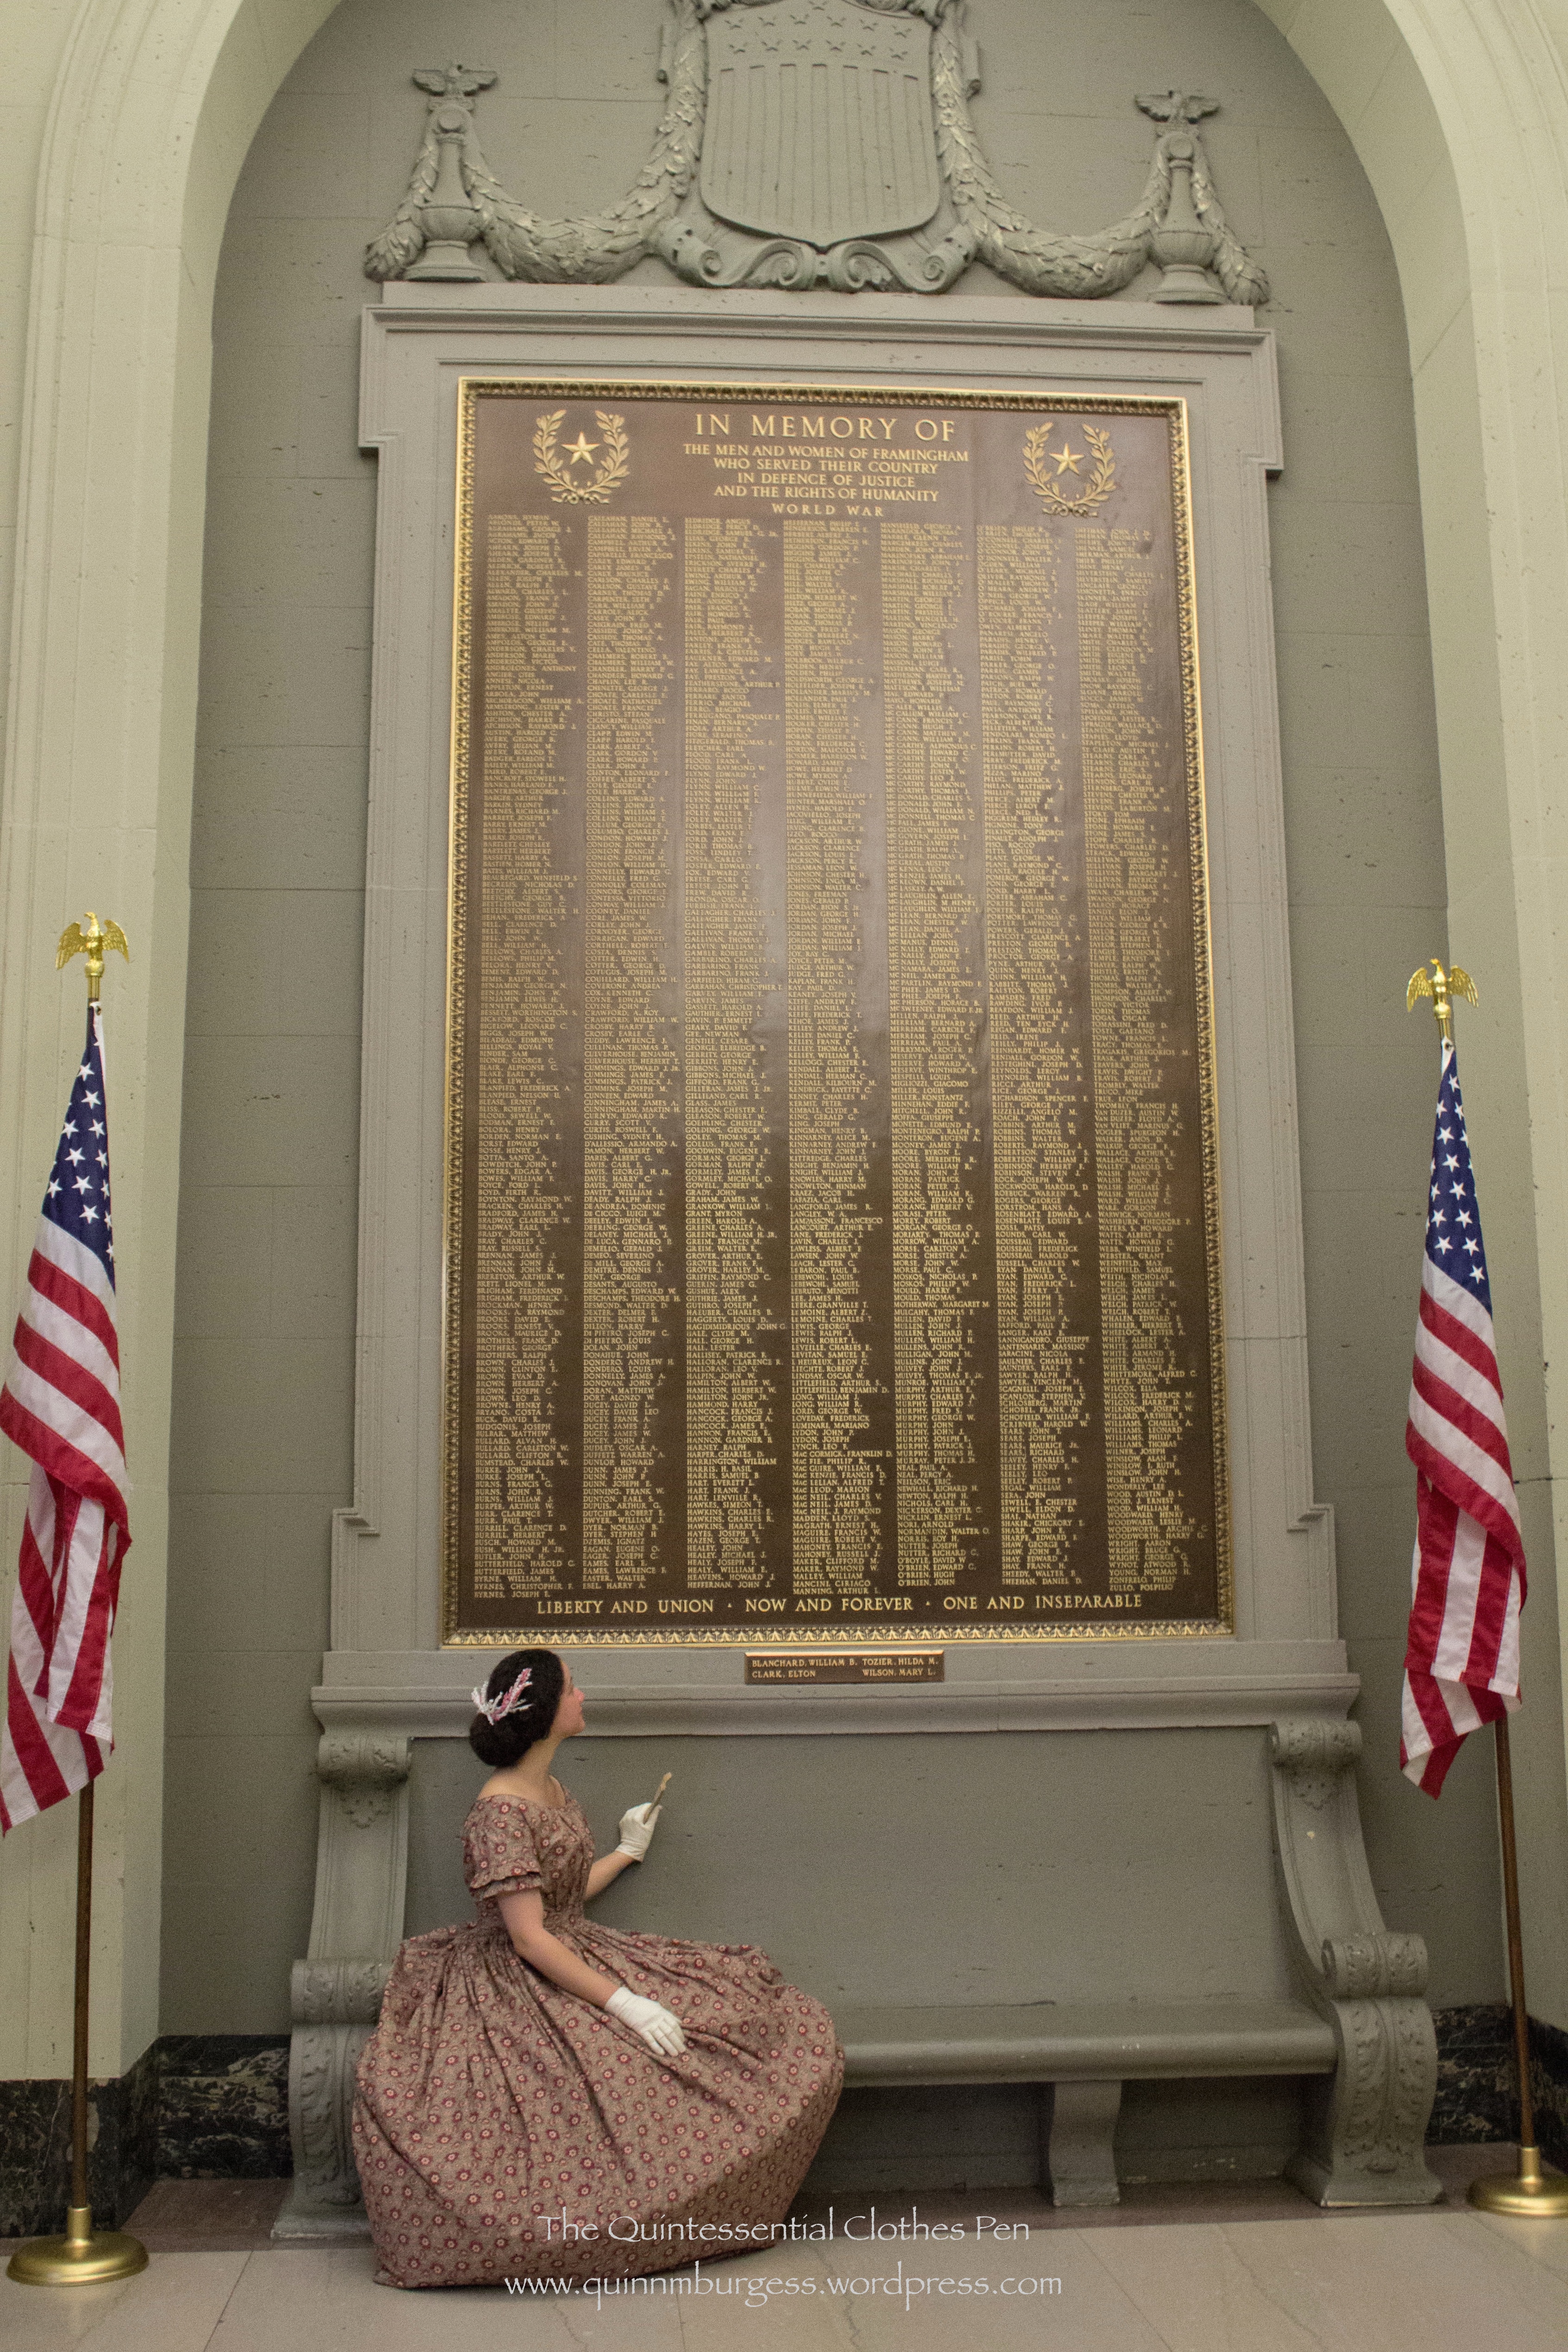
Appreciating those who have served our country. The ball was held in a local town hall which had lists for all the 20th century wars. I don’t think they have 19the century war plaques, but we thought it was a nice photo opportunity.
The defining design details were obviously the low neck and short sleeves, but there were other common details as well, such as double puffs or pleats to trim the sleeves, tubular sleeves without very much fullness at the top or bottom, 1.5″-2″ waistbands sitting on the outside of the skirt waistband, and gathered or pleated fullness on the fronts and backs (no darts on any of these cotton bodices). Some of the bodices have a yoke around the top so that only the bottom portion of the bodice is gathered, but this look says “young girl” not “grown woman” to me, so I opted for a bodice without a yoke.
In terms of construction, to have enough fabric in the print for the pleats and gathers on the print fabric, I first constructed and fit the lining. Then I separated one side of the lining to use as a pattern and added width to have space for the pleats I had planned. Once I had cut the print, I reassembled the lining and mounted the pleated print on top. From there on I treated the two layers as one.
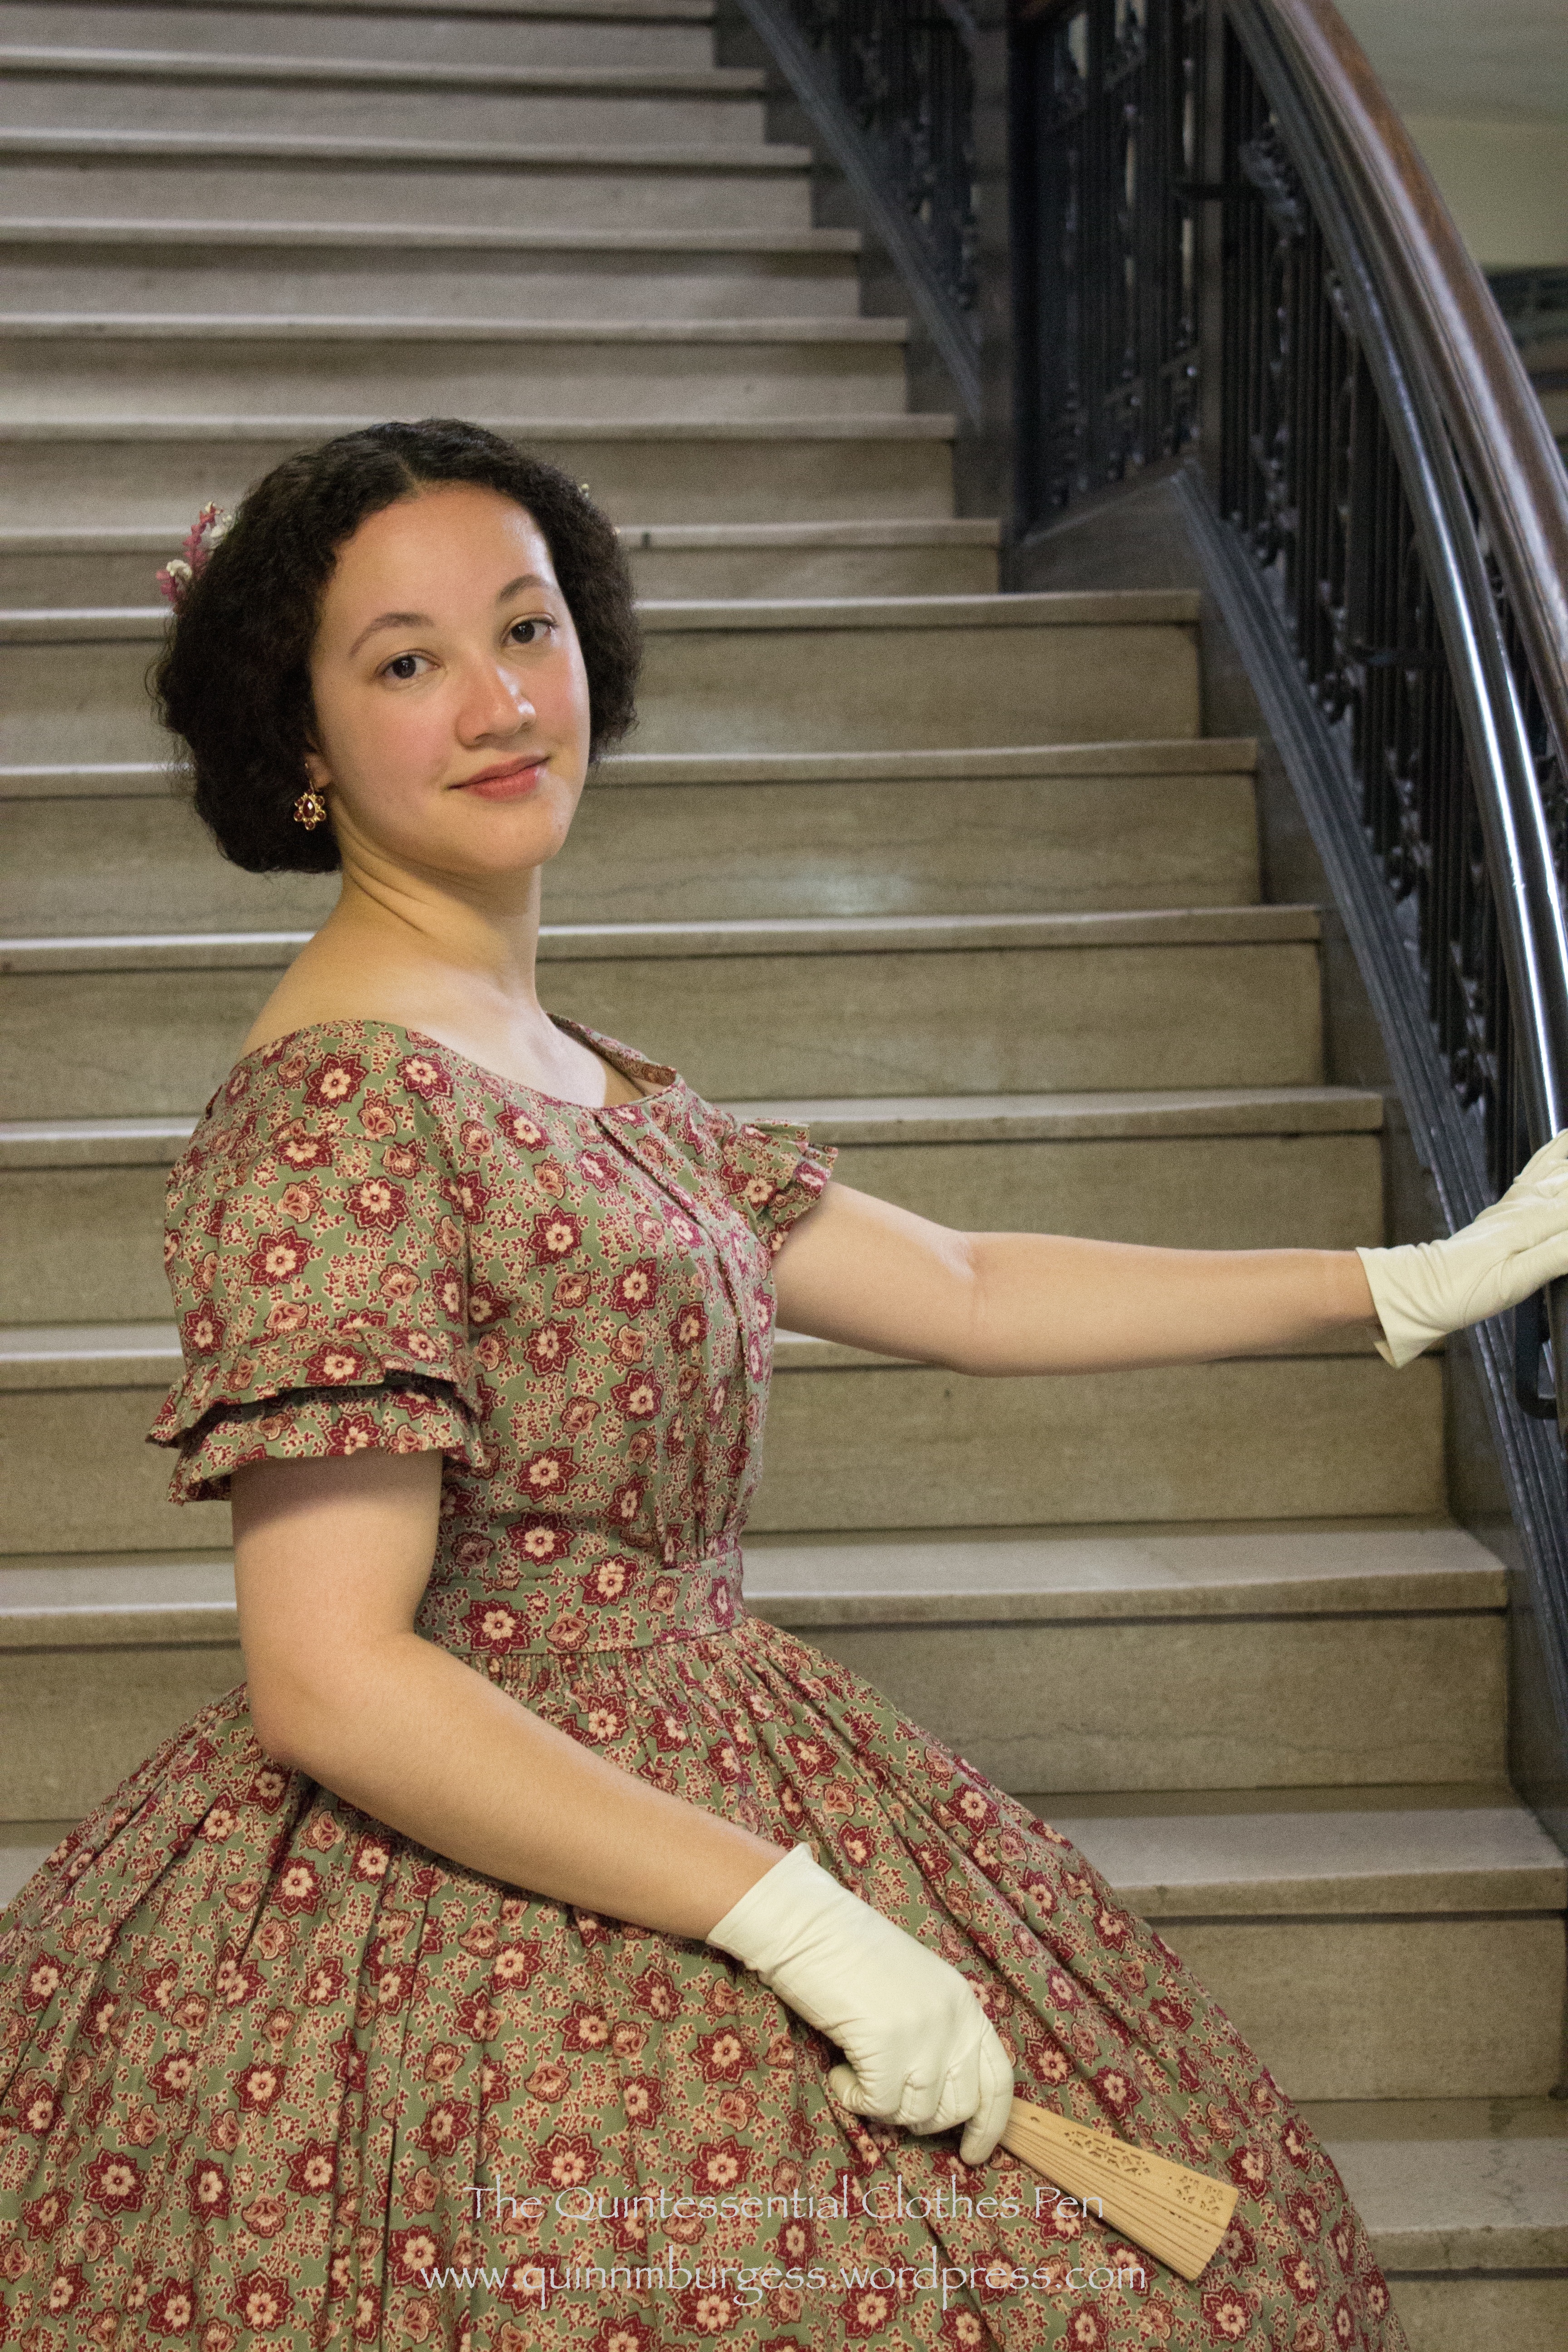
Bodice closeup and a nice view of my successful 1850s round hair style!
As I’ve looked at 1850s images and fashion plates in comparison to early 1860s, especially, what I’ve noticed is that the 1850s really attempted to make a woman’s head look round or wide, whereas by the early 1860s the styles begin to grown upward and become vertically elongated. Here are some great examples of the round 1850s hair look: from 1851-53, c. 1855, from 1857, another 1857, yet another 1857, one more from 1857, and one from 1859. Here’s a super wide 1850s style and here is an example of the different shape of the early 1860s. The very round shape is what I was attempting to complement my 1850s bodice.
How? Well, I put gel right at the roots of my hair while it was still wet and then encouraged it to stand up from my head rather than being pulled back. I let it dry like that and it stayed all day. Later in the day, I styled it for my 1940s Anne Adams dress photos by brushing it out (and brushing my hair when it’s dry makes it big!!!). There was lots of added hair spray for that style, so when I went to restyle it there was plenty of fullness and air in my hair. I puffed the fronts and pinned them up and behind my ears then did a big roll with the rest.
The finishing touch was a new hair crescent that I made specifically to complement the colors in the cotton print. The crescent is made up of fully wired millinery flowers in ivory, some of which I dyed to be pinkish. Each extension is a singular stem and I just twisted them together until I liked the result. Lastly, I sewed a hair comb in the center to help attach it to my head and stabilize the wires. Each side also has a bobby pin to secure it to my head so the extended bits don’t flap around while I’m dancing.
Back view, and new hair crescent.
I’m super pleased with the end result: the bodice, the hair style, and the hair crescent! Oh, and the pictures (thanks!). And I had a marvelous time at the ball–it was one of the class of events which makes me feel radiant and at which I really enjoy myself (compared to those when I’m grumpy and grouchy at the world). And all the smiling and dancing gave me a lovely natural rosy glow in the pictures. The aloof face is my attempt at a 19th century portrait face (it took a long time to capture a picture then, which is my rationale for why everyone has a generally serious face!). You had to pick something you could keep still for a long time, and a big smile is hard to maintain without movement or looking staged.
This is a follow-up post to my last post: ca. 1860 Corset For Me! (HSF #4). That post has a short background on my reasons for building the corset, but it doesn’t mention other details, so that’s what this post is for!
My new ca. 1860 corset.
So let’s start with more background, since this post is all about intense amounts of details! We’ll start with the pattern I made for this corset: you’ll notice it has bust and hip gores as well as that curved piece on each side of the front. The bust gores aren’t so unusual for a modern 1860s corset recreation, but I don’t see too many corsets made (and certainly not many corset patterns) with hip gores and I’m not sure I’ve ever seen anyone reproduce an 1860s corset with that curved piece in front. I found these details intriguing and wanted to make this style for two reasons: 1, because it’s a style I haven’t seen recreated, but which I have multiple examples of in my research, and 2, because it seemed like it would fit into a new thought I absorbed a few months ago.
1865-1867 corset, The Met
First, a discussion about the style. It seems like a lot of modern ca. 1860s corsets are cut with vertical seams that run from top to bottom of the corset to create shaping, sometimes with the addition of bust gores. (The corset on the right is an example of one from the 1860s that uses this style of seaming to create shape.) These corsets are cut with shaping in the seams to create space for the bust and hips, but an alternative to this is to use bust and hip gores to achieve shape for the body. The interesting thing is that hip gores do not seem to be very commonly used in historic corsets made by modern people, despite their use in historic clothing. I attribute this to the fact that shaped seams are easier to execute than inserting gores of any type, but especially gores that are not in a seam (like the gores in my corset). Also, I would think that pattern companies have an easier time grading patterns using the shaped seams, because the gores (particularly hip gores) really need a lot more individual adjustment and fiddling on a body than shaped seams do.
Second, about this new thought that I absorbed. While reading Merja’s most recent blog posts about corset construction, I was rather surprised by a simple statement that makes so much sense but which I haven’t necessarily followed in corset making in the past (here are Merja’s gusseted 1870s corset, which has the sentence which mentions this magical new thought, as well as her 1880s purple corset and 1860s white corset with seaming like the Met corset, above, which exhibit the thought without it being explicitly stated). Essentially, she says that she always makes adequate space in the corset for bust and hips, so that the corset is only constraining her waist. Duh! A related thought is that when you tighten your corset you displace some bits to your bust and hips, so your corset really does need adequate room there to accommodate the normal and the extra. That makes so much sense and sounds so much more comfortable than having a corset that digs into your hips or pushes your bust around uncomfortably. I made the goal to take this approach for the new corset and all future corsets! and this new corset was my first attempt at really following this sound piece of information.
So given that the style I set out to make is one that I haven’t ever seen a pattern for, where did I get mine? Well, it’s loosely based off of one in Corsets and Crinolines by Norah Waugh (the pattern is ca. 1873, pg. 80). I say loosely, because I started there, but then began combining pieces and changing the shape of them to suit my measurements and the seam placement that I wanted (most importantly the hip gore and that curved front piece). Interestingly, Waugh notes on a different corset pattern (ca. 1860, pg. 78) that the 1860s style of corset without bust or hip gores (more like what I seem to see in modern made ca. 1860 corsets like the one from the Met at the top of this post) was a style preferred in France. The English preferred the style of corset I am making with gores. (Merja’s white 1860s corset I mentioned in the pervious paragraph uses this French corset pattern in Waugh, if you’d like to see what it looks like made up.)
I wound up making two mockups to get the pattern the way I wanted it even after adjusting the pattern from the beginning (and still made a few alterations before cutting out my real fabric). The original pattern in the book had a waist that was much too small and a bust that was a little large relative to my measurements. Despite my changes, the first mockup was too short waisted, needed bigger and longer bust gores, smaller hip gores (I had overestimated how much ease I needed there), and a little bigger waist. The second mockup was still a little short (I added another ½” to the top), the hip gores were still just slightly too big, and the lacing gap between the back pieces was wider than I wanted it to be by about 3″. Ugh! I actually determined that last fact after cutting out and sewing up my actual fabric. Turns out my shoulder blade area is bigger than I thought. I had an inner struggle about if I wanted to take out the small stitch size flat felled seam to insert a piece or if I wanted to just let it go. Adding a piece won in the end, because I figured that I was spending so much time on the corset that I really wanted to be pleased with it and not have nagging doubts for the next number of years until making a replacement. (The piece I added is between the front and back pieces. You can see it easily in the first picture in this post. It’s a v shaped piece that extends from top to bottom.) Adding the piece actually wasn’t so bad, despite all my inner complaining and I’m very pleased I did it, because I am happy with the result.
1864 corset, The Victoria and Albert Museum.
That’s all the aspects of choosing the pattern and executing it. Now I can move on to my inspiration for creating it. This blue corset at the V and A is the most thoroughly photographed piece of inspiration (click through, there are lots of different angles of the corset, and close up pictures!). As you can see, the blue corset has bust gores, that curved front piece, (and if you look at the pictures of the back…) hip gores, as well as useful close up construction photos showing the flossing, how the busk is sewn in, how the binding is sewn on, etc. You can also see great detail for things like how to sew the points of the bust darts and the tops of the hip gores: they are overcast near the tips of the bust gores and tops of the hip gores before being machine sewn with topstitching to the binding. I used this method in my corset, sewing the overcasting by hand. I found that it was very useful on the bust gores (since mine are set into a slit in the fabric, not a seam) because the amount of seam allowance near the points is negligible (like, less than ⅛”) and that would have been extremely frustrating to try and machine sew! Also, the overcasting kept the edges from fraying as I was working with them. It also adds an extra measure of stability and sturdiness to those areas.
1839-1841 corset, The Met.
Other very useful images to me were this orange 1860s corset front and side views (with generally similar lines as the blue V and A one) and this 1862 Godey’s image of a corset (with very similar lines as the blue V and A one). (As a side note: Does anyone know what collection houses the orange corset? I’ve only been able to find images, but no real source.) These corsets provide a nice end date range for my corset pattern, because in the 1870s the corset begins to change shape. But to determine a good start date for my corset I had to look elsewhere. The Met has a corset dated 1839-1841 with similar hip gores and the front curved piece (great zoomable pictures including an interior view, click through the image!), but it does not have separate bust gores (they are cut in one with the front pieces as is usual for 1840s corsets) and it does not have a front opening busk (those weren’t in general use until 1849). The 1839-41 corset is more curvy than the 1860s ones, as you would expect from an 1840s corset, but it still looks like a forerunner to me! Waugh has an 1844 corset pattern (pg. 77) that has similar lines to the 1839-41 Met one, with bust gores but without hip gores or the curved front piece. These 1840s corsets are useful for determining the start point of my date range, which seems to safely be the 1850s. Thus, my corset is dated ca. 1860, which is just a shorter way of saying 1850-1870. That makes sense looking at the silhouette of the dresses from these decades, as well, since neither the 1850s or 1860s require the curvy shape of 1840s or 1870s corsets.
EDIT: The orange corset mentioned above is in the collection of the Manchester Art Gallery via this link.
I used all of these different images to look for construction details to use in my corset. Specific things I was looking for include: stitch size, width of the binding, method of sewing the binding, placement of bones, design of flossing, seam placement, method of setting bust and hip gores, location of topstitching, placement of eyelets down the back, finishing of the interior of the corset, and length of the busk. Some of these things can be determined by looking at the extant corsets I’ve shared in this post, but others required other helpful research. Specifically, the gusset construction method I used came from this image that Merja shared in her 1870s corset post. It’s from 1872, but is still relevant for my corset, because if you look at the blue and orange corset pictures you will see it used on the overcasting at the bust and hip gores. This image, from 1868, shows similar methods as well (and has a selection of mostly French and a few English style corsets if you’d like to see more examples of those).
And now, here are the close up construction details of my corset that I promised.
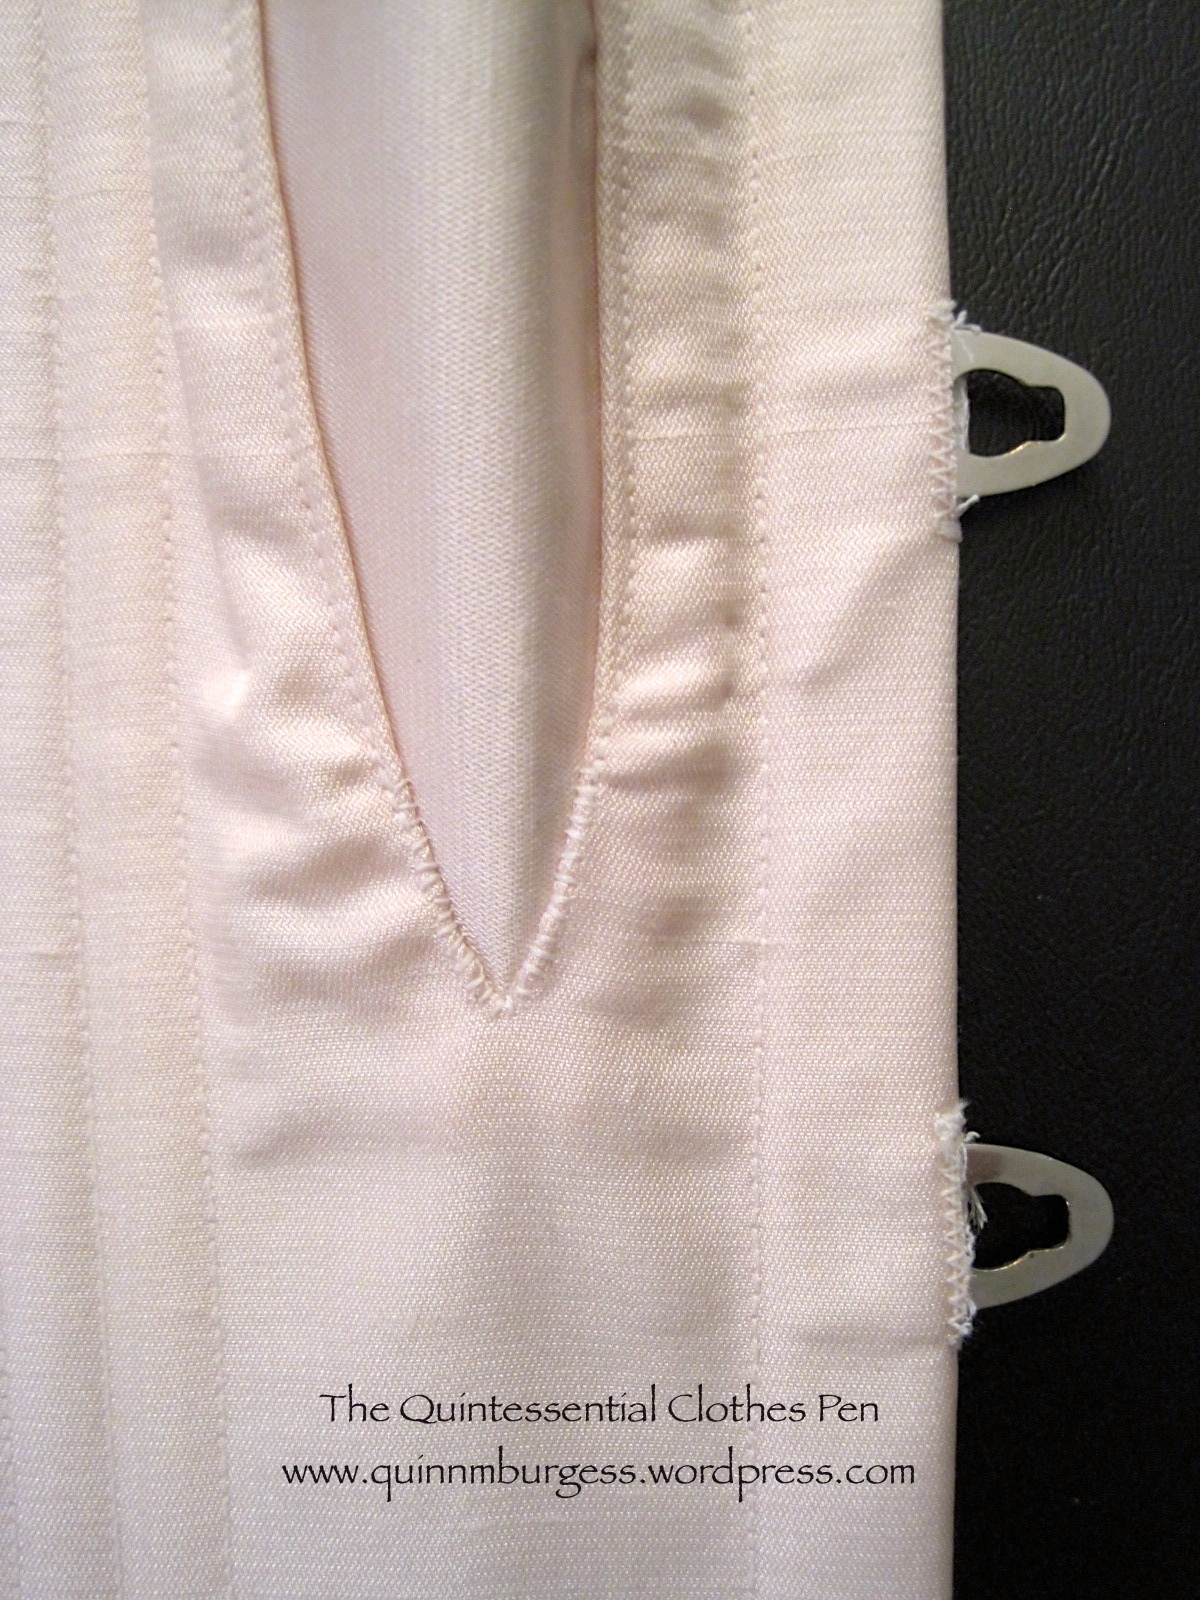
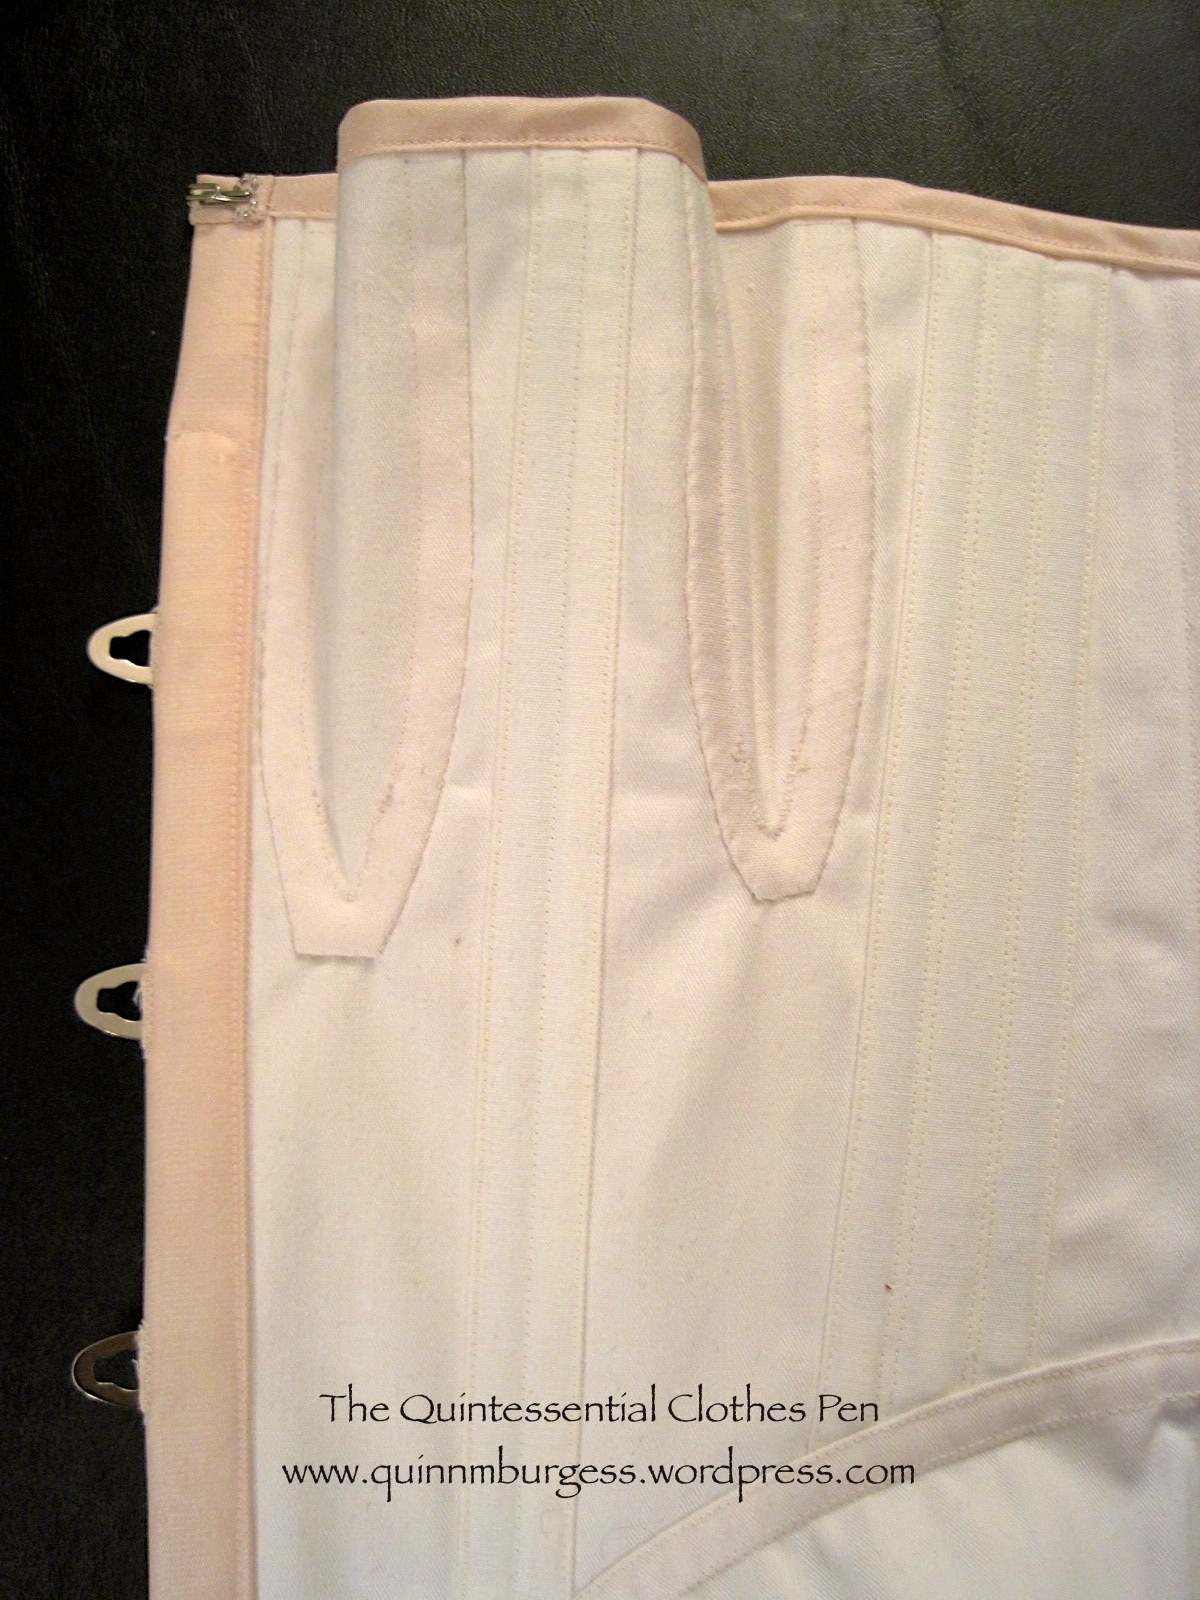
An interior view of my corset. It’s important to me that the inside of garments is as nicely finished as the outside, as you can see. It’s a little hard to see, but the grommets near the waist are set closer together than the ones a the top and bottom.Details: Hand sewn overcast stitches at the bast of the bust gore and machine top stitching above that. Machine sewn button holes for the busk hooks (I’ve found this method to be much sturdier than leaving a gap in a seam on the edge).Details: The busk is top stitched around the top curve to keep it from moving. There is flossing at the top of the boning channels (every boning channel is flossed at the top and bottom). Machine sewn top stitched binding.Details: The top hook of my busk is a few inches below the top of the corset, so I added a hook and thread loop at the top to keep it closed. I used coutil cut on the straight of grain for my boning channels: the edges are pressed under and then they are topstitched into place and into the proper number of channels (keeps the inside tidy and doesn’t require extra notions!). The seam allowance of my bust gores is turned under and flat felled by hand with a whip stitch that only catches the coutil. The curved front piece is flat felled by machine.Years of use have caused my busk to have a bend in it at my waist line. See how it curves up from the table in the middle? Impressive, really, that my body can permanently change the shape of metal.
I’m hoping to get pictures of the corset on me this weekend at its first ever wearing. Hopefully I’ll be able to share those in the near future!
In the spirit of the HSF #23: Generosity and Gratitude, I thought I’d share an annotated version of my altered 1917 Knitted Sweater Of Angorina pattern. Who knows, maybe you’re thinking of knitting this sweater or something similar right now, and this version of the pattern and these notes will come in super handy as you knit your own sweater?
“Knitted Sweater of Angorina” from the Star Needlework Journal 1917.
My version:
“Knitted Sweater of Angorina”
Here’s the pattern. I’ve put original directions in [brackets] if I’ve changed them, and included my version before the original version, so you can compare. My version of the pattern and any notes that I have added are in italics.
One of the major reasons I adjusted the pattern in places was in attempt to make it to my measurements (40″ hips, 30″ waist, and 36″ bust). On size 5 needles I was knitting 10 stitches in 2.5″, which was 2 squares of the pattern, and knitting 1″ vertically every 6 rows, which was 1 square of the pattern. If I had knit the sweater with this gauge and the original directions I would have had a sweater body that would be too big: about 12″ too big around and 3″-5″ too long in length.
ABBREVIATIONS: K – knit, P – purl.
MATERIALS: 6 skeins of probably acrylic yarn (of medium weight and unknown length, though on the smallish side, as modern skeins go (and I could have used 7!)); 5mm and 3mm knitting needles; 6 plastic buttons.
[17 balls of THE AMERICAN THREAD COMPANY’S Article 200 “Angorina” Fluffed Cotton, size 4; two long celluloid knitting needles No. 5 and two shorter celluloid knitting needles No. 3; 6 buttons.]
DIRECTIONS:
For the Basket Stitch pattern: Cast on a number of stitches divisible by 10 and 2 over for the edge stitches. (So the 10 is the repeat of two squares of the pattern, and the 2 extra are for the edges.)
lst Row: Slip the first stitch (this is the edge stitch) , * then knit 5, and purl 5, repeat from * to the end of row ending with P 6, turn (the last stitch is the edge stitch).
2nd, 3rd, 4th, 5th and 6th rows: Same as first Row.
7th Row: Slip the first stitch, * then P 5, and knit 5, repeat from * to the end of Row, ending with K 6, turn.
8th, 9th, 10th, 11th and 12th Rows: Same as 7th Row.
These twelve rows form the pattern, which is knit throughout the sweater.
Sweater
Cast on 82 [112] stitches on the long celluloid needles No. 5 and begin to K at the bottom of the sweater,
FOR THE BORDER: K plain back and forth for 14 rows or 7 ridges (2 rows of plain knitting back and forth form a ridge).
Now begin to knit the pattern as directed above.
K 12 [14] rows, then begin to decrease 1 St at the beginning and end of every third row until 10 stitches have been decreased at each end.
There are now 62 [92] stitches left in the row and 42 rows of pattern K.
Continue knitting the pattern for 120 [138] more rows or until 15 patterns or 180 patterns are K in all. (That last section of directions about 15 patters and 180 patterns confused me, so I just sort of ignored it…)
This completes the length of the back.
Next Row: Slip the first stitch, then knit 5, and P5 for 21 [31] stitches (this is for the right shoulder), bind off 20 [28] stitches for the back of the neck, the next 21 [32] stitches left on the needle are for the left shoulder.
Now put the first 21 [32] stitches on to a spare needle or thread (and I added one stitch to make it 22, so I would have a 20 stitches for the repeat of the pattern and one for each end), and continue knitting the left front as follows: K the pattern for 8 rows pattern (this is for the shoulder), then begin to increase 1 stitch at the beginning of every second row, this is at the neck – until 20 stitches have been increased.
There are now 42 [52] stitches in the row.
K the pattern without increasing for 84 [104] rows, then begin to increase 1 stitch every 3rd [7th] row at the outer edge (the outer edge was the end of each 2nd row for me) (the front edge must be straight) for 10 [5] times (that means I knitted in this fashion until I had increased 20 stitches), then K 12 more rows without increasing. (I chose not to knit the final 12 rows: I just ignored that direction.)
16 patterns of 192 pattern rows are now K for the length of, the front. (Again, I was confused by this direction and just ignored it.)
K 7 ridges plain back and forth for the border. (7 ridges equals 14 rows.)
Bind off loosely, break the thread. Now K the right front to correspond with the left front, then sew up the underarm seams (this is the length of 10 ½ patterns or 126 pattern rows from the bottom of the sweater up). (I waited to sew up my seams until I was entirely finished knitting the sweater. As before, I ignored the confusing direction about the number of patterns and pattern rows.)
Repeat the directions from right after “This completes the length of the back…” for the right front of the sweater. I’ve repeated them here, with the changes I made for knitting the right side instead of the left.
Next Row: Slip the first stitch, then knit 5, and P5 for 21 [31] stitches (this is for the right shoulder), bind off 20 [28] stitches for the back of the neck, the next 21 [32] stitches left on the needle are for the left shoulder.
Now put the first 21 [32] stitches on to a spare needle or thread (and I added one stitch to make it 22, so I would have a 20 stitches for the repeat of the pattern and one for each end), and continue knitting the left front as follows: K the pattern for 8 rows pattern (this is for the shoulder), then begin to increase 1 stitch at the beginning of every second row, this is at the neck – until 20 stitches have been increased.
There are now 42 [52] stitches in the row.
K the pattern without increasing for 84 [104] rows, then begin to increase 1 stitch every 3rd [7th] row at the outer edge (the outer edge was the beginning of each 2nd row for me) (the front edge must be straight) for 10 [5] times (that means I knitted in this fashion until I had increased 20 stitches), then K 12 more rows without increasing. (I chose not to knit the final 12 rows: I just ignored that direction.)
16 patterns of 192 pattern rows are now K for the length of, the front. (Again, I was confused by this direction and just ignored it.)
K 7 ridges plain back and forth for the border. (7 ridges equals 14 rows.)
Bind off loosely, break the thread.
FOR THE SLEEVES (The following directions are what I used for my first attempt at a sleeve for this sweater… I didn’t like the resulting sleeve and chose to take it apart and try again. I’ll include my revised sleeve pattern following these directions for the sleeve I didn’t like. You can read more about why I changed my sleeve pattern and see pictures of the before and after, in this previous post.):
Cast on 72 stitches, and K the pattern for 3 rows, then begin to decrease 1 stitch at the beginning and end of every second row until 5 stitches have been decreased at each end.
There are now 62 stitches left in the Row.
Knit 120 rows of pattern. [K 9½ patterns or 114 rows without decreasing.]
Now slip the stitches on to the No. 3 needles, and K plain back and forth for 18 ridges for the cuff, bind off, and sew up the seam.
Place the sleeve in the armhole, so that the sleeve seam and underarm seam meet. (I waited until all of my pieces were knit before sewing any seams.)
(So now, here is my revised sleeve pattern):
Cast on 72 stitches (I added a single plain knit row, as a transition), and K the pattern for 3 rows, then begin to decrease 1 stitch at the beginning and end of every second row until 5 stitches have been decreased at each end.
There are now 62 stitches left in the Row.
Knit 60 rows of pattern without decreasing. Knit 60 rows, decreasing 1 stitch at the beginning and end of every 4th row. [K 9½ patterns or 114 rows without decreasing.] (Again, I ignored the first part because it is confusing.)
Now slip the stitches on to the No. 3 needles, and K plain back and forth for 10 [18] ridges for the cuff, bind off, and sew up the seam.
Place the sleeve in the armhole, so that the sleeve seam and underarm seam meet. (I waited until all of my pieces were knit before sewing any seams.)
This second sleeve pattern worked much better for me, so I repeated it for my second sleeve.
FOR THE BANDS: Cast on 12 [16] stitches on the No. 3 needles. K plain back and forth for 2 1/2 [4] inches (25 rows), then make a buttonhole as follows: K 4 [7] stitches. bind off 4 [6] stitches, K 4 stitches (this leaves 4 [5] stitches at each side of the 4 [6] stitches bound off).
In the next Row cast on the 4 [6] stitches bound off, thus forming a buttonhole.
K back and forth for 3 1/2 [3] inches (35 rows), then make the next buttonhole.
Continue knitting plain back and forth making 4 more buttonholes so that there are 6 in all, always leaving an interval of 3 1/2 [3] inches (35 rows) between each buttonhole.
(I calculated these measurements and row lengths between buttonholes to fit into the length of the front of the sweater before the V neck starts… in my case, that length was 21″. If your gauge is different you might want to consider changing these directions to suit you.)
(At this point I became very worried about running out of yarn. I wish I would have had enough to make the bands as wide as the original pattern called for… but I had to make them narrower, so my revised pattern will reflect that. If you have enough yarn you should keep the band wide and only adjust for length.)
K 1/2 [1] inch (5 rows) after the sixth buttonhole then begin to decrease 1 stitch at the beginning of every second row until 8 stitches have been decreased.
There are now 8 stitches in the row. Knit for awhile… turns out I knit plain for 45 rows. Begin to increase 1 stitch at the end of every 2nd row until 8 stitches have been increased… in theory that was my plan, but since I was running out of yarn, I just slowly decreased until I ran out of yarn. [K plain for 18 inches or long enough to go around the neck, then increase 1 stitch at the beginning of every second Row until 16 stitches are on the needle again.]
K plain for 21 inches or as long as the wider part of the band with the buttonholes, bind off loosely.
Sew the buttonhole part of the band on to the right front, the narrow part around the neck and the plain wider part to the left front, this should be done very carefully, then sew on the buttons.
Whew! At this point I just need to sew up my seams and sew on the buttons. Yay!
It’s been months since I bought the fabric for this dress (I actually had to look back to see when I purchased the fabric: it was February). I bought it rather on a whim, with the goal of expanding the number of patterned dresses in my historic wardrobe. Well, success! My 1953 dot dress is complete!
Yay!And the back.
I think it looks more flattering on me than it does on Squishy, but the opportunity I’m hoping to use to wear it and take pictures has been postponed due to the busy lives of my friends. We’ve got a grand plan involving roller skating, a 50s diner, and ice cream. All of those things just scream for pictures!
But for now, the facts (a la the HSF, though unfortunately the cutoff for the HSF is 1937, so this doesn’t qualify!):
Fabric: The dress is constructed from about 3 yds of lightweight cotton lawn printed with dots and lined with some of my white striped $1 a yard cotton fabric. It’s a perfect pairing, because it creates opacity but keeps the lightweight feel of the lawn.
Pattern: The skirt pattern is from a Vogue pattern I bought at Vintage In Vogue last year. The bodice pattern is a simple darted bodice pattern I draped for myself with the neckline adjusted to be a scoop in front and a v in back.
Year: 1953.
Notions: 10-12 yds of pink Hug Snug; white, off white, and pink thread; and an off white plastic zipper (It was all I had that wasn’t dark since I don’t use zippers much for historic sewing…).
How historically accurate?: I give it 95%. Cotton is entirely reasonable for the 1950s. I’m not sure when Hug Snug was first marketed, but the design on the spools certainly looks vintage (and rayon had been in use for at least 20 years by the 1950s). If they didn’t have Hug Snug, they probably had something similar. The pattern was printed in the 1950s and a basic darted bodice is seen on many 1950s dresses and patterns. The sewing machine was in widespread use by the 1950s. The only thing is that my plastic zipper is probably a bit modern (in the 1950s zippers were still metal, I believe).
Hours to complete: 30: lots of interior finishing by machine and hand .
First worn: By Squishy for pictures.
Total cost: My entire 50 yd roll of Hug Snug was only 50 cents, the fabric was about $15, and the zipper was probably about $2… Total: about $17.
Now, you know that I love paying attention to details. I had a lot of fun spending time on the interior details of this dress. Unfortunately, they won’t be visible, but I know that this dress is as cute inside as it is outside, and now you will, too!
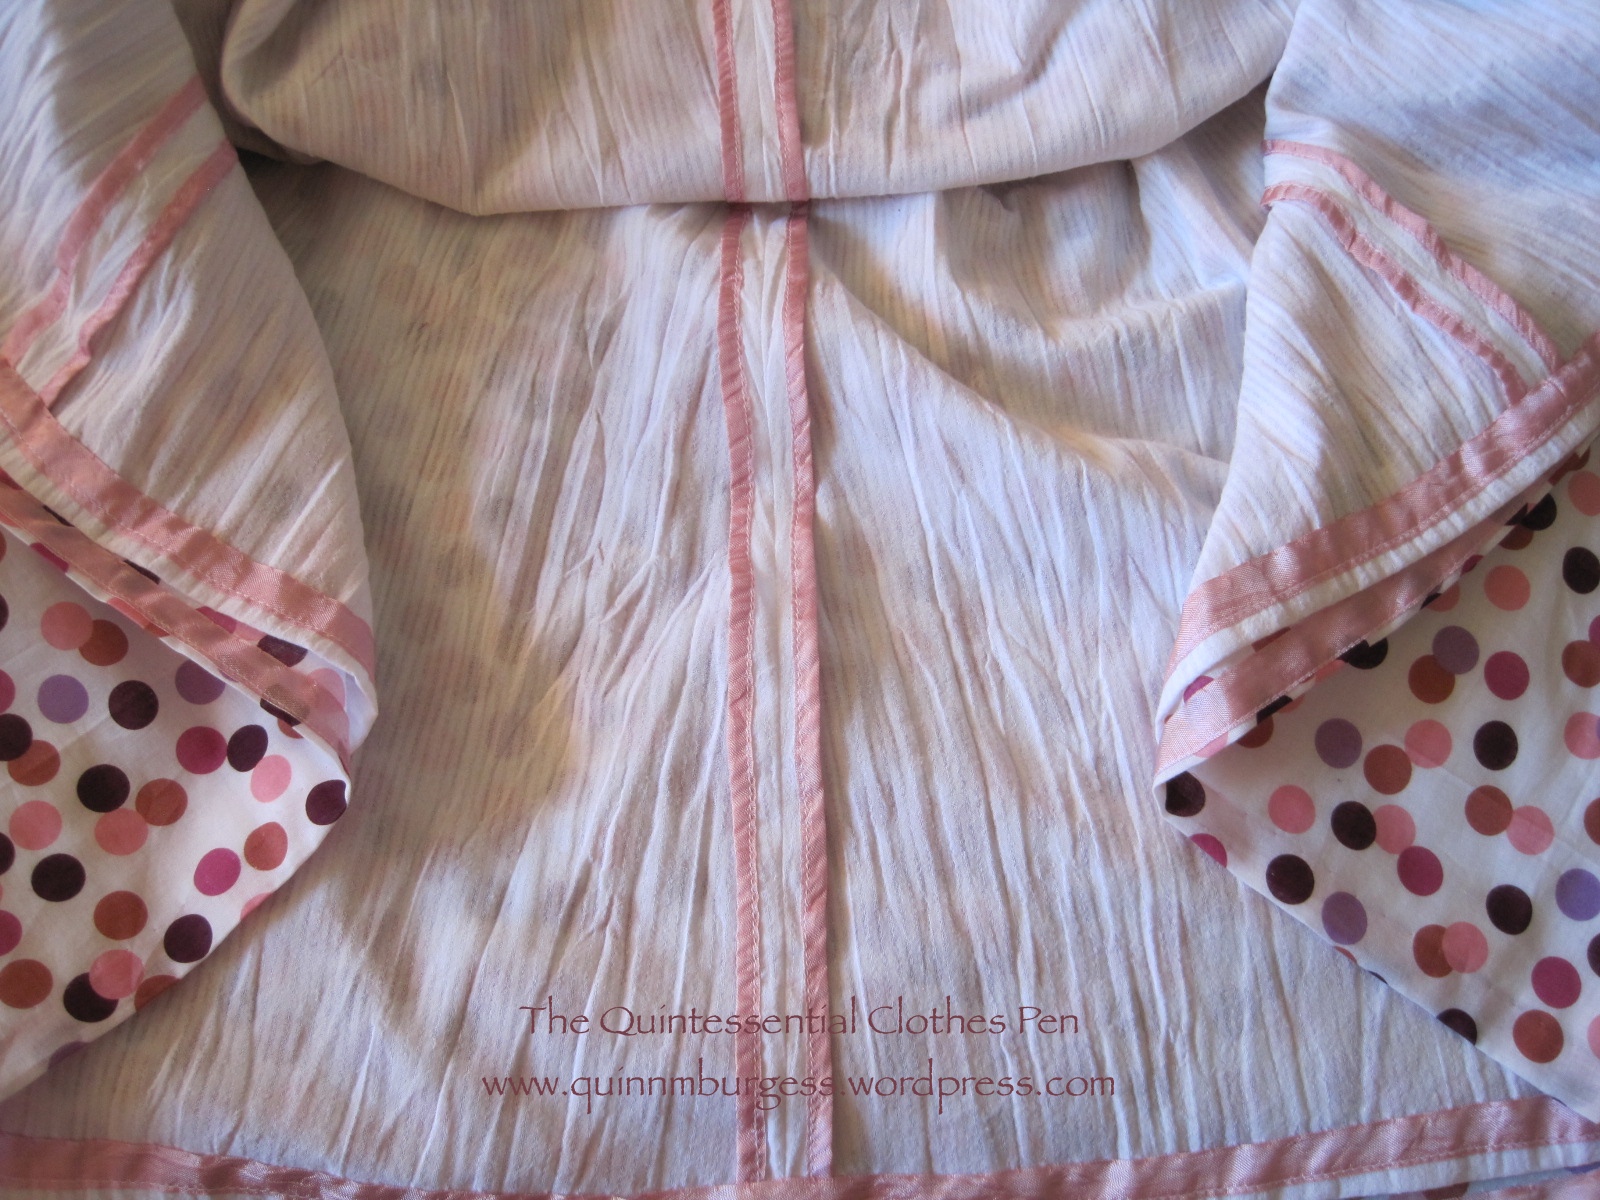
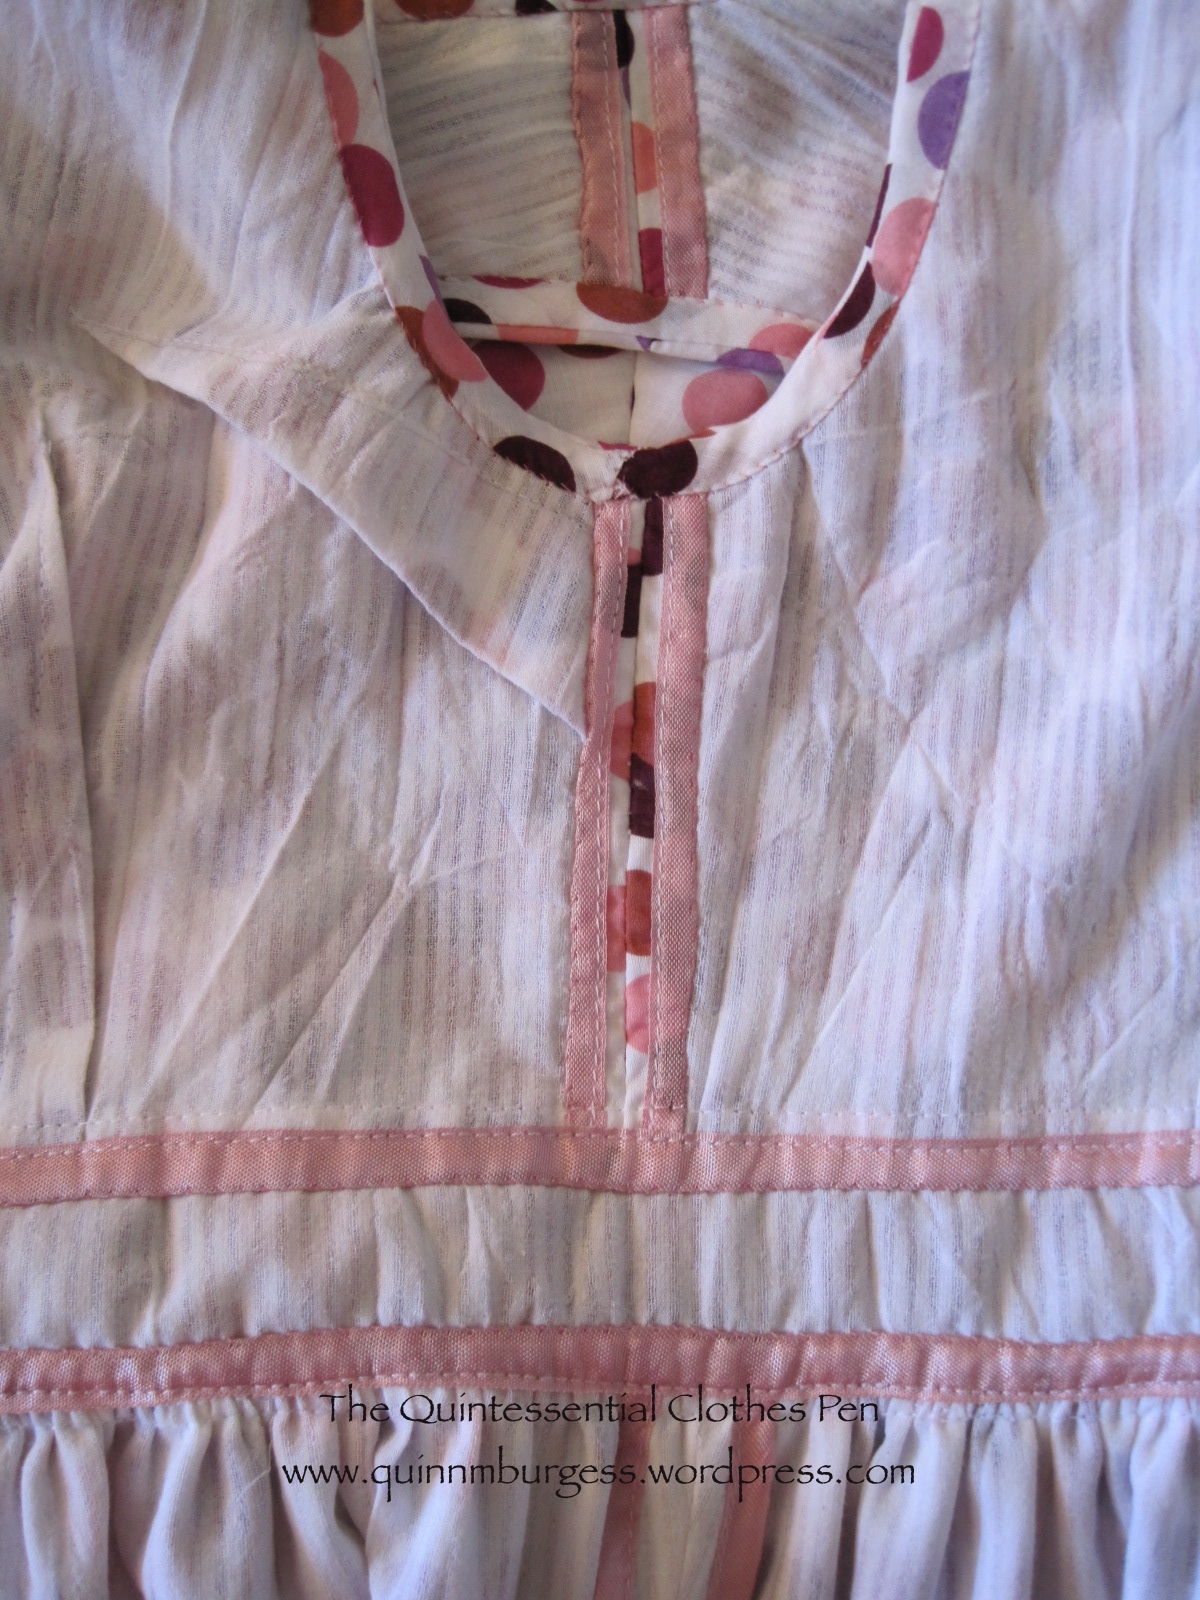
The hems flipped up to see the interior finishing. Both hems are finished with Hug Snug and I also used Hug Snug to bind the seam allowances of the white lining. The seam allowances of the dot fabric are turned and zig zagged (the Hug Snug showed through to the exterior too much when I did a sample using Hug Snug on the dot). The first side of the Hug Snug is machine stitched to the hem and the second side is hand sewn with only tiny prick stitches that go through to the outside fabric so it’s almost invisible.More of the inside of the skirt. It’s like candy, with all the pink Hug Snug seam binding on the white fabric! I love it!Here’s the side seam of the bodice that doesn’t have the zipper. On the bodice the dot and the white stripe fabric are treated as one, unlike on the skirt. All of the seams are bound with Hug Snug. The armhole (at the top of the photo) and the neckline are bound with self fabric bias strips.Here’s a close up of the shoulder seam showing the Hug Snug and the self fabric bias. All of the bodice seam and edge bindings are stitched down to the white stripe lining by hand using whip stitches.Here’s what it looks like without skirt support.
I might even like the inside more than the outside… I’m really looking forward to wearing this at some point! I was even thinking that perhaps I could wear it in my modern life without a crinoline petticoat under it, but I think the skirt is a little too long and the waist is a little too high. If I had more of an every day vintage style I might be able to pull it off, or if I was getting dressed up, but for normal days, unfortunately, I don’t think I’ll be wearing it around my everyday life. All the more reason my friends need to clear their calendars!!!
“Georgina” is the name I’ve chosen for my new 1858 cotton print day dress. Being a day dress from a new decade (the 1850s), makes her a fabulous new expansion in my wardrobe of historic clothes!
Georgina: 1858 cotton print day dress.Back view.
The dress is constructed from about 5yds of a Marcus Brothers reproduction historic cotton print I purchased earlier this summer. I used Past Patterns #701 and #702 bodice patterns as a starting point, though I had to make significant alterations to achieve a comfortable and pleasing fit, especially in the shoulder/armsceye area. I used the darted pattern for the fitted lining and the gathered pattern for the gathered exterior. The sleeves are the bishop sleeves from one of the patterns, though I totally changed the cuff design.
The cuff design and a lot of other fiddly details were taken from this c. 1852 dress at the Met (pictured below). If you zoom in on the cuffs on the Met website you can see that they look just like mine (pictured later in this post)! I also used the following design elements from the Met dress: piping at the neck and waist, gathers that are tacked down beyond the seam line, button closure on the cuffs, and cartridge pleating all around the skirt. I have a whole pinterest board of inspiring images for this dress and hat ensemble, but this dress is the one from which I took the most information and detail.
c. 1852 Dress, Met.
Here are a few pictures of the fiddly details I integrated from the Met dress:
Gathers at the center back that are tacked down beyond the seam line. I like the controlled look these extra stitches produce.Self fabric cuff finished with a small ruffle. The cuffs close with a hand sewn buttonhole and button.
Georgina’s bodice is lined with white cotton. There are hand sewn boning channels sewn into the bodice in the front darts on each side and on the sides. The bones are then slipped in between the layers of fabric. I didn’t have the right length metal bones, so I used heavy duty plastic wire ties–but–I cut them in half the long way so they are much skinnier than normal (they just don’t look at all historically plausible in their normal width, in my opinion). Once they’re in the bodice, you’d never know they are plastic instead of metal.
The proper left side of the bodice: hand stitched boning channels in the darts, front hook closure, a hook to attach the skirt and bodice together, and nicely finished piping along the bottom edge.
The bodice is finished at the neck and bottom edge with piping that is nicely whip stitched to the inside. There is also piping in the armsceye seam. The sleeve seams are french seamed by machine with the opening seam allowance at the cuff turned twice and stitched by hand. The other bodice seams are all machine sewn and the bodice is hand finished. The bodice closes at center front with hidden hooks and bars. It also hooks to the waistband of the skirt to keep the two pieces from gaping while worn.
The skirt has a wide hem that is hand stitched. The long skirt seams are machine sewn. The waistband is the same cotton print with an interfacing layer of canvas to create stability. The skirt is cartridge pleated and hand sewn to the waistband. There is a single layer of lightweight flannel folded into the cartridge pleats to give them a little more bulk than the thin cotton had on its own.
I also took the time to add pockets to this skirt! This turned out to be really useful for storing gloves, sunglasses, chapstick, a fan… with two pockets a lady can store so many things! Here’s how I made them and sewed them into the skirt:
The pockets are muslin rectangles with a piece of the cotton print topstitched on the top center (this is the part of the pocket that can show while I’m wearing the dress and taking things in and out of the pockets).After the cotton print was sewn on I french seamed the vertical seam and then the bottom seam by machine, making sure that the cotton print stayed centered. On the left is what a pocket looks like with the french seams facing out. On the right is a pocket turned inside out to show the cotton print centered at the top.I left the top part of the vertical seam open and hand sewed that into slits in the skirt using a whip stitch through the pocket and the seam allowances (essentially under stitching the pockets, which keeps the muslin from rolling to the outside!). The pocket slits were made after the skirt was cartridge pleated and attached to the waistband, so the slits stop below the cartridge pleats (it was way too much thinking to try and figure out where the pockets should be before cartridge pleating the skirt!).It worked wonderfully, and the pockets blend right in and are hardly noticeable, even when they gap open! (I’ve turned the edges of the pocket so you can see the muslin pocket for this picture, but they don’t actually stay turned out like that, and you can imagine how the print fabric of the skirt blends right into the print section of the pocket).On the inside, the top edge of each pocket is stitched to the cartridge pleats to evenly distribute the weight of anything in them.
Georgina cost about $18: $15 for the fabric and about $3 for hooks and eyes. The various other fabrics (cotton lining, canvas interlining, etc.) were all in my stash from previous projects (yay!). I first wore Georgina last weekend to a vintage dance performance on George’s Island in the Boston Harbor. I’ve got pictures of the performance and pictures of island exploration coming up soon!
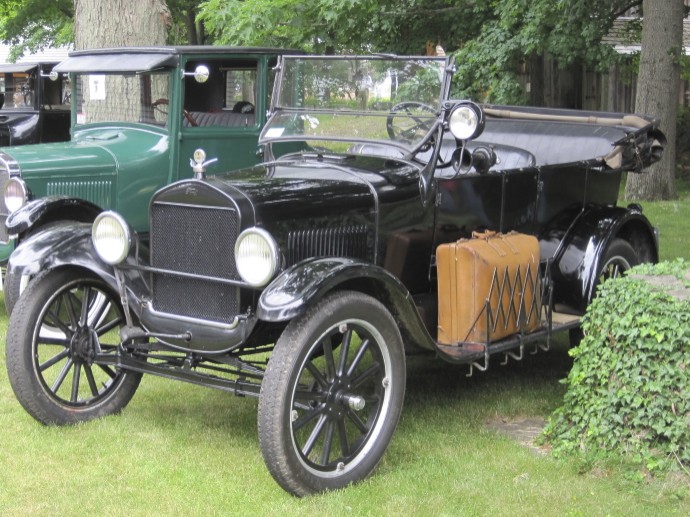
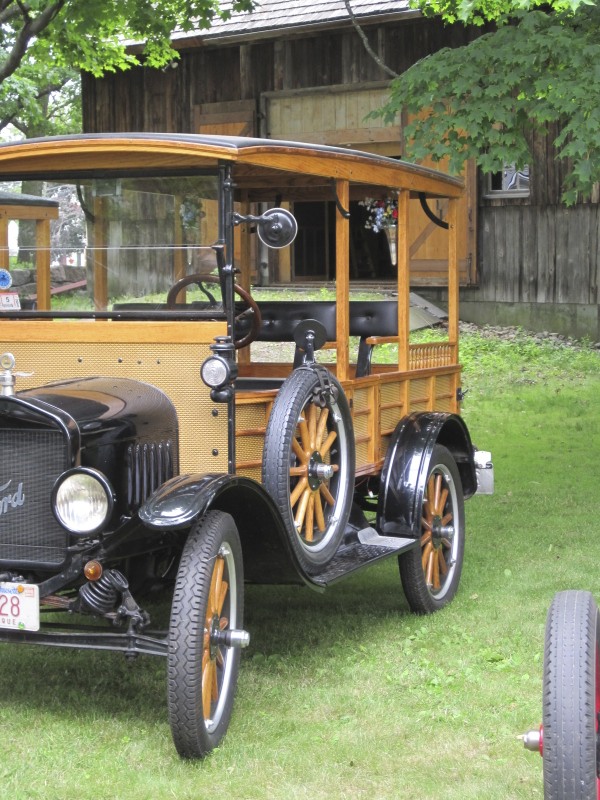
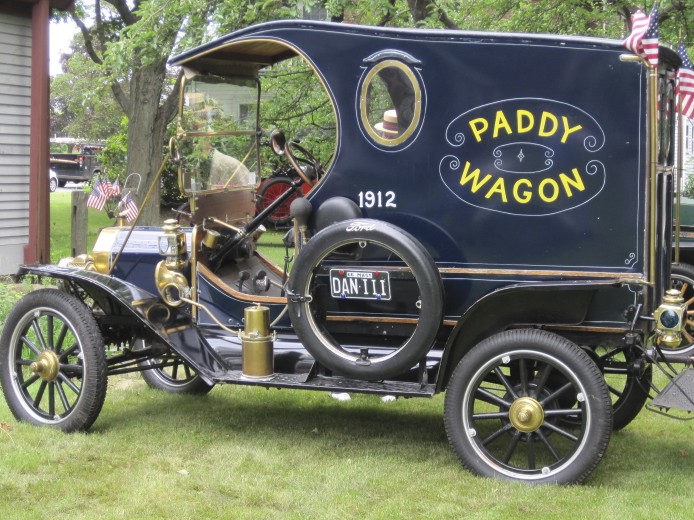
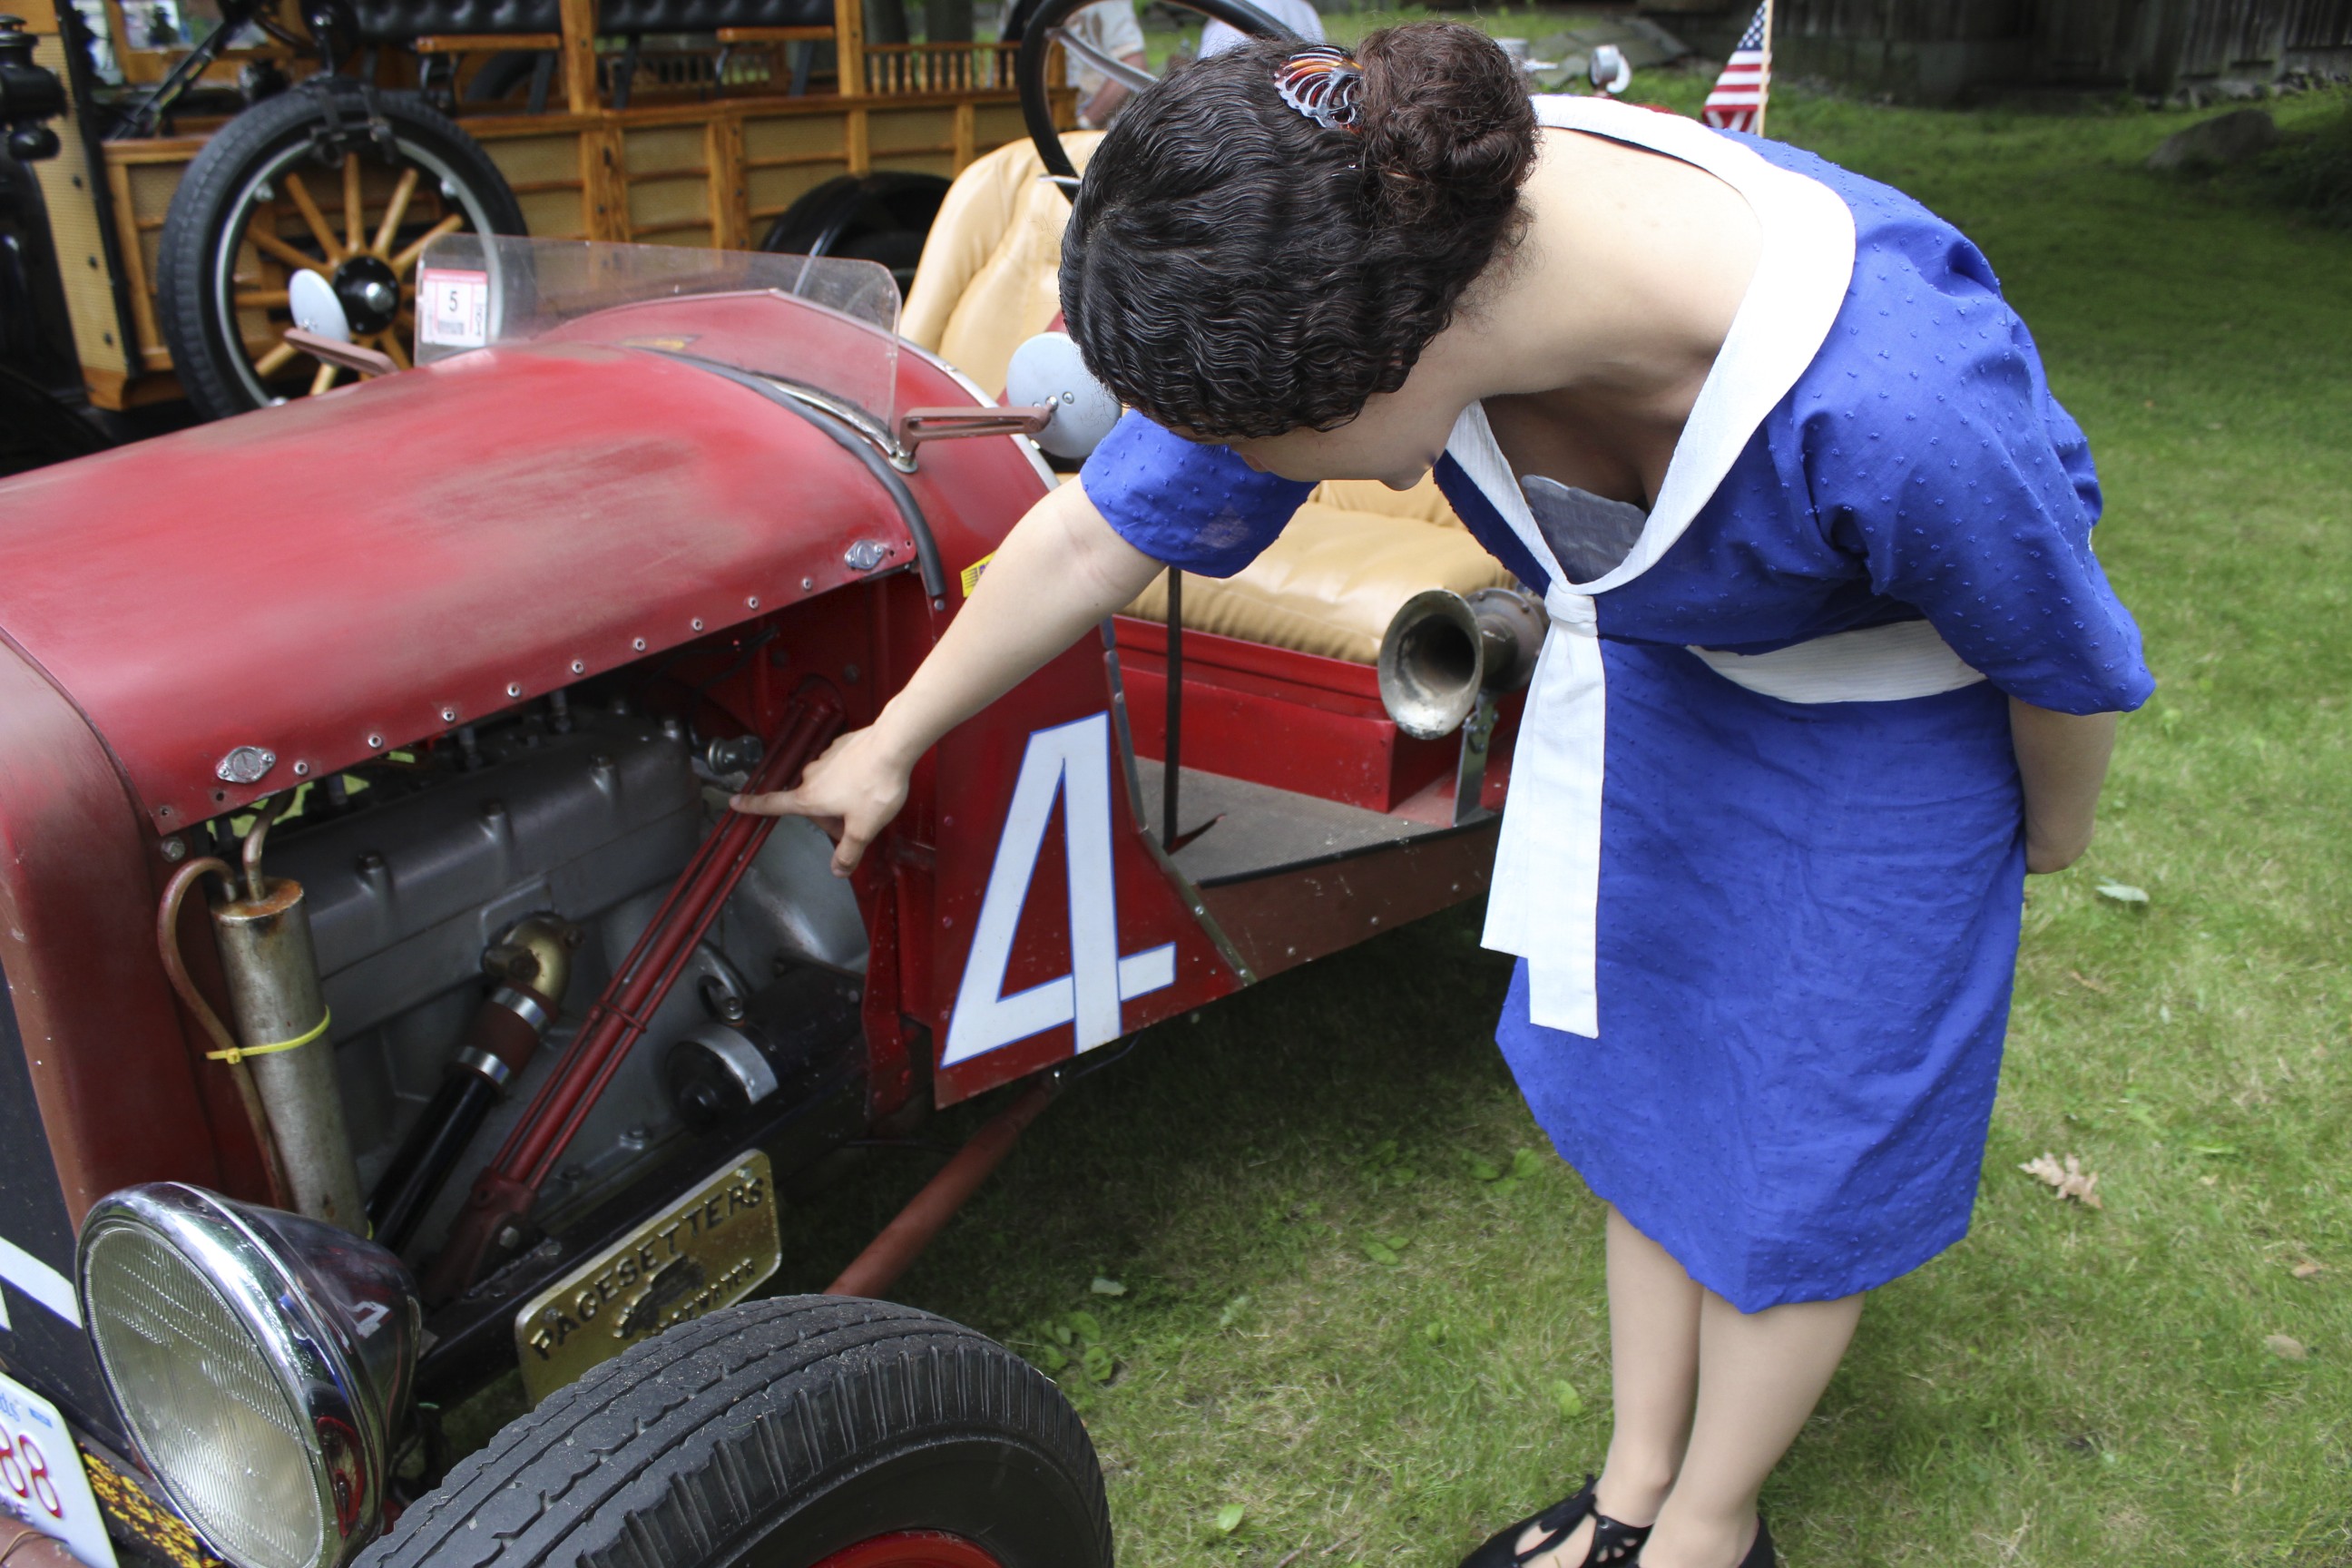
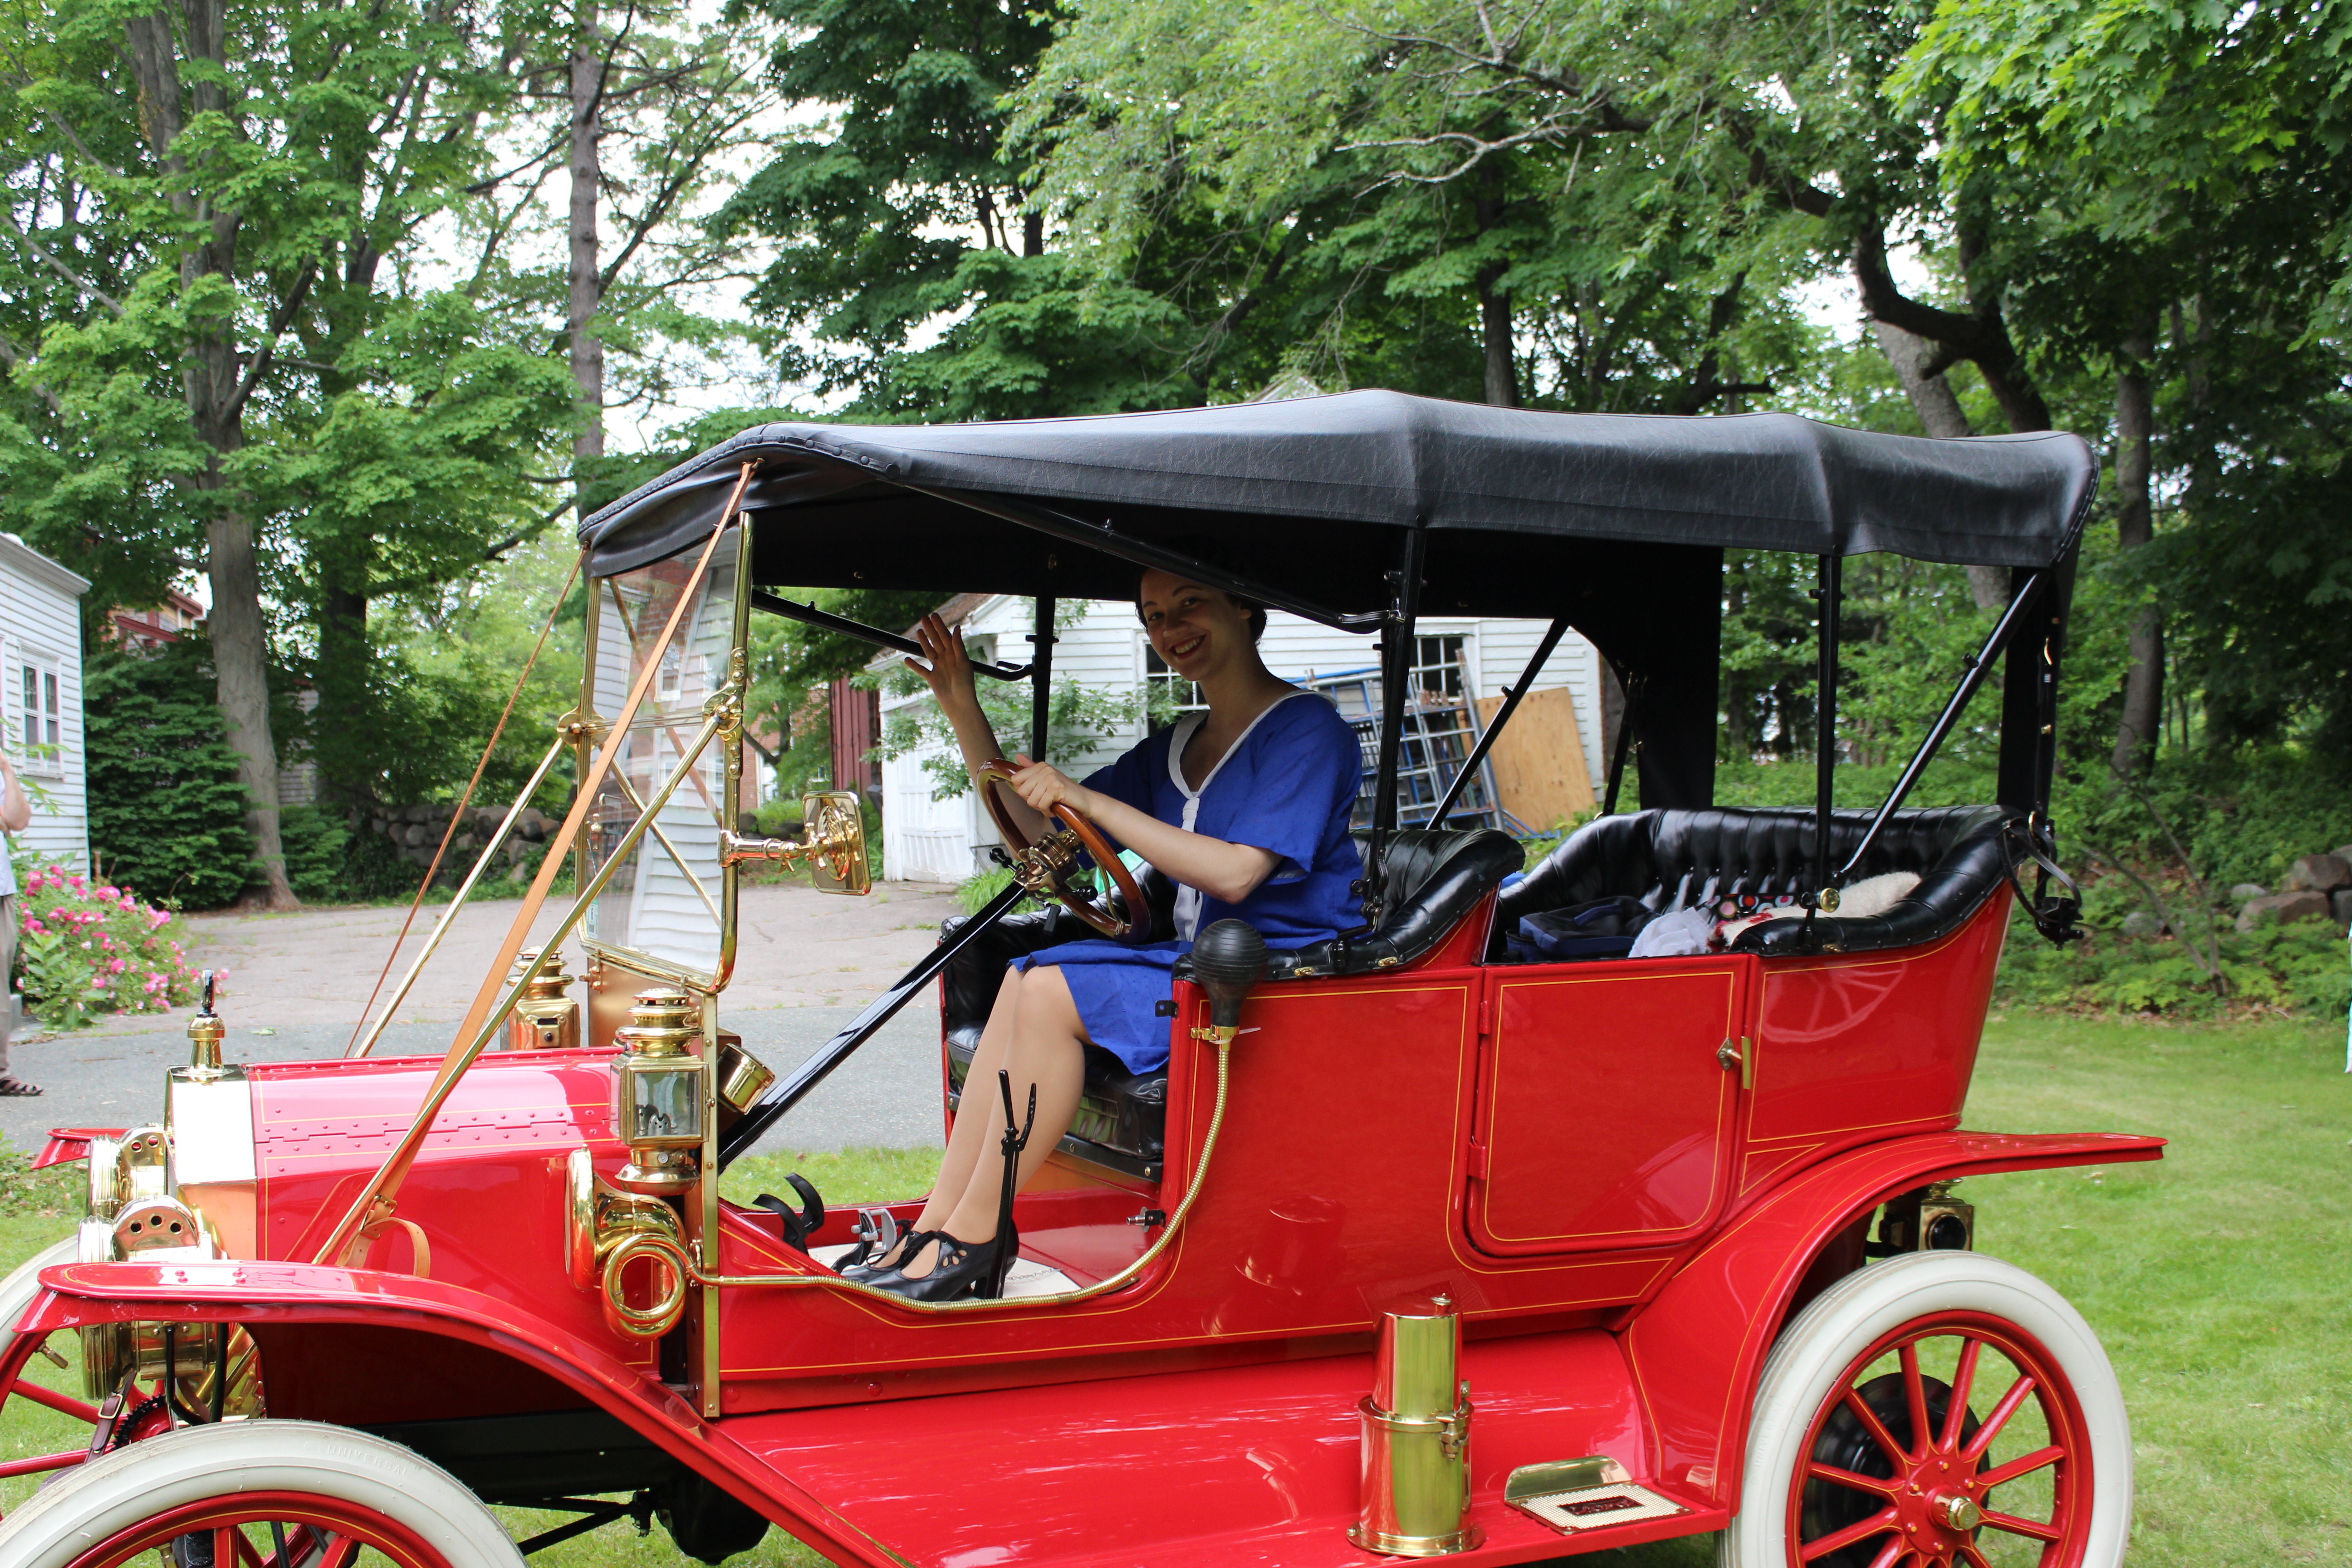
A few posts ago, when I introduced The First Picnic Of The Summer, I mentioned my involvement with other events that same weekend. It’s time to share pictures of another event from that weekend: an afternoon of music, dancing, and Model Ts at the Braintree Historical Society in Braintree, MA.
Let’s start with atmosphere: some Model Ts! Model Ts were produced between the years 1908 and 1927 by the Ford Motor Company. My grandfather worked for Ford years ago (though not on Model Ts!) and I have family members who still live in Michigan, so I feel a special connection to that part of car history. As far as I could observe, all of these Model Ts were still operational, drivable, and licensed to drive on the street! Neat!
Front view of a Model T.I love the luggage storage on this one!Pretty swanky, with all that gleaming wood!I like that this picture has a modern car in the background!Need I say more? It’s labeled!“R. I. Brow & Son; Oil Dealer” I love it! Especially with the canisters attached.Two Model Ts parked in front of the barn.A pretty fabulous red Model T with be-boater-ed gentlemen lurking behind it… (They had no idea I was taking a picture! bwhaha!)
The reason we were in attendance at this event was to do a few small dance performances. We did the same 20s dances that we performed at the Great Gatsby: the Charleston, Tango, Foxtrot, and One Step. I don’t have pictures of the performances… but in between performances we had time to wander amongst the Model Ts and have a picnic lunch.
Oh yes, and I wore a new 1926 dress and my all new American Duchess Gibsons! I also attempted some “make-do finger waves” in my hair. Basically, that means that I didn’t try for real finger waves… I just put some gel in my hair and used a fine tooth comb on the top bits. Since my hair has natural waves it just dried in a sort of wavy way and I put up the back in a low bun. I think it turned out pretty well, though, for not trying that hard!
This link contains an affiliate code, which provides a small benefit to my shoe fund. This does not affect my impressions and reviews of this product.
The dress was made because we needed day clothes for this event and my other two 20s evening dresses are not appropriate. As I mentioned in the post May Fabric Stash Additions when I shared this fabric, I wanted a cotton so it would be lightweight and washable… and this is what I wound up with. I thought it might be to sailor-y, but in the end I don’t think it is! I like that it’s a rather striking color and not something I would normally pick out for myself.
I didn’t use a pattern for the dress, I just sort of used my measurements and made it up while referencing a lot of 20s patterns in the COPA archive for skirt shape, mostly. The front and back bodice and sleeves are all one piece cut in the kimono style. It’s all french seamed and the skirt and sleeves are finished with hug snug. The waistband is a little messy on the inside, because I haven’t taken the time to finish it and because the sides were doing a weird thing I had to fix with a wonky side dart. But eh, no one will see the inside! I’m glad it’s done and I like the faked tie-collar.
Gibsons!
The Gibsons are comfortable and cute. I like that the sole is a little thicker than on my Astorias, because it means the pointy toe shoe leather isn’t getting scratched while I walk (as it is on my Astorias). The toes are pretty pointy but they are starting to stretch to my foot shape, so that’s good.
Trying to pose… “This is an engine. It moves the car.” Plus, new dress and a good view of my hair!Looks a lot different from a modern car engine, doesn’t it?A better view of my new 1926 day dress and Gibsons.Another view. The red car is fun, too!
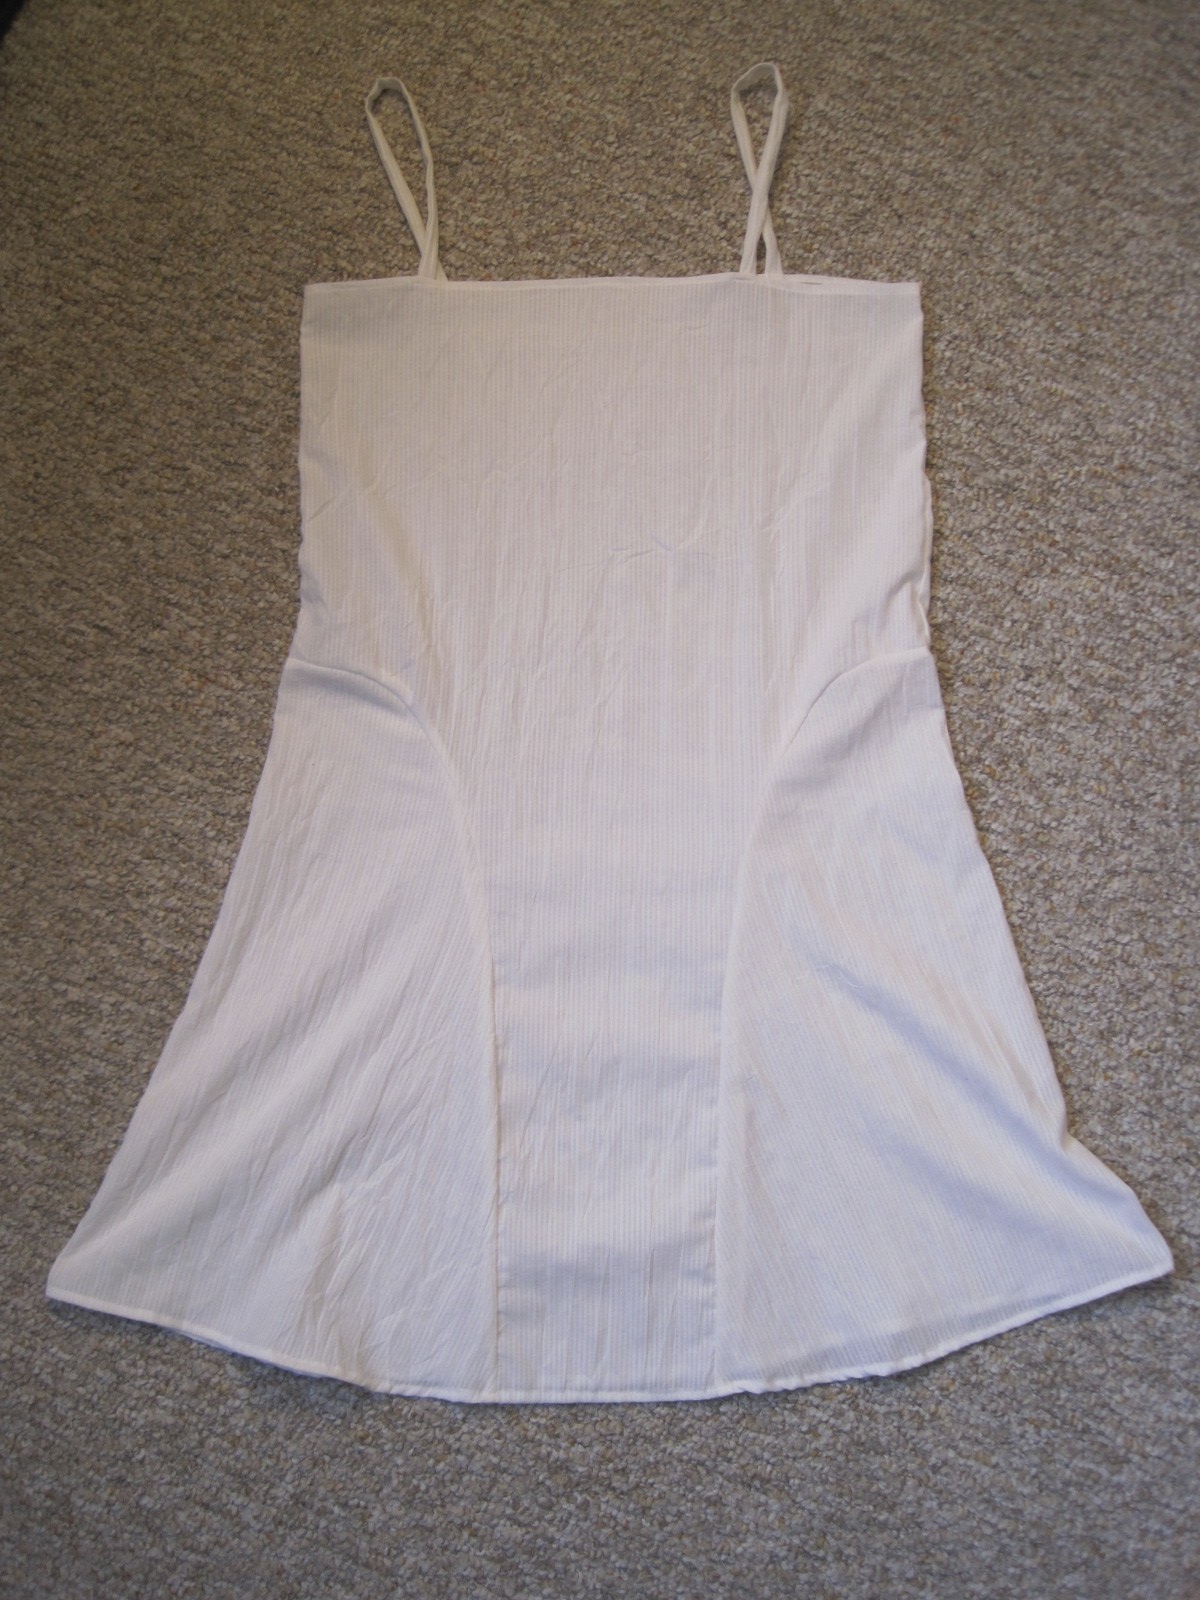
The blue cotton is slightly sheer, so I made a cotton slip to wear under the dress to add opacity. It’s made of the same $1/yd white cotton that the trim on the dress is made of, so if it shows at the neck or elsewhere it just blends right in. I used the same measurements I used for the pink slip of my 1925 beaded dress. I was inspired by looking at 1920s patterns to add the curved panels on the side instead of having another straight slip.
White slip to go under the 1926 day dress.
As I said, in addition to looking at cars and dancing, we also had a picnic lunch.
1920s picnic!After eating we listened to some stories read aloud.And read some 1920s magazines!
One of the most exciting parts of the afternoon was when one kind gentleman asked if we would like to sit in his 1920s car! Of course we said “Yes!”
“How do I drive a car?”Practicing my princess wave.
All in all, it was a pretty fun, low-key event. Next post I’ll share some of the more “artsy” photos from the day, as I did in The First Picnic Of The Summer: Part II.
Life! Is often great, but does rather get in the way of sewing plans sometimes…
This HSF challenge #11 had a due date of June 3rd. I actually finished sewing on June 18th, but I’ve been busy posting about other things so this has been even further delayed. Oh well, I had the best of intentions: to complete this 18th century petticoat for the Squares, Rectangles, and Triangles Challenge.
Description:
Many historical garments, and the costumes of many people around the world, use basic geometric shapes as their basis. In this challenge make a garment made entirely of squares, rectangles and triangles (with one curve allowed), whether it is an 18th century kimono, a flounced 1850s skirt, or a medieval shift.
Apricot (orange) 18th century under petticoat.
Pattern: None, but I referenced both of these tutorials on constructing 18th century petticoats. Katherine’s tutorial is for a petticoat with an uneven length (to go over panniers, or a bum roll, for example). Rebecca’s tutorial is for a petticoat with an even length (the same length all the way around, to be worn without extra supports). Both tutorials have construction information, Rebecca’s includes a bit more detail in terms of which stitches and methods to use.
Year: Loosely 1700-1790.
Notions: Thread, yellow polyester ribbon for ties.
How historically accurate?: I give it 70%. Accuracy gets knocked down because: 1- the color is a bit vibrant for the period (but it’s an under petticoat, and I wanted it to be fun!), 2- all unseen seams are machine sewn, 3- I used bright yellow polyester ribbon for ties, 4- I haven’t seen much research that shows cotton being used at this time for a single plain petticoat of this sort. On the other hand: 1- all finishing was done by hand, 2- the dimensions and method of creation are historically accurate.
Hours to complete: 6 or 7? I can’t really remember…
First worn: Well, Squishy wore it for pictures!
Total cost: $12 for the fabric. The ribbon is leftover from my childhood craft projects…
Side view.Front. See the yellow ribbon?Back. I love how the pleats fan out.
I chose to bind the top with self fabric and use polyester ties in a fun color for this petticoat, since I knew it wouldn’t be seen and I might as well use some of those things from my stash! The back half of the petticoat ties in front, then the front ties wrap all the way around to the front and also tie in front. That’s why you can see all the yellow ribbon crossing in the back. This method used a solid 3 yds of ribbon, though the ends I have to tie with are generous and could probably be shorter if I wanted to save on tie length.
Back tied in front before the front gets tied. There are hemmed pocket slit openings on each side.
I just love the color of this petticoat. It’s so bright and sunny and cheerful, especially with the yellow ribbons! There’s also a sneak peek in this last picture at what will likely be a future HSF item: the bum roll… more on that soon-ish.
The first step in constructing my 1760s Curtain-Along jacket was to draft up the pattern from Janet Arnold (you can read more about the pattern I chose in my Initial Curtain-Along Thoughts post). In my experience, sometimes the patterns work pretty well without a lot of tweaks, but sometimes you really do need to do some serious fitting to make them work. Given that knowledge, I decided to make a mock-up of the pattern without any adjustments to see how it would fit. The measurements weren’t too far off of my own, so I didn’t think I’d run into any really awful problems.
And here are the results! I put the mock-up together matching up all of the points that were indicated in the pattern.
Initial state. It is pinned down at center front, but I haven’t made any other adjustments. Squishy is pretty close to my shape, so you can see that there are some adjustments that need to be made for the jacket to fit me.First problem: the gap at the shoulders. You can see on the left that I’ve pinned out the excess fabric, and on the right side nothing has been pinned.Second problem: the center back waist point is halfway up the back! I extended the center back seam above the waist so that the waist would sit lower and match the side fullness.I don’t think anyone has a back/hip area that would easily fit into this shape…Third problem: sleeves that are too far off of the shoulder and twisted around in a way that is odd looking and uncomfortable. I had to try this on to make those observations, but you can see the problems in the picture.The solution was to take the sleeve off, adjust the armsceye, and pin the sleeve back on without it being twisty. You can see on the left side that I’ve adjusted the sleeve, and on the right I didn’t do anything.
Oh, I also lengthened the sleeve pattern a bit, because it was a little short on me, and extended center front so it would actually close… After making the adjustments to the pattern, I took to the scissors and cut out the real fabric, mineral felicite and peach linen lining. Then it was on to the hand sewing…
Recently, I’ve been doing lots of thinking about and planning for a variety of summer sewing adventures. Whenever new projects begin there is a lot of research into the silhouette, cut, and fabrics. I’ve got my oft-referenced books, but the internet contains caches of great (and trustworthy) information as well, if you look in the right places and are wary of the information that is untrustworthy.
Here is one new information source you probably haven’t come across in your internet travels: the Commercial Pattern Archive at the University of Rhode Island. “CoPA-Online contains over 50,000 scanned images (garments & pattern schematics) from 42,000 commercially produced patterns, dating back to 1868 and is growing daily.” Here is the background on this great resource:
The Commercial Pattern Archive database, CoPA, provides a unique tool for researchers and designers to recreate or date clothing from 1868 to 2000. There are several collections from the States, Canada and the UK represented in the database which functions like a Union Catalog of pattern collections. The cornerstone of CoPA is the Betty Williams Collection. Betty Williams, a theatrical costumer in New York City, pioneered research on commercial patterns in the early 1980s. She became a leader in the field, establishing a major personal pattern collection and encouraging others to actively participate in the collection and storage of patterns. Betty passed away in 1997 leaving a wealthy legacy of research, and an extensive pattern collection now housed at the University of Rhode Island. The Williams Collection is combined with the URI and Joy Spanabel Emery Collections in the Commercial Pattern Archive in URI Library Special Collections.
One of my students shared this resource with me a few months ago and I have only just started digging into all the wonderful information that is available. You have to subscribe to see all of the patterns in the collection, but there is a free sample search that brings up a limited amount of patterns. I’ve just been using the free sample search and have found lots of fabulous patterns. Some of the patterns just show the envelope front images, but a lot of them also contain an image of the construction pieces. It’s great, because you can see lots of patterns and layouts for different silhouettes from different periods. The archive includes clothing patterns for men, women, and children, nightwear, underwear, swimwear, outwear… a huge variety of patterns and information! It is also possible to arrange to visit the archive in person.
Coming up in my sewing queue for the summer are garments from the 1760s, 1860s, 1880s, 1920s, and 1950s. Ooo, exciting variety, right? You never know in what period I’m going to turn up next! (Except that in the past it was pretty likely to be between 1810-1930… but I’m pushing the boundaries now on both ends!) So far I’ve accessed CoPA to find resources for the 1880s and 1920s. Here are some examples:
1885 Beatrice Bodice Pattern at CoPA.1927 Slip On Dress with Pleated Skirt Pattern at CoPA