The first step in constructing my 1760s Curtain-Along jacket was to draft up the pattern from Janet Arnold (you can read more about the pattern I chose in my Initial Curtain-Along Thoughts post). In my experience, sometimes the patterns work pretty well without a lot of tweaks, but sometimes you really do need to do some serious fitting to make them work. Given that knowledge, I decided to make a mock-up of the pattern without any adjustments to see how it would fit. The measurements weren’t too far off of my own, so I didn’t think I’d run into any really awful problems.
And here are the results! I put the mock-up together matching up all of the points that were indicated in the pattern.
Initial state. It is pinned down at center front, but I haven’t made any other adjustments. Squishy is pretty close to my shape, so you can see that there are some adjustments that need to be made for the jacket to fit me.First problem: the gap at the shoulders. You can see on the left that I’ve pinned out the excess fabric, and on the right side nothing has been pinned.Second problem: the center back waist point is halfway up the back! I extended the center back seam above the waist so that the waist would sit lower and match the side fullness.I don’t think anyone has a back/hip area that would easily fit into this shape…Third problem: sleeves that are too far off of the shoulder and twisted around in a way that is odd looking and uncomfortable. I had to try this on to make those observations, but you can see the problems in the picture.The solution was to take the sleeve off, adjust the armsceye, and pin the sleeve back on without it being twisty. You can see on the left side that I’ve adjusted the sleeve, and on the right I didn’t do anything.
Oh, I also lengthened the sleeve pattern a bit, because it was a little short on me, and extended center front so it would actually close… After making the adjustments to the pattern, I took to the scissors and cut out the real fabric, mineral felicite and peach linen lining. Then it was on to the hand sewing…
It’s been a fair bit of time since I first thought about joining in on the Curtain-Along hosted by Jen of Festive Attyre. I thought the idea was fun and I was inspired by the Waverly curtain series, but I wasn’t inspired enough to get involved… until I saw additional colorways being offered by fabric stores as yardage rather than curtains! It’s not that they were being offered as yardage, it’s just that I like the colors better and I like that they will be less represented in the costuming world, since most people seem to have gone for the traditional curtain color ways.
Waverly Mineral Felicite: my fabric.
Anyway, I mentioned way back in October that I had bought some yardage of the Mineral Felicite colorway of the Waverly fabric. It’s taken me about 9 months to get around to using it, but I’ve finally found the time! I’m super excited about it. The colors are lovely and I’m branching out (haha, no pun intended) into an earlier period than I usually inhabit as inspiration for my Curtain-Along garment.
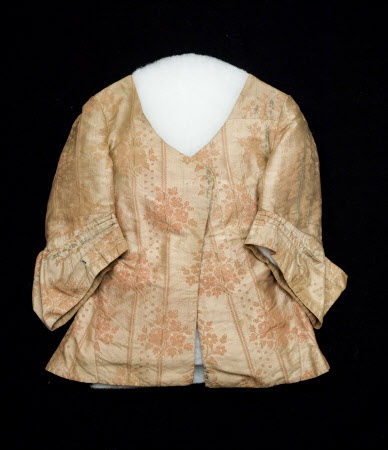
This main inspiration jacket has the ambiguous dating of “18th century” and the details aren’t super clear cut for me to do my own clear dating. I like the simple shape, the colors, and the blue silk ribbon trim on the edges. These are all aspects of this garment that I want to bring in to my own jacket, but I also wanted to find a shape and style that appeals to me. So I did a lot of thinking about what decade of the 18th century I wanted to aim for. There was lots of looking at Pinterest. Initially I thought I wanted to aim for 1770s, but after more thinking I’ve settled on the 1760s as the decade for this jacket.
I picked the 1760s for a variety of reasons. 1- I want to be able to wear the jacket with a future quilted petticoat and quilted petticoats were most popular between 1700-1775; 2- Conveniently, there is a pattern available in Janet Arnold for a 1760s jacket; 3- I like the slightly longer skirts on the jackets of the 1760s.
The jacket below is the one Janet Arnold took the pattern I will be using from. I will likely omit the cuffs (I’ve got a future 1740s jacket project in the works with cuffs!) and will almost certainly be adding the blue silk ribbon like my original inspiration jacket.
Jacket. 1760-1790. National Trust Inventory Number 1348744
I’ve been trying to be good about not buying more fabric… but sometimes things are just too good to pass up, or an event comes along that requires new clothes! I think I last bought fabric in January, so that’s a pretty good few months of no-new-fabric.
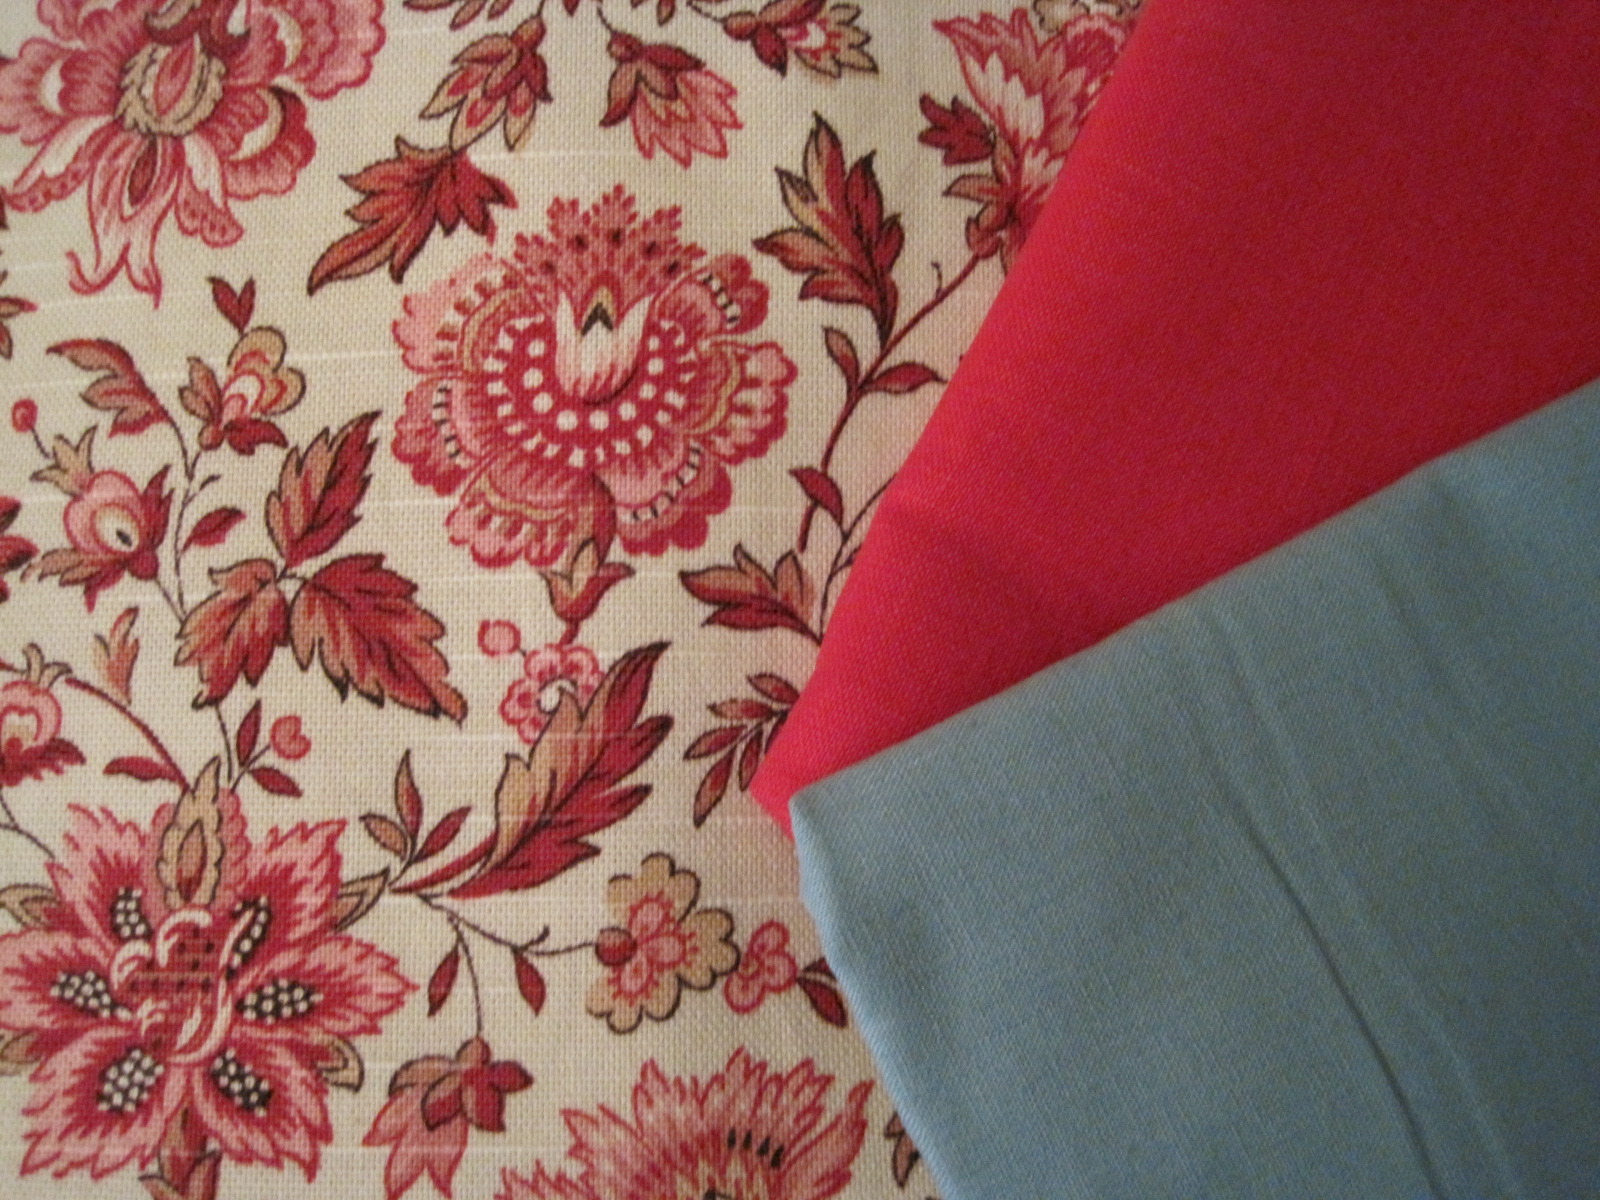
I wasn’t even looking for this fabric! But I happened upon this great red/pink/brown cotton chintz and couldn’t get it out of my mind. In the end, I decided I would regret it if I didn’t buy it. And there you are. I’m thinking of perhaps an 1790s/1800ish open robe eventually. The other two fabrics wouldn’t have been bought on their own, but with the chintz already being purchased… I tacked them on to the order. There is a small bit of the cherry red linen, to make a 1740s jacket some day, and a bit of that blueish cotton/linen blend. I was hoping it would be more teal colored, but it’s not. So it might get relegated to lining something else.
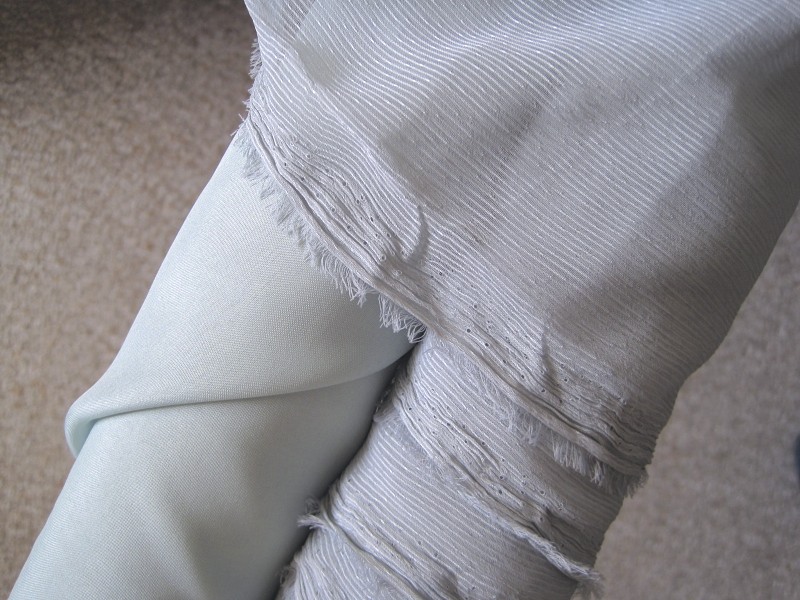
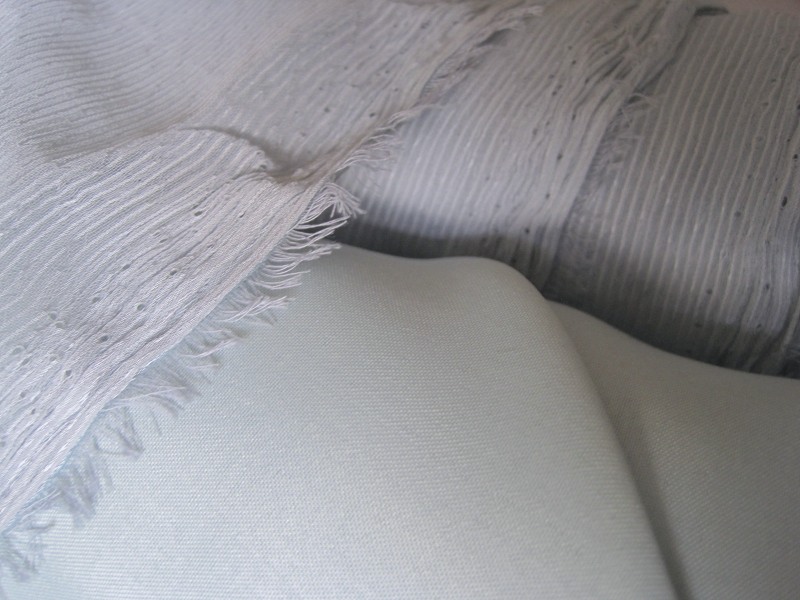
Later in the month, I was on a grand search to find fabric for an 1860s cotton dress and came across this fabulous light teal stripey fabric for $1/yd. I’m calling it the elusive blue green fabric in my head, because that color is sort of hard to find and I’ve been inspired lately to find it. At $1/yd I couldn’t pass it up!
The pictures don’t really do it justice. I’m thinking of making a new Regency evening gown using it and perhaps a 1906ish evening gown some day as well. I bought that similarly colored lining to go with the stripy for the 1906ish evening gown, because at $1/yd in the right color it’s just meant to be, even if it is polyester. I’m not sure what the fabric content of the stripy fabric is, but I’m guessing it’s probably man-made…
Lastly, I’ll be performing in another 1920s dance event next weekend during the day and I needed a 20s day dress. I wanted it to be washable and I didn’t have any appropriate fabrics in my stash. There weren’t a lot of options that I liked, but in the end I went with this royal blue cotton lawn swiss dot. The dress will have white accents on it (and is looking rather sailor-like, despite that not being my intent). I have to just claim the sailor look so I don’t feel foolish in it.
I’ve been sewing up a storm this weekend! (And yes, pun intended, since I was stuck inside all weekend because of the blizzard ‘Nemo’… and as a side note, do you think they saw the irony in naming this storm Nemo? All I think of is a cute cartoon fish, which seems at odds with the 2 1/2 feet of snow that is still being cleaned up outside as I create this post.)
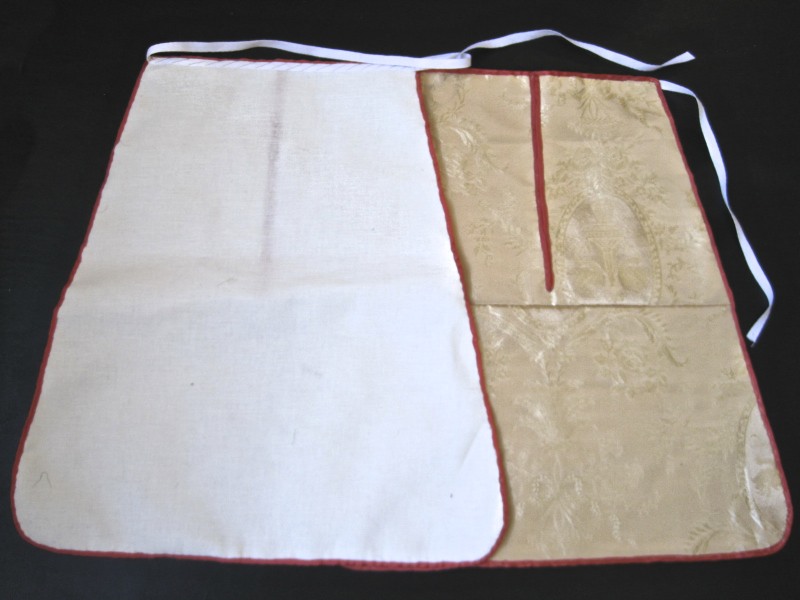
Anyway… events were cancelled, including the Regency Ball I created my 1813 dress (HSF #1) for, which is rather sad. Not being able to go anywhere means I’ve had lots of time to work on other things, though. Mostly, I’ve spent the time working on my replacement of the berry ballroom dancing dress. I was hoping to move along on my new 1864 ball gown as well, but that didn’t happen because I was so inspired to keep working on the ballroom dress (and I made lots of progress, so that’s good!). I did take some time out of my furious sewing to finish up my new silk pockets, just in time for the deadline of the Historical Sew Fortnightly’s Challenge #3: Under It All.
Year: The year in Costume Close-Up is 1740-1770, but I think these can be used for years spanning almost the entirety of the 18th century.
Notions: About 2 yds of 1/4″ persimmon colored silk ribbon and about 1 yd of 1/4″ white cotton twill tape for ties.
How historically accurate?: I give them a 95% rating. Accurate fabrics, accurate piecing, accurate pattern, no machine sewing… Thread choice is not accurate, and I’m not convinced that the stitches I used to attach my edging ribbon are accurate either. (And I probably should have tea dyed my waist tie so it wouldn’t be so bright white… but I am the only person who is likely to see it, and frankly, I just wanted to attach it and be done.)
Hours to complete: Entirely hand sewn, so about 13 hours.
First worn: They haven’t been worn yet, and probably won’t be worn for awhile… but at least now they’re done, and ready to go for next time I need them!
Total cost: $7? If I count the cost of all the bits and pieces. Since they use scraps from other projects it’s hard to tell.
Back view. You can see the linen backing. The silk on the front has a second layer of linen under it.Close-up of the tiny stitches holding the ribbon down along the edges.
This story starts as so many sewing related stories do: I went in “just to look.” In fact, we all went in “just to look.”
I’m sure you can guess what happened…
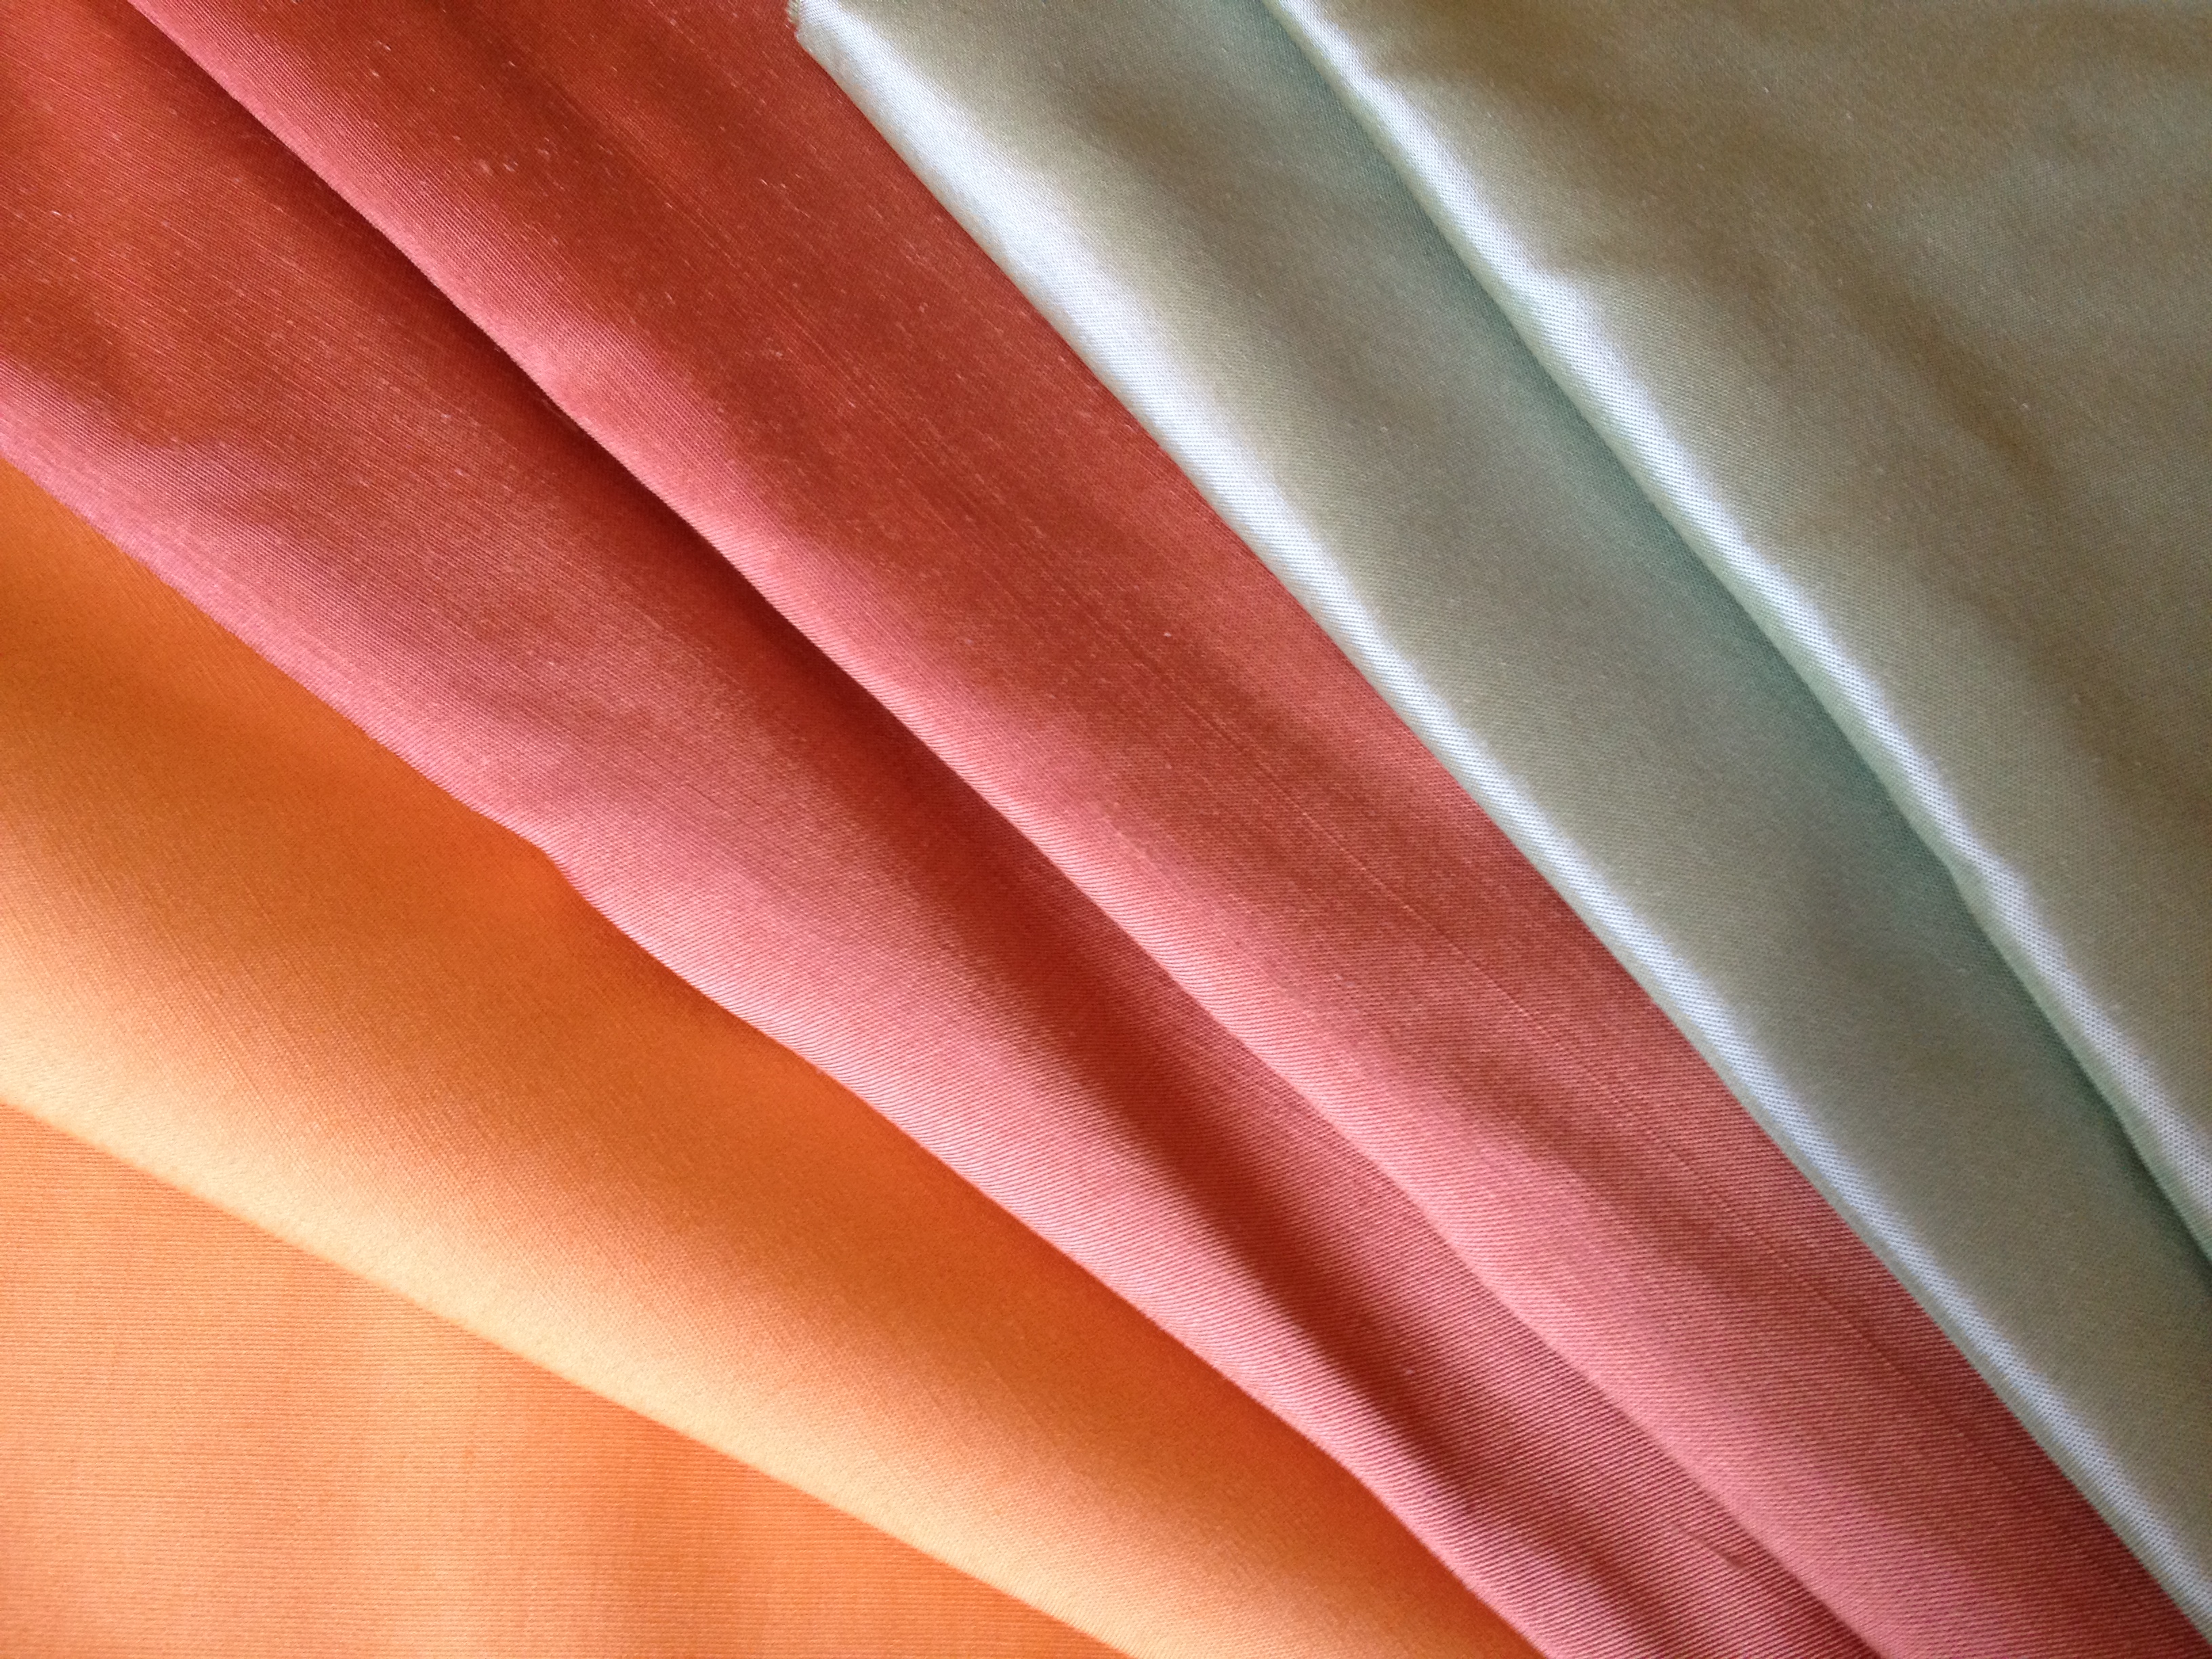
All three of us each came out with 2 or 3 lovely fabrics! We just couldn’t resist the bargain priced silks! My stash additions: 4 yards of apricot cotton, 6 yards of pink silk, and 2 yards of icy green silk. All truly stunning colors on their own, but together they just make me super happy!
What will I use them for, you ask? What a practical question! Well, the cotton for an 18th century under petticoat (a garment that will probably never be seen, so I picked a fun color that is vaguely plausible for that period), the icy green silk for 18th century accessories (hat, muff cover, and maybe mitts, with some leftover to do something else with as well…), and the pink for… something. Perhaps an 18th century something, maybe a sacque? Perhaps a 19th century something, maybe a bustled gown? I got enough to make something and have enough for self fabric trim, I think (it was all that was left on the bolt…). I’ll have to wait to be specifically inspired, but in the meantime I am generally inspired by the color. It’s a great grown-up shade of pink! Whee!
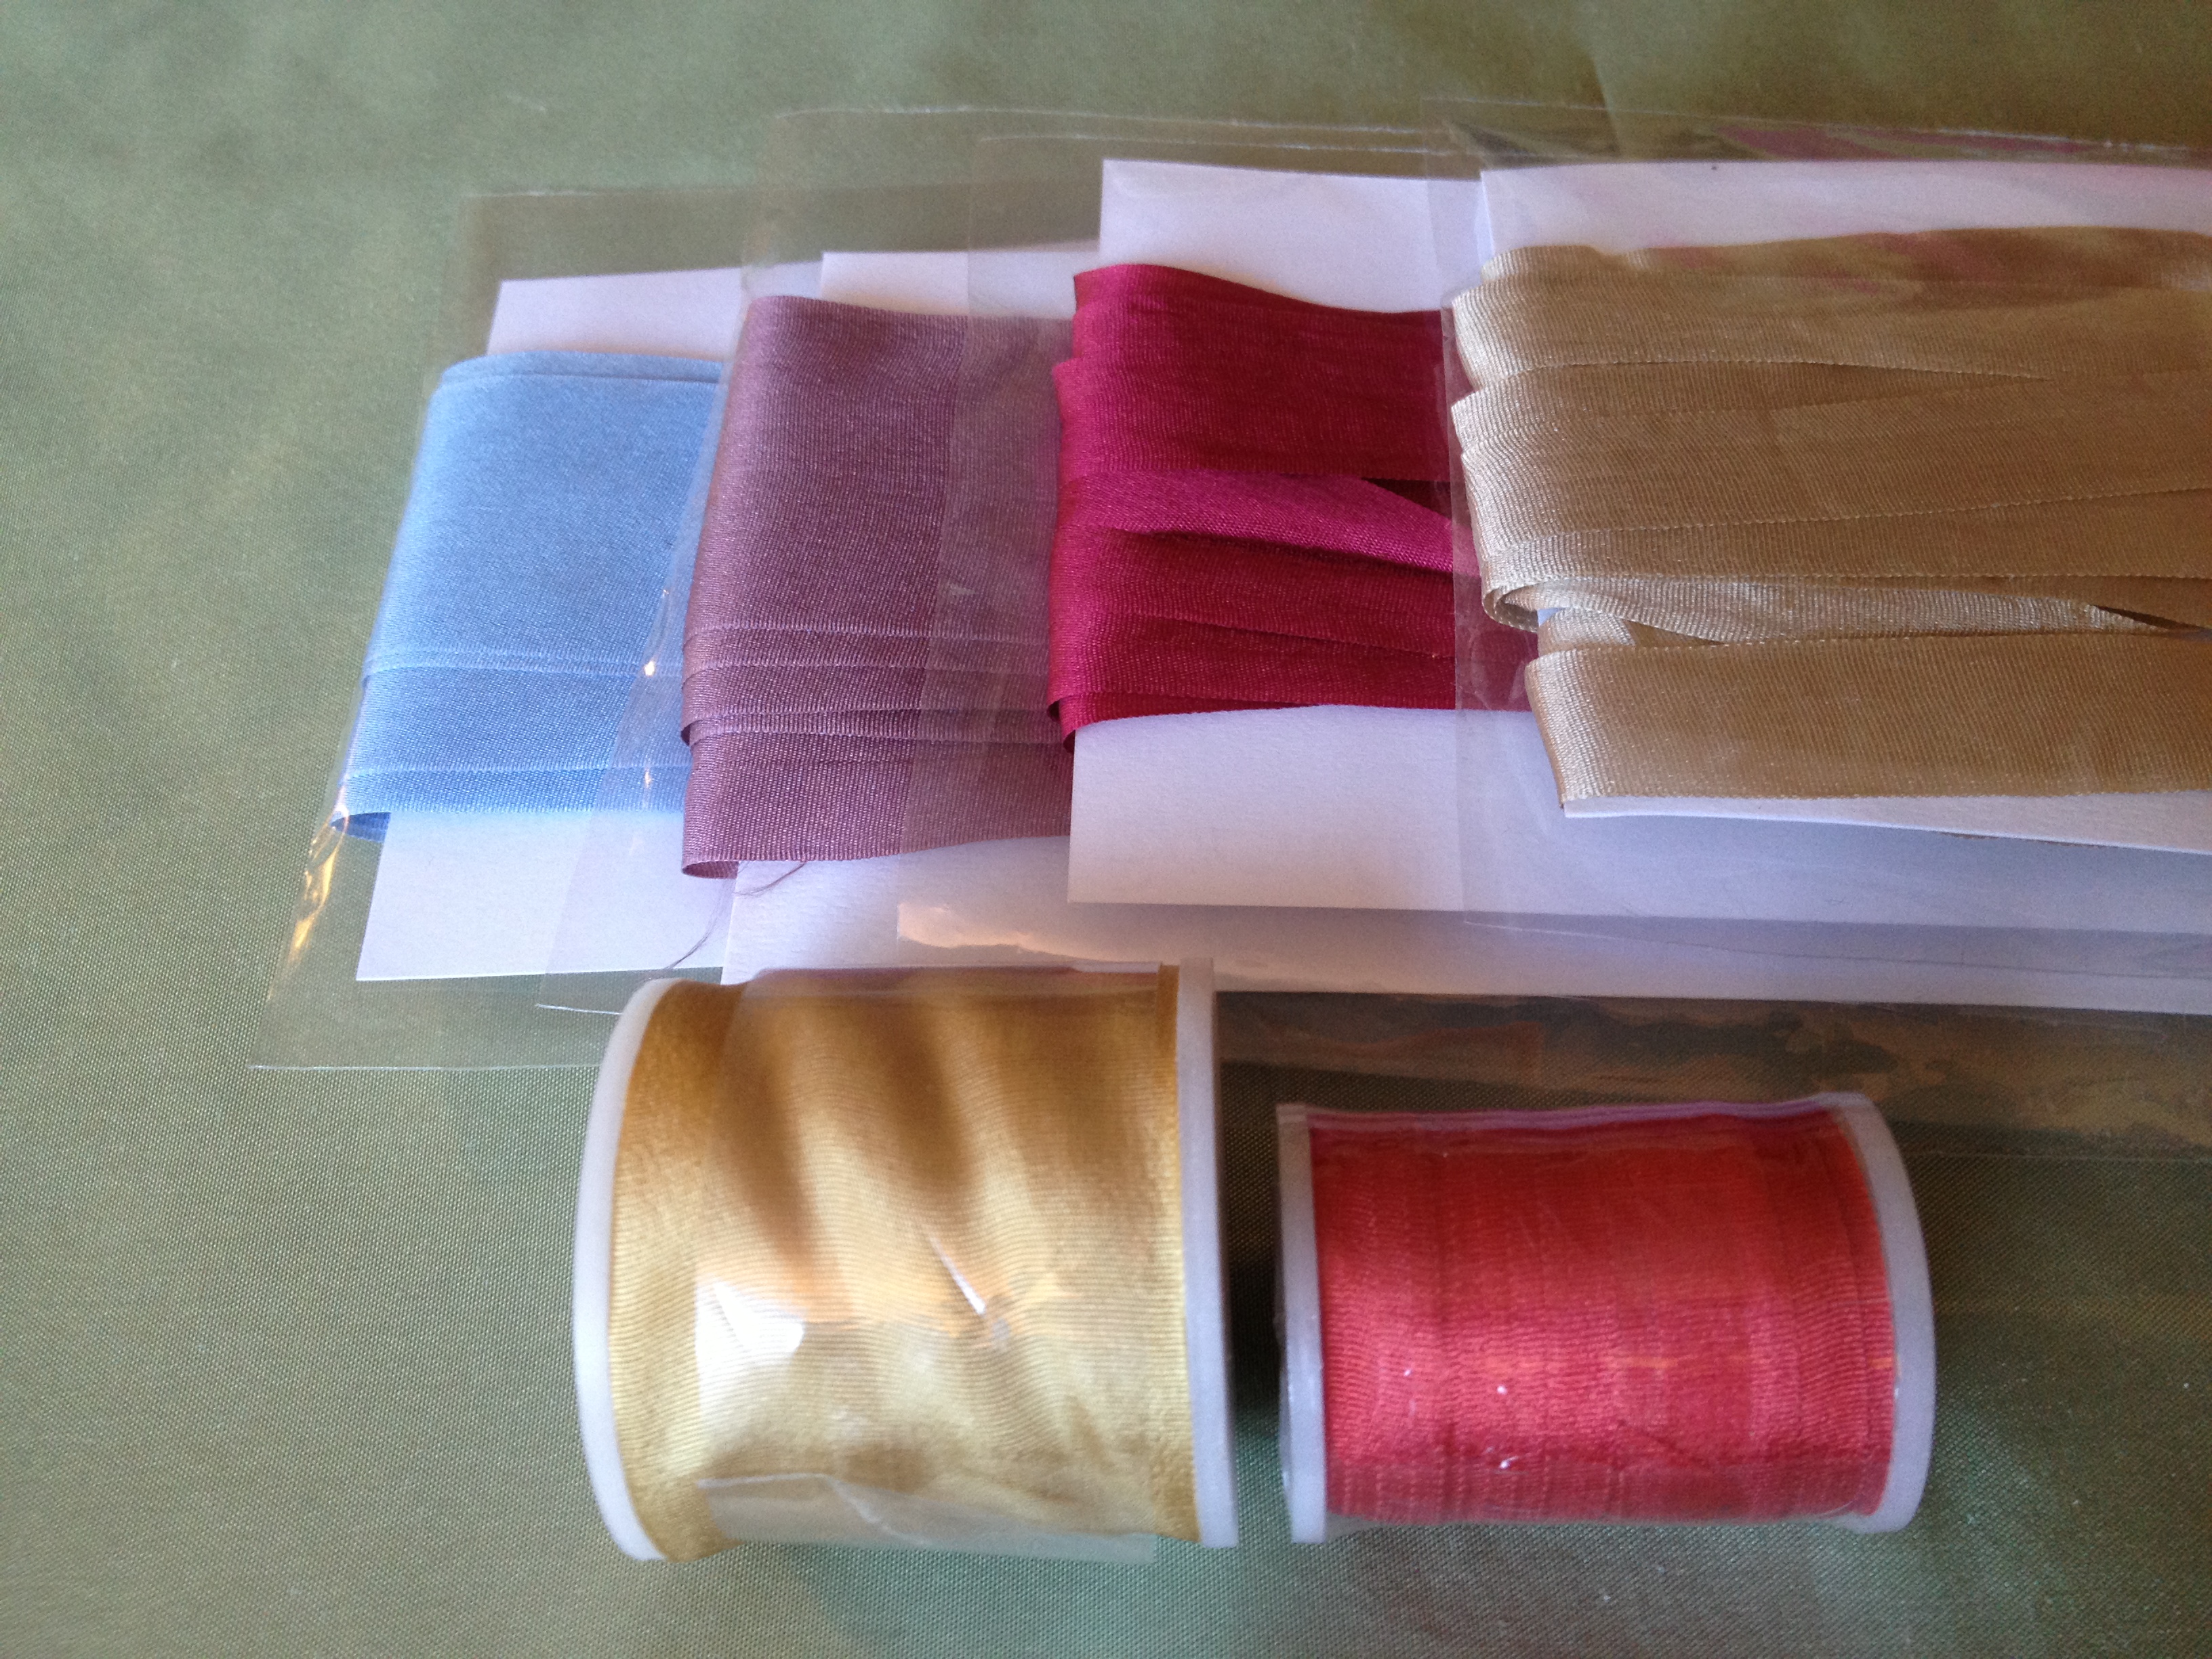
I also bought some silk ribbon that is a stash addition. The champagne ribbon on the top is the ribbon I plan to use to decorate my Kensingtons. Of course, while looking for that I got totally distracted and overwhelmed by other beautiful ribbons as well… not surprising, really, considering how lovely they are!
I justified their purchase by proposing a use for each of them. Blue: to trim my soon to be made Waverly Mineral Felicite 1780s jacket. Purple (they called it silver/grape, which is a cute name): to trim future Regency bonnets and an 18th century cap. Dark pinkish/red: I couldn’t resist the color! One day I plan to make the Costume Close-up laced front jacket, and I think this would be lovely for that, perhaps with some plain purple wool that is in my stash. Champagne: to trim my Kensingtons. Gold spool: to trim an 18th century hat, perhaps with my icy green silk? We’ll see about that. Persimmon spool (it’s not quite so bright in person): I couldn’t resist the color! I love it! I do plan to use it to bind some 18th century pockets in the near future (it will make me super happy to know that color is on my pockets, even if no one else sees them!). I have 10 yards of it… so I’m sure it will get used for other things as well!
As I mentioned in my look back at 2012 post, one of early 2013’s projects will be to paint and decorate my recently purchased American Duchess Kensingtons.
This link contains an affiliate code, which provides a small benefit to my shoe fund. This does not affect my impressions and reviews of this product.
Kensingtons, yay! And the buckles came in that cute little bag. Love it!
When I first thought of buying Kensingtons, I was set on painting them yellow, either a lightish shade of yellow or medium yellow, like the images below.
1775-1785. Colonial Williamsburg.Mid-18th Century. Bata Shoe Museum. (Those buckles are so pretty!)
But then I started looking at fashion plates… Some of them had very cute yellow shoes, but there were also some that had pink shoes that caught my eye. I love pink things… so I started thinking about painting the shoes pink.
First, fashion plates with cute pink shoes from the 1770s and 1780s.
PINK shoes. 1778.PINK shoes. Gallerie des Modes, 1778.PINK shoes. 1778-1787.PINK shoes. Magasin des Modes, June 1787.PINK shoes. Magasin des Modes, March 1789.
Second, fashion plates with cute yellow shoes from the 1770s and 1780s.
YELLOW shoes. c. 1776.YELLOW shoes. c. 1776.YELLOW shoes. Gallerie des Modes, 1779.YELLOW shoes. Magasin des Modes, April 1787.
Then I went back to looking at extant shoes and thought “perhaps two-tone shoes?” Either yellow with pink accents or pink with yellow accents… perhaps like the ones below? Here’s a fashion plate showing two-tone shoes, and there are more extant examples a little farther down in the post.
Two-tone pink shoes. The Dress of the Year 1775 by Ann Frankland Lewis.
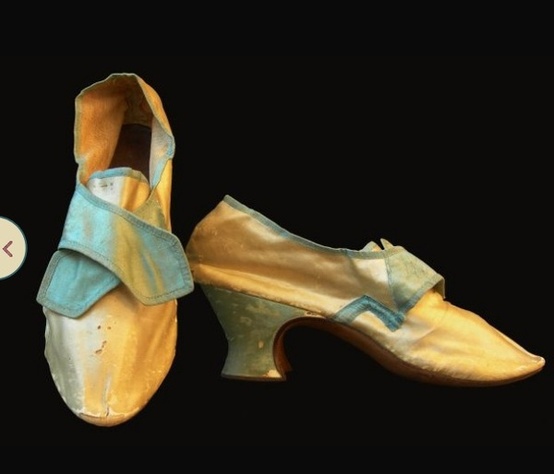
Another thing, I’ve noticed that many of the extant shoes I see are cloth, not leather. Well, the Kensingtons are leather, so that’s what I’ve got to work with (and I like it in a way, because the shoes will be much more durable). So then I started thinking about what I need to do to capture the 18th century in leather shoes that already have the right 18th century shape. I took a close look at the details in these next photos and analyzed what I saw.
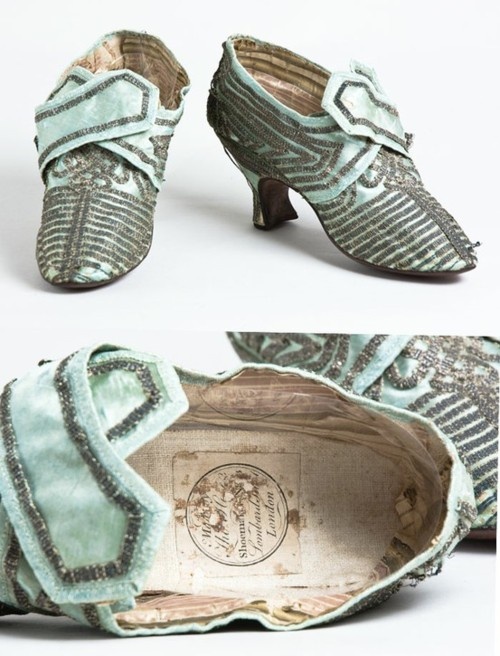
Light blue satin shoes with silver braid. c. 1770. The Charleston Museum. STUNNING!Silk. 1770s. Met.Silk and leather. 1770-1789. Met.Silk and leather. c. 1775-1785. Shoe Icons.Silk. 1780s. Met.
If that isn’t enough examples, you can see more on my pinterest board: Shoes: 1770-1789. The details that strike me are: the binding around the ankle opening and latchets (often in a contrasting color) and the 3D quality of the trim and fabric of the shoes… the decorations are not simply painted on, but sewn on. That’s hard with leather, but glue is a good alternative to stitching.
I’ve seen other styles of painted and decorated historic shoes on my costuming friends. And at American Duchess, Lauren has done multiple posts and tutorials about 18th century shoes that she has painted and decorated.
Two-tone painted and bound Devonshires, from American Duchess.Two-tone painted and bound Devonshires, from American Duchess.
What materials to use for decorations? Lauren used what looks like cotton bias tape, and on later Regency shoes narrow grosgrain which comes in a wide variety of colors. But the extant shoes look like they are bound with silk, so that’s what I’m going to aim for.
“What will I wear these shoes with?” is an important question I asked myself. “Well, everything I own from the 18th century until I buy another pair of 18th century shoes,” I answered. In the works right now are a taupey-brown silk petticoat, blue wool petticoat, Waverly mineral felicite jacket, and creamy quilted petticoat (you can see most of these fabrics in this previous post). In the future, I’m inspired by a purple and yellow color combination, as well as green and pinkish/red (these colors all in the fashion plates above!).
I’ve been ruminating over this decision for months so I make a choice I’m really happy with. I had all these options to think about: pink, yellow, both… It was tough. But I finally made a decision to go simple: yellow with champagne silk binding and champagne heels (saving pink for later, or removable ribbons, or other accessories). The latchets might also get pained champagne, I’m undecided on that point. Do you have thoughts about that? (More opinions is always better in these situations, you know!) I’ve got the paint from my Astorias, so that was easy… and the silk ribbon has been ordered! More to come soon!
I really should post about my 9 Month Sewing Plan before posting about the additions I might have added to it (cough, cough). But oh well… These fabrics are exciting so I don’t want to wait!
The first fabric stash addition is 2 yards of Waverly Mineral Felicite. I was interested in the Curtain- Along created by Jen of Festive Attyre, but I wasn’t inspired enough by the three Waverly curtain colors (Cream, Noir, and Crimson) to actually hop on the train (and I didn’t want to make something super similar to what other people are making). But then I started researching other color ways online and fell in love with the Mineral Felicite at onlinefabricstore.net. You can see my Pinterest board of various color ways here. The board also includes some other similar fabrics. I haven’t done all my research yet so I can only generally say that I’m planning to make a 1780s jacket out of this fabric. (And possibly something else, because 2 yards of this fabric is actually quite a lot!)
My next fabric stash addition has two parts. The first is plain weave creamy yellow silk that I bought a few months ago when buying the whole giant mound of fabric that is for my 9 Month Sewing Plan. I bought a few sections of it from the remnant table for just $6 a yard! I love prices like that! It had no definite plans, until… I was starting to near completion of my current hand sewing project and started thinking (which is almost always dangerous!) about what to hand sew next. I’ve been contemplating an 18th century quilted petticoat for about a year, but never had a real need and considered it to be overwhelming. But now the idea is sticking… and I’m planning to hand quilt a petticoat sometime in the foreseeable future! I mean, I hand piece and quilt queen size quilts, and if I can do that, I think I can tackle a petticoat. In fact, I think a queen size quilt is actually bigger… The second part of this, and the recent stash addition, is a plain weave cream colored wool to back the petticoat with (only $5 a yard!). You can see both of the fabrics in the top photo. To the right you can see the wool by itself. I’m excited… It’s going to be really amazing!
While looking at the wool wall for the petticoat backing I stumbled upon this wonderful wool plaid. There were only about 1 1/2 yards left on the bolt and it was $8 a yard, but I loved it and couldn’t let it go, even though I had no idea what I would do with it. It’s really lovely and thick, and a little fuzzy and soft, and not itchy. It’s hard to see in the picture, but it’s forest green, plum purple, dark tan, and light beige. The repeat is pretty big (I didn’t measure it, but I’d guess about 6″). After taking down this bolt, I stopped at the wool remnant table… where wool was only $3 a yard! Really nice wool! There were about ten 1-2 yard pieces of that slightly fuzzy beige wool in the picture… and I might have bought all of them! I have visions of using some of them, with the plaid, to make a bustle dress either from the 1870s or 1880s (with a train!!!). I’m still open to inspiration for this fabric, though, so who knows what else I will come up with? Does it strike you as anything in particular? I also have visions of maybe using the beige wool for an 18th century cloak, and a modern skirt, and probably other things… I have a lot of it. Whee!
I also found, at the wool remnant table, two similar but different dark blue wools. There were two pieces of each, all under 1 1/2 yards in length (and I did have to dig through a lot of blue wool, analyzing the selvedge edges of each to make sure I found matches, before I was successful). One of the two blues will be used to make a 1780s petticoat. The other… I don’t know. Maybe a cloak, instead of the beige wool? Blue cloaks were more common than brown in the 18th century, I believe. And I’m not sure that the beige is the right shade of brown, anyway. I have more research to do on that before I make a decision. One of the blues is more purple-y than that other (and I think I do like that one best!) but I’m not sure if it’s too purple-y for the 18th century. Although if they are not next to each other they just look navy and are almost impossible to tell apart, so I’m not sure it matters. On the left is another view of the same fabrics.
Well, as you can see, I was sort of struck by an 18th century inspiration… so most of these new additions relate to new 18th century projects. Yikes, I had better go sew, or my stack of to-be-used fabric might just envelop me!
For my birthday a month or so ago I treated myself to a fun little accessory shopping spree at American Duchess and purchased two pairs of the new-ish clocked silk stockings Lauren has added to her offerings. Fun!
They arrived while the weather was still warm… so they just sat around waiting for my attention. Finally, I spent some time with them, trying them on, etc. I’m super excited to wear them! I think the red will be really fun and silly and good for picture taking at holiday events, and the blue is nice and light and appropriate for all year round without being white. I have nothing against white stockings, but I like the idea of colored and clocked ones! The elastic around the tops of the stockings is pretty tight, so they might get worn turned down under my knee. The only other thing about them is that the foot (from heel to toe) was bigger than my foot. Not for long, though! Inspired by a post from Lauren about adjusting the stockings to fit your foot, I went at it with the sewing machine. First, I changed my needle to a ball point to help sew through the knit.
First attempt at the red pair. I made the mistake of cutting the toe off before trying to sew it. It was frustrating to sew, so I suggest you don’t try it that way. You can also see the second line of zig zag stitching because I went back to shape the toe to my foot (my toes are not squared off like the first line of stitching).First attempt next to the second attempt. The second one was so much easier, since I hadn’t cut the toe off yet!Here’s the blue pair. They went so much faster than the red pair! You can see that I wasn’t exact with the line I sewed. I figured that as long as the general shape is right it will be fine on my toes.The blue pair after cutting off the unnecessary toe length.Success! And I actually think it’s more comfortable to have the toe seam on the tips of your toes rather than the tops.
Product links in this post contain an affiliate code, which provides a small benefit to my shoe fund. This does not affect my impressions and reviews of this product.
I recently met up with friends from the Massachusetts Costumers to attend a colonial faire. It was a cold, damp, day so we had the opportunity to pull out warm clothes and accessories like mitts, muffs, and cloaks.
First, I made a matching petticoat out of the remaining bit of striped fabric I had. I had enough to make the front stripes run vertically, but in the back the stripes are only vertical for about 12″ and then I hd to do lots of piecing to even have enough fabric. Right above the vertical stripes are stripes that run horizontal, and above that are remnants of my green 1900 skirt from Newport. And I really do mean remnants! There are 3 rows of pieced in remnants, some of those are even pieced together with vertical seams to be wide enough! Of course, you can’t see all of the crazy piecing, since the skirt of the anglaise covers it. And I was rather in a hurry while doing all of this, so I have to confess that I did not iron any of my seams… or my hem… Bad behavior, I know!
Robe a la anglaise worn a la polonaise.
Second, I decided to wear the anglaise a la polonaise. I did this in part to keep it out of the mud in the fields we would be wandering through, and partly because I found multiple examples of striped robes a la anglaise with matching petticoats that were worn a la polonaise.
Robe retroussee dans les poches. KCI. c. 1780. French. In “…the “retroussée dans les poches”… [The] gown’s hem is pulled out from slits in either side, and draped on the back.” (From KCI) Okay, not actually a polonaise, but very similar.Robe a la polonaise. KCI. c. 1780. French.
Third, I decided against wearing the straw hat I wore last year. The shape of the brim is good, but the crown is too high for the 18th century and the ribbon wasn’t sewn on in an 18th century decorative way. I thought of adding that same blue silk ribbon to my 1912 ivory mushroom hat since that hat shape also appears in the 18th century… but it seemed a bit too much to have an ivory silk hat to wander around muddy fields. Plus, after completing my hair style, I realized that I hadn’t made my hair big enough to support the hat (and I didn’t want to cover up the rolls I had attempted in the back!).
Bun roll hair.
Fourth, I attempted a new hair style with rolls in the back. I don’t think I quite made it, since it kind of looks like edible buns on the back of my head… But it was an experiment, and I learned some things, so it wasn’t a total bust. I separated the hair on the front part of my head and brushed it out and hair sprayed it upside down to add volume. Then I actually put it into a pony tail on the back of my head, which I pinned in place to create the poof in front. I then separated the pony tail into those three sections and rolled them individually. I took the remaining bottom section of hair, brushed it out a little, and pinned it up so it would fall from the bottom roll, rather than the base of my scalp.
Rather sad petticoat, but fabulous new muff!
Fifth, I wore my new 18th century muff! The muff is from one of the classes I took at Dress U this summer, with Stephanie Pool. It’s stuffed with 100% down and is super warm. The blue silk cover is removable, so I can make lots of covers and have interchangeable muffs! I was hoping to have the blue silk ribbon on my head to complement the muff, but that didn’t happen. Incidentally, muffs make rather good pockets… I was able to put a little bag with my phone, money, etc. in it as well as my camera inside my muff!
You can see the down filled pillow inside. The two ends have a silk ribbon running through a channel. You simply pull the ribbon to gather the ends and then tie them to secure the gathers. You simply have to untie the ribbons to loosen the gathers and change the cover!
I did sort of give up and not try super hard for accuracy when I was getting dressed. I decided not to wear stockings, because I didn’t want them to get dirty. I couldn’t find any shoes that were remotely 18th century-like. I clearly need to make some under petticoats and readdress my bum pad/roll situation (I had also made my bum pad smaller, since it seemed so large last year… but this year my skirts looked a little sad and droopy… so maybe I went too far?). I need to actually hem the silk tucked into my bodice, so it’s not a full square of fabric… Oh also, I guess I need to make some simple pockets, until I learn embroidery and make some fancy embroidery pockets as I mentioned earlier this year.
At this point, I am going to freely admit that I rather failed at creating an outfit that is historic clothing, rather than a historic costume. Certainly, there are some aspects of this ensemble that are correct. For example, I’m very pleased that I cut my sleeves so that the stripes go around my arm, not vertically. I think my trim is well done and really makes good use of the fabric I selected. And I like the scale of my stripes, but feel that the fabric is really not the right choice for a piece of historic clothing, rather than a historic costume. In addition to that knowledge, I have learned a lot about the construction of 18th century clothing, which I did not know when I made this last year. For example, I now know how to make petticoats the correct way, and how to construct the bodice of the robe the correct way, and how to sew the shoulder straps the correct way. I plan to make more 18th century things in the next year, so I will be sharing these sources with you as I go so that you will be able to gain this knowledge as well.
In the end, I’ve chalked this green anglaise up to experience, as every seamstress has to do, now and again. We all have to start somewhere. It’s pretty rare that the first thing you make from a totally new era is as correct as you want it to be!
Here’s a few more shots from the day, of me and my companions. Enjoy!
New caraco and quilted petticoat.New jacket! In a day! You can read more at Jenni’s blog: here.I really enjoy this pond. That willow on the right is the very same one we took pictures at last year!It was chilly, so we stopped in the tavern at the inn to warm up a bit.In front of the real fire! It was really pleasant.Of course, I took this picture to be silly. There was a lot of picture taking and iphone-ingShoe shot! With our “chaperone,” who was obviously not wearing historic clothes.
Oh yes, and I’ve realized I don’t have any shoes that are remotely 18th century-like. So I need to deal with that too… I want yellow ones!…
Ooo! Lauren over at American Duchess has just opened the pre-order period for a new style of historic shoes! Head on over to American Duchess to check out the details of the Kensington and other styles from the 18th and 19th centuries!
New from American Duchess: Kensingtons in red and black
These links contain an affiliate code, which provides a small benefit to my shoe fund. This does not affect my impressions and reviews of these products.