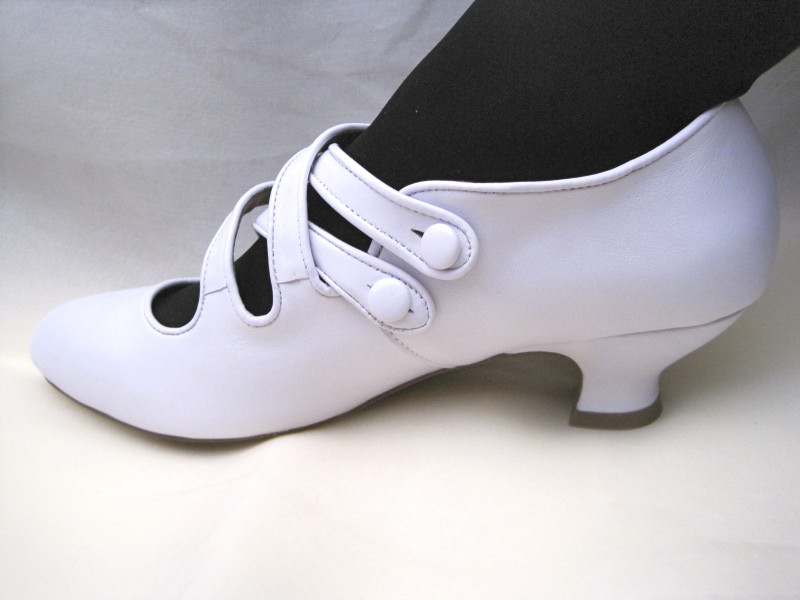
Five months after my super intense excitement of the pre-order of my American Duchess Astorias, they have finally arrived! Luckily, I still have events coming up for which they will be great, though they did miss out on being worn at the Titanic Weekend back in April. Despite their innate cuteness, however, they are going to need some adjusting before I wear them. Here they are, unadjusted.
This link contains an affiliate code, which provides a small benefit to my shoe fund. This does not affect my impressions and reviews of this product.
Reasons I love them:
The straps are just so cute! There were a wide variety of shoes with this kind of detail in the Edwardian period and this modern shoe does a fantastic job of capturing that perfectly Edwardian spirit!
They are super comfortable! It hardly feels like there is a heel on them and the shape of the toe box is just right for comfot.
Things I’m disappointed with and want to change (and my plans for doing so):
Due to my very narrow flat feet at least half of the straps are about 1/2″ too big, causing unattractive gaping over my foot (the crossed straps look really outstanding when held taut against my foot, but when they gap the shoes just looks messy). The plan: to remove the buttons from their original location and restitch them at the point where the straps want to be when tight. Overall, it’s a pretty simple solution that just takes time to execute.
I ordered the ivory color of the shoe, and to my eyes it looks very white. Since I plan to wear the shoes with many clothes where ivory is a featured color, it is important to me that my shoes are ivory and not white. In the photo below you can see how different the shoe looks from the ivory silk background. The plan: to paint my Astorias with Angelus Leather Paint from Dharma Trading Company to be a suitable color.
Well, that’s the plan. Time to start–I’ve got two weeks before I wear them!
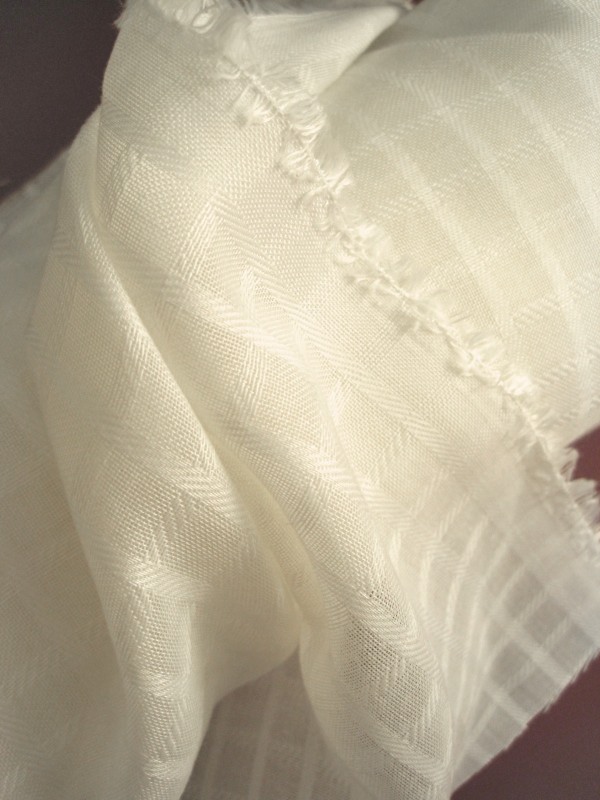
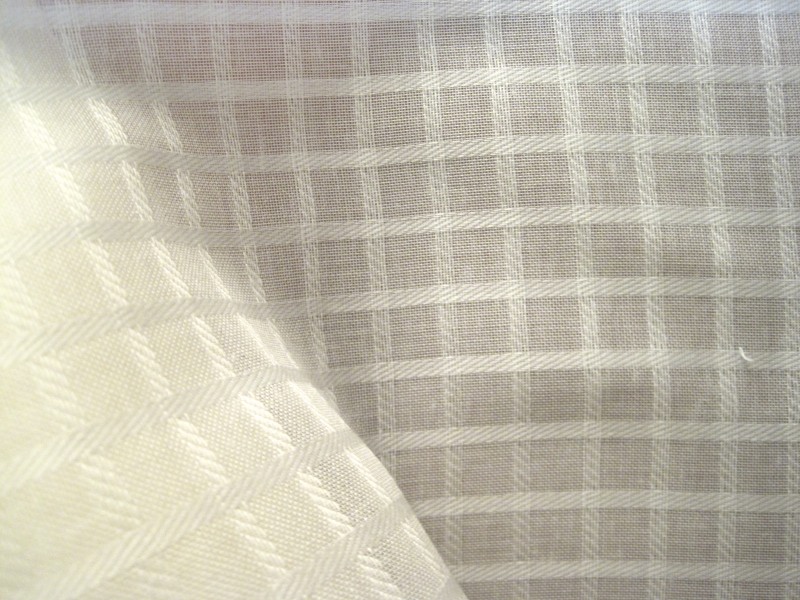
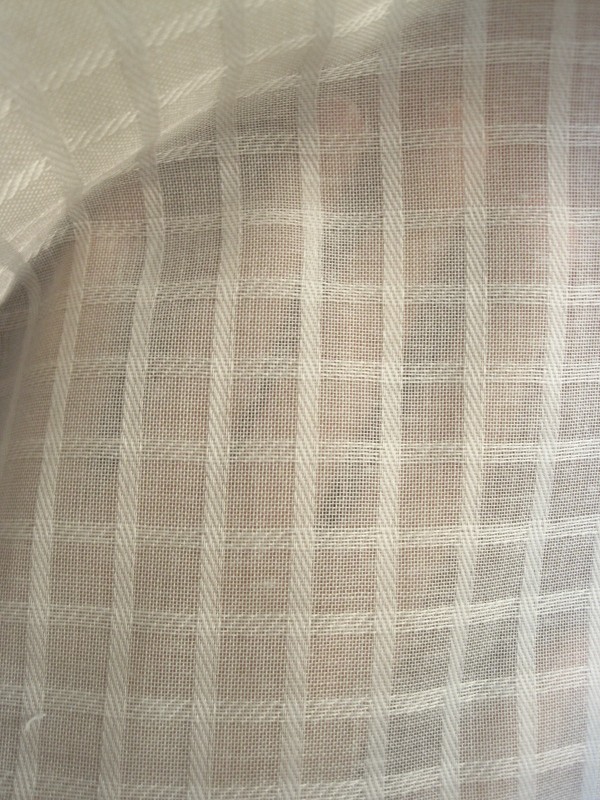
I recently mentioned the addition of a new fabric to my stash! I bought it with the thought to build an early Regency dress and another something or two. Perhaps an 18th century apron? Or an Edwardian blouse? Now I’m also considering a frothy 1908-ish dress. And I’m sure that more ideas will be sparked before I actually construct anything (because there are many other things on the “to be sewn” list that need to come first!). But I did promise pictures. Here they are!
Ivory cotton gauze with windowpane pattern. It’s fairly sturdy, but has a lovely drape and is quite soft to the touch.It’s semi-transparent. This is with nothing behind it but color.This is with my hand behind it. You can see the outline of my hand pretty distinctly.
This photo was taken the day of the filming of the documentary that I spoke of in my last post. The first photo is the original photo as it came out of the camera. The second photo is a version that I altered (thinking, “The photo is so dark. I need to lighten it up a bit to see the details!). However, now that I’ve seen both images, I’m torn! I think both are wonderful! Each is striking in a different way. I’m curious to know what you think? Version 1 or Version 2? Why that choice?
Version 1 (original)Version 2 (brightened to show detail)
7am: wake up, shower, coif hair, apply makeup, dress
8am: grab already packed bags and head out the door
9am: change into Annabelle and participate in the filming of a documentary regarding Henry Bergh, the founder of the ASPCA, by Sagacity Productions
The CVD members who participated in the filming.
2pm: go out to lunch (still in 1860s garb)
It’s hard to sit next to each other in modern seating when wearing hoops!
4pm: head home for a super quick nap
5pm: paint toes and get dressed for a modern evening out
Yes… I do actually wear modern clothes sometimes!
11pm: arrive home, feeling like I’ve just lived at least two days… all in one!
The amazing part? Despite the fact that I didn’t have time to change my 1860s hair style, it worked just as well for my modern look! I got a comment that it looked inspired by the 1940s. Maybe? I think a modern woman always looks distinguished and a bit vintage when wearing her hair up in the evening, since it is just not the style these days (and I was surrounded by mostly college age people… so there were mostly curling ironed hair styles around…). To be entirely fair, there were many amazing parts of that day! I feel blessed that it was mine.
For those of you who live near Boston, you will know that the fabric store selection in this area is pretty dismal. We do have a few small stores that have a fun selection of certain kinds of fabrics and/or great low prices on a random assortment of fabric, but we don’t have a great fabric store population. Have you heard that the new Fabric Place Basement opened at the end of last year where the old Fabric Place was, in Natick? (Spoiler: there is a coupon for 15% off of one cut of fabric on the website for the store!) When you descend the stairs it looks like a huge selection (of what I hoped to be all dress goods), but I found that about 1/3 of it is decorating fabrics (great for some things, but only rarely for historic costuming), 1/3 of it is quilting fabrics, and that leaves only 1/3 for dressmaking fabrics. They did have some great fur, and a lot of sequined things, and a huge selection of leather. They did also have silks, in a random assortment of colors and types, for between $10 and $20 a yard depending on the type. Oh, and they had some really nice wools, in a random assortment of weights and colors, but for pretty good prices, considering the quality of the fabric. The notions section was ok, but not outstanding, and the trim section just seemed a little random, with an abundance of sequined trims.
But… I did find some new pieces for my stash! The highlight is a bunch of cameo buttons. They are plastic, but I think they look pretty good (and for 25 cents a piece I really can’t complain!). It would also be possible to carefully paint the black background to change up the look… I have 2 different shapes in 5 different sizes. I envision a variety of uses for the cameos: as brooches, buttons, or to add interest to accessories.
Most of the cameos are the same frame and figure, but these two below were different. It is easiest to see the difference in the frame, and I think the little one has a man on it rather than a lady like the others.
It’s a button in disguise!
Anyway, the other thing I found (and bought…) is an ivory cotton gauze with a windowpane pattern on it. It is 118″ wide and was actually a really good price! Yay! I bought enough to make a Regency dress (at some point in the future…) as well as something else… Maybe an 18th century apron? Or an Edwardian blouse? I don’t plan to use it right away, but I am thinking of ideas. I’ll have to take a picture of it!
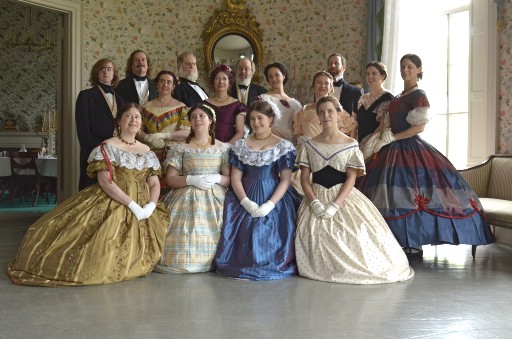
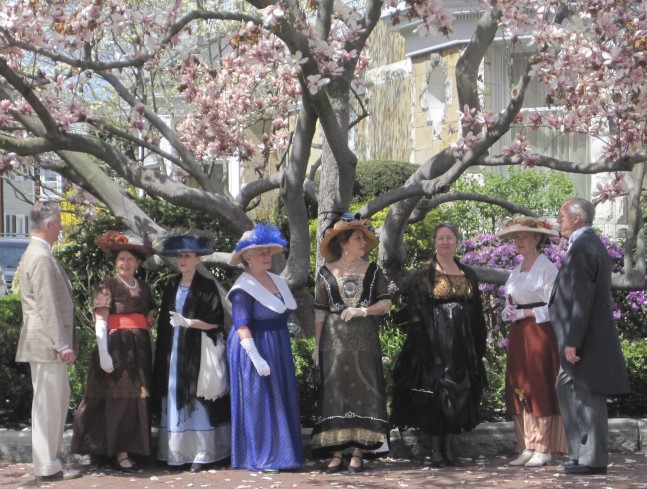
Here we are, a third and final installment of posts related to my recent Titanic-themed weekend. You can read more about my tea gown and matching hat as well as my evening gown in previous posts. I think I’ll limit my commentary to captions. Here we go!
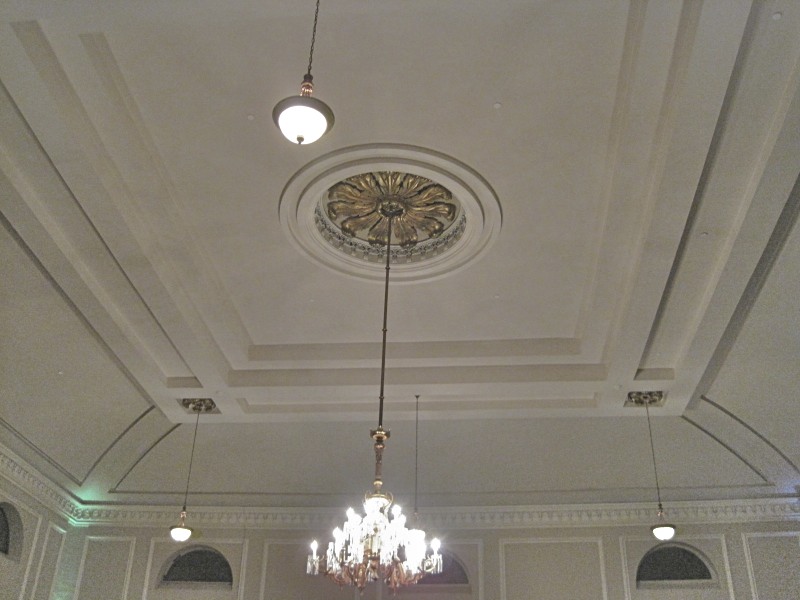
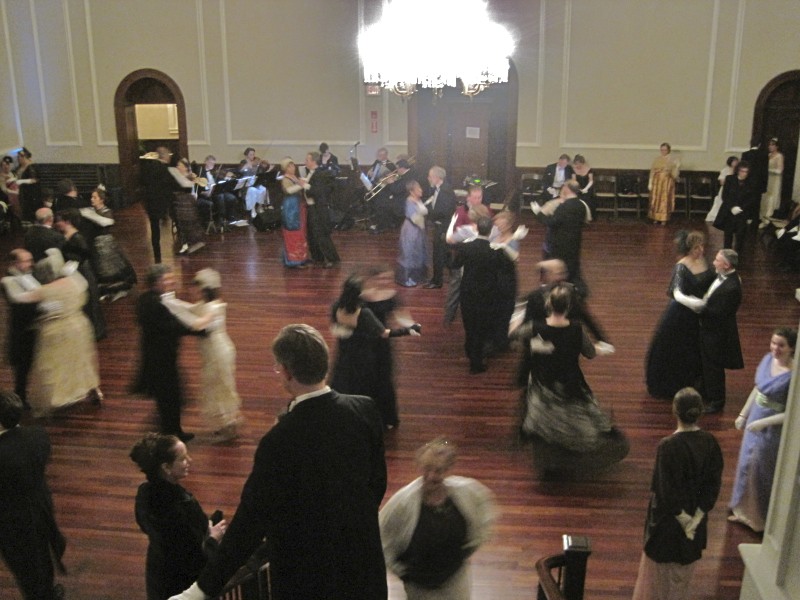
The weekend began with a casual Steerage Ball with a light and charming atmosphere.Saturday afternoon was a formal tea to relax after a morning dance workshop.Fabulously dressed people were all around!I do love flounces, in any period.In lovely whites, a staple of the Edwardian wardrobe.There were picturesque photo opportunities, of course.And the men were just as fabulous looking as the ladies.The weather was lovely and some people took the opportunity to talk a walk outdoors.While others took advantage of a less strenuous opportunity for enjoyment indoors.Saturday evening was a formal dinner and grand ball.So we all donned our finest finery...And after dinner, danced the night away to live music.There was a balcony and staircase that added serious elegance to the room.Dancing, dancing, dancing...Of course, a girl must rest sometimes, and why not with a fabulous fan? The room did get quite warm.This backdrop was just lovely, and so perfect for pictures!Picturesque!Pictures were taken in abundance.At 11:40pm (which is when the ship hit that ill-placed iceberg) we took part in a moment of silence to remember those who were lost followed by a haunting final waltz to the melancholy melody which was the last song played by the band as the Titanic sank.On Sunday, I was able to wear my 1913 walking suit and hat on the Museum Stroll. I wore the blouse and skirt to the Steerage Ball, with a wonderfully simple, yet very Edwardian coiffure, but of course I didn't get pictures of that... oops. There were fabulous outfits all around, but it was difficult to get pictures given that we were spread throughout a museum!
All in all, a lovely weekend full of fabulous clothing, beautiful music, and wonderful dancing. What a recipe for amazing memories!
We took a rather in-depth look at my new 1912 evening gown. Now, on to the second 1912 ensemble that I also wore during the weekend: day gown and hat!
Gown and hat with (unbuttoned...) white kid opera gloves. I'm so pleased with the overall effect! Unfortunately, I don't have pictures of the back. There are cool details back there, so another fashion shoot will be required in the future...
This gown is constructed from silk charmeuse. The skirt is a single layer in addition to the overskirt panel in front. The bodice has a foundation of the same white cotton as my new evening gown. Mounted on to that cotton are (from the neck down) layers of ivory silk charmeuse, ivory silk flat lined with fabulous ivory colored diamond lace, black silk velvet, and black silk charmeuse. The overskirt panel is trimmed with matching silk velvet and the belt is constructed of the same. There are small buttons on the overskirt velvet trim (because, really, the Edwardians just loved adding buttons everywhere!). Because the back bodice mirrors the front in its style (which unfortunately I don’t have a picture of right now…), I had to be crafty with my closures. The dress has two places that open with hooks and bars: the left side from just under the arm to a few inches down the hip and the left shoulder seam around the neck to the center back of the collar. The effect is a form fitting dress that looks like it was magically donned. The side closure is straight forward, with the foundation layer hooking first, to take the tension of holding the dress tight, and the outer charmeuse layer hooking over that simply to stay closed. Again, the foundation is essential to achieving the elegant, effortless exterior. The neck closure is a series of hook and bars that turn different directions to accommodate the seams: front to back at the shoulder, hooks that hook up on the collar to attach it to the back neck, and hooks going sideways on the center back of the collar.
In addition to the gown, I also constructed what I call the “mushroom” hat, which you can read more about in this previous post. I created the pattern for the hat, which is basically just a shaped brim with circular side band. The side band support the crown, which is a circle that is pleated to create that “mushroom” shape. I love the hat! It lends such an air of Edwardian drama and elegance to the look! And I am so pleased the the “mushroom” shape worked out!
Hm… Patterning this dress… Well, the general skirt shape is from Janet Arnold, but it is adapted to have two symmetrical box pleats that terminate at the top in delightfully detailed seams (which I really, really need pictures of!). The bodice pattern was draped with many references to my inspiration image. I created a basic shape for the bodice and then cut in into the different pieces (ivory silk, ivory silk and lace, black velvet, and black charmeuse) so that each piece would fit together perfectly. The belt is slightly shaped but doesn’t actually have a pattern.
The dress is inspired by this image from a 1910 issue of the magazine Bon Ton.
I'm sure you can guess, but the dress I was referring to is the one on the right.
In the end I made a few changes: I added a train, discarded the white under sleeves (I made them, I tried them, and they just didn’t work! They pulled the bodice in all sorts of weird ways… Maybe if the were not so tight they wouldn’t pull so much? I am fine with having gloves cover my lower arms, anyway.), and drastically scaled back the beading. Perhaps you’ll remember my plan to bead this dress? Well, the beading was drastically scaled back because I didn’t like the beads I bought as much as I thought I would (they are rectangular and larger than I thought… not seed bead-y at all), I realized I didn’t want to devote as much time as it would take to do the amount of beading I originally intended, I didn’t have enough beads to bead all four panels as much as the one panel I completed and I didn’t want to buy more beads, and I didn’t like the beading motif I had created, nor was I inspired to change it. You can see that I did leave one outline shape of beading on the bodice in the velvet section, but the rest was scrapped. That one line is repeated front and back (symmetry, you know). I did actually complete the overskirt top panel, but decided not to use it after my scaling back plan was complete (you can see it, below). I’m going to keep the beaded panel and see if it finds its way onto another project one day… I would still love to do intense beading on a garment, but I’ll have to pick a different one, because it wasn’t measuring up to my expectations for this dress.
Scrapped beaded panel. A mix of silvery and black beads. I started in the center with the somewhat wonky lines, can you see improvement? I think it would have been distracting from the dress to have four panels like this.
I recently returned from a successful Titanic-themed weekend of events, including multiple vintage dance opportunities. I’ve been working on some new clothing for these events since January, which you can read more about in my past posts relating to the 100th Anniversary of the Titanic. I’ve been rather remiss in posting updates about the progress of the new dresses I constructed for these events… So my first task is to share pictures of my attire and explain the inspiration and construction of the garments.
I created two new 1912 ensembles: an evening gown and a day gown with accompanying hat. Let’s start with the evening gown!
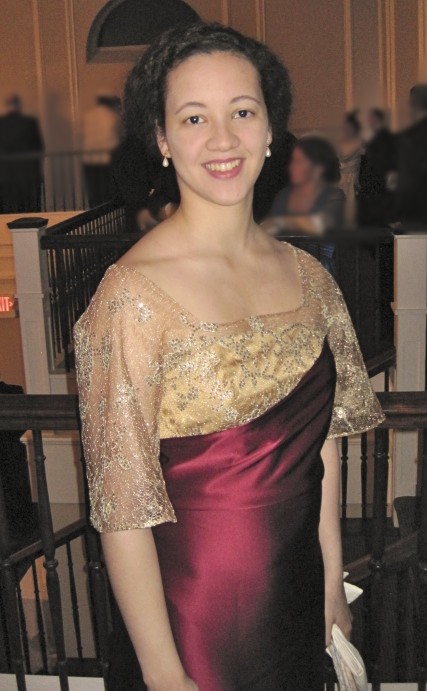
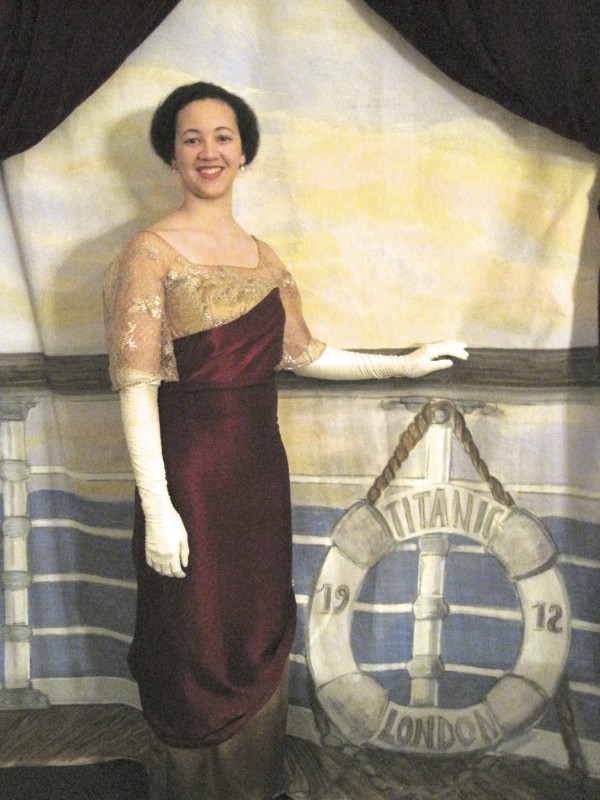
My camera had a challenging time capturing the colors and shimmering sequins on this gown, but this is a good representation of the colors. Look! I wore my ballroom dance shoes, which worked well, and my white kid opera gloves and pearl drop earrings... fabulous!Fabulous painted backdrop! Perfect for taking photos, although my camera didn't quite catch the colors so well in this photo. I think this gown is so much more fabulous in person! I was told that the sequins just shimmer in subdued mood lighting.
This gown is burgundy silk charmeuse with a gold silk charmeuse underskirt. The bodice is gold silk layered under gold sequined net. The sleeves are the same gold sequined net flat lined with nude colored tulle: the tulle provides unnoticeable stability for the net layer. The burgundy layers are pleated up and held in place in two places by gold silk and sequined net covered buttons. The bodice and skirt are lined with brown cotton and the entire dress is mounted on a foundation of some extra white cotton which I have an excess of in my fabric stash. The foundation layer is essential to the drape of the dress, because it provides stability as well as a layer to attach all of the pleats and drapery points to. The foundation allows the burgundy silk to effortlessly hang and artfully fold without looking heavy or as though it serves to hold an weight. The foundation layer also supports the underskirt which is attached at about knee height (thus not extending all the way up to the waist and saving fabric). If you plan to create a draped Edwardian gown I strongly suggest that you include a foundation layer: the practice is historically accurate and will help your dress look effortless rather than heavy. This gown closes center back with hooks and eyes along the gold sequin area and a complicated series of further hooks and eyes at the top of the burgundy back drape. The hooks and eyes help create the tension that is required to keep the waist carefully draped in elegant folds across the waist.
There is not a hat associated with this gown because hats were not worn for formal evening events. I did create a wonderful Edwardian coiffure with loops and puffs of hair on the crown of my head surmounting the two front sweeps from the front as they swooped around the base of the back of my head. Unfortunately, I didn’t get any closeups of the style. I feel it is necessary to encourage you by saying that the more often I practice my Edwardian hair styling the faster I am and the better the styles look. You, too, can have fabulous Edwardian hair! Practice! Practice! Practice!
I draped the pattern for the foundation, bodice, and sleeves. The underskirt is a mix of information from the usual pattern book culprits (Janet Arnold and Norah Waugh) that I took in and then kept in mind while flat patterning a knee high underskirt pattern. The outer draped layer is just that: draped. It was a good challenge–I would have a hard time creating a flat pattern of that layer. All I can say is that it is just one rectangular piece of fabric that was sometimes frustrating and draped with many references to my inspirational images.
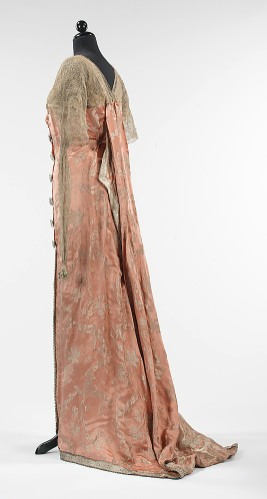
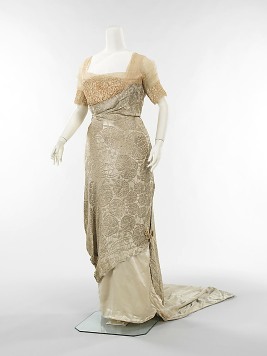
It turns out that the evening gown is a mash-up of two gowns (pictured below) at the Metropolitan Museum of Art. I think I started by aiming for the pink dress but wound up moseying my way along to the pale blue dress. Do you see the influence of both the pink and pale blue dresses? I do…
1914 Callot Soeurs evening dressSide/Back of the same.1911-1914 Callot Souers evening dress.Side/Back of the same.
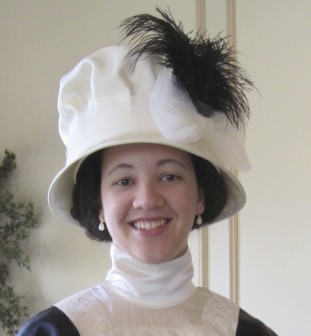
The specifics: wired buckram brim and sideband, ivory silk charmeuse flatlined with ivory cotton to cover the brim and crown, bias cut ivory silk shantung brim binding, trimmed with ivory tulle and black ostrich feathers, lined with the same ivory cotton as the flat lining. (Did you know that craft stores sell tulle in 6″ wide rolls 25′ long in all sorts of colors in the bridal section??? This is great for hats!)
All in all, I’d say the hat turned out beautifully! I didn’t take the time to smooth out every bubble in the silk charmeuse along the brim, so there are a few bubbles… but I think I’m the only person who will ever notice them. It’s rather a tall hat… But I like it! I think it achieved the mushroom-y look I mentioned in Part I of the Ivory Mushroom Hat adventure and it has space in the head size opening as I intended. It even resembles a mob-cap, as I mentioned in Part I. Yay! I think it lends some serious Edwardian grandeur to my look. Full length pictures of the tea gown are coming soon so you can decide what you think about the hat.
It turns out that hair makes a great bandeau! I added some fake hair to my coiffure for tea to help support the hat in the back and it worked wonderfully. Without the extra hair the hat slips down over my face to a point somewhere around my nose… luckily, my poofy hair plus some extra hair works wonders!
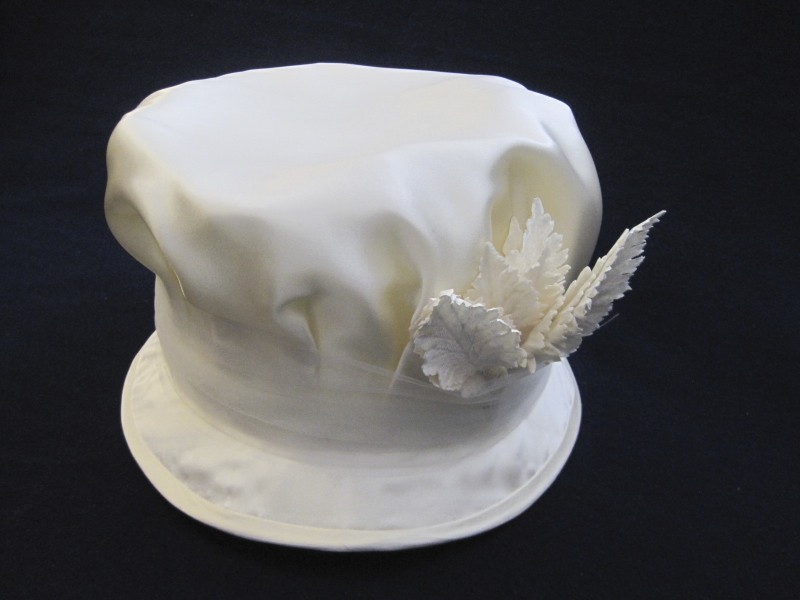
I decided to trim the hat with black feathers and an ivory tulle bow because all ivory was overwhelming… the tulle trim is lost, whereas when black feathers are added the tulle trim suddenly stands out as well. Judge for yourself, below! Here are some other trim ideas I sampled on the hat before making my decision.
All ivory with a tulle bow.All ivory with ivory millinery leaves.With black goose biots.
The plan: to create an ivory and black hat to accompany my (almost) completed Titantic-era tea gown. I started with some ideas in mind, but was also open to inspiration from challenges of construction or materials. I raided my millinery trim stash for ivory and black millinery flowers and leaves, black and white ostrich feathers, pleated and plain ivory ribbons and trims, and other practical necessities like millinery wire, buckram, and organza…
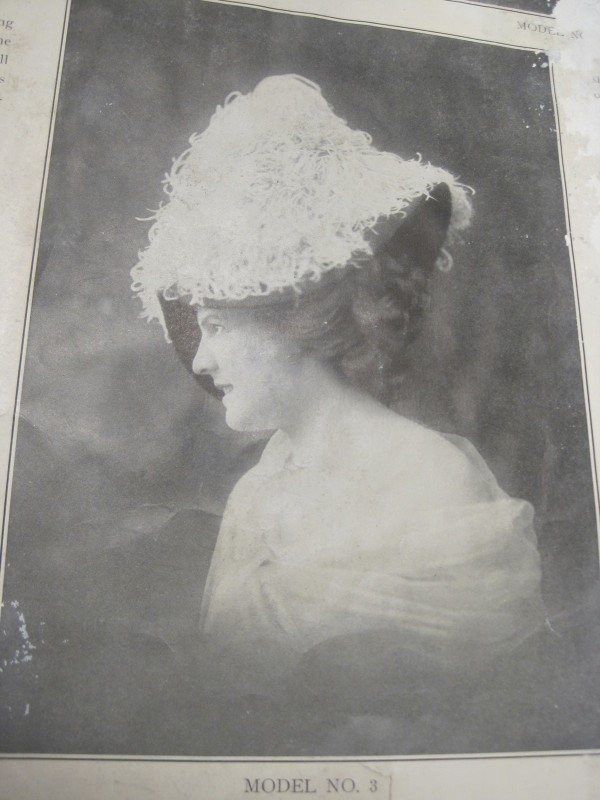
I’m calling this hat a “mushroom” hat because it is my goal to make the crown roomy about the head and puffy in the crown, like a mushroom top! You can see this mushroom-y detail in the images below: look at how the head size opening is often bigger than the head! Given that the head size opening needs to be big, one challenge I will face is figuring out how to make the thing stay up on my head and not fall down over my face. I’m not sure big hair will be enough… That’s something I’ll have to determine once the hat is complete. I might have to use some sort of bandeau inside of the hat to support it. Bandeaus are often used to perch hats on the head, especially in periods like the 1870s and last quarter of the 18th century, but it seems like a practical solution to this 1912 hat perching problem, also! I’ll have to let you know how the bandeau situation turns out.
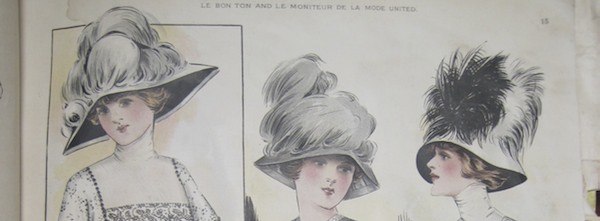
A selection of inspirational and awesome hats from a 1910 issue of the magazine Bon Ton. I particularly like the be-feathered hat on the far right...From the 1910 issue of Bon Ton. Look at how huge that head size opening is! And the feathers are just giant! I don't plan to attempt to create this, but I do think it fabulous!Another fabulously feathered hat from Bon Ton, 1910. Also included simply because it is wonderful, not because I intend to build it...
These last two images show the direction this hat is going. I love the mushroom-y shapes (which also resemble mob-caps), large scale trim, and head size openings.
Another hat from the 1910 issue of Bon Ton. This hat is one of my top inspirational images for my hat creation. It has that mushroom-y shape.The hat on the right from The Metropolitan Museum of Art via American Duchess. Love the mob-cap-like/mushroom-y shape... and that buckle! Wow!