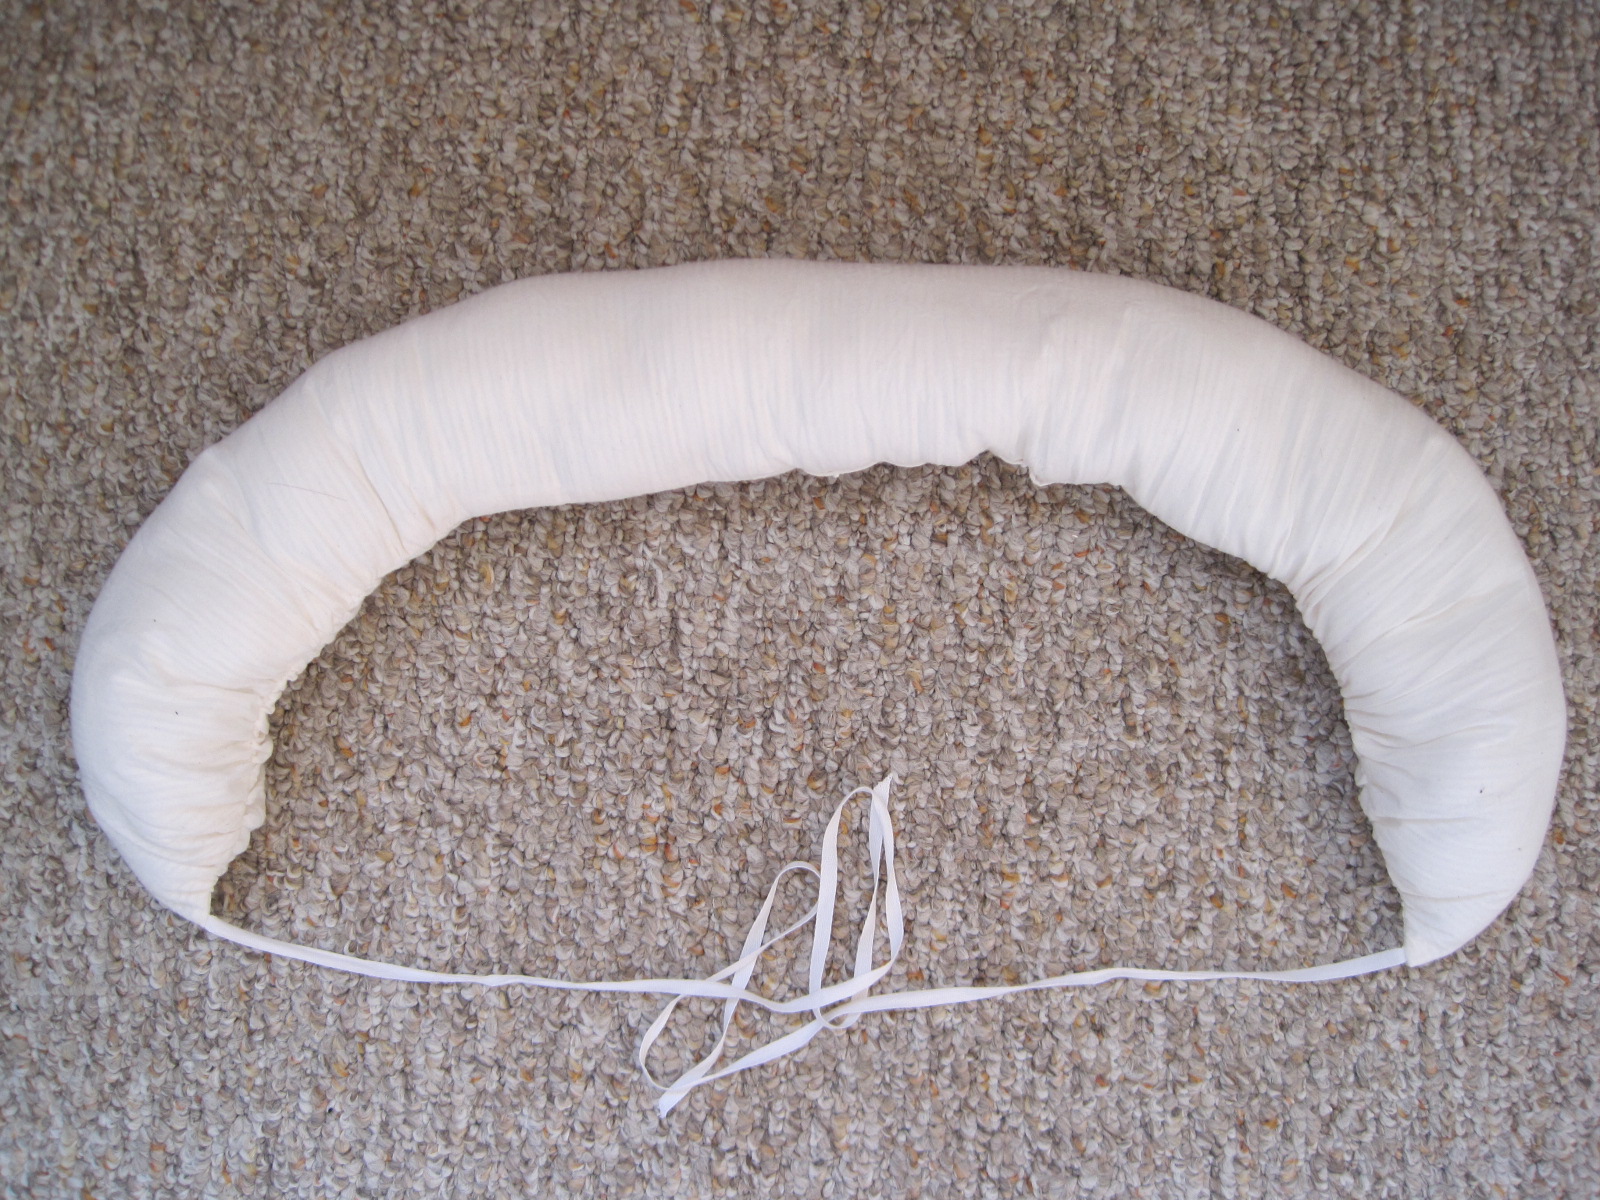
When I posted about my new apricot 18th century petticoat, I also mentioned that there was a sneak peak at my new bum roll in the pictures. Remember? The bum roll fulfills the HSF #15 Challenge: White. It’s a rather simple accessory, so there’s not a whole lot to say about it.
Ooo… A white bum roll!
The facts:
Fabric: About 10″ white striped cotton
Pattern: None, the bum roll is just a rectangle that’s gathered at the sides and tapered a little toward the front points.
Year: Loosely 1700-1780.
Notions: Thread, poly fill, 1/4″ white cotton tape for ties.
How historically accurate?: I give it 80%. Bum pads/rolls in the 18th century were probably not made of cotton or stuffed with poly fill. But the shape achieves the desired silhouette and is in the vein of research I have seen on 18th century bum rolls.
Hours to complete: 1
First worn: Well, Squishy wore it for pictures!
Total cost: The fabric was $1 a yard, so about 30 cents.
The gathers are what creates the crescent shape. It pulls in to be a tighter curve when tied around the body as well.
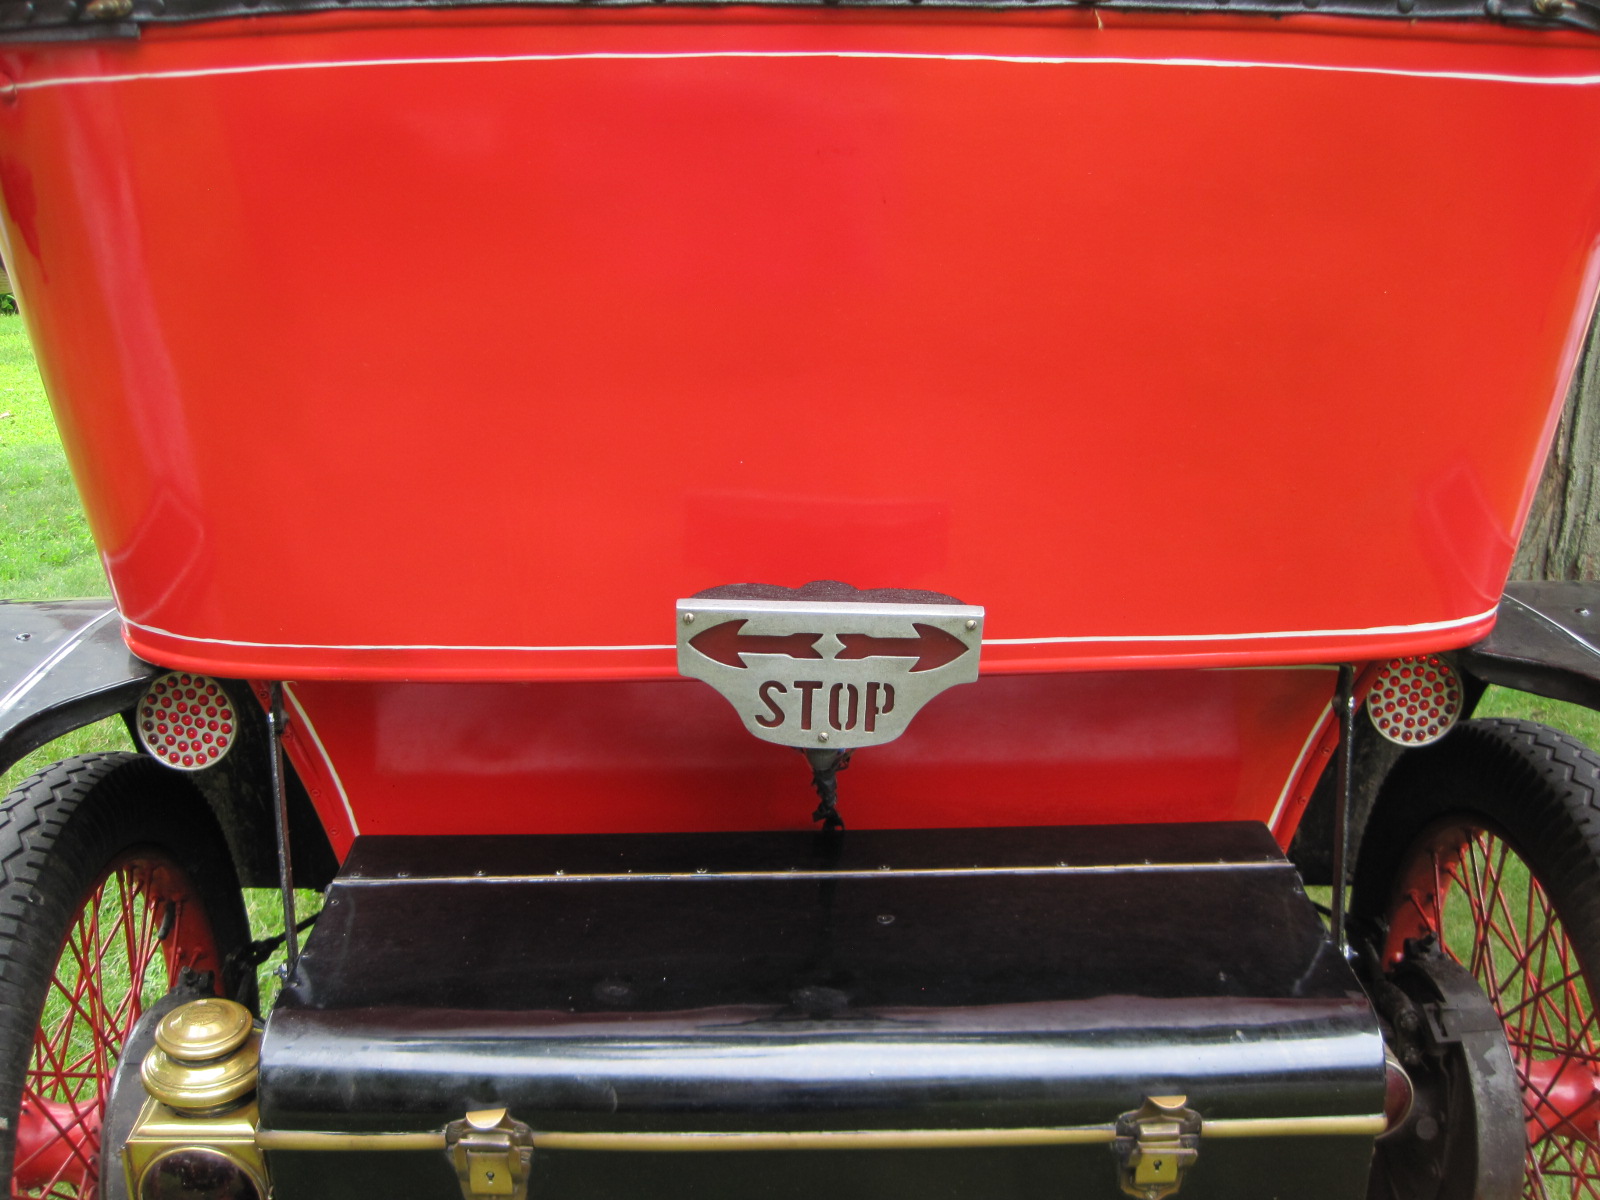
Remember last post, I told you I was going to share some “artsy” photos from the Model T event that occurred recently? Here we are, it’s time.
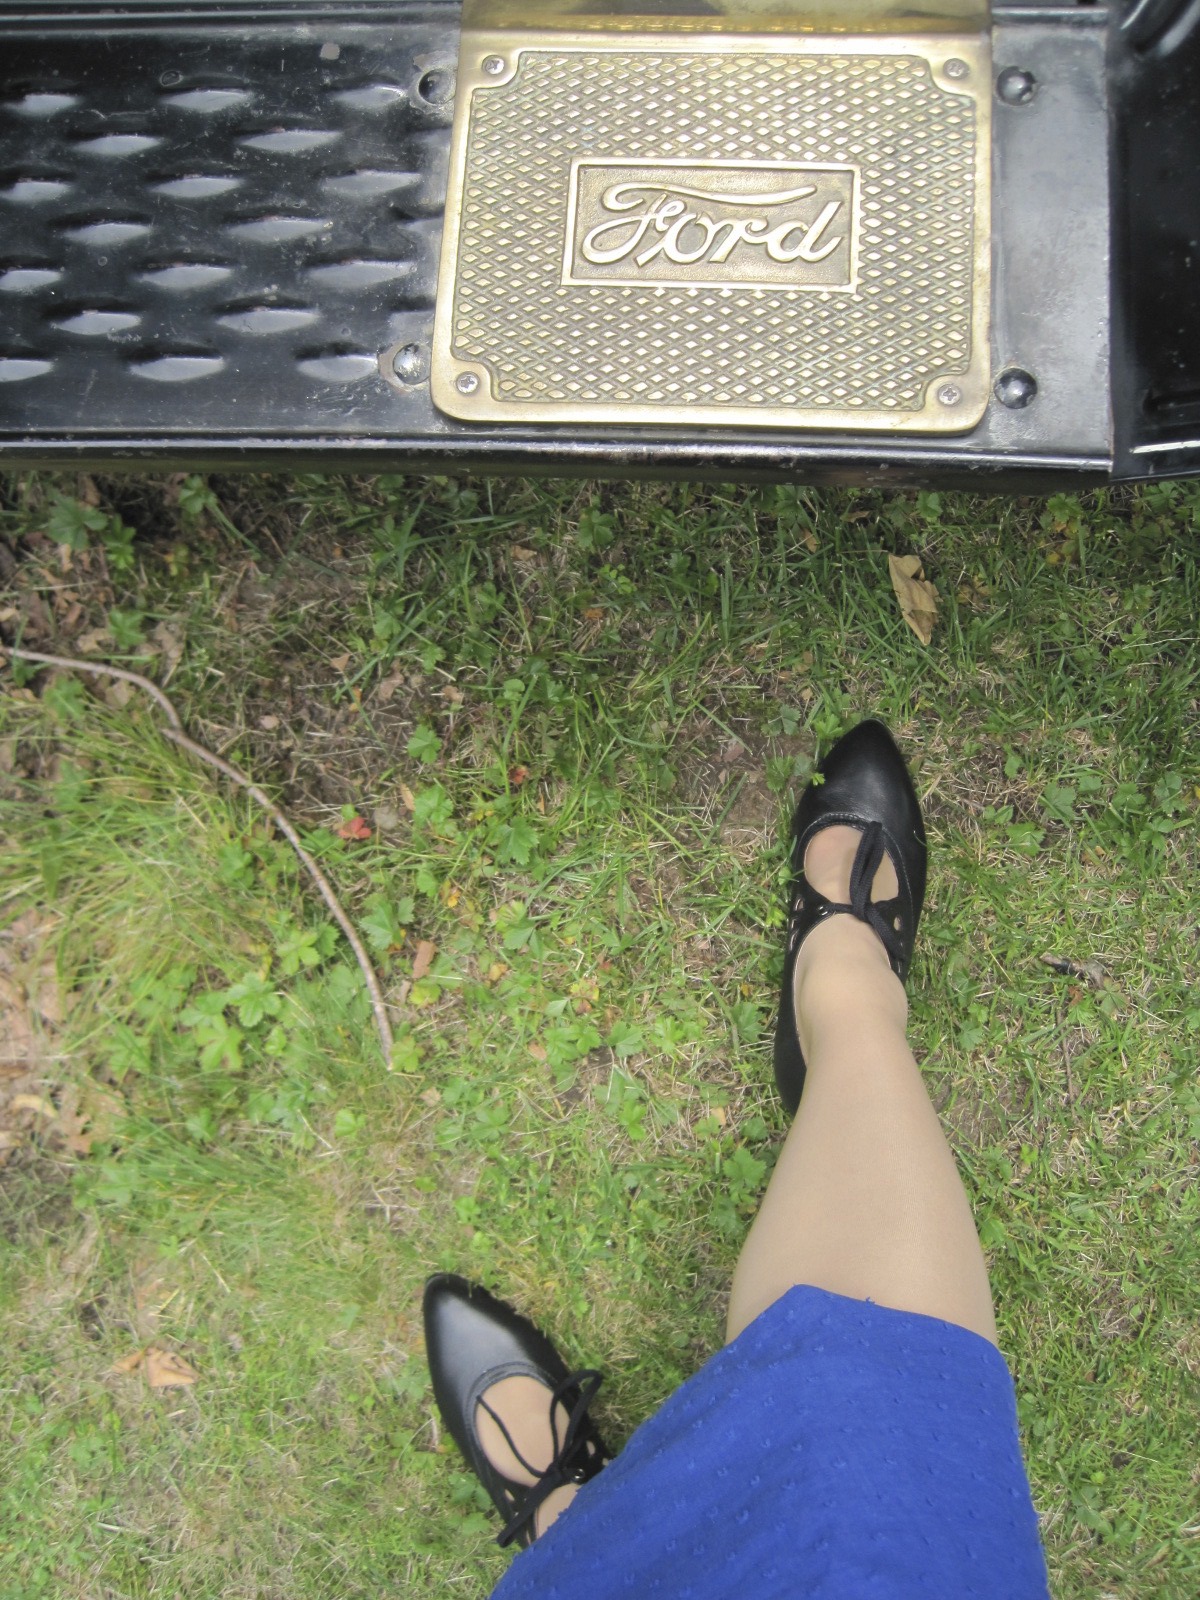
Close up of a wheel with the Ford logo in the center.Isn’t the stop/brake light situation cute? I love it!I like the spare tire on this green car.And the glass in this headlight has a lovely pattern.I wanted to get this shot of the Ford logo with my new shoes, American Duchess Gibsons.
This link contains an affiliate code, which provides a small benefit to my shoe fund. This does not affect my impressions and reviews of this product.
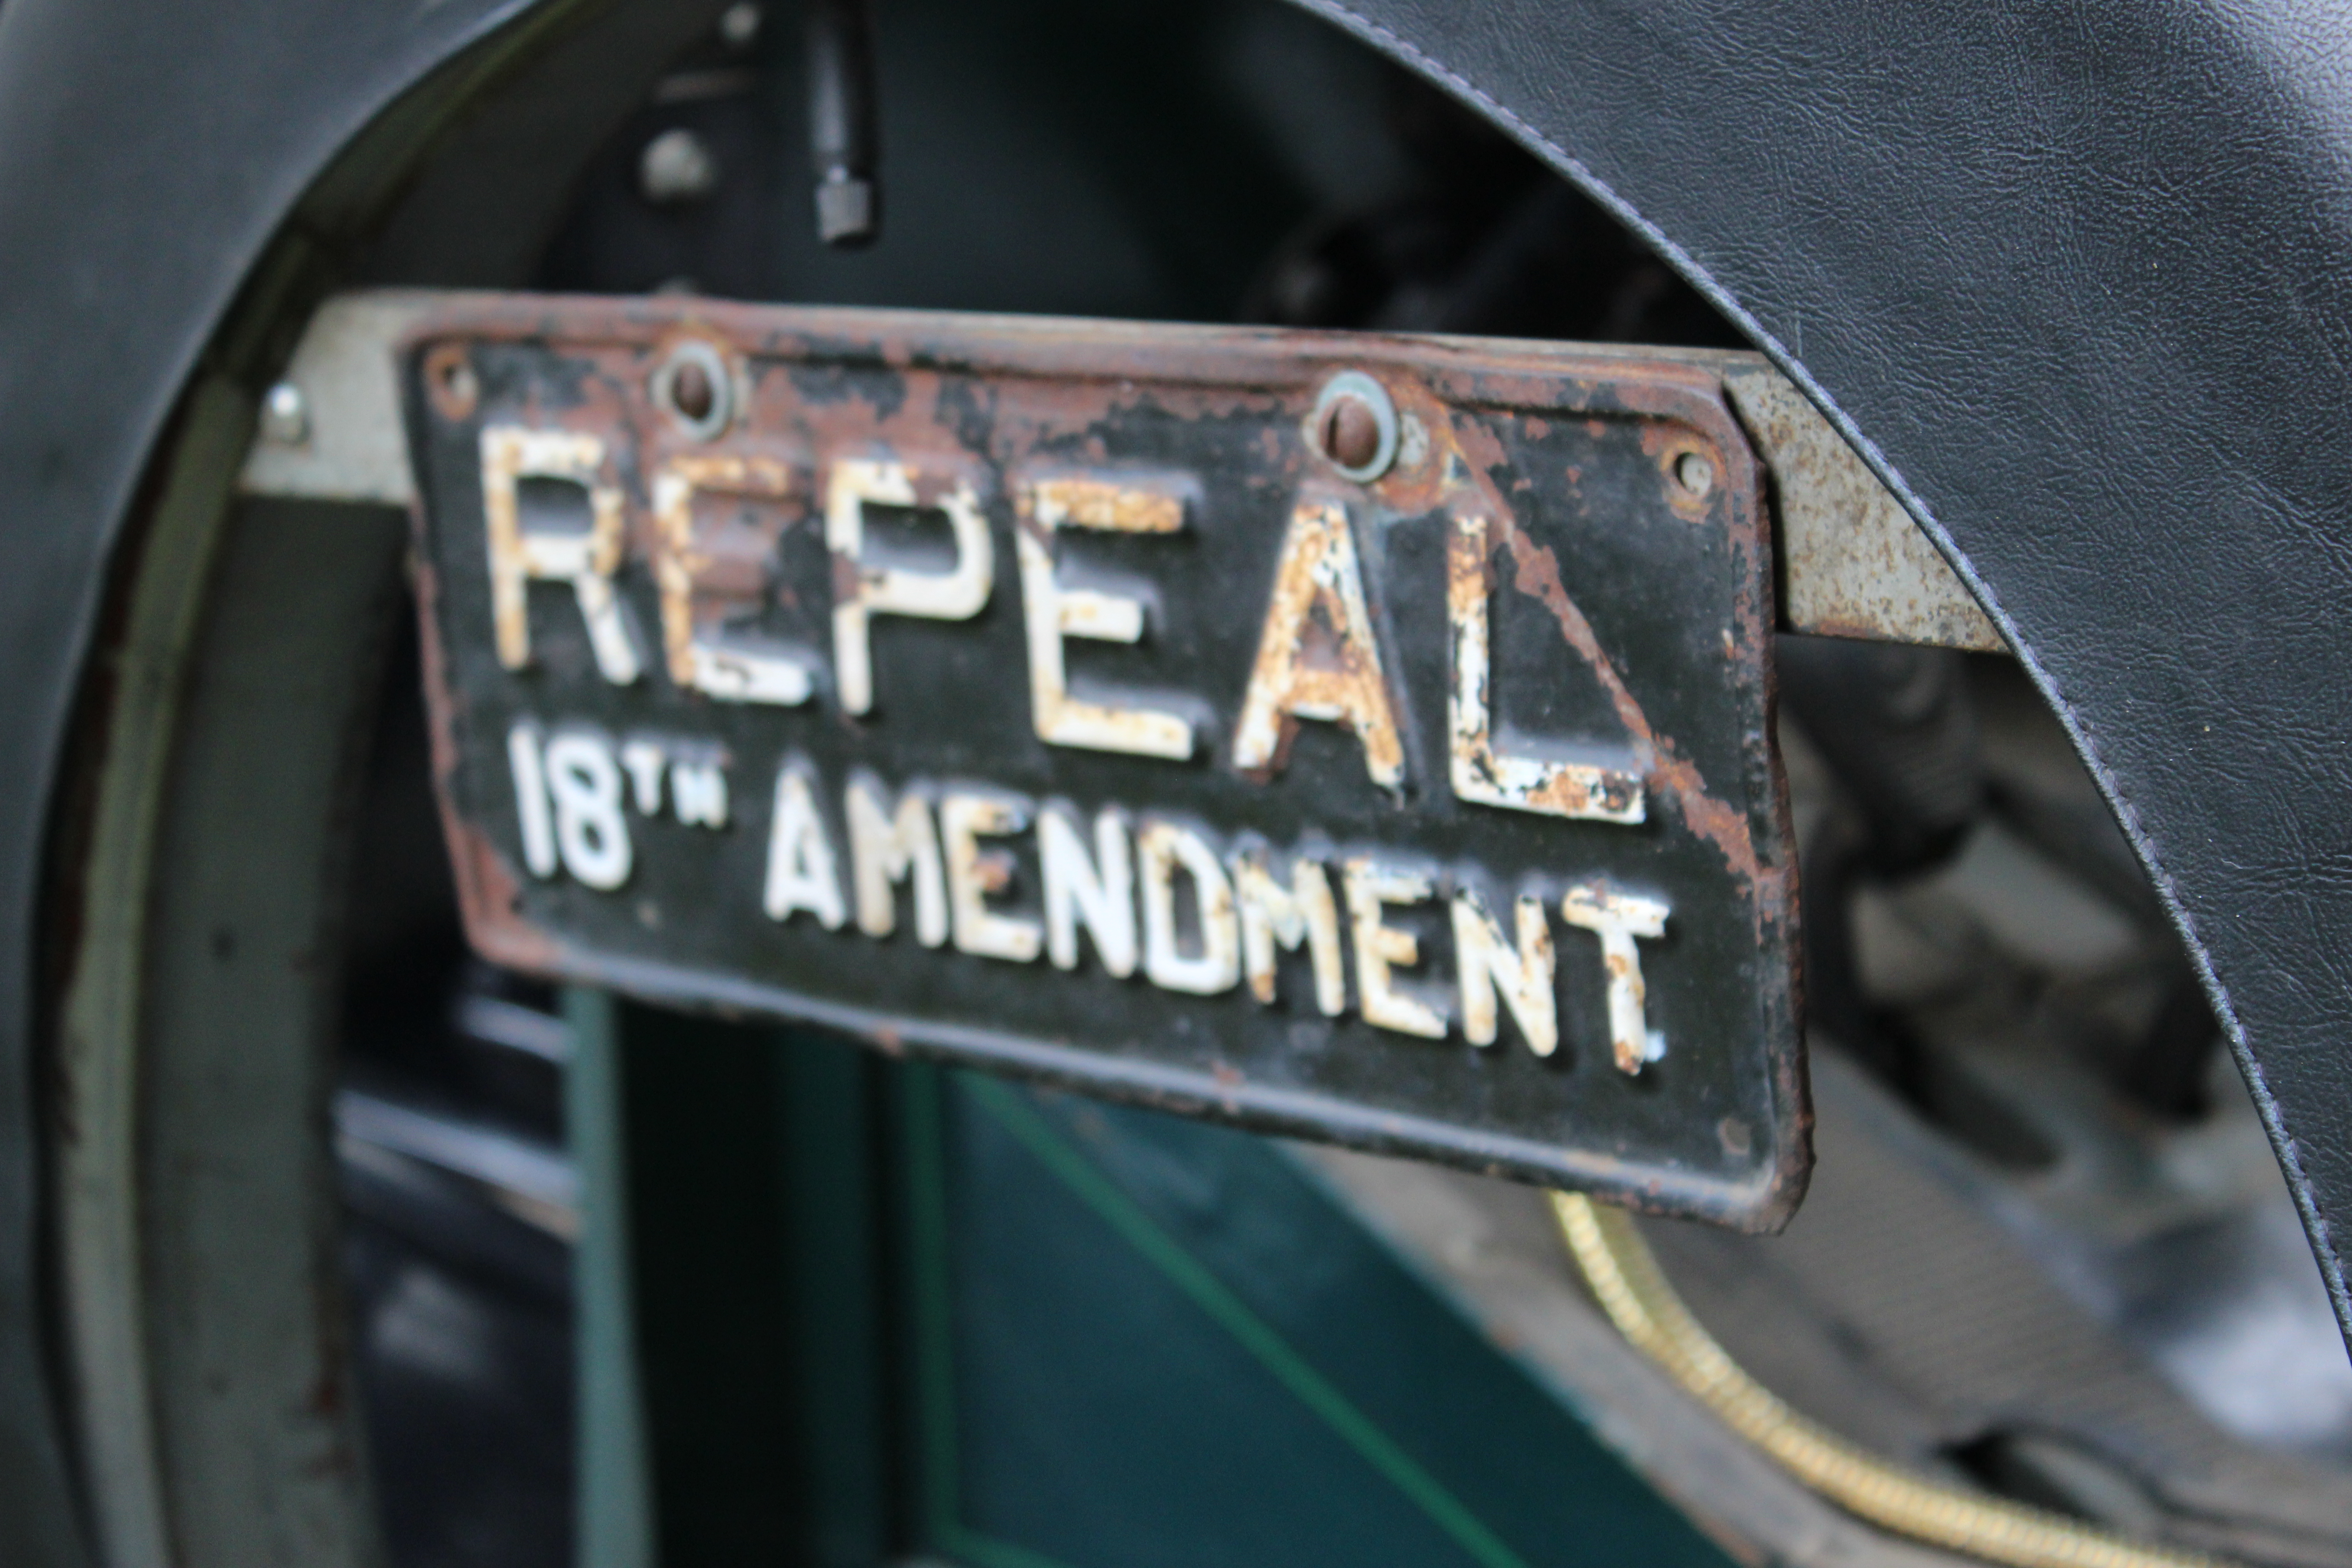
Here I am! Someone else got me getting my feet!Speaking of shoes, we were playing with focus in this shot and the next.Same photo, but in one the focus is the wheel and in the other it’s my feet.Attached to one of the cars. (The 18th Amendment is the one that established Prohibition.)See us reflected in the windshield? We tried to look like we were driving, but that didn’t work, so we had to settle with this.
That’s it! I hope you enjoyed this 1920s Model T adventure. I sure did!
A few posts ago, when I introduced The First Picnic Of The Summer, I mentioned my involvement with other events that same weekend. It’s time to share pictures of another event from that weekend: an afternoon of music, dancing, and Model Ts at the Braintree Historical Society in Braintree, MA.
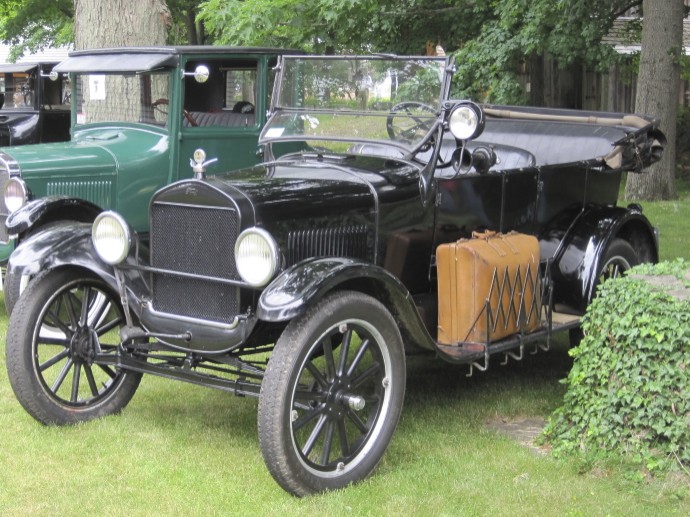
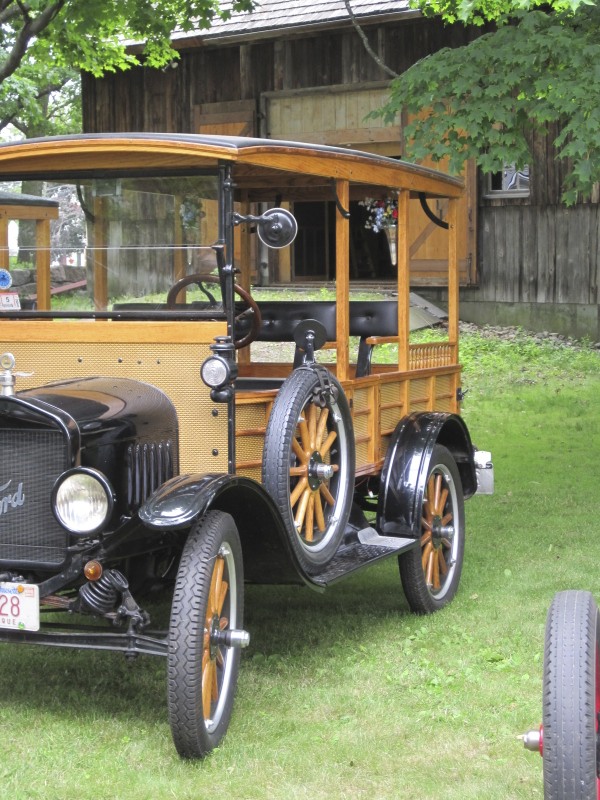
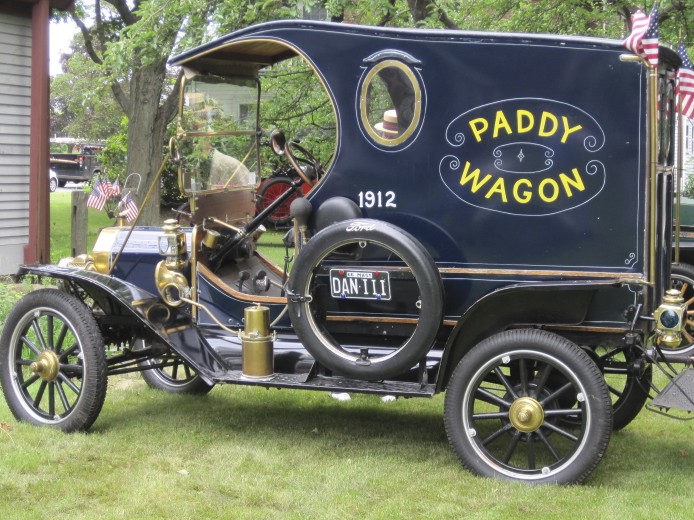
Let’s start with atmosphere: some Model Ts! Model Ts were produced between the years 1908 and 1927 by the Ford Motor Company. My grandfather worked for Ford years ago (though not on Model Ts!) and I have family members who still live in Michigan, so I feel a special connection to that part of car history. As far as I could observe, all of these Model Ts were still operational, drivable, and licensed to drive on the street! Neat!
Front view of a Model T.I love the luggage storage on this one!Pretty swanky, with all that gleaming wood!I like that this picture has a modern car in the background!Need I say more? It’s labeled!“R. I. Brow & Son; Oil Dealer” I love it! Especially with the canisters attached.Two Model Ts parked in front of the barn.A pretty fabulous red Model T with be-boater-ed gentlemen lurking behind it… (They had no idea I was taking a picture! bwhaha!)
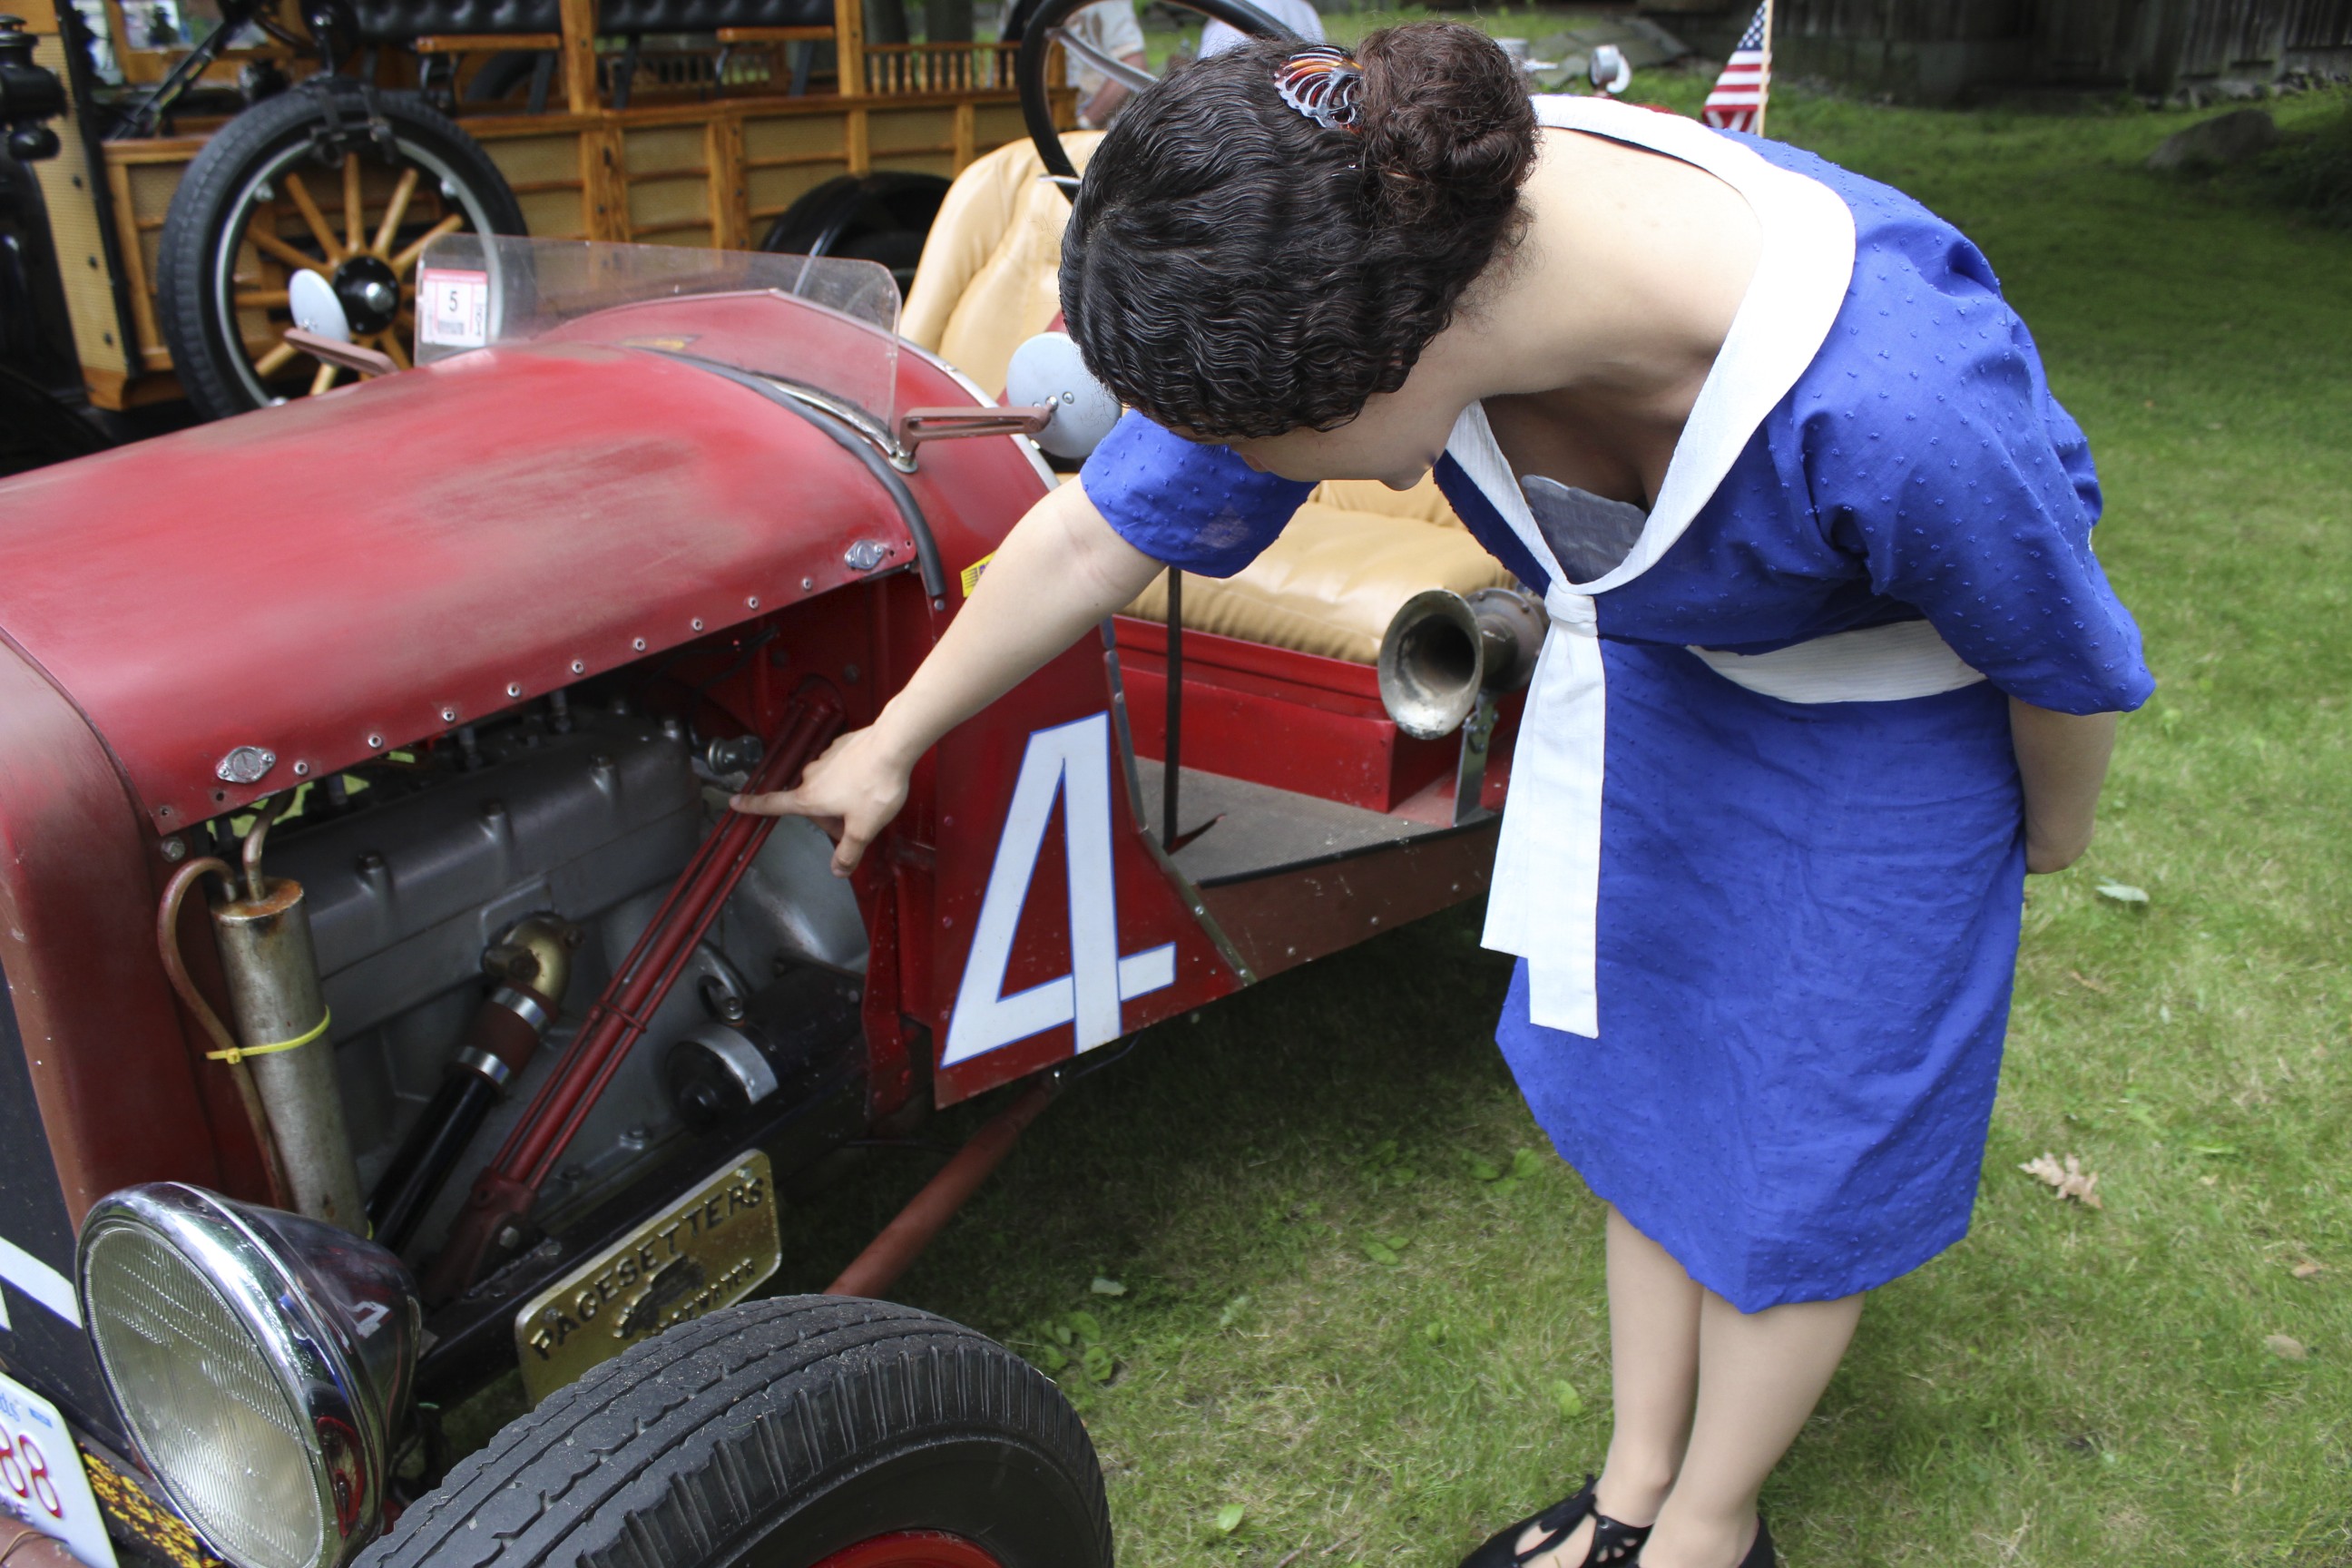
The reason we were in attendance at this event was to do a few small dance performances. We did the same 20s dances that we performed at the Great Gatsby: the Charleston, Tango, Foxtrot, and One Step. I don’t have pictures of the performances… but in between performances we had time to wander amongst the Model Ts and have a picnic lunch.
Oh yes, and I wore a new 1926 dress and my all new American Duchess Gibsons! I also attempted some “make-do finger waves” in my hair. Basically, that means that I didn’t try for real finger waves… I just put some gel in my hair and used a fine tooth comb on the top bits. Since my hair has natural waves it just dried in a sort of wavy way and I put up the back in a low bun. I think it turned out pretty well, though, for not trying that hard!
This link contains an affiliate code, which provides a small benefit to my shoe fund. This does not affect my impressions and reviews of this product.
The dress was made because we needed day clothes for this event and my other two 20s evening dresses are not appropriate. As I mentioned in the post May Fabric Stash Additions when I shared this fabric, I wanted a cotton so it would be lightweight and washable… and this is what I wound up with. I thought it might be to sailor-y, but in the end I don’t think it is! I like that it’s a rather striking color and not something I would normally pick out for myself.
I didn’t use a pattern for the dress, I just sort of used my measurements and made it up while referencing a lot of 20s patterns in the COPA archive for skirt shape, mostly. The front and back bodice and sleeves are all one piece cut in the kimono style. It’s all french seamed and the skirt and sleeves are finished with hug snug. The waistband is a little messy on the inside, because I haven’t taken the time to finish it and because the sides were doing a weird thing I had to fix with a wonky side dart. But eh, no one will see the inside! I’m glad it’s done and I like the faked tie-collar.
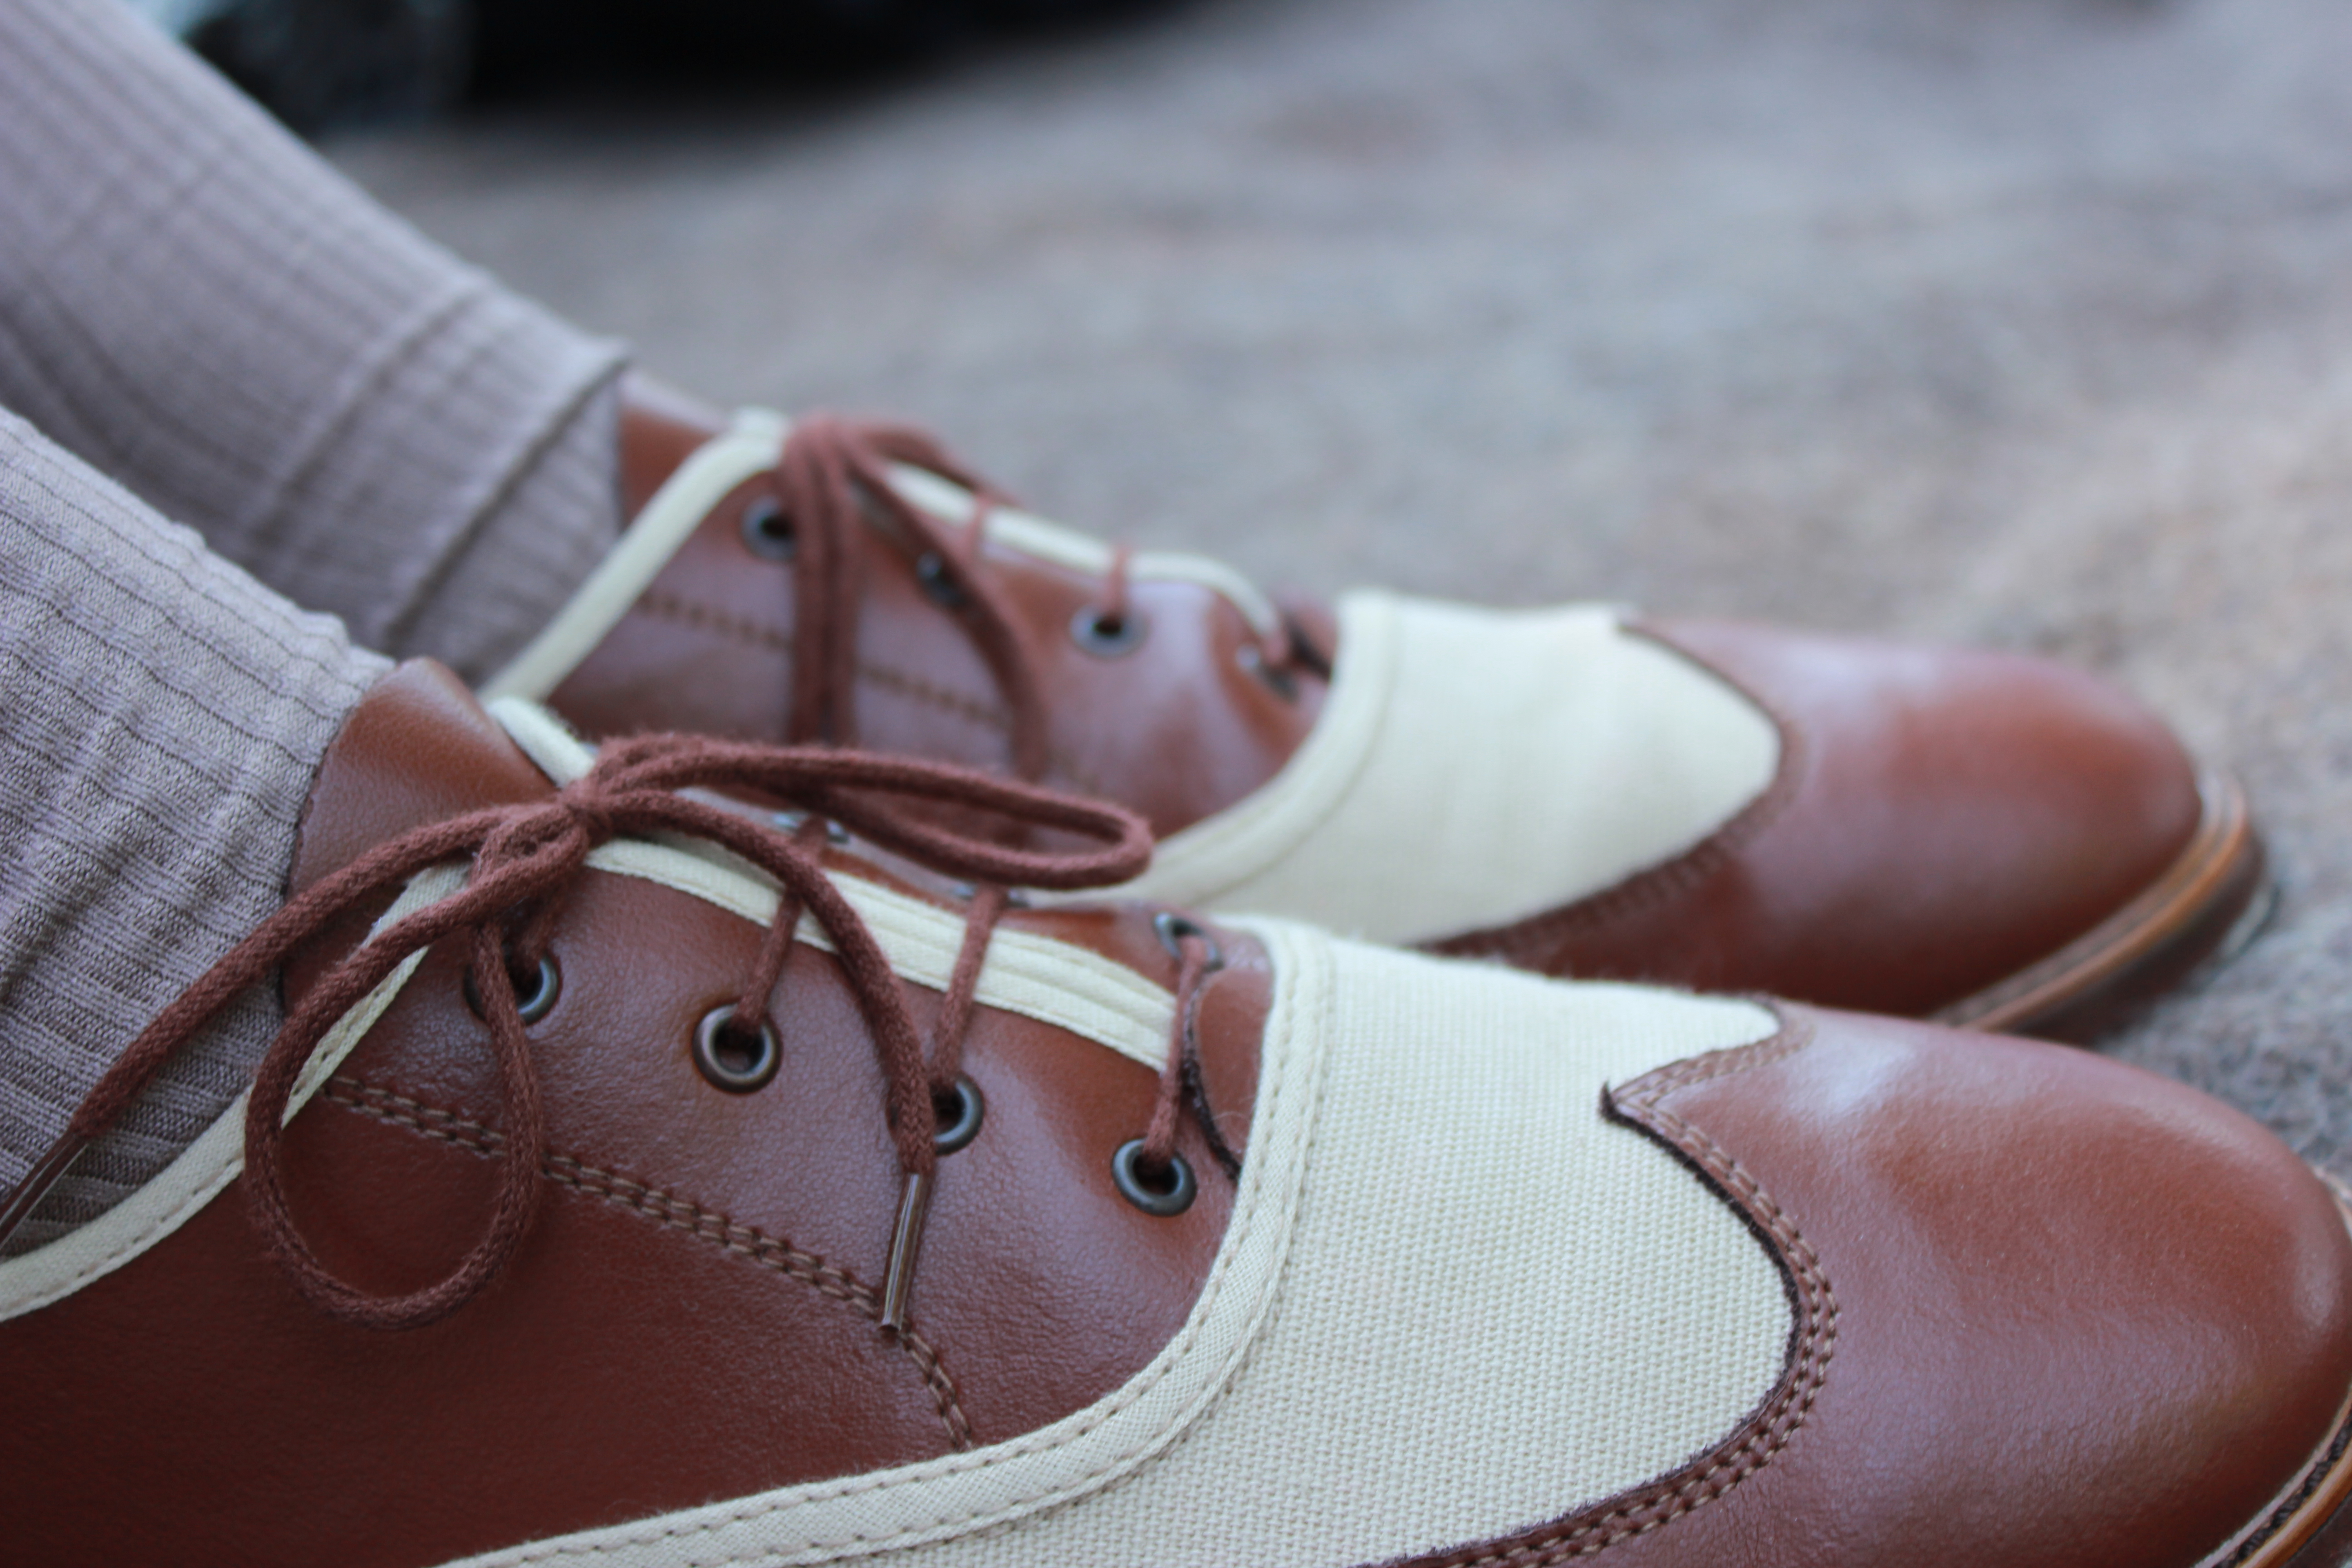
Gibsons!
The Gibsons are comfortable and cute. I like that the sole is a little thicker than on my Astorias, because it means the pointy toe shoe leather isn’t getting scratched while I walk (as it is on my Astorias). The toes are pretty pointy but they are starting to stretch to my foot shape, so that’s good.
Trying to pose… “This is an engine. It moves the car.” Plus, new dress and a good view of my hair!Looks a lot different from a modern car engine, doesn’t it?A better view of my new 1926 day dress and Gibsons.Another view. The red car is fun, too!
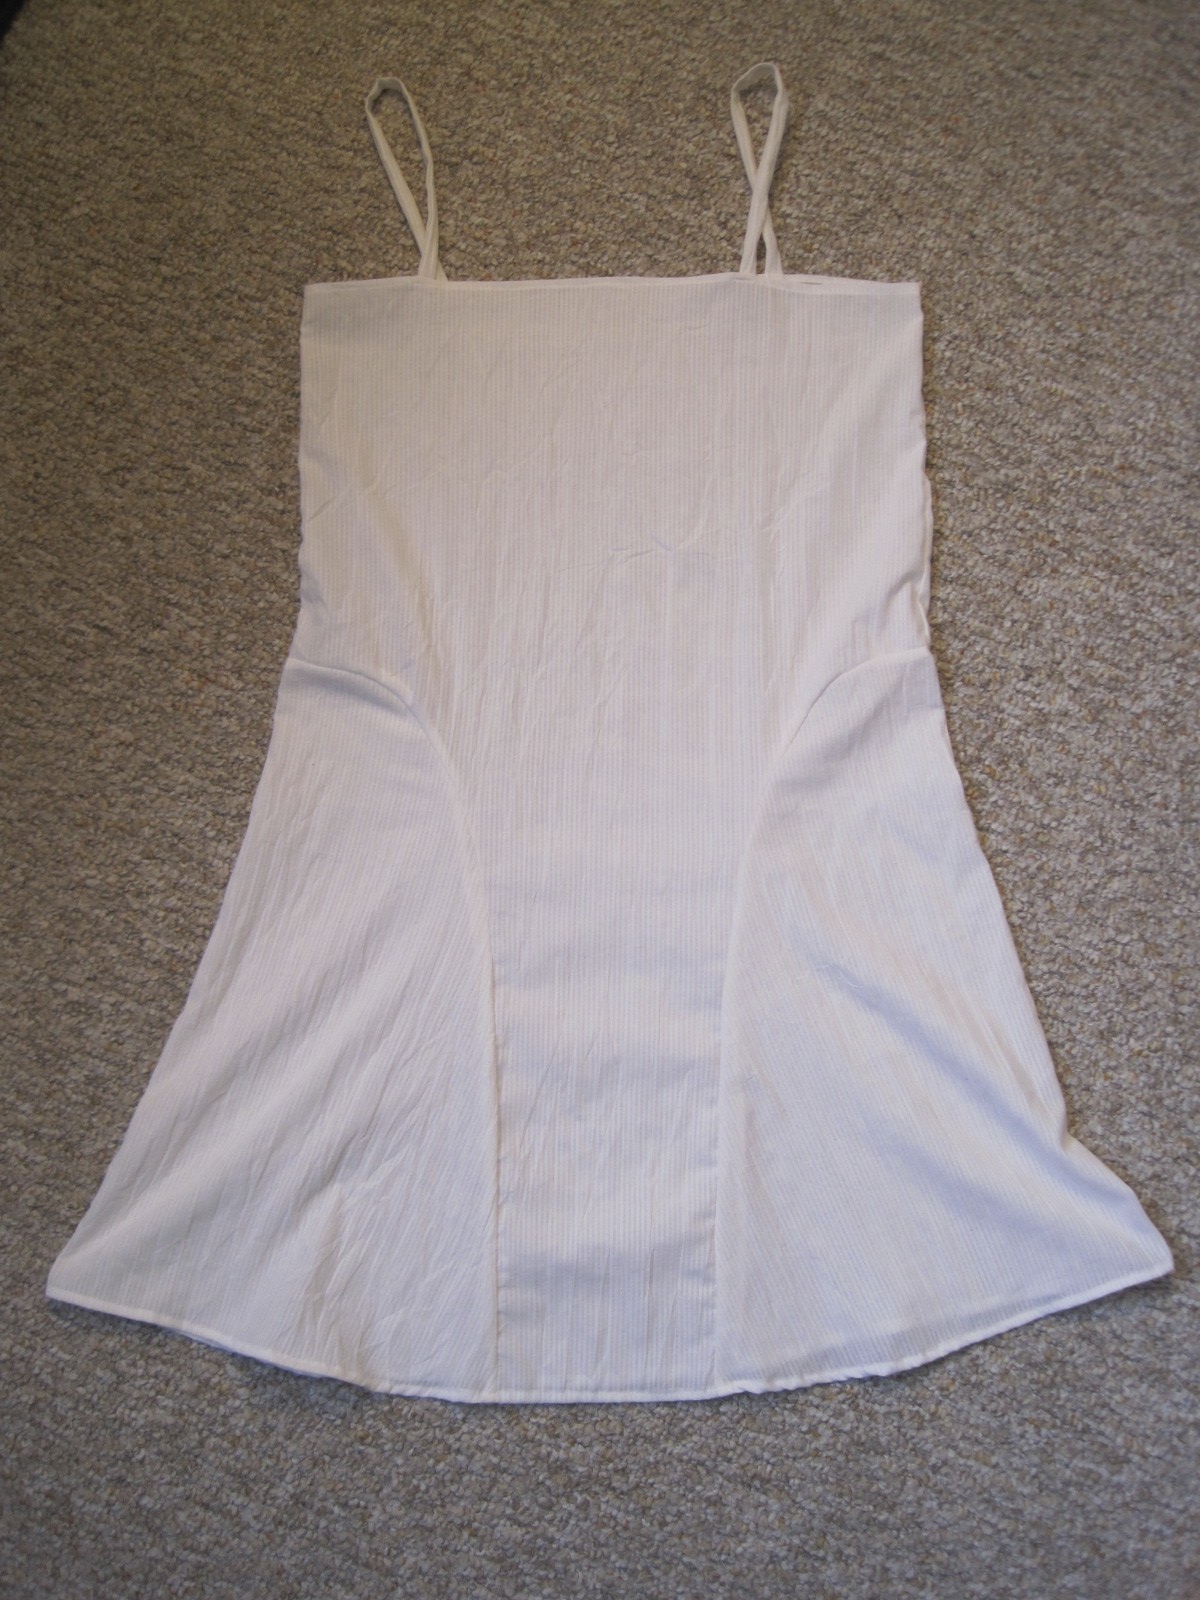
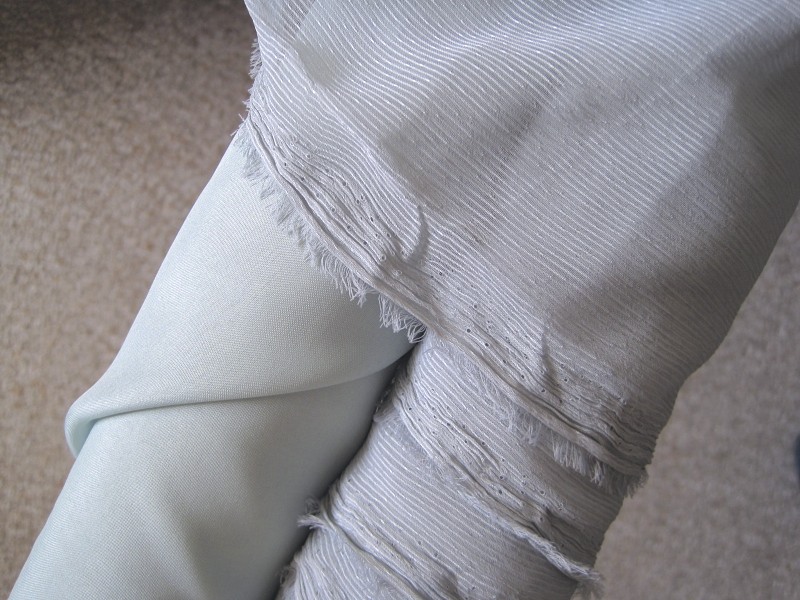
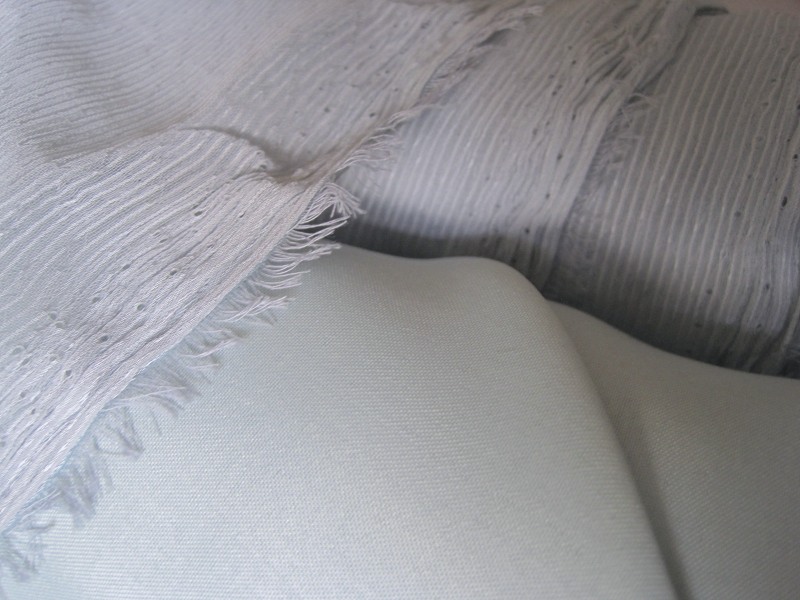
The blue cotton is slightly sheer, so I made a cotton slip to wear under the dress to add opacity. It’s made of the same $1/yd white cotton that the trim on the dress is made of, so if it shows at the neck or elsewhere it just blends right in. I used the same measurements I used for the pink slip of my 1925 beaded dress. I was inspired by looking at 1920s patterns to add the curved panels on the side instead of having another straight slip.
White slip to go under the 1926 day dress.
As I said, in addition to looking at cars and dancing, we also had a picnic lunch.
1920s picnic!After eating we listened to some stories read aloud.And read some 1920s magazines!
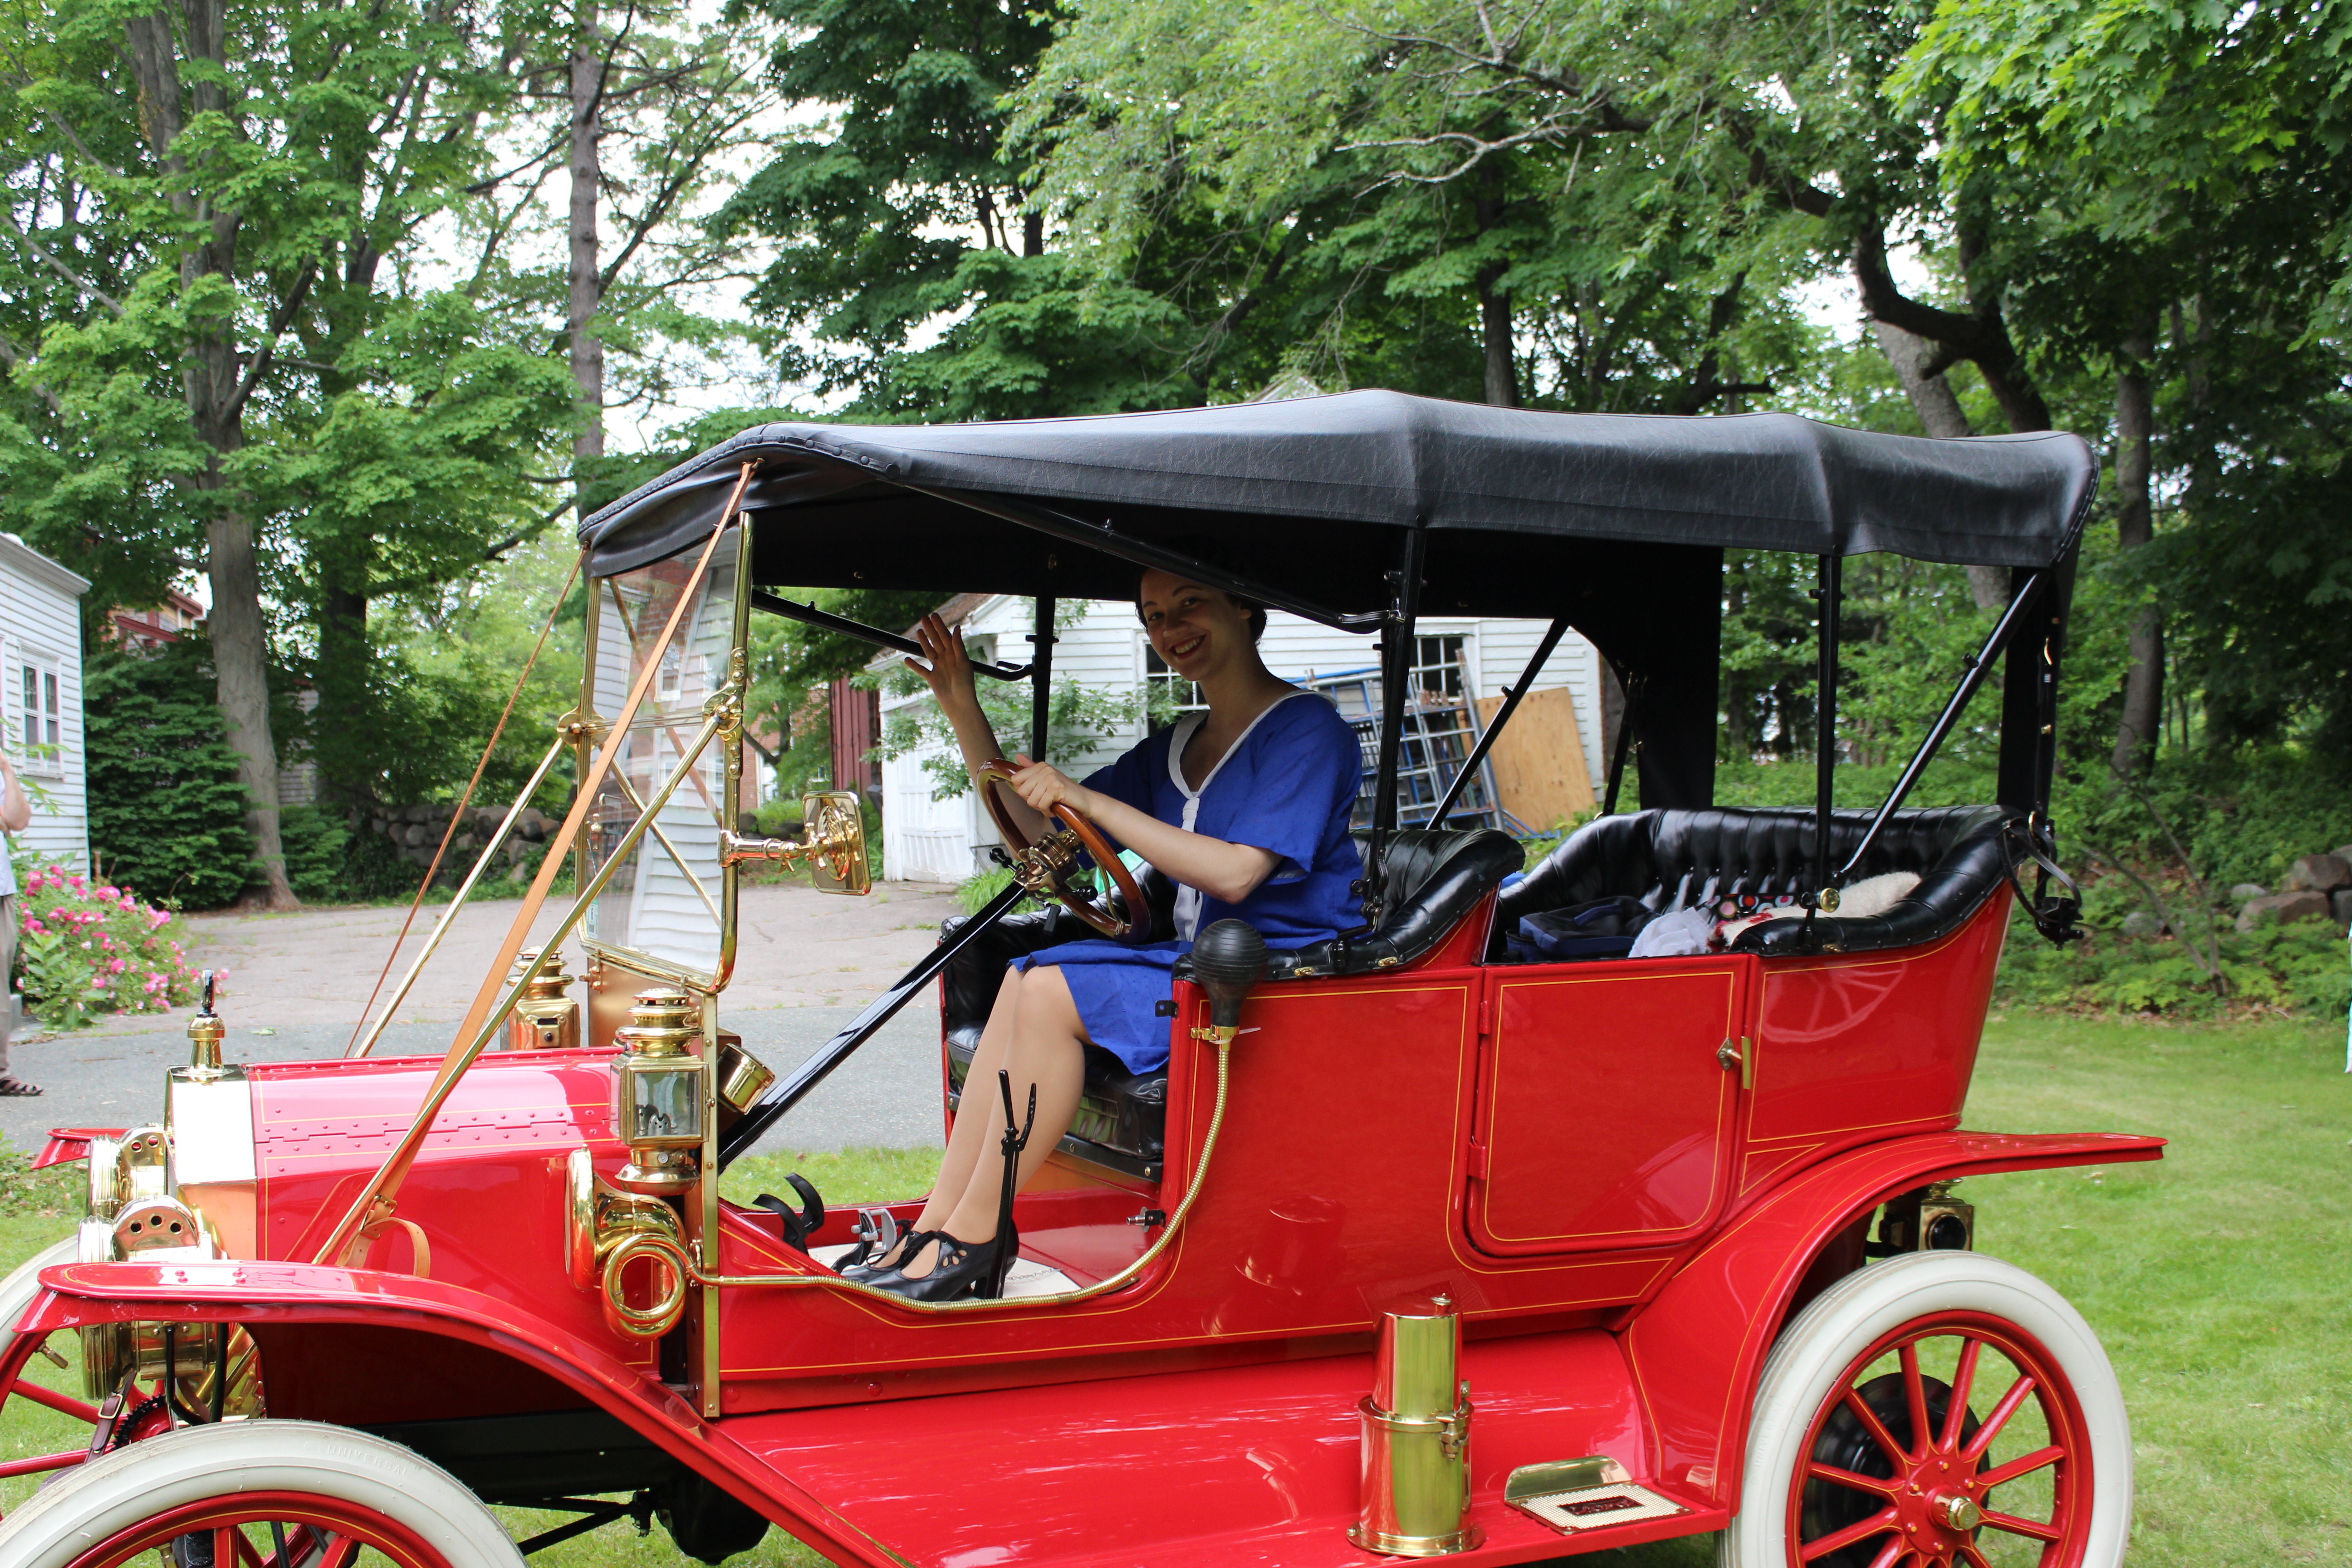
One of the most exciting parts of the afternoon was when one kind gentleman asked if we would like to sit in his 1920s car! Of course we said “Yes!”
“How do I drive a car?”Practicing my princess wave.
All in all, it was a pretty fun, low-key event. Next post I’ll share some of the more “artsy” photos from the day, as I did in The First Picnic Of The Summer: Part II.
Life! Is often great, but does rather get in the way of sewing plans sometimes…
This HSF challenge #11 had a due date of June 3rd. I actually finished sewing on June 18th, but I’ve been busy posting about other things so this has been even further delayed. Oh well, I had the best of intentions: to complete this 18th century petticoat for the Squares, Rectangles, and Triangles Challenge.
Description:
Many historical garments, and the costumes of many people around the world, use basic geometric shapes as their basis. In this challenge make a garment made entirely of squares, rectangles and triangles (with one curve allowed), whether it is an 18th century kimono, a flounced 1850s skirt, or a medieval shift.
Apricot (orange) 18th century under petticoat.
Pattern: None, but I referenced both of these tutorials on constructing 18th century petticoats. Katherine’s tutorial is for a petticoat with an uneven length (to go over panniers, or a bum roll, for example). Rebecca’s tutorial is for a petticoat with an even length (the same length all the way around, to be worn without extra supports). Both tutorials have construction information, Rebecca’s includes a bit more detail in terms of which stitches and methods to use.
Year: Loosely 1700-1790.
Notions: Thread, yellow polyester ribbon for ties.
How historically accurate?: I give it 70%. Accuracy gets knocked down because: 1- the color is a bit vibrant for the period (but it’s an under petticoat, and I wanted it to be fun!), 2- all unseen seams are machine sewn, 3- I used bright yellow polyester ribbon for ties, 4- I haven’t seen much research that shows cotton being used at this time for a single plain petticoat of this sort. On the other hand: 1- all finishing was done by hand, 2- the dimensions and method of creation are historically accurate.
Hours to complete: 6 or 7? I can’t really remember…
First worn: Well, Squishy wore it for pictures!
Total cost: $12 for the fabric. The ribbon is leftover from my childhood craft projects…
Side view.Front. See the yellow ribbon?Back. I love how the pleats fan out.
I chose to bind the top with self fabric and use polyester ties in a fun color for this petticoat, since I knew it wouldn’t be seen and I might as well use some of those things from my stash! The back half of the petticoat ties in front, then the front ties wrap all the way around to the front and also tie in front. That’s why you can see all the yellow ribbon crossing in the back. This method used a solid 3 yds of ribbon, though the ends I have to tie with are generous and could probably be shorter if I wanted to save on tie length.
Back tied in front before the front gets tied. There are hemmed pocket slit openings on each side.
I just love the color of this petticoat. It’s so bright and sunny and cheerful, especially with the yellow ribbons! There’s also a sneak peek in this last picture at what will likely be a future HSF item: the bum roll… more on that soon-ish.
The first step in constructing my 1760s Curtain-Along jacket was to draft up the pattern from Janet Arnold (you can read more about the pattern I chose in my Initial Curtain-Along Thoughts post). In my experience, sometimes the patterns work pretty well without a lot of tweaks, but sometimes you really do need to do some serious fitting to make them work. Given that knowledge, I decided to make a mock-up of the pattern without any adjustments to see how it would fit. The measurements weren’t too far off of my own, so I didn’t think I’d run into any really awful problems.
And here are the results! I put the mock-up together matching up all of the points that were indicated in the pattern.
Initial state. It is pinned down at center front, but I haven’t made any other adjustments. Squishy is pretty close to my shape, so you can see that there are some adjustments that need to be made for the jacket to fit me.First problem: the gap at the shoulders. You can see on the left that I’ve pinned out the excess fabric, and on the right side nothing has been pinned.Second problem: the center back waist point is halfway up the back! I extended the center back seam above the waist so that the waist would sit lower and match the side fullness.I don’t think anyone has a back/hip area that would easily fit into this shape…Third problem: sleeves that are too far off of the shoulder and twisted around in a way that is odd looking and uncomfortable. I had to try this on to make those observations, but you can see the problems in the picture.The solution was to take the sleeve off, adjust the armsceye, and pin the sleeve back on without it being twisty. You can see on the left side that I’ve adjusted the sleeve, and on the right I didn’t do anything.
Oh, I also lengthened the sleeve pattern a bit, because it was a little short on me, and extended center front so it would actually close… After making the adjustments to the pattern, I took to the scissors and cut out the real fabric, mineral felicite and peach linen lining. Then it was on to the hand sewing…
I was recently able to visit a wholesale quilt fabric company to purchase historic dress fabrics for an upcoming mid-19th century performance on behalf of me and other members in my vintage dance troupe. It was such a treat! The majority of the fabrics we found were Marcus Brothers fabrics, but RJR also had a smaller number of really lovely fabrics.
Marcus Brothers Gettysburg Print 1840-1860. To make an1850s day dress.Windham Fabrics Colonies Archives Print c. 1850 and Marcus Brothers Charleston II Print. For other 1850s/60s day dresses.
There were so many lovely things, but the best part was the prices! All of the fabrics were between $2.50-$3.75 a yard! You had to buy a bolt, which varied between 7 1/2 and 15 yds, but at those prices it’s still outstanding! We came away with fabric for the 1850s/60s dresses and bit more besides… There were some things that were just so fantastic they couldn’t be left behind!
Marcus Brothers Old Sturbridge Village Print. To eventually make an 1840s dress! It’s going to be so pretty! I love this fabric and the colors (it’s actually yellow and pinkish flowers with brownish vines).RJR Print. I have no idea what I will make with this, I just love it. I find it to be so striking!Another sample of the lovely prints. These were purchased by a friend. One will be used for an 1860s dress, eventually, and the other will possibly be used for an 1840s dress, eventually.
Don’t worry, there will be upcoming posts with more on the 1850s day dress I’ll be making as well as the other much farther in the future projects. And I’m sure I’ll also have great pictures from the mid-19th century performance as well.
You might have noticed that my last post was titled “First Picnic Of The Summer: Part I” but I didn’t actually mention what the next part would be. While the last post had general pictures of the day and of our outfits, this post is going to be filled with more artsy, detail shots. We had fun playing with the cameras that were available and working on our photography skills.
These links contain an affiliate code, which provides a small benefit to my shoe fund. This does not affect my impressions and reviews of these products.
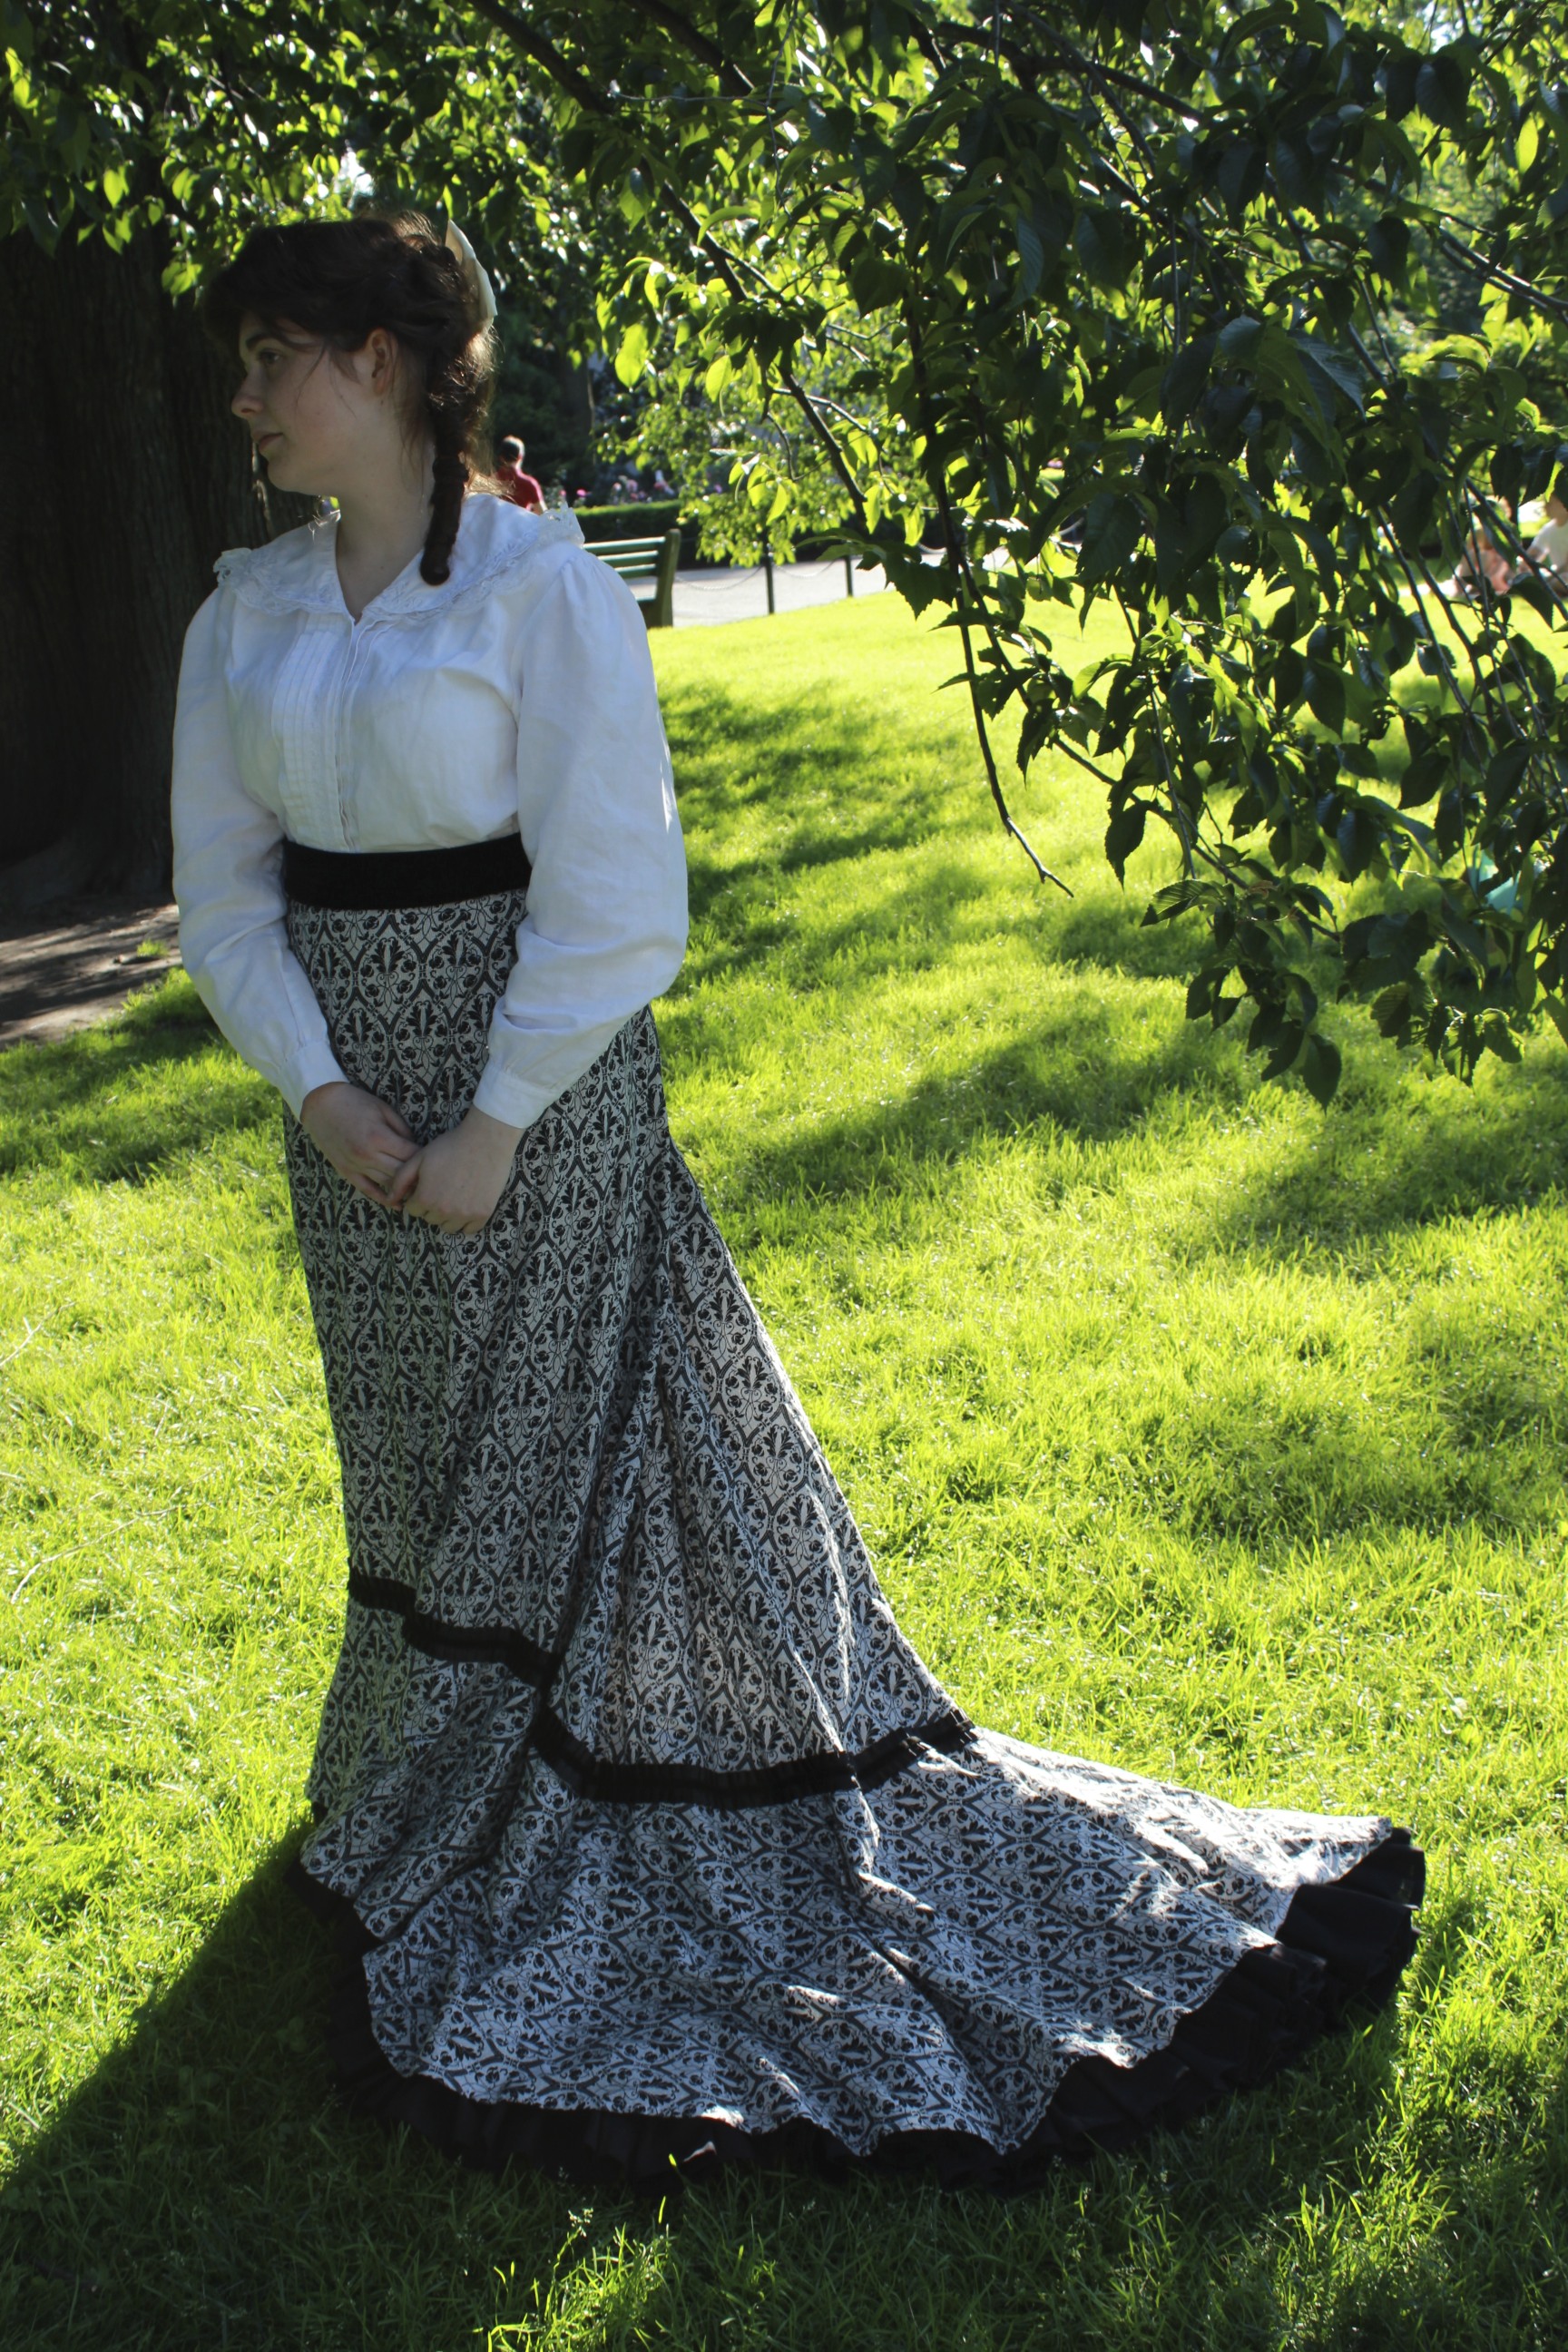
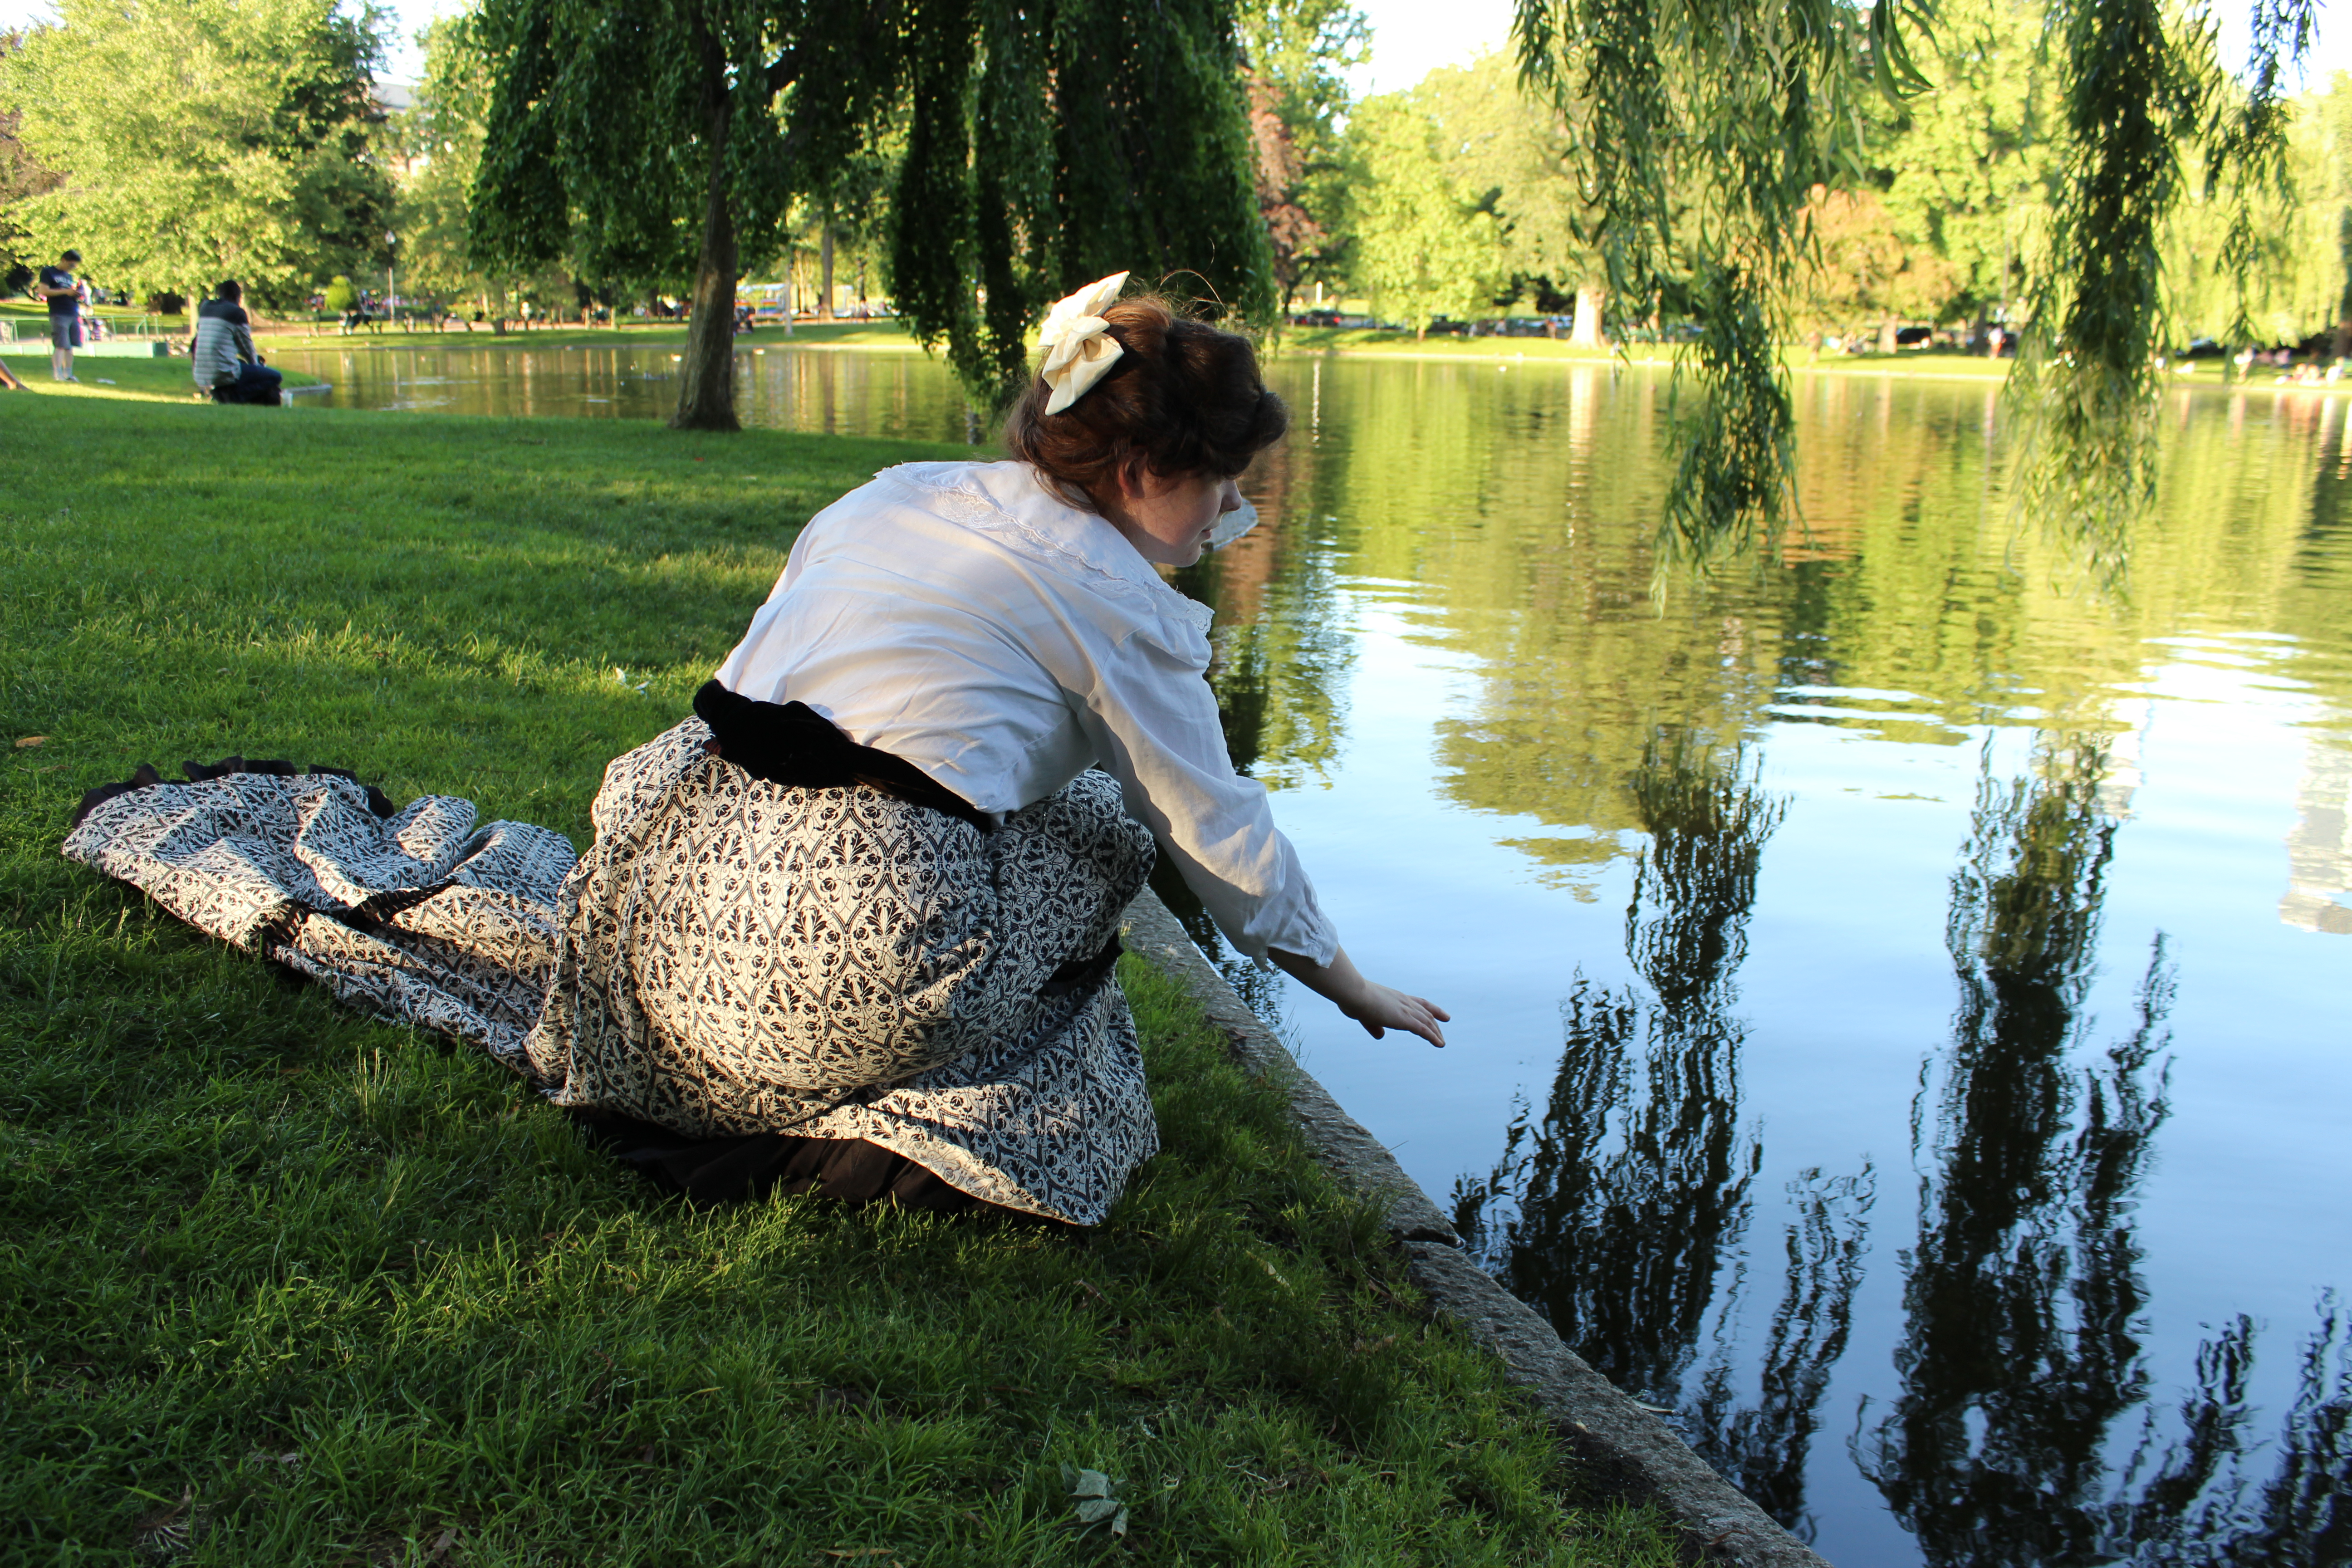
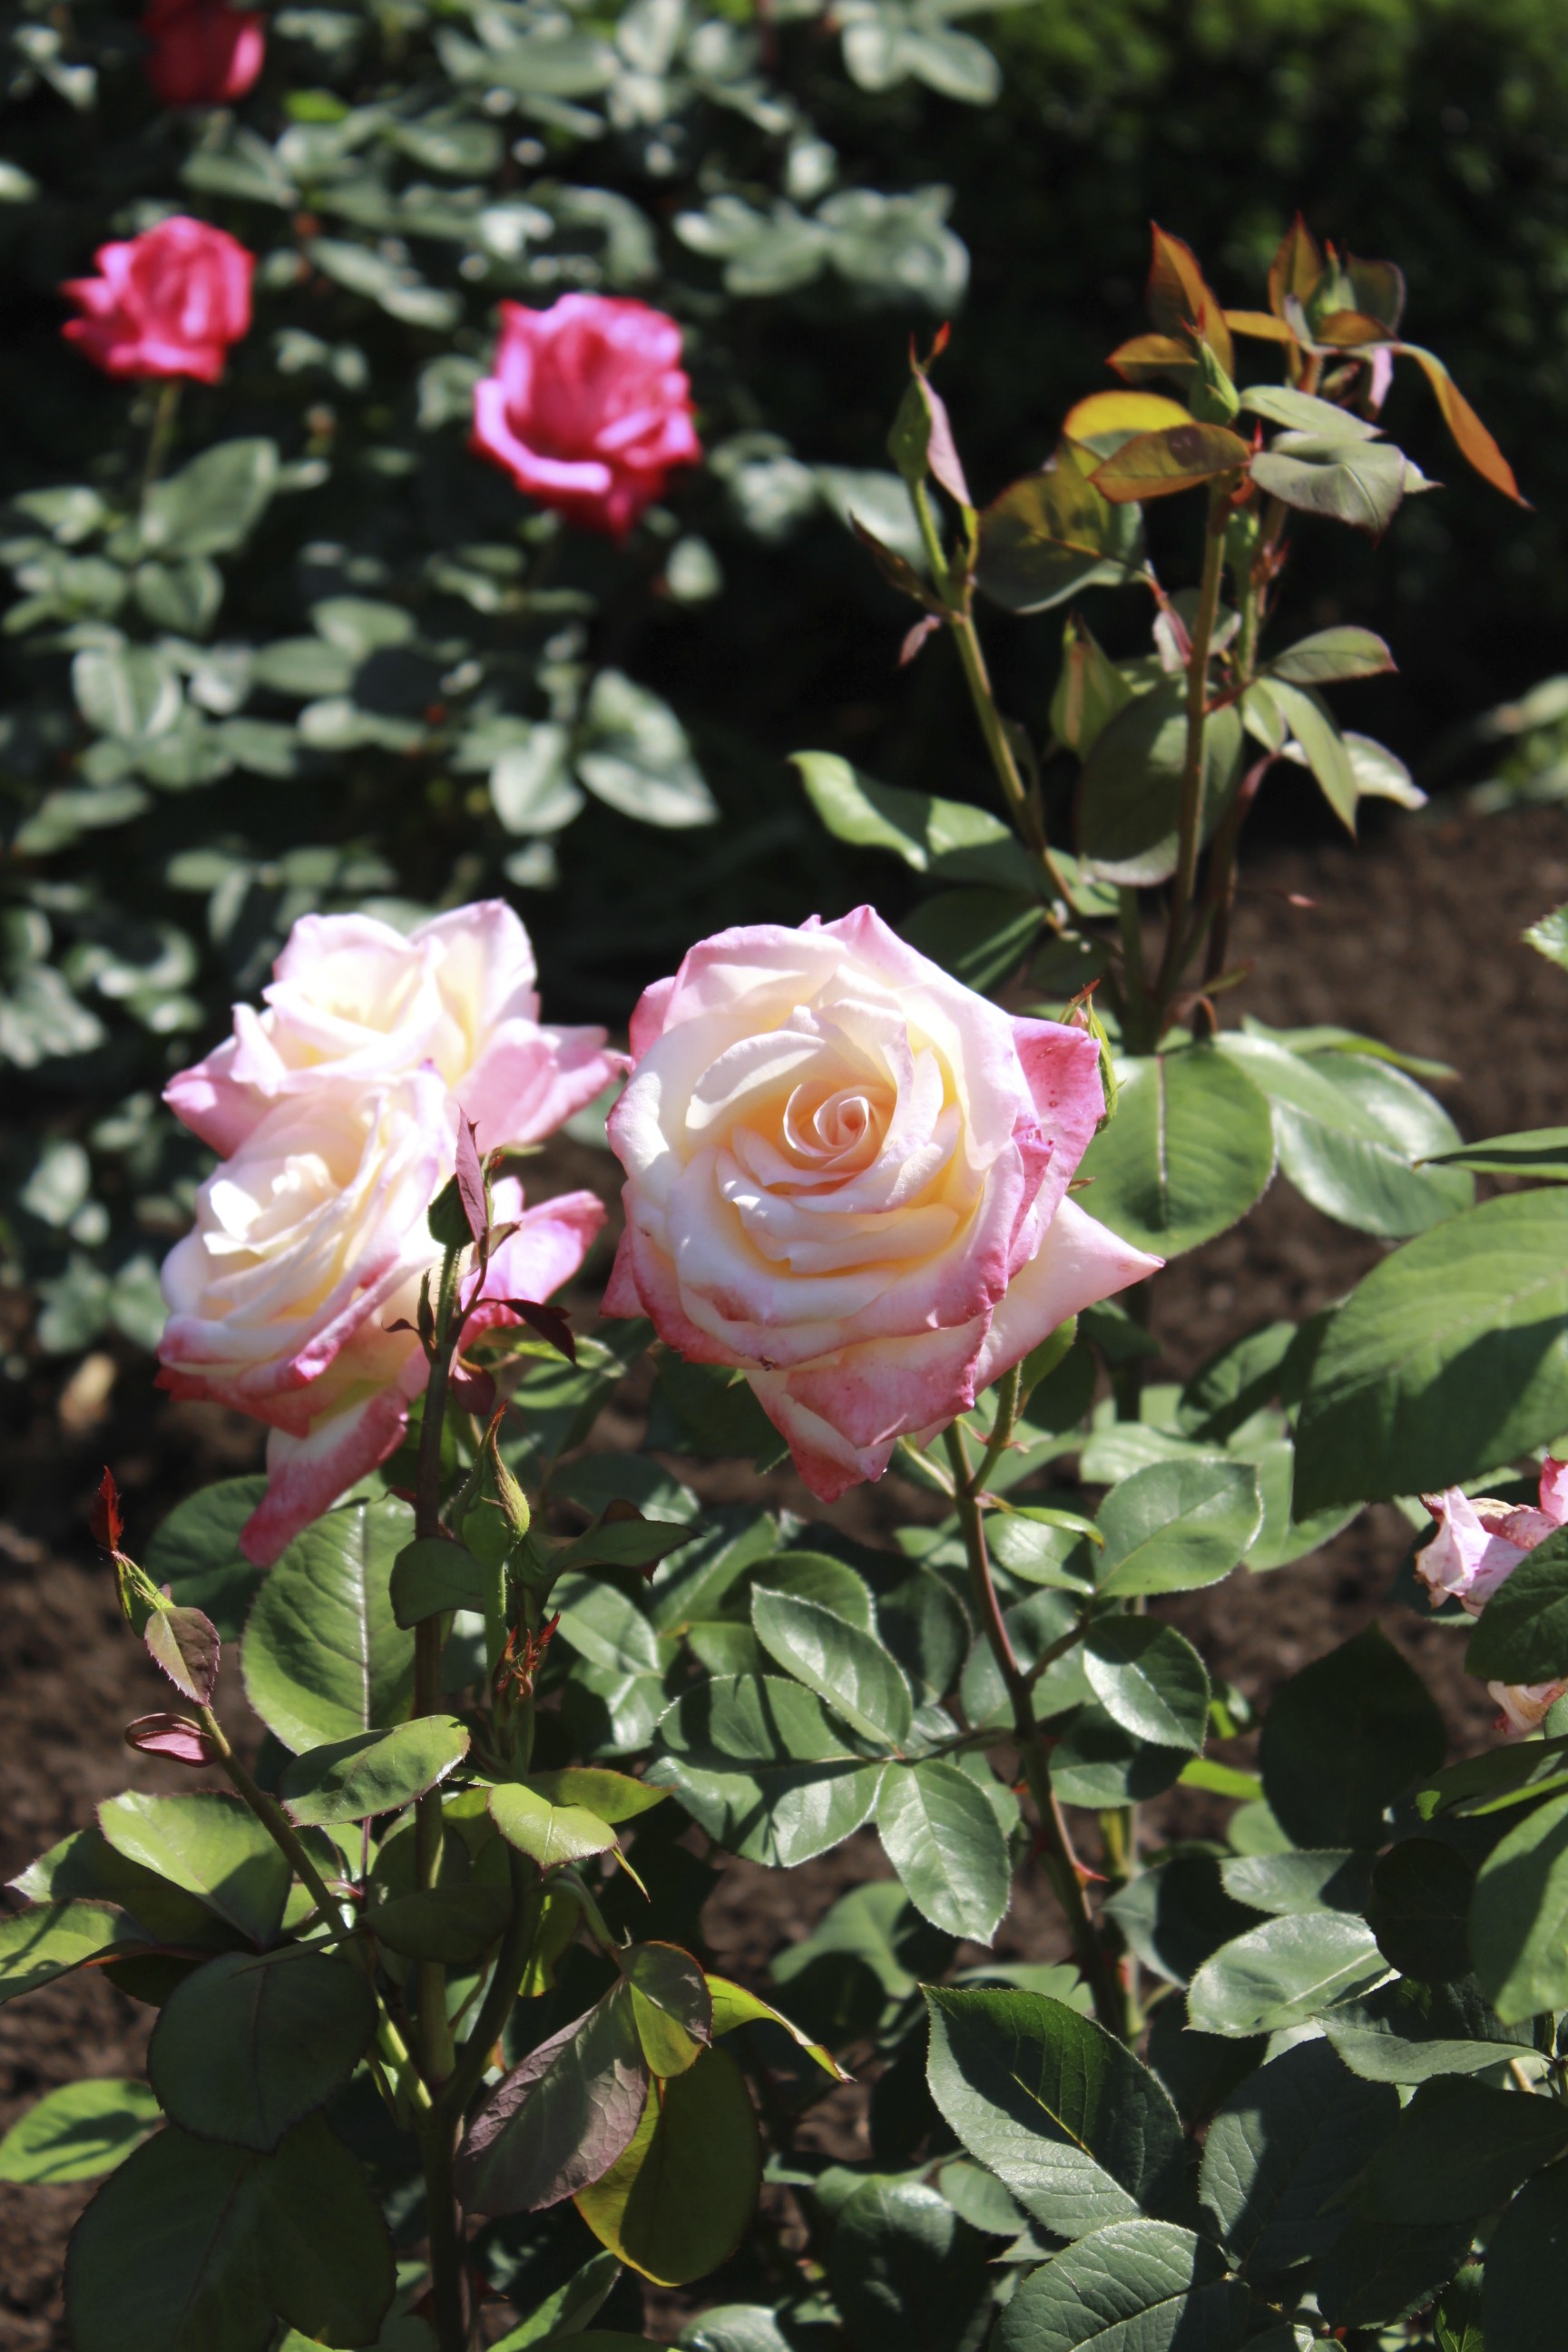
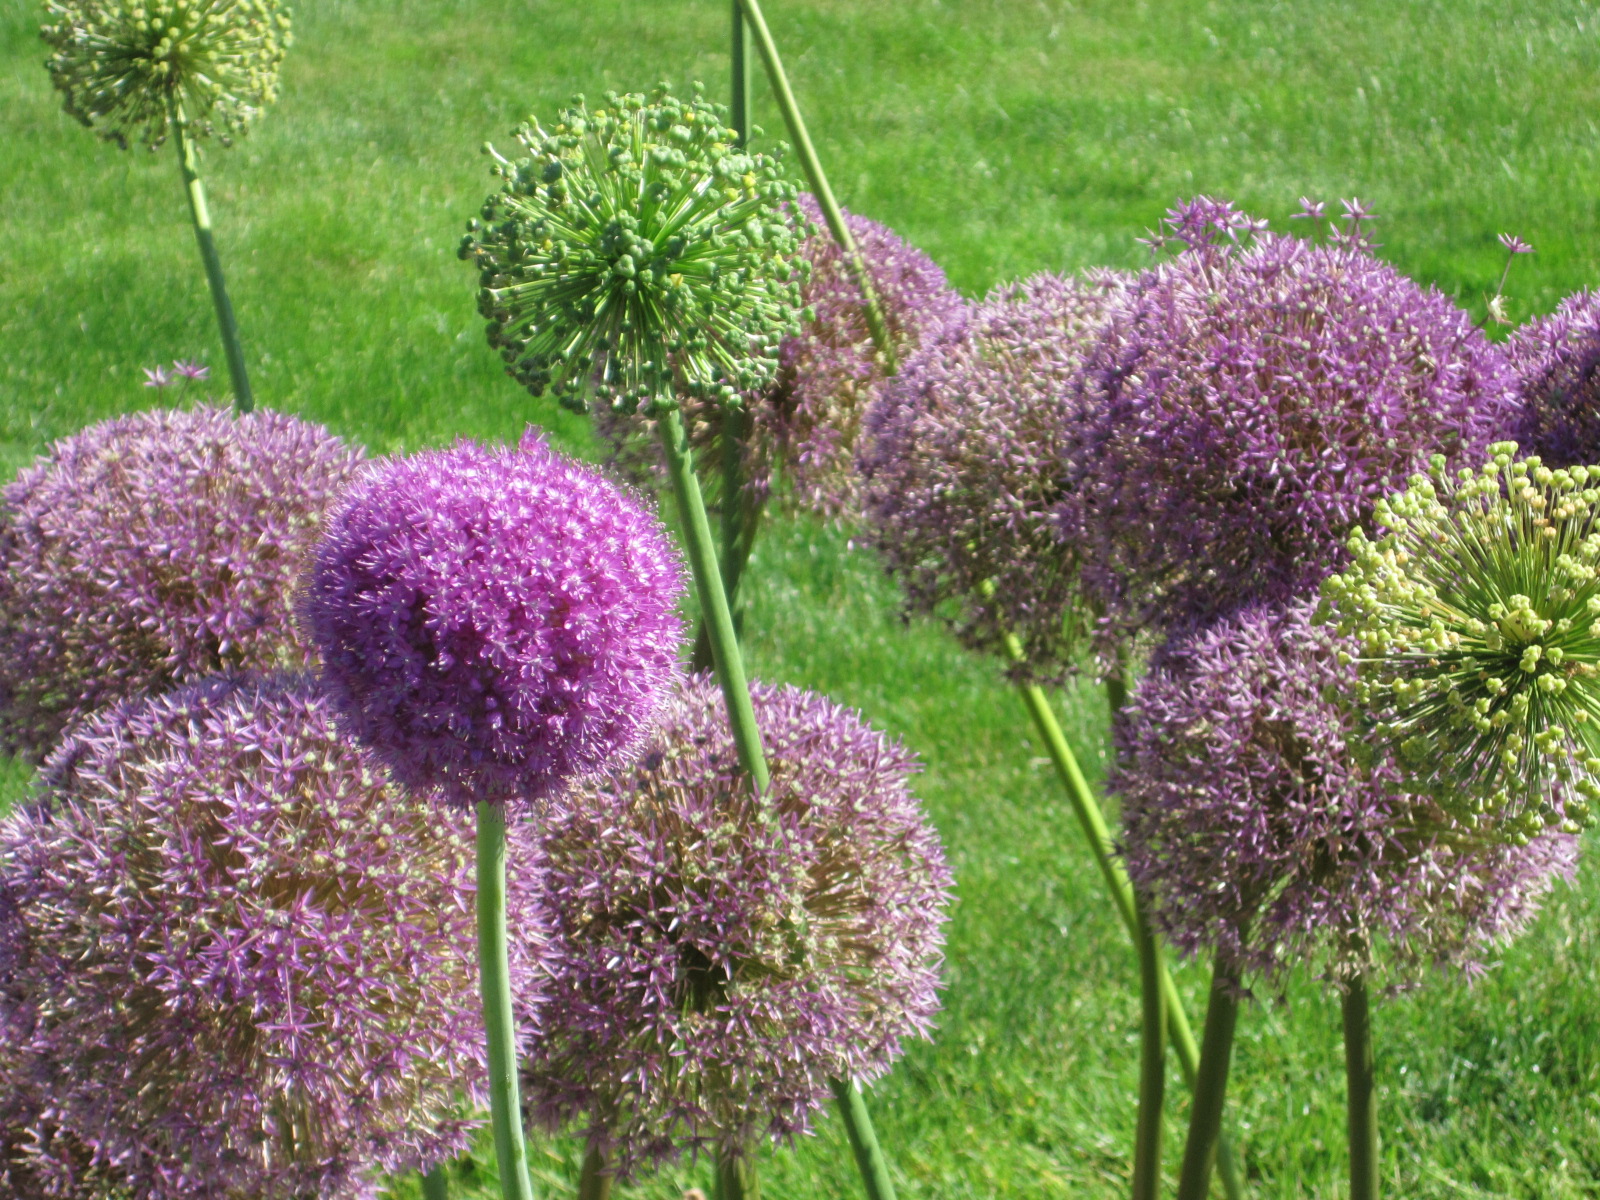
More feet. It’s fun to play with the focus of the photo in these detail shots.Hats!The willow and the trained skirt have similar qualities that make this photo neat.I enjoy how the branches fill in the background space and create complimentary curves with the skirt.This was intended to be casual bench lounging, but it looks very Sleeping Beauty c. 1900 to me. Where’s a prince when you need one?I love the longing reach for the reflection of the willow. That’s a good metaphor for life sometimes… reaching for reflections.This is pretty, too, with the skirt and tree having similar qualities. Also, I love the pop of red on the ground. Could be that those are flower petals… but I actually think they’re the remains of some child’s balloon animal.Playing with the focus on some lovely roses.Baby ducks! I enjoy that they are not what your eye is first drawn to in this photo and I like the super bright green of the tree.My favorite: a close up of the allium flowers!
Last weekend was a whirlwind of events and that means I’ve got lots of pictures to share! The pictures will be coming in small-ish groups. I do hope you’ll be able to vicariously enjoy the nice weather and fun through them.
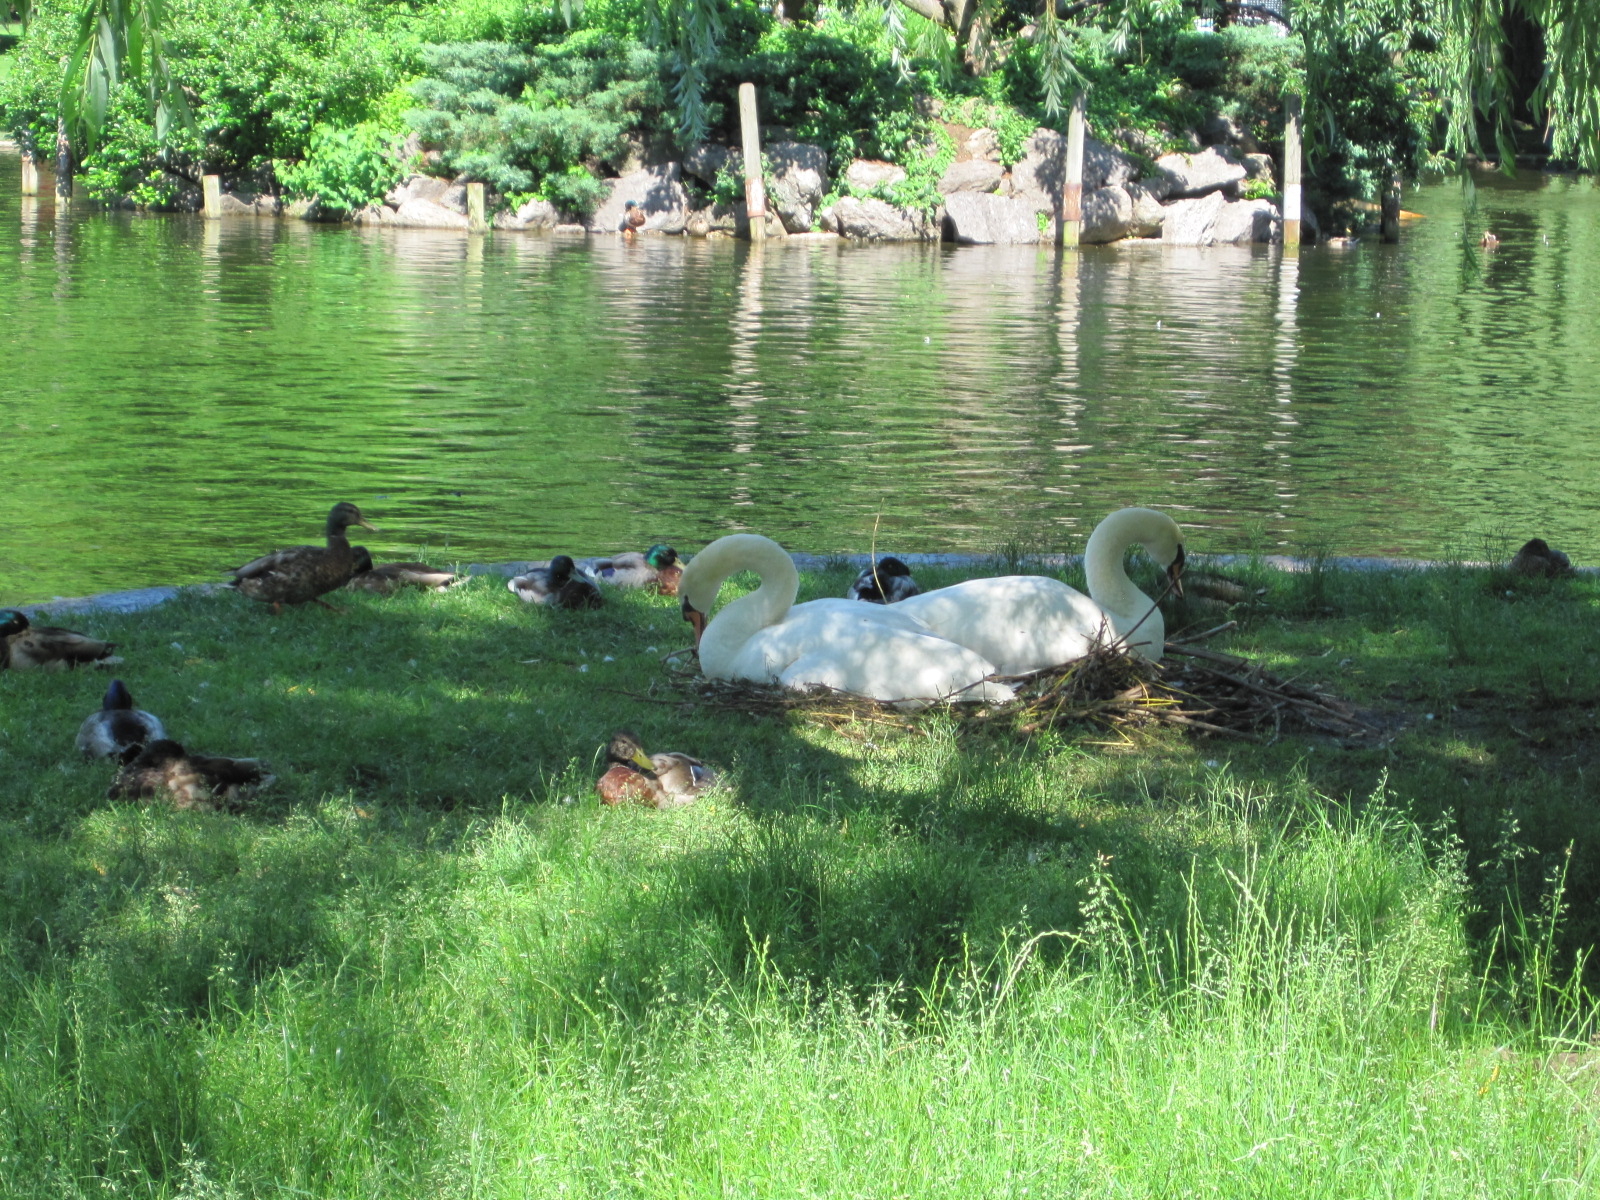
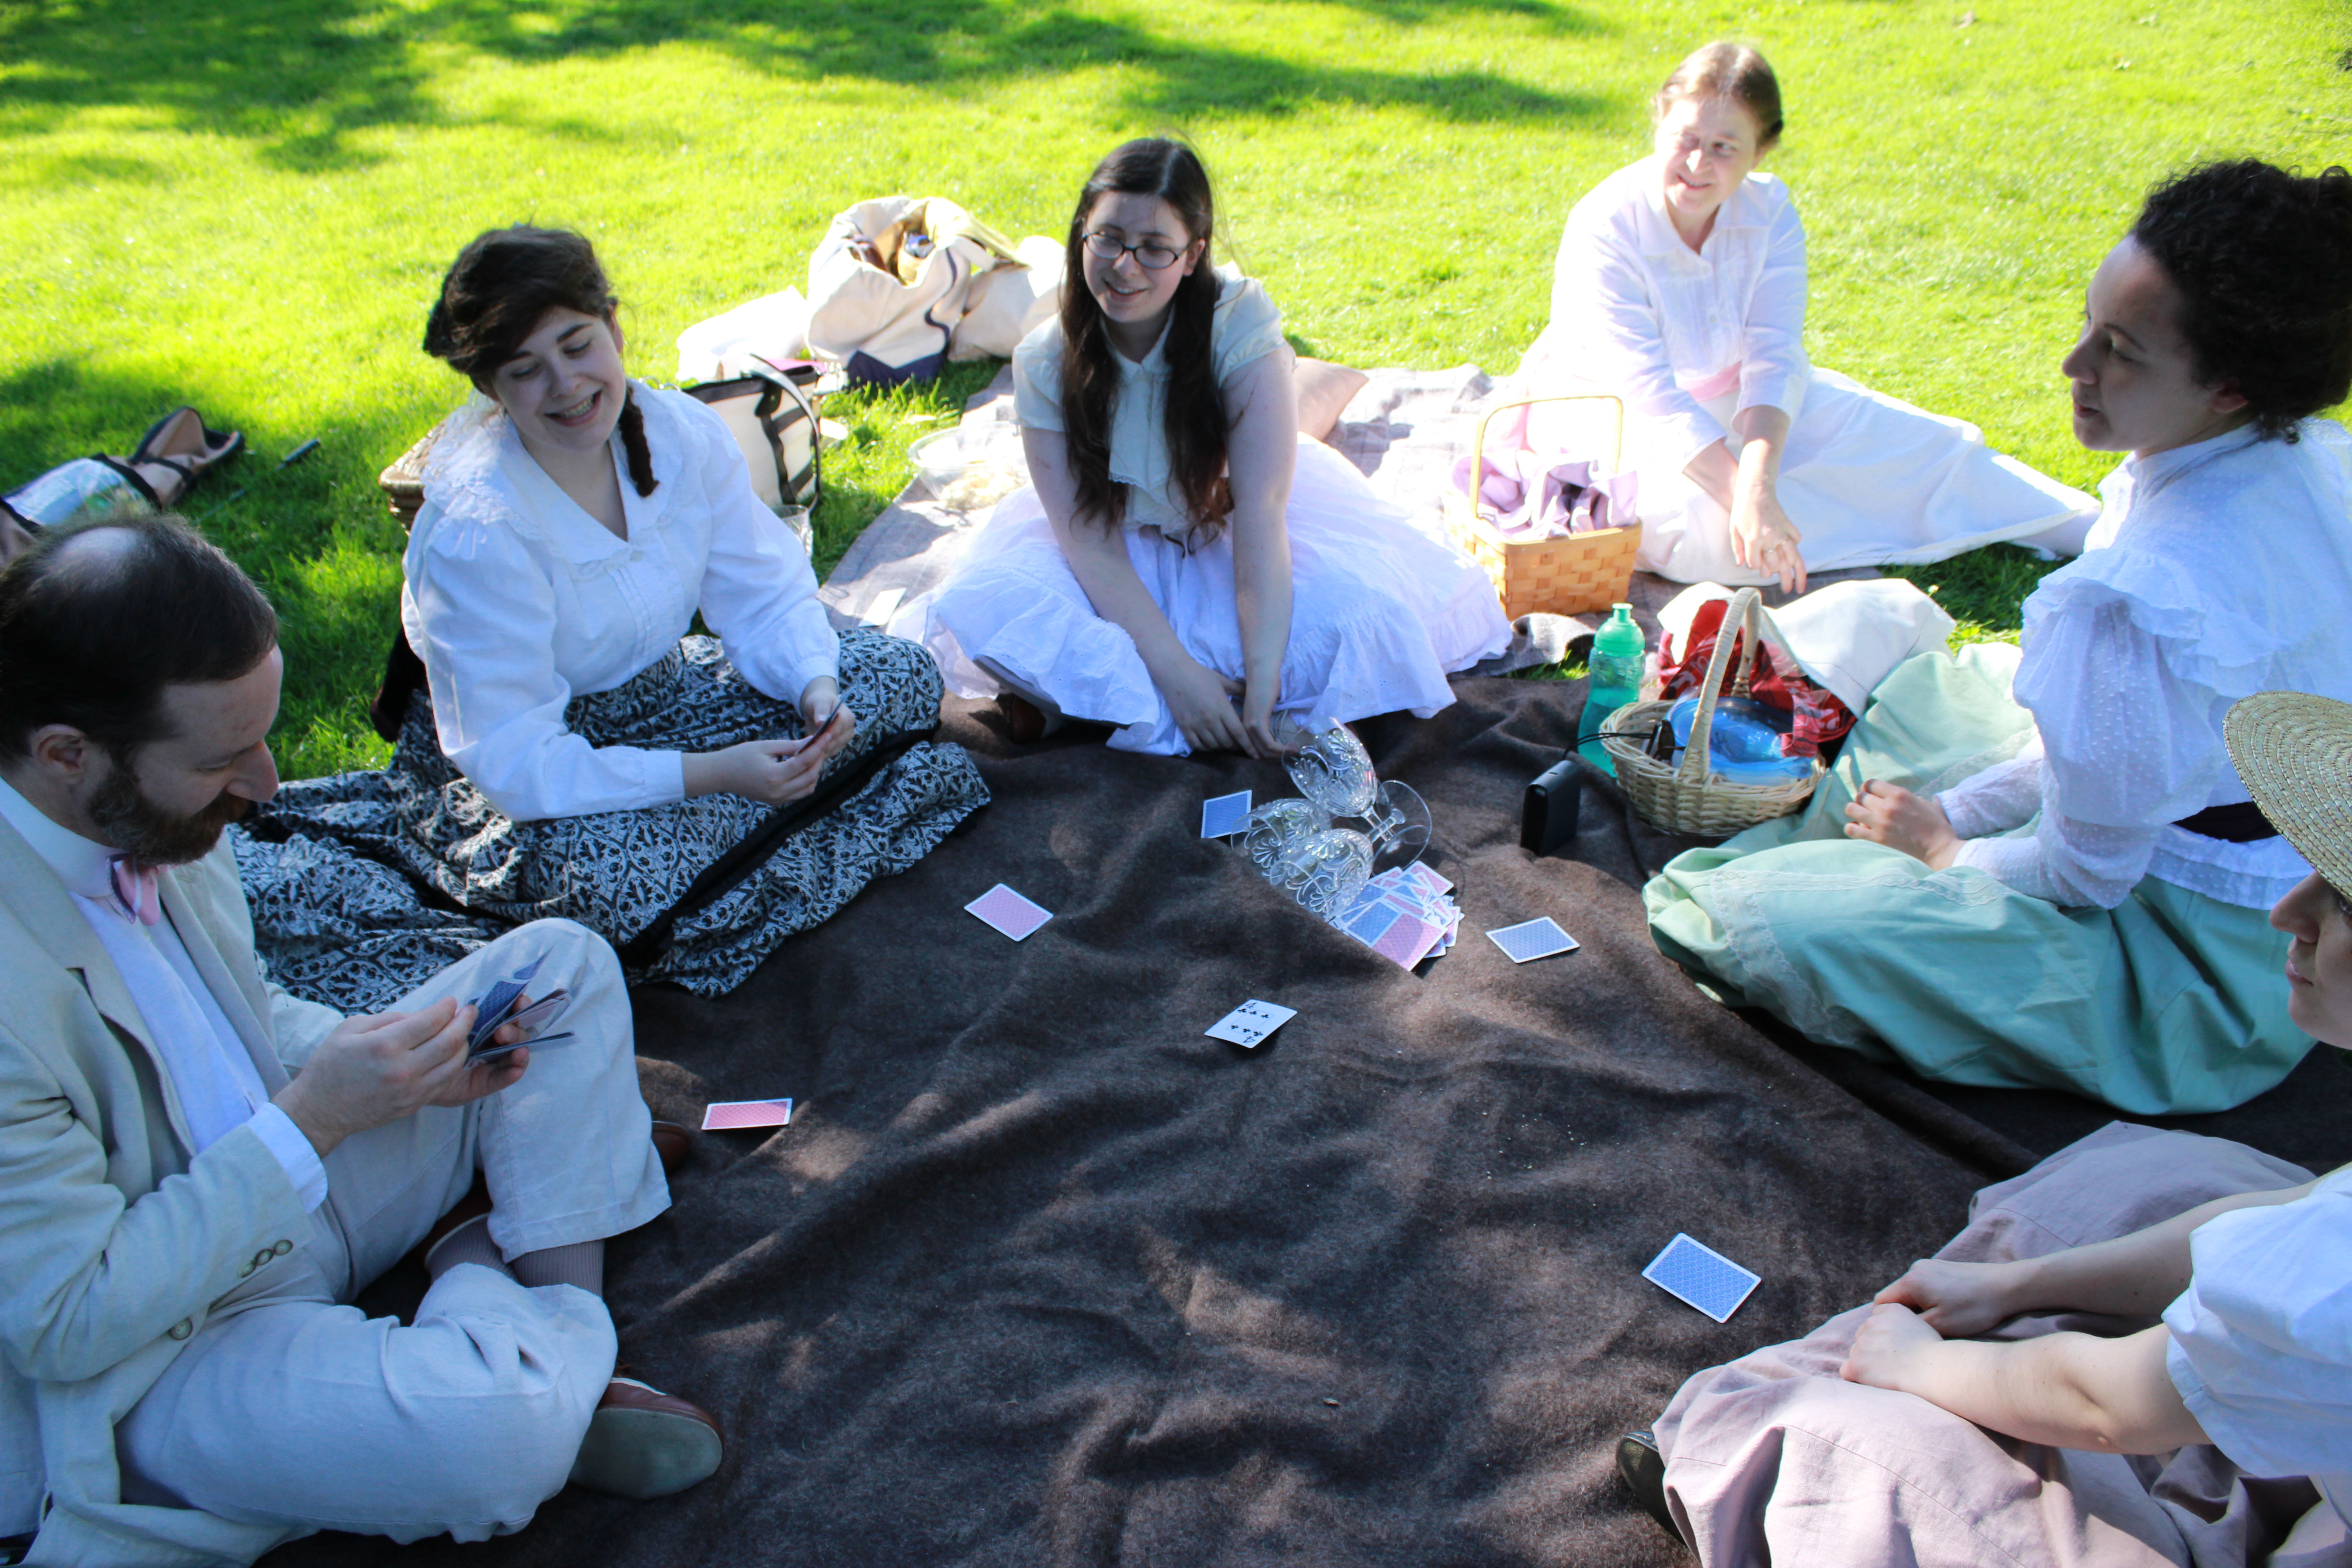
The first event was a low-key turn of the 20th century picnic in the Boston Public Garden. You might remember that last year we did a Regency picnic in the same place? We were out to have a good time and get some fresh air without worrying about 100% historical accuracy, hence the low-key part of the description. So without further ado, pictures!
Taking a turn about the garden.There are lots of ducks in and around the swan pond in the center of the garden and this time of year you can also see baby ducks! There were 9 of them in this bunch. Aren’t they cute?There are also swans around the swan pond. These ones were nesting in a fenced off area. Pretty, but you wouldn’t want to get too close. Swans are big, and mean.There are lovely old trees around the garden as well.The trees make great backdrops for photos.Walk a bit away from the swan pond and you are likely to encounter George Washington, who happened to be showing off his Bruins spirit this past weekend. (I love that the city, presumably, had a custom all-weather jersey-cape made, since Washington can’t actually move his arms to put on a jersey, given that he’s bronze…)All around the statue of Washington are lovely flower beds. The flowers get changed out pretty regularly so they’re always blooming and pretty. These flowers are my favorite though! They’re called allium, and I love the colors, and the size, and the circle-y-ness of them.I believe I have a weakness for circle-y things. And, my outfit matched the flowers! I think my gibson-y hair turned out pretty well, too.I know this picture is similar to the last one… but I can’t decide which one I like best. I’m hoping maybe you have an opinion that will sway me one way or the other?It got warm promenading about the garden, so we returned to the blankets in the shade to play cards.After the rest, we broke out the croquet set we had brought along. Apparently we were more interesting while playing croquet than we were at any other time during the day, because we actually gathered a crowd of people who were watching us play.Contemplating my next shot. I was getting out of the metal panel obstacle…I was the pink ball! I think it was supposed to be red, but it looked awfully pink to me!My outfit choice was inspired by an image in the KCI collection. I did my best to imitate it in spirit, despite my lack of a boater.When revisiting the image I realized that it does not include a croquet mallet. Be that as it may, I tried, and I think the inspiration is clear, even though my memory is not!Picnic-ers!
It’s been a fair bit of time since I first thought about joining in on the Curtain-Along hosted by Jen of Festive Attyre. I thought the idea was fun and I was inspired by the Waverly curtain series, but I wasn’t inspired enough to get involved… until I saw additional colorways being offered by fabric stores as yardage rather than curtains! It’s not that they were being offered as yardage, it’s just that I like the colors better and I like that they will be less represented in the costuming world, since most people seem to have gone for the traditional curtain color ways.
Waverly Mineral Felicite: my fabric.
Anyway, I mentioned way back in October that I had bought some yardage of the Mineral Felicite colorway of the Waverly fabric. It’s taken me about 9 months to get around to using it, but I’ve finally found the time! I’m super excited about it. The colors are lovely and I’m branching out (haha, no pun intended) into an earlier period than I usually inhabit as inspiration for my Curtain-Along garment.
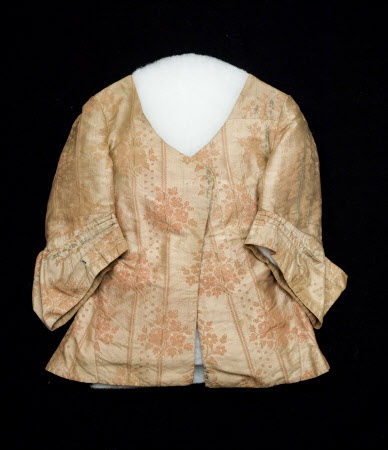
This main inspiration jacket has the ambiguous dating of “18th century” and the details aren’t super clear cut for me to do my own clear dating. I like the simple shape, the colors, and the blue silk ribbon trim on the edges. These are all aspects of this garment that I want to bring in to my own jacket, but I also wanted to find a shape and style that appeals to me. So I did a lot of thinking about what decade of the 18th century I wanted to aim for. There was lots of looking at Pinterest. Initially I thought I wanted to aim for 1770s, but after more thinking I’ve settled on the 1760s as the decade for this jacket.
I picked the 1760s for a variety of reasons. 1- I want to be able to wear the jacket with a future quilted petticoat and quilted petticoats were most popular between 1700-1775; 2- Conveniently, there is a pattern available in Janet Arnold for a 1760s jacket; 3- I like the slightly longer skirts on the jackets of the 1760s.
The jacket below is the one Janet Arnold took the pattern I will be using from. I will likely omit the cuffs (I’ve got a future 1740s jacket project in the works with cuffs!) and will almost certainly be adding the blue silk ribbon like my original inspiration jacket.
Jacket. 1760-1790. National Trust Inventory Number 1348744
I’ve been trying to be good about not buying more fabric… but sometimes things are just too good to pass up, or an event comes along that requires new clothes! I think I last bought fabric in January, so that’s a pretty good few months of no-new-fabric.
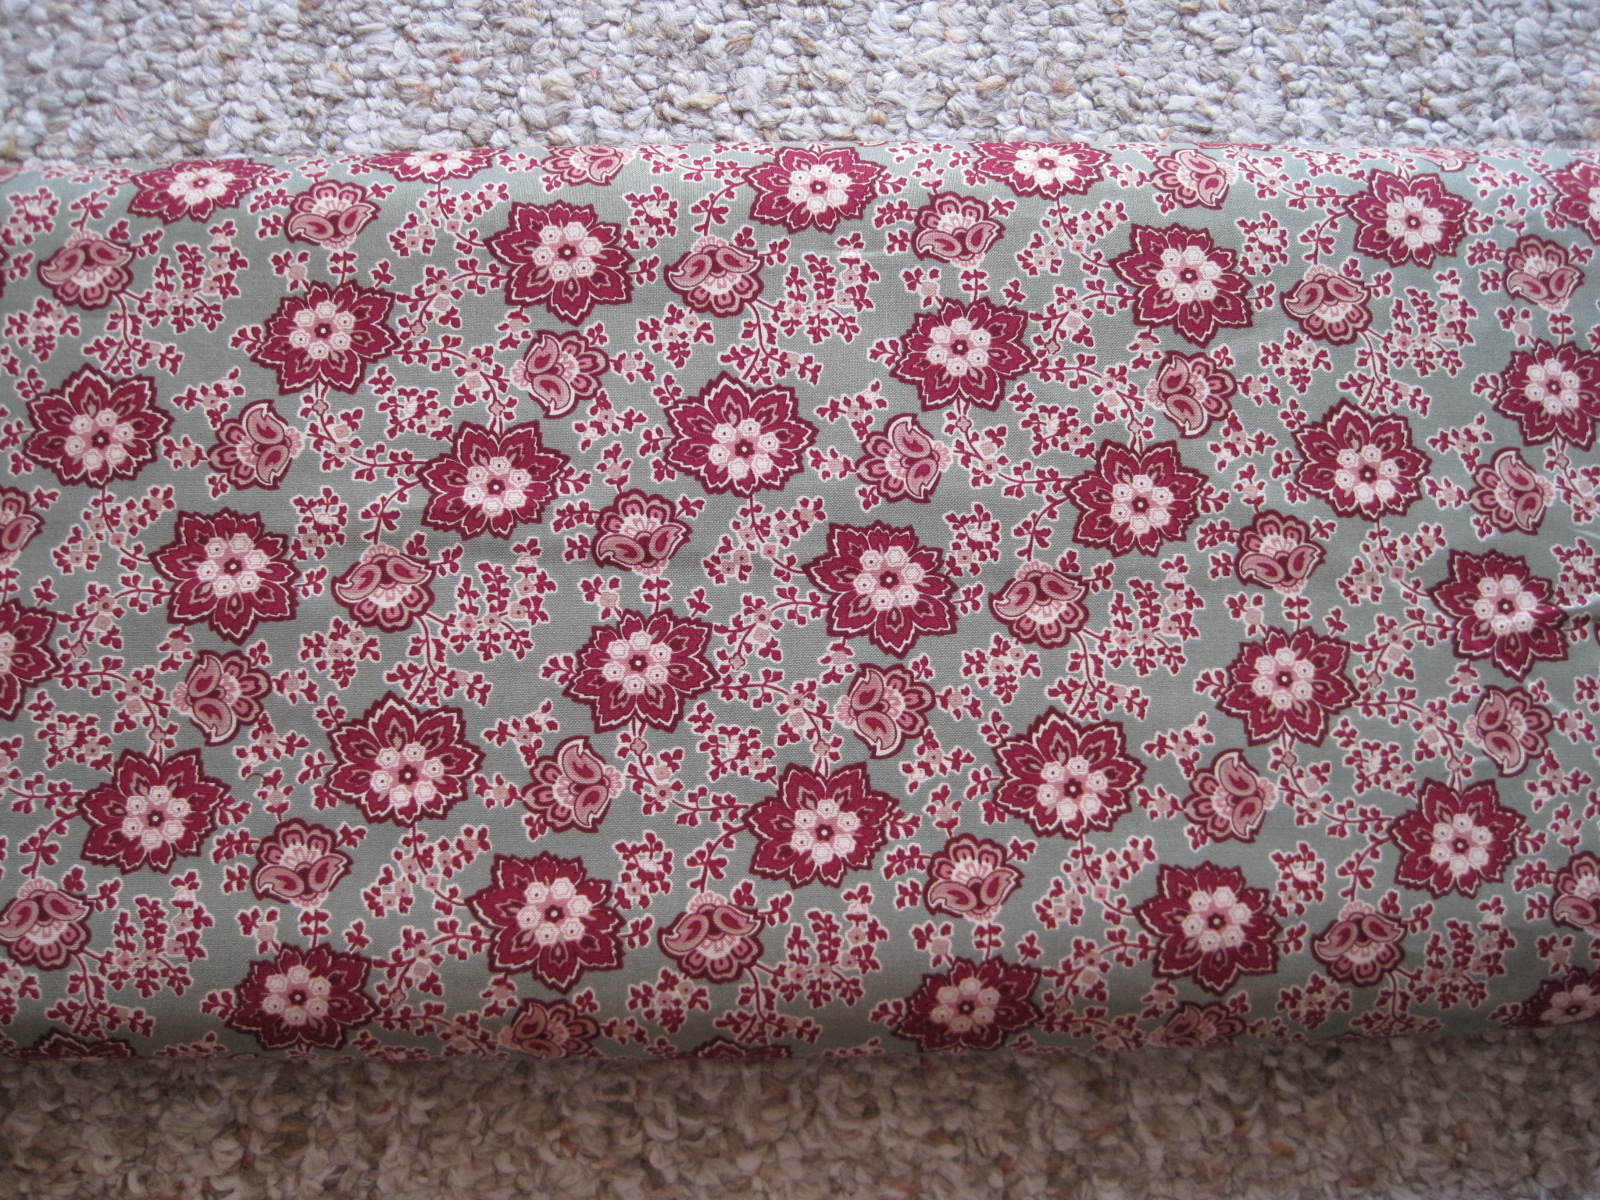
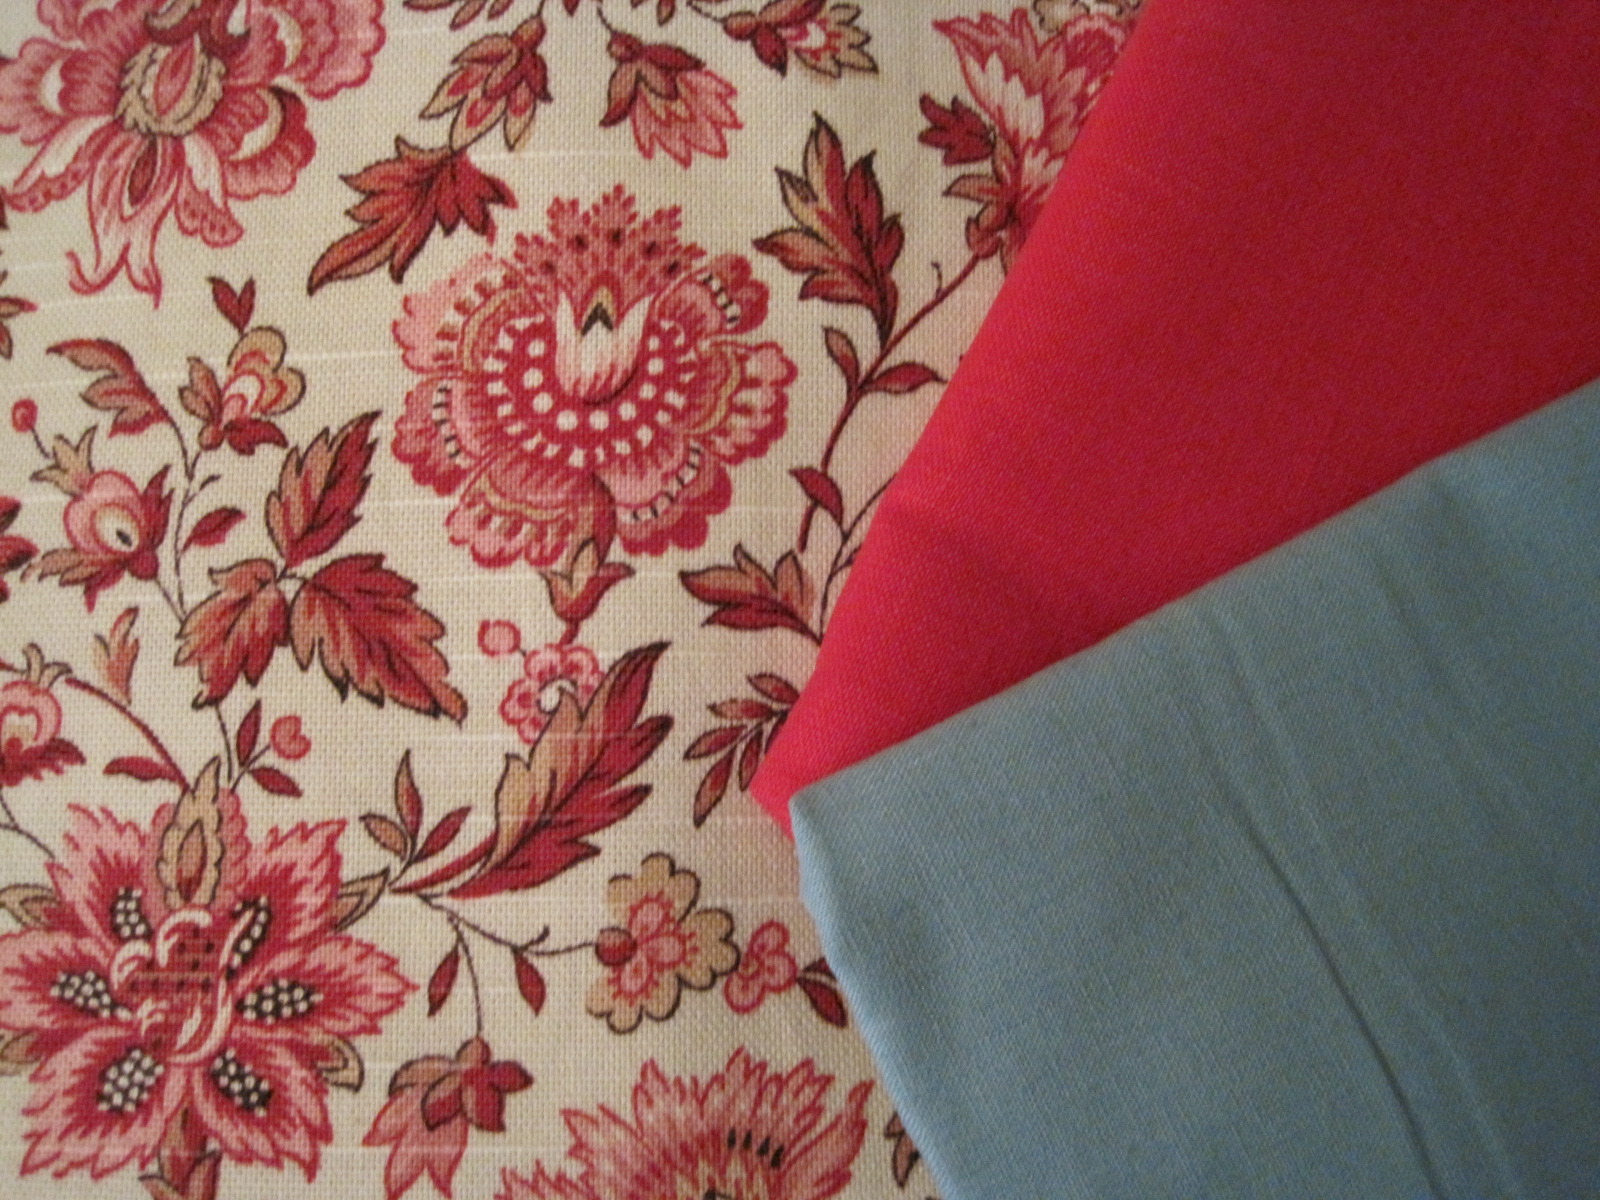
I wasn’t even looking for this fabric! But I happened upon this great red/pink/brown cotton chintz and couldn’t get it out of my mind. In the end, I decided I would regret it if I didn’t buy it. And there you are. I’m thinking of perhaps an 1790s/1800ish open robe eventually. The other two fabrics wouldn’t have been bought on their own, but with the chintz already being purchased… I tacked them on to the order. There is a small bit of the cherry red linen, to make a 1740s jacket some day, and a bit of that blueish cotton/linen blend. I was hoping it would be more teal colored, but it’s not. So it might get relegated to lining something else.
Later in the month, I was on a grand search to find fabric for an 1860s cotton dress and came across this fabulous light teal stripey fabric for $1/yd. I’m calling it the elusive blue green fabric in my head, because that color is sort of hard to find and I’ve been inspired lately to find it. At $1/yd I couldn’t pass it up!
The pictures don’t really do it justice. I’m thinking of making a new Regency evening gown using it and perhaps a 1906ish evening gown some day as well. I bought that similarly colored lining to go with the stripy for the 1906ish evening gown, because at $1/yd in the right color it’s just meant to be, even if it is polyester. I’m not sure what the fabric content of the stripy fabric is, but I’m guessing it’s probably man-made…
Lastly, I’ll be performing in another 1920s dance event next weekend during the day and I needed a 20s day dress. I wanted it to be washable and I didn’t have any appropriate fabrics in my stash. There weren’t a lot of options that I liked, but in the end I went with this royal blue cotton lawn swiss dot. The dress will have white accents on it (and is looking rather sailor-like, despite that not being my intent). I have to just claim the sailor look so I don’t feel foolish in it.