

At this point, I’ve posted about most of the garments and accessories needed for the 1790s ensemble I’ve been slowly creating (you can read past posts here: stays, cap, sash, as well as petticoat and bum pad). The final piece (and perhaps one of the most essential pieces) is the dress!

I started this in 2023, along with most of the accessories, and finally finished in May 2024. My goal for this post is to document the inspiration and construction details of the dress (photos of the dress being worn will come later!).
Basic Information
To start, the information for the Historical Sew Monthly 2024 Challenge #10 UFO Spotter:
We all have an UnFinished Object or two (or ten!) Now’s the time to complete one of your unfinished historical costuming projects.
This dress was definitely a UFO! It’s been hanging in my sewing room for many months in a state of partial completion.
Just the facts:
Fabric/Materials: 3 ½ yards of 120″ wide ivory windowpane woven curtain sheer (probably polyester) and 1 yard of 58″ wide lightweight white linen for the lining.
Pattern: Adapted from the 1790s Round Gown pattern in The American Duchess Guide To 18th Century Dressmaking by Lauren Stowell and Abby Cox. I changed the front bodice to suit my goals and style as well as adding ruffles to the sleeves and hem.
Year: c. 1794.
Notions: 2 ½ yards of ¼” white cotton twill tape, 4 hooks and loops, and thread.
How historically accurate is it?: 95%. The pattern and construction methods are well researched and documented. The only points off, I’d say, are for the fiber content of the main dress fabric.
Hours to complete: 13.5 for the main dress construction + 11.5 for the ruffles = 26 hours of hand sewing.
First worn: Not yet!
Total cost: I paid approximately $10/yard for the main fabric and $6/yard for the linen. So, with the addition of the notions I would say this dress cost about $50 for materials.
A Few Observations
As with the 1790s petticoat I made (linked above in the introduction to this post) this dress is entirely hand sewn.
I had to go back through my records to figure out what I spent on the fabric for the dress. It’s been in my stash for years, so while I remember what store I purchased it from I had no memory of how much I paid. It turns out that I bought both the windowpane exterior fabric and the linen lining in 2012! At the time, I had no particular plan in mind for them, so they sat and waited… for over ten years! I’m excited to have finally put them to good use!
Inspiration
I’ve been interested in trying various garments and accessories in the American Duchess book since I first purchased it, and this 1790s idea felt like a good opportunity, especially since I could work from the undergarments out with the patterns and instructions all in one place.
The basic elements of the 1790s dress in the book worked for me, but I decided I wanted a different front bodice look, more like the gown on the right in the image below (rather than like the one on the left, which is more like what the sample in the book is shaped like). The painting below, La duquesa de Osuna como Dama de la Orden de Damas Nobles de la Reina María Luisa, by Augustín Esteve is dated between 1796 and 1797 (it is available on Wikimedia Commons). That’s a few years later than my date of 1794, but the gathered front and round neck shape is seen earlier, even in the 1780s in Chemise a la Reine styles (you can read more about this style, popularized by Marie Antoinette, here on the Fashion Institute of Technology: Fashion History Timeline page). There is another example of the front shape I was intrigued by in the Cora Ginsburg auction catalog from Spring 2023 on page 12.

In addition to the bodice shape, I was particularly inspired by the fashion plate below for the ruffles at the hem and wrists. Other fashion plates from this year show the same detail. The plate below, and more from 1794, can be seen on the Dames a la Mode website here.
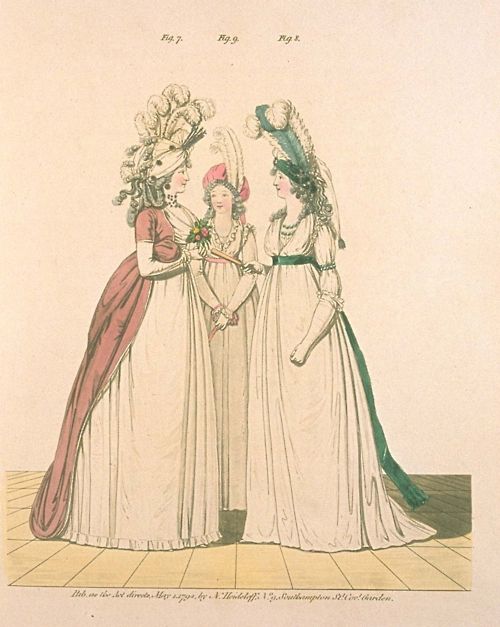
I gathered my favorite inspiration, including those shown above, together on a Pinterest board, which you can see here if you are interested.
Construction
I mostly followed the directions in the American Duchess book, though I did have to adapt a few order of operations things in the bodice to accommodate my change in front style, as well as to accommodate adding the ruffles to the sleeve openings.
I started by assembling the bodice lining. Below is my bodice lining, ready for the exterior pieces to be added.

I didn’t take any further in-process photos, but I did document the completed garment. First, an image of what the front looks like when the front closure is done up. The exterior of the dress adjusts at the high waistline and the neckline with drawstrings.

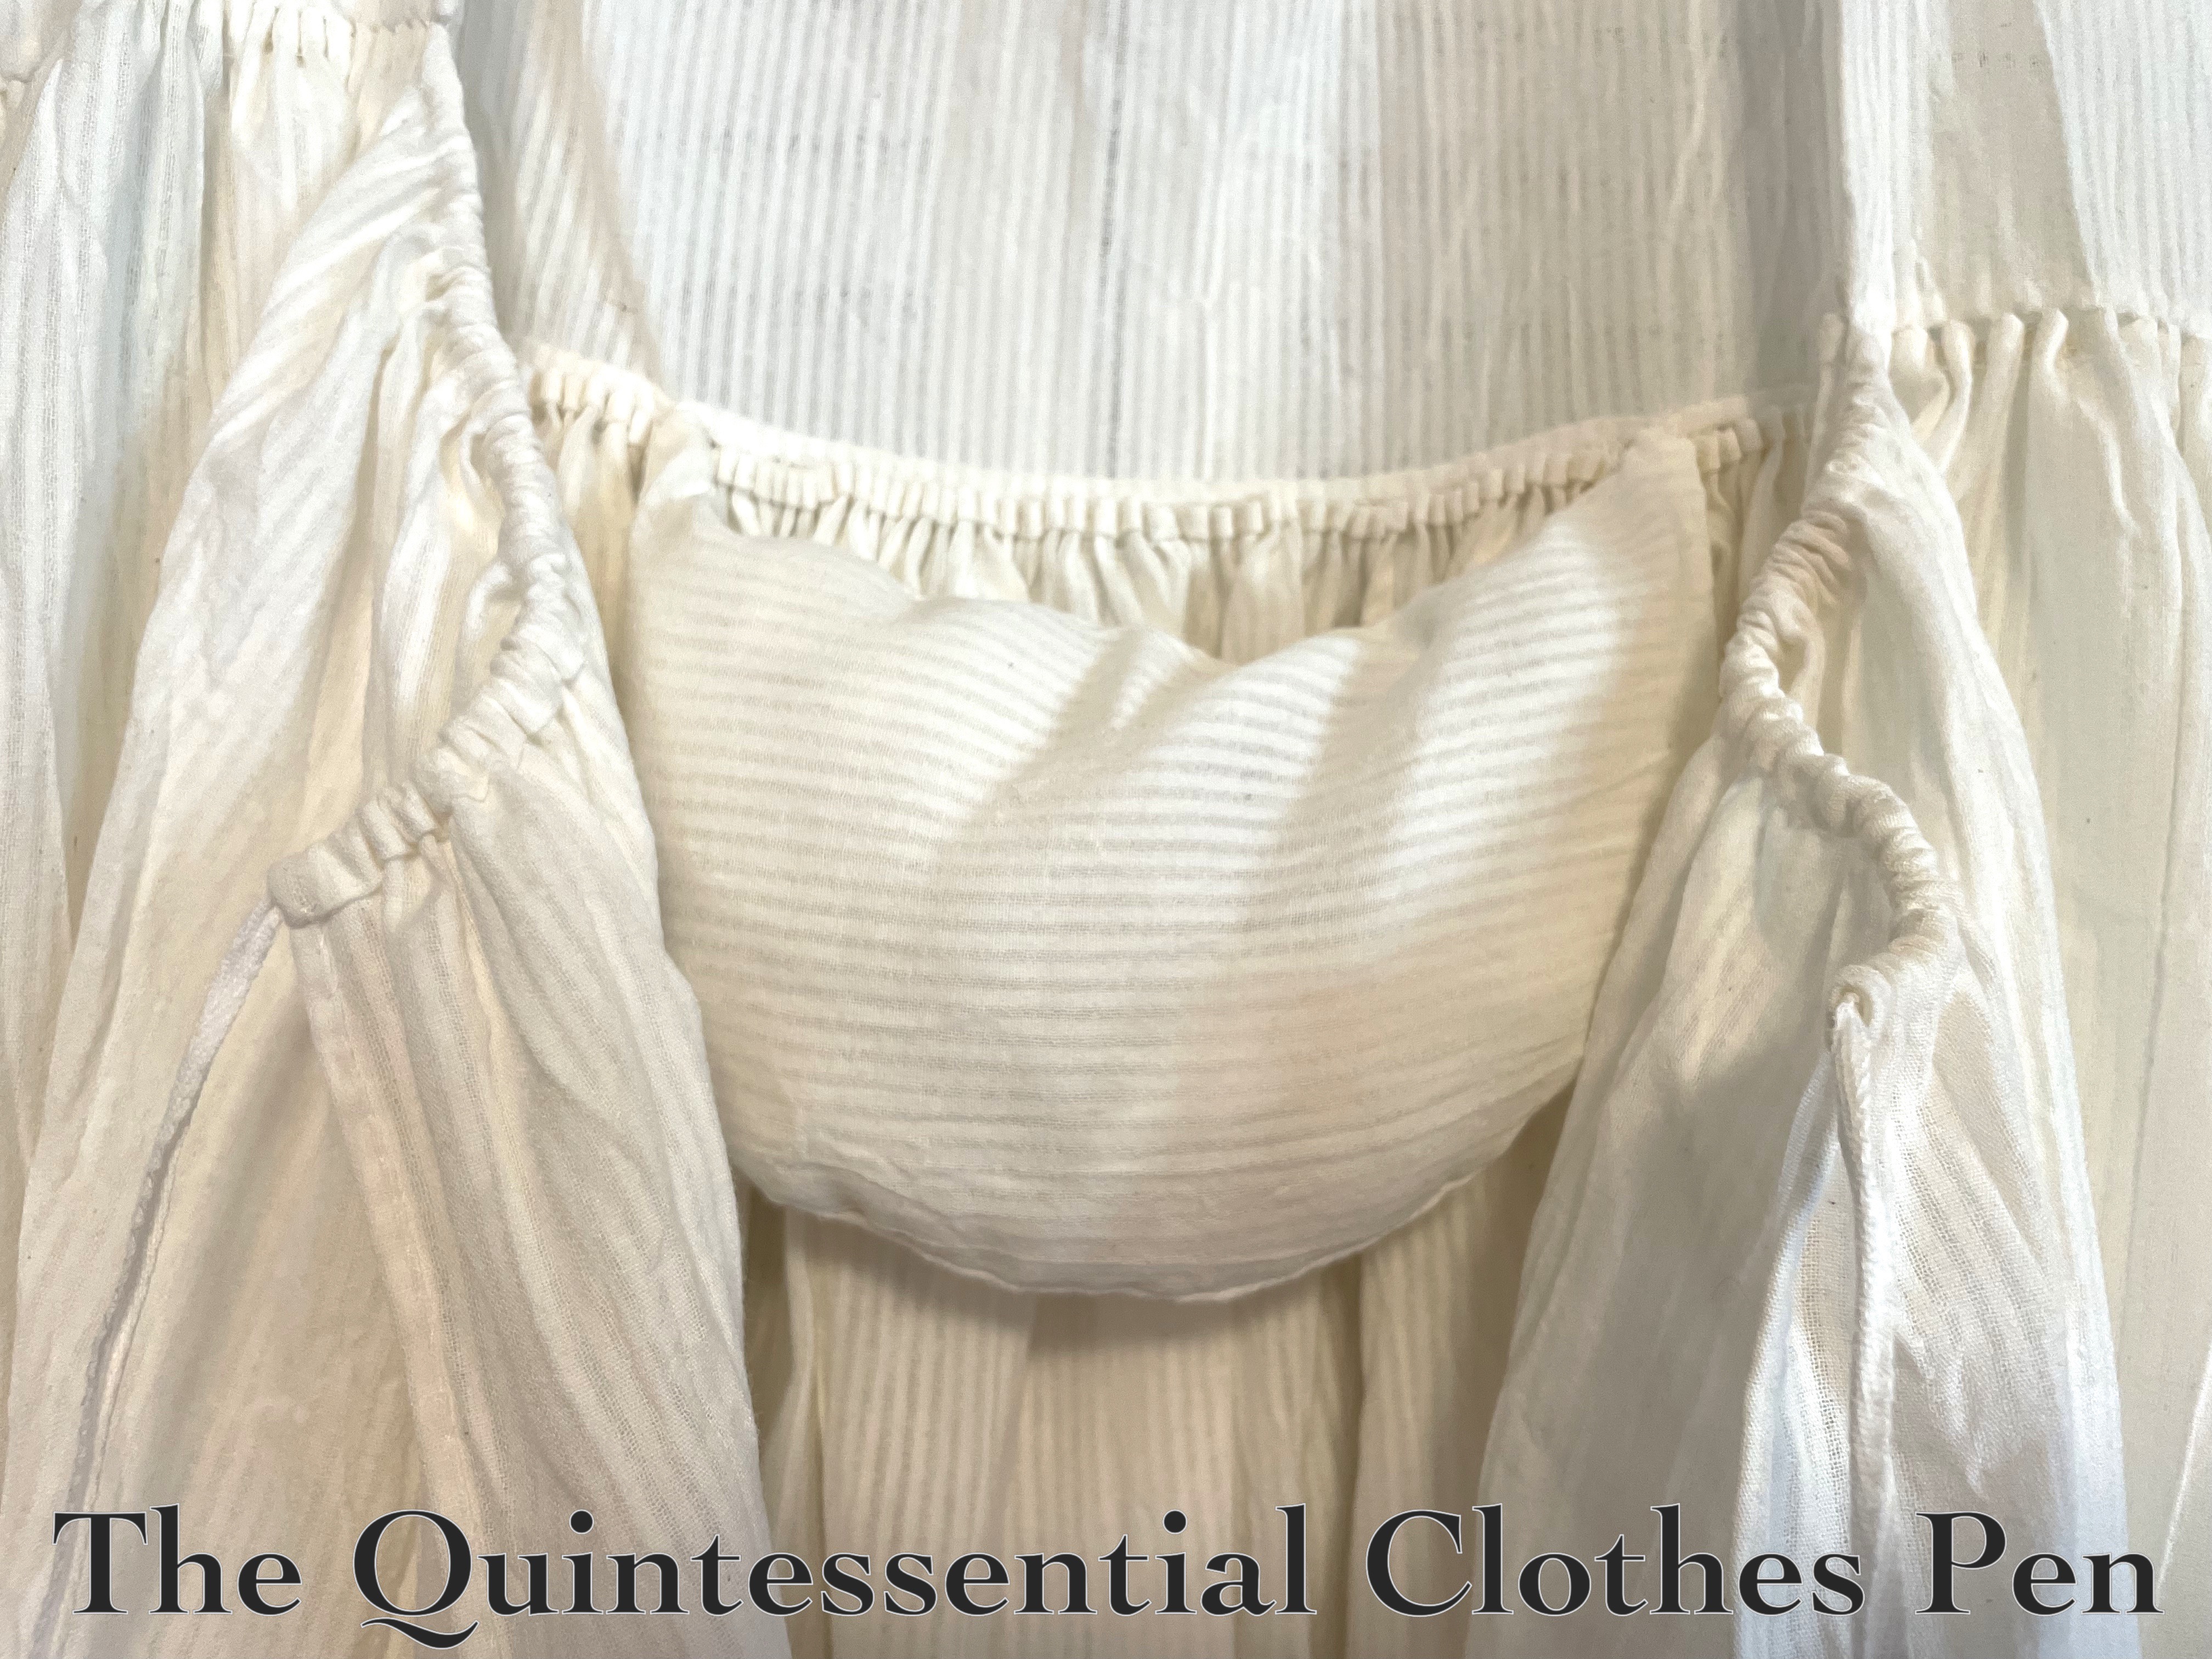
Then, below, is the dress with the front exterior opened up. Historically speaking, the lining would likely have been pinned in place, but I decided hooks would be simpler for me (and still adjustable with a little bit of sewing) and so my lining closes with 4 hooks and loops. The front skirt slit opening is lost in the gathers once the exterior of the dress is closed.
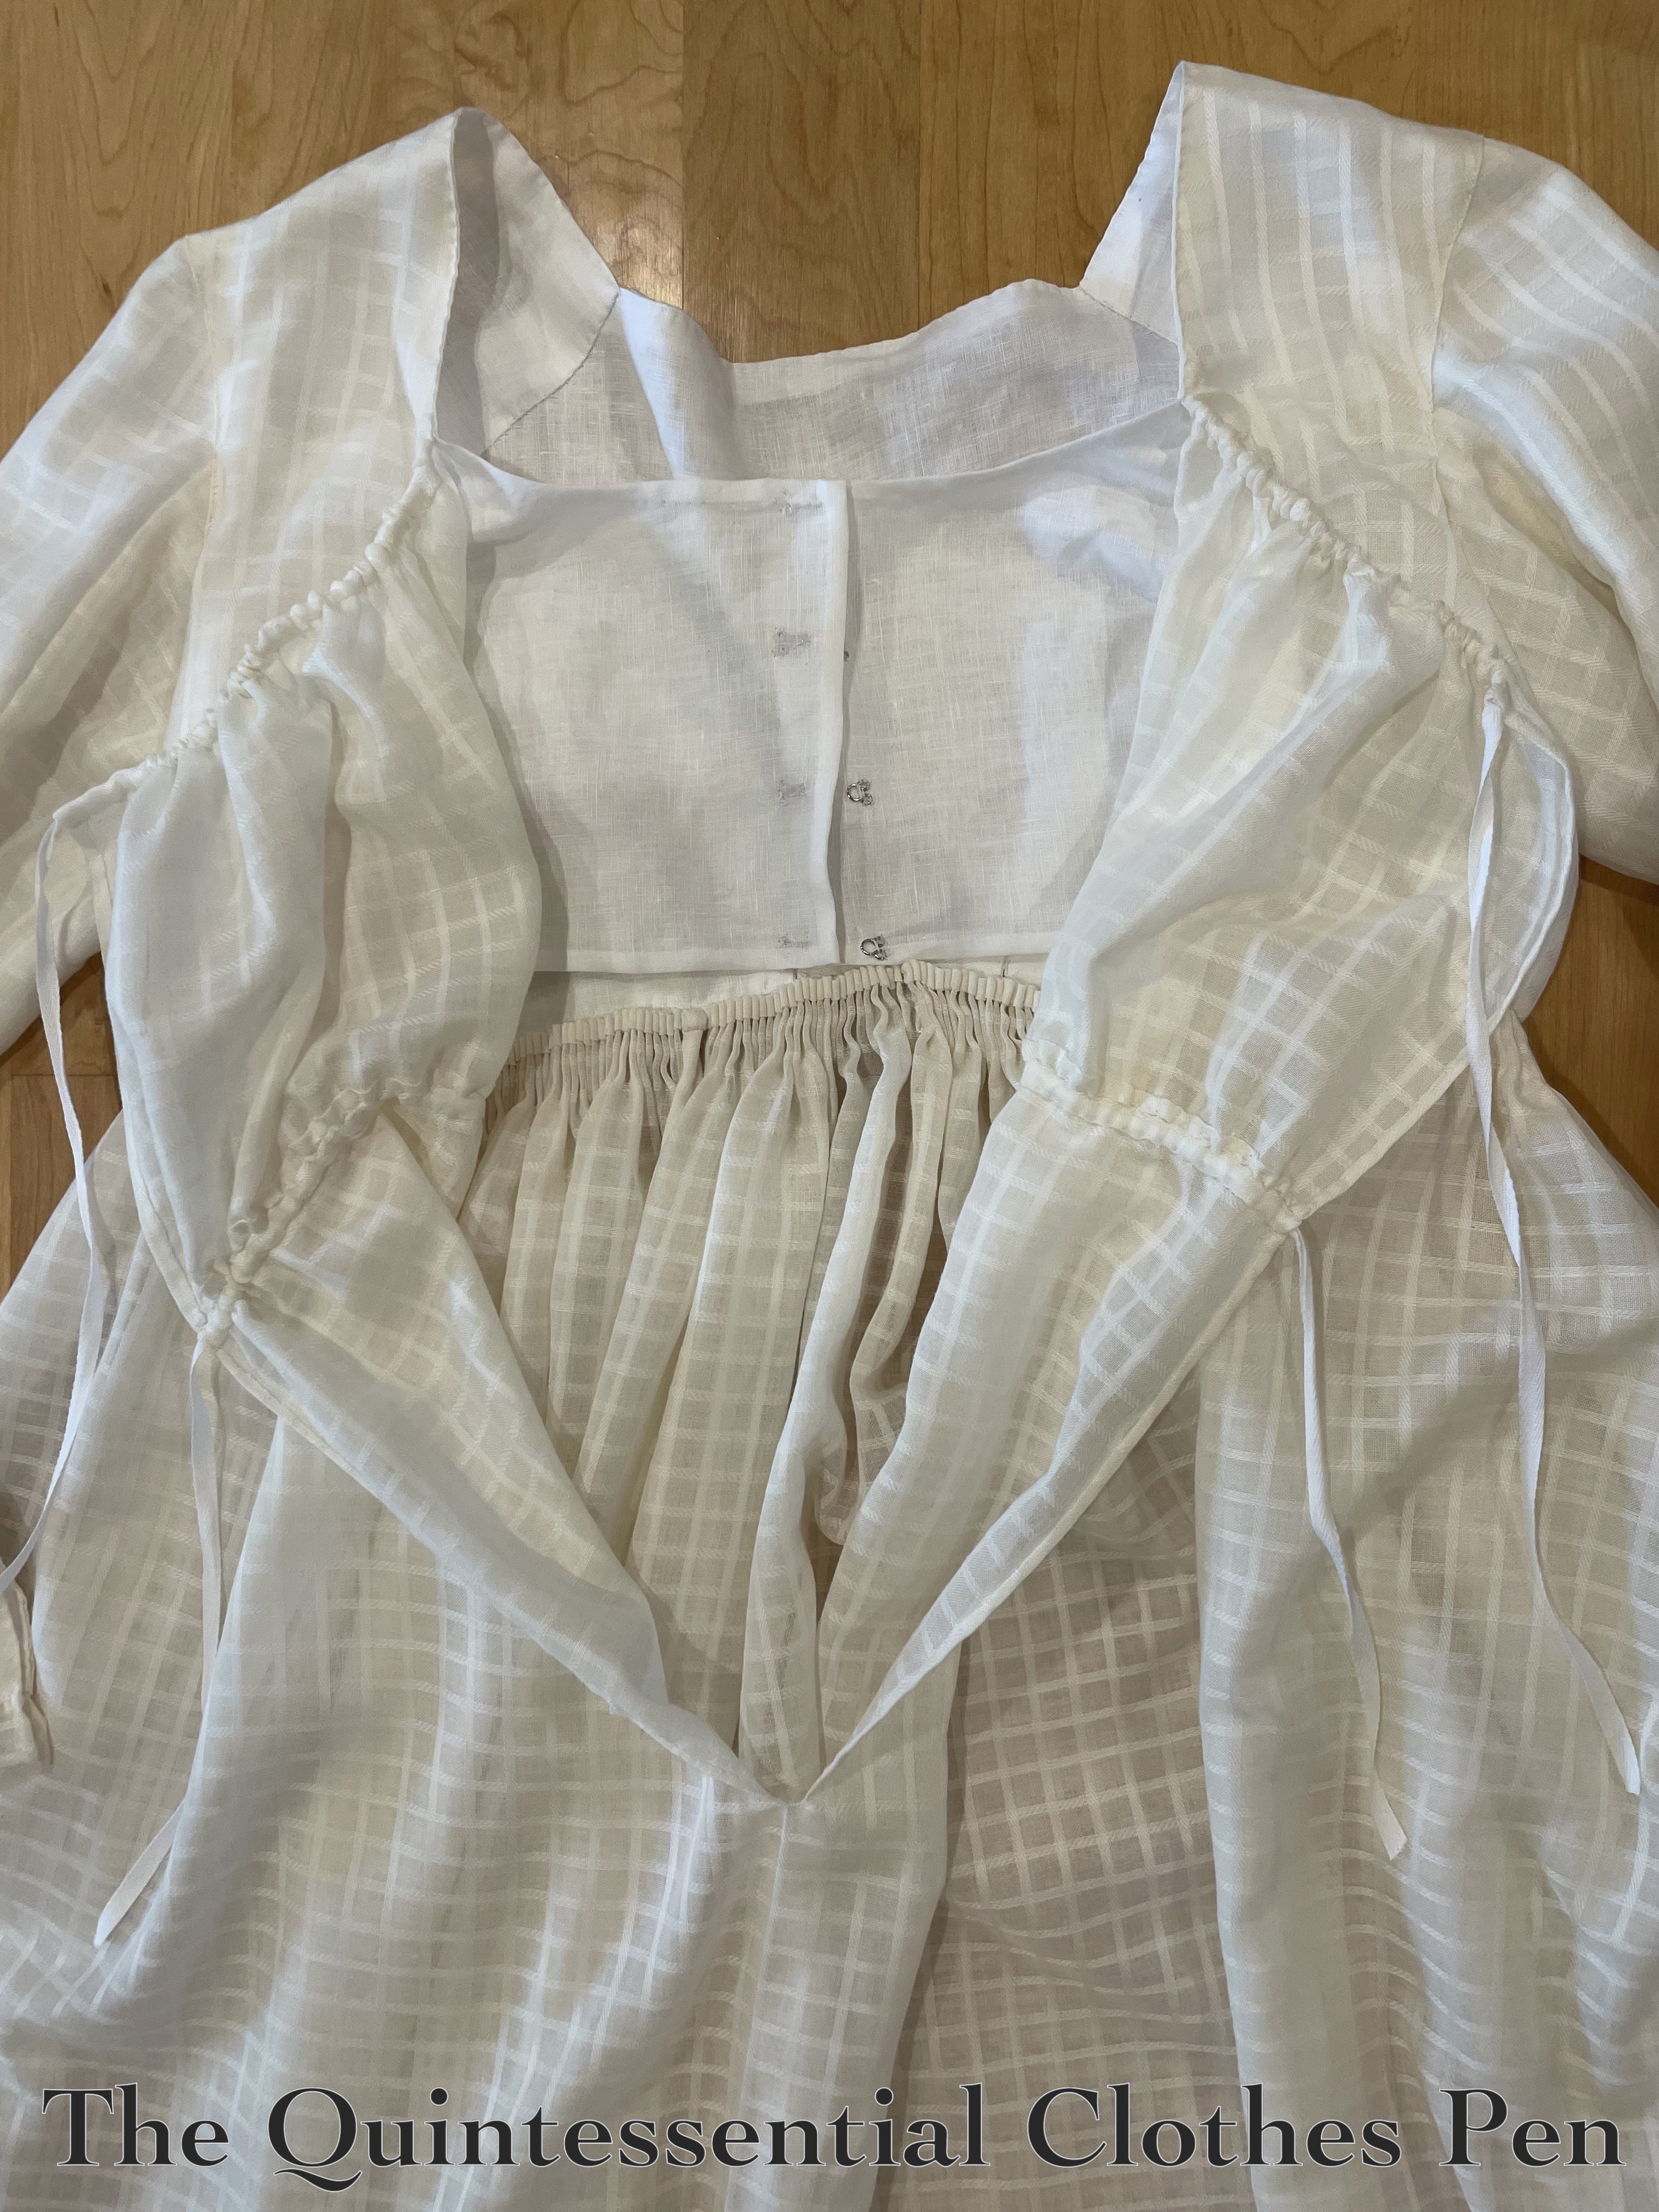
The next photo shows the back of the bodice, which curves up a little at center back in a very 1790s way, as well as the very full skirt that is attached across the back using cartridge pleats, creating a lovely series of folds.

And here is a view of the entire back of the dress.
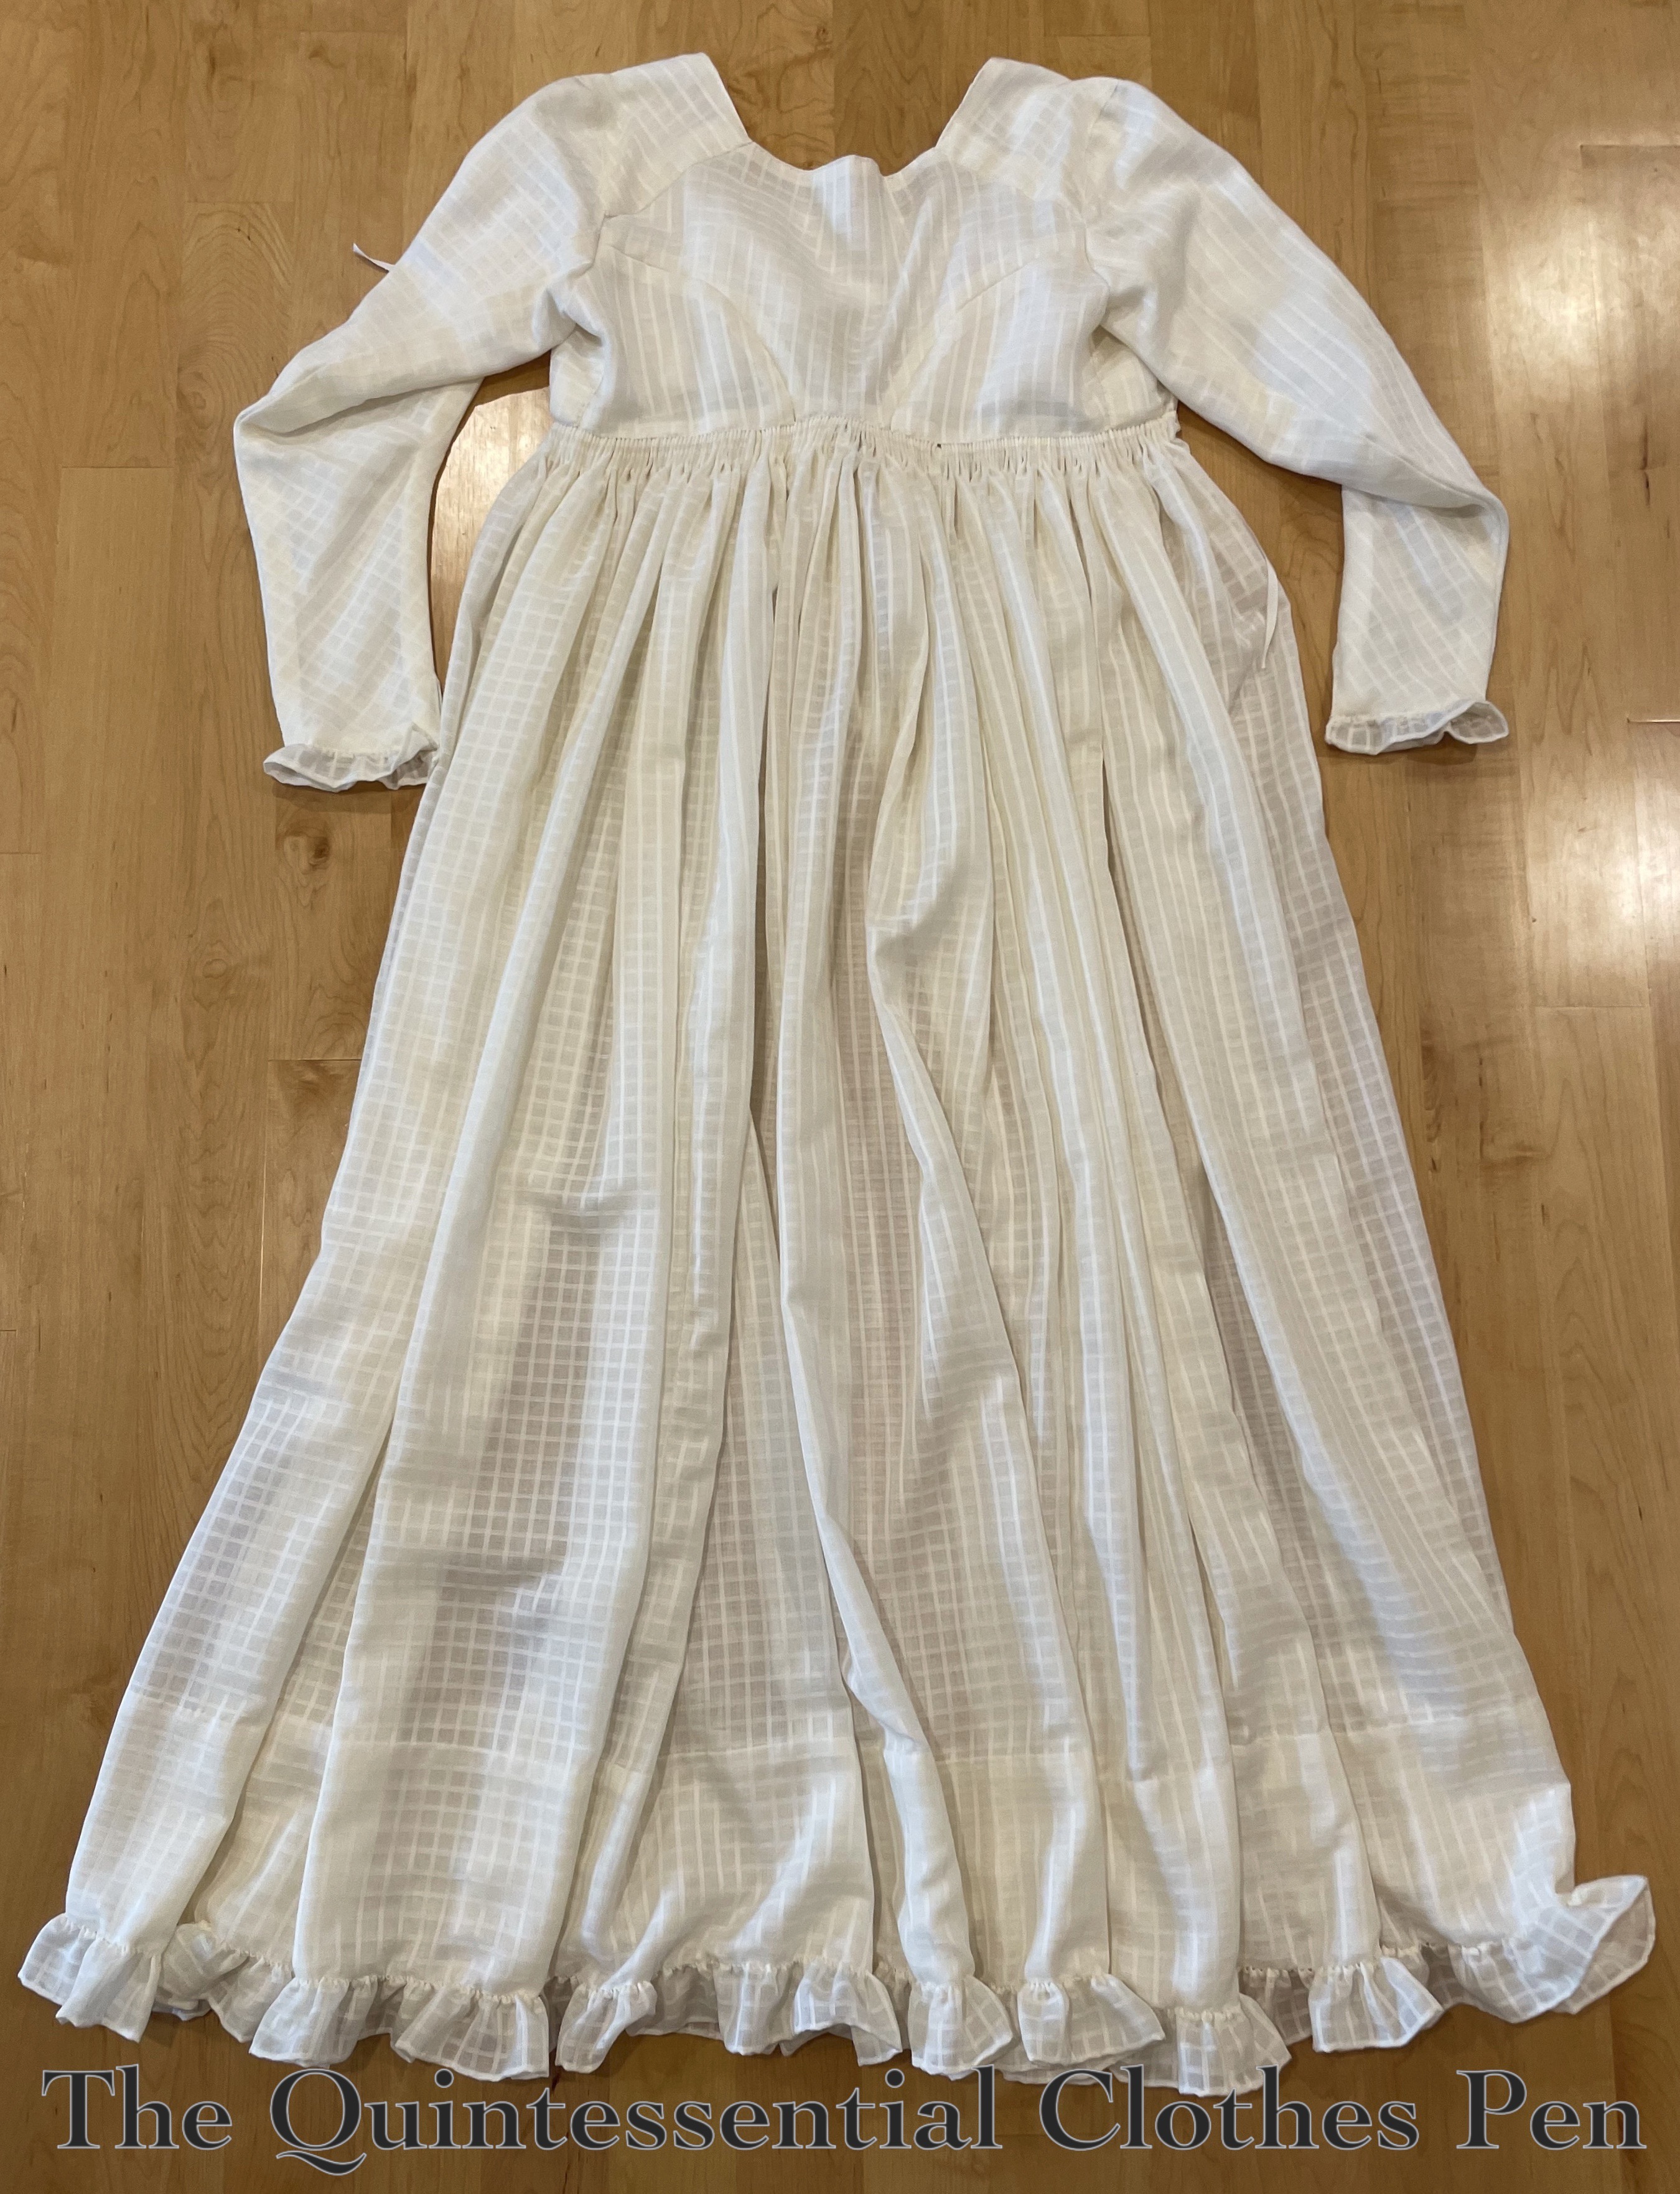
The final touch was to hem and then add all of the ruffles! I brought the basic rectangle shapes with me on trips and quietly introverted while hemming miles of edges. Eventually, they were all hemmed and connected. Then… I went back along one long edge on each ruffle section and ran whip gathers. Then, finally, I butted the edges to the sleeve hems and bottom edge of the skirt and whipped the ruffles into place.
Below is a closeup of the hem ruffle, where the narrow hem of the ruffle and the butted edges are both clearly visible.
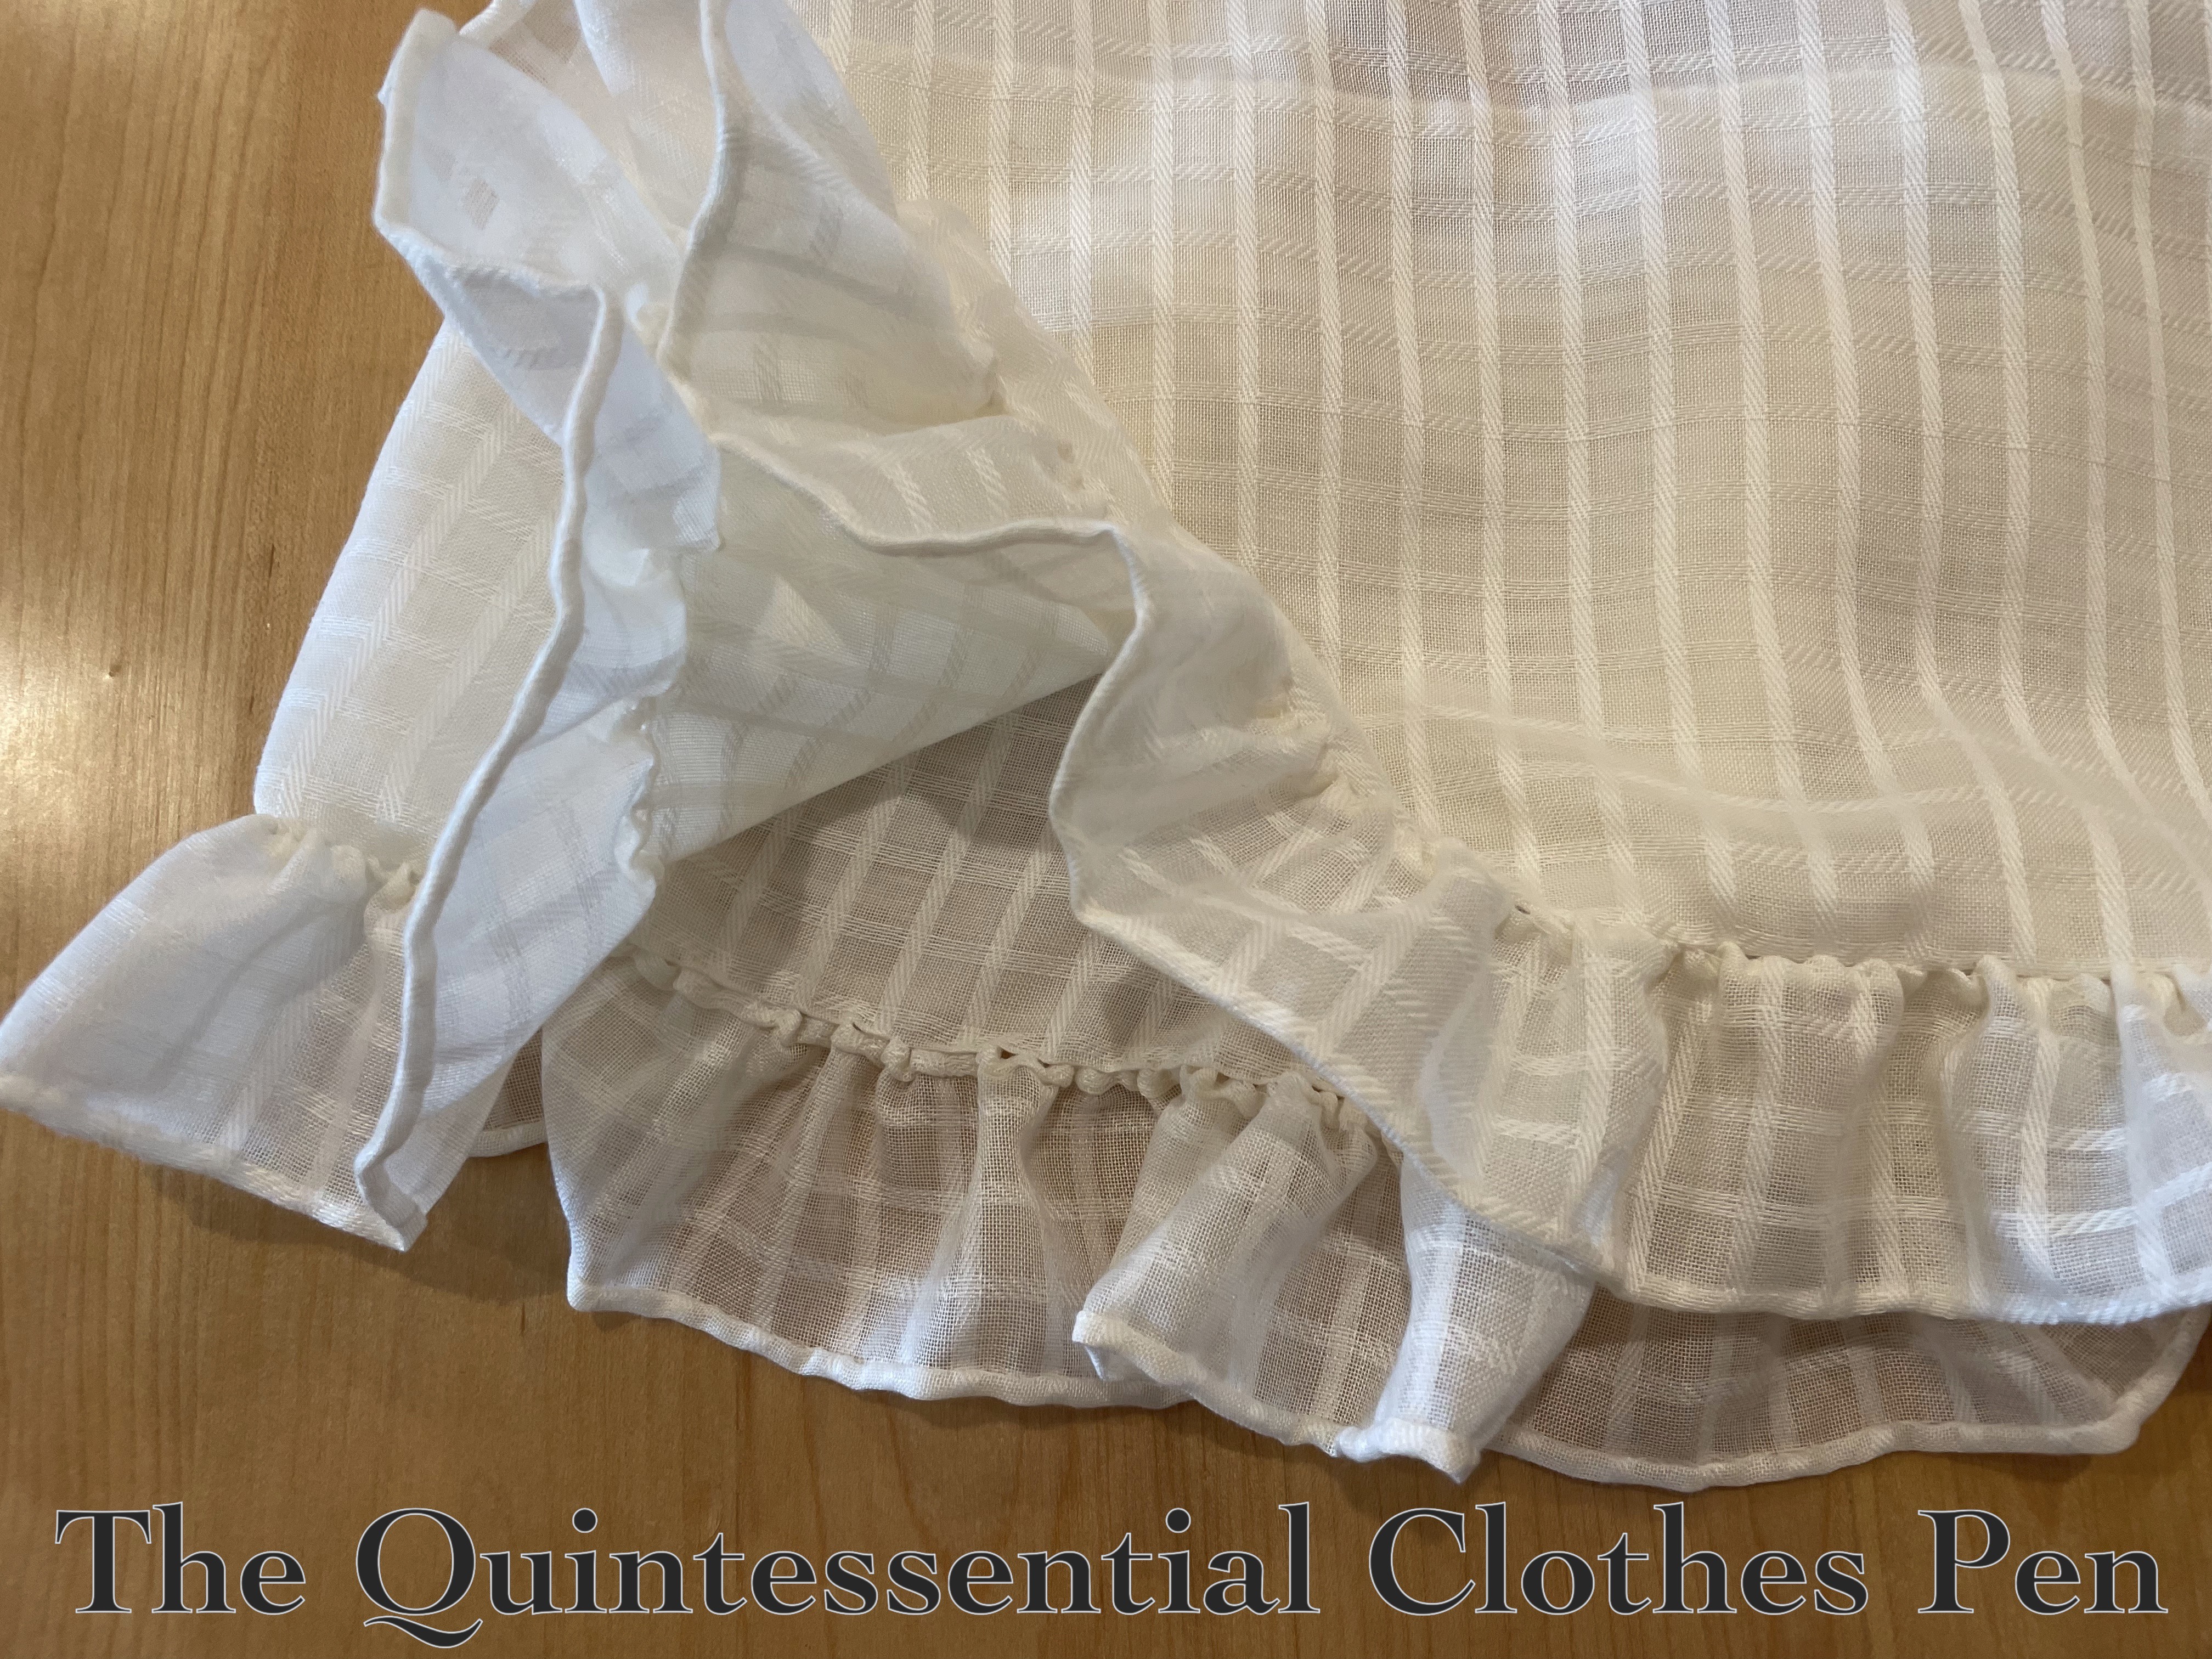
And here is a closeup of the sleeve opening, which again shows the narrow hems on the ruffle and butted edges of the ruffle and sleeve.

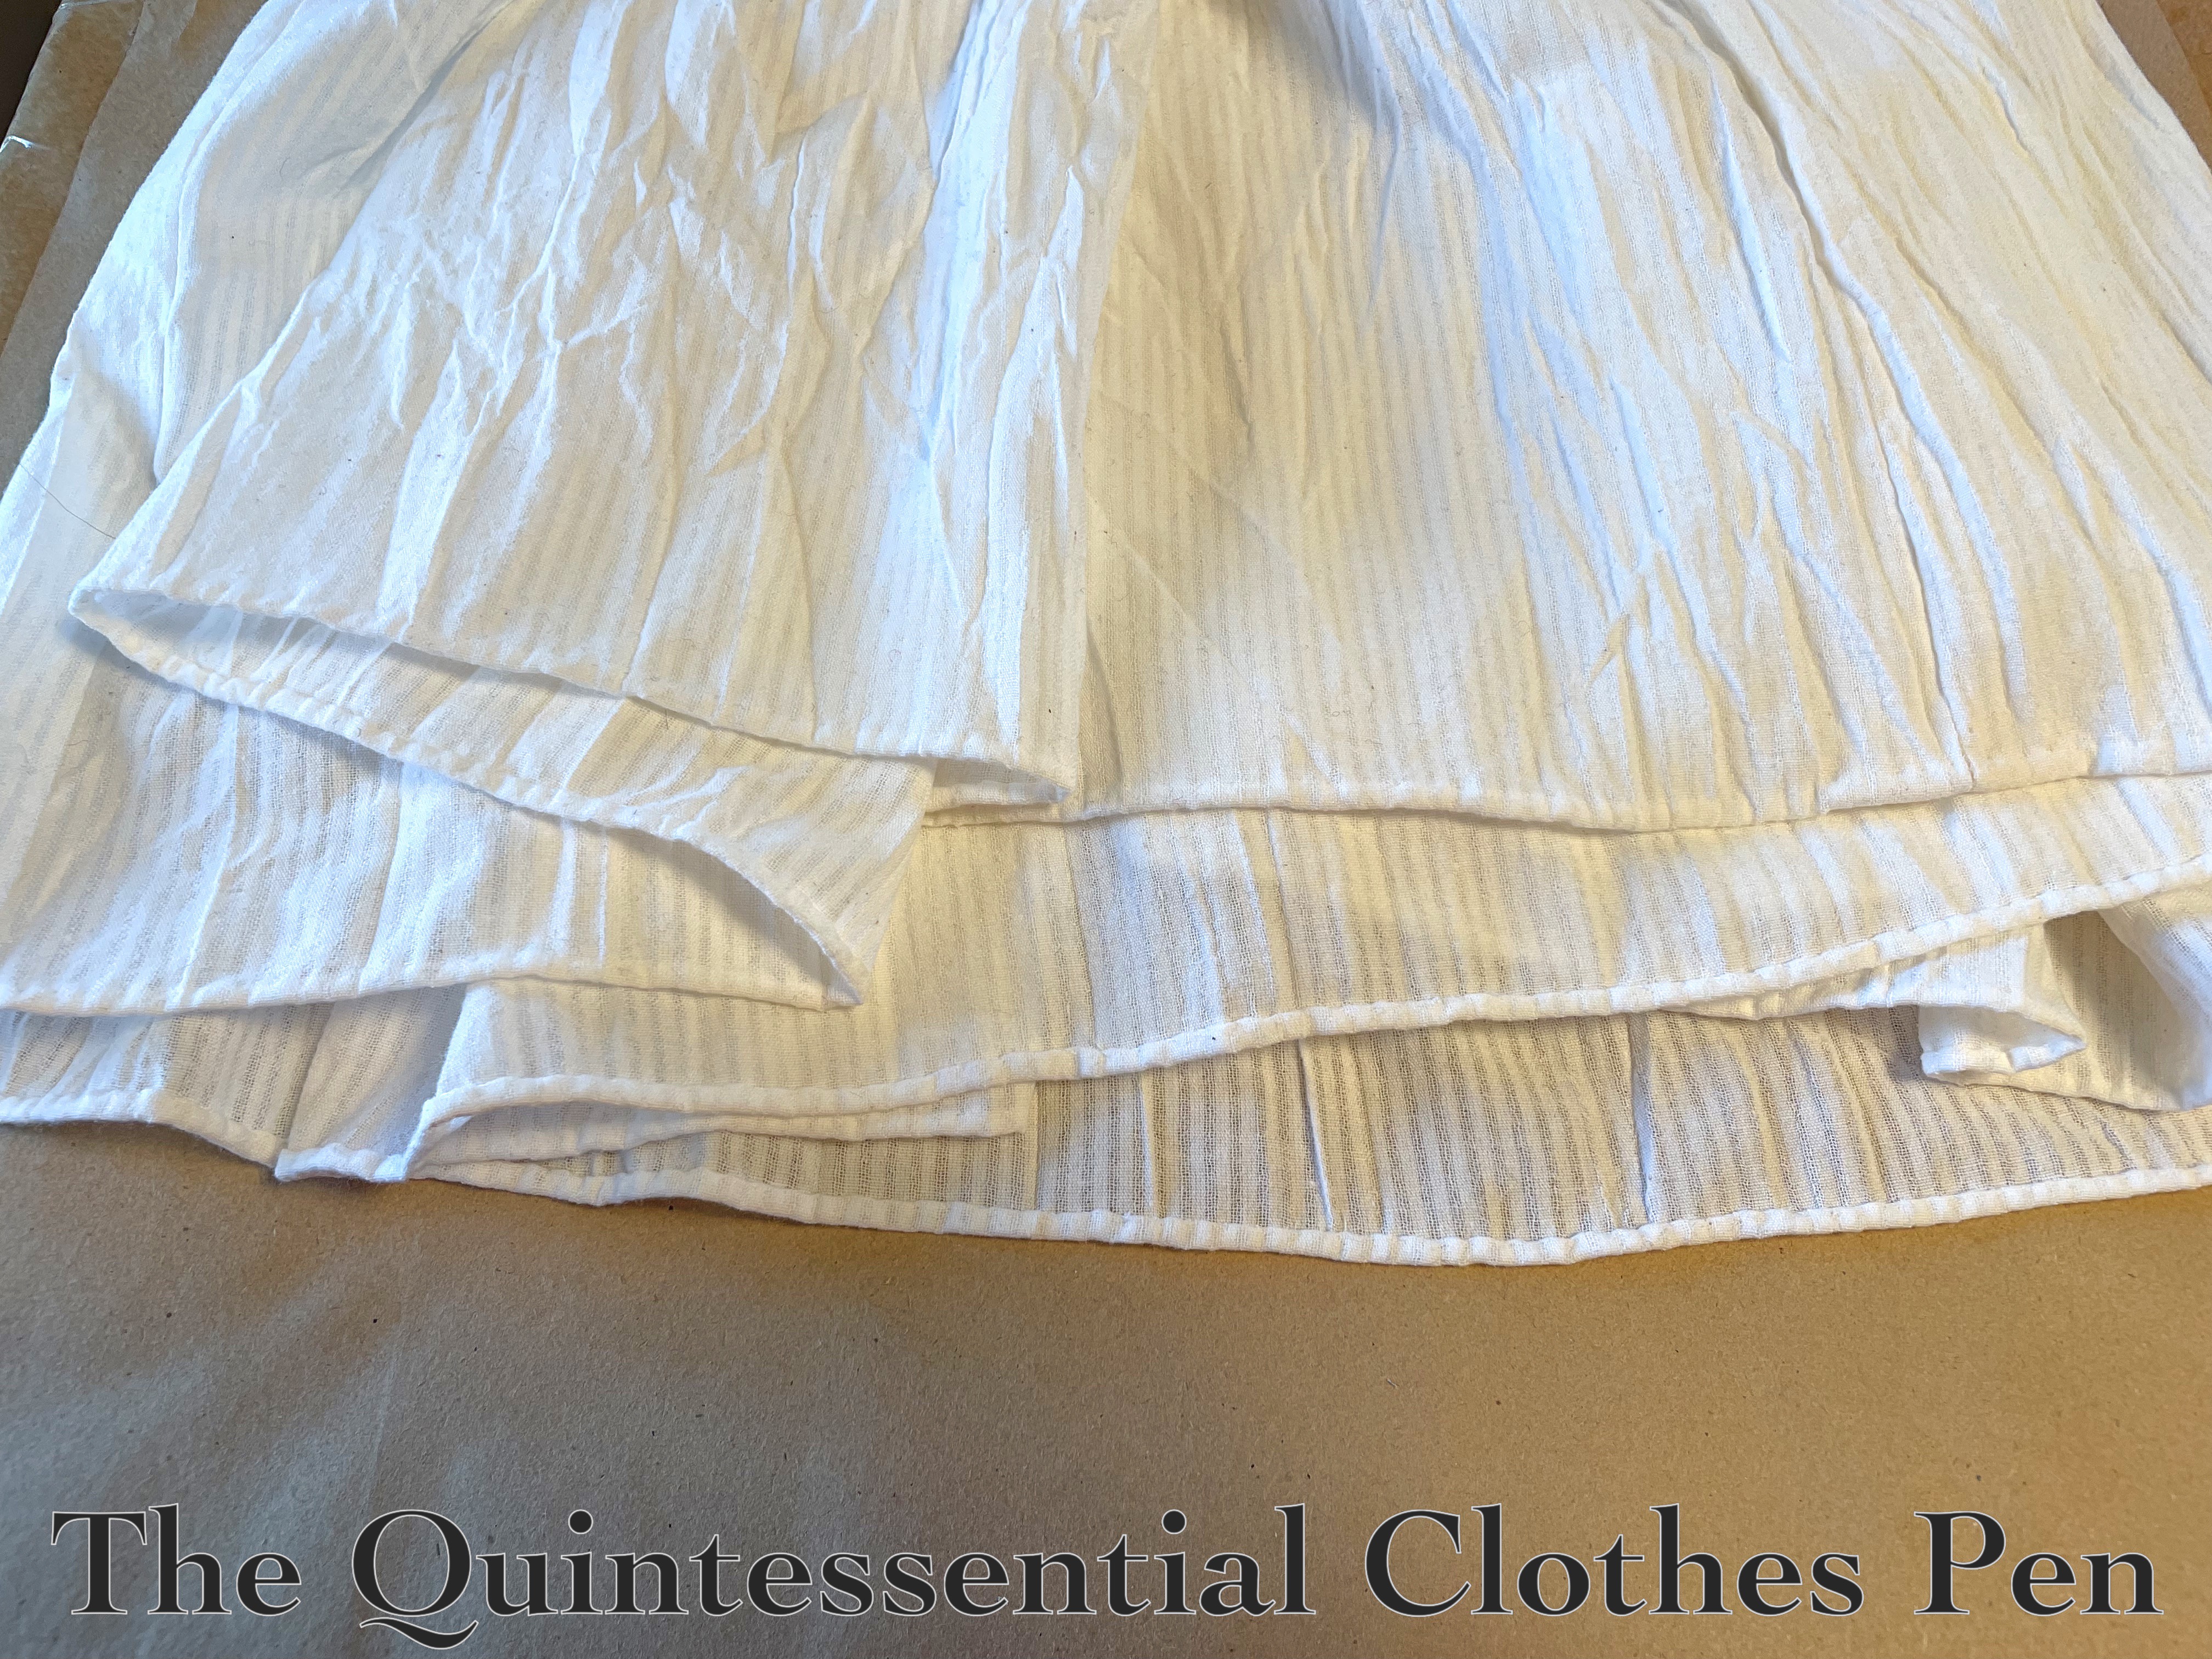
I did have one strange decision to make regarding the depth of them hem on the dress itself. It might not have struck you as odd that the hem is so deep (about 6″), but it does look slightly strange to me when I look at photos of the dress laid out, or when I see it without the petticoat underneath.
The reason for the unusually (for this period) deep hem is that my petticoat somehow ended up being a bit short, even with a narrow hem. I didn’t want to have the nice, smooth white expanse of this skirt broken by a section at the hem that wasn’t backed by a petticoat before the dense white of the ruffle. And I had lots of length in my dress exterior to play with.
I considered tucks to take up the length and provide opacity, but it looked ridiculous in this fabric and for this particular decade. Instead, I settled on this wide hem which is set at a height that makes the ruffle just brush the tops of my feet. The top edge of the deep hem just blends in when the petticoat is under the dress. Here is a view of the hem. Each of the squares is about ½”.

And that’s it! The dress is finally done! I’m super pleased that this UFO garment and the accessories to complete an ensemble are finished and that I have a whole new decade of clothing ready to wear.
Now, I’ve moved on to other sewing projects and trying to figure out how to use (mostly) my real hair to create a 1790s look so that I can get photos of the whole 1790s ensemble. More on that once I figure it out and get photos. In the meantime, thanks for reading this far and sticking with me through all of these minute details!


 The Quintessential Clothes Pen