Wicked, Monstrous, Silly, And A Good Time

10012673_1109871912380610_4283278151979500963_o
Some friends and I, taken by the official photographer of the night.

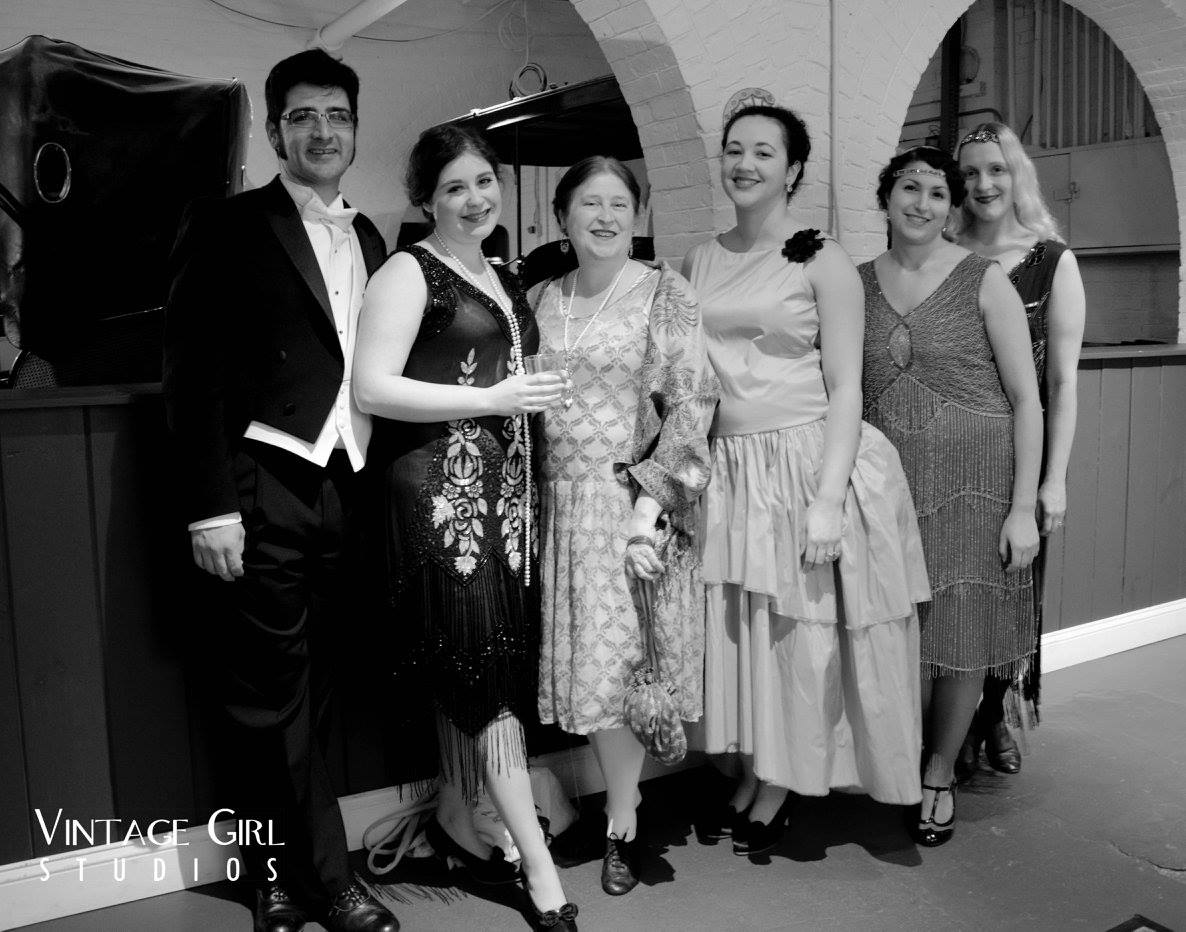
In the words of journalist Heywood Broun, “The Jazz Age was wicked and monstrous and silly. Unfortunately, I had a good time.” I don’t know about wicked or monstrous, but I certainly had a silly and good time recently at the Greater Boston Vintage Society’s White Lightning Ball.

IMG_2309
Silly faces!

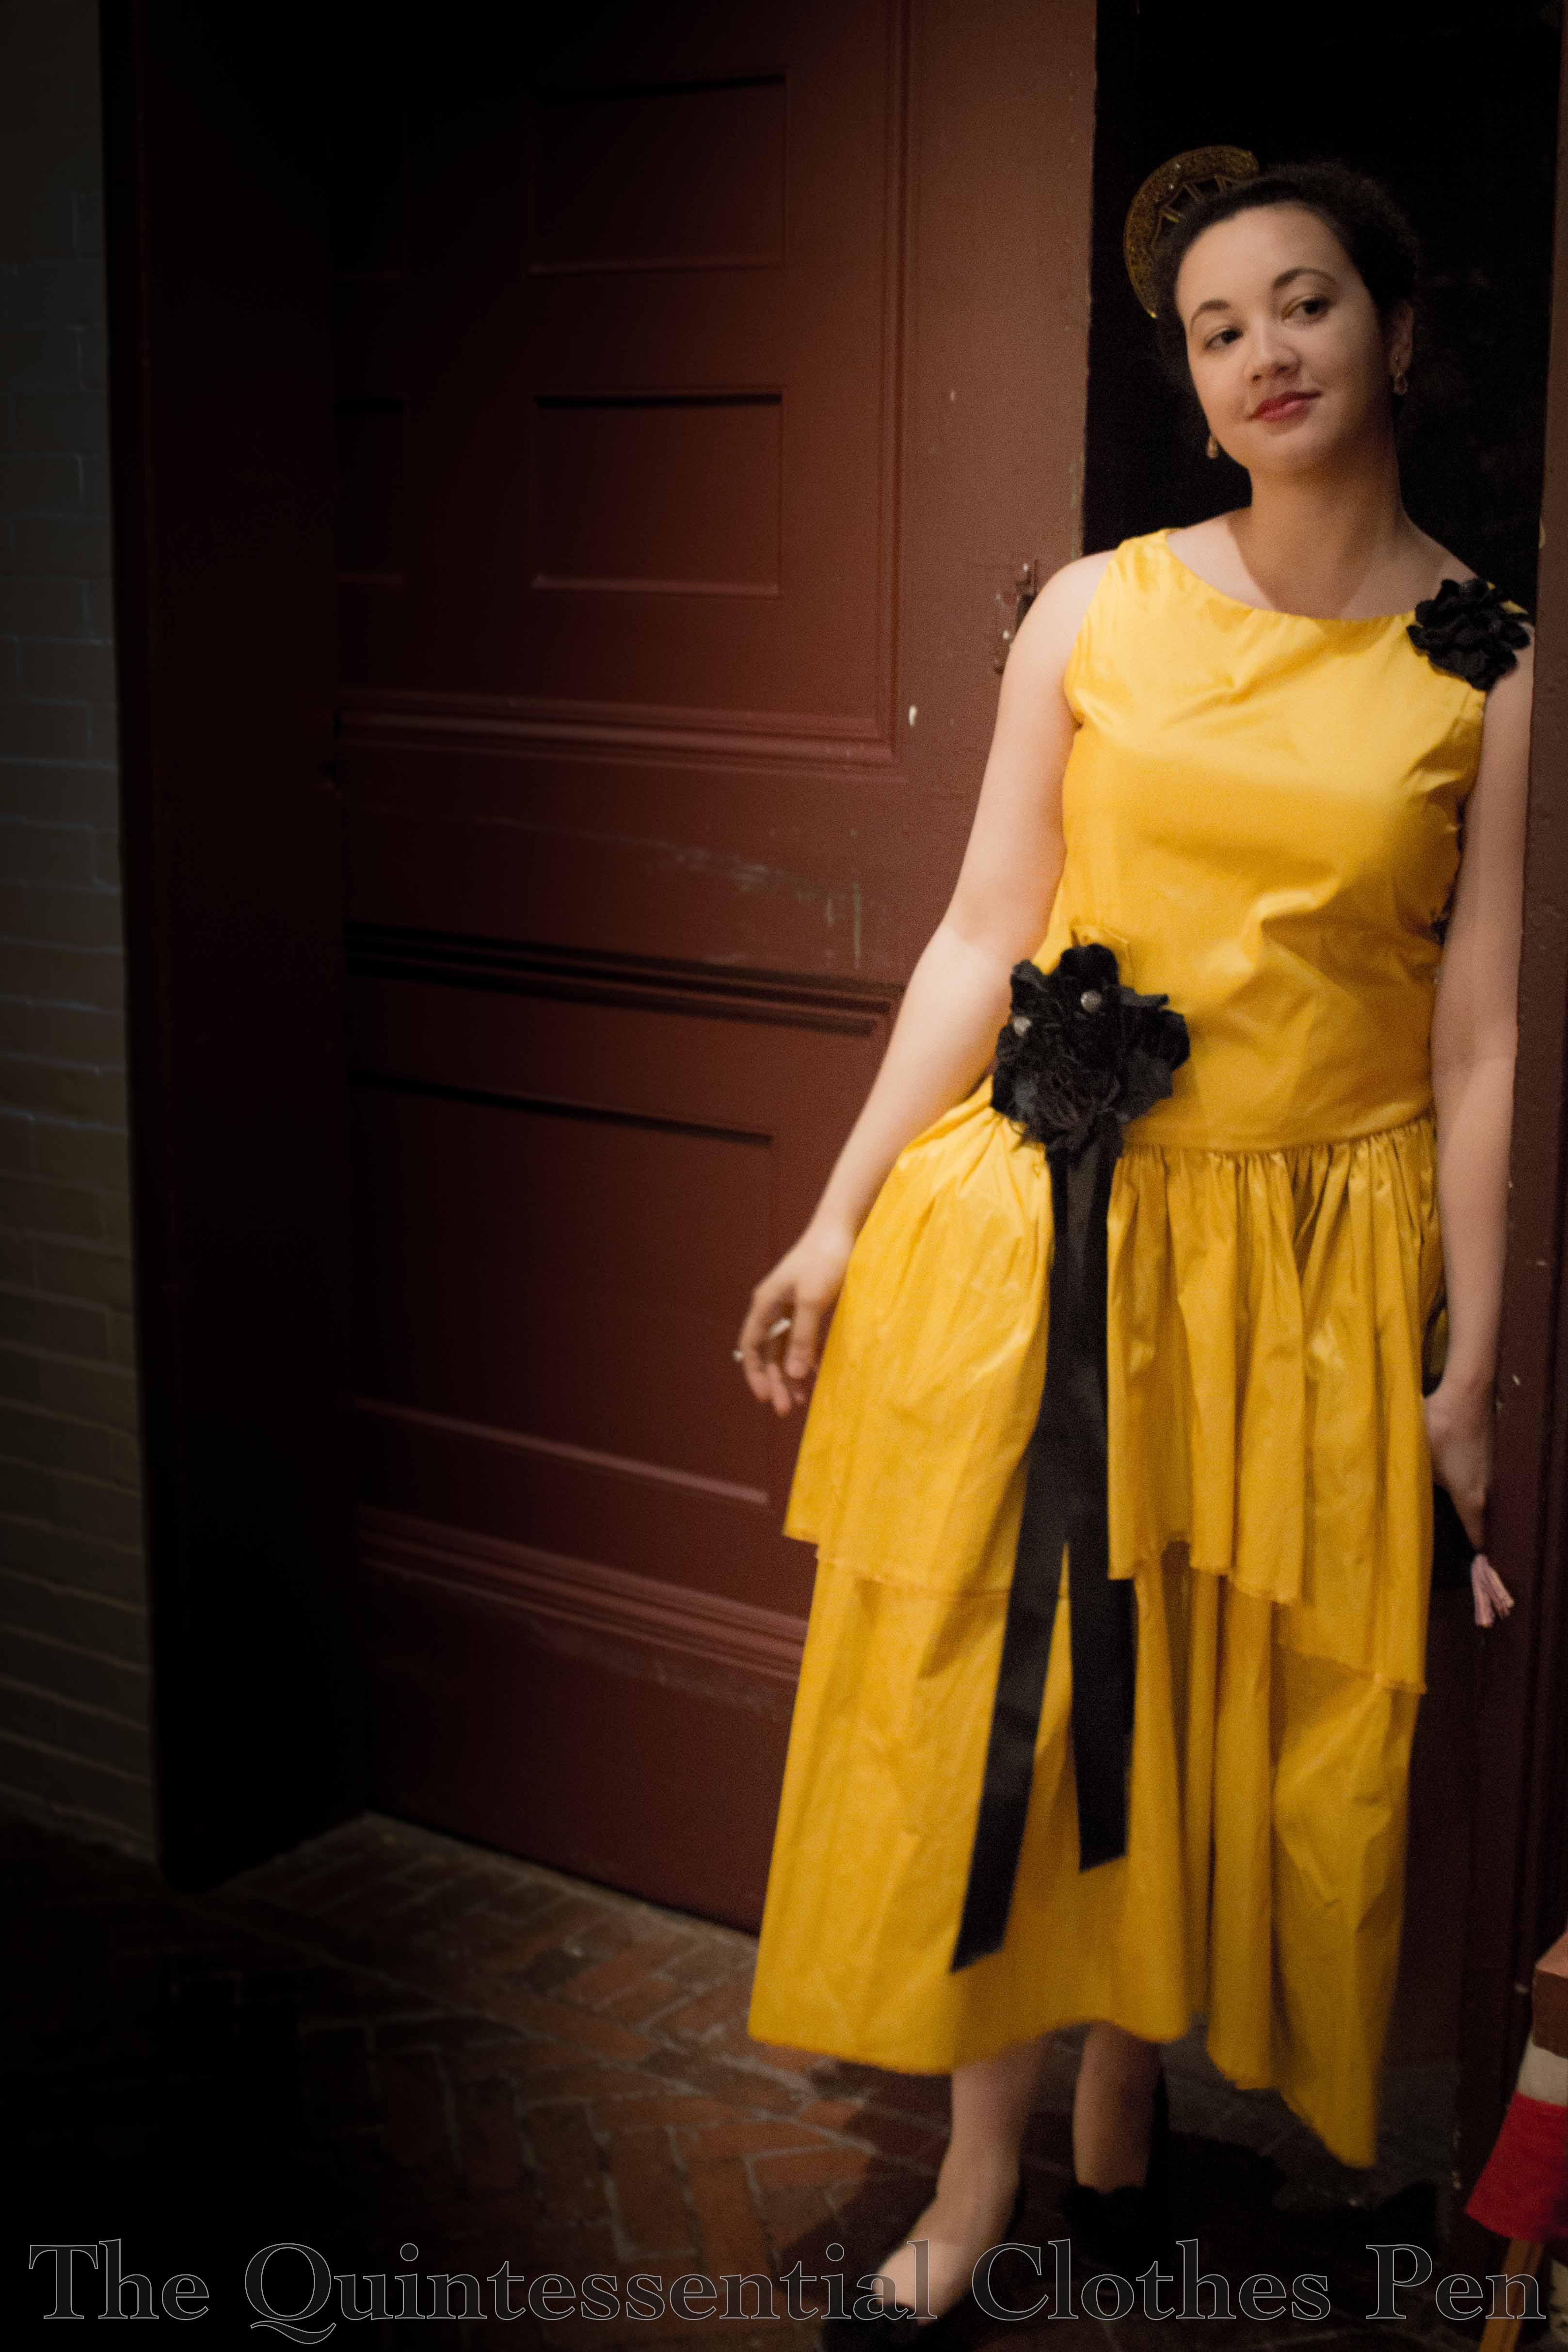
I wore my 1924 robe de style from last summer, updated with new dramatic trimmings that suit the dress much better than the last iteration. It’s such a fun, unusual, and distinctive style to wear. I fielded quite a few questions about the style and happily encouraged people who knew things about it such as that it looked like Lanvin. For my hair, I didn’t have time to attempt waves, so I aimed for a romantic style that was less time consuming, inspired by these: no waves worn with a robe de style, a romantic bun (on the right), and long hair pinned up. Also, this set of drawings shows a large hair comb worn with a robe de style which reminded me that I haven’t worn mine in a long time.

IMG_2331 (1)

My accessories include: my vintage celluloid hair comb; silver drop earrings with peachy faux stones, which don’t often match things, so it was nice to wear them since they don’t get worn often; and a recent purchase from American Duchess, black Seaburys! (Never fear, there’s a whole post coming about the Seaburys, but for now we’re focusing on the event and the clothes.)

IMG_2362 (1)

This event is held at the Larz Anderson Auto Museum in what was the Anderson family’s carriage house in the early 20th century. It is a large building with multiple levels used for stabling horses as well as storing carriages and cars. The upper floor of the carriage house housed an exhibit of motorcycles during the event, if you’re wondering about the background. Downstairs was the collection of Anderson family cars from the 1900s and 1910s. They were very fun to look at and so tempting to sit in… I know it wouldn’t be good for the cars… And there were security cameras… so I had to content myself with looking at them and dreaming of reproductions that we could ride in.

IMG_2352 (1)

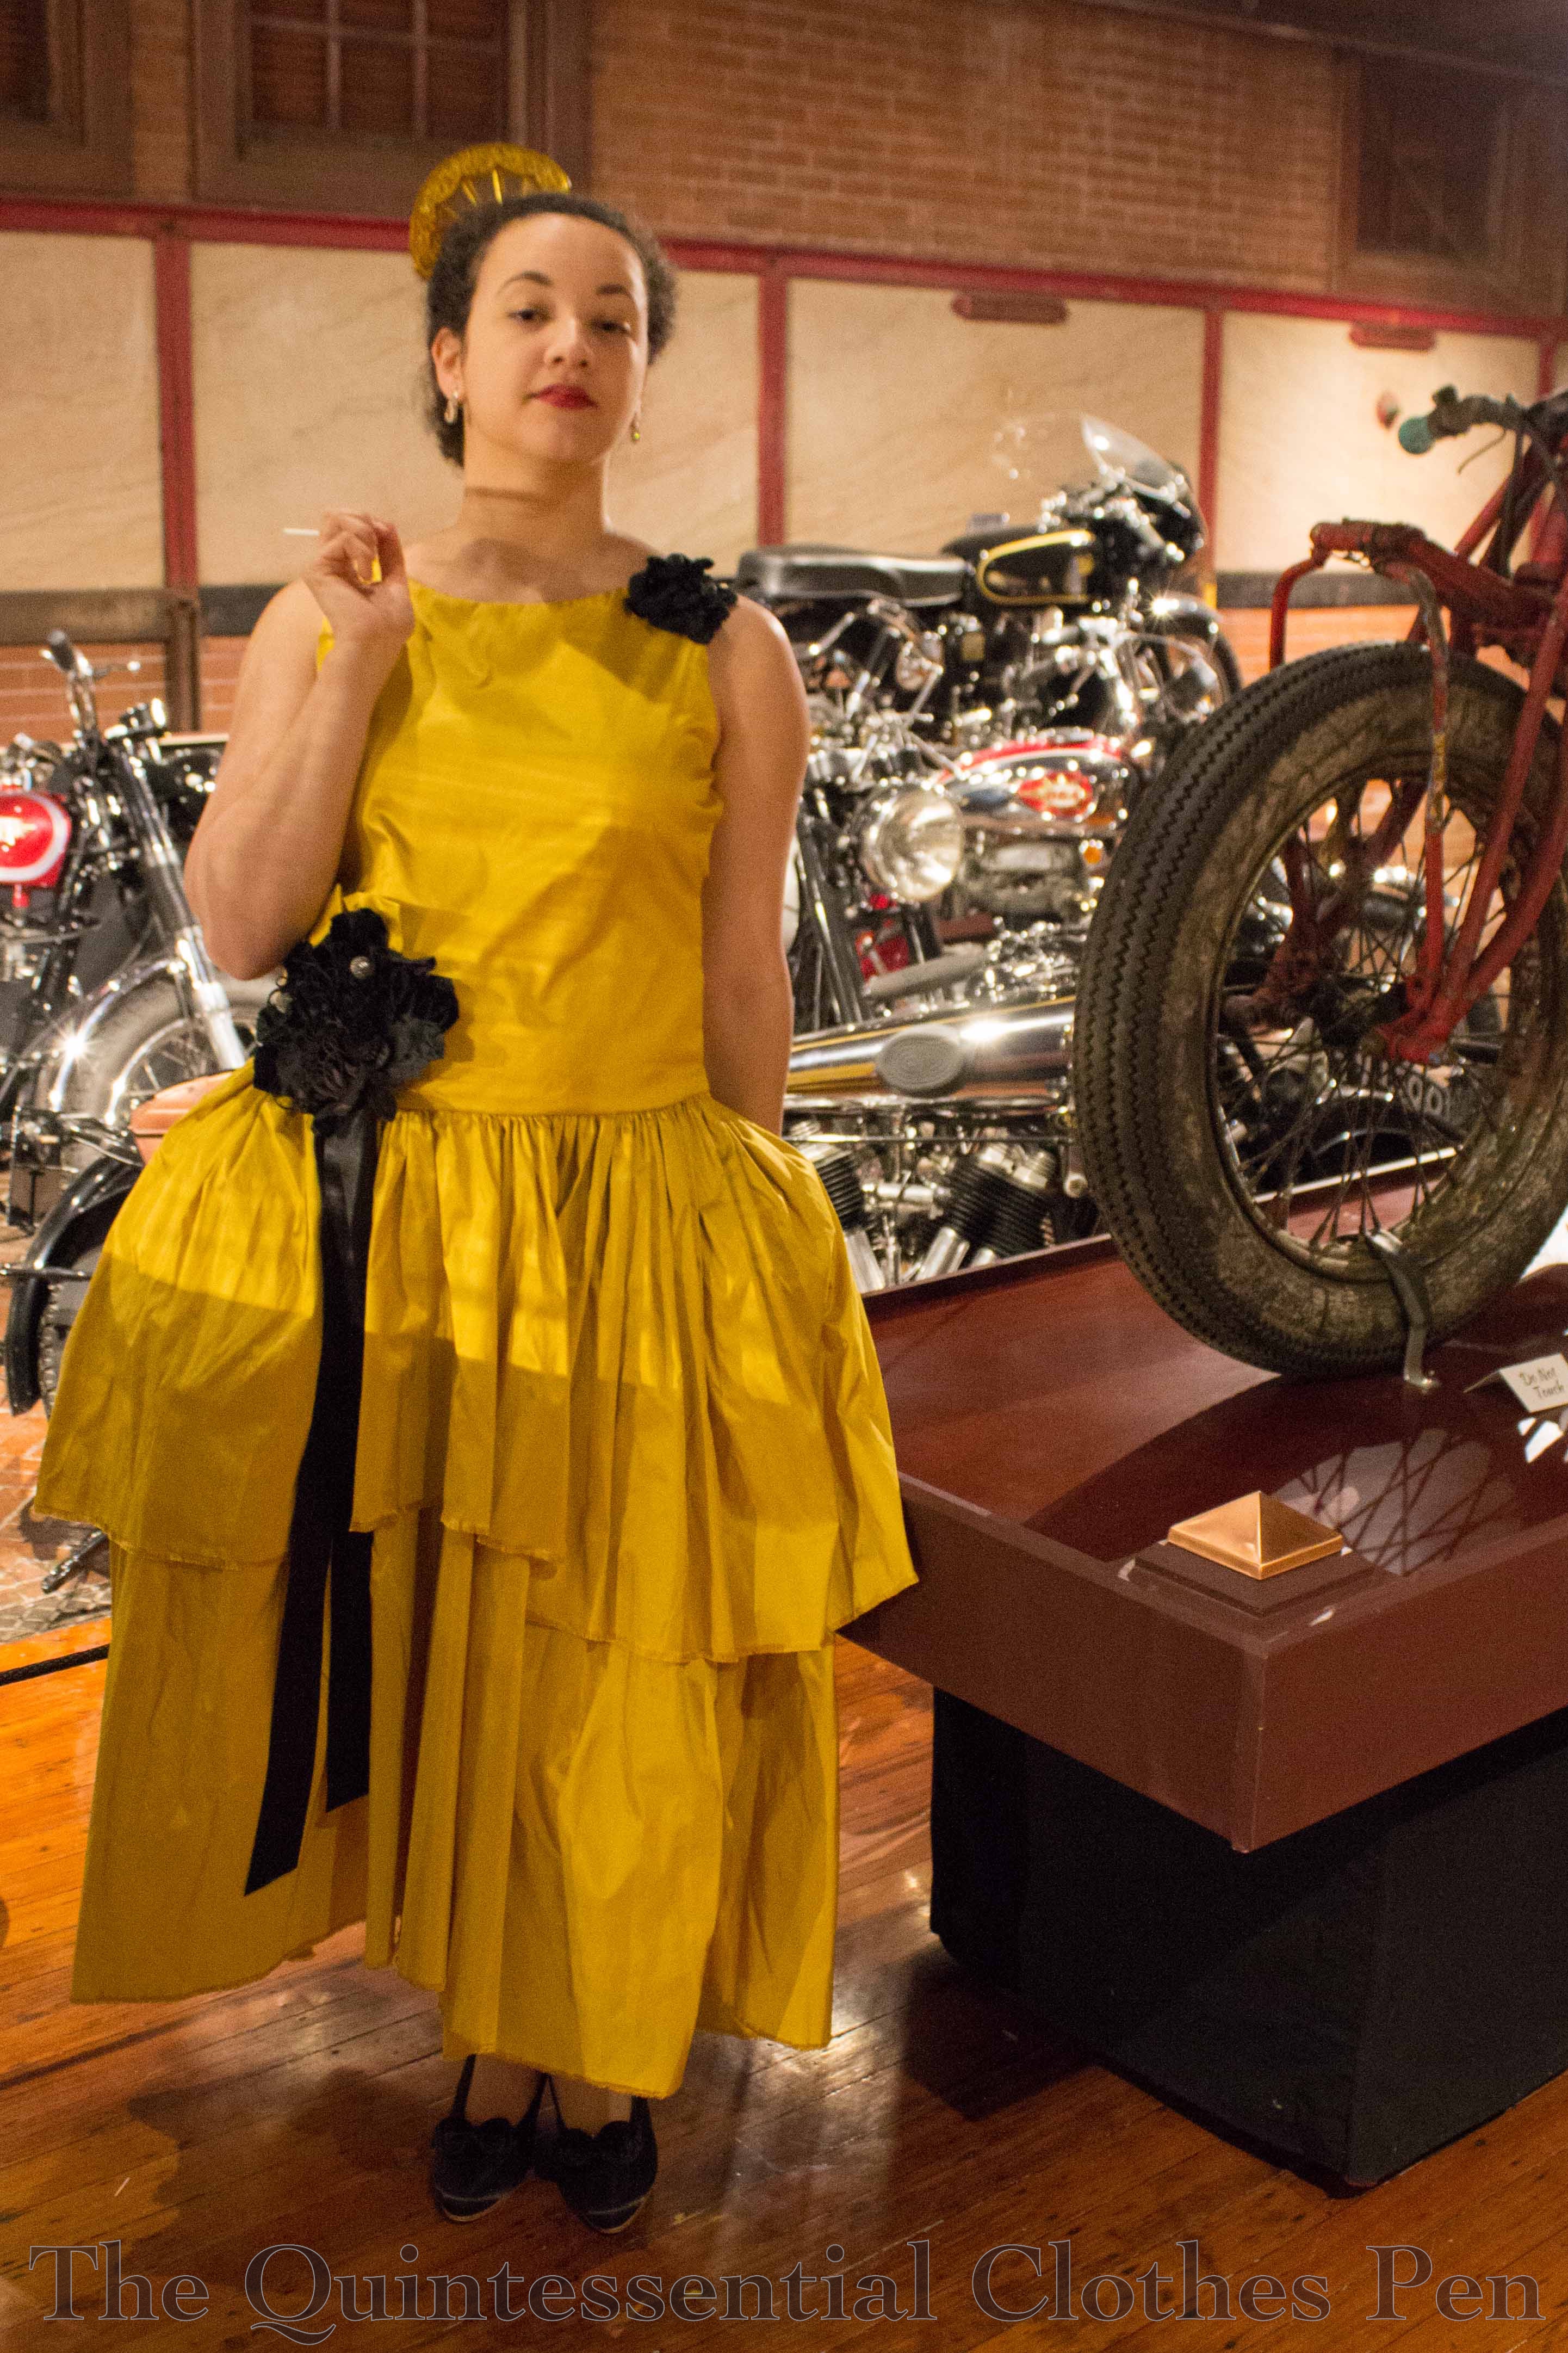
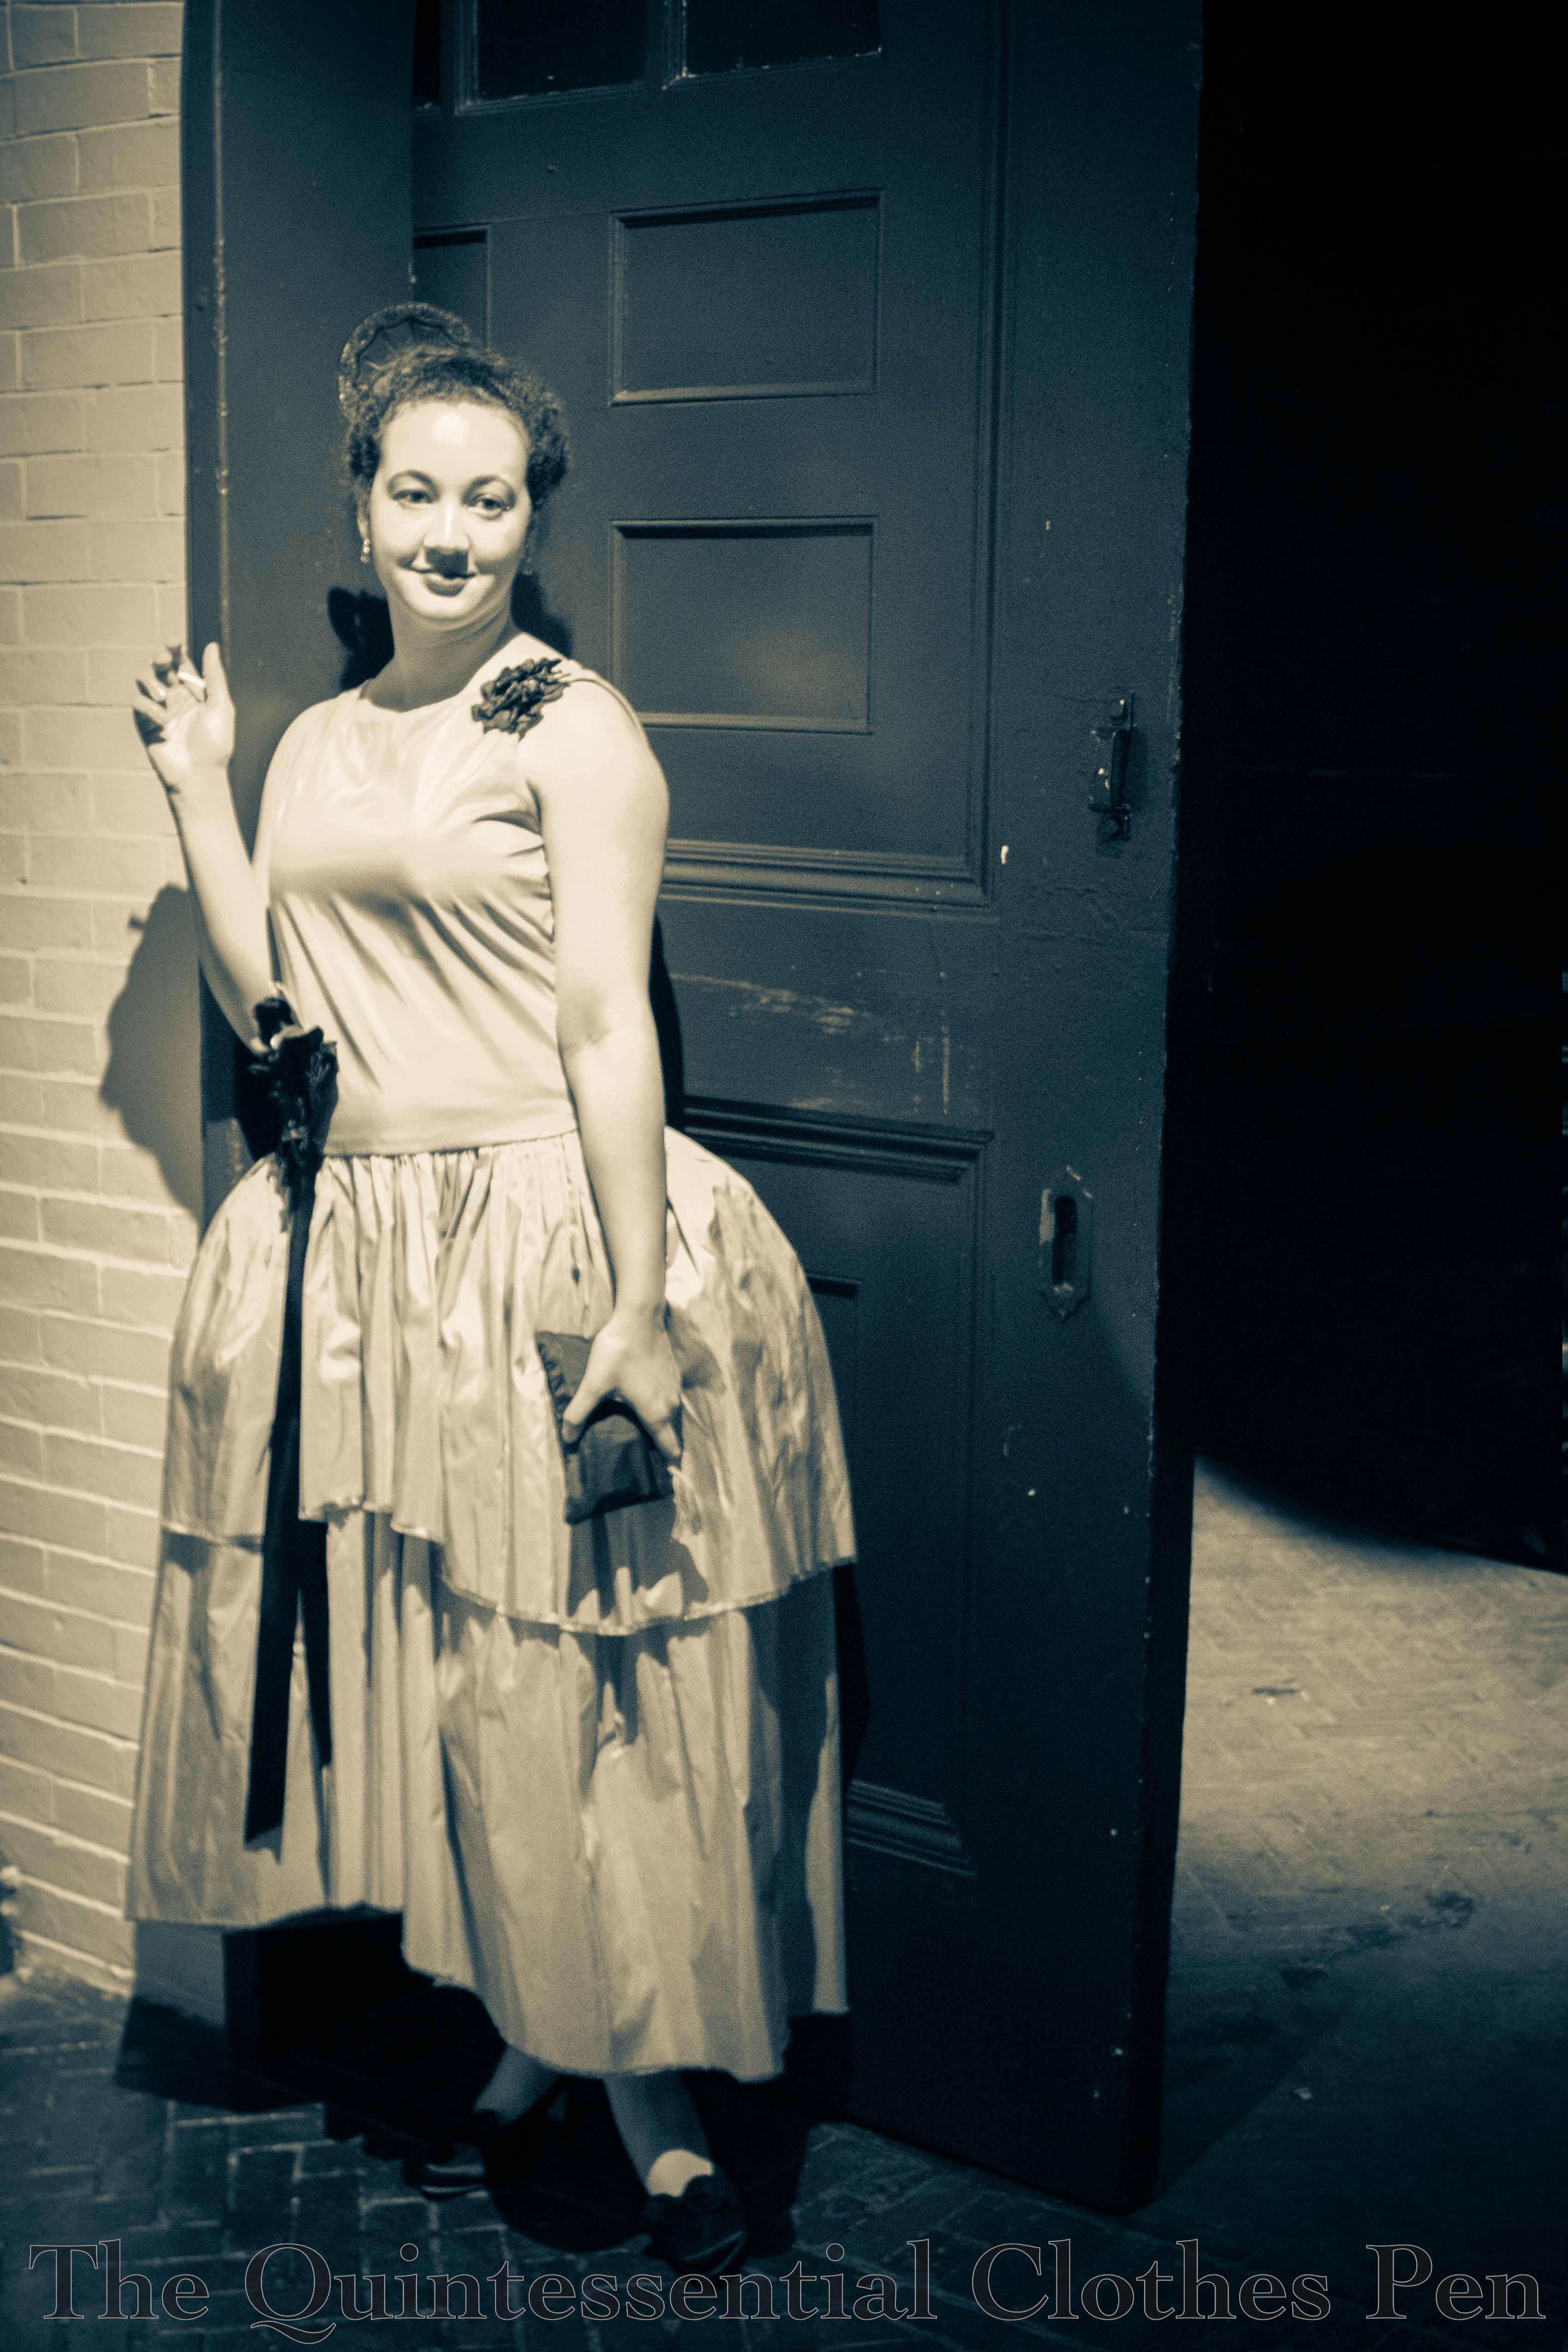
My other silly accessory was a candy cigarette. It does rather add to the 20s look, but of course I don’t smoke, so there was rather a lot of me flipping it around in my hand trying to figure out how to hold it and not look ridiculous. I didn’t ever try eating it, so I can’t report how it tasted, but I was pleased that it lasted almost until the end of the night when I dropped it for the second time and it broke in half. Until then it was going strong and gave me something to do with my hands in pictures, which is always a good thing.

IMG_2372-2 (1)

Mostly I stood around and talked to friends, hatched dreamy plans for how to sit in the cars, and took pictures, but we did go out on the dance floor a few times for some Charleston. Too bad nobody got pictures of that!

IMG_2375 (1)

This was the third year of the event, I believe, but only the first year I had been free to attend. It was fun, and nice to attend an event that I wasn’t helping to run.

SaveSave

1890s Skating Ensemble Photo Shoot

When I first wore my 1895 skating ensemble last January, I ran out of time and braid after trimming the back and sleeves. Sometime last year I ordered more of the braid from Debs Lace and Trims* and in November or December I ordered black wood toggles from eBay (super cheap, 50 for $2–I’ll have toggles for life!).

IMG_7425
Showing off the finished trim on the back and sleeves from the first wearing.

I’ve only found this one picture of the front of the inspiration skating jacket. It’s not as close-up as I would like, but it was enough to base a plan on for my own jacket. Using that and other images on my sewing project Pinterest board, I planned out the yardage for each new row of trim. After lots of pinning, stringing toggles, and careful sewing I had used up every single inch of the new batch of braid for a total of 10 yards of braid trim on the jacket. But the result is excellent! I’m just as chuffed with the additional trim as I was with the ensemble when I first made it.

IMG_7421

It didn’t snow much here this year (such a change from last year!), but we did have a day of sticky snow right after I finished the trim that was lovely to look at. I convinced Mr. Q to take pictures of me around our neighborhood the next morning while the temperature warmed up and everything began to melt. Luckily we made it out early enough in the day that there was still snow!

IMG_7452

Passersby were staring, a lady on a balcony started a conversation with me about my outfit, and Mr. Q was, well, out of his comfort zone. I guess I’m just used to the situation. He was not–and I was amused.

IMG_7417

However, despite my penchant for making really odd faces and talking when someone is trying to get a good shot of me, Mr. Q did manage to get a number of very nice pictures of the totally finished ensemble.

IMG_7439

As you can see, I’ve edited out the odd faces and so far only included some of the more elegant and put together ones I managed to pull off.

IMG_7423

Here are some silly ones. I’m not sure what’s happening this one–it looks like I’m blowing a kiss or making a wish. I might have been talking. It’s cute though!

IMG_7429

This was a successful pose! Sometimes I just look totally silly when I pose, but I guess curious-what’s-around-this-tree face is not so bad.

IMG_7418

And finally, one in which I wonder again what I’m doing… I think I was going to reach up for the tree branch, but then Mr. Q pointed out that it looked weird… It’s a fun silhouette shot, anyway.

IMG_7431

*If you haven’t been before, check out Debs Lace and Trims. You can’t beat her prices and most laces and trims I’ve ordered from her have been excellent, with the exception of a few stiff laces when I was hoping for soft lace. But even then, the prices are so low that I put the lace in my stash and use it for other projects without being worried I wasted my money on a product I wasn’t happy with.

Project Journal: Versailles Sacque: Meet Mr. Panniers

There are five big checkboxes on my related-to-the-trip sewing to-do list before my trip involving Versailles in May:

  1. Panniers
  2. Petticoat
  3. Robe a la francaise (with a subset of trimming)
  4. Hair
  5. Shoes

This week, I checked the first item off the list!

IMG_0681
“Take that, Mr. Panniers! You are totally and completely done!”

I think part of the reason I feel so triumphant is that I really had to wrangle these to make them bend to my will. I started back in 2013 or 2014 when I decided to join the 18th Century Court Gown Sew Along. At that point, I made the decision to use the Simplicity pattern (#3635) and $1/yard lightweight and tightly woven mystery fabric from my stash.

At first, everything seemed to behave: I cut out the pieces and started sewing. Then I realized I didn’t have time for the project and so I let the panniers languish until earlier this year when I pulled them out again to finish them so I could use them as a base for my Versailles Sacque. Perhaps it was the languishing that caused Mr. Panniers to take on a personality and want to thwart me when I got back to him this year…

It started with perfectly amiable sewing. The waist casing and drawstring were without event. And then, boning! There was twisting, and warping, and curving inwards, and all sorts of bad. The lower three bone channels eventually cooperated, but those angled top bones? Nope! No cooperation from them! (Yes, check my picture, there are no angled top bones. No, I’m not trying to trick you.)

The bones curved in on my bum and front side so badly that it made the panniers look like a jelly bean! Not what I was aiming for. My solution was to unpick the channels across the front and back (not the sides) and make one continuous horizontal bone channel like those below it. (That’s why you can’t see angled bone channels in the picture.) But the fabric is a very tight weave and does not easily forgive pin or needle holes, so you can still see the angle I originally stitched as directed by the pattern if you look closely.

IMG_0682

Mr. Panniers was much more cooperative with the new horizontal channel across the top. Whew! And ok, I have to take some responsibility for the problems because I’m confident that some of the struggle was due to my choice of boning–1/2″ wide zip ties about 18″ long that I masking taped together to get the lengths I needed. I have to pack this guy, and having bones that don’t weigh a lot (like metal) and won’t break (like cane or reed) was high on the list. The bones are simply overlapped in the channels, each of which has an opening, so the plan is to remove them (and label them) for packing, then reinsert them once I’m unpacking the whole ensemble in France. Anyway, the zip ties were coiled in the packaging and didn’t want to change their shape, which is why the angled bones were curving in towards my body and why the whole thing is so bent on warping if not carefully and delicately handled.

IMG_0684

Here’s a look at Mr. Panniers interior. The white ribbons are suggested in the pattern to help keep the shape. They’ve all been adjusted to my body shape (tedious, but worth it–sewing these on and fixing that angled bone channel problem were the things that kept this from being finished a month ago!).

As you can see, in terms of materials and construction, Mr. Panniers aims for the right shape as the goal. To that end, I appreciate that with my overlapping bones I can easily adjust the size at any point by overlapping the bones more. I find that this pattern is a bit too trapezoidal for my taste, so I’ve overlapped the bottom bone a little extra to make the skirt hang more vertically from about the knee down.

Needless to say, the bones are staying in and Mr. Pannier will be resting flat and collapsed until I need to pack him, so that for any fittings, etc. no more wrangling will be necessary.

(Side question: Does anyone know when it would be appropriate to use singular ‘pannier’? Would that be appropriate for referring to one of a set of two pocket hoops, for example?)

Side note: this is officially the last post that will be tagged 1770 court gown, since that project has now morphed into the saga of the Versailles Sacque and accessories.

19CBRE: Following With Trust

(I thought I was very clever when I came up with the name for the post… and then a few days later I couldn’t remember what I was thinking the content should be! I guess if I confuse myself that easily I should certainly explain my cleverness so you can appreciate it, too!)

I was reading Thomas Hillgrove’s The Art of Practical Dancing from 1868 and I came across this passage on page 154:

“It is recommended that the lady, when waltzing, leave herself to the direction of her partner, trusting entirely to him, without in any case seeking to follow her own impulse. A lady who should endeavor to avoid an encounter with other dancers, would risk interfering with the intention of the gentleman, to whom alone should be trusted her security amid the crowd surrounding and crossing her in every direction.” 

IMG_4854

I thought, “Hm! Trusting myself entirely to my partner’s care is something I rarely do! I’m often giving non-verbal hints about my opinions on where we should go, how much we should rotate, etc… and depending on the ability of my partner, my hints sometimes come down to downright back-leading.” I’m sure this partly comes from eight or so years of competitive modern ballroom dancing, in which the leader is in charge, but the lady has the duty to do her part to see what’s going on around the floor and help ensure that crashes, etc. don’t occur, as well as my independent-modern-woman mindset. However, despite these reasons, I imagine Hillgrove would have taken exception to my dancing style!

I started thinking about whether it made sense for me to attempt Hillgrove’s method while dancing historical dances. I dance in three settings, at private rehearsals when the dance troupe I am part of is practicing for performances, during performances with said dance troupe, and at public balls when I am dancing with guests of varying abilities or with members of the dance troupe.

I think it boils down this way: when dancing in a performance there are goals of elegance, nice spacing between couples, etc. that we are aiming for, and my interpretation of our artistic directors’ instruction in addition to my own feeling is that every person dancing should contribute to these goals, so a bit of hinting makes sense for the context. I feel similarly about hinting while dancing at balls depending on the ability of my partner, and if the goal is to ensure the safety of myself, my partner, or other people who might cut us off, etc. I also feel justified in back-leading a partner who needs some assistance to stay with the music, avoid crashes, or know how much rotation to complete in a given step, etc… but it sounds like I don’t really ever  follow with trust!

With these thoughts in mind at a recent ball, I attempted to follow partners (whose abilities I have faith in) with trust. It was surprisingly uneventful! I think it really comes down to the ability of a partner in order to determine if I’m comfortable with that level of trust. Do you entirely follow your partners with trust at historical dance events? Or are you like me, picking and choosing when you feel comfortable doing so?

IMG_0647
Success! Time to go home.

(As another side note, it’s been just about a year since my last 19CBRE post. If you’re not sure what that’s all about, check out this introductory post. You can see all of the posts relating to 19CBRE here. Perhaps this year I’ll get around to posting more of the interesting tidbits I’ve been thinking of posting over the last year!)