1950 Baroness Christmas Dress!

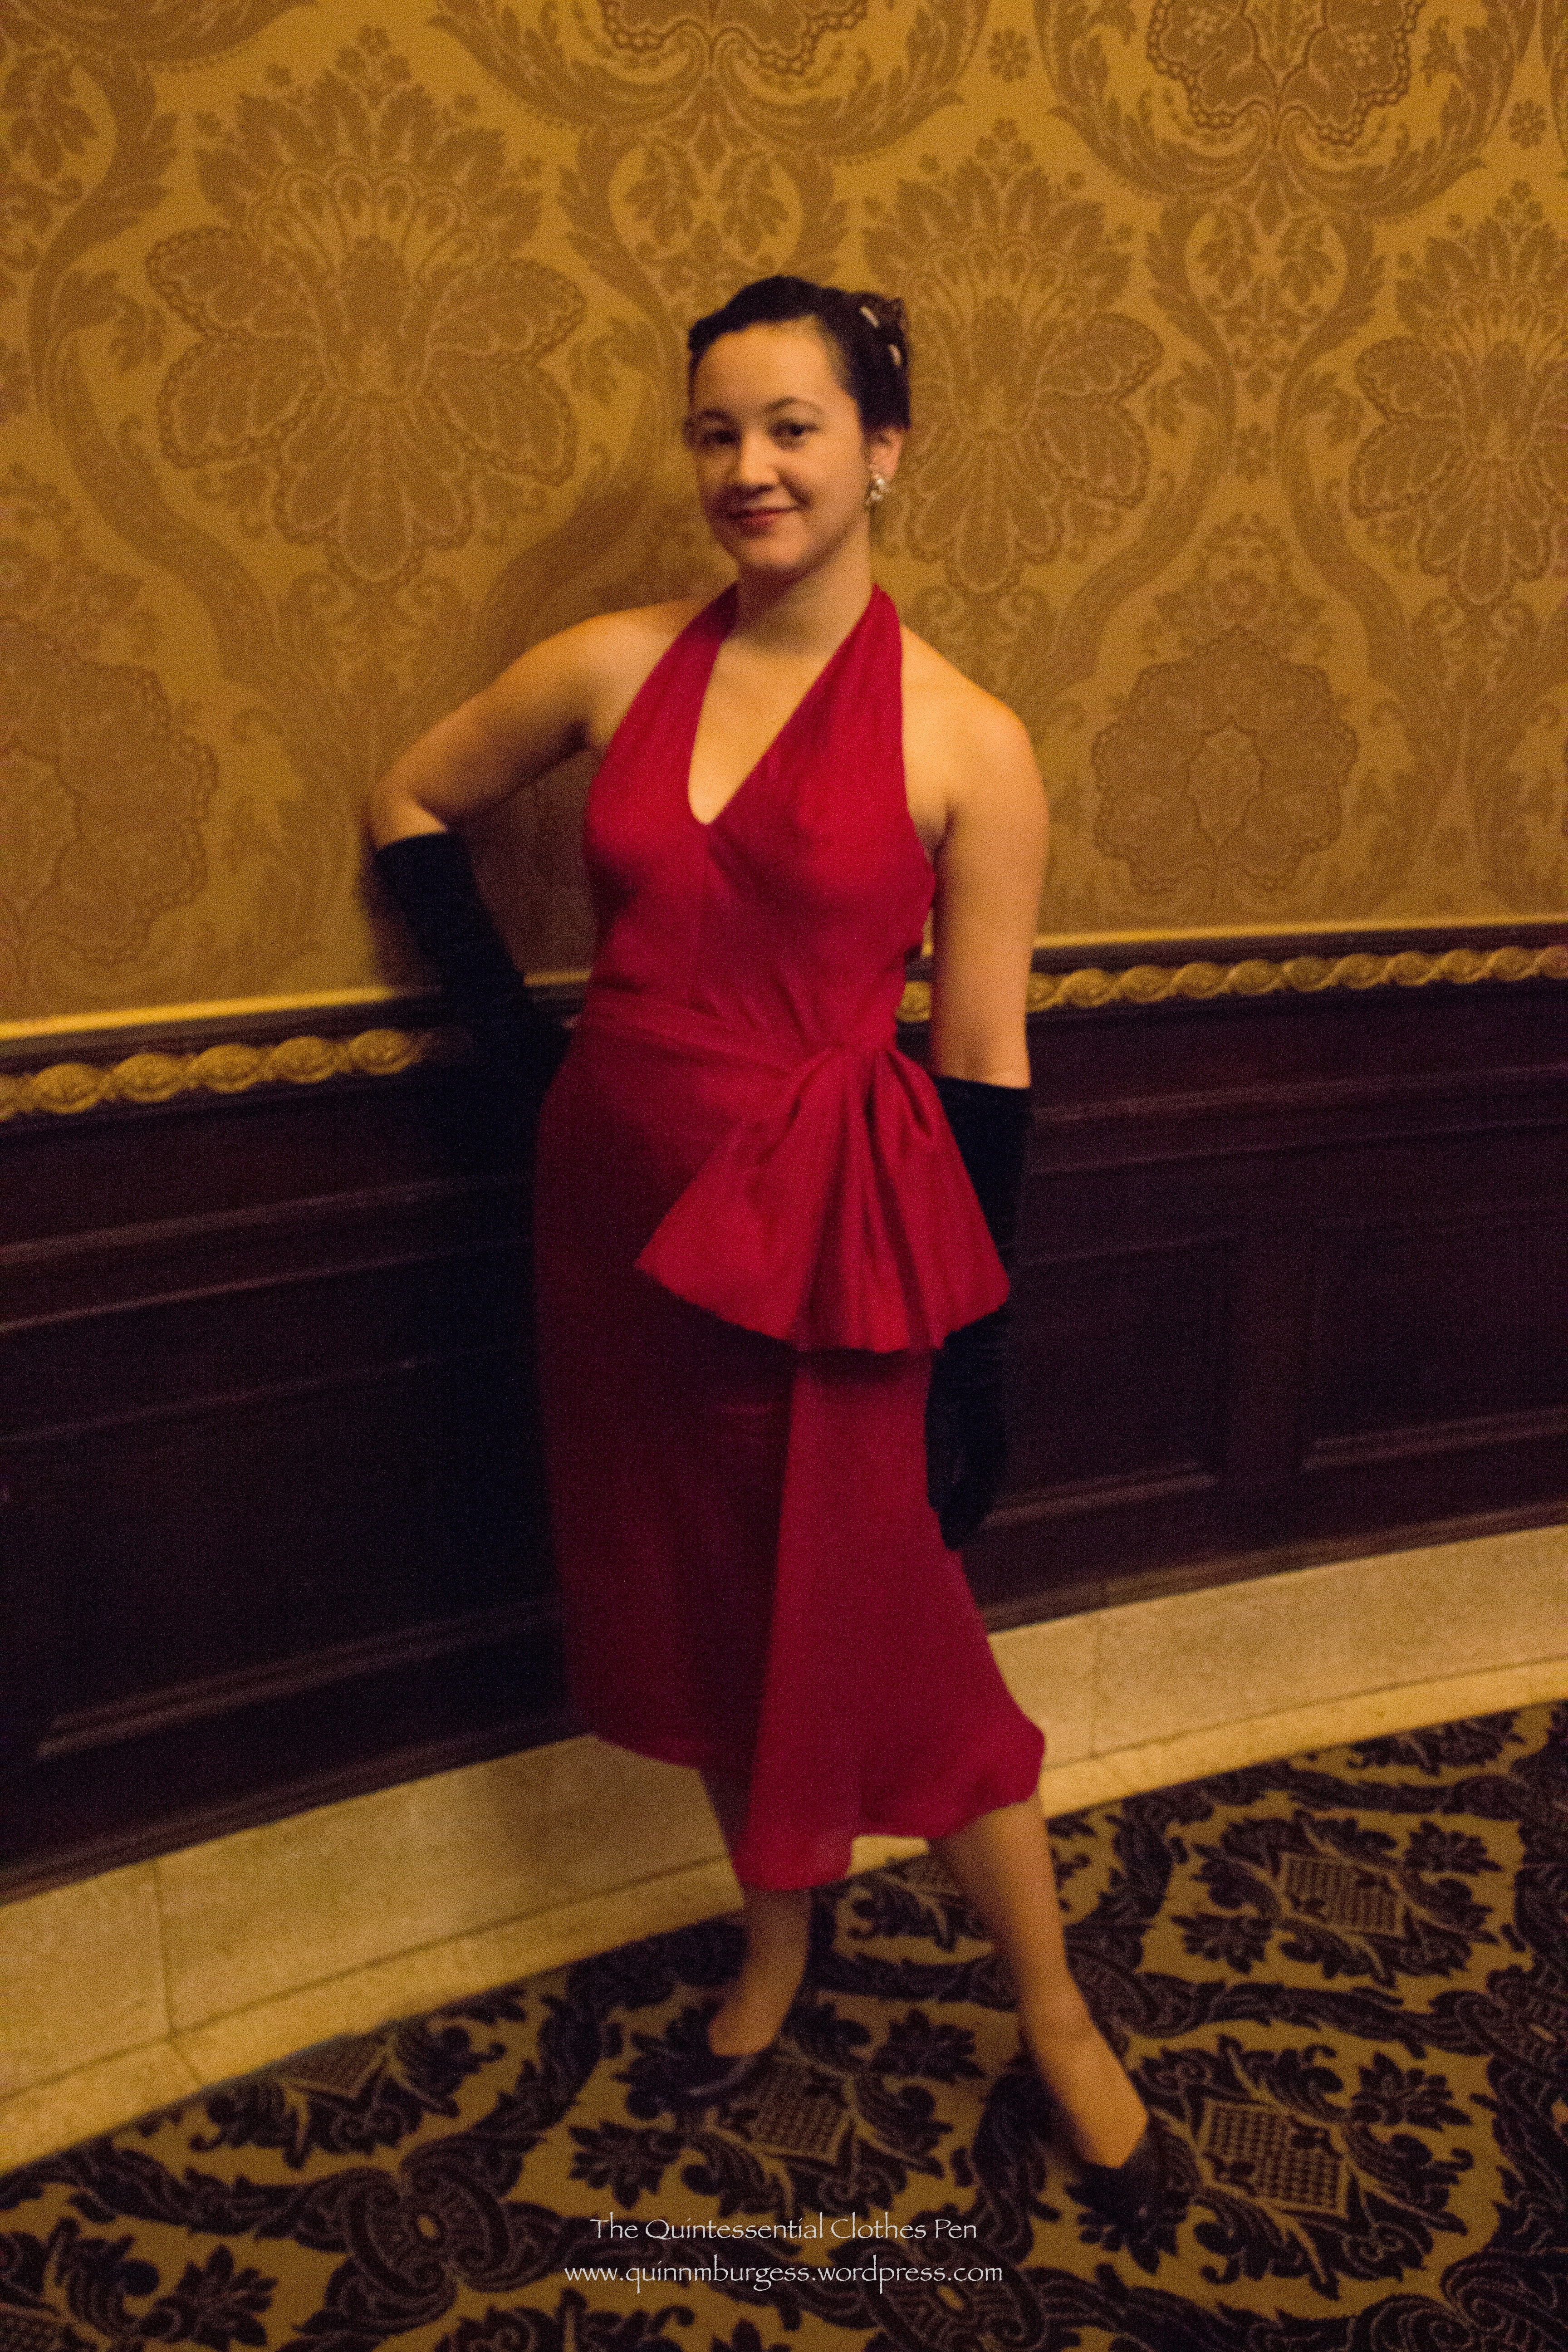
Success! I not only finished my 1950 Baroness Christmas dress the weekend after Thanksgiving, but we also managed to line up our schedules and go see The Boston Ballet’s Nutcracker at the beautiful Boston Opera House, where we took pictures! There were brass bands playing outside and carolers in silver down coats on our walk to the theatre. It was all very festive. And, of course, there was The Nutcracker with a live orchestra.

As you might be expecting, I wore my Christmas dress and took pictures for Edelweiss Patterns’ Virtual Christmas Dress Party. The original inspiration image is in this post. The dress is made from rayon and lined with polyester. I made an attempt to do a 50s stylized up-do, too, though I don’t have any close up head shots… but without further ado, here it is:

IMG_0025

IMG_0026

There were a few changes from the original, like adding a slit behind the front drape for ease of movement, adding a self fabric belt over the waist seam, and not quite making the pleats across the front deep enough to read once the bow was attached. I’m quite pleased, however, and love how festive the dress is! (And it’s quite formal, with that low back…)

Our group was very well balanced in having two greens and two reds, and three hats, and four  gloves (two pairs, you know)… (It sounds like One Fish Two Fish Red Fish Blue Fish or The Twelve Days of Christmas, doesn’t it?)

IMG_0033
3 hats!
IMG_0024
5 of us in 1950s inspired Christmas outfits!
IMG_0038
Merry Christmas!


Our Apartment Redecoration Project Part II: Pillows

The new couches that sparked our apartment redecoration project also came with four feather pillows. They were rather squashed and sad when we received them, but I decided to give them a fluffing and make new covers for them to accent our newly decorated room. (After all, feather pillows are quite nice and there was no sense in discarding them.)

IMG_1584
Our recently redecorated living room.

It was a challenge to find fabric that would match the colors of our room, was a design we both liked, and was not $40/yard. At the very last store I went to I found three fat quarters with this fairytale tree design for about $1.50 each.

IMG_1589

I scoured the store looking for more but to no avail. What to do with four pillows and only three pieces of fabric? Also, the fat quarters weren’t quite big enough to cover the entire front of the pillows…

IMG_1590

Luckily, I had an off-white cotton in the stash that perfectly matched the background of the fat quarters. I used it to make the backs of the pillows, including the bit that wraps around to the front and makes those bars top and bottom. For the fourth pillow, I made a cover entirely out of the solid fabric. It lives on our red circle chair, where it is a nice contrast. And the off-white looks fine with the white couches, since there are other off-white things in the room, like the walls, which are large! And really, our two seater couch would have been overwhelmed with two patterned pillows anyway. These 22″ pillows are not small! It worked out perfectly!

IMG_1576
Inside a pillow cover. I serged all the seams, because serging is fun, and easy!

I followed this tutorial to make my pillow covers, adjusting for the extra seams I needed to add to use my fat quarters. I also flat lined all the pillow covers with muslin to help keep the feathers from poking through, to provide opacity, and to help disguise the seam allowance from the fat quarter seams. I love that this style cover does not require closures and is easy to remove if necessary. We love that the pillows give an interesting spark to the room, jazzing up our couches a bit with their non-solid fabric.

Our Apartment Redecoration Project Part I: Living Room

I mentioned a few posts back how busy I was. Things have mostly settled down, our redecoration is complete, and now I have time to share pictures!

IMG_3919

The redecoration project was rather unplanned. It all started because we were gifted two very nice couches. When Mr. Q suggested that we take the couches I will admit that I was dubious. Our purple Ikea couch has supported us well over the last few years and I didn’t know if the new ones would be that much nicer. But they are much nicer… higher quality foam stands up much better to use over time and deeper cushions are just more comfortable–there’s more space to tuck your legs up on the couch or surround yourself with blankets and pillows!

IMG_1584

Our before and after pictures aren’t quite at the same angle, but you get the idea. The dining area didn’t change a whole lot, so I didn’t feel it needed to take up as much space in the picture. You can see that we’ve gained furniture and “stuff” over the last three or so years (and that before picture was very early on, but I thought we’d go for the most drama in terms of change).

Those white couches you see came to us with country-farm style red covers on them. It was the right sort of color but not at all the right style for our modern jewel tone living room. After lots of stressing about the potential of having to recover the new couches, I realized that the shape of them wasn’t much different than our ikea couch. And that led us to Ikea-hack covers for our new couches.

We bought 3 white cotton twill Ektorp couch covers (a 3 seater, a 2 seater, and one extra 3 seater for extra fabric), chopped them up as needed so they could expand to fit the new couches, then chopped up the extra fabric cover to fill in the gaps, and finally sewed all the unusual seams to create a new couch cover that would fit. It’s not a beginner level sewing project, but it’s certainly do-able if you have an idea of draping and are creative about problem solving how to expand a couch cover to fit a larger couch than it was intended for. I think this will all be easier to show in pictures.

IMG_0008
Thankfully, the cushion covers fit our new couch cushions pretty perfectly! (Mr. Q notes that he wouldn’t say “perfectly” but maybe “with some coaxing.”) The foam is a little stuffed in, but it was so much better than having to make the cushion covers from scratch. The prospect of doing it from scratch was just overwhelming!
IMG_1440
Here’s our new 2 seater couch with the chopped up Ikea cover on it. You can see that there is a significant gap between the pieces along the seat seam and around the back of the arms.
IMG_1443
But that’s why we purchased an extra cover, so that I could chop it up and piece it in where needed. I’ve got my sewing tools out: seam ripper, snips, pins, sewing measuring tape, tool-type measuring tape, sharp fabric scissors, more pins, pencil, and a ruler. And you can see that I was in the process of measuring out a section to piece in.
IMG_1439
It’s very clear in this picture that the ikea cover was not deep enough for the new couch. So we have a seam that runs over the arm of each couch and down the side, but with the cushions on you really don’t see them at all.
IMG_0004
It’s hard to see in the last picture, but I also had to adjust the top corner of the cover on the 2 seater couch. The Ikea covers have darts along the back that you can just make out in this picture (I’ve unpicked them), but the back of this couch was shorter than the cover (odd, because the 3 seater fit perfectly). So I needed to reposition the darts differently for this couch.
IMG_0001
I also needed to take in the center seat section on the 2 seater couch. It was between 1″-2″ too wide and looked sloppy. I made a fuss but decided to take it in the right way, on the seams between the seat and the arm section, and I’m glad I did, because you can’t tell at all on the finished couch that I had to do that alteration.
IMG_0017
Now on to the 3 seater couch. It needed the same addition for depth that the 2 seater did. You can see that I’ve sewn the addition to the bottom seat section but haven’t sewn it to the top/back yet. I had to do some interesting piecing over the arm, which is what I’m doing in this photo.
IMG_0019
Here’s another view after I’ve attached that depth extender to the seat/back and am working on the seams to piece in the weird bit over the arm of the couch. If you look closely you will see that there are actually two oddly shaped pieces near my hands.

It was a long Saturday of shopping at Ikea and sewing until late into the night. Mr. Q doesn’t have the sewing skills to help with that part but he was engaged the entire time in positive encouragement and occasionally seam ripping or other assigned jobs.  He also put all of the cushion covers on while I was madly seam ripping and taking large white bundles to my sewing table.

I didn’t take the time to nicely serge or finish the new seams. We actually had to wash the 2 seater cover one day after finishing it (oops! but at least the stain came right out along with the wrinkles!) and the seam allowances frayed as you would expect, but not enough to cause any alarm. So I’m not worried about it. There was also nice velcro on the old red cover that held the cover to the couch under the curve of the arms and also along the back seat area. We kept the velcro but didn’t get around to sewing it on. I think it would be nice under the arms, but I’m not inclined to do it anytime soon. The bit along the back doesn’t seem to have made a difference–our new cover stays in place without a problem.

IMG_1448
Ta da! Finished ikea-hack couch covers, with all new pillows and throws (that make such a fuzzy mess on our white couches… we definitely did not think that one through!).

HSF #23: 1917 Cranberry Red Scarf

IMG_9660
Look, I made my scarf!

…and it qualifies for the HSF Challenge #23: Modern History! This particular challenge is to make something historical or historically inspired that is wearable in an everyday context. And a scarf like this: absolutely wearable in my modern life if I choose!

Just the facts:

Fabric: 2 skeins, of unknown length, of probably acrylic yarn.

Pattern: Made by me. (More details below.)

Year: 1910s. (More details below.)

Notions: None!

How historically accurate?: Ideally, it would have been made of angora yarn, but I had the acrylic on hand and didn’t want to spend extra money (angora yarn isn’t cheap, you know!). Acrylic wasn’t invented until 1941. However, the dimensions of the scarf are accurate, the pattern is entirely plausible for the 1910s, and the style is taken directly from an ad from the 1910s. So I’d say 90%.

Hours to complete: No idea. I knit while watching Netflix and didn’t pay any attention.

First worn: In Plymouth, MA the weekend before Thanksgiving while portraying a suffragette (as I did last year).

Total cost: $2.50 for the knitting needles and $1 for the yarn = $3.50.

The color is perfectly suited to the holiday season, being cranberry red just like the fresh berries I used to make homemade cranberry sauce last week. (That was really easy and tasty, by the way–I bought Ocean Spray cranberries and the recipe was on the bag!)

IMG_9662
Cranberry red!

The pattern is moss stitch. I knit an extra row at the beginning and end just to provide some stability. Then, K2, P2 all the way across for two rows. P2, K2 all the way across for the next two rows. Repeat. Super easy. I keep track of what row I’m on in a little notebook with all my knitting patterns in it. That way I know where I’m at while I’m watching Netflix or when I’ve put it down and picked it up on a different day.

The dimensions are taken directly from a 1910s knitted wear ad that Lauren from Wearing History shared on her blog, here. I made my scarf 8” wide and 68″ long so it would provide maximum warmth while being worn. It also helps that it’s acrylic, which doesn’t breath and keeps you toasty. The fringe is about 6″ long and tied into 9 tassels, just as seen in the ad on a few of the scarves (turns out that I had the perfect number of fringe pieces to divide by 9 without planning!).

I had hoped to make these gloves from a 1910s pattern in matching yarn, but didn’t even start them. Perhaps it’s something that I can do next year! I’ve never knit gloves and I’ve only just taught myself to knit in the round, so while the cables in the pattern are not at all daunting, the simple idea of making gloves is. But challenges are fun sometimes! And I’m very pleased with the scarf.

IMG_9658
It was breezy and cold!