

Photos of the finished yellow sacque are on their way, but before I get to posting those I’d like to discuss the construction details of the dress. I’ve already posted about the accessories and other parts of the ensemble. You can view those blog posts at the links below.
c. 1770 Pink Panniers
18th Century Blue Foundation Petticoat
A White 1780s Petticoat
Yellow Sacque Petticoat
Engageants For The New Yellow Sacque
A Stomacher for the Yellow Sacque
Overall Goal
Whereas my goal for the Versailles Sacque was to hand sew everything and use historically accurate materials and methods, my overall goal for this new sacque was to machine sew as much as possible and use materials from the stash. This pair of goals influenced my choices for patterning and constructing the new dress. (If you’d like more information about the Versailles Sacque, you can read all of the posts about this project here.)
Patterning
The sacque itself is made from the JP Ryan Pet-en-l’air pattern. This is the same pattern I used for my Versailles Sacque. For the new Yellow Sacque, I used a larger size than I previously did. I also tweaked some of the dimensions to fit the measurements of the two friends I knew I wanted to be able to wear the new dress. This included things like increasing the back shoulder width and the bicep circumference.
I started with a mockup, which allowed me to check and see if the changes I made to the paper pattern worked on a real body. And they did! I only had minimal changes to make — some of which was taking out a little bit of the ease I’d added in. Oh well! That happens.
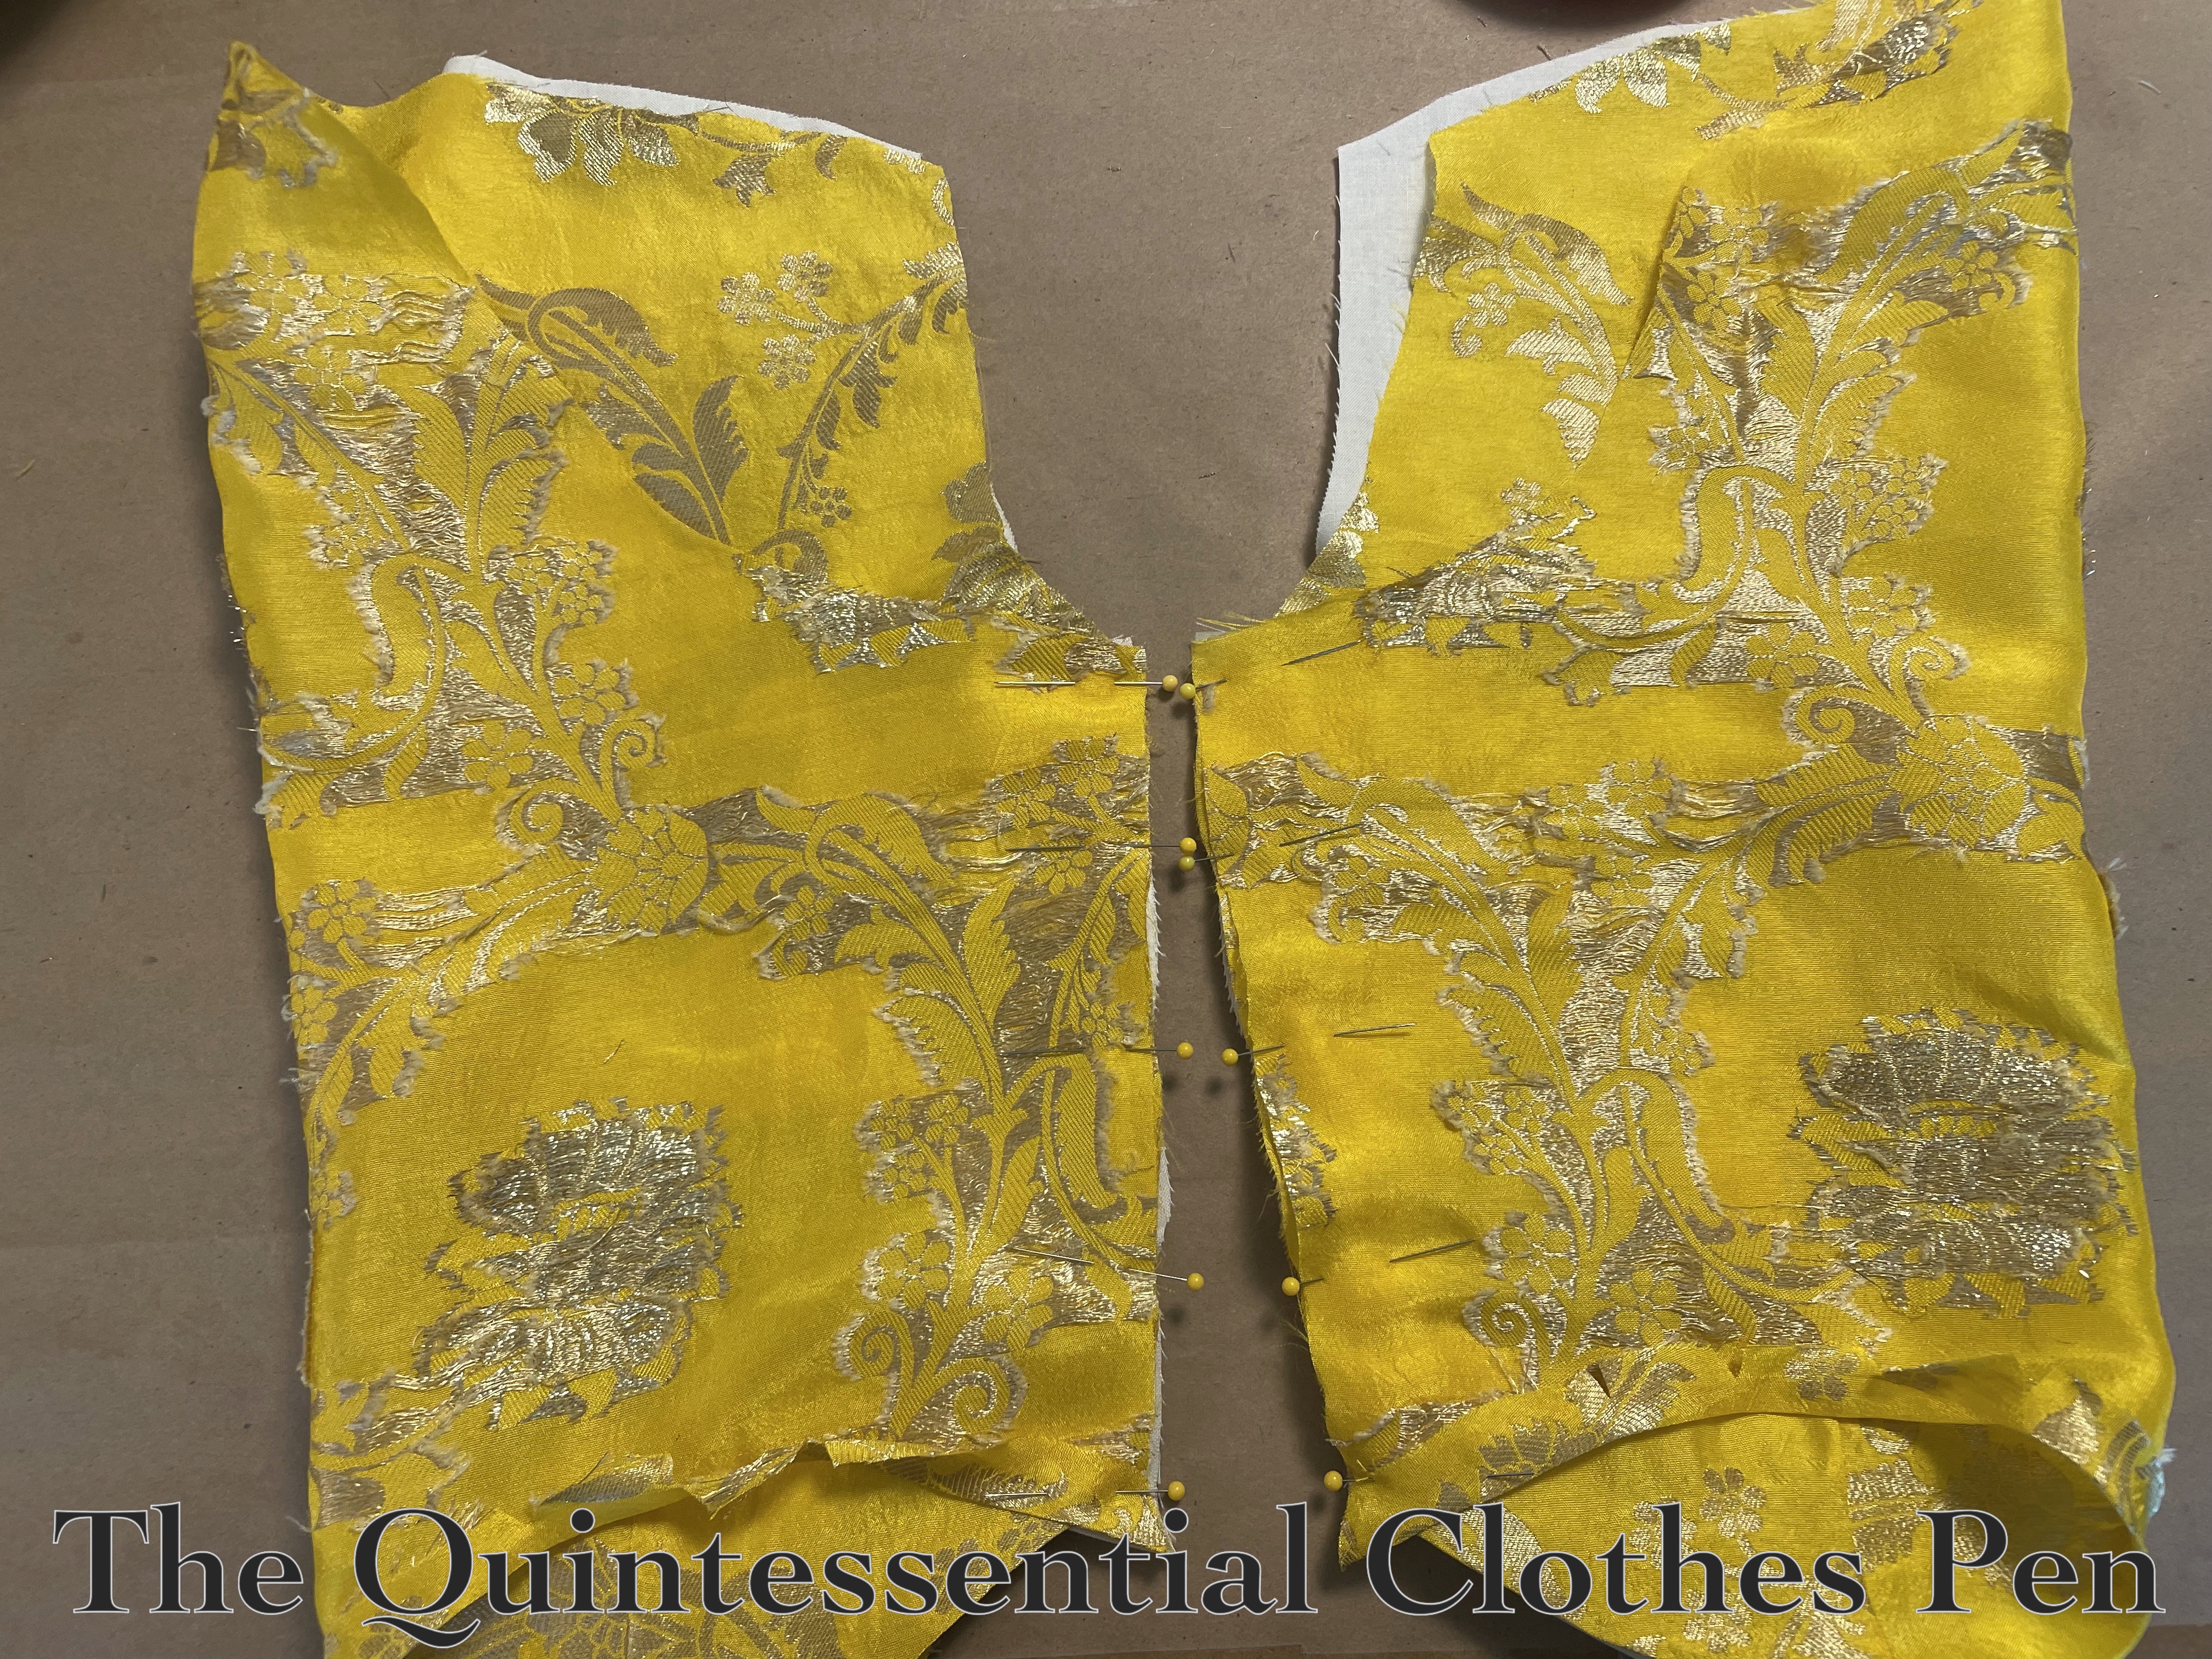
Early Construction, With The Dress In Pieces
After cutting out all of the pieces, there were some steps that were easier to do before attaching things together. For example, I added boning and ties at the back of the lining in order to add adjustability underneath the back pleats of the dress. Ties or lacing like this was common for sacque style dresses in the 18th century.
I was pleased to reuse bones and bone casing from an old deconstructed corset as well as ivory ribbon that was gifted to me. Using things from the stash!

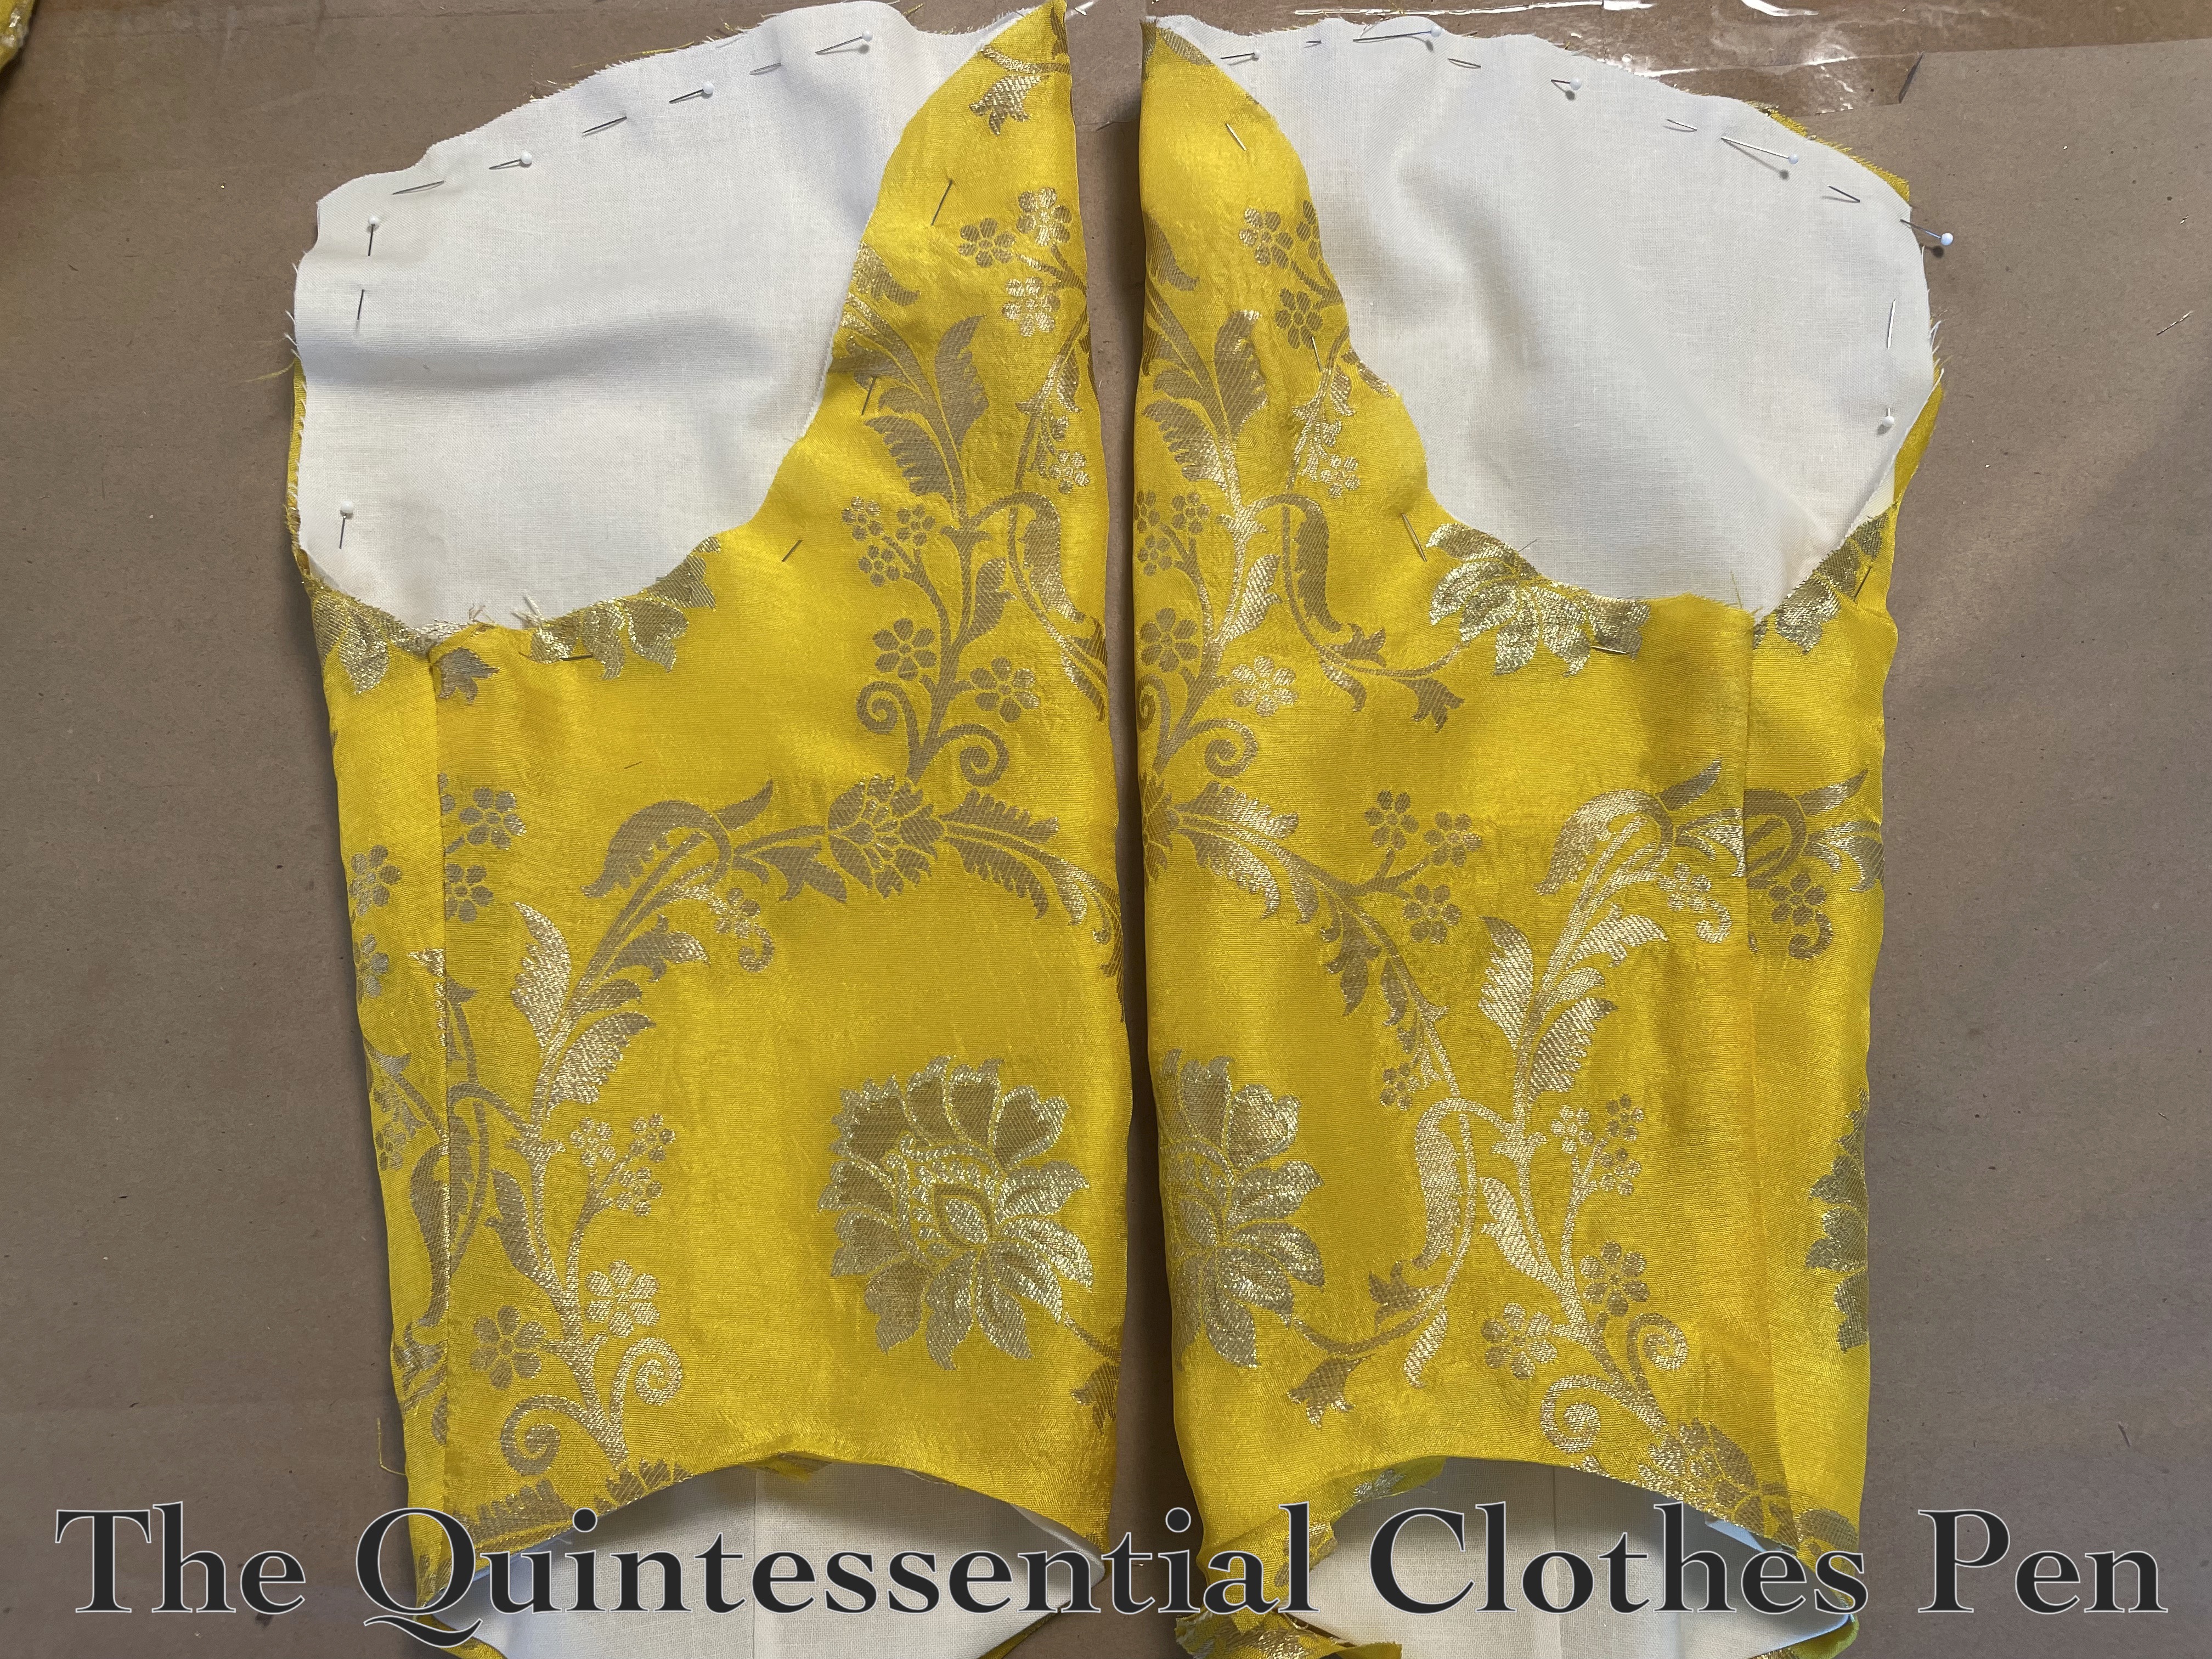
I also assembled the sleeves, with their linings, before attaching them to the dress. Below are the sleeves with the sleeve inseams pinned and ready to sew. By folding the lining and exterior right sides together and stacking them, there is a neat trick by which you can sew once to get both lining and exterior inseams sewn with one go (and all of the raw edges hidden between the layers.
Here are the sleeves turned right sides out. The bottom edges are already pressed under in preparation for being hand sewn later in the process. The top edges are pinned and ready for basting, so that they can be set into the arm opening as one layer.
Back Pleats
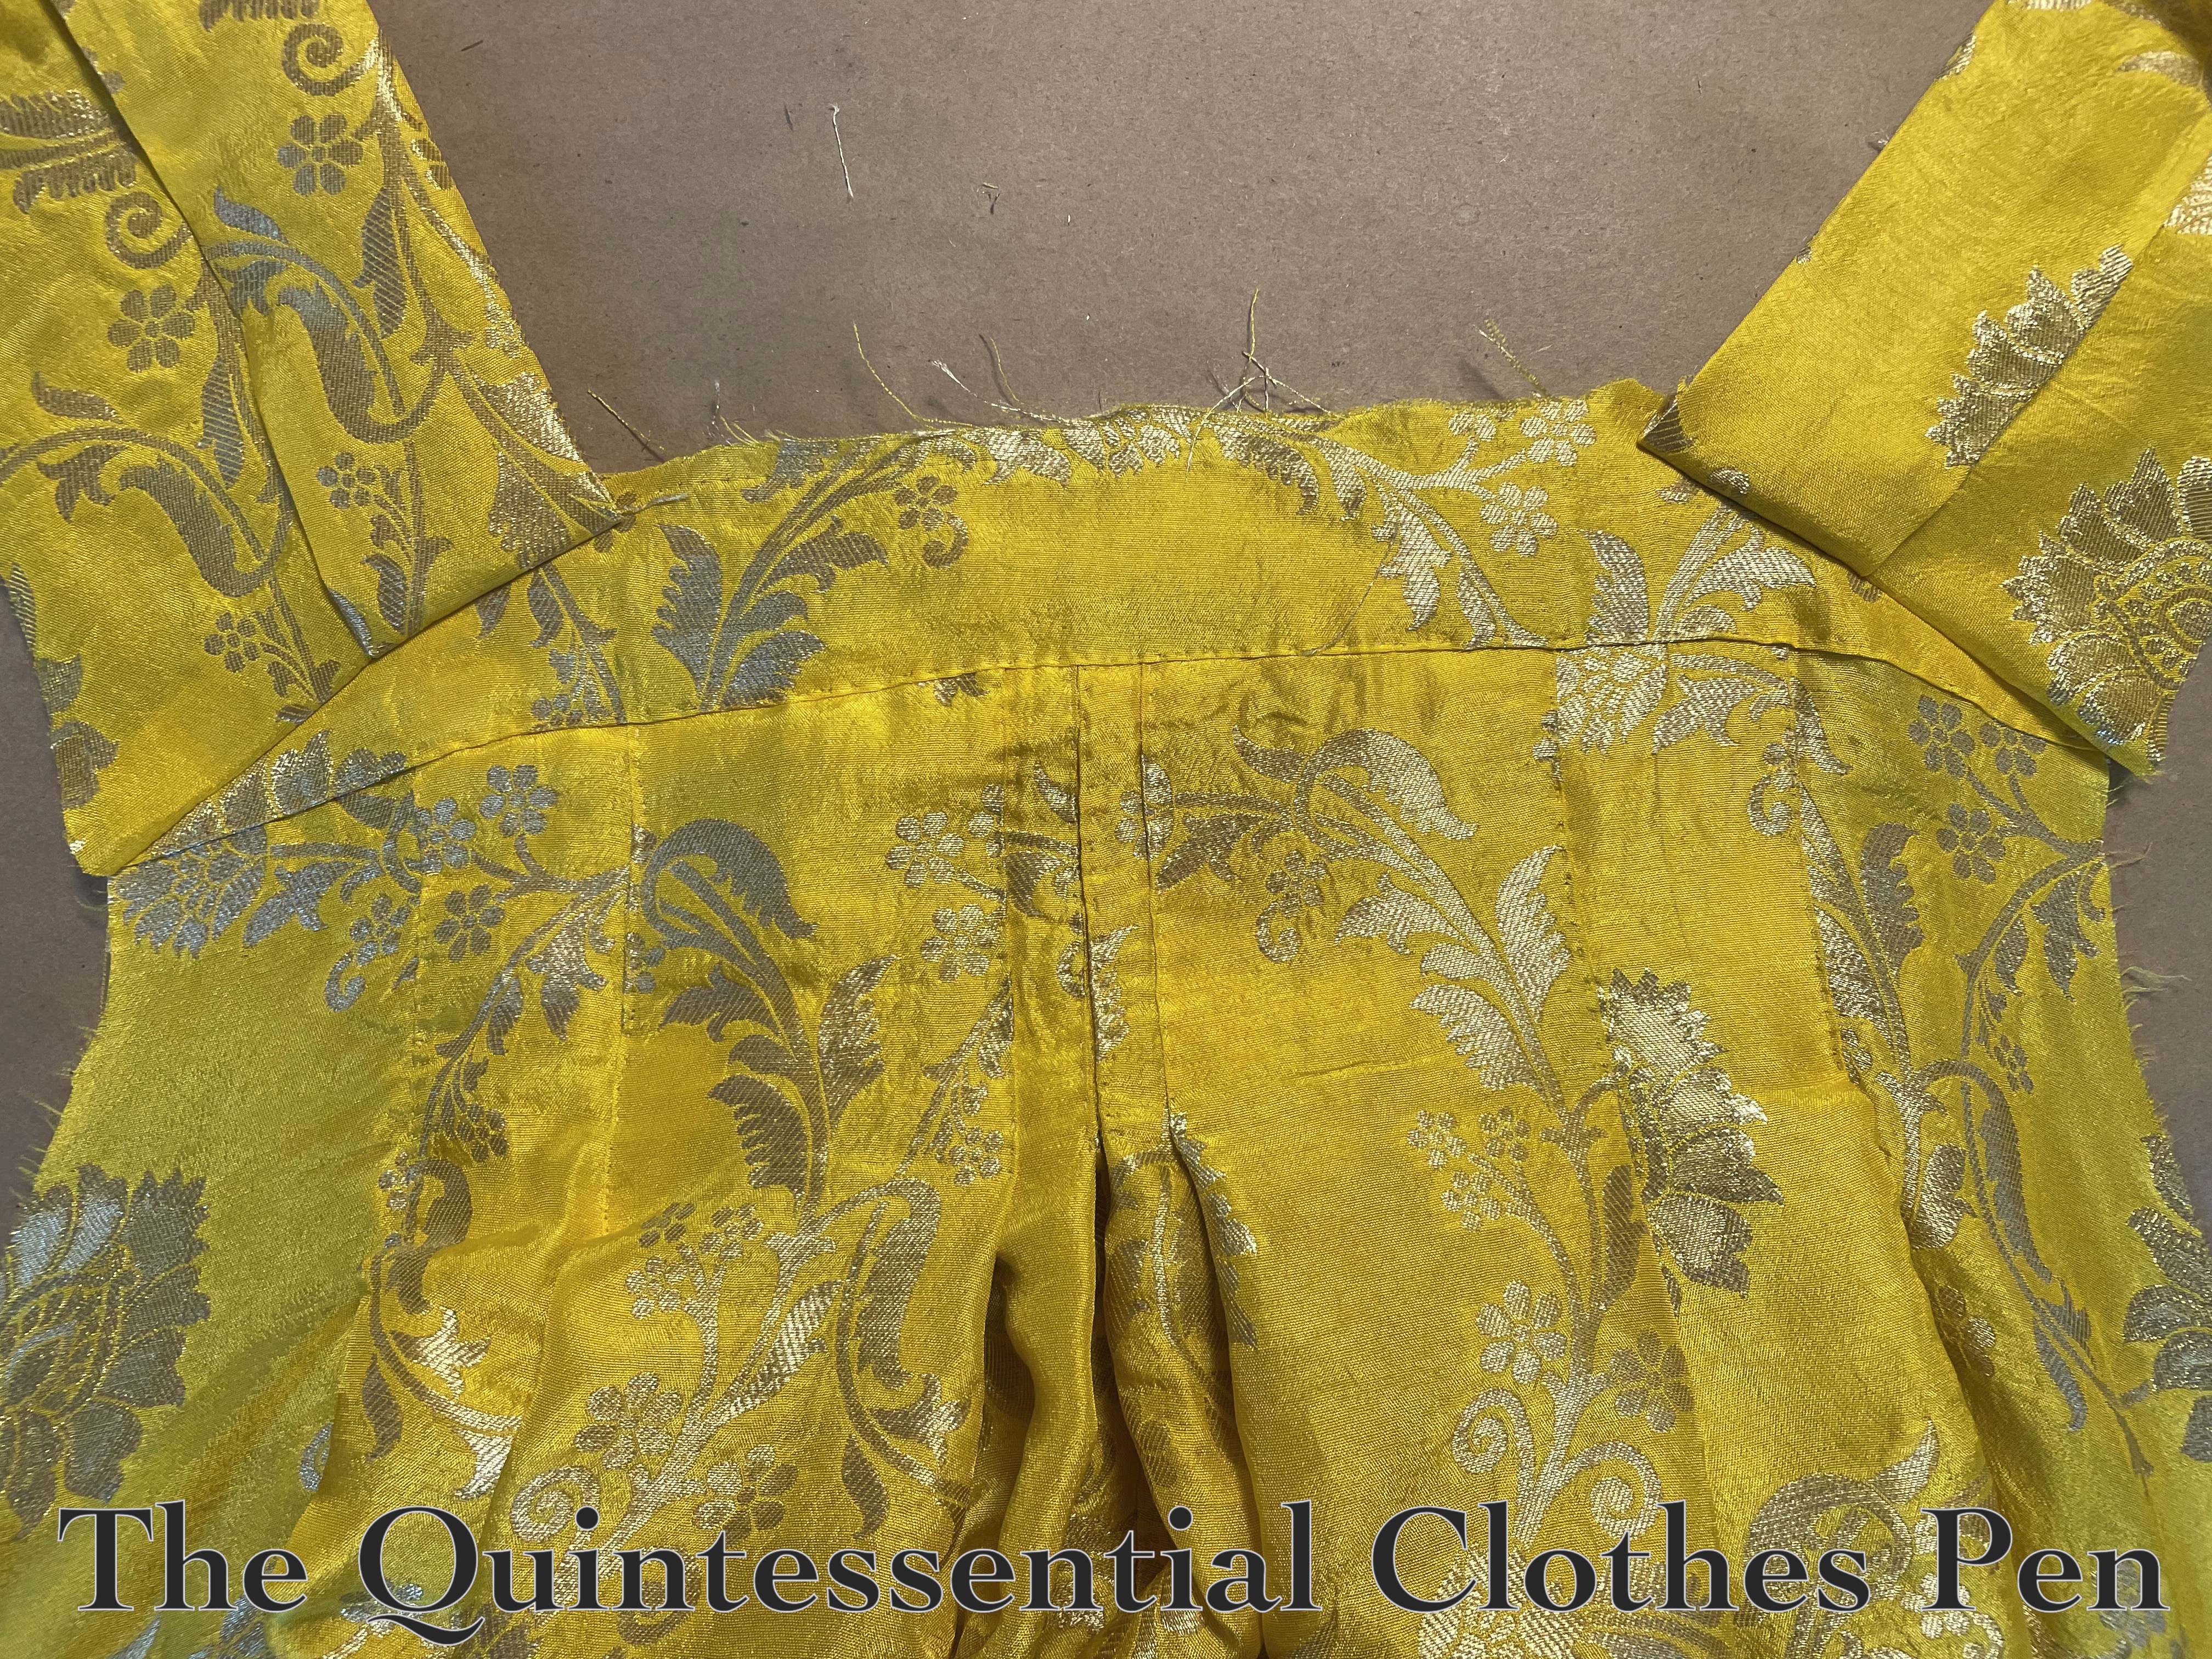
Eventually the process moved on to the back pleats — the signature feature of a sacque! I carefully followed the pleating instructions and hand stitched the various stacked box pleats in place. Then I went to put the back neck piece on… Oops!
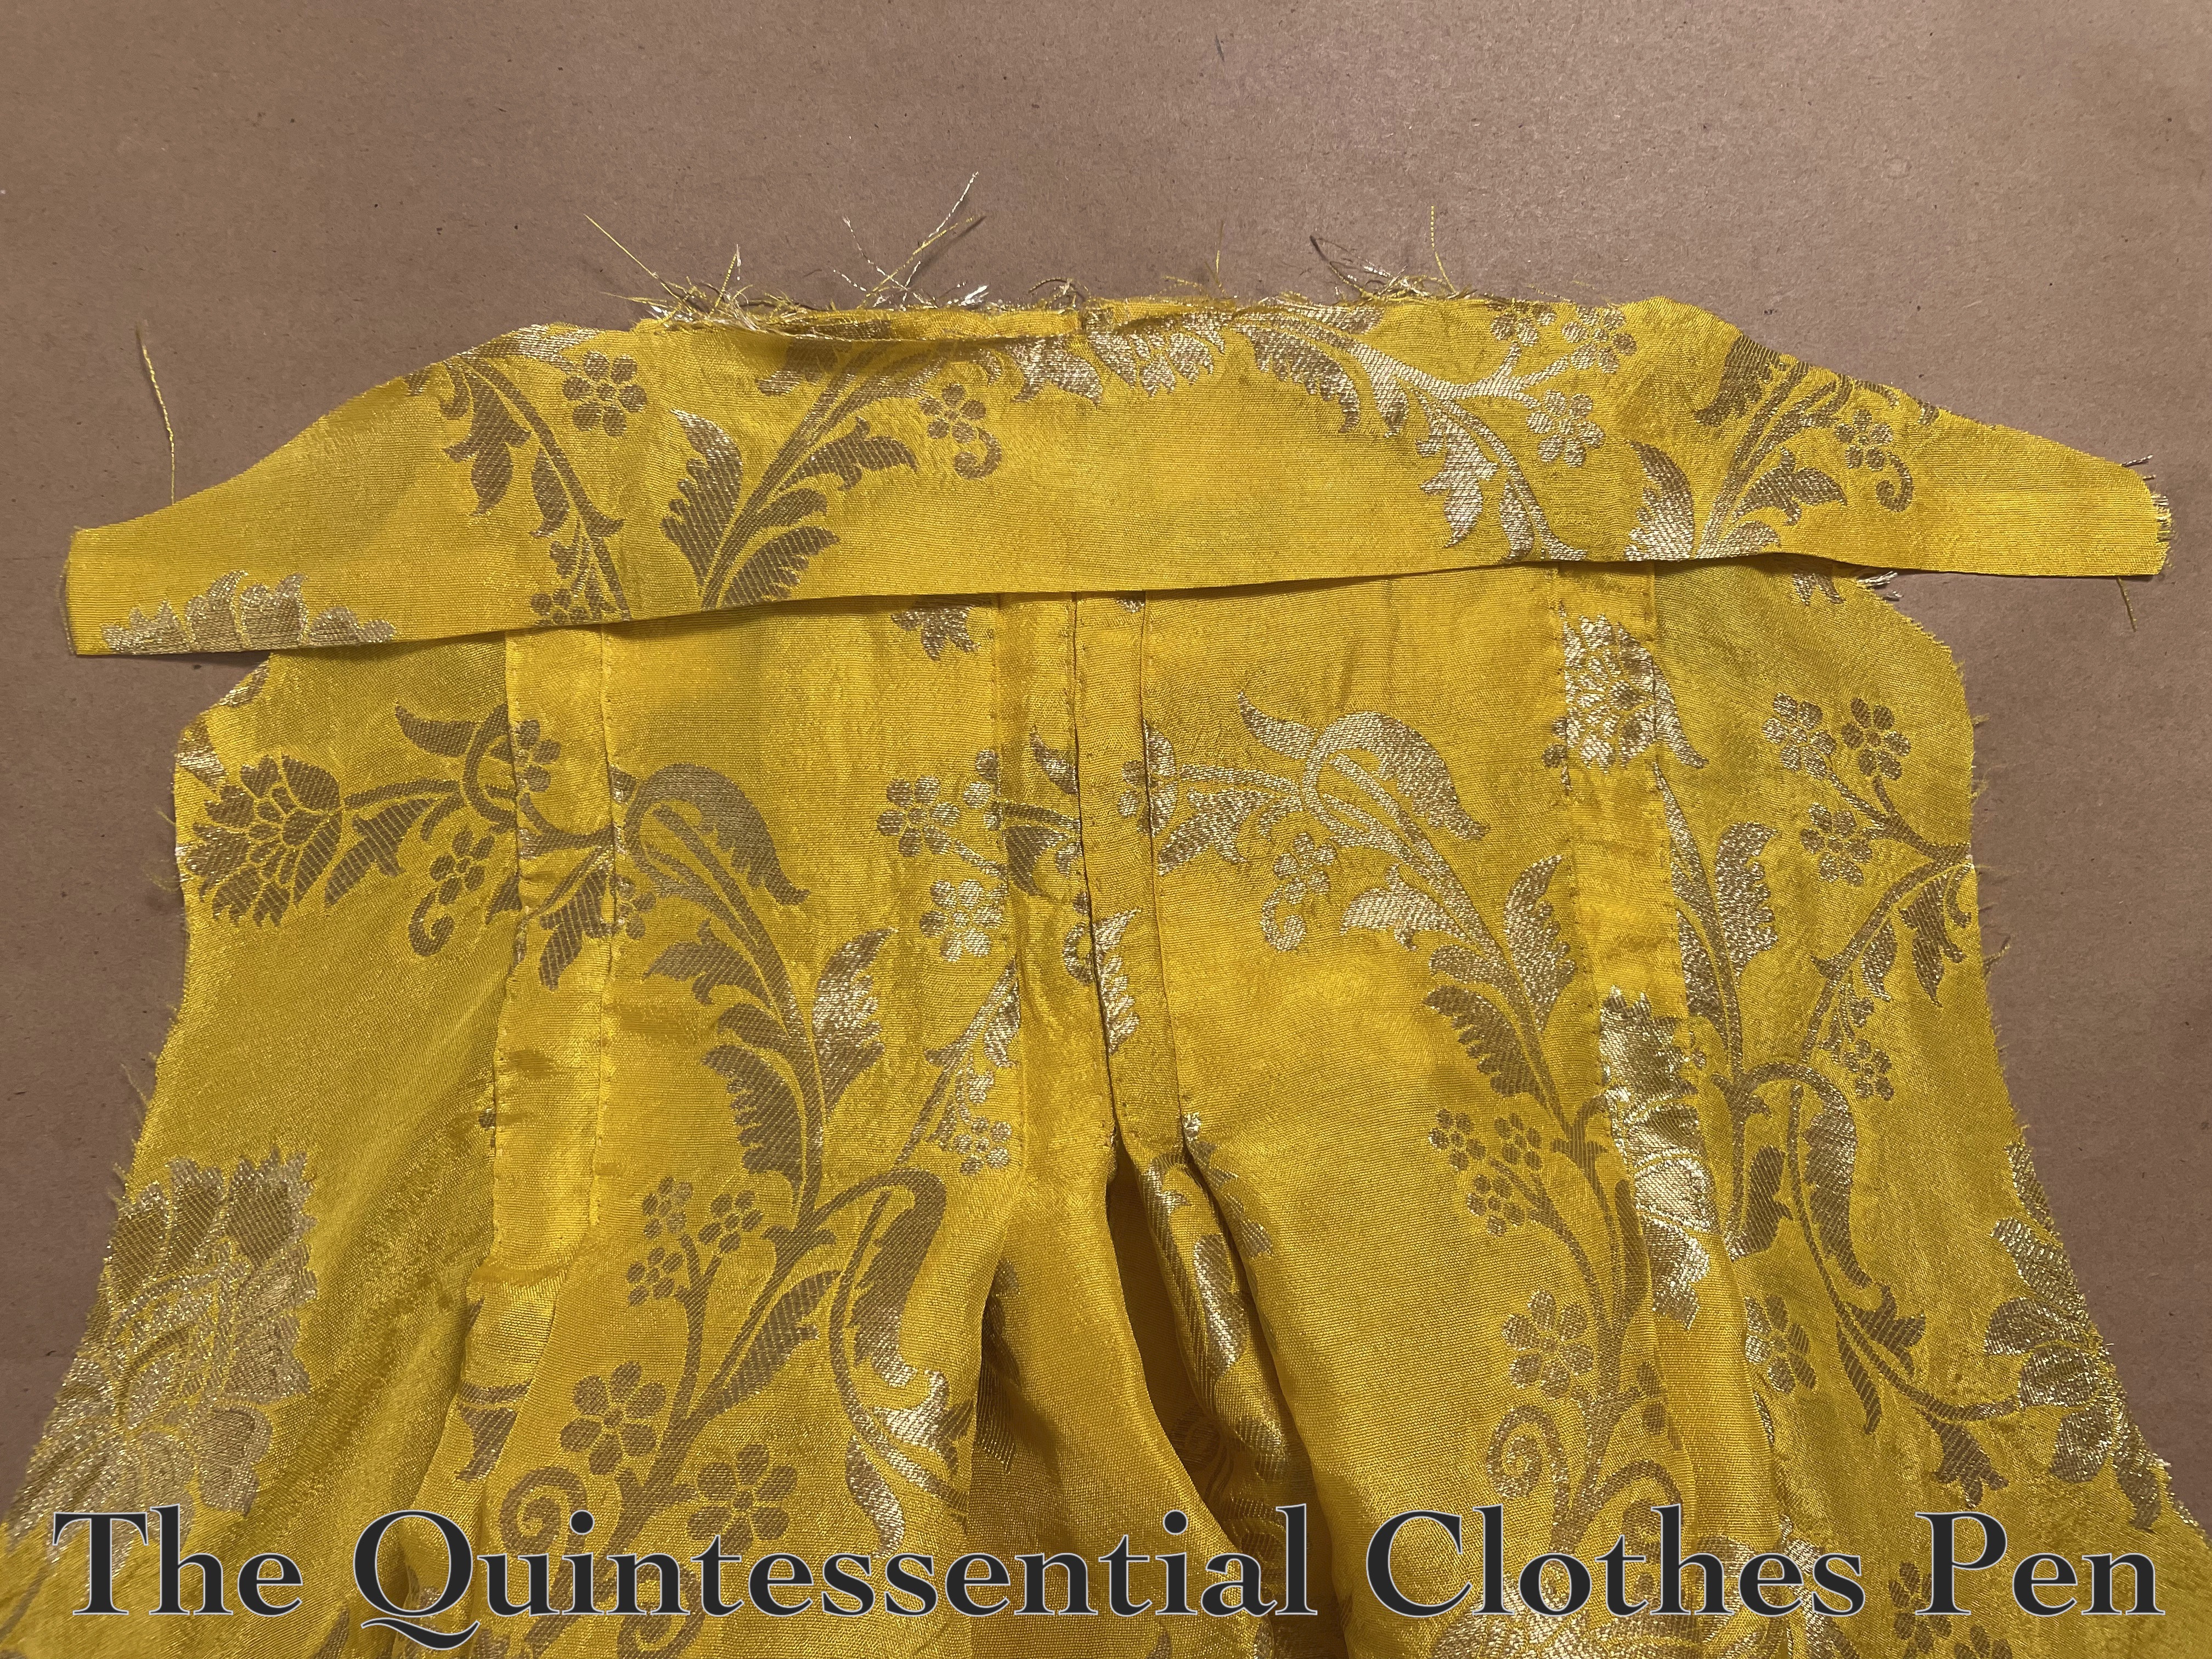
They widths didn’t match! This was not a pattern problem. This was my problem! When I adjusted the pieces (the backs and the back neck piece) for a body shape with wider shoulders I didn’t remember to adjust the spacing of the pleats across the back accordingly.
So, I carefully removed the stitching holding the pleats and re-organized them to make the back wider. I didn’t want to change the center due to the depths of the pleats, but I was able to move the side pleats over towards the arm holes. I don’t think the change is noticeable. And extant garments show a variety of pleating patterns and widths, so I feel perfectly justified from that perspective.
Sleeve Ruffles
Before I started this dress, I’d been looking through my new copy of Patterns of Fashion 6, from The School of Historical Dress (information and purchasing information about the book is available here, on The School of Historical Dress website). In the book (on pages 15 and 16, to be precise), there are diagrams of sacque patterns laid out in the most economical way possible. This includes various pieced seams for some parts of the garment as well as a way of cutting the sleeve ruffles that nestles them together to save fabric. I was intrigued! And I decided that for this yellow sacque I wanted to try out this method.
Essentially, a rectangle is cut on a diagonal with each diagonal portion making up a flounce. With the rectangle folded along a short side, this results in one triangle that can be cut on the fold while the other one ends up with a seam in the middle. Additionally, one of the flounces ends up being upside down in terms of the pattern on the fabric. I think this is a fun, historical quirk (as compared to what we would likely find on a modern garment) and I also don’t think it’s noticeable once the flounce with the upside down pattern and seam is placed underneath the other flounce.
So, I cut my flounces accordingly, with a wavy edge! Below is the result, with the two pieces separated slightly to show the geometry.

After the first diagonal separation, I also updated the scallops a little further to make each layer of flounces slightly different in shape than the other. The extra bits I cut off to do this are pictured below.

Hemming
Other steps were completed and eventually the dress looked like a dress! It was time to think about hemming it!
I wanted a narrow hem of about ½”. That’s easy to do, but I was worried about the metallic threads on the wrong side of the yellow fabric snagging on the train while being worn. I’ve seen this happen and know it can create pulls in the fabric that I wanted to avoid. But I didn’t want to put on a linen facing (as might have been used in the 18th century on what seem to be rare occasions), because I didn’t want an obvious line of stitching along the top or the weight and drape of that part of the lightweight silk dress to be different than the rest of the garment.
One trick I know of to help with this is to put a facing of tulle over the underside of the train. This makes a smooth surface to drag on the floor while not adding weight or making an obvious line along the top at whatever point the facing stops.
I looked in my stash and found a one yard piece of ivory tulle that would be just the right size for this purpose. A single layer of the ivory blends very well with the yellow silk!
The tulle facing tapers away to nothing around the side seams of the dress and extends up about 6″ above floor level at the center back.
Below is a photo showing part of the hem of the dress with the ivory tulle pinned in place. I pieced the tulle where needed, which was not in the same places as the seams of the yellow silk.
 And here is a closeup of the wrong side of the fabric, where the metallic threads are clearly visible on the left and the tulle is just noticeable on the right. One it was all pinned in place I used a sort of running prick stitch to catch the tulle to the yellow silk. This resulted in very small stitches on the yellow silk (or where possible, I caught the metallic threads so that the stitches wouldn’t be visible at all). The stitches are not at all noticeable when the dress is being worn.

Materials & Time Spent
This dress (accounting for all of the individual parts of the ensemble) used:
- 10.75 yards of the yellow figured silk
- 3.25 yards of cream cotton (1.25 yards for for the sacque lining and 2 yards for the petticoat)
- Scraps of ivory silk
- Scraps of natural canvas
- 1 yard ivory tulle
- Embroidered/sequin bits from approximately ½ yard of gold lace
As well as small notions such as ivory ribbon, bones and bone casings, and thread.
I didn’t keep track of how much time I spent on this project, which was a relief in some ways. It was nice to just make it and not count. My photos show that I started patterning and mocking up the pattern in fall of 2023. I know I cut the pieces out in the winter of 2024 while my notes were still fresh. And then I was busy and didn’t start sewing until summer of 2024. I finished the dress on September 28, 2024. So it took me about a year of not-at-all consistent work — a Saturday here, a day or two of vacation there, and some hand sewing in the evenings. For this project, I’m not going to try and estimate the hours, but just bask in the knowledge of not keeping time.
And that’s it! This dress is made of pretty wonderful fabric that steals the show without additional trimmings, so I didn’t add any aside from accessories (such as the stomacher). Photos of the finished garment will be coming soon!


