HSF #21: Trim For Evie In Time For A Ball

I’m taking a quick break from the 1950s adventure posts to insert my HSF #21 post into the mix. More 1950s coming soon!

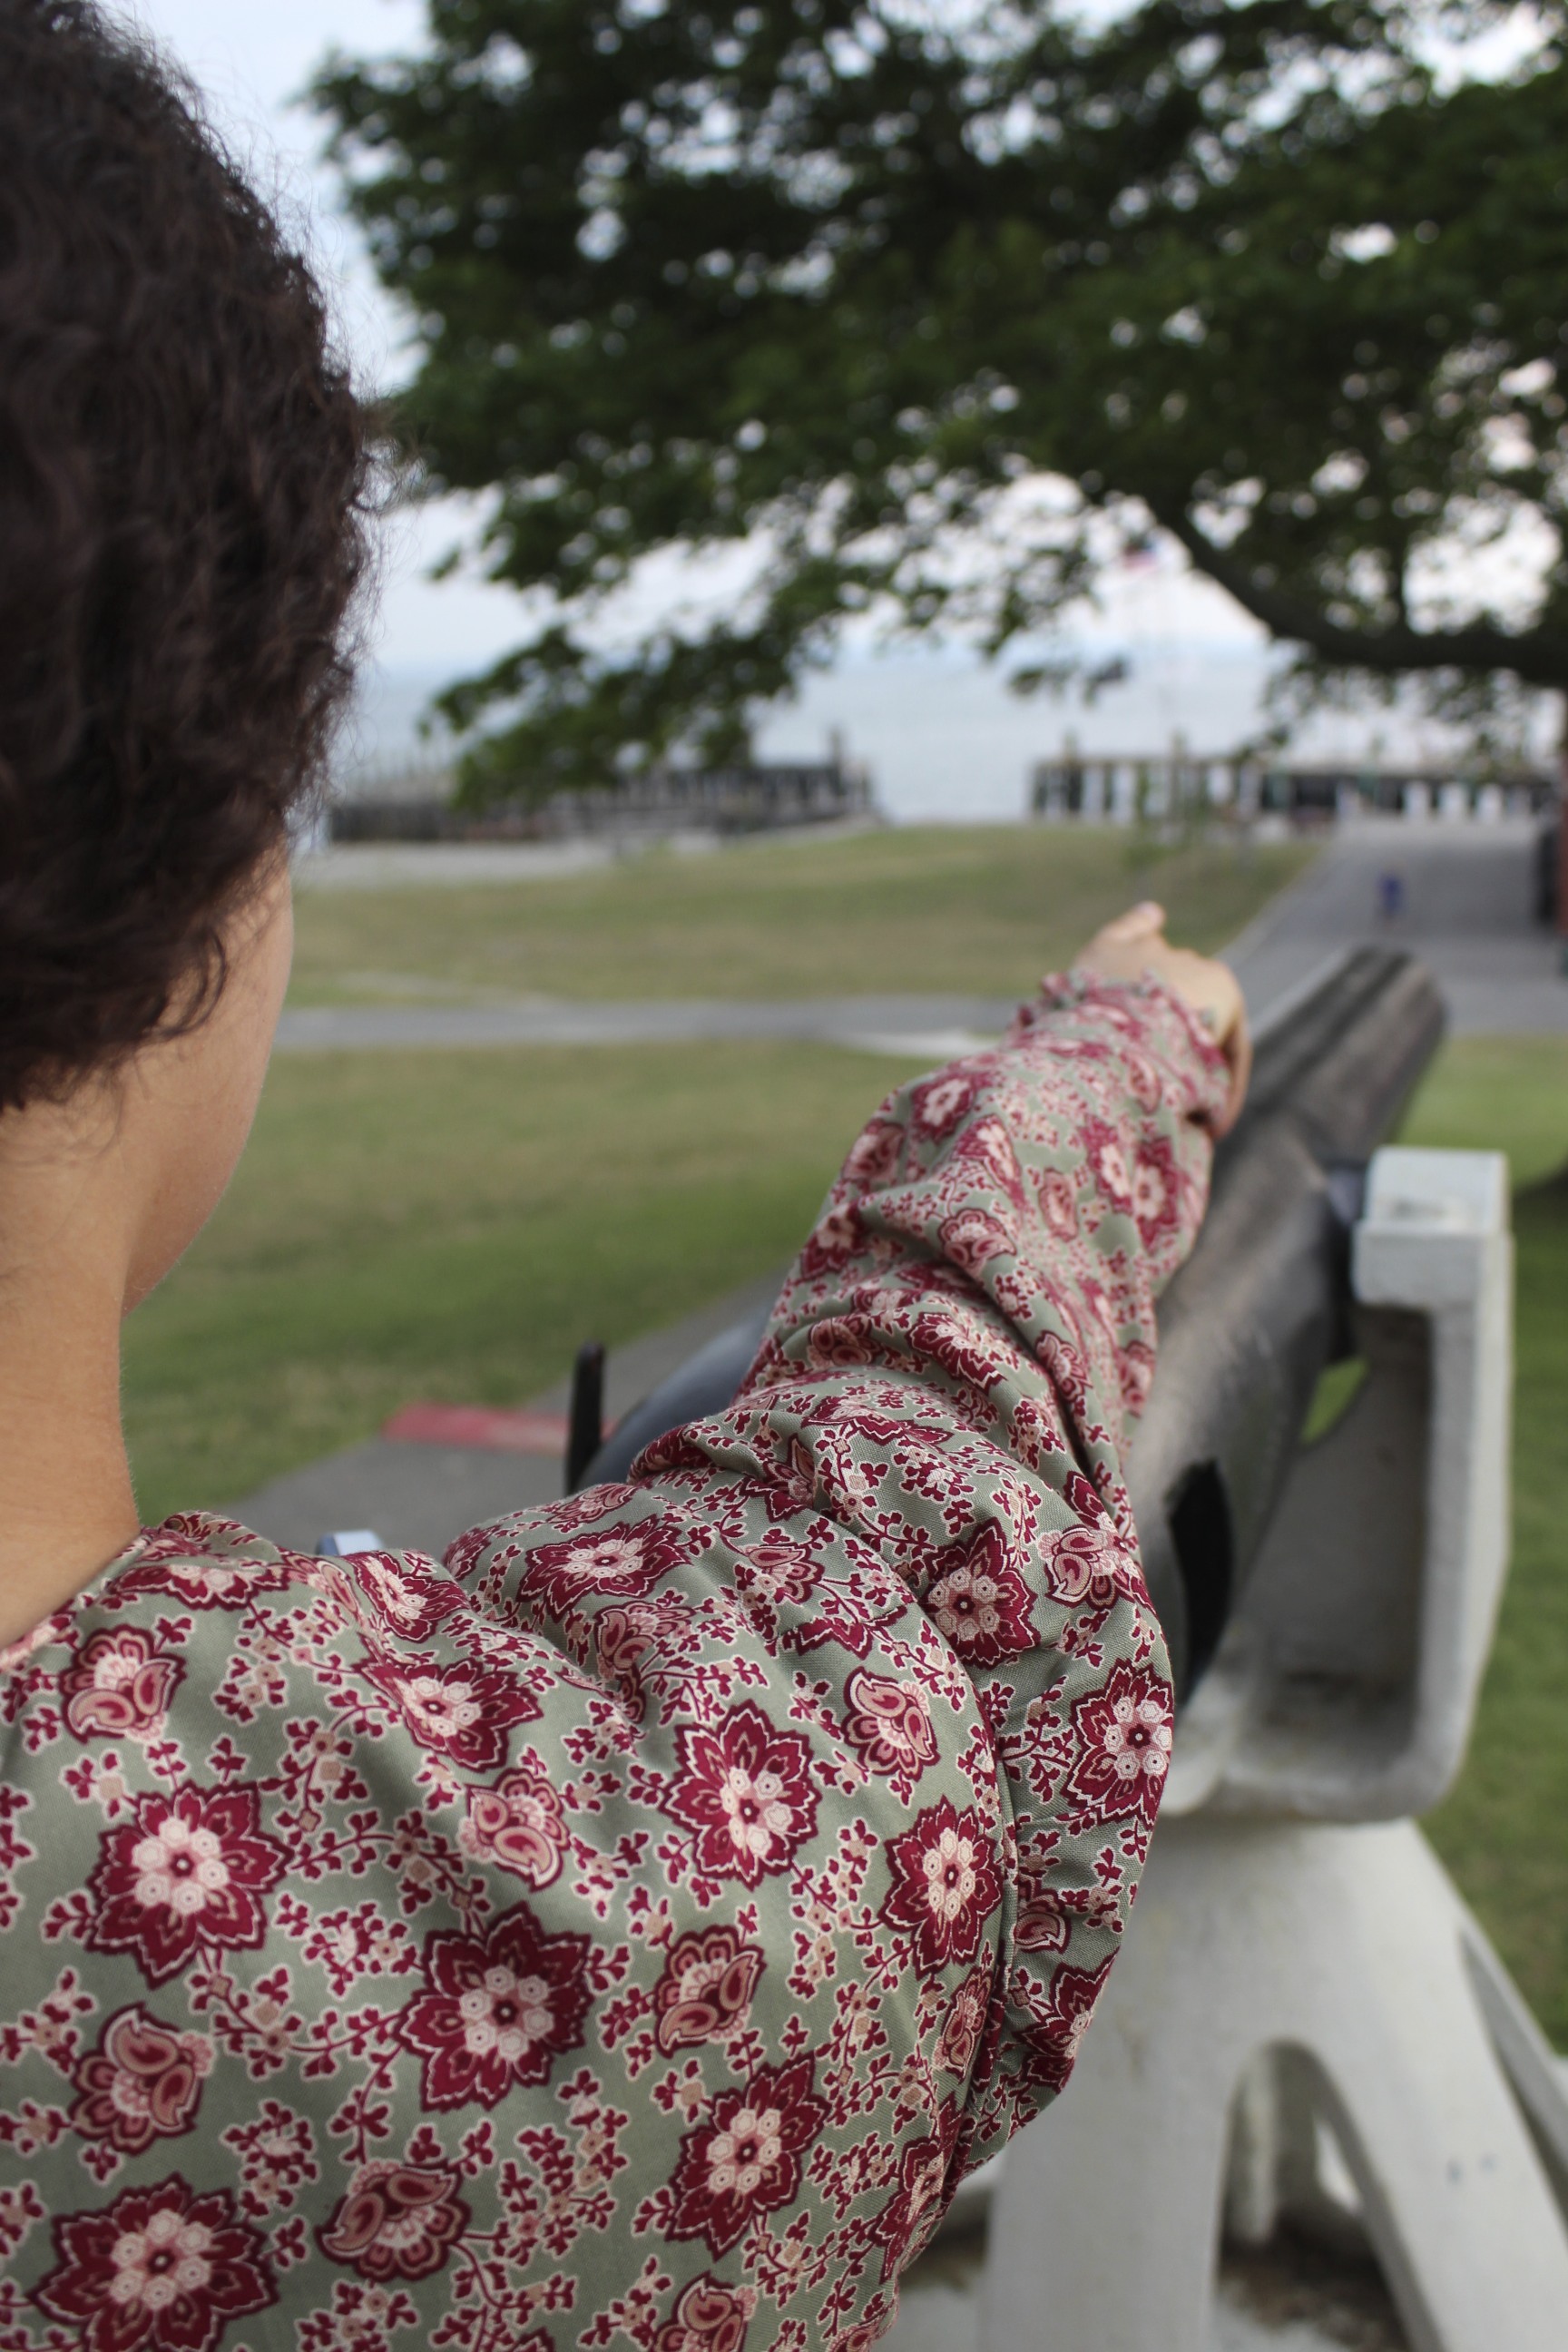
It’s been on my sewing list for a few months to add a bit more trim to the sleeves of Evie, my most recent Civil War era dress, but I’ve been working on knitting my sweater and completing other projects, like my 1822 Walking Dress, so I hadn’t really been inspired to complete the trim. However, the Commonwealth Vintage Dancers were asked to run a ball as part of recent Civil War reenactments in Worcester, MA, and that gave me the perfect incentive to finish up trimming Evie! She also happens to be green, so this is my entry for the HSF Challenge #21: Green.

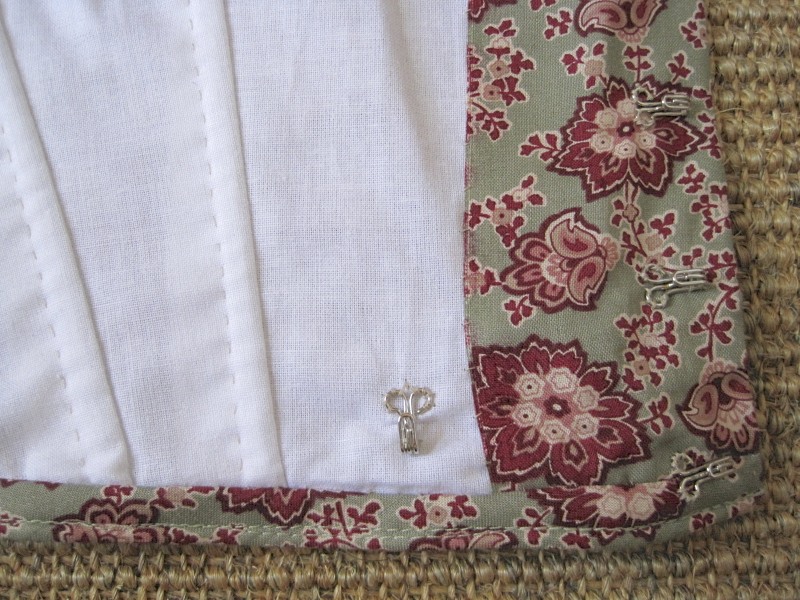
Oh yes, I forgot I had some other minor changes to make to Evie since I last wore her in March as well. Boring things, like changing out the boning at center back, and enlarging the armsceye a bit under the arm, and adding hooks and bars to connect the bodice to the skirt. I got all those things done, too, though they don’t get their own photographs. I really like the added trim. It gives the bodice a little bit more interest and helps balance out the immense skirt.

IMG_4987 - Version 2
Here is Evie, with her new sleeve trim.
IMG_4988
Another view. The sleeve trim is a smaller scale version of the trim on the skirt.
IMG_4988 - Version 2
A cropped version of the picture above. I can’t decide which way I like it better, so I’m including both.
IMG_0138
And here is what the bodice of Evie looked like before I added the sleeve trim.

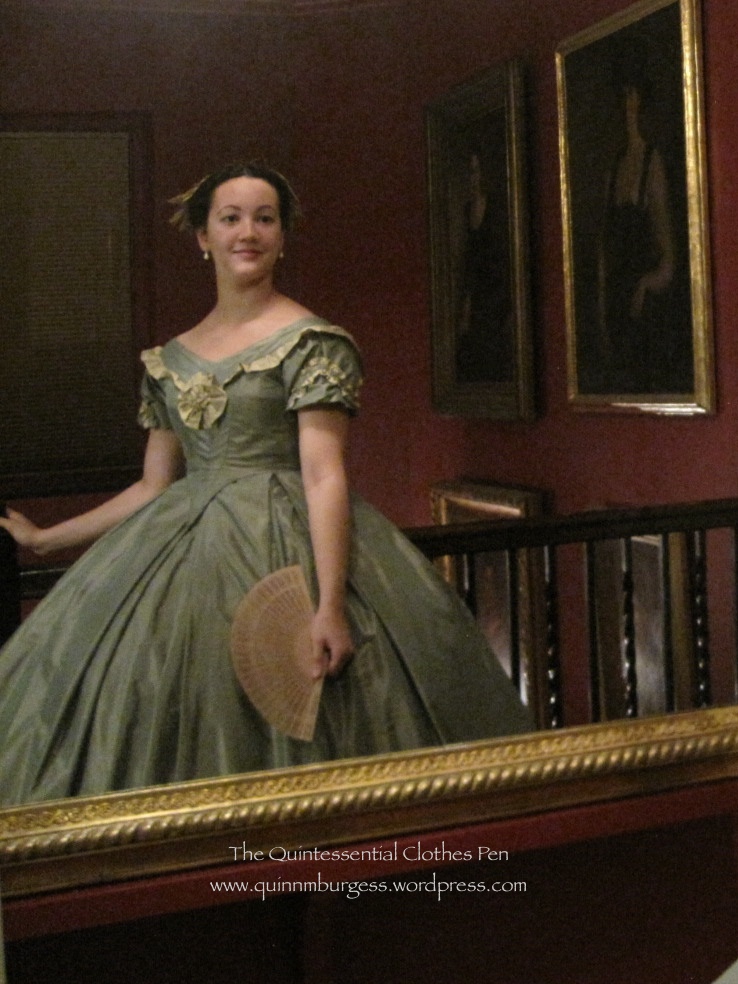
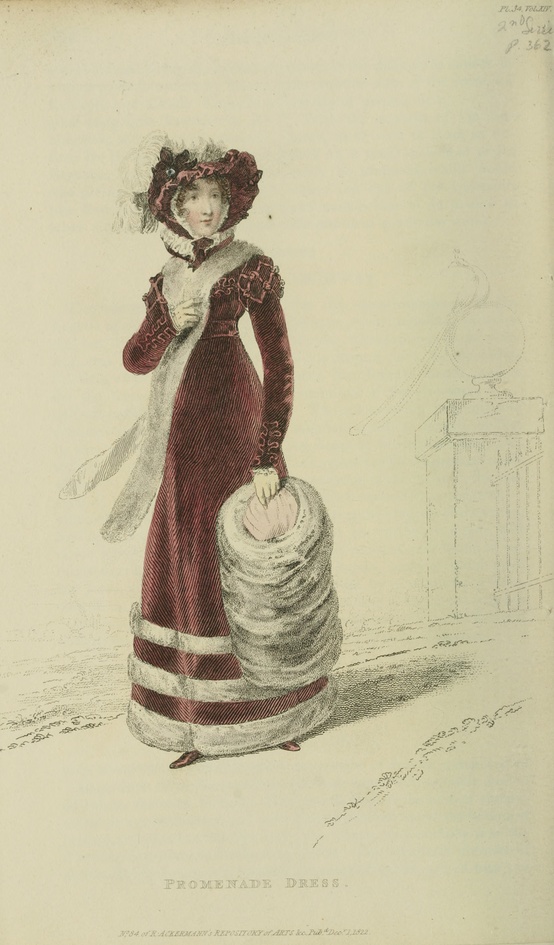
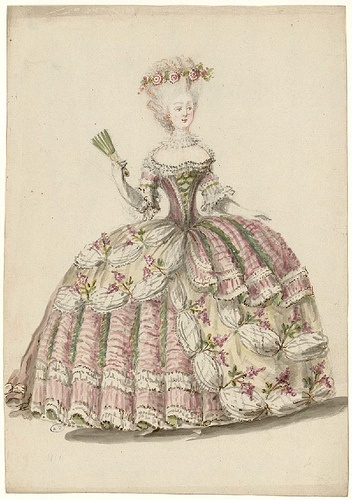
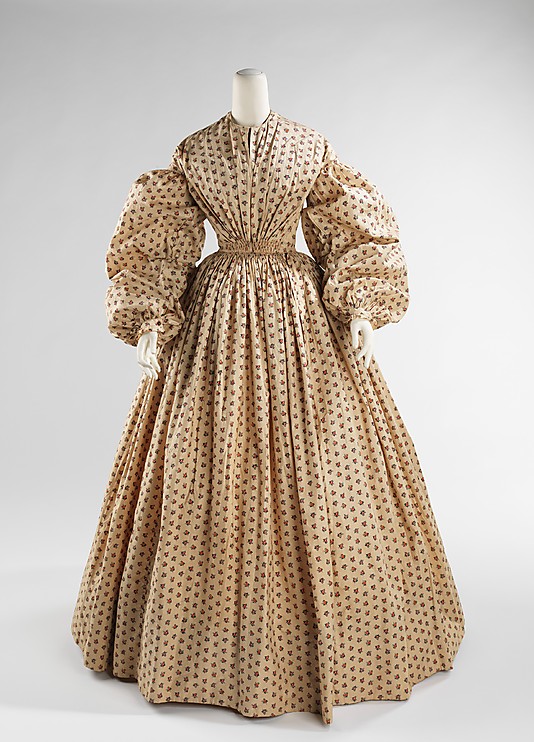
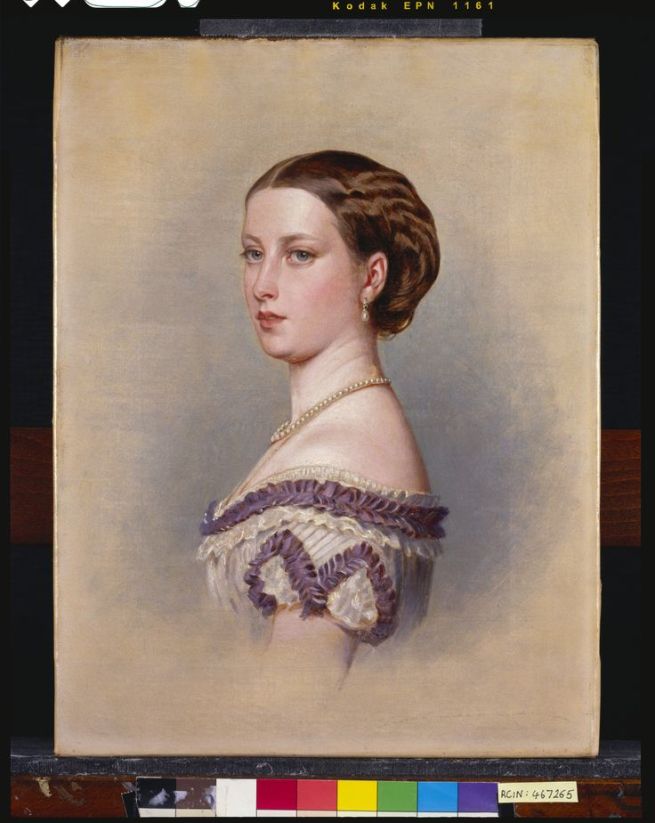
Most of the trim on this dress is based on two images I discussed in this previous post: a fashion plate from 1864 and a costume made by Tirelli Costumi. The sleeve trim is based off of yet a third inspiration source: the painting, below, of Princess Helena in the Royal Collection. It’s perfect that it’s from 1864, just like my inspiration fashion plate. It’s even better that it echoes the bertha trim I already had and the zig zag on my skirt.

b5e346822ebb9589dd64aca144479f35
This is a copy by William Corden (1819-1900) of the portrait of Princess Helena by Albert Graefle (RCIN 403988). The original was painted for Princess Helena as a birthday present for Queen Victoria on 24 May 1864. Princess Helena (1846-1923), nicknamed Lenchen, was the fifth child and third daughter of Queen Victoria and Prince Albert. She was lively, outspoken and something of a tomboy. In 1866, two years after this portrait was painted, she married Prince Christian of Schleswig Holstein and in 1916 they celebrated their Golden Wedding anniversary; she was the only child of Queen Victoria to do so. Queen Victoria recorded in her Journal that ‘Lenchen’s picture by Graefle, is extremely good & pretty’.

Now, the facts:

Fabric: small bits of leftover gold silk shantung and green silk taffeta from the construction of the dress.

Pattern: none.

Year: 1864.

Notions: only thread.

How historically accurate?: Well, shantung is not accurate, but silk is (and this doesn’t look very shantung-y). I give this trim a 98% on accuracy.

Hours to complete: 4? All hand sewn.

First worn: With the new trim, on October 11, to a Civil War ball.

Total cost: $0, because it’s leftovers!

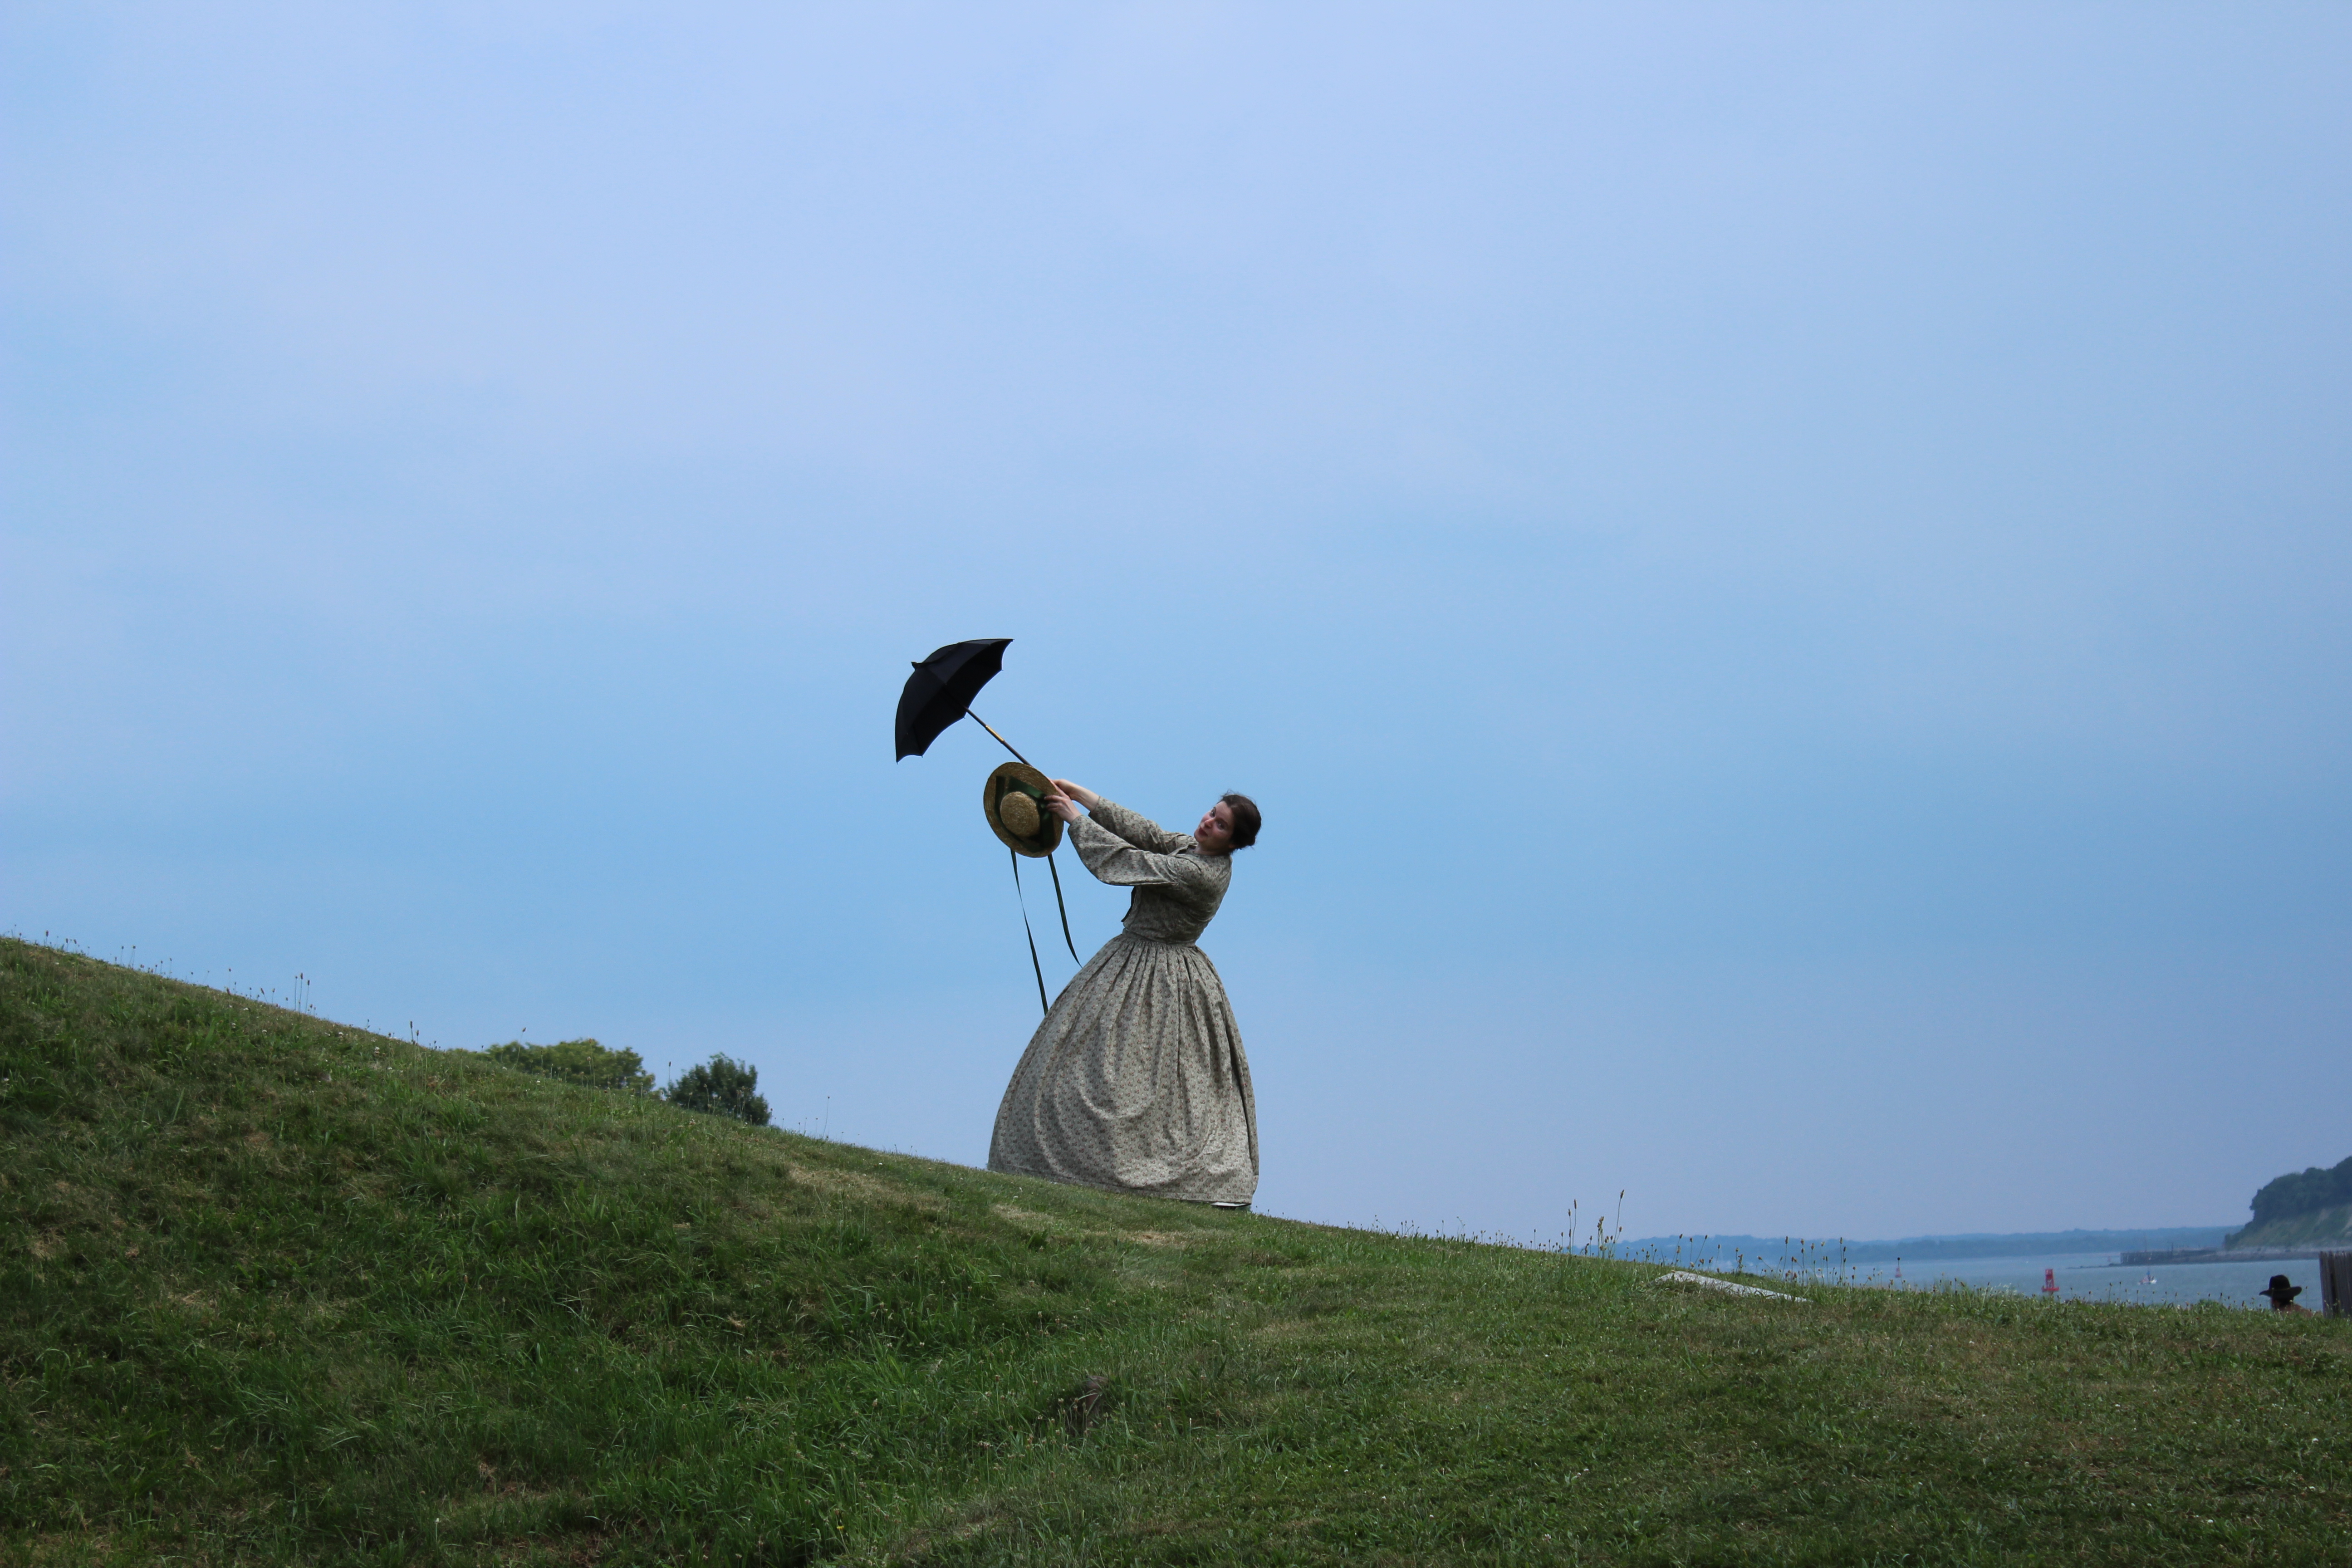
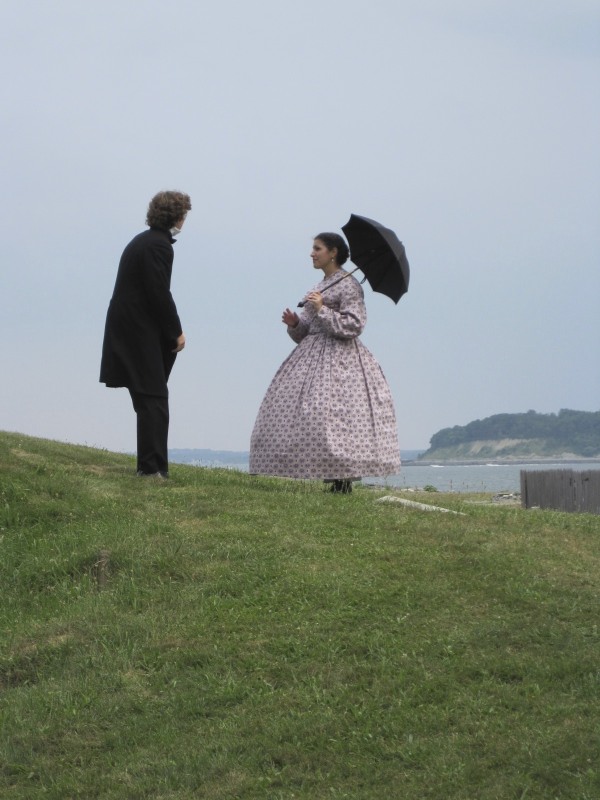
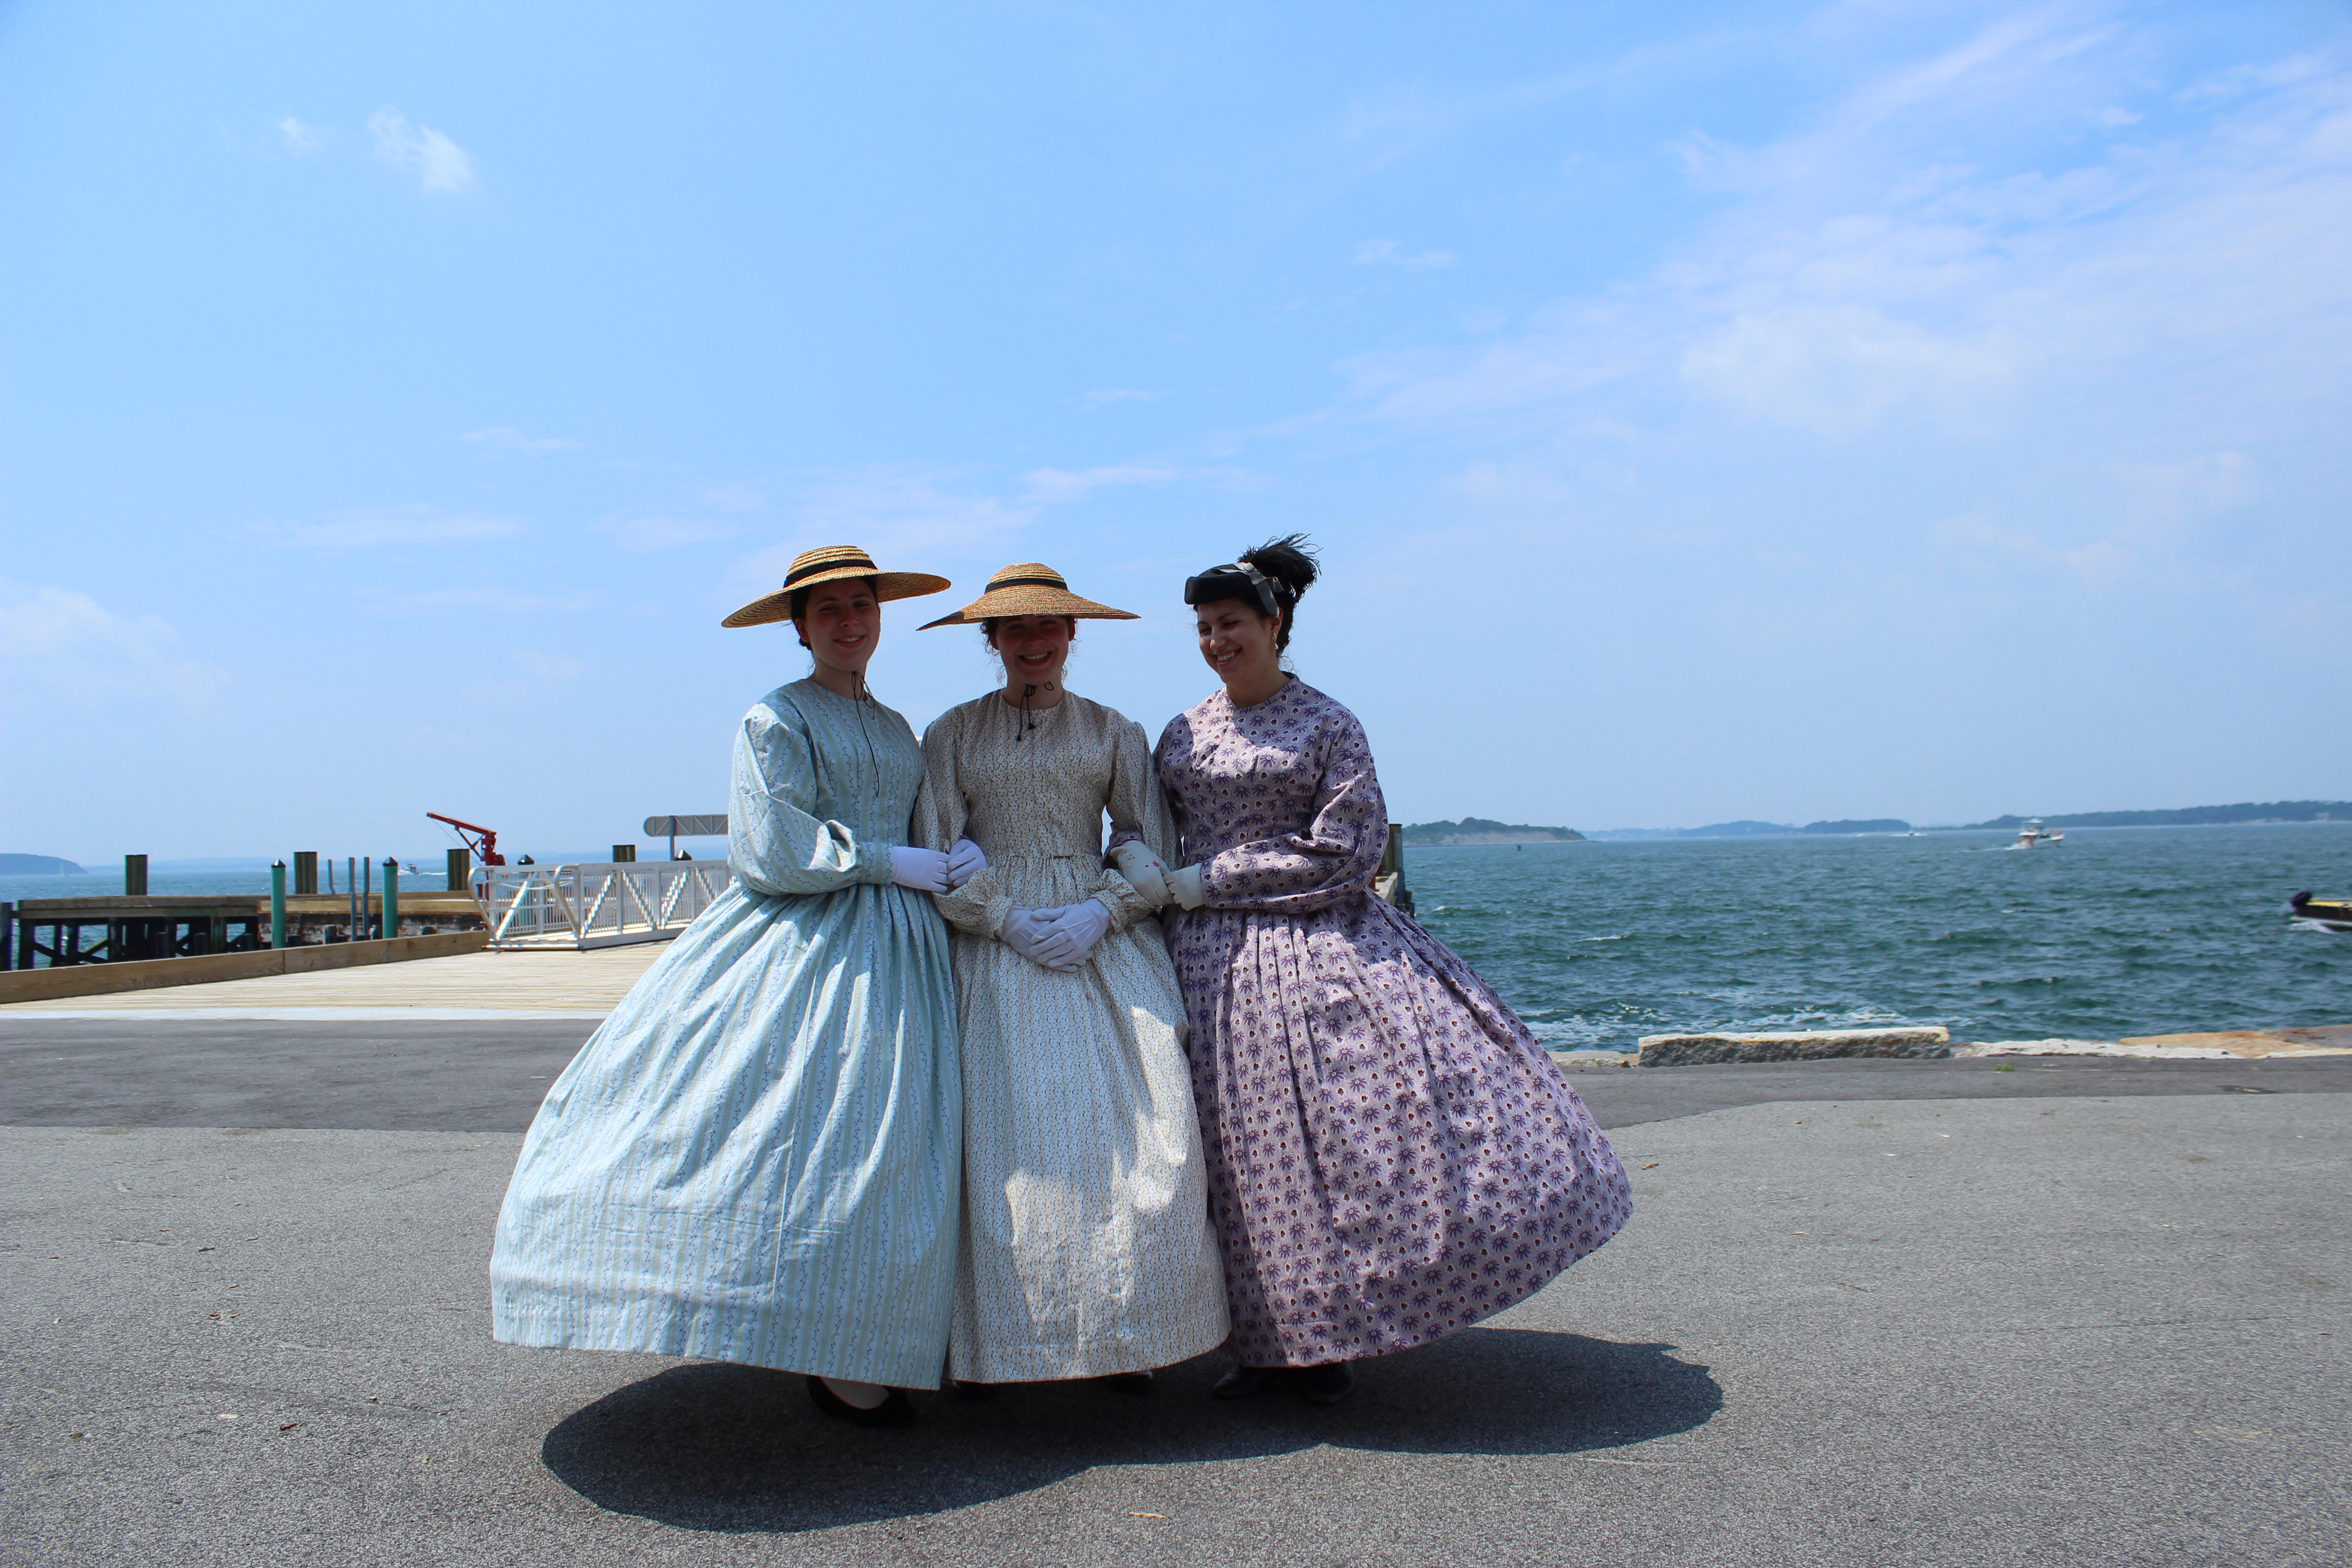
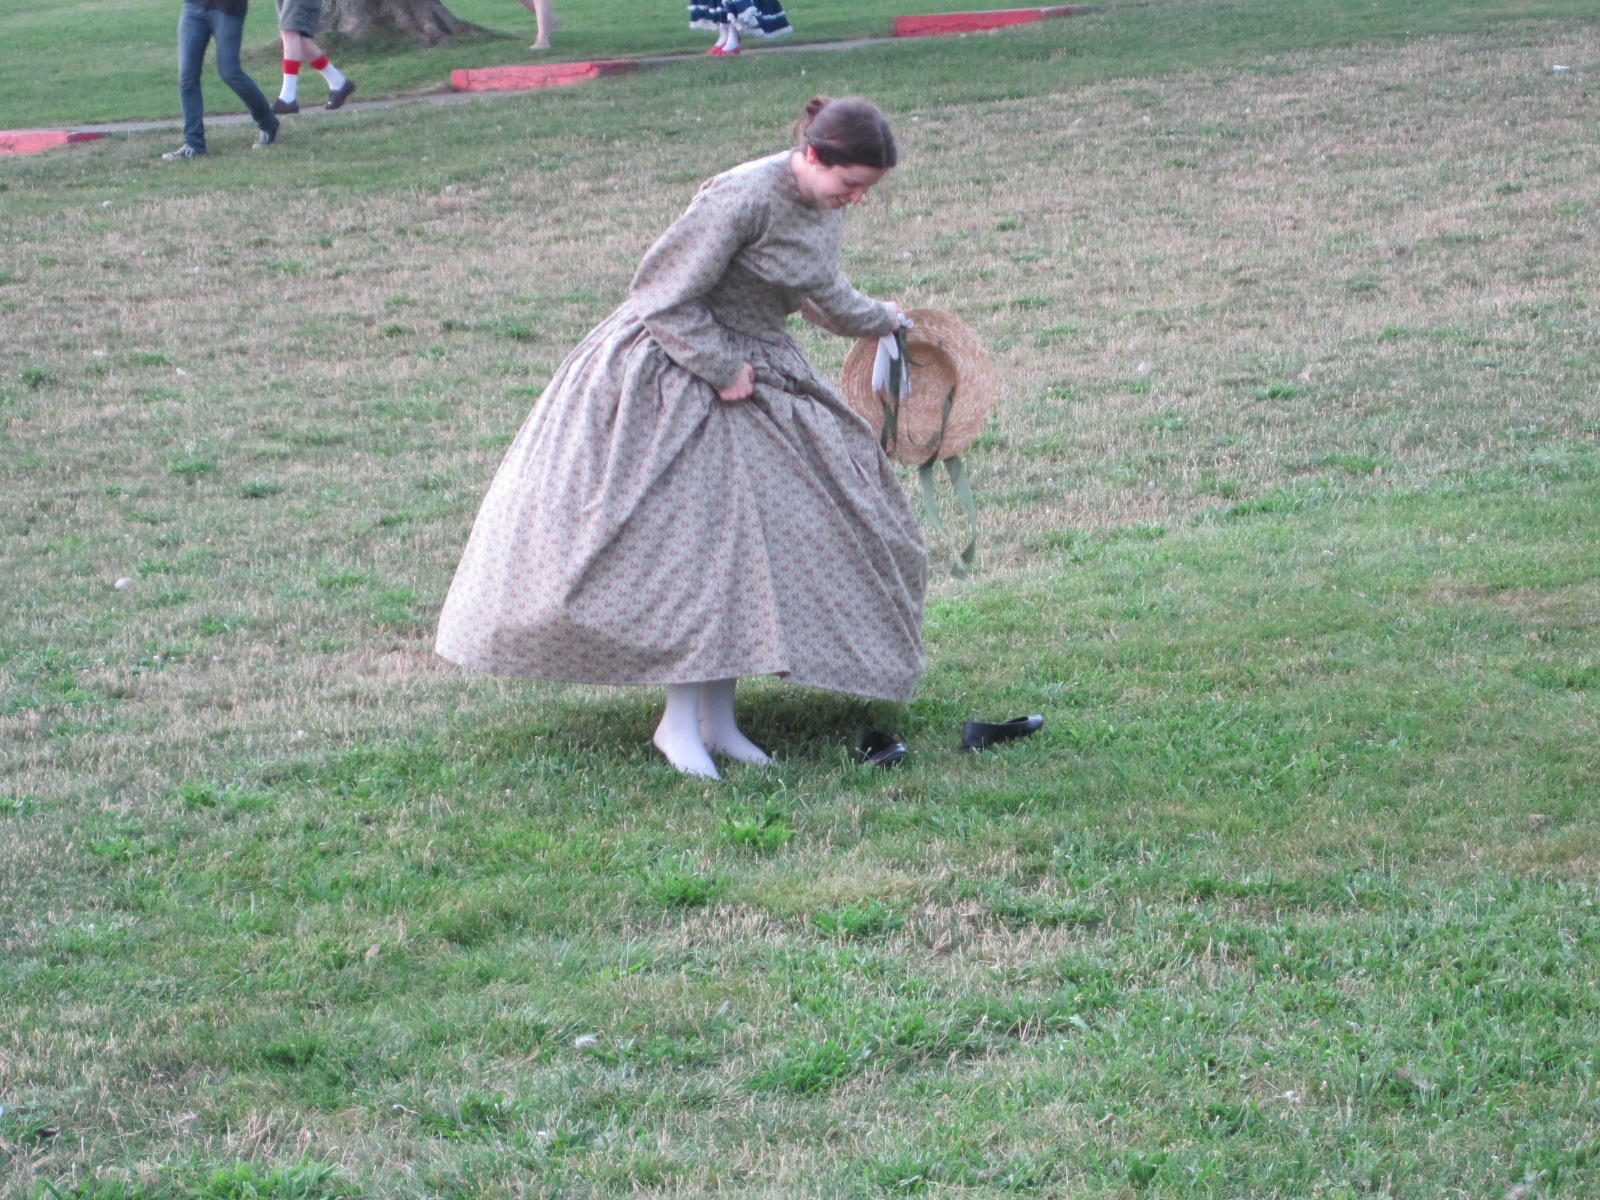
Now for the bonus part of this post where I include pictures from the Civil War ball.

IMG_4993
The entrance to the building had these fabulous doors.
IMG_4991
Each section looked like this.
IMG_4941
Dancing a waltz.
IMG_4934
Swinging skirts are fun!
IMG_4943
People looked very nice.
IMG_4946
And it was nice to see unfamiliar faces and meet new people.
IMG_4947
There was a constant swishing sound of skirts brushing against one another.
IMG_4961
The Commonwealth Vintage Dancers interspersed short performances throughout the evening.
IMG_4964
This is the Triplet Galop Quadrille.
IMG_4955
The ball room had large, dark, seriously-faced portraits around the perimeter. I’m not sure they approved of all the dancing!
IMG_4954
There were also Civil War era flags that the reenactors had brought to help decorate the room. And here’s a full length shot of Evie with her new sleeve trim.

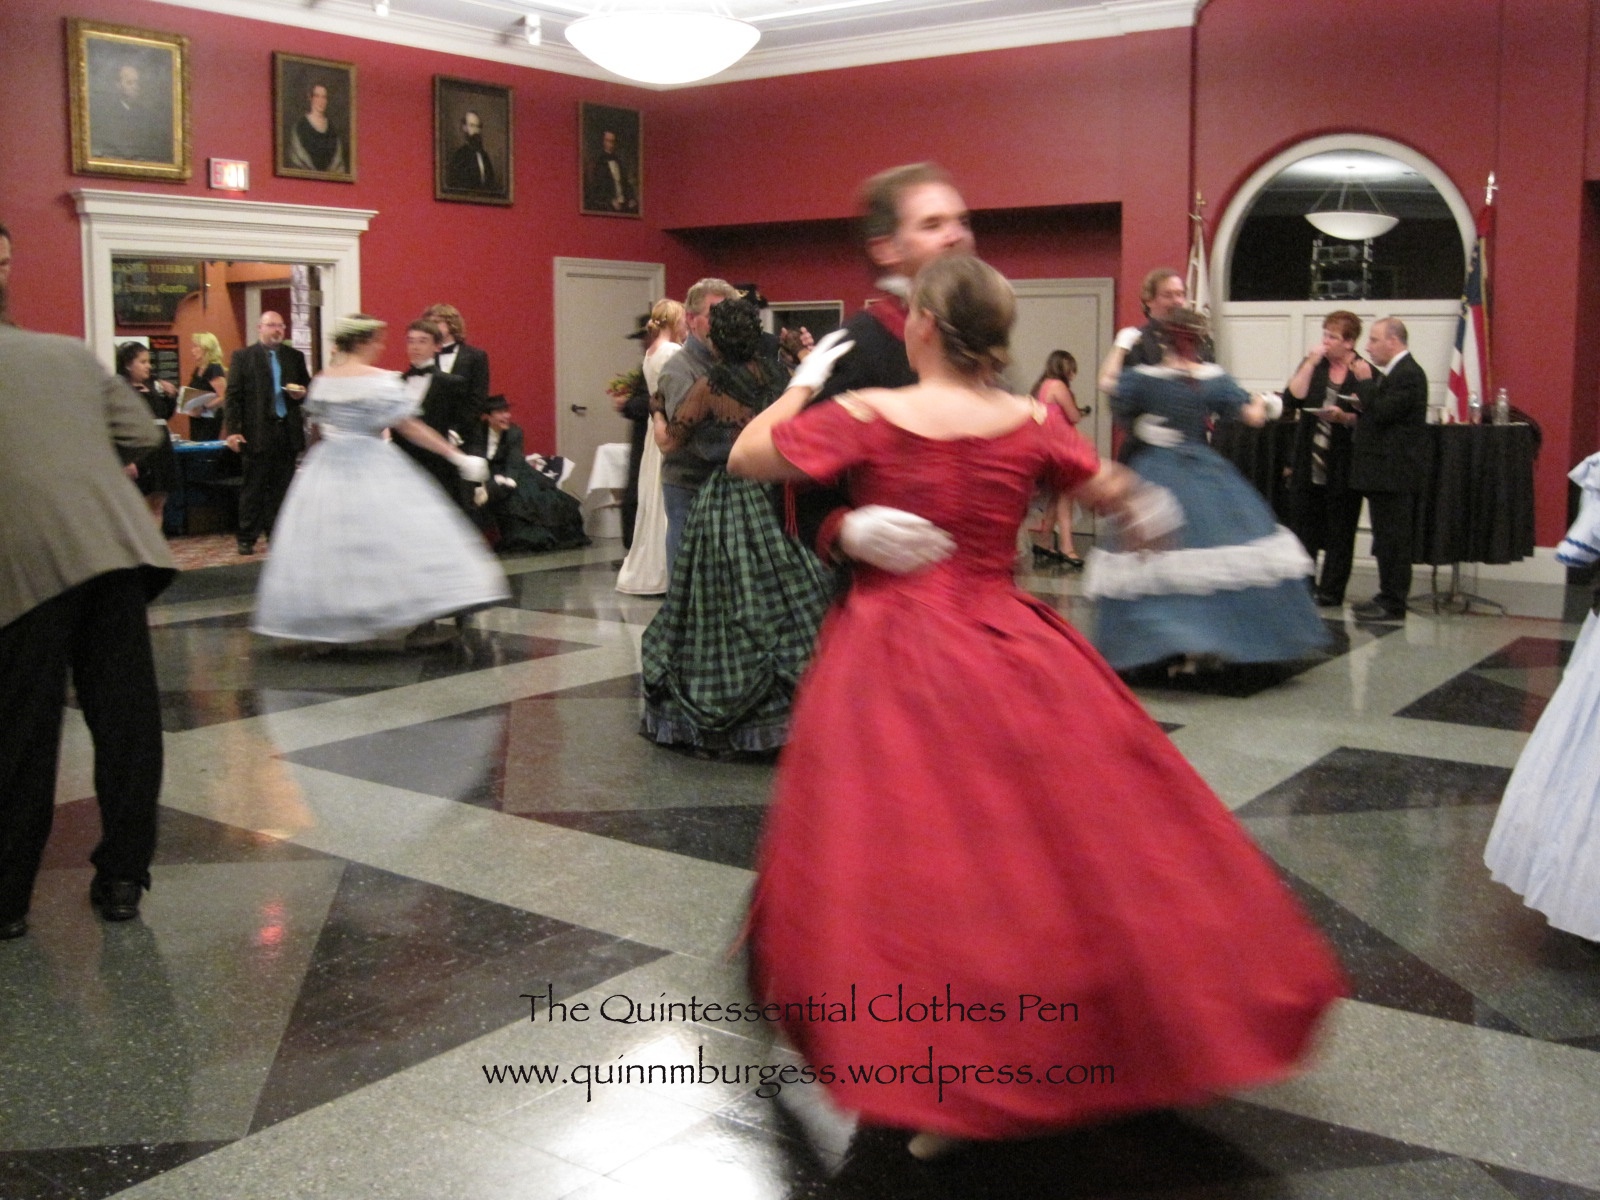
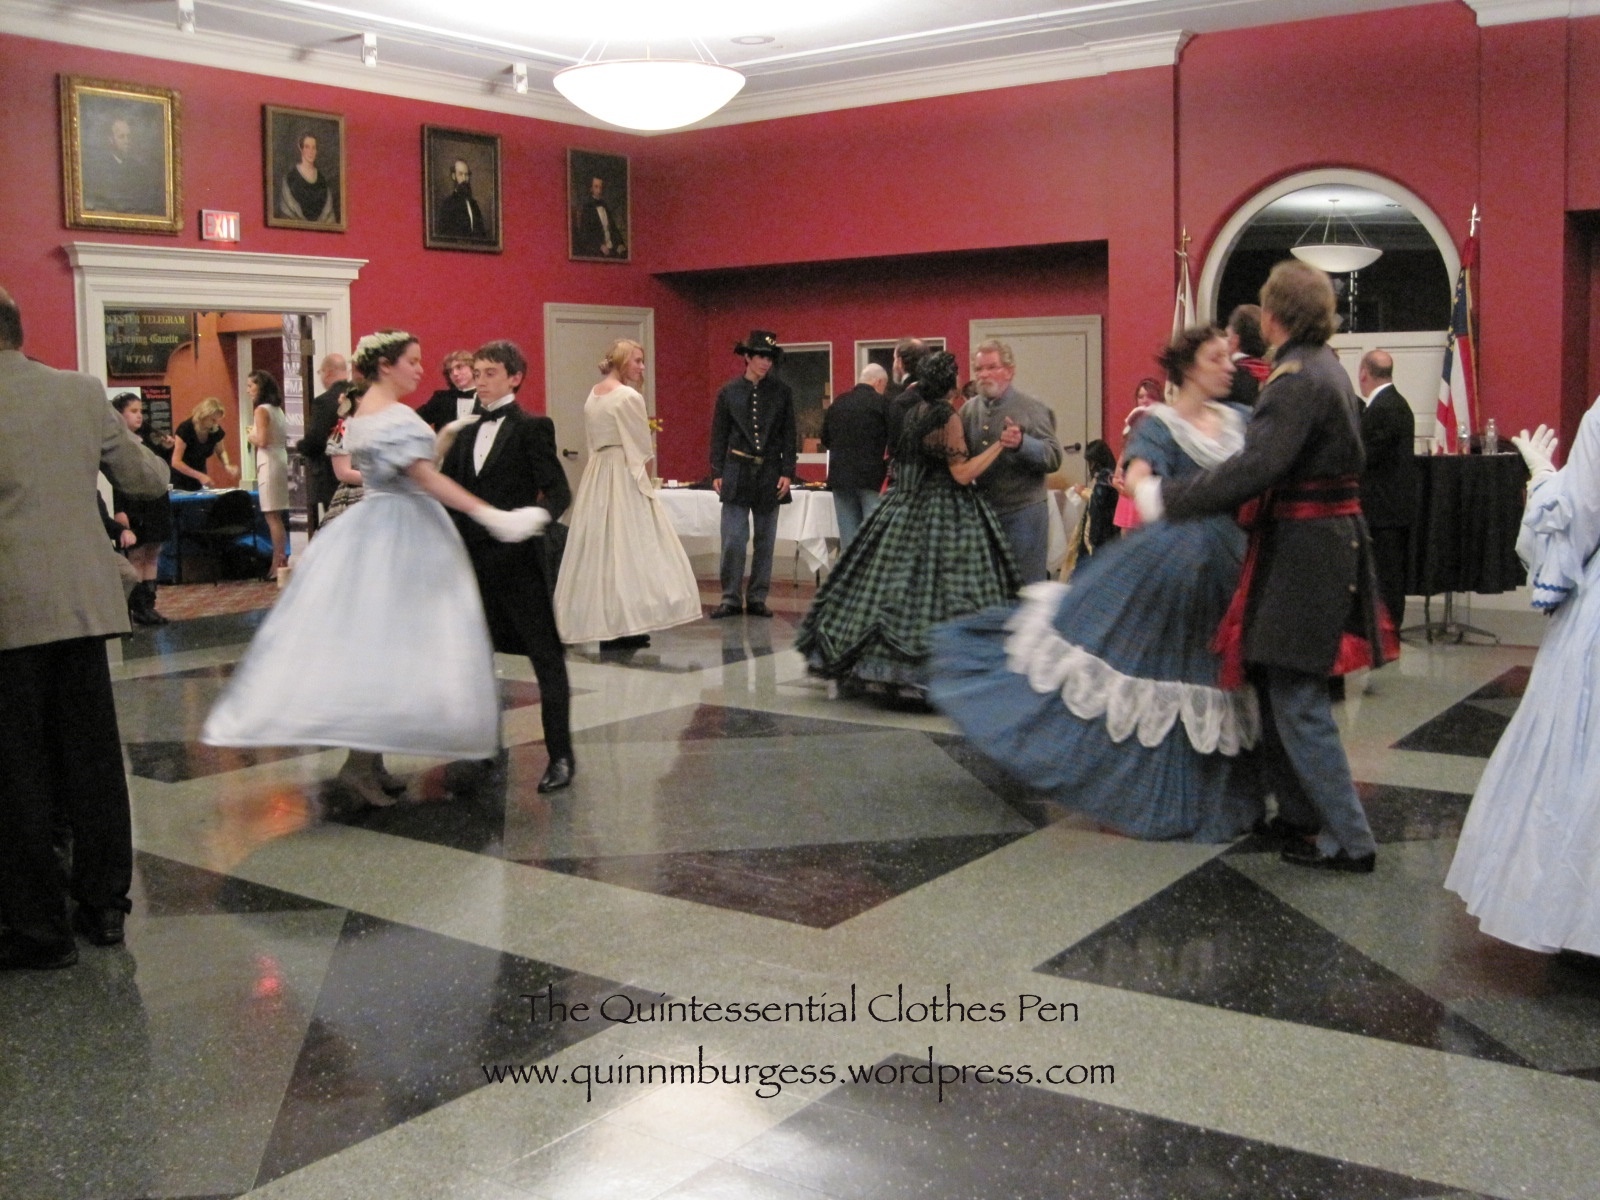
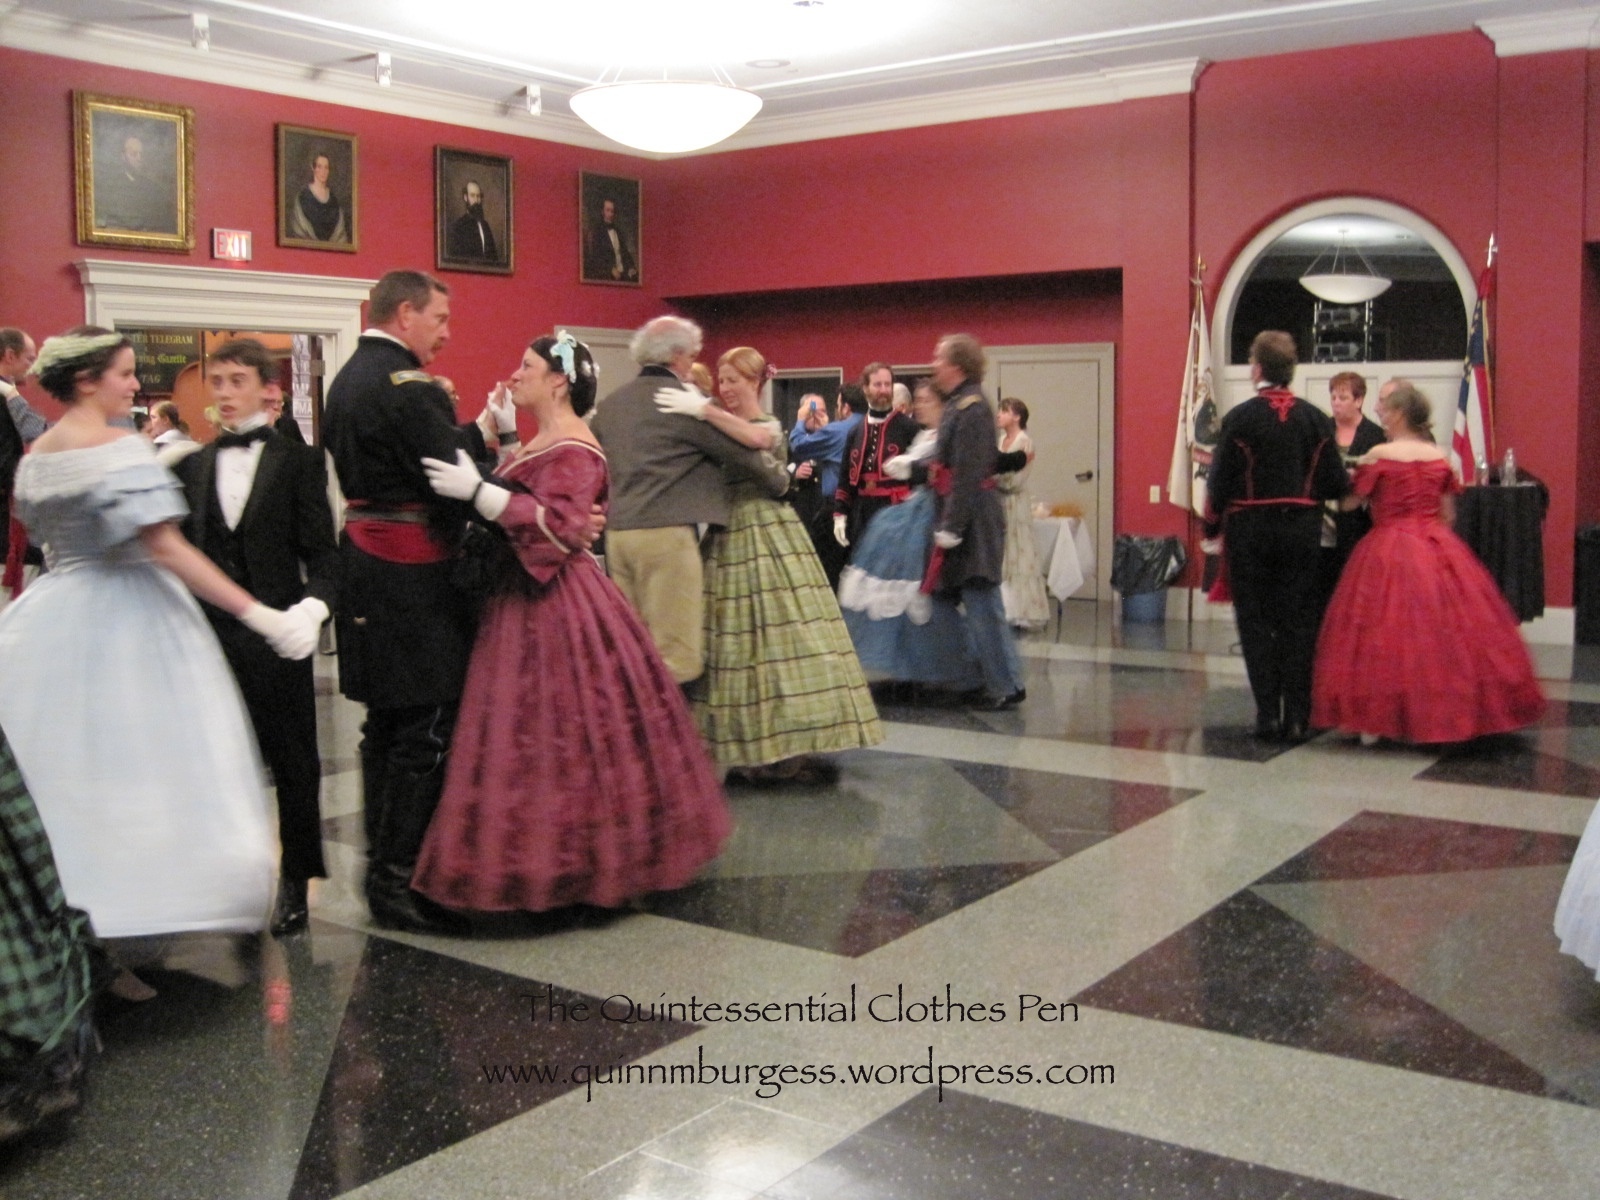
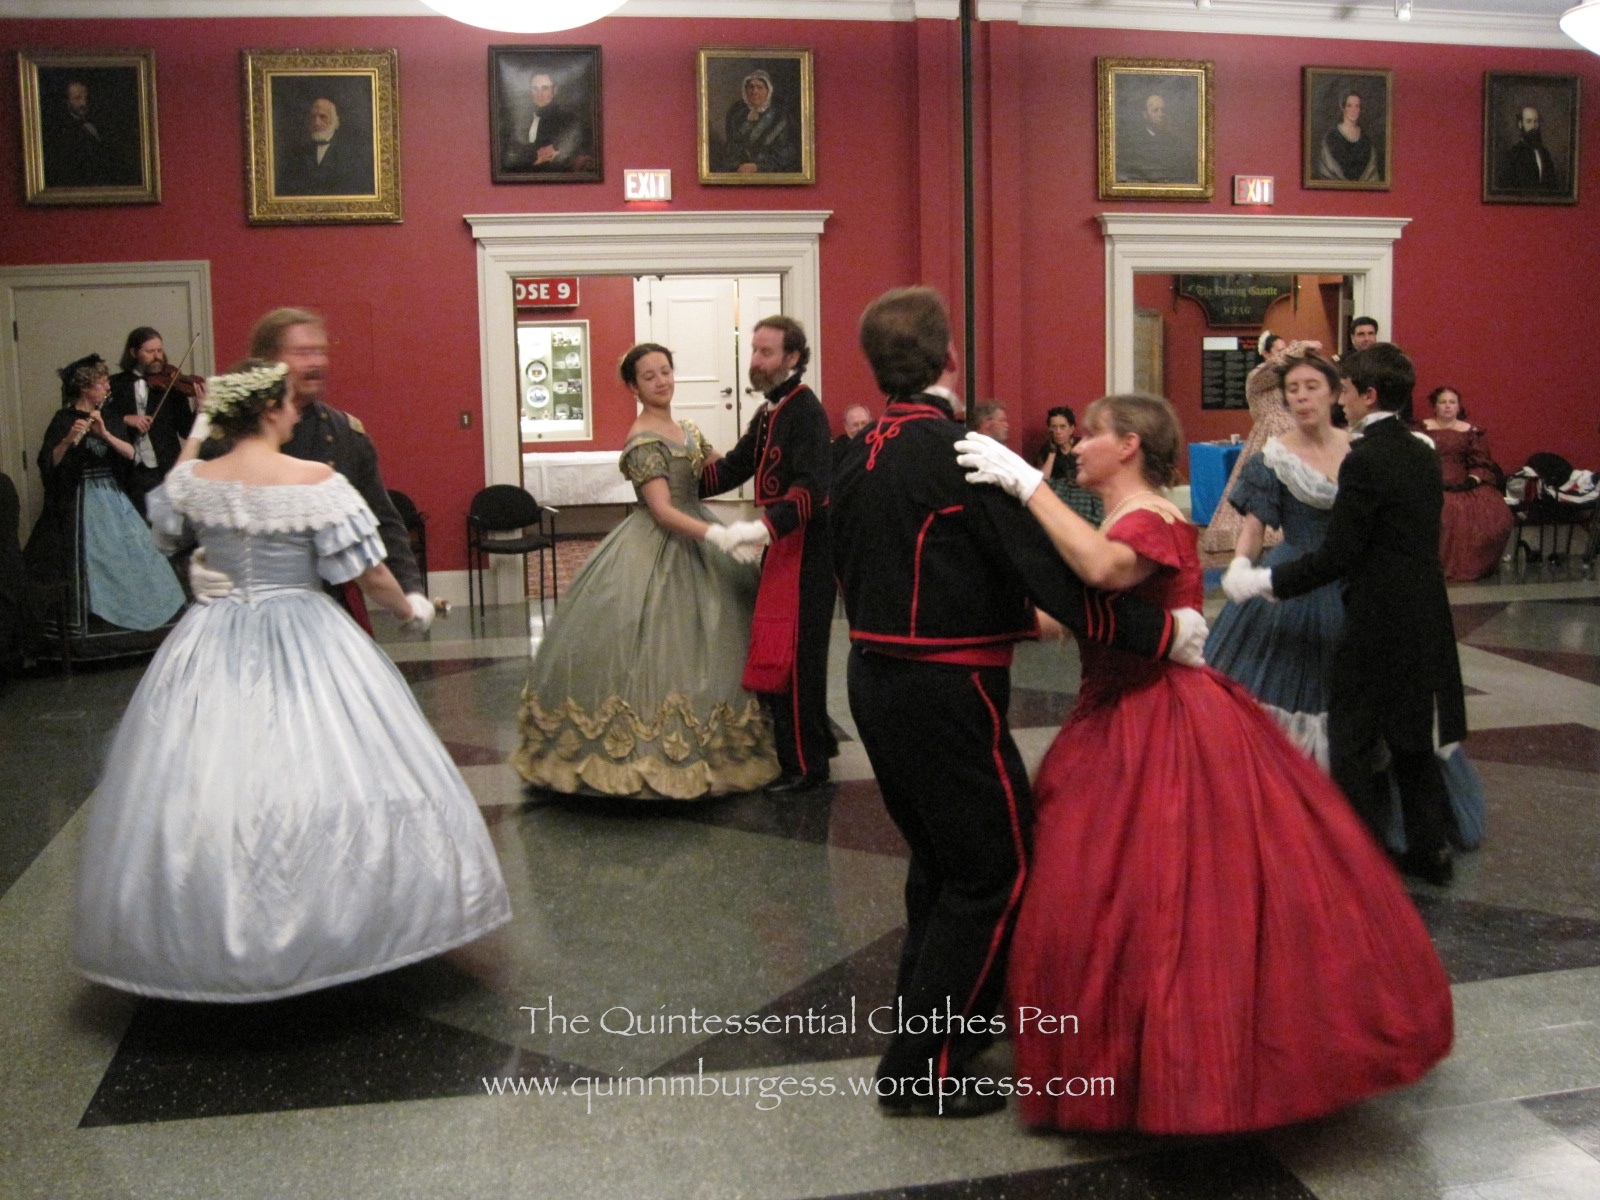
I had a lovely time. This ball was nicely different than our usual evening balls with all the new faces. My senses were most struck by the abundance of rather more sturdy and thick wools worn by the military gentlemen than I am used to feeling at most balls, when there are more gentlemen in smoother wool tailcoats. The occasional feel of the thicker wool on my left arm was a tangible, and rather transporting, connection to the past. It seems quite likely that at a ball held during the Civil War a lady would have felt more thick wool on uniformed gentlemen than she might have felt at a ball pre or post war when there would have been more civilian tailcoats at a ball.

Have I inspired you to want to learn 1860s dancing and attend a ball? I’ll end with this small encouragement for your attendance at the Commonwealth Vintage Dancers’ next Civil War events. The Commonwealth Vintage Dancers have a Civil War Dance Weekend coming up in November, 2013. It’s super reasonably priced and includes lots of dance classes, two balls, and a German. There’s no experience necessary. If you’re at all interested and in the New England area you should check it out, because we’re doing lots of awesome Civil War dancing in 2014 as well (they are listed at the bottom of the Civil War Dance Weekend link, above), and why not get started learning or brushing up sooner rather than later? I’d love to see you there!

HSF #20: Finally Finished 1822 Walking Dress

…It’s only been a year! Or pretty close to a year. I posted an overview of my early 1820s project last November. The project included a petticoat, 1824 ball gown, 1822 walking dress, muff, tippet, bonnet, and chemisette. Some of these things are still in the UFO pile or on the to do list, but I’m super pleased that this post is about the completion of the 1822 walking dress!

The image below is my inspiration for the now complete walking dress. I wore it last December to go caroling outside before Fezziwig’s Ball, but at that point my time had run out and though the construction was complete there was no trim. Below the image of my inspiration is an image of the walking dress as it looked last December with no trim. And below that is an image of the now completed walking dress with trim! It certainly fits me better than the hanger, but you’ll have to wait a few months to see it on me.

19562579602401776_TvaRkZoN_c
Promenade Dress. Ackerman’s Repository. December 1822.
IMG_4083
December 2012. Unfinished early 1820s ensemble.
IMG_4889
Yay! All the trim is on!

Before I share some close ups of the trim and construction, let me share the facts:

Fabric: 4-5 yds of dark pink wool, 4-5 yds of ivory super soft and thick cotton twill, 1/2 yd-ish of lavender polyester velvet, 1/2 yd-ish of lavender silk shantung,  and a bit of canvas for the collar.

Pattern: Adapted from my 1822 green ball gown pattern, I think. It’s pretty much exactly the same except that it has a higher back, collar, and sleeves. The ball gown pattern is based off of a pattern in Janet Arnold.

Year: 1822.

Notions: Pink and lavender thread, polyester batting in the hem, and hooks for the waist.

How historically accurate?: Very, having used modern materials and a few very nice looking modern fabrics . The pattern is from Janet Arnold, so you know it is good on accuracy and the trim scale and pattern is taken from a fashion plate from 1822. As a historic costume I give it 98%.

Hours to complete: Oh goodness… I’m sure the main construction took at least 40 hours and the trim took probably 50ish hours to cut, press, and hand sew. I didn’t keep track at all on this project.

First worn: To Fezziwig’s Ball in December 2012, though with trim it will debut at Fezziwig’s Ball in December 2013!

Total cost: $40 perhaps?

Ok, now for the trim and construction shots.

IMG_4892
Top of the sleeve. First I had to sew the bias into a tube so the raw edges would be finished and the bias could “float” without having to be sewn down all along the edges. Then I tacked the bias tubes in a zig zag then crossed and tied other zig zags to get the finished pattern.
IMG_4891
The front. The pattern looks very much like an oak leaf to me. The bias is stitched in a tube with the raw edges showing on the back, then the edges are stitched down all around to create the pattern.
IMG_4890
The sleeve. The bias is stitched on the same way as it is on the front. The motifs are sewn on the front of the arm rather than the outside.

I actually had forgotten that I’d taken these construction shots. In fact, I had totally forgotten the method I had used to construct my sleeves until I saw the picture again! These pictures where the wool looks more pink than maroon show the color best. It’s really much more vibrant, and much less brownish, than some of the pictures make it look.

IMG_3946
The canvas pad stitched into the collar before sewing the pieces together.
IMG_3949
The top of the sleeve before the gathered sleeve top was sewn on. I didn’t want to waste wool where it wouldn’t be seen, so it stops part way up the lining, then the gathered cap is sewn on and hides the raw edge of the wool.
IMG_3951
The lining is stab stitched to the wool at the cuff.

And just in case you want to read more about my entire project from the early 1820s, here’s a link to that category of entries on my blog. As I continue to finish up other bits and pieces I’ll keep adding them to that category, and it’s neat because the category filters only those posts so there’s a nice continuity.

HSF #19: Mineral Felicite Stomacher

First, I want to say “Thank you!” to all of you who provided me with your thoughts and insights about my Curtain Along troubles. I took all of the things that you mentioned and reconsidered my jacket, coming at last to the conclusion that a stomacher would solve a lot of my problems. Of course then I had to decide if I wanted my jacket to lace over or pin to the stomacher and how I wanted to trim the new design (ribbon or self trim)… for now I’ll leave you in suspense on those two points, because the point of this post is to share my completion of the stomacher, as it fits into the HSF Challenge #19: Wood, Metal, Bone.

IMG_0571

Just the facts:

Fabric: A bit of left over Mineral Felicite print from the jacket (it sure is a good thing I had extra!), small bits of leftover peach linen from the jacket lining, and a bit of leftover white linen from another project for the interlining.

Pattern: Made by me and referencing Costume Close-Up.

Year: 1760s-ish.

Notions: Thread and cane.

How historically accurate?: 90%. Accurate fiber contents, though the print of my Mineral Felicite isn’t perfectly accurate. I may not have used the exact stitches that an 18th century garment would have. Also, I feel like I’ve seen stomachers that are boned, but when I was looking for this project I couldn’t find any of them. So I might have made that up. But it will make my stomacher lay so much smoother than without boning, so it’s worth it.

Hours to complete: 6.

First worn: Has not been worn yet.

Total cost: Free since everything was from left overs.

Ok, now here’s the amusing part. As I mentioned in my last post about the jacket, I have only small scraps of the lining linen left. I could have backed my stomacher with a non matching linen all in one piece… but I decided to piece together my matching scraps for the back. It’s a little crazy looking, but it will match the sleeves and amuse me. Actually, I wouldn’t have had enough scraps if I hadn’t reused some of the bits I cut off from the front when changing the line to fit over a stomacher…

IMG_0572

See what I mean? It’s a bit crazy. Oh well. You can see the three bones that run vertically up up the middle of the stomacher. Anyway, work on the jacket has now been put on hold so I can complete some of the other upcoming HSF challenges, but I hope to get back to it soon.

Trouble In Curtain Land

A few weeks ago, I was super excited and motivated that I had time to work on my Curtain Along jacket. I made the changes I had deemed necessary from my last fitting and was feeling good about getting it done and how much I liked it… but then I tried it on again to determine center front and decide about trim… and there were new problems, and I was so discouraged!

The problems sum up in the following way:

Problem #1- The sleeves that go with the jacket in Janet Arnold just do not work for me without serious alteration. The crown isn’t large enough for me to be able to move or be comfortable, and the sleeve is at least 4 inches too short. With the sleeves set in the jacket was pulled all over the place and was so unbearably uncomfortable! And the annoying thing is that in the mockup the sleeve worked!

After ripping the sleeves out, and being thankful that, at least, they were what was causing the bodice to do all sorts of wonky things, I bounced back and came up with a solution. I’ll use the sleeve pattern from my 1780s Robe A La Anglaise and recut the sleeves. I’ve got extra Mineral Felicite fabric, so that’s no problem. On the other hand, I have only tiny matching linen scraps left. Of course, it would be totally period correct to use a different linen to line the sleeves than what I used to line the bodice. But piecing is also period correct, and I decided to use all my tiny matching linen scraps to piece together pieces big enough to cut out the new sleeve pattern.

IMG_4850
Extreme piecing. I’m amused by it at this point. This sleeve is only partially completed (there is more piecing to be done!) but you can see the original pattern shape.

I haven’t finished piecing, or cut out the new Mineral Felicite sleeve, or sewn the new sleeves in… but I think that my solution will work, so we’ll call that problem solved. Whew!

Problem #2- After my initial fittings, I had to add an extension to my center front pieces to get the jacket to close comfortably and without wrinkles. It barely closed in my mockup and I thought it would be enough, but in the real fabric it just wasn’t. So I pieced on extensions. Piecing is totally period correct, but this piecing is so… obvious and symmetrical.

IMG_4841
Center front piecing. The yellow headed pins are my center front line. I haven’t done anything about center front since I put those pins in!

This problem is still unresolved. Plus, I can’t decide how I want the jacket to close, anyway. Pins? Hooks and loops? If you have any thoughts about the piecing problem or the closure indecision, please do share!

Problem #3- Trim! I was going to trim the jacket with box pleated blue silk ribbon around the neck, front, hem, and cuffs. I thought I had enough ribbon (6yds), but in the end I think I have not quite enough to trim all of those edges. AND, the blue didn’t seem to pick up the blue in the print as much as I originally thought it did, and I’m worried that even if I do less pleated trim (say, not the sleeves, or something) the trim will look super costume-y and not 18th century. I also have a gold silk ribbon (5 yds). Not enough to trim the whole jacket, but what if I scrap the idea of trimming the edges and instead do some sort of center front bow trim/something of some sort to hide the piecing using the gold? I think the gold looks nice… but what sort of trim would I do that wouldn’t look made-up and costume-y???

IMG_4847
Blue silk ribbon. There’s blue in the flowers, but perhaps not enough blue to make the blue ribbon make sense???
IMG_4848
Gold silk ribbon. Too match-y?
IMG_4844
Blue and gold together, for comparison.

I  have no idea what I’m going to do about the ribbon issue. Bows at center front seem to be used on stomacher front jackets, and stomacher front jackets seem to be exclusively pet en l’air styles. This jacket is not a pet en l’air, though it could be altered to have a stomacher front (thus eliminating the piecing issue). Sigh. I just think myself around in circles. So again, I appeal to you! If you have any thoughts, please share!

Help! I’d really appreciate it!

Surrender!

…to the costuming peer pressure…

icon

The short explanation of the crazy is that Kendra, of Demode Couture, has started an 18th Century Court Ensemble Sew-Along. The longer explanation of the crazy is written by Kendra herself, here on her blog.

I’m talking about it on my blog because I’ve submitted to the indirect costuming peer pressure and joined in! (You should too…) I’ve got my fears about my participation (I spent about two days debating my decision to join in!): I’m unlikely to have a relevant event to wear a court gown to (unless I make one!), I’m not super confident in my ability to get 18th century “right” yet, and I don’t want to spend mounds of money on this project (which you could so easily do!).But… I want to participate! So, I’ve found some cures for my fears and committed, in a thoughtful and careful way, to the crazy.

This is the gown I’ve decided on. It was a hard choice! But it’s a good choice for me, because I’ve already got pink silk in the stash that I bought back in January with the intent of making “an 18th century something” perhaps, so that takes care of the bulk of the materials (and the cost). So I’ve just got to procure the trim materials and accessories. I’ve already found the things I want, but I’m going to wait a bit to purchase them and get started on the sewing, so stay tuned for more posts about that in a few months!

e97cee6a74d1756827c28213e6397915
Grand Duchess Maria Feodorovna by Roslin, wearing the Star and Badge of the Order in 1770. (I’ve also seen this dated as 1777.)
c628b97dc89626f6577689f549884f42
Slightly different version of same painting. Included in an article about Women’s Imperial Court Costume In Imperial Russia.

I also considered these other gowns, but decided against them in the end.

2b3135733bdb0420963a1a7c04afd51a
Robe de cour from Les Arts Decoratifs

I love this robe de cour! It looks more like fancy dress than a court gown to me. I can imagine it as “Snowflake” or “Winter” or “Snow Queen.” I seriously considered this one… but I don’t have any of the appropriate materials in my stash right now, and the cost of the materials I wanted to use was more than I wanted to spend on this project. So I’ve added this to my list of “things I eventually want to sew.” I can even envision it as fancy dress in the 19th century with a different skirt shape… a bustle gown, perhaps? I just love that the triangles look like icicles, and the diagonal trim looks like snowflakes… It’s pretty ridiculous!

4af7326884f958d2409f5320c53b6e7b
1795 – Caroline, Princess of Wales

Then there’s this absurd looking court gown from the very end of the 18th century. I love the periwinkle color, the tassels, and what looks like chain (wouldn’t that be fun to figure out!) edging the poofs. It’s pretty silly. But again, I don’t have any appropriate fabrics in my stash…

25e7c98dcf6e7807e2e4806bdbfd1107
Robe de cour from Les Arts Decoratifs

I like this last one, too, although not as much as the first two. I feel like this would be a great use of an iridescent shot silk, at least for the green part. I like the fur trim, and the gold, but I’m just not overwhelmed by awesome-ness.

The choice was made more difficult by the fact that other people have already “claimed” certain court gowns they want to make, and the idea is that no two dresses are the same. (So I might have had more options, but they’d already been claimed!) You can see what other people have picked and keep track of all the court ensembles being made on Kendra’s blog: Demode Couture. There are at least 30 people participating so far and lots of pretties have been chosen! These are my favorite gowns from among the ones that are already claimed.

18th century court gown. It’s so cute!
ef20e9a8894c14ec10b57fac190c75fc
18th century robe de cour. How to achieve those fantastic waves? But I do love this one!
183fec6f65f70eced493dc859b7a9326
18th century robe de cour. This one has great waves as well! Lovely.

Kendra already did a post on 18th Century Court Gown Basics that’s a great introduction to this oddly specifc class of garments, and I’m sure more information will be coming over the next year from all of the participants.

Georgina’s Island Exploration

After our vintage dance performance on George’s Island, we had time to explore the island and express our silly-ness. Most of the island is occupied by Fort Warren. We were joined on our ramblings by someone with exceptional knowledge of the fort and stories of reenactments that have taken place there, so we basically got an insider’s tour, which was really fun and interesting.

IMG_3563
Oh no, don’t blow away! Silly-ness started before we even made it into the fort!
IMG_4678
Aside from the wrong-era clothing, doesn’t this look like a Jane Austen type scene?
IMG_3487
Lovely historic cotton print dresses along the water before entering the fort.
IMG_3517
There was also a jungle gym fort with a slide outside the main entrance to the actual fort. No one actually slid down, but this is what would have happened if one of us had tried it!
IMG_3595
After walking through the initial gate house, you have to pass through an outer courtyard area, two sides of which are walled with openings through which you could be shot at when the fort was active. Luckily for us no shots were fired!
IMG_4687
Apparently there was also a moat to the right, which could only be crossed by a drawbridge. Now there’s a solid bridge, but when the fort was in use there was a portcullis in addition to the drawbridge!
IMG_3506
After passing through the drawbridge/portcullis entry, you emerge into the main part of the fort (that large grassy area on the right of this photo). There are ramparts all around which overlook the ocean and originally were home to many large guns.
IMG_4717
The view looking out over the ocean-facing side of the fort.
IMG_4715
The view looking back towards Boston. That’s the Boston skyline.
IMG_3693
Historic cotton print dresses! The two dresses on the right are fabrics that I bought at the same time I bought the fabric for Georgina. The white dress is similar reproduction fabric. I think all of these dresses are variations on Past Patterns #701 and #702.
IMG_4725
Looking out over the main grassy area of the fort.
IMG_4711
Walking along the ramparts.
IMG_3683
Despite the sign’s warning, there was nothing behind it except grass…
IMG_3653
Interior room in the fort. There are lots of these dark spaces that you can walk and look through, though they all start to look the same if you don’t have someone there to explain the differences to you. Luckily, we did have someone to explain, which made the exploration a lot more interesting.
IMG_3714
We exited the fort in a different way than we entered and found new opportunities for silly-ness. Here, I’m aiming along a large inoperable gun.
IMG_3720
The gun was right at the top of a hill… You can see the sparkle in my eye as I thought “Let’s run down the hill!”
IMG_3721
And we’re off! The normal island visitors looked a little shocked to see four hoop-skirted ladies hurtling down a hill with hats and arms flying!
IMG_4726
But we had fun! Indeed, there were some shoes that got left behind part way down the hill!

Thankfully, there were storms that night (we were beginning to see lightening before we even left the island!). The intense heat broke and the weather became much more manageable, which is good for us, because the very next day we were at it again, this time at a 1920s lawn party. More on that soon!

Meet Georgina!

“Georgina” is the name I’ve chosen for my new 1858 cotton print day dress. Being a day dress from a new decade (the 1850s), makes her a fabulous new expansion in my wardrobe of historic clothes!

IMG_4675
Georgina: 1858 cotton print day dress.
IMG_4671
Back view.

The dress is constructed from about 5yds of a Marcus Brothers reproduction historic cotton print I purchased earlier this summer. I used Past Patterns #701 and #702 bodice patterns as a starting point, though I had to make significant alterations to achieve a comfortable and pleasing fit, especially in the shoulder/armsceye area. I used the darted pattern for the fitted lining and the gathered pattern for the gathered exterior. The sleeves are the bishop sleeves from one of the patterns, though I totally changed the cuff design.

The cuff design and a lot of other fiddly details were taken from this c. 1852 dress at the Met (pictured below). If you zoom in on the cuffs on the Met website you can see that they look just like mine (pictured later in this post)! I also used the following design elements from the Met dress: piping at the neck and waist, gathers that are tacked down beyond the seam line, button closure on the cuffs, and cartridge pleating all around the skirt. I have a whole pinterest board of inspiring images for this dress and hat ensemble, but this dress is the one from which I took the most information and detail.

61.141.3_front_CP4
c. 1852 Dress, Met.

Here are a few pictures of the fiddly details I integrated from the Met dress:

IMG_4773
Gathers at the center back that are tacked down beyond the seam line. I like the controlled look these extra stitches produce.
IMG_4767
Self fabric cuff finished with a small ruffle. The cuffs close with a hand sewn buttonhole and button.

Georgina’s bodice is lined with white cotton. There are hand sewn boning channels sewn into the bodice in the front darts on each side and on the sides. The bones are then slipped in between the layers of fabric. I didn’t have the right length metal bones, so I used heavy duty plastic wire ties–but–I cut them in half the long way so they are much skinnier than normal (they just don’t look at all historically plausible in their normal width, in my opinion). Once they’re in the bodice, you’d never know they are plastic instead of metal.

IMG_4769
The proper left side of the bodice: hand stitched boning channels in the darts, front hook closure, a hook to attach the skirt and bodice together, and nicely finished piping along the bottom edge.

The bodice is finished at the neck and bottom edge with piping that is nicely whip stitched to the inside. There is also piping in the armsceye seam. The sleeve seams are french seamed by machine with the opening seam allowance at the cuff turned twice and stitched by hand. The other bodice seams are all machine sewn and the bodice is hand finished. The bodice closes at center front with hidden hooks and bars. It also hooks to the waistband of the skirt to keep the two pieces from gaping while worn.

The skirt has a wide hem that is hand stitched. The long skirt seams are machine sewn. The waistband is the same cotton print with an interfacing layer of canvas to create stability. The skirt is cartridge pleated and hand sewn to the waistband. There is a single layer of lightweight flannel folded into the cartridge pleats to give them a little more bulk than the thin cotton had on its own.

I also took the time to add pockets to this skirt! This turned out to be really useful for storing gloves, sunglasses, chapstick, a fan… with two pockets a lady can store so many things! Here’s how I made them and sewed them into the skirt:

IMG_4597
The pockets are muslin rectangles with a piece of the cotton print topstitched on the top center (this is the part of the pocket that can show while I’m wearing the dress and taking things in and out of the pockets).
IMG_4598
After the cotton print was sewn on I french seamed the vertical seam and then the bottom seam by machine, making sure that the cotton print stayed centered. On the left is what a pocket looks like with the french seams facing out. On the right is a pocket turned inside out to show the cotton print centered at the top.
IMG_4777
I left the top part of the vertical seam open and hand sewed that into slits in the skirt using a whip stitch through the pocket and the seam allowances (essentially under stitching the pockets, which keeps the muslin from rolling to the outside!). The pocket slits were made after the skirt was cartridge pleated and attached to the waistband, so the slits stop below the cartridge pleats (it was way too much thinking to try and figure out where the pockets should be before cartridge pleating the skirt!).
IMG_4778
It worked wonderfully, and the pockets blend right in and are hardly noticeable, even when they gap open! (I’ve turned the edges of the pocket so you can see the muslin pocket for this picture, but they don’t actually stay turned out like that, and you can imagine how the print fabric of the skirt blends right into the print section of the pocket).
IMG_4775
On the inside, the top edge of each pocket is stitched to the cartridge pleats to evenly distribute the weight of anything in them.

Georgina cost about $18: $15 for the fabric and about $3 for hooks and eyes. The various other fabrics (cotton lining, canvas interlining, etc.) were all in my stash from previous projects (yay!). I first wore Georgina last weekend to a vintage dance performance on George’s Island in the Boston Harbor. I’ve got pictures of the performance and pictures of island exploration coming up soon!

Model Ts, A New 1926 Dress, And New Shoes: Part I

A few posts ago, when I introduced The First Picnic Of The Summer, I mentioned my involvement with other events that same weekend. It’s time  to share pictures of another event from that weekend: an afternoon of music, dancing, and Model Ts at the Braintree Historical Society in Braintree, MA.

Let’s start with atmosphere: some Model Ts! Model Ts were produced between the years 1908 and 1927 by the Ford Motor Company. My grandfather worked for Ford years ago (though not on Model Ts!) and I have family members who still live in Michigan, so I feel a special connection to that part of car history. As far as I could observe, all of these Model Ts were still operational, drivable, and licensed to drive on the street! Neat!

IMG_2970
Front view of a Model T.
IMG_4565
I love the luggage storage on this one!
IMG_4572
Pretty swanky, with all that gleaming wood!
IMG_4563
I like that this picture has a modern car in the background!
IMG_4570
Need I say more? It’s labeled!
IMG_4580
“R. I. Brow & Son; Oil Dealer” I love it! Especially with the canisters attached.
IMG_3125
Two Model Ts parked in front of the barn.
IMG_4587
A pretty fabulous red Model T with be-boater-ed gentlemen lurking behind it… (They had no idea I was taking a picture! bwhaha!)

The reason we were in attendance at this event was to do a few small dance performances. We did the same 20s dances that we performed at the Great Gatsby: the Charleston, Tango, Foxtrot, and One Step. I don’t have pictures of the performances… but in between performances we had time to wander amongst the Model Ts and have a picnic lunch.

Oh yes, and I wore a new 1926 dress and my all new American Duchess Gibsons! I also attempted some “make-do finger waves” in my hair. Basically, that means that I didn’t try for real finger waves… I just put some gel in my hair and used a fine tooth comb on the top bits. Since my hair has natural waves it just dried in a sort of wavy way and I put up the back in a low bun. I think it turned out pretty well, though, for not trying that hard!

This link contains an affiliate code, which provides a small benefit to my shoe fund. This does not affect my impressions and reviews of this product.

The dress was made because we needed day clothes for this event and my other two 20s evening dresses are not appropriate. As I mentioned in the post May Fabric Stash Additions when I shared this fabric, I wanted a cotton so it would be lightweight and washable… and this is what I wound up with. I thought it might be to sailor-y, but in the end I don’t think it is! I like that it’s a rather striking color and not something I would normally pick out for myself.

I didn’t use a pattern for the dress, I just sort of used my measurements and made it up while referencing a lot of 20s patterns in the COPA archive for skirt shape, mostly. The front and back bodice and sleeves are all one piece cut in the kimono style. It’s all french seamed  and the skirt and sleeves are finished with hug snug. The waistband is a little messy on the inside, because I haven’t taken the time to finish it and because the sides were doing a weird thing I had to fix with a wonky side dart. But eh, no one will see the inside! I’m glad it’s done and I like the faked tie-collar.

IMG_4457
Gibsons!

The Gibsons are comfortable and cute. I like that the sole is a little thicker than on my Astorias, because it means the pointy toe shoe leather isn’t getting scratched while I walk (as it is on my Astorias). The toes are pretty pointy but they are starting to stretch to my foot shape, so that’s good.

IMG_3004
Trying to pose… “This is an engine. It moves the car.” Plus, new dress and a good view of my hair!
IMG_3132
Looks a lot different from a modern car engine, doesn’t it?
IMG_3108
A better view of my new 1926 day dress and Gibsons.
IMG_3110
Another view. The red car is fun, too!

The blue cotton is slightly sheer, so I made a cotton slip to wear under the dress to add opacity. It’s made of the same $1/yd white cotton that the trim on the dress is made of, so if it shows at the neck or elsewhere it just blends right in. I used the same measurements I used for the pink slip of my 1925 beaded dress. I was inspired by looking at 1920s patterns to add the curved panels on the side instead of having another straight slip.

IMG_4596
White slip to go under the 1926 day dress.

As I said, in addition to looking at cars and dancing, we also had a picnic lunch.

IMG_3057
1920s picnic!
IMG_3068
After eating we listened to some stories read aloud.
IMG_3060
And read some 1920s magazines!

One of the most exciting parts of the afternoon was when one kind gentleman asked if we would like to sit in his 1920s car! Of course we said “Yes!”

IMG_3024
“How do I drive a car?”
IMG_3032
Practicing my princess wave.

All in all, it was a pretty fun, low-key event. Next post I’ll share some of the more “artsy” photos from the day, as I did in The First Picnic Of The Summer: Part II.

Belated HSF #11: 18th Century Apricot Petticoat

Life! Is often great, but does rather get in the way of sewing plans sometimes…

This HSF challenge #11 had a due date of June 3rd. I actually finished sewing on June 18th, but I’ve been busy posting about other things so this has been even further delayed. Oh well, I had the best of intentions: to complete this 18th century petticoat for the Squares, Rectangles, and Triangles Challenge.

Description:
Many historical garments, and the costumes of many people around the world, use basic geometric shapes as their basis. In this challenge make a garment made entirely of squares, rectangles and triangles (with one curve allowed), whether it is an 18th century kimono, a flounced 1850s skirt, or a medieval shift.
 
IMG_4606
Apricot (orange) 18th century under petticoat.

Just the facts:

Fabric: Almost all of 4yds of apricot cotton I bought back in January.

Pattern: None, but I referenced both of these tutorials on constructing 18th century petticoats.  Katherine’s tutorial is for a petticoat with an uneven length (to go over panniers, or a bum roll, for example). Rebecca’s tutorial is for a petticoat with an even length (the same length all the way around, to be worn without extra supports). Both tutorials have construction information, Rebecca’s includes a bit more detail in terms of which stitches and methods to use.

Year: Loosely 1700-1790.

Notions: Thread, yellow polyester ribbon for ties.

How historically accurate?: I give it 70%. Accuracy gets knocked down because: 1- the color is a bit vibrant for the period (but it’s an under petticoat, and I wanted it to be fun!), 2- all unseen seams are machine sewn, 3- I used bright yellow polyester ribbon for ties, 4- I haven’t seen much research that shows cotton being used at this time for a single plain petticoat of this sort. On the other hand: 1- all finishing was done by hand, 2- the dimensions and method of creation are historically accurate.

Hours to complete: 6 or 7? I can’t really remember…

First worn: Well, Squishy wore it for pictures!

Total cost: $12 for the fabric. The ribbon is leftover from my childhood craft projects…

IMG_4608
Side view.
IMG_4607
Front. See the yellow ribbon?
IMG_4609
Back. I love how the pleats fan out.

I chose to bind the top with self fabric and use polyester ties in a fun color for this petticoat, since I knew it wouldn’t be seen and I might as well use some of those things from my stash! The back half of the petticoat ties in front, then the front ties wrap all the way around to the front and also tie in front. That’s why you can see all the yellow ribbon crossing in the back. This method used a solid 3 yds of ribbon, though the ends I have to tie with are generous and could probably be shorter if I wanted to save on tie length.

IMG_4604
Back tied in front before the front gets tied. There are hemmed pocket slit openings on each side.

I just love the color of this petticoat. It’s so bright and sunny and cheerful, especially with the yellow ribbons! There’s also a sneak peek in this last picture at what will likely be a future HSF item: the bum roll… more on that soon-ish.

Mock-up-ing-Along

The first step in constructing my 1760s Curtain-Along jacket was to draft up the pattern from Janet Arnold (you can read more about the pattern I chose in my Initial Curtain-Along Thoughts post). In my experience, sometimes the patterns work pretty well without a lot of tweaks, but sometimes you really do need to do some serious fitting to make them work. Given that knowledge, I decided to make a mock-up of the pattern without any adjustments to see how it would fit. The measurements weren’t too far off of my own, so I didn’t think I’d run into any really awful problems.

And here are the results! I put the mock-up together matching up all of the points that were indicated in the pattern.

IMG_4431
Initial state. It is pinned down at center front, but I haven’t made any other adjustments. Squishy is pretty close to my shape, so you can see that there are some adjustments that need to be made for the jacket to fit me.
IMG_4432
First problem: the gap at the shoulders. You can see on the left that I’ve pinned out the excess fabric, and on the right side nothing has been pinned.
IMG_4433
Second problem: the center back waist point is halfway up the back! I extended the center back seam above the waist so that the waist would sit lower and match the side fullness.
IMG_4434
I don’t think anyone has a back/hip area that would easily fit into this shape…
IMG_4435
Third problem: sleeves that are too far off of the shoulder and twisted around in a way that is odd looking and uncomfortable. I had to try this on to make those observations, but you can see the problems in the picture.
IMG_4436
The solution was to take the sleeve off, adjust the armsceye, and pin the sleeve back on without it being twisty. You can see on the left side that I’ve adjusted the sleeve, and on the right I didn’t do anything.

Oh, I also lengthened the sleeve pattern a bit, because it was a little short on me, and extended center front so it would actually close… After making the adjustments to the pattern, I took to the scissors and cut out the real fabric, mineral felicite and peach linen lining. Then it was on to the hand sewing…