Finishing My Grandmother’s Quilted Wall Hangings

My grandmother Betty was an avid quilter. She was well supported by my grandfather, who greatly enjoyed road trips and would happily stop at all the fabric stores along the way to collect interesting fabrics. Betty was always on the hunt for solid fabrics in unusual colors as well as eye-catching prints that were different than anything else she already had in her stash.

Betty was, in fact, the person who taught me how to sew, to hand quilt, and to cross stitch when I was quite young. Not only was she passing her passion along to me, but I think she was also trying to keep me occupied on those long road trips…

After Betty passed away, my grandfather (on another road trip) brought me all of her fabrics, her quilting books, some partially cut projects, and even her notebook of notes on her quilting projects. It was boxes and boxes of things! Amongst those many boxes, I found these three square quilted panels.

They were clearly intended for some purpose and had been mostly completed in terms of the piecing and quilting, but they lacked backings and/or bindings.

I pulled them out about 7 years ago and thought “it might be nice to finish these and hang them in my sewing room” in recognition of Betty. Fast forward those 7 years and the quilted panels were still in that unfinished state. But last summer I put it on my to-do list to go through the fabrics I inherited and find backing and binding fabrics, so that when I had time I would at least be ready to think about finishing the panels.

I took an inventory of the panels in their inherited state:

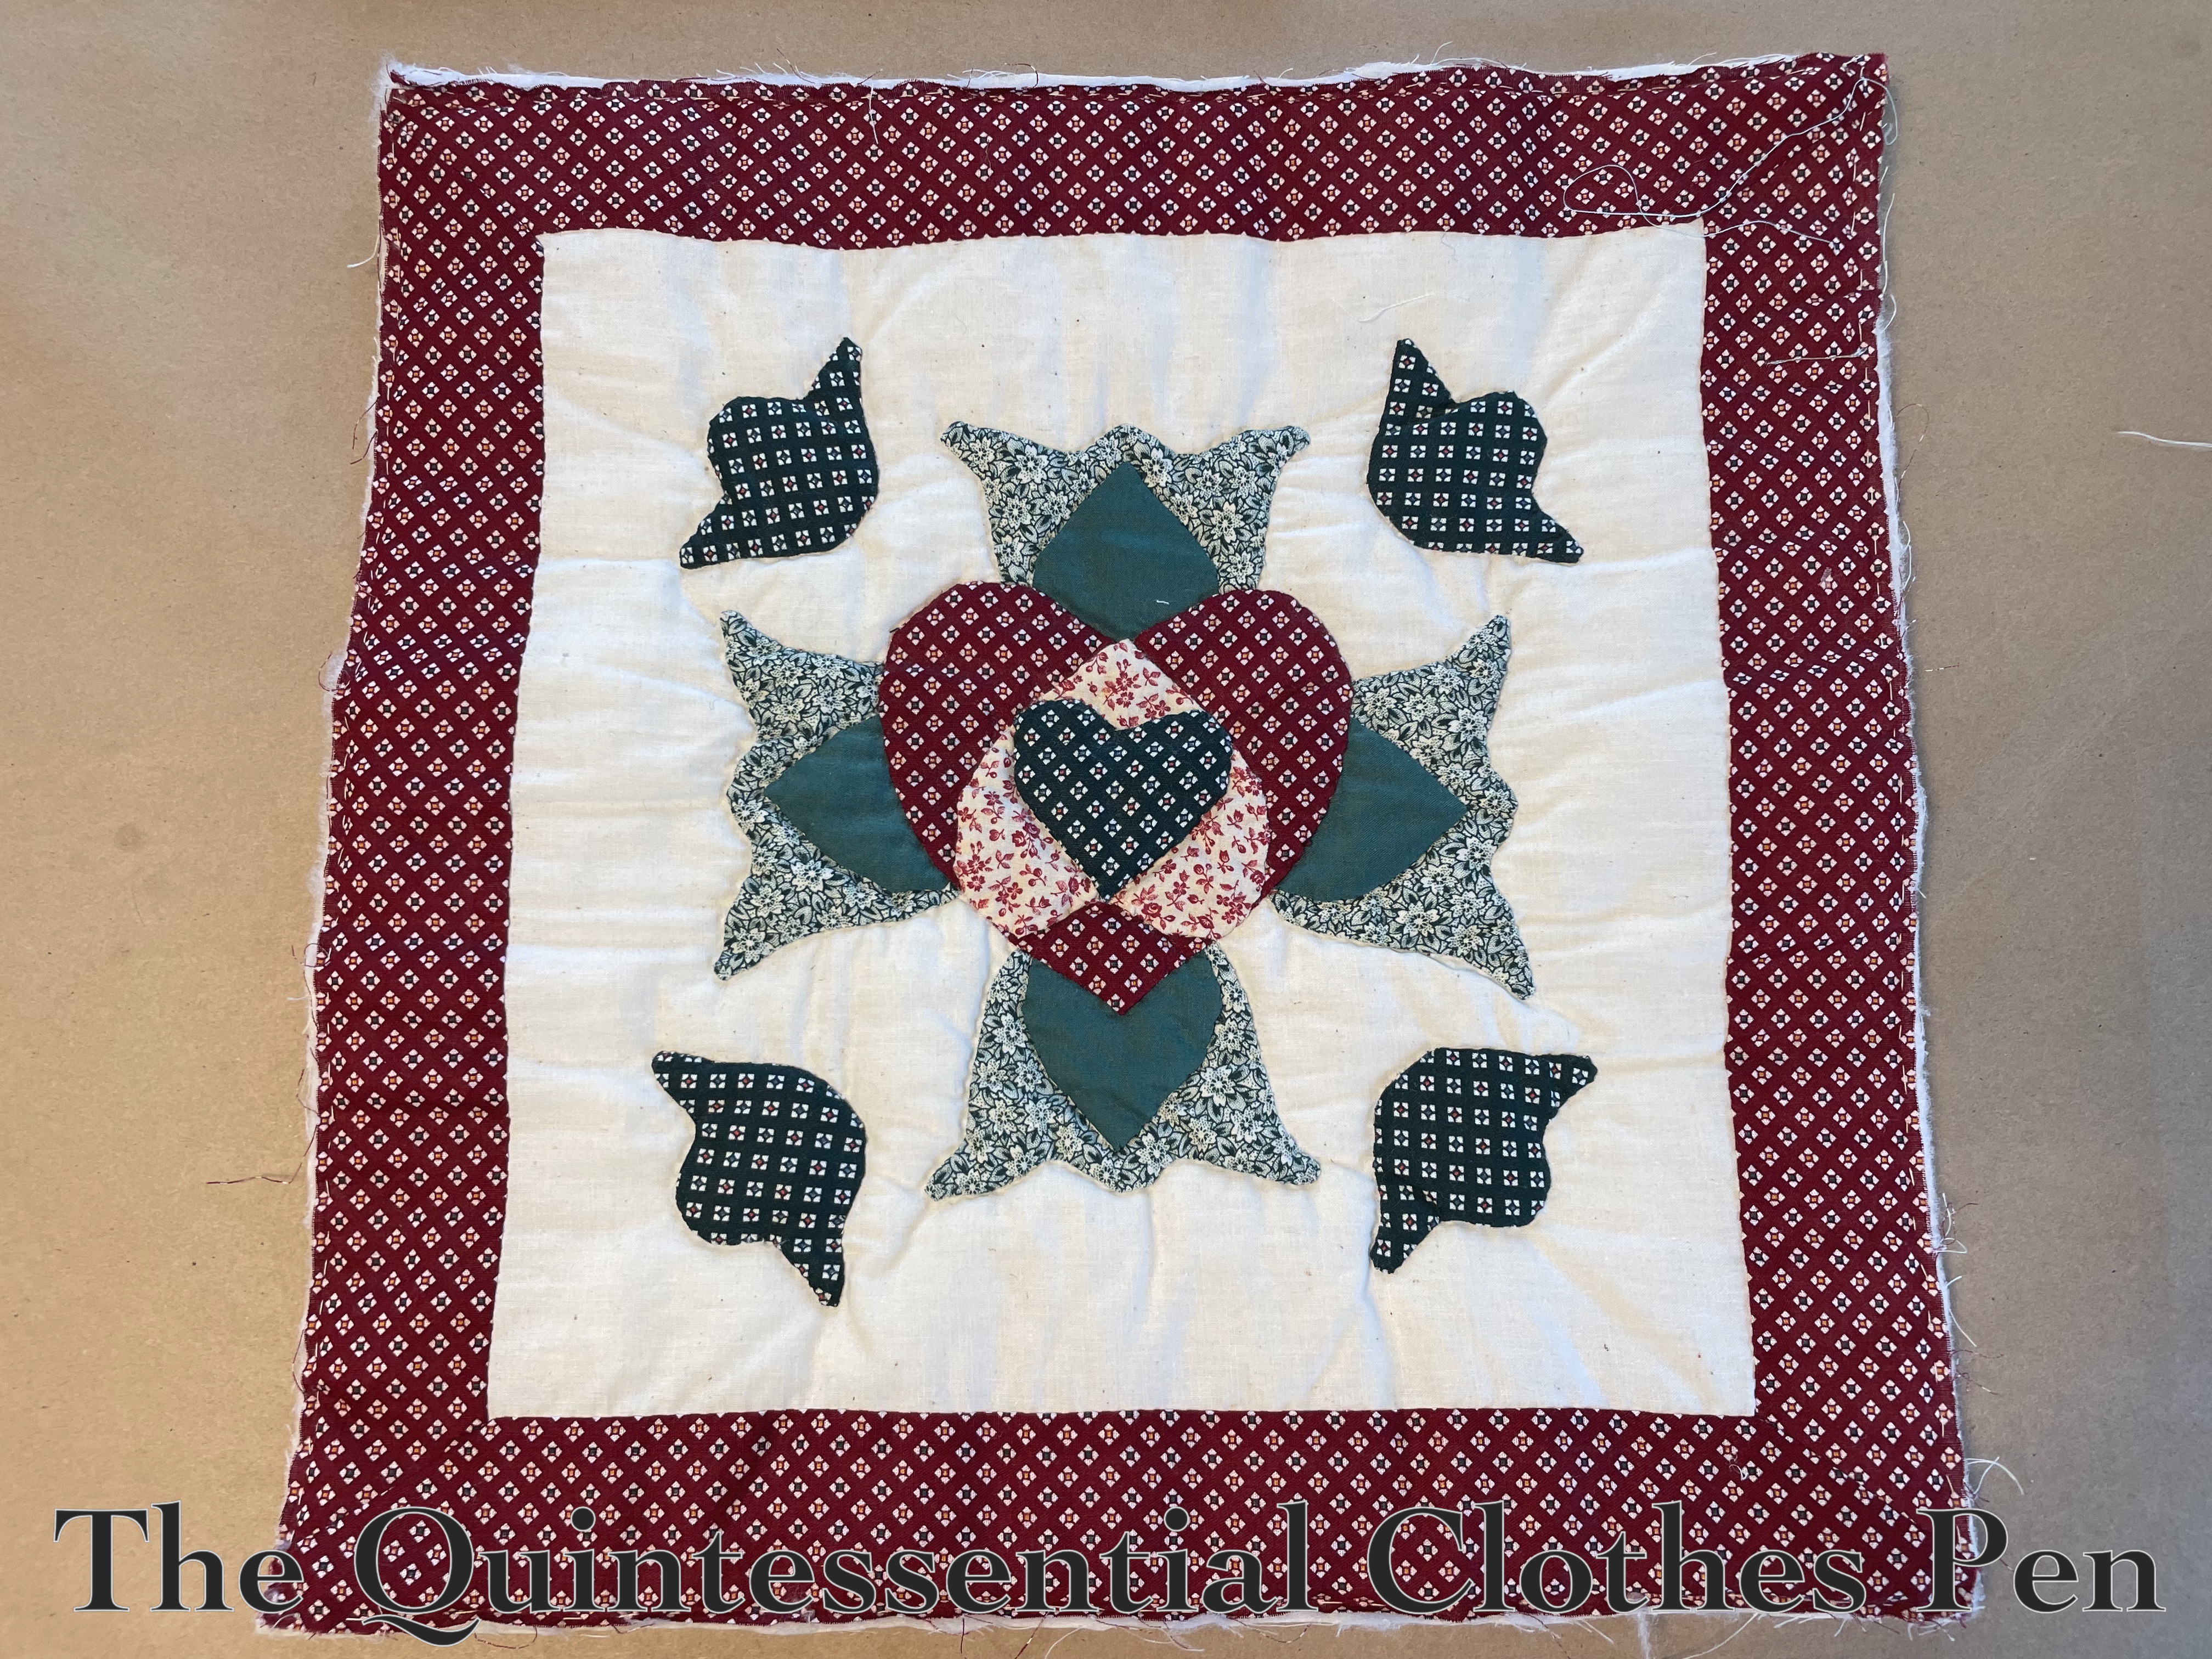
  • The red was basically done and just in need of binding. (The quilting had been done along with the appliqué hearts.)
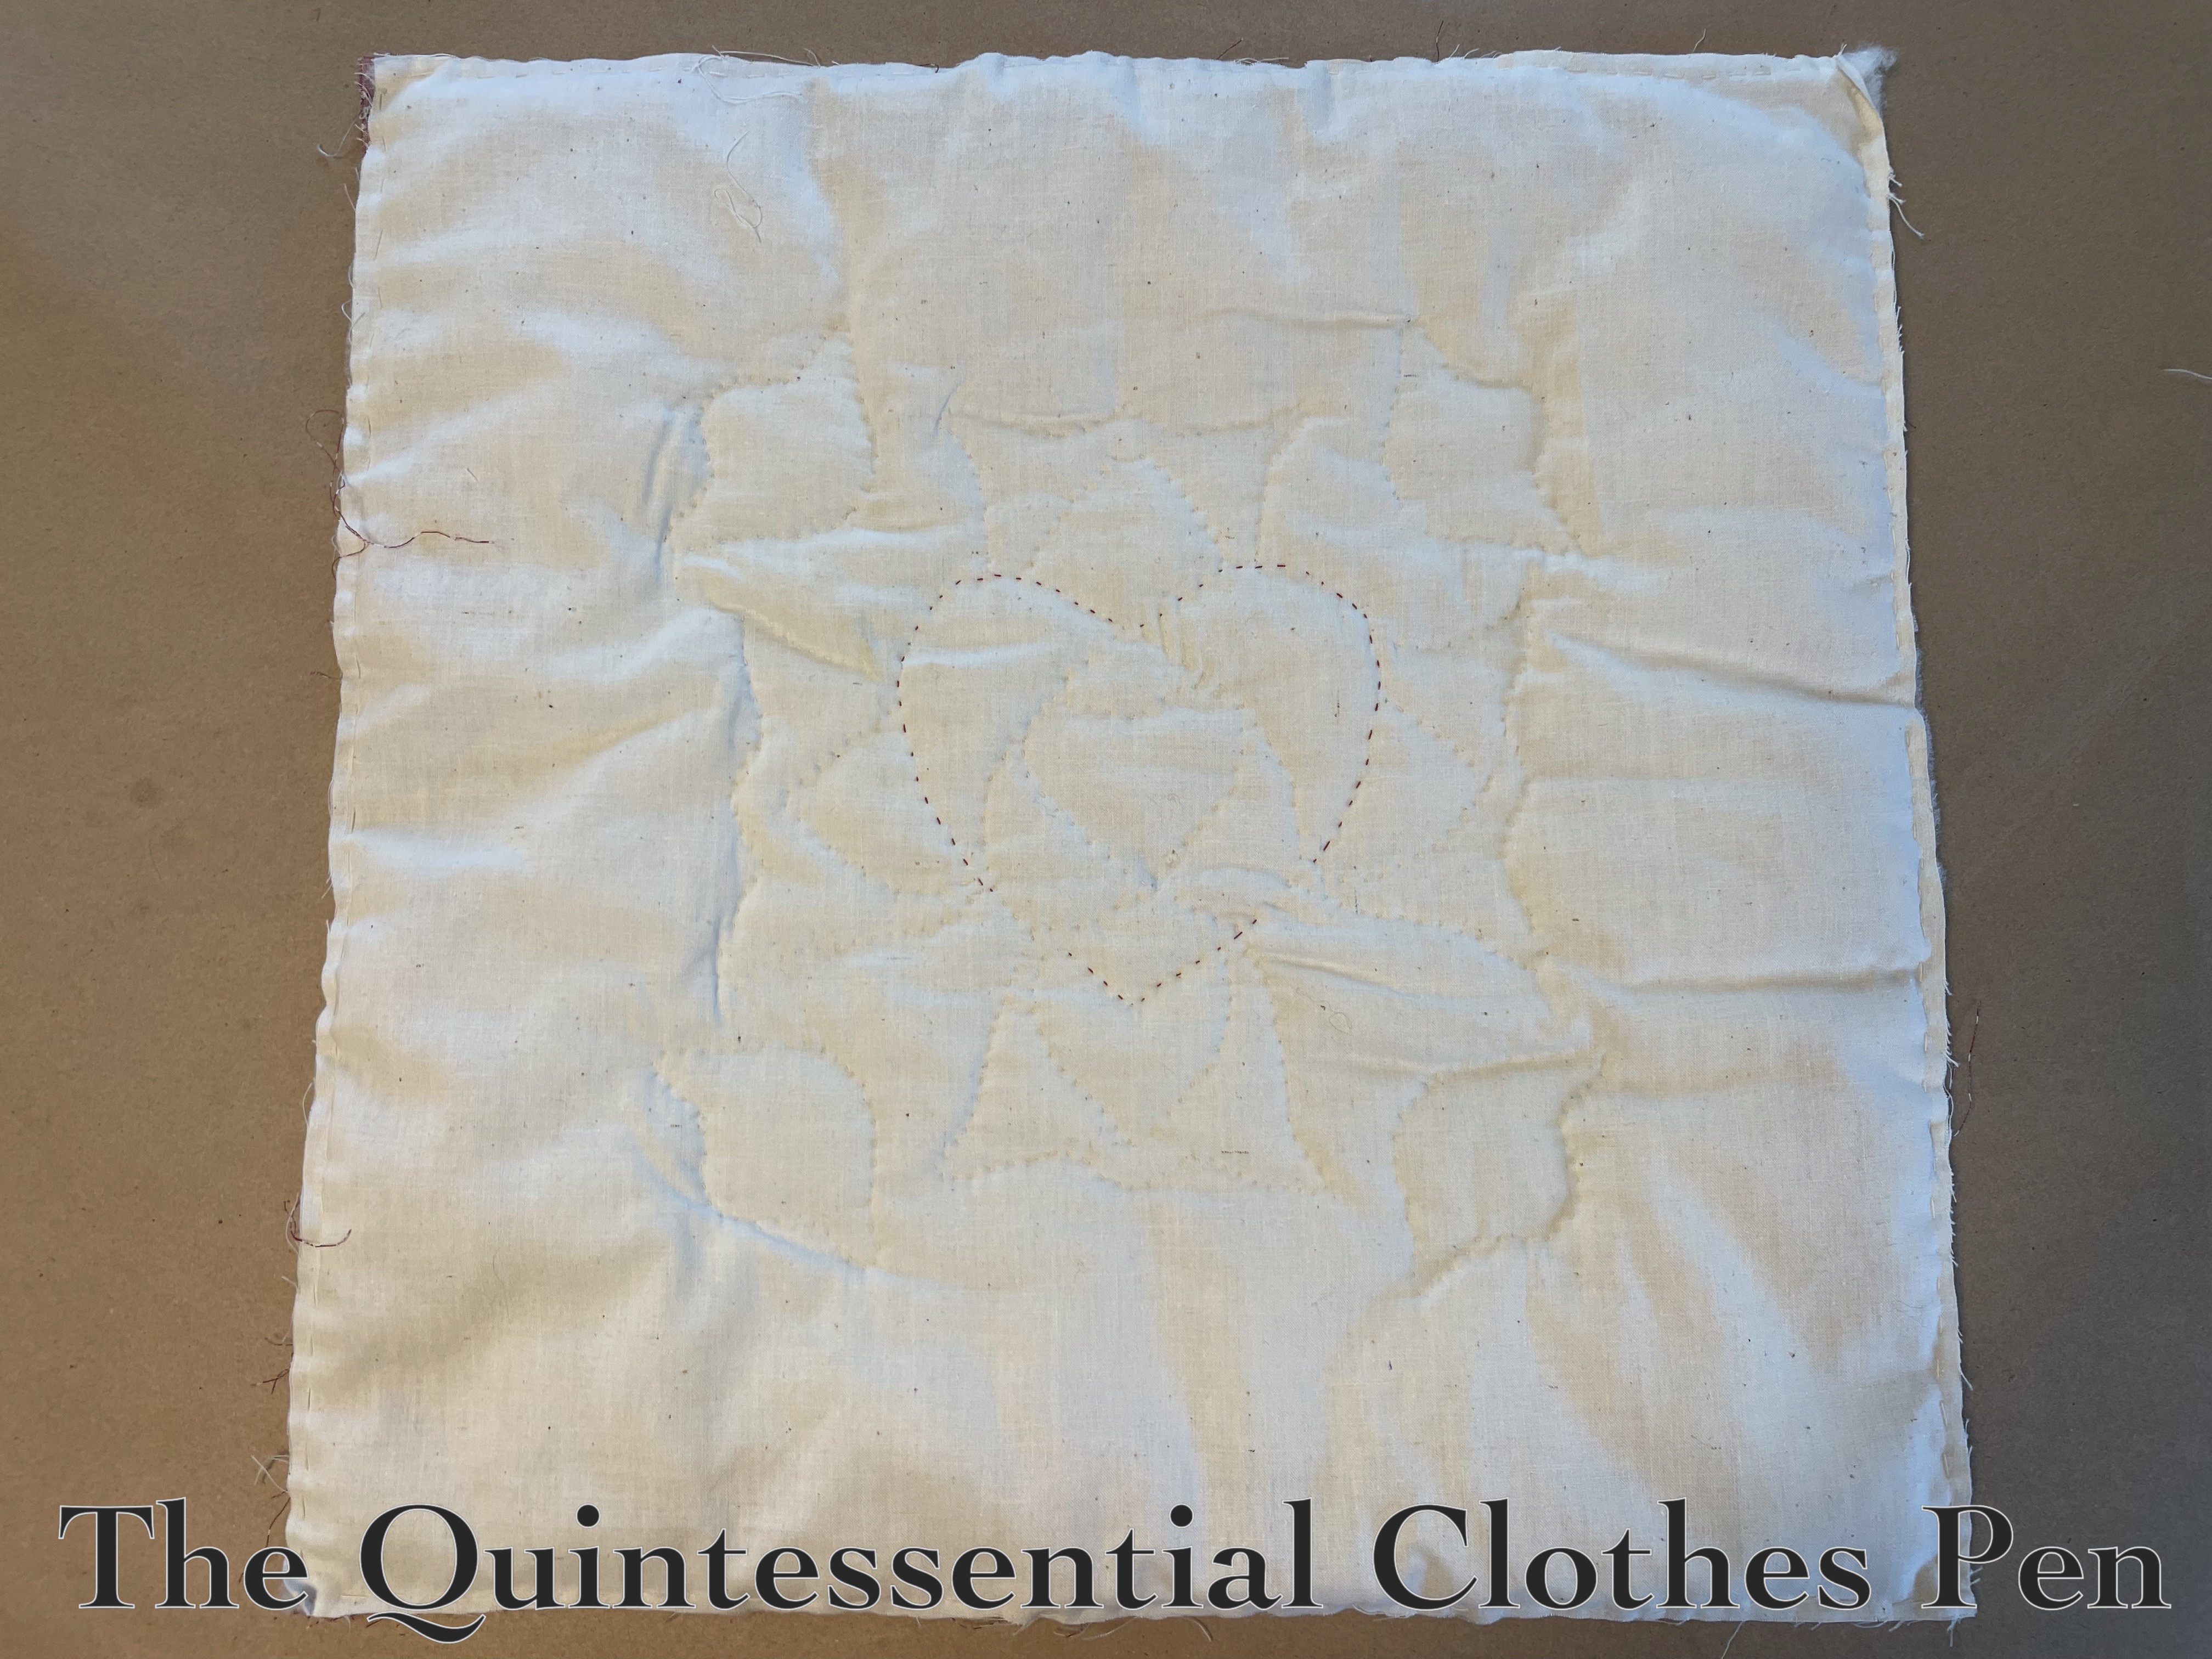
  • The green was also basically done and only in need of binding. (The quilting had been completed in a leafy motif.)
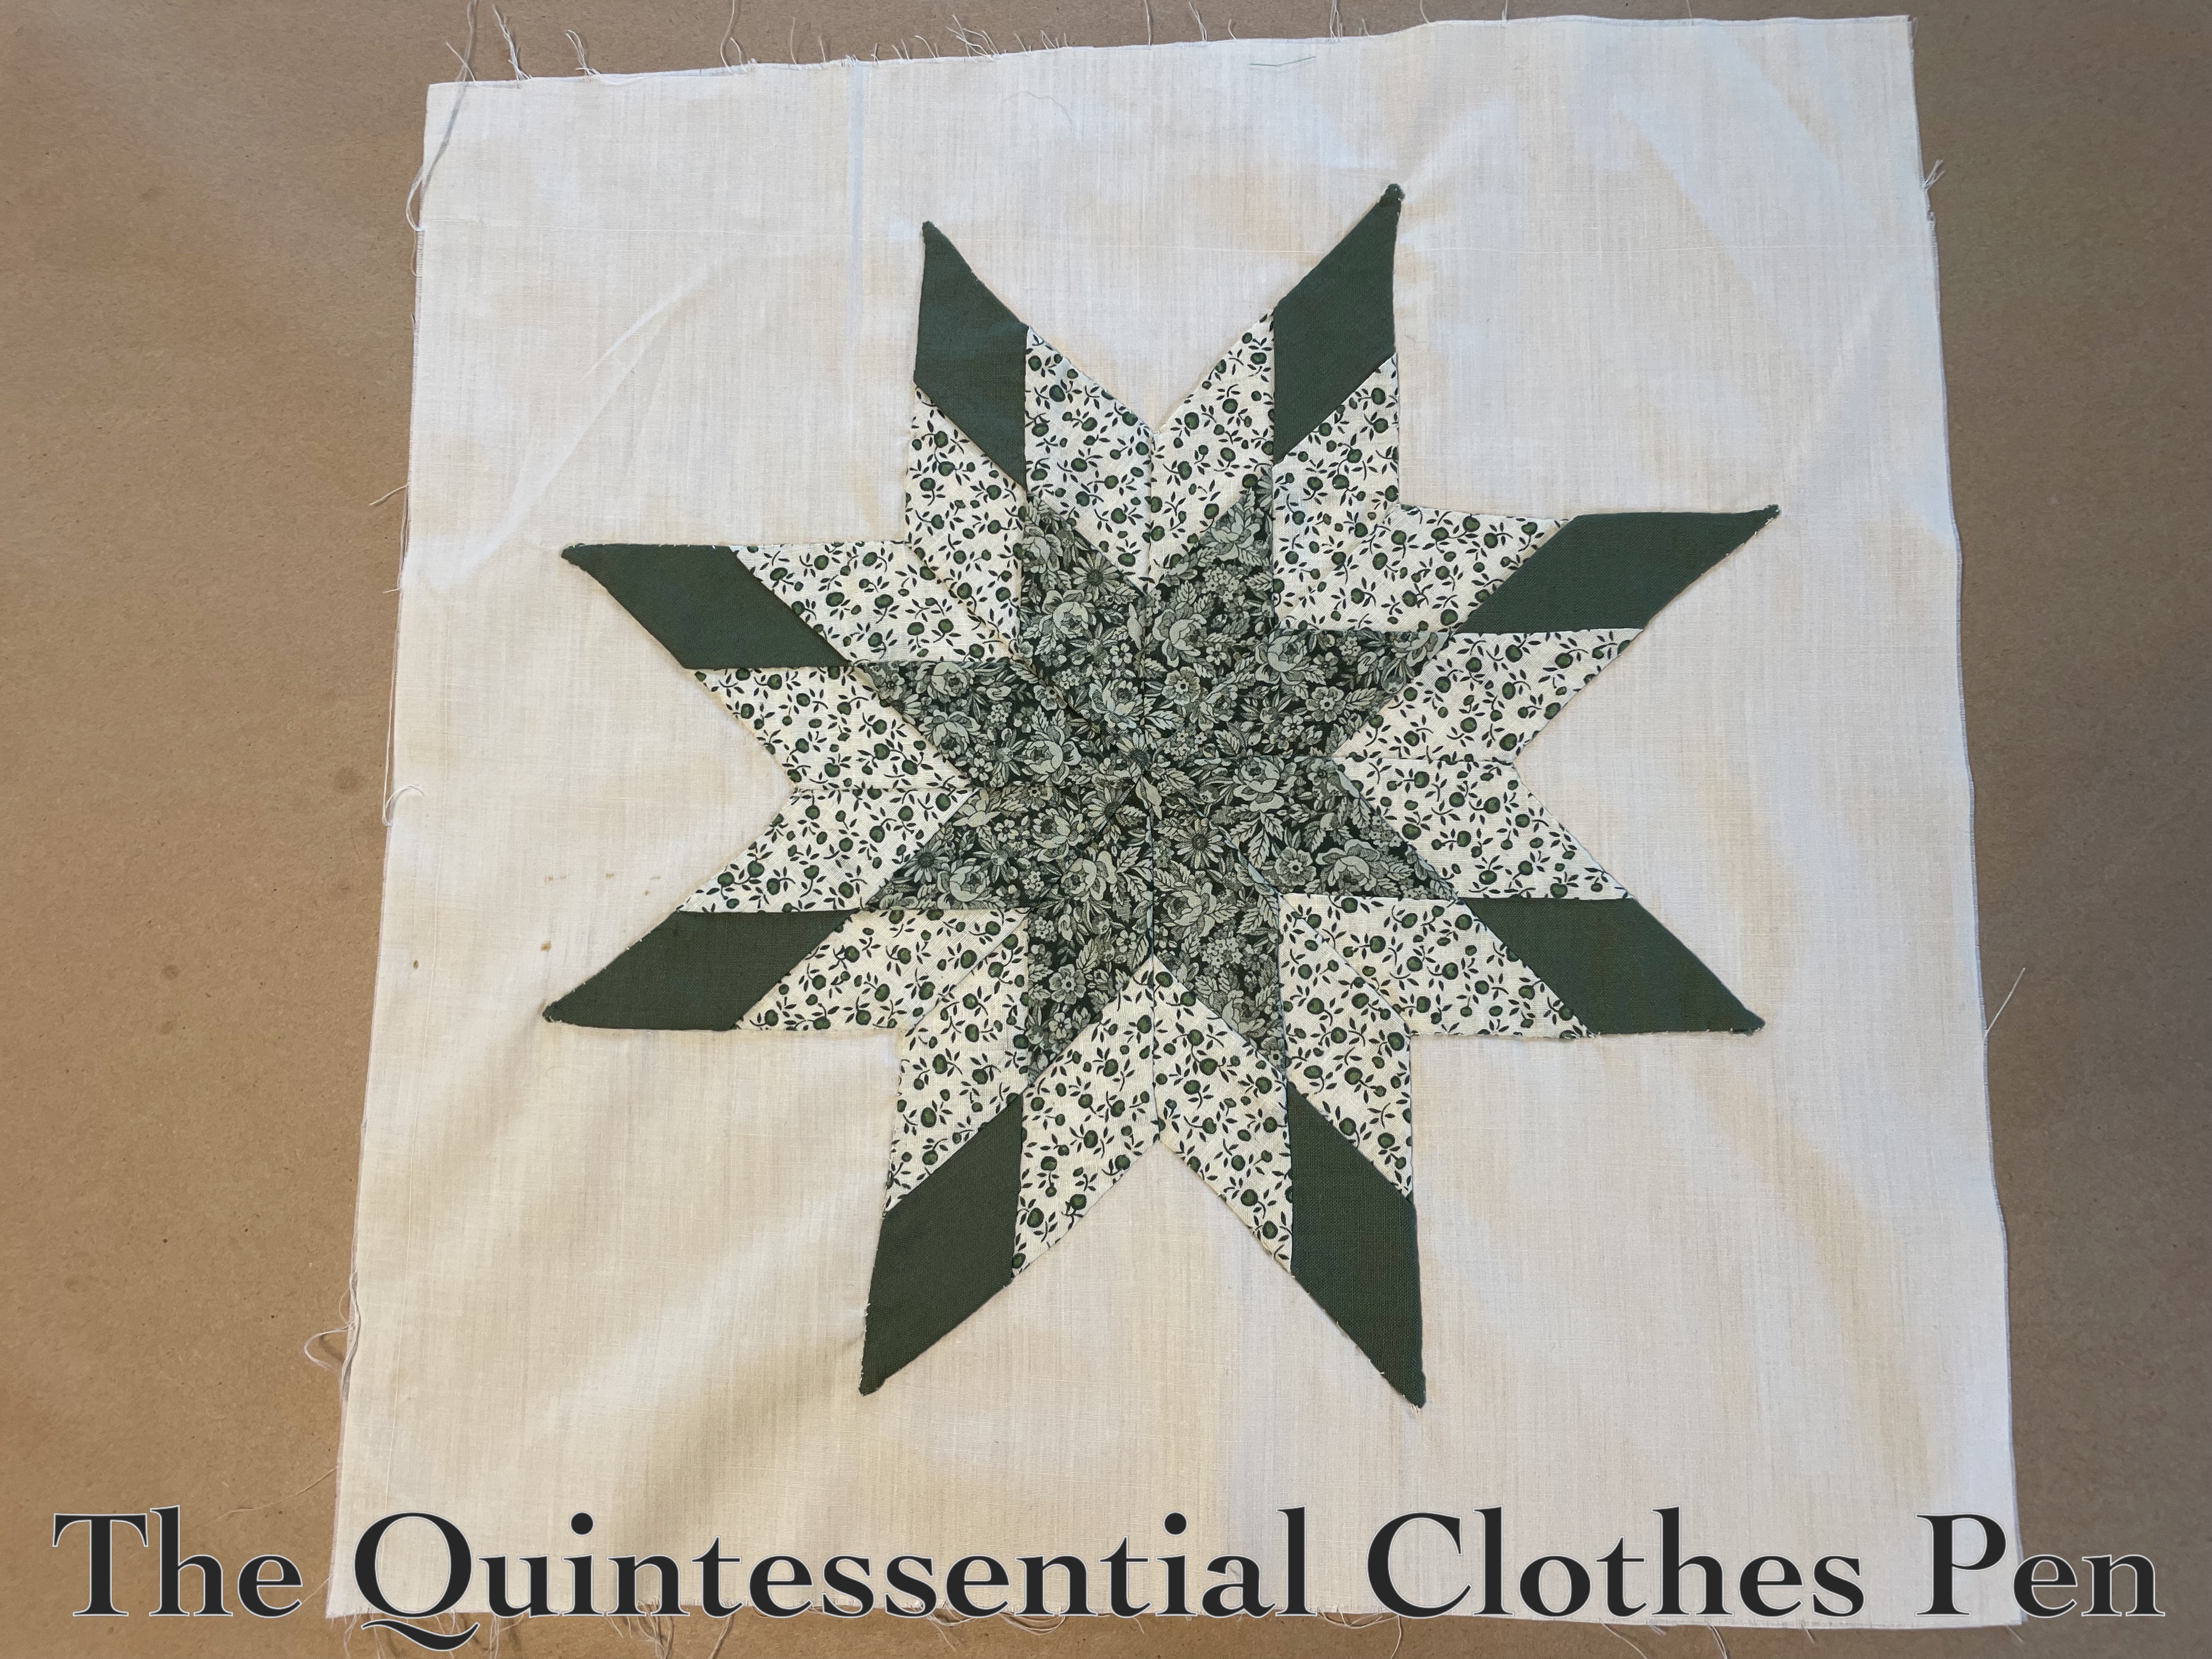
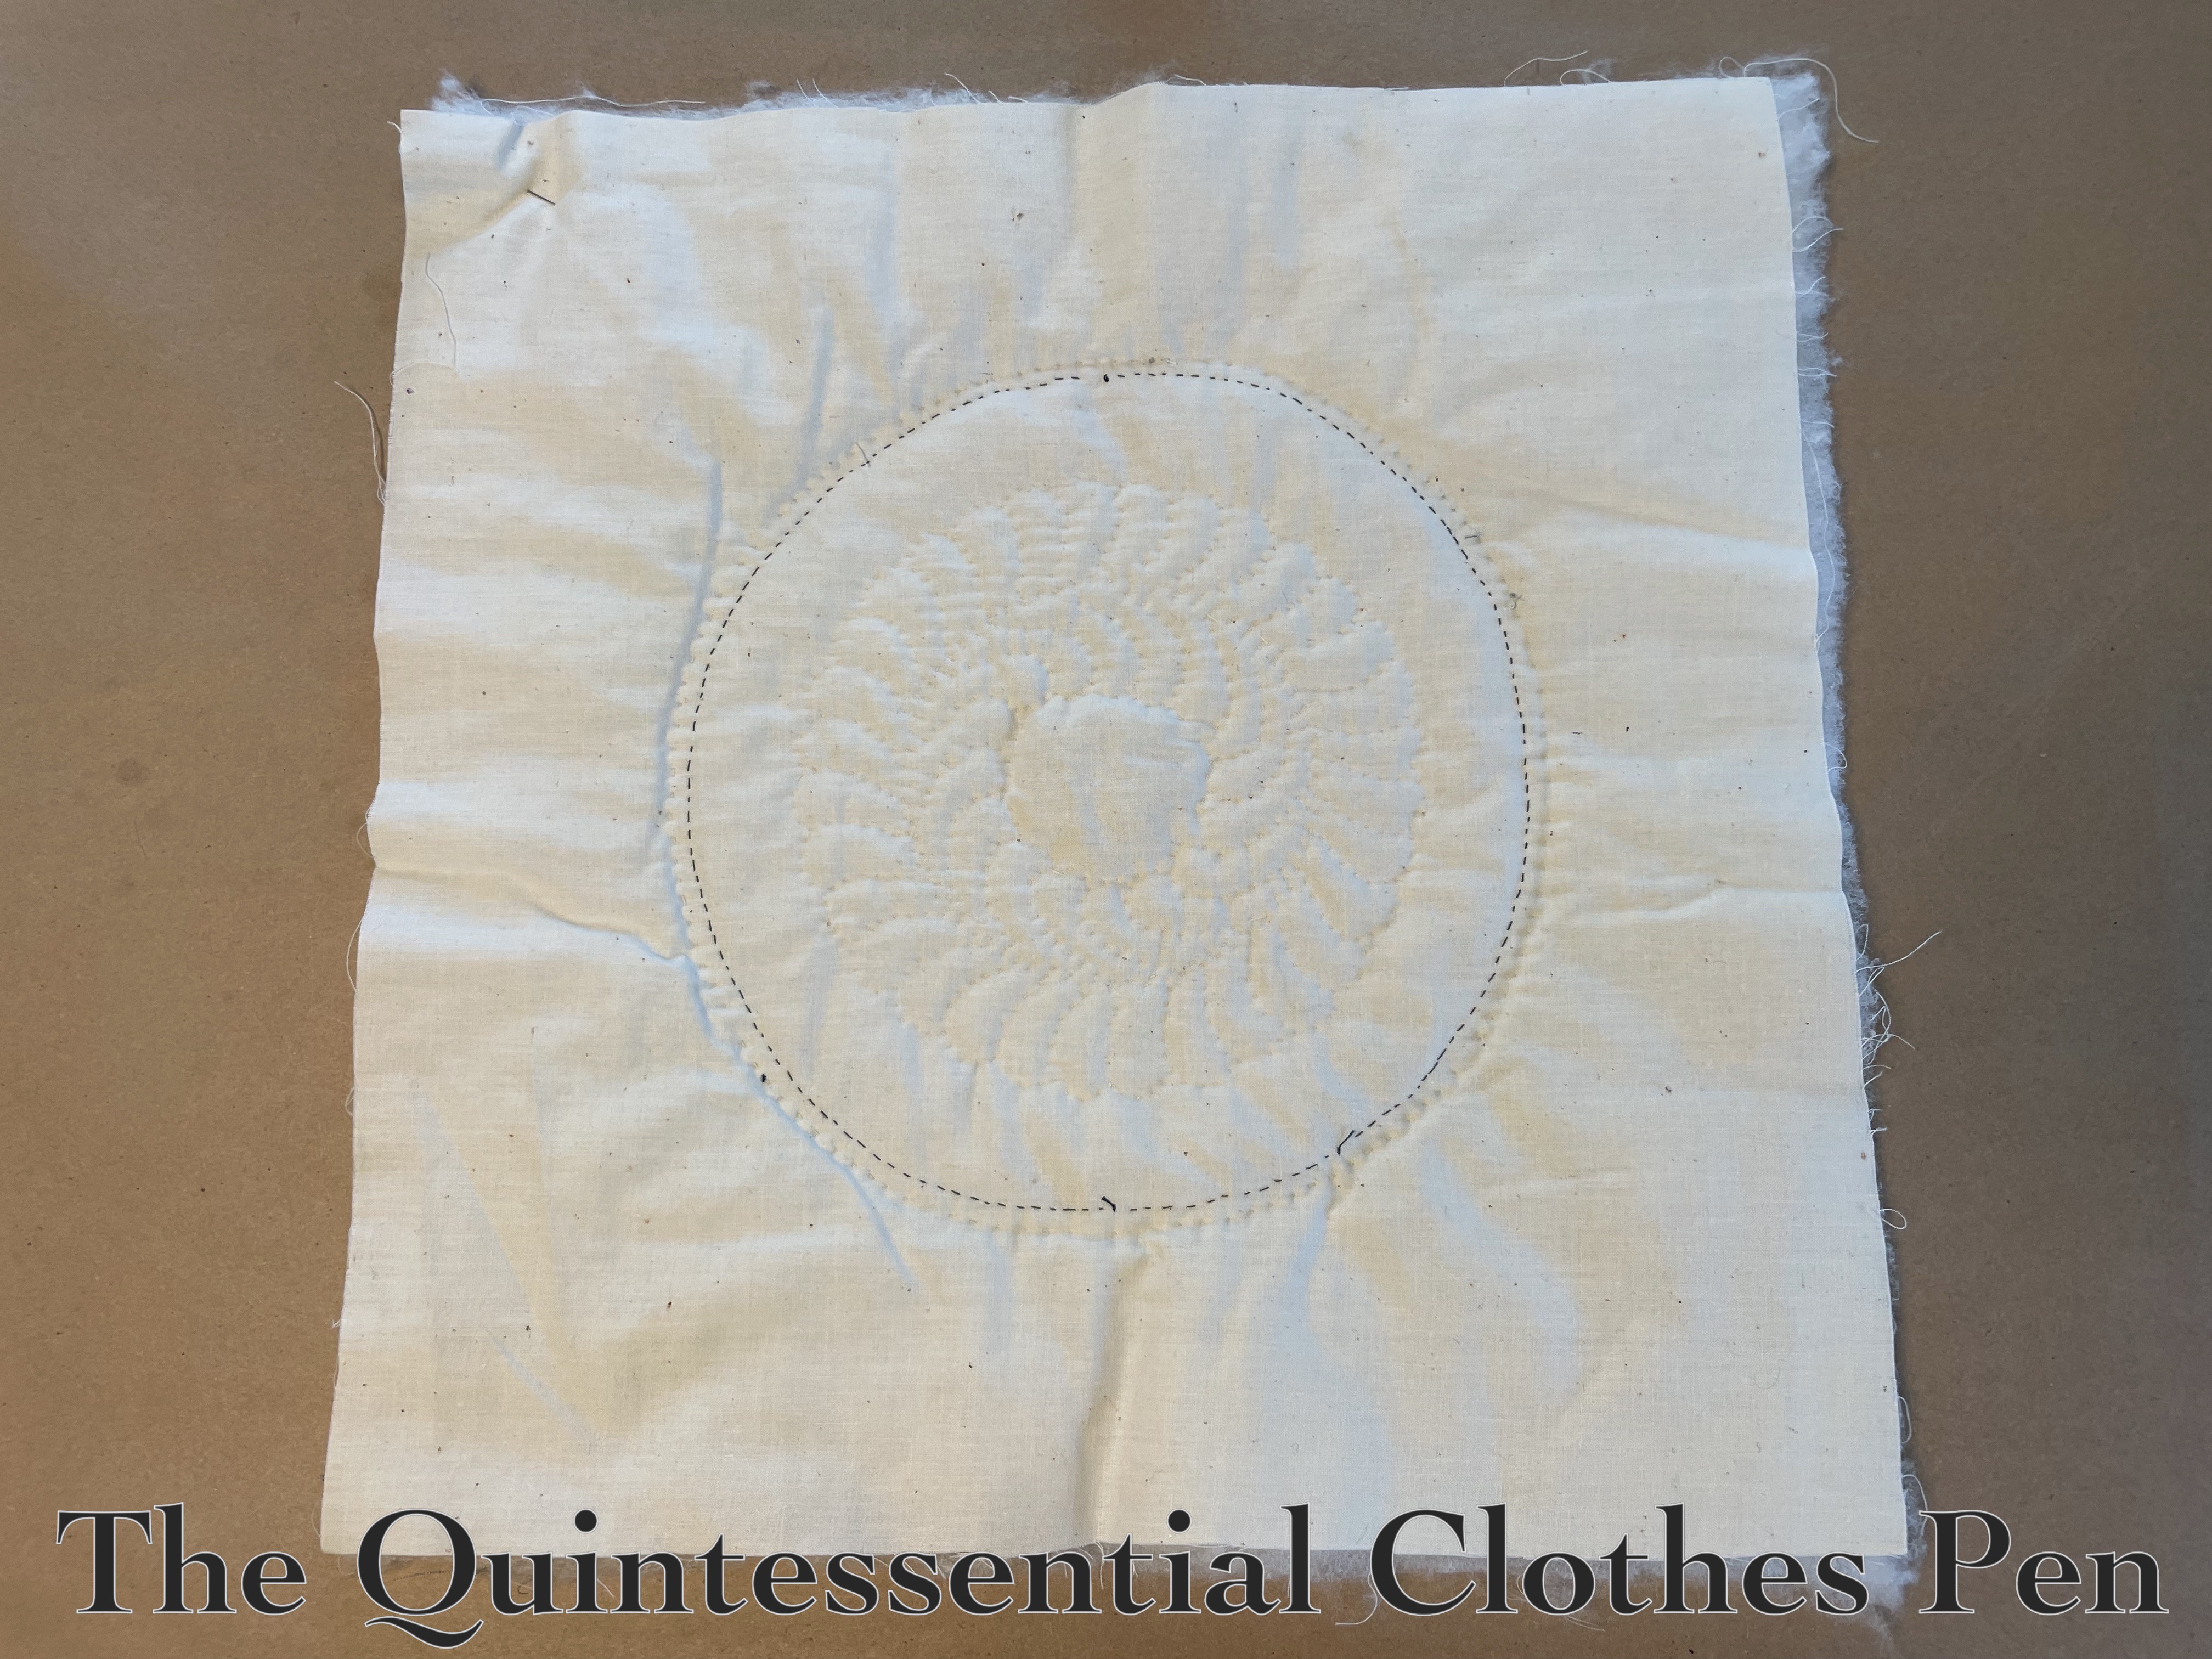
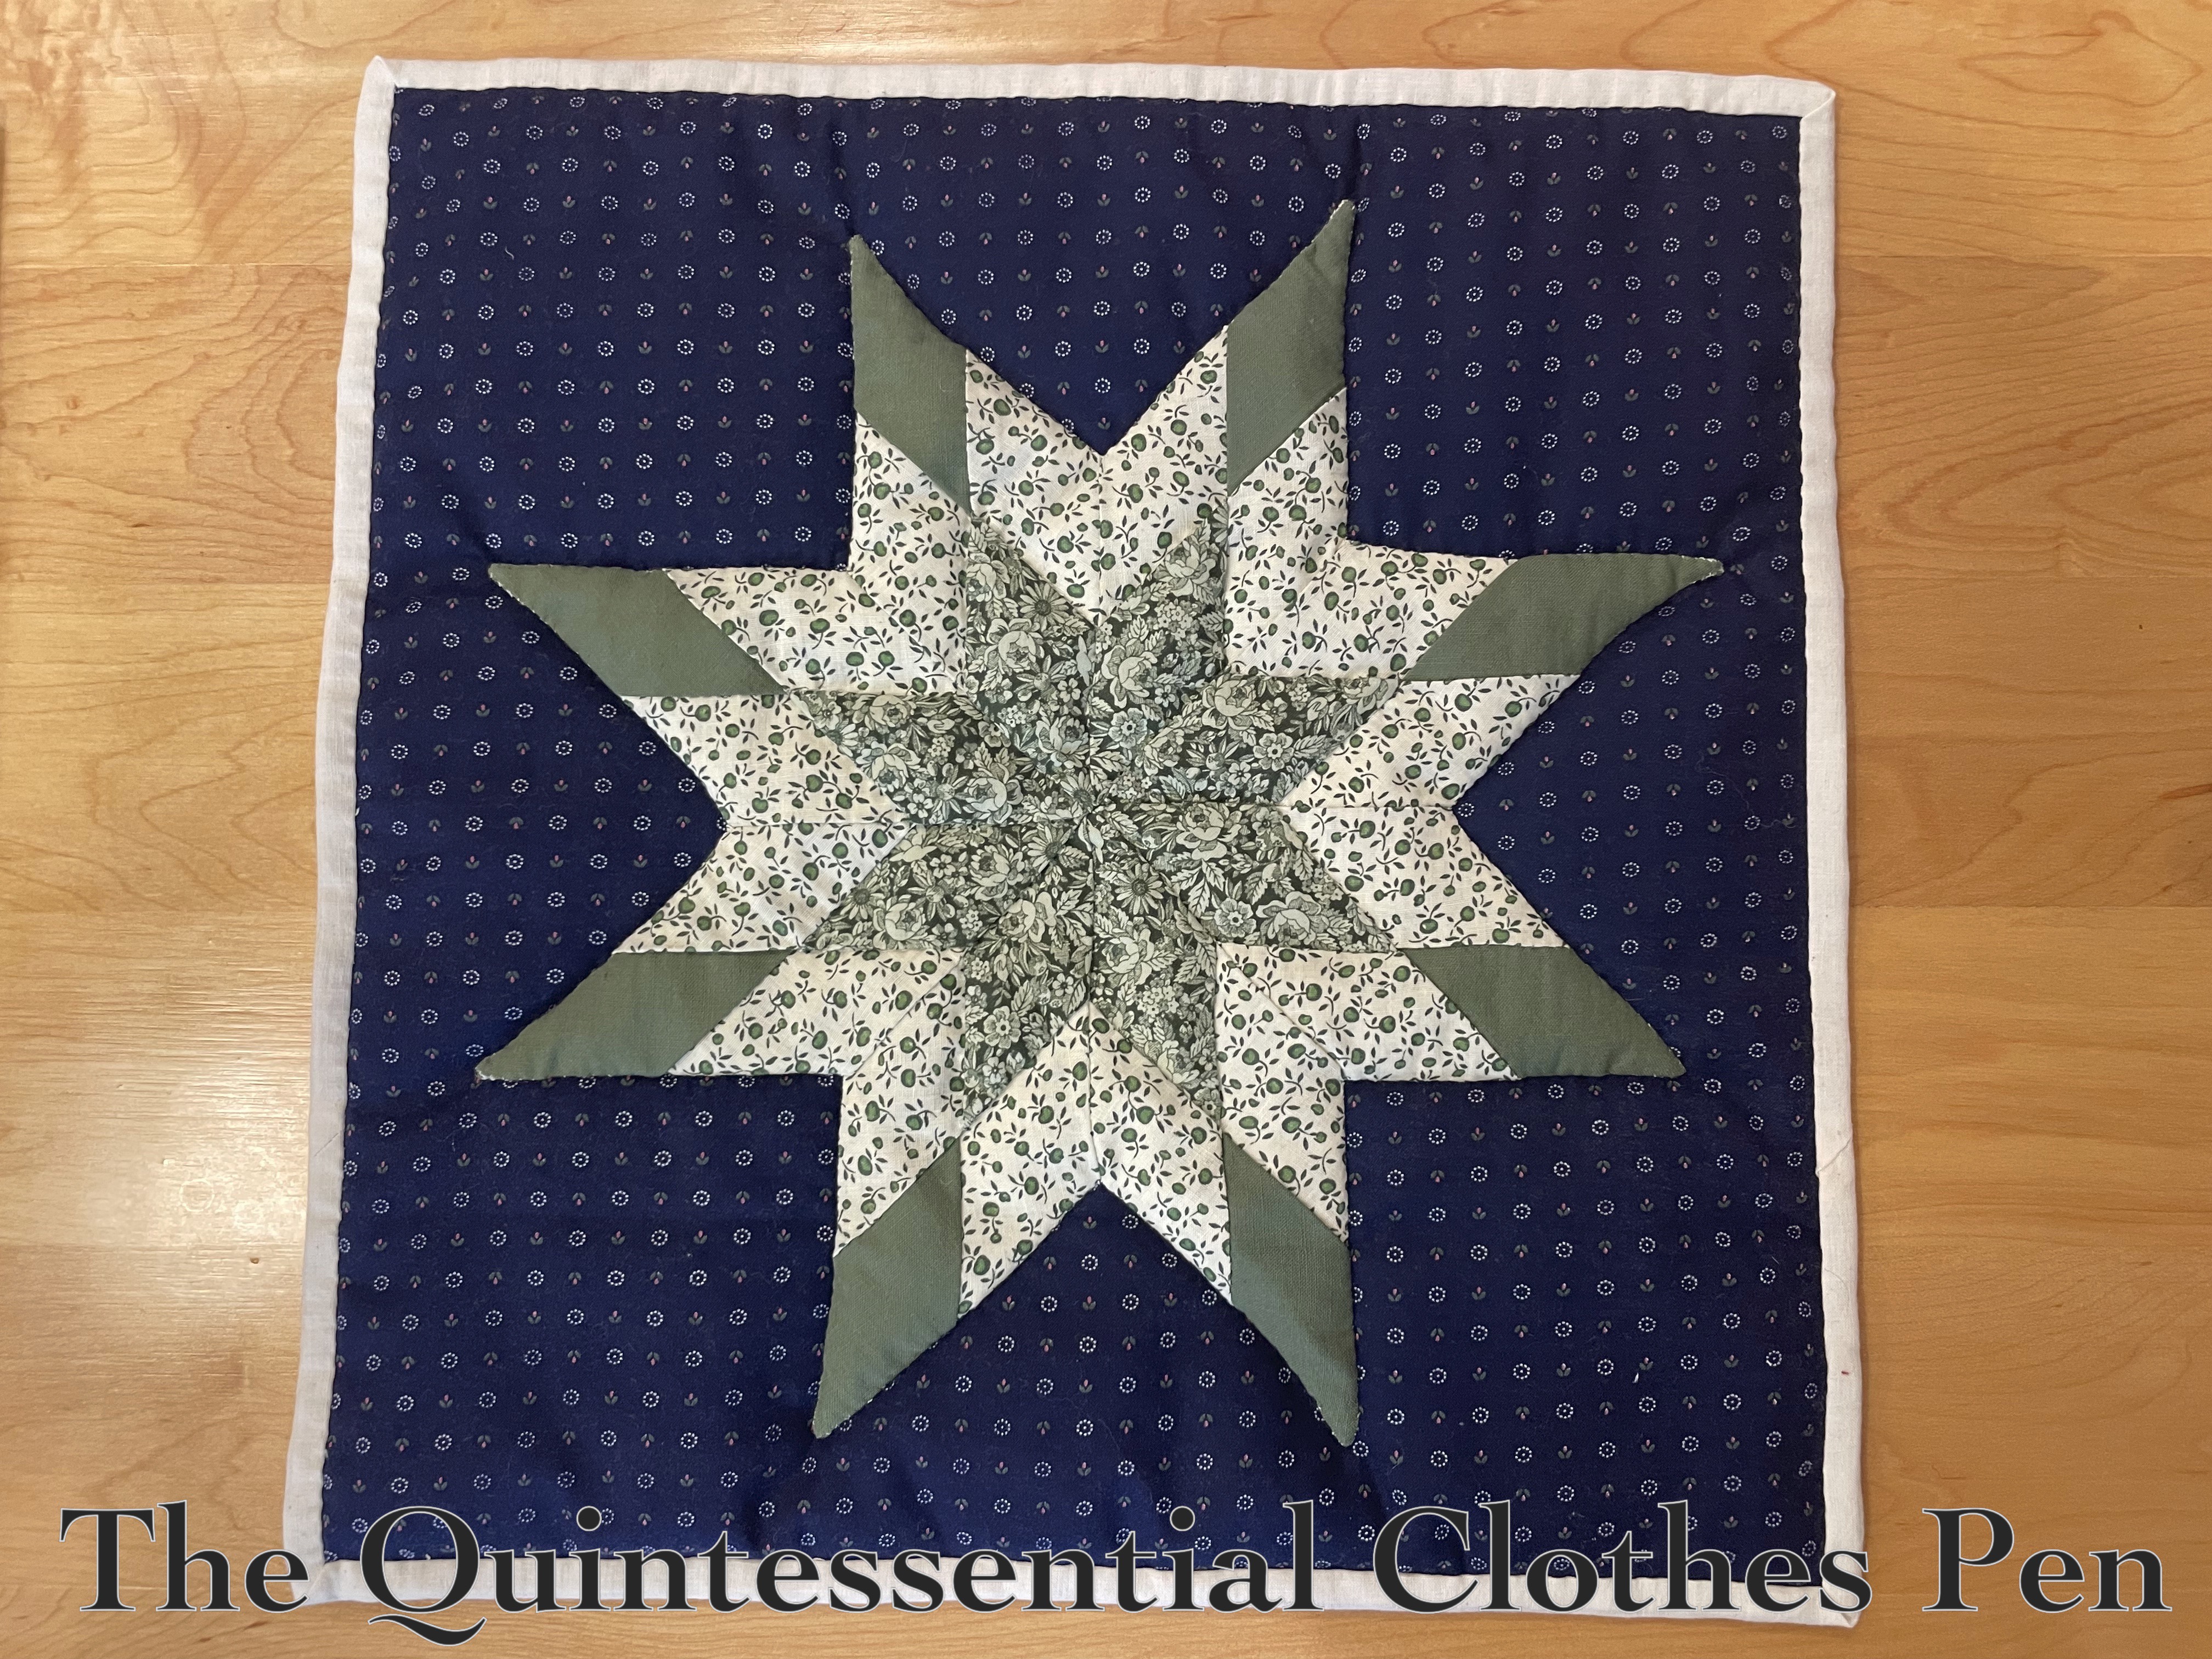
  • The star was all pieced, but not quilted onto a backing yet. Also, before coming to me, it had gained age stains on the ivory backing, which isn’t ideal. I didn’t want to unpick all of the edges… (I don’t find it to be fun and I wanted to keep my grandmother’s sewing intact) so my plan was to use the ivory to make a border around the star and re-appliqué it onto a blue patterned background. I felt this would tie it in with the other two pieces and help the three panels feel like an intentional set. Then the star also needed to be quilted to a backing and bound.

Below, photos of the backs of the panels before I started working on them.

I went through all of the green and blue (and ivory, but that’s not the most exciting!) quilting fabric I had inherited to pick out suitable backing and binding options for each panel. Below are just a sample of the many solids and prints I had to choose from!

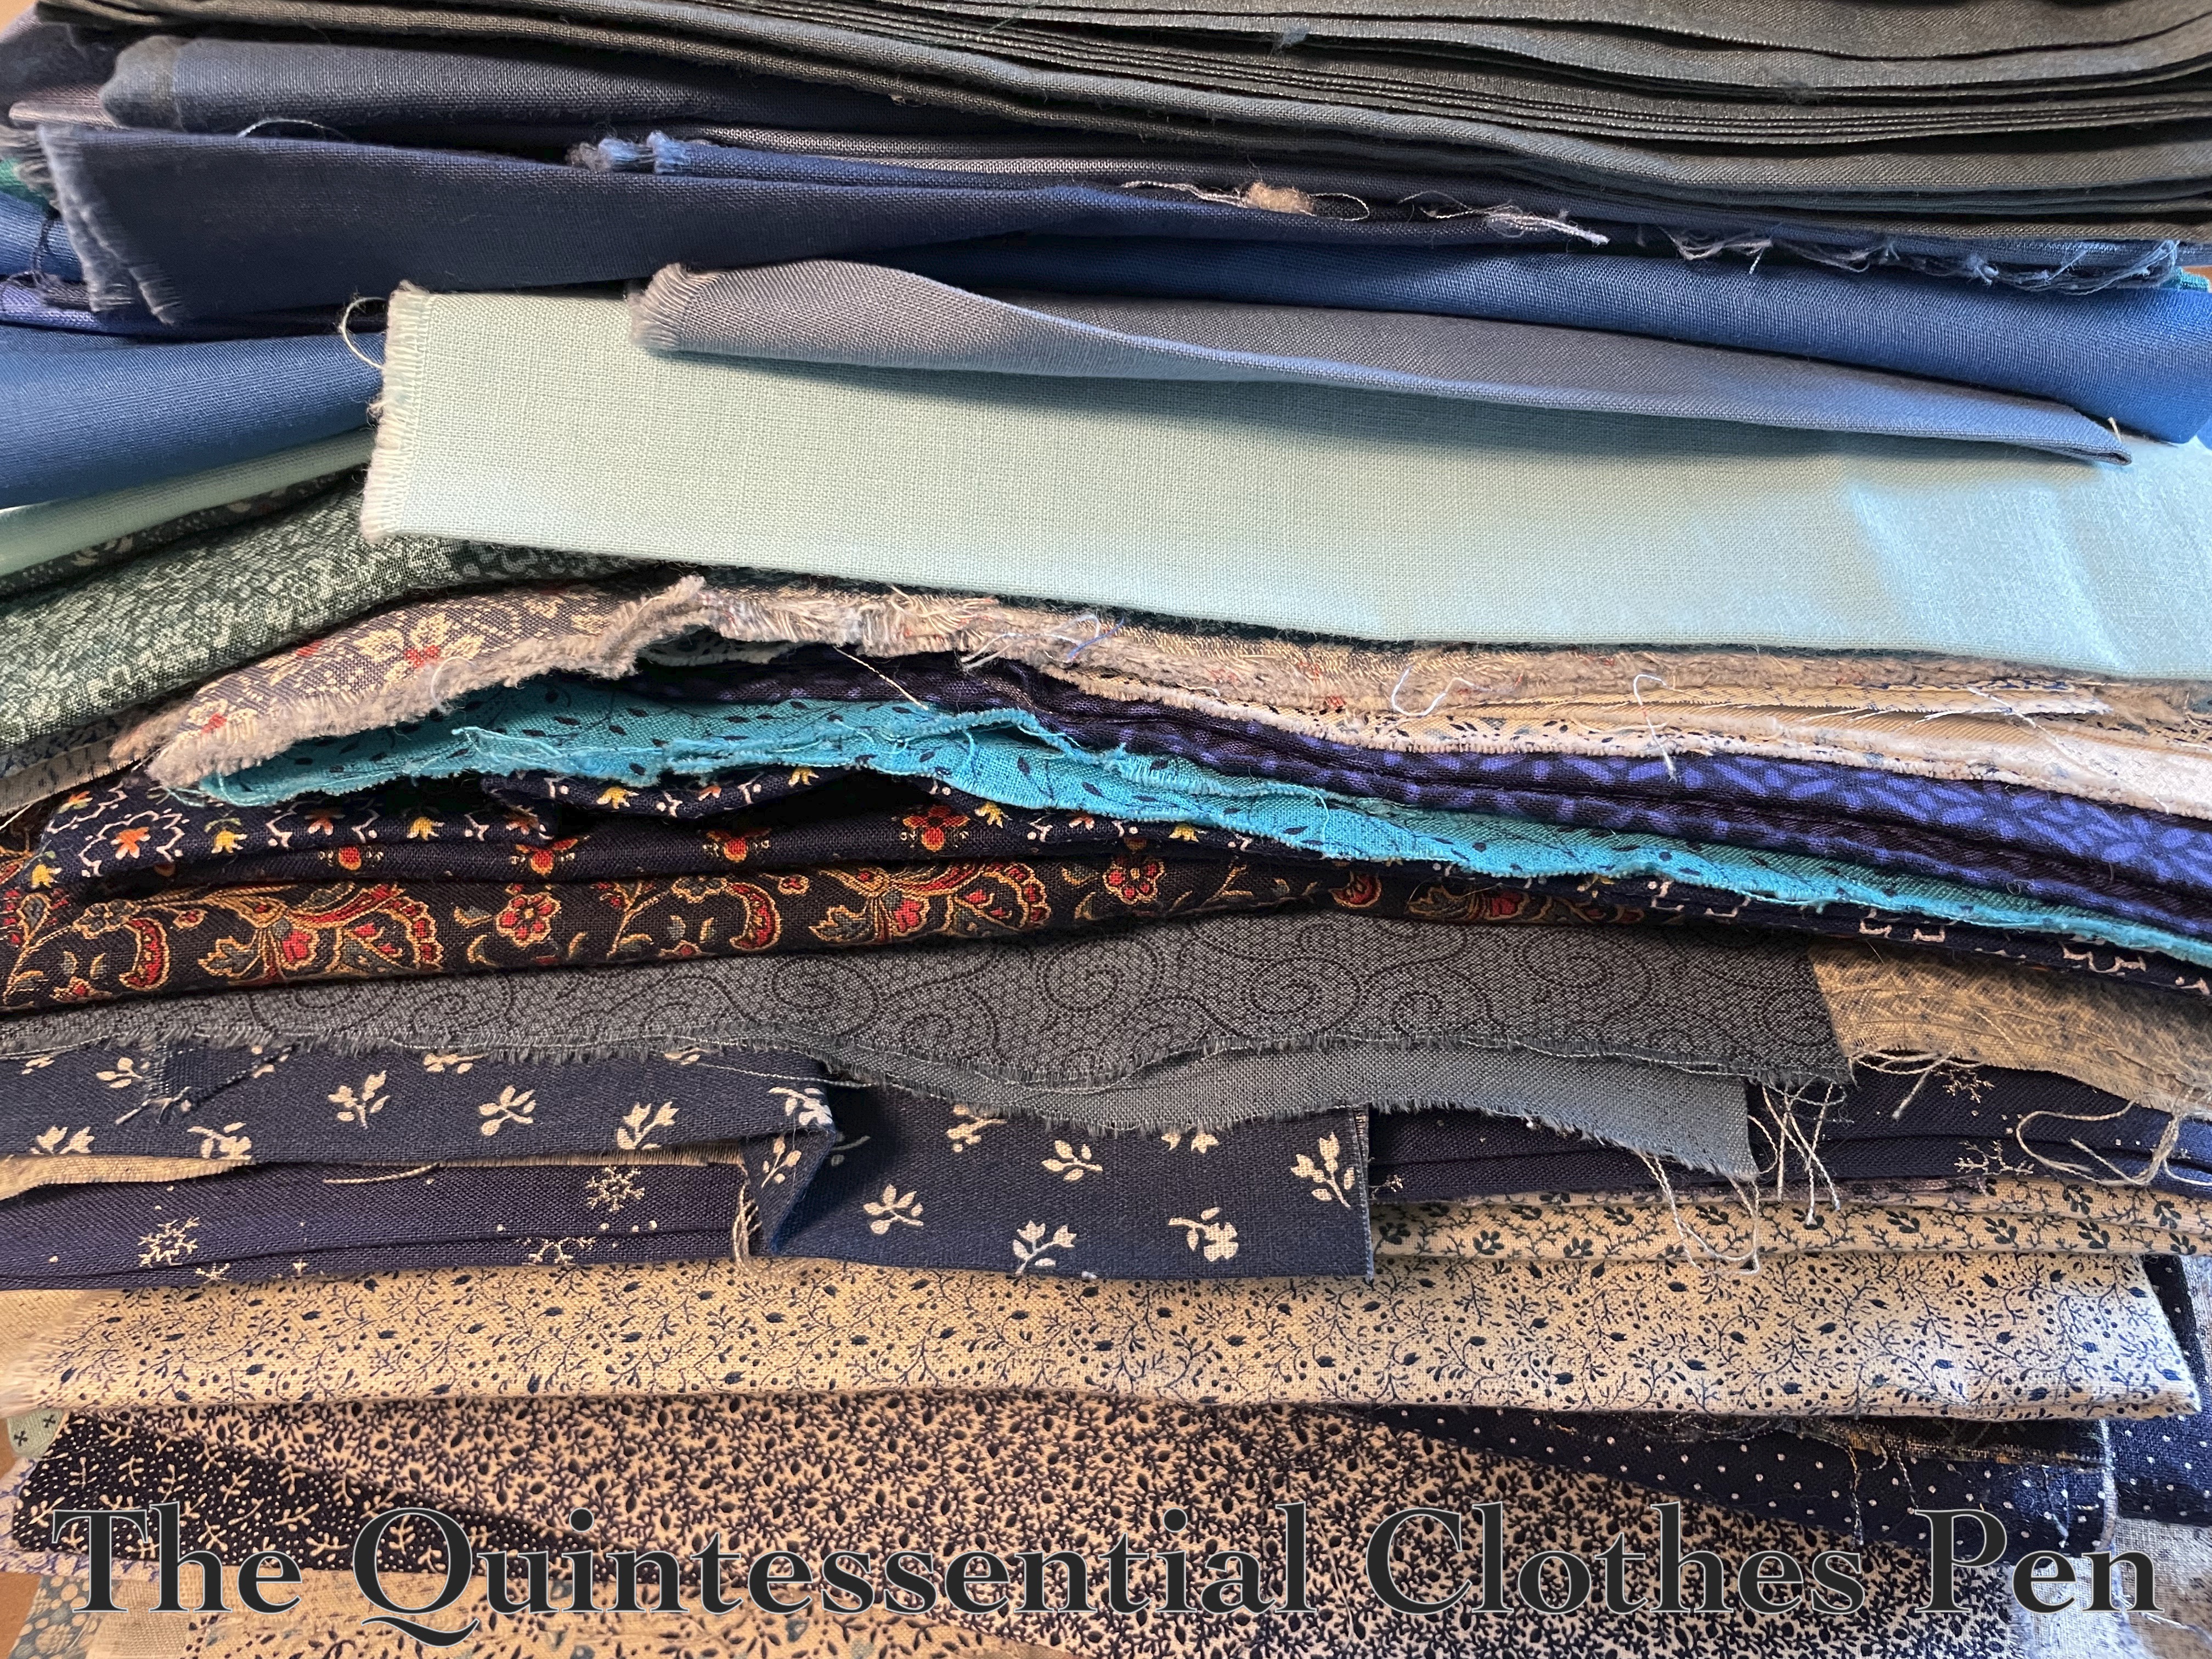
I chose a dark green binding for the red panel, a lighter green binding for the green panel, and a blue small print for the new background for the star, as well as ivory binding and backing.

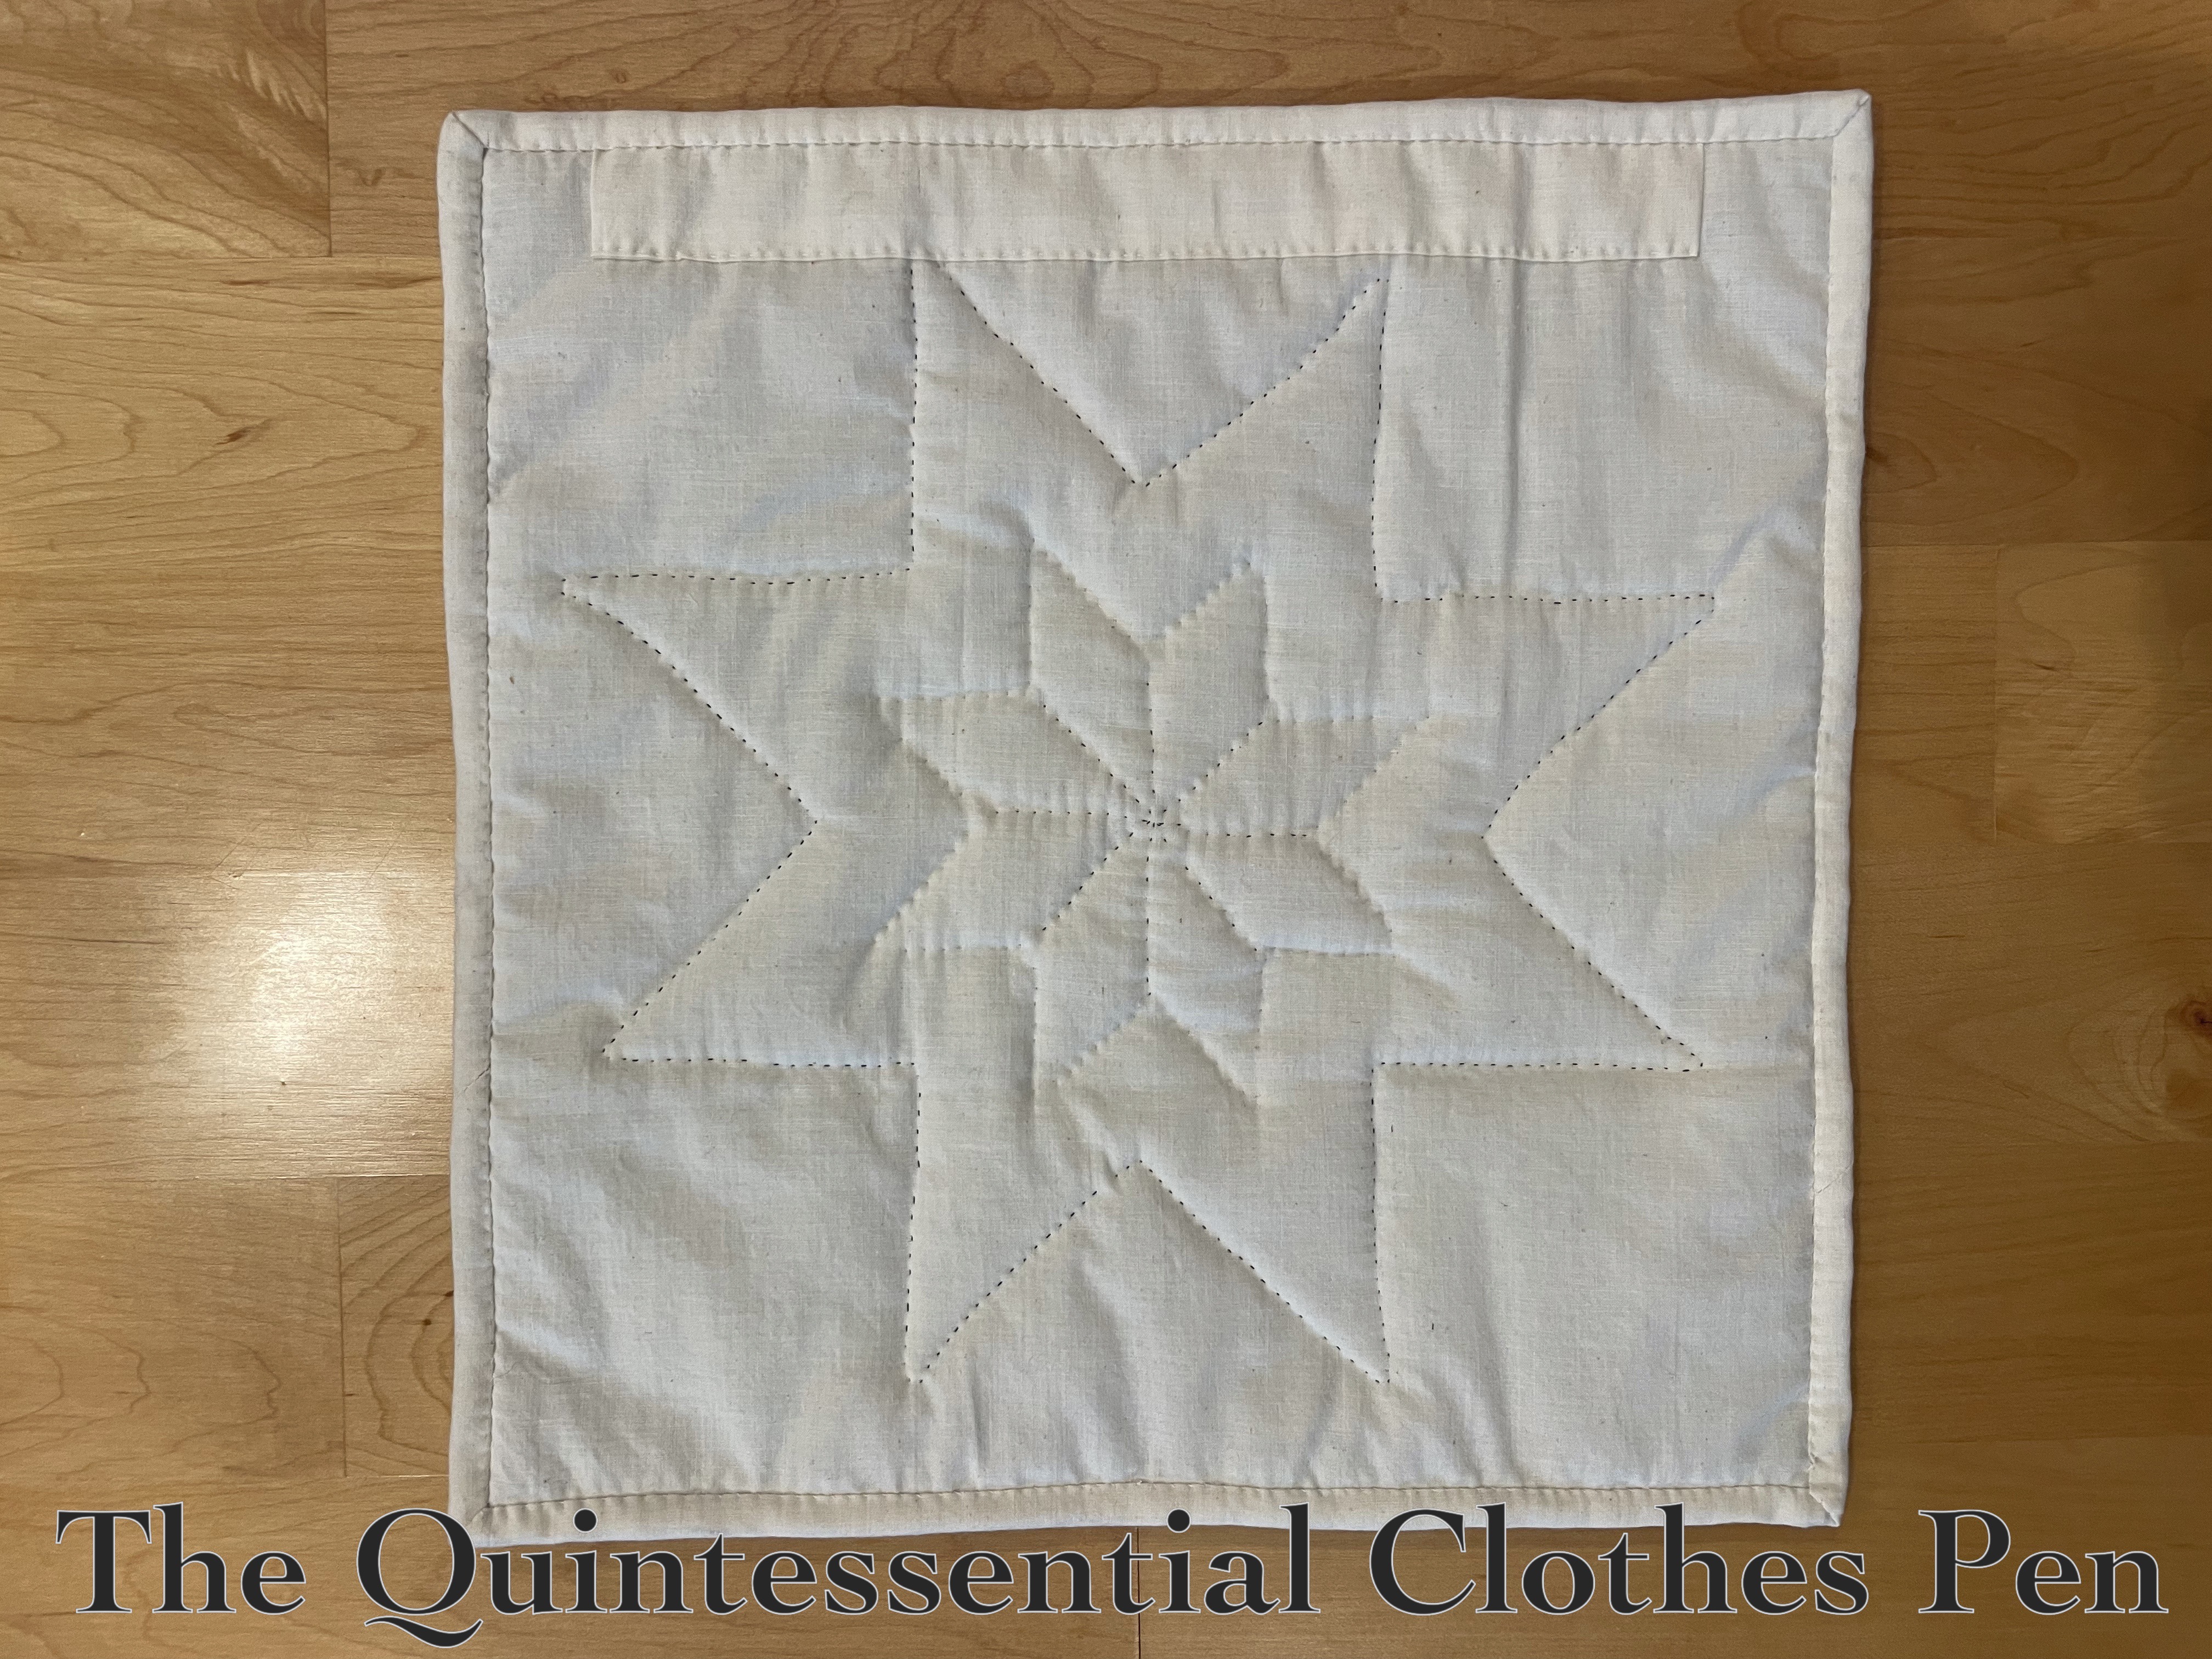
And here is an individual photo of each completed panel, front and back.

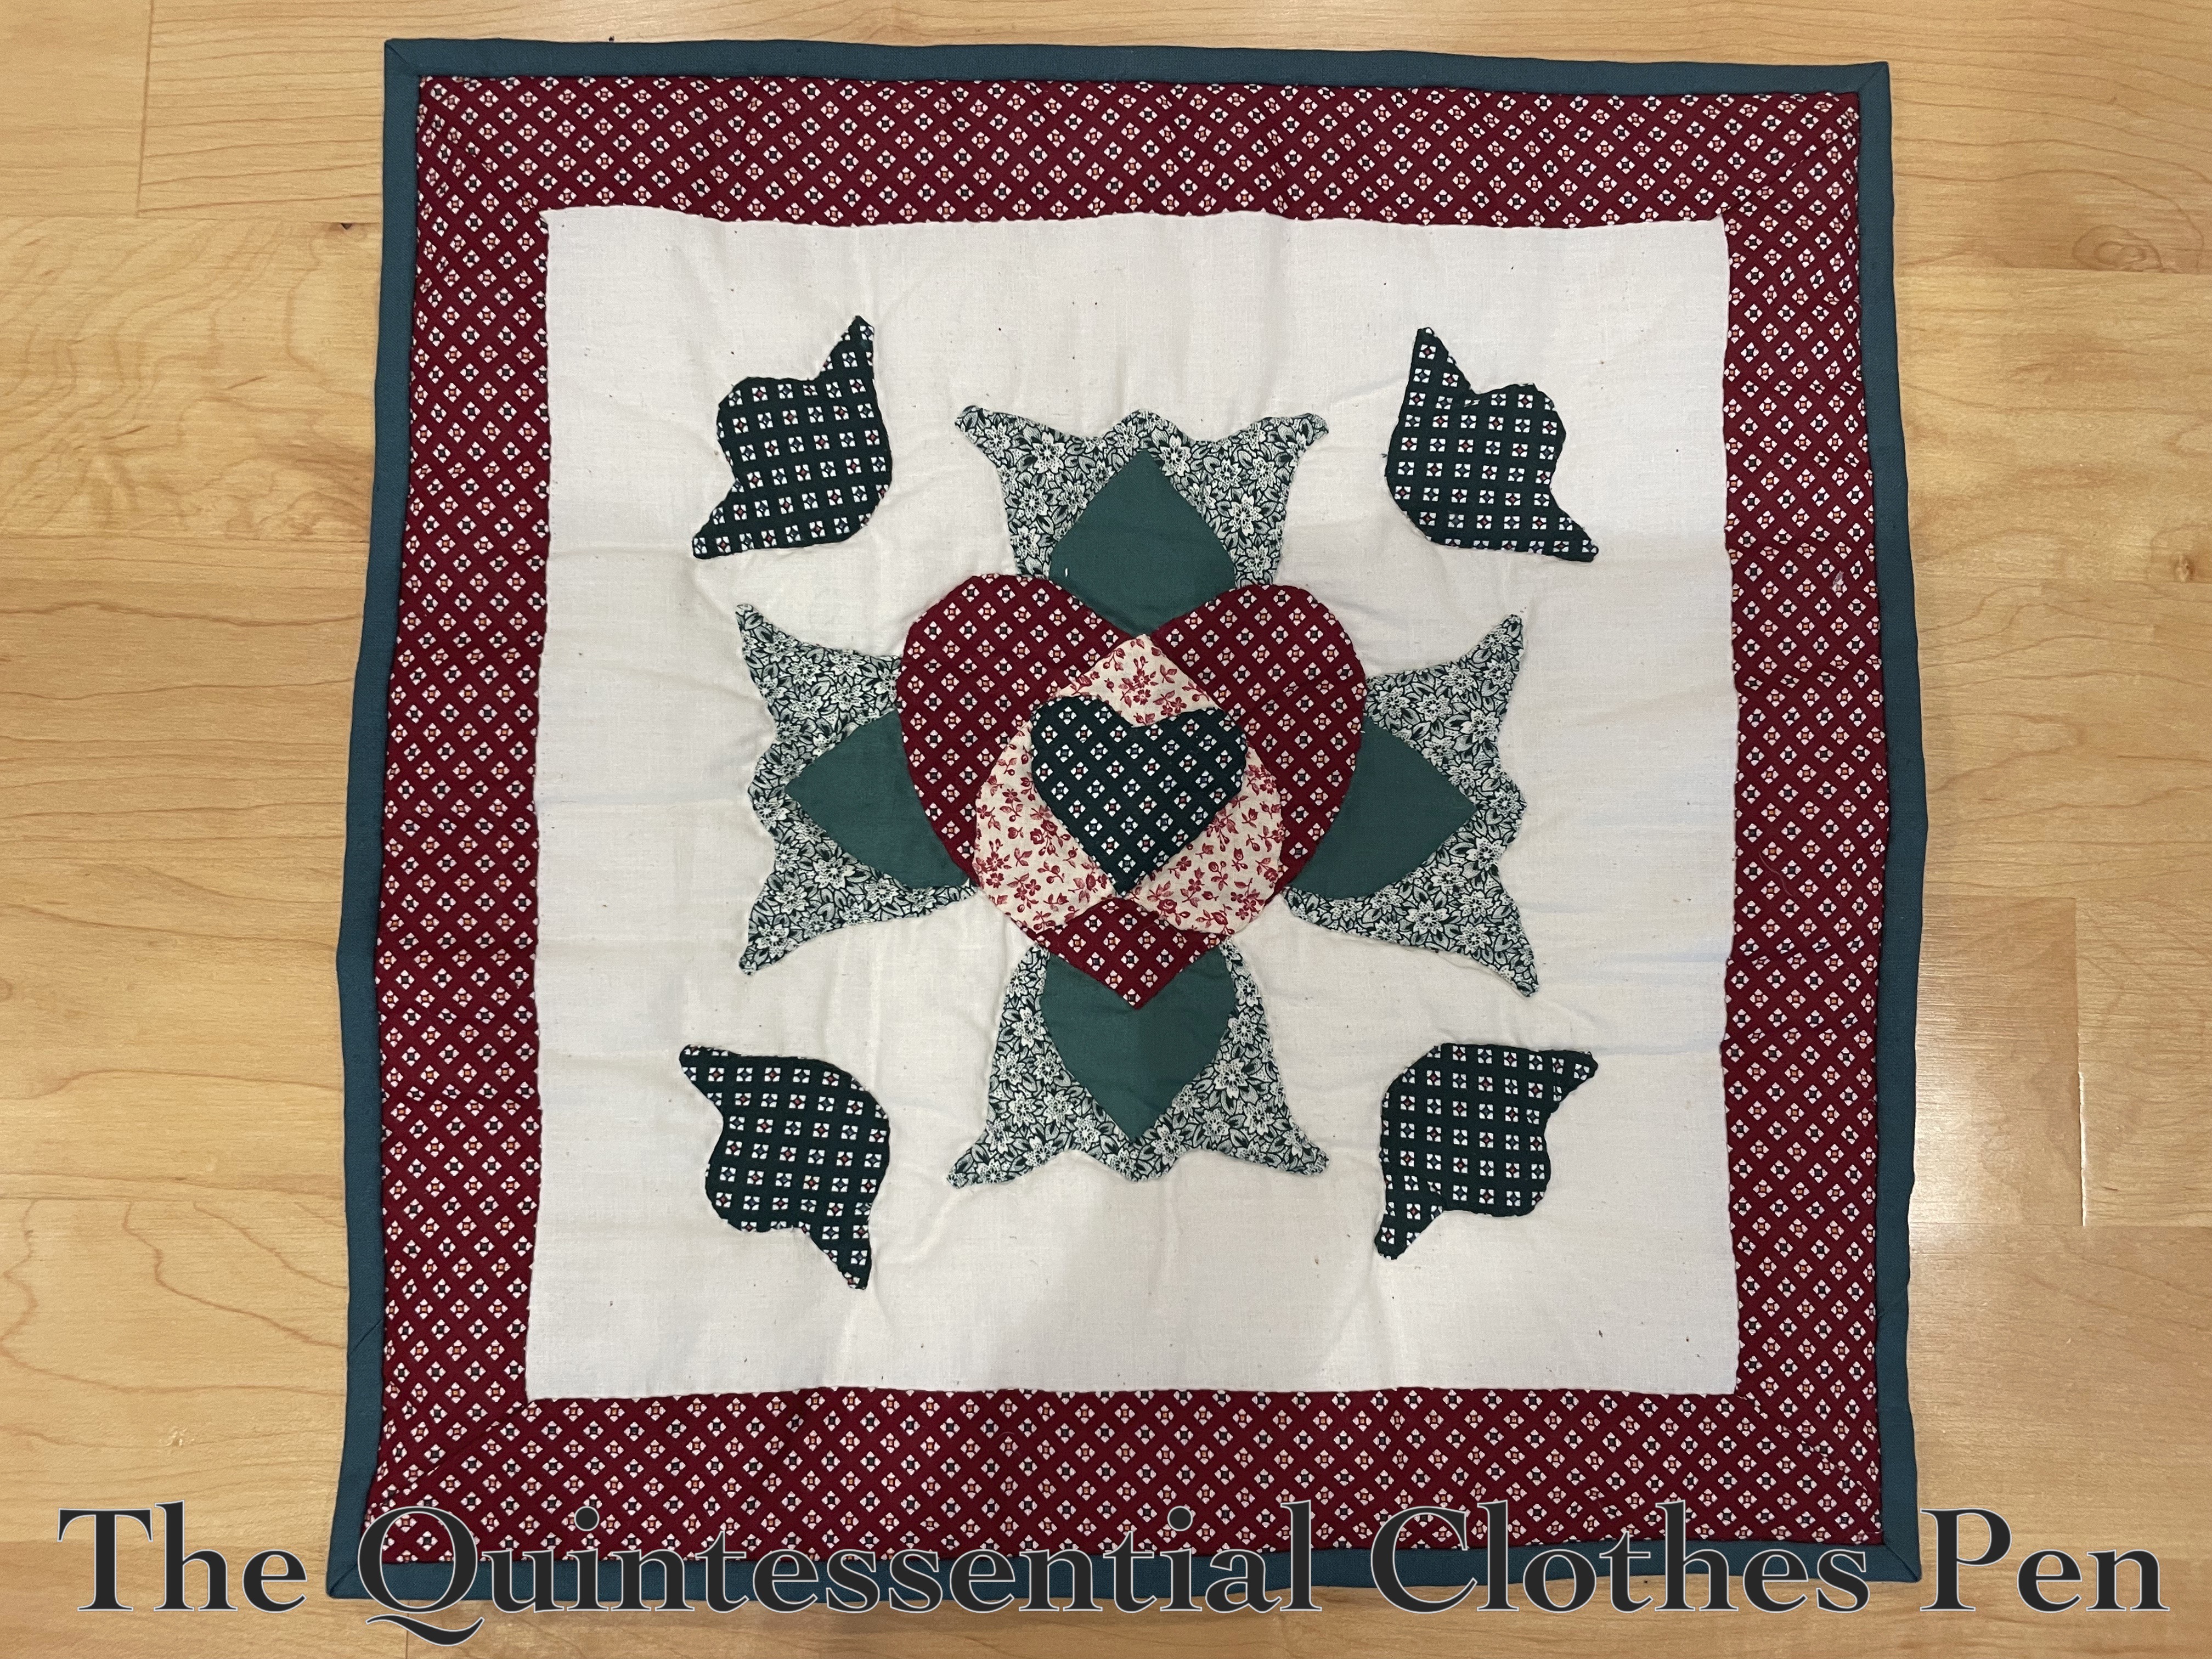
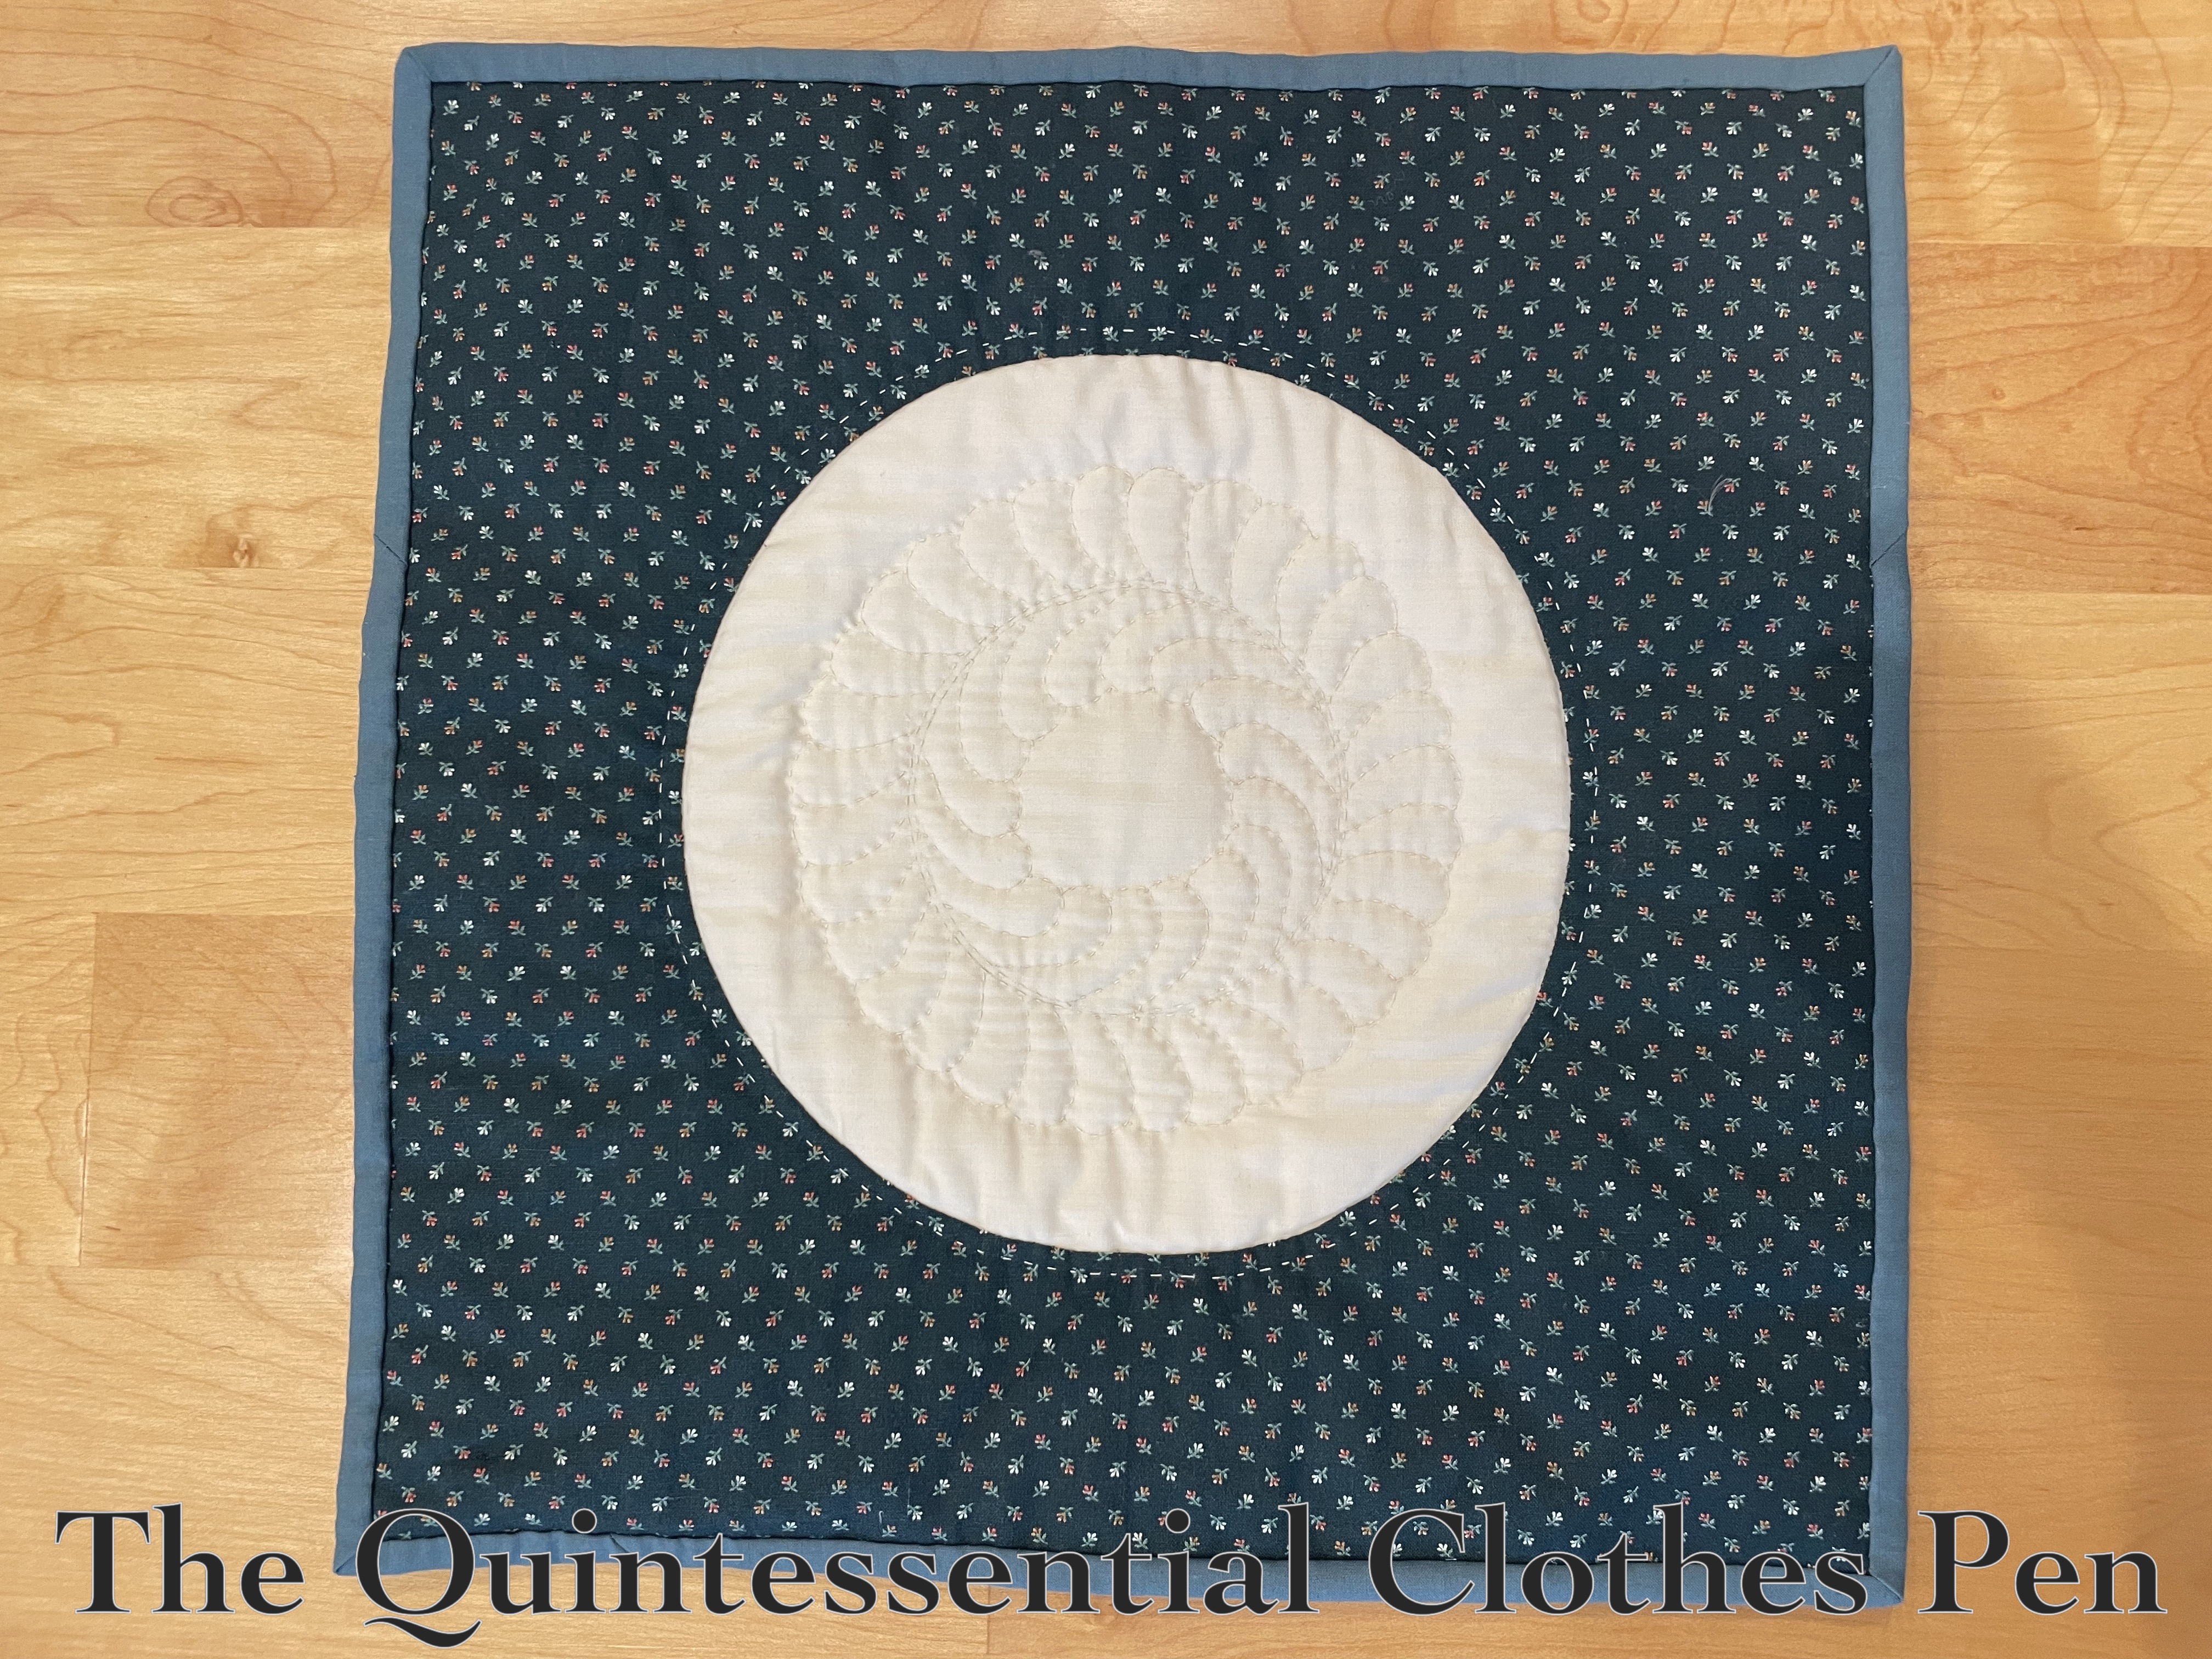
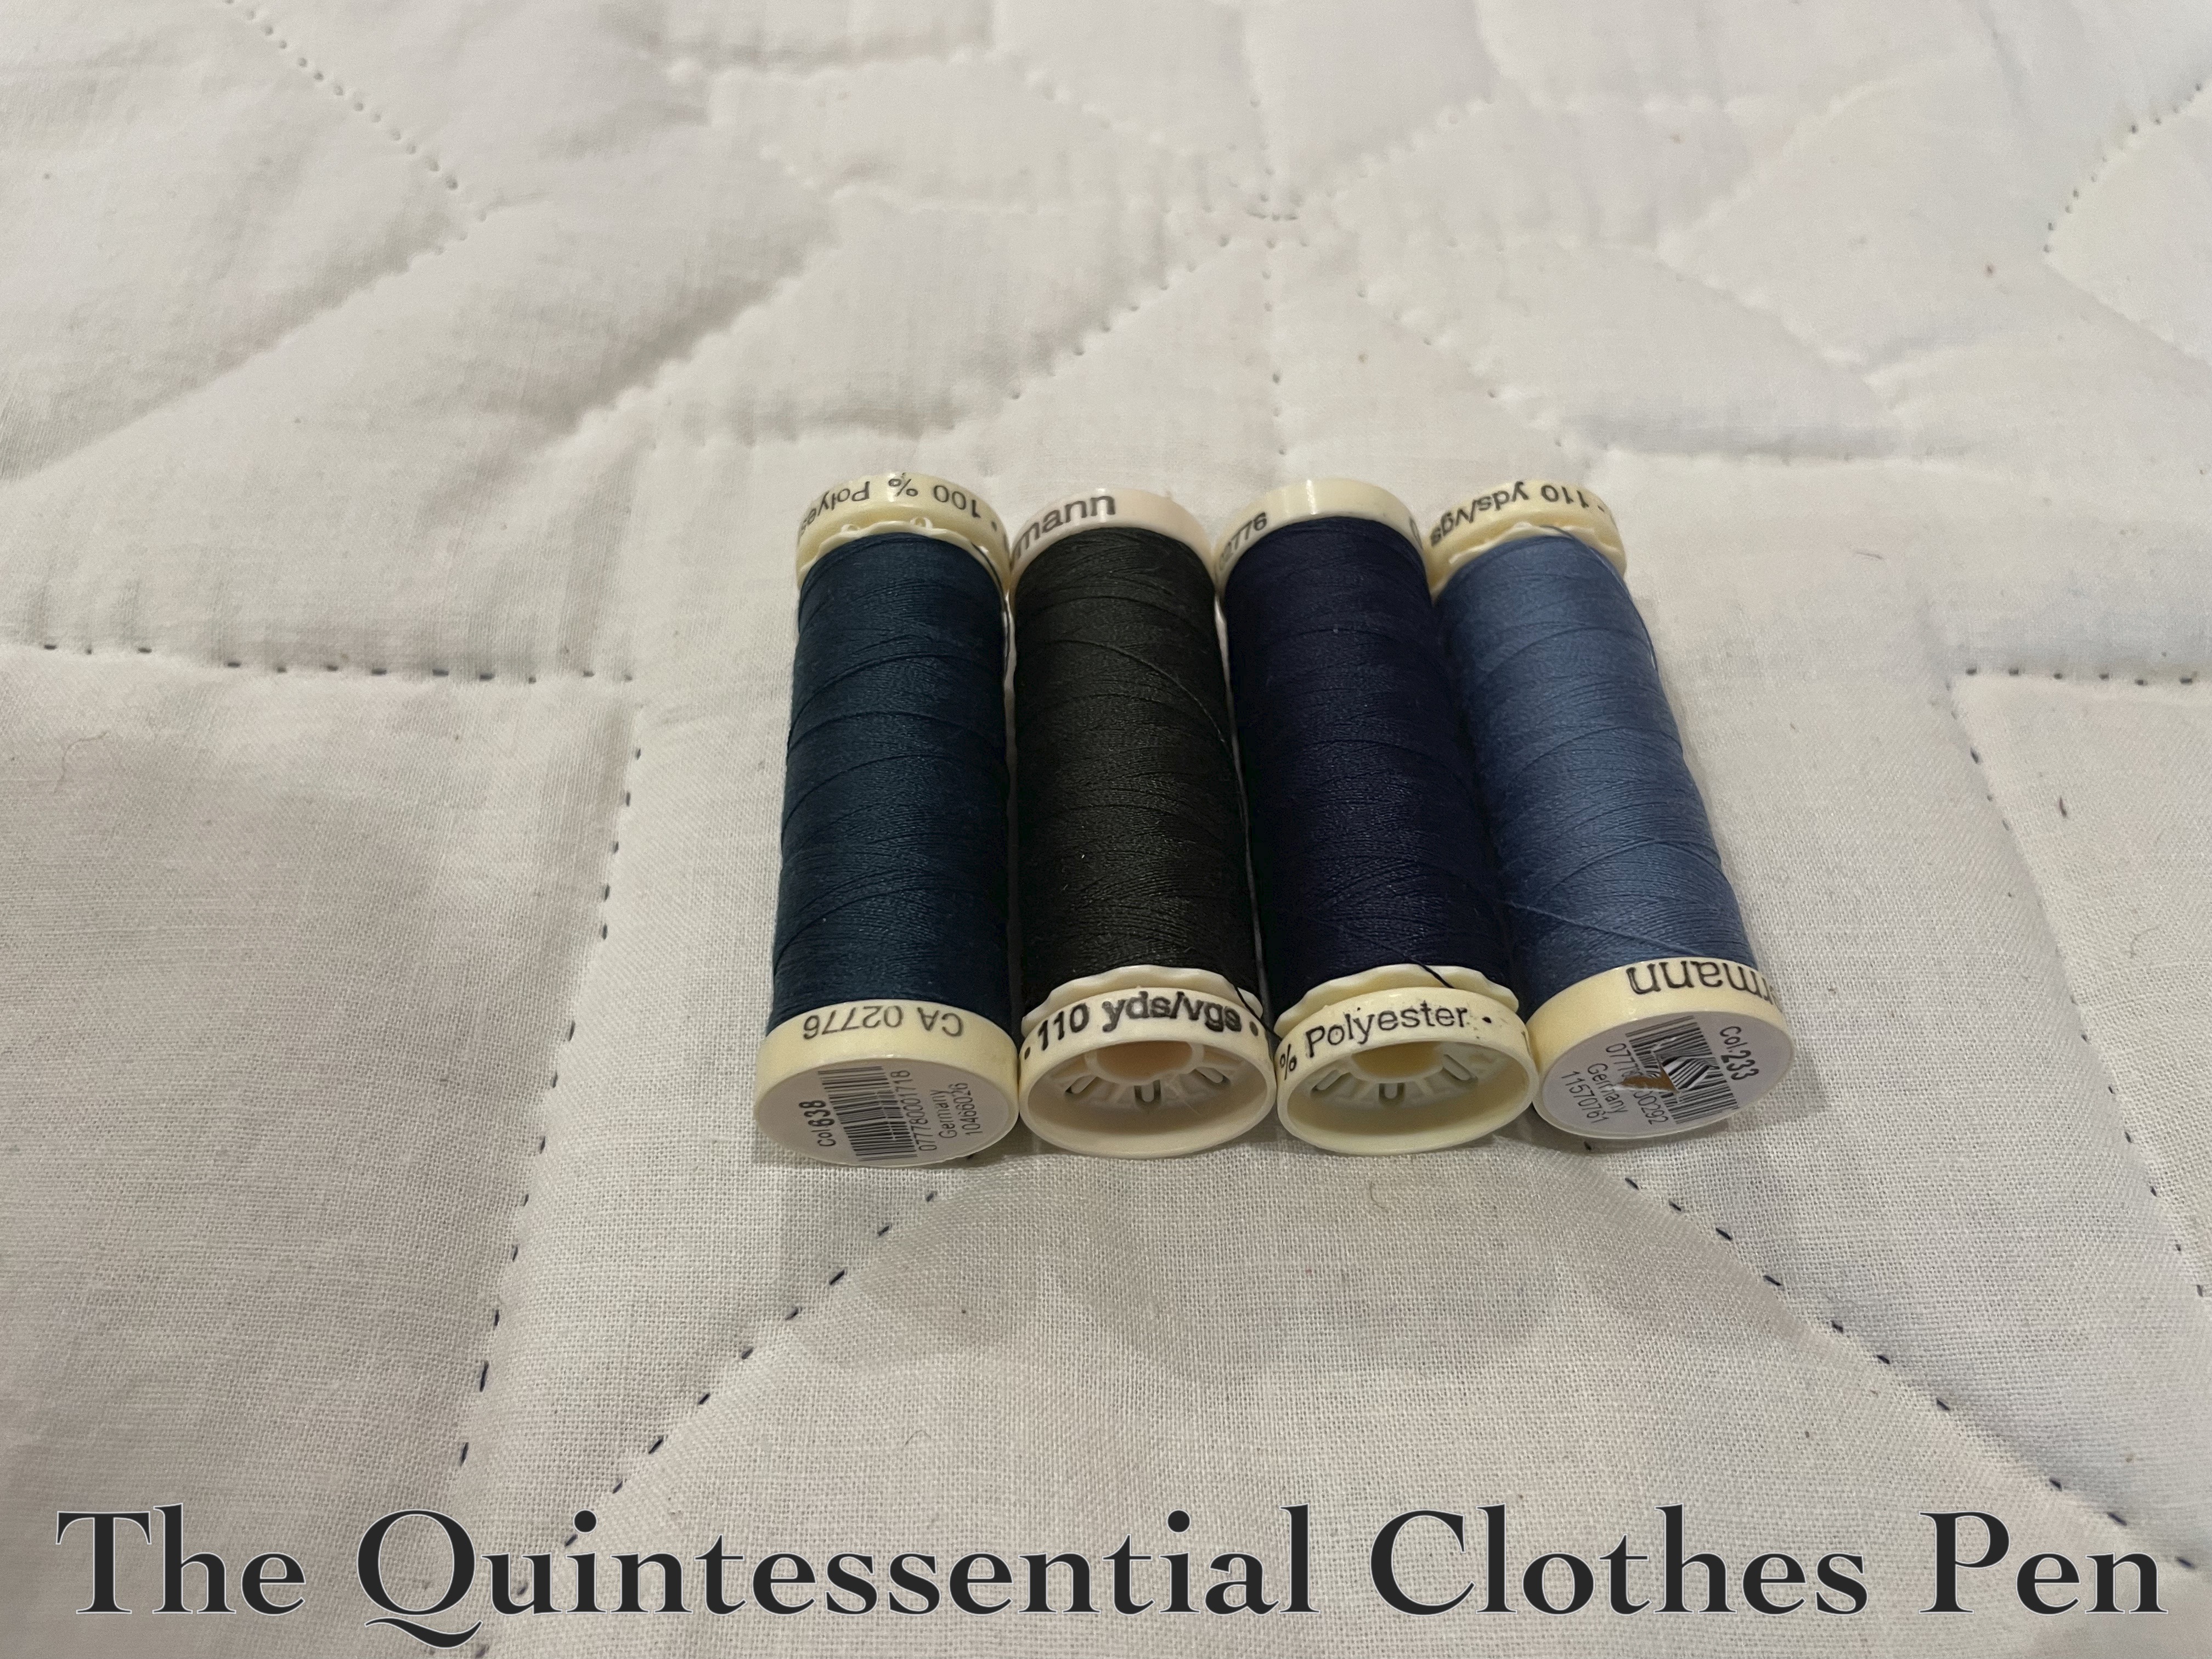
I used a mixture of beautiful shades of green and blue (and ivory) thread to match the different colors use for the bindings and quilting.

It was fun figuring out what pattern I wanted to use to quilt the star, so that it would have dimension and seem in keeping with the other panels. I’m pleased with the pattern that is visible on the back!

Each panel also has a channel sewn along the top edge on the back, so that I can easily hang them on the wall. I puzzled about the best way to do this. I wanted a dowel of some sort to run through the channel to keep the panels from sagging. And I wanted to be able to balance the dowel on something that would be easy to put up and not put holes in my wall. I settled on Command hooks, and found very small ones that would fit a wooden skewer. It turns out that the panels don’t weigh much and I had skewers around the house… plus they were easy to cut to just the right length!

Now I have a lovely tribute to grandmother Betty hanging above my sewing machine!

Two Sacques At ‘The Salon at Palais-Royal’

I am finally ready to share a full set of photos of the new Yellow Sacque and its friend, my older Versailles sacque (all of the construction details for these dresses can be found by clicking the links)! The two dresses had a joyful outing together at an event last year. This post is going to share about the event itself as well as photos and recollections.

Below, a photo of the Versailles Sacque and new Yellow Sacque next to each other!

Photo courtesy of Aleks Vu

About The Event

In October 2024, I had the great joy of attending the ‘Salon at Palais-Royal: An 18th-Century Chevalier Experience’ weekend hosted by Costumers of Color. The program included educational lectures, a violin concert, historical activity discussions and demonstrations, dancing, and more, with the goal of providing an inclusive environment for people of color both in terms of attendance and in terms of the educational theme of the event.

It was a success! Costumers of Color shared on the page for the event that “over 40 of the 140 attendees were POC (people of color).” That’s pretty amazing, and special! (If you go to the linked page, you can see group photos, one of which is of all the people at the event who identify as people of color.) I enjoyed that aspect of the event, as well as the educational theme that centered Joseph Bologne, Chevalier de Saint Georges, an 18th century Black “scholar, a fencer, a virtuoso violinist and a famous and sought-after composer.” (This quote is from the Costumers of Color blog post about Joseph Bologne. Please go give it a read if you would like to learn more! Bologne’s achievements are impressive!) In addition to these elements, I also enjoyed the combination of learning and participating that was incorporated into the weekend.

What Was Worn

For the formal evening part of the event, I chose to wear my Versailles Sacque (made and last worn in 2016, which I posted about here)! For this wearing, I updated the ensemble with a lace tucker around the neckline of the dress. This small new accessory helps complete the full look. It took a little bit of referencing my old blog posts to reconstruct my hair form and remind myself what accessories to wear, but I was successful. I was very grateful to myself for documenting things so well!

I also had the pleasure of seeing the new Yellow Sacque and all of the new accessories I’ve been making being elegantly worn by a friend!

Below, showing off both the front and back of the sacque (or Robe à la Française) style of dress.

Photo courtesy of Aleks Vu

More Photos

I was so pleased that my American Duchess Kensingtons were still in good shape after the immense amount of rain they endured in 2016. It was really exciting to break them out again with this dress! I’m still chuffed with the metallic lace I added. For Versailles, more bling was the thing! And in this photo, you can see how the light turquoise paint color picks up on the hints of turquoise in the dress fabric!

One of the things that I’d struggled to capture in photos for the Versailles dress’s first wearing was the changeable nature of the silk fabric. It is a ‘shot’ fabric, meaning that it uses two different colors woven in opposite directions: a vibrant turquoise and a deep red. This means that fabric appears to be both colors, or a mixture that looks a bit purple, depending on how the light hits it.

Most of my photos from the first wearing of the dress show the purple color, but the lighting at this event captured the many colors of the fabric much more clearly! Below is one example. Most of the dress appears in the red tone, but the shadows of the dress in the back look like the green color.

As I mentioned earlier, I had to reconstruct my hair style for this wearing. In 2016, I cobbled together a large form from many hair supports on hand (you can read about that in this past post). After that event, I deconstructed the large form in order to be able to use the individual parts again. So for this, re-forming the large form was necessary.

Below, you can see the final result of the style. This is the same style I created in 2016. (You can read more about it in this past post.)

My friend wearing the Yellow Sacque also had a fabulously large hairstyle! Her style uses elements from the book The American Duchess Guide To 18th Century Beauty, including the ‘Ski Slope Hair Cushion’ and ‘1770s Pouf’ on pages 119 and 127. She also created her own buckles (those pre-made rolls of hair on the sides). And I had fun helping her place them the day of. It was fun to make two styles that are similar, but different in shape and details!

Recollections

I had a fantastic time traveling with friends to this event. We all enjoyed the content of the weekend as well as the opportunity to make or refresh our clothing and accessories.

In fact, we had such a lovely time we felt the need to take a break in the ladies dressing room! How could we not, with such an elegant day bed and foot stool to lounge on?

It was also a special experience to have the opportunity to meet other bloggers and costumers I don’t often (or ever) get to see in person! We might exchange comments and be inspired by each other’s creations, but to meet people and have a conversation is extra wonderful. I’m so grateful that Cindy, of Cation Designs (who is in the photo with me, below), took the time to chat with me and express her appreciation for how this blog has made costuming feel approachable for her!

After a lovely evening, it was time to head out. It wasn’t particularly warm outside, so an extra layer was much appreciated!

But a pause was necessary… I love my silly moose poses! Thanks for enjoying this outing with me!