Back in October of 2016, I made a new, smaller crinoline (also called a hoop skirt) than the one I’d had for about the last 10 years. I thought it would be great, and it was… in terms of shape. Unfortunately, the new crinoline had a fatal flaw: the channels for the hoops were too wide for the slippery-ness of the hoops and therefore all the tapes would slide to one side while being worn, causing the hoops to drop down and create a trip hazard for the wearer. I had loaned these to a friend at a ball and was horrorstruck as I realized the problem and she attempted to dance without realizing the problem. It was such an awful feeling! We solved the problem for the night, but I resolved to fix the hoops before wearing them again and I learned a good lesson about trying out new garments myself before loaning them! I’ll get to my solution for the sliding hoops in a bit, but first I’ll start at the beginning.
The new crinoline was an experiment to see if I could use the hooping from a cheap Amazon hoop skirt like this to create a cage crinoline with smaller dimensions than my usual crinoline, the super-cupcake, which has a decidedly high fashion silhouette. The answer to that question is ‘yes’ it was easy to reuse the hoop steel from the Amazon crinoline to make a cage crinoline.
You see, the super-cupcake looks great with the right circumference of skirt and the right environment (high fashion daywear or a ballroom); however, under a cotton day dress I wanted a more subtle, practical, reasonable shape. I have to admit to liking a big skirt though, so a reasonable crinoline for me still has a larger circumference than what it might be for others. Also, at 5’6″ I am taller than the average woman, which allows me to carry off a larger circumference while staying within reasonable looking proportions. (For more thoughts on practical sized crinolines, Maggie May has shared useful research and an equation to help determine crinoline circumferences.)
Here’s a comparison of my two crinolines worn with cotton dresses: the super-cupcake is on the left and the newer reasonable crinoline is on the right.

Interestingly, the dimensions of these two crinolines aren’t terribly different. The lowest hoop is only about 8″ smaller on the new crinoline. The biggest difference (and what alters the silhouette most) is that the new crinoline has a more tapered shape in the upper hoops.
I’ve provided the following size chart in an effort to help those who might be making or adjusting their own crinolines. Even if you don’t want to deal with all the vertical tapes, you can use these dimensions to adjust the hoop sizes in a ready-made modern crinoline to achieve the same effect.

Interestingly, both of these crinolines have the same vertical tape length that is short enough to keep the bottom hoop decidedly above the floor. The lowest hoop on these is about at my mid-calf height. This keeps my feet from getting tangled–especially useful while dancing! In order to keep my dresses from folding under the bottom hoop as I move, I have a cotton petticoat with a substantial ruffle around the hem which provides stability for the dress worn on top. You can see the length of the super-cupcake on me as well as the ruffled petticoat that I wear over both crinolines in this post.
Here are my two crinolines next to each other while the new one was still in progress. They have an overall similar construction (although I did simplify the new ones, using fewer hoops and fewer vertical tapes).

My old crinoline used ivory twill tape for the vertical supports. There are actually two layers of it that are hand sewn together to make channels for the hoops, creating channels along the lines of those seen in this 1859 hoop skirt patent filed by James Draper of New York (while the hoop circumferences are not provided in the patent, the silhouette of Draper’s hoop skirt is similar to that of my super-cupcake). This method used a ridiculous amount of twill tape, so I came up with a way to make the new channels that would use only one layer of twill tape for each vertical support. More on that in a moment.
The old crinoline’s hoops are made from cotton covered steel that was in a ribbon form originally. I had cut each ribbon in half (and over time, the fabric covering started to fall off, which caused me to painstakingly wrap each hoop all the way around with thread to make it more durable–a caution to anyone else using this to make a crinoline, although I’m not sure where you’d source this type of material these days as I believe this type of ribbon wire is no longer being produced). The fabric covering combined with the narrow channels in the twill tape means that the vertical ribbons only slide when I want them to, but that they otherwise stay in place nicely.
For the new crinoline, I machine sewed tucks into a single layer of twill tape to create channels for the hoops. You can see those tucks in the photo below.
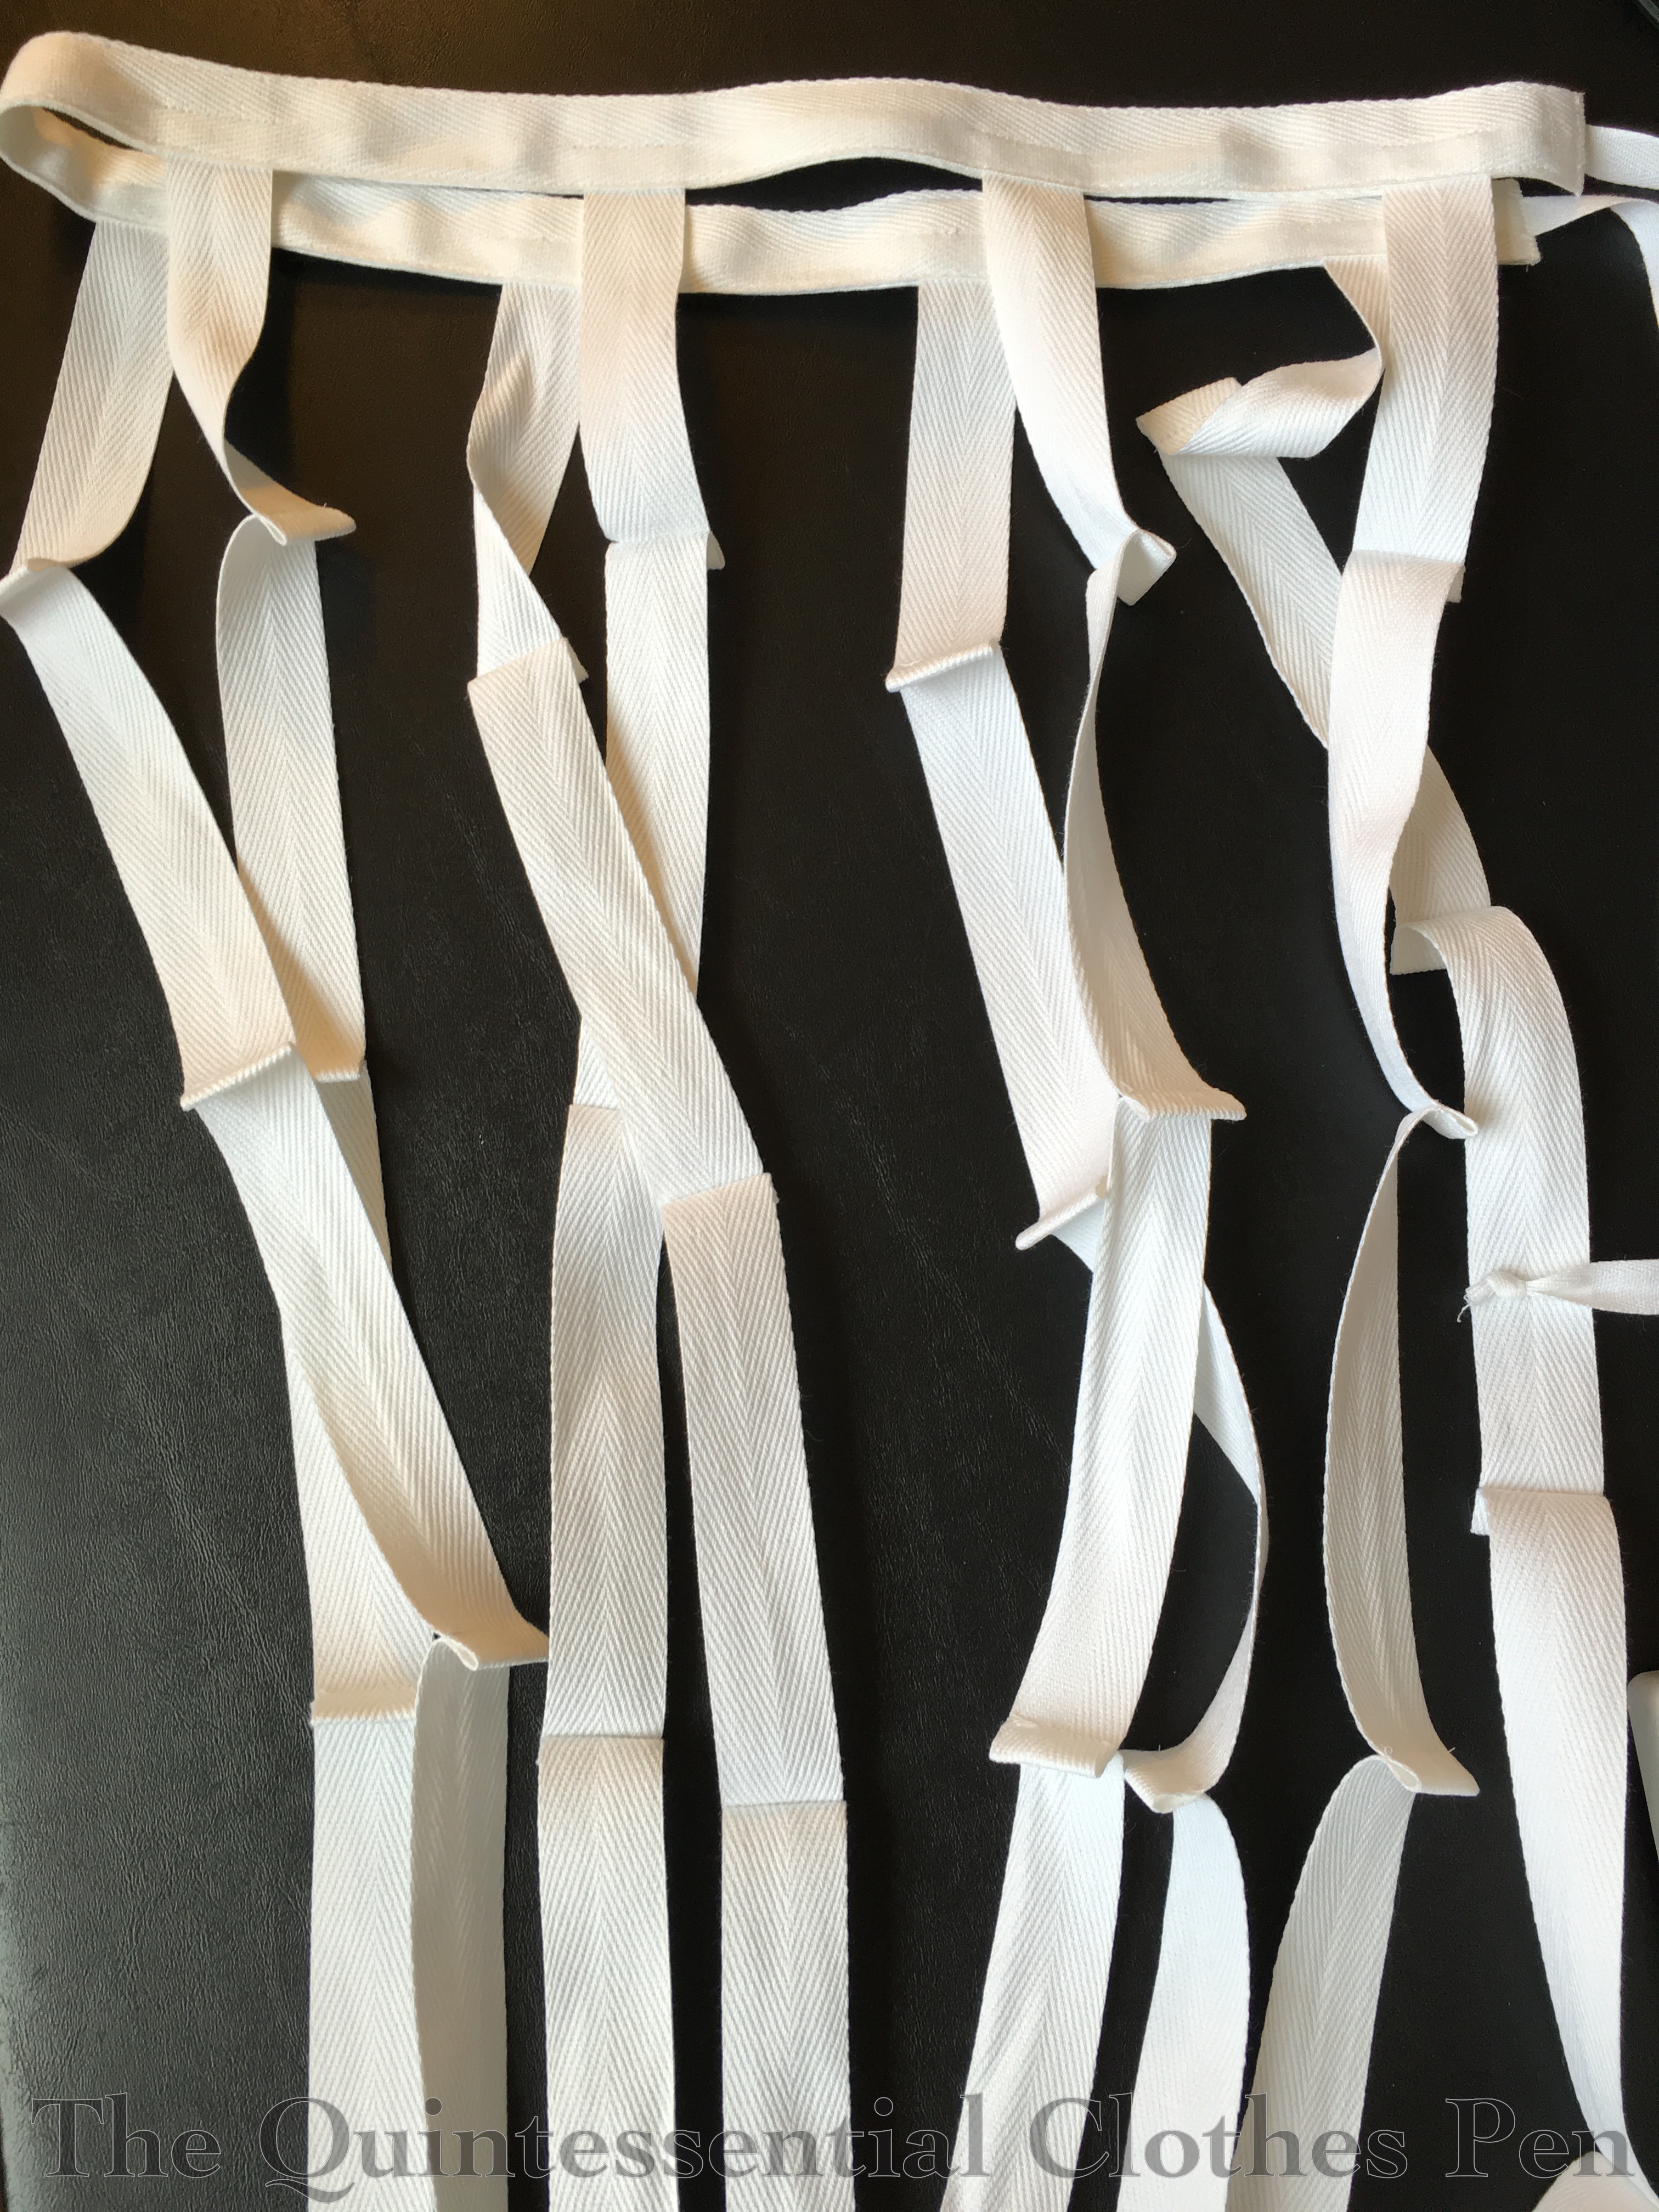
I also machine sewed the vertical tapes to the twill tape waistband, because why not–I was machine sewing anyway. The waistband is two layers of twill tape sandwiched together.

That’s basically it for the construction before the awful incident of loaning them out. I cut the hoops to be the dimensions I wanted, slid them through the channels, and used the plastic joiners that had come with crinoline to secure the ends. Done! Or so I thought…
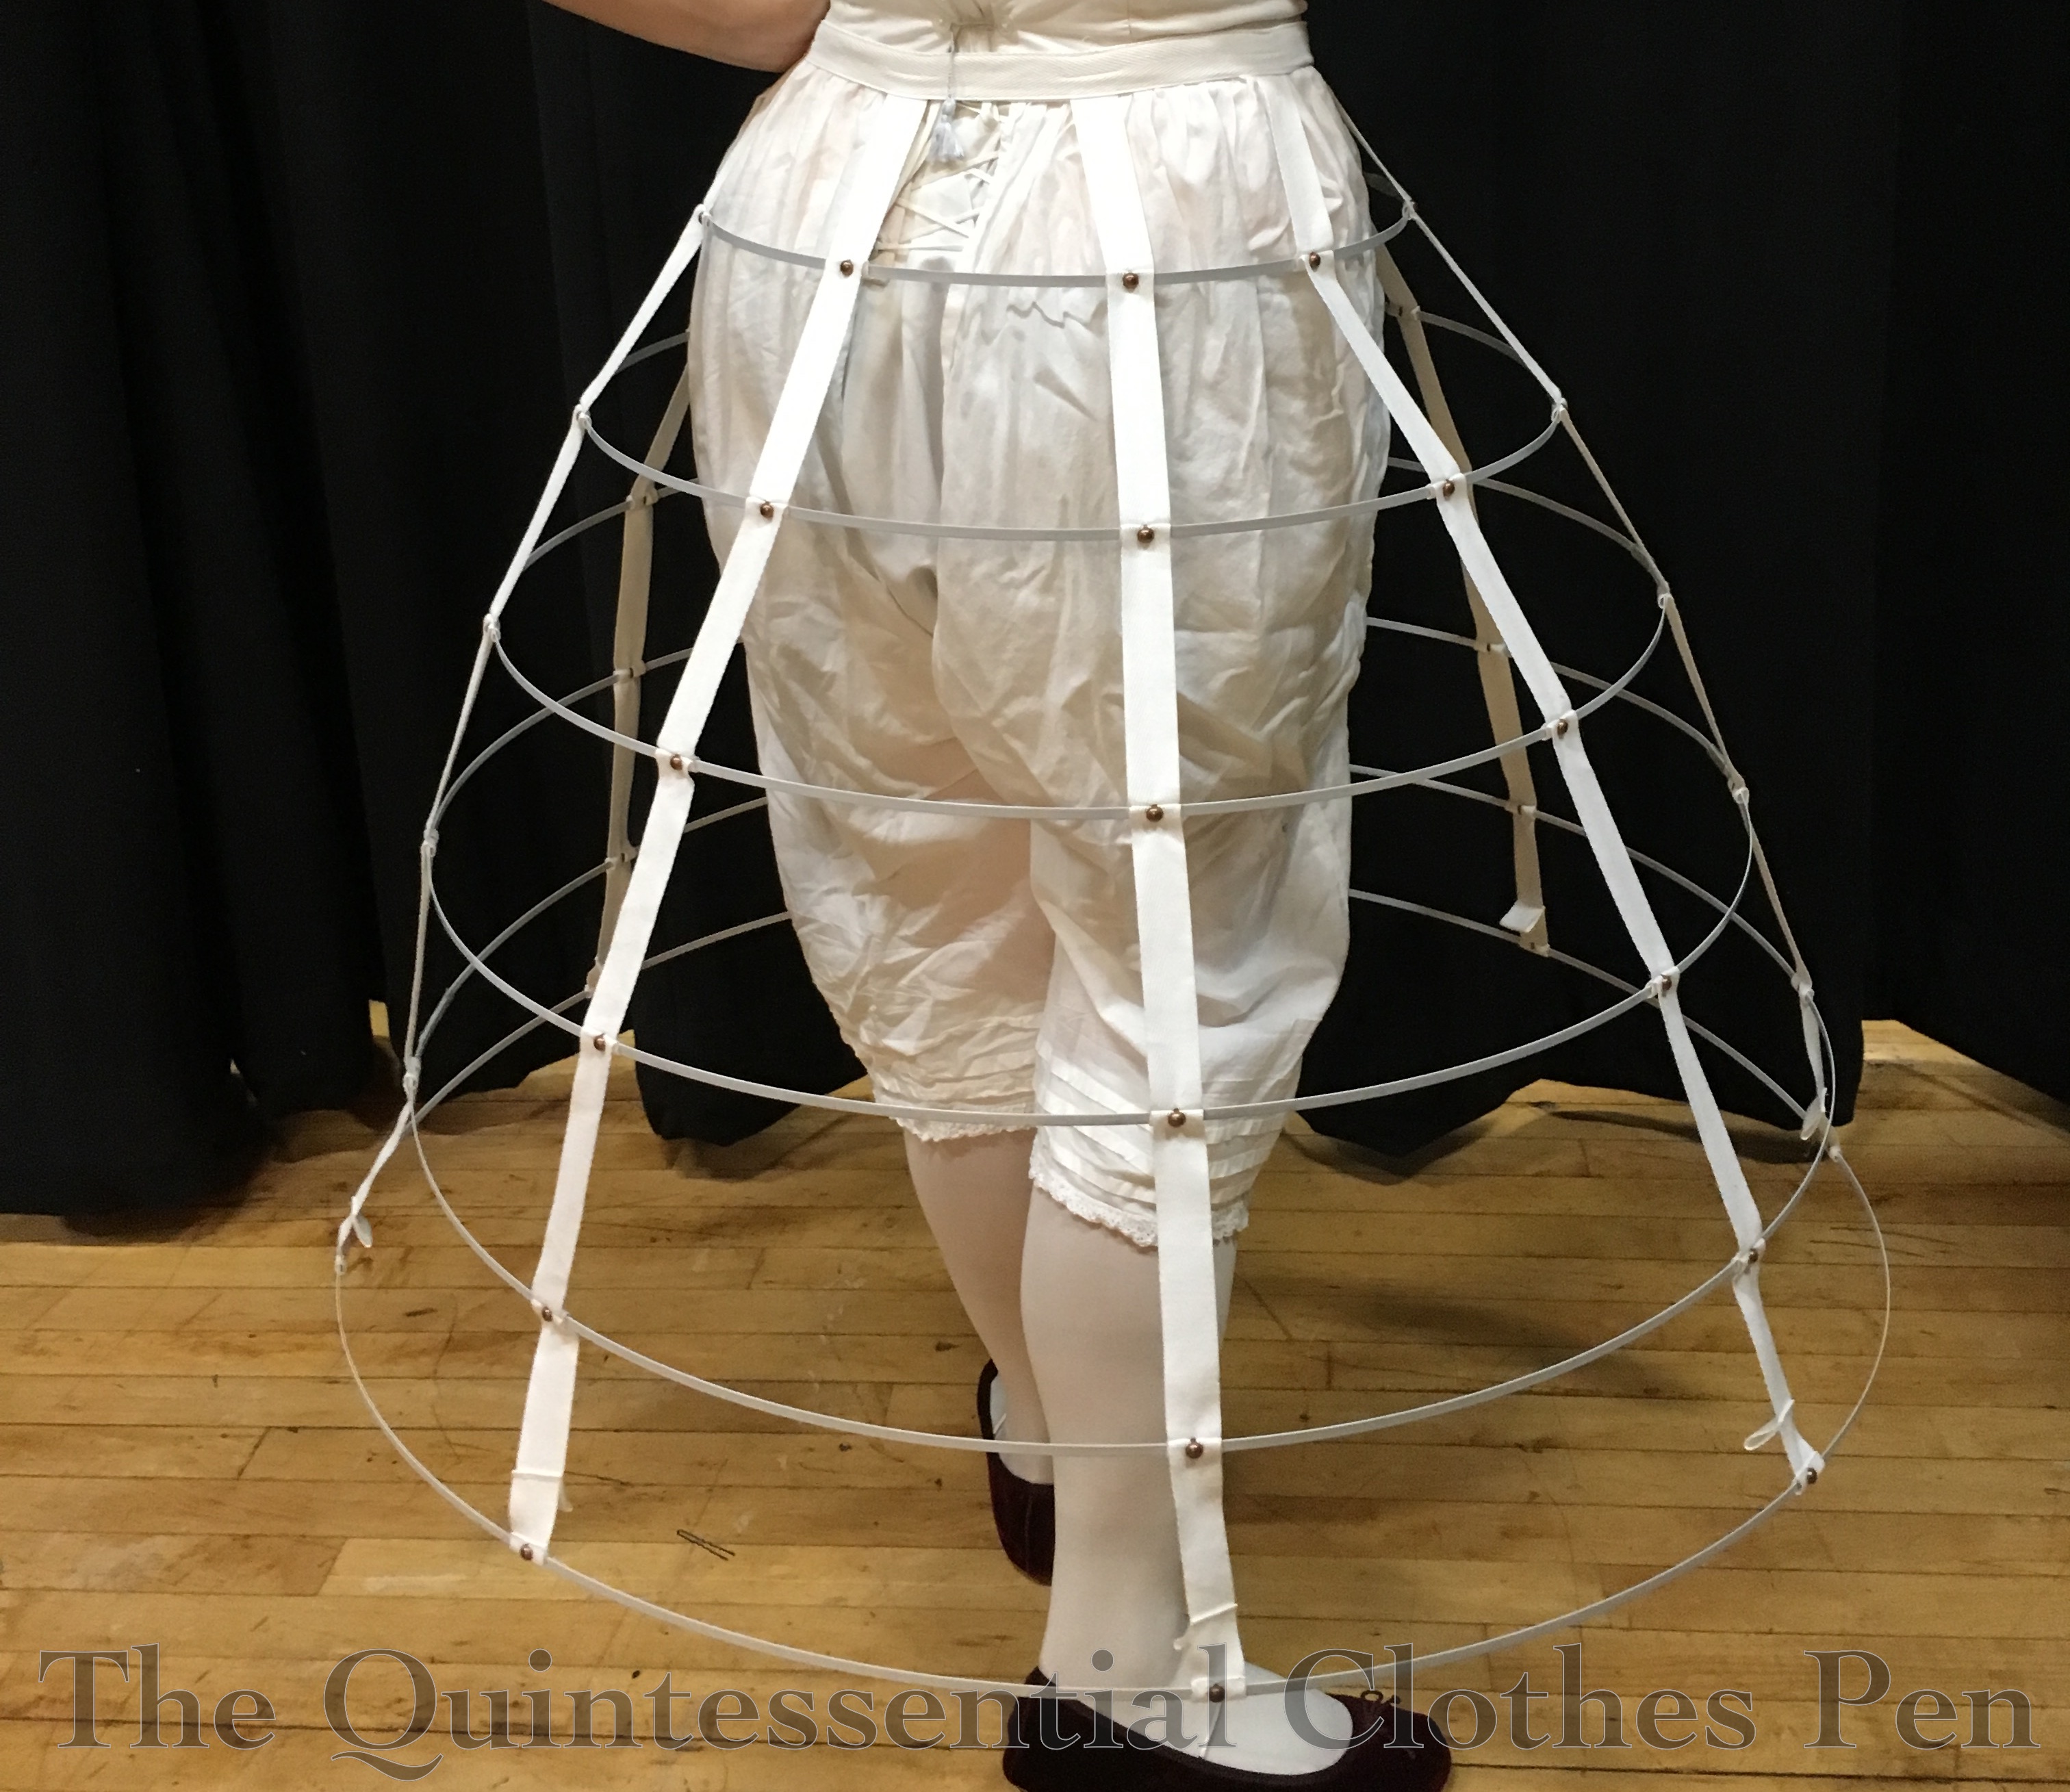
After realizing that these hoops were going to slide horribly, I went back to research to figure out how this problem was solved in the past. What I noticed are little metal dots on each join of hoop to vertical support. That makes so much sense! I wanted to add these to my hoops but I didn’t know what to call them while searching for materials.
It took me a little research to figure it out, but I did and now I’ll share that with you. They are called spots! Once you realize that then a whole world of spots becomes available to you. Decorative ones, bronze, copper, nickel, black… so many options! I got plain domed copper from this seller on eBay and am very happy with them. They’re easy to apply with a pair of pliers and seem quite durable. Now my hoops and tapes stay in place–no more sliding around!

And here is the finished result of the spots on the reasonable crinoline. I like the look as well as the practicality. I’m planning to add gold ones to the super-cupcake as well, for looks more than anything else.